
Following from a previous article about not increasing bulk I have considered a few options for the Canon 8-15mm fisheye.
The 8-15mm is not a small lens and due to the different flange distance between Canon EF mount for DSLR (44mm) and Sony E-Mount (18mm) we have a chunky 35.5mm N100 to N120 adapter port that makes the whole set up not that compact.
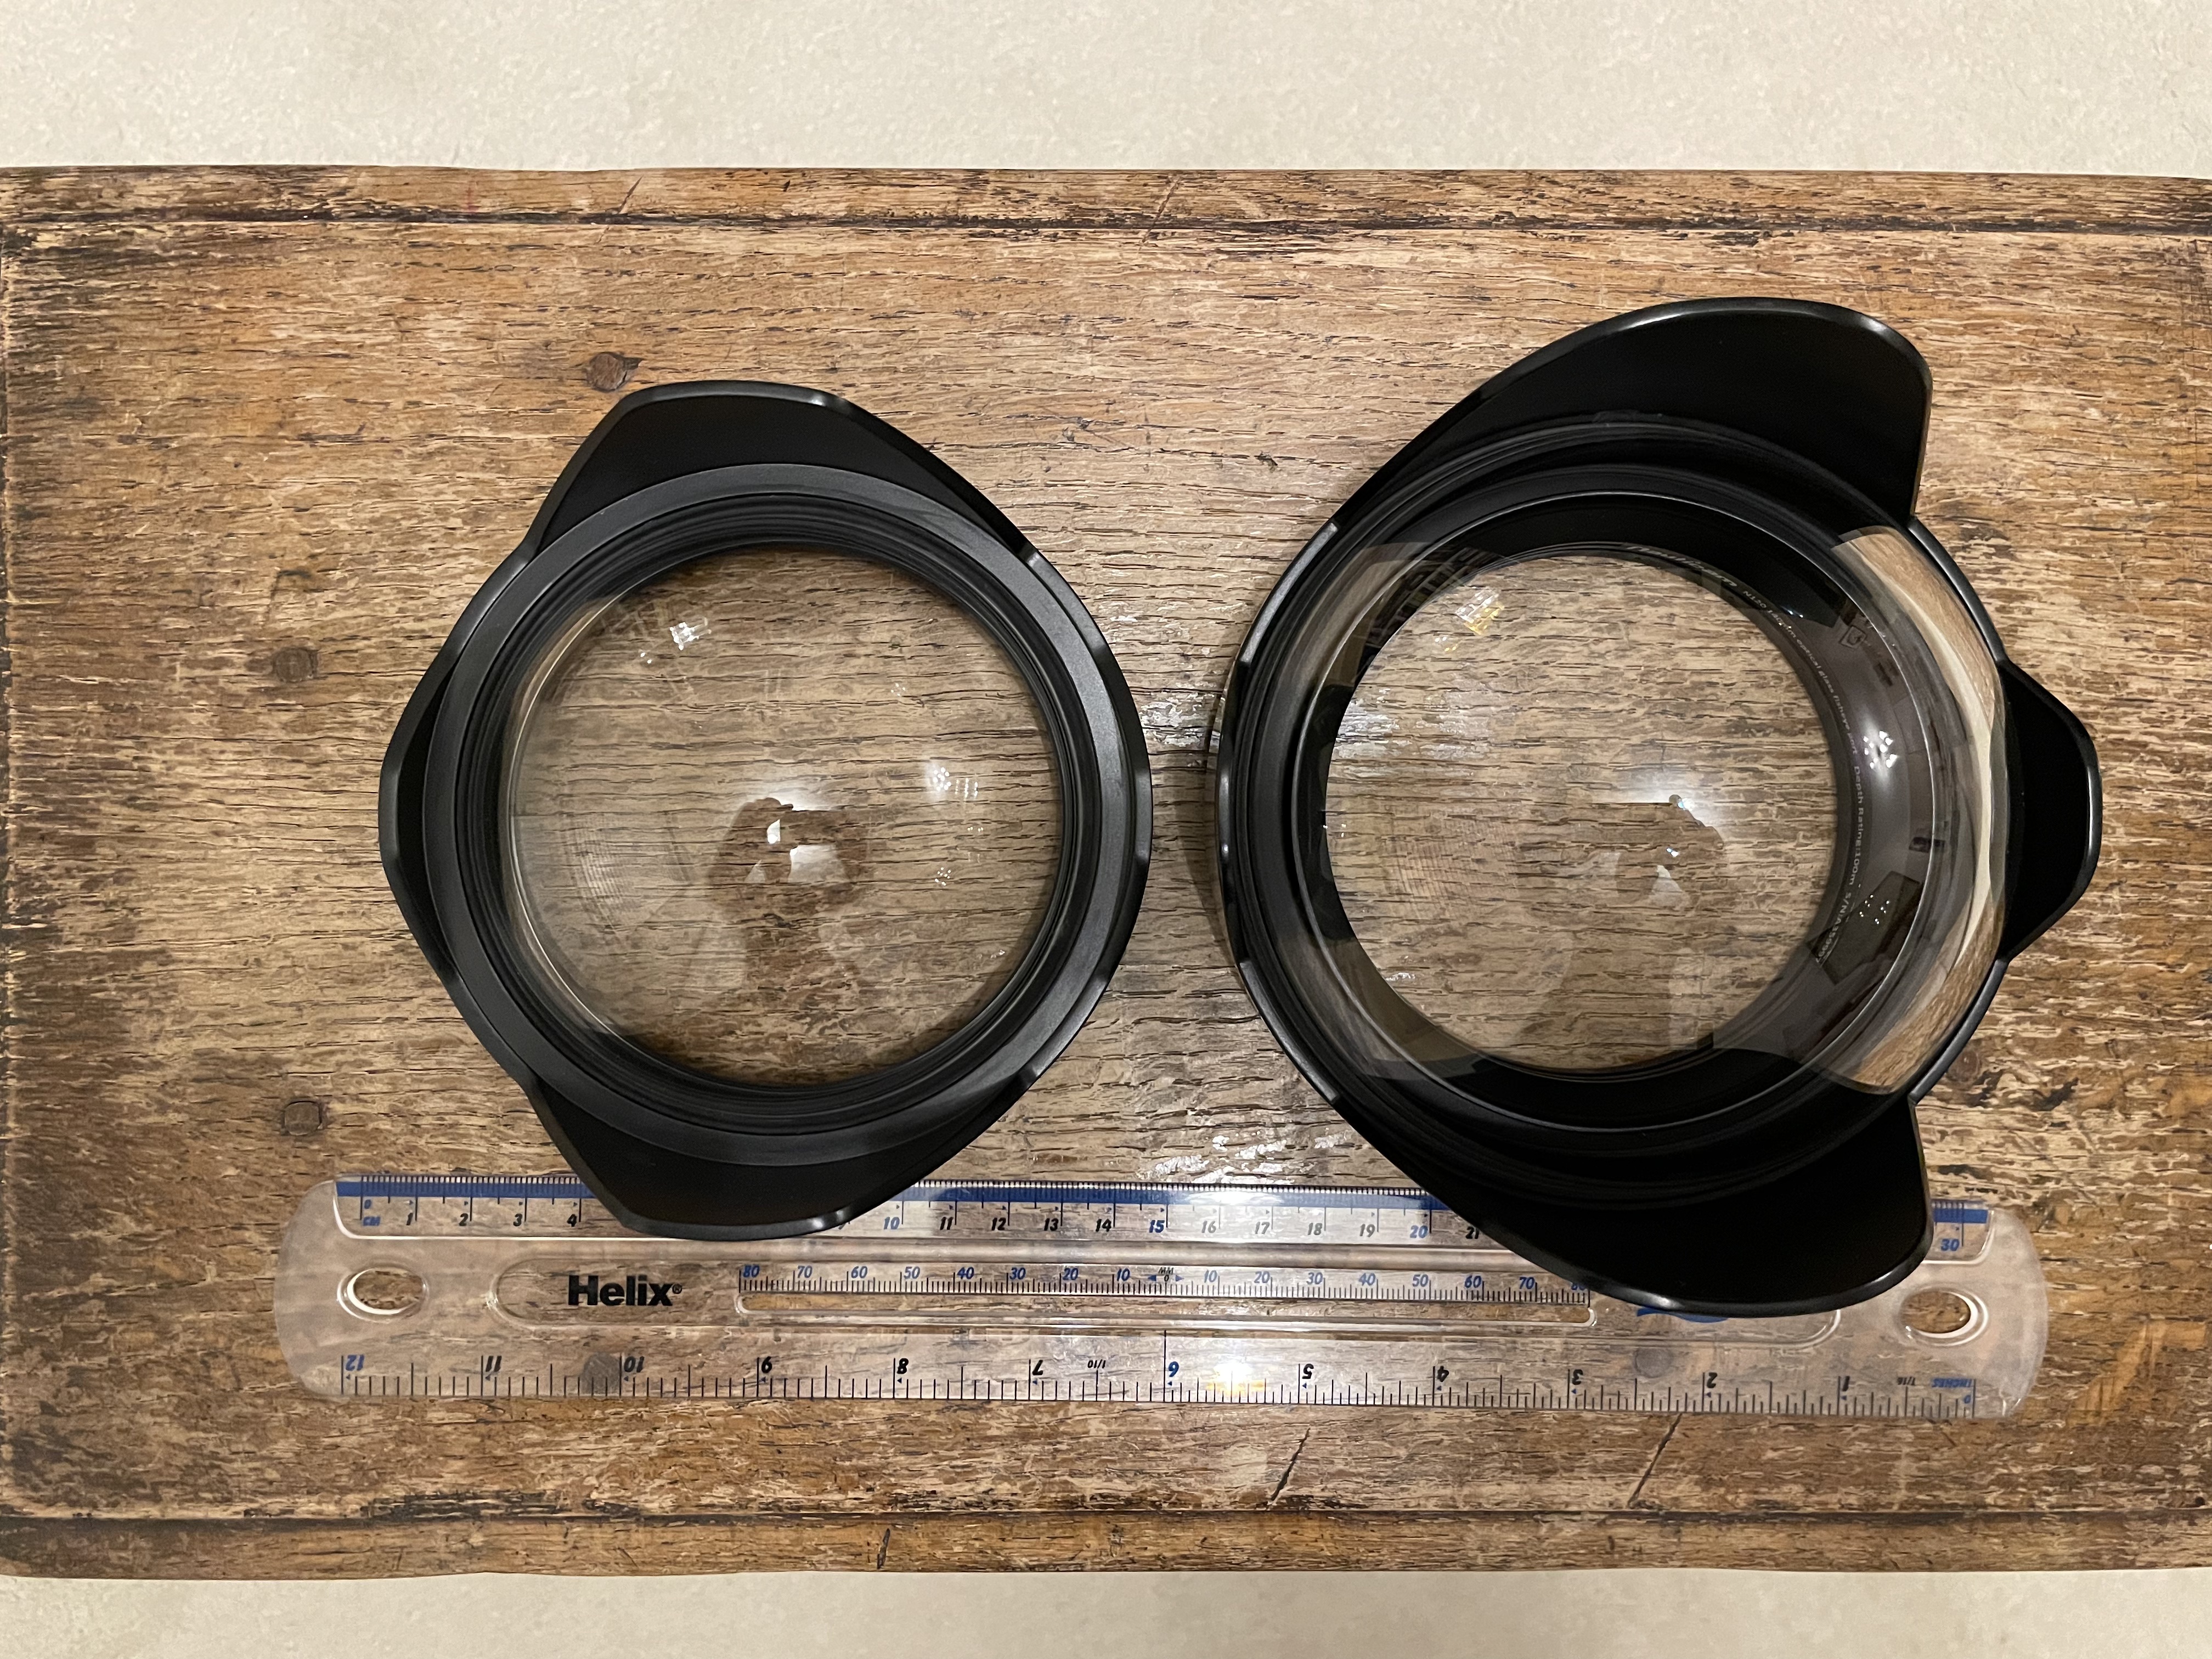
Dome Options 140mm vs 4.33″
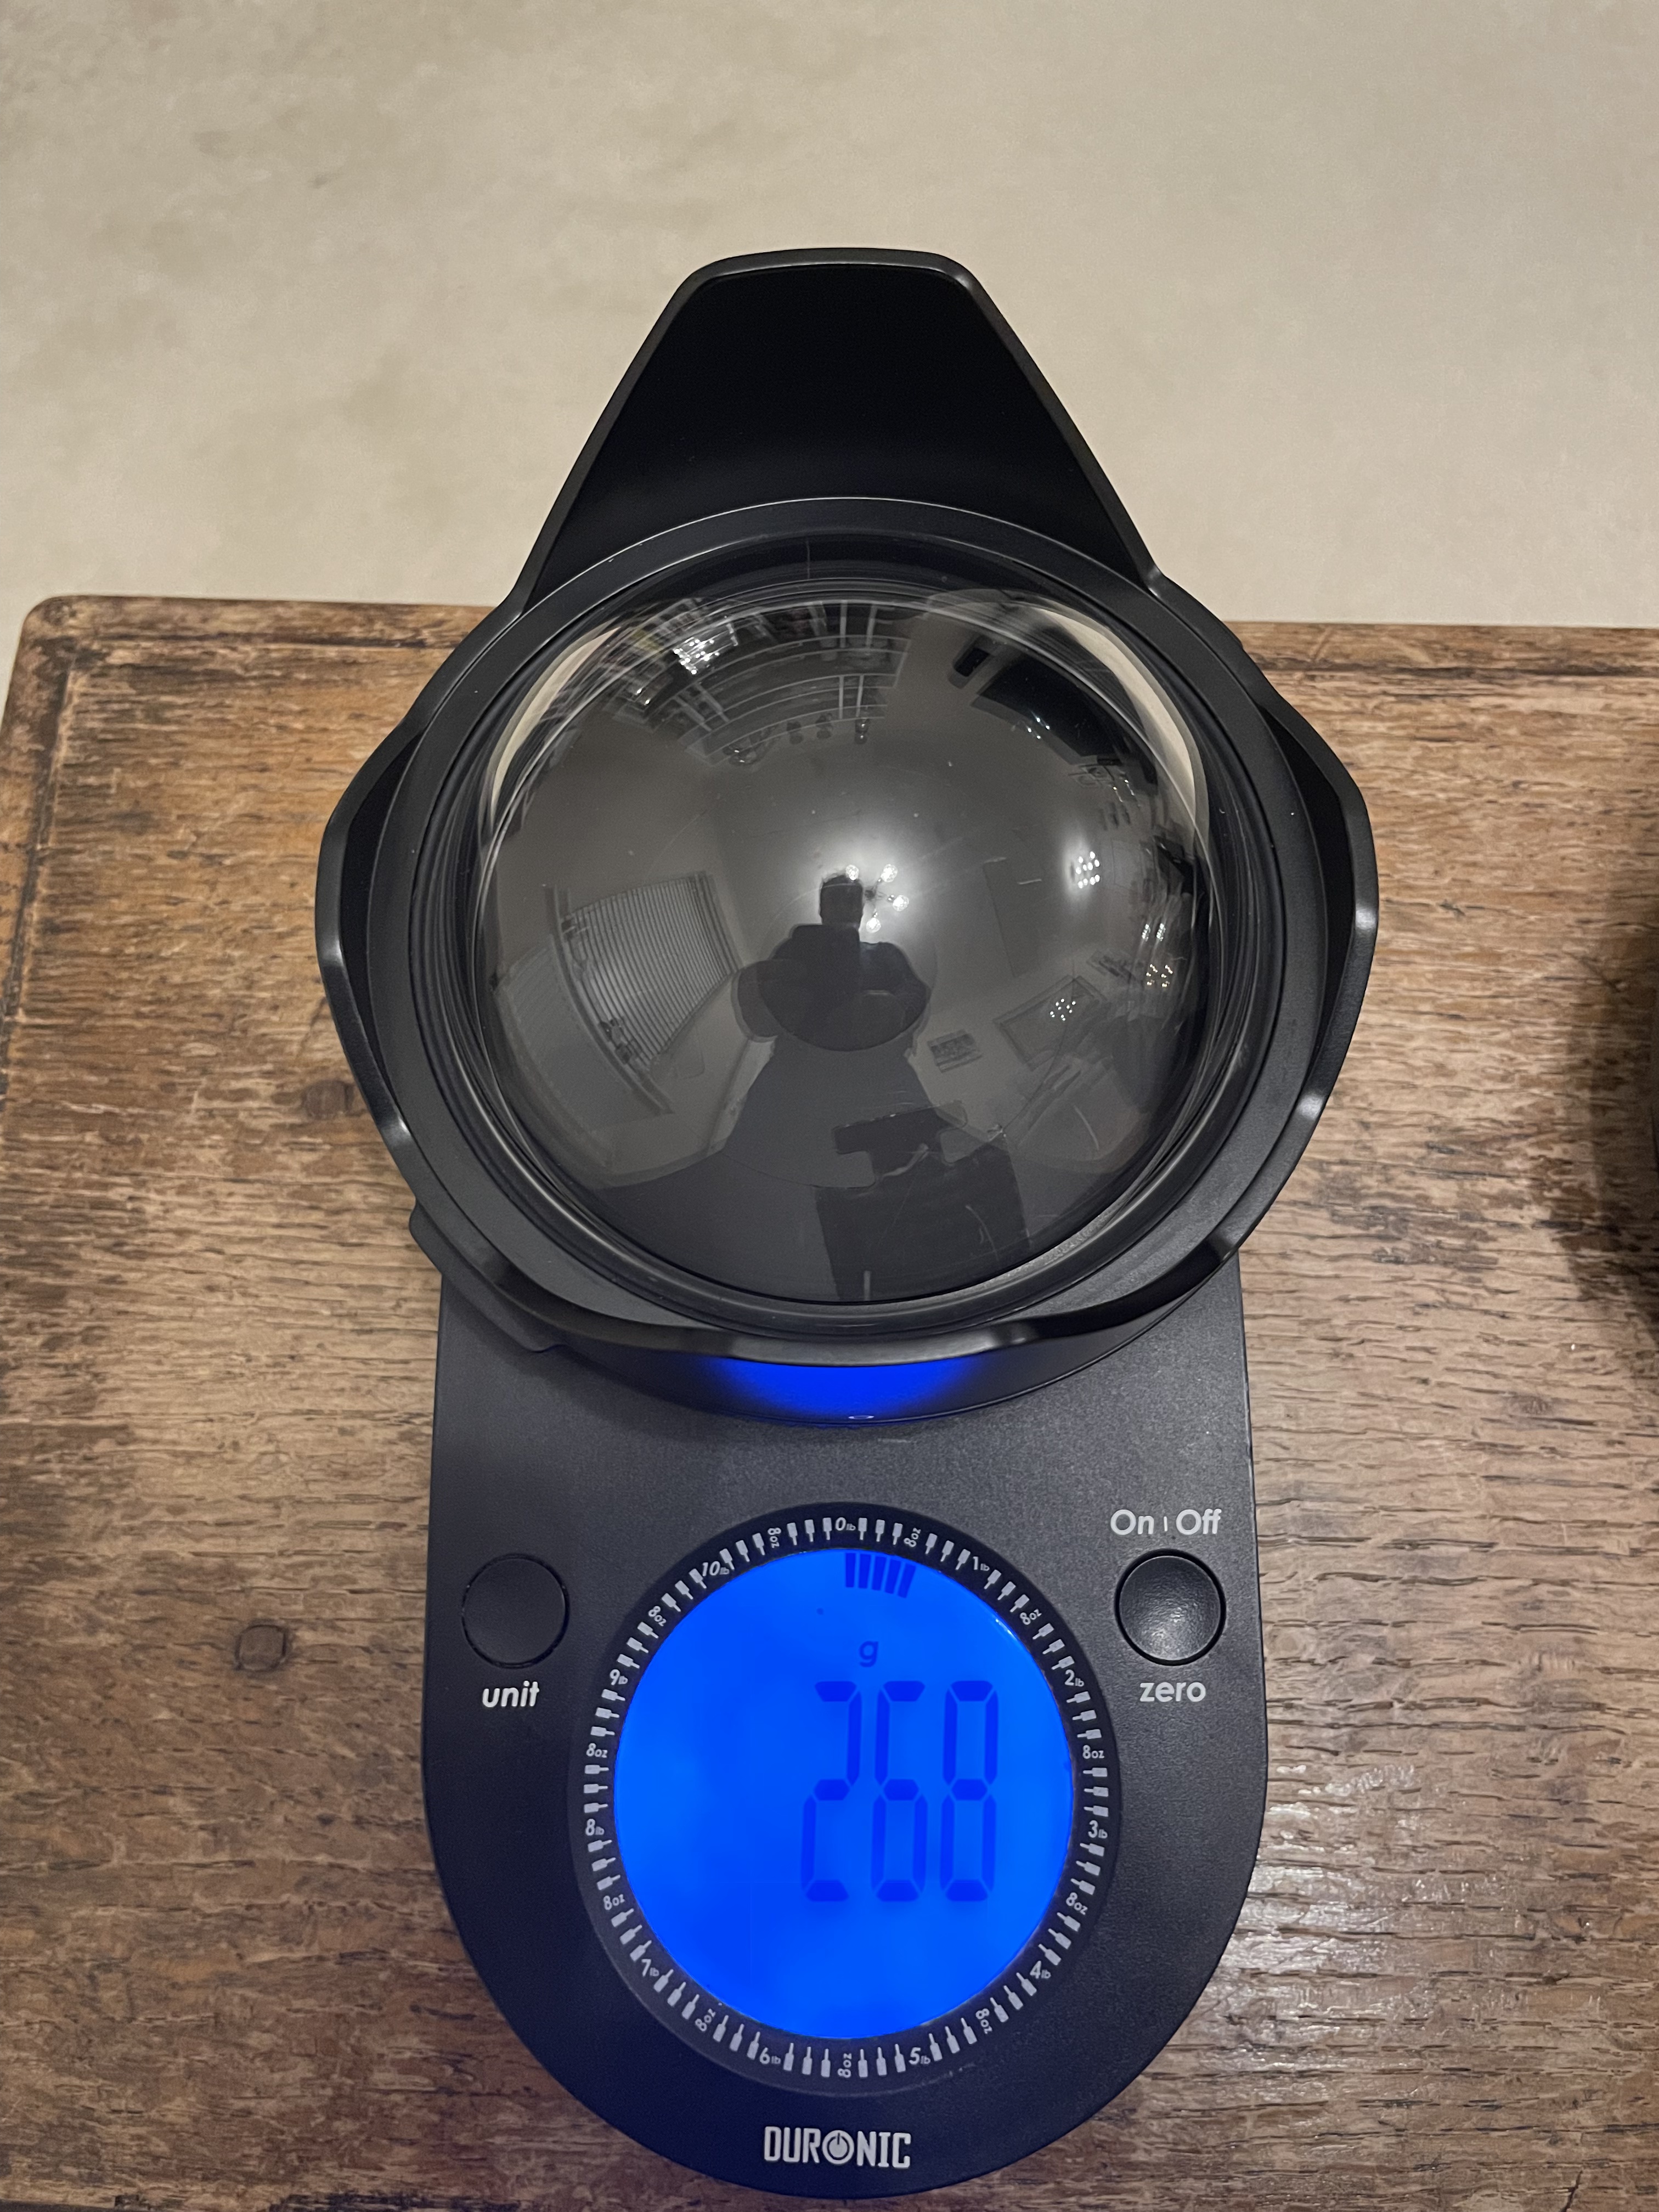
The Nauticam port chart recommends the 140mm glass fisheye dome for the 8.15mm, this port is 69mm radius and is made with anti reflective optical glass and weights 630 grams.

There is another dome from Nauticam the 4.33″ acrylic but this does not feature on the port chart for the Canon 8-15mm.
I did some calculations and this dome should require the same extension so I ordered one conscious that this would be lighter but not necessarily increase the underwater lift due to a reduced volume.
Although there is a difference of 362 grams the smaller volume will result in less buoyancy 348g lift vs 688g lift for the 140mm so overall the additional buoyancy is only 22 grams.
The primary benefit of this smaller dome is that it gets you closer this in turn means that things will look bigger and as consequence depth of field will drop. Depth of field depends on magnification and as you will get closer it will drop compared to other domes. So larger domes have more depth of field not because they are larger when you are at close range but simply because your camera focal plane is standing further back.
To give an idea this is a little miniature shot with the 140mm dome with the target touching the glass port.
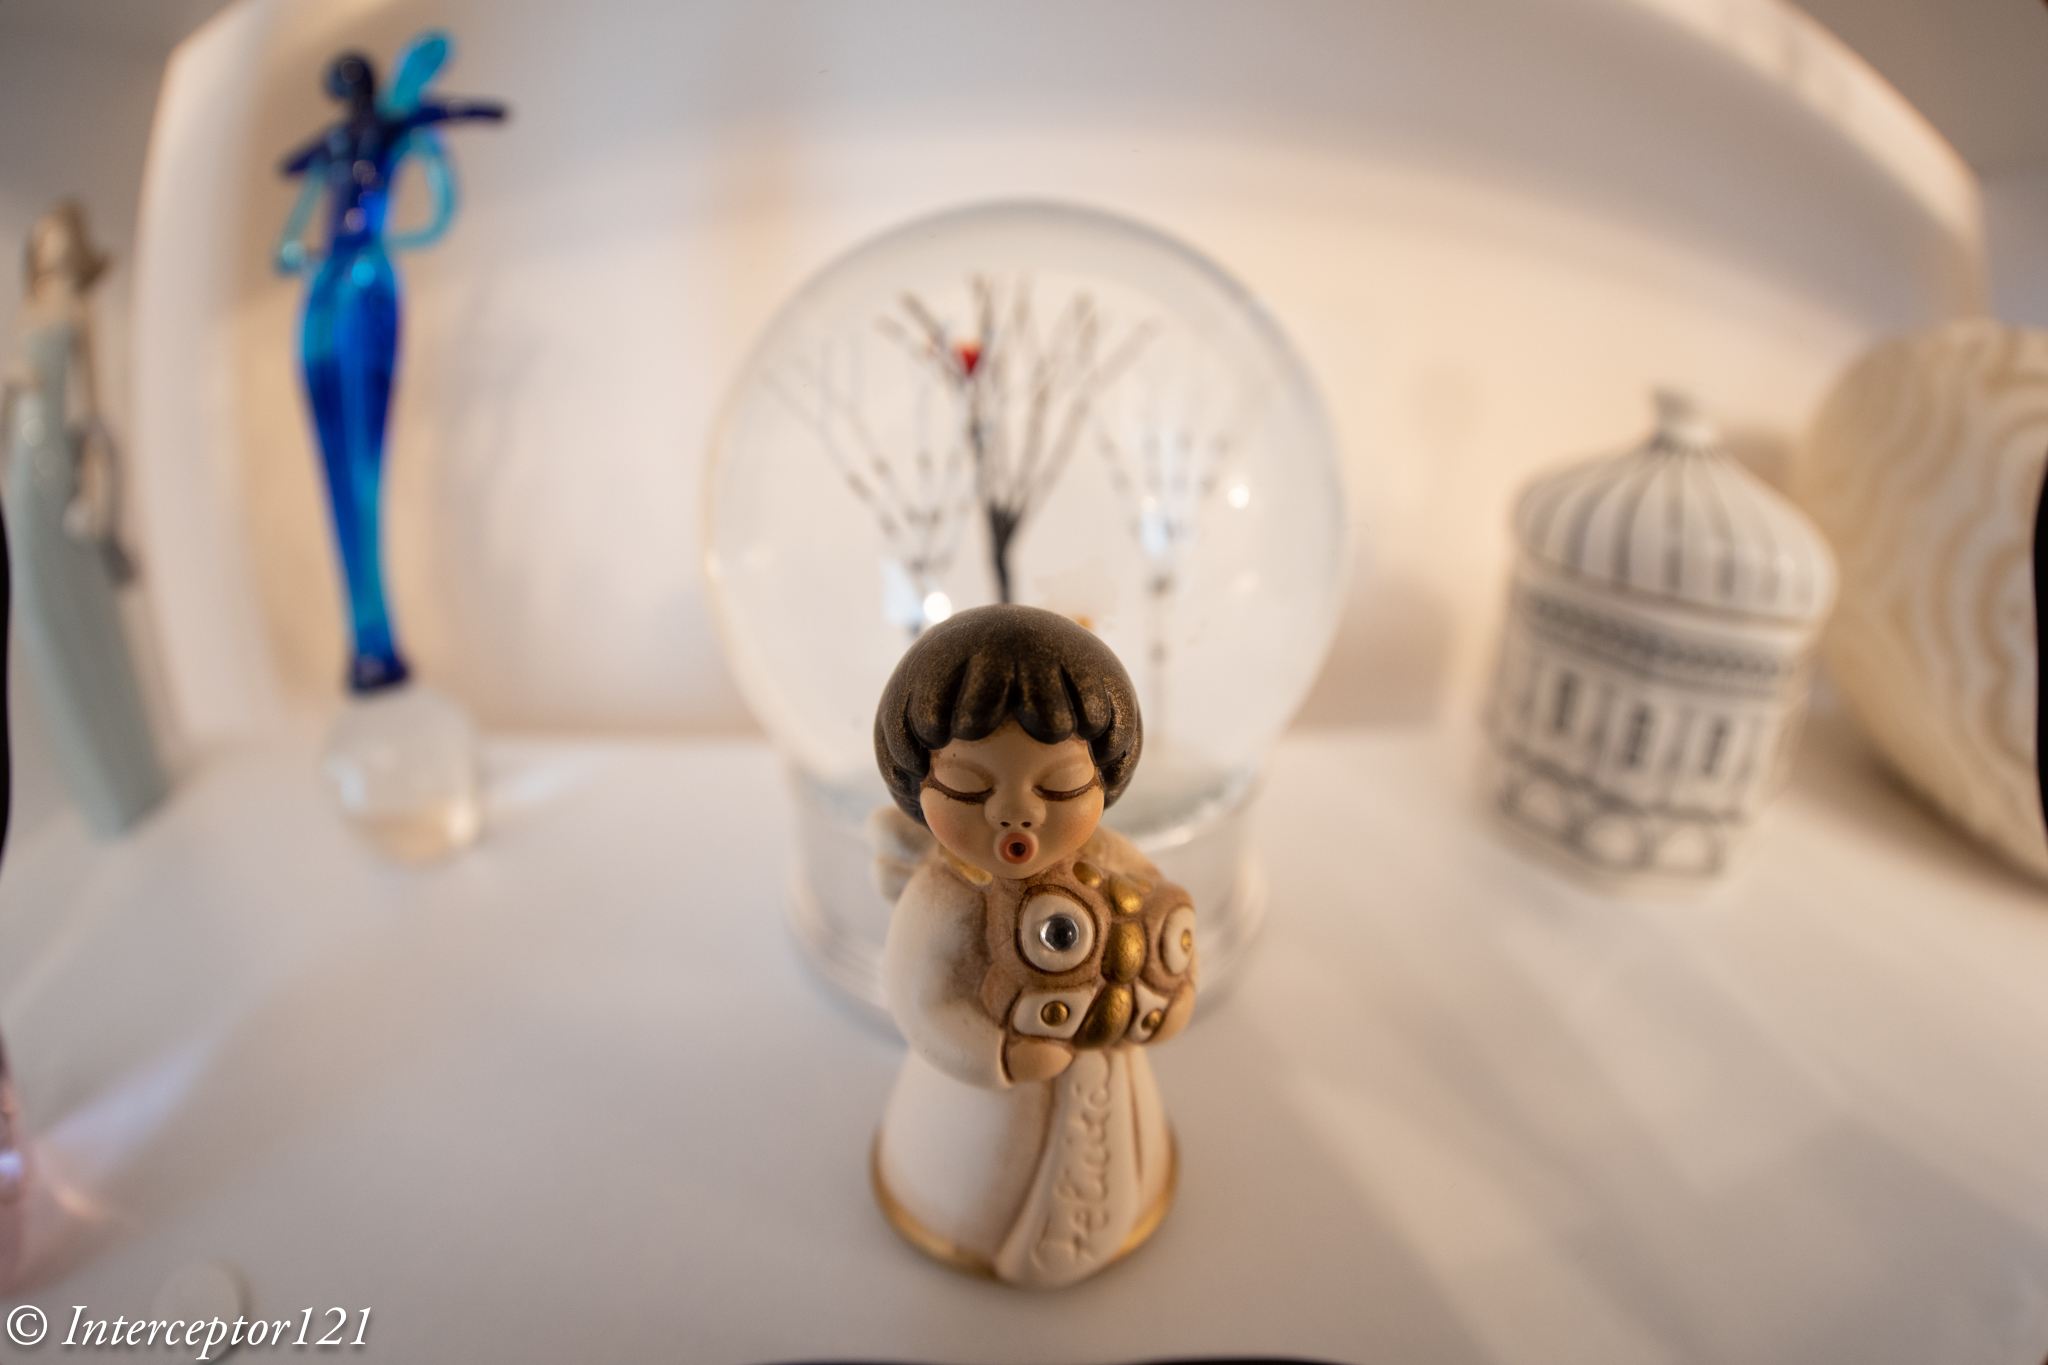
This is the same target with the 4.33″ dome.

Side by side shows the difference in magnification.

If we look at the same detail we can see that the 140mm dome image detail is less blurred.

We are on land here there is no water involved and the 140mm image is sharper at the edge simply because it is smaller.
As depth of field must be compared at equal magnification we can also bust another myth of larger domes vs smaller domes there is no increased depth of field you are just standing further back if you compared the front of the port instead of the focal plane.
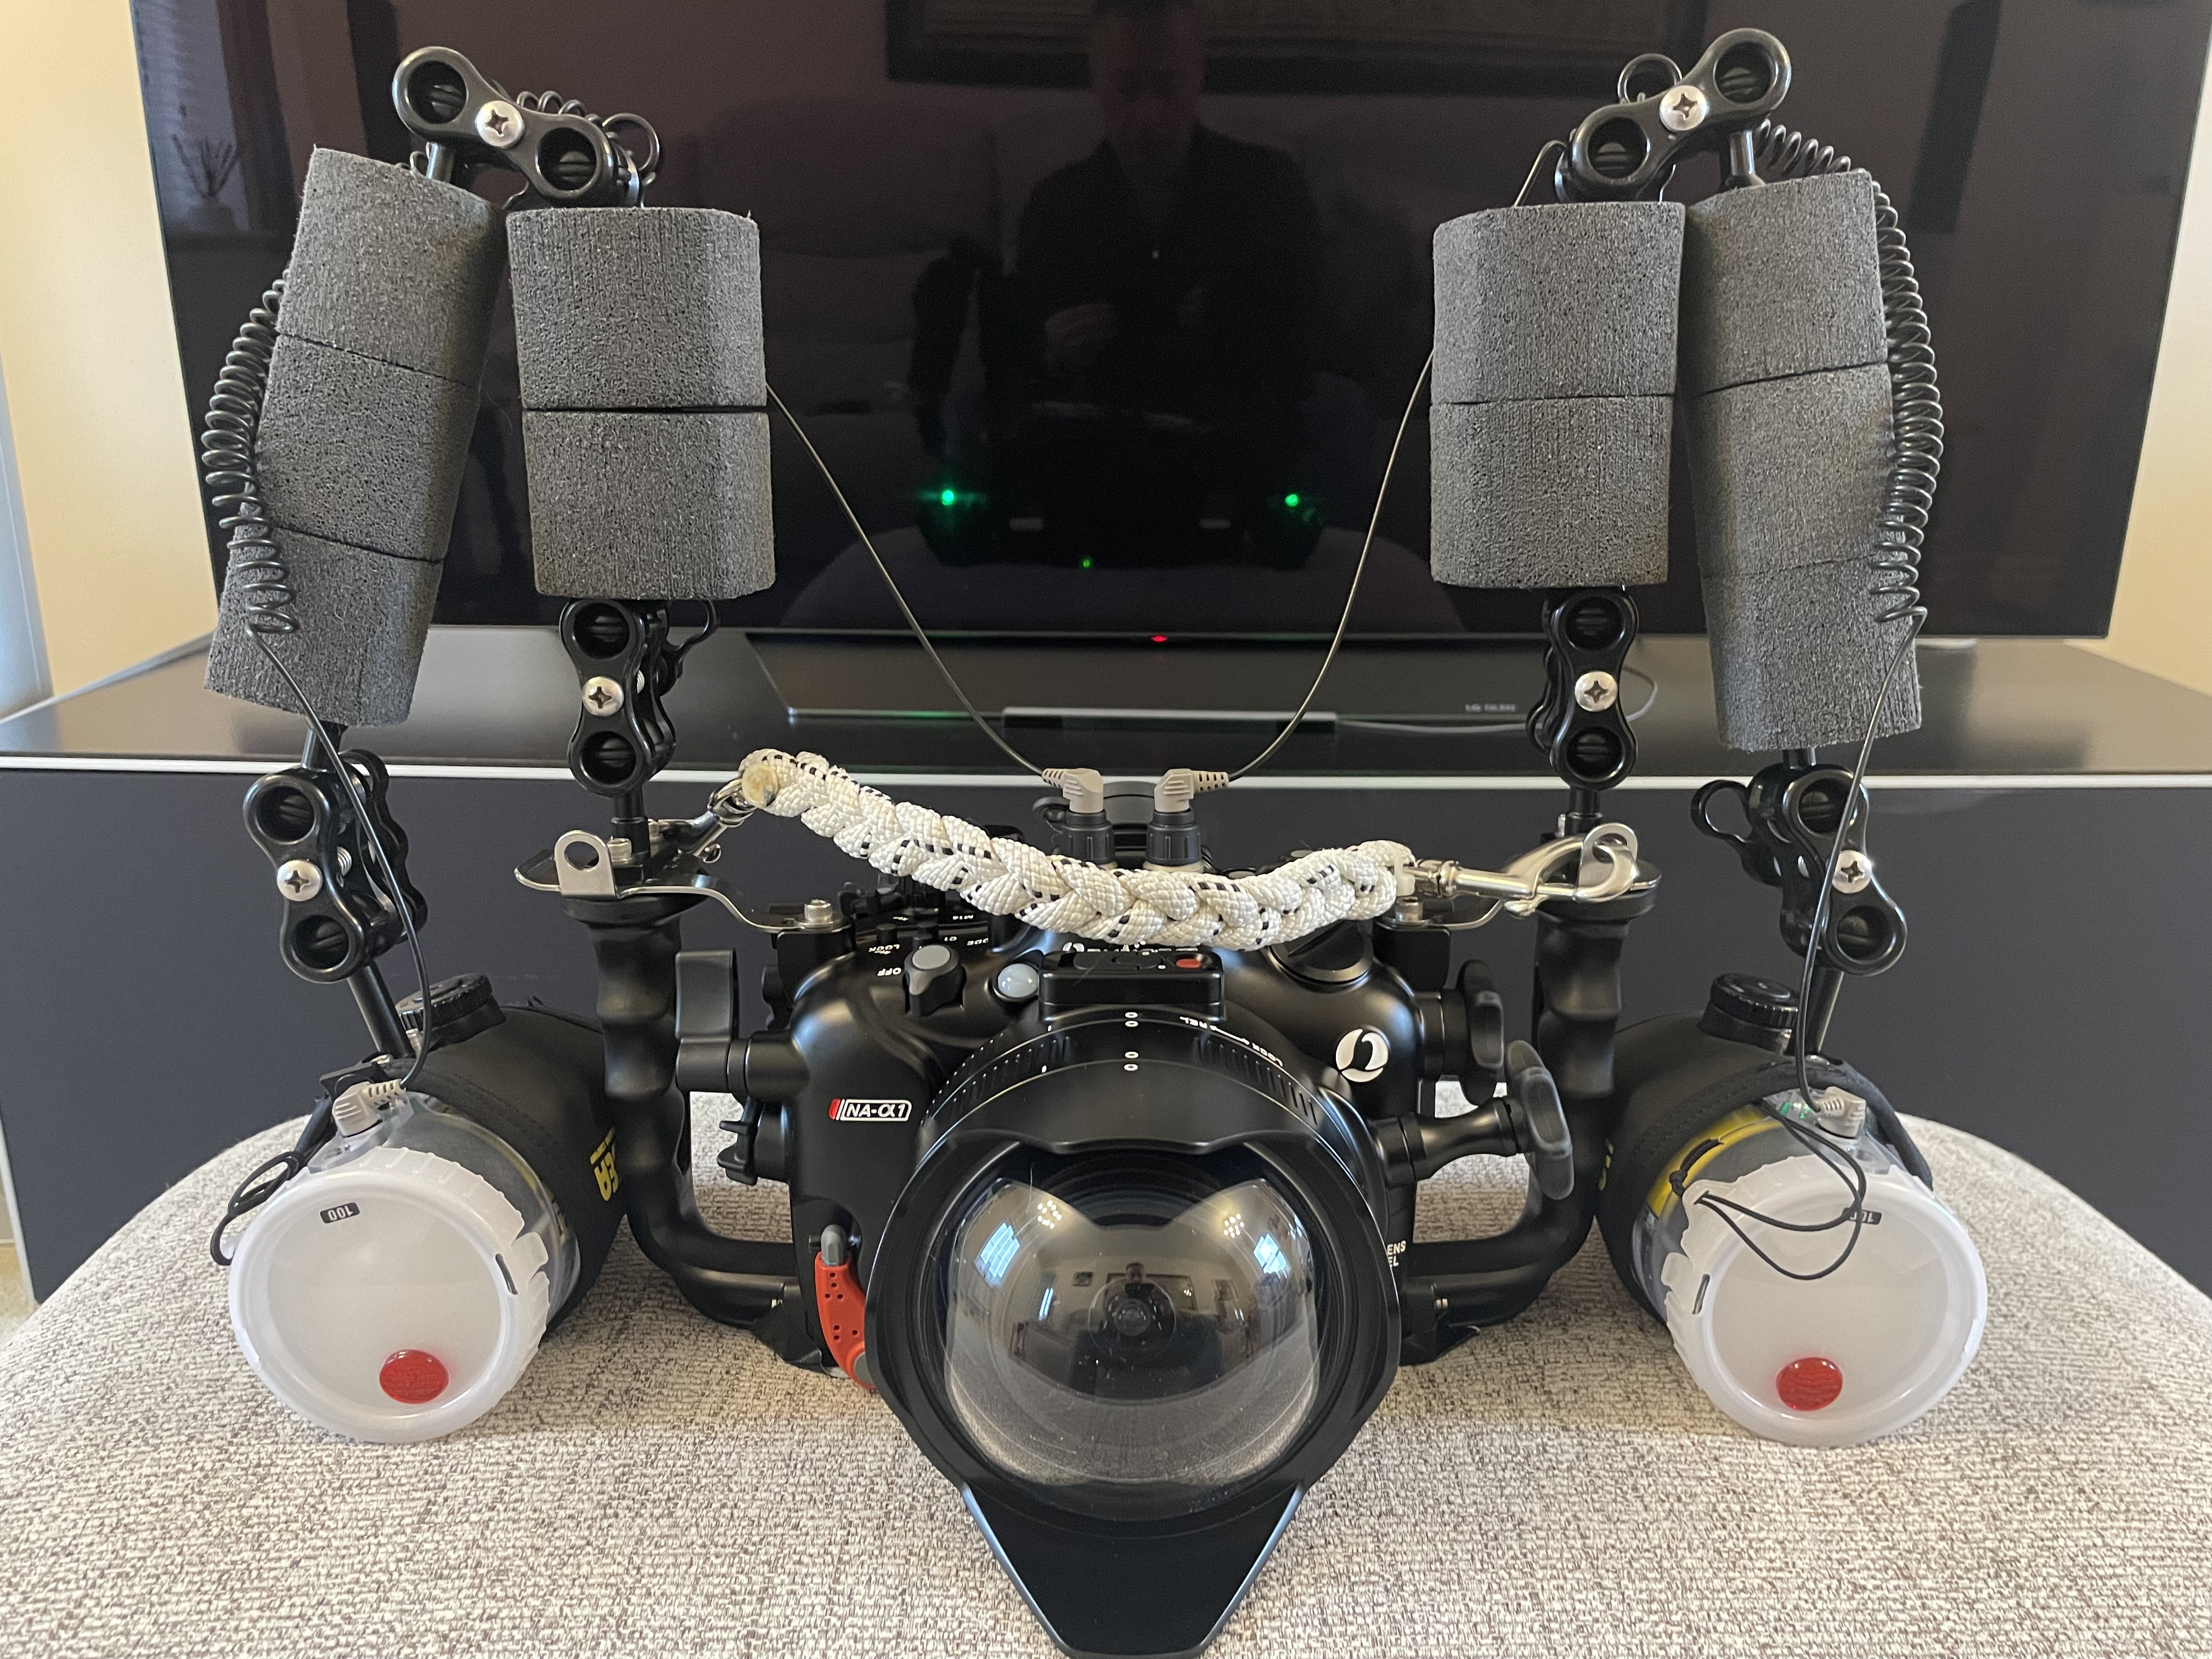
Building the Rig
The extension required is still 30mm as for the 140mm dome,

The overall size of this dome means it is flush with the extension ring.

This is the overall rig with the amount of flotation in this image it is around 600 grams negative in fresh water.
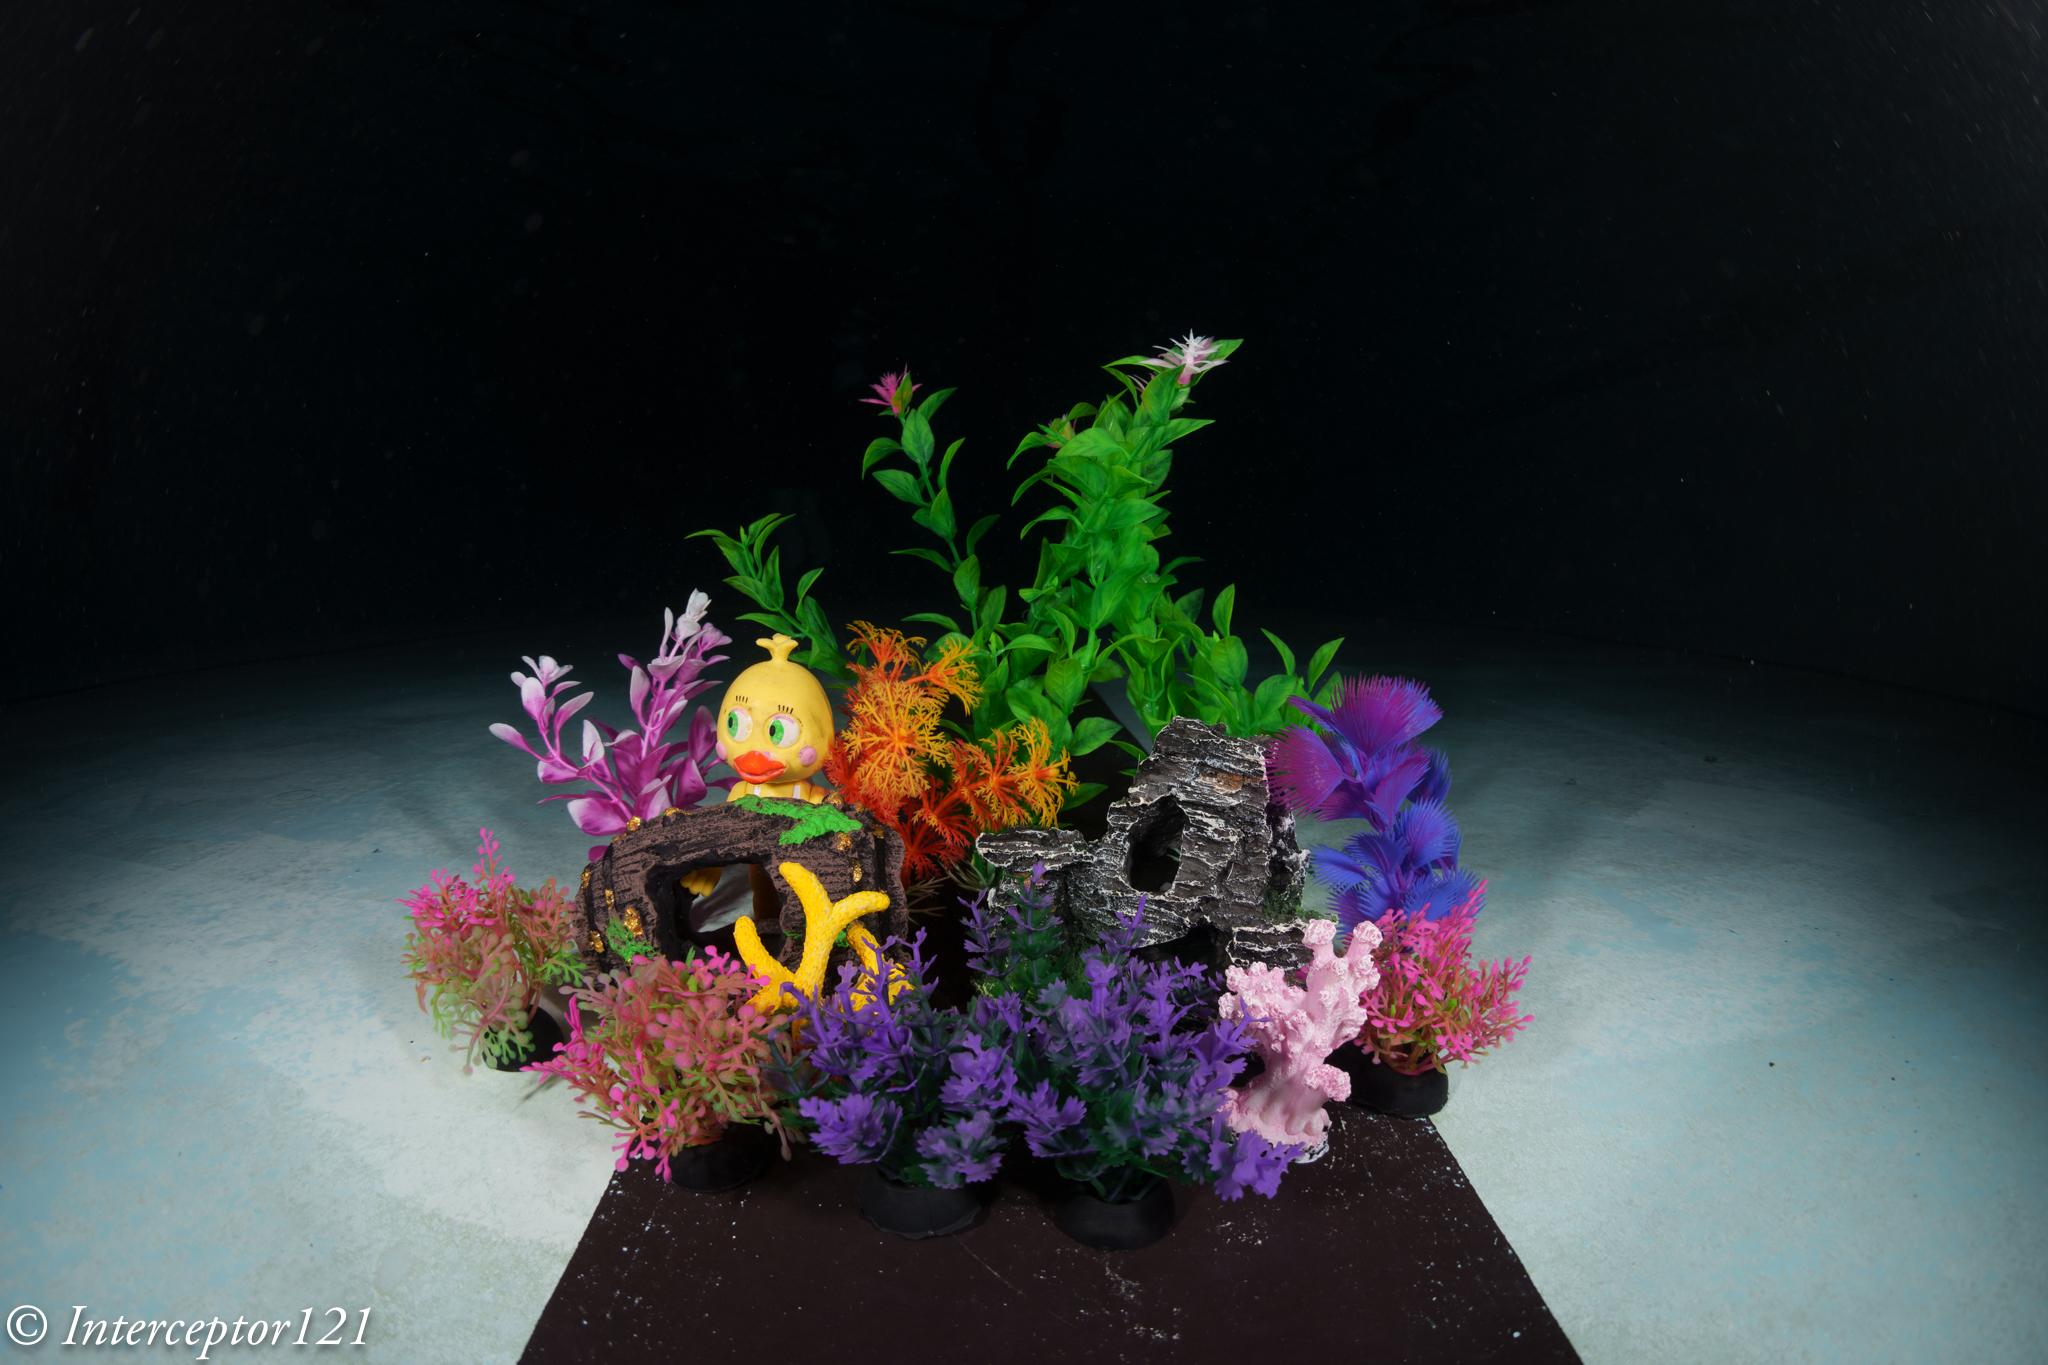
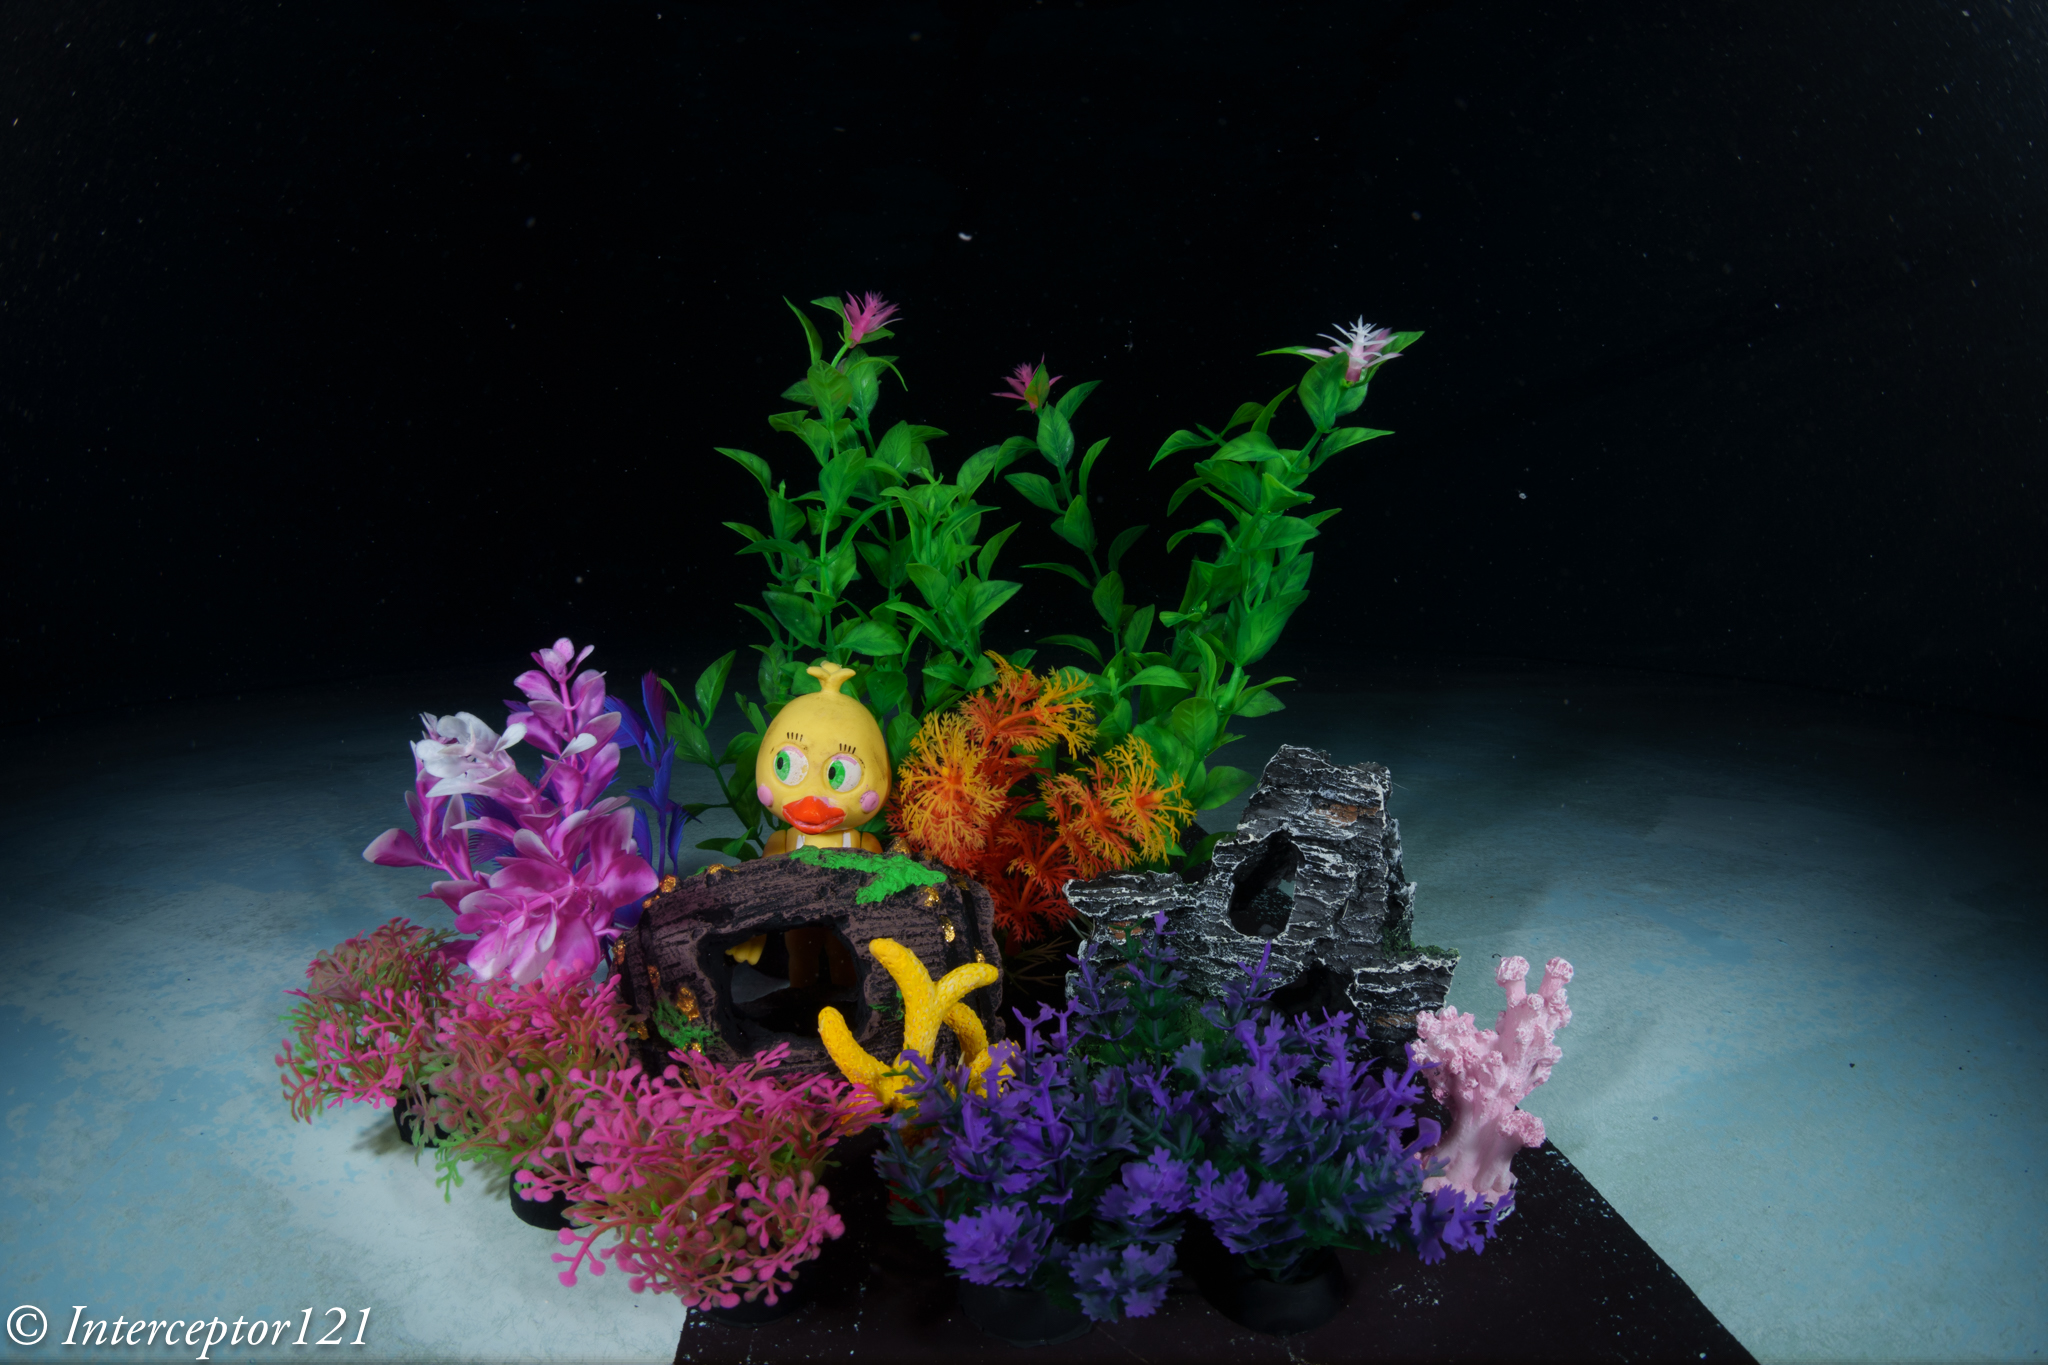
Now that we know what to expect is time to get in the pool and take some shots. I got some miniature aquarium fixtures to simulate a close focus wide angle situation.
Pool Session
Once in water I set up my artificial reef and got shooting.
I was at the point of touching the props so I had to stand back a little. As expected the issue is depth of field.
Shots at f/11
For starter we try to get as close as possible and focus in line with the chick.

Due to the extreme magnification the front details are quite soft. So from here I start moving backwards a little.
Still focussed on the chick the sharpness improves due to reduced magnification this is a simulation of a larger dome.

There still is severe blurring of the front detail at f/11. However due to the increased depth of field that the dome brings behind the focus point the rest looks pretty good.
Focussing on the middle of the frame at f/11 results in blurry details for the features in the front of the frame but much less blurry than before and the chick is still relatively sharp.
Focussing on the pink reef detail results in a better overall result in a counterintuitive way.
Shots at f/16
Stopping down the lens results in increased depth of field so more of the image is in focus however the overall sharpness drops. This is a good place to be if you don’t want to be too sophisticated with the choice of focus point and you are close.
You can get closer but the front detail is still a bit soft but acceptable.

If you move your focus point a bit further in front the situation improves.

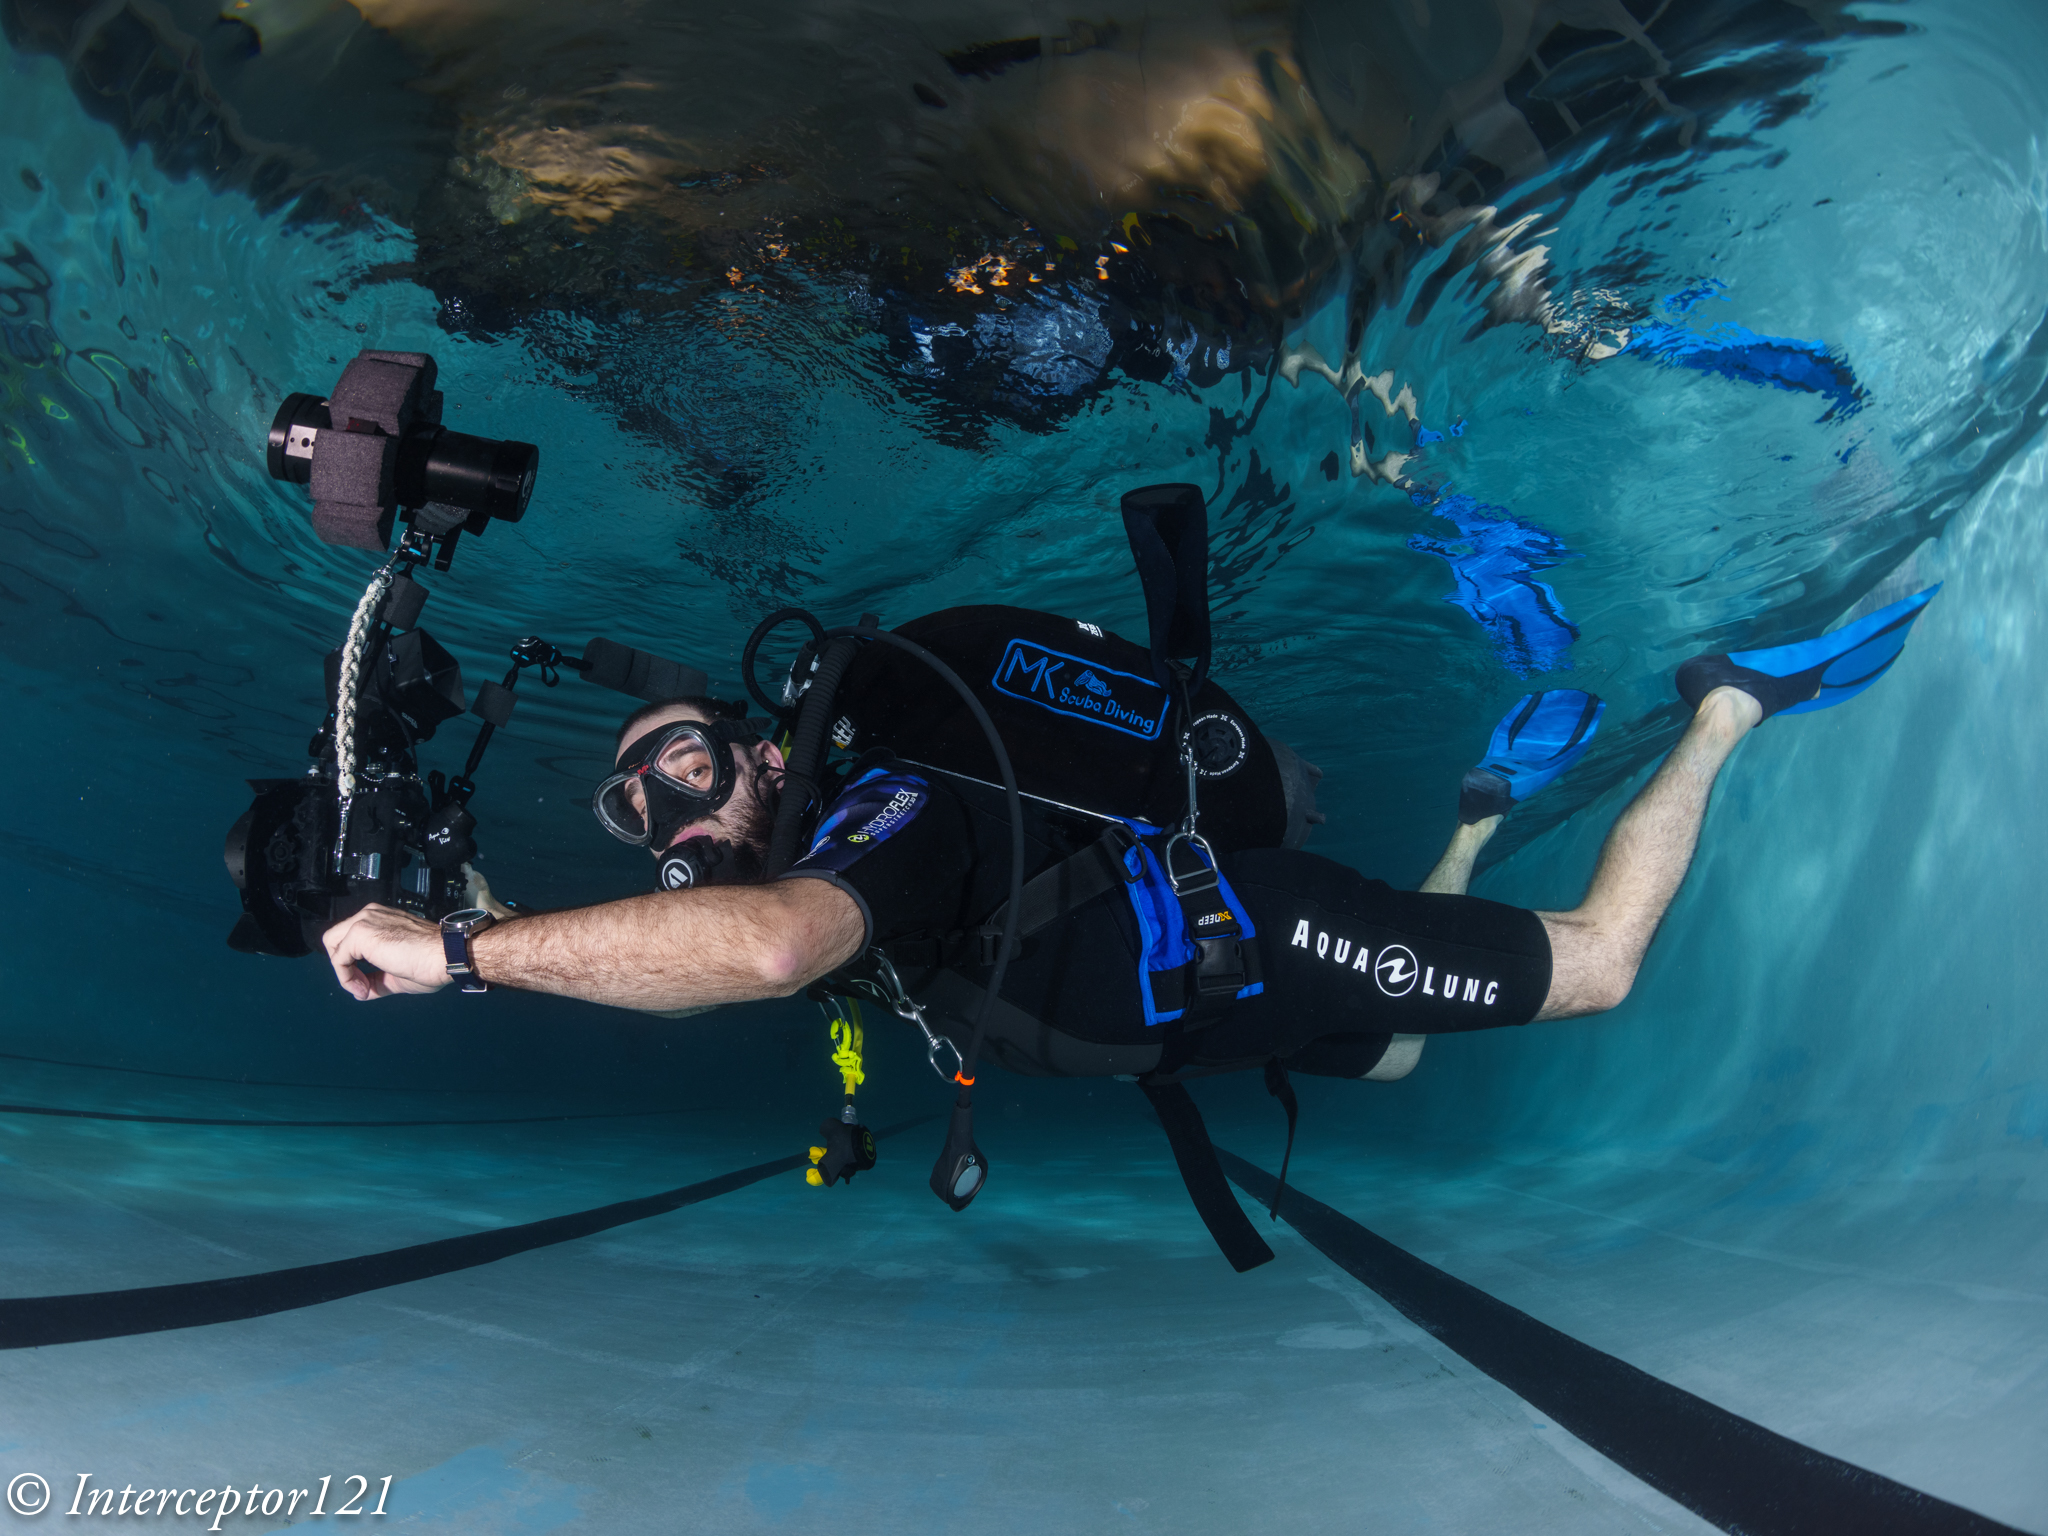
At this point I decided to get into the picture with a white balance slate.

Although the front is quite blurry due to the extreme close range the result is acceptable for the non pixel peeper.
Shots at f/22
We are here hitting diffraction limit and the image looses sharpness but we are after depth of field so be it.
Now the depth of field is there although the detail in the centre is less sharp.

Moving the focus point makes the image a bit better.
Time to insert the diver in the frame.

Overall ok not amazing consider the dome is on the parts.
Conclusion
The small acrylic dome does quite well at close range, the limitations come from the depth of field and not from the water and the dome increases the depth of field behind the focus point. This is something that you can use to your advantage if you remember when you are in open water.
For shots that are further away you can shoot at f/11 and get excellent IQ there is no need to stop down further to improve the edges. Consider however that f/8 may be just too wide on full frame and introduce additional aberrations regardless of depth of field.
Some numbers:
Nauticam 140mm Glass dome: £911
Nauticam 4.33″ Acrylic dome: £550
Price difference £361 or 40% however bear in mind that the primary benefit of the glass dome is to resist reflections and ghosting due to the coating and the fact you can keep the 8-15mm hood on.

Where did you get that “miniature aquarium fixtures”? Did you collect them as parts or they come as a kit?
Click on the image
Great article. Really helpful! I think I’ll use my Sigma 15mm behind the 4,33 dome then. Will be enough for some „casual“ fisheye shooting…
Am not sure the hood will fit. In addition the sigma doesn’t focus as close as the lens is smaller. This article is only valid for the 8-15 i take no responsibility for lack of performance or compatibility with the sigma
If the hood won’t fit, I’ll cut it. It’s not an expensive lens. Got it for 200€. I think it should focus, too. There’s actually a 4“ dome port from SAGA for this lens. So maybe it will fit and it will focus.
There is actually a 4“ dome port from SAGA for this lens. So I think it should work then?
https://www.aditech-uw.com/de/shop/3787-saga-4-domeport-fr-sigma-15-mm.html
At your own risk as you can read from another post the sigma is a small lens which means it will need a larger dome to focus very close. Hence I do not recommend it
Hi, just wanted to confirm the weight of the dome, at 630g. The nauticam website says 1.45kg, but that also seems too heavy for the size of the 140mm dome
As you can see the item is on the scale and nauticam website is wrong
The 4.33“ acrylic should also work fine with the Sigma 15mm.
See here: https://reefphoto.com/blogs/video/nikon-full-frame-lens-recommendations-for-underwater-imaging-in-2020
Every works just worse. As the lens focuses further away it won’t focus on the dome and will perform worse. Hence people use larger domes with the sigma. The sigma is a cheap lens but is very small and focuses not so far way from the entrance pupil that makes the dome requirements larger than lenses that are big like the canon. It is not easy to understand but that is the way it is.
Hello, sigma 15mm and Canon 8-15 mm doesn’t have the same 15 cm minimum focus distance? It’s confusing to me why Canon 8-15 mm works better. Thanks!!
Because the sigma is a smaller lens and what matters is the distance from the entrance pupil
https://www.zenunderwater.com/products/dp-100
What do you think about the even smaller zen dp-100 dome for cfwa?
Very interesting article, thank you! I’m still considering which solution would work best for me. I have the 28-60 and the 16-35 GM II. I’m not too keen on the 28-60 + WWL-1 setup because I’d like to do split shots. The 16-35 requires a huge (230?) port… Would the 8-15 be the solution? Also for split shots? What do you think? Or maybe 28-60 + WACP-C?
16-35 GMII works well with 180mm port however either that or the 230 make little difference to the fact you need to shoot f/20 and smaller. Unfortunately full frame is taxing on split shots a custom 12” or 16” dome is required to have the land part in focus
Works with the canon 8-15mm