Category Archives: ambient light

Nikkor UW15 on Sony Mirrorless for photography – Worth it?

Nauticam makes some really interesting adapters and ports for Sony cameras, one of them allows you to use vintage Nikkor lenses on full frame mirrorless cameras.

I decided to source the UW15 as I am planning to use it for video after seeing the results on the movie Avatar.

The challenge of the Nikkor lenses is that they are entirely manual with aperture and focus knobs. This is generally not an issue for videography which is my intended use but I wanted to check how does this lens work for photography as many people still rave about it.

Lenses compatible with the adapter are UW 15, UW 20 and UW 85 full manual. Later autofocus lenses are not supported.

The Rig

My rig is a classic derivation from wide angle with 8″ and 12″ arm segments and my trusty (!) Sea and Sea YS-D2.

Nikkor 15mm rig

The Nikkor weights around 600 grams and gives almost zero lift so this rig was over 300 grams negative in fresh water.

Before using it you need to assemble the lens on the adapter.

Nauticam Nikonos Adapter

You have two parts that can be removed to allow the lens to mount depending on your preference. I set the lens with the display upright so I could try and see it while shooting.

Nauticam Nikkor adapter top side

The controls are located on the left side side and bottom which is where I normally have my levers.

Nauticam Nikkor adapter controls

On the right you will see the display scales.

Nikkor UW15 Aperture and Focus Display

I have to say I was a bit nervous setting this on my A1 considering that this is a lens that is 25 years old at least but the vacuum test was fine so ready to go to the pool with the friends at Rec2Tec Bletchley.

The UW 15 Construction

The Nikkor lenses were generally rectilinear. The 15mm has a field of view equivalent to 20mm so only 94 degrees on the diagonal.

The approach was to correct the water distortion until such point when the image becomes rectilinear and eliminate other aberrations.

I have to say that the amount of chromatic aberrations is practically non existant.

White balance slate

Rectilinear lenses have gone out of fashion since dome ports with fisheye distortion being the preferred look for wide angle in modern underwater photography. For video though straight lines have a value.

Pool Session

Using this lens on the Sony A1 proved challenging for photography. Nailing the focus using peaking did not feel particularly precise.

Not so sharp focus

Some shots may have been sharp enough on film resolution but with the 50 megapixels of the A1 even the slightest misfocus shows.

Is it in focus?

My productivity was quite low at the beginning as I was trying to get a hand of the lens.

The lens itself is by all means extremely sharp even for my camera.

Grid

I worked out that I could not do what I normally do which is to frame first and focus after as by the time I had nailed the focus things would have moved so I decided to set the focus and move forward or back until I thought I had my target in focus.

The situation started to improve.

DSD student with Instructor David Allen

I felt I had worked out how to use the lens so started looking for some subjects. During those sessions you see all sort of stuff as people practice their skills.

Riding

Considerations on the controls

I believe that the average underwater photographer shooting digital will find it very hard to use this lens and will end up shooting at f/8 or smaller apertures so that focussing becomes easier. The lens is especially challenging as it is not particularly wide so you do need strobe power.

DSD Student

I found really hard the lack of display of aperture and focus position. The lens is designed for much smaller Nikonos housing, with my A1 housing being more bulky you need to actually turn and look at the lens to check your settings so many times I did not have the right aperture of focus and it all was pretty laborious. In a video situation for wide angle this lens will work just fine with set and forget at 4K but to nail focus on a high megapixel camera is a hard task.

When you do get the focus though the image is outstanding.

Just married

I tried a selfie to check the focus scale and it worked well.

Selfie

Consider that the most shots were at f/5.6 or f/8.

Dave

As you have no exif data it is impossible to remember what you shot unless you write it down on a slate.

Is it worth it?

The answer depends on your use case and if you already had the lens.

The following use cases fit the Nikkor UW 15 pretty well:

  1. Videos of sharks or pelagic that do not come too close where ambient light is low
  2. Photos at mid range with fairly static scenes where you want straight lines for example fashion models

The lens is definitely not easy to use for dynamic shots, situations where you need to get very close (as it does not focus very close) and where you need to continuosly adjust focus.

In terms of costs in GBP you are looking at:

£474 Nauticam Nikonos Adapter 37202

£300-500 Second hand Nikkor UW15

Obviously if you already have the lens and you are in one of the above use cases I would recommend you get an adapter and give it a go perhaps looking on the second hand market.

If instead you do not have the lens I would say not to bother unless money is no object, you are in the two use cases above and you have sufficent dexterity to control this lens.

Undewater photography has moved forward a great deal thanks to autofocus and although the Nikkor UW 15 is really sharp getting critical focus right is not easy. When it comes to video where you do not normally use autofocus for wide angle this lens is really interesting.

You can shoot at f/5.6 even f/4 subjects in the distance in ambient light with extremely clear and sharp detail at a fraction of the cost of other water contact optics. If you do not own any of the WACP or WWL I would say the UW 15 deserves some considerations but only if your command of depth of field and focus is very good otherwise it is better to pass.

Why You need 1.4 lenses on Micro Four thirds

This post is NOT about underwater imaging. With the lockdown most of us have started using their cameras in the garden to shoot bugs, or birds or family members or abstracts.

In my instagram on the side you can see some examples of what I have been up to.

Shooting underwater is typically done at small apertures because of underwater optics issues. It is rare to shoot wide angle wider than f/5.6 on a MFT body or F/11 on full frame.

On land everything changes and you want to have as much light as possible coming into your camera to maximise dynamic range, bring out colours and minimised noise. Aperture controls not just how much light hits the sensor but also depth of field or I should say depth of focus.

Depth of field at equal level of magnification (size of the subject relative to the frame) depends only on the aperture of the lens. It does not matter if the lens is short or long once the subject fill your frame it is the f/number that influences depth of field.

2.8/2/1.4 is the Magic Number

Typically in full frame terms f/2.8 was a good lens, and the reason is quite simple if you shoot a classic 50mm lens from 1.5 meters away you will have 15 cm or half a foot depth of field. This is ideal to keep things in focus but also provide some background separation as objects blur as they move away from the area in focus. If you had a faster lens more light would go in the frame however you risk that nothing is in focus, for example nose and eye in focus and maybe ears not in focus.

And this is why 2.8 has been the magic number for full frame photography. If we move to an APSC sensor this becomes 2 and on MFT the magic number is 1.4. So 1.4 on a 25mm lens on MFT is equivalent to 2.8 on 50mm on full frame.

-20200211-13.jpg
Street Photography Night scene at 1.4

1.4 also gives plenty of light to your sensor so when you want to do some street photography or filming on MFT you can keep your ISO very low.

Exposure Value

Every scene has a level of illumination given in LUX and your camera needs to be able to expose for it with the right focus, with the required motion blur and lowest noise.

The scene in the image above is shot at f/1.4 1/60 ISO 640 let’s calculate the Ev taking into account the reference value is f/1 1 second and ISO 100.

1.4 means 1 stop 1/60 means 5.9 stops and 640 means 2.67 stops. So in total we have 6.9 stops of light taken away from aperture and shutter and 2.67 stops added by ISO gain. Total of 4.22 Ev using the formula Lux = 2.5 2^Ev we get 47 Lux which is the level of illumination of your living room in the evening with artificial lights.

If you had a slower lens like for example 2.8 to cover the same scene you needed to shoot at ISO 2500 this would have increased the noise, reduced the dynamic range and the colors.

2.8 Zooms are for outdoor

There are a number of great lenses for MFT cameras that are midrange zoom and have outstanding optical quality:

Panasonic 12-35
Olympus 12-40

The lenses above are constant aperture and weather sealed they are ideal for outdoor use however they do not offer a shallow depth of field for subject isolation as they really are f/5.6 in full frame equivalent and they are also slow meaning they will take you to the ISO 2500 zone if you try street photography or shooting movies in your living room.

Prime Rules

If you want fast lenses in MFT you need to have prime lenses, this is due to the physical constraint of the format.

Here my selection, I am not a fan of vintage lenses or full manual lenses, I like the best optical quality and if I want to add a vintage feel I do it in post.

From left: Panasonic 12mm, Sigma 16mm, Panasonic 25mm, Panasonic 42.5 all (at least) 1.4 lenses

In more detail:

Panasonic 12mm 1.4

The Panasonic 12mm 1.4 is an expensive lens that I use for astrophotography and gimbals plus low light narrow room indoor shots.

It is weather sealed, extremely sharp and fast to focus and works in full auto focus on a gimbal.

Home Sweet Home
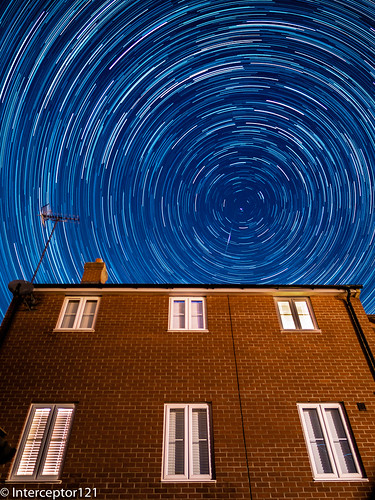
Star Trail with 12mm 1.4
Gimbal
Sigma 16mm 1.4

The Sigma 16mm 1.4 must be the best value prime on the market for MFT lenses. I use it in street photos and for videos. It is almost a 35mm full frame lens.

-20200213-11.jpg
street photography with Sigma 16mm
Garden Overview
Panasonic 25mm

The Panasonic 25mm is a workhorse for small group portraits and ideal lens for movie style video.

25mm 1.4
Kids video with 25mm
Nocticron 42.5

The Panasonic 42.5 Nocticron is probably the best portrait lens on MFT and one of the best lenses overall. It is an f/1.2 lens however in terms of actual transmission performs the same as f1/.4 lenses but with better rendering of out of focus areas.

Nocticron portrait

Why not Olympus/Others?

Of course there are equivalent primes from other brands for all focal lengths except the 12mm. They will perform equally and as long as they can go to 1.4 all is good. I use Panasonic bodies so tend to have Panasonic lenses and I buy Sigma since a long time but this is personal. There are tons of reviews on which lenses to choose etc etc but is not my place to do such comparisons. Edit since Olympus giveaway promotion in 2020 I have replaced the Sigma 16mm 1.4 with the Olympus 17mm 1.2 as they are equally bulky. The Oly pro is a fabulous lens but at the RRP suggested not affordable for many.

How about Video?

Even more essential to have fast primes for video as you are constrained in the shutter speed you can use.

Using a 1.4 lens at 1/50 you can shoot several scenes at different ISO

ISOLuxTypical Scene
200125Dark day
40063Indoors low lit areas
80032full overcast sunset/sunrise very dark indoor
160015Near twilight
32008After Twilight dark
64004dark
128002very dark
256001Candlelight
Aperture vs environment

For my purposes this adequate for reference underwater scenes at 3.5 means I can cover 100 Lux in ambient light in movie mode before turning on the lights.

Conclusion

If you find yourselves with grainy images or videos invest in fast lenses. A lens is the eye of your camera and the sensor is the brain. Think about getting better lenses before investing in a new camera and consider that if you need to go in lower light it is not always true that getting a bigger sensor will help considering the limitation of depth of field so you may want to think about lights.

Matching Filters Techniques

The issue is that the Ambient light filters are set for a certain depth and water conditions and does not work well outside that range. While the idea of white balancing the scene and getting colour to penetrate deep into the frame is great the implementation is hard.

Thinking about Keldan we have a 6 meters version and a 12 meters version as listed on their website. The 6 meters version works well between 4 and 12 meters and the other between 10 and 18. At the same time the Spectrum filter for the lens works down to max 15 meters and really performs better shallower than 12 meters.

With that in mind it follows that if you plan to use the spectrum filter -2 you are probably getting the 6 meters ambient filters. So what happens if you go deeper than 12 meters? The ambient light filter is not aligned to the water ambient light and the lights start to look warm this is not such a bad thing but can get bad at times.

You can of course white balance the frame with the lights however this becomes somewhat inconvenient so I wanted to come out with a different technique. In a previous post I have described how to match a lens filter to a light/strobe filter. Instead of matching the light filter to the ambient light I match the filters on land between each other in daylight conditions to obtain a combination that is as much as possible neutral. I have done this for URPRO, Magic Filter and Keldan Spectrum filter and worked out the filter that when combines give a neutral tone.

Magic filter combined with 2 stops cyan filter giving almost no cast

This tone tends to emulate the depth where the filter has the best color rendition. So in case of Keldan this is around 4 meters and so is Magic with URPRO going deeper around 6-9 meters.

The idea is that you can use the filter without lights for landscape shots and when you put the lights into the mix you can almost shoot in auto white balance or set the white balance to the depth the two were matching. I wanted to try this theory in real life so I did 3 different days of diving testing the combination I had identified the results are in this video.

The theory of matching filters worked and the filter more or less performed all as expected. I did have some additional challenges that I had not foreseen.

Filter Performance

The specific performance of a filter is dependant on the camera color science. I have had great results with URPRO combined with Sony cameras but with Panasonic I always had an orange cast in the clips.

Even this time the same issue is confirmed with the URPRO producing this annoying cast that is hard if not impossible to remove also in post.

The Magic filter and the Spectrum filter performed very close, with magic giving a more saturated and baked in image with Keldan maintaining a higher tone accuracy. This is the result of the design of the filters: the Magic filter has been designed to take outstanding picture better than life, the Spectrum filter has been designed using tools to give accurate color rendition. What it means is that the magic images look good even in the LCD while Keldan are a bit dim but can be helped in post.

Looking at the clip in the first 3 and half minutes you can’t tell apart Magic and Spectrum down to 9 meters, with the URPRO giving consistent orange cast.

Going a bit deeper I realised you also need a scenario where you are swimming closer to a reef and want to bring some lights in the frame because you are outside the best working range of the filter. In order to avoid excessive gap when approaching the reef I had stored white balance readings at 6 9 12 15 meters so when I had a scene with mixed light instead of balancing for say 15 meters and then having an issue with the light I used the 9 meters setting so the image is dim when you are far and gets colorful as you approach which is somehow expected in underwater video.

The section at 15 meters are particularly interesting

You can see that URPRO gets better with depth but also how at 5:46 you see a fairly dim reef at 5:52 I switch on the lights and the difference is apparent.

At 6:20 the approach with Keldan was directly with the lights the footage still gives an idea of depth however the colours are there and the background water looks really blu as I had white balance set for 9 meters.

Key Takeaways

All filters produced acceptable results however I would not recommend URPRO for the Panasonic GH5 and settle for the Magic Filter or the Spectrum filter. Today the spectrum is the only wet filter for the Nauticam WWL-1 but I am waiting for some prototypes from Peter Rowlands for the magic. I would recommend both the magic and the spectrum and the choice really depends on preference. If you want a ready look with the least retouching the magic filter is definitely the way to go as it produces excellent ready to use clips that look good immediately in the LCD.

The Keldan Spectrum filter has a more desaturated look and requires more work in post but has the benefit of a more accurate image.

I think this experiment has proved to work and I will use this method again in the future. This method is also potentially available using the keldan or other ambient light using a tone that closely matches the lens filter.


Filter Poll

CREATIVE strobe filters for wide angle

When people think about creating lighting technique for underwater photography a few things come to mind and usually it is about tools. Snoots for example have become very popular and help the underwater photographer to increase separation of the subject from the background. I have seen some people jumping in the water with a black slate to create an artificial black background, clearly is much easier to do that for macro as everything is at end and typically the subjects are not fast moving or the diver is not fast moving.

Then of course there is strobe positioning, classic, inward, crossed, rabbit ears, backlighting etcetera here goes a long list of options.

At the end however some pictures just seem to “pop” more than others, and this usually has to do with the colours and the contrast and with the blue.

It is not a coincidence that the term Mustard Blue is what has made some shots from Alex Mustard re-known and if you read his underwater photography masterclass there is a whole section ‘The sea is blue’ where Dr. Mustard goes on about the importance of exposure and background blue.

His suggestions are to:

  1. Dial in an underexposure (for the water) around -2/3 to -1 1/3 Ev
  2. Using warm strobes

It is worth stressing out that the primary reason why the camera gets fooled by the conditions underwater is because colours gets absorbed and blue lights gets scattered instead creating that milky glare at times when the water has lots of suspended particles.

If shoot an auto mode with exposure compensation at zero your pictures will for most part come out washed out and lacking contrast underwater and this is one the primary reasons photographer like Dr Mustard do not follow the expose to the right rules.

Underexposure for the water is obtained by keeping the aperture and ISO constant as they are aligned to the strobes and changing the shutter speed accordingly. Obviously if you are shooting video your shutter speed is most likely fixed so you need to find alternative ways to get your blue as you want it but generally you would still underexpose probably not as much.

With regards to warm strobes this is a fairly subtle point linked to the camera auto white balance mechanism.

Most flash strobes have colour temperatures between 5500 and 6500 K and therefore are not at all particularly warm.

Inon Z240 Standard and Warm diffuser

Inon has developed warming diffusers for their Z240 range and I believe also for the most recent Z330 range. They are available in 4600K and 4900K temperature. I definitely recommend the 4600K version over the 4900K as it has a stronger effect.

So how does a warm strobe work in order to get a richer blue?

Table of light sources – Olympus education

When we shoot with strobes the camera is set to auto white balance, and will average for most the subject we hit with our strobes to calculate the average colour temperature and tint.

The camera auto white balance operates between 2500K and 7500K typically so a warm strobe is likely to set the colour to 4600K instead of the typical 5500K the ‘extra’ 900K do not really do anything to the subject that will anyway we white balance but give an extra kick to the blue background. Underwater colour temperature is usually higher than 9000K and easily reaches 14000K (purple tone in the water) at depth. So the warm strobes are particularly effective in shallower and clearer water as they push the blue to a darker tint like in this example taken around 12 meters.

f/8 1/125 ISO 125

You can see how deep is the blue other example taken on the Barge at less than 10 meters.

Portrait in deep blue…

So what happens if you don’t have a warm strobe or if there aren’t warm diffusers for the strobe you have, or maybe you don’t want to spend the money for them?

Amazon comes to the rescue

If your strobe is around 5250 with diffusers (like Sea and Sea YS-D2 or Inon S2000/Z240/D200) get a 1/8 CTO

Rosco Cinegel sun 1/8 CTO, 20×24″ Color Correction Lighting Filter

You can find this filter also under Lee on colour 231, with a little amount you can get a half sheet that is enough for a few strobes.

This filter has a negligible -0.3 Ev light loss and will bring your strobe down to around 4600K .

If you have a fairly cool strobe you need a 1/4 CTO

Rosco un 1/4 CTO 20X24 Amber – Rosco RS340911

If you have something different you can try a mired shift calculator here

http://www.leefilters.com/lighting/mired-shift-calculator.html

Be careful not to exceed with this technique or subject will turn too warm.

An alternative and perhaps counterintuitive approach is to use cooling filters.

In this case the strobe light will become colder to emulate the water colour and the camera will need to be set to custom white balance.

In almost all cameras except Olympus that reach 14000K colour temperatures are limited to 10000K however they can be further enhanced to reach 11000K if you have an adjustment panel like the Panasonic or Sony cameras. Pushing the adjustment to the A gives extra 1K. This technique with a bare lens has however a limitation as when the custom white balance caps the colours go completely off.

In order to see what can the colour temperature setting do we can compare a normal grey card shot with one where the colour temp is 11000K and magenta is pushed to the max.

Grey card bare lens
Maxed out Custom White balance on Panasonic GH5

In order to cool down the strobes you need a cyan filter, the custom white balance can correct up to 2 stops Cyan but no more. You can trim a sheet of Rosco 4360 to fit into your diffuser as below. This takes around 1 stop Ev off the strobe.

Sea and Sea diffuser with a Cyan 60 gel

It important to stress that the predominant colour in blue and blue water is cyan not blue and this is what gives the washed out scattering. We want to keep the deep blues and get rid of light blue and green which ultimately is cyan the colour of water.

So the strobe will emulate the water and the camera custom white balance will set the colour restoring what was lost and giving us a full correct spectrum. This however only works until the water colour temperature gets to 11000K and this is not as deep as you may think it could be a low as 9-10 meters. A cyan 60 filter is approximately 9500K. You can see the colour in the image below.

Cyan 2 Stop results in Colour Temperature around 9500K

In this technique the strobe is not used to give colour but to eliminate shadows the custom white balance is going to give a deep colour that penetrates the whole frame so any subject in the distance will be colourful as well.

The benefit of this technique is that you may use wider apertures and even slower shutter speeds like in this 1/60 example here.

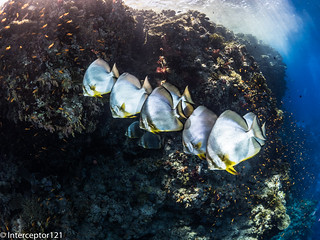
batfish formation 1/60 f/5.6 ISO 200

You can clearly see the orange colours of the anthias far behind in the frame.

The ultimate stretch of this technique is to combine a filter like the magic filter this can be used with both a Cyan 2 stops and also a Cyan 3 stops in deeper water. This technique is taxing on exposure as your strobes are half power and your exposure has 1 2/3 stops less however this is easily recovered as you tend to shoot at slower shutter speeds of 1/30 to 1/60 instead of 1/125 to 1/200 because the filter will give you the deeper blues.

Magic filters on WB slate

The magic filter adds around 3000K to you camera custom white balance ability reaching the 14000K where the water starts turning purple blue. To that regards due to the amount of red I do not recommend going to deep with the magic and keep it to a max of 13 meters as recommended on their website.

The magic filter is almost a perfect match for the Cyan 60 filter if you overlap them over the lens you get almost a neutral grey card the temperature is only 150K off while the tint is around 5 notches toward green in Lightroom.

Magic Filter + Cyan 60 results in almost neutral grey card

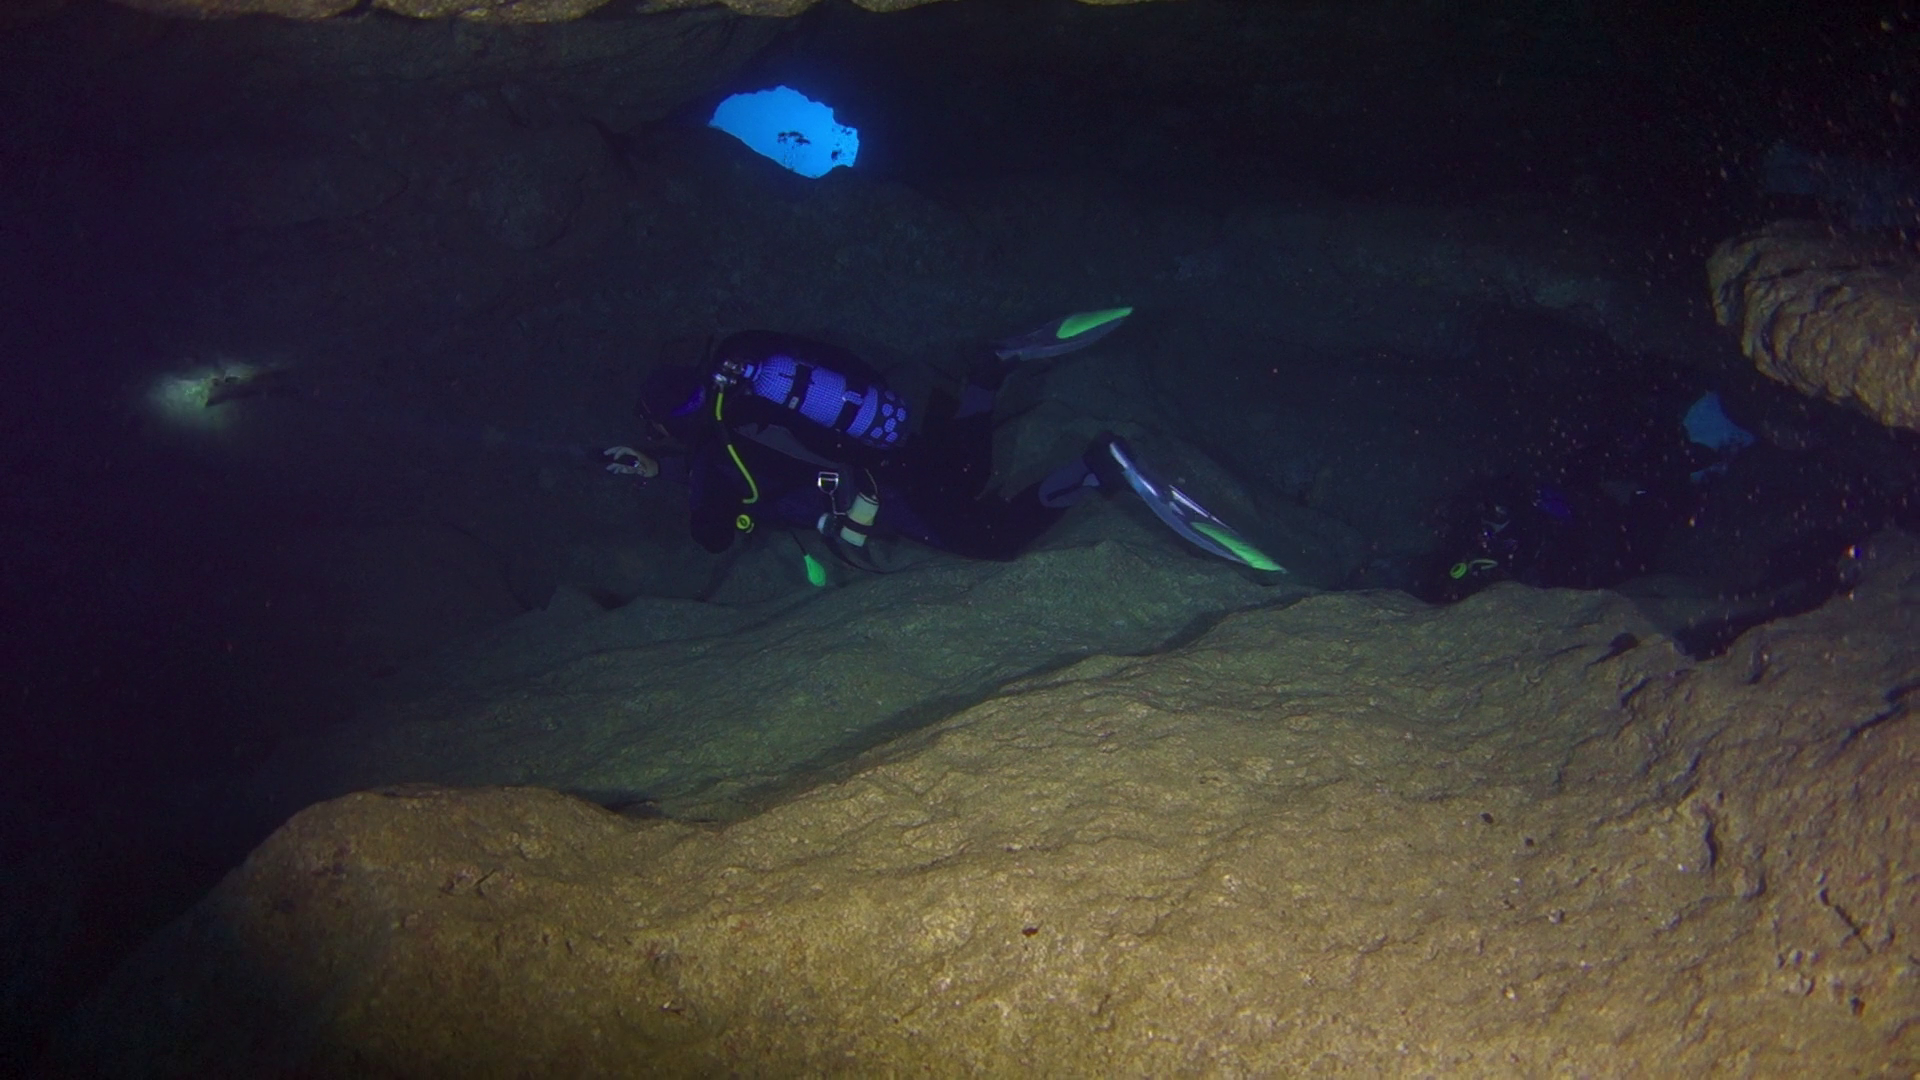
This cave shot I believe gives an idea and is taken with filter on lens and strobes.

Magic filter plus Cyan 60

I have also tried the magic filter with Cyan 90 however there are some side effect to consider. Firstly you get Cyan cast on the image at shallower depths. Second the magic filter has a tendency to turn purple below a certain depth so I recommend to use the magic with the Cyan 60 as you are certain that the foreground subject and the strobe filter will give you a neutral colour. If you are in deeper water and the temperature is above 10000K this will only result in a deeper blue and a warmer light on the subject that once RAW corrected will look just fine.

Conclusion

In this post I have tried to give you some tips on how to use gels to give deeper blue or richer colours to your wide angle. I would recommend to start with warming diffusers and then move to cyan filters and finally to magic filter and cyan filter in combination.

I will be demonstrating extensively this techniques during my 2020 Red Sea Liveaboard

A final word for video shooters. I am not aware of any add on warming diffusers for video lights and generally I have not seen LED warmer than 5000K therefore unless you shoot at 60p 1/125 it will be very hard to get deep blue at shallow depths without a lens filter.

See my other post for video specific tips.

Full size images are available on my flickr pages all images here are reduced to 1600 pixels for storage purposes.

The importance of Underwater white balance with the Panasonic gh5

One of the key steps in order to get the best underwater colours in your video is to perform a custom white balance.

This is true on land and on water because auto white balance only works in a specified range of color temperatures.

Panasonic GH5 advanced user manual

For our GH5 the range where auto works goes is approximately 3200-7500K. When the camera is working outside this range you get a colour cast. Let’s see with some examples:

Grey card Auto White Balance 8mm
Grey card Custom White Balance 8mm

In the example above I am taking a picture of a white balance reference card under warm lights that have a colour temperature of 2700K.

As you can see the auto white balance fails resulting in a yellowish tinge, while the shots taken after the custom white balance is accurate.

In terms of white balance card I use the Whibal G7 Studio 3.5″x6″ (8.9×15.2 cm). I found this card to work well underwater and I use it with a lanyard attached to a clip that I hook on my BCD D rings.

More info on the whibal here

It is possible to buy a larger card such as the reference that is 7.5″x10″ however this is cumbersome and I found the Studio version to work well with the Panasonic GH5 as it only uses the central part of the frame for white balance.

Custom white balance with the 8mm fisheye

Going back to our GH5 instruction manual you can also see that the camera white balance is limited to 10,000K which is the colour of blue sky.

Underwater due to light absorption at longer wavelengths red and orange disappear at depth and blue tends to scatter over suspended particles. So the colour temperature of water tends to be higher than 10,000K and also the blue is somewhat washed out by scattering.

This is the reason filters are essential because reduce the amount of blue or to say better cyan and bring the camera into a range where custom white balance works again.

I have already posted a whole range of observations on filters in a previous post so am not repeating here.

With the right filter for the water colour I dive in and with the appropriate white balance card you can get some pretty decent results with custom white balance.

To help the colour accuracy I have experimented with the Leeming Luts and I want to thank Paul Leeming for answering my obscure questions. Obviously you do not have to use the LUTs and you can design them yourself however I found that using the Cinelike D LUT I have a very good starting point for colour correction.

The starting point is a CineLike D profile with saturation, noise reduction and sharpness set to -5 all other settings to default as suggested by Paul, there is no need to lower the contrast as CineLike D is already a flat curve.

*Noise and sharpness have actually nothing to do with grading but are set to -5 as the GH5 applies sharpening and noise reduction even at -5 setting. Sharpening has generally a negative effect all around while noise reduction if required is better performed in the editor.

Looking at imaging resource tests of the GH5 we can appreciate that the camera colours are oversaturated by default.

the GH5 has around 113% over saturated colours

The GH5 tends to push deep colour and wash out cyan and yellow. This becomes apparent when we look at a white balanced clip uncorrected.

White balanced clip in final cut pro you can see how the water column is washed out whilst red and other dark colours are accurate

The Leeming Lut helps rebalancing the camera distorted colours and when you apply the camera LUT, provided you have followed the exposure instructions and applied the profile as described, the improvement is immediate.

The previous clip now with the CineLike D Leeming LUT applied

From here onwards it is possible to perform a better grading and work to improve the footage further.

For the whole read please look at Leeming Lut website

One other thing that I believe it is interesting is that while generally for ambient light or balanced light shots I do not actually trust the camera exposure and go -1/3 to -2/3 for close up shots exposing to the right greatly helps highlights recovery

In the two frames you can see the difference the LUT brings restoring the correct balance to the head of the turtle.

Turte detail the highlights appear blown out
Turtle detail with Leeming Lut applied

To be clear the turtle detail has been white balanced in water on the whibal card while using a Keldan Spectrum filter -2, then in fcpx automatic balancing is applied. The LUT brings out a better dynamic range from the same frames.

Obviously you are free to avoid lens filters and LUTs and to some extent it is possible to get similar results however the quality I obtain using automatic settings I believe is quite impressive.

I found myself most times correcting my own wrong exposures or wanting to increase contrast in scene where I had little however this only happens in sever circumstances where white balance and filters are at the limits.

Conclusion

There are many paths to get the right colours for your GH5 underwater videos in my opinion there are four essential ingredients to make your life easier and give your footage a jump start:

  • Take a custom white balance using a professional grade white balance card
  • Set the right picture profile and exposure when shooting
  • (Recommended) Use appropriate filters for the water conditions
  • Apply the appropriate LUT to eliminate the errors in the GH5 colour rendering in post processing

With the following settings producing a video like this is very simple and all your efforts are in the actual cutting of the clip.

Short clip that applies this blog tips

Please note some of the scenes that look off are shot beyond the working conditions of filters and white balance at around 25 meters…

Getting the best colors in your underwater video with the panasonic gh5

There is no doubt that the Panasonic GH5 is a very capable camera and in given conditions the video performance you can get is truly impressive.

Broadly speaking a video clip needs to be:

  1. Sharp
  2. Colorful
  3. Contrasty
  4. Clean

Those 4 characteristics are tightly related to:

  1. Resolution
  2. Color depth
  3. Dynamic range
  4. Low Noise

Resolution

Today everyone shoots 4K and after all resolution is well supported by almost any camera, broadly is unaffected by other factors and unless the noise is really high sharpness of your frame is not going to be a real issue shooting at 4K.

Color depth

In normal conditions and not underwater a camera can resolve many colors. However underwater due to the diffraction of light and selective absorption of colours the starting point is very different from land. So generally is not the camera that cannot resolve the colors but the colors that are missing to start with. This post will focus specifically on this aspect. The Panasonic GH5 can resolve 23.8 bits in RAW and therefore technically has less than 8 bits color depth – do not confuse this with the 8 or 10 bit recording setting.

Dynamic Range

Underwater scenes tend to have limited dynamic range, with the exception of sunbursts or shooting against the light this is going to be an issue only in specific circumstances of very bright scenes with shadows. In all scenes taken with video lights dynamic range is not an issue at all. The GH5 has 13 stops of dynamic range but rarely this is an important consideration.

Noise

Noise is an important consideration as when the noise goes up the camera looses the other characteristics, color, dynamic range and resolution will be affected when the camera is outside the sweet spot. Broadly speaking the Panasonic GH5 does not do well once you pass the ISO 1600 setting and I tend to cap the ISO in video at 800 in most cases.

Diving Conditions

To understand how those variables play we can see how the same set up reacts very differently in scene where there is less light and therefore the camera uses high ISO like this one.

The same camera with exactly the same equipment in brighter water produces this

So the reason for the above is that with less light there are less colours and the clip looks what it is really.

OK moving on to the main subject of this post how do I get the colors right? It is a combination of techniques and the trick is to use the right one in the right conditions.

Generally every site has specific conditions that change depending on weather, time of the day, visibility and other factors. So in broad terms a site will have more or less light and therefore more or less colours. It is therefore impossible to categorically define what to do at a given depth but is more about typical values. With this in mind we have typically 3 scenarios:

  1. Ambient light shots
  2. Artificial light shots
  3. Balanced light shots

Close up Shots

In general close up shots especially of small subject fall within the scenario 2 for which a video light with high color rendering is important as this will define the colours you see. With a lot of power it is possible to extend artificial lighting to larger subjects but eventually you run out of power due to distance or size of the subject.

Wide angle shots and seascapes

True wide angle shots are generally ambient light shots which also means when it gets too dark the colors will be missing and it will look blue not matter the equipment.

In order to make the most of ambient light shots for wide angle it is essential to balance the colours in water even when you use a RAW format on a still image because RAW files are not as RAW as you think and are actually compressed.

Custom White Balance

Using Custom White balance with a grey card it is possible to obtain decent results until the camera hits the maximum color temperature in the case of the Panasonic GH5 this is 9900K. Depending on conditions you may get to 10-12 meters and this still works, in darker water this stops working much sooner.

Chrisoula K Bow
Chrisoula K Ambient Light 5 meters

Color Filters

Color filters push the limit of custom white balance further down. Some add more or less 4 meters others up to 6-8 meters at the expense of an overall loss of light. Filters are useful when there is a lot of light because also help to keep the Panasonic Gh5 in the best aperture range (not smaller than f/11)

Filter in action at 10 meters

Right now there are predominantly 3 filters on the market:

  1. UR PRO
  2. Magic filter
  3. Keldan Spectrum

All those filters will improve the performance and color rendering of your footage, under the conditions that the loss of light is not pushing the camera above reasonable ISO values.

In terms of depth range the magic filter and the Keldan Spectrum -2 version can be pushed to 15 meters depth on a bright day in clear water. The URPRO is capable of getting a few meters more down to around 17-18 meters although it does generate an orange cast (as there is no red left) it is still workable.

FilterLight LossTypical Max Depth
Magic Filter1 2/3 Ev15 meters
Keldan Spectrum -22 stop (WWL)15 meters
URPRO 1 2/3 Ev18 meters

This image gives an idea of the 3 filters as you can see they are very different one from the other.

Keldan top URPRO bottom Magic filter

Balanced Wide Angle Shots

This is an entirely new technique that has started with the Keldan Ambient light filters. I wrote a whole piece on wetpixel

The principle is to use custom white balance with or without filter to obtain color rendering and then put filters on the video light so that the color of the light emulates the ambient light and therefore it only gives texture not color.

Keldan has developed a whole range of filters for various situation that match their light and therefore are not applicable to any other light.

As I do not own a set of Keldan I have done some tests and found that a gel of Cyan filter 2 or 3 stops makes my divepro G18+ practically ambient light in the conditions I dive into.

FilterCyan Strength
Magic Filter2 stops
Keldan Spectrum2 stops
URPRO3 stops

The above value are based on my experience use at your own risk especially with different lights.

Square Cyan 2 stops Round Cyan 3 stops

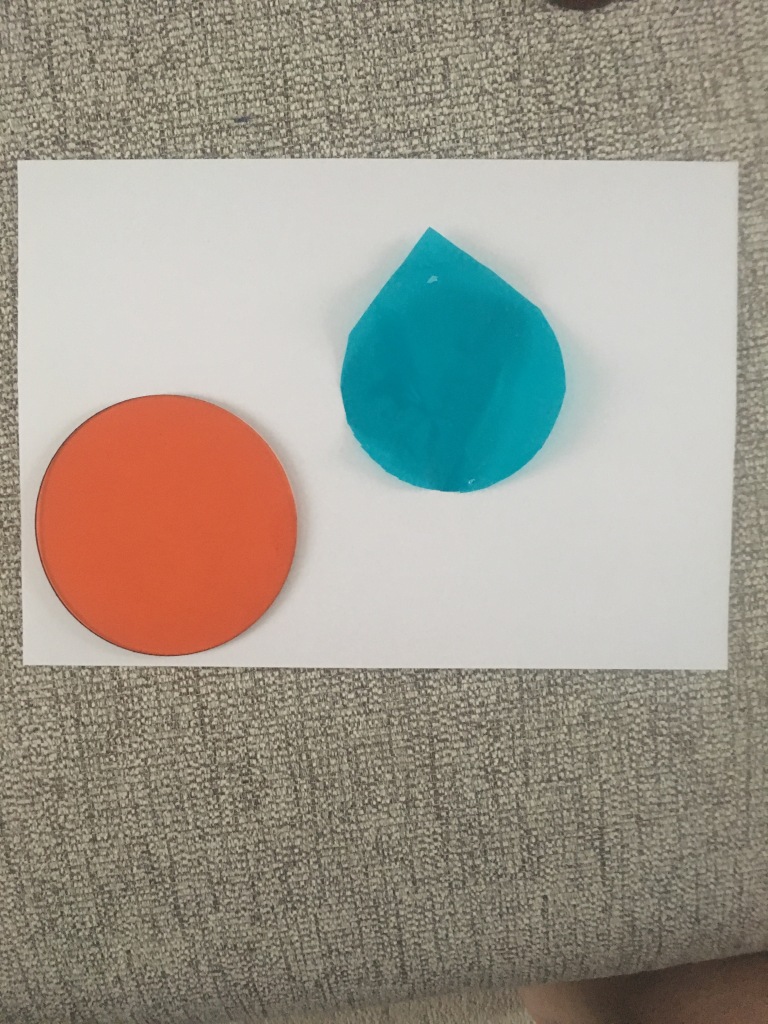
To give an idea I overlapped the filter to my iPhone lens

This is the shot without any filters

Original Shot

URPRO and Cyan 3 stops (darker)
Magic filter and cyan 2 stops accurate
Keldan and cyan 2 stops accurate

This example shows that the two filters cancel themselves the result is almost daylight with no cast which means in water if you use a video light or a strobe you will not see a red or orange spots on the image.

For those taking pictures the same combination remains true with Inon Z240 and Sea and Sea YS-D2

Example picture here

five in a row
My own filter and Cyan 3 stop note that the light is coming from the other side

One thing to take into account is that you need to find a way to hold the gel on the video light or the strobes. The flat surface strobe diffusers make this process easy, finding something you can use with your video lights is not easy and also the gels may melt after continuous use.

Artificial lights

It comes a point and a depth where filters stop working, this could be as shallow as 8 meters in green water. As the scene is dark using lights is what is required. There is nothing specific about this technique except making sure you don’t get burned highlights or backscatter. As it happens in photography using long arms (maybe not as long as for stills) is key to get good lighting on your subject.

My Camera Settings

I use CineLike D with saturation, sharpness and noise reduction to -5. I shoot at 24/25p AVCI 400 mbps and follow the 180 rules, it is entirely possible to shoot at 1/100 if you like more crisp look.

Clearly there are people out there that do not like filters and think white balance is best etc but I think a good read on magic filters explains it all.

http://www.magic-filters.com/need.html

Getting the best underwater colours for your 4K Sony RX100 Mark IV

It is not a mystery that even the new Mark IV version has issues with custom white balance.

The ergonomics have not changed and you need to go into photo mode to set custom white balance but generally underwater results are poor. Using filters is therefore a necessity also on the new 4K version.

RX100 Mark IV Video Behavior

The RX100 offers now a 4K 100 mbps mode and can use picture profiles.

I have used a modified version of PP6 that use the cine2 gamma curve, I have however changed the colour to the Pro mode and changed a number of other settings in my last video in Puerto Galera.

The water was green and murky but this gives you an idea of what you can get.

Filter Options and Wide Angle

Although the Nauticam WWL-1 is the best lens for the RX100 it does not take filters and therefore is not adequate for video.

In this review clip you can see the options available on the market.

In terms of wide angle you have two options for 4K:

  1. Inon UWL-H100
  2. Inon UWL-100

Both lenses work fine in 4K however the older UWL-100 achromat does vignette in photo mode.

The UWL-H100 offers a very wide field of view also in HD mode with no vignette and accepts the mangrove/deeproof filter.

This filters is loaded with magenta so I suggest adjusting the tint in the auto white balance mode to +2 green.

The UWL-100 works fine in 4K and is wider than the UWL-H100 however has only the M67 mount. If you have one of those lenses you can use the Ikelite 6442 filter. This filter required you to remove the rubber ring on the lens and does work quite well except has a yellow cast to it you can reduce by changing the tint to +2 blue and increasing also magenta to +1.

For flexibility purposes probably the UWL-H100 is better as it takes the bayonet but the UWL-100 is really wide and has a little less fringing. Some people do like the UR/PRO filters better.

I hope you find this post useful and good luck with getting the best colours from your Sony RX100 Mark IV

Video Feature Sony RX100 Mark II in Malta

Following from my previous post I managed to get together a clip out of the 5 dives I did

The first day was somewhat plagued by visibility a bit lower than the norm for the location but the second day was fabulous

For this trip I brought with me the Inon UWL-H100 and the red push on filter from deep roof H20 and the Inon UCL-330 as I was expecting medium size fish and nothing really small

Here is the outcome

I am quite happy how things turned out so let me share the settings with you

First I shot most of the footage in 25p AVCHD mode only some small sections are shot at 50p and actually I did not need to slow down any of the material.

For the wide shots I used steady shot in normal mode and shutter priority at 1/50th. With the filter on I had auto white balance with tint correction G2 A1. I noticed that the camera was giving red tint in some situation and so added a bit of green back. The Amber correction instead is for the RX100 itself the camera does not have vibrant yellow and is a bit blue.

Tunas
Tunas – AWB with filter

For the first time I use creative mode changing the standard contrast to -3 in order to prevent crushing of blacks.

Exposure was set all along to -1/3 and metering to multi area with AUTO ISO limited 160-800.

I think the results are so good that in fact I have performed no colour correction to any shots in ambient light.

Opening the tuna farm
Opening the tuna farm – AWB with filter

For shots with lights I set up first colour temperature to 6500K and A1 to match the lights but then in some of the far shots this resulted a bit cold so I adjusted very slightly in post the temperature.

Seahorse
Seahorse – AWB UCL330

Only 40″ are adjusted in the whole video in essence is as shot and the editing took me half hour.

In cave
In cave –  AWB no filter

I did a bit of analysis and the camera was operating for most at ISO200 with aperture around f/3.5 – f/4.0 which is really the sweet spot of the lens.

I did have some challenges using the UCL330 for some nudibranches  that really required a stronger lens so they look a bit small, there was also surge so I had to fight with focus problems but all in all very happy.

Nudibranch
Nudibranch – AWB UCL330

The longer working distance of the UCL330 (20-30 cm or 8″ to 1′) proved challenging on walls as you are too far to hang on to anything or use a stick. I will bear this in mind in the future.

For the close up shots I used steady shot active.

I also wanted to say that a few times the camera did manage to white balance properly however the results were not exciting and frankly not worth the hassle. Using the filter is just so much better with the auto white balance.

Tweaking the Sony RX100 Mark II Video Performance

I am currently in Malta for few days relaxing and I manage to squeeze in some dives. The Mediterranean sea is nothing sensational (from a pure diving point of view) but does offer clear water, and some brisk thermoclines, and a combination of algae, blue water, caves and silvery fish that is challenging on the dynamic range of our little RX100.

The purpose of this trip is mostly to refine the video settings and go more in depth in few topics. I wanted to try specifically the following:

  • Metering modes
  • Creative modes
  • Stabiliser modes
  • Tracking focus
  • Medium size fish portraits
  • White balance
  • Caves and low light

Some of my settings will be the same and I am not intending to changed them those are:

Auto ISO: 160 – 800

DRO: Auto

Starting off with metering, the first attempt was to try and use the camera on 0 exposure compensation with centred weighted average metering.

Entering Cave Fairly Bright

Pretty soon I realised this gave issues of banding of the blue water, this was apparent not only in backlit shots but also in normal wide angle of fish in specific cases. So after dive number 1 I changed it to the standard -0.3 from dive 2.

I set a new creative style with contrast at -3 in the hope to recover detail and seem to be working fine with the shots still having plenty of contrast.

Lowered Constrast on -3

I also tried spot metering for close up but it makes no sense the video lights are too wide and ended up with burned highlights at the edges of the frame so back to centred weighted average for close up shots.

Spot metering
Spot metering

So when it comes to metering my settings are:

Wide angle: multi area

Close up: centered weighted average

I did some tests with stabiliser in steadyshot mode, this gives back some field of view and the lens offers 100 degrees diagonal and 90 horizontal, I actually think a bit more anyway with fairly stable conditions this worked fine. At longer focal length for close up I am still using active mode.

Schooling Fish 100 fov

I have a +3 diopter for this test as I realised in my last still trip I don’t have a lens for medium size fish, the lens worked very well and I also tried the camera tracking focus but it seems it won’t work with fireworms or similar. So either keep normal focus or manual with peaking.

Tracking focus fail
Tracking focus fail
Rock FIsh UCL 330
Rock FIsh UCL 330

White balance has been a subject of discussion, I did manage this time to white balance a few times but to be honest it was not worth the effort there is a better correction of the purple hue of the filter but this can be corrected setting Green to 1 or 2 in AWB. I also changed the AWB to include a correction with Amber 1 as per examples. Very happy with the results I think this is the final set up with this filter lacking a proper orange filter.

AWB corrected
AWB corrected

Shooting in low light was rewarding with ISO maxed out at 800. I am becoming less and less a fan of video lights in cave due to the amount of backscatter am getting. I think I will default at using the lights as dive torches instead of wide beams of even leaving them off for effect.

Backscatter
Backscatter
Cave in natural light


Red Sea Workshop with Alex Mustard – Part VI Schooling Fish

On Friday we were up for our last 3 dives at Shark Reef the current had not changed but this time I decided to give more a go to the schooling fish after setting up all the backgrounds I wanted.

As you can see from the image on the title we had more of the usual divers chasing fish but this did not deter me this time as I developed a specific technique to do the dive that I used fully on the last two photo dives.

So after a bit of experimental shots like this one

Batfish school from Top

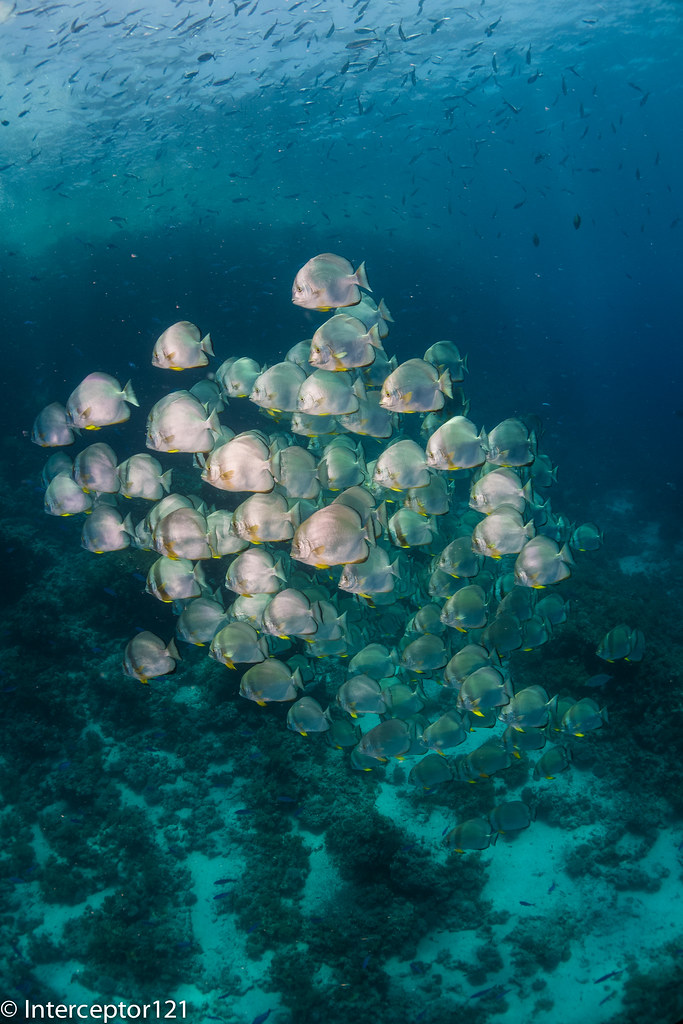
It was time to give it a proper go. To be honest is not that I like batfish that much and probably this is one fish that you can shoot in RAW in ambient light however if you do that you need to sacrifice quite a few ISO stops. With strobes the issue is to get the school in a formation that allows you to do a good job with lighting. This is my best shot for the session.
Schooling Batfish on Reef
What I like about this shot is the light on the fish or most of it where you can see yellow fins but also the background and a hint of surface.

Other fish that featured on the day were jacks but catching a school of those running past is quite hard unless the school is really big and they circle you.

Jacks Schooling
Jacks Schooling

In those type of formation you have all sort of issues with hightlights form the strobes in fact I was shooting 1/4 of power.

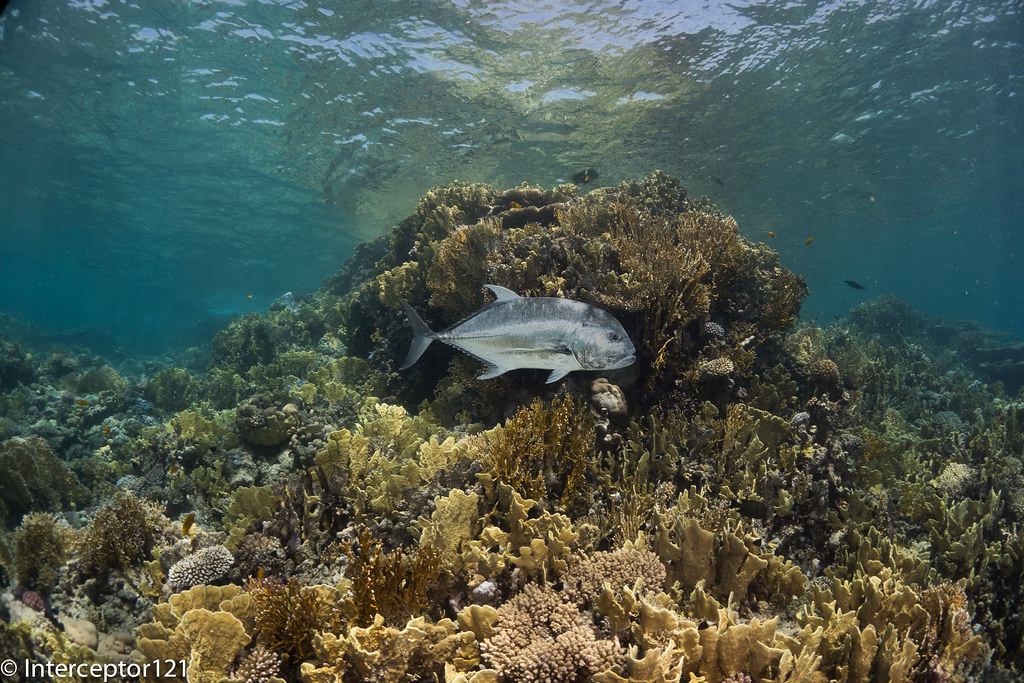
Giant trevallies made a more interesting single fish shot like this one.

Giant Trevally
Contrary to what you may think this is a shot with strobes otherwise you would not see the texture of the fish as you see it. Maybe a busy background but good technical exercise.

I also attempted a few anthias shots just to try a well tested technique to get them buzzing out the reef

Red Reefs
In the middle of the dives while I was waiting the barracuda school came out to play. Barracudas are quite tough as they require strobes to lit properly and I find the multitude of black and white shots that you see a bit boring as the fish texture is what makes the shot.

You have several challenges with the formation, if the school is big is difficult to take it all unless you are on the bottom or on the top. In the first case you need to control bubbles in the second you shoot the bottom so better be neat.

Anyway with a bit of patience I got the shot that I wanted

Arrows
It is impossible to illuminate properly all of them but this shot has got the right geometry and I think is quite pleasant.

On the second dive I was lucky to spend some time with a Giant Barracuda that was literally commanding the school at sight, very rewarding from a diving point of view I got so excited that I kept shooting with a relatively slow shutter speed however the fish that is lit by the strobe is well crisp.

Giant Barracuda issuing orders

This shot is much deeper than the previous so the blue is colder but still makes for an interesting shot.

On dive 3 I decided to do a bit of video although I had not taken my favorite lens so I had to apply a filter directly on the camera lens. Moreover I had forgot the setting Toy effect on from some other experiment and whilst this is off in RAW it came back in video so the result is a soft warmer image…yuk still was fun to put it together so here it goes

It was time to rinse the gear (if you could call that hosing it quickly on the dive platform) and get ready to leave the day after. On the last day we were asked to put together a selection of our best 10 pictures and were give a video with some gopro footage taken by the ops manager plus our slideshow. Considering the time it was spent to do it the result is excellent.I hope this has given you an idea of the workshop that I definitely recommend, on the next post I will write my personal lessons learned from such experience.