Category Archives: diopters

which macro lens to pick for your gh5 or micro four third

I see many posts on line debating which macro lens is best for your micro four third system.

If I refer to the Nauticam system we have 4 macro lenses:
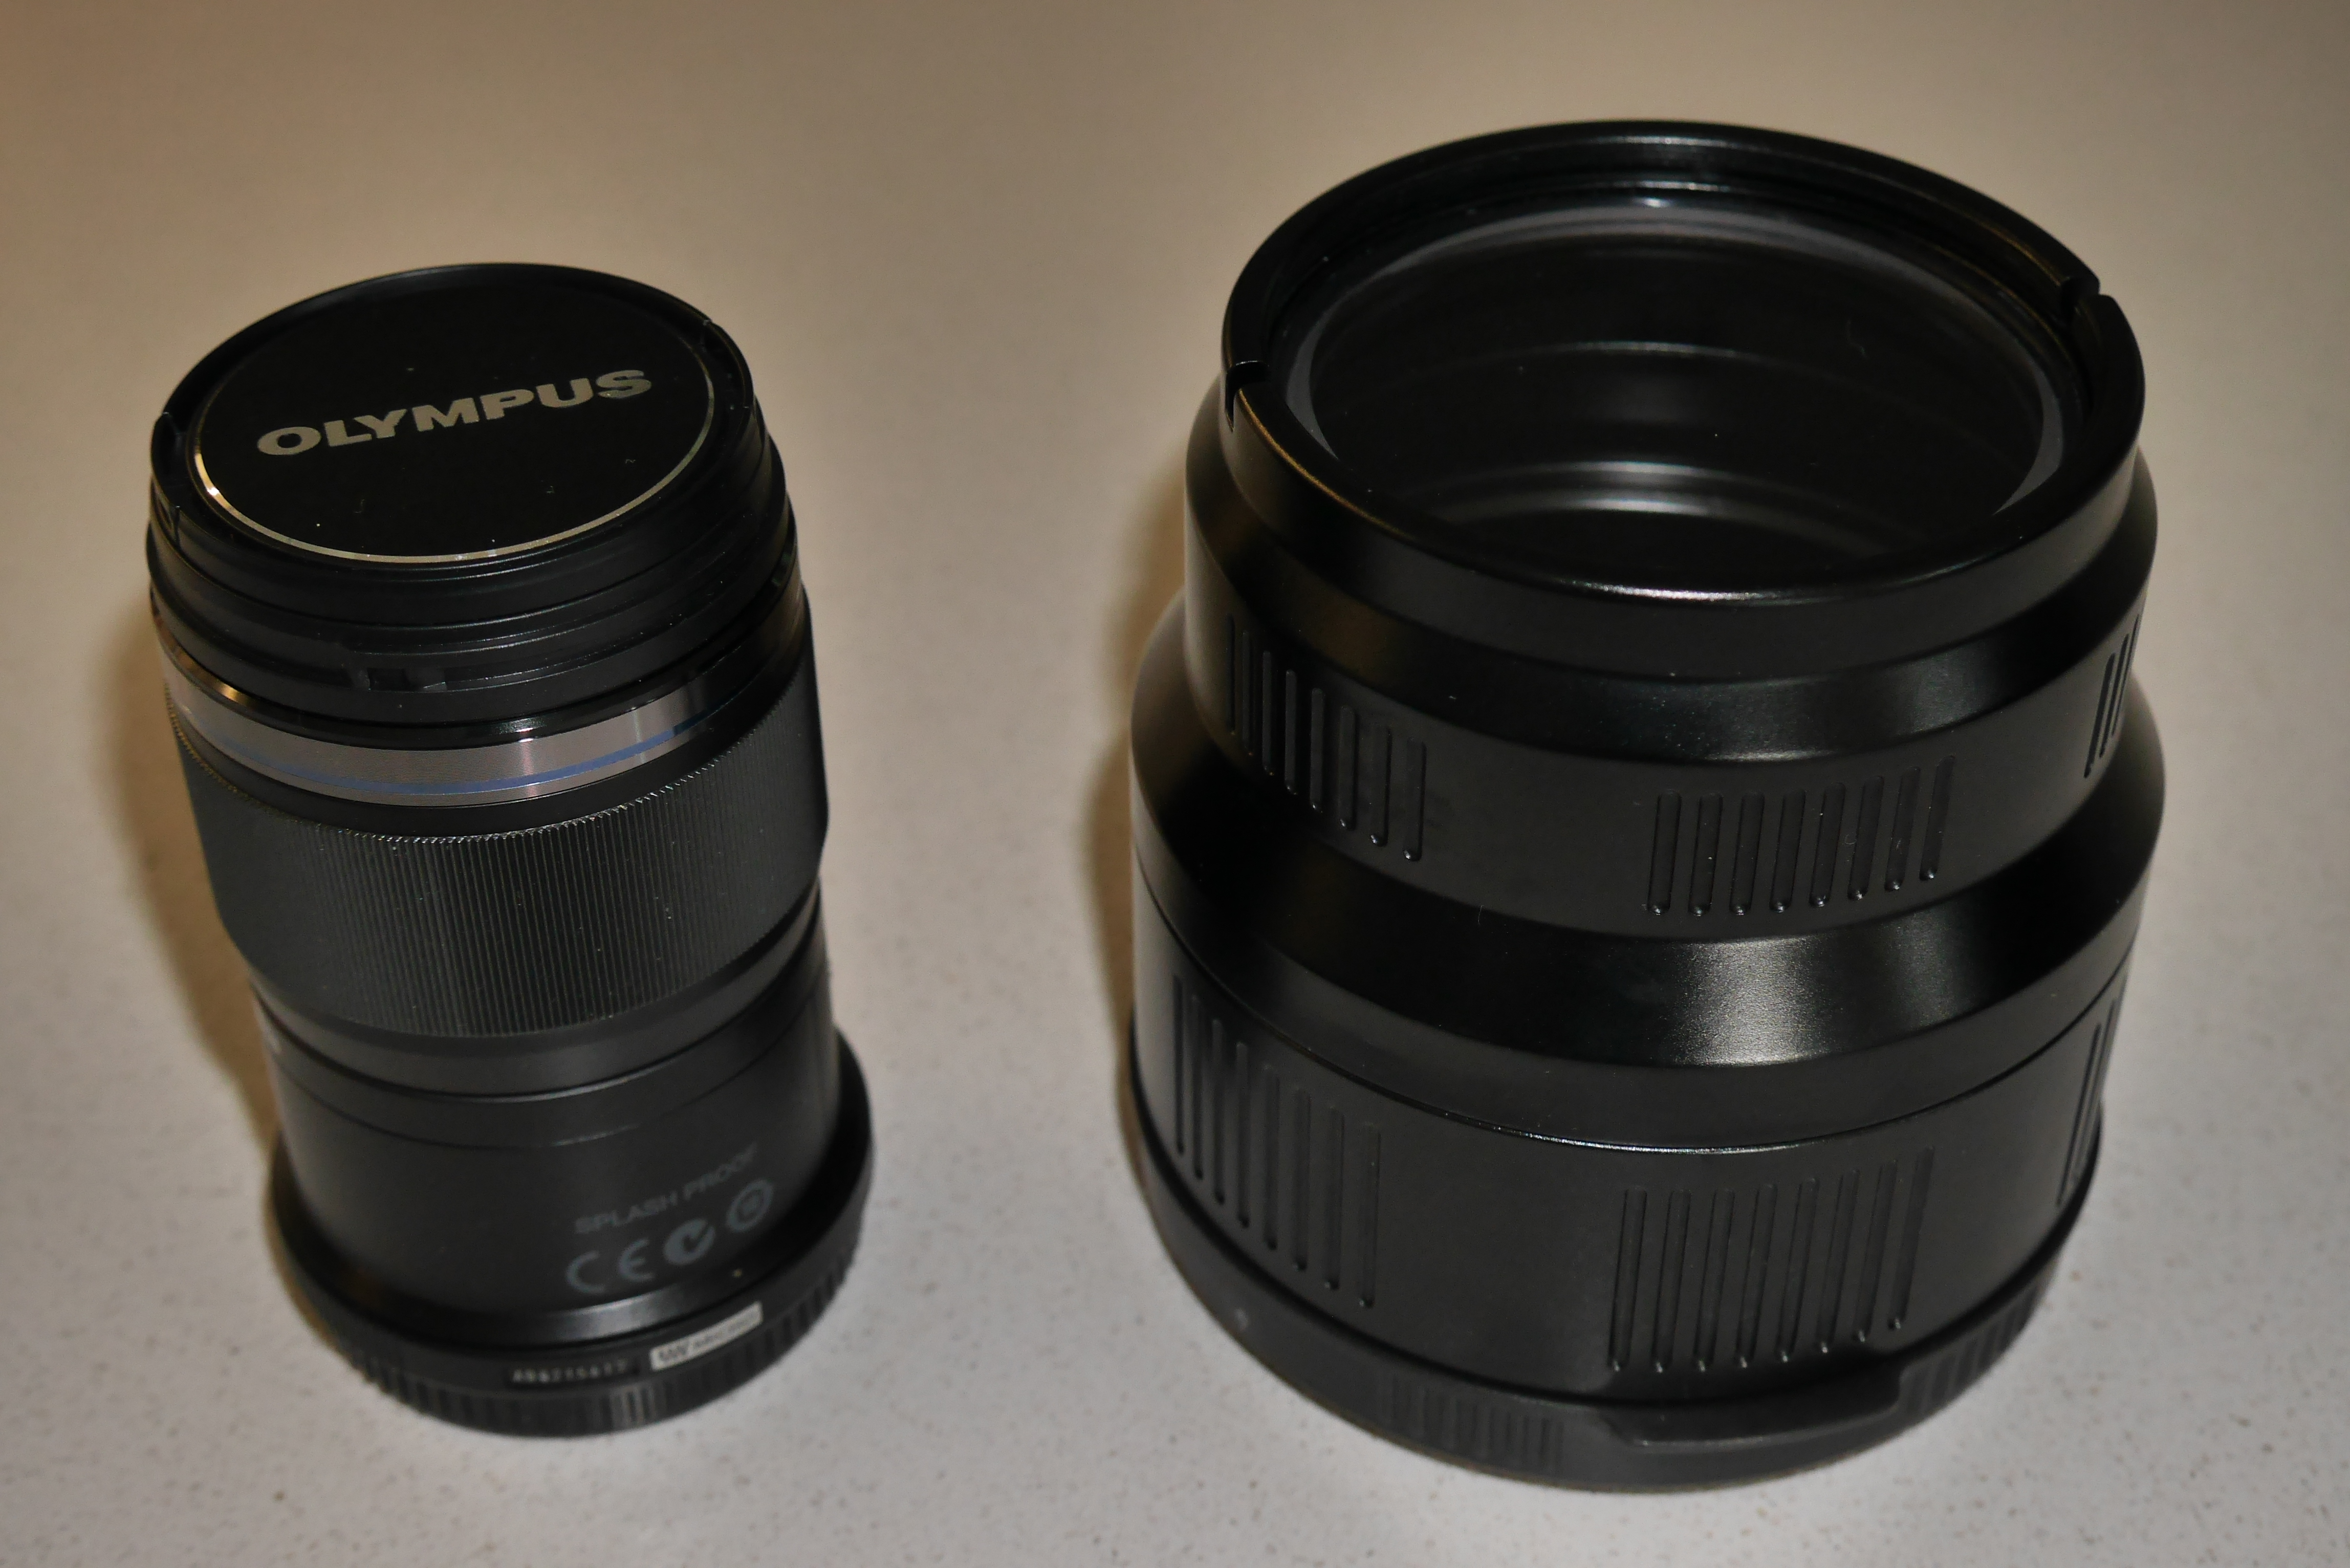
  • Olympus 30mm
  • Panasonic 30mm
  • Panasonic 45mm
  • Olympus 60mm

For the purpose of this article I will skip the Olympus 30mm as the Panasonic lens is known to be sharper and will focus on the other 3 lenses.

DxOMark is a popular tool for comparison as it gives you the results on one page. I have run it for the Oly 60 and the Pana 30 and 45 on the 20 Mpix OMD E-M1 MKII

DxOMark Comparison on Olympus OMD E-M1 MKII

Surprisingly the much more expensive Leica performs worse than the other cheaper models, this is confirmed on all internet sites running other type of tests.

What we can see is that there is little difference between the Panasonic 30mm and Olympus 60mm when it comes to image quality so whichever lens you choose your subject at the same level of magnification and aperture will have more or less the same detail.

Common Misconception: Shorter focal length give more depth of field

Many people think that using a longer lens is harder because there is less depth of field this is actually incorrect conceptually.

Let see why

Using an online calculatore like Dofmaster https://www.dofmaster.com/dofjs.html

Enter for the Panasonic GH5 the following parameters

Circle of confusion: 0.015 mm

Focal length 30mm

Distance 10.5 cm (minimum distance of the 30mm Macro)

Aperture f/11

Result Total depth of field 0.3cm

Now enter

Focal Length 60mm

Distance 21 cm (as it achieves the same magnification)

Aperture f/11

Result Total depth of field 0.3cm

So depth of field is not a consideration when choosing a macro lens…

Shooting a subject close to the background

In the following 3 shots am taking an image of a widget at f/11 at 29-44-60 mm on a Leica 12-60 (it is just easier it makes no difference to the outcomes)

Shot at 60mm
Shot at 44mm
Shot at 29mm

At the same aperture you can clearly see that there are no difference whatsoever in the detail and actually overall in the picture you don’t notice anything.

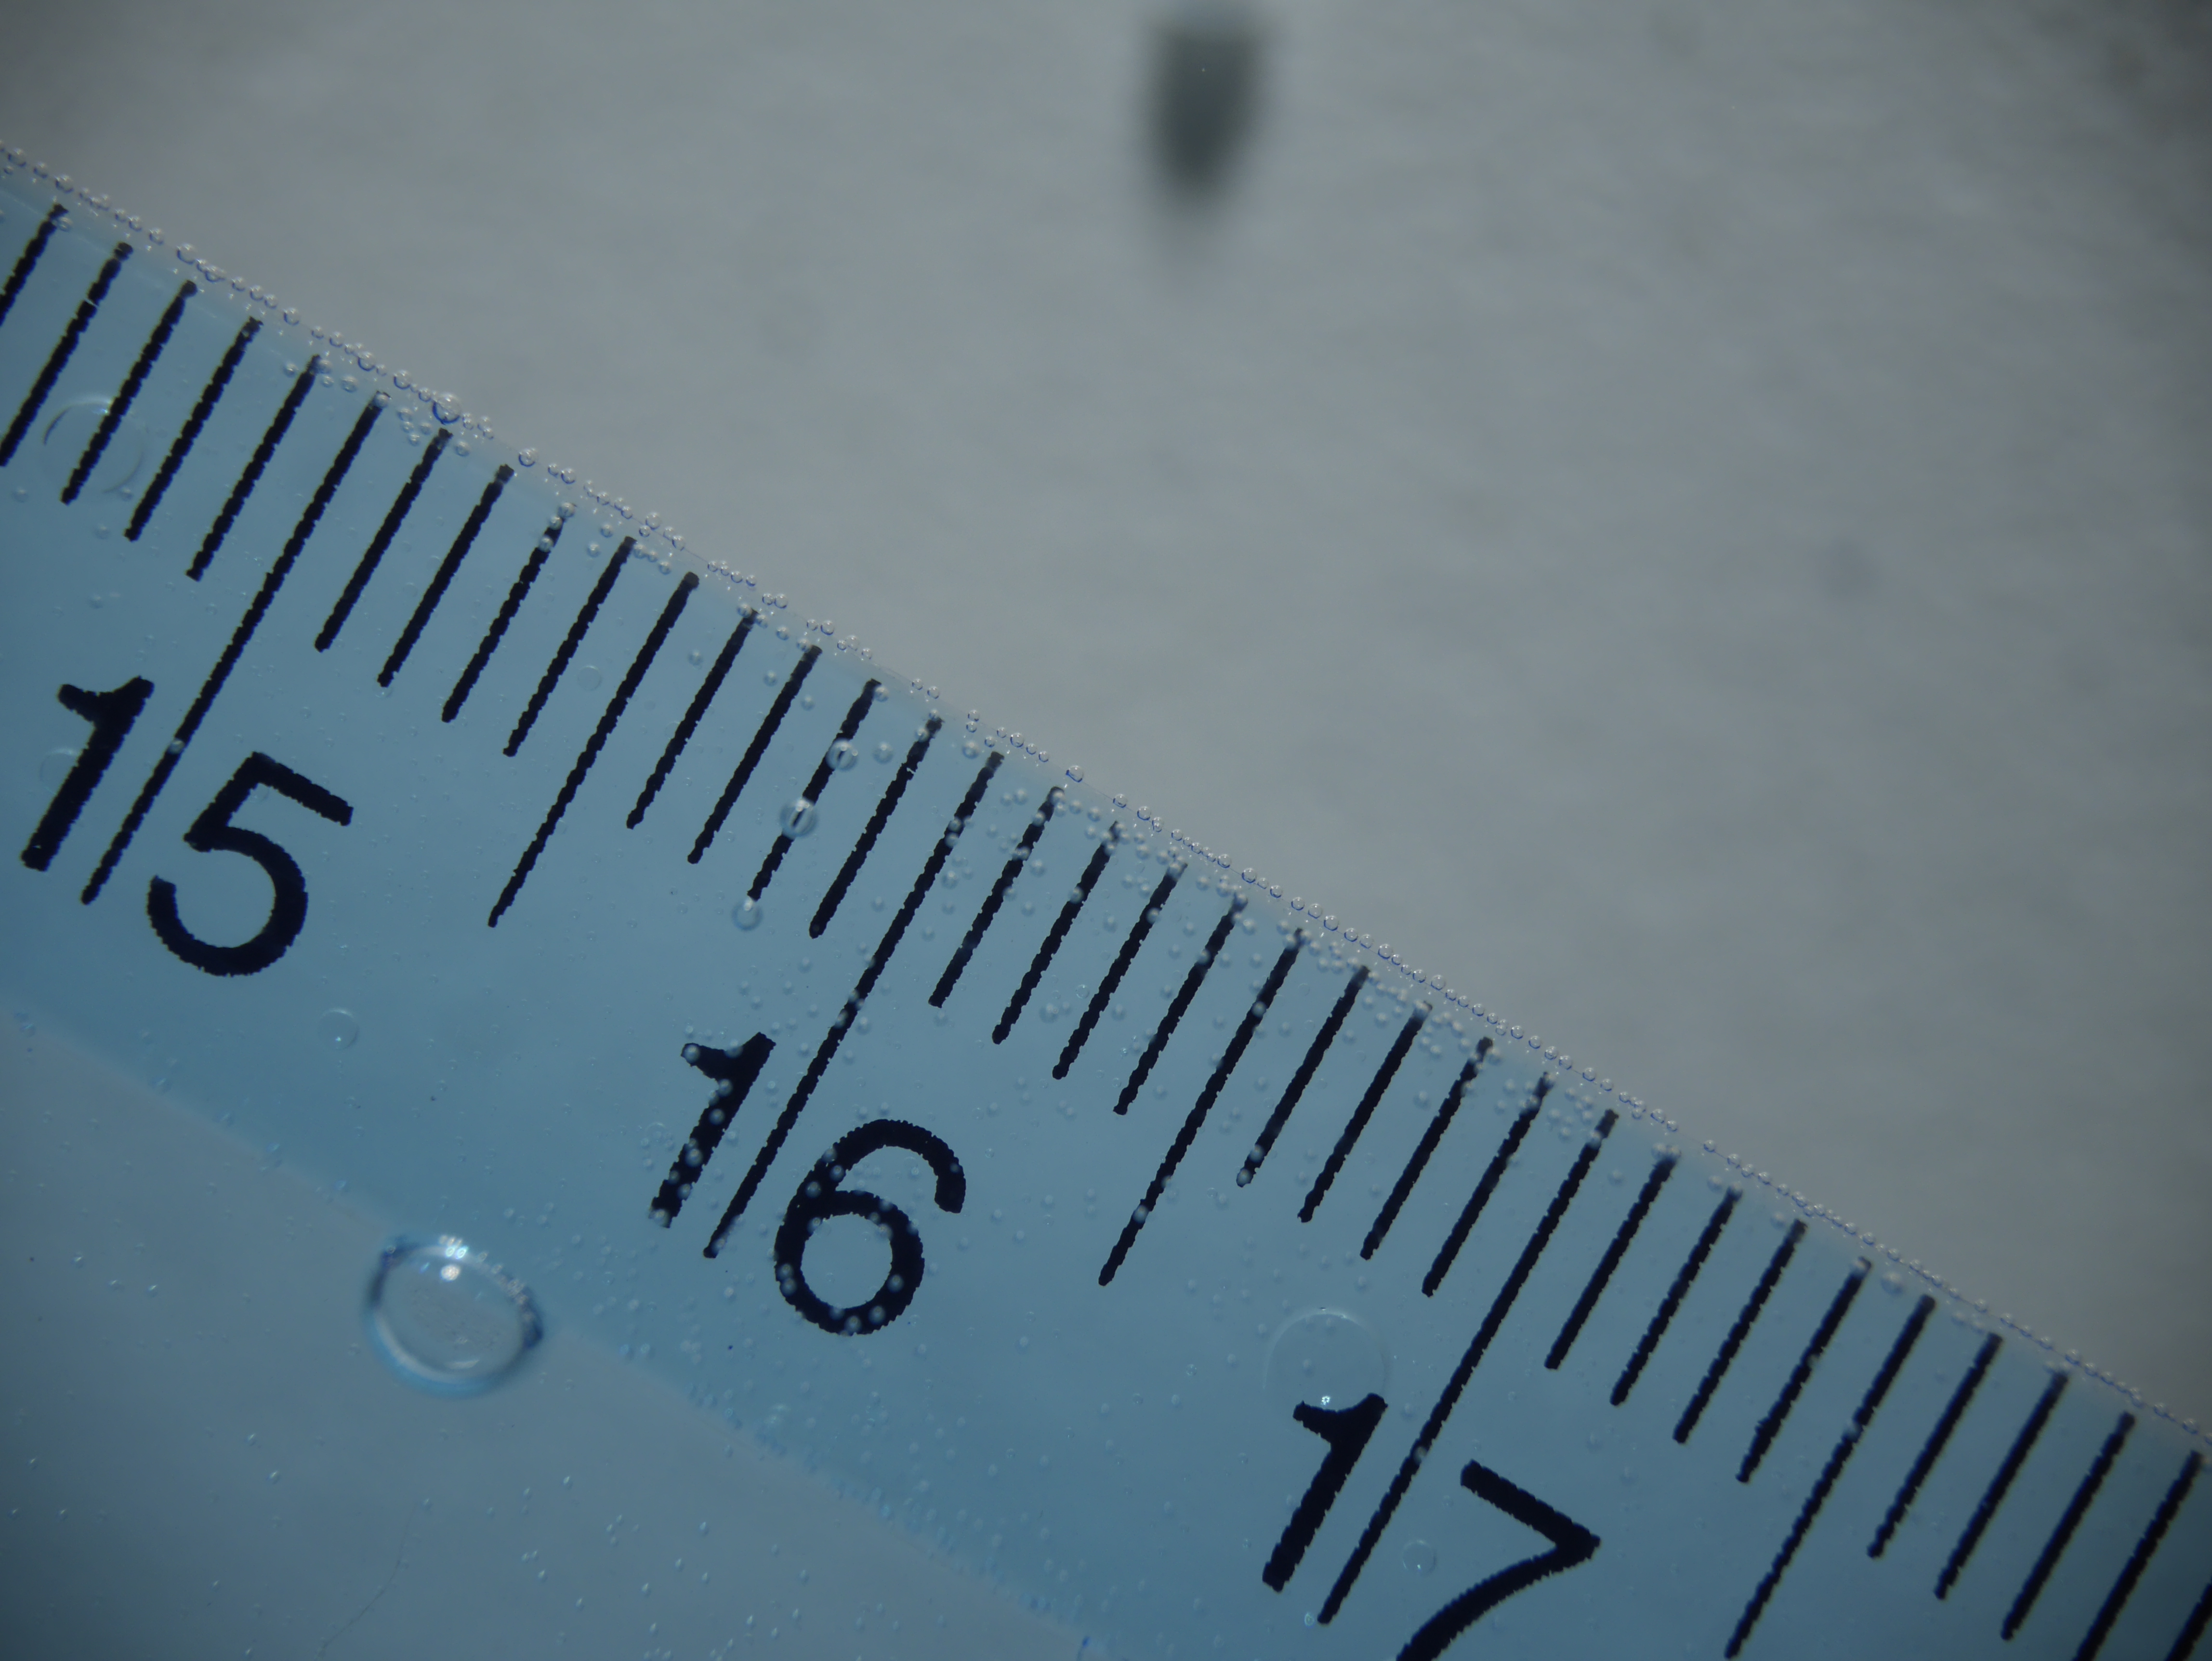
Shooting a subject far from the background

For the second shot I have moved the widget away from the wall.

Shot at 60mm
Shot at 44mm
Shot at 29mm

Again there is no difference in the level of detail of the widget however looking at the background we can see that

  • The 60mm shot reveals one brick and less than one quarter
  • The 44mm shot reveals one brick and a half
  • The 29mm shot reveals two bricks

So while the subject is exactly the same as the 60mm lens has a narrower field of view we see much less of the background.

This means that if you are shooting a nudibranch on the sand or something flat on a rock you won’t notice anything however if there is space behind the subject you will capture much more of that resulting in less subject isolation.

Underwater Comparison 30 vs 60 mm

In the first shot the Rhinopia is taken with a 60mm lens

Rhinopia Olympus 60mm

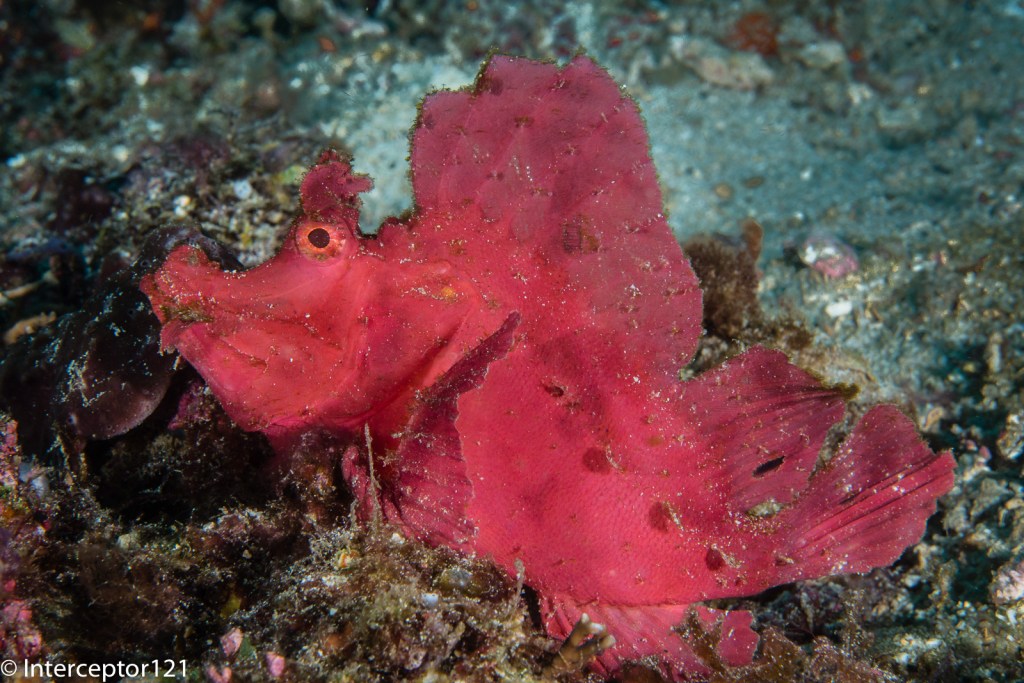
In the second shot the same Rhinopia with the 30mm (in a different place to be fair)

I have marked up with red the areas that with a longer focal length would have been minimised.

Which Lens to choose?

Now that we have clarified that depth of field is not a consideration and as each macro lens will have the same magnification there are only two factors that matter:

  1. Working distance
  2. Isolation from background

The 60 mm will have a longer working distance and at the same magnification will isolate the subject better from busy backgrounds, the 60 mm is also better for skittish subject because of the longer working distance. I have this lens and I have borrowed the 30mm in couple of occasions but do not have the 30mm yet.

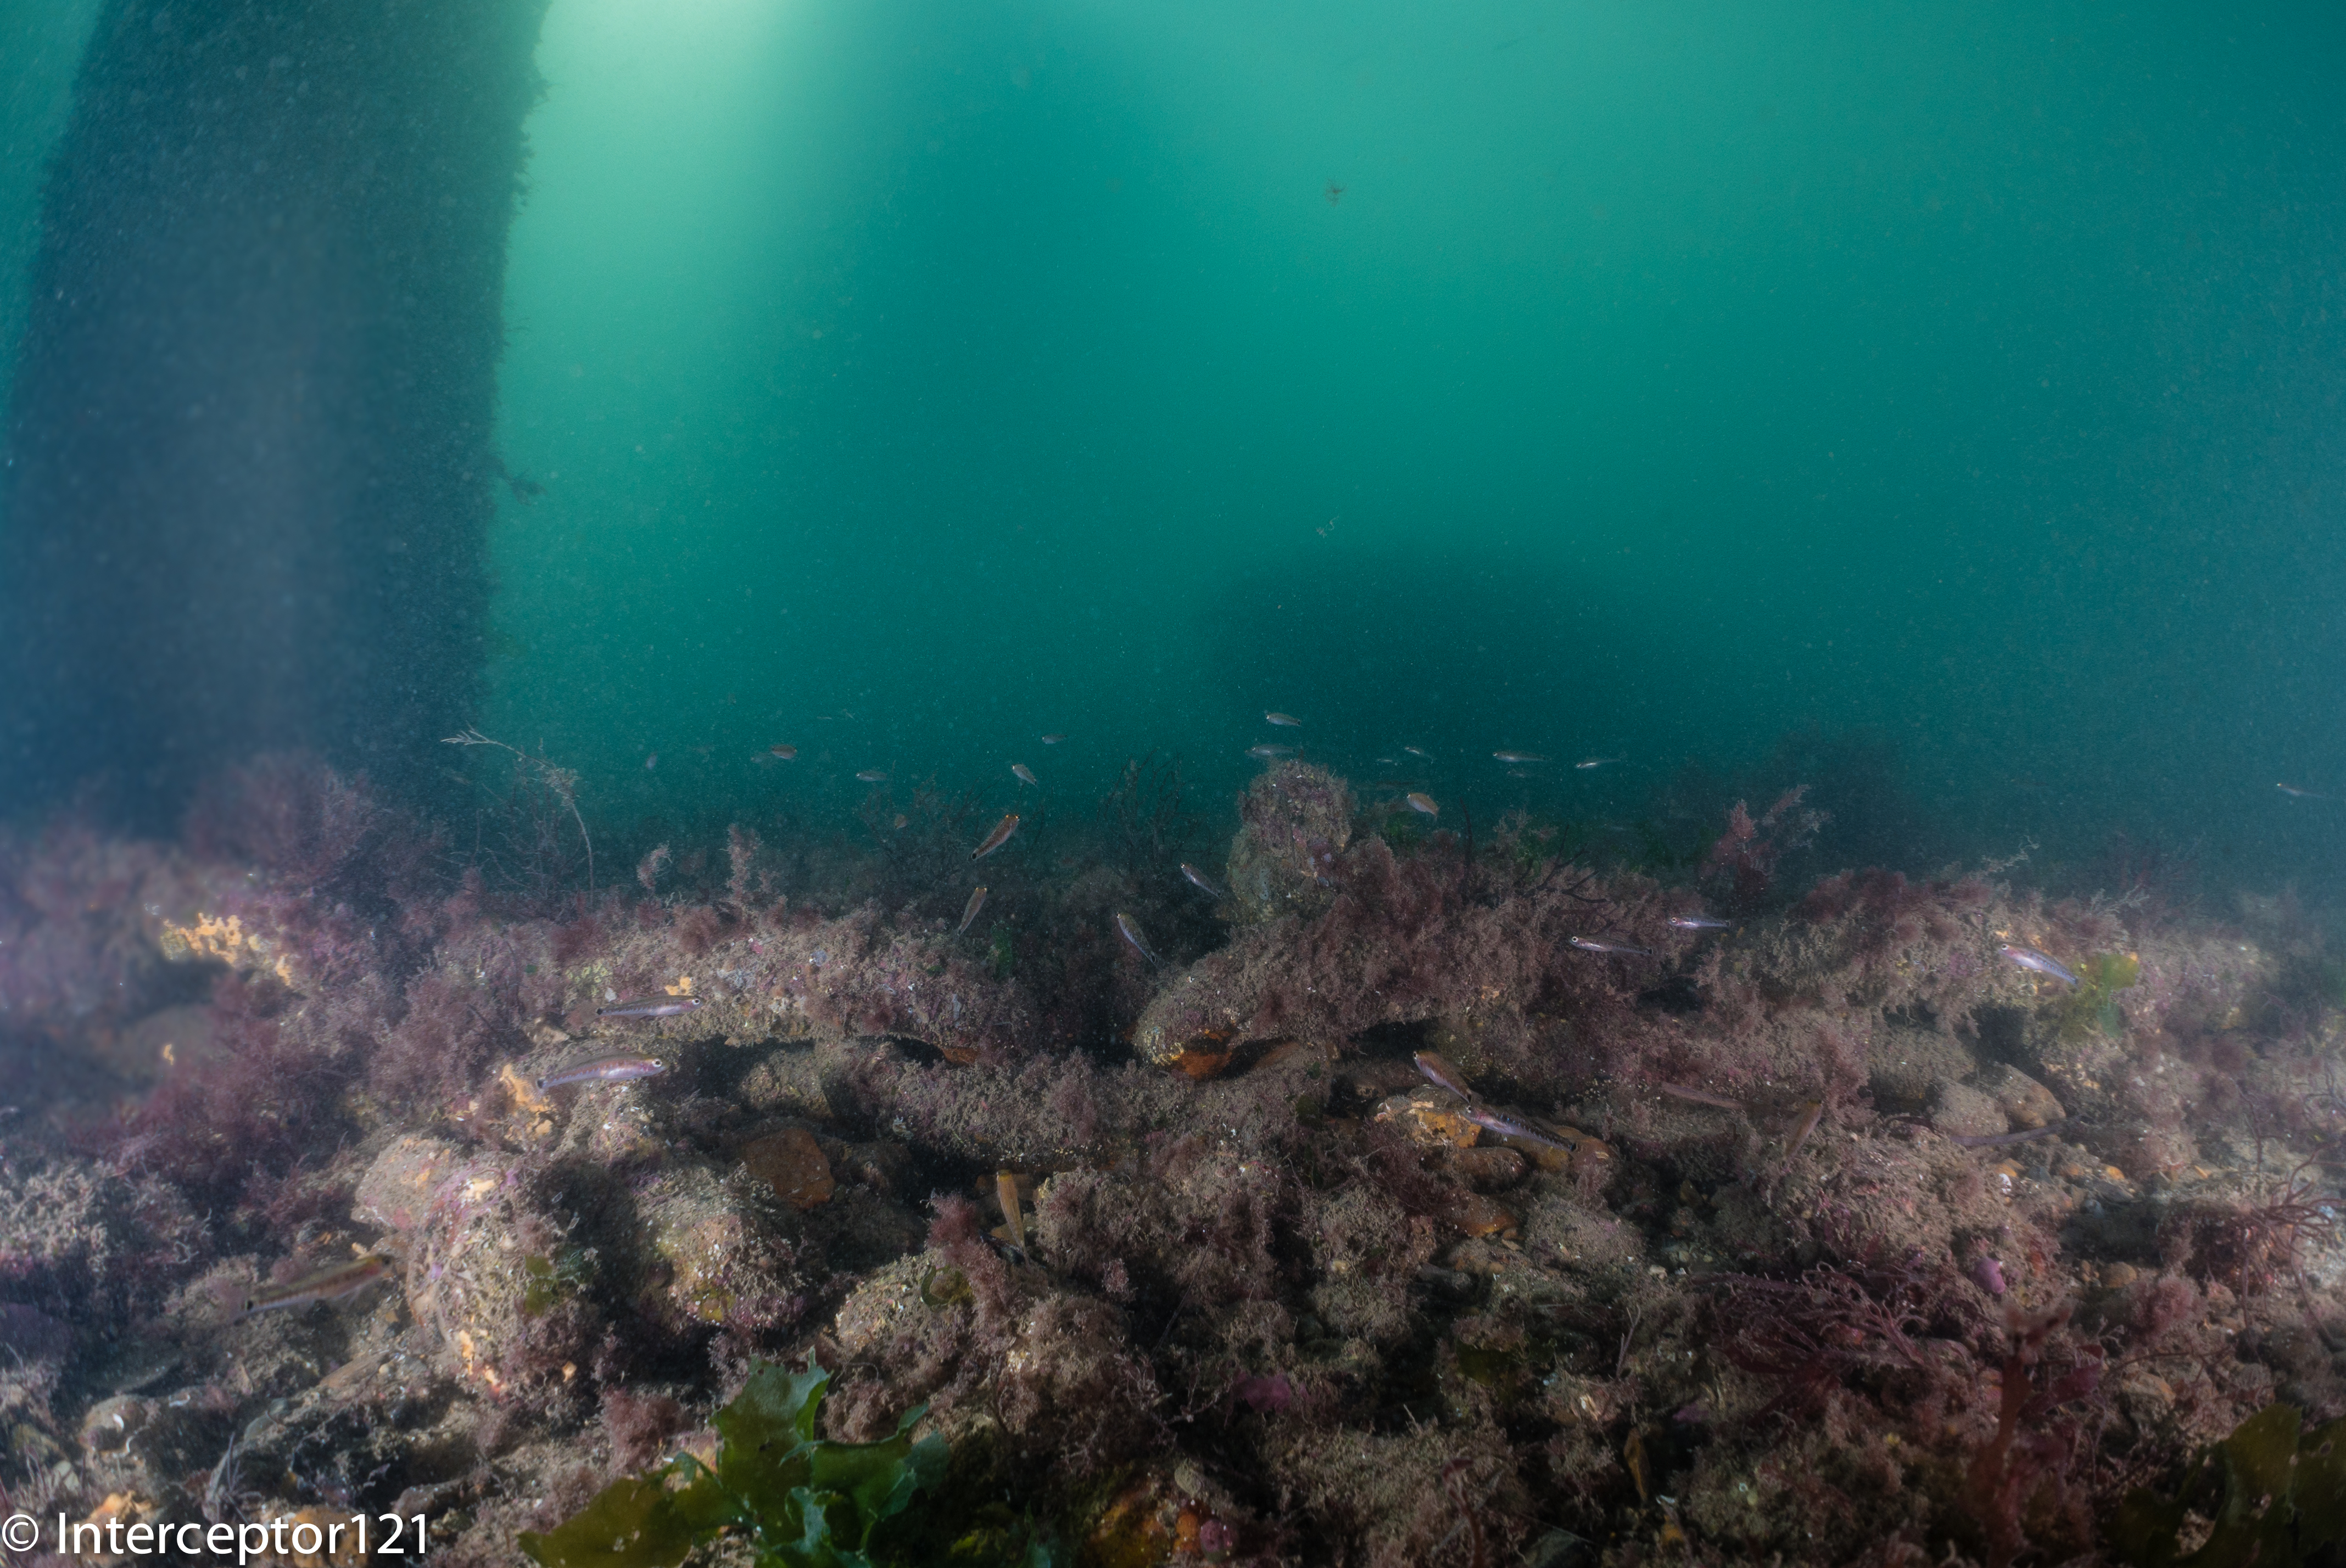
There are however situations where longer working distance is not a benefit, specifically when the visibility is poor and there are suspended particles or the subject is really large.

In the example below I was at one meter from the two frogfish, a 30mm would have been better however the shot came OK.

Hairy frogfish Olympus 60mm

Conclusion

I believe the Olympus 60mm is a must lens to have. To date I have not felt the need for the Panasonic 30mm that is indeed a very sharp lens because I have always managed to pull out the shots. However for someone diving in murky water and focussing on nudibranches or subject laying flat on the seabed the Panasonic 30mm could be a better choice. I also want to say that using the 14-42mm at 42mm for me is actually a better choice for portraits and with a close up lens works very well with small subject not super macro and therefore as I already own the 14-42mm and various diopter for me the 30mm is not on the shopping list.

Macro video with the Panasonic gh5

Broadly speaking with the GH5 as well as with any other camera you have four categories of close up work:

  1. Close-up – frame size 10 cm or 4″ and wider typically hand held
  2. Super close-up – frame size 5cm or 2″ preferably on tripod
  3. Macro – frame size below 2″ only on tripod
  4. Super macro – frame size below 1″

For still images a typical choice is the Olympus 60mm, this lens however is very narrow so for any subject that is not too small and for the first category of close up you end up having working distances well above one foot. This in turns means more water to go through and makes it virtually impossible to cover larger subjects.

If you make that choice is because you have skittish subjects that do not like proximity and are very small. Furthermore the Olympus 60mm has not stabilisation and therefore with our GH5 will only use in-body stabilisation. Another side effect of using this lens is that it is impossible to take shots of divers or anything else at medium range so the videos end up being a collection of very close shots that may please someone but result fairly boring.

Of course you can make this kind of video exciting to an extent like here

But at the end for me something like this is more fun although of course the quality is very different (I shot this years ago with a Panasonic LX7 and edited in iMovie)

The difference between the stunning video of Dustin and the basic video of mine is that you only have very close shots in the first one and frankly a slideshow of still images would be equally nice. There is no description of any sort of where is the fish what are the conditions or anything at all. You may argue that the stuff to see is not that nice but at the end this gives you a real idea of the diving where you go which is the purpose of my videos and majority of non Pro people. Furthermore medium size subjects that move like octopus, squids, crabs will almost always exhibit some kind of behaviour.

My macro video rig is built around the Panasonic 14-42 MKII which is the same lens I use for wide angle video with the Nauticam WWL-1. In effect am running video like a compact set up.

GH5 Macro Video Rig as at 29 March 2019

Ergonomics and lens

  1. The field of view with at 42mm is only 23 degrees horizontal and 13 degrees height this is ideal for portrait type of work
  2. I still use my old Sola 1200 video lights that can be used with a 20 degree beam creating a snoot like effect to better isolate your subject. It can be argued that color rendering index of newer lights is better but I think the narrow coverage of the lights is more important. Consider that at wide end the field of view is less than 60 degrees anyway with the flat port at 18mm
  3. I use two close-up lenses with a Saga dual flip diopter
  4. The rig as described is heavy in water more than 700 grams negative to ensure the required stability
  5. The tripod base has 2x 3″ segments and 1x 5″ segment to be as close as possible to the bottom this creates issue if you do not have a monitor as you need to have your face in the sand however once the shot is framed all is good

Close-up lenses

I use two close up lenses with this rig as the 14-42mm as a working distance in water around 26cm and a minimum frame size around 9cm that is pretty wide.

SubSee 5 wet lens

The SubSee 5 is in the sweet spot for the 14-42mm lens because it starts working pretty much when the 14-42mm can-t focus anymore and down to around 10-12 cm working distance. Minimum frame size is 46 mm

SubSee 5 + 14-42@42mm

Using the Ex-Tele feature in video means we can get to 33mm which is below the 36mm classic DSLR 1:1

When this is insufficient and the subjects are really tiny the next lens is the Nauticam CMC-2

Nauticam CMC-2 on Saga dual flip holder

The CMC-2 gives a frame size of 32mm as in this image

Panasonic 14-42@42mm with CMC-2

Using Ex-tele this becomes 23mm which is the same you get with the CMC-1 without ex-tele and is plenty for any purpose. It is theoretically possible to stack the two close up lenses but is not really necessary and the working distance too small. The CMC-2 works around 6-7 cm so you have still space for lights etc.

Olympus 60mm

Is there any use for this lens? Of course there is in case you want to capture a frame smaller than 23mm with the 60mm you can get down to 17mm with the bare lens to 12mm with the Ex tele, 9 mm with the CMC-1 and 6 mm with CMC-1 and ex tele. Will you be able to focus and work with the CMC-2 at 22mm from the subject is another discussion however for skittish subjects it gives you more working distance and this may be needed. I would recommend taking this lens with you for those cases but for video I do not see how you can really use the CMC-1. Please note the CMC-2 is useless with the 60mm as the working distance improvement is minimal to none.

How to choose the best close-up lens for your underwater MFT rig

How many times you see practically new close up lenses being sold on eBay after sitting for years in a cupboard? Have you ever experienced the frustration of buying a close-up lens to find out it did not add anything to your set up?

There is a lot of confusion in terms of what is that you are really getting when you buy an underwater close-up lens. In most cases lenses are specified in diopters, in some other cases with a magnification factor, in few cases with the focal length.

The focal length is probably the most useful of those specification because in a traditional diopter the following formula is valid if you approximate the lens to converge in the rear element:

Working distance ≤ Focal length – physical length of the close-up lens

For example for a Subsee +5 diopter the focal length is 1000/5=200mm the lens is 32mm therefore the working distance is less than 168mm.

Now on its own this means very little. Depending on the camera we use a distance of 168mm may be a great improvement or no improvement at all.

To understand why we need to look on our camera and find the little symbol that indicates the focus distance reference mark.

While for DSLR the shooting distance is typically calculated from the front on the lens for micro four third you need to use this obscure symbol.

IMG_1394
P1055540

Once we locate the reference mark we need to identify the corresponding reference on the housing we can use the other dials as starting point. In this case the mark is approximately in the middle of the cold shoe.

When we put the camera in the housing we can then look up the specifications of the lens and calculate the minimum shooting distance. For example for an Olympus 60mm this value is 19cm.

P1055541

We take note of this point and then measure the distance between the glass and the minimum working distance on land.

P1055543

This works out to be around 9cm. We now need to consider that once immersed in water this distance will be multiplied by 1.33 to become 12cm.

It follows that any diopter with a focal length close to 12cm or longer is not going to be effective for our camera and lens combination. More likely we need something that can focus substantially closer or the benefit will be minimal. Assuming we half the physical working distance between the port and the subject we need something around 60-80mm focal length which considering the length of the lens itself could mean getting 2cm away from the subject.

Continue reading How to choose the best close-up lens for your underwater MFT rig

Nauticam bayonet mount for wet lenses

Nauticam entered the wet lenses market with their SMC close up wet lens that was optimized for DSLR.

Then it released the CMC compact macro converter for compact cameras and micro four thirds and finally the Wet Wide Angle Lens I that is compatible with compacts, micro four thirds and also full frame cameras with 28mm equivalent lens.

Up to now all lenses were using the traditional M67 mount as most of the lenses, even the close up ones, are pretty heavy this means going for the dive with the same lens. Nauticam has developed the flip diopter adapter for flat ports to overcome this issue.

Flip Diopter on Nauticam RX100 IV

The flip diopter is a good solution for micro four thirds and DSLR but looks rather cumbersome on compacts as the image shows.

I asked Nauticam for a bayonet adapter and specifically if they could develop something for the Inon LD bayonet system that so far has been the reference for wet lenses for compacts and micro four thirds cameras.

LD mount converter on RX100 IV

Edward told me that due to the fact that the WWL-1 lens rear element is so large the Inon LD system was not an option so they went off and developed their own system.

M67 bayonet mount converter

I would like to thank Nauticam again for making those parts available before general availability.

Looking a bit closer to it you can see that due to the specific construction with two concentric rings you need a special tool to apply the adapter on the port.

M67 bayonet mount converter The large item is to attache the mount to the port
M67 bayonet mount converter
The large item is to attache the mount to the port

Obviously as the Nauticam lenses use an M67 thread new adapter needed to be developed.

Mount converter for CMC/SMC

Nauticam does not use ABS plastic and uses aluminum for all their parts.

Now that the items have a bayonet adapter there is a need for a lens holder to put on the arms.

Lens holder looks too big for a 5" arm segment
Lens holder looks too big for a 5″ arm segment

The lens holder is too big for a standard 5″ segment but looks in proportion with a longer segment.

Lens holder on 8" arm segment
Lens holder on 8″ arm segment

The adapter is larger than the LD mount and a bit big for compacts to the point that even with a tray the adapter tips the rig back.

Another challenge is that this system is designed for Nauticam lens that have protruding rear element so when used with standard lenses there is a gap between the port and the wet lens that can be counter productive, not the end of the world and frankly the Inon system has the same problem. This however means that if you wanted to use this system with a different wide angle wet lens this would be suboptimal.

I am waiting for Nauticam to ship me back the WWL-1 so I can show how that lens performs on this system.

Another observation of course is that if you use this system for wide angle the super heavy WWL-1 and the fact that the adapter only works on a normal segment means your rig will be very heavy in water. I am going to discuss with Nauticam the possibility to have the adapter on a float arm however their carbon arms do not have any mounting point to be used.

Stay tuned for a full review of this adapter with the new 29 macro port that looks very promising for video.

Nauticam NA-LX100 4K Video Review

Following the previous review that was dedicated to still images we now go into the subject of 4K video with the Panasonic LX100 and related Nauticam LX-100.

Currently there are only two compact cameras that produce 4K video the Sony RX100 and the Panasonic LX100.

The housing for the Sony RX100 has a traditional M67 port whilst the LX100 uses the N50 compact port system.

This means you can use all your wet lenses with the RX100 without specific adapters. The LX100 has however a number of benefits.

This table compares the field of view of the two cameras in 4K video mode.

LX100
4K Horizontal FOV Vertical FOV Diagonal FOV Sensor width 35mm 3:2
26.00 71.90 44.40 79.50 15.80 23.86
81.00 26.20 14.90 29.90 15.80 74.40
RX100
4K Horizontal FOV Vertical FOV Diagonal FOV Sensor width 35mm 3:2
28.00 67.90 41.50 75.40 11.85 26.73
80.00 26.00 14.80 29.60 11.85 76.37

When the camera shoots in 4K mode the focal length remains the same however the camera uses a smaller part of the sensor. A normal micro four third sensor measures 17.3×12 mm whilst the 1″ sensor of the RX100 is 13.2×8.8 mm. Note that the LX100 does not use the whole sensor due to the multi aspect format that keeps the diagonal field of view unchanged regardless of the image format.

What we can see in the LX100 table is that although the focal length in 4K is 26mm the horizontal field of view is the same of a full frame camera with a lens of 23.86mm this means the field of view in 4K should be slightly wider than a picture taken by the LX100 in 4:3 format.

I put the camera on a tripod and took two sample shots, this is the first at 24mm in 4:3 format that I then cropped to 16:9.

4:3 Crop to 16:9
4:3 Crop to 16:9

This other shot is from exactly the same position taken extracting a 4K frame from a small video.

4K Photo 16:9
4K Photo 16:9

As stated the horizontal dimension is just a few mm wider in 4K 16:9.

What this means is that this is the same that any normal camera with a 24mm lens that then is cropped to movie format in terms of field of view.

The Sony RX100 does not have a multi aspect sensor and therefore the horizontal field of view drops more.

With the short port on the LX100 using a wet lens like the Inon UWL-H100 we can achieve more than 97° horizontal which is very wide and zoom all the way to 79° and if we use a wetmate or the mini dome cover the other range between 72° and 50°.

Practically the LX100 with wet lenses and wetmate or minidome gives you access to focal lengths between 15.5-21mm and again 24-35mm is like having an 8-18mm lens on a micro four third which is good for whale sharks and mantas this is even wider than the 7-14mm lens on a Panasonic GH4 in 4K and the LX100 has a (weak) optical stabiliser on the lens.

The RX100 mark IV instead can only cover between 96° and 90° before the wet lens stops working properly and we jump to 68° if using a wetmate.

UWL-H100 Flat Test Cards

This shot taken at around 15cm shows a nearly rectilinear and very wide image.

In short if you are after some super wide angle in 4K the LX100 is definitely the way to go.

From an ergonomic point of view I shoot video in shutter priority and let the camera work out ISO and aperture, this is relatively easy to do with the LX100 although the absence of custom memory modes on a mode dial is painful.

A control that can be quite useful due to the tendency of the LX100 to go focus hunting is to set the ae/af lock button to af-on. This requires the shutter to be set in release priority with this control you can use manual focus and force the LX100 to refocus when you hit the af-lock. This is a very useful feature.

Update 28 September the method described to fight focus hunting does not work in 4K. There is going to be another post with the best settings for 4K video for the LX100.

For what concerns macro both the LX100 and RX100 present their challenges due to the short zoom lens, the LX100 more so due to the horrible rectangular port. It can be argued that you can’t shoot wide and macro with the LX100 whilst you can do that with the RX100 however the strength of the LX100 is certainly in its very wide lens and the short port that combined with a flat wide angle lens can produce an extremely wide field of view able to cover practically almost any wide angle scene.

For macro the GH4 and upcoming GX8 are probably going to be better placed due to the higher crop factor giving focal lengths in excess of 100mm using the 14-42mm lenses.

If you want to get into 4K video and your focus is primarily wide angle the LX100 is an excellent device.

The WWL-1 on a Nauticam LX100


Nauticam NA-LX100 housing and port system review

Nauticam has given me the opportunity to test the housing for the Panasonic LX100 priced at $1,200 or £922 in UK.

As anticipated some time ago this housing features the new N50 mini port system for compact.

NA-LX100 aperture and format dial

The housing comes with the rectangular port as a standard, as the LX100 has a 24mm equivalent lens and the lens extends quite a lot between the shortest and longest focal length it is not possible to use an M67 long port or there will be vignetting.

In order to install the camera you need to set the aperture to f/16 and the aspect ratio to 4:3 with focus mode in normal and lift the zoom lever. Likewise to take the camera out of the housing.

LX100 housing preparation

Unfortunately as mentioned several times on this blog pincushion distortion severely affects the image at focal lengths shorter than 35mm equivalent as our in water test shot demonstrated. If you zoom in the corners you can see also extensive blur and chromatic aberrations.

LX100 flat port at 24mm

Furthermore the lack of an M67 port means you now need the Nautical flip diopter for rectangular port that costs $220 or £170.

When you eventually get to put a diopter on the lack of zoom means that magnification with traditional lenses is quite limited.

UL-165
NA-LX100 UCL-165

The frame width is 62mm with a single Inon UCl-165 and goes to 5cm when we stack another UCL-330.

UCL-165+330
NA-LX100 UCL-165+330

Image quality is ok except some blue fringing at the borders.

A single UCL-100 gives a frame width of 42mm.

UCL-100
NA-LX100 UCL-100

Apparently the Nauticam CMC ($320 or £240) gives 32mm frame width that is adequate for macro.

So if you are into macro you need to invest $1,200+$220+$320=$1,740 to have some decent magnification.

If you possess many clamps and cold shoe ball mounts you can buy an Inon M67 lens arm and use the lenses you have saving some $$$ but the magnification is limited unless you get the CMC.

For semi-wide angle a mini dome port is available at $280 or £216.

N50 3.5
N50 3.5″ Mini Dome

This restores the field of view in air however you can only zoom to 40mm before the camera can’t focus anymore. I have even tried with dry diopters on the camera there is no improvement.

Optical quality is great.

LX100 Mini Dome 24mm

Probably the most useful port is the N50 short port that has an m67 thread and allows to use wet wide angle lenses.

N50 Short Port
N50 Short Port

I went to Swanage but got the tide wrong visibility was shocking still gives an idea of the image quality of the LX100 with the Nauticam WWL-1 wet lens.

SWANAGE (4 of 4)
Atlantic Ocean Anemones

SWANAGE (3 of 4)
Kelp?

Upside down
Upside down

SWANAGE (1 of 4)
Myst!

If you have a Nauticam wet mate you can also use it with the short port and achieve the same or better sharpness than the minidome thought with some residual chromatic aberration.

LX100 Short Port Wet Mate 24mm

The big benefit is that if you find that your wet wide angle lens is too wide for what you are shooting you can change lens without changing the port.

NA-LX100 rear buttons

For what concerns the ergonomics of the LX100 they are quite intuitive on land.

One of the characteristics is the lack of a mode dial.

You have an auto position  for shutter speed and aperture and if you leave them as such the camera shoots in program mode.

Once you move the aperture the camera goes in aperture priority mode. Probably the worst situation is the shutter dial that once touched has to come down all the way from 1/4000 to whatever you need it to be.

Also you don’t have thirds of exposure for the shutter dial and for example to get 1/50 you need to go to 1/60 and then use the rear dial.

I found the ergonomics of the camera in water particularly annoying as I was shooting with gloves. I did like the nauticam trigger system for the shutter however the amount of hardware of the nauticam tray and its weight are not really an option for me.

The Panasonic LX100 is a very interesting camera on land but in water ends up quite uncomfortable and expensive. The housing with the 3 ports comes at $1,200+$180+$280 if you add the Nauticam CMC and the WWL-1 you end with a whopping $3,195 the camera costs another $800. Total investment $4,000.

This is a lot of money in my opinion considering that with another $300 you can get a Panasonic GX7 with GX7 housing, an Olympus 60mm with 65 macro port and a Panasonic 8mm fisheye with 4.33″ dome. The LX100 and GX7 share the same sensor but there is no doubt that the macro performance of a dedicated lens as well as the fisheye of the 8mm lens have no comparison.

In conclusion the Panasonic LX100 with NA-LX100 is a bit of a flop for stills the only use that I can think of is wide angle 4K video with the short port and a wet lens but other than that I don’t see how Nauticam is going to sell many of those units.

Guide to Micro Four Third Lens and Port selection for Underwater Photography

Micro Four Thirds camera have become increasingly popular for underwater photography especially for macro and close up subjects in the last years.

The micro four thirds standard is shared between Olympus and Panasonic however in terms of underwater use Olympus is on the forefront and in fact it produces their own poly-carbonate housings for all new models.

Nauticam has their own N85 port system for micro four third that as of today has 10 different ports, two extension rings and a large number of focus and zoom gear. You can also buy cheaper 3D printed gear to save a few bucks for majority of lenses.

The other interesting characteristic of the micro four third market is that since the introduction of the 16 megapixels sensors, there have not been any substantial improvement in image quality among the various model, we will have to see what the 20 megapixels sensor of the Panasonic GX8 will bring but all in all the camera choice is mostly one of ergonomics and features.

Olympus is quickly clearing stock but you can still found the OM-D E-M10 out there for £478 with kit lens. The might Panasonic GX7 is now £433 with kit lens. In US you can find both the Panasonic GX7 and the Olympus O-MD E-M100 for $599 with kit lens.

The Panasonic LX100 sets you at £589 in UK and $698 in US really if you are into photography and want a micro four third it is a no-brainer you get a previous version GX7 or OMD EM10 (as you can’t find an EM5 new) and happy days.

Now that you have committed to the camera you are into lenses and ports for underwater use. The Olympus housing costs on average 25% less than Nauticam and has less choice of ports for me really is not appealing so let’s assume we are into Nauticam. What lens or port to choose?

Both the Olympus 14-42 EZ and the Panasonic 14-42 II fit in the Nauticam 35 port and require 3D printed gear to operate. The flat port will be OK for fish portrait and if you already have wet lenses it is definitely recommended to buy the 35 macro port first especially if you shoot video.

Nauticam Macro 35 port

Deepshot zoom gear on the GX7

Both lenses do need a wet diopter to shoot small subjects in water as the smallest frame is around 7-9 cm width otherwise.

If you come from a compact camera most likely you have wet lenses and therefore you can re-use them for close range work.

Obviously a flat port for a 28mm equivalent lens is not a solution for wide angle.

First of all at the wide end due to water magnification the angle of view is the same of a 37mm lens which gives a field of view of just 60 degrees. The other point is that you really want to shoot at the tele end to avoid cluttering the background too much and typically in water those kit lenses work only at over 25cm from the port which means they are only good for medium size fish portraits.

The sequence of shots shows that even if the size of the cup is pretty much the same it looks much better at long focal length.

Cup at 28mm
Cup at 28mm

At 28mm you can see the glass in the frame on the right side and the window in the background.

Cup at 50mm
Cup at 50mm

At 50mm with similar size of the cup the glass is half gone and the cup looks nicer less of the window is showing.

Cup at 42mm
Cup at 42mm

at 42mm the glass is nearly out of the frames and the windows in the background is gone.

If you did not have any wet diopters the first additional lens and port to get will depend on your subjects, if you shoot macro you need a macro lens, if you shoot close focus wide angle you need a fisheye lens it is as simple as that.

Olympus 60mm and Nauticam 65 Port (35 + 30 mini extension)

The Olympus macro 60mm is the preferred lens combined with the Nauticam 65 port (or 35 port plus 30 extension). This lens can focus 10cm from the port and therefore can be used also in low visibility. Really there is no reason to use the more expensive 45mm Leica lens. The 60mm is great also for portrait work of small fish.

Cup at 60mm
Cup at 60mm

The same shot of the cup at 60mm means we now say goodbye to the glass due to the reduced angle of view. The increased working distance also means a more pleasant perspective.

I hope this explains why for underwater macro we want to shoot with long focal length as this helps us to get rid of the background so a longer lens will always be better than a zoom lens with a wet diopter and it will also give more magnification in case you have really small subjects.

If macro is not your priority and you are happy with kit lens and diopter for wide angle the first option is the Panasonic 8mm fisheye, that since the introduction of the Olympus 8mm pro fisheye has also reduced in price.

Panasonic 8mm Fisheye and Nauticam 4.33
Panasonic 8mm Fisheye and Nauticam 4.33″ Dome Port

This lens works best with the Nauticam 4.33″ dome port. If you shoot in 3:2 format you can also try the Nauticam 3.5″ wide angle port that makes the set up even smaller however there are no substantial improvements on how close you can get as the strobes will fail to lit properly anything that is right on the port without risking to see the strobe lights in the frame. The 3.5″ port will vignette in 4:3 image format though some users report success.

EDIT 7 September 2015

The issue of the 3.5″ port has been put forward again with the argument that it allows you to get closer than the 4.33″ dome with the Olympus EM5. I do not have an EM5 but I do have a Panasonic GX7 the end of the dome is 9 cm away from the focus point and this means that the dome allows you to get closer than the minimum focus distance of the lens of 10cm. As the dome is shorter than the minimum focus distance on the GX7 the 3.5″ port does not bring any benefit. Furthermore as trays are in general around 30cm you need to be around 15 cm anyway to be able to illuminate the subject properly with edge lighting, in virtue of this I remain convinced that the 3.5″ port does not bring any real benefit except is a bit cheaper and may vignette.

So your starter kit if you upgrade from compacts of you own a close up lens is Macro 35 port followed by Olympus 60mm and mini extension ring 30 or Panasonic fisheye 8mm with 4.33′ dome for wide angle.

Wide angle zoom lens are less of a priority but the choice is between the Olympus 9-18mm and the Panasonic 7-14mm bearing in mind that if you had a wet wide angle lens you may not even bother getting an intermediate wide angle zoom lens.

That’s all for now hopefully this will cover most of the ground for all new micro four third underwater shooters with kit lenses!

Panasonic GX7 First Test

So time has come for my first video with a micro four third camera the Panasonic GX7. I had only 3 dives in Sharm and conditions on Naama Bay beach were not the best but still good enough to give the set up a good try, this is the resulting video.

I used the Nauticam housing with the Macro 35 port and the M67-LD adapter so that I could use the Inon UWL-H100 wet lens.

As it is not possible to fix the position of the lens I had to take the hood off and therefore I used an Ikelite UR/PRO filter for the 100mm lens. I had to use gaffer tape on the lens and inside the filter or it would be loose but it worked.

The first dive was with the URPRO filter in auto white balance, I was hoping this would give me good results but instead everything came with a strong yellow cast.

From the second dive I used custom white balance and the results were much much better.

To give an idea of the issue this is a shot of a grey card with the UR/PRO filter on land with white balance fixed.

URPRO test card
URPRO test card

You can see what kind of effect the filter bear it is orange in colour.

Other than this I was pretty happy with the GX7 especially because I could use the full zoom with the wide angle lens this is the first time I see it working. The moray eel shot towards the end of the video is an example.

Back home I was not happy at all about the UR/PRO and the inability to work with auto white balance. Probably I could have played with the tint but it did not come to mind. So I got in touch with Peter Rowlands of Magic Filters to see if they had an option that would fit on the Ikelite mount. Peter sent me two sample and they fit perfectly in the ikelite frame, though this is not commercially available I guess you can request those if you are not happy with the ikelite UR/PRO.

This is the same test card with the magic auto filter.

DSC04030

You can see that it looks less orange and also slightly colder.

I did some tests and the UR/PRO is a warmer filter with 2700K temperature whilst the magic auto is 3200K. The magic is however more red and has more magenta tint than the UR/PRO.

For me this means that the magic will work better in auto and will require less custom white balance. However those 500K difference mean you will eventually need to custom white balance once you go below 18-21 meters. I know people say filter work until 21 meters anyway but I have tried with deeproof down to 30 and on a bright day it was still good.

So if you are not happy with the yellow cast of your UR/PRO in auto white balance is definitely worth giving magic filters a go.

The GX7 confirmed all the good features including the ex tele mode

Here the shrimps are shot with a single Inon UCL-165 and then the close up of the head uses ex tele that pushes well over super macro.

Look at the incredible ability to refocus in video mode. See how focus locks on the shrimps when I press the button.

Overall the GX7 can do pretty much everything on a single dive with a wet wide angle lens and a close up lens. You can cover from 100 degrees wide to super macro. The fact you can zoom with the wide angle removes the need to take the lens off at every occasion and in fact in the red sea you barely need to have any other lens.

I was not particularly happy with the lack of hood that the ikelite filter wants removed so I experienced the occasional flare. Still pretty good result.

The clip looks much better at home than it does on youtube where the gap with the RX100 seems much smaller.

So as far as video is concerned if you don’t need 4K the GX7 gives you extremely high quality footage and reasonable cost.

A final note I shot this video in 24p at home I can’t tell the difference with 25p see if you can see it!

Panasonic Lumix G X Vario 14-42mm / F3.5 – 5.6 / Power OIS and Nauticam Macro Port 35

The Lumix G X 14-42 Power Zoom lens is designed for video with a silent motor zoom controlled by a slider that is quite effective to use.

The focal range in 4:3 format is 14-42mm which corresponds to 29-87mm in the standard 35mm format (the crop factor is 2.08 36/17.3 and not 2 how commonly thought in the classic 3:2 aspect ratio).

This lens is not exactly a best in class in terms of performance especially considering quite a bit of vignetting at wide end and distortion that anyway gets corrected nicely in camera for most. A detailed review is here http://www.photozone.de/olympus–four-thirds-lens-tests/765_pana14423556hd

You can see that this is lens is quite sharp at 2868 LW/PH to give you an idea the much more expensive Lumix 12-35mm reaches 3110 LW/PH though sharpness drops at corners to around 2100-2200.

Another interesting characteristic is that this lens performs best at f/3.5-f/5.6 which is close to the widest aperture as we will use this lens with the Nauticam flat port 35 this is all good news.

Nauticam Macro Port 35

The lens fits very nicely inside the port leaving space for small filters and close up lenses but not really a lot.

The lens does not really move much between 14 and 42 mm and reaches his longest at 14mm.

I have tried using a set of Inon diopters to see the degree of magnification you can get.

This shot is with an Inon UCL-165 +6.06 diopter.

Lumix G X 14-42 PZ @ 42mm with Inon UCL-165

The smallest frame width with this lens is 42mm however in video mode using the ex tele converter option this becomes a much smaller area achieving in fact super macro easily with the added benefit of larger depth of field.

If you are into pixel peeping you can see some chromatic aberration on the edges this is a combination of the lens and the wet diopter.

I also tried stacking an UCL-165 with the UCL-330 this achieves a capture width of 32mm so we are in super macro zone.

Lumix G X 14-42 PZ @ 42mm with Inon UCL-165+330 Stacked

Image quality does not get much worse but there are some internal reflections here on the white surface as the Inon lenses are not coated externally.

Finally I wanted to see if the Inon UCL-100 would work and it does achieving super macro without any fringing. If you want to use this lens for pygmy sea horse photography and do not want to get an Olympus 60mm this or the sub see 10 are the close up lenses to get, also the nauticam SMC is in the same range.

Lumix G X 14-42 PZ @ 42mm with Inon UCL-100

Now onto what is really good of this lens port combination and this is the versatility as you can attach the Inon UWL-H100 and get a very wide 18mm flat wide angle that is very sharp indeed as per previous images

_1000200
Nauticam 35 Port with Inon UWL-H100 on Panasonic Lumix 14-42mm

Consider that this image is taken at f/3.5 and the ruler is in the corner at ISO 1600 and you can see that sharpness is more than acceptable.

More interesting is that for some reason with this lens you can fully zoom through even down to 42mm without soft corners.

I have no idea how this is possible but it works just fine.

So if you are a video junkie you can cover the whole 100 degrees wide to super macro with this lens the Nauticam 35 Macro Port the Inon UWL-H100 and the UCL-100. For video it gets even cheaper with the UCL-165. You can of course use the flat port to do nice fish portrait in the mid-range of the zoom.

I forgot to mention the zoom gear which is actually pretty expensive because of the complex spring design.

The total cost for the Nauticam 35 with zoom gear is $510 plus of course the lens itself $290 total of $800.

Inon UWL-H100 + LD adapter = $654

Inon UCL-100 = $282

Inon UCL-165 = $205

Wet Lenses Still total = $936

Wet Lenses Video total = $859

Let’s compare to getting an Olympus 9-18mm with 4″ wide angle port and the Olympus 60mm with 30 extension ring total price $2129.

Price gap for stills $393 but you now also have a mid range lens for portraits, personally I don’t really like the Olympus 9-18 behind that port comparing side by side images taken with the 14-42 PZ and Inon lens I am not sure the Olympus is any better and definitely needs diopters due to mushy corners. For macro the 60mm Olympus lens has the advantage of increased working distance but is a very specific lens that you would only use for really small stuff.

For what concerns video you would probably look at the Panasonic 7-14 and forget the Olympus 60mm the combination is worth $1800 which is a difference of $636. Again the issue with rectilinear lenses and dome ports is there and the 7-14 does not take diopters.

So if we were to use the lenses on land no doubt you would need additional glass but in water wet lenses can be quite cost effective especially if you use a micro four third camera for video.

Peter Rowlands uses a Panasonic GX7 with Inon UWL-H100 and dome successfully and I am joining that club now.

Stay tuned for more tests next to come will be the Panasonic Fisheye 8mm with the 4.33″ dome which is another essential buy for the micro four third cameras underwater, obviously for pictures and not video.


The end of advanced compact cameras for underwater photography

With the arrival of the new Nauticam N50 port system for advanced compacts I believe we say goodbye to using a large sensor compact underwater.

We already saw some signs when Sony released the RX100 Mark III with a 24-70mm equivalent lens, this effectively killed any use of the camera for macro. The new Panasonic LX100 has a similar problem with a 24-75mm lens but on top it has the new N50 port system in the nauticam housing or a severely limited functionality in the Ikelite version. It is obvious that the Panasonic LX100 will have similar sever limitations for macro but also with only 10 Megapixels really not be a strong competitor.

The last kid on the block is the Canon G7X, this camera looks very similar to the Sony RX100 Mark II and has a 24-100 zoom range that on land is very useful with an aperture of f/2.8 at tele end that is really interesting for land use. However this camera in the Nauticam version has the same port system N50.

So why has Nauticam introduced this? Both the Canon G7X and the Panasonic LX100 have fairly long lenses in terms of physical size and the zoom mechanism is such that the lens is retracted at wide end. This means that there is quite a gap between the lens and the port and wet lenses in those conditions have issues of both corner softness and chromatic aberrations. So Nauticam has introduced a short port with zoom blocked so that wet lenses can be used.

Effectively this is like diving with a fixed 18mm lens on your camera behind a dome with no zoom capability, taking the wet lens off results in horrible pincushion distortion so not really appealing.

Pincushion Distortion at 24mm with flat port

The dome port does not allow the use of the full zoom at least without a diopter, so this is of limited use too for video.

Cost wise the new housing with the port system are around $1,200 in the US with additional $350 for the dome and $180 for the flat wide port. We are approaching the low end of Micro 4/3 Nauticam housing prices and are more expensive than Olympus OEM options but without the same flexibility and quality in terms of lenses.

It is clear that the Sony RX100 Mark I and II will remain one of a kind and this is the reason why they remain popular few years after launch.

Sony RX100 Mark II Rig June 2014 Front