So time has come for my first video with a micro four third camera the Panasonic GX7. I had only 3 dives in Sharm and conditions on Naama Bay beach were not the best but still good enough to give the set up a good try, this is the resulting video.
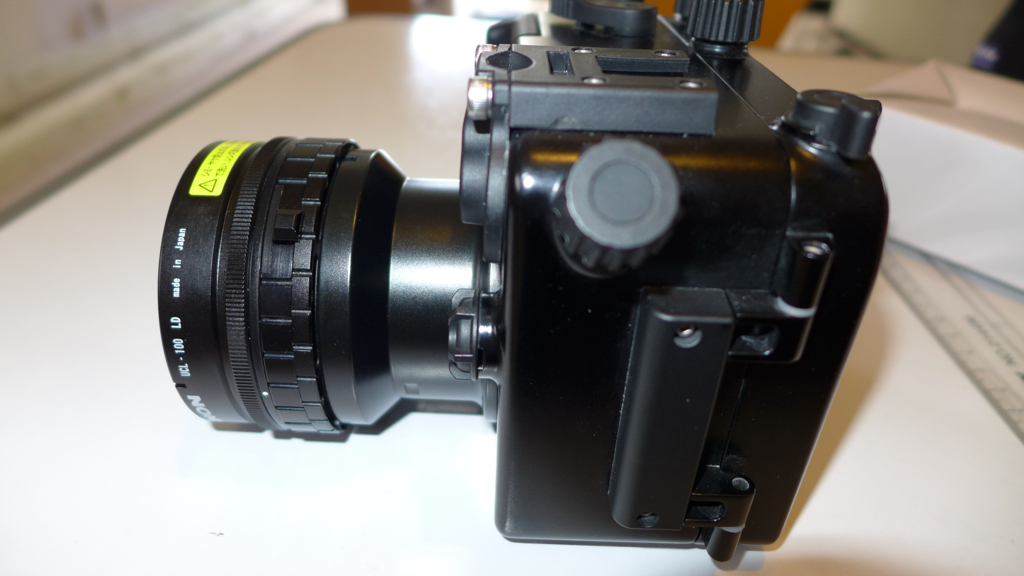
I used the Nauticam housing with the Macro 35 port and the M67-LD adapter so that I could use the Inon UWL-H100 wet lens.
As it is not possible to fix the position of the lens I had to take the hood off and therefore I used an Ikelite UR/PRO filter for the 100mm lens. I had to use gaffer tape on the lens and inside the filter or it would be loose but it worked.
The first dive was with the URPRO filter in auto white balance, I was hoping this would give me good results but instead everything came with a strong yellow cast.
From the second dive I used custom white balance and the results were much much better.
To give an idea of the issue this is a shot of a grey card with the UR/PRO filter on land with white balance fixed.
URPRO test card
You can see what kind of effect the filter bear it is orange in colour.
Other than this I was pretty happy with the GX7 especially because I could use the full zoom with the wide angle lens this is the first time I see it working. The moray eel shot towards the end of the video is an example.
Back home I was not happy at all about the UR/PRO and the inability to work with auto white balance. Probably I could have played with the tint but it did not come to mind. So I got in touch with Peter Rowlands of Magic Filters to see if they had an option that would fit on the Ikelite mount. Peter sent me two sample and they fit perfectly in the ikelite frame, though this is not commercially available I guess you can request those if you are not happy with the ikelite UR/PRO.
This is the same test card with the magic auto filter.
You can see that it looks less orange and also slightly colder.
I did some tests and the UR/PRO is a warmer filter with 2700K temperature whilst the magic auto is 3200K. The magic is however more red and has more magenta tint than the UR/PRO.
For me this means that the magic will work better in auto and will require less custom white balance. However those 500K difference mean you will eventually need to custom white balance once you go below 18-21 meters. I know people say filter work until 21 meters anyway but I have tried with deeproof down to 30 and on a bright day it was still good.
So if you are not happy with the yellow cast of your UR/PRO in auto white balance is definitely worth giving magic filters a go.
The GX7 confirmed all the good features including the ex tele mode
Here the shrimps are shot with a single Inon UCL-165 and then the close up of the head uses ex tele that pushes well over super macro.
Look at the incredible ability to refocus in video mode. See how focus locks on the shrimps when I press the button.
Overall the GX7 can do pretty much everything on a single dive with a wet wide angle lens and a close up lens. You can cover from 100 degrees wide to super macro. The fact you can zoom with the wide angle removes the need to take the lens off at every occasion and in fact in the red sea you barely need to have any other lens.
I was not particularly happy with the lack of hood that the ikelite filter wants removed so I experienced the occasional flare. Still pretty good result.
The clip looks much better at home than it does on youtube where the gap with the RX100 seems much smaller.
So as far as video is concerned if you don’t need 4K the GX7 gives you extremely high quality footage and reasonable cost.
A final note I shot this video in 24p at home I can’t tell the difference with 25p see if you can see it!
Two years and few months later I am pleased my blog hit 100,000 visits. Considering that there is sponsorship and this is pretty much content produced during free time I am well pleased.
So as commemoration topic I want to put a few considerations that spin off a post on the editing and share section of wet pixel.
Many people spend a lot of money on underwater video rigs and use sharing websites such as youtube and vimeo to host or promote their content. The reason is clear those sites have a huge audience and if you have original content you can get a bit of advertising revenue as well that is never a bad thing.
However most of us have noticed that once you upload a file on those websites it looks worse than the original some time much worst. Why does that happen?
The answer lies in two words video compression.
Video compression is a technical subject and my previous post tried to share some of my finding in regards of the reasons why a camera produces video better than another even if the second produces better still images. It is all in the compression effectiveness and the same issue applies when we share our videos on line.
Unfortunately many people do not really know much about this subject and assume that the video editing program they purchased has all the answers and everything is optimised. Well that is not the case. Video produced off the shelf by such programs with default settings may be watchable but are not great and usually worse than the source clip of a good deal.
Another common misconception is that you need to convert a file produced by your device to another format so you can edit.
Finally many people convert files many times and wonder why the result is far off the original clips, not realising that video compression is lossy so each time you manipulate a clip are you are making things worse.
Obviously am talking consumer and prosumer here not RAW video recording at stellar bitrates.
So what is the best way too produce an underwater clip that looks good without spending too much time on it and that when uploaded on the web looks still decent?
To give an idea why a clip like this one shot with a compact camera
Does not look to far off this other clip shot with a semipro camcorder Sony AX100
or a Panasonic GH4
What all 3 clips at 1080p on youtube and honestly evaluate if there price difference is justified you will probably think no and think the second clip is actually a pro.
So why is that?
50% of the problem comes from the editing, I don’t have the details of how the other two clips are done but I know my clip is edited with iMovie, surely not the most advanced tool on the market you would think.
However there are a few tricks of the trade that I will explain to you one at time:
1. Never let your editor convert the files at the import.
Unless your workstation can’t physically process them leave the clips as in. Even think about getting a better computer in the long run if you can’t process files as is.
Many editors convert the files at import, in intermediate formats like prores or Avid that have no temporal compression. Those files unlike the originals have each frame stored like a complete image so that it is easier to edit. If your editor allows you use the original file without any conversion. You can do this in Final Cut using proxy and cheating also in iMovie creating manually event folders and copying mov or mp4 compliant files manually into them.
2. Once you finish your editing use the highest quality option available for export.
This is sometimes a tricky issue as the default options of those programs mention sometimes just a quality option with a slider from low to best. Many programs though, like final cut offer other options and modules for advanced compression.
If you have spent money on the editor spend the extra funds on the advanced codecs as they are worth every penny.
Once you have the advanced codecs (x264 is the one I use and is free plug in for iMovie) use constant quality with factor of 18 and the slowest preset your workstation can bear.
X264 preset go from very fast to placebo, my workstation can tolerate a very slow for 1080p that applies all the most advanced compression settings. This together with quality at 18 gives me an output very similar to the input but much more efficient with a smaller file.
At this point you are nearly there and ready to upload on vimeo and youtube.
Between the two services which one has the best quality?
Vimeo plain and simple, the same file will look better than youtube with less artefacts at the same resolution, however vimeo requires you to have a plus account to upload and share in 1080p whilst youtube is free.
So this is the reason why your files do not look as good as the clips you shot with the camera when you share them.
Now onto the second part why do clips produced with my very expensive equipment look worse than someone with a much cheaper set up and inferior equipment?
This second problem has to do with the way videos are shot.
Many people look on the internet for guidance on how to produce a video clip that looks decent and are tempted by some esoteric terms such as: flat profiles, colour grading, gamma curves etc etc.
They then go into water with their camera set like they have read on the internet and then spend a long time editing their clips, after all that effort the result image is a bit soft and the colors are washed out. This seems to be quite a common issue especially with pros.
Note that the two videos above are probably two of my favourites of the last few years. However check the difference between the close up shots with lights or the land shots and the wide angle with natural light? Very different
This instead is an example of someone who knows how to work with the limitation of the set up:
Flat profiles and color grading may work very well when the environment is controlled in a studio situation or where there is plenty of light but in water this is seldom the case. So the best help is to get it right first time and if needed use a filter for your ambient light shots.
Many people including me used to be a white balance evangelist but I have to say with years I have lost interest and I think is greatly overrated.
This video from ikelite is my absolute favourite
The best part is at 0:45 comparing filter with auto white balance and filter with manual white balance. The clips says looks at the purple that comes with the manual white balance but actually that is a horrible hue there!
I have spent the entire 2012-2014 trips trying to perform custom white balance with various cameras, with various degree of success. When I was in Raja Ampat I once left the camera in auto and realised the color where the best I ever got. Though this was a mistake but after few months when I reviewed the clips and how they were taken I realised the truth, even since I have never hit the custom white balance button once on my RX100 and I am preparing to do exactly the same on the GX7.
So my five cents into video editing and doing something decent for sharing on the internet is based around the following key principles:
Get the clip right in camera. Use the settings that make the clip look great at the outset, experiment until you are happy of the results. Forget about theory focus on what you like.
Don’t let your editor alter the clips at all and use no or minimum grading or even try to do no correction at all including contrast and exposure any time the editor touches the clip something is damaged.
Export with advanced settings using all the CPU power you have at hand to produce a high quality but as small as possible file
Good luck for your next trip, I am very much looking forward to mine!
Youtube now supports double frame rate video 50p and 60p so what?
That is actually a legitimate question look at this example here which is a short clip from a trip to Barbados in 2013, this was originally shot on a Sony RX100 Mark II in AVCHD progressive 1080@50p 28 Mbps
If you don’t see the 50p option is because your browser operating system does not support it. You need the latest version of browser and operating system and a machine fast enough plus enough bandwidth. So for Mac this means OS X Yosemite and Safari and for Windows you need 8.1 and IE9.
I hope you enjoyed the clip now check this other one which is a instead shot at 25p with the same camera at 24 Mbps/
I think you can see by yourself which one looks better and it is the 25p clip despite an overall lower bitrate.
There are a number of reasons:
Underwater clips do not have a lot of action as you may think so extra frames go a bit to waste
The encoding which is how the clip is first recorded by the camera is not really that different.
The human eye does a great job at interpolating missing frames anyway
There is not really much more data in the 50p file compared to its 30p rendition
The image quality if you look at a still frame is better in the 25p clip.
There are of course benefits in shooting at double frame rate if you want to slow down the footage 50% speed but for what concerns your normal shooting you would say for that clip you could not tell.
Let’s think about it in simple terms if you have a clip shot at 25p with 24 Mbps you would expect something not quite double but a bit more for 50p instead you only have 28 Mbps. To be more precise you have 22 Mbps vs 26 Mbps video which is 18% more in Sony’s case. So that is not really much information more.
What is more interesting is the structure of the data what follows now is a bit technical but bear with me.
GOP Structure Row 1 and 3 Sony AVCHD 25p and AVDHD progressive 50p
The first and third rows are representation of Sony 25p and 50p clips. The green bar are I frames that you can think of like a JPEG image, the red bars are P frames or prediction the only contain a delta from the previous frame not a full image.
You can see that in the first row there are 12 P red bar between each green I bar. This means that the GOP or group of picture is composed of a sequence IPPPPPPPPPPPP that repeats indefinitely.
On the 3 row there is a representation of a Sony 50p clip you can see that now there are 23 P frames between two I frames.
So the increment in full frame is limited however if we look at the sizes we see that the I frames in the 25p clip are 12% bigger and also the P frames are smaller.
So in short if you look at the image quality the 25p clip has more information in the full frames as well as for the predicted frames whilst the 50p clips has more frames but overall with less quality.
Which means that unless you are shooting something that is really action packed or you want to do slow motion there is no actual benefit but instead a deterioration when you shoot AVCHD progressive underwater.
Note: if instead we were shooting at higher bitrates for the 50p the story would be different but at similar bitrate it goes as above.
You will also have noticed stream 2 and 4 in the image above I repeat them again here
GOP Structure Panasonic AVCHD 25p and AVCHD progressive 50p
The second and fourth stream are generated by a Panasonic camera and they look different. You will notice now the existence of frames with the tag B and also that some of the P frames have a green slice.
This means that Panasonic AVCHD implementation has two features that Sony does not have:
1. It has B frames which not only predict future frames from the past frames but can also reference future frames in the prediction (sounds crazy but it works basically the frames are stored in memory before past ones are saved)
2. It has slices for images so on one frame there can be an element of prediction from a previous frame and another element completely newly generated for example if the prediction was completely in a part of picture where there was a lot of movement.
H264 encoding has motion compensation so things that do not change are referenced and new parts are predicted or in this case partially created from scratch.
So the Panasonic encoding algorithm is much superior to the Sony one for AVCHD this explains why a small camera like the Panasonic LX7 could produce video to compete with a larger sensor RX100 with almost double number of megapixels.
What makes me laugh is when photography magazines jump to conclusion on the video quality of a camera shooting a static frame!
Of course if there is not movement the camera with the best IQ in still pictures will prevail however when you record motion all of that becomes somewhat less relevant as compression impacts the quality.
So the more effective compression algorithm of Panasonic beats Sony to the point that even a larger sensor size seems not to matter.
This explains why when you take a real life clip Panasonic cameras perform better in video despite a worst image quality in still images.
The difference between the 28 Mbps and 24 Mbps follows pretty much the same trend of the Sony clips there is not enough bitrate to justify the double frame rate unless there is a lot of action in your clip.
So to conclude if you are shooting AVCHD the normal 24/25p more will have better image quality and will be more suitable to scenes with a lot of dynamic range, will give more colour and contrast. If there is really a lot of action or you want to slow down the clip shoot in 50p bearing in mind that image quality will actually drop if you look at a still frame in isolation.
Underwater contrary to what you may expect things do not actually go that fast and most of the movement is in a specific part of the frame or in a limited part of it so AVCHD 24/25p gives better results.
Finally when looking at a camera for video check for real clips do not look at resolution charts designed for still images as they give very little indications on the quality of your videos. Also if there are any tests make sure those are on the JPEG images that share similar processing engine not on RAW files are you are not shooting RAW video. And finally consider that at similar bitrate some manufacturer have a clear edge on others when it comes to real time compression in our example Panasonic produces similar quality to a Sony camera with overall a better sensor but poorer compression.
Following from my previous post I managed to get together a clip out of the 5 dives I did
The first day was somewhat plagued by visibility a bit lower than the norm for the location but the second day was fabulous
For this trip I brought with me the Inon UWL-H100 and the red push on filter from deep roof H20 and the Inon UCL-330 as I was expecting medium size fish and nothing really small
Here is the outcome
I am quite happy how things turned out so let me share the settings with you
First I shot most of the footage in 25p AVCHD mode only some small sections are shot at 50p and actually I did not need to slow down any of the material.
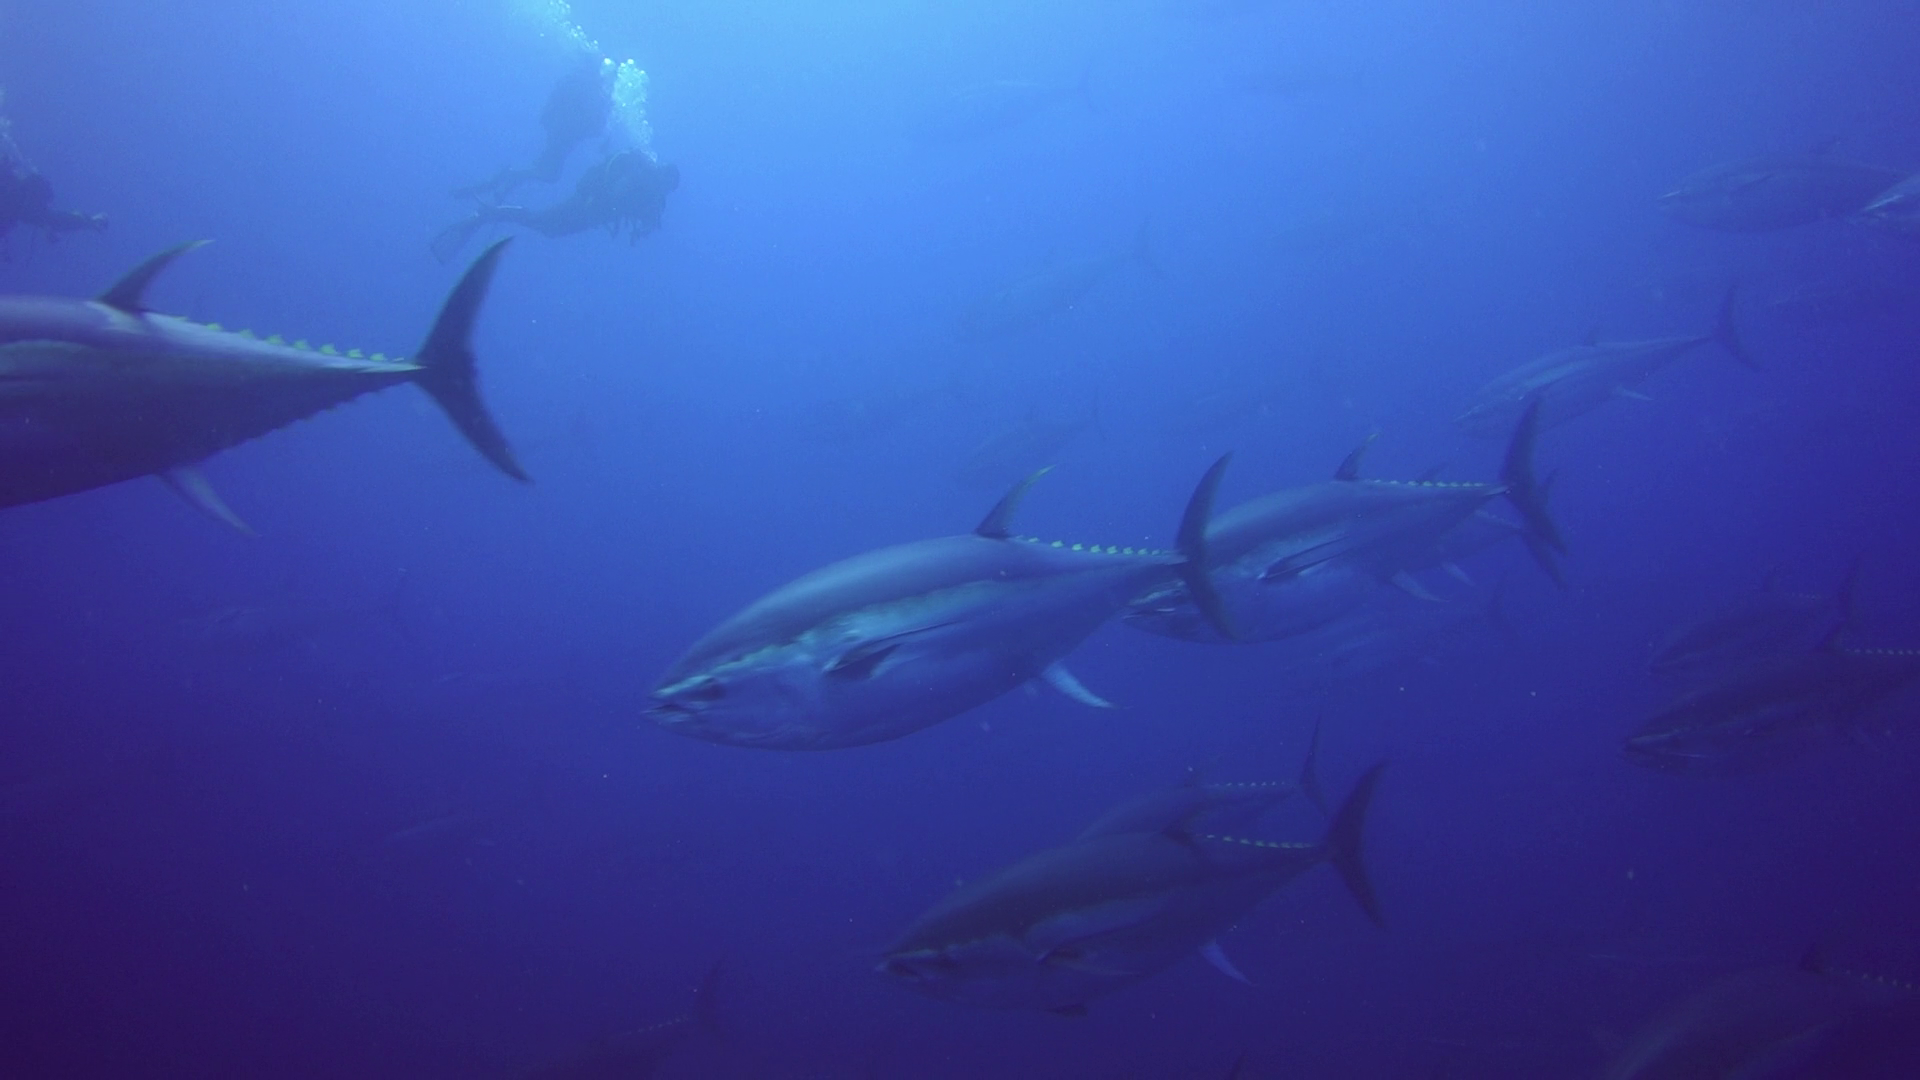
For the wide shots I used steady shot in normal mode and shutter priority at 1/50th. With the filter on I had auto white balance with tint correction G2 A1. I noticed that the camera was giving red tint in some situation and so added a bit of green back. The Amber correction instead is for the RX100 itself the camera does not have vibrant yellow and is a bit blue.
Tunas – AWB with filter
For the first time I use creative mode changing the standard contrast to -3 in order to prevent crushing of blacks.
Exposure was set all along to -1/3 and metering to multi area with AUTO ISO limited 160-800.
I think the results are so good that in fact I have performed no colour correction to any shots in ambient light.
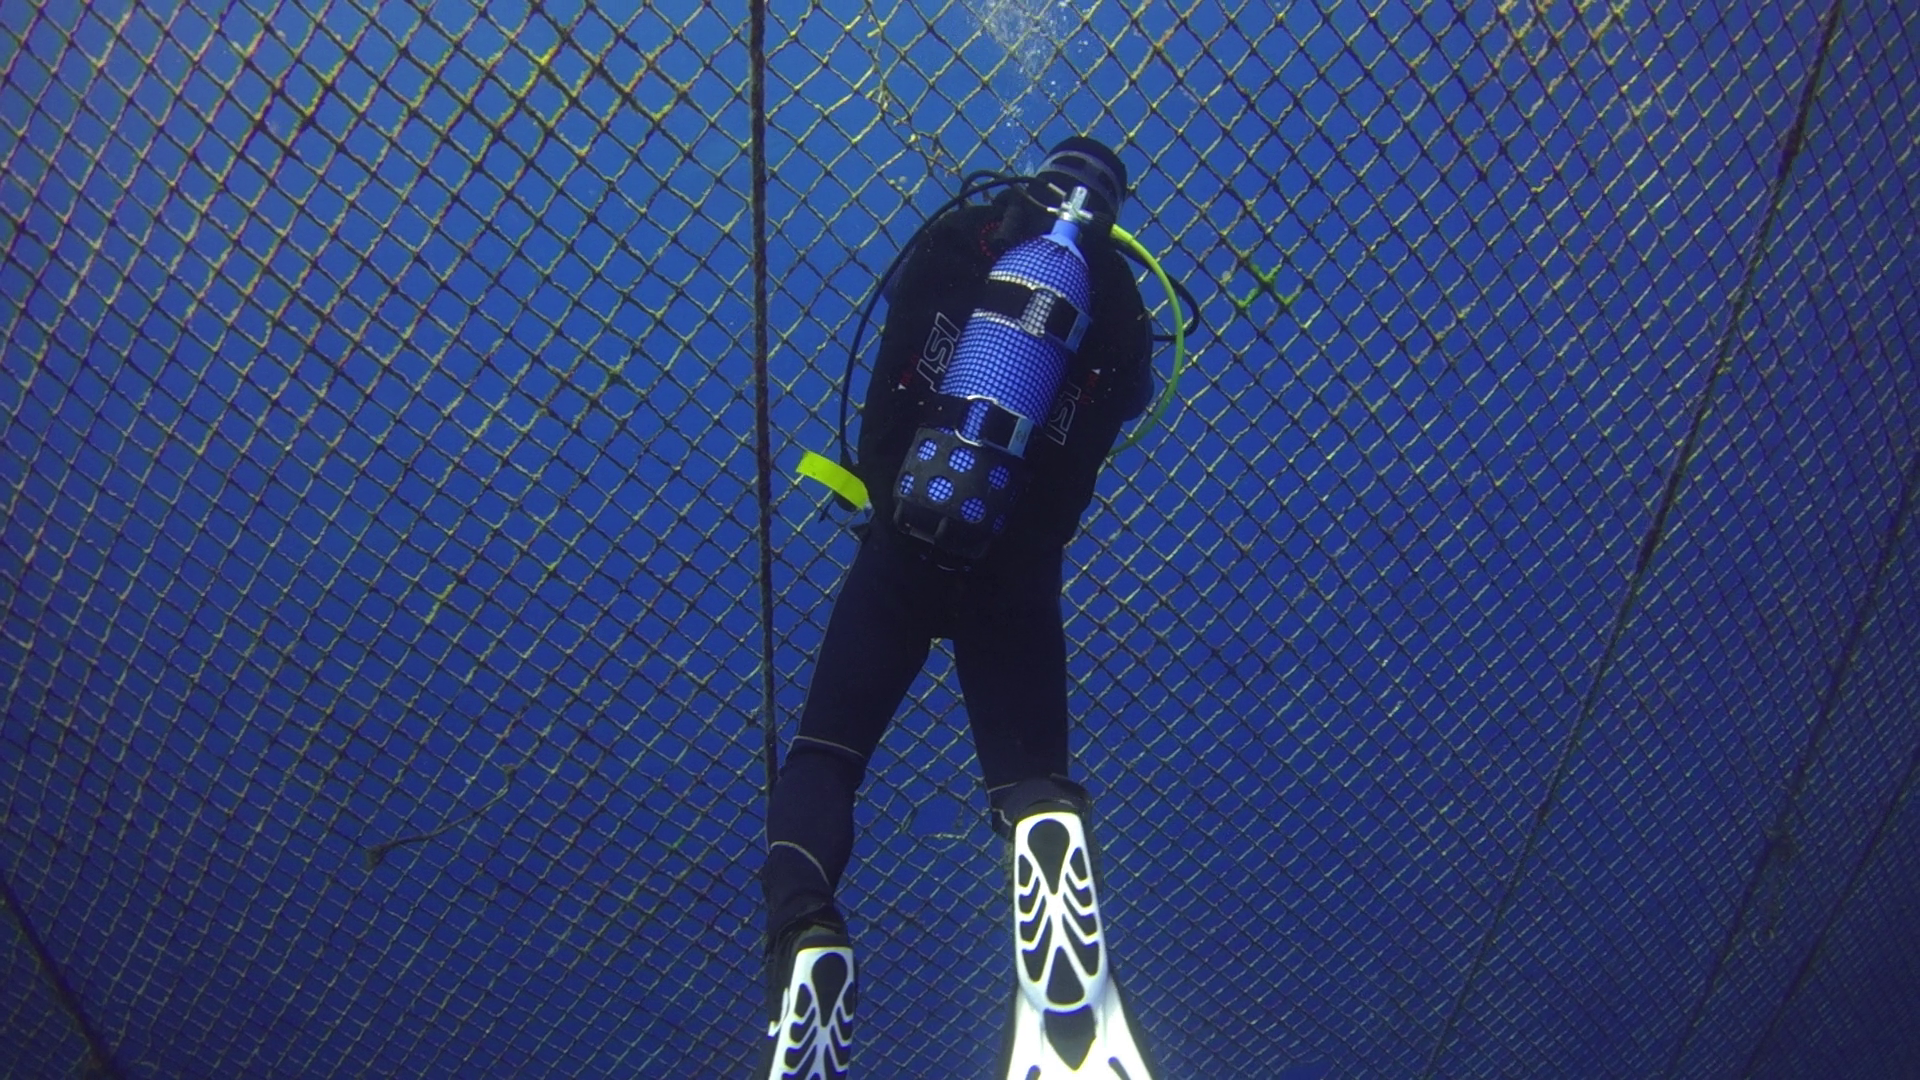
Opening the tuna farm – AWB with filter
For shots with lights I set up first colour temperature to 6500K and A1 to match the lights but then in some of the far shots this resulted a bit cold so I adjusted very slightly in post the temperature.
Seahorse – AWB UCL330
Only 40″ are adjusted in the whole video in essence is as shot and the editing took me half hour.
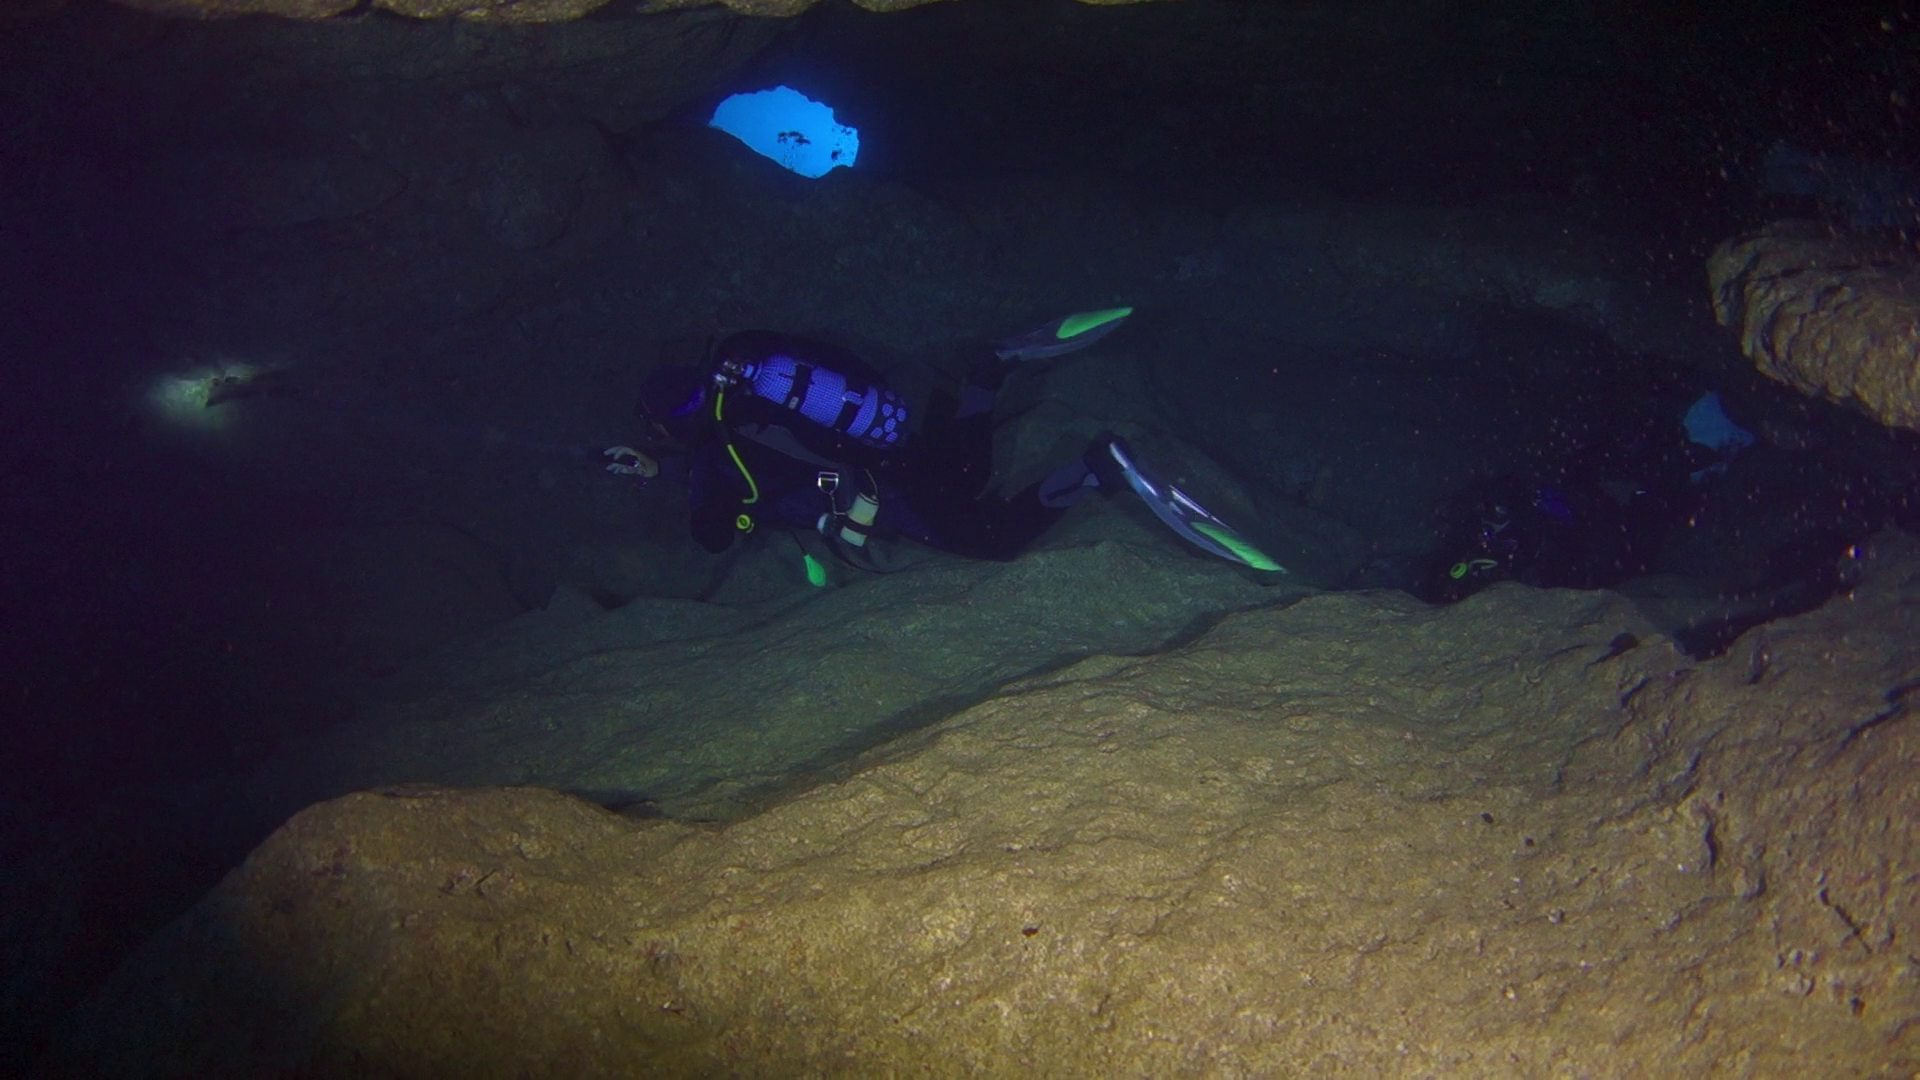
In cave – AWB no filter
I did a bit of analysis and the camera was operating for most at ISO200 with aperture around f/3.5 – f/4.0 which is really the sweet spot of the lens.
I did have some challenges using the UCL330 for some nudibranches that really required a stronger lens so they look a bit small, there was also surge so I had to fight with focus problems but all in all very happy.
Nudibranch – AWB UCL330
The longer working distance of the UCL330 (20-30 cm or 8″ to 1′) proved challenging on walls as you are too far to hang on to anything or use a stick. I will bear this in mind in the future.
For the close up shots I used steady shot active.
I also wanted to say that a few times the camera did manage to white balance properly however the results were not exciting and frankly not worth the hassle. Using the filter is just so much better with the auto white balance.
In one of my first posts on this blog I covered the subject of setting white balance with the Sony RX100.
It may be useful to have a quick recap on the topic:
For pictures setting a custom white balance is not useful if you shoot in RAW as the amount of correction in post processing is far superior*
For video (that is shot in compressed format) setting the appropriate white balance for your shots is essential
There are exceptions to this rule, some people like to set custom white balance even in RAW when they shoot ambient light pictures. This is because changing the white balance shifts the histogram and therefore if you had taken a shot with an incorrect white balance you may retrieve wrong information from the histogram. Personally I do not do this most of the ambient light shots I judge by eye and not histogram or are silhouettes anyway but may be useful to know.
The other exception is when you shoot a raw video format with bit rates in excess of 100 Mbps, in that case the footage is captured in a bland format lacking any real depth and contrast and things are corrected in post processing. This does not apply to any consumer camera that works in AVCHD or Mp4 with bit rate lower than 50 Mbps in any case.
It follows that setting the appropriate white balance for our videos is something that is important otherwise our clips will look dull, green or have some sort of color cast we do not like.
As many of you RX100 I have experience with the infamous Custom White Balance 9900K error. In theory if you set your custom white balance with the camera in P mode over a neutral target this error should only occur if the color temperature is out of range (>9900K) unfortunately this is not the case and you get this error pretty much always with our beloved camera. At the beginning I thought that this was due to my cheap PADI slate, but after various attempts against my hand, sand, buddy’s tank, the sun I have to think there is some genuine issue here.
So I got myself whibal card, that on my test on land performs amazingly well with both the RX100 and the Nikon D7100.
The first thing we can realize is that the auto white balance setting is rather cool in outdoor scenes, whilst it tends to be warmer in indoor scenes with artificial light.
Auto White Balance
When you take a custom white balance the colors appear warmer and the bluish cast departs and the yellows come back.
This is particularly bad news if you shoot underwater without a filter and think of using auto white balance as those results will be pretty ugly.
The whibal card has a specific black mark that if illuminated tells you the white balance reading is incorrect because of reflections. I thought this was the key to the 9900 Error, unfortunately I was wrong.
It just fails 100% reliably really painful so I could not get rid of my trusted red filter for the Galapagos trip. I even tried setting the white balance with the filter and it would fail as well.
So I went back to auto white balance and red filter and I am pretty happy with the results, many people have asked me if I have manipulated the footage in post processing as the colors look very deep and some have even said unnatural. Even so shooting at 1/50 means a relatively low ISO and in the specific trip another f/stop of aperture was not really significant but I would have like to have the option of working without the filter, sadly this was not an option.
For what concerns white balance just a few things I want to say:
1. At depth there is no color anyway so what your eye can see it is not what it is, the proof is when you use lights or strobes things look much better than the naked eye. Using your visual as a reference can produce dull results.
2. You have to set an appropriate white balance for your scene, this means removing the cast. If a scene has no cast and the colors look saturated this is not a white balance issue on its own but may due to the camera settings. The RX100II is one of the less saturated camera on the market. The mark I instead is pretty saturated take this into account.
3. Footage that looks dull IS in fact ugly. The fact you set custom white balance with or without a filter does not mean that results is the perfect result, there is no such thing in fact and as colors disappear at depth white balance is not that effective anyway
Nick Hope sometime ago published some interesting tests on wetpixel
It turns out that there is more than meets the eye.
Just to clarify the only color correction in my Galapagos clip is:
1. In the scene of the dolphins I was pointing the camera upwards and did not have time to take the filter off so ended up with a red cast, I performed a white balance adjustment in iMovie on the opposite value of the tint I was getting until I liked it.
2. In the scene where there is a group of Galapagos sharks and the close up of the eagle ray I have reduced the blue gain as it was over saturated
In all other cases the only changes were increase of contrast or reduction of brightness. When the water was green like at the end in the Punta Vicente Roca scene I did not touch it to make it look artificially blue.
Again for those who ask I use a deeproof push on filter for the Inon UWL-H100 this filter is my preferred for the only reason that is actually the only one available on the market that fits on the lens. Personally I would much prefer a plastic filter like the ikelite/URPRO but this one is glass. It seems to correspond to a deep sunset 2700K with magenta tint of +5 on the RX100 but I have no tools to measure it I can only say it works.
So my recommendation for the RX100 is to get this solution as the Inon lens has the best optical quality and a hood that comes very handy to reduce flare. There are other lenses that fit the RX100 but have no hood. Obviously an not even considering the fisheye style lenses as distortion is ugly and placing a filter under the lens is a very bad idea.
The time finally came for our trip to Galapagos and I was ready with a set of think rubber suits to overcome the cold water. I just bought a 5mm Oneill Sector (wonderful suit) a 3mm hooded vest, kevlar gloves and a 5mm 4th Element short john. Well the short john was not used and for most I used just the wetsuit and a set of O’Neill Thermo X unders (very recommended) as El Nino is coming and the water was warmer at 25-27C or 77-80F.
This means lack of schooling hammerhead at shallow depth close to the reef, they were in the blue. We had however our good dose of schooling barracuda, tuna (in the 1000s) and even galapagos sharks
This is the video I produced
If you have problems with playing in your country use vimeo instead
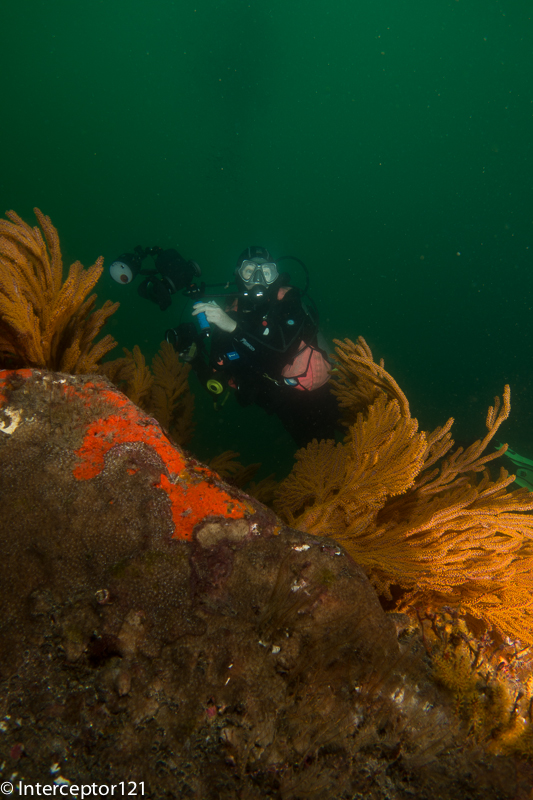
The conditions were difficult with low visibility and in some sites very green water as you can see here
Questions will come about what I used etc etc so here is the list
Sony RX100II in Nauticam housing
FIx adapter for Inon LD mount
Inon UWL-H100
Deeproof blue water filter
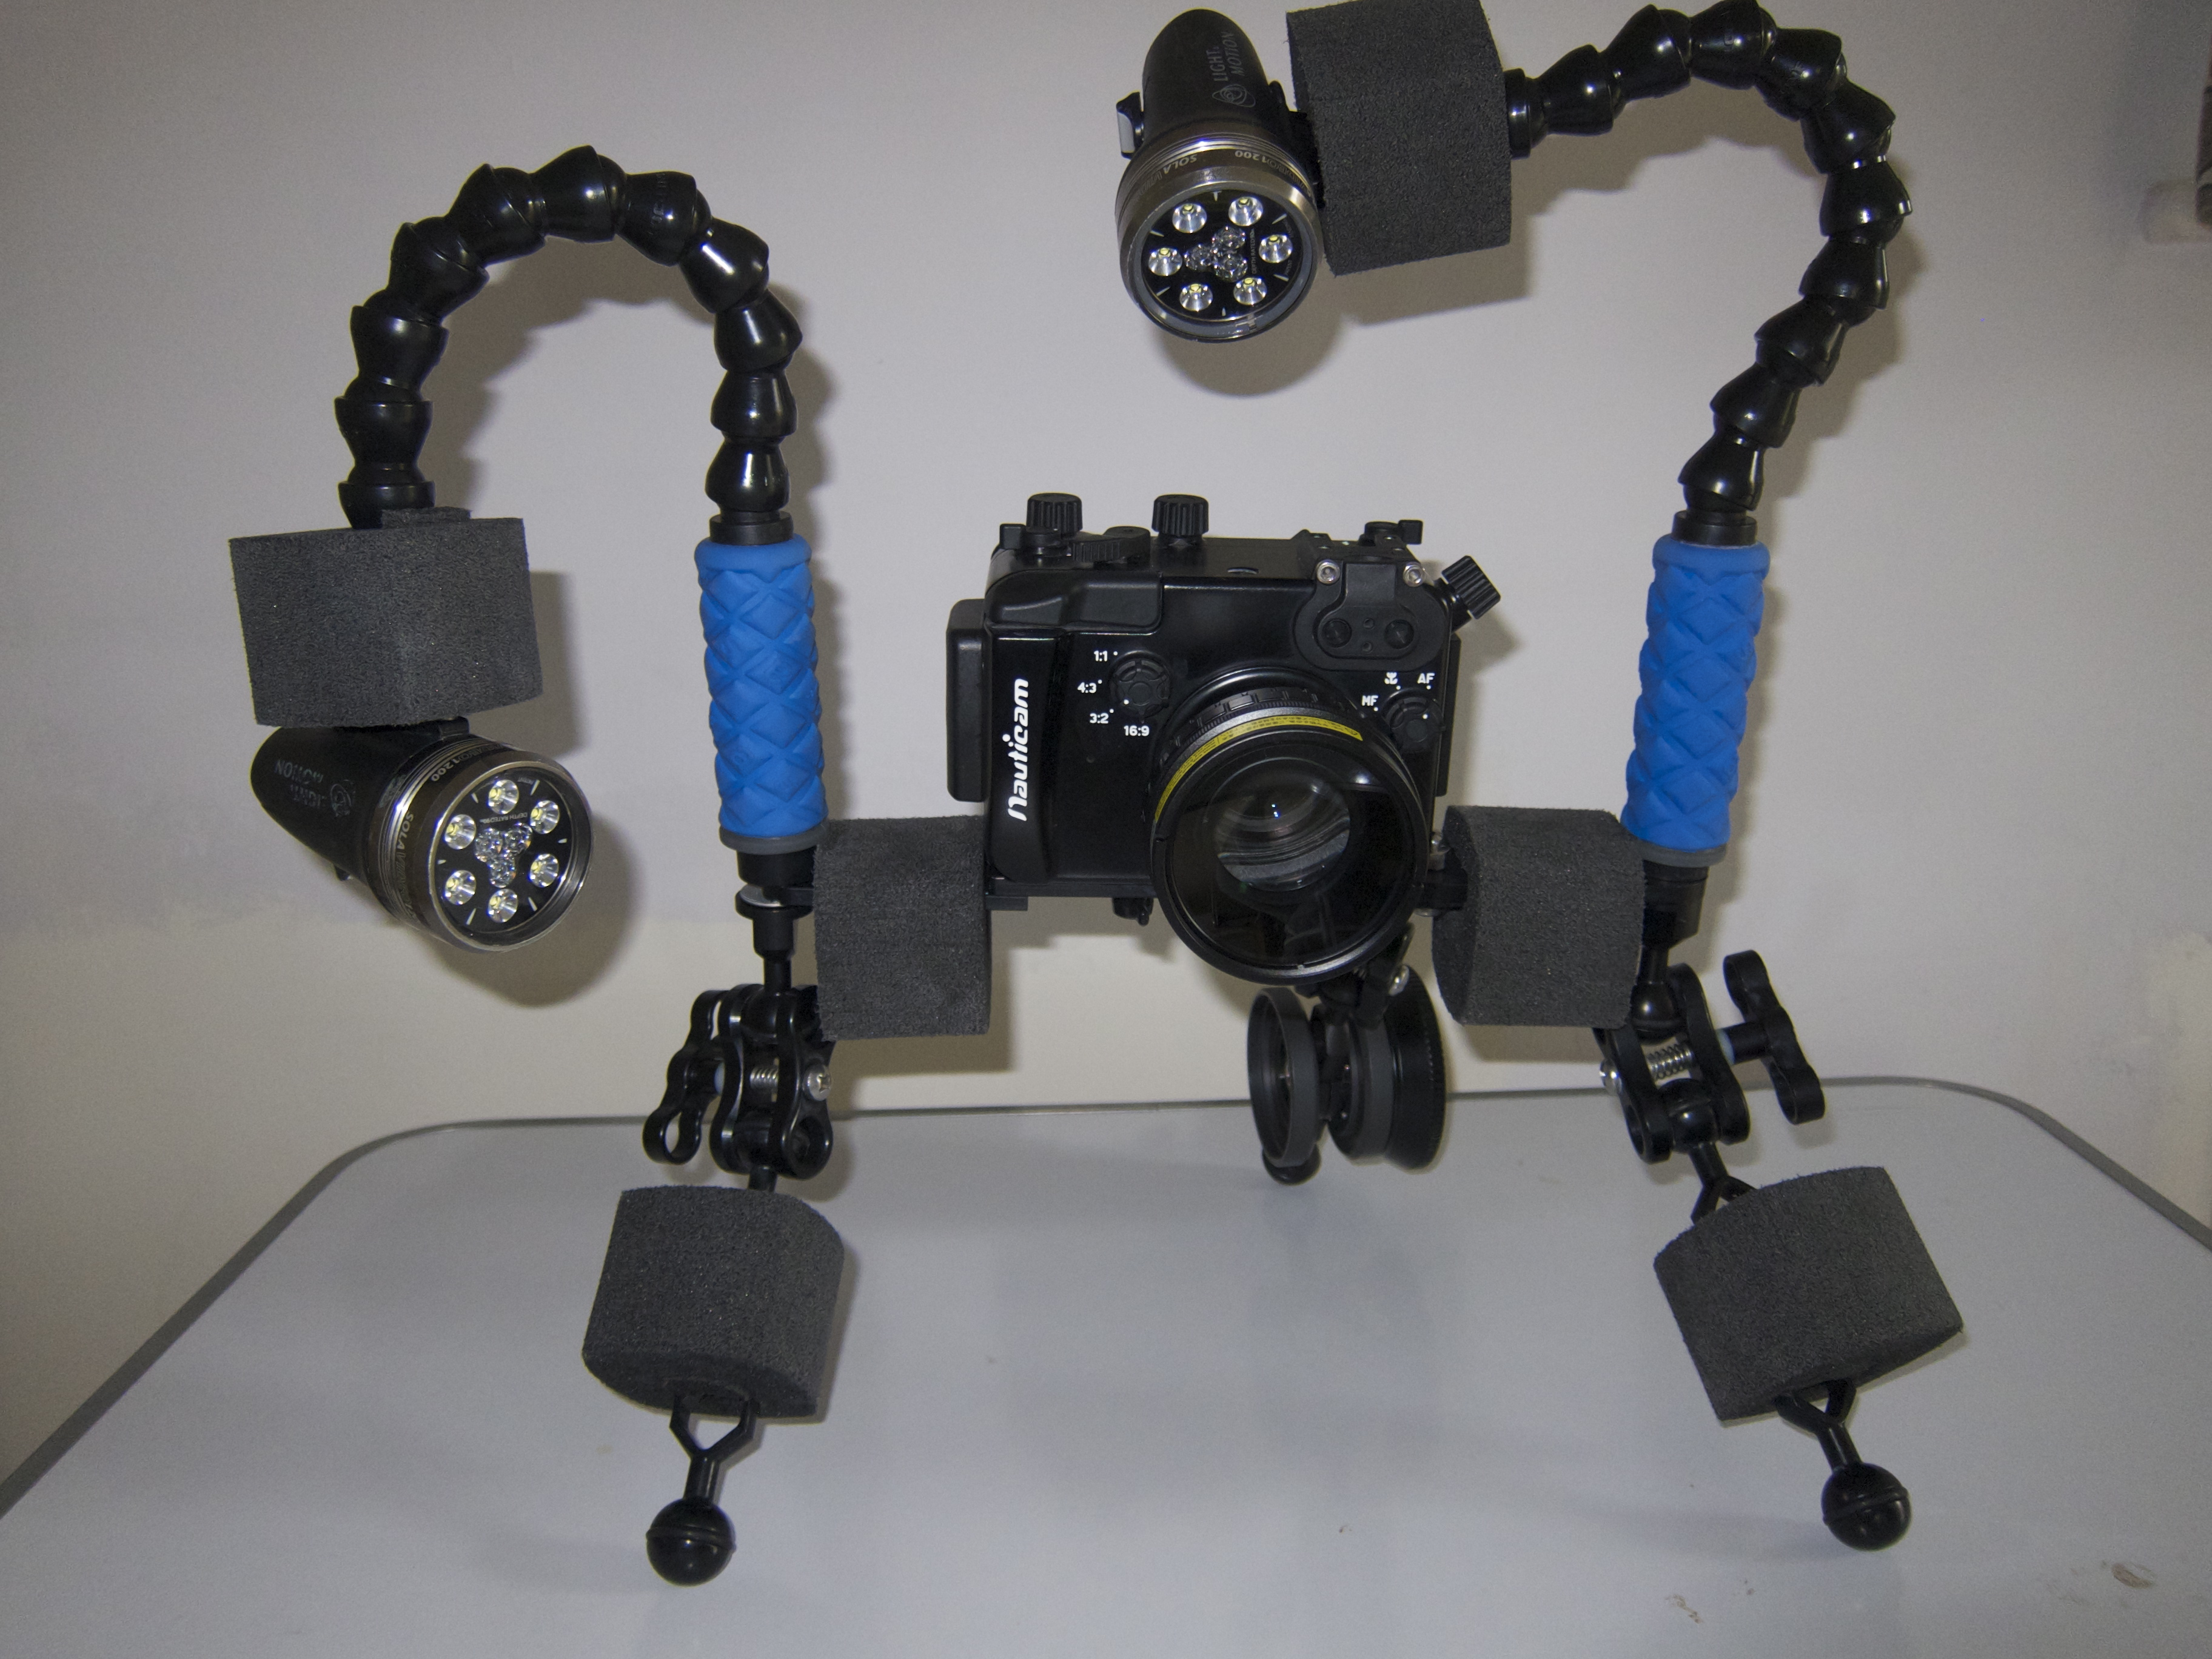
Sola video lights 1200 (just few shots of the barracudas and some close ups)
Combination of arms and sometimes no arms
Ultralight tray TR-DM with extension and handles
The video has been produced with iMovie 9.0.4 no stabilization performed except the scene with the moray eels mating (very mild)
I shot the whole trip in shutter priority 1/50th of a second in the 25 fps 24 Mbps format. After some tests at home I have decided to use this mode as I can’t physically play the 50 fps files the camera produces on any of my devices differently. The 25 fps gives a film look and very smooth footage. This format is only available on the RX100II and not on the original RX100 so the consideration I made at the time for video settings of the RX100 remain valid.
The benefit of 1/50th shutter speed is a full f/stop of light the disbenefit is that at the surface and for backlit shots this is too slow, in those cases I go back to program mode or increase shutter speed to 1/100 or 1/200 or more.
For what concerns the editing I import the raw files in iMovie without using the conversion and then export with x264 using very slow preset and level 4.0 compatibility to use it with my appleTv.
I do minimal color correction in some cases I had to eliminate the red color cast of the filter when shooting upwards, to do that I change the white balance to top yellow until i remove the cast.
In some cases I had to put the green gain to the max for the same problem but in all other cases there is NO color correction in post.
When you work with AVCHD cameras the footage is compressed and the key is to get it right in camera.
As Galapagos conditions were challenging, although less than I expected, I used gloves in some dives to hang on to the barnacles and I also modified the set up to completely eliminate the lights.
I would dive with two 3″ segments and two 6″ Inon Mega float arms when I had the lights on and for other shots in ambient light I would have this set up here that looks odd but it is very effective and almost neutral at only 120 grams in water. The position of the floats means the camera stays upright at all times.
Compact tray for ambient light
I would put a single Sola light on top of the housing not for video purpose but to signal the dive master when I was a bit far in the murky or dark waters. I used this set up on almost all blue water dives (Darwin and Wolf) and the normal set up with lights for the South and West sites with murky or green water.
There will be a separate post on the photos, I did a total of 18 dives with the camera of which 4 where photo and 14 video. You can see an example in the featured image.
I have now ran some statistics on the final clip that I produced
I used a total of 41 video clips:
ISO average was 273 with the following breakdown
2 clips at 160
30 clips at 200
6 clips at 400
3 clips at 800
f/stop average was 3.1 hyperfocal distance on average 1.16 meters. So if I were able to shoot without filter I would have not gained anything in terms of sharpness as most subjects were further away
I would consider the Galapagos and the dive trip I did not the best in terms of brightness and visibility so I would conclude that the RX100II with the Inon UWL-H100 and a red filter is the best set up for wide angle video in terms of performance, ease of use and flexibility.
So after a few months since I got the Nauticam housing I finally had the time to get in the water and try it on.
I was in Barbados for a week and although the diving was not exactly outstanding I did have enough to test the camera behavior.
The link to the videos are here for YouTube at 1080p
or if you prefer Vimeo at 720p
The footage was all taken at 1080p50 the highest mode of the RX100. The RX1oo can work in both PAL and NTSC standard but I chose the PAL mode just to avoid the annoying NTSC message at startup. The clip has been edited with iMovie 9.0.9 and then exported in 1080p25 using Xencoder codec for quicktime in high profile. Youtube then reconverts it to its own specifications, but at least I have the highest possible starting point.
As mentioned the RX100 shoots at shutter speed of 1/100 in 50p mode and this suited me fine in case I wanted to produce a 60p clip for viewing on the computer as currently no online system supports it.
As discussed in the previous post I shot all wide angle in camera Program mode. This allowed me to use the left control wheel button to call the white balance set menu that in video is not available. I set the picture format to 16:9 so that would show similar on the screen. I did notice that when I actually started the movie recording the crop of the active steadyshot kicked in with a reduction of field of view of around 9 degrees or a 1.14 zoom equivalent.
However the active steady shot was well worth it as I have not used any stabilization for any part of this clip and therefore not introduced any extra cropping.
The wide angle shots with the RX100 are an absolute breeze when you use a filter and there is no need for custom white balance until it gets too deep to actually use a filter. I struggled getting decent results with custom white balance, the 9900 K error came pretty much every time except when in shallow water and balancing on sand. Also the results were off with too much magenta tint to the point I had always to correct it.
Ultimately I kept the filter and the camera in Auto White balance and did not bother doing a custom reading at all. The results were excellent.
SS Stavronikita AWB
In deeper water the filter started making the image a bit dark so I took it off and used a temperature setting of 9900K with Magenta and Amber at the maximum.
For close up at distances over 20cm I still shot in program and had good results. When getting super close or macro I used Movie mode in Aperture priority mode with aperture set at f/11. Towards the end of the clip you can see a shot of a small pink frogfish that is done like that. The close up on the eye is shot with two stacked Inon UCL165 the depth of field is really small as you can see but still workable considering I hand held the camera at all time.
Pink Frogfish f/11
When I shot this arrow crab I had left the camera in program mode so it chose an aperture of f/5.6 you can see that whilst the mouth is in focus the arrow is not
Arrow Crab f/5.6
Similar situation with the pedersen shrimp where not everything is sharp in focus
Pedersen Shrimp f/5.6
Obviously I am being very exigent with my footage and in normal condition this is already good to very good.
So what I liked and what I did not like about the RX100 Mark II:
I liked:
The ergonomics and ease of use are outstanding
The camera performs incredibly well with a filter in auto white balance
The manual focus with peaking works extremely well
Dynamic range and colors are outstanding and not just for a compact
Image crisp even in the corners at f/1.8 compared to the Mark I this is extremely significant
The active stabilizer was great and meant to manipulation in post
Battery life is incredible
Performance in low light is excellent and better than the Mark I the camera never reached the ISO MAX of 800 I had set hitting a top of 640 at 30 meters
Autofocus at wide end in bright conditions is superb
The only think I hated was the custom white balance results an absolute disgrace, to the point that there is no benefit doing it. Not only that the few parts of the clip I had used it and correct it were still a bit off and required correction in post to a small extent.
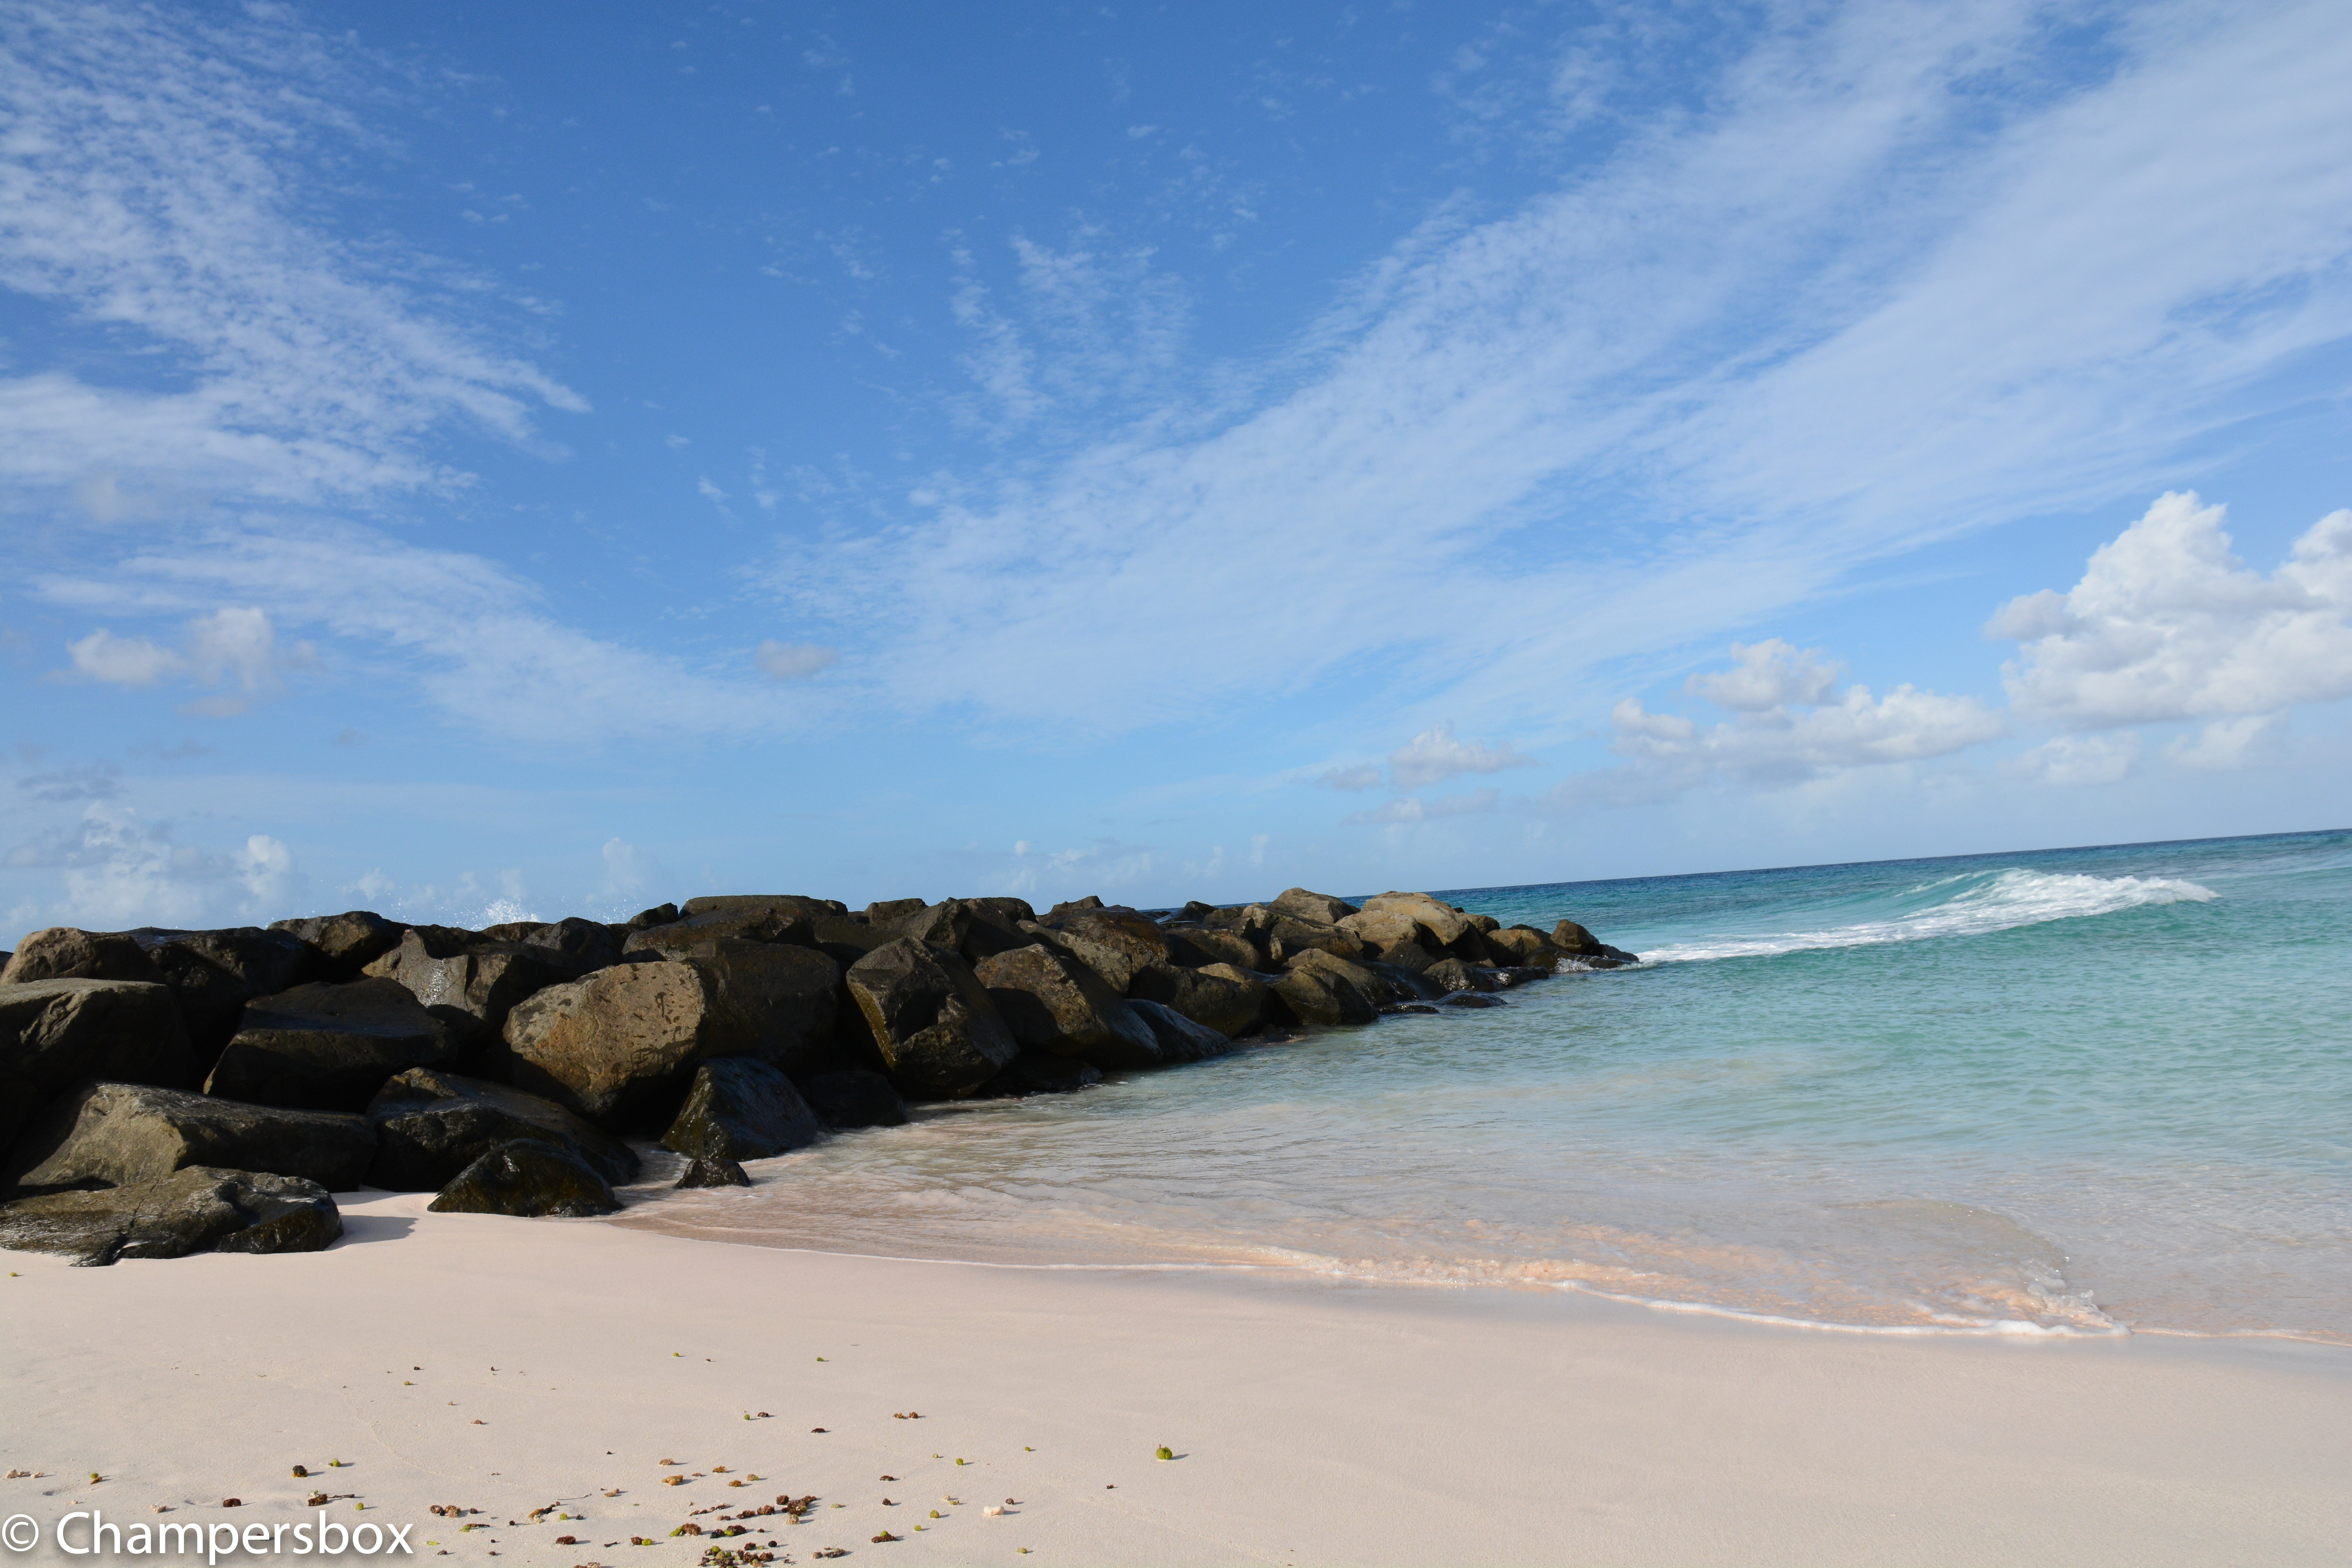
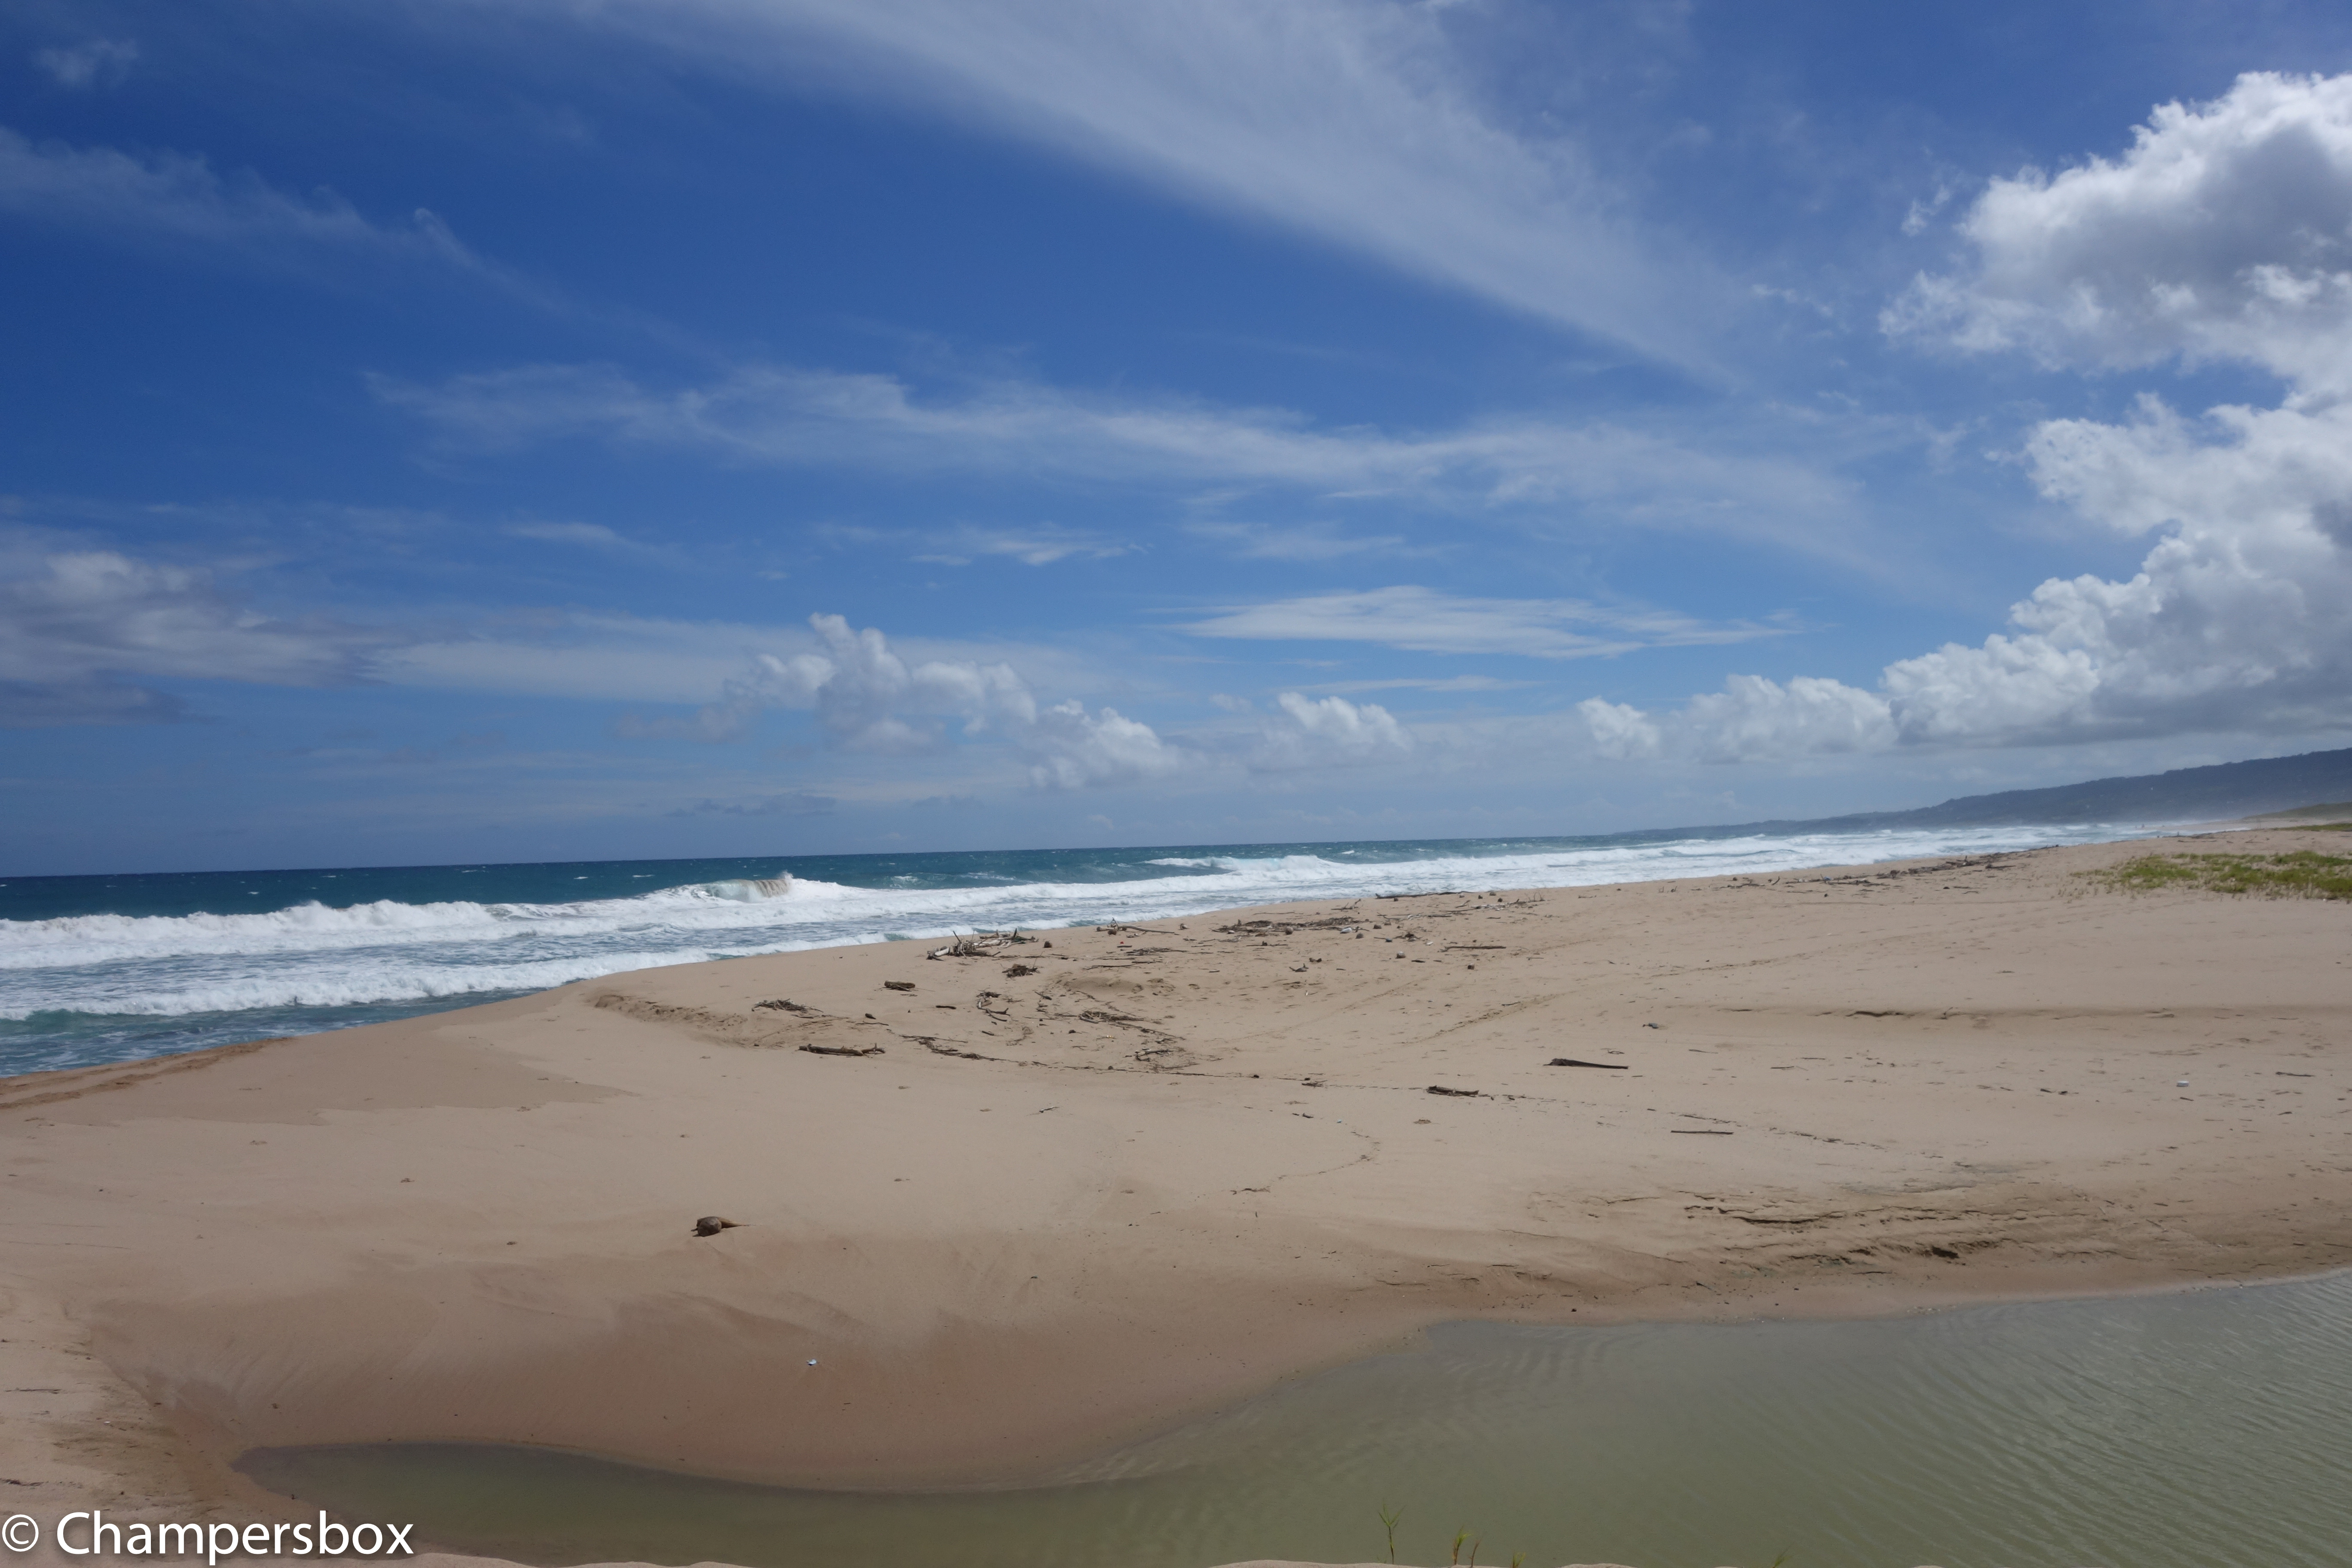
Also to consider some of the topside capabilities of the RX100 Mark II just to give an idea though this is not exactly the same location have a look as this shot with a Nikon D7100 with sigma 17-70 in comparison with the RX100 Mark II
Nikon D7100 Beach LandscapeRX100 Beach Landscape
There is a difference but considering the size of the RX100 and the fact it fits in a pocket I don’t think there can be that many complains. Obviously once you look at specific lenses for the DSLR things change but in the 28-100mm all purpose range I would say that the gap is not as much as double as the price of the two set ups.
So is the Sony RX100 the best compact underwater video set up? Definitely
Is the Mark II better than the original RX100? Yes and well worth an upgrade for video
How does it compare with the Panasonic LX7? The dynamic range and the colors are superior and produces footage that is simply better and sharper. Where the LX7 excels is at macro in clear waters, this is not because of magnification as the RX100 and LX7 perform exactly the same with diopters, and this is because of the LX7 amazing autofocus. However with a bit of silt or other objects in range there is need to switch to manual focus and there the RX100 is actually superior when using peaking even if the depth of field is actually less, the manual focus on the LX7 with the magnifier is not as good unfortunately.
So my ranking for video is:
1. Sony RX100 Mark II
2. Panasonic LX7
3. Sony RX100
I would also add that for stills the LX7 is even more rewarding at macro range due to the performance of autofocus.
It is not a mystery that the RX100 is capable of shooting excellent video. In fact in some comparisons with SLRs cameras there is little to no difference in the footage quality. The RX100 has many settings and options so which ones are important for underwater video? I will go and explain those that I find useful.
RX100 Video Behavior
Although the RX100 offers full manual control in video this option is not as useful as it seems. Now that many video editors support AVCHD progressive the 50p or 60p options are the more relevant as the footage can be slowed down to half speed and still offer a standard frame rate (50/60p at half speed is 25/30p).
The RX100 shoots video in program mode with shutter speeds of double the frame rate so 1/100 for PAL and 1/125 for NTSC that is excellent news. The camera will then drop to 1/50 or 1/60 when the max ISO is reached which is still acceptable. In Movie Program mode the camera shoots at the lowest possible ISO for the set shutter speed at the widest required aperture. The RX100 has a minimum ISO in video of 125 and the RX100 has it at 160, which is quite high.
Shooting Wide angle
I shoot all my wide-angle footage with the camera in Program Mode. By that I actually mean Photo Program Mode. Pressing the movie button in P mode results in the same behavior that shooting video in P mode. In order to be able to frame correctly I set the image format to 16:9 also for stills. This is also useful to capture ambient light landscapes. I started shooting in P because this allowed me to white balance quickly however I found out that the custom white balance on the RX100 Mark II is a total disaster and in fact I never use it as it gives weird results. I shoot with a red filter with Auto white balance on until approximately 25/27 meters and then I move to White Balance set to K (colour temperature) 9900K Tint set to M7+Y7. When shooting with lights I also use auto white balance. Generally speaking I only use the movie button and the white balance settings for wide angle.
Deep Wreck in Program Mode
Shooting Macro
When shooting with diopter at tiny subjects focus with the RX100 is a challenge. I set my video mode to Aperture priority with an aperture of f/11 and Auto ISO, the camera will always keep a shutter speed of double the frame rate which is ideal. If you light the subject properly the RX100 will always shoot at the lowest ISO maybe at 200 but not more. I use auto white balance for all my macro. I find it convenient to leave the video mode like this so that I only have P for wide angle and Movie – Aperture priority for video. If you prefer you can set those as memory recall 1 and 2 but I find that not as useful except you don’t need to use the control dial.
Frogfish at f/11
Settings for the Function Buttons
Many features that can be assigned to the function button are not available in video or not useful. I only have 4 settings in the function wheel:
ISO
Metering Mode – Always on evaluative
DRO – I set it to auto
Focus Mode – in video only constant and manual are available
To be perfectly honest I rarely change any of those except for testing the camera exposure. Even the metering mode can be left to evaluative all the time as when you shoot macro the area is so small and evenly illuminated that I have never had an issue with exposure.
Settings for the Control Wheel
I use the following assignments and I find them very useful:
Left: White balance
Centre: Manual Focus Toggle
Right: Exposure Lock
The bottom arrow is always assigned to exposure compensation and can’t be changed I set it to -0.3 eV all the time.
White Balance
The performance of custom white balance with the RX100 Mark II is shocking worse than the original RX100, 9 out of 10 I get a white balance error and the results are usually off with too much magenta. The only occasions where I do not get an error is in 6 meters or water (20 feet) on a sandy bottom. In other conditions it does not matter if you try with sand, tanks, hand, slates the outcome is shocking. The results can be used changing the tint to an M2 or even zero but generally using a filter and auto is just much easier and better. I assign the K setting to 9900K M7 for shooting at depth, This is painful because it means that unless you have a flat lens like an Epoque or Inon you can basically forget shooting video with the RX100 as the custom white balance is erratic at least.
The Inon UWL-H100 has only one red filter that is compatible and is made by deeproof. I find this filter excellent though I prefer plastic to glass I have to say it works a treat.
Results with White Balance Error 9900 Note the Magenta tingeSimilar scene with auto white balance and red filter
Focus
The RX100 focus automatically on the center when shooting video and does it very well,. Tracking focus is not as useful and by assigning the center button to manual focus it can be eliminated. When shooting macro it is essential to use peaking. I set it to low with white color. Generally with diopters there is only one focus distance so I move the camera until the peaking shows nice white and then press record trying to be steady. That’s pretty much it.
DRO
I keep the dynamic range optimizer to Auto. This means the ISO is most of the times set automatically to 200 to preserve dynamic range. When the scene is perfectly lit the ISO is chosen to be 160. I don’t see much difference between ISO 160 and 200 but if this bothers you set the DRO to off which means the camera will mostly shoot at ISO 160 in good light conditions.
ISO and Max ISO
I set the ISO Max to 800, having analysed a lot of my footage I have not found one example where the camera shot at ISO800 yet unless I had a filter and was at 30 meters. However I prefer the camera to drop the shutter speed and keep the ISO to 800 instead of going all the way down to 3200.
Zoom
In video the RX100 activates digital zoom even when you set it to off. This deteriorates the image so you need to pay attention that the middle notch corresponding to 3.6x is not exceeded or you will see artifacts in your footage.
Stabilizer
I use active steady shot thought this reduces the field of view as it does help with shake quite a lot with macro footage.
Other Settings to disable
There are a number of settings that are harmful in video either because they use battery or because they are counter productive I disable them all list includes:
Smile / Face Detection
Picture effects
Audio recording ( I do not like bubble sound)
Wind Noise Reduction
The following are only relevant for still but I like them off regardless.
I have been fortunate to receive one of the first RX100M2 that have reached the market so I thought of sharing with you my first impression and what I believe will be the potential for underwater imaging use.
This is the link to the unboxing video of the camera
I posted a summary of the RX100 capabilities for underwater video some time ago on this blog the post is here:
Probably the best thing is to revisit my review and update any significant differences between the RX100 Mark 2 and the original version which is still on the market and will remain at least until the end of 2013.
Key Strengths
Bright Lens – Not changed
The RX100M2 has exactly the same lens of its predecessor RX100, it is true that when zoomed the minimum aperture drops down to f/4.9 however this is not a concern for underwater imaging as usually long focal lengths are for macro and we are interested in very small aperture to allow for greater depth of field.
Low Noise – Improvement!
In virtue of the new retro illuminated sensor the mark 2 has one full f-stop advantage over the original RX100. This means that ISO800 is a breeze and potentially we could go as low as ISO1600. I would not do that but what it means is a cleaner image at depth in ambient light.
Image Quality – Improvement
Image quality is outstanding and the lack of aggressive contract and sharpness filters in the default settings means more room for correction in post processing.
Video Mode Control – no change
The RX100 had complete control on video mode and the mark 2 maintains the standard. Very important is that the program mode is excellent and keeps the shutter speed at 1/100 or 1/125 when used in active mode which is ideal for 50/60p smooth footage.
Manual Focus – no change
Same as for the RX100
Battery Life – Improvement
According to Sony battery life has improved from an already outstanding CIPA 330 to a declared value of CIPA 350. The new Mark 2 has also an hot shoe so in theory if any manufactures produces a wired TTL enabled housing this means plenty of shooting before changing the battery pack. We suspect though that only ikelite will have this option on the housing.
Active Steadyshot – no change
I initially slagged the RX100 stabilization system based on performance on land. However at a more in depth analysis it turns out that the RX100 active steadyshot, even if at cost of an image crop is very effective for sudden camera movement and for high magnification macro. The Stabilizer is not as sticky as others so when you eventually vibrate it does not jump. Although the performance for stills is poor to irrelevant and so is the normal mode the active mode is very effective for underwater use. The mark 2 is built exactly with the same algorithm and combination of optical and electronic.
Tedious Workarounds Comparison
Some of the ergonomics of the RX100 are not the best and seriously deduct from an otherwise excellent experience, the most annoying issues:
Lack of focus lock – no change
For some reason Sony decided to skip on this essential feature, the workaround involves switching to manual focus however it is then possible to accidentally change focus if the front ring is set to control focus. The RX100M2 has the same issue.
Setting Custom White Balance in Video – No change
Setting custom white balance is only possible in the still modes, while in fact if you shoot RAW don’t actually need white balancing. This is the largest non sense of this camera that requires the user to navigate out into Program to ensure white balance is set correctly and you don’t end up with the Custom WB Error message. Though this is annoying is not such a killer as it would initially seem if you take your movies in one of this still modes which is valid for wide angle and ambient light shot. For macro you will need to switch to movie mode aperture priority in AWB. If you keep this discipline this is issue is mitigated. The RX100M2 does not change this and I believe this is due to the fact that the shutter button that is used to set custom white balance is disabled in video.
Lack of 24/25/30 progressive modes at 1080HD – Improvement!
The RX100M2 shoots at 50/60p as well as 25/24p in addition to that you can switch between PAL and NTSC which is great!!!
AVCHD – Improvement!
The RX100M2 has not only the progressive modes at double frame rate but also AVCHD 1.0 compliant format, this means that if you choose the 24M 24/25 p mode you can import with all editing programs without issue. Not only that but if you use the wireless import utility this converts also the AVCHD progressive files in mp4 for you. This is great improvement
Key Weaknesses comparison
The RX100 had also some key weaknesses let’s see how the mark 2 fares.
Macro Performance – no change
Exactly the same as its predecessor the RX100M2 has a minimum focus distance of 5cm on land that becomes around 7 in water. Like with the RX100 because of the large capture area you will need diopters for macro shots. On a positive note once you have a close up lens the performance is incredible when coupled with manual focus with peaking.
Stabilizer
Sony has adopted a lens shift approach in this camera instead of the sensor shift of the higher end alpha, maybe due to large size of the sensor compared to the camera body. They have then added some software processing in camera but the results are just average. There are many other cameras that do better than the RX100.
Soft Corners at Wide End – Improvement
The RX100 first generation had soft corners until f/5.6 the situation changes dramatically as we can see in this test card comparison shot. Not sure if there was an issue with the RX100 original sensor but this looks excellent and as sharp as the panasonic LX7 or Canon G15.
Look for yourself!!!
Left RX100M2 Right RX100
No Neutral Density Filter – marginal deterioration
As its predecessor there is no neutral density also on the mark2. A little tip for video is to shoot with filters that take away 1 1/3 f-stop. This is not ideal but helps. There were some speculation that because the minimum ISO in RAW is now 100 instead of 80 sunballs would be more difficult to shoot. 1/3 of an f-stop does not really make any difference I believe this is more a statement so that the RX100 housing that are in stock sell out at full price.
Other features
I have to say that the tilting screen is fantastic to shoot on a tripod on lens. I doubt any housing can accommodate for this but the feature is outstanding
Tilt screen side view
And this is the rear
RX100M2 tilt screen
Conclusion
So the question is should I buy the RX100M2 or the RX100 maybe grabbing a deal? Recsea has already announced a housing for the mark 2 and Nauticam is working on it. I believe that when it comes to still photography the difference between the two cameras are not substantial as many shots are with strobes I have however noticed a much faster internal flash cycle time. I do not want to be definite but looks like a full dump takes around seconds to recharge. Also to be considered that in US the price difference is $100 so definitely the Mark2 is the way forward. In UK/Europe the difference on the list price is £150/€180 which is much more.
So I would say if you are planning to use the camera for video go for the RX100M2 the improvements are significant both in terms of video formats but also in terms of sharpness at wide apertures. If your main interest is photography and you live in US go for the mark 2 in Europe instead I would grab a deal on the RX100 when the price of the housing drops.
I am waiting for a test housing from Nauticam as soon as I have it I will post an unboxing video followed by some pool tests.