Nauticam entered the wet lenses market with their SMC close up wet lens that was optimized for DSLR.
Then it released the CMC compact macro converter for compact cameras and micro four thirds and finally the Wet Wide Angle Lens I that is compatible with compacts, micro four thirds and also full frame cameras with 28mm equivalent lens.
Up to now all lenses were using the traditional M67 mount as most of the lenses, even the close up ones, are pretty heavy this means going for the dive with the same lens. Nauticam has developed the flip diopter adapter for flat ports to overcome this issue.
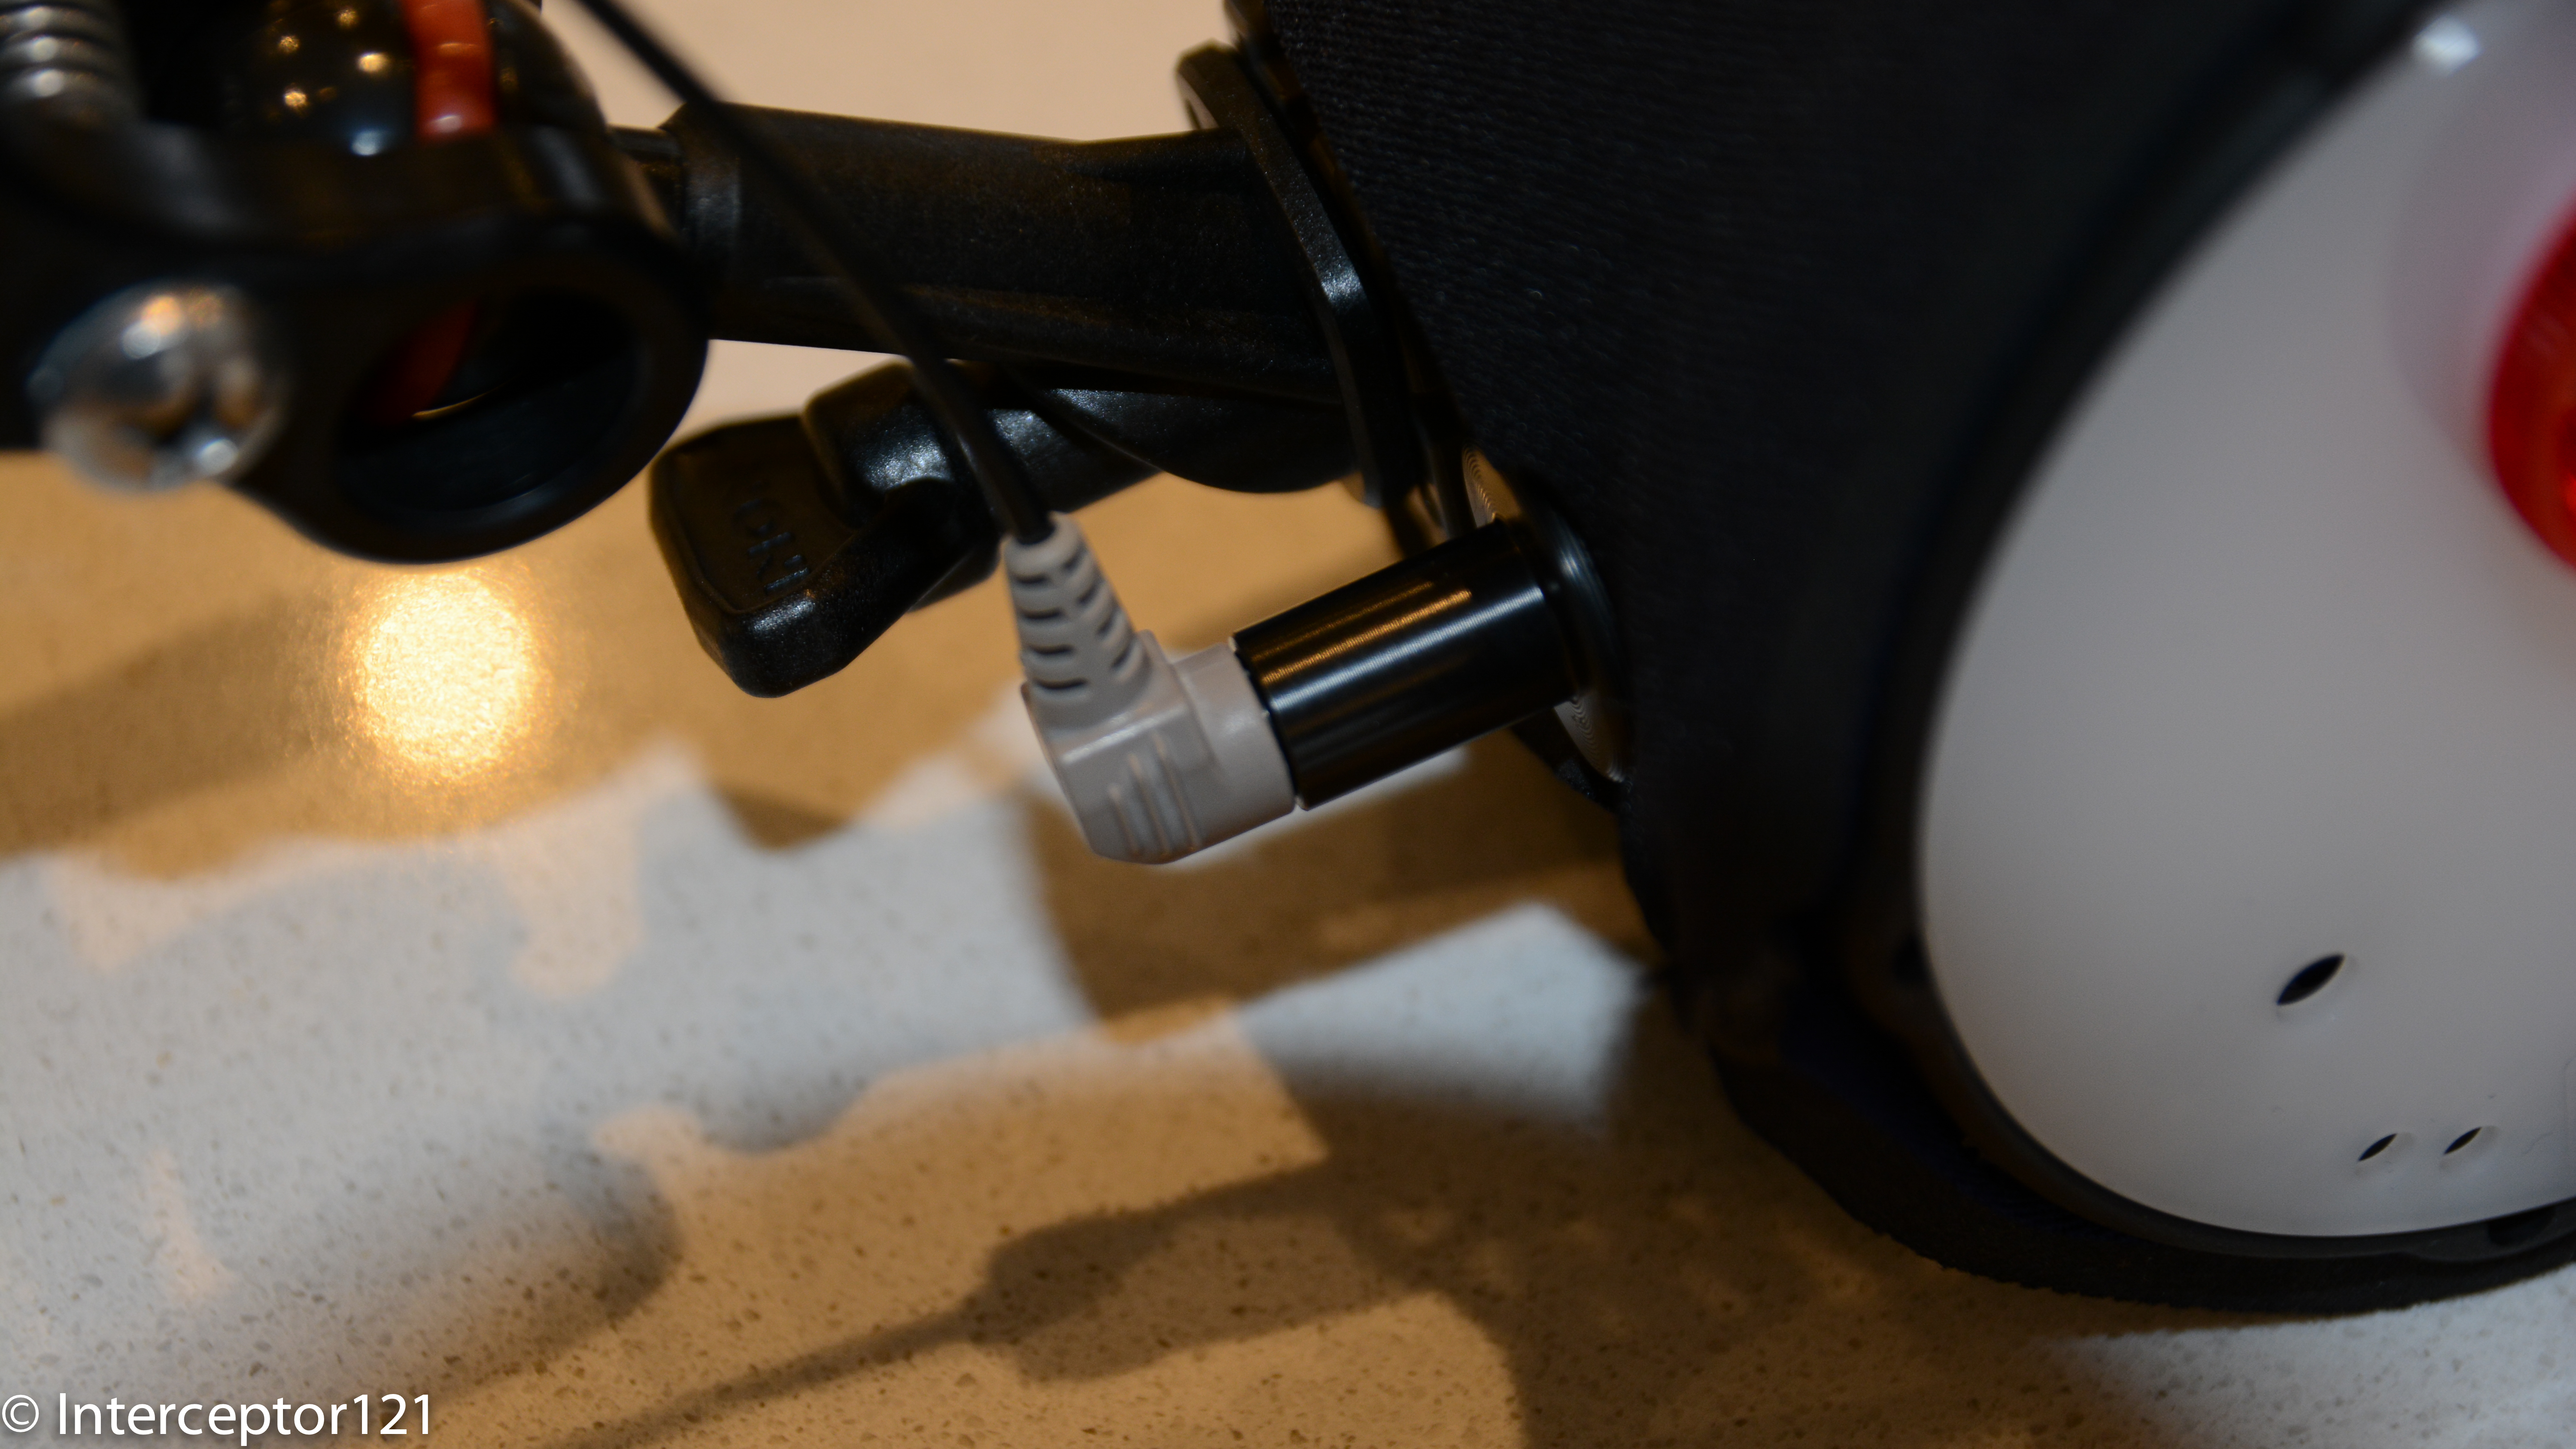
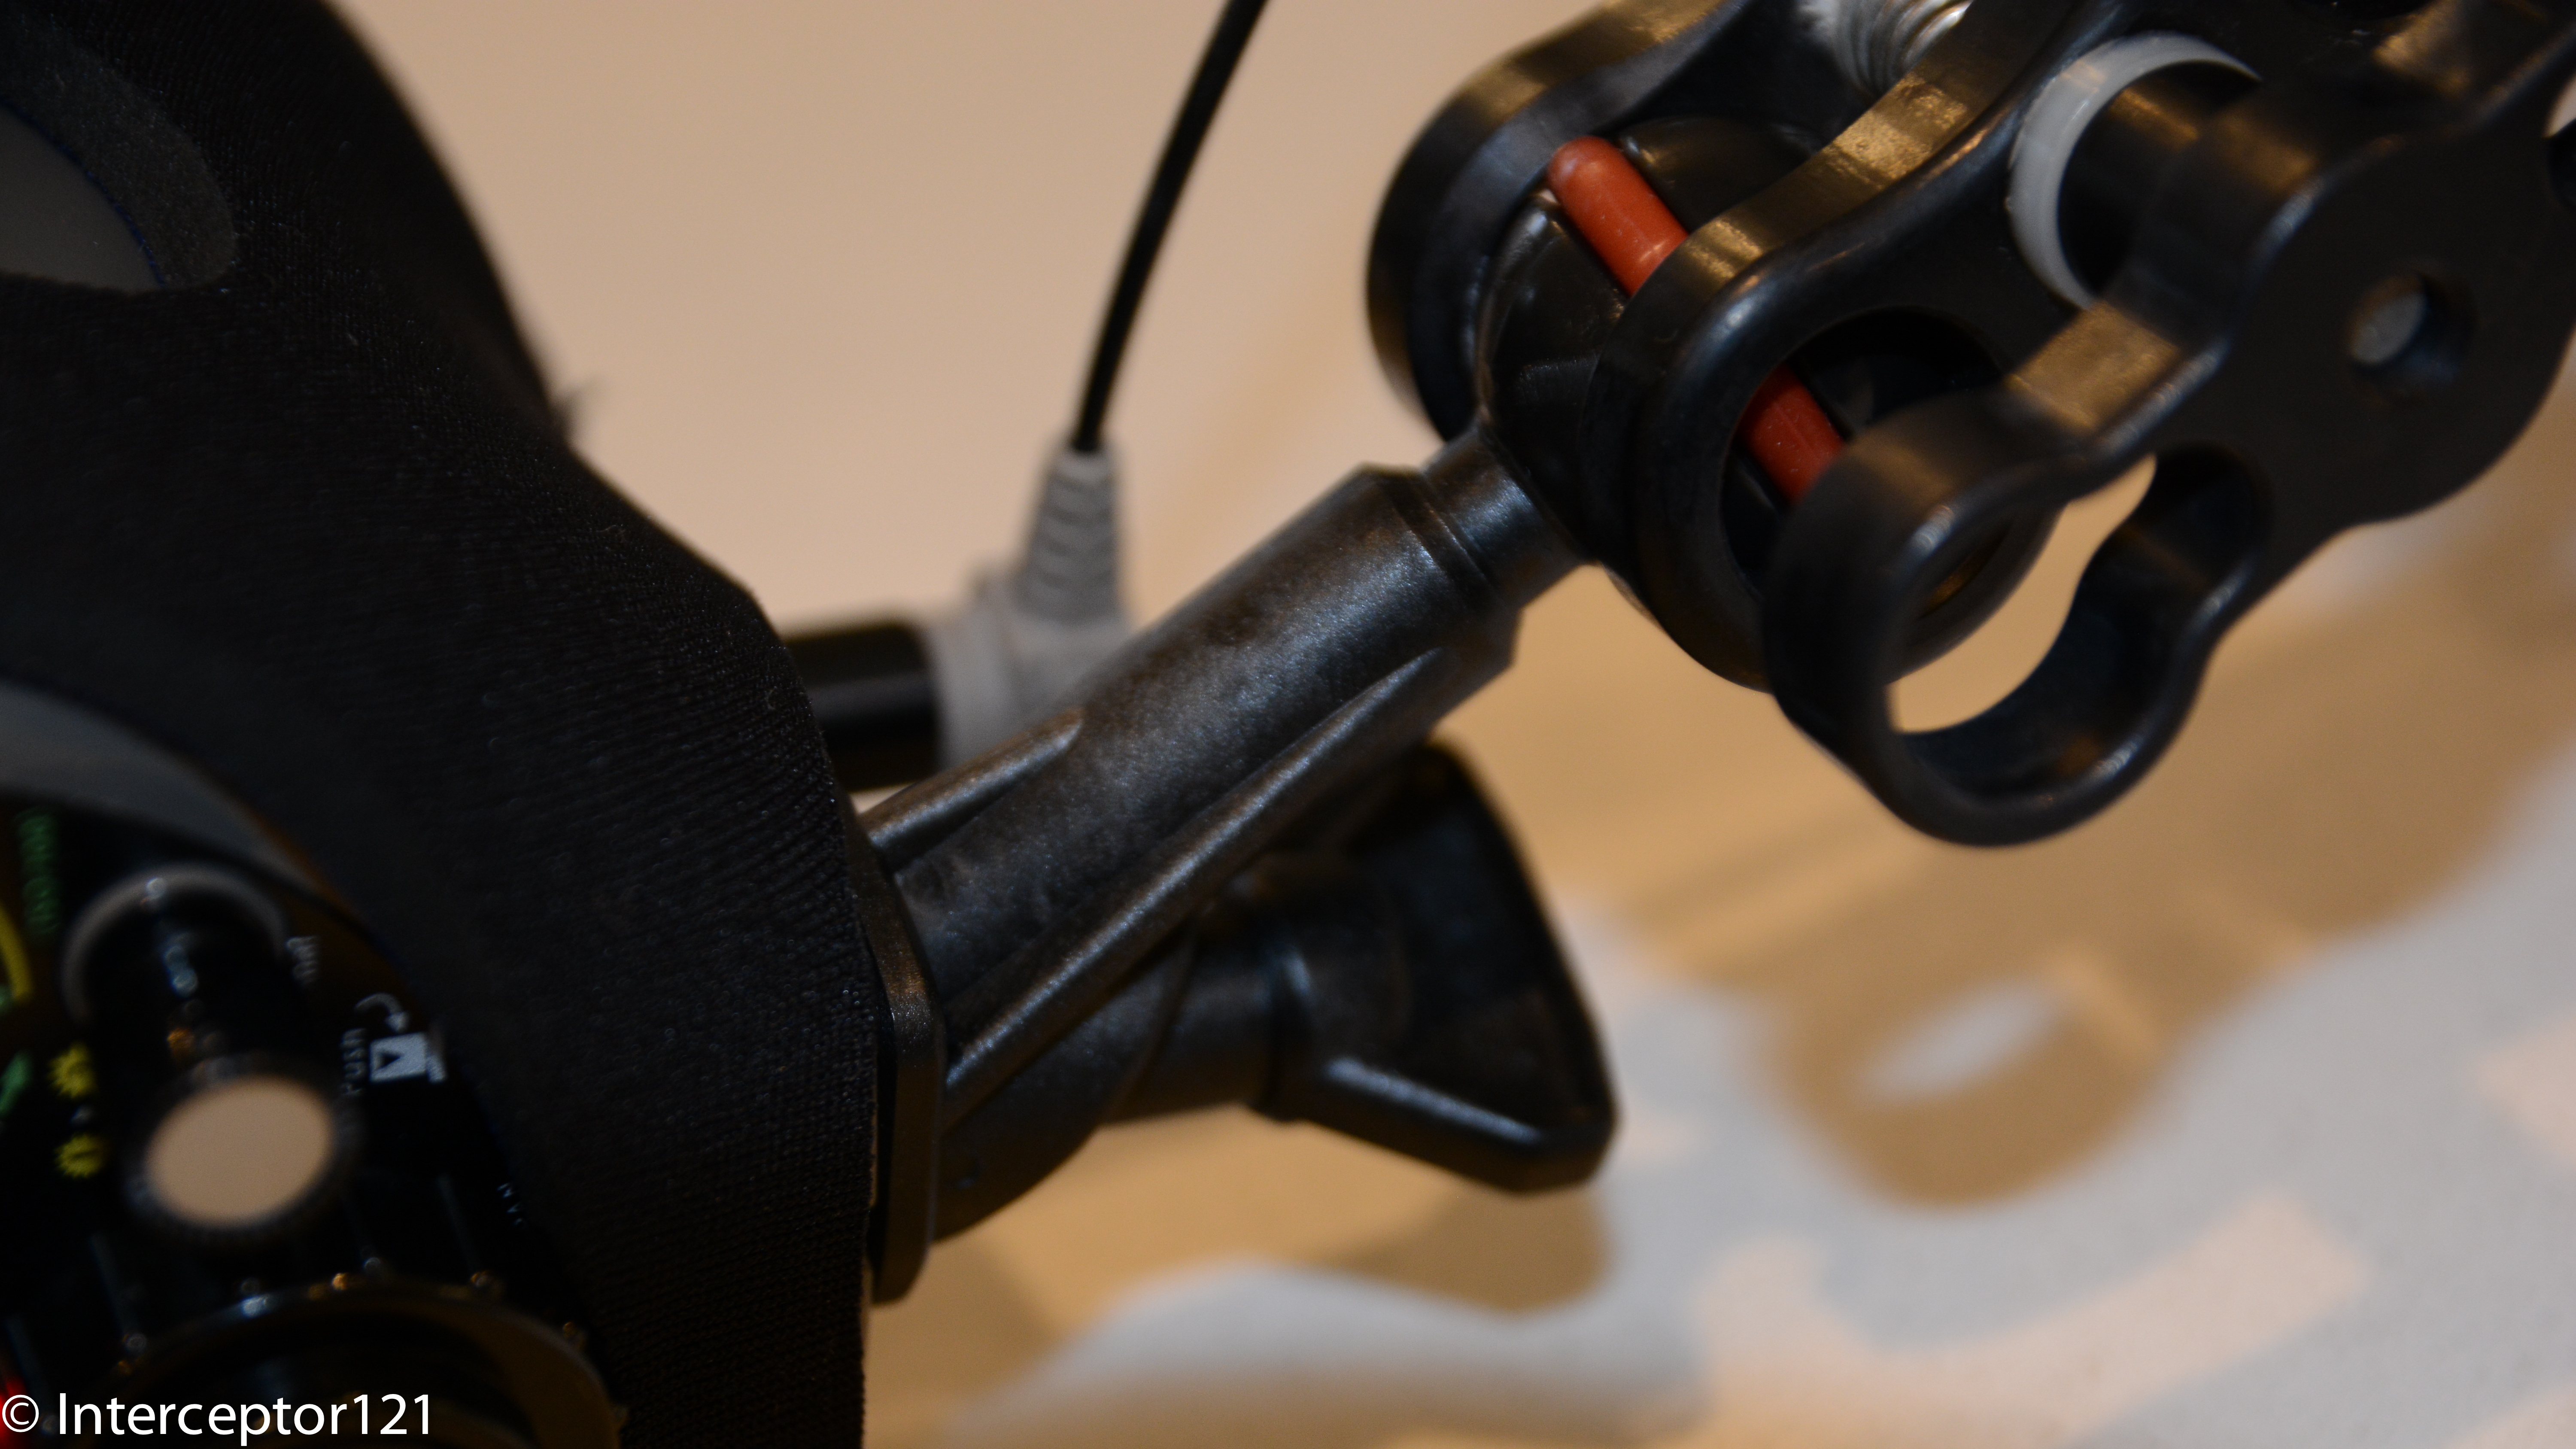
Flip Diopter on Nauticam RX100 IV
The flip diopter is a good solution for micro four thirds and DSLR but looks rather cumbersome on compacts as the image shows.
I asked Nauticam for a bayonet adapter and specifically if they could develop something for the Inon LD bayonet system that so far has been the reference for wet lenses for compacts and micro four thirds cameras.
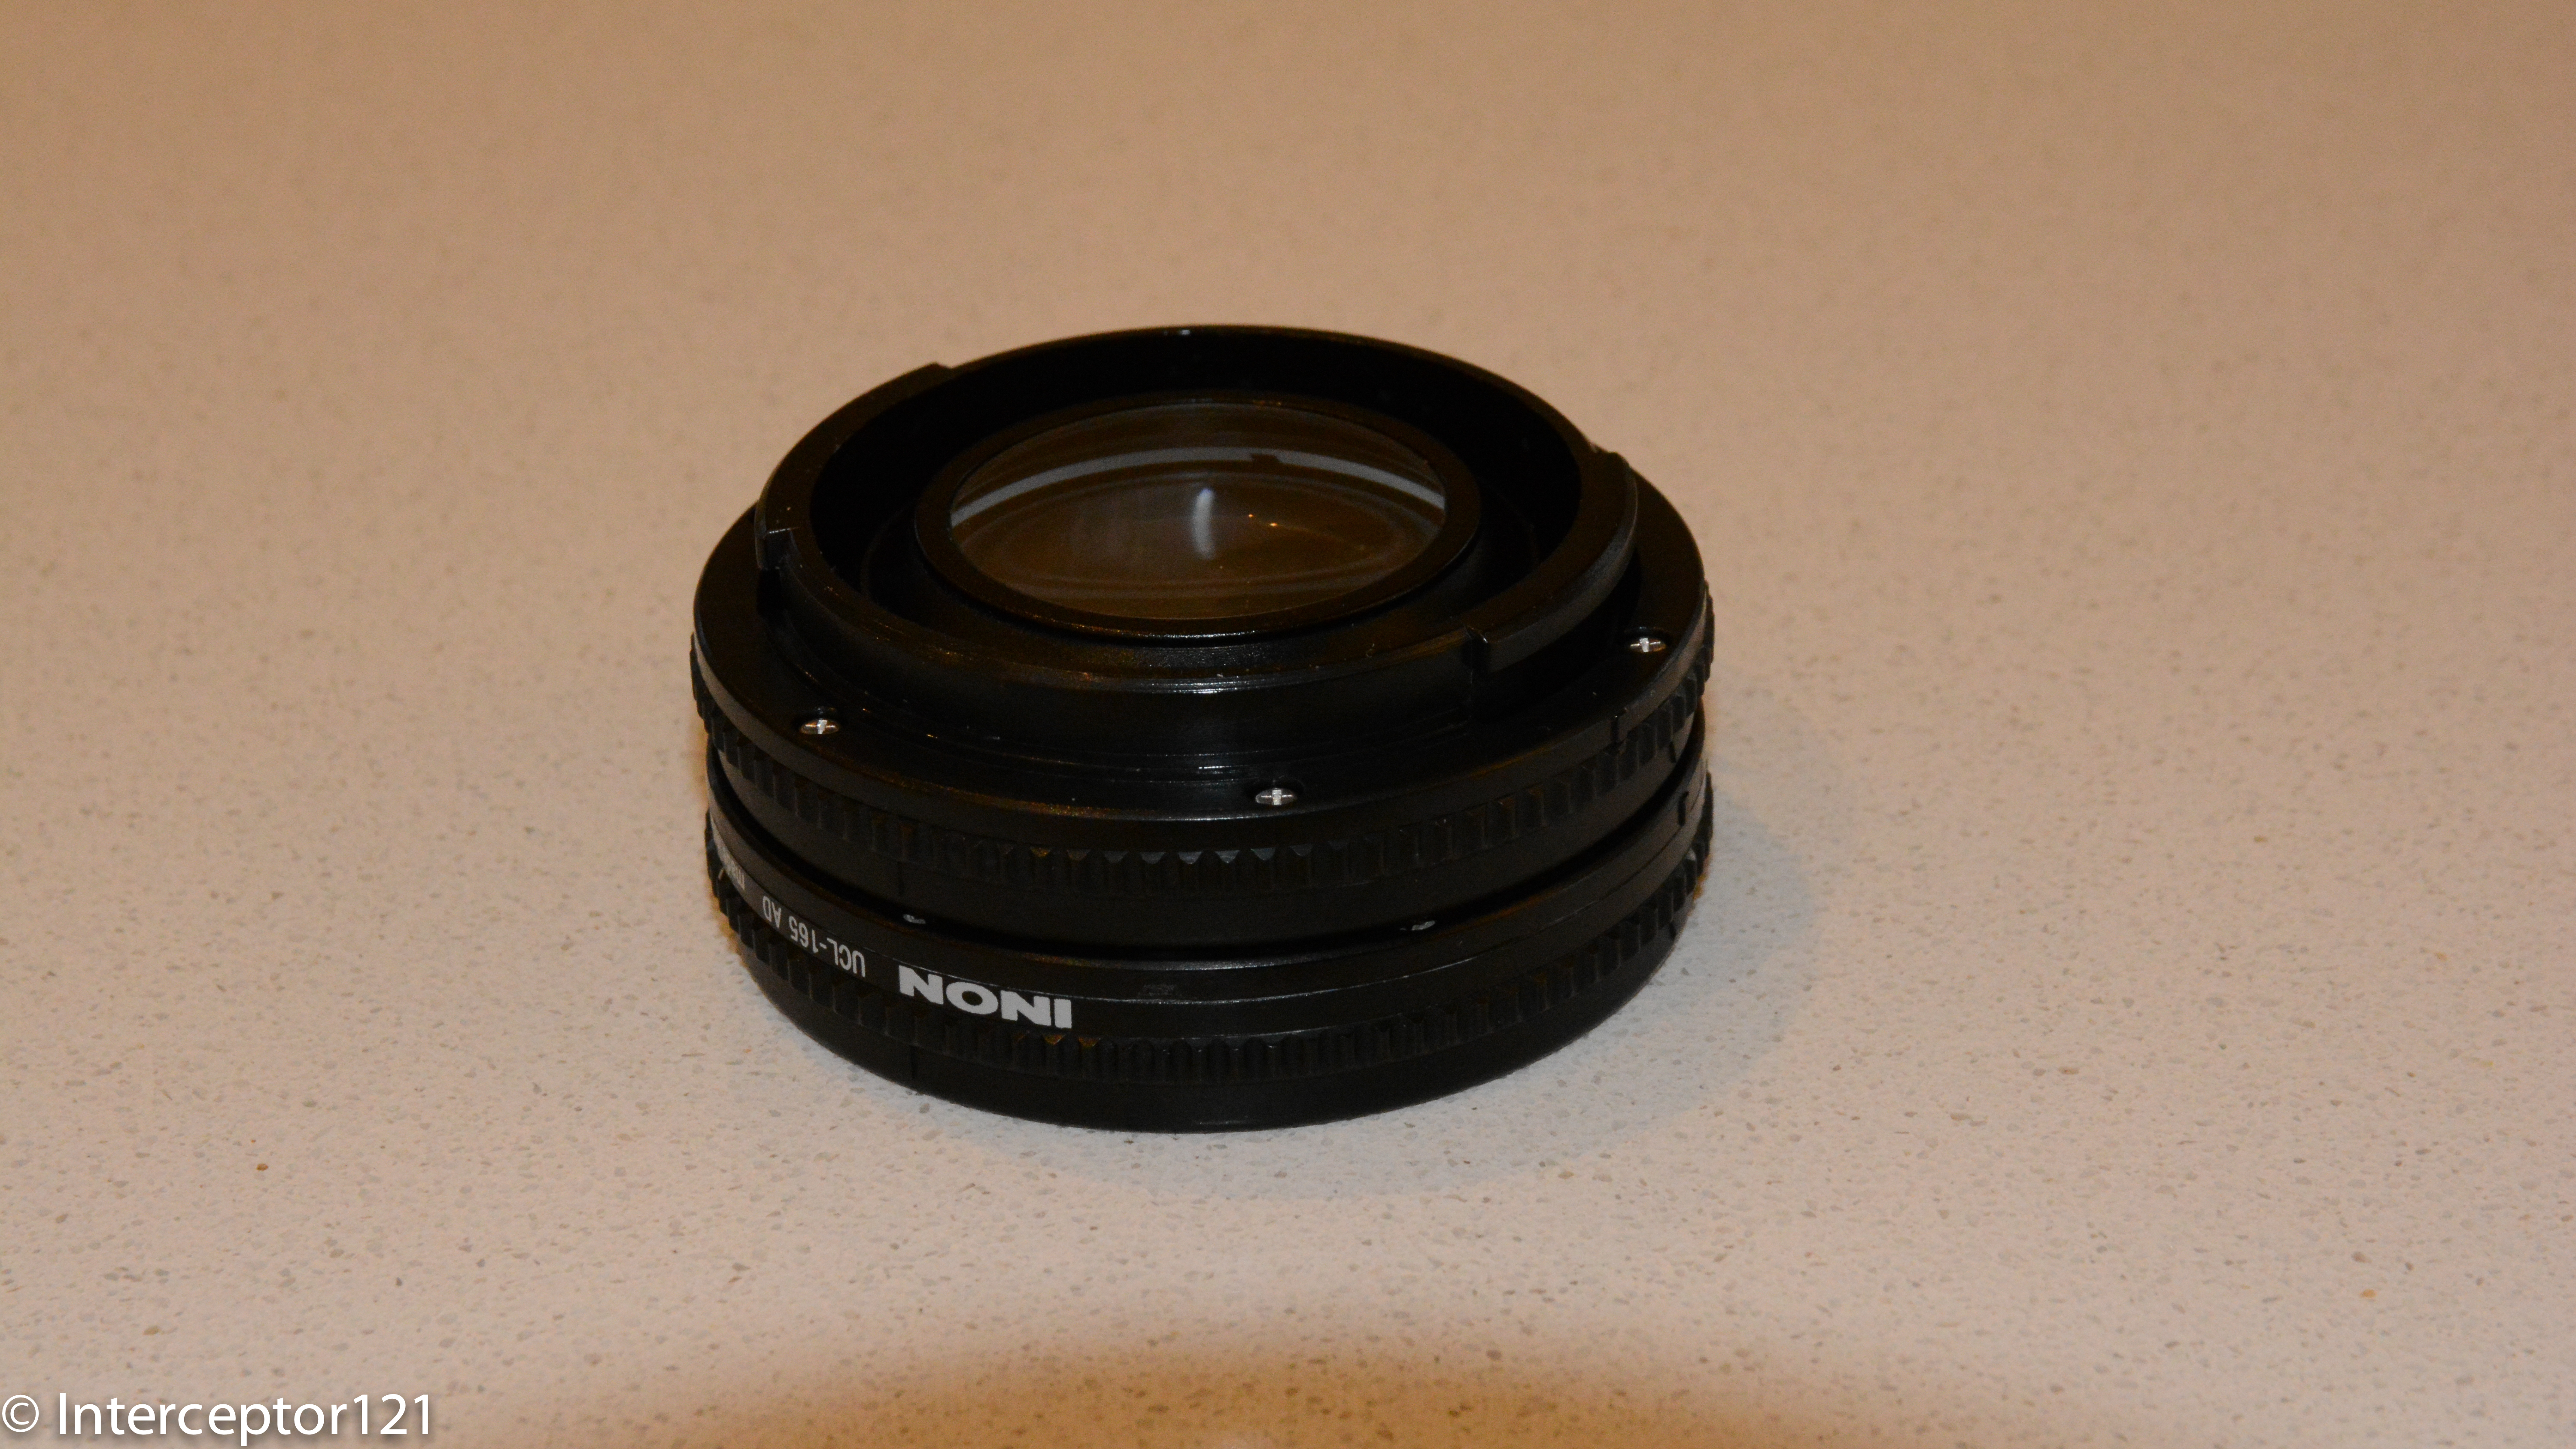
LD mount converter on RX100 IV
Edward told me that due to the fact that the WWL-1 lens rear element is so large the Inon LD system was not an option so they went off and developed their own system.
M67 bayonet mount converter
I would like to thank Nauticam again for making those parts available before general availability.
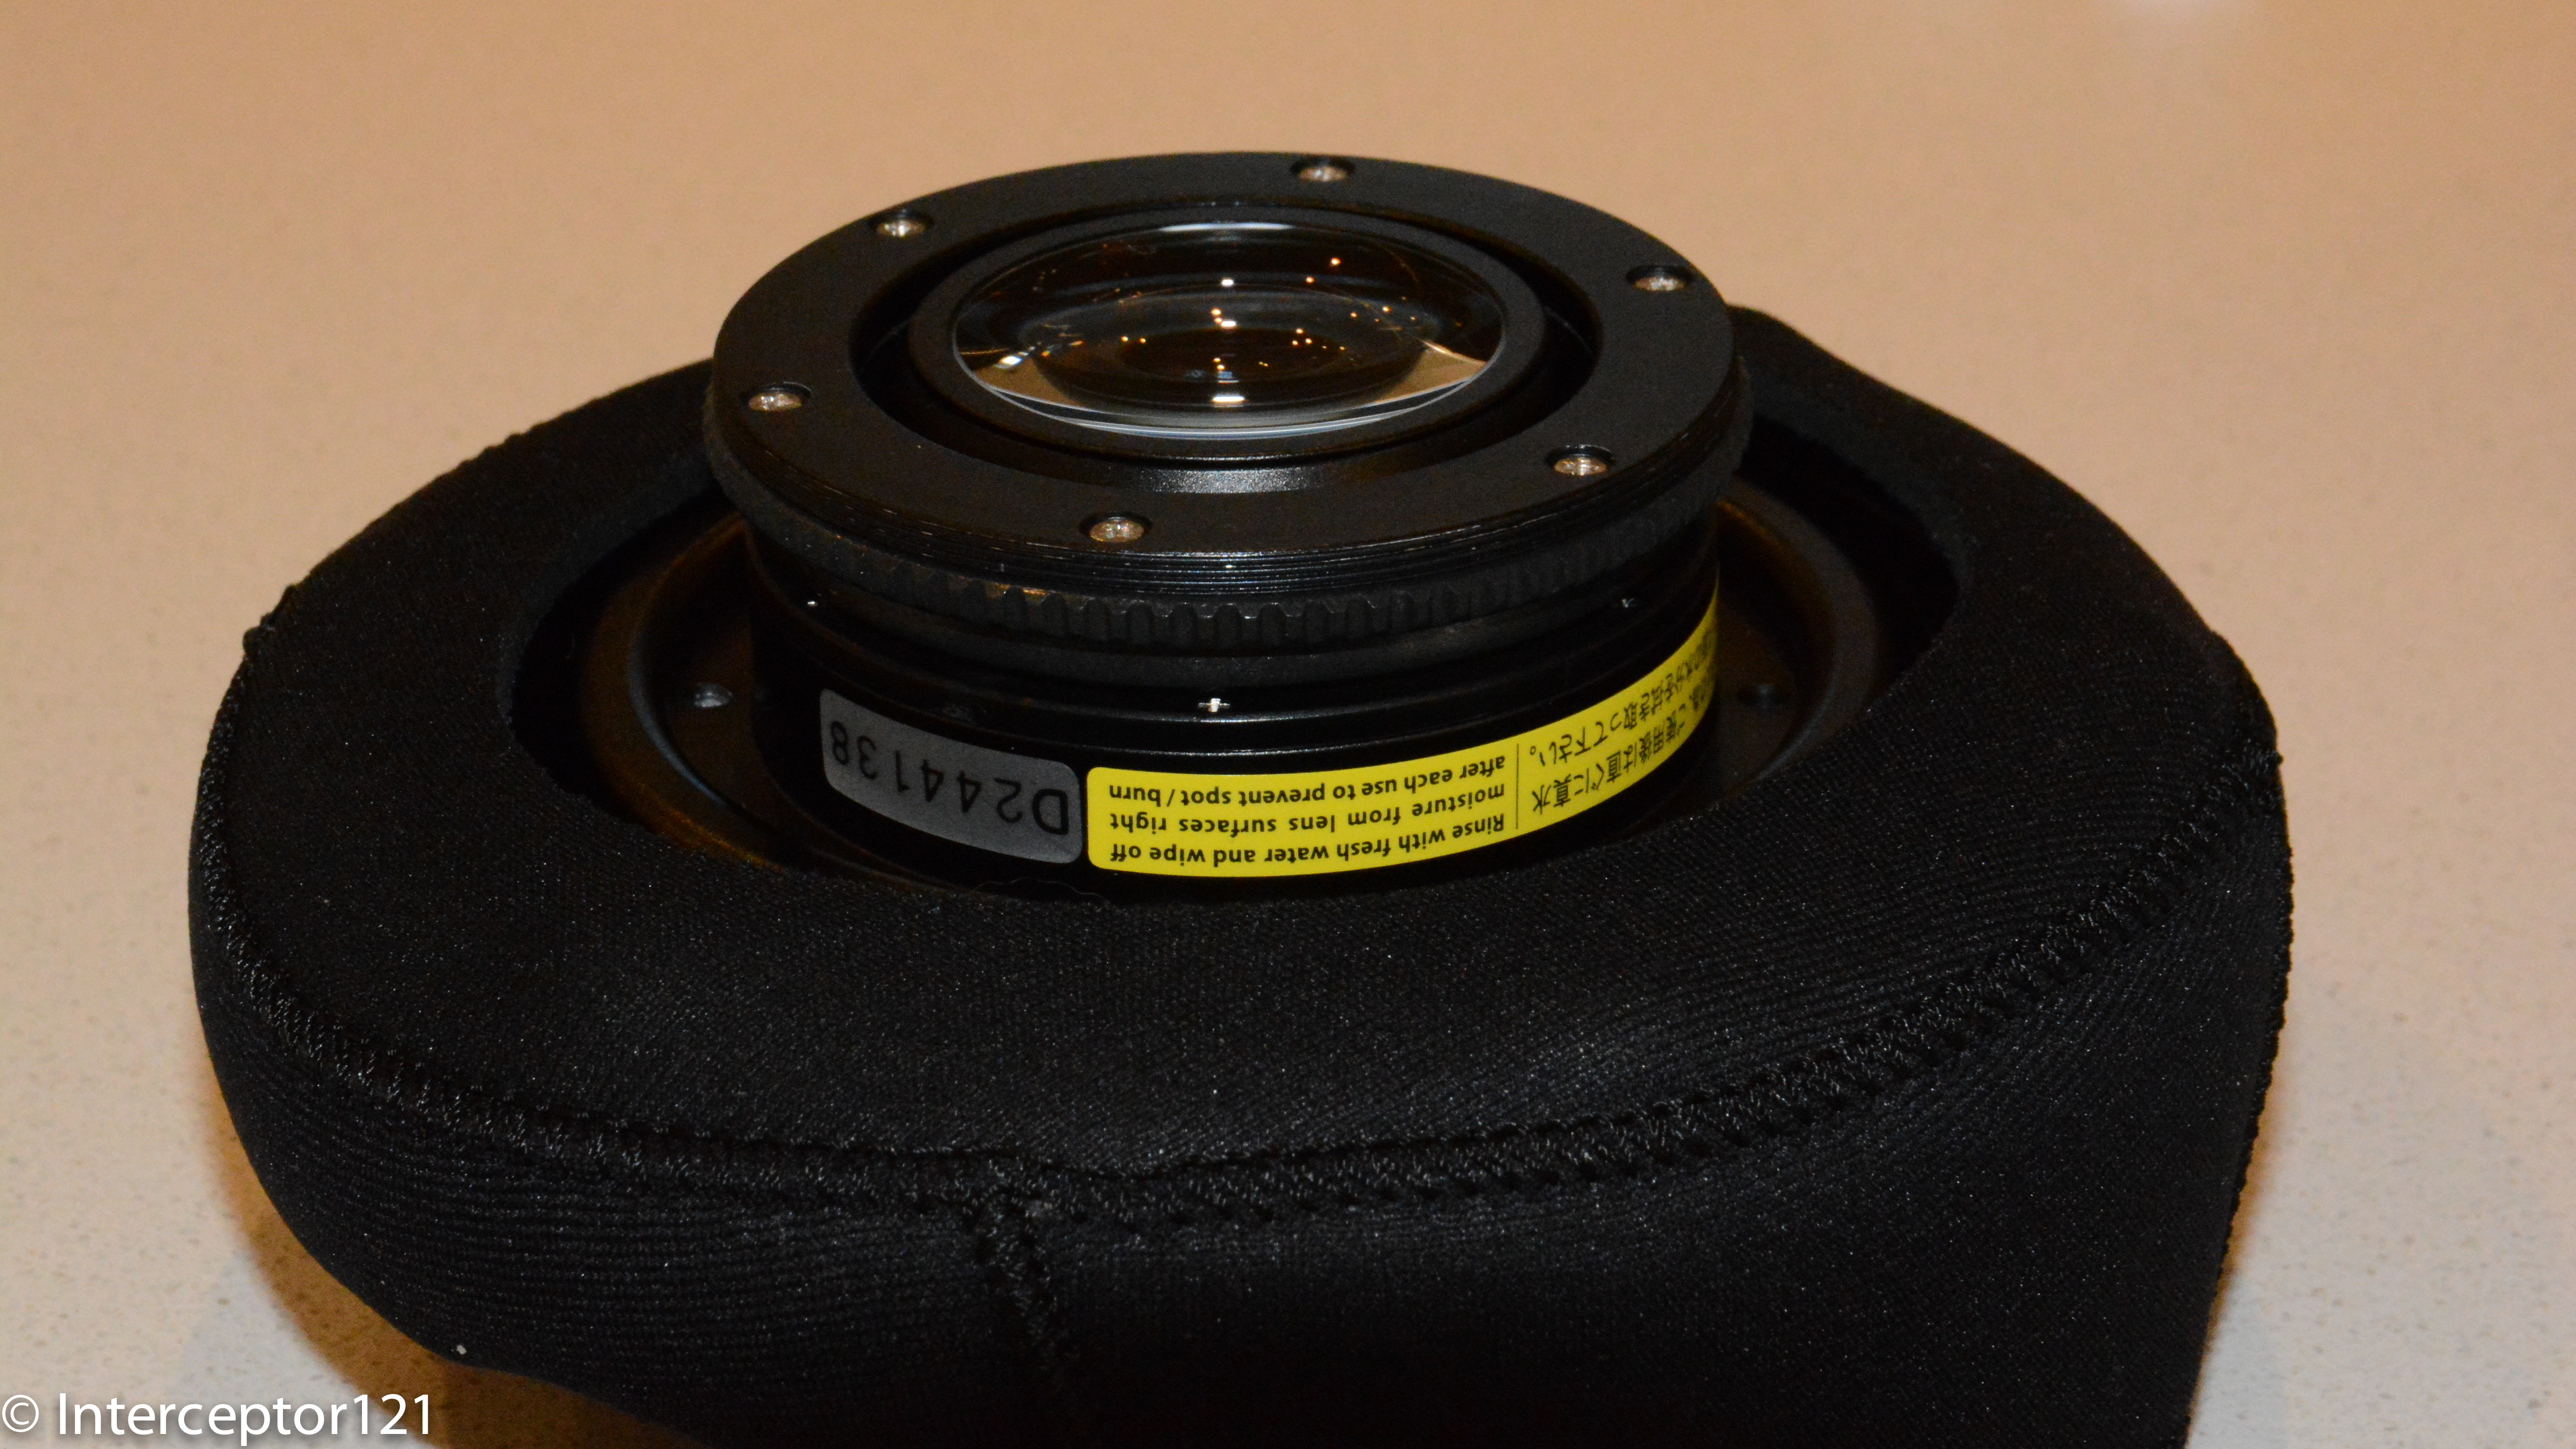
Looking a bit closer to it you can see that due to the specific construction with two concentric rings you need a special tool to apply the adapter on the port.
M67 bayonet mount converter The large item is to attache the mount to the port
Obviously as the Nauticam lenses use an M67 thread new adapter needed to be developed.
Mount converter for CMC/SMC
Nauticam does not use ABS plastic and uses aluminum for all their parts.
Now that the items have a bayonet adapter there is a need for a lens holder to put on the arms.
Lens holder looks too big for a 5″ arm segment
The lens holder is too big for a standard 5″ segment but looks in proportion with a longer segment.
Lens holder on 8″ arm segment
The adapter is larger than the LD mount and a bit big for compacts to the point that even with a tray the adapter tips the rig back.
Another challenge is that this system is designed for Nauticam lens that have protruding rear element so when used with standard lenses there is a gap between the port and the wet lens that can be counter productive, not the end of the world and frankly the Inon system has the same problem. This however means that if you wanted to use this system with a different wide angle wet lens this would be suboptimal.
I am waiting for Nauticam to ship me back the WWL-1 so I can show how that lens performs on this system.
Another observation of course is that if you use this system for wide angle the super heavy WWL-1 and the fact that the adapter only works on a normal segment means your rig will be very heavy in water. I am going to discuss with Nauticam the possibility to have the adapter on a float arm however their carbon arms do not have any mounting point to be used.
Stay tuned for a full review of this adapter with the new 29 macro port that looks very promising for video.
Youtube now supports double frame rate video 50p and 60p so what?
That is actually a legitimate question look at this example here which is a short clip from a trip to Barbados in 2013, this was originally shot on a Sony RX100 Mark II in AVCHD progressive 1080@50p 28 Mbps
If you don’t see the 50p option is because your browser operating system does not support it. You need the latest version of browser and operating system and a machine fast enough plus enough bandwidth. So for Mac this means OS X Yosemite and Safari and for Windows you need 8.1 and IE9.
I hope you enjoyed the clip now check this other one which is a instead shot at 25p with the same camera at 24 Mbps/
I think you can see by yourself which one looks better and it is the 25p clip despite an overall lower bitrate.
There are a number of reasons:
Underwater clips do not have a lot of action as you may think so extra frames go a bit to waste
The encoding which is how the clip is first recorded by the camera is not really that different.
The human eye does a great job at interpolating missing frames anyway
There is not really much more data in the 50p file compared to its 30p rendition
The image quality if you look at a still frame is better in the 25p clip.
There are of course benefits in shooting at double frame rate if you want to slow down the footage 50% speed but for what concerns your normal shooting you would say for that clip you could not tell.
Let’s think about it in simple terms if you have a clip shot at 25p with 24 Mbps you would expect something not quite double but a bit more for 50p instead you only have 28 Mbps. To be more precise you have 22 Mbps vs 26 Mbps video which is 18% more in Sony’s case. So that is not really much information more.
What is more interesting is the structure of the data what follows now is a bit technical but bear with me.
GOP Structure Row 1 and 3 Sony AVCHD 25p and AVDHD progressive 50p
The first and third rows are representation of Sony 25p and 50p clips. The green bar are I frames that you can think of like a JPEG image, the red bars are P frames or prediction the only contain a delta from the previous frame not a full image.
You can see that in the first row there are 12 P red bar between each green I bar. This means that the GOP or group of picture is composed of a sequence IPPPPPPPPPPPP that repeats indefinitely.
On the 3 row there is a representation of a Sony 50p clip you can see that now there are 23 P frames between two I frames.
So the increment in full frame is limited however if we look at the sizes we see that the I frames in the 25p clip are 12% bigger and also the P frames are smaller.
So in short if you look at the image quality the 25p clip has more information in the full frames as well as for the predicted frames whilst the 50p clips has more frames but overall with less quality.
Which means that unless you are shooting something that is really action packed or you want to do slow motion there is no actual benefit but instead a deterioration when you shoot AVCHD progressive underwater.
Note: if instead we were shooting at higher bitrates for the 50p the story would be different but at similar bitrate it goes as above.
You will also have noticed stream 2 and 4 in the image above I repeat them again here
GOP Structure Panasonic AVCHD 25p and AVCHD progressive 50p
The second and fourth stream are generated by a Panasonic camera and they look different. You will notice now the existence of frames with the tag B and also that some of the P frames have a green slice.
This means that Panasonic AVCHD implementation has two features that Sony does not have:
1. It has B frames which not only predict future frames from the past frames but can also reference future frames in the prediction (sounds crazy but it works basically the frames are stored in memory before past ones are saved)
2. It has slices for images so on one frame there can be an element of prediction from a previous frame and another element completely newly generated for example if the prediction was completely in a part of picture where there was a lot of movement.
H264 encoding has motion compensation so things that do not change are referenced and new parts are predicted or in this case partially created from scratch.
So the Panasonic encoding algorithm is much superior to the Sony one for AVCHD this explains why a small camera like the Panasonic LX7 could produce video to compete with a larger sensor RX100 with almost double number of megapixels.
What makes me laugh is when photography magazines jump to conclusion on the video quality of a camera shooting a static frame!
Of course if there is not movement the camera with the best IQ in still pictures will prevail however when you record motion all of that becomes somewhat less relevant as compression impacts the quality.
So the more effective compression algorithm of Panasonic beats Sony to the point that even a larger sensor size seems not to matter.
This explains why when you take a real life clip Panasonic cameras perform better in video despite a worst image quality in still images.
The difference between the 28 Mbps and 24 Mbps follows pretty much the same trend of the Sony clips there is not enough bitrate to justify the double frame rate unless there is a lot of action in your clip.
So to conclude if you are shooting AVCHD the normal 24/25p more will have better image quality and will be more suitable to scenes with a lot of dynamic range, will give more colour and contrast. If there is really a lot of action or you want to slow down the clip shoot in 50p bearing in mind that image quality will actually drop if you look at a still frame in isolation.
Underwater contrary to what you may expect things do not actually go that fast and most of the movement is in a specific part of the frame or in a limited part of it so AVCHD 24/25p gives better results.
Finally when looking at a camera for video check for real clips do not look at resolution charts designed for still images as they give very little indications on the quality of your videos. Also if there are any tests make sure those are on the JPEG images that share similar processing engine not on RAW files are you are not shooting RAW video. And finally consider that at similar bitrate some manufacturer have a clear edge on others when it comes to real time compression in our example Panasonic produces similar quality to a Sony camera with overall a better sensor but poorer compression.
I receive so many queries about equipment that I thought I would put some of my items on sale.
My cupboard is near enough to explode and I need to streamline the equipment I have. Currently I have 3 strobes, a huge selection of ball and clamp arms, 3/4 and 1/2 locline arms, float arms, floats, video lights, tray bases, around 15 clamps and some 6 macro wet lenses and 3 wide angle wet lenses with 3 different mounts.
I guess it is time for a clear up so I will add a section with items on sale where I will list some of the combination items.
The idea is to provide a full set of lenses or a tray + float solution as those seem to be the most asked for items in my set up.
So if you look on the menu you will see the link Sales items with details of the various sets. I can also sell the items individually but I think this makes little sense as I’d rather do that on ebay.
Many people read my posts and then go to gear shops but there there is always a little mistake or problem getting the whole set up from here you avoid that. I priced the items based on 50% of retail UK price and I would ship to UK and Europe, other overseas will attract import duty so it is not worth it in my opinion.
If there is anything you like use the contact form on the relative page to inquiry
Snell’s window is a phenomenon by which an underwater viewer sees everything above the surface through a cone of light of width of about 96 degrees [From Martin Edge: Underwater Photography].
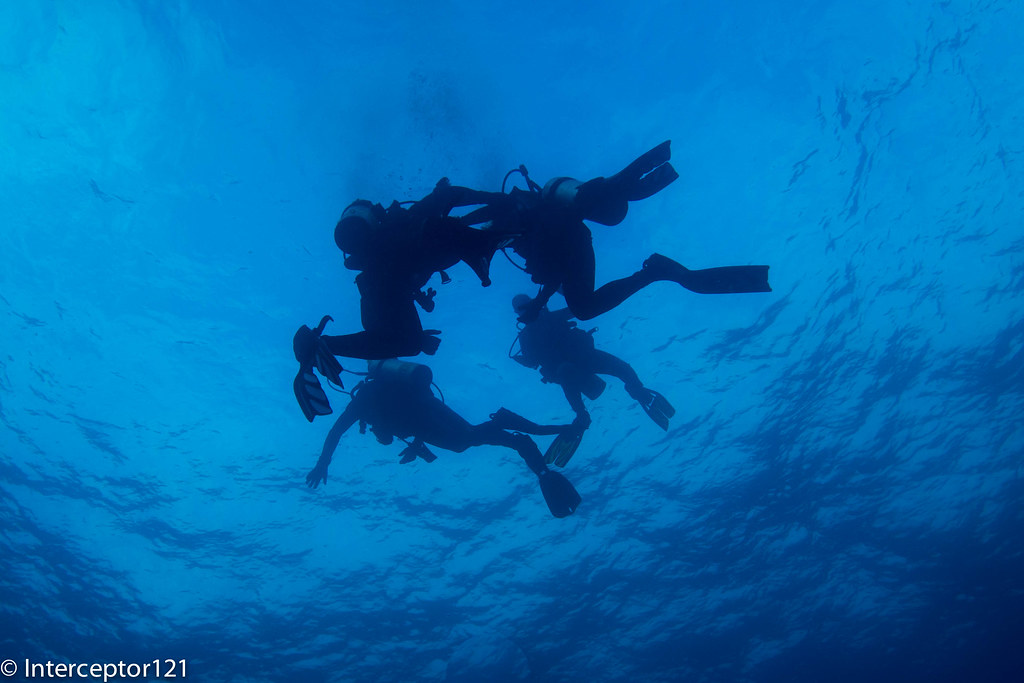
During my last Gapapagos Trip there was a bit of an issue in terms of photography subjects, in essence most of them were fairly big like sharks, turtles, eagle rays and of course divers.
After a while shooting or trying to shoot those uncooperative models I had the idea to try and do different things such as silhouettes and Snell windows. You can also combine both as we did in this case.
So what do you need to shoot image of a Snell window:
1. A lens that is wide enough, you need a bit more than 96º field of view to take the whole window
2. Something interesting on the surface (if you have calm water you can see right through)
3. An interesting subject as silhouette to contrast the clear water if there are waves and you can’t easily see through.
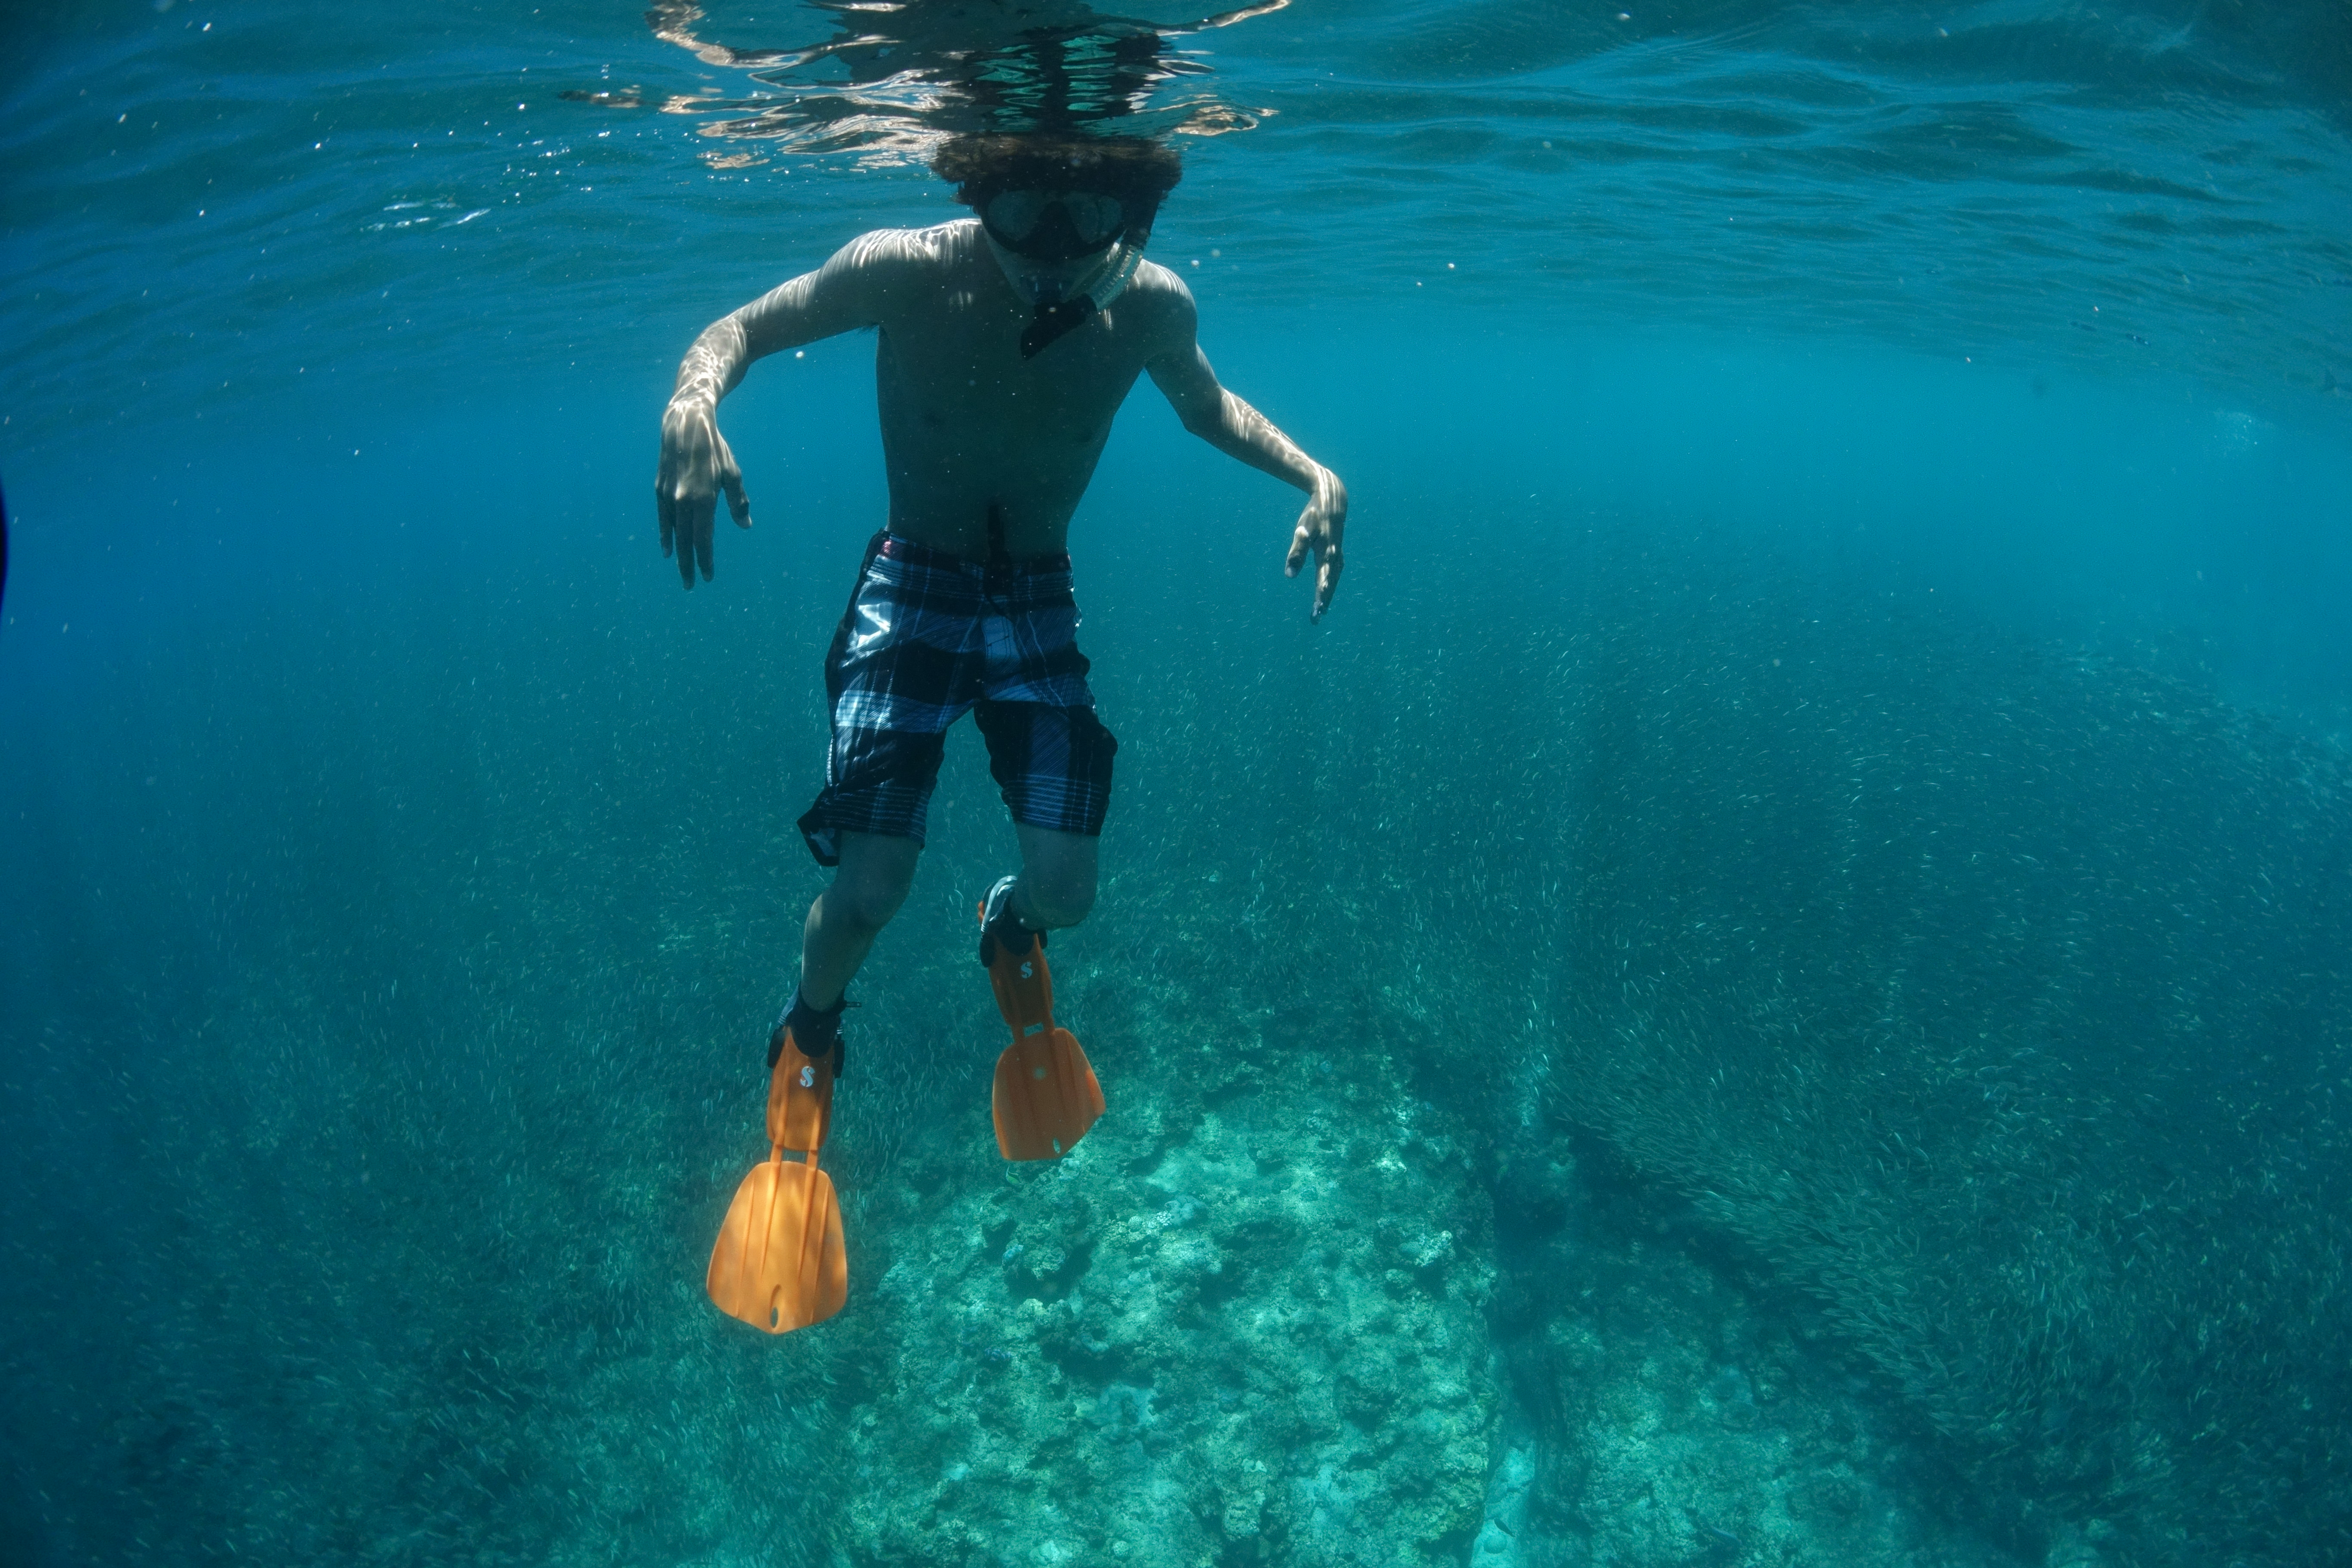
A normal flat wet wide angle lens for our compact camera is not sufficient to capture the snell’s windows as in this example
Divers at Safety Stop – taken with Inon UWL-H100 at wide end
Take into account that even with a fisheye lens on an SLR you can’t capture the Snell’s window on the vertical axis as the field of view will fall short a few degrees.
With a compact camera a semifisheye lens will capture the edges of the window if correctly aimed on the diagonal and horizontal dimensions and will fall short on the vertical.
Snell window divers exiting the water or ascending – UWL-04 semi fisheye lens Canon S95
I am reporting some of the calculated field of view for the most popular lenses at present for compact at 3:2 image format
Wet Lens
Diag FOV
Hor Fov
Ver FOV
Flare/Ghost
UWL-04
151.95
123.22
79.85
Ghost Possible
UWL-100 28AD
149.01
120.97
78.48
No
UWL-28
160.56
129.75
83.81
Both
UWL-H100
157.85
127.71
82.58
No
All those lenses will take a good Snell’s window I have not tried the UWL-28 and I have some concerns this lens may flare as it usually does but I do not know for sure.
Both the Inon lenses produce sharp images with no defect.
In general small sensor cameras like the Canon S series will work fine with the fix/idas lenses and should produce good results also of normal shots through the water.
Using the UWL-04 or UWL-28 with large sensor cameras like the RX100 there could be a sharpness issue a larger apertures so make sure you close that at f/8 or smaller instead of using the shutter speed to balance exposure if you want to go through the water.
Snell’s windows are uncommon with compact camera shooters as they are considered an advanced subject but they can be taken. I will be taking more in a next trip to Egypt I hope for calm surface conditions so I can go through the surface with the shots. Failing that this is very easy to practice in a swimming pool.
In one of my first posts on this blog I covered the subject of setting white balance with the Sony RX100.
It may be useful to have a quick recap on the topic:
For pictures setting a custom white balance is not useful if you shoot in RAW as the amount of correction in post processing is far superior*
For video (that is shot in compressed format) setting the appropriate white balance for your shots is essential
There are exceptions to this rule, some people like to set custom white balance even in RAW when they shoot ambient light pictures. This is because changing the white balance shifts the histogram and therefore if you had taken a shot with an incorrect white balance you may retrieve wrong information from the histogram. Personally I do not do this most of the ambient light shots I judge by eye and not histogram or are silhouettes anyway but may be useful to know.
The other exception is when you shoot a raw video format with bit rates in excess of 100 Mbps, in that case the footage is captured in a bland format lacking any real depth and contrast and things are corrected in post processing. This does not apply to any consumer camera that works in AVCHD or Mp4 with bit rate lower than 50 Mbps in any case.
It follows that setting the appropriate white balance for our videos is something that is important otherwise our clips will look dull, green or have some sort of color cast we do not like.
As many of you RX100 I have experience with the infamous Custom White Balance 9900K error. In theory if you set your custom white balance with the camera in P mode over a neutral target this error should only occur if the color temperature is out of range (>9900K) unfortunately this is not the case and you get this error pretty much always with our beloved camera. At the beginning I thought that this was due to my cheap PADI slate, but after various attempts against my hand, sand, buddy’s tank, the sun I have to think there is some genuine issue here.
So I got myself whibal card, that on my test on land performs amazingly well with both the RX100 and the Nikon D7100.
The first thing we can realize is that the auto white balance setting is rather cool in outdoor scenes, whilst it tends to be warmer in indoor scenes with artificial light.
Auto White Balance
When you take a custom white balance the colors appear warmer and the bluish cast departs and the yellows come back.
This is particularly bad news if you shoot underwater without a filter and think of using auto white balance as those results will be pretty ugly.
The whibal card has a specific black mark that if illuminated tells you the white balance reading is incorrect because of reflections. I thought this was the key to the 9900 Error, unfortunately I was wrong.
It just fails 100% reliably really painful so I could not get rid of my trusted red filter for the Galapagos trip. I even tried setting the white balance with the filter and it would fail as well.
So I went back to auto white balance and red filter and I am pretty happy with the results, many people have asked me if I have manipulated the footage in post processing as the colors look very deep and some have even said unnatural. Even so shooting at 1/50 means a relatively low ISO and in the specific trip another f/stop of aperture was not really significant but I would have like to have the option of working without the filter, sadly this was not an option.
For what concerns white balance just a few things I want to say:
1. At depth there is no color anyway so what your eye can see it is not what it is, the proof is when you use lights or strobes things look much better than the naked eye. Using your visual as a reference can produce dull results.
2. You have to set an appropriate white balance for your scene, this means removing the cast. If a scene has no cast and the colors look saturated this is not a white balance issue on its own but may due to the camera settings. The RX100II is one of the less saturated camera on the market. The mark I instead is pretty saturated take this into account.
3. Footage that looks dull IS in fact ugly. The fact you set custom white balance with or without a filter does not mean that results is the perfect result, there is no such thing in fact and as colors disappear at depth white balance is not that effective anyway
Nick Hope sometime ago published some interesting tests on wetpixel
It turns out that there is more than meets the eye.
Just to clarify the only color correction in my Galapagos clip is:
1. In the scene of the dolphins I was pointing the camera upwards and did not have time to take the filter off so ended up with a red cast, I performed a white balance adjustment in iMovie on the opposite value of the tint I was getting until I liked it.
2. In the scene where there is a group of Galapagos sharks and the close up of the eagle ray I have reduced the blue gain as it was over saturated
In all other cases the only changes were increase of contrast or reduction of brightness. When the water was green like at the end in the Punta Vicente Roca scene I did not touch it to make it look artificially blue.
Again for those who ask I use a deeproof push on filter for the Inon UWL-H100 this filter is my preferred for the only reason that is actually the only one available on the market that fits on the lens. Personally I would much prefer a plastic filter like the ikelite/URPRO but this one is glass. It seems to correspond to a deep sunset 2700K with magenta tint of +5 on the RX100 but I have no tools to measure it I can only say it works.
So my recommendation for the RX100 is to get this solution as the Inon lens has the best optical quality and a hood that comes very handy to reduce flare. There are other lenses that fit the RX100 but have no hood. Obviously an not even considering the fisheye style lenses as distortion is ugly and placing a filter under the lens is a very bad idea.
After the various Backscatter, Bluewater photo, and other shops compact cameras reviews I thought of putting my 10 pence in as well.
Most of those reviews you find are written by people who shoot DSLR and then occasionally go and take a compact in water to see how it goes. For what concerns underwater use I only shoot compact and I believe I know how to navigate into features and limitations of compact camera quite well so here is my view on the subject.
The first hint when you look at a high-end compact camera is to check if Nauticam makes a housing for it. If not maybe your camera is not as good after all. There are some exceptions of course.
Categories
I have ranked compacts according to the following shooting categories:
Movie
Ambient Light
Macro
Portraits
Close Focus Wide Angle
All purpose cameras
When possible there will be a top 3 in each category.
The Compacts
I have considered only the following cameras
Canon G16
Canon S120
Olympus XZ-2
Panasonic LX7
Sony RX100II
The Fuji X20 is a potential addition but I have not found anyone that actually shoots it underwater so I abstain from judging here.
Best Cameras for Movie
In order to score in this category the cameras need to have full manual exposure control in movie mode and be able to shoot double frame rates for the system of choice PAL or NTSC.
This is my appraisal:
Sony RX100II
Panasonic LX7
N/A
Canon cameras do not offer exposure control in movie mode, Olympus video is pathetic. Not possible to even consider a number 3 here.
Best Cameras for Ambient Light
Here I consider shots without strobes with a view angle of 100º diagonal you need a wet wide-angle lens to take those shots.
Here are the rankings:
Sony RX100II
Panasonic LX7
Canon S120
Olympus lags behind in image quality and the Canon G16 does not have any wet lens that allows to take those shots without strobes.
Best Cameras for Macro
I am looking here at shots are real 1:1 reproduction ratio and how easy is to take those shots in terms of autofocus and depth of field. In order to achieve this level of magnification a close up wet lens is necessary for all cameras. No compact camera achieves real macro with the bare port underwater.
Here are the results:
Canon G16
Canon S120
Panasonic LX7
The Canon G16 in virtue of a 140mm focal length at telephoto end gives the highest magnification ratio, the Canon S120 follows closely same image quality less magnification. The Panasonic LX7 has only a 90mm equivalent lens however the autofocus is incredible so you can use +10 diopters very easily and it is the only camera to really offer Bokeh.
The Olympus XZ-2 lags in terms of image quality, the RX100II has great image quality but little magnification, you need a +10 diopter to give a 1:1 reproduction ratio and focus is difficult because of shallow depth of field due to the large sensor.
Best Cameras for Portraits
Here we are considering shots with the bare port at 35mm focal length using strobes. Here is the ranking:
Sony RX100II
Panasonic LX7
Canon S120 & Canon G16
Whilst the RX100II has the best image quality it comes a bit as a surprise why the LX7 gives better images than the Canon. The reason is that Canon tend to have a very unbalanced color range with over saturated red. This does not go away with RAW images as it affects the whole spectrum. It is possible to correct this using blue diffusers for strobe but this is just a patch, the LX7 tend to give much better balanced images.
Best Cameras for CFWA
Close focus wide-angle is shot with a fisheye like lens, using strobes typically at small apertures here are the rankings:
Sony RX100II
Canon G16
Canon S120
It is quite clear that the RX100II with the widest choice of fisheye lens and the highest dynamic range is the best camera for the job, but the addition of the Inon Zoom lens helps getting the G16 in this category, the S120 follows with similar results. The LX7 does not offer a fisheye options sadly and the XZ-2 lags behind in image quality compared to the two canons.
Best Versatile Still Cameras
Here I look at cameras that can shoot all type of shots from macro to ambient light.
Sony RX100II
Canon S120
Olympus XZ-2
The lack of fisheye options cuts out the LX7 and the poor performance of zoom wide-angle lens at wide end kicks the G16 out.
Best Overall Camera Still and Movie
Taking the previous list and eliminating the cameras that do not offer exposure control in movie mode this is the result
Sony RX100II
NA
NA
So the Sony RX100II is the only real all round camera and this explains why it beats the other in terms of sales.
During the London Dive Show I attended a talk from Martin where he covered a number of shooting situations and how to deal with them in terms of composition and settings.
There was a promotion for a two for one tuition day with him that my buddy was keen to take so few months later we made our way to Dorset for a day of underwater photography with Martin.
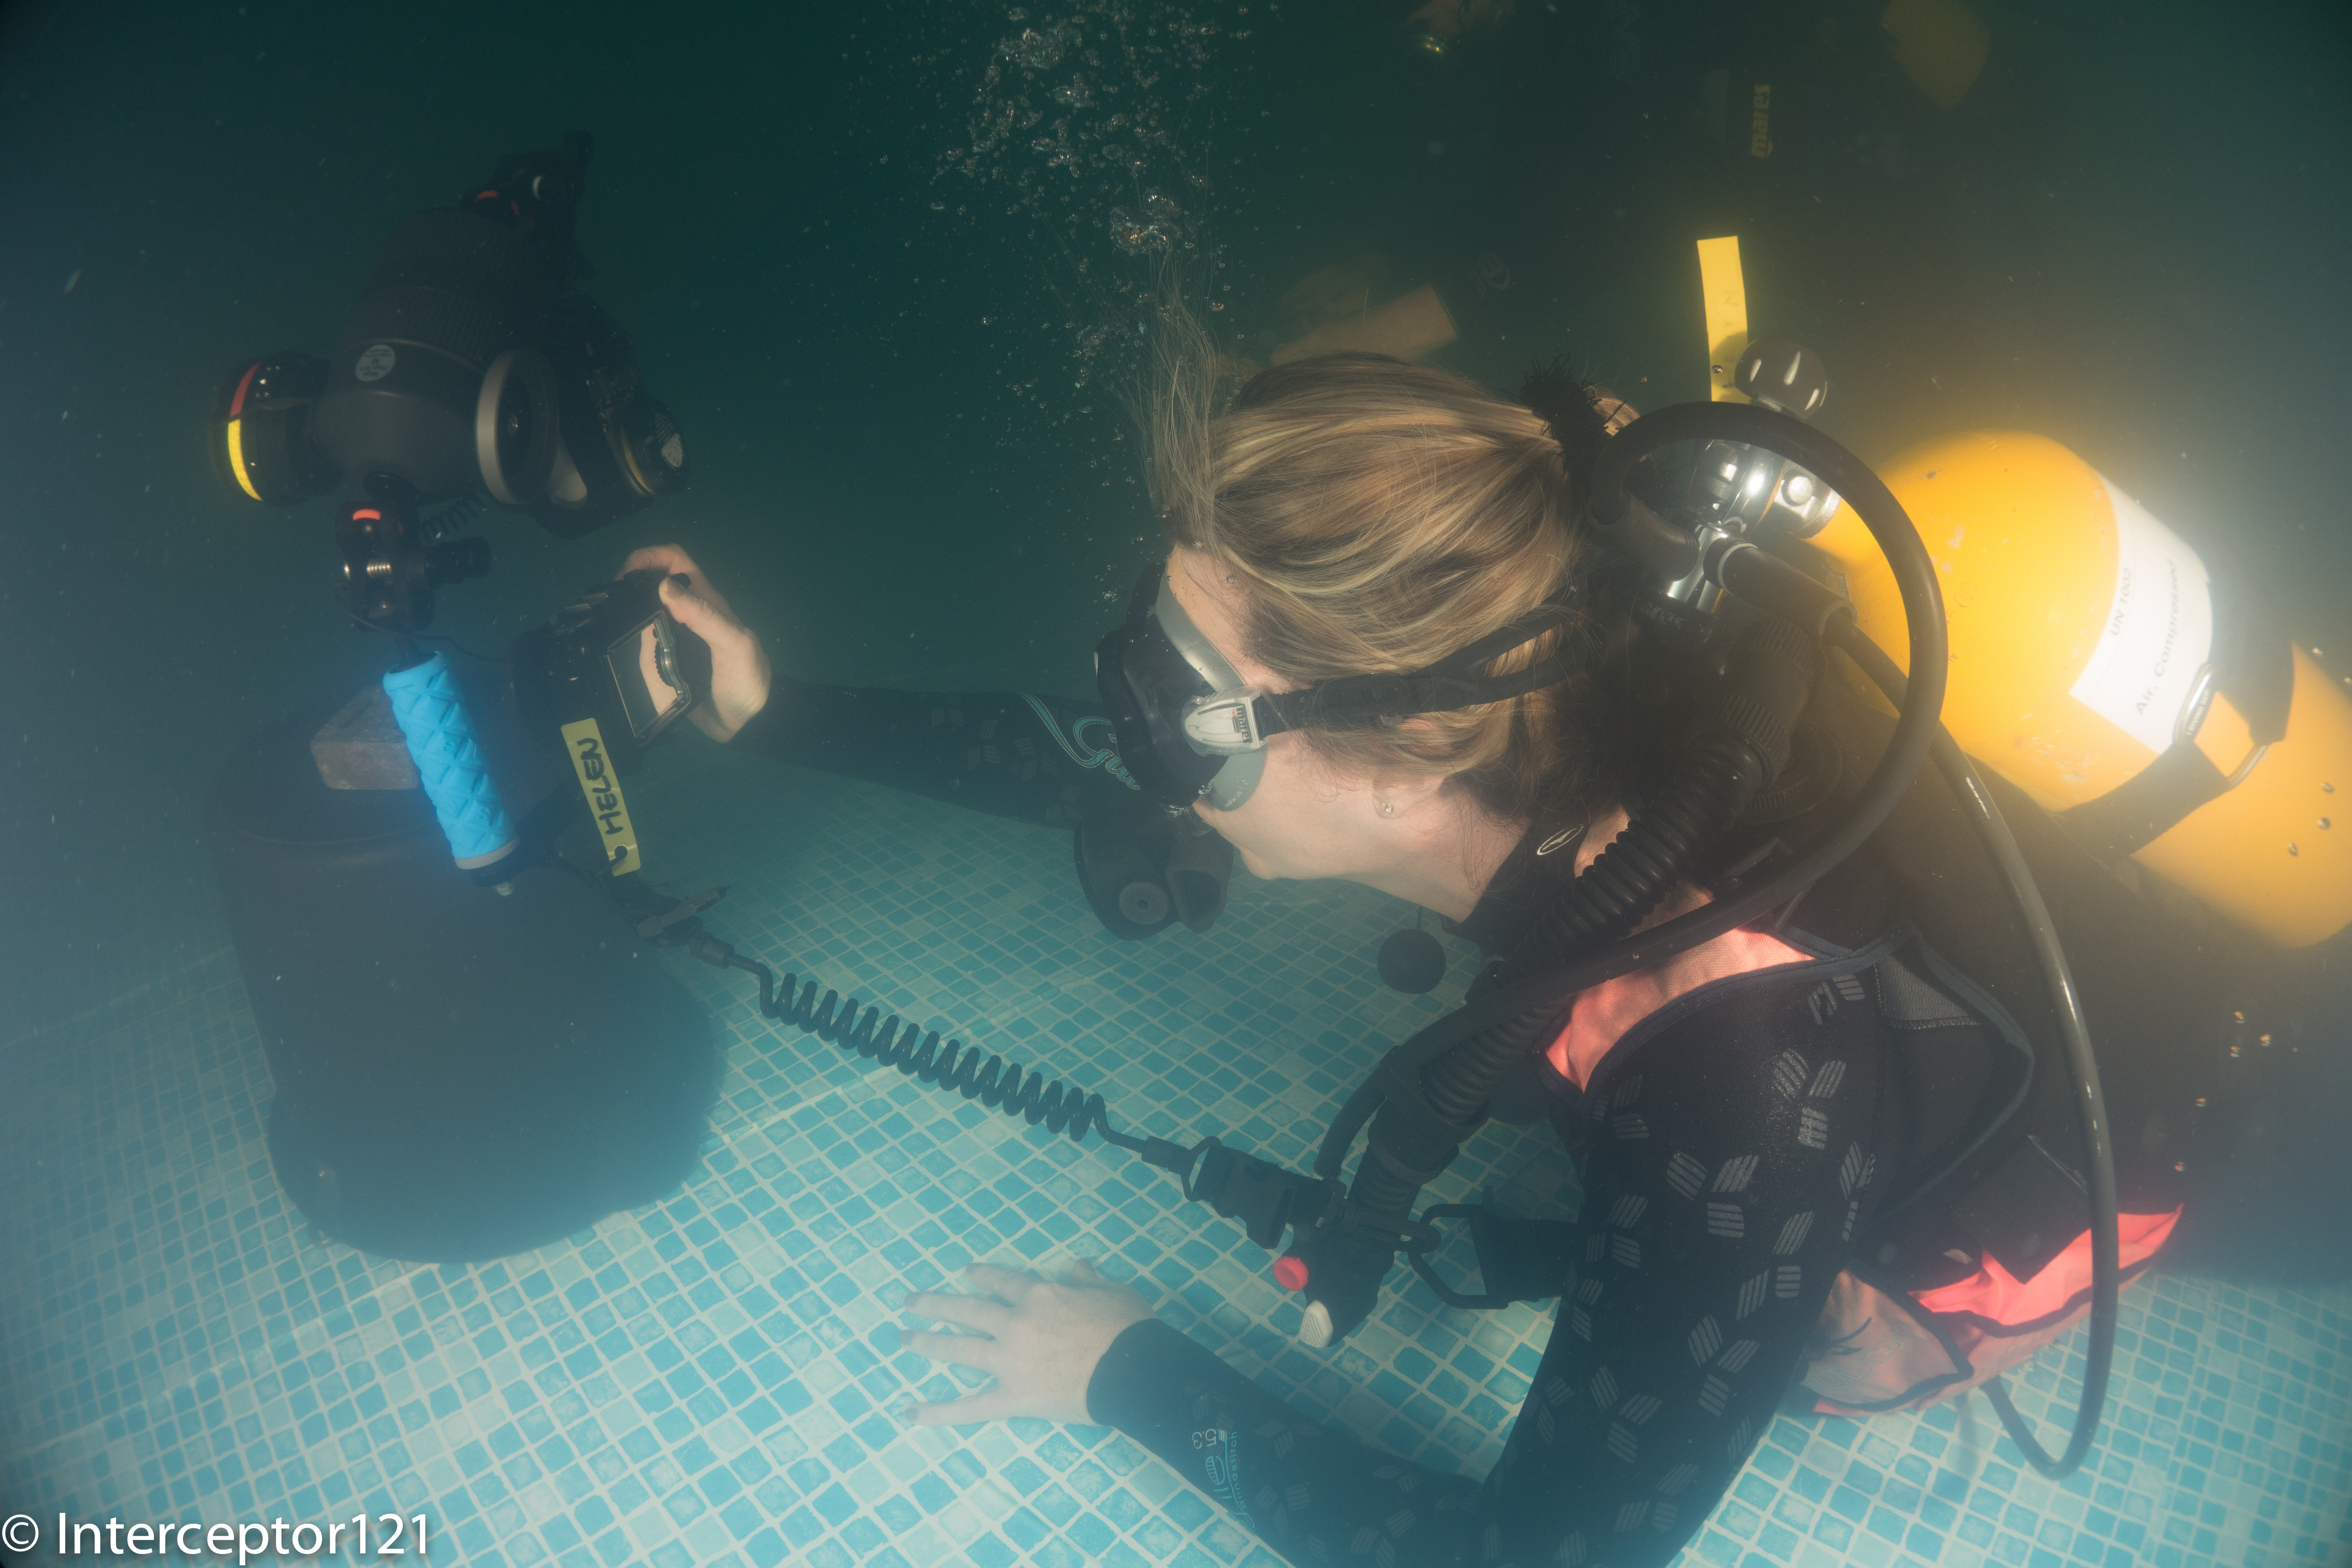
This will be my first day of shooting with the RX100 Mark II albeit in a pool with my new arms and lenses so I was looking forward to it.
We arrived in Poole the night before and got ready for an 8.30 start with Martin.
We started off with a review of some basic exposure concepts and then looked at competition winning pictures and trying to identify what makes a wow picture. It was extremely useful!
Afterwards we went through our trips pictures so he could see what needed improving. Then look at what was needed for the next trip.
With that in mind we set up to jump in the pool to take some pictures the objective was to improve my buddy close ups and portraits as apparently her wide angle is as good as it gets with the Canon S95 used see featured image on this post.
Pool conditions were low visibility and plenty of suspended particles as the pool is used for kids swimming lessons let me give you an idea!
Pool Conditions
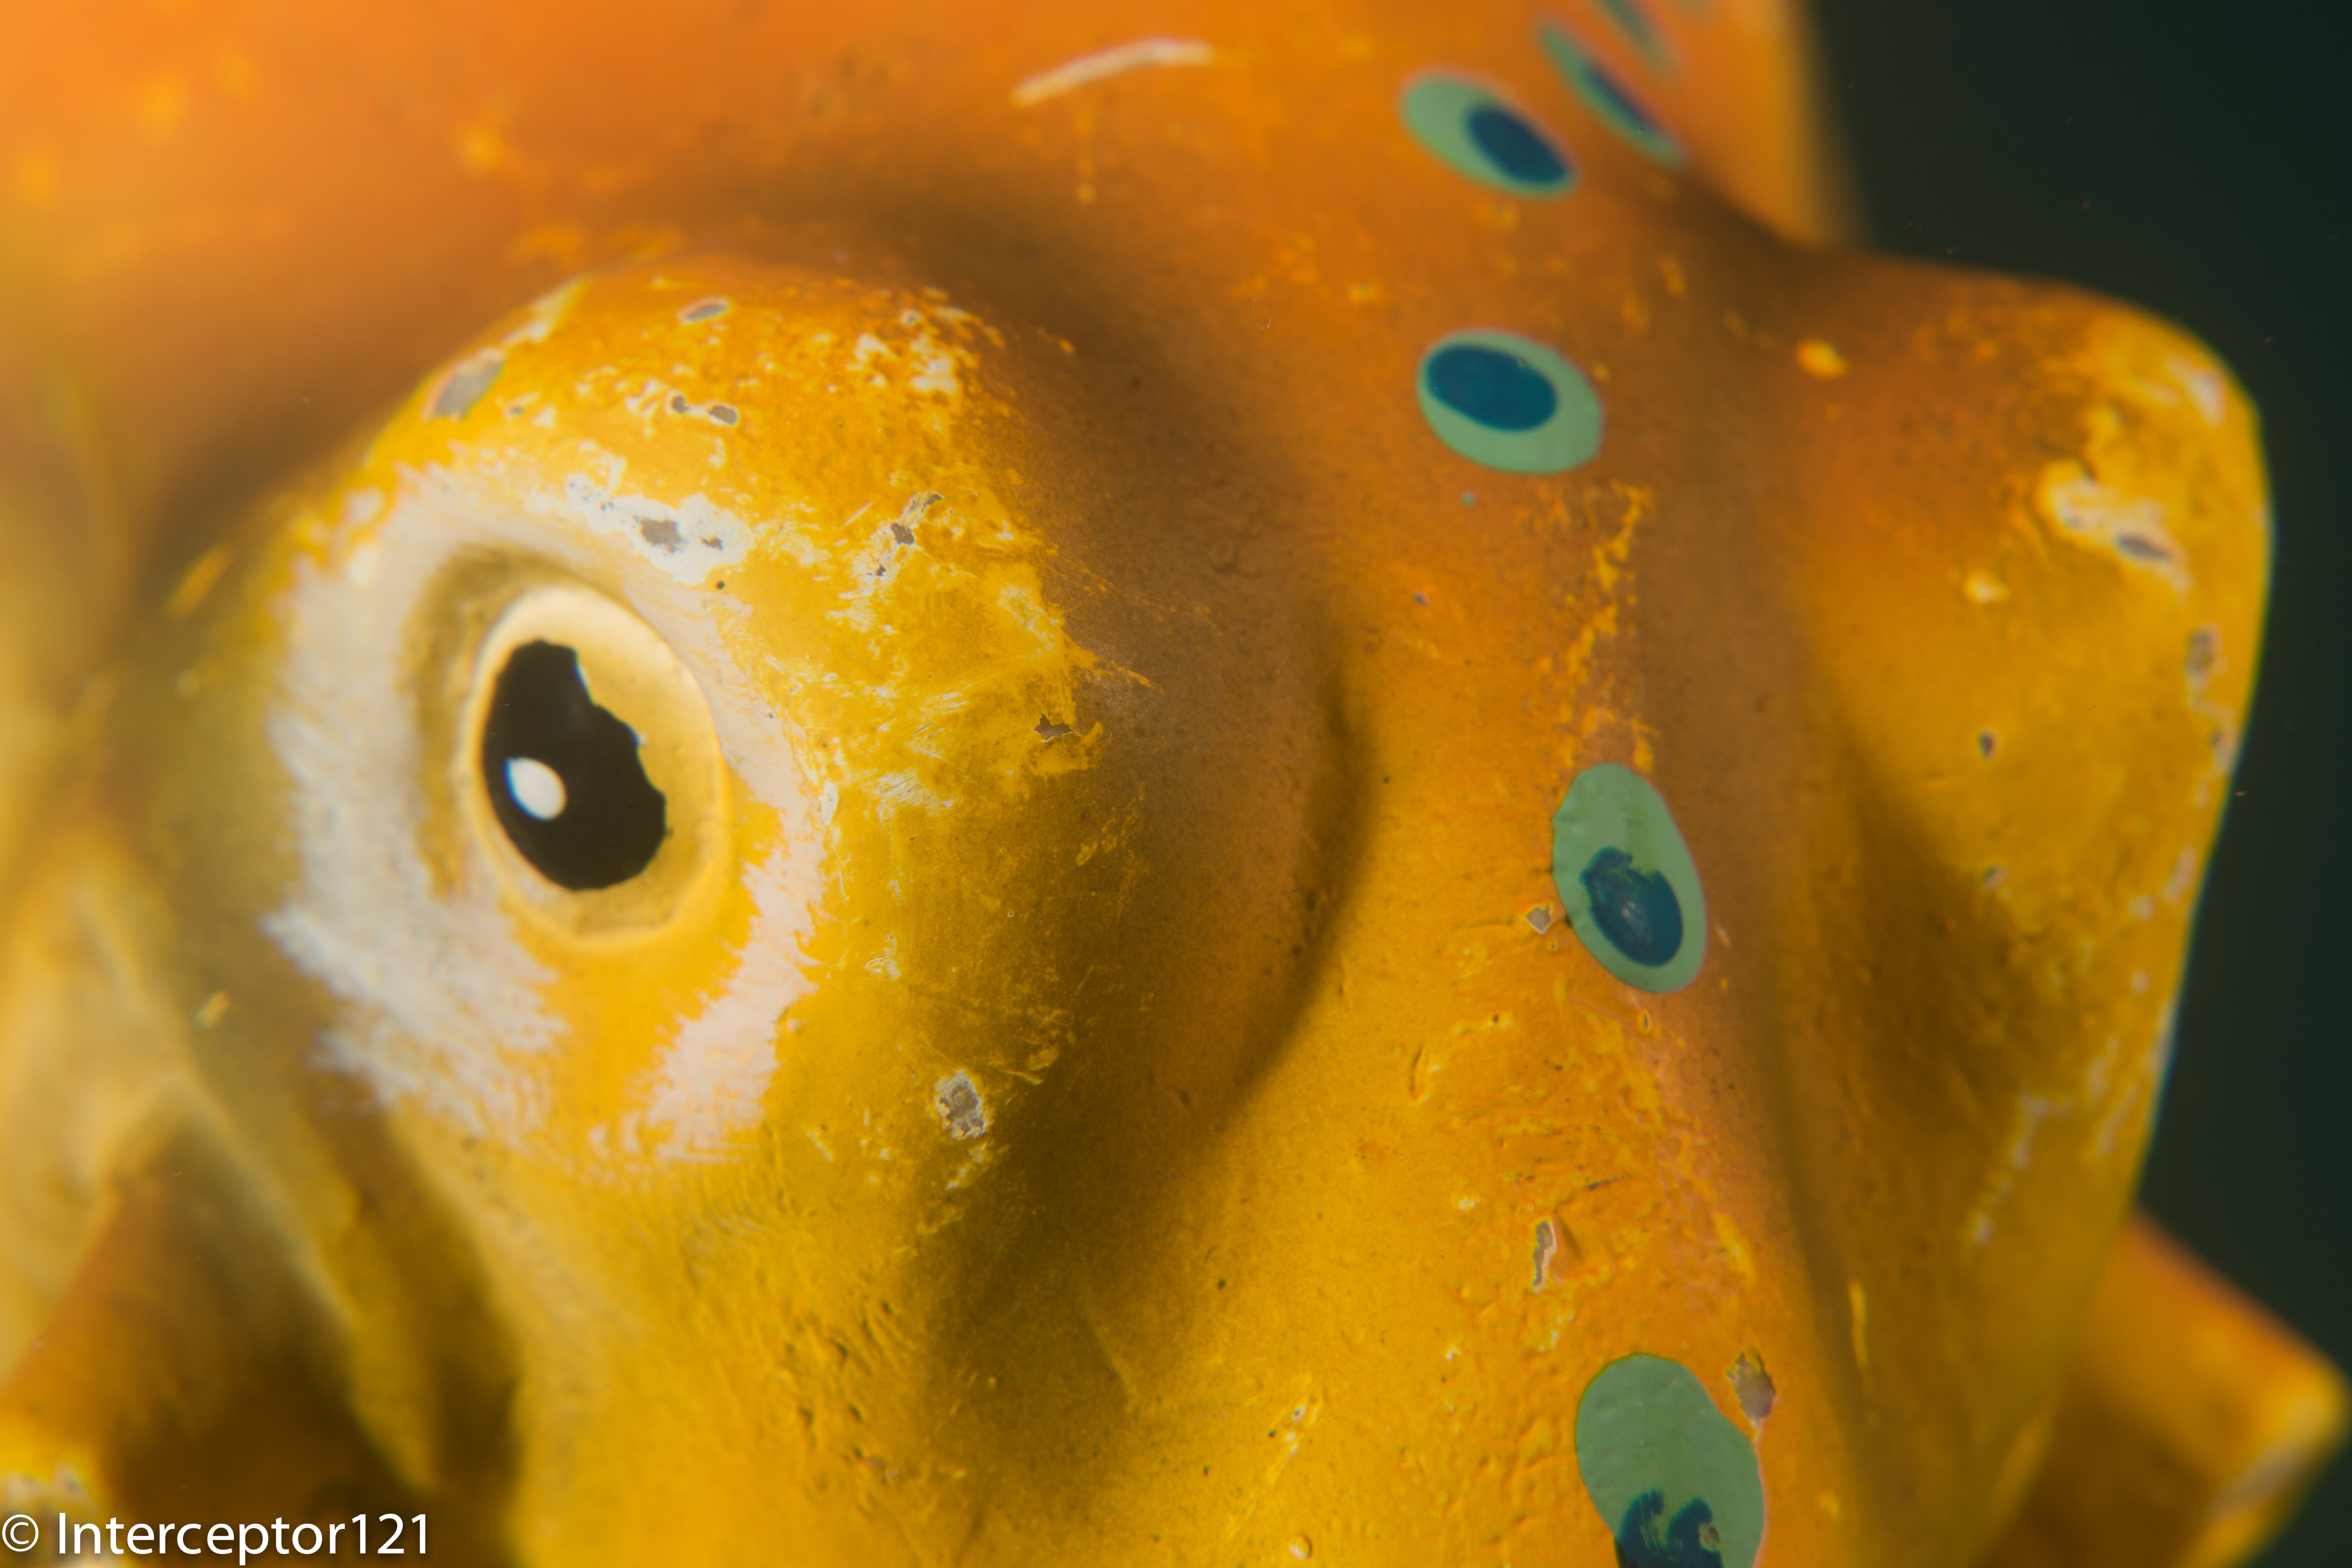
The first task was to shoot a frog with a view of eliminating shadows in its mouth. Start with one strobe and finish off with two.
Frog at 28mm
The frog with the bare port gives you an idea of the size and the complexity of the task with one strobe. There are shadows in his mouth.
Frog at 50mm
I then shot a portrait at 50mm, the reason why you see shadows more on the left is because I set the strobe at different powers.
Frog single diopter
The magnification of the RX100 is little so I went on with a first Inon UCL-165 and full zoom at 100mm equivalent. Note that everything is pretty much sharp at f/11.
Frog Double Diopter
With two Inon UCL-165 focusing on the mouth will result in this and the eyes being in focus and the rest blurred because of lack of depth of field.
Octopus fisheye
I then moved to an Octopus rich of textures. I took the first shot with my Inon UWL-100 28AD with dome.
Octopus at 28mm
The same octo at 28mm fills the frame much more of course.
Octopus at 50mm
The Octopus at 50mm looks even better. I have topped up the lighting on this one.
Octopus single diopter
I then took this guy with a single UCL-165 note the depth of field insufficient to keep the back of the head in focus, results though are exceptional.
Octopus double diopter
With two close up lenses we go back to the depth of field problem even at f/11.
I thought I had at that point nailed all focus and strobe issues, especially considering I shot with single auto focus, I did not bother using manual focus at all with exception of some double diopter shots.
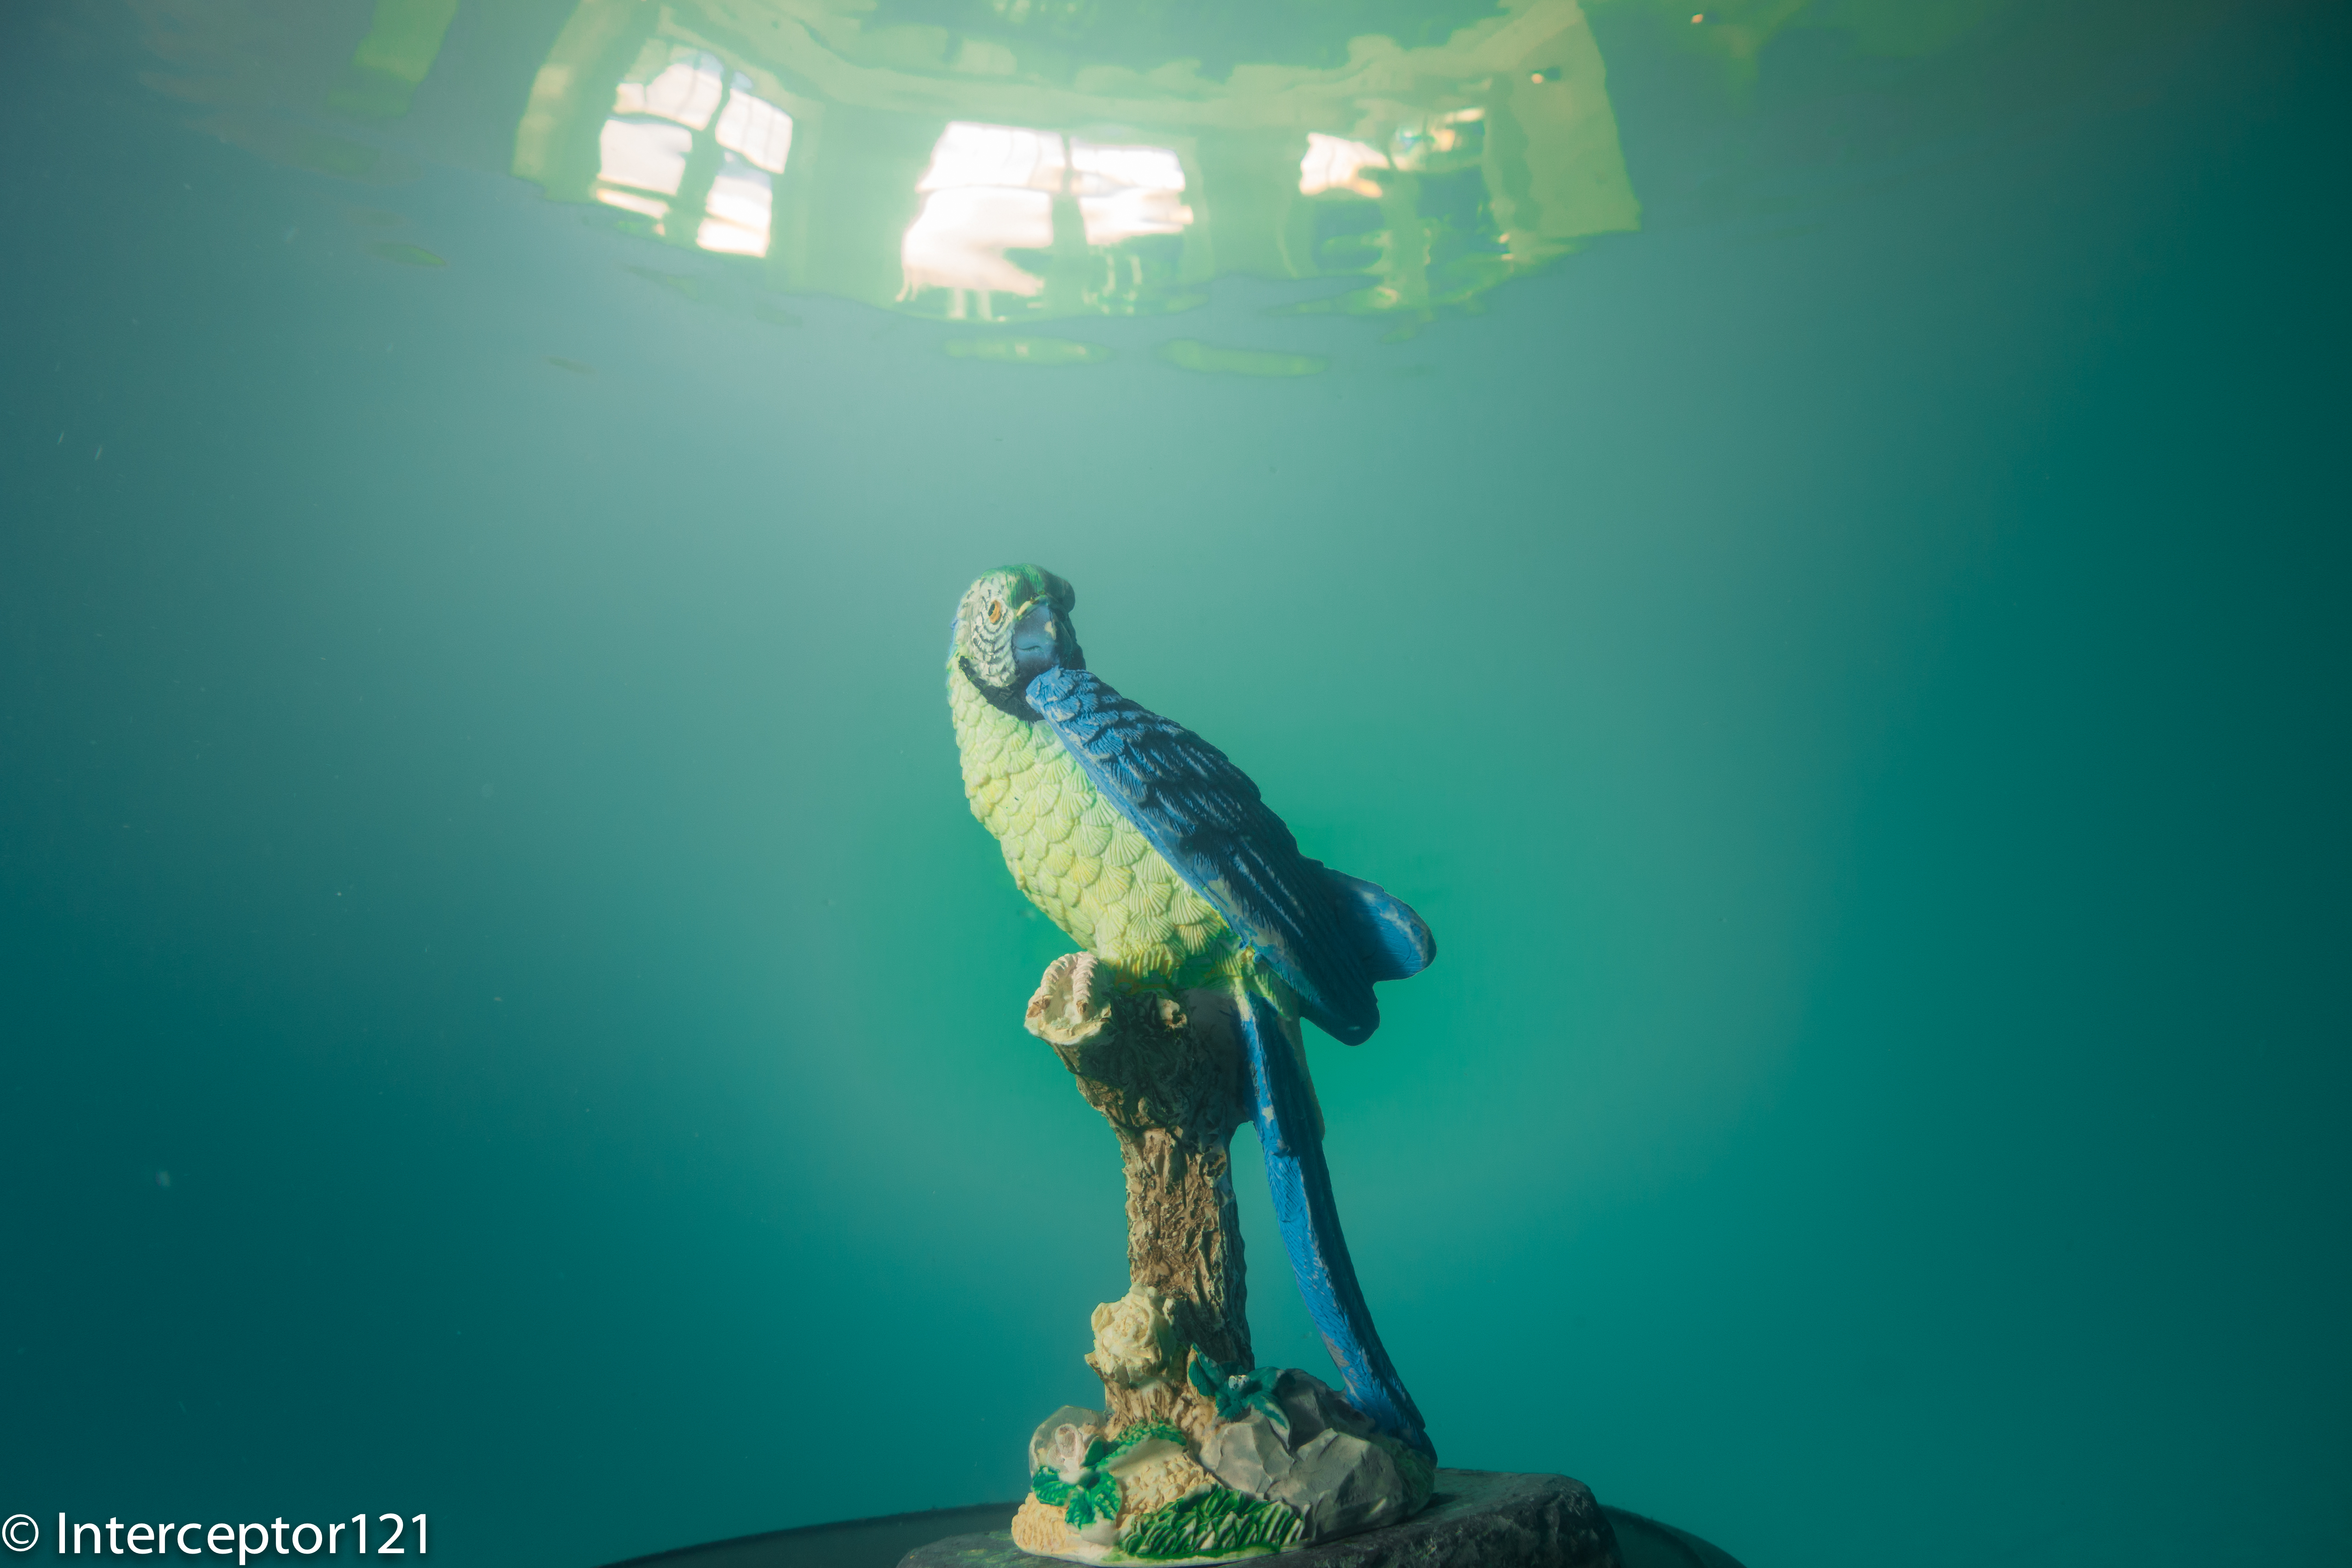
I then tried a few surface reflections with the fisheye this being the best.
Falcon Fisheye
You can see the outside of the pool and the windows on the top.
Family Fisheye
Afterwards made my own composition of statues for a fisheye shot that I think came out very well. The Z240 performed extremely well in both TTL and external auto as well as manual.
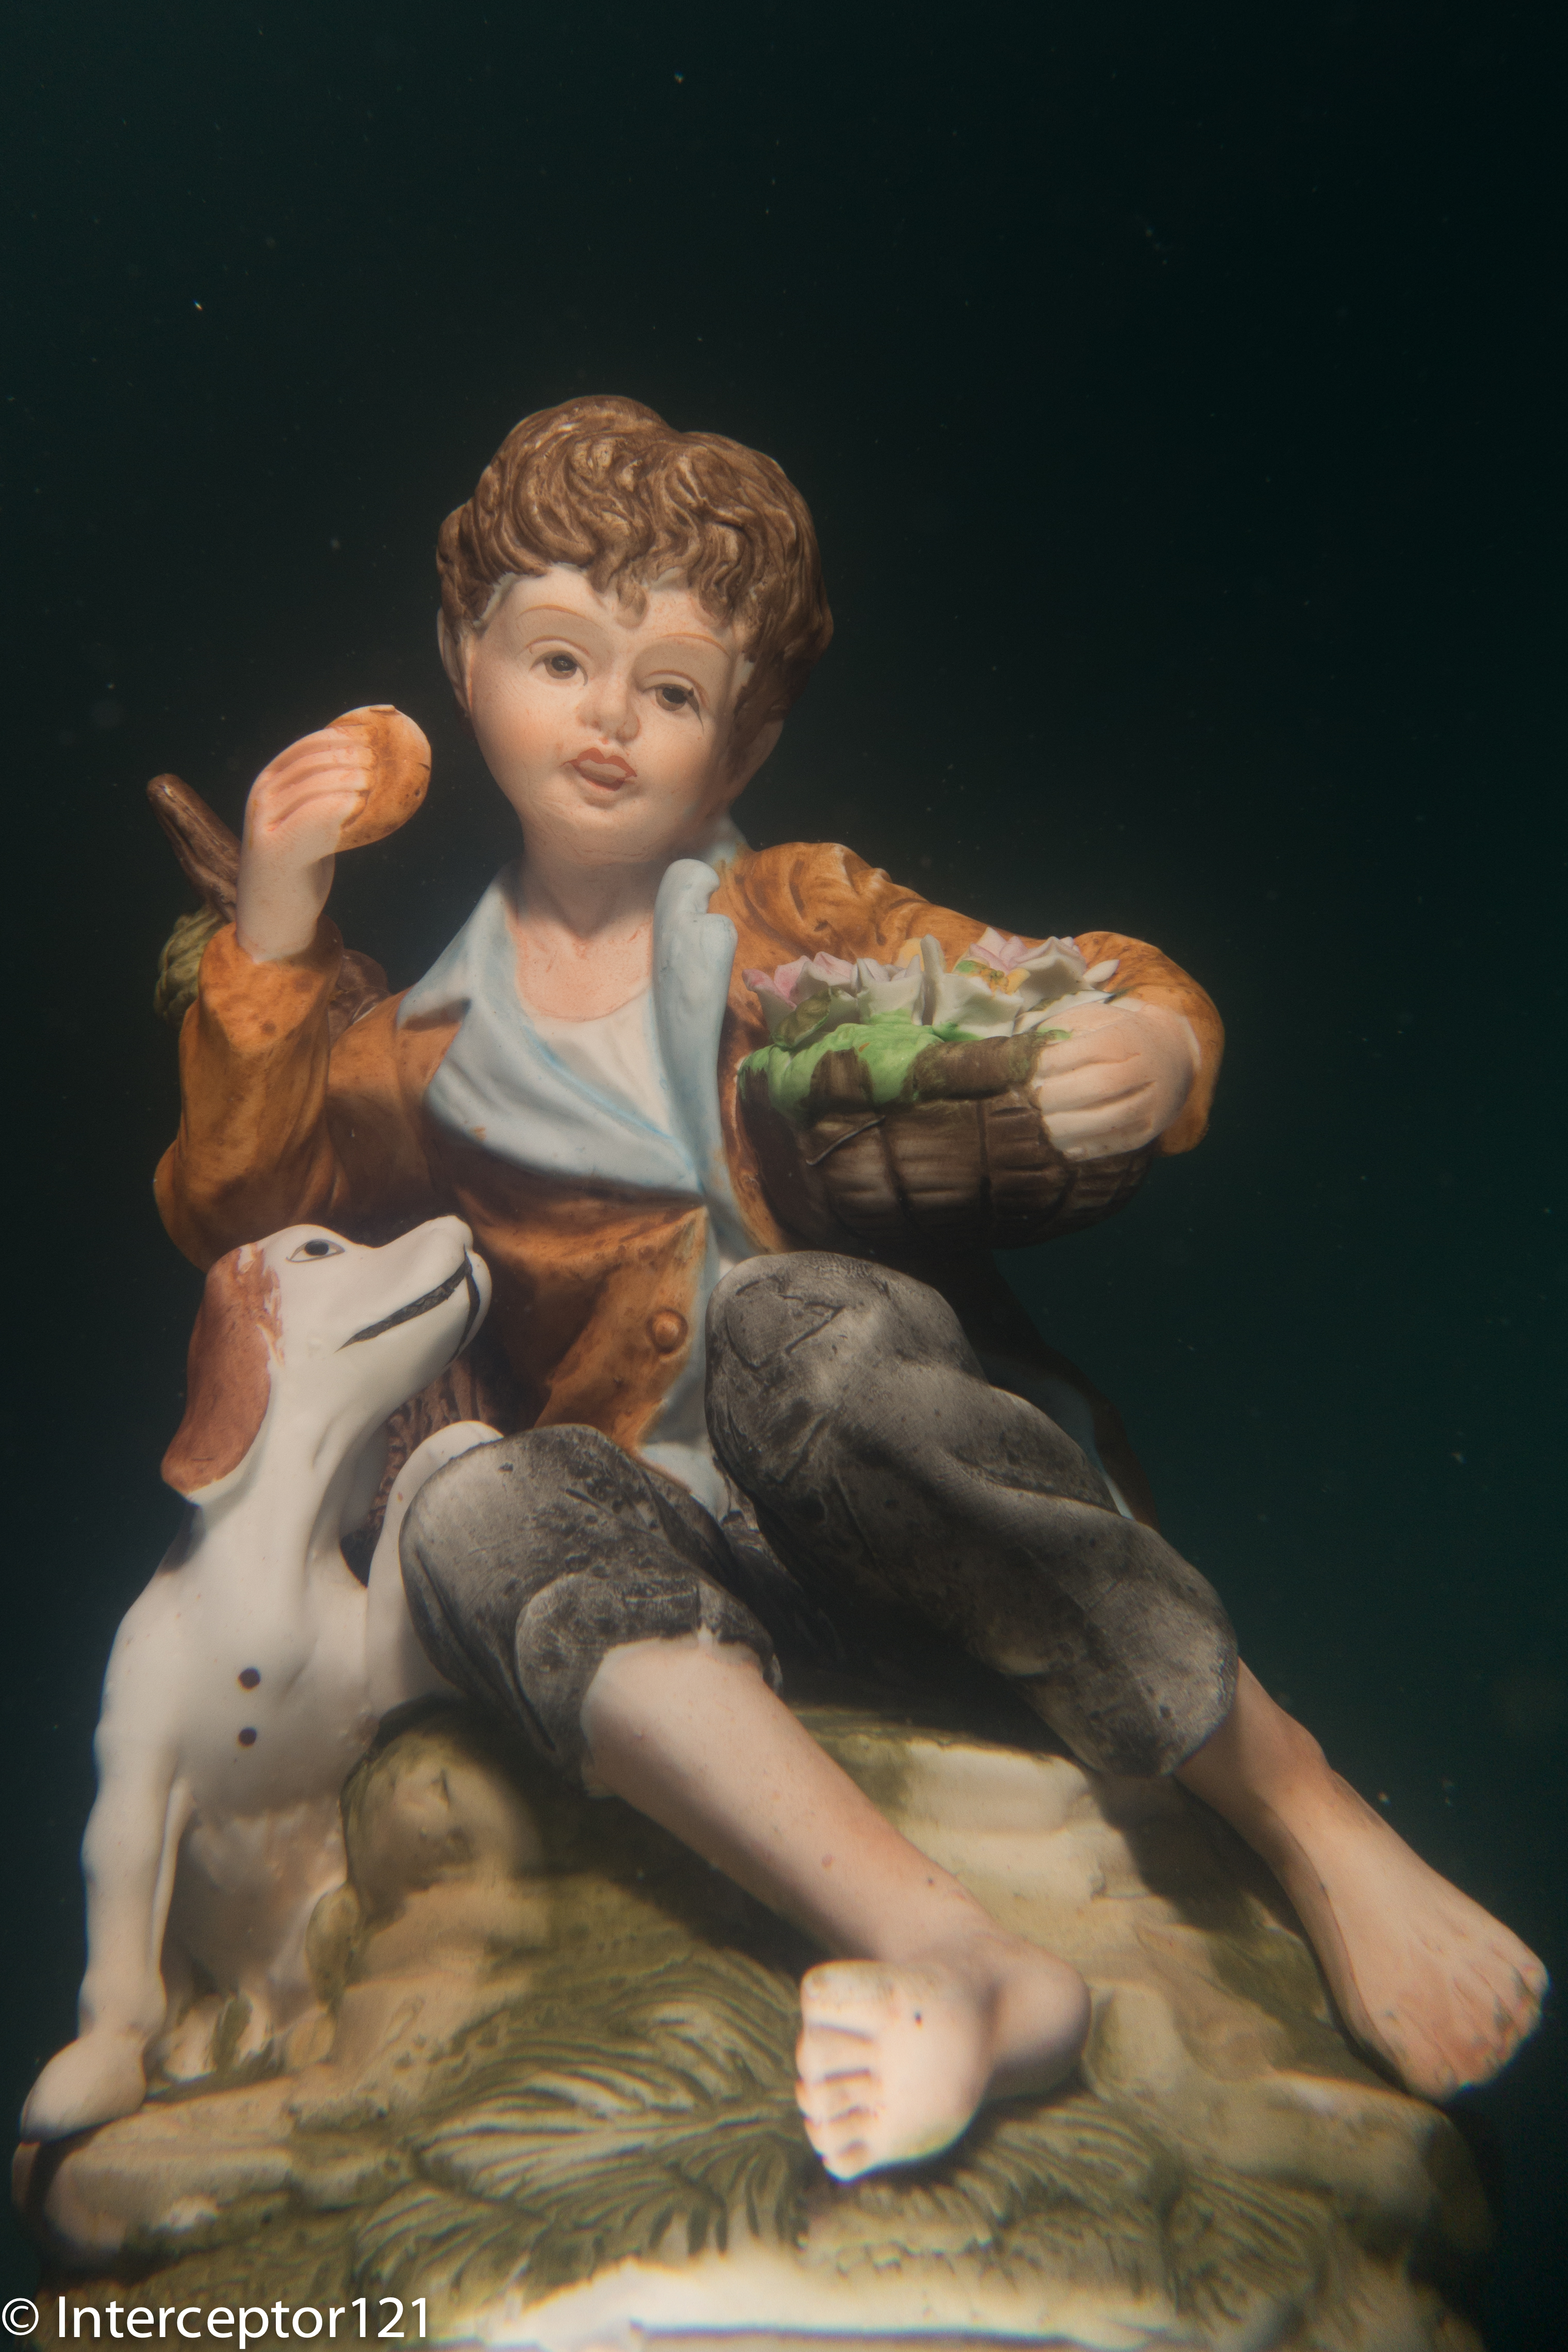
Child with dog
Martin asked me to have a go at the child with the dog as it is extremely difficult to lit up properly.
I went for an alternative strobe placement with light from the bottom as if it was in a gallery. He was impressed with the results.
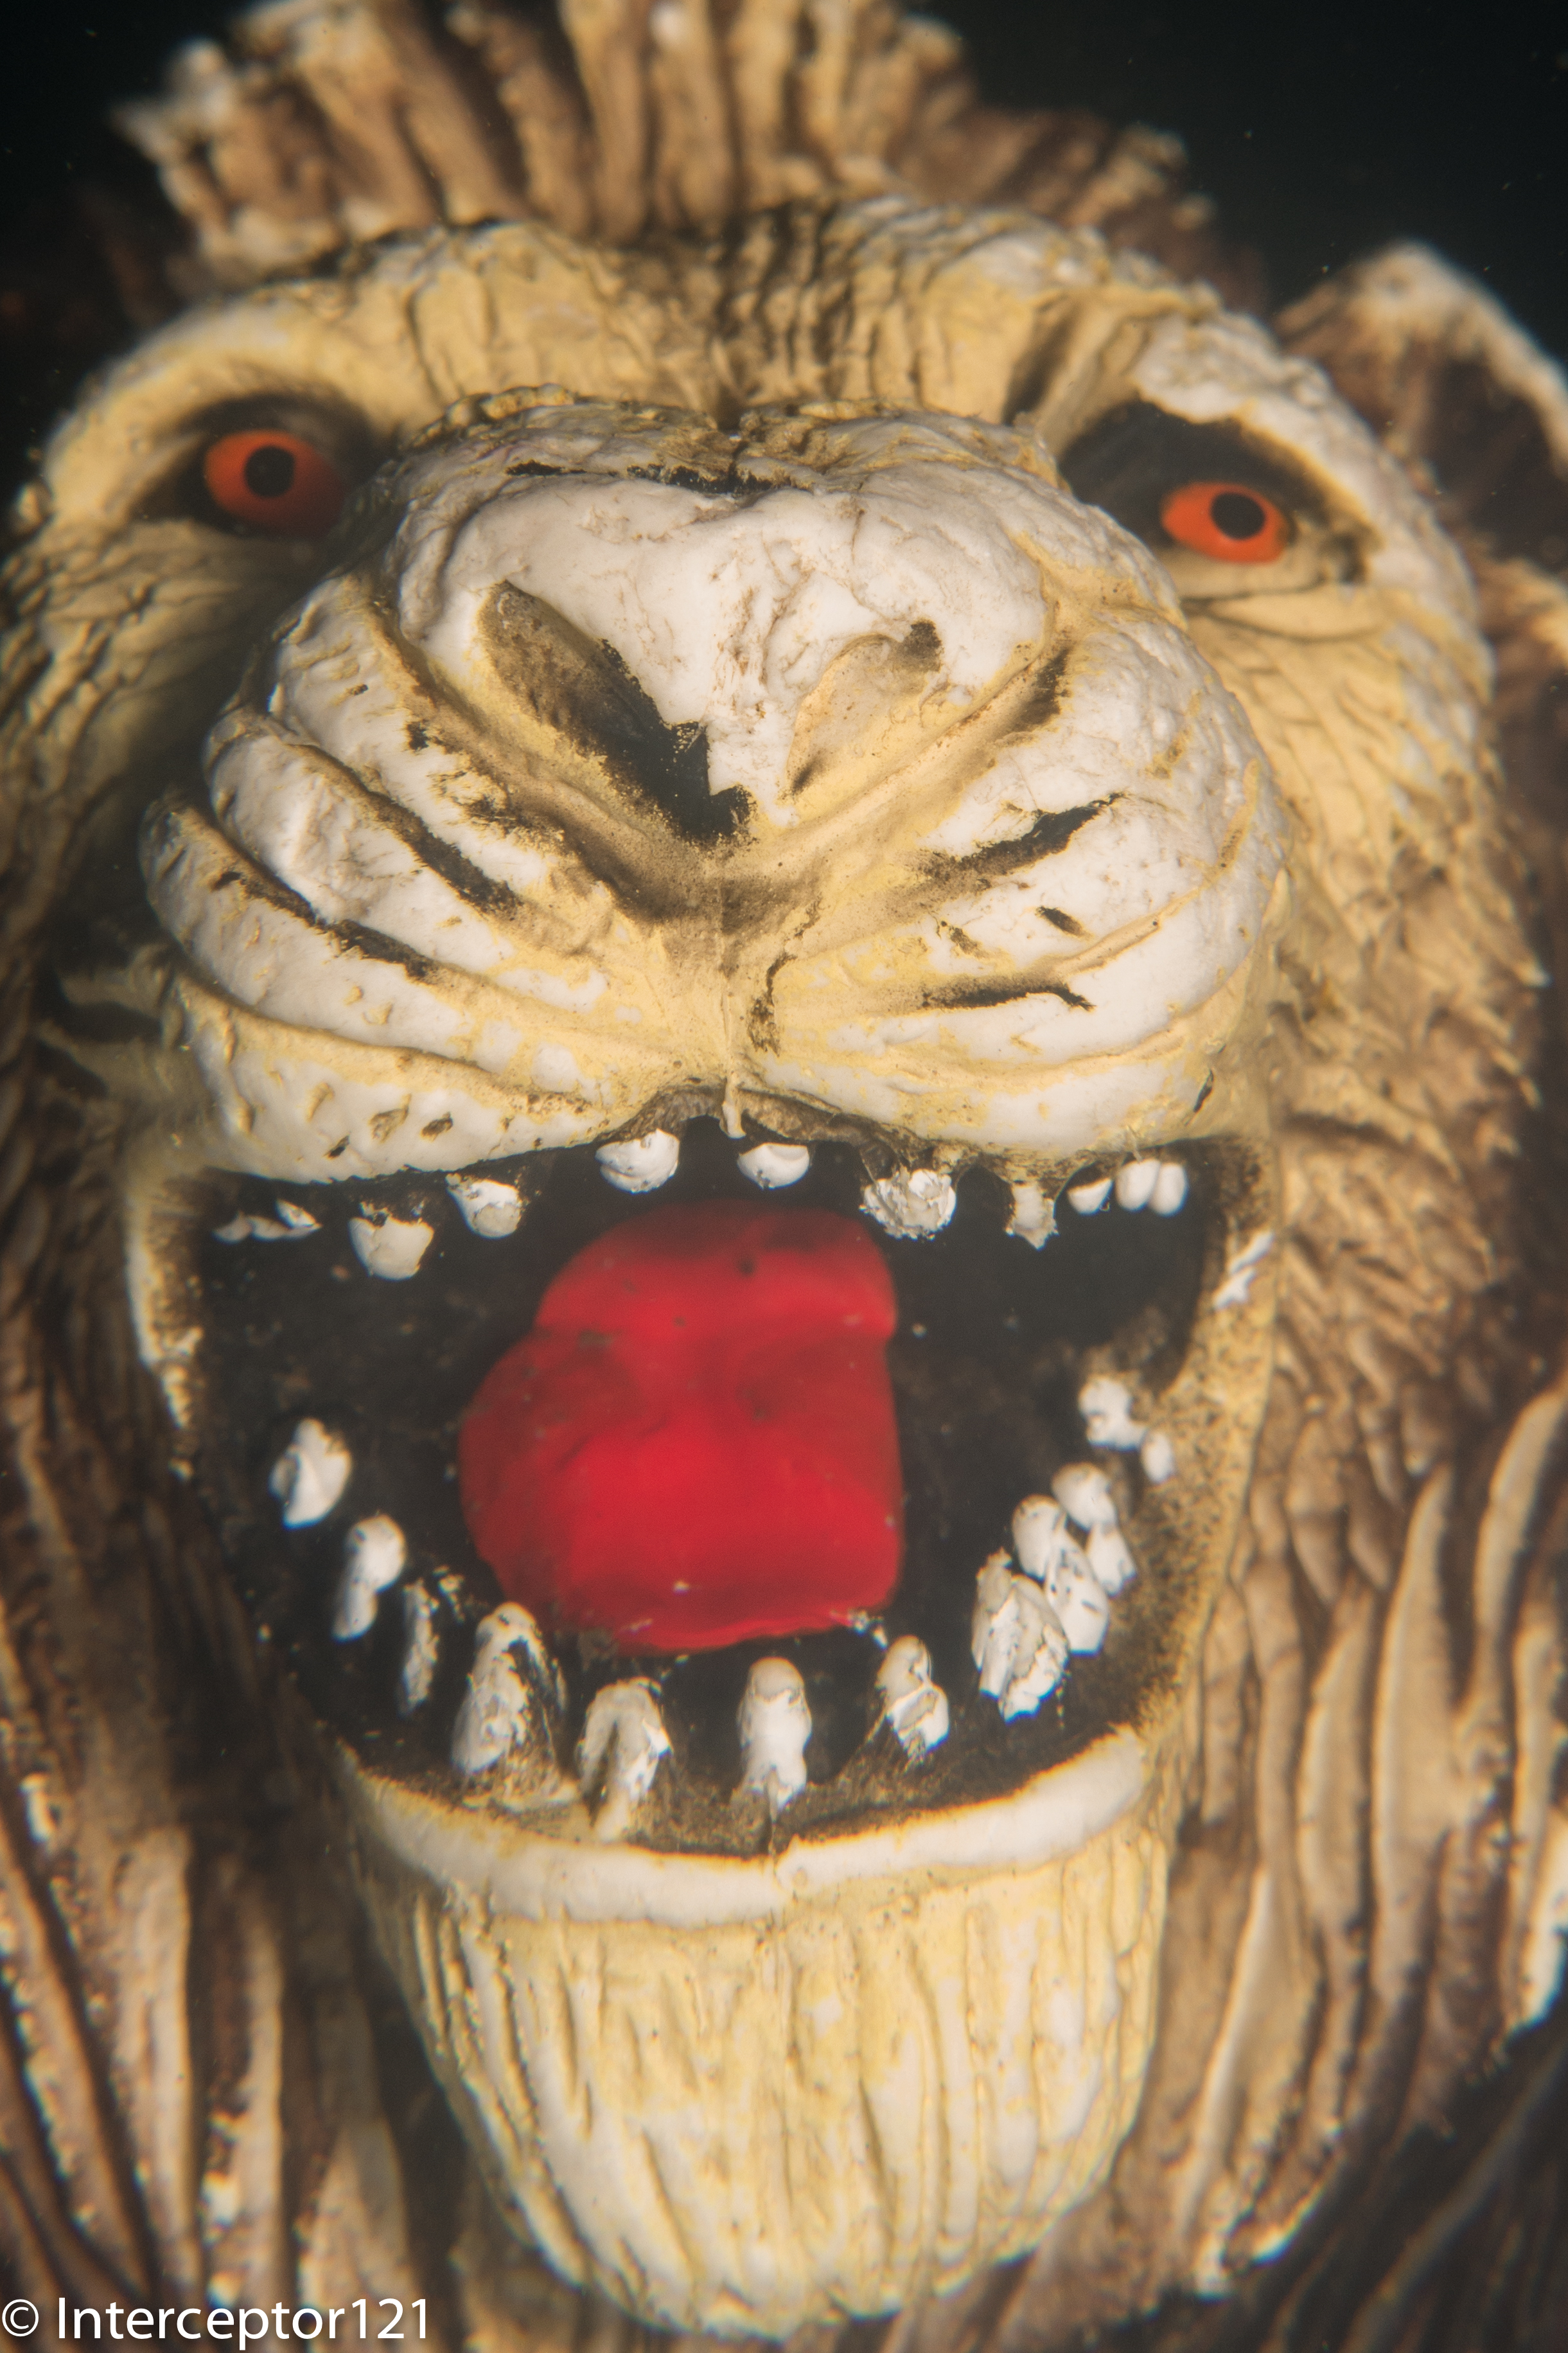
Lion Mouth Single Diopter
To finish off my last task was the tongue and eyes of a lion that I shot with a single UCL-165.
Overall a great day and I definitely recommend you the tuition day with Martin. He is a great person and extremely good at teaching I can see the benefits my buddy had right away.
Lessons learned on the RX100
There were a few things that I learned about my RX100 still rig mode that I want to share with you.
The autofocus is incredible. I even used this for macro. If the camera does not focus is because you don’t have enough depth of field and that is it.
Best macro performance is with a single diopter and also had a benefit of an increased working distance, this means the shots will need cropping for extremely small critters
Two diopters resulted in near bokeh with less than 1mm in focus and difficult to autofocus (though the LCD is great and I could see if things were in focus or not I think this is personal and I would recommend DMF to others)
Performance at wide angle with the UWL-100 28AD with dome is stellar
Inon float arms (I used two 6″ segments) were perfect with lens holders on it.
Inon Z240 twin set with one in TTL and the second in external auto delivered creative lighting without headaches, remember to buy the AUTO diffuser that does not come with the strobe
Strobes in manual allowed for even more creativity and the level of precision compared to sea and sea was staggering
Despite pool conditions the RX100 focused well in low light and much better than the Canon S95 that was returning focus error on the same exposures. I will not bother having a focus light with this camera and only have a single sola on night dives
That’s all for now any question just drop a comment
Over a year ago I wrote a set of posts for the RX100 and some of the quirks of this wonderful little camera.
Steadyshot – aka Image Stabilizer
The RX100 has a specific Active mode for video not available when taking stills. I described the differences between those two modes in this post
Everyone is so obsessed of having the widest possible field of view that other more important considerations are completely missed out.
If you have ever shot a video with a GoPro underwater you know how bad is the quality of the image in the corners, this is because the flat port combined with the gopro lens create many optical aberrations.
Our RX100, especially the original Mark I, also has an issue in the corners, this is not just an underwater issue is also true on land. The lens on the camera has a lot of distortion and when corrections are applied to the image this effectively creates corner softness.
When we add a wide angle lens the image quality in the corners deteriorates further especially if the lens is flat creating a lot of chromatic aberrations that you can see in pictures with a blue or yellow halo around the edges.
Standard Steadyshot
Now the good news the Active steady shot mode crops the image of a factor of 1.15x getting rid of the majority of the corner softness.
There is of course a price to pay which is the loss of some of the angle of view. According to my calculation if you use an Inon UWL-H100 you start from more than the declared 100.8º more around 104º in fact. When the active mode is on this drops to around 95º. Remember all those values represent the largest incident angle that means the diagonal field of view.
Active Steadyshot
A lens with 100º diagonal field of view means 90º horizontal. So after the active mode is engaged our horizontal field of view looks more like 84º which is equivalent to a 20mm lens. This is sufficient for most close wide angle shots and plenty for ambient light videos of large fish or wrecks. I generally suggest to keep the Active mode on, of course if you can be in a fixed position and hold the camera really steady you can also use the standard mode and obtain more field of view. There is a chance though that you will need to crop the extra field of view if you need to stabilize in the editing phase.
For macro shots without a tripod the steadyshot is a must and helps greatly. I do not even see a reason to take it off if you have a tripod as the RX100 does not have a particularly small capture area.
Digital Zoom
This brings the second subject: digital zoom, if you shoot pictures you avoid it as what you are doing is to crop the image, something you can do yourself in processing. In video though there is very little quality loss as we use just 2 megapixels of the 20 of the RX100 camera. In my test you can use digital zoom until the 2x multiplier is reached, this corresponds to 7.2x magnification and see no noticeable degradation in the image quality. The other benefit is that the depth of field is the same despite the magnification so you can save yourself stacking two diopters with all the difficulties that follow in terms of focus.
Max Optical Zoom with UCL-165
Digital zoom is always on in video mode and I recommend to use it with a single close up lens before embarking on dual diopters or a strong single diopter. Also take into account that with a single +6 diopter your working distance is around 4″ which is ideal for most critters except pygmy seahorse and bobtail squid or some shrimps.
Digital Zoom 2x with UCL-165
Video Lights
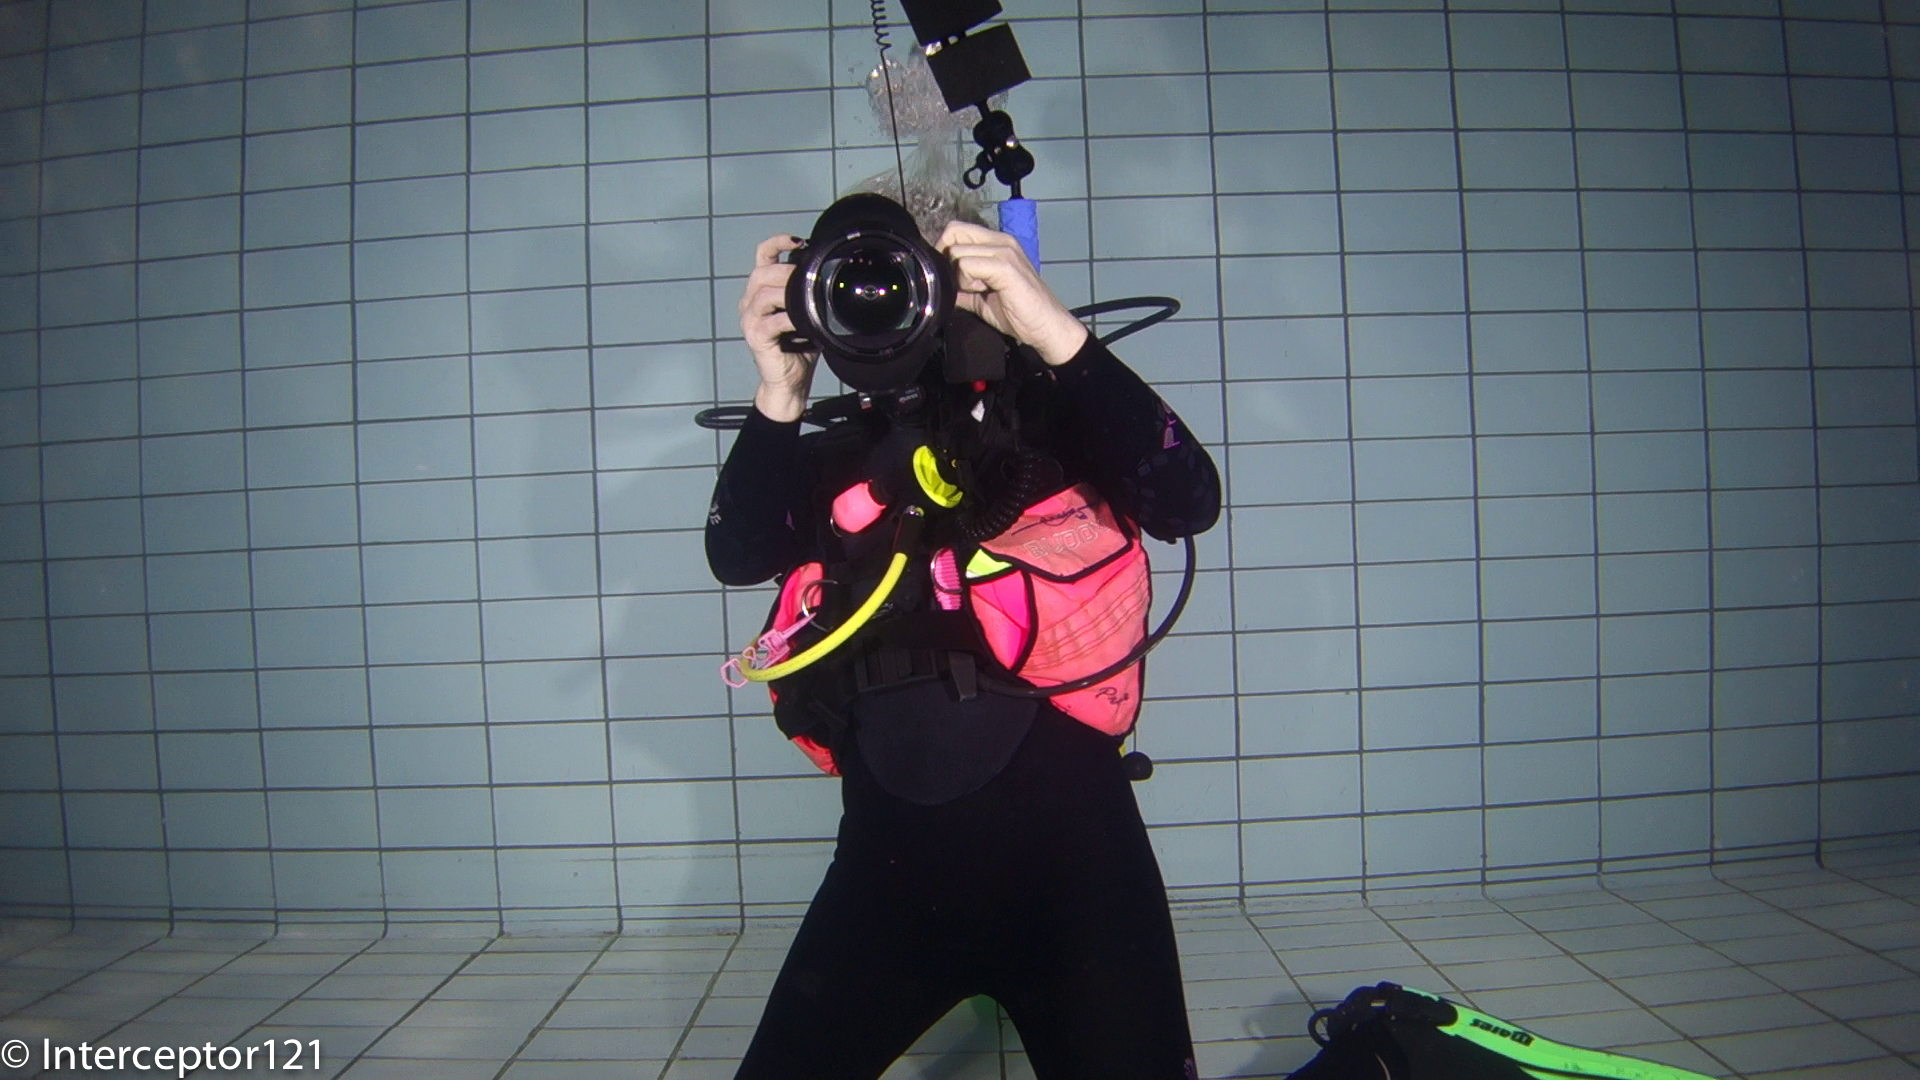
In another post I have explained that getting hung up about light angle coverage is not really the only thing to consider, there is also luminous flux and quality of light. With my Sola 1200 I can cover something between 2 and 4 feet away with decent results further away is just back scatter. Generally this is ok for some close portrait work and close wide angle and of course not sufficient to cover part of a wreck or much larger subjects. You may decide not to bother at all with lights for wide angle and just render your deep wreck dives in black and white in this case consider that a pair of Sola Dive 800 at $399 are a high quality macro set up, function as dive light and provide some decent close wide angle portrait illumination. For macro shots you need much less than that, I set my fill light at minimum (300 lumens) and the main light at 2/3 which is 600 lumens, I can shoot at f/11 with this light intensity. You can see me shooting in the feature image.
Recently I have started building my RX100 Mark II photo rig and as part of this I had to choose a wet fisheye lens.
For video I do not like the barrel distortion of a fisheye lens, and on top of that you can’t attach a push on filter to a dome so for me those are two big no when it comes to the RX100 and its white balance error woes.
For still instead I shoot only RAW never white balance in the water and a fisheye lens is required so that I can have human size strobe arms when shooting close focus wide angle at distances between 0 and 16”.
I will focus my discussion on the Nauticam housing starting off with a 67mm thread and go from there.
Currently there are 3 options on the market for the RX100 and come from 3 difference manufacturers. I will go through each one briefly and then we will look more in detail at the two I consider best.
The first lens is the FIX UWL-28M52R, this lens is the smallest of all and was originally design to nicely complement the form factor of a Canon S100 in a fix housing, hence the 52mm thread. The lens has a magnification factor of 0.41x and a diameter of 126mm including the hood, the lens is actually much smaller at around 90mm.
Fix has introduced this lens in 2011 as a replacement of the previous UWL-04 model for two reasons, the first is to have a smaller lens as the UWL-04 was a too big in comparison of the housing, second probably cost though this was never declared. However other people tests and plenty of in water images show that this lens is actually worse than its predecessor. It is also smaller making split over-under shots more difficult.
When Fix withdraw the UWL-04 the manufacturer of the lens continued the production and finally put it back on the market under the i-divesite brand. This lens is the same as the Fix except the label.
Both lenses the old and new fix are pretty much a copy of the old Inon UFL-165, both made of 4 glass elements and an acrylic dome with hard anti scratch coating.
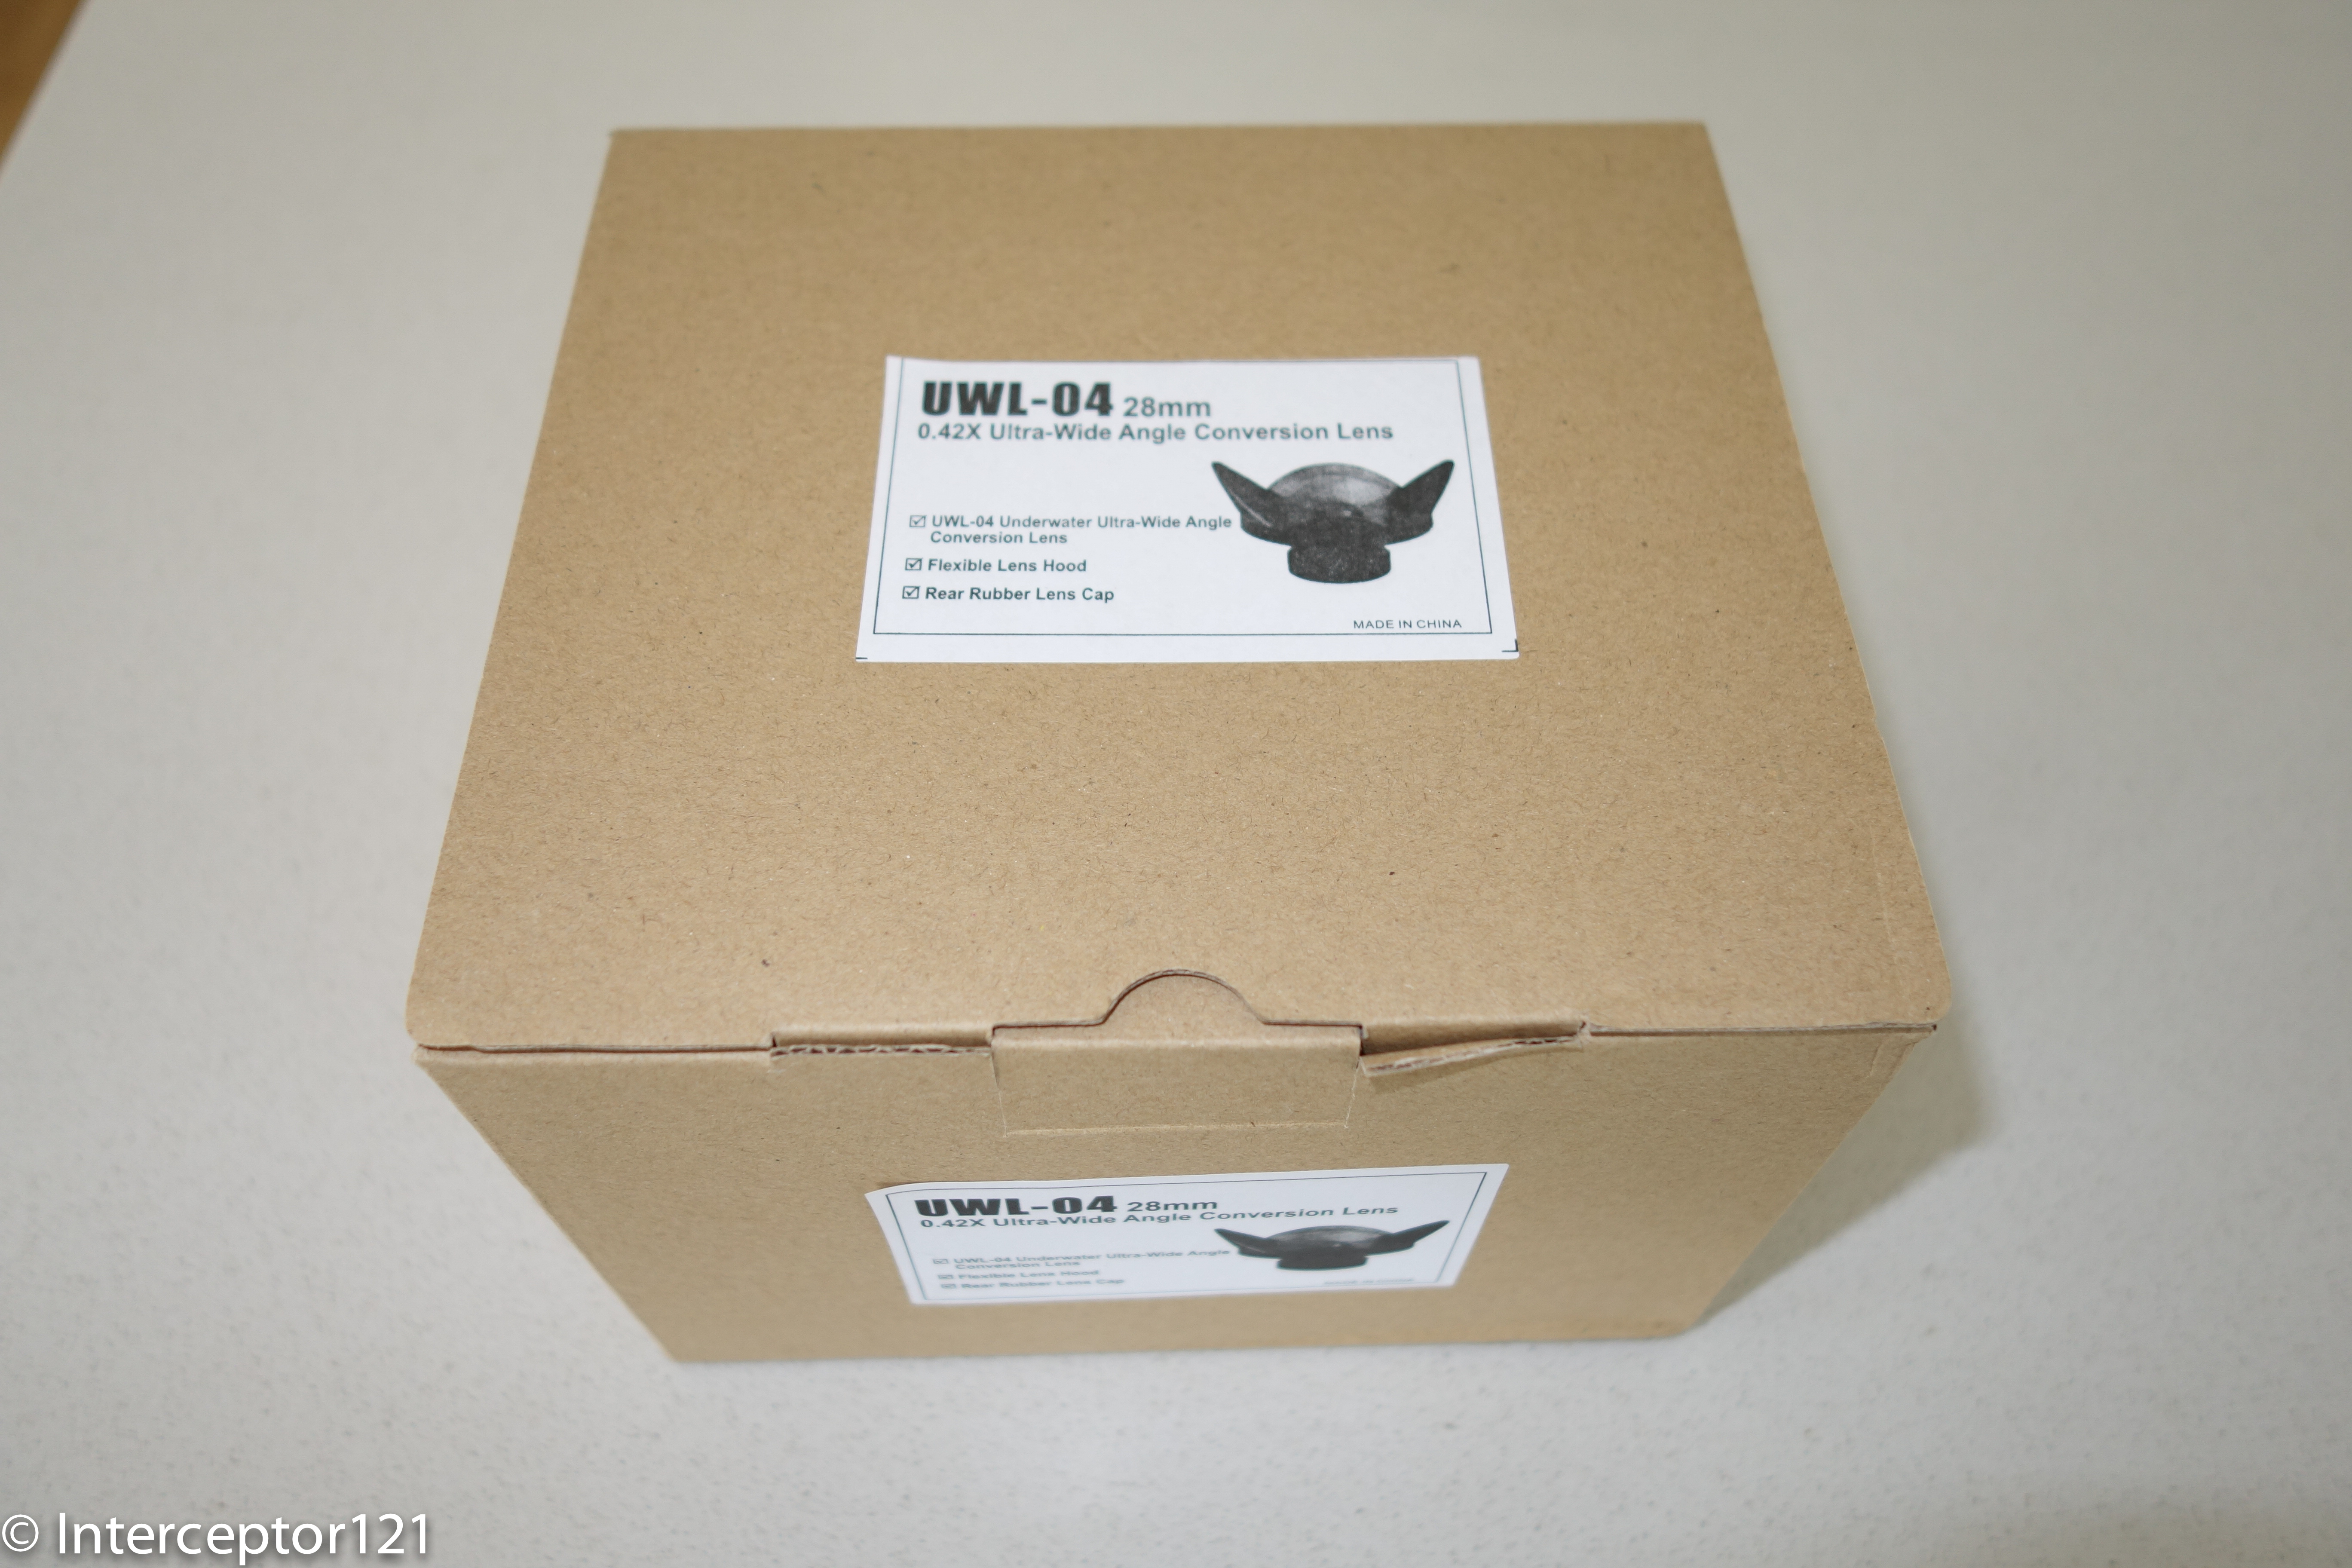
Here is a set of shots for the UWL-04 and the various parts in the box.
UWL-04 BoxUWL-04 package contentsUWL-04 Hood CoverUWL-04 with ringUWL-04 back lens
The last lens on the market is the Inon UWL-H100 with dome. This lens is available with an M67 mount and with an LD bayonet mount. Due to the size and weight of those lenses in water (100 to 500 grams weight and diameter between 125 and 152 mm) a bayonet mount is my preferred choice.
The Inon lens is actually made entirely of glass, the dome is the biggest at 115mm for the lens with an overall diameter of 132mm. This lens is the more suitable to split over under shot and promises a better contrast and less flare than the other lenses with plastic domes. Inon had some concerns about plastic domes and flare following the performance issue of their UFL165 so went for 100% glass for all next generation lenses.
Vignetting with RX100
In certain conditions all those lenses actually have some vignette in water. Despite what you read on shop websites if you look at real pictures there is a bit of that.
The Fix and Idas lenses have an issue with the lateral hood, the shots look clear of vignette on land but in water the magnification of the hood petals makes them show in the picture, we are talking a minimum crop required around 1% and usually on one side. The Inon UWL-H100 has a different issue and it gives in specific situations a tiny bit of vignette in the corners, around 2% of the image needs to be cropped. Both lenses will not vignette when image stabilization is deactivated, the image stabilizer tends to aggravate the issue so if you are obsessed switch it off and try to be steady shooting at speeds of 1/125th of a second or faster. For example on the amount of vignette see the following
UWL-04 note the vignette upper left centerUWL-28M52R again vignette on the left upper sideUWL-H100 vignette in left corners
I would like to thank Alex Tattersall, Tamas Plotek and Troy Williams for those in water pictures.
Inon UWL-100 28AD
Inon has another lens that is suitable for the RX100 and is the UWL-100 28AD a lens originally introduced in 2005. This lens has a smaller rear element than the UWL-H100 and it is not suited to many cameras with a very large lens aperture. The RX100 however works fine with this lens and contrary to the newer UWL-H100 this lens does not vignette in water or on land. The reason is that the de-magnification of this lens is less than the newer lens 0.63x vs 0.6x. This is the lens I have chosen for my RX100 Mark II and I will compare it here with the UWL-04 I have recently bought for my Canon S95. There are no substantial differences between the UWL-100 28AD and the UWL-H100 in terms of optical quality.
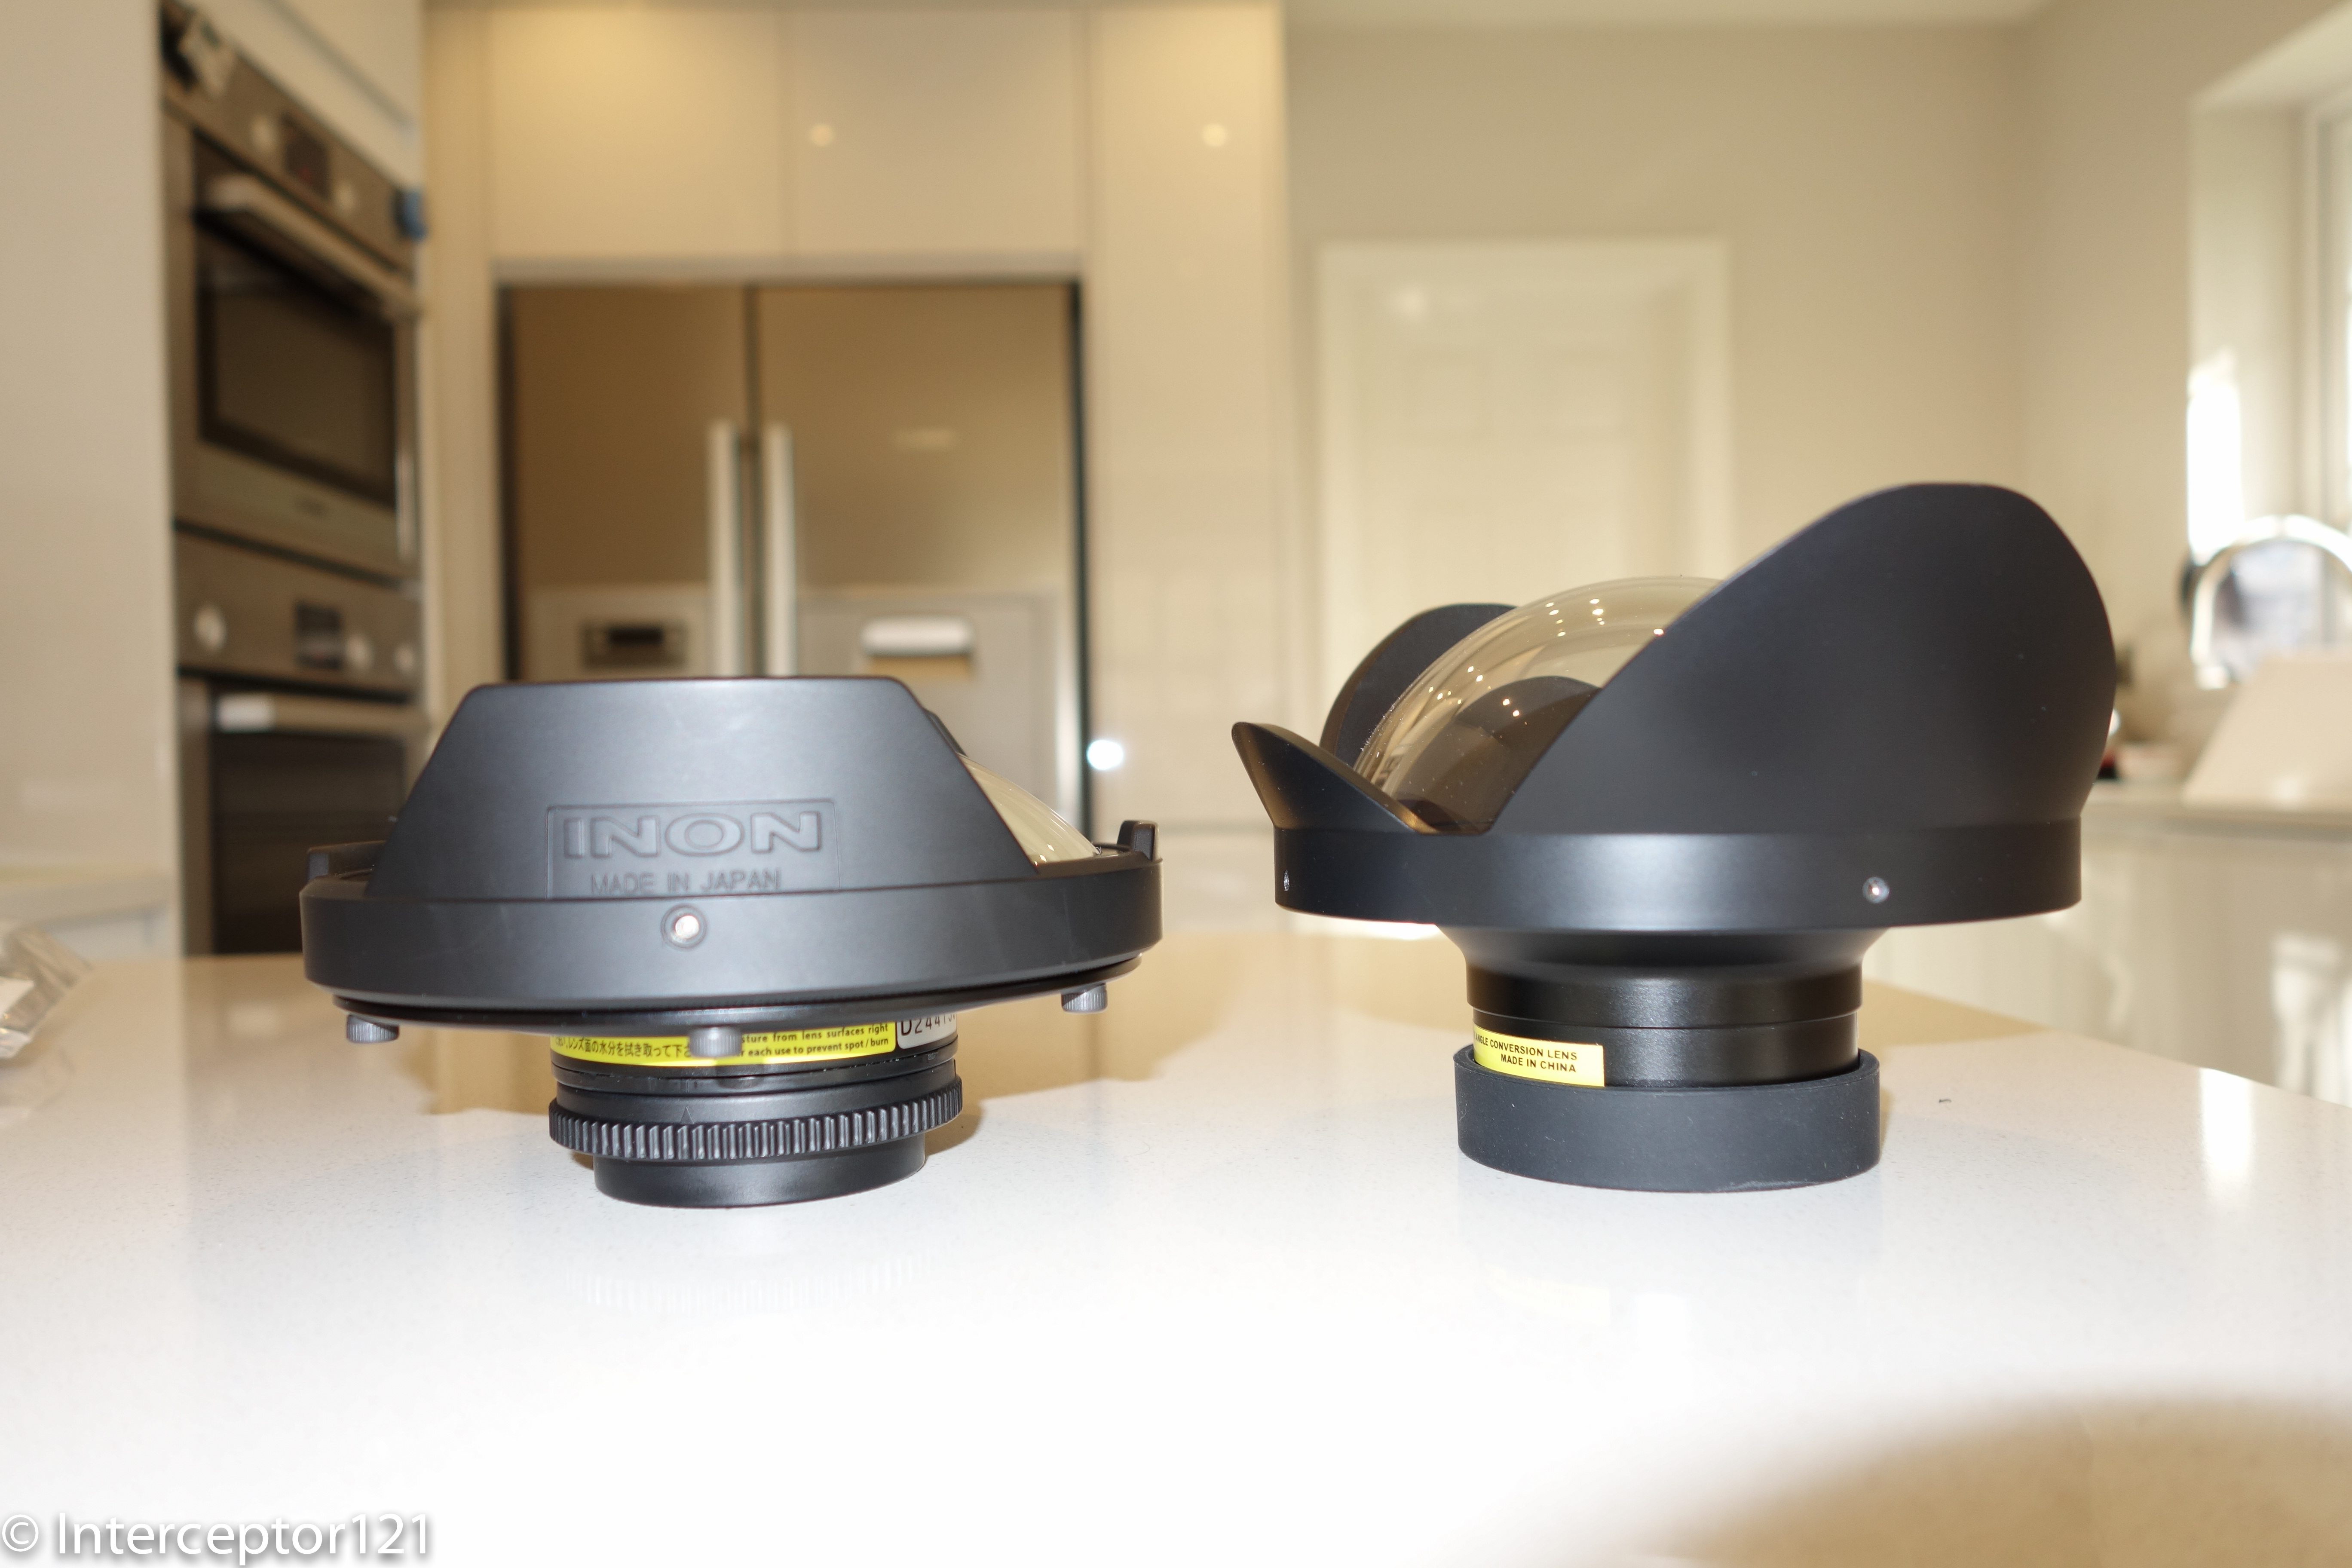
Here are few pictures to compare the lenses, take into account that whilst the weight on land is comparable, once in water the Inon lens is heavier at 400 grams versus 160 of the UWL-04.
UWL-04 UWL-100UWL-04 UWL-100 profile
Image Quality
There is no need to take the lenses in water to compare image quality generally things get worse in water not better so it is sufficient to take a shot on land and see how that goes to have a relative comparison between two lenses. In this example the cameras are on a table exactly in the same position when the shots are taken and use the same settings of ISO, aperture and shutter speed.
The first impression is that the UWL-04 is a tad wider but more rectilinear, the Inon lens has definitely more barrel distortion and is more a fisheye than the UWL-04 is. Looking at mid upper frame you can see that at diagonal level the UWL-100 28AD is actually wider than the UWL-04 that remains wider horizontally. This means looking at the specs can be misleading and results depend on the camera lens combination.
So how do these lenses compare when it comes to corner sharpness and flare?
This is a shot with the UWL-100 in very harsh conditions with sun-rays hitting the lens directly on the dome, you can clearly see the ghosting that comes from it.
UWL-100 Sunlight
This is the same shot in the same place taken with the UWL-04 you immediate notice that the ghosting has a green color. This is most likely due to lack of anti-reflection coating inside the dome and to the color of the inner lens mount.
UWL-04 Sunlight
Looking at the image the picture taken with the Inon has a clearer ghosting but then is sharp in the rest of the image, the UWL-04 image has flare around it with comparable less contrast as we move from the center to the corners.
The other two images are a crop in the corner, you can see that despite the high level of distortion you can still distinguish some detail of the small grass bush in the Inon image, the UWL-04 instead is softer and the bush is basically a uniform green shape with no detail at all.
UWL-100 CropUWL-04 Crop
Update 28 Feb I have taken some shots with the UWL-H100 and the UFL165AD here are the overviews
Inon UWl-H100
The UWL-H100 is actually wider than the UWL-04 with the Sony RX100 despite the advertised 144.5 degrees versus 165 of the UWL-04. Has the same level of detail of the UWL-100 28AD
Inon UFL-165 AD
The UFL165AD flare issue is obvious in this shot both lower corners are compromised, this confirms why the UWL-04 is the best option for the Canon S series in terms of flare or vignette.
Looking at the UWL-H100 crop you can see the vignette more apparent in the upper corner and the image sharpness, it is possible that with an M67 mount there is no vignette with a Nauticam housing in most conditions, with LD mount you need to turn image stabiliser off or crop. Considering this is the widest lens it is not a big issue. Once cropped the UWL-H100 gives still the widest field of view but someone maybe be annoyed by this. Zooming in results in the same field of view of the UWL-10- 28AD
Ergonomics
The Inon lens presents the benefit of a bayonet mount, although the lens is heavy it can be removed in water quite easily, the UWL-04 has some issues whereby the adapter ring would unscrew instead of the lens, this can be avoided fixing the adapter on the lens but then there is no lens cap that would fit the larger M67 screw in the box so you need to buy one yourself, generally the size of the petals make this lens impossible to handle in water and is more like diving with a dome port. It has to be noted though that you can zoom through with both lenses so still continue and take portrait shots and close ups. Obviously for real close or macro you do need to take the lens off which with the UWL-04 you can basically forget.
Cost
The UWL-04 costs $460 in US as shown here with dome cover and step down ring, and £362 in UK. The Inon UWL-100 28AD with dome costs $907.80 including an M67-ADF adapter in US and £775 in UK. All in all the Inon is around near to double the price of the UWL-04. The UWL-H100 is even more expensive at $970 for the M67 version and $942 for the LD bayonet, you then need to add $160 for an adapter for a total of $1,102 that is a lot of money another reason for the 28AD version.
Conclusion
The Inon is the best lens for the RX100 and there is no doubt, however it costs more than double the UWL-04 not everybody will be able to afford it. The UWL-04 is a somewhat basic lens that lacks sophistication and is essentially not removable in water but comes at a great price. In terms of field of view the lenses are very similar with the Inon lenses having more fisheye distortion and a wider diagonal field of view. The UWL-04 is more rectilinear and as consequence has less field of view diagonally. Only one lens has zero vignette at the wide end and this is the UWL-100 28AD with dome.
In Water Shots
I don’t have shots in water yet pending my next trip but two galleries that give an idea are here:
The second shooter has got rid of the UWL-04 to buy an Inon as not happy with corner sharpness!
My perspective is if I look at the pictures I can barely tell the difference however looking close the Inon lens is sharper at one f/stop less, the UWL-04 requires stopping at f/8 or smaller, you can happily shoot f/5.6 with the Inon which means you need less light and less strobe power.
So the time has come to talk about photography more in depth. I have actually given up stills in favor of video since a few years as I find video gets me closer to behaviors than stills do, I guess am just not patient enough to capture behaviors on still as that involves waiting!
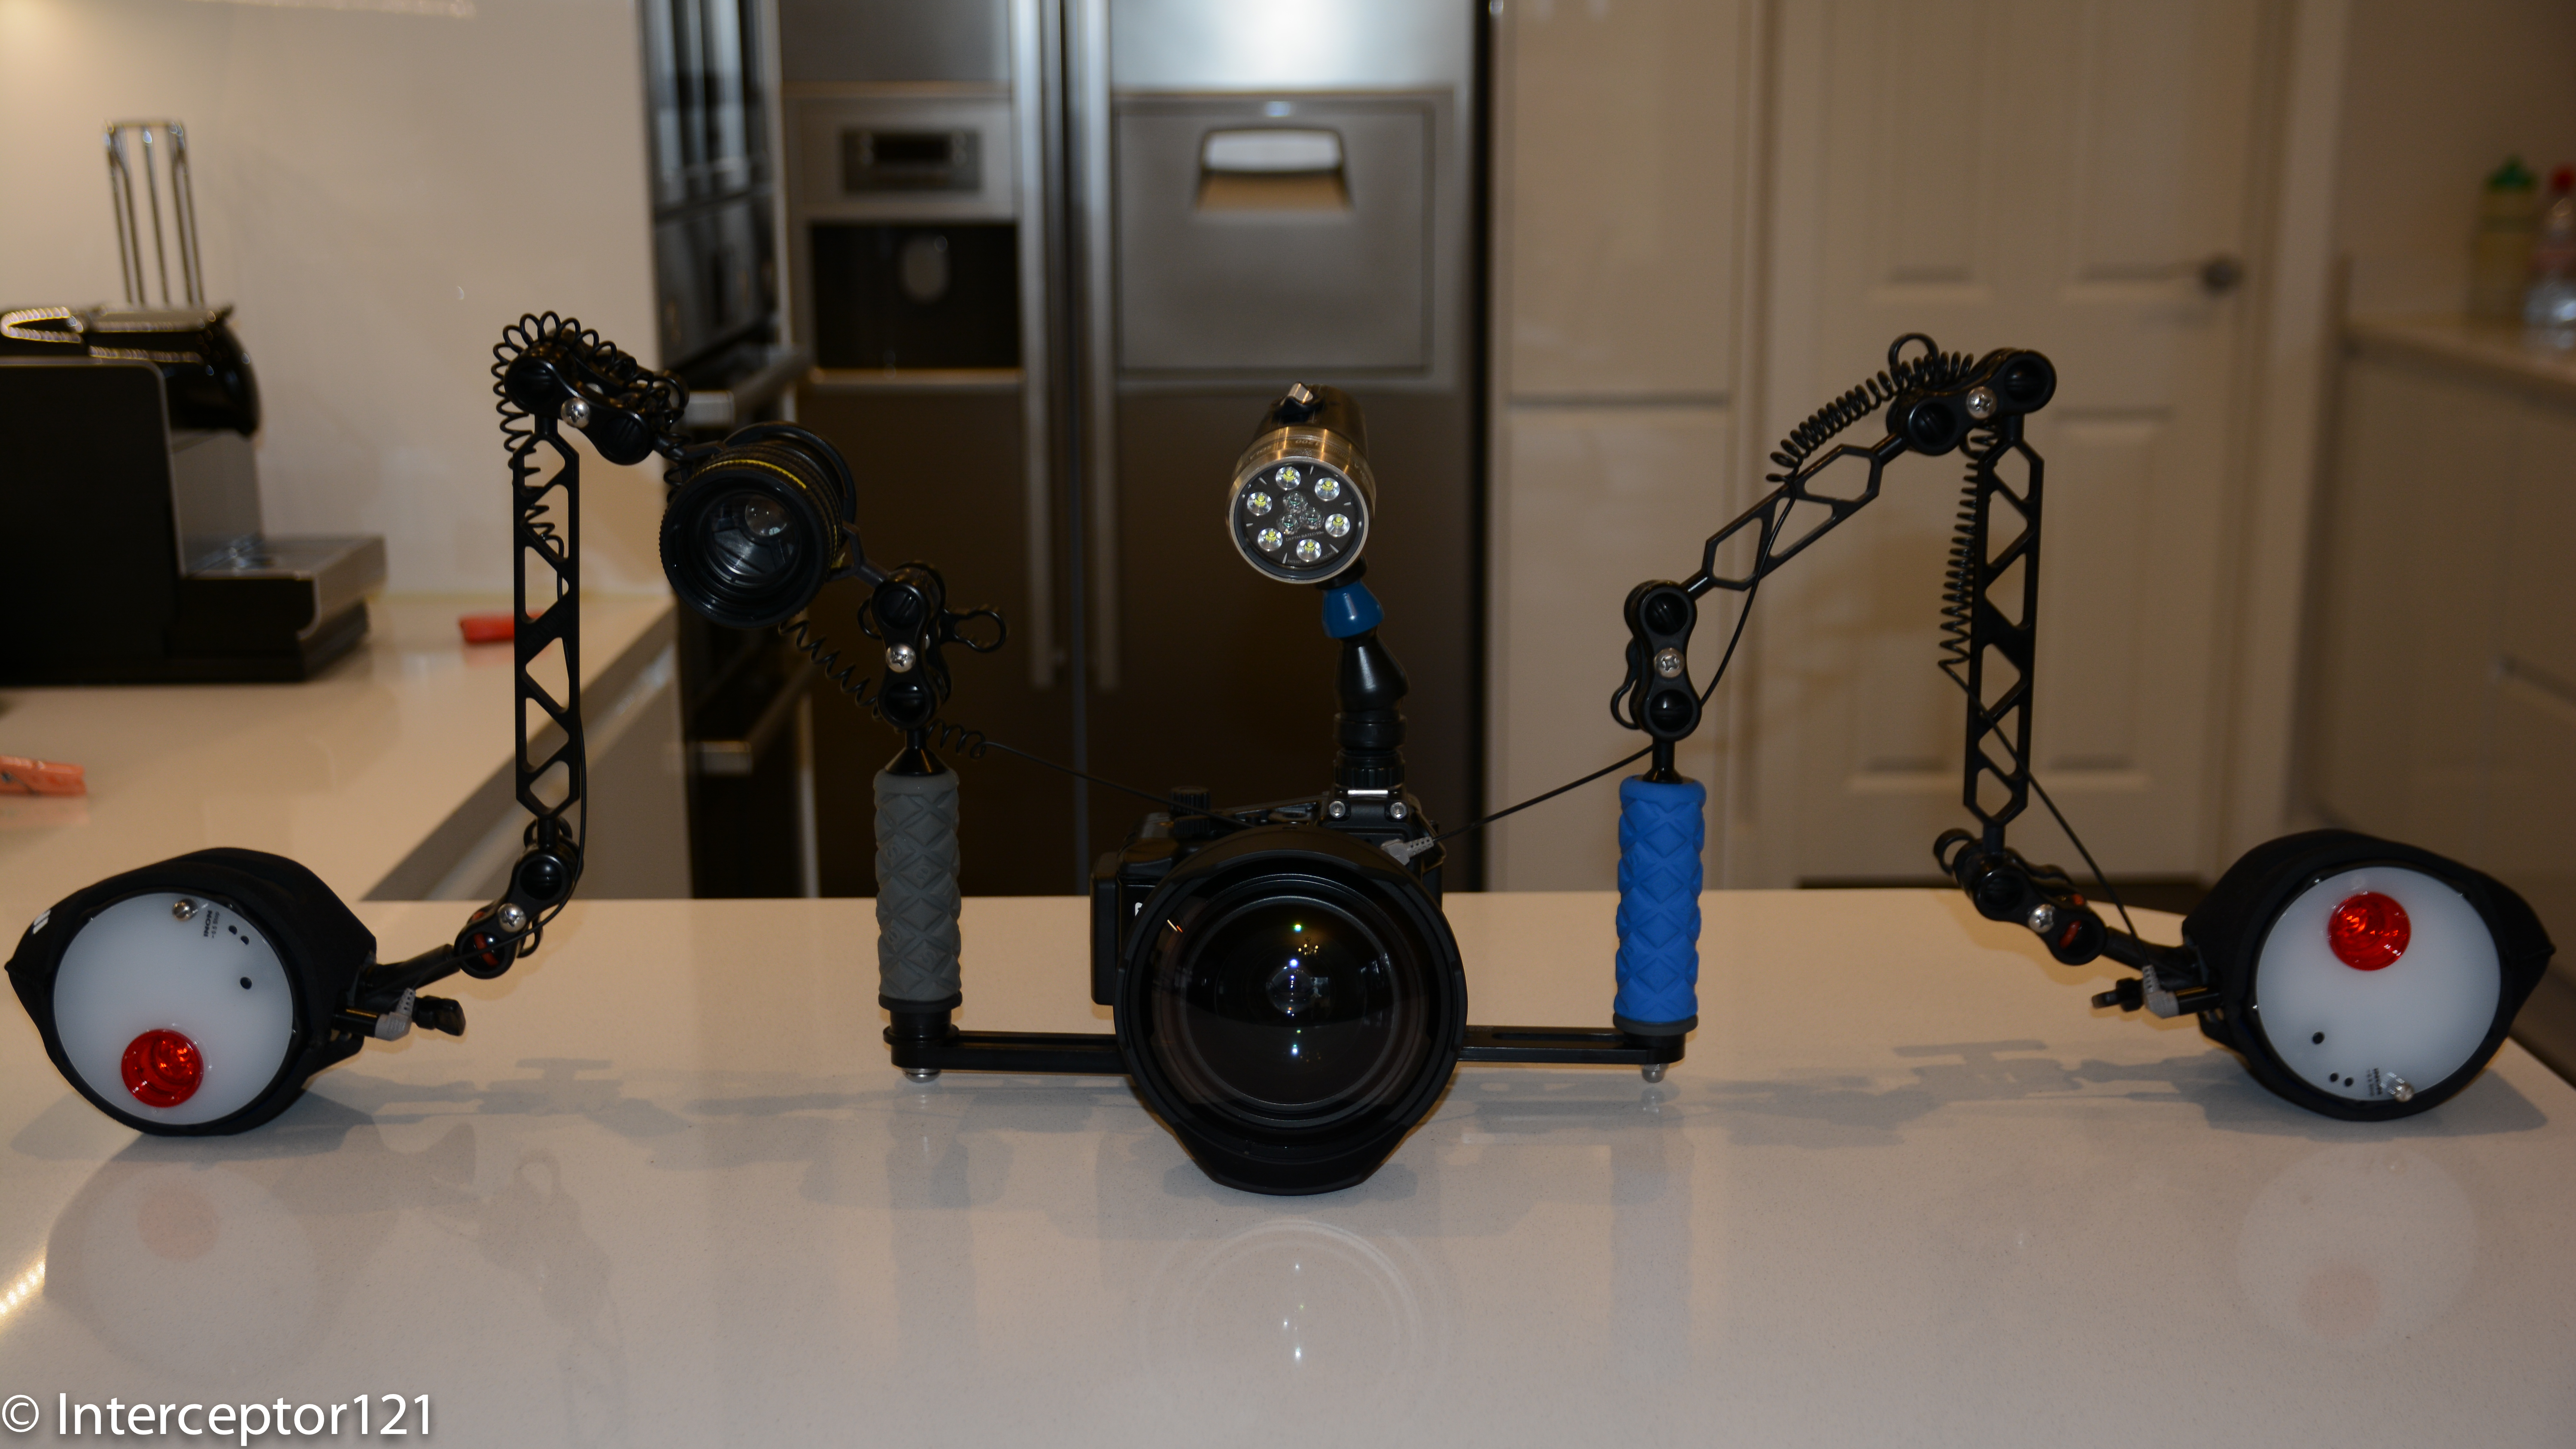
Anyway this is the rig as it is today without the floats.
Sony RX100 Mark II Still Rig as of 2014 January 20th
The RX100 is a demanding compact for the very same reason why it is the best compact the huge sensor it sports. If you come from shooting a canon or panasonic or even Olympus on a 1/1.7″ sensor you find the RX100 to be very unforgiving. In essence you can’t really just point and shoot you need to put some more thinking into your shots.
The rig that I have put together for stills has the same meticulous attention to detail than my video rig has, you would say OCD probably but here it is.
So let’s start with the housing, Nauticam just makes the best most ergonomic housing for the RX100 period. There is nothing you can think of improving about this housing. Even if the bulkhead connector is useless you can actually put a vacuum valve on it to put it to full use.
Nauticam do offer an M67 thread native on all their compact housings but I find this tedious to say the least. The beauty of a compact is that you can shoot wide and macro on the same dive, the M67 thread in essence negates this as it makes virtually impossible to change lenses on a dive. This is the reason why I went for the Inon 28AD mount for my rig using an inexpensive 10 bar adapter priced at $20 or £15.
M67-ADF adapter with Inon UWL-100 attached
Once you connect the Inon UWL-100 28AD the lens is very close to the housing to the point of nearly touching the port. This means you get no vignette with this lens with the added dome, and actually a larger field of view in water than you get with the UWL-H100. Why is that? The UWL-100 28AD has less magnification so it does not vignette even on land, once you add the dome you get almost the same field of view in water around 150º. The lens is just a tad lighter than the UWL-H100 with an in water weight of 400 grams.
The choice of the 28AD mount means you can only use the UCL-165AD close up lenses, that if attached would crash into the glass, you need therefore a 28AD->AD adapter from Inon.
28AD to AD adapter with UCL-165AD attached
You do get vignette until 50mm however this is not an issue as you shoot those lenses at the tele-end.
This is the whole lens set with the two adapters.
Two UCL-165AD, UWL-100 28AD with dome, 28AD->ADF adapter, M67-28ADF adapter
As discussed in other posts the two stacked diopters give you super macro, they are also light with 35 grams each in water. The small amount of fringing they give can be eliminated in lightroom with a single click.
Inon UCL-165AD x2 with Inon 28AD to AD adapter
The wide angle lens sports a 115mm optical glass dome with inner anti-reflection coating. If you are into observing fine detail you will notice that the dome is not actually a full semicircle but flatter, if you add the special coating this means no flare and increased contrast. If you wonder why shots taken with Inon dome lenses are sharper is because only 1% of the incoming light is reflected, against 3% of an acrylic dome, the glass dome due to the coating don’t flare, plastic ones do as simple as that.
Inon UWL-100 28AD with Dome
Now let’s move on to the strobes a twin Inon Z240 set. I have been a sea and sea user for years until I managed to damage my YS-01 and got no assistance at all from S&S since then I decided to go elsewhere.
What I love about the Z240 is the variety of controls to manage shadows, the sharp aiming light with a red filter good for the most skittish critters. Contrary to what many people think I aim directly at the subject in macro as the distance is short and backscatter is not an issue so no point aiming the strobes away for me.
FIT Sea and Sea adapter for Inon Strobes
I happened to have a pair of Sea and Sea optical L cable that served me well and had no will to change, FIT produces this cost effective adapter that goes on your Z240 and makes it compatible, I just love it.
Inon Z MV Strobe adapter
I believe Inon Z MV strobe head adapter has no equal in ergonomics but for some reason a part that is $20 in Japan sells at over $40 in US and £30 in UK so is not that popular. My second choice would be the Nauticam strobe adapter that has got the small feet needed to correctly lock on the strobe head.
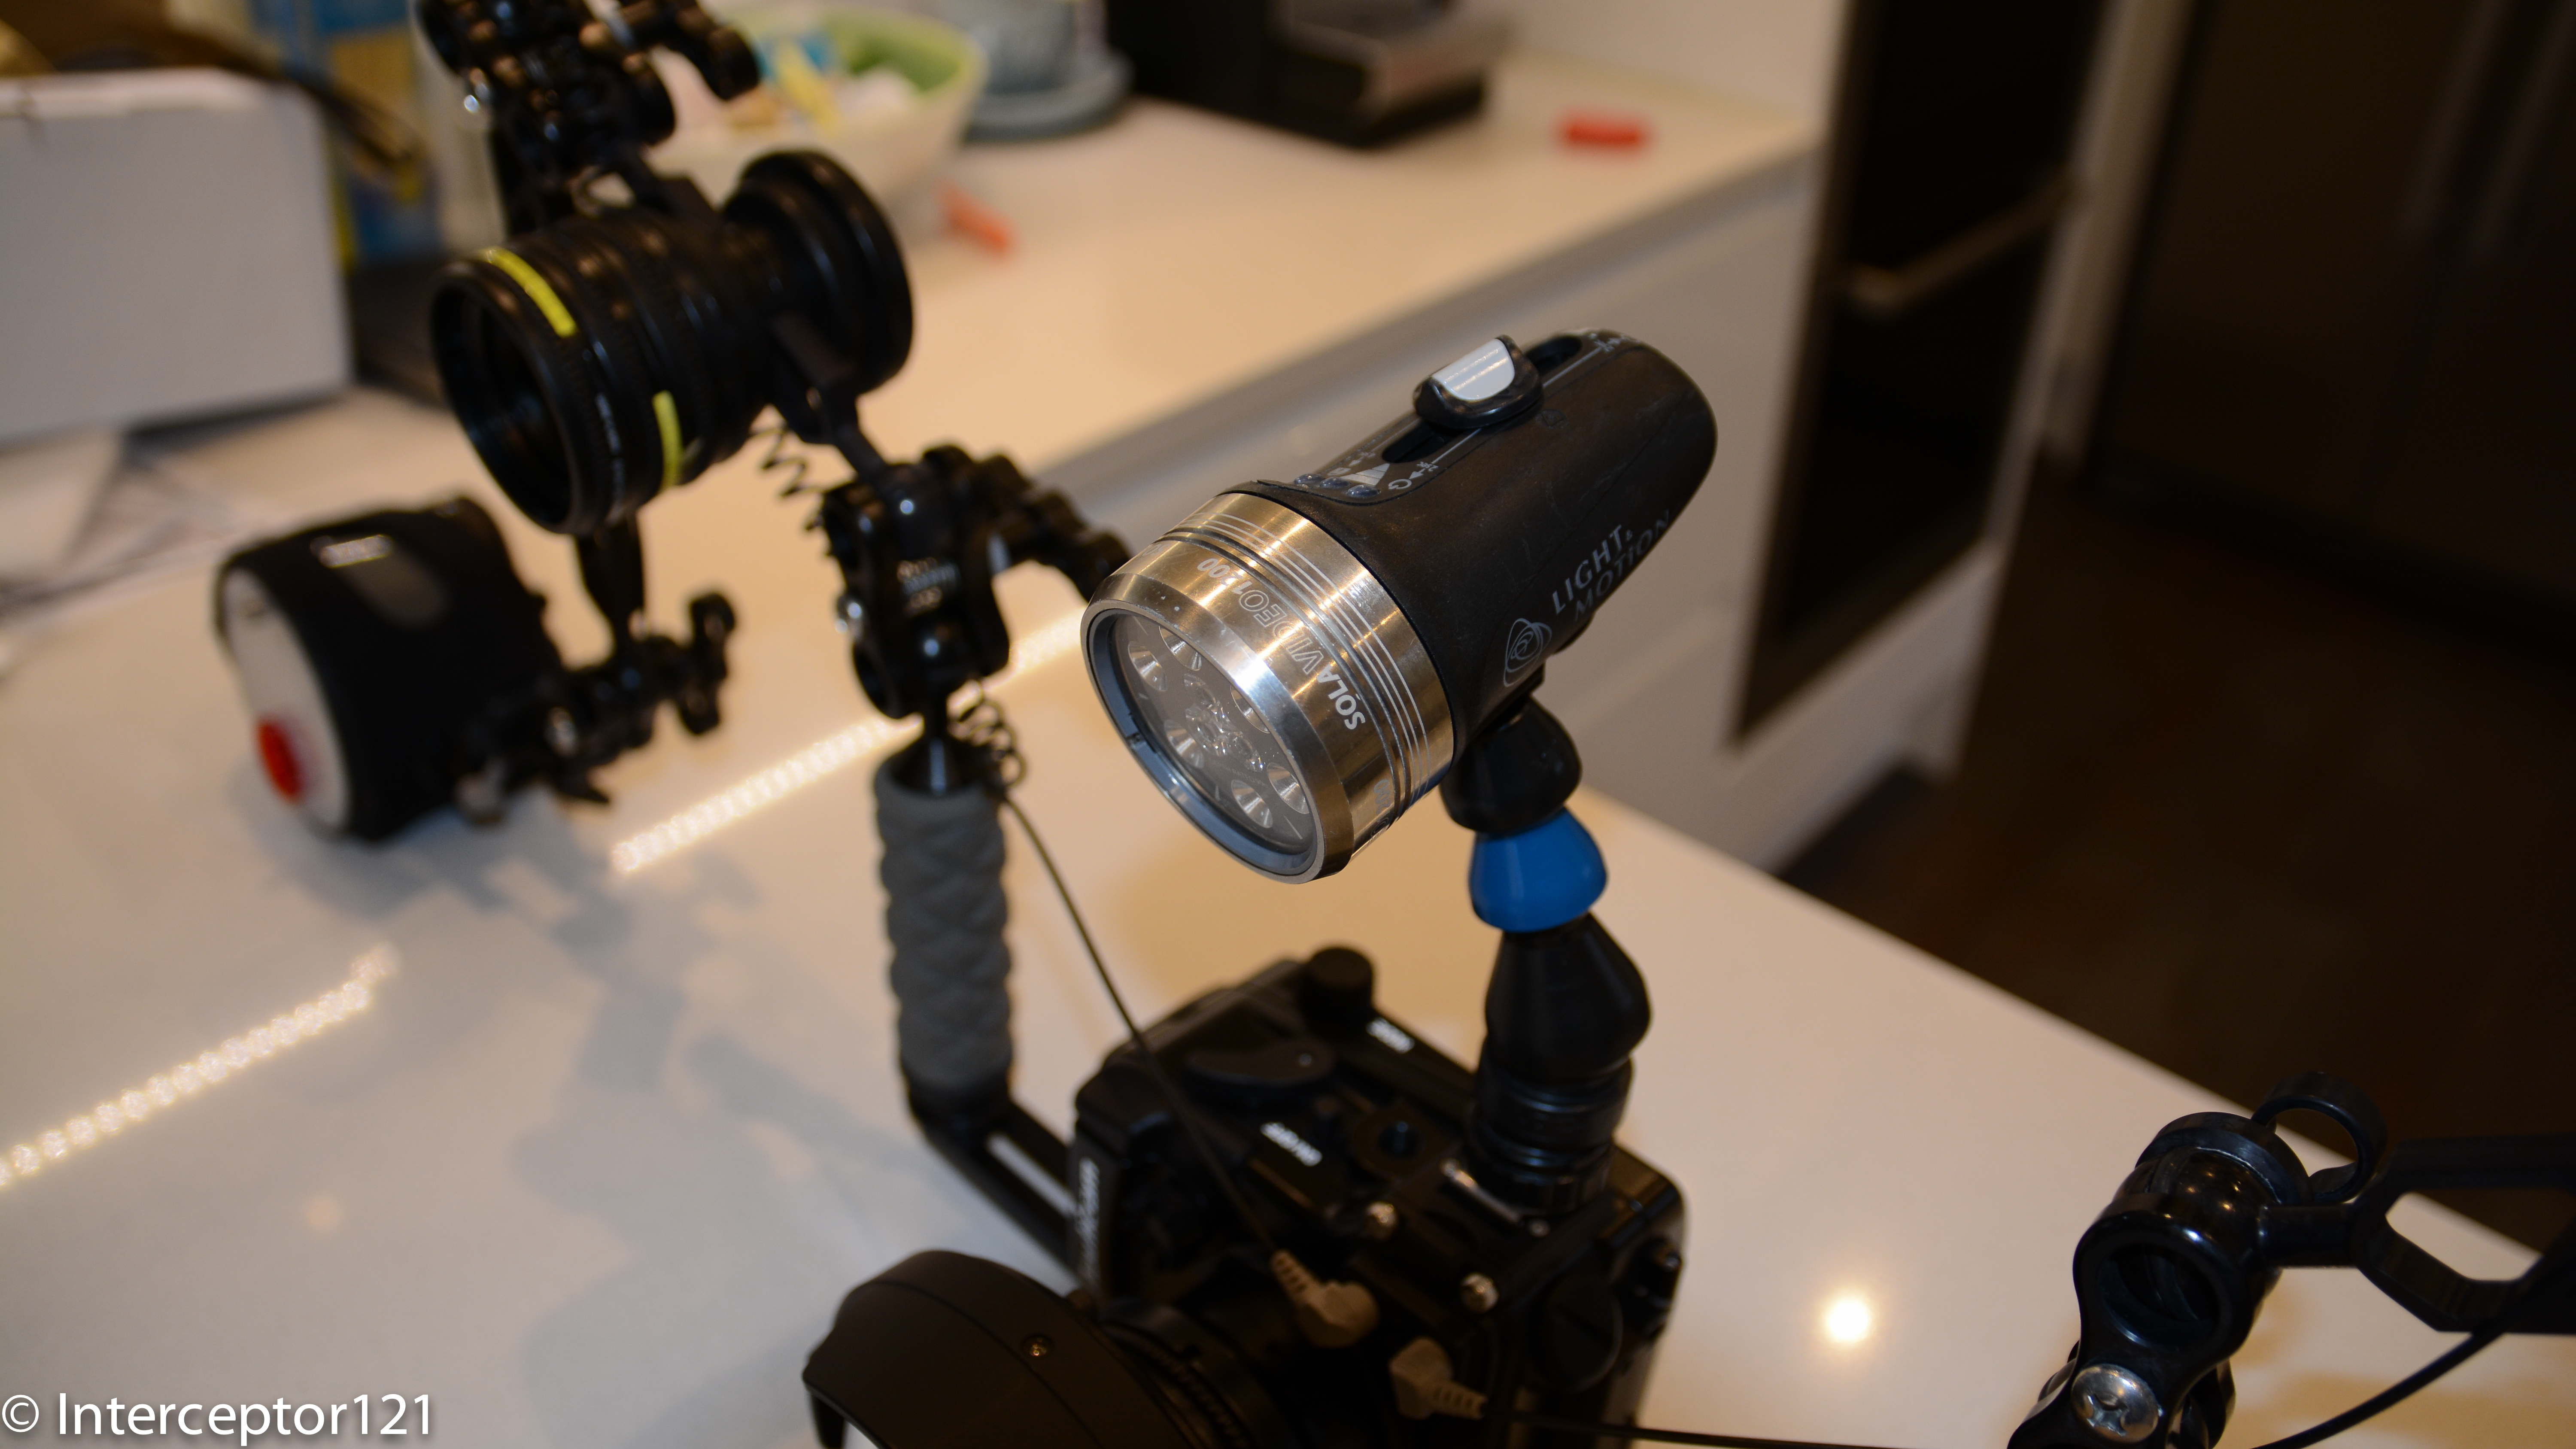
Sola 1200 on Loc line mount
With the Z240 doing wonders as aiming light there is no real room for a focus light however I have a set of Sola Video 1200 and what I like is that you can use them as dive light. I have connected them with a locline cold shoe, this will soon change to a ball mount, as the cold shoe is on the left side. Probably I will get a Sola Dive 800 so I can leave my two trays set for video and stills on the boat.
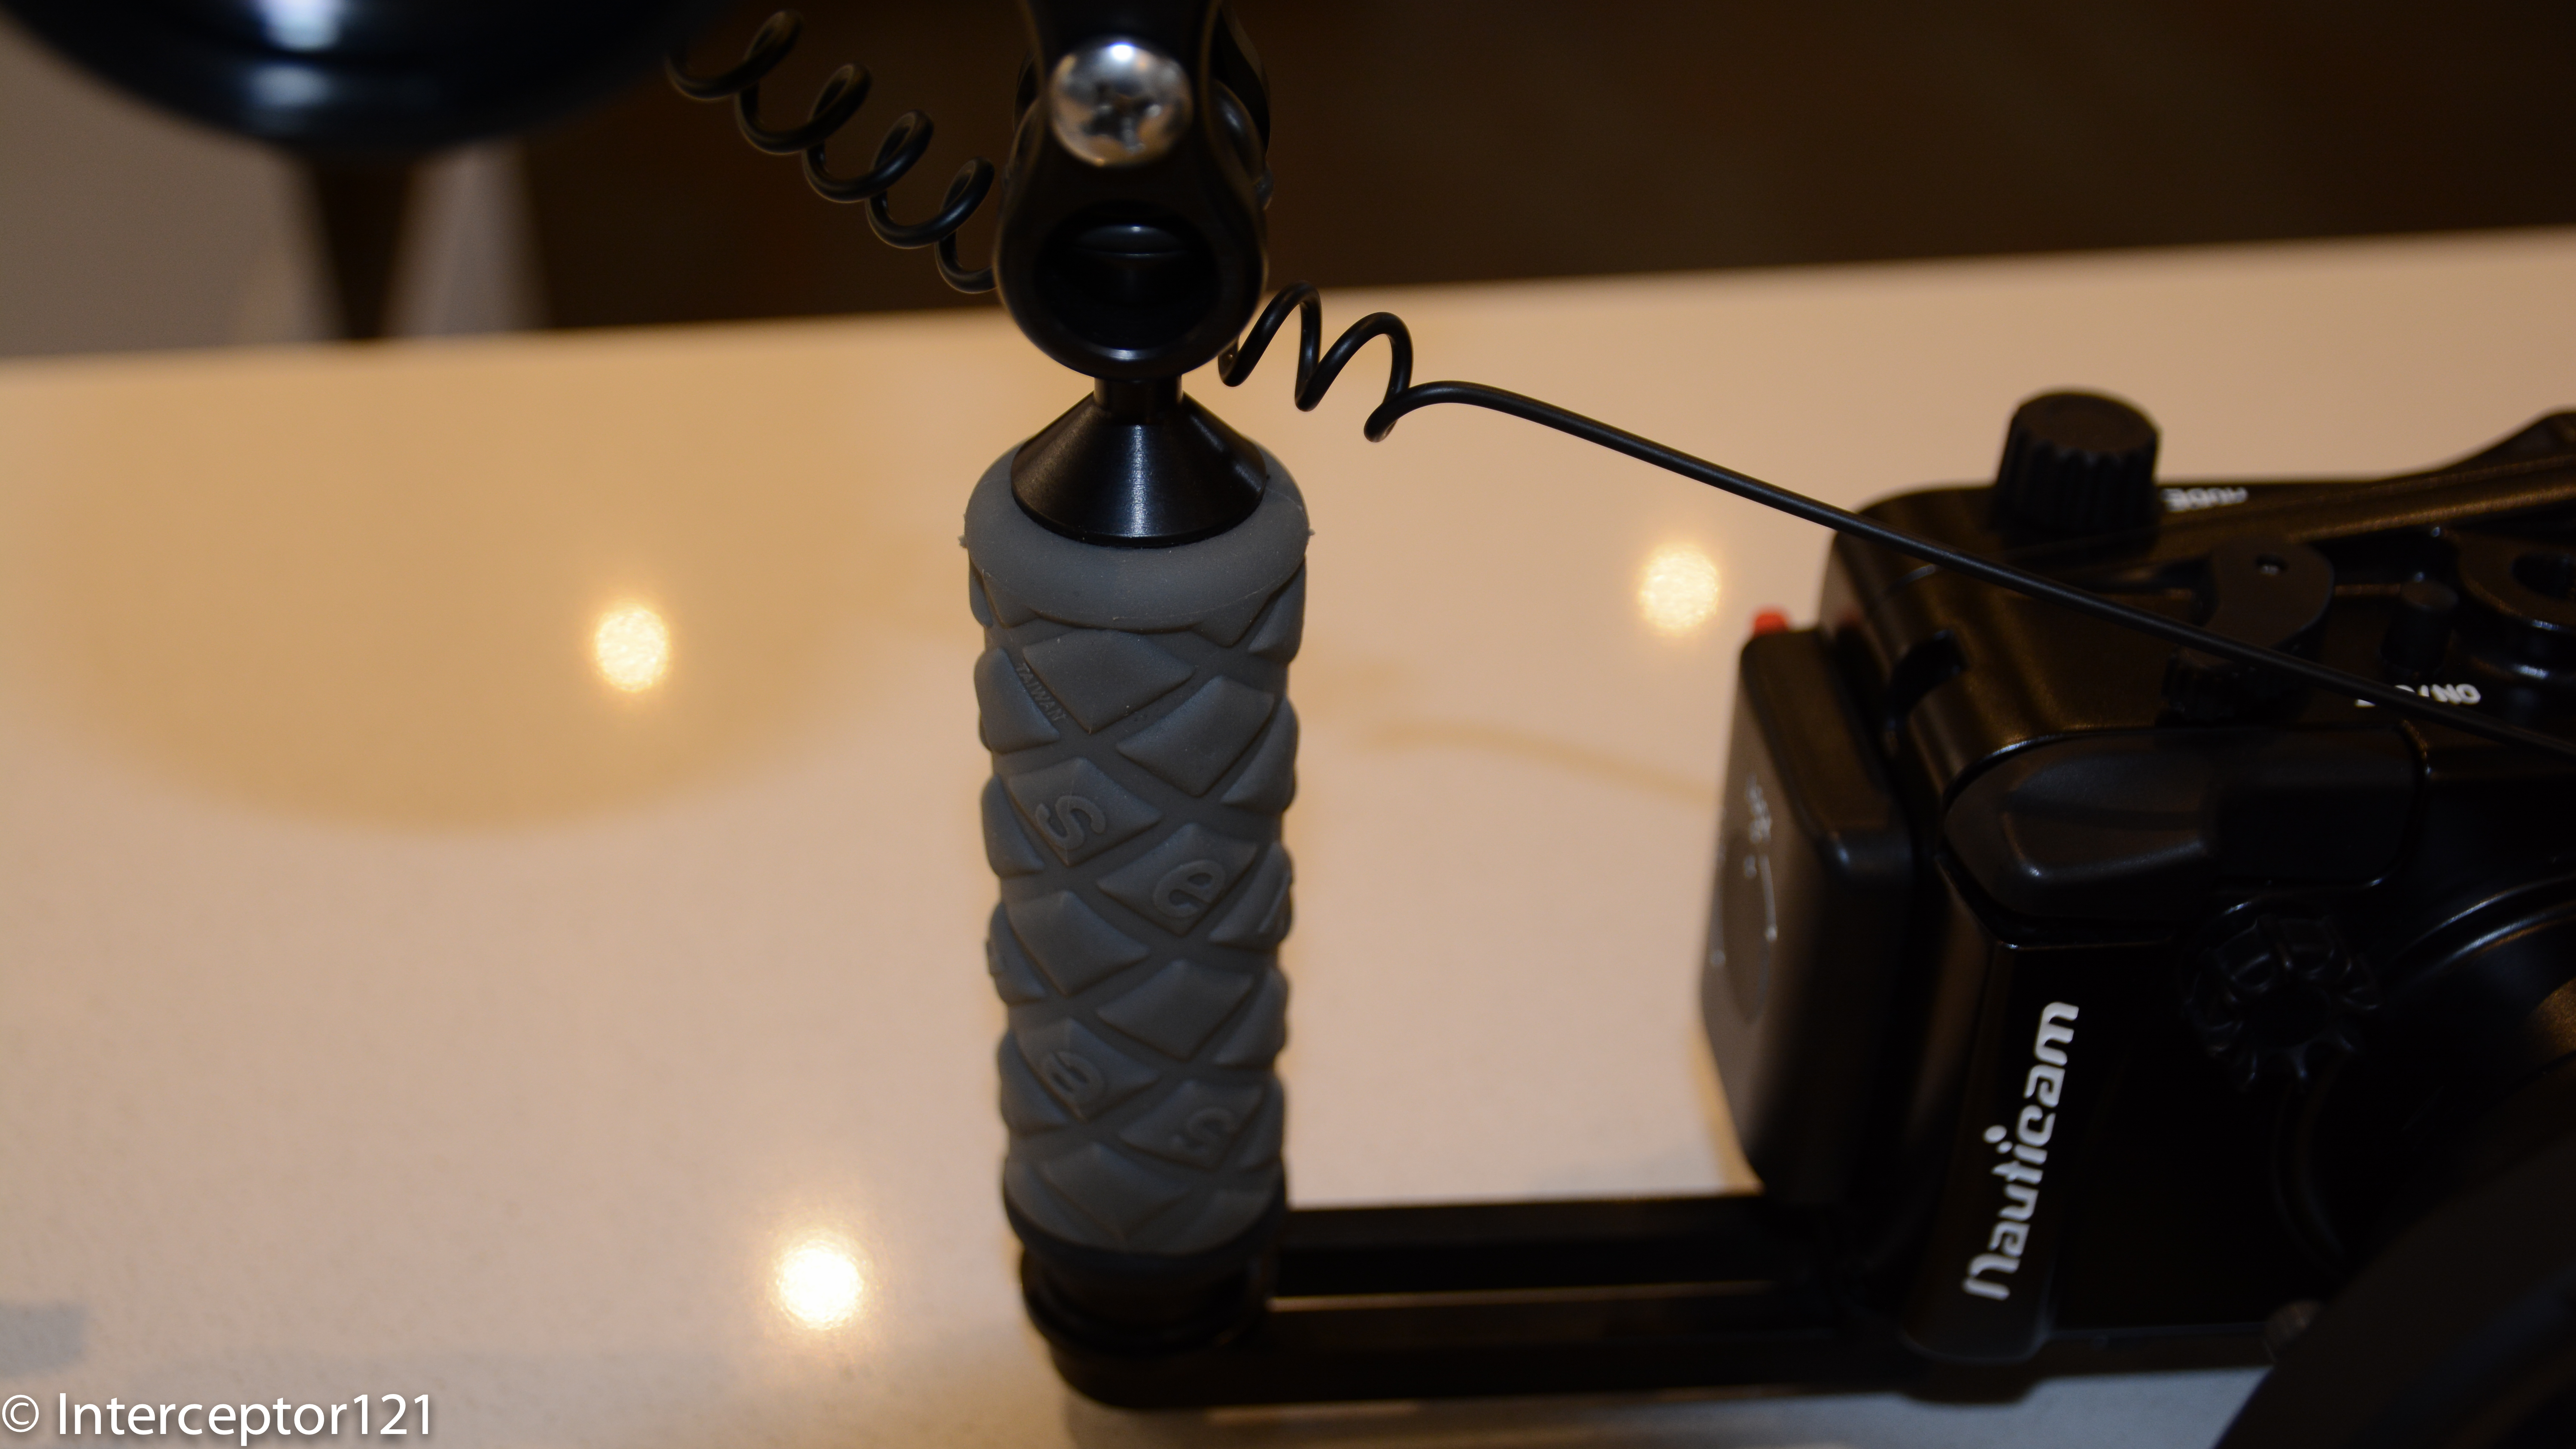
Left Handle Ultralight TR-DHB
Looking at the tray I use ultralight, it simple and sturdy and allows me to center the port in the middle of the tray.
The most attentive will see that the two handles have different colors.
Right Handle Ultralight AC-H
Why is that? Firstly I want to place the handles at maximum distance, second by placing two different handle I can ensure the ball is at the same height, this would not be true if I was using the same handle on both sides. I use a TR-DM with a TR-DUPL long extension to make the tray 30cm or 12″.
Sony RX100 Mark II Still Rig as of 2014 January 20th
So this is what it looks like, there will be floats on it, I estimate I need 8 floats to make the rig neutral with the lenses off. I am planning to place 3 on each 8″ arm segment and two on the tray however I might change this to 2 on each arm and a bespoke float on the tray bottom. I will run some test to see what works best.
So that’s all folks surely there will be questions and I look forward to answer them.
Just want to remind you that if you are in the market for a compact still or video rig I provide a personal shopper service for £30 or $45 that provides an end to end service on your budget where all you have to do is to call the shop to pay. Of course we would discuss any observations about the set up before this gets finalized, but am sure better to spend a little amount instead of making expensive mistakes!
UPDATE 9 June 2014 I have made some more changes to the rig the current version (never say final) is here