It was time to get wet and test the Canon 8 – 15 mm fisheye on the GH5 in the pool so I made my way to Luton Aspire with the help of Rec2Tec Bletchley.
I had the change to try a few things first of all to understand the store coverage of the fisheye frame, this is something I had not tested before but I had built a little model.
In purple the ideal rectangle built with the maximum width and height of the fisheye frame
This model ignores the corners the red circle are 90 degrees light beams and the amber is the 120 degrees angle. A strobe does not have a sharp fall off when you use diffusers so this model assumes your strobe can keep within 1 Ev loss around 90 degrees and then drop down to – 4 Ev at 120 degrees. I do not want to dig too deep into this topic anyway this is what I expected and this is the frame.
Shot at 1.5 meters from pool wall
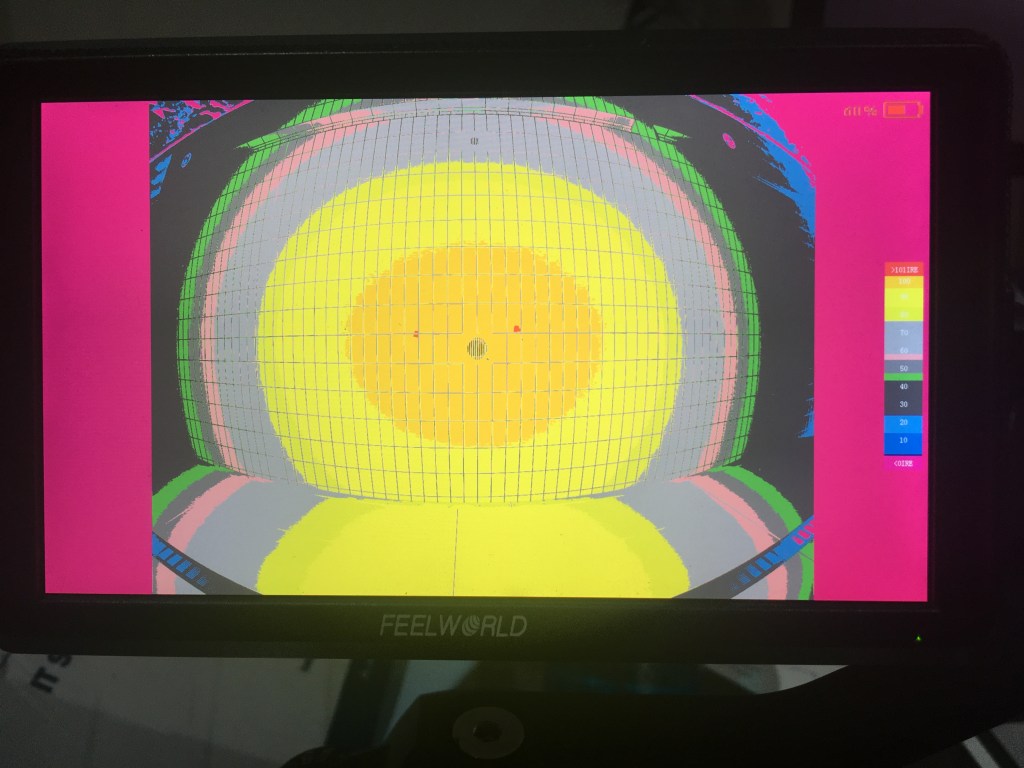
You can see a tiny reflection of the strobes together with a mask falling on the left hand side… In order to test my theory I run this through false colour on my field monitor, at first glance it looks well lit and this is the false colour.
False colour diagram of previous shot
As you can see the strobes drop below 50 at the green colour band and therefore the nominal width of those strobes is probably 100 degrees. In the deep corners you see the drop to 20 % 10% and then 0 %.
Time to take some shots
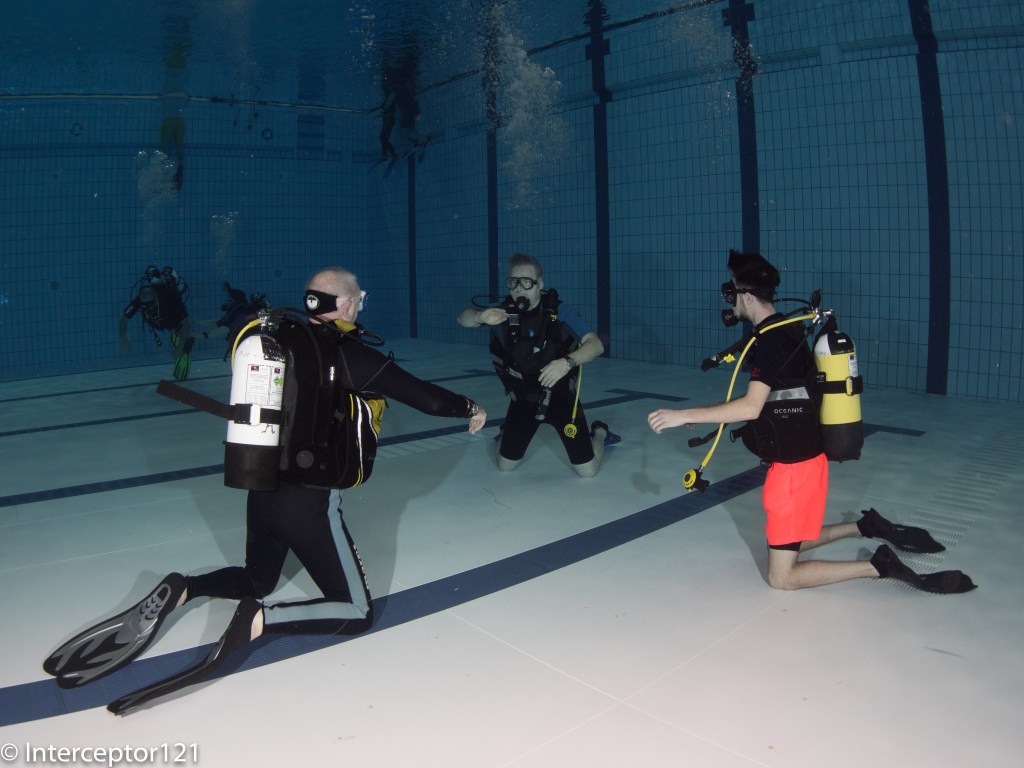
Divers hovering @ 8 mm
The lens is absolutely pin sharp across the frame, I was shooting at f/5.6 in the 140 mm glass dome.
Happy divers @ 9 mmBCD removal @ 10 mmGliding @ 11 mmOpen Water class @ 12mmDivers couple @ 13 mmHover @ 15 mm
Performance remains stunning across the zoom range. I also tried few shots at f/4
9 mm f/4
There is no reef background but looks pretty good to me.
The pool gives a strong blue cast so the shots are white balanced.
If you want details of the rig and lens mount are in a previous post
The issue is that the Ambient light filters are set for a certain depth and water conditions and does not work well outside that range. While the idea of white balancing the scene and getting colour to penetrate deep into the frame is great the implementation is hard.
Thinking about Keldan we have a 6 meters version and a 12 meters version as listed on their website. The 6 meters version works well between 4 and 12 meters and the other between 10 and 18. At the same time the Spectrum filter for the lens works down to max 15 meters and really performs better shallower than 12 meters.
With that in mind it follows that if you plan to use the spectrum filter -2 you are probably getting the 6 meters ambient filters. So what happens if you go deeper than 12 meters? The ambient light filter is not aligned to the water ambient light and the lights start to look warm this is not such a bad thing but can get bad at times.
You can of course white balance the frame with the lights however this becomes somewhat inconvenient so I wanted to come out with a different technique. In a previous post I have described how to match a lens filter to a light/strobe filter. Instead of matching the light filter to the ambient light I match the filters on land between each other in daylight conditions to obtain a combination that is as much as possible neutral. I have done this for URPRO, Magic Filter and Keldan Spectrum filter and worked out the filter that when combines give a neutral tone.
Magic filter combined with 2 stops cyan filter giving almost no cast
This tone tends to emulate the depth where the filter has the best color rendition. So in case of Keldan this is around 4 meters and so is Magic with URPRO going deeper around 6-9 meters.
The idea is that you can use the filter without lights for landscape shots and when you put the lights into the mix you can almost shoot in auto white balance or set the white balance to the depth the two were matching. I wanted to try this theory in real life so I did 3 different days of diving testing the combination I had identified the results are in this video.
The theory of matching filters worked and the filter more or less performed all as expected. I did have some additional challenges that I had not foreseen.
Filter Performance
The specific performance of a filter is dependant on the camera color science. I have had great results with URPRO combined with Sony cameras but with Panasonic I always had an orange cast in the clips.
Even this time the same issue is confirmed with the URPRO producing this annoying cast that is hard if not impossible to remove also in post.
The Magic filter and the Spectrum filter performed very close, with magic giving a more saturated and baked in image with Keldan maintaining a higher tone accuracy. This is the result of the design of the filters: the Magic filter has been designed to take outstanding picture better than life, the Spectrum filter has been designed using tools to give accurate color rendition. What it means is that the magic images look good even in the LCD while Keldan are a bit dim but can be helped in post.
Looking at the clip in the first 3 and half minutes you can’t tell apart Magic and Spectrum down to 9 meters, with the URPRO giving consistent orange cast.
Going a bit deeper I realised you also need a scenario where you are swimming closer to a reef and want to bring some lights in the frame because you are outside the best working range of the filter. In order to avoid excessive gap when approaching the reef I had stored white balance readings at 6 9 12 15 meters so when I had a scene with mixed light instead of balancing for say 15 meters and then having an issue with the light I used the 9 meters setting so the image is dim when you are far and gets colorful as you approach which is somehow expected in underwater video.
The section at 15 meters are particularly interesting
You can see that URPRO gets better with depth but also how at 5:46 you see a fairly dim reef at 5:52 I switch on the lights and the difference is apparent.
At 6:20 the approach with Keldan was directly with the lights the footage still gives an idea of depth however the colours are there and the background water looks really blu as I had white balance set for 9 meters.
Key Takeaways
All filters produced acceptable results however I would not recommend URPRO for the Panasonic GH5 and settle for the Magic Filter or the Spectrum filter. Today the spectrum is the only wet filter for the Nauticam WWL-1 but I am waiting for some prototypes from Peter Rowlands for the magic. I would recommend both the magic and the spectrum and the choice really depends on preference. If you want a ready look with the least retouching the magic filter is definitely the way to go as it produces excellent ready to use clips that look good immediately in the LCD.
The Keldan Spectrum filter has a more desaturated look and requires more work in post but has the benefit of a more accurate image.
I think this experiment has proved to work and I will use this method again in the future. This method is also potentially available using the keldan or other ambient light using a tone that closely matches the lens filter.
I think the subject of frame rates for underwater video is filled with a level of non-sense second to none. Part of this is GoPro generated, the GoPro being an action cam started proposing higher frame rates as standard and this triggered a chain reaction where every camera manufacturer that is also in the video space has added double frame rate options to the in codec camera.
This post that no doubt will be controversial will try to demistify the settings and eliminate some fundamental misconception that seem to populate underwater videography.
The history of frame rates
The most common frame rates used today include:
24p – used in the film industry
25p – used in the PAL broadcasting system countries
30p – used in the NTCS broadcasting system countries
PAL (Phase Alternating Line) and NTSC (National Televion System Committee) are broadcasting color systems.
NTSC covers US South America and a number of Asian countries while PAL covers pretty much the rest of the world. This post does not want to in the details of which system is better as those systems are legacy of interlaced television and Cathodic Ray Tubes and therefore are for most something we have to put up with.
Today most of the video produced is consumed online and therefore broadcasting standards are only important if you produce something that will go on Tv or if your footage includes artificial lighting that is connected to the power grid – so LED does not matter here.
So if movies are shot in 24p and this is not changing any time tomorrow why do those systems exist? Clearly if 24p was not adequate this would have changed time ago and except some experiments like ‘The Hobbit’ 24p is totally fine for today use even if this is a legacy of the past.
The human eye has a reaction time of around 25 ms and therefore is not actually able to detect a moving object in the frame at frame rates higher than 40 frames per second, it will however detect if the whole room moves around you like in a shoot out video-game. Our brain does a brilliant job of making up what is missing and can’t really tell any difference between 24/25/30p in normal circumstances. So why do those exist?
The issue has to do with the frequency of the power grid and the first Tv based on Cathodic Ray Tube. As the power of the grid runs at alternate current with a frequency of 60 Hz in the US when you try to watch a movie on Tv that has been shot at 24p this has judder. The reason is that the system works at 60 cycles per second and in order to fit your 24 frames per second there is a technique called Telecine. To make it short artificial fields are added each 4 fields so that this comes up to 60 per second however this looks poor and creates judder.
In the PAL system the grid runs at 50 Hz and therefore 24p movies are accelerated to 25p and this the reason the durations are shorter. The increased pitch in the audio is not noticeable.
Clearly whey you shoot in a television studio with a lot of grid powered lights you need to make sure you don’t have any flicker and this is the reason for the existence of 25p and 30p video frame rates. Your brain can’t tell the difference between 24p/25p/30p but can very easily notice judder and this has to be avoided at all costs.
When using a computer display or a modern LCD or LED Tv you can display any frame rates you want without issues therefore unless you are shooting under grid power artificial lights you do not have to stick to any broadcasting system.
180 Degrees Angle Rule
The name is also coming from a legacy however this rule establishes that once you have set the frame rate your shutter speed has to be double of that. As there is no 1/48 shutter 24/25p are shot at 1/50s and 30p is shot at 1/60s this makes sure also everything stays consistent with possible flicker of grid powered lights.
The 180 degrees angle rule gives each frame an amount of motion blur that is similar to those experienced by our eyes.
It is well explained on the Red website here. If you shoot slower than this rule the frames look blurry if you choose a faster shutter speed you eliminate motion blur so in general everybody follows this and it works perfectly fine.
Double Frame Rates
50p for PAL and 60p for NTSC are double frame rates that are not part of any commercial broadcasting and today are only supported officially for online content.
As discussed previously our reaction time is not able to detect more than 40 frames per second anyway so why bother shooting 50 or 60 frames per second?
There is a common misconception that if you have a lot of action in the frame then you should increase the frame rate but then why when you are watching any movies you don’t feel there is any issue there even if you are watching Iron Man or some sci-fi movie?
That is because those features are shot well with use of a lot of equipment that makes the footage rock steady, the professionals that do it follow all the rules and this looks great.
So the key reason to use 50p or 60p has to do with not following those rules and not being that great of shooting things in a somehow unconventional manner.
For example you hold the camera while you are moving for example a dashboard cam, or you hold the camera while running. In this case the amount of changes in the frame is substantial as you are moving not because things around you are moving. So if you were still in a fixed point it will not feel like there is a lot of movement but if you start driving your car around there is a lot of movement in the frame.
This brings the second issue with frame rates which is panning again I will refer to Red for panning speed explanation.
So if you increase the frame rate from 30 to 60 fps you can double your panning speed without feeling sick.
Underwater Video Considerations
Now that we have covered all basics we need to take into account the reality of underwater videography. Our key facts are:
No panning. Usually except some cases the operator is moving with the aid of fins. Panning would require you to be in a fixed point something you can only do for example in a shark dive in the Bahamas
No grid powered lights – at least for underwater scenes. So unless you include shots with mains powered lights you do not have to stick to a set frame rate
Lack of light and colour – you need all available light you can use
Natural stabilisation – as you are in a water medium your rig if of reasonable size is floating in a fluid and is more stable
The last variable is the amount of action in the scene and the need of slow motions – if required. The majority of underwater scenes are pretty smooth only in some cases, sardine runs, sea lions in a bait ball there really is a lot of motion and in most cases you can increase the shutter speed without the need to double the frame rate.
When I see video shot at 50/60p and played back at half speed for the entire clip is really terrible and you loose the feeling of being in the water so this is something to be avoided at all costs and it looks plain ugly.
Furthermore you are effectively halving the bit rate of your video and to add more usually the higher frame rate of your camera is not better than the normal frame rate of your camera and you can add more frames in post if you wanted to have a more fluid look or perform a slow motion.
I have a Panasonic GH5 and have the luxury of normal frame rates, double frame rates and even a VFR option specifically for slow motions.
I analysed the clips produced by the camera using ffprobe to see how the frames are done and how big they are and discovered a few things:
The 50/60p recording options at 150 Mbps have a very long GOP essentially a full frame is recorded every 24 frames while the 100 Mbps 25/30p records a full frame every 12 frames. So the double frame rate has more frames but is NOT better at managing fast moving scenes and changes in the frame.
The VFR option allows you to set a higher frame rate and then slows down recording to the frame rate of choice. For some reason the 24p format has more options than all the others and the 25p does not even have a 50% option. As the footage is recorded at 100 Mbps the VFR footage at half speed conformed to 30p is higher quality than 60p slowed down to 30p (100 Mbps vs 150/2=75 Mbps) in terms of key frames and ability to predict motion this is better as it has double the amount of key frames per second see this explanation with details of each frame look for the I frames.
The AVCI all intra option has actually only I frames and it will have 24/25/30 of them per second and therefore it is the best option to detect fast movement and changes in the frame. If you need to slow this down this still has 12 key frames per second so other frames can easily be interpolated.
Slow motion – as the image will be on the screen for longer and it is slowed down you need to increase the shutter speed or it will look blurry. So if you intend to take a slow mo you need to make that decision at time of your shot and go for a 90 or 45 degree angle. This remains through if you use VFR or if you slow down AVCI clips in post
If you decided AVCI is not for your the ProRes choice is pretty much identical and again you do not need to shoot 50/60p unless you have specific situations. In general AVCI is equal or better than ProRes so the whole point of getting a recorder is highly questionable but that is another story.
For academic purposes I have compared the 3 different ways Final Cut Pro X does slow down. To my surprise the best method is the ‘Normal Quality’ which also makes sense as there are many full frames.
Now it is interesting to compare my slow motion that is not ideal as I did not increase the shutter speed as the quality of AVCI is high the footage looks totally fine slowed down
Various slow motion technique in FCPX with 1/50s shutter
Looking at other people example you get exactly the wrong impression you take a shot without increasing the shutter speed and then slow it down. The reason why 60p looks better is for the shutter speed not for the image quality itself it is also completely unneeded to slow down a whale shark as it glides through the water.
The kind of guidance you get
So taking this kind of guidance blindfolded is not a good idea.
Key Take Aways
Unless you shoot using main grid powered lights you can choose any frame rate you want 24/25/30 fps.
Shutter speed is important because it can give a motion blur or freeze motion in case of a slow motion clip
You need to choose what scenes are suitable for slow motion at time of capture
Slowing down systematically your footage is unnatural and looks fake
Using formats like AVCI or ProRes gives you better option for slow down than 50/60 fps implementation with very long GOP
VFR options can be very useful for creating purposes although they have limitations (fixed focus)
How do I shoot?
I live in a PAL system country however I find always limitations with the 25 fps options in camera. The GH5 VFR example is not the only one. All my clips are shot 24 fps 1/50s, I do not use slow motion enough and if I did I would probably keep using AVCI and increase the shutter speed depending on the effect I want to give to the scene, this is also the most natural and easier way to shoot underwater as you do not have to continuously change format. Having all intra frames gives me all the creativity I need also for speed ramps that are much more exciting than plain slow motion see this example.
Looking at Nauticam port chart the only option for a fisheye zoom is to combine the Panasonic PZ 14-42 with a fisheye add on lens. This is a solution that is not that popular due to low optical quality.
So micro four thirds users have been left with a prime fisheye lens from Panasonic or Olympus…until now!
Looking at Nauticam port chart we can see that there is an option to use the Speedbooster Metabones adapter and with this you convert your MFT camera to a 1.42x crop allowing you to use Canon EF-M lenses for cropped sensor including the Tokina 10-17mm fisheye. This is certainly an option and can be combined with a Kenko 1.4x teleconverter giving you a range of 14.2 to 33.8 mm in full frame equivalent or 7.1 to 16.9 mm in MFT terms fisheye zoom of which the usable range is 8 -16.9 mm after removing vignetting.
A further issue is that the Speedbooster gives you another stop of light limiting the aperture to f/16 while this is generally a bonus for land shooting in low light underwater we want to use all apertures all the way to f/22 for sunbursts even if this means diffraction problems.
This lens on full frame can be used for a circular and diagonal fisheye but Wolfgang has devised a method to use it as an 8-15mm fisheye zoom on MFT.
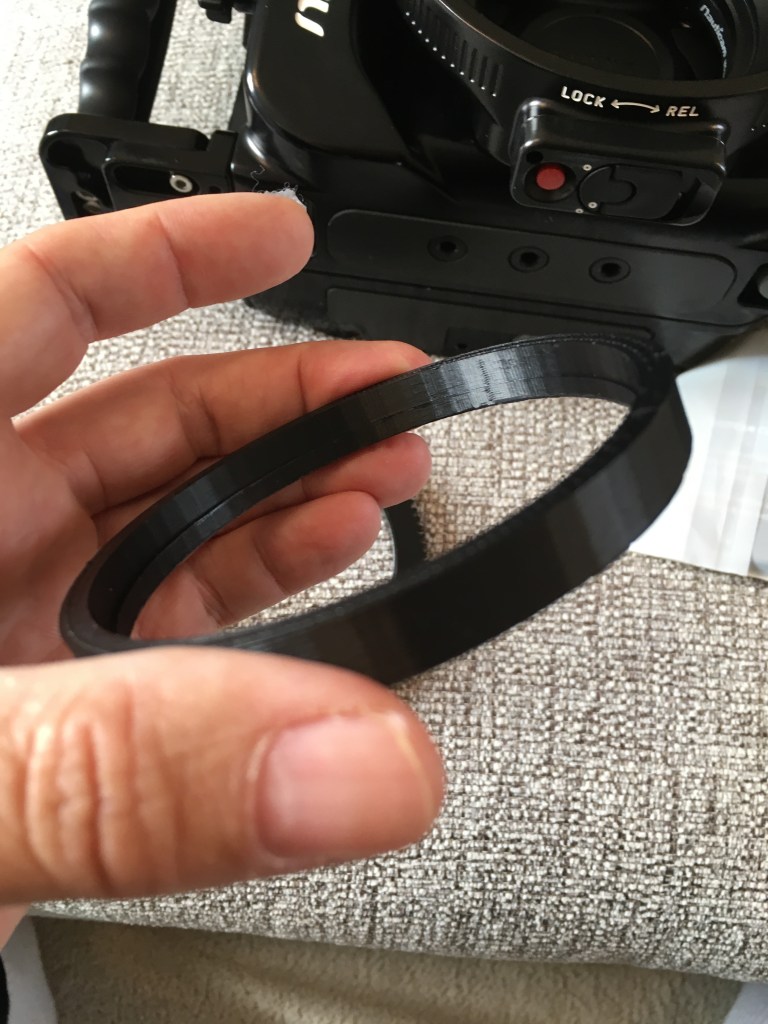
Part list – missing the zoom gear
What you need are the following:
Canon EF 8-15mm f/4L fisheye USM
Metabones Smart Adapter MB_EF_m43_BT2 or Viltrox EF-M1 Adapter
A 3D printed gear extension ring
Nauticam C-815Z zoom gear
Nauticam 36064 N85 to N120 34.7mm port adapter with knob
Nauticam 21135 35mm extension ring with lock
Nauticam 18810 N120 140mm optical glass fisheye port
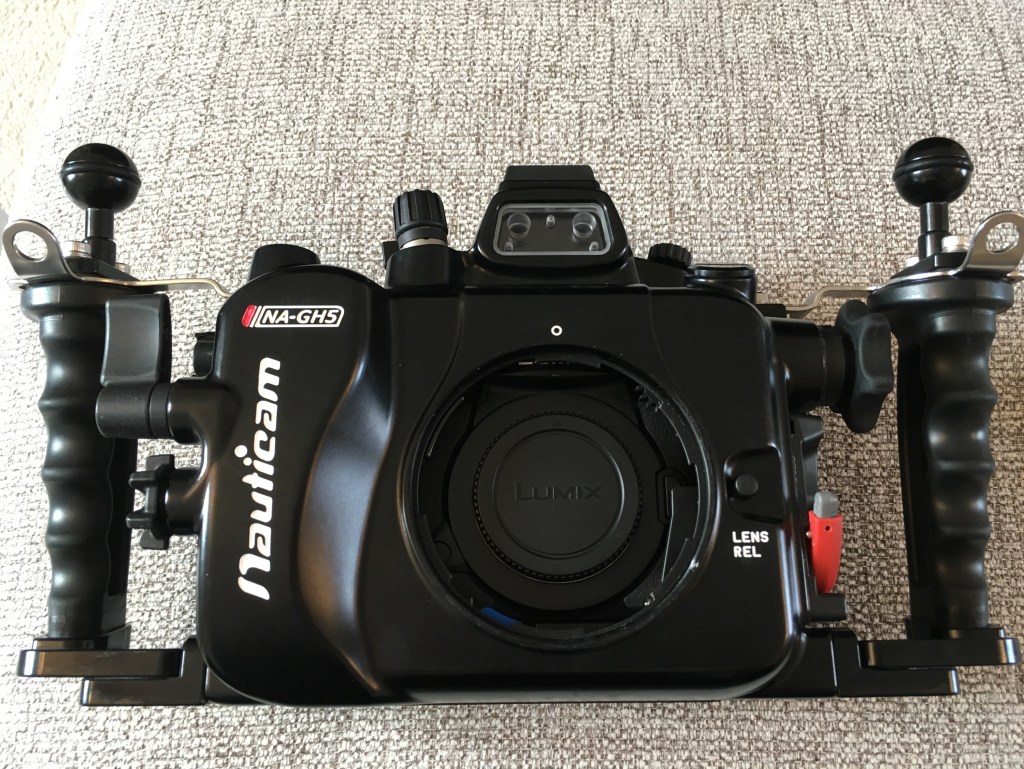
The assembly is quite complicated as the lens won’t fit through the N85 port. It starts with inserting the camera with no lens in the housing.
GH5 body only assemblyCamera in housing without port
The next step is to fit the port adapter
Attach N85 N120 Metabones adapter
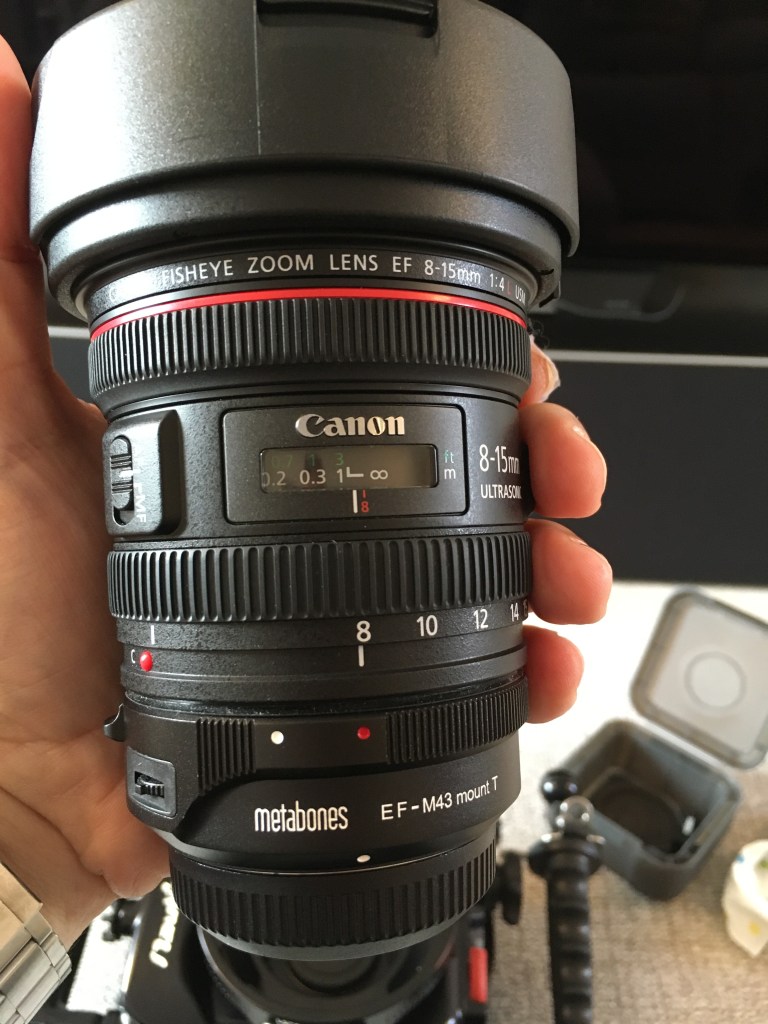
Then we need to prepare the lens with the smart adapter once removed the tripod mount part.
Canon 8-15 on Metabones Smart Adapter IV
As the port is designed for the speed booster the lens will be few mm off therefore the gear will not grip. Wolfgang has devised a simple adapter to make it work.
gear extension ringZoom gear on lens
This shifts the gear backwards allowing to grip on the knob.
Looking at nauticam port chart an extension ring of 30mm is recommended for the speedbooster and now we have extra 5mm in length Wolfgang uses a 35mm extension. however looking at the lens entrance pupil I have concluded that 30mm will be actually better positioned. Nauticam have confirmed there won’t be performance differences. You need to secure the ring on the dome before final assembly.
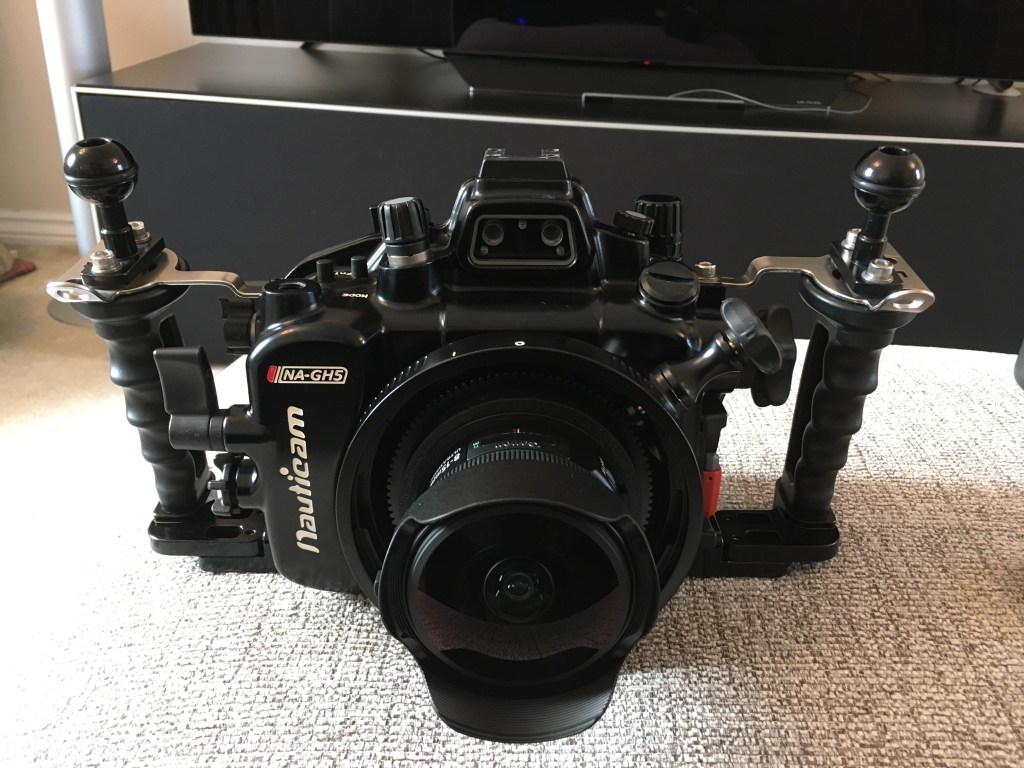
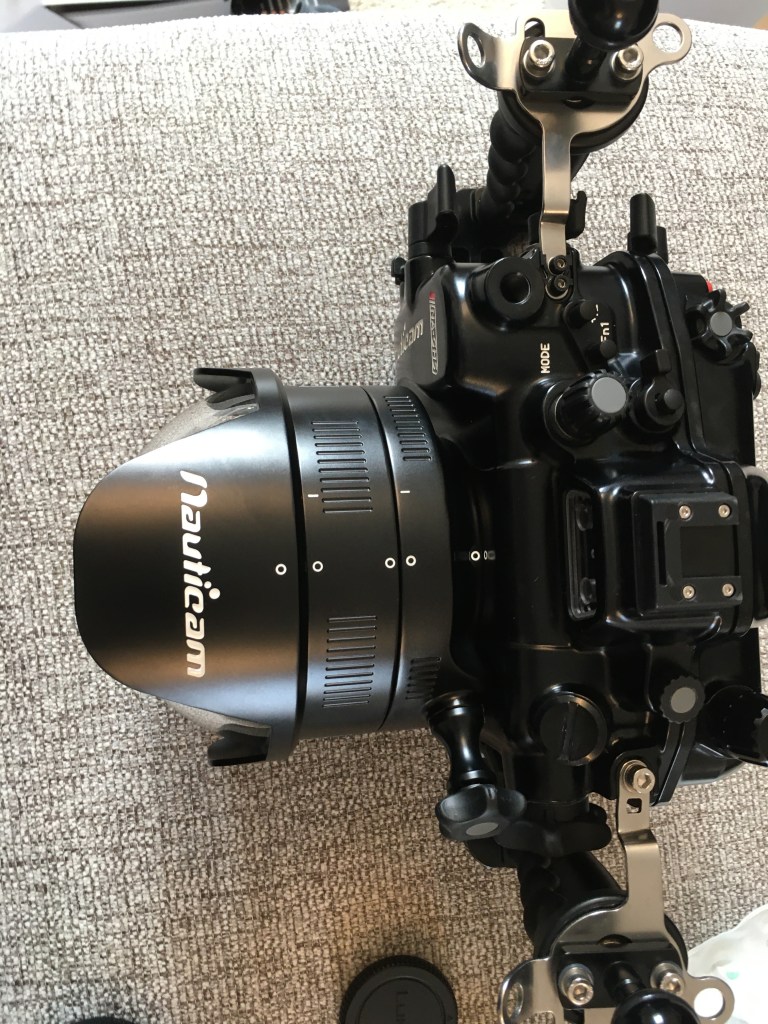
Fisheye dome and extensionFull assembly top viewSide front view
The rig looks bigger than the 4.33 dome but the size of the GH5 housing is quite proportionate. It will look bigger on a traditional small size non clam style housing.
The disassembly will be made again in 3 steps.
Disassembly
I am not particularly interested in the 1.4x teleconverter version consider that once zoomed in to 15mm the lens is horizontally narrower than a 12mm native lens so there is no requirement for the teleconverter at all.
This table gives you an idea of the working range compared to a rectilinear lens along the horizontal axis as diagonal is not a fair comparison. The lens is very effective at 8-10mm where any rectilinear would do bad then overlaps with an 8-18mm lens. The choice of lens would be dictated by the need to have or not straight lines. The range from 13mm is particularly useful for sharks and fish that do not come that close.
Focal length
Horizontal
Vertical
Diagonal
Horizontal Linear Eq
Width
Height
Diagonal
8
130.9
95.9
170.2
17.3
13
21.64
9
114.9
84.7
147.8
10
102.5
75.9
131.0
6.9
11
92.6
68.7
117.8
8.3
12
84.5
62.9
107.2
9.5
13
77.7
57.9
98.4
10.8
14
72.0
53.7
90.9
11.9
15
67.0
50.1
84.6
13.0
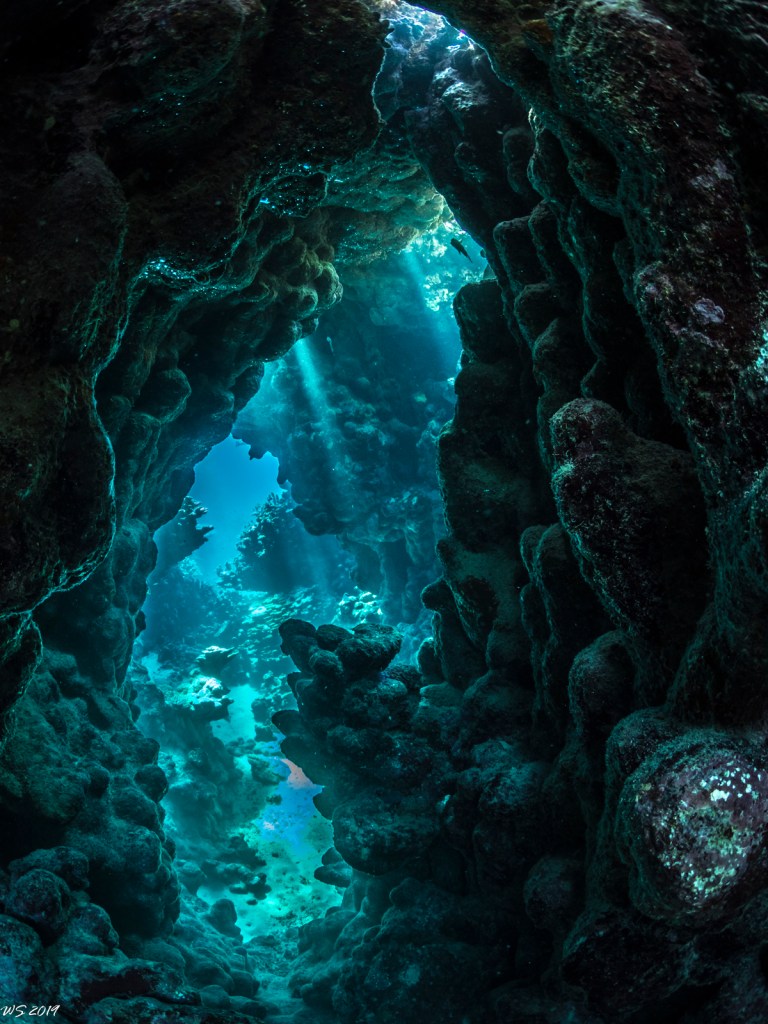
Wolfgang has provided me with some shots that illustrate how versatile is this set up.
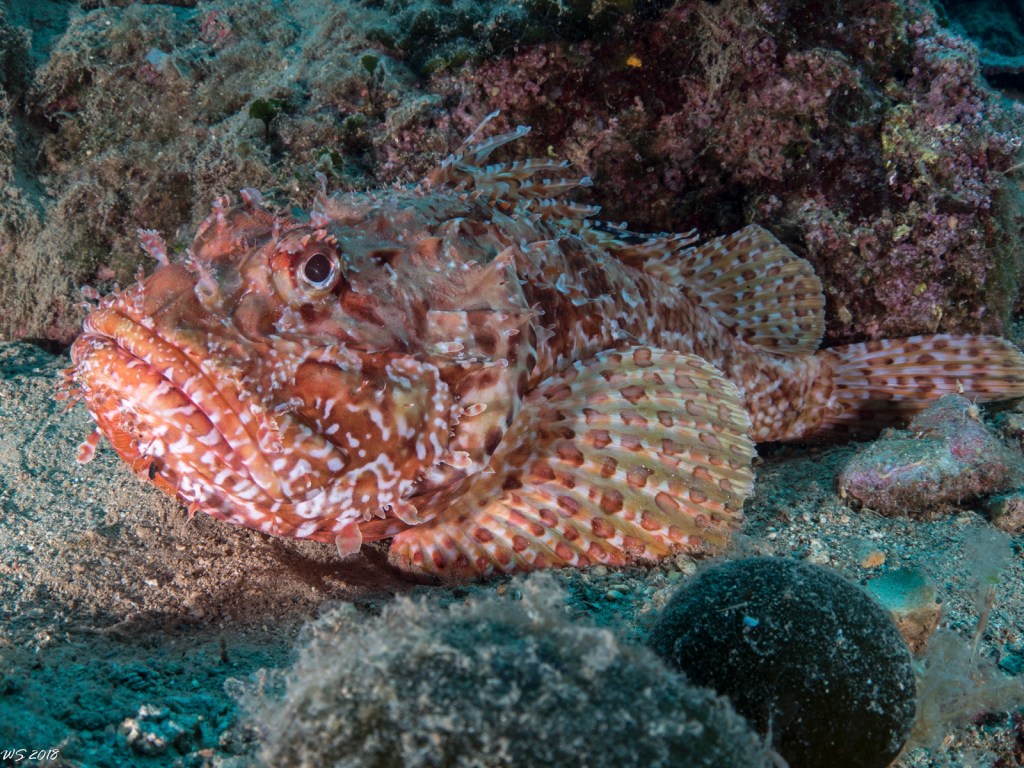
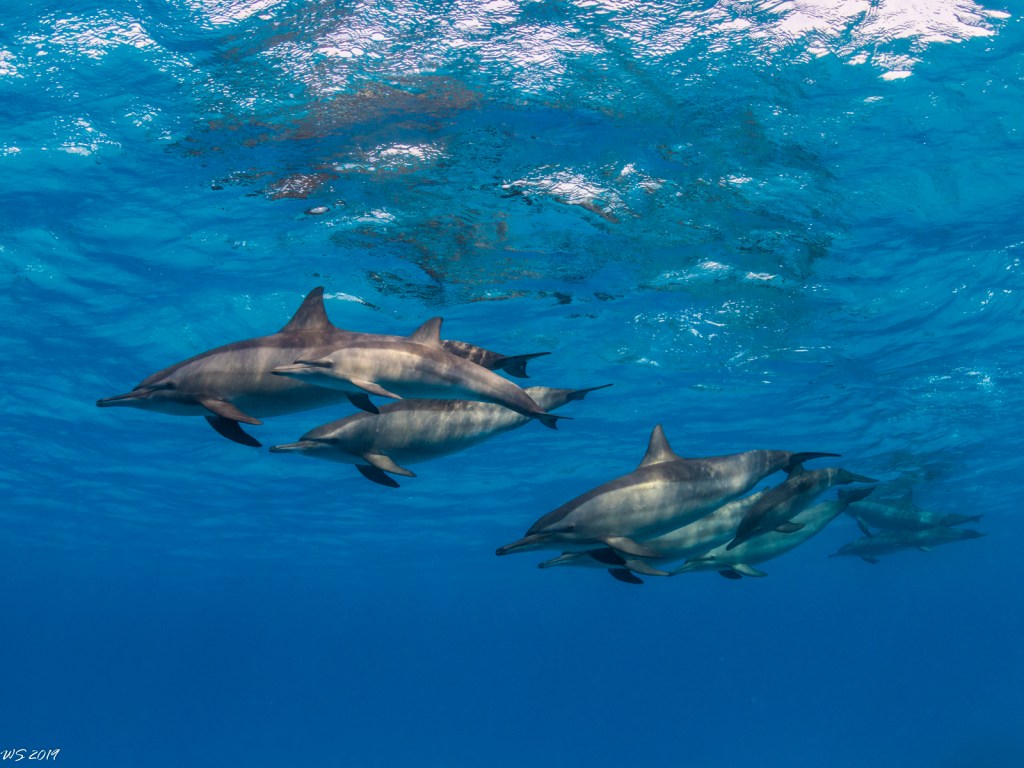
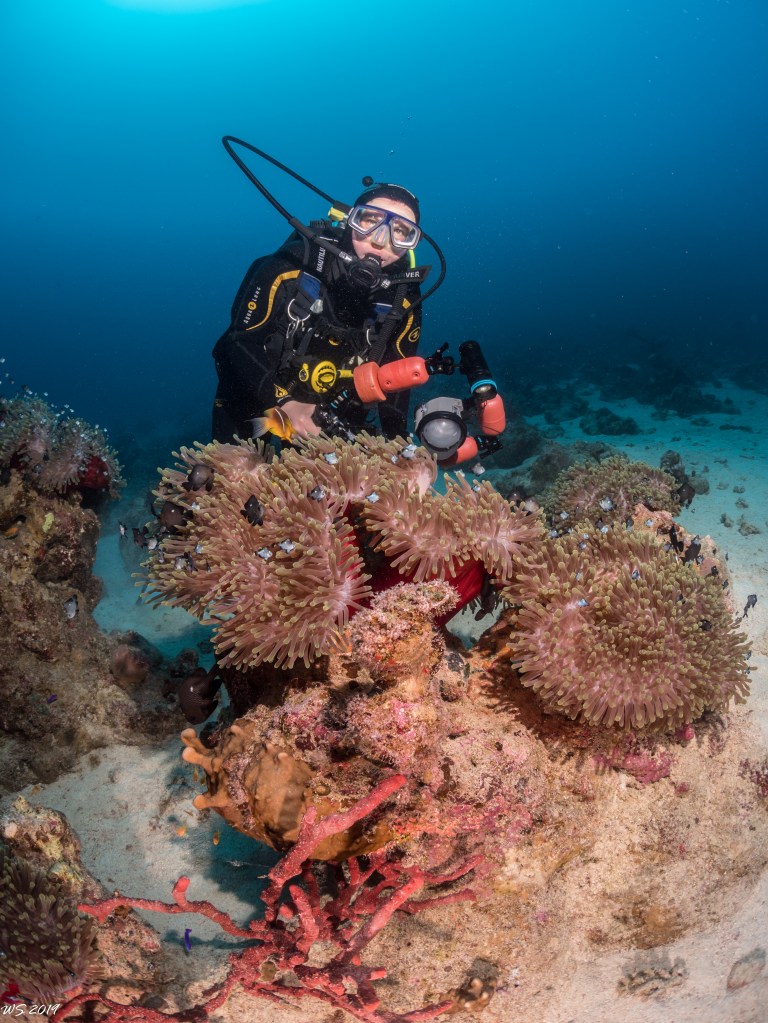
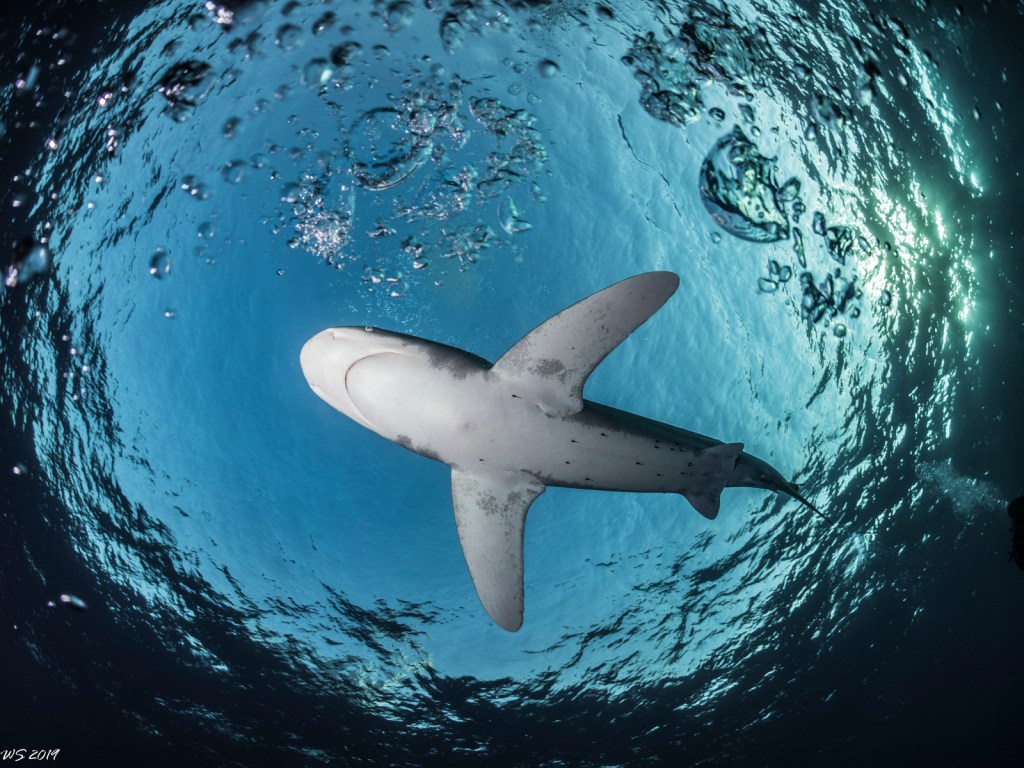
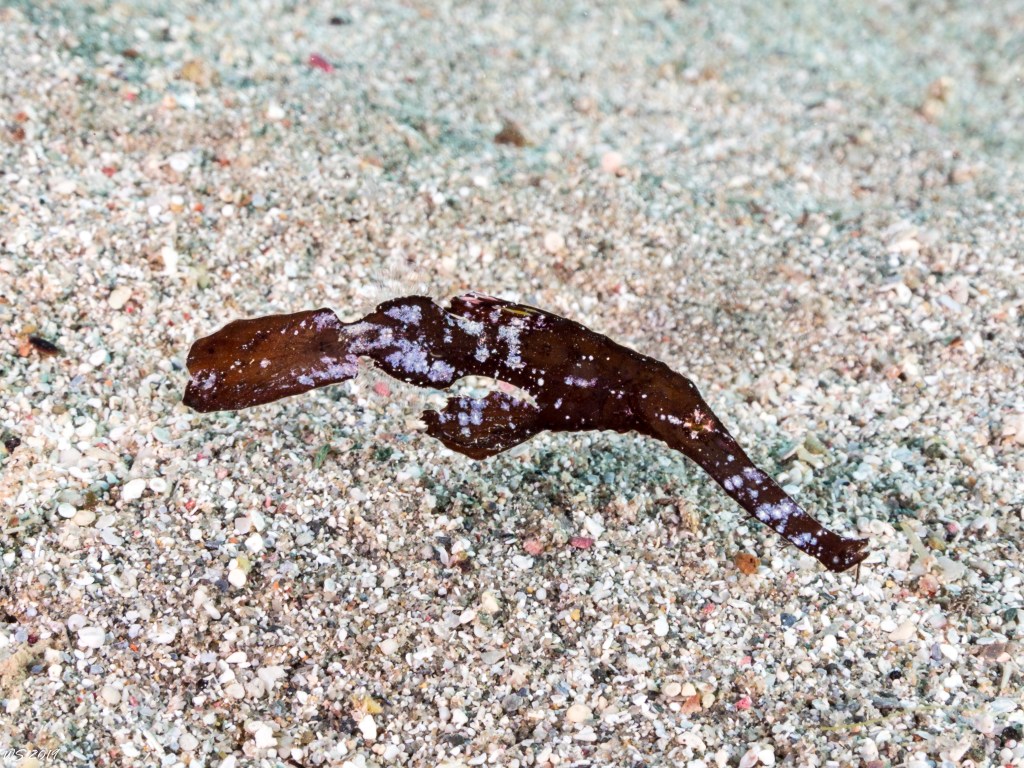
8mm end surface shotCaves 8mm15mm end close upDolphins at 15mmDiver close up at 8mmSnell windows 8mmRobust ghost pipefish @15mm
As you can see you can even shoot a robust ghost pipefish!
The contrast of the glass dome is great and the optical quality is excellent. On my GH5 body there is uncorrected chromatic aberration that you can remove in one click. Furthermore lens profiles are available to de-fish images and make them rectilinear should you want to do so.
I would like to thank Wolfgang for being available for questions for providing the 3D print and the images that are featured here on this post.
If you can’t print 3D and need an adapter ring I can sell you one for £7 plus shipping contact me for arrangements.
Note: it is possible to use a Metabones Speed Booster Ultra in combination with a Tokina 10-17mm zoom fisheye and a smaller 4.33″ acrylic dome.
UK Cost of the canon option: £3,076
Uk Cost of the Tokina option: £2,111
However if you add the glass dome back
UK Cost of Tokina with glass dome: £2,615
The gap is £461 and if you go for a Vitrox adapter (would not recommend for the speedbooster) the difference on a comparable basis is £176 which for me does not make sense as the Canon optics are far superior.
So I would say either Tokina in acrylic for the cost conscious or Canon in glass for those looking for the ultimate optical quality.