Category Archives: MFT Lenses

What Happens After the Olympus has fallen?

On June 24 2020 Olympus corporation has announced they will divest the imaging business and sell the business to be carved-out to JIP (Japanese Industrial Partners).

The full script is here: Memorandum.

Olympus had already delayed the disclosure of financial results for the year ended 31 March 2020, Nikon had already done the same. Clearly companies need to build some accounting provisions for Covid-19 however you would argue that for the year ended on 31st of March the impact of Covid-19 was not substantial as most countries only entered lockdown in March and this is not a prime period for camera sales anyway.

As as an M&A consultant specialising in carve-outs and divestment I have my views on how this will turn out based on my experience but this is not the purpose of this post. What I wanted to do is to perform a short analysis of what I think has gone wrong and what is likely to be the most significant challenge to the newco that will be formed from Olympus imaging business.

The overall situation of the camera market

According to CIPA worldwide sales in units have fallen 87% since 2010.

The overall number of images is actually growing however as of 2017 85% of those pictures are taken on mobile phones.

According to DxOMark and other sources, mobile phones are closing the gap on cameras on a number of aspects. Mobile phones have a lot of development behind and have powerful processors that combined with multiple lenses can produce stunning images.

Most images are consumed on mobile phones and are usually limited to resolutions lower than 4 megapixels or even 1.5 megapixels like Instagram we can understand where this is all going. There is software that allows you to retouch your images directly on your phones one of the reason why instagram is so popular.

As the market for digital camera shrinks camera manufacturers feel the squeeze and this means business will disappear in the process with Covid-19 putting a final stake in what was already a walking dead: Olympus camera business.

Why Olympus?

First of all Olympus is not the first company going through this, it has already happened to Pentax though this entity was sold at profit in the golden years of digital cameras. Contrary to what most people think Olympus was not originally a camera brand but started out with medical and microscopes in 1919 only in the mid 30s Olympus started making cameras and as of today Olympus is predominantly a B2B enterprise. Olympus has also been at the centre of significant corporate fraud in 2011 and in 2016 was also in the middle of a bribery scandal in US. The last ten years of Olympus corporation history have been plagued by misconduct and therefore nobody would go anywhere near a possible acquisition of Olympus assets at least until now.

As of FY 2020 the imaging division has posted 3 consecutive years of losses with a 10% revenue reduction on FY 2019. Olympus had started the restructuring of their manufacturing operations in 2017 and has cut c45% of their operating losses as result. As a division is still loosing cash and therefore if you had to evaluate the business in terms of EBIT multiplier, a common method for corporate transactions, Olympus Imaging Division is worth nothing and actually it has negative value means it costs cash just to run.

The improvement trajectory and the nature of the distressed business has fallen in the interest of JIP who specialised in acquiring divisions of loss making companies and had already closed deals with Sony, Nec to name a few.

Some Olympus consumers have felt betrayed by this move as Olympus had repeatedly affirmed they were continuing the camera business however the reality is that nobody was likely to go anywhere near it until now and the moment they have a prospective buyers this would most likely proceed as it has happened. From corporate point of view, despite the various scandals, Olympus has been increasing their operating profits as the other divisions are all successful. Removing a loss making divisions will greatly benefit the shareholders and investors and will also allow Olympus to focus on the segments that are successful. If the proposed transaction completes Olympus will effectively exit consumer markets.

So in short Olympus is divesting the imaging division because is loss making, it dilutes shareholder value and they now have a potential buyer, it would be crazy for them not to proceed in consideration of the overall situation of the camera market.

Questionable Choices

In addition to the compression of the digital camera market, Olympus has also made some questionable choices, and is affected by the overall stagnation of imaging sensors. Olympus does not make their sensors since a long time, previously they bought them from Panasonic, then lately from Sony.

Sony who makes sensors for most brands including Nikon and Panasonic, has not released anything new in the micro four thirds segment since 2017. For this reason we have not seen a rush from Panasonic to release new models and things have been pretty quiet on their front since the G9 camera in 2018 with the rest of the range just aligning to the 20 megapixel sensor.

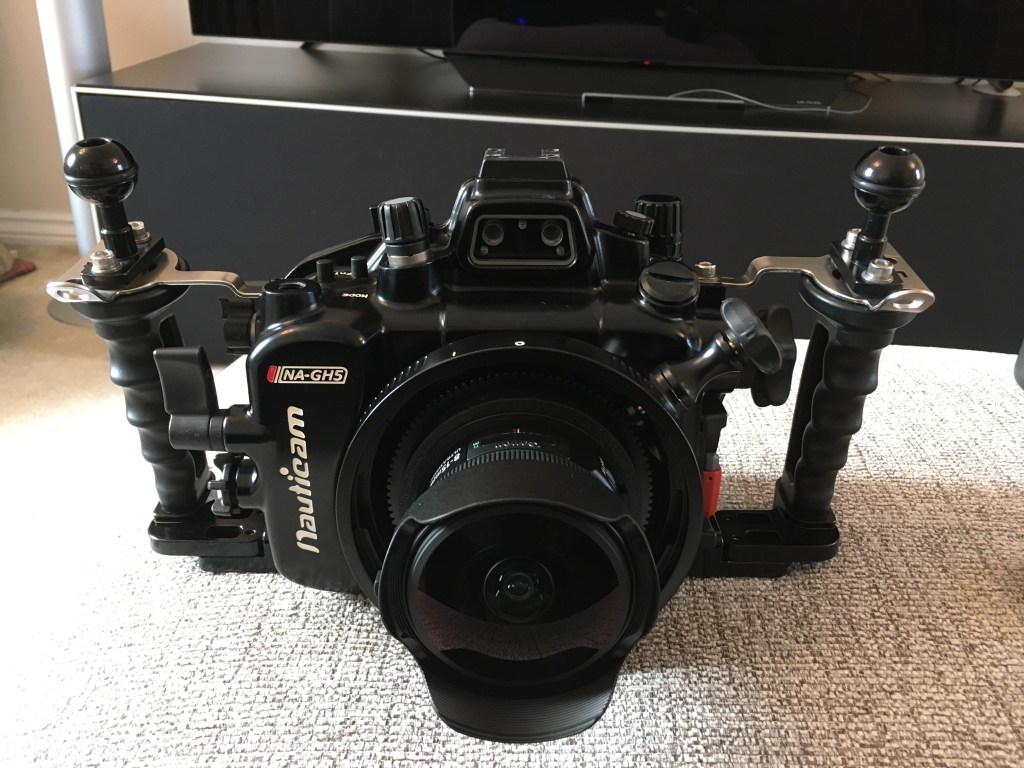
Olympus instead has released a few models of their flagship OMD range, the EM1X and the EM-1 Mark III, both based on the same sensor technology of the previous OMD EM-1 Mark II released December 2016.

The EM1X specifically aimed at the professional wildlife photographer has a RRP of £2,699, that is the same price of a Nikon D850.

Size by Side courtesy of Camerasize.com

Combined with the Olympus 300mm f/4 prime the EM1X is 2.3 Kg while the D850 with the Nikkor 500mm f/5.6 prime is 2.4 Kg. The Nikon set up ends up being around £6K while the Olympus is £4.7K at RRP. I am not sure this is an appealing proposition considering the significant IQ difference between the two cameras and the pretty identical weight.

Also to consider that at £1,499 you can buy a Nikon D500 that has the same RRP of the new OMD EM-1 MKIII. Now it is possible that Nikon is heavily discounting items and they are going to go bust next, however you can clearly see that competing with those boys may not be a good idea.

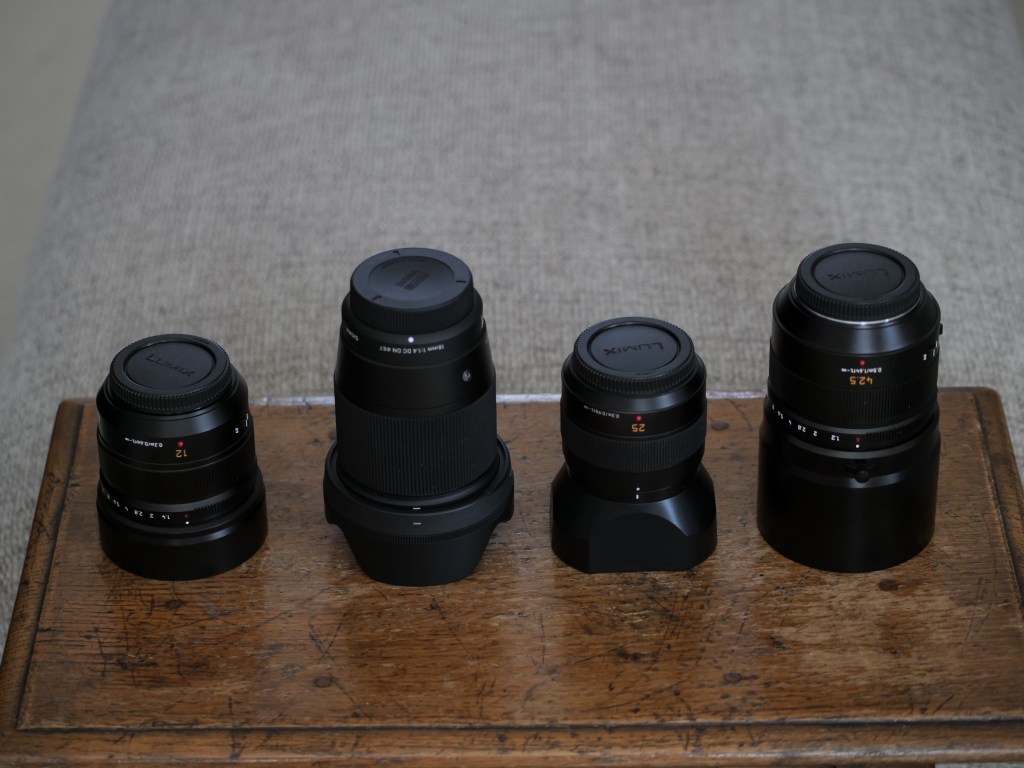
The Micro Four Thirds Benefits

The benefits of MFT are listed in the four thirds website here.

There were 3 key items:

  1. Radical reduction in thickness, size and weight
  2. An interchangeable lens system designed to handle video in the future
  3. Continued use of four thirds lenses

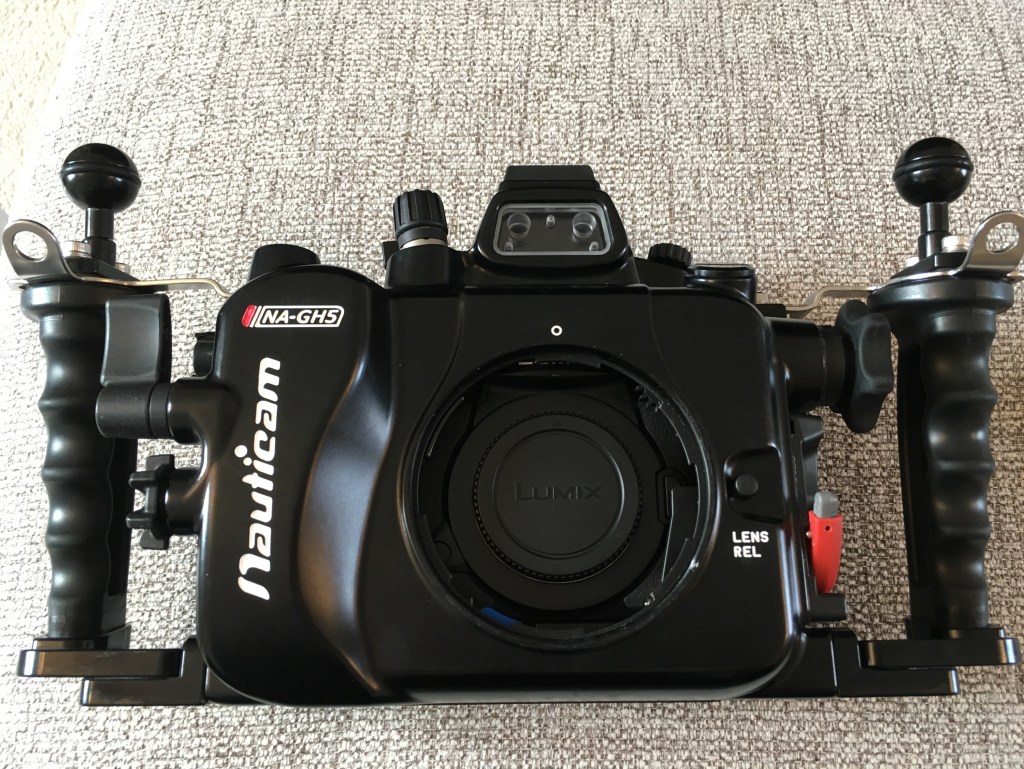
Looking at the reduction in size the EM1X is not a good example for this and we can argue the Panasonic G and GH series body are neither. Panasonic had to accommodate item 2 video handling and to do that needed to include an heatsink in their models and this makes the shape of the GH5 large. Then they continued that trend with the G9: both cameras are very similar to an APSC DSLR and larger than Sony A series.

Olympus never cracked the video space, their cameras are limited in that respect while Panasonic has scored significant success and now brands like Zcam and Blackmagic Design use MFT sensor for semipro cinema cameras that perform very well in that segment.

So MFT has not disappointed as a whole, though Olympus seemed to have lost track of the manifesto, and ended up competing in territories where other players are already consolidated. It has to be said they have done that on their own accord as the OMD EM-1 MKII is a very capable camera for who does not want to invest in a large rig and with a battery grip gives you pretty much the same of the EM1X at half the cost or less at today prices.

What happens next?

It is worth looking at what is in scope and what is the envisaged structure of the imaging division after the carve-out.

Scope

There is mention that the prestigious brands of OMD and Zuiko will continue with NewCo. In short this means that OMD and Zuiko that really were product lines become brands. This is because Olympus corporation will continue and therefore NewCo cannot be called Olympus cameras or similar. There is no mention of Pen or Tough lines to be in scope of the transaction specifically, this may be simply omitted or those are not in the interest of JIP.

NewCo will also maintain the R&D and manufacturing functions, this is important as otherwise product development would not be possible. We need to understand practically what does this mean in terms of key people and which one will move along and which one will leave.

Timetable

JIP is currently performing diligence and, subject to confirmation of their assumptions, the deal would be signed at the end of September and then close at the end of 2020. JIP has now access to Olympus data and financials and this will help them confirm their offer, but potentially could also mean they back off if the situation is worse than expected. Olympus has also committed to continue the restructuring already in progress, this is important as that has an impact on the valuation of the business.

Transition Agreements & Rebranding

When the transaction is complete it is possible that there are still dependencies on the seller and therefore transitional service agreements are put in place. It is easy to imagine that those will go ahead for 18 to 24 months and the largest question mark is up to which point the NewCo will be allowed to use the Olympus brand and how they are going to deal with re-branding. Re-branding can be lethal to businesses I do not want to provide a long list but there is an intangible value to the name of a brand and is not simple to switch consumer to the new brand and keep them all, people sometimes, actually most times, go elsewhere and Panasonic will most definitely benefit from this.

The immediate future

Usually when those type of transactions are announced there are all sorts of activities to say that is business as usual, things will get better and products roadmaps and other events are promptly coming out to reassure consumers. The prime reason for that is that consumers may want to switch right now or if they were planning to buy this specific brand they may change their mind. The reality is that carving-out a business is not easy and nobody really knows how things will turn out.

Micro Four Thirds Future

The crisis at Olympus is not a good thing for Micro Four Thirds there is no doubt about it, however this should not be too much of a worry for day to day life. DSLR has been pronounced dead years ago but is still there and MFT is an important step towards mirrorless. It is evident that cameras will eventually move towards mirrorless and the advances of Olympus cameras on autofocus are an important step, today only Sony and Olympus have decent autofocus on mirrorless. Canon and Nikon are playing catch up but their pro equipment is still DSLR.

The market is shrinking and Olympus is not going to be the last company to struggle, who will survive is not necessarily linked to who has the best product, but to those who can manage the market situation and can align to consumer needs.

Why You need 1.4 lenses on Micro Four thirds

This post is NOT about underwater imaging. With the lockdown most of us have started using their cameras in the garden to shoot bugs, or birds or family members or abstracts.

In my instagram on the side you can see some examples of what I have been up to.

Shooting underwater is typically done at small apertures because of underwater optics issues. It is rare to shoot wide angle wider than f/5.6 on a MFT body or F/11 on full frame.

On land everything changes and you want to have as much light as possible coming into your camera to maximise dynamic range, bring out colours and minimised noise. Aperture controls not just how much light hits the sensor but also depth of field or I should say depth of focus.

Depth of field at equal level of magnification (size of the subject relative to the frame) depends only on the aperture of the lens. It does not matter if the lens is short or long once the subject fill your frame it is the f/number that influences depth of field.

2.8/2/1.4 is the Magic Number

Typically in full frame terms f/2.8 was a good lens, and the reason is quite simple if you shoot a classic 50mm lens from 1.5 meters away you will have 15 cm or half a foot depth of field. This is ideal to keep things in focus but also provide some background separation as objects blur as they move away from the area in focus. If you had a faster lens more light would go in the frame however you risk that nothing is in focus, for example nose and eye in focus and maybe ears not in focus.

And this is why 2.8 has been the magic number for full frame photography. If we move to an APSC sensor this becomes 2 and on MFT the magic number is 1.4. So 1.4 on a 25mm lens on MFT is equivalent to 2.8 on 50mm on full frame.

-20200211-13.jpg
Street Photography Night scene at 1.4

1.4 also gives plenty of light to your sensor so when you want to do some street photography or filming on MFT you can keep your ISO very low.

Exposure Value

Every scene has a level of illumination given in LUX and your camera needs to be able to expose for it with the right focus, with the required motion blur and lowest noise.

The scene in the image above is shot at f/1.4 1/60 ISO 640 let’s calculate the Ev taking into account the reference value is f/1 1 second and ISO 100.

1.4 means 1 stop 1/60 means 5.9 stops and 640 means 2.67 stops. So in total we have 6.9 stops of light taken away from aperture and shutter and 2.67 stops added by ISO gain. Total of 4.22 Ev using the formula Lux = 2.5 2^Ev we get 47 Lux which is the level of illumination of your living room in the evening with artificial lights.

If you had a slower lens like for example 2.8 to cover the same scene you needed to shoot at ISO 2500 this would have increased the noise, reduced the dynamic range and the colors.

2.8 Zooms are for outdoor

There are a number of great lenses for MFT cameras that are midrange zoom and have outstanding optical quality:

Panasonic 12-35
Olympus 12-40

The lenses above are constant aperture and weather sealed they are ideal for outdoor use however they do not offer a shallow depth of field for subject isolation as they really are f/5.6 in full frame equivalent and they are also slow meaning they will take you to the ISO 2500 zone if you try street photography or shooting movies in your living room.

Prime Rules

If you want fast lenses in MFT you need to have prime lenses, this is due to the physical constraint of the format.

Here my selection, I am not a fan of vintage lenses or full manual lenses, I like the best optical quality and if I want to add a vintage feel I do it in post.

From left: Panasonic 12mm, Sigma 16mm, Panasonic 25mm, Panasonic 42.5 all (at least) 1.4 lenses

In more detail:

Panasonic 12mm 1.4

The Panasonic 12mm 1.4 is an expensive lens that I use for astrophotography and gimbals plus low light narrow room indoor shots.

It is weather sealed, extremely sharp and fast to focus and works in full auto focus on a gimbal.

Home Sweet Home
Star Trail with 12mm 1.4
Gimbal
Sigma 16mm 1.4

The Sigma 16mm 1.4 must be the best value prime on the market for MFT lenses. I use it in street photos and for videos. It is almost a 35mm full frame lens.

-20200213-11.jpg
street photography with Sigma 16mm
Garden Overview
Panasonic 25mm

The Panasonic 25mm is a workhorse for small group portraits and ideal lens for movie style video.

25mm 1.4
Kids video with 25mm
Nocticron 42.5

The Panasonic 42.5 Nocticron is probably the best portrait lens on MFT and one of the best lenses overall. It is an f/1.2 lens however in terms of actual transmission performs the same as f1/.4 lenses but with better rendering of out of focus areas.

Nocticron portrait

Why not Olympus/Others?

Of course there are equivalent primes from other brands for all focal lengths except the 12mm. They will perform equally and as long as they can go to 1.4 all is good. I use Panasonic bodies so tend to have Panasonic lenses and I buy Sigma since a long time but this is personal. There are tons of reviews on which lenses to choose etc etc but is not my place to do such comparisons. Edit since Olympus giveaway promotion in 2020 I have replaced the Sigma 16mm 1.4 with the Olympus 17mm 1.2 as they are equally bulky. The Oly pro is a fabulous lens but at the RRP suggested not affordable for many.

How about Video?

Even more essential to have fast primes for video as you are constrained in the shutter speed you can use.

Using a 1.4 lens at 1/50 you can shoot several scenes at different ISO

ISOLuxTypical Scene
200125Dark day
40063Indoors low lit areas
80032full overcast sunset/sunrise very dark indoor
160015Near twilight
32008After Twilight dark
64004dark
128002very dark
256001Candlelight
Aperture vs environment

For my purposes this adequate for reference underwater scenes at 3.5 means I can cover 100 Lux in ambient light in movie mode before turning on the lights.

Conclusion

If you find yourselves with grainy images or videos invest in fast lenses. A lens is the eye of your camera and the sensor is the brain. Think about getting better lenses before investing in a new camera and consider that if you need to go in lower light it is not always true that getting a bigger sensor will help considering the limitation of depth of field so you may want to think about lights.

Fisheye Zoom for Micro Four Thirds

Looking at Nauticam port chart the only option for a fisheye zoom is to combine the Panasonic PZ 14-42 with a fisheye add on lens. This is a solution that is not that popular due to low optical quality.

So micro four thirds users have been left with a prime fisheye lens from Panasonic or Olympus…until now!

Looking at Nauticam port chart we can see that there is an option to use the Speedbooster Metabones adapter and with this you convert your MFT camera to a 1.42x crop allowing you to use Canon EF-M lenses for cropped sensor including the Tokina 10-17mm fisheye. This is certainly an option and can be combined with a Kenko 1.4x teleconverter giving you a range of 14.2 to 33.8 mm in full frame equivalent or 7.1 to 16.9 mm in MFT terms fisheye zoom of which the usable range is 8 -16.9 mm after removing vignetting.

A further issue is that the Speedbooster gives you another stop of light limiting the aperture to f/16 while this is generally a bonus for land shooting in low light underwater we want to use all apertures all the way to f/22 for sunbursts even if this means diffraction problems.

Wolfgang Shreibmayer started a trend time ago in WetPixel https://wetpixel.com/forums/index.php?/topic/61629-canon-ef-lenses-on-mft-cameras/ to use full frame lenses and in this post I want to do a deep dive on what is for me the most interesting lens option the Canon 8-15mm fisheye.

This lens on full frame can be used for a circular and diagonal fisheye but Wolfgang has devised a method to use it as an 8-15mm fisheye zoom on MFT.

Part list – missing the zoom gear

What you need are the following:

  • Canon EF 8-15mm f/4L fisheye USM
  • Metabones Smart Adapter MB_EF_m43_BT2 or Viltrox EF-M1 Adapter
  • A 3D printed gear extension ring
  • Nauticam C-815Z zoom gear
  • Nauticam 36064 N85 to N120 34.7mm port adapter with knob
  • Nauticam 21135 35mm extension ring with lock
  • Nauticam 18810 N120 140mm optical glass fisheye port

The assembly is quite complicated as the lens won’t fit through the N85 port. It starts with inserting the camera with no lens in the housing.

GH5 body only assembly
Camera in housing without port

The next step is to fit the port adapter

Attach N85 N120 Metabones adapter

Then we need to prepare the lens with the smart adapter once removed the tripod mount part.

Canon 8-15 on Metabones Smart Adapter IV

As the port is designed for the speed booster the lens will be few mm off therefore the gear will not grip. Wolfgang has devised a simple adapter to make it work.

gear extension ring
Zoom gear on lens

This shifts the gear backwards allowing to grip on the knob.

3D design is here

Lens inserted on housing

Looking at nauticam port chart an extension ring of 30mm is recommended for the speedbooster and now we have extra 5mm in length Wolfgang uses a 35mm extension. however looking at the lens entrance pupil I have concluded that 30mm will be actually better positioned. Nauticam have confirmed there won’t be performance differences. You need to secure the ring on the dome before final assembly.

Fisheye dome and extension
Full assembly top view
Side front view

The rig looks bigger than the 4.33 dome but the size of the GH5 housing is quite proportionate. It will look bigger on a traditional small size non clam style housing.

The disassembly will be made again in 3 steps.

Disassembly

I am not particularly interested in the 1.4x teleconverter version consider that once zoomed in to 15mm the lens is horizontally narrower than a 12mm native lens so there is no requirement for the teleconverter at all.

This table gives you an idea of the working range compared to a rectilinear lens along the horizontal axis as diagonal is not a fair comparison. The lens is very effective at 8-10mm where any rectilinear would do bad then overlaps with an 8-18mm lens. The choice of lens would be dictated by the need to have or not straight lines. The range from 13mm is particularly useful for sharks and fish that do not come that close.

Focal lengthHorizontalVerticalDiagonalHorizontal Linear EqWidthHeightDiagonal
8130.995.9170.217.31321.64
9114.984.7147.8
10102.575.9131.06.9
1192.668.7117.88.3
1284.562.9107.29.5
1377.757.998.410.8
1472.053.790.911.9
1567.050.184.613.0

Wolfgang has provided me with some shots that illustrate how versatile is this set up.

8mm end surface shot
Caves 8mm
15mm end close up
Dolphins at 15mm
Diver close up at 8mm
Snell windows 8mm
Robust ghost pipefish @15mm

As you can see you can even shoot a robust ghost pipefish!

The contrast of the glass dome is great and the optical quality is excellent. On my GH5 body there is uncorrected chromatic aberration that you can remove in one click. Furthermore lens profiles are available to de-fish images and make them rectilinear should you want to do so.

I would like to thank Wolfgang for being available for questions for providing the 3D print and the images that are featured here on this post.

If you can’t print 3D and need an adapter ring I can sell you one for £7 plus shipping contact me for arrangements.

Amazon links UK

Canon EF 8-15 mm f/4 fisheye USM lens

Viltrox EF-M1 Mount Adapter

Note: it is possible to use a Metabones Speed Booster Ultra in combination with a Tokina 10-17mm zoom fisheye and a smaller 4.33″ acrylic dome.

UK Cost of the canon option: £3,076

Uk Cost of the Tokina option: £2,111

However if you add the glass dome back

UK Cost of Tokina with glass dome: £2,615

The gap is £461 and if you go for a Vitrox adapter (would not recommend for the speedbooster) the difference on a comparable basis is £176 which for me does not make sense as the Canon optics are far superior.

So I would say either Tokina in acrylic for the cost conscious or Canon in glass for those looking for the ultimate optical quality.

Using Rectilinear Wide Lenses Underwater

I was checking the technical details of Alex Mustard Underwater Photography Master Class and the majority of wide angle pictures are taken with a fisheye lens. In the section about shooting sharks Alex says that he prefers to shoot sharks with a fisheye otherwise they look ‘skinny’.

If you look online on underwater video forums you frequently see comments on problems with wide angle lenses connected with the use of a rectilinear wide angle lens in a dome.

The two most common complaints are soft corners and distortion.

Soft corners are due to a combination of lens optical issues and dome port optics. In short any lens is to some extent curved and therefore if you shoot a flat surface the image may be sharp in the centre and softer as you move to the corners. Issues with field of curvature are corrected stopping down the lens. The issue with field of curvature happens everywhere not just underwater.

Right now there are four wide angle lens that can be housed for a micro four third camera:

Olympus 9-18mm

This lens has a nice working range that allows to capture 100 degrees diagonal at widest setting and still has a 35mm equivalent at the tele end. This is a pretty little lens at $699 is the most affordable option that can be put in a housing. You will need a wide angle port and the zoom gear. The whole combination for your Nauticam housing comes at $1,399. This lens can also be combined with a glass dome but this will make the whole combination much more expensive and you may want to think about getting a better lens instead.

Olympus 7-14mm

This is an outstanding lens especially on land due to the fast f/2.8 aperture. It is expensive at $1,299.99 and very heavy and bulky. The lens does not fit through the N85 port opening and requires a port adapter this gives the extra benefit of a focus know but with such a wide lens is not really useful due to high depth of field. You will need a 180mm glass dome and the zoom gear for the lens to complete the set up ending at a whopping $3159.99.

Panasonic 7-14mm

I have owned this lens and I have to say that at $799 is the right compromise between wide field of view and price. Furthermore once you get the zoom gear you have the option of a cost effective acrylic dome that will give you a very wide set up for $1589.99. There are reports of poor performance with this lens and it is true that is not as sharp in corners but the results are perfectly acceptable if you stop at f/8 in close shots.

Steering Wheel Truck
Panasonic 7-14mm with acrylic dome 9mm f/8
Exploring the Chrisoula
Panasonic 7-14mm with acrylic dome 7mm f/5

This lens is prone to reflections and flare however once you add the N120 port adapter and the 180mm glass dome this will get you to $2819 at that point you may want to consider the Olympus combination instead.

Panasonic Leica 8-18mm

This is my favourite lens is sharp does not suffer from field of curvature issues and has a very useful zoom range 16-35mm in 35mm equivalent. The zoom gear and the 7″ acrylic dome will take you to 1889.99 that is an excellent price point. The lens is not prone to reflection or flare and as the 7″ dome has the same curvature radius than the 180mm dome it will produce very similar results.

Encircled
Panasonic 8-18mm in 7 acrylic dome f/8
Sunset Neat
Panasonic 8-18mm at 8mm f/10

The significant size of the acrylic port and the fact it floats make it ideal for split shots and this is the lens that gives me the best results.

This lens can also take port adapter that allows you to use the 180mm glass dome. This adds up to $2919.99 if you experience bad reflections and shoot frequently in the sun it may be worth it but I have not had any issue so far with this lens probably because of its nano coating.

I have found the 7mm focal length too problematic for dome ports and the amount of perspective distortion excessive generally it would be preferred to shoot at 9mm and narrower however this maybe insufficient for wreck interiors if you want a rectilinear look.

Perspective Distortion

One of the regular complaints of video shooters especially in wrecks or caves is that the edges look horrible and distorted and that there is an issue with the corners pulling. This is in fact not an issue but a problem with perspective as you shoot very wide angle. The following test shots will illustrate that the issue happens on land and has nothing to do with dome ports.

Shot at f/2.8 with Panasonic 8-18mm at 8mm shows sharp corners
Image with objects in edges at 8mm

As we can see the football looks like an oval and the chair is pulled. This is due to a perspective issue and is not a lens problem. When you shoot underwater video the objects on the edges of the frame change shape creating this pull effect that most people dislike.

Same scene at 9mm

At 9mm the amount of perspective distortion is reduced and this is the reason why 18mm on 35mm equivalent is one of the favourite focal length for rectilinear video and the maximum angle that should be used in small spaces to avoid the pulling edges.

One of the reason why a lens like the Nauticam WWL-1 is preferred for video is because the corners look sharp but is that really true?

Not really let’s apply some barrel distortion to simulate the WWL-1 to the image that looked badly distorted.

Barrel distortion applied -60 8mm

Now the football looks circular as we have applied -60 barrel distortion, obviously the rest of the image is now bent but this seems not to be of a concern to most people!

Barrel distortion -30 9mm

It needs much less correction to bring the 9mm shot into shape and for sure between the 8mm and 9mm the 9mm is the dimension that produces the most acceptable results.

It has to be said that in video with 16:9 aspect ratio most of the issue will be cropped away at the edges but the distortion in the middle of the frame will remain. For the same reason the 9mm image will appear practically rectilinear with no issues

16:9 crop still showing the edge ‘pulling’ at 8mm

16:9 crop looks straight at 9mm

I hope this post was useful there are four options for micro four thirds shooters to use rectilinear lenses I have settled for the Panasonic 8-18mm as in most cases it is still possible to control the perspective issue, I found this impossible at 7mm.

Bike on Hold 2
Bike in hold 2 on SS Thistlegorm Panasonic 8-18 at 8mm
Bubbling Bike
Shot at 7mm showing the front tyre pulling outside the frame

Obviously if you shoot in the blue this problem will not be visible however rectilinear lenses are popular with wreck shooters and I think this posts gives an idea of the challenges at play.

Finally I would discourage the use of the 7-8mm focal length range for video to those that want to have a rectilinear look.

From this post I started supporting Bluewater Photo in US for my links because it still provides multi brand and choice and because I learnt a lot from Scott Gietler Underwater photography guide back in the days where there was no internet resource to learn from.

which macro lens to pick for your gh5 or micro four third

I see many posts on line debating which macro lens is best for your micro four third system.

If I refer to the Nauticam system we have 4 macro lenses:

  • Olympus 30mm
  • Panasonic 30mm
  • Panasonic 45mm
  • Olympus 60mm

For the purpose of this article I will skip the Olympus 30mm as the Panasonic lens is known to be sharper and will focus on the other 3 lenses.

DxOMark is a popular tool for comparison as it gives you the results on one page. I have run it for the Oly 60 and the Pana 30 and 45 on the 20 Mpix OMD E-M1 MKII

DxOMark Comparison on Olympus OMD E-M1 MKII

Surprisingly the much more expensive Leica performs worse than the other cheaper models, this is confirmed on all internet sites running other type of tests.

What we can see is that there is little difference between the Panasonic 30mm and Olympus 60mm when it comes to image quality so whichever lens you choose your subject at the same level of magnification and aperture will have more or less the same detail.

Common Misconception: Shorter focal length give more depth of field

Many people think that using a longer lens is harder because there is less depth of field this is actually incorrect conceptually.

Let see why

Using an online calculatore like Dofmaster https://www.dofmaster.com/dofjs.html

Enter for the Panasonic GH5 the following parameters

Circle of confusion: 0.015 mm

Focal length 30mm

Distance 10.5 cm (minimum distance of the 30mm Macro)

Aperture f/11

Result Total depth of field 0.3cm

Now enter

Focal Length 60mm

Distance 21 cm (as it achieves the same magnification)

Aperture f/11

Result Total depth of field 0.3cm

So depth of field is not a consideration when choosing a macro lens…

Shooting a subject close to the background

In the following 3 shots am taking an image of a widget at f/11 at 29-44-60 mm on a Leica 12-60 (it is just easier it makes no difference to the outcomes)

Shot at 60mm
Shot at 44mm
Shot at 29mm

At the same aperture you can clearly see that there are no difference whatsoever in the detail and actually overall in the picture you don’t notice anything.

Shooting a subject far from the background

For the second shot I have moved the widget away from the wall.

Shot at 60mm
Shot at 44mm
Shot at 29mm

Again there is no difference in the level of detail of the widget however looking at the background we can see that

  • The 60mm shot reveals one brick and less than one quarter
  • The 44mm shot reveals one brick and a half
  • The 29mm shot reveals two bricks

So while the subject is exactly the same as the 60mm lens has a narrower field of view we see much less of the background.

This means that if you are shooting a nudibranch on the sand or something flat on a rock you won’t notice anything however if there is space behind the subject you will capture much more of that resulting in less subject isolation.

Underwater Comparison 30 vs 60 mm

In the first shot the Rhinopia is taken with a 60mm lens

Rhinopia Olympus 60mm

In the second shot the same Rhinopia with the 30mm (in a different place to be fair)

I have marked up with red the areas that with a longer focal length would have been minimised.

Which Lens to choose?

Now that we have clarified that depth of field is not a consideration and as each macro lens will have the same magnification there are only two factors that matter:

  1. Working distance
  2. Isolation from background

The 60 mm will have a longer working distance and at the same magnification will isolate the subject better from busy backgrounds, the 60 mm is also better for skittish subject because of the longer working distance. I have this lens and I have borrowed the 30mm in couple of occasions but do not have the 30mm yet.

There are however situations where longer working distance is not a benefit, specifically when the visibility is poor and there are suspended particles or the subject is really large.

In the example below I was at one meter from the two frogfish, a 30mm would have been better however the shot came OK.

Hairy frogfish Olympus 60mm

Conclusion

I believe the Olympus 60mm is a must lens to have. To date I have not felt the need for the Panasonic 30mm that is indeed a very sharp lens because I have always managed to pull out the shots. However for someone diving in murky water and focussing on nudibranches or subject laying flat on the seabed the Panasonic 30mm could be a better choice. I also want to say that using the 14-42mm at 42mm for me is actually a better choice for portraits and with a close up lens works very well with small subject not super macro and therefore as I already own the 14-42mm and various diopter for me the 30mm is not on the shopping list.

How to choose the best close-up lens for your underwater MFT rig

How many times you see practically new close up lenses being sold on eBay after sitting for years in a cupboard? Have you ever experienced the frustration of buying a close-up lens to find out it did not add anything to your set up?

There is a lot of confusion in terms of what is that you are really getting when you buy an underwater close-up lens. In most cases lenses are specified in diopters, in some other cases with a magnification factor, in few cases with the focal length.

The focal length is probably the most useful of those specification because in a traditional diopter the following formula is valid if you approximate the lens to converge in the rear element:

Working distance ≤ Focal length – physical length of the close-up lens

For example for a Subsee +5 diopter the focal length is 1000/5=200mm the lens is 32mm therefore the working distance is less than 168mm.

Now on its own this means very little. Depending on the camera we use a distance of 168mm may be a great improvement or no improvement at all.

To understand why we need to look on our camera and find the little symbol that indicates the focus distance reference mark.

While for DSLR the shooting distance is typically calculated from the front on the lens for micro four third you need to use this obscure symbol.

IMG_1394
P1055540

Once we locate the reference mark we need to identify the corresponding reference on the housing we can use the other dials as starting point. In this case the mark is approximately in the middle of the cold shoe.

When we put the camera in the housing we can then look up the specifications of the lens and calculate the minimum shooting distance. For example for an Olympus 60mm this value is 19cm.

P1055541

We take note of this point and then measure the distance between the glass and the minimum working distance on land.

P1055543

This works out to be around 9cm. We now need to consider that once immersed in water this distance will be multiplied by 1.33 to become 12cm.

It follows that any diopter with a focal length close to 12cm or longer is not going to be effective for our camera and lens combination. More likely we need something that can focus substantially closer or the benefit will be minimal. Assuming we half the physical working distance between the port and the subject we need something around 60-80mm focal length which considering the length of the lens itself could mean getting 2cm away from the subject.

Continue reading How to choose the best close-up lens for your underwater MFT rig

Nauticam WWL-1 with Macro Port 29 for Micro Four Thirds

Nauticam has recently released a new Macro port 29 that is shorter than the 35 and is designed for optimal compatibility with the following lenses and the WWL-1 Wet lens.

  1. Olympus M.Zuiko Digital ED 14-42mm f/3.5-5.6 II R
  2. Panasonic Lumix G Vario 12-32mm f/3.5-5.6 ASPH Mega OIS
  3. Panasonic Lumix G X Vario Power Zoom 14-42mm f/3.5-5.6 Power OIS

I have had the port and wet lens for a few days and those are my observations with the Panasonic lenses as I do not own the Olympus.

In general terms none of those lenses are amazing in terms of optical quality and only the Panasonic lenses are stabilized. This is not so important for still images but an advantage for video.

Photozone has tests of all the three lenses

Olympus Test

Panasonic Vario G X PZ Test

Panasonic 12-32 Test

The Panasonic power zoom is better than the Olympus however the lens has issue of vignetting and pretty high chromatic aberration. The Panasonic 12-32mm is surprisingly good and has similar resolution and less issues of fringing.

I attached the 29 Macro Port to my GX7 housing and took some tests shots in the sink with the WWL-1 petals touching the subject.

Panasonic G X 14-42 PZ Port 29

The image is wide and the corner sharpness is great with minimal to no chromatic aberrations.

The 12-32mm lens does not vignette at wide end and gives similar performance to the PZ lens with the benefit of increased field of view.

Panasonic 12-32mm Port 29

The shots are taken at f/4 ISO 1600.

For comparison I mounted the 4.33″ dome and the 8mm fisheye and took a similar shot.

8mm Fisheye
8mm Fisheye

The field of view is wider but of course distortion in the corners is very high to the point they become garbled.

Clearly if you do need a fisheye lens the 8mm is still the choice however the WWL-1 has the advantage that you can use the full zoom and a field of view of around 130° with a 28mm equivalent lens and around 135° with 24mm equivalent.

One thing that is interesting is the use of the 12-32mm with the Macro 29 port combined with the Panasonic GH4 in 4K.

The crop factor of 1.2x means that the focal length with this lens at 4K 16:9 is 31.38mm. This makes this port compatible with a number of flat wide angle lens of the old generation.

Specifically the old Inon UWL-100 would give a field of view of 100° equivalent to 18mm in 4K. The additional benefit is that you can use the Ikelite UR/PRO push on filter and the full zoom. At the tele end 83.7mm may be a bit short however the fact that you have a fully rectilinear lens and you can use a push on filter is a big advantage.

The Macro port 29 is also compatible in normal mode with the Inon UWL-H100 at 24mm equivalent as per image.

Inon UWL-H100 Port 29

The field of view appears narrow as the lens can get closer to the subject compared to the WWL-1. The optical quality is excellent with minimum fringing.

In summary the Macro Port 29 is a must purchase for the following users:

  • 4K Panasonic GH4 video users
  • 4K Panasonic GX8 Users
  • HD and Still images micro four third users wanting a full wet lens set up

The 12-32mm lens also give almost the same field of view of the Panasonic 7-14mm with wide angle port at much lower cost when coupled with an Inon UWL-H100 allowing use at apertures of f/4 and f/5.6 with one to two stops advantages on the 7-14mm.

On a final note for the users of the Macro 35 port Nauticam has now released the zoom gear for the Panasonic 14-42mm II Mega OIS. This lens is better than all of those discussed in this post in terms of optical quality and it comes as kit lens on lower end Panasonic cameras. If you already have the Macro Port 35 and a kit lens or if you don’t have any lens or port this is definitely the best option in terms of cost and optical quality

Guide to Micro Four Third Lens and Port selection for Underwater Photography

Micro Four Thirds camera have become increasingly popular for underwater photography especially for macro and close up subjects in the last years.

The micro four thirds standard is shared between Olympus and Panasonic however in terms of underwater use Olympus is on the forefront and in fact it produces their own poly-carbonate housings for all new models.

Nauticam has their own N85 port system for micro four third that as of today has 10 different ports, two extension rings and a large number of focus and zoom gear. You can also buy cheaper 3D printed gear to save a few bucks for majority of lenses.

The other interesting characteristic of the micro four third market is that since the introduction of the 16 megapixels sensors, there have not been any substantial improvement in image quality among the various model, we will have to see what the 20 megapixels sensor of the Panasonic GX8 will bring but all in all the camera choice is mostly one of ergonomics and features.

Olympus is quickly clearing stock but you can still found the OM-D E-M10 out there for £478 with kit lens. The might Panasonic GX7 is now £433 with kit lens. In US you can find both the Panasonic GX7 and the Olympus O-MD E-M100 for $599 with kit lens.

The Panasonic LX100 sets you at £589 in UK and $698 in US really if you are into photography and want a micro four third it is a no-brainer you get a previous version GX7 or OMD EM10 (as you can’t find an EM5 new) and happy days.

Now that you have committed to the camera you are into lenses and ports for underwater use. The Olympus housing costs on average 25% less than Nauticam and has less choice of ports for me really is not appealing so let’s assume we are into Nauticam. What lens or port to choose?

Both the Olympus 14-42 EZ and the Panasonic 14-42 II fit in the Nauticam 35 port and require 3D printed gear to operate. The flat port will be OK for fish portrait and if you already have wet lenses it is definitely recommended to buy the 35 macro port first especially if you shoot video.

Nauticam Macro 35 port

Deepshot zoom gear on the GX7

Both lenses do need a wet diopter to shoot small subjects in water as the smallest frame is around 7-9 cm width otherwise.

If you come from a compact camera most likely you have wet lenses and therefore you can re-use them for close range work.

Obviously a flat port for a 28mm equivalent lens is not a solution for wide angle.

First of all at the wide end due to water magnification the angle of view is the same of a 37mm lens which gives a field of view of just 60 degrees. The other point is that you really want to shoot at the tele end to avoid cluttering the background too much and typically in water those kit lenses work only at over 25cm from the port which means they are only good for medium size fish portraits.

The sequence of shots shows that even if the size of the cup is pretty much the same it looks much better at long focal length.

Cup at 28mm
Cup at 28mm

At 28mm you can see the glass in the frame on the right side and the window in the background.

Cup at 50mm
Cup at 50mm

At 50mm with similar size of the cup the glass is half gone and the cup looks nicer less of the window is showing.

Cup at 42mm
Cup at 42mm

at 42mm the glass is nearly out of the frames and the windows in the background is gone.

If you did not have any wet diopters the first additional lens and port to get will depend on your subjects, if you shoot macro you need a macro lens, if you shoot close focus wide angle you need a fisheye lens it is as simple as that.

Olympus 60mm and Nauticam 65 Port (35 + 30 mini extension)

The Olympus macro 60mm is the preferred lens combined with the Nauticam 65 port (or 35 port plus 30 extension). This lens can focus 10cm from the port and therefore can be used also in low visibility. Really there is no reason to use the more expensive 45mm Leica lens. The 60mm is great also for portrait work of small fish.

Cup at 60mm
Cup at 60mm

The same shot of the cup at 60mm means we now say goodbye to the glass due to the reduced angle of view. The increased working distance also means a more pleasant perspective.

I hope this explains why for underwater macro we want to shoot with long focal length as this helps us to get rid of the background so a longer lens will always be better than a zoom lens with a wet diopter and it will also give more magnification in case you have really small subjects.

If macro is not your priority and you are happy with kit lens and diopter for wide angle the first option is the Panasonic 8mm fisheye, that since the introduction of the Olympus 8mm pro fisheye has also reduced in price.

Panasonic 8mm Fisheye and Nauticam 4.33
Panasonic 8mm Fisheye and Nauticam 4.33″ Dome Port

This lens works best with the Nauticam 4.33″ dome port. If you shoot in 3:2 format you can also try the Nauticam 3.5″ wide angle port that makes the set up even smaller however there are no substantial improvements on how close you can get as the strobes will fail to lit properly anything that is right on the port without risking to see the strobe lights in the frame. The 3.5″ port will vignette in 4:3 image format though some users report success.

EDIT 7 September 2015

The issue of the 3.5″ port has been put forward again with the argument that it allows you to get closer than the 4.33″ dome with the Olympus EM5. I do not have an EM5 but I do have a Panasonic GX7 the end of the dome is 9 cm away from the focus point and this means that the dome allows you to get closer than the minimum focus distance of the lens of 10cm. As the dome is shorter than the minimum focus distance on the GX7 the 3.5″ port does not bring any benefit. Furthermore as trays are in general around 30cm you need to be around 15 cm anyway to be able to illuminate the subject properly with edge lighting, in virtue of this I remain convinced that the 3.5″ port does not bring any real benefit except is a bit cheaper and may vignette.

So your starter kit if you upgrade from compacts of you own a close up lens is Macro 35 port followed by Olympus 60mm and mini extension ring 30 or Panasonic fisheye 8mm with 4.33′ dome for wide angle.

Wide angle zoom lens are less of a priority but the choice is between the Olympus 9-18mm and the Panasonic 7-14mm bearing in mind that if you had a wet wide angle lens you may not even bother getting an intermediate wide angle zoom lens.

That’s all for now hopefully this will cover most of the ground for all new micro four third underwater shooters with kit lenses!

Panasonic Lumix G X Vario 14-42mm with Fisheye Converter DMW-GFC1

The Panasonic 8mm Fisheye lens for micro four third is a clear winner for close focus wide angle however the lack of zoom and the really wide 180º cover mean that there are many subjects that will look tiny in the frame.

The next option in terms of width is the Panasonic 7-14mm wide angle lens however this requires a large dome for optimal performance making the set up expensive.

Is there anything else left if you don’t want to buy a wet lens and you already have the Panasonic PZ 14-42 X Lumix G?

Panasonic produces an add on lens DMW-GFC1 that is declared to provide 10.5mm equivalent and reduce minimum focussing distance to 16 cm all specs can be found here.

This add on lens can be used with the 4.33″ dome for the 8mm fisheye and the 30 extension.

I took a few test shots and the results are pretty good.

This first shot is at f/5 and is very sharp in the centre.

Fisheye Converter f/5

Fisheye Converter f/5

Getting a bit closer and stopping at f/8 the results are pretty good for an adapter that is less than £100 on amazon.

Fisheye Converter f/8

Barrel distortion is contained so this combination may be good for wrecks where the fisheye effect is a bit disturbing.

If you have the Lumix G Vario X PZ 14-42mm you may want to invest in this little accessory before getting the much more expensive 8mm fisheye even if the Nauticam 30 extension is required. Later on the extension can be used with the flat port 35 and the Olympus 60mm for super macro and the 4.33″ dome of course with the 8mm.

I think it is amazing how much can be obtained out of this lens if we consider wet diopters, wet wide angle lenses and this adapter before you need to get a second lens.

This lens could also work for video with the Panasonic GH4 at 4K however zoom is not recommended with it.

Panasonic Lumix G X Vario 14-42mm / F3.5 – 5.6 / Power OIS and Nauticam Macro Port 35

The Lumix G X 14-42 Power Zoom lens is designed for video with a silent motor zoom controlled by a slider that is quite effective to use.

The focal range in 4:3 format is 14-42mm which corresponds to 29-87mm in the standard 35mm format (the crop factor is 2.08 36/17.3 and not 2 how commonly thought in the classic 3:2 aspect ratio).

This lens is not exactly a best in class in terms of performance especially considering quite a bit of vignetting at wide end and distortion that anyway gets corrected nicely in camera for most. A detailed review is here http://www.photozone.de/olympus–four-thirds-lens-tests/765_pana14423556hd

You can see that this is lens is quite sharp at 2868 LW/PH to give you an idea the much more expensive Lumix 12-35mm reaches 3110 LW/PH though sharpness drops at corners to around 2100-2200.

Another interesting characteristic is that this lens performs best at f/3.5-f/5.6 which is close to the widest aperture as we will use this lens with the Nauticam flat port 35 this is all good news.

Nauticam Macro Port 35

The lens fits very nicely inside the port leaving space for small filters and close up lenses but not really a lot.

The lens does not really move much between 14 and 42 mm and reaches his longest at 14mm.

I have tried using a set of Inon diopters to see the degree of magnification you can get.

This shot is with an Inon UCL-165 +6.06 diopter.

Lumix G X 14-42 PZ @ 42mm with Inon UCL-165

The smallest frame width with this lens is 42mm however in video mode using the ex tele converter option this becomes a much smaller area achieving in fact super macro easily with the added benefit of larger depth of field.

If you are into pixel peeping you can see some chromatic aberration on the edges this is a combination of the lens and the wet diopter.

I also tried stacking an UCL-165 with the UCL-330 this achieves a capture width of 32mm so we are in super macro zone.

Lumix G X 14-42 PZ @ 42mm with Inon UCL-165+330 Stacked

Image quality does not get much worse but there are some internal reflections here on the white surface as the Inon lenses are not coated externally.

Finally I wanted to see if the Inon UCL-100 would work and it does achieving super macro without any fringing. If you want to use this lens for pygmy sea horse photography and do not want to get an Olympus 60mm this or the sub see 10 are the close up lenses to get, also the nauticam SMC is in the same range.

Lumix G X 14-42 PZ @ 42mm with Inon UCL-100

Now onto what is really good of this lens port combination and this is the versatility as you can attach the Inon UWL-H100 and get a very wide 18mm flat wide angle that is very sharp indeed as per previous images

_1000200
Nauticam 35 Port with Inon UWL-H100 on Panasonic Lumix 14-42mm

Consider that this image is taken at f/3.5 and the ruler is in the corner at ISO 1600 and you can see that sharpness is more than acceptable.

More interesting is that for some reason with this lens you can fully zoom through even down to 42mm without soft corners.

I have no idea how this is possible but it works just fine.

So if you are a video junkie you can cover the whole 100 degrees wide to super macro with this lens the Nauticam 35 Macro Port the Inon UWL-H100 and the UCL-100. For video it gets even cheaper with the UCL-165. You can of course use the flat port to do nice fish portrait in the mid-range of the zoom.

I forgot to mention the zoom gear which is actually pretty expensive because of the complex spring design.

The total cost for the Nauticam 35 with zoom gear is $510 plus of course the lens itself $290 total of $800.

Inon UWL-H100 + LD adapter = $654

Inon UCL-100 = $282

Inon UCL-165 = $205

Wet Lenses Still total = $936

Wet Lenses Video total = $859

Let’s compare to getting an Olympus 9-18mm with 4″ wide angle port and the Olympus 60mm with 30 extension ring total price $2129.

Price gap for stills $393 but you now also have a mid range lens for portraits, personally I don’t really like the Olympus 9-18 behind that port comparing side by side images taken with the 14-42 PZ and Inon lens I am not sure the Olympus is any better and definitely needs diopters due to mushy corners. For macro the 60mm Olympus lens has the advantage of increased working distance but is a very specific lens that you would only use for really small stuff.

For what concerns video you would probably look at the Panasonic 7-14 and forget the Olympus 60mm the combination is worth $1800 which is a difference of $636. Again the issue with rectilinear lenses and dome ports is there and the 7-14 does not take diopters.

So if we were to use the lenses on land no doubt you would need additional glass but in water wet lenses can be quite cost effective especially if you use a micro four third camera for video.

Peter Rowlands uses a Panasonic GX7 with Inon UWL-H100 and dome successfully and I am joining that club now.

Stay tuned for more tests next to come will be the Panasonic Fisheye 8mm with the 4.33″ dome which is another essential buy for the micro four third cameras underwater, obviously for pictures and not video.