Category Archives: Tips

Panasonic GH5M2 and S series Demystifying Movie recording settings 2022 Update


In 2018 I wrote the original article as I had acquired the GH5 and I was faced with a ton of non-sense on which format to use when I was shooting video. With the S series software stack Panasonic has made some changes to the options available and I thought it was about time to refresh the original article. As Before I will focus my analysis on 4K video and ignore other formats. This time I will be looking at the NTSC standard of 29.97 and 59.94 frames per second. This is simply because today majority of content produced by Panasonic consumer digital cameras is consumed online and all computer screen work at 60 Hz refresh rate so shooting anything different than 30 or 60 will result in choppy video. This presents some challenges if you are in a PAL zone and are shooting under artificial lights however for the purpose of this article I want to just ignore this issue, obviously you could shoot 24 fps and hope in a 24 – 30 conversion which is scatty of course. For simplicity I will refer to 30 and 60 fps and not exact values.

Today we have 5 settings for UHD 

  1. 200 Mbps 420 10 Bits Long GOP 60 fps
  2. 150 Mbps 420 8 Bits Long GOP 60 fps
  3. 100 Mbps 420 8 Bits Long GOP 30 fps
  4. 150 Mbps 422 10 Bits Long GOP 30 fps
  5. 400 Mbps 422 10 Bits All-Intra 30 fps.

The last option is only available on the GH5 series and on the S1H. The first option is only available on the S series and the GH5M2. 

Long GOP vs All Intra

The difference between Long GOP and All Intra is that in the Long GOP what is encoded is a group of pictures (GOP) and not separate individual pictures.

Within a Group of Pictures there are different type of frames:

  • I (Intra coded) frames containing a full picture
  • P (Predictive coded) frames containing  motion interpolated picture based on a prediction from previous frames
  • B (bi-predictive coded) frames containing a prediction from previous or future frames

It is important to note that frames are not stored sequentially in a GOP and therefore the GOP needs to be decoded and the frames reordered to be played, this requires processing power.

The reason why H264/HEVC is very efficient is that within a group of picture there is only one full frame and the rest are predictions clearly if the prediction algorithm is accurate the level of perceived quality of long GOP is very high and similar to All-Intra clips.

This is the reason why comparing All Intra and Long Gop using static scenes or scenes with repetitive movement that can be predicted very accurately by the codec is a fundamental error.

So which format should you choose?

In order to understand the workings we need to dig deeper into the structure of the GOP but before doing so let’s evaluate the All-Intra codec.

AVC All-Intra explanation

This codec records at 400 Mbps so with 30 fps this means circa 13.4 Mbits per frame or  1.67 MB per frame and there is no motion interpolation so each frame is independent from the others. The implementation of All-Intra of the GH5 does not make use of CABAC entropy but only CAVLC coding is used, this makes the resulting files easier to read and to edit. The idea of All intra is that you don’t require powerful hardware to edit without conversion in an intermediate codec. However based on my experience this is not entirely through and you need a decent GPU to play it back and edit real time without issues.

If you consider a Jpeg image of your 3840×2160 frame on the GH5 you see that it stores around 4.8 MB per image because there is no chroma sub-sampling so if you wanted to have exactly the same result you would need to use ProRes 4444 to get a comparable quality (this not even taking into account that Jpeg are 8 bits images).

Video uses chroma sub-sampling so only part of the frame contain colours at a given time. Apple in their ProRes white paper declare that both ProRes 422 and 422 HQ are adequate to process 10 bit colour depth and 422 sub-sampling however they show some quality differences and different headroom for editing. If you count 50% for 4.2:0 sub-sampling and 67% for 422 you get around 2.34 MB and 3.5 MB frame sizes that correspond to ProRes 422 and ProRes 422 HQ individual frame sizes.

it would appear that All Intra 400 Mbps would fall short of Apple recommended bit-rate for 422 10 bit colour however practical tests show that AVC All intra at 400 Mbps is perceptually identical to ProRes 422 HQ and uses much less space. We also did some SNR measures time ago with the friend Paal Rasmussen and we did not find significant improvements shooting ProRes 422 HQ vs All-I on card.

Long GOP Codecs

Coming back to the other recording quality option we still need to evaluate how the various long GOP codecs compare relative to each other.

In order to fully understand a codec we need to decompose the GOP into the individual frames and evaluate the information recorded. If you look on Wikipedia it will tell you that P frames are approximately half the size of an I frame and B frame are 25%. I have analysed the Panasonic GH5M2 clips using ffprobe a component of ffmpeg that tells you what is exactly in each frame to see if this explains some of the people claims that there is no difference between the settings.

Link to Panasonic on the H264 implementation is here: documentation

There is unfortunately no documentation of the HEVC implementation that I have found to date.

200 Mbps 420 10 Bits Long GOP 60 fps Analysis

An analysis with ffprobe shows a GOP structure with N=30 and M=1 where N is the length in frames of the group of pictures and M is the distance between I or P frames.

This codec does not have B frames but only P frames.

Analysing a set of I frames of a fixed subject at 60 fps resulted in a frame size of 1.16MB for the I frames. This value is quite low however we need to understand that HEVC is much more efficient than H264. 

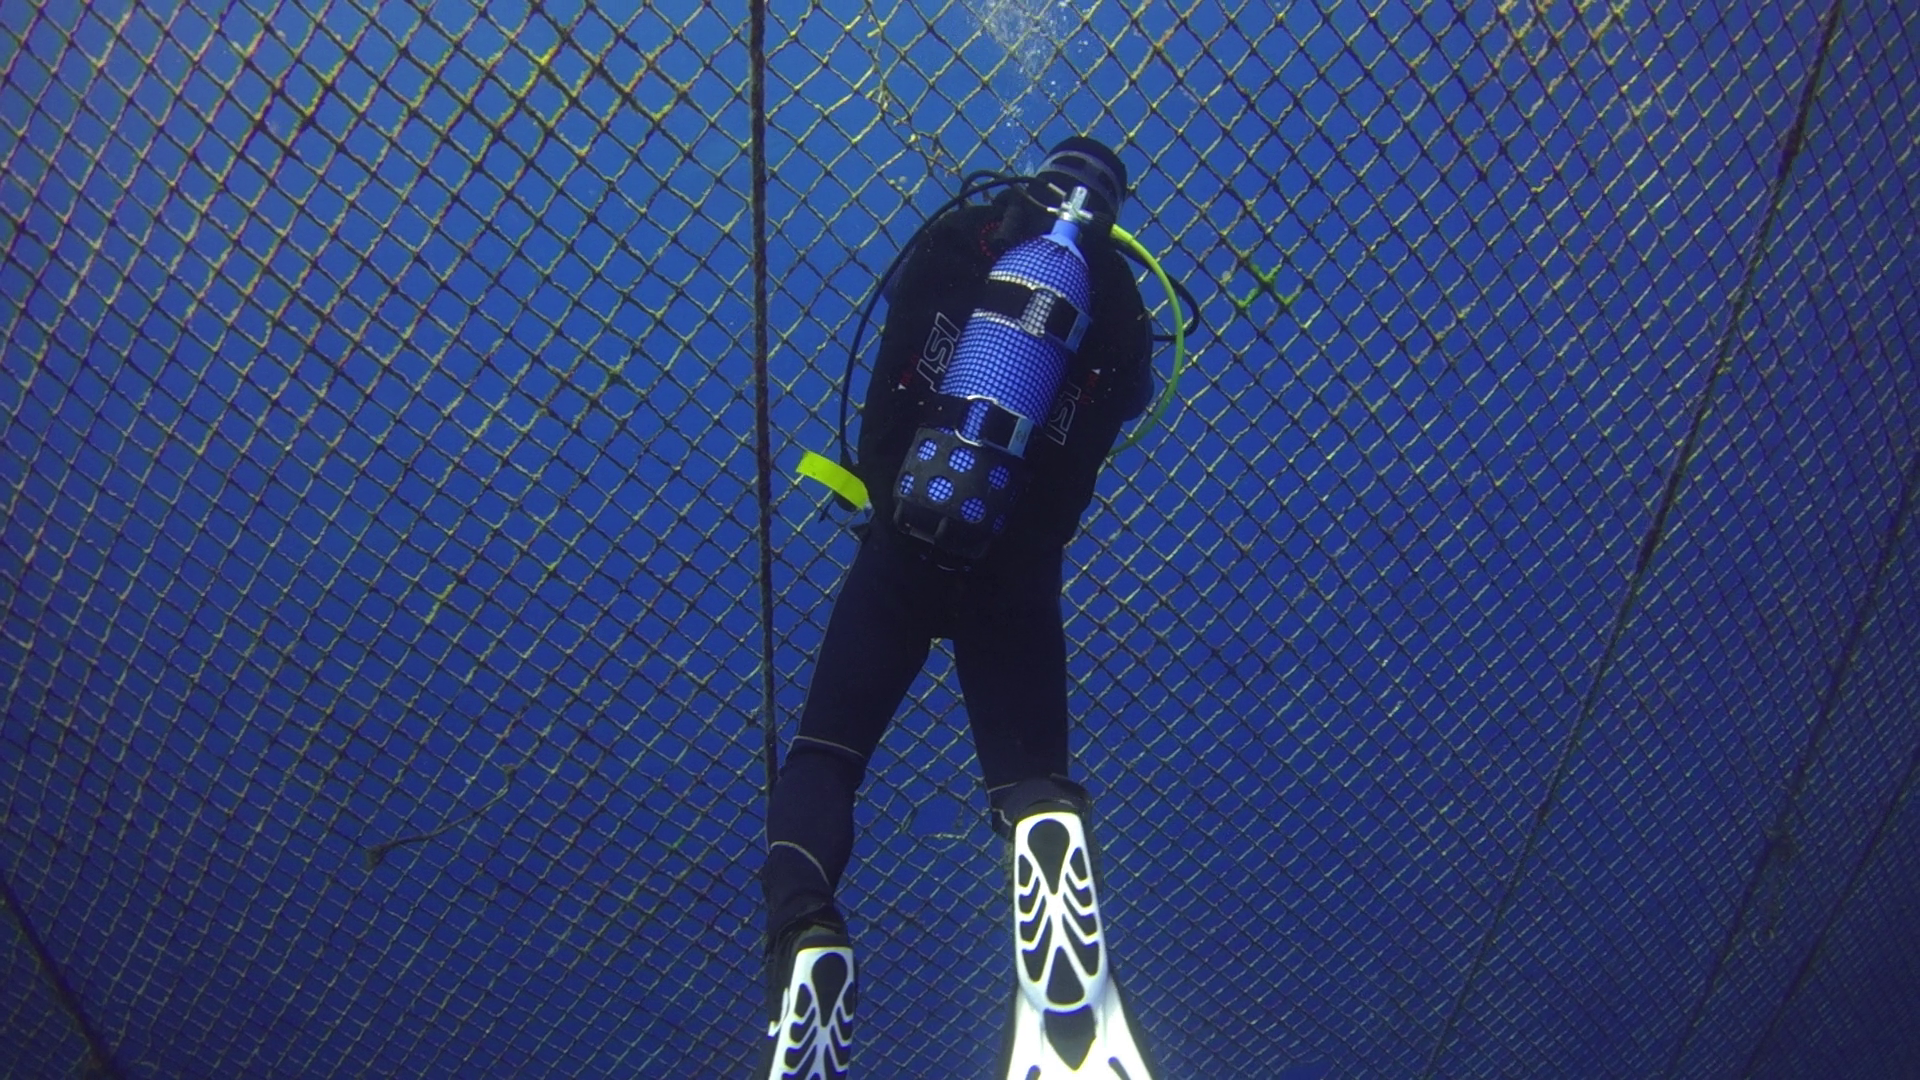
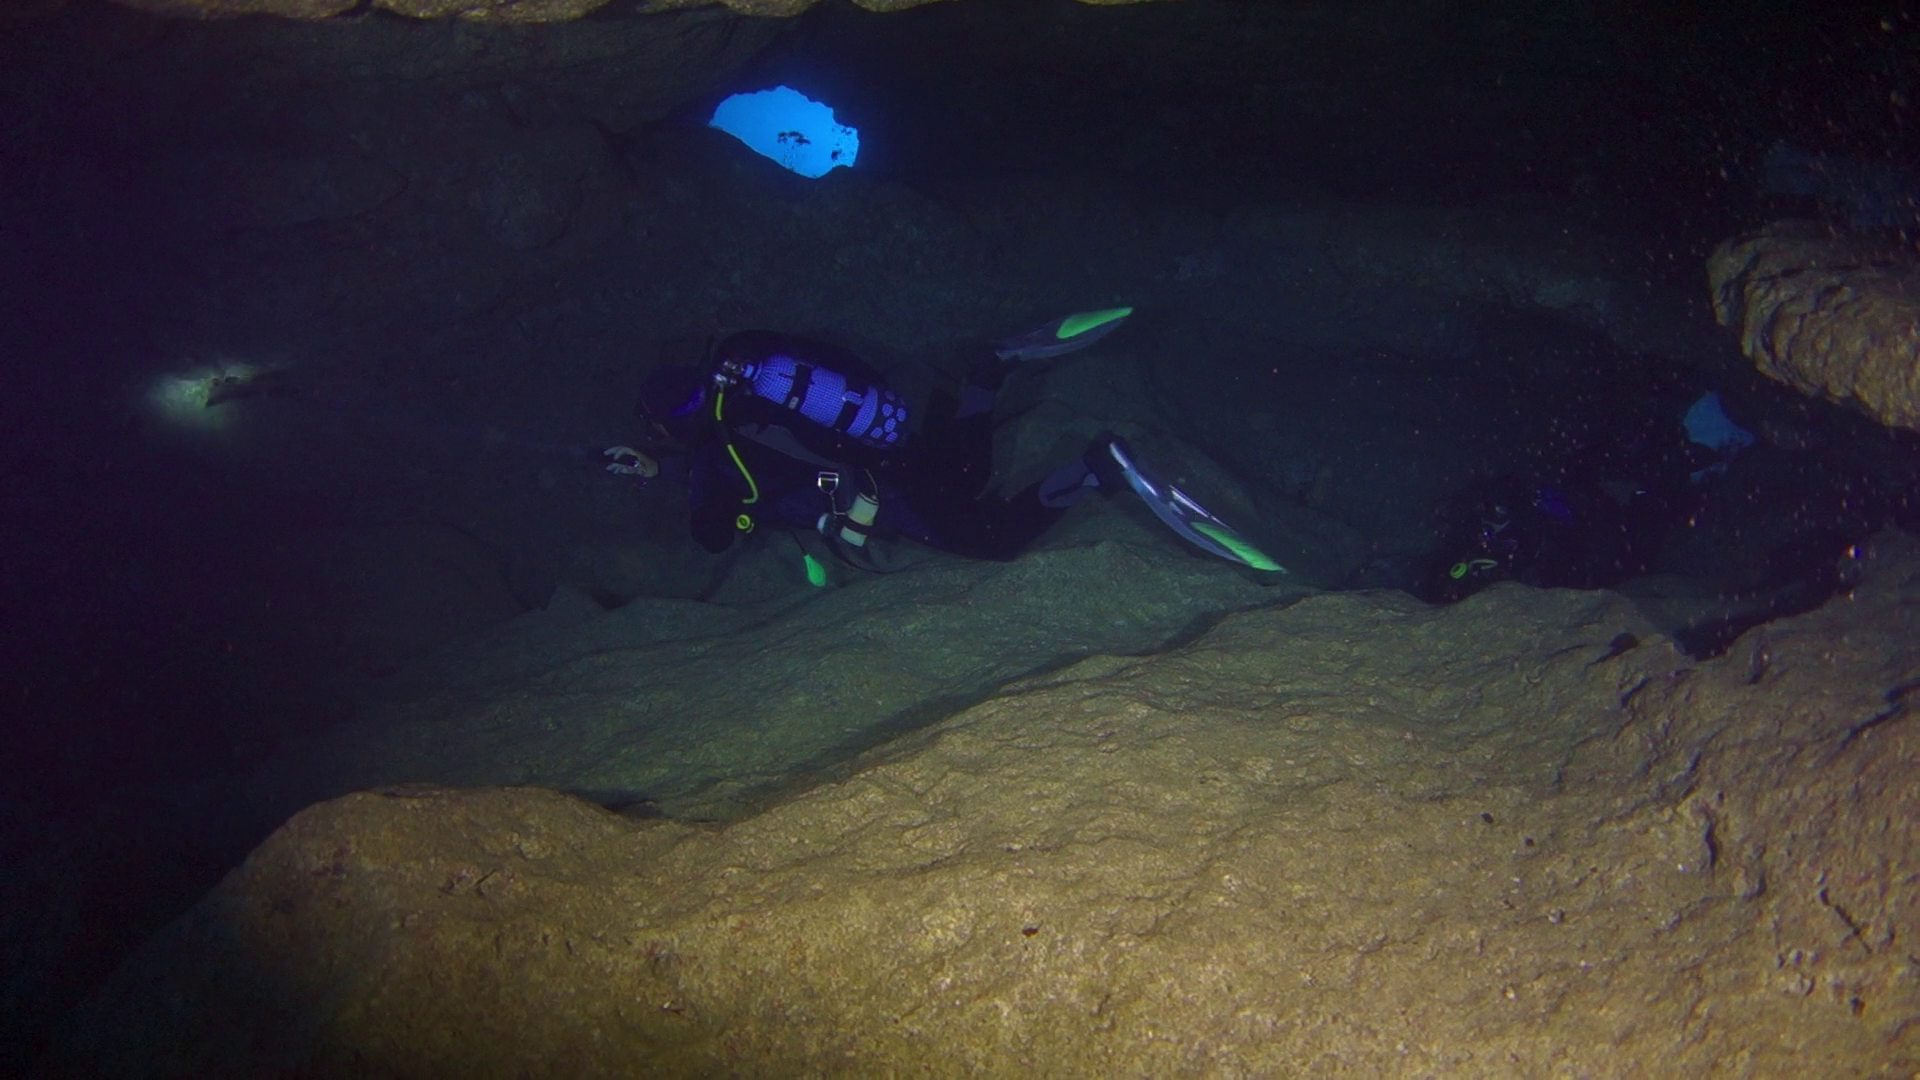
I shot this test video time ago comparing the recording of this codec with a Ninja V in ProRes 422 HQ. As you can see no major differences however I have not pushed the grading in the clip.

The speed ramps in this video use this codec


150 Mbps 420 8 Bits Long GOP 60p Analysis

An analysis with ffprobe shows a GOP structure with N=30 and M=3 where N is the length in frames of the group of pictures and M is the distance between I or P frames.

So each Group of Pictures is made like this

IBBPBBPBBPBBPBBPBBPBBPBBPBBPBB before it repeats again.

Analysing a set of I frames of a fixed subject at 30 fps resulted in a frame size of 1.26MB for the I frames.

One very important aspect of the 150 Mbps codec is that as the GOP is double the length of the single frame rate 100 Mbps codec there are the same number of key frames per second and therefore it is NOT true that this codec is better at predicting motion however the additional frames result in better slow motion performance than what is done in software in majority of cases.

100 Mbps 420 8 Bits Long Gop 30 fps Analysis

An analysis with ffprobe shows a GOP structure with N=15 and M=3 where N is the length in frames of the group of pictures and M is the distance between I or P frames.

So each Group of Picture is made like this

IBBPBBPBBPBBPBBP before it repeats again.

Analysing a set of I frames of a fixed subject at 30 fps resulted in a frame size of 1.49MB for the I frames which is the highest if we exclude All I.

150Mbps 422 10 Bits Long Gop 30 fps

An analysis with ffprobe shows a GOP structure with N=15 and M=1 which means this codec does not use B frames but just I and P frames so the GOP structure is as follows:

IPPPPPPPPPPPPPP before it repeats again.

Analysing a set of I frames of a fixed subject at 30 fps resulted in a frame size of 1.25MB for the I frames.

H264 Codec Ranking for Static Image Quality UHD

So in terms of absolute image quality and not taking into account other factors the Panasonic GH5M2 and S series Movie recording settings ranked by codec quality are as follows:

  1. 400 Mbps 422 10 Bit All intra 30 fps (1.67 MB per frame)
  2. 100 Mbps 420 8 Bit Long Gop 30 fps (1.49 MB per frame)
  3. 150 Mbps 420 8 Bit Long Gop 60 fps (1.26 MB per frame)
  4. 150 Mbps 422 10 Bit Long Gop 30 fps (1.25 MB per frame)

The 100 Mbps  and 400 Mbps codec are marginally different with the 150 Mbps long GOP really far away.

Note that as the technology is different I cannot directly compare the new 200 Mbps codec however based on visual impression and ability to grade I would recommend this over the 150 Mbps 420 8 bits

Conclusion

If you have a camera that has the 400 Mbps All Intra this remains the best format  to use. V90 cards have dropped in price and are now available up to 256 GB. Unfortunately this option is only available on the GH5 series and on the S1H.

If you have a camera that does not have the All-I you can of course purchase an external recorder that in some cases will allow you to shoot RAW however this is not necessarily going to give better image quality and will definitely extend your processing time.

My revised advice, if your camera does not have the ALL I and you don’t have an external recorded, is as follows:

  1. Use the 100 Mbps Long Gop codec it is very efficient in the compression and the perceived quality is very good. You need to get the exposure and white balance right in camera as the clips may not withstand extensive corrections. There is a risk with footage with a lot of motion of some errors in motion interpolation that can generate artefacts but this based on experience is not very high. 
  2. Use the new 200 Mbps HEVC for double frame rate it is not hard to process as HEVC 10 bits has hardware acceleration on all platforms.

Generally there appears to be no benefit using the internal 422 10 Bit codec nor the 420 8 bit double frame rate due to the limitations of the GOP structure, in addition the lack of hardware acceleration for H264 10 bits means you will need to convert the files for editing and they do not open with standard programs or load on phones or tablets. The same is true for All Intra but at least you can edit it ok.

To conclude this is a summary table with all key information

Screenshot 2022-01-24 at 18.01.50

Additional Considerations

A certain number of GH5 users have upgraded to the S5, I was one of them until I sold the camera after 1 month of using and after buying a Ninja V. If you are a Panasonic S1/S5 user you need not only to contend with recording time limits but also with lack of codecs on the camera to fully use the potential that it has. You need to add an external recorder to really see the benefits because in real life situations you are not shooting a step chart so the dynamic range is destroyed by compression quality and errors and SNR drops. It would be interesting to test how does the GH5M2 400 Mbps compare with one of the S cameras using the 150 Mbps 10 bit codec but this is not something I did. I would only warn everyone going down that path that you may get less than what you think and you may require additional hardware to get there. Take also into account that S series only shoot 50/60 fps in APSC/Super35 mode and that in full frame mode there is a substantial amount of rolling shutter that makes pans and tilt practically not possible.

The truth about v-log

There is no doubt that LOG formats in digital cameras have a halo of mystery around them mostly due to the lack of technical documentation on how they really work. In this short article I will explain how the Panasonic V-Log actually works on different cameras. Some of what you will read may be a surprise to you so I have provided the testing methods and the evidence so you can understand if LOG is something worth considering for you or not. I will aim at making this write up self-contained so you have all the information you need here without having to go and search elsewhere, it is not entirely possible to create a layman version of what is after all a technical subject.

Panasonic V-LOG/V-Gamut

A logarithmic operator is a non-linear function that processes the input signal and maps it to a different output value according to a formula. This is well documented in Panasonic V-Log/V-Gamut technical specifications. If you consider the input reflection (in) you can see how the output is related to the input using two formulas:

  1. IRE = 5.6*in+0.125 (in < cut1 ) *
  2. IRE = c*log10(in+b)+d (in >= cut1 ) 

Where cut1 = 0.01, b=0.00873, c=0.241514, d=0.598206

There are few implications of this formula that are important:

  • 0 input reflectance is mapped to 7.3% IRE
  • Dark values are not compressed until IRE=18%
  • Middle Grey (18% reflectance) is still 42% IRE as standard Rec709
  • White (90% reflectance) is 61% IRE so much lower than Rec709
  • 100% IRE needs input reflectance 4609 which is 5.5 stops headroom for overexposure.

So what we have here is a shift of the black level from 0% to 7.3% and a compression of all tones over 18% this gives the washout look to V-LOG that is mistakenly interpreted as flat but it is not flat at all. In fact the master pedestal as it is known in video or black level is shifted. Another consequence of this formula is that VLOG under 18% IRE works exactly like standard gamma corrected Rec709 so it should have exactly the same performance in the darks with a range between 7.3% and 18% instead of 0-18%.

In terms of ISO measured at 18% reflectante V-LOG should have identical ISO value to any other photo style in your camera this means at given aperture and exposure time the ISO in a standard mode must match V-LOG.

When we look at the reality of V-LOG we can see that Panasonic sets 0 at a value of 50% IRE so generally ⅔ to 1 full stop overexposed this becomes obvious when you look at the waveform. As a result blacks are actually at 10% IRE and whites at 80% once a conversion LUT is applied.

Challenges of Log implementation

LOG conversion is an excellent method to compress a high dynamic range into a smaller bit depth format. The claim is that you can pack the full sensor dynamic range into 10 bits video. Panasonic made this claim for the GH5s and for the S1H, S5.

There is however a fundamental issue. In a consumer digital camera the sensor is already equipped with a digital to analog converter on board and this operates in a linear non log mode. This means the sensor dynamic range is limited to the bit depth of the analog to digital converter and in most cases sensors do not even saturate the on board ADC. It is true that ADC can also resolve portions of bits however this does not largely change the picture.

If we look at the sensor used in the S1H, S5 this is based on a Sony IMX410 that has saturation value of 15105 bits or 13.88 stops of dynamic range. The sensor of the GH5s which is a variant of Sony IMX299 has a saturation of 3895 (at 12 bits) or 11.93 stops.

None of the S1H, S5 or GH5s actually reaches the nominal dynamic range that the ADC can provide at sensor level. The sensor used by the GH5 has more than 12 stops dynamic range and achieves 12.3 EV of engineering DR, as the camera has 12 bits ADC it will resolve an inferior number of tones.

So the starting point is 12 or 14 stops of data to be digitally and not analogically compressed into 10 bits coding. Rec709 has a contrast ratio requirement of 1000:1 which is less than 10 stops dynamic range. This has not to be confused with bit depth. With 8 bits depth you can manage 10 stops using gamma compression. If you finish your work in Rec709 the dynamic range will never exceed log2(1000)=9.97 stops. So when you read that rec709 only has 6.5 stops of DR or similar it is flawed as gamma compression squeezes the dynamic range into a smaller bit depth.

When we look at a sensor with almost 14 stops of dynamic range the standard rec709 gamma compression is insufficient to preserve the full dynamic range as it is by default limited to 10 stops. It follows that logically LOG is better suited to larger sensors and this is where it is widely used by all cinema camera manufacturers.

In practical terms the actual photographic dynamic range (this is defined as the dynamic range you would see on a print of 10″ on the long side at arm length), the one you can see with your eyes in an image, is less than the engineering value. The Panasonic S5 in recent tests showed around 11.5 stops while the GH5S is around 10 and the GH5 9.5 stops of dynamic range. Clearly when you look at a step chart the tool will show more than this value but practically you will not see more DR in real terms.

This means that it is possible that a standard gamma encoded video in 10 bits can be adequate in most situations and nothing more is required. There is also a further issue with noise that the log compression and decompression produces. As any conversion that is not lossless the amount of noise increases: this is especially apparent in the shadows. In a recent test performed with a S5 in low light and measured using neat-video assessment V-Log was one of the worst performed in terms of SNR. The test involved shooting a color checker at 67 lux of ambient illumination and reading noise level on the 4 shadows and darks chips. Though this test was carried out at default setting it has to be noted that even increasing the noise reduction in V-LOG does not eliminate the noise in the shadow as this depends on how V-LOG is implemented.

V-LOG Noisy Shadows

The actual V-Log implementation

How does V-LOG really work? From my analysis I have found that V-Log is not implemented equally across cameras, this is for sure a dependency on the sensor performance and construction.  I do not know how a Varicam camera is built but in order to perform the V-Log as described in the document you need a log converter before the signal is converted to digital. In a digital camera the sensor already has an on board ADC (analog to digital converter) and therefore the output is always linear on a bit scale of 12 or 14 bits. This is a fundamental difference and means that the math as illustrated by Panasonic in the V-LOG/V-Gamut documentation cannot actually be implemented in a consumer digital camera that does not have a separate analog log compressor.

I have taken a test shot in V-LOG as well as other standard Photo Styles with my Lumix S5 those are the RAW previews. V-LOG is exactly 2 2/3 stops underexposed on a linear scale all other parameters are identical.

Image on a standard photo mode looks correctly exposed
RAW image shot in V-LOG shows 2 2/3 underexposure

What is happening here? As we have seen ISO values have to be the same between photo styles and refer to 18% middle grey however if you apply a log conversion to a digital signal this results in a very bright image. I do some wide field astrophotography and I use a tool called Siril to extract information from very dark images this helps visualise the effect of a log compression.

The first screenshot is the RAW file as recorded a very dark black and white image as those tools process separately RGB.

Original image in linear representation

The second image shows the same RAW image with a logarithmic operator applied; this gives a very bright image.

Same image in logarithmic scale

Now if you have to keep the same middle grey value exposure has to match that linear image so what Panasonic does is to change the mapping of ISO to gain. Gain is the amplification on the sensor chip and has values typically up to 24-30 dB or 8 to 10 stops. While in a linear image the ISO would be defined as 100 at zero gain (I am simplifying here as actually even at 100 there will be some gain) in a log image zero gain corresponds to a different ISO value. So the mapping of ISO to gain is changed. When you read that the native ISO is 100 in normal mode and 640 in V-LOG this means that for the same gain of 0 dB a standard image looks like ISO 100 and a V-LOG image looks like ISO 640, this is because V-LOG needs less gain to achieve the same exposure as the log operator brightens the image. In practical terms the raw linear data of V-LOG at 640 is identical to an image taken at 100.

This is the reason why when a videographer takes occasional raw photos and leaves the camera in V-LOG the images are underexposed.

The benefit of the LOG implementation is that thanks to log data compression you can store the complete sensor information in a lower bit depth in our case this means going from 14 to 10 bits. 

There are however some drawbacks due to the fact that at linear level the image was ‘underexposed‘, I put the terms in italic as exposure only depends on time and aperture of the lens, so in effect is lack of gain for which there is no term.

The first issue is noise in the shadows as those on a linear scale are compacted, as the image is underexposed: a higher amount of noise is present and this is then amplified by the LOG conversion. It is not the case that LOG does not have noise reduction, in fact standard noise reduction expects a linear signal gamma corrected and therefore could not work properly (try setting a high value in V-LOG on a S camera to see the results), the issue is with the underexposure (lack of gain) of the linear signal.

There are also additional side effects due to what is called black level range, I recommend reading on photonstophotos a great website maintained by Bill Claff. When you look at black levels you see that cameras do not really have pure black but have a range. This range results in errors at the lower scale of the exposure; the visible effect is colour bleeding (typically blue) in the shadows when there is underexposure. As V-LOG underexposed in linear terms you will have issues of colour bleeding in the shadows: those have been experienced by several users so far with no explanation.

The other side effect is that the LUT to decompress V-LOG remains in a 10 bit color space which was insufficient to store the complete dynamic range data and this does not change. So the LUT does not fully reverse the log compression in Panasonic case this goes into the V709 CineLike Gamma which is in a Rec709 gamma. As the full signal is not decompressed means that there are likely errors of hue accuracy so V-LOG does not have a better ability to reproduce accurate colors and luminance and this is the reason why even after a LUT is applied it needs to be graded. If you instead decompress V-LOG in a log space like Rec2020 HDR you will see that it does not look washed out at all and colors are much more vibrant as the receiving space has in excess of 20 stops.

Some users overexpose their footage saying they are doing ETTR. Due to the way log is implemented this means it will reach a clipping point sooner and therefore the dynamic range is no longer preserved. This is a possible remedy to reduce the amount of noise in low light however the log compression is not fully reversed by the LUT that is expecting middle grey exposure and therefore color and luminance accuracy errors are guaranteed. If you find yourself regularly overexposing V-LOG you should consider not using it at all.

Shadow Improvement and input referred noise

The Lumix cameras with dula gain sensor have a different behaviour to those without. This is visible in the following two graphs again from Bill Claff excellent website. 

The first is the shadow improvement by ISO here you can see that while the GH5/G9 stay flat and are essentially ISO invariant, the GH5S and S5 that have a dual gain circuit have an improvement step when they go from low to high gain. What changes here is due to the way the sensors of the GH5s and S5 are constructed, the back illumination means that when the high gain circuit is active there is a material improvement in the shadows and the camera may even have a lower read noise at this ISO (gain) point than it had before because of this.

Another benefit of dual gain implementation is easier to understand when you look at input referred noise graphs. You can see that as the sensor enters the dual gain zone the input referred noise drops. Input referred noise means the noise that you would need to feed as an input to your circuit to produce the same noise as output. So this means when that step is passed the image will look less noisy. Again you can see that while the GH5 stays relatively flat the GH5s and S5 have a step improvement. Is it is not totally clear what happens in the intermediate zone for the GH5s possibly intermediate digital gain or more noise reduction is applied.

The combination of a certain type of sensor construction and dual conversion gain can be quite useful to improve shadows performance.

Do not confuse dual gain benefit with DR preservation, while dual gain reduces read noise it does not change the fact that the highlights will clip as gain is raised. So the effective PDR reduces in any case and is not preserved. The engineering DR is preserved but that is only useful to a machine and not to our eyes.

Now we are going to look at specific implementation of V-LOG in various camera models.

Front Illuminated 12 bits Sensors

Those are traditional digital cameras for photos and include the GH5, G9 for example. On those cameras you will see that the V-Log exposure shows a higher ISO value of 1 stop compared to other photo styles at identical aperture and shutter speed setting but the actual result is the same in a raw file so your RAW at 400 in VLOG is the same of another photo style at 200. This is a direct contradiction of Panasonic own V-Log model as the meter should read the same in all photo styles so something is going on here. As there is no underexposure it follows that there is no real log compression either. Those cameras are designed in a traditional way so low ISO (gain) is good high ISO (gain) is not. This is visible in the previous graphs.

Those screenshot show how the raw data of an image taken at ISO 250 in standard mode is identical to the V-LOG image and therefore shows how there is not LOG compression at all in the GH5. V-LOGL of the GH5 is therefore just a look and does not have any increase of dynamic range compared to other photo styles.

Image in standard photo style at ISO 250
Identical image at ISO 500 showing that there is no compression at all
VLOG L look of the same raw data

Is this version of V-LOGL more effective than other photo style with a compressed gamma like CineLikeD? According to Panasonic data CineLikeD has 450% headroom so it is already capable of storing the whole dynamic range that the GH5 can produce (450% means 12.13 stops vs 12.3 theoretical maximum).

In addition noise performance of V-Log is worse because all is doing is acting on shadows and highlights and not really doing any log conversion. The business case for acquiring a V-Log key on those cameras is limited if the objective was to preserve dynamic range as the camera already has this ability with photo styles included with the camera and moreover the V-LOG is not actually anything related to LOG compression otherwise the image would have needed to have less gain and would have shown underexposed. The fact that the camera is shooting at nominal ISO 400 means most likely that some form of noise reduction is active to counter the issue that V-Log itself introduces of noise in the shadows. So in this type of camera V-LOG is only a look and does not accomplish any dynamic range compression.

Back Illuminated 12 bits readout sensors

The cameras that have this technology are the GH5s and the BGH1, the back illumination gives the sensor a better ability to convert light into signal when illumination levels are low. Those cameras have actually a sensor with an 14 bits ADC but this is not used for video.

In order to decompose the procedure I have asked a friend to provide some RAW and Jpeg images in Vlog and normal. You can see that in the GH5s there is 1 stop underexposure and therefore a light form of log compression.

Standard Photo Style GH5s
V-LOG -1 stops from standard at identical setting due to gain reduction
VLOGL in the GH5s as presented by the camera

In the GH5s implementation the camera meters zero at the same aperture shutter and ISO in LOG and other photo styles and zero is 50% IRE so actually is 1 stop overexposed.

The procedure for V-Log in this cameras is as follows:

  1. Meter the scene on middle grey + 1 stop (50%)
  2. Reduce gain of the image 1 stop behind the scenes (so your 800 is 400 and 5000 is 2500)
  3. Digital log compression and manipulation

As the underexposure is mild this means the log compression is also mild as it is only recovering 1 stop as the two effect cancels this is actually a balanced setting.

The IMX299 dual gain implementation was a bit messed up in the GH5s but has been corrected in the BGH1 with the values of 160 and 800. It is unclear what is happening to the GH5s and why Panasonic declared 400 and 2500 as the dual gain values as those do not correspond to sensor behaviour, perhaps additional on sensor noise reduction only starts at those values or just wanting to make a marketing statement.

Back Illuminated 14bits Sensors

Here we have the S1H and S5 that have identical sensors and dual gain structure. 

The metering behaviour on the S series is the same as the GH5s so all photo styles result in identical metering. The examples were at the beginning of this post so I am not going to repeat them here.

Now the gain reduction is 2 and ⅔ stops which is significant. After this is applied a strong log compression is performed. This means that when you have ISO 640 on the screen the camera is actually at gain equivalent to ISO 100 and when you have 5000 is at 640 resulting in very dark images. In the case of the S5/S1H VLOG does offer additional dynamic range not achievable with other photo styles.

Interestingly V-Log on the S series does achieve decent low light SNR despite the strong negative gain bias. Here we can see that the Log implementation can be effective however other photo styles that do not reduce gain may be a better choice in low light as gain lifts the signal and improves SNR. It is also important to note that the additional DR of VLOG compared to other photo styles is in the highlights so it only shows on scenes with bright areas together with deep darks this was noted on dpreview and other websites.

Should you use V-LOG?

It looks like Panasonic is tweaking the procedure for each sensor  or even camera as they go along. The behind the scenes gain reduction is really surprising however it is logical considering the effect of a log compression. 

Now we can also see why Panasonic calls the GH5s implementation V-LOGL as the level of log compression is small only 1 stops as opposed to VLOG in the S series where the compression is 2 ⅔ stops. We have also seen that V-LOG, at least in a digital consumer camera with sensor with integrated ADC, has potentially several drawbacks and those are due to the way a camera functions.

Looking at benefits in terms of dynamic range preservation:

  1. GH5/G9 and front illuminated sensor: None
  2. GH5s/BGH1 back illuminated MFT: 1 stop
  3. S5/S1H full frame: 2 ⅔ stops

What we need to consider is that changing the gamma curve can also store additional dynamic range in a standard video container. Dpreview is the only website that has compared the various modes when they reviewed the Panasonic S1H.

A particularly interesting comparison is with the CineLikeD photo style that according to Panasonic can store higher dynamic range and is also not affected by the issues of V-LOG in the shadows or by color accuracy problems due to log compression. The measures of dpreview show that:

  1. On the GH5s V-LOG has 0.3 stops benefits over CineLikeD
  2. On the S1H V-LOG has a benefit of 0.7 stops over CineLikeD2

Considering the potential issues of noise and color bleeding in the shadows together with hue accuracy errors due to the approximation of the V-LOG implementation I personally have decided not to use V-LOG at all for standard dynamic range but to use it for HDR footage only as the decompression of V-LOG seems to have limited to no side effects. In normal non HDR situations I have shot several clips with V-LOG but I never felt I could not control the scene to manage with other photo styles and the extra effort for a maximum benefit of 0.7 Ev is not worth my time nor the investment in noise reduction software or the extra grading effort required. As HDR is not very popular I have recently stopped using V-LOG altogether due to lack of support of HDR in browsers for online viewing.

Obviously this is a personal consideration and not a recommendation however I hope this post helps you making the right choices depending on what you shoot.

This write up is based on my analysis on Panasonic V-LOG and does not necessarily mean the implementation of other camera manufacturers is identical however the challenges in a digital camera are similar and I expect the solutions to be similar too.

Using Rectilinear Wide Lenses Underwater

I was checking the technical details of Alex Mustard Underwater Photography Master Class and the majority of wide angle pictures are taken with a fisheye lens. In the section about shooting sharks Alex says that he prefers to shoot sharks with a fisheye otherwise they look ‘skinny’.

If you look online on underwater video forums you frequently see comments on problems with wide angle lenses connected with the use of a rectilinear wide angle lens in a dome.

The two most common complaints are soft corners and distortion.

Soft corners are due to a combination of lens optical issues and dome port optics. In short any lens is to some extent curved and therefore if you shoot a flat surface the image may be sharp in the centre and softer as you move to the corners. Issues with field of curvature are corrected stopping down the lens. The issue with field of curvature happens everywhere not just underwater.

Right now there are four wide angle lens that can be housed for a micro four third camera:

Olympus 9-18mm

This lens has a nice working range that allows to capture 100 degrees diagonal at widest setting and still has a 35mm equivalent at the tele end. This is a pretty little lens at $699 is the most affordable option that can be put in a housing. You will need a wide angle port and the zoom gear. The whole combination for your Nauticam housing comes at $1,399. This lens can also be combined with a glass dome but this will make the whole combination much more expensive and you may want to think about getting a better lens instead.

Olympus 7-14mm

This is an outstanding lens especially on land due to the fast f/2.8 aperture. It is expensive at $1,299.99 and very heavy and bulky. The lens does not fit through the N85 port opening and requires a port adapter this gives the extra benefit of a focus know but with such a wide lens is not really useful due to high depth of field. You will need a 180mm glass dome and the zoom gear for the lens to complete the set up ending at a whopping $3159.99.

Panasonic 7-14mm

I have owned this lens and I have to say that at $799 is the right compromise between wide field of view and price. Furthermore once you get the zoom gear you have the option of a cost effective acrylic dome that will give you a very wide set up for $1589.99. There are reports of poor performance with this lens and it is true that is not as sharp in corners but the results are perfectly acceptable if you stop at f/8 in close shots.

Steering Wheel Truck
Panasonic 7-14mm with acrylic dome 9mm f/8
Exploring the Chrisoula
Panasonic 7-14mm with acrylic dome 7mm f/5

This lens is prone to reflections and flare however once you add the N120 port adapter and the 180mm glass dome this will get you to $2819 at that point you may want to consider the Olympus combination instead.

Panasonic Leica 8-18mm

This is my favourite lens is sharp does not suffer from field of curvature issues and has a very useful zoom range 16-35mm in 35mm equivalent. The zoom gear and the 7″ acrylic dome will take you to 1889.99 that is an excellent price point. The lens is not prone to reflection or flare and as the 7″ dome has the same curvature radius than the 180mm dome it will produce very similar results.

Encircled
Panasonic 8-18mm in 7 acrylic dome f/8
Sunset Neat
Panasonic 8-18mm at 8mm f/10

The significant size of the acrylic port and the fact it floats make it ideal for split shots and this is the lens that gives me the best results.

This lens can also take port adapter that allows you to use the 180mm glass dome. This adds up to $2919.99 if you experience bad reflections and shoot frequently in the sun it may be worth it but I have not had any issue so far with this lens probably because of its nano coating.

I have found the 7mm focal length too problematic for dome ports and the amount of perspective distortion excessive generally it would be preferred to shoot at 9mm and narrower however this maybe insufficient for wreck interiors if you want a rectilinear look.

Perspective Distortion

One of the regular complaints of video shooters especially in wrecks or caves is that the edges look horrible and distorted and that there is an issue with the corners pulling. This is in fact not an issue but a problem with perspective as you shoot very wide angle. The following test shots will illustrate that the issue happens on land and has nothing to do with dome ports.

Shot at f/2.8 with Panasonic 8-18mm at 8mm shows sharp corners
Image with objects in edges at 8mm

As we can see the football looks like an oval and the chair is pulled. This is due to a perspective issue and is not a lens problem. When you shoot underwater video the objects on the edges of the frame change shape creating this pull effect that most people dislike.

Same scene at 9mm

At 9mm the amount of perspective distortion is reduced and this is the reason why 18mm on 35mm equivalent is one of the favourite focal length for rectilinear video and the maximum angle that should be used in small spaces to avoid the pulling edges.

One of the reason why a lens like the Nauticam WWL-1 is preferred for video is because the corners look sharp but is that really true?

Not really let’s apply some barrel distortion to simulate the WWL-1 to the image that looked badly distorted.

Barrel distortion applied -60 8mm

Now the football looks circular as we have applied -60 barrel distortion, obviously the rest of the image is now bent but this seems not to be of a concern to most people!

Barrel distortion -30 9mm

It needs much less correction to bring the 9mm shot into shape and for sure between the 8mm and 9mm the 9mm is the dimension that produces the most acceptable results.

It has to be said that in video with 16:9 aspect ratio most of the issue will be cropped away at the edges but the distortion in the middle of the frame will remain. For the same reason the 9mm image will appear practically rectilinear with no issues

16:9 crop still showing the edge ‘pulling’ at 8mm

16:9 crop looks straight at 9mm

I hope this post was useful there are four options for micro four thirds shooters to use rectilinear lenses I have settled for the Panasonic 8-18mm as in most cases it is still possible to control the perspective issue, I found this impossible at 7mm.

Bike on Hold 2
Bike in hold 2 on SS Thistlegorm Panasonic 8-18 at 8mm
Bubbling Bike
Shot at 7mm showing the front tyre pulling outside the frame

Obviously if you shoot in the blue this problem will not be visible however rectilinear lenses are popular with wreck shooters and I think this posts gives an idea of the challenges at play.

Finally I would discourage the use of the 7-8mm focal length range for video to those that want to have a rectilinear look.

From this post I started supporting Bluewater Photo in US for my links because it still provides multi brand and choice and because I learnt a lot from Scott Gietler Underwater photography guide back in the days where there was no internet resource to learn from.

CREATIVE strobe filters for wide angle

When people think about creating lighting technique for underwater photography a few things come to mind and usually it is about tools. Snoots for example have become very popular and help the underwater photographer to increase separation of the subject from the background. I have seen some people jumping in the water with a black slate to create an artificial black background, clearly is much easier to do that for macro as everything is at end and typically the subjects are not fast moving or the diver is not fast moving.

Then of course there is strobe positioning, classic, inward, crossed, rabbit ears, backlighting etcetera here goes a long list of options.

At the end however some pictures just seem to “pop” more than others, and this usually has to do with the colours and the contrast and with the blue.

It is not a coincidence that the term Mustard Blue is what has made some shots from Alex Mustard re-known and if you read his underwater photography masterclass there is a whole section ‘The sea is blue’ where Dr. Mustard goes on about the importance of exposure and background blue.

His suggestions are to:

  1. Dial in an underexposure (for the water) around -2/3 to -1 1/3 Ev
  2. Using warm strobes

It is worth stressing out that the primary reason why the camera gets fooled by the conditions underwater is because colours gets absorbed and blue lights gets scattered instead creating that milky glare at times when the water has lots of suspended particles.

If shoot an auto mode with exposure compensation at zero your pictures will for most part come out washed out and lacking contrast underwater and this is one the primary reasons photographer like Dr Mustard do not follow the expose to the right rules.

Underexposure for the water is obtained by keeping the aperture and ISO constant as they are aligned to the strobes and changing the shutter speed accordingly. Obviously if you are shooting video your shutter speed is most likely fixed so you need to find alternative ways to get your blue as you want it but generally you would still underexpose probably not as much.

With regards to warm strobes this is a fairly subtle point linked to the camera auto white balance mechanism.

Most flash strobes have colour temperatures between 5500 and 6500 K and therefore are not at all particularly warm.

Inon Z240 Standard and Warm diffuser

Inon has developed warming diffusers for their Z240 range and I believe also for the most recent Z330 range. They are available in 4600K and 4900K temperature. I definitely recommend the 4600K version over the 4900K as it has a stronger effect.

So how does a warm strobe work in order to get a richer blue?

Table of light sources – Olympus education

When we shoot with strobes the camera is set to auto white balance, and will average for most the subject we hit with our strobes to calculate the average colour temperature and tint.

The camera auto white balance operates between 2500K and 7500K typically so a warm strobe is likely to set the colour to 4600K instead of the typical 5500K the ‘extra’ 900K do not really do anything to the subject that will anyway we white balance but give an extra kick to the blue background. Underwater colour temperature is usually higher than 9000K and easily reaches 14000K (purple tone in the water) at depth. So the warm strobes are particularly effective in shallower and clearer water as they push the blue to a darker tint like in this example taken around 12 meters.

f/8 1/125 ISO 125

You can see how deep is the blue other example taken on the Barge at less than 10 meters.

Portrait in deep blue…

So what happens if you don’t have a warm strobe or if there aren’t warm diffusers for the strobe you have, or maybe you don’t want to spend the money for them?

Amazon comes to the rescue

If your strobe is around 5250 with diffusers (like Sea and Sea YS-D2 or Inon S2000/Z240/D200) get a 1/8 CTO

Rosco Cinegel sun 1/8 CTO, 20×24″ Color Correction Lighting Filter

You can find this filter also under Lee on colour 231, with a little amount you can get a half sheet that is enough for a few strobes.

This filter has a negligible -0.3 Ev light loss and will bring your strobe down to around 4600K .

If you have a fairly cool strobe you need a 1/4 CTO

Rosco un 1/4 CTO 20X24 Amber – Rosco RS340911

If you have something different you can try a mired shift calculator here

http://www.leefilters.com/lighting/mired-shift-calculator.html

Be careful not to exceed with this technique or subject will turn too warm.

An alternative and perhaps counterintuitive approach is to use cooling filters.

In this case the strobe light will become colder to emulate the water colour and the camera will need to be set to custom white balance.

In almost all cameras except Olympus that reach 14000K colour temperatures are limited to 10000K however they can be further enhanced to reach 11000K if you have an adjustment panel like the Panasonic or Sony cameras. Pushing the adjustment to the A gives extra 1K. This technique with a bare lens has however a limitation as when the custom white balance caps the colours go completely off.

In order to see what can the colour temperature setting do we can compare a normal grey card shot with one where the colour temp is 11000K and magenta is pushed to the max.

Grey card bare lens
Maxed out Custom White balance on Panasonic GH5

In order to cool down the strobes you need a cyan filter, the custom white balance can correct up to 2 stops Cyan but no more. You can trim a sheet of Rosco 4360 to fit into your diffuser as below. This takes around 1 stop Ev off the strobe.

Sea and Sea diffuser with a Cyan 60 gel

It important to stress that the predominant colour in blue and blue water is cyan not blue and this is what gives the washed out scattering. We want to keep the deep blues and get rid of light blue and green which ultimately is cyan the colour of water.

So the strobe will emulate the water and the camera custom white balance will set the colour restoring what was lost and giving us a full correct spectrum. This however only works until the water colour temperature gets to 11000K and this is not as deep as you may think it could be a low as 9-10 meters. A cyan 60 filter is approximately 9500K. You can see the colour in the image below.

Cyan 2 Stop results in Colour Temperature around 9500K

In this technique the strobe is not used to give colour but to eliminate shadows the custom white balance is going to give a deep colour that penetrates the whole frame so any subject in the distance will be colourful as well.

The benefit of this technique is that you may use wider apertures and even slower shutter speeds like in this 1/60 example here.

batfish formation 1/60 f/5.6 ISO 200

You can clearly see the orange colours of the anthias far behind in the frame.

The ultimate stretch of this technique is to combine a filter like the magic filter this can be used with both a Cyan 2 stops and also a Cyan 3 stops in deeper water. This technique is taxing on exposure as your strobes are half power and your exposure has 1 2/3 stops less however this is easily recovered as you tend to shoot at slower shutter speeds of 1/30 to 1/60 instead of 1/125 to 1/200 because the filter will give you the deeper blues.

Magic filters on WB slate

The magic filter adds around 3000K to you camera custom white balance ability reaching the 14000K where the water starts turning purple blue. To that regards due to the amount of red I do not recommend going to deep with the magic and keep it to a max of 13 meters as recommended on their website.

The magic filter is almost a perfect match for the Cyan 60 filter if you overlap them over the lens you get almost a neutral grey card the temperature is only 150K off while the tint is around 5 notches toward green in Lightroom.

Magic Filter + Cyan 60 results in almost neutral grey card

This cave shot I believe gives an idea and is taken with filter on lens and strobes.

Magic filter plus Cyan 60

I have also tried the magic filter with Cyan 90 however there are some side effect to consider. Firstly you get Cyan cast on the image at shallower depths. Second the magic filter has a tendency to turn purple below a certain depth so I recommend to use the magic with the Cyan 60 as you are certain that the foreground subject and the strobe filter will give you a neutral colour. If you are in deeper water and the temperature is above 10000K this will only result in a deeper blue and a warmer light on the subject that once RAW corrected will look just fine.

Conclusion

In this post I have tried to give you some tips on how to use gels to give deeper blue or richer colours to your wide angle. I would recommend to start with warming diffusers and then move to cyan filters and finally to magic filter and cyan filter in combination.

I will be demonstrating extensively this techniques during my 2020 Red Sea Liveaboard

A final word for video shooters. I am not aware of any add on warming diffusers for video lights and generally I have not seen LED warmer than 5000K therefore unless you shoot at 60p 1/125 it will be very hard to get deep blue at shallow depths without a lens filter.

See my other post for video specific tips.

Full size images are available on my flickr pages all images here are reduced to 1600 pixels for storage purposes.

Panasonic GH5 Demystifying Movie recording settings

EDIT: January 2022

This article is now obsolete, I wrote a new one that also considers the S series cameras and you can find it here

Panasonic GH5M2 and S series Demystifying Movie recording settings 2022 Update

There are a lot of videos on YouTube that suggest that there is not much difference among the various recording settings of the GH5 for UHD.

To recap we have 4 settings for UHD (I will refer to PAL system because it is easier but all applies equally to 24p, the 30p/60p format will be the same with worse results)

  1. 100 Mbps 420 8 Bits Long GOP 25p
  2. 150 Mbps 420 8 Bits Long GOP 50p
  3. 150 Mbps 422 10 Bits Long GOP 25p
  4. 400 Mbps 422 10 Bits All-Intra 25p

The difference between Long GOP and All Intra is that in the Long GOP what is encoded is a group of pictures (GOP) and not separate individual pictures.

Within a Group of Pictures there are different type of frames:

  • I (Intra coded) frames containing a full picture
  • P (Predictive coded) frames containing  motion interpolated picture based on a prediction from previous frames
  • B (bi-predictive coded) frames containing a prediction from previous or future frames

It is important to note that frames are not stored sequentially in a GOP and therefore the GOP needs to be decoded and the frames reordered to be played, this requires processing power.

The reason why H264 is very efficient is that within a group of picture there is only one full frame and the rest are predictions clearly if the prediction algorithm is accurate the level of perceived quality of long GOP is very high and similar to All-Intra clips.

This is the reason why comparing All Intra and Long Gop using static scenes or scenes with repetitive movement that can be predicted very accurately by the codec is a fundamental error.

Incorrect example here:

The scene is composed of static predictable objects with no motion and after YouTube compression the (wrong) conclusion is that there is no absolute difference between the codecs. Instead what this shows is the effectiveness of Long GOP when the prediction is accurate which is exactly the point of the codec plus the fact that YouTube flattens differences due to heavy compression and use of Long GOP.

Another example is a bit better as it uses a fountain which is a good representation of unpredictable motion

In the 300% crop you can see how All_Intra performs better than Long GOP in terms of prediction despite the YouTube compression, but generally those tests are unreliable if you see the last section of the video where there is a semi-static scene you cannot really take the three examples apart.

So why is that and is there any point selecting different settings on your Panasonic GH5?

In order to understand the workings we need to dig deeper into the structure of the GOP but before doing so let’s evaluate the All-Intra codec.

AVC All-Intra explanation

This codec records at 400 Mbps so with 25 fps this means circa 16 Mbits per frame or  1.9 MB per frame and there is no motion interpolation so each frame is independent from the others. The implementation of All-Intra of the GH5 does not make use of CABAC entropy encoding as Panasonic does not believe this is beneficial at higher bit-rates making this AVC-Intra implementation very close to ProRes as both are based on Discrete Cosine Transform.

If you consider a Jpeg image of your 3840×2160 frame on the GH5 you see that it stores around 4.8 MB per image because there is no chroma sub-sampling so if you wanted to have exactly the same result you would need to use ProRes 4444 to get a comparable quality (this not even taking into account that Jpeg are 8 bits images).

Video uses chroma sub-sampling so only part of the frame contain colours at a given time. Apple in their ProRes white paper declare that both ProRes 422 and 422 HQ are adequate to process 10 bit colour depth and 422 sub-sampling however they show some quality differences and different headroom for editing. If you count 50% for 4.2:0 sub-sampling and 67% for 422 you get around 2.34 MB and 3.5 MB frame sizes that correspond to ProRes 422 and ProRes 422 HQ individual frame sizes.

In simple terms All Intra 400 Mbps would fall short of Apple recommended bit-rate for 422 10 bit colour for circa 92 Mbps is like saying you are missing 0.44 MB from your ProRes 422 frame and 1.6 MB from ProRes 422 HQ and you have 0.3 MB more than ProRes LT however I do not have the full technical details of ProRes to evaluate directly.

The real benefit of such codec is that it can be processed with modest hardware without conversion as the AVC Intra codec is edit ready and each frame is captured individually without any motion artefacts and therefore the computer does not have to do a great deal of work to decode and render the clips.

In order to record All-Intra in your memory card you need a V60 or higher specs card which in terms of $ per GB costs you more than an SSD drive however you no longer need a recorder.

Coming back to the other recording quality option we still need to evaluate how the various long GOP codecs compare relative to each other.

In order to fully understand a codec we need to decompose the GOP into the individual frames and evaluate the information recorded. If you look on Wikipedia it will tell you that P frames are approximately half the size of an I frame and B frame are 25%. I have analysed the Panasonic GH5 clips using ffprobe a component of ffmpeg that tells you what is exactly in each frame to see if this explains some of the people claims that there is no difference between the settings.

Link to Panasonic documentation

100 Mbps 420 8 Bits Long Gop 25p Deep Dive

An analysis with ffprobe shows a GOP structure with N=12 and M=3 where N is the length in frames of the group of pictures and M is the distance between I or P frames.

So each Group of Picture is made like this

IBBPBBPBBPBBP before it repeats again.

A size analysis shows that B frames are in average 14% of the I frame and P frames are around 44% of the I frame.

I B B P B B P B B P B B
Size 1648326 247334 237891 728777 231947 228048 721242 228347 227544 713771 236866 232148
Ratio to I frame 100% 15.01% 14.43% 44.21% 14.07% 13.84% 43.76% 13.85% 13.80% 43.30% 14.37% 14.08%

With an average video bit-rate of 94 Mbps each GOP has 45.3 Mbps which means an I Frame has around 13.1 Mbits or 1.57 MB per frame and an equivalent All-Intra bit-rate of approximately 328 Mbps however this codec is using CABAC entropy encoding that Panasonic states is 20-30% more efficient than CAVLC used in All-Intra so net of motion artefacts this codec is pretty strong.

150 Mbps 420 8 Bits Long GOP 50p Deep Dive

An analysis with ffprobe shows a GOP structure with N=24 and M=3 where N is the length in frames of the group of pictures and M is the distance between I or P frames.

So each Group of Pictures is made like this

IBBPBBPBBPBBPBBPBBPBBPBB before it repeats again.

A size analysis shows that B frames are in average 13.4% of the I frame and P frames are around 41% of the I frame. With an average bit-rate of 142.7 Mbps each GOP has 68.5 Mbits which means an I Frame has around 11.3 Mbits or 1.35 MB per frame and an equivalent all Intra bit-rate of approximately 566 Mbps. Again this uses CABAC entropy encoding so the equivalent All-Intra is higher.

One very important aspect of the 150 Mbps codec is that as the GOP is double the length of the single frame rate 100 Mbps codec there are the same number of key frames per second and therefore it is NOT true that this codec is better at predicting motion. In fact it is exactly the same so if you had acquired a 100 Mbps codec at 25 fps and then slowed down the footage to half speed asking your editor to interpolate intermediate frames it would come to the same result although with some more processing required.

150Mbps 422 10 Bits Long Gop 25 fps

An analysis with ffprobe shows a GOP structure with N=12 and M=1 which means this codec does not use B frames but just I and P frames so the GOP structure is as follows:

IPPPPPPPPPPP before it repeats again.

A size analysis shows that P frames are on average 53% of I frames so this codec is in fact less compressed however this has also some consequences.

With an average bitrate of 150 Mbps each GOP has 72 Mbits which means an I Frame has around 10.5 Mbits or 1.25 MB per frame and an equivalent all Intra bitrate of approximately 262 Mbps. So this codec in terms of compression efficiency this is actually the worst and this is due to the lack of B frames.

We can only think that the Panasonic GH5 processing is not strong enough to capture 10 bit and then write 422 Long GOP with IPB structure.

Codec Ranking for Static Image Quality UHD

So in terms of absolute image quality and not taking into account other factors the Panasonic GH5 Movie recording settings ranked by codec quality are as follows:

  1. 400 Mbps 422 10 Bit All intra 25 fps (1.9 MB per frame)
  2. 100 Mbps 420 8 Bit Long Gop 25 fps (1.57 MB per frame)
  3. 150 Mbps 420 8 Bit Long Gop 50 fps (1.35 MB per frame)
  4. 150 Mbps 422 10 Bit Long Gop 25 fps (1.25 MB per frame)

The 100 Mbps  and 400 Mbps codec are marginally different (21% larger frame size) with the 422 10 Bits long GOP really far away.

Conclusion

If you want to record your footage to the internal memory card you are really left with two choices:

  1. Use the 100 Mbps Long Gop codec it is very efficient in the compression and the perceived quality is very good. It does however require you to convert to ProRes or similar during editing if you don’t want to overload your computer as the codec is really heavy on H264 features. You need to get the exposure and white balance right in camera as the clips may not withstand extensive corrections. There is a risk with footage with a lot of motion of some errors in motion interpolation that can generate artefacts.
  2. Buy a V60 or V90 memory card and use 400 All intra at single frame rate. This will give you edit ready footage of higher quality without motion artefacts, You still need to get exposure and white balance right in camera as the headroom is not so large to allow extensive corrections. The bit-rate and frame size is not sufficient to really give you all the benefits of 422 sampling and 10 bit colour but it will be a good stepping stone to produce good quality rec709 420 8 bit footage.

Generally there appears to be no benefit using the internal 422 10 Bit codec nor the 420 8 bit double frame rate due to the limitations of the GOP structure, here Panasonic has created a few options that to be honest appear more a marketing effort than anything else.

There may be some use to the 150 Mbps double frame rate if you intend to slow down the footage after the conversion to ProRes or similar but the extremely long GOP does not make this codec particularly robust to scenes with a lot of motion and in any case not more robust than the 100 Mbps codec.

A final thought if you are interested in 10 bit colour is that the FHD All Intra 200 Mbps codec has enough quality and headroom to allow manipulation. This is in fact the only codec that has bit-rate higher than ProRes HQ at least at 24 and 25 fps so if you want to check the real range of colours and dynamic range the camera is capable of you should try this codec.

Video Feature Sony RX100 Mark II in Malta

Following from my previous post I managed to get together a clip out of the 5 dives I did

The first day was somewhat plagued by visibility a bit lower than the norm for the location but the second day was fabulous

For this trip I brought with me the Inon UWL-H100 and the red push on filter from deep roof H20 and the Inon UCL-330 as I was expecting medium size fish and nothing really small

Here is the outcome

I am quite happy how things turned out so let me share the settings with you

First I shot most of the footage in 25p AVCHD mode only some small sections are shot at 50p and actually I did not need to slow down any of the material.

For the wide shots I used steady shot in normal mode and shutter priority at 1/50th. With the filter on I had auto white balance with tint correction G2 A1. I noticed that the camera was giving red tint in some situation and so added a bit of green back. The Amber correction instead is for the RX100 itself the camera does not have vibrant yellow and is a bit blue.

Tunas
Tunas – AWB with filter

For the first time I use creative mode changing the standard contrast to -3 in order to prevent crushing of blacks.

Exposure was set all along to -1/3 and metering to multi area with AUTO ISO limited 160-800.

I think the results are so good that in fact I have performed no colour correction to any shots in ambient light.

Opening the tuna farm
Opening the tuna farm – AWB with filter

For shots with lights I set up first colour temperature to 6500K and A1 to match the lights but then in some of the far shots this resulted a bit cold so I adjusted very slightly in post the temperature.

Seahorse
Seahorse – AWB UCL330

Only 40″ are adjusted in the whole video in essence is as shot and the editing took me half hour.

In cave
In cave –  AWB no filter

I did a bit of analysis and the camera was operating for most at ISO200 with aperture around f/3.5 – f/4.0 which is really the sweet spot of the lens.

I did have some challenges using the UCL330 for some nudibranches  that really required a stronger lens so they look a bit small, there was also surge so I had to fight with focus problems but all in all very happy.

Nudibranch
Nudibranch – AWB UCL330

The longer working distance of the UCL330 (20-30 cm or 8″ to 1′) proved challenging on walls as you are too far to hang on to anything or use a stick. I will bear this in mind in the future.

For the close up shots I used steady shot active.

I also wanted to say that a few times the camera did manage to white balance properly however the results were not exciting and frankly not worth the hassle. Using the filter is just so much better with the auto white balance.

Tweaking the Sony RX100 Mark II Video Performance

I am currently in Malta for few days relaxing and I manage to squeeze in some dives. The Mediterranean sea is nothing sensational (from a pure diving point of view) but does offer clear water, and some brisk thermoclines, and a combination of algae, blue water, caves and silvery fish that is challenging on the dynamic range of our little RX100.

The purpose of this trip is mostly to refine the video settings and go more in depth in few topics. I wanted to try specifically the following:

  • Metering modes
  • Creative modes
  • Stabiliser modes
  • Tracking focus
  • Medium size fish portraits
  • White balance
  • Caves and low light

Some of my settings will be the same and I am not intending to changed them those are:

Auto ISO: 160 – 800

DRO: Auto

Starting off with metering, the first attempt was to try and use the camera on 0 exposure compensation with centred weighted average metering.

Entering Cave Fairly Bright

Pretty soon I realised this gave issues of banding of the blue water, this was apparent not only in backlit shots but also in normal wide angle of fish in specific cases. So after dive number 1 I changed it to the standard -0.3 from dive 2.

I set a new creative style with contrast at -3 in the hope to recover detail and seem to be working fine with the shots still having plenty of contrast.

Lowered Constrast on -3

I also tried spot metering for close up but it makes no sense the video lights are too wide and ended up with burned highlights at the edges of the frame so back to centred weighted average for close up shots.

Spot metering
Spot metering

So when it comes to metering my settings are:

Wide angle: multi area

Close up: centered weighted average

I did some tests with stabiliser in steadyshot mode, this gives back some field of view and the lens offers 100 degrees diagonal and 90 horizontal, I actually think a bit more anyway with fairly stable conditions this worked fine. At longer focal length for close up I am still using active mode.

Schooling Fish 100 fov

I have a +3 diopter for this test as I realised in my last still trip I don’t have a lens for medium size fish, the lens worked very well and I also tried the camera tracking focus but it seems it won’t work with fireworms or similar. So either keep normal focus or manual with peaking.

Tracking focus fail
Tracking focus fail
Rock FIsh UCL 330
Rock FIsh UCL 330

White balance has been a subject of discussion, I did manage this time to white balance a few times but to be honest it was not worth the effort there is a better correction of the purple hue of the filter but this can be corrected setting Green to 1 or 2 in AWB. I also changed the AWB to include a correction with Amber 1 as per examples. Very happy with the results I think this is the final set up with this filter lacking a proper orange filter.

AWB corrected
AWB corrected

Shooting in low light was rewarding with ISO maxed out at 800. I am becoming less and less a fan of video lights in cave due to the amount of backscatter am getting. I think I will default at using the lights as dive torches instead of wide beams of even leaving them off for effect.

Backscatter
Backscatter
Cave in natural light


Underwater Photography Workshops – My Tips

I thought the Red Sea workshop with Alex Mustard was brilliant to I thought of writing down my notes and sharing them with you.

This final post is a general one and has my lesson learned from attending the workshop, those that follow are generic tips that I think would be beneficial to anyone wanting to attend a similar experience.

Before the Workshop

The experience actually starts before you even attend the sessions key points for me include:

  • Ask questions about the workshop and how it works
  • Know your equipment
  • Take all the gear you have
  • Be fit and self reliant
  • Set your self objectives

I did not really ask many questions before going as Dr Mustard sent a very comprehensive document however this is not standard and it is better to ask in advance about the conditions, the dives, the type of training and generally how the workshops is organized. Some have talks, other have one to one, other are just dive trips where you ask when you need. Not all types fit everyone so better to make sure you go to one that matches your need.

Sadly even this time like in every trip I have come across people using their equipment or part of their equipment for the first time. The end results is wasted dives and opportunities, I cannot stress enough that testing your rig in a pool before going allows you to familiarize with it and make any corrections you need.

Pool Conditions
Pool Practice

Also take all the possible lens, ports, parts that may be useful. Once you are there you don’t want to have regrets about something you have left home. In my case all was there but I did not know about remote strobes otherwise I would have got myself a trigger as I have 2 Z240s.

Transformer Tray
In case of doubt exceed with equipment

In most of those workshops buddy system does not really apply so make sure you are self reliant and fit as the conditions allow to avoid embarrassing or even dangerous incidents. Once there dive within your comfort limit and if you don’t really have a buddy dive with a guide.

It is useful to know before you go what your objectives are, for example what type of shots you want to work on. This means you have something to do over and above the assigned tasks.

During the workshop

Once there you need to stay focused on your performance. Those are additional points to think about:

  • Deliver the assigned tasks
  • Go off the beaten track
  • Learn from other participants
  • Take notes

Sometimes during those workshop there are challenges or set shot that are suggested, this is your opportunity to compare your work with others and therefore you should make sure you deliver those also to find out if there are limits with your equipment.
Eggs
In the Red Sea workshop were given the task of taking pictures of cardinal fish with eggs in their mouth. I realized I could not fill the frame because I lacked a mid range close up lens and my camera would not focus closer.

In addition to the suggested shots you should make changes to those and try something different even if not totally different.

Ras Katy Sunset

There are many landscape split shots but not many portrait so why not try one results can be excellent and it is easier with a small dome.

Other participants also will give a go to the same shots or have better editing skills it is worth to watch and learn.

Trucks
My buddy was setting up a remote strobe I fired a few shots (unintentionally of course) so I got my own shot!

Finally take notes of what you did right and wrong and if you missed anything.

After the workshop

After the sessions are over still there is work to do over and above going over your pictures again.

  • Write down your lessons learned
  • Look at other people images
  • Order any equipment that you missed

Well it goes without saying that I put the notes together and summarized them here.

I also found great to connect to other people and then look at their gallery for other shots that we had not discussed before.

Finally I ordered myself an Inon UCL330, funny I had this lens and sold it not realizing the real use which is fish portraits!!!

That’s all for now if you go on a workshop soon I hope you find this useful.