CREATIVE strobe filters for wide angle

When people think about creating lighting technique for underwater photography a few things come to mind and usually it is about tools. Snoots for example have become very popular and help the underwater photographer to increase separation of the subject from the background. I have seen some people jumping in the water with a black slate to create an artificial black background, clearly is much easier to do that for macro as everything is at end and typically the subjects are not fast moving or the diver is not fast moving.

Then of course there is strobe positioning, classic, inward, crossed, rabbit ears, backlighting etcetera here goes a long list of options.

At the end however some pictures just seem to “pop” more than others, and this usually has to do with the colours and the contrast and with the blue.

It is not a coincidence that the term Mustard Blue is what has made some shots from Alex Mustard re-known and if you read his underwater photography masterclass there is a whole section ‘The sea is blue’ where Dr. Mustard goes on about the importance of exposure and background blue.

His suggestions are to:

  1. Dial in an underexposure (for the water) around -2/3 to -1 1/3 Ev
  2. Using warm strobes

It is worth stressing out that the primary reason why the camera gets fooled by the conditions underwater is because colours gets absorbed and blue lights gets scattered instead creating that milky glare at times when the water has lots of suspended particles.

If shoot an auto mode with exposure compensation at zero your pictures will for most part come out washed out and lacking contrast underwater and this is one the primary reasons photographer like Dr Mustard do not follow the expose to the right rules.

Underexposure for the water is obtained by keeping the aperture and ISO constant as they are aligned to the strobes and changing the shutter speed accordingly. Obviously if you are shooting video your shutter speed is most likely fixed so you need to find alternative ways to get your blue as you want it but generally you would still underexpose probably not as much.

With regards to warm strobes this is a fairly subtle point linked to the camera auto white balance mechanism.

Most flash strobes have colour temperatures between 5500 and 6500 K and therefore are not at all particularly warm.

Inon Z240 Standard and Warm diffuser

Inon has developed warming diffusers for their Z240 range and I believe also for the most recent Z330 range. They are available in 4600K and 4900K temperature. I definitely recommend the 4600K version over the 4900K as it has a stronger effect.

So how does a warm strobe work in order to get a richer blue?

Table of light sources – Olympus education

When we shoot with strobes the camera is set to auto white balance, and will average for most the subject we hit with our strobes to calculate the average colour temperature and tint.

The camera auto white balance operates between 2500K and 7500K typically so a warm strobe is likely to set the colour to 4600K instead of the typical 5500K the ‘extra’ 900K do not really do anything to the subject that will anyway we white balance but give an extra kick to the blue background. Underwater colour temperature is usually higher than 9000K and easily reaches 14000K (purple tone in the water) at depth. So the warm strobes are particularly effective in shallower and clearer water as they push the blue to a darker tint like in this example taken around 12 meters.
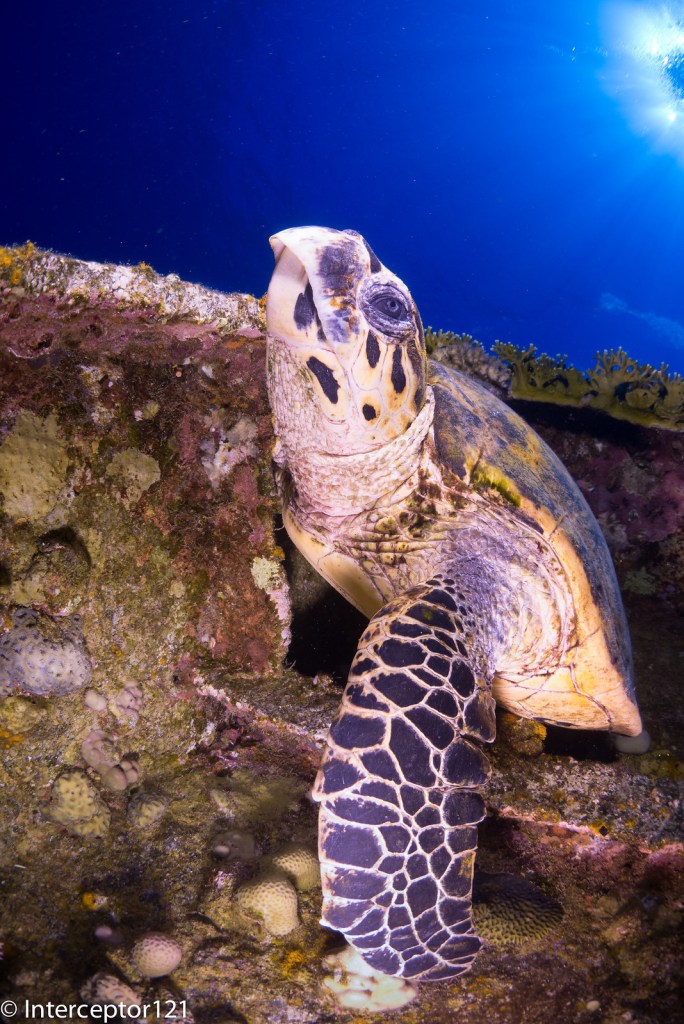
f/8 1/125 ISO 125

You can see how deep is the blue other example taken on the Barge at less than 10 meters.

Portrait in deep blue…

So what happens if you don’t have a warm strobe or if there aren’t warm diffusers for the strobe you have, or maybe you don’t want to spend the money for them?

Amazon comes to the rescue

If your strobe is around 5250 with diffusers (like Sea and Sea YS-D2 or Inon S2000/Z240/D200) get a 1/8 CTO

Rosco Cinegel sun 1/8 CTO, 20×24″ Color Correction Lighting Filter

You can find this filter also under Lee on colour 231, with a little amount you can get a half sheet that is enough for a few strobes.

This filter has a negligible -0.3 Ev light loss and will bring your strobe down to around 4600K .

If you have a fairly cool strobe you need a 1/4 CTO

Rosco un 1/4 CTO 20X24 Amber – Rosco RS340911

If you have something different you can try a mired shift calculator here

http://www.leefilters.com/lighting/mired-shift-calculator.html

Be careful not to exceed with this technique or subject will turn too warm.

An alternative and perhaps counterintuitive approach is to use cooling filters.

In this case the strobe light will become colder to emulate the water colour and the camera will need to be set to custom white balance.

In almost all cameras except Olympus that reach 14000K colour temperatures are limited to 10000K however they can be further enhanced to reach 11000K if you have an adjustment panel like the Panasonic or Sony cameras. Pushing the adjustment to the A gives extra 1K. This technique with a bare lens has however a limitation as when the custom white balance caps the colours go completely off.

In order to see what can the colour temperature setting do we can compare a normal grey card shot with one where the colour temp is 11000K and magenta is pushed to the max.
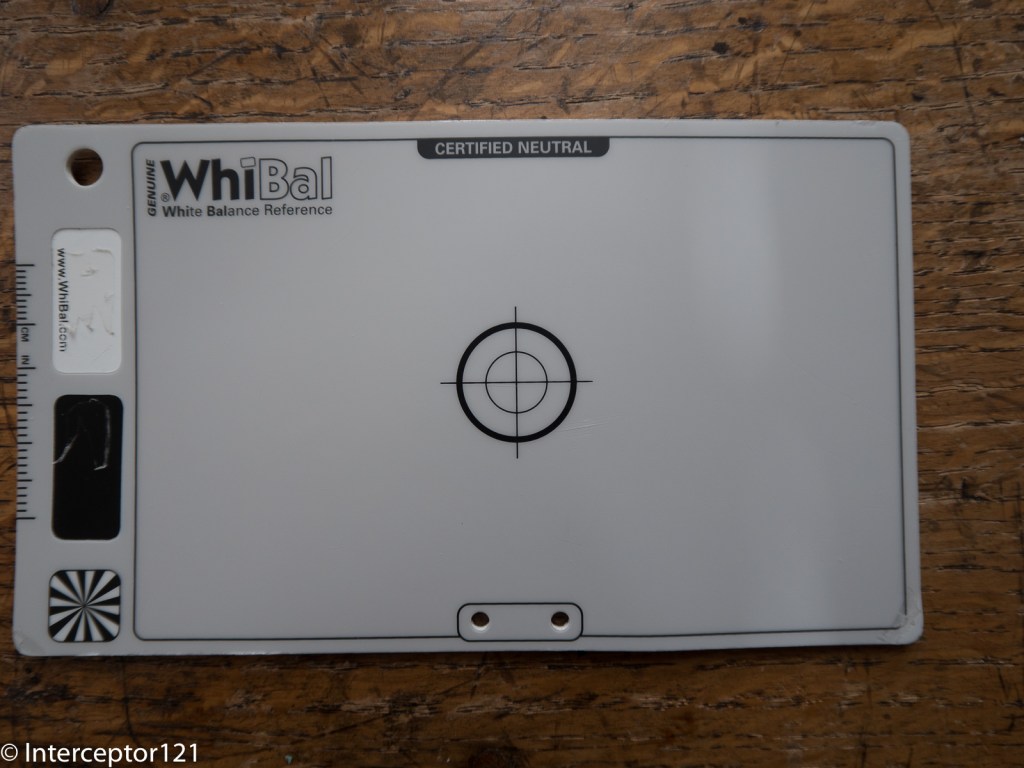
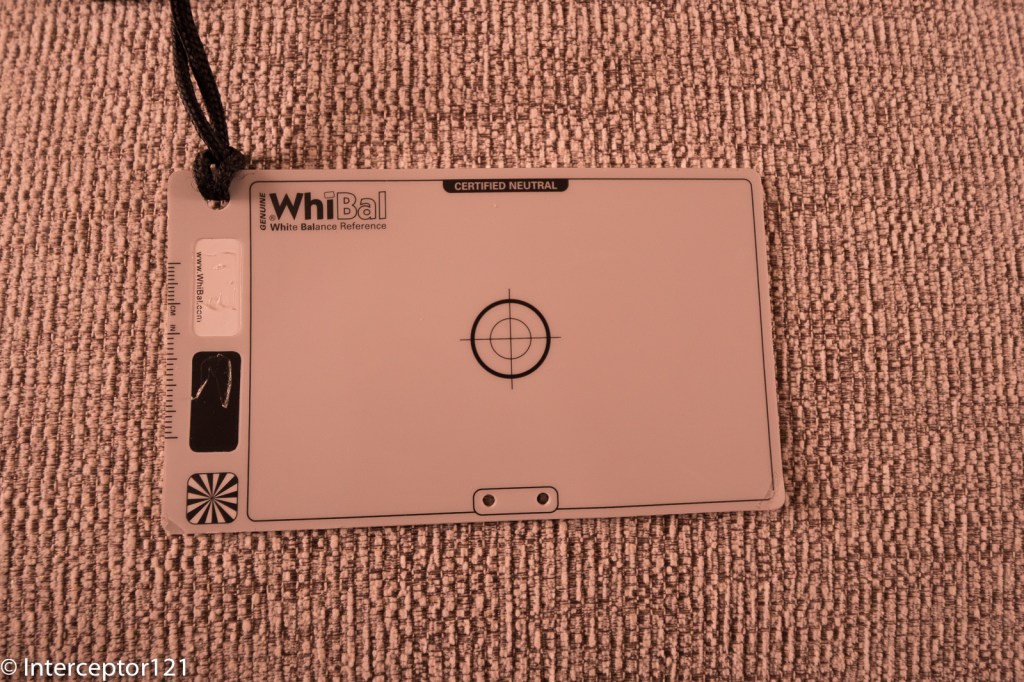
Grey card bare lens
Maxed out Custom White balance on Panasonic GH5

In order to cool down the strobes you need a cyan filter, the custom white balance can correct up to 2 stops Cyan but no more. You can trim a sheet of Rosco 4360 to fit into your diffuser as below. This takes around 1 stop Ev off the strobe.
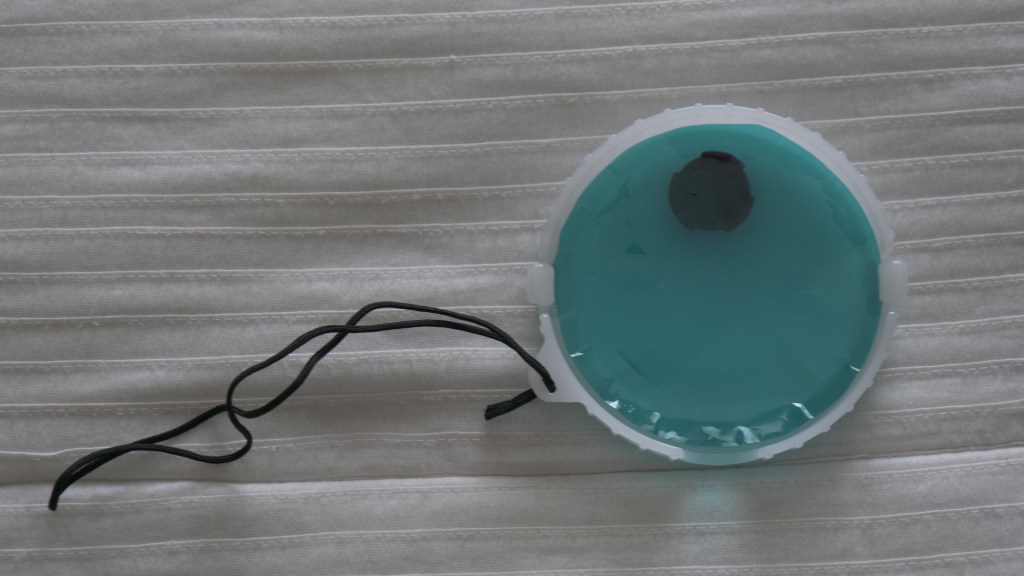
Sea and Sea diffuser with a Cyan 60 gel

It important to stress that the predominant colour in blue and blue water is cyan not blue and this is what gives the washed out scattering. We want to keep the deep blues and get rid of light blue and green which ultimately is cyan the colour of water.

So the strobe will emulate the water and the camera custom white balance will set the colour restoring what was lost and giving us a full correct spectrum. This however only works until the water colour temperature gets to 11000K and this is not as deep as you may think it could be a low as 9-10 meters. A cyan 60 filter is approximately 9500K. You can see the colour in the image below.

Cyan 2 Stop results in Colour Temperature around 9500K

In this technique the strobe is not used to give colour but to eliminate shadows the custom white balance is going to give a deep colour that penetrates the whole frame so any subject in the distance will be colourful as well.

The benefit of this technique is that you may use wider apertures and even slower shutter speeds like in this 1/60 example here.

batfish formation 1/60 f/5.6 ISO 200

You can clearly see the orange colours of the anthias far behind in the frame.

The ultimate stretch of this technique is to combine a filter like the magic filter this can be used with both a Cyan 2 stops and also a Cyan 3 stops in deeper water. This technique is taxing on exposure as your strobes are half power and your exposure has 1 2/3 stops less however this is easily recovered as you tend to shoot at slower shutter speeds of 1/30 to 1/60 instead of 1/125 to 1/200 because the filter will give you the deeper blues.

Magic filters on WB slate

The magic filter adds around 3000K to you camera custom white balance ability reaching the 14000K where the water starts turning purple blue. To that regards due to the amount of red I do not recommend going to deep with the magic and keep it to a max of 13 meters as recommended on their website.

The magic filter is almost a perfect match for the Cyan 60 filter if you overlap them over the lens you get almost a neutral grey card the temperature is only 150K off while the tint is around 5 notches toward green in Lightroom.

Magic Filter + Cyan 60 results in almost neutral grey card

This cave shot I believe gives an idea and is taken with filter on lens and strobes.

Magic filter plus Cyan 60

I have also tried the magic filter with Cyan 90 however there are some side effect to consider. Firstly you get Cyan cast on the image at shallower depths. Second the magic filter has a tendency to turn purple below a certain depth so I recommend to use the magic with the Cyan 60 as you are certain that the foreground subject and the strobe filter will give you a neutral colour. If you are in deeper water and the temperature is above 10000K this will only result in a deeper blue and a warmer light on the subject that once RAW corrected will look just fine.

Conclusion

In this post I have tried to give you some tips on how to use gels to give deeper blue or richer colours to your wide angle. I would recommend to start with warming diffusers and then move to cyan filters and finally to magic filter and cyan filter in combination.

I will be demonstrating extensively this techniques during my 2020 Red Sea Liveaboard

A final word for video shooters. I am not aware of any add on warming diffusers for video lights and generally I have not seen LED warmer than 5000K therefore unless you shoot at 60p 1/125 it will be very hard to get deep blue at shallow depths without a lens filter.

See my other post for video specific tips.

Full size images are available on my flickr pages all images here are reduced to 1600 pixels for storage purposes.

The importance of Underwater white balance with the Panasonic gh5

One of the key steps in order to get the best underwater colours in your video is to perform a custom white balance.

This is true on land and on water because auto white balance only works in a specified range of color temperatures.

Panasonic GH5 advanced user manual

For our GH5 the range where auto works goes is approximately 3200-7500K. When the camera is working outside this range you get a colour cast. Let’s see with some examples:

Grey card Auto White Balance 8mm
Grey card Custom White Balance 8mm

In the example above I am taking a picture of a white balance reference card under warm lights that have a colour temperature of 2700K.

As you can see the auto white balance fails resulting in a yellowish tinge, while the shots taken after the custom white balance is accurate.

In terms of white balance card I use the Whibal G7 Studio 3.5″x6″ (8.9×15.2 cm). I found this card to work well underwater and I use it with a lanyard attached to a clip that I hook on my BCD D rings.

More info on the whibal here

It is possible to buy a larger card such as the reference that is 7.5″x10″ however this is cumbersome and I found the Studio version to work well with the Panasonic GH5 as it only uses the central part of the frame for white balance.

Custom white balance with the 8mm fisheye

Going back to our GH5 instruction manual you can also see that the camera white balance is limited to 10,000K which is the colour of blue sky.

Underwater due to light absorption at longer wavelengths red and orange disappear at depth and blue tends to scatter over suspended particles. So the colour temperature of water tends to be higher than 10,000K and also the blue is somewhat washed out by scattering.

This is the reason filters are essential because reduce the amount of blue or to say better cyan and bring the camera into a range where custom white balance works again.

I have already posted a whole range of observations on filters in a previous post so am not repeating here.

With the right filter for the water colour I dive in and with the appropriate white balance card you can get some pretty decent results with custom white balance.

To help the colour accuracy I have experimented with the Leeming Luts and I want to thank Paul Leeming for answering my obscure questions. Obviously you do not have to use the LUTs and you can design them yourself however I found that using the Cinelike D LUT I have a very good starting point for colour correction.

The starting point is a CineLike D profile with saturation, noise reduction and sharpness set to -5 all other settings to default as suggested by Paul, there is no need to lower the contrast as CineLike D is already a flat curve.

*Noise and sharpness have actually nothing to do with grading but are set to -5 as the GH5 applies sharpening and noise reduction even at -5 setting. Sharpening has generally a negative effect all around while noise reduction if required is better performed in the editor.

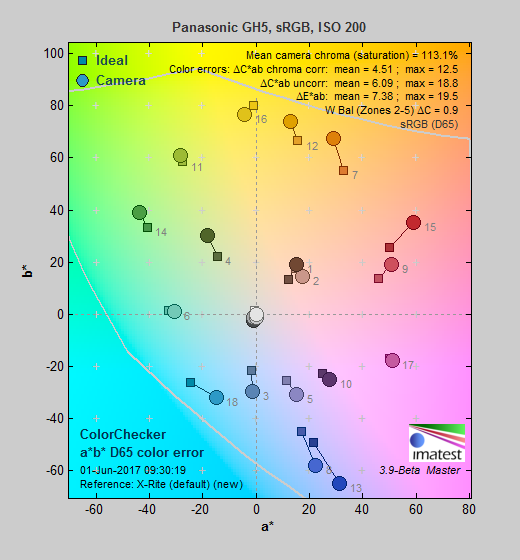
Looking at imaging resource tests of the GH5 we can appreciate that the camera colours are oversaturated by default.

the GH5 has around 113% over saturated colours

The GH5 tends to push deep colour and wash out cyan and yellow. This becomes apparent when we look at a white balanced clip uncorrected.

White balanced clip in final cut pro you can see how the water column is washed out whilst red and other dark colours are accurate

The Leeming Lut helps rebalancing the camera distorted colours and when you apply the camera LUT, provided you have followed the exposure instructions and applied the profile as described, the improvement is immediate.

The previous clip now with the CineLike D Leeming LUT applied

From here onwards it is possible to perform a better grading and work to improve the footage further.

For the whole read please look at Leeming Lut website

One other thing that I believe it is interesting is that while generally for ambient light or balanced light shots I do not actually trust the camera exposure and go -1/3 to -2/3 for close up shots exposing to the right greatly helps highlights recovery

In the two frames you can see the difference the LUT brings restoring the correct balance to the head of the turtle.

Turte detail the highlights appear blown out
Turtle detail with Leeming Lut applied

To be clear the turtle detail has been white balanced in water on the whibal card while using a Keldan Spectrum filter -2, then in fcpx automatic balancing is applied. The LUT brings out a better dynamic range from the same frames.

Obviously you are free to avoid lens filters and LUTs and to some extent it is possible to get similar results however the quality I obtain using automatic settings I believe is quite impressive.

I found myself most times correcting my own wrong exposures or wanting to increase contrast in scene where I had little however this only happens in sever circumstances where white balance and filters are at the limits.

Conclusion

There are many paths to get the right colours for your GH5 underwater videos in my opinion there are four essential ingredients to make your life easier and give your footage a jump start:

  • Take a custom white balance using a professional grade white balance card
  • Set the right picture profile and exposure when shooting
  • (Recommended) Use appropriate filters for the water conditions
  • Apply the appropriate LUT to eliminate the errors in the GH5 colour rendering in post processing

With the following settings producing a video like this is very simple and all your efforts are in the actual cutting of the clip.

Short clip that applies this blog tips

Please note some of the scenes that look off are shot beyond the working conditions of filters and white balance at around 25 meters…

which macro lens to pick for your gh5 or micro four third

I see many posts on line debating which macro lens is best for your micro four third system.

If I refer to the Nauticam system we have 4 macro lenses:

  • Olympus 30mm
  • Panasonic 30mm
  • Panasonic 45mm
  • Olympus 60mm

For the purpose of this article I will skip the Olympus 30mm as the Panasonic lens is known to be sharper and will focus on the other 3 lenses.

DxOMark is a popular tool for comparison as it gives you the results on one page. I have run it for the Oly 60 and the Pana 30 and 45 on the 20 Mpix OMD E-M1 MKII

DxOMark Comparison on Olympus OMD E-M1 MKII

Surprisingly the much more expensive Leica performs worse than the other cheaper models, this is confirmed on all internet sites running other type of tests.

What we can see is that there is little difference between the Panasonic 30mm and Olympus 60mm when it comes to image quality so whichever lens you choose your subject at the same level of magnification and aperture will have more or less the same detail.

Common Misconception: Shorter focal length give more depth of field

Many people think that using a longer lens is harder because there is less depth of field this is actually incorrect conceptually.

Let see why

Using an online calculatore like Dofmaster https://www.dofmaster.com/dofjs.html

Enter for the Panasonic GH5 the following parameters

Circle of confusion: 0.015 mm

Focal length 30mm

Distance 10.5 cm (minimum distance of the 30mm Macro)

Aperture f/11

Result Total depth of field 0.3cm

Now enter

Focal Length 60mm

Distance 21 cm (as it achieves the same magnification)

Aperture f/11

Result Total depth of field 0.3cm

So depth of field is not a consideration when choosing a macro lens…

Shooting a subject close to the background

In the following 3 shots am taking an image of a widget at f/11 at 29-44-60 mm on a Leica 12-60 (it is just easier it makes no difference to the outcomes)

Shot at 60mm
Shot at 44mm
Shot at 29mm

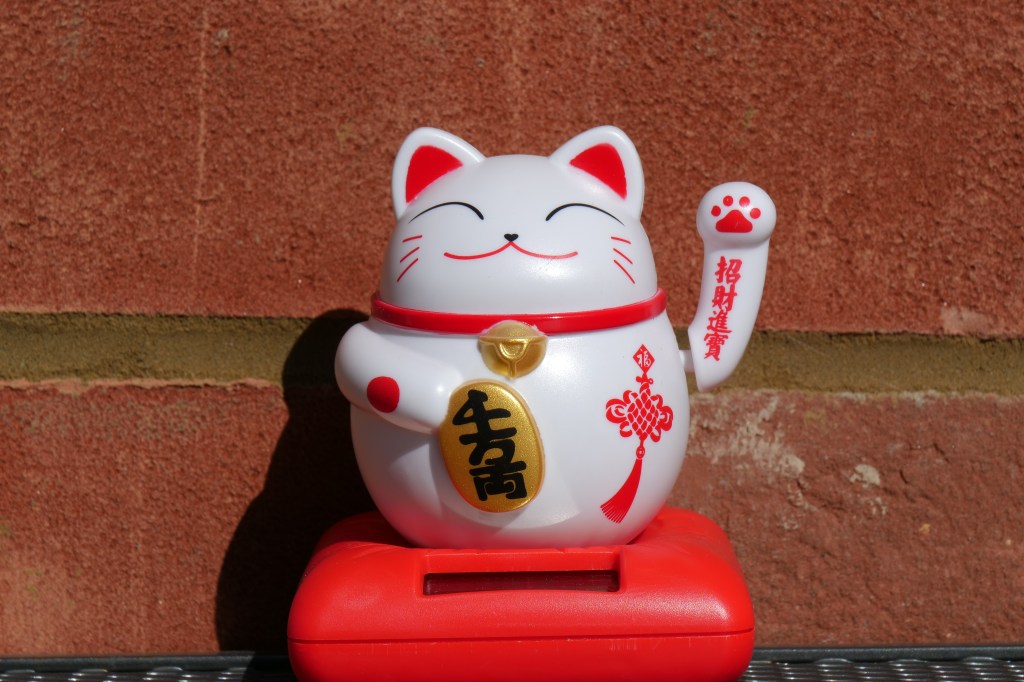
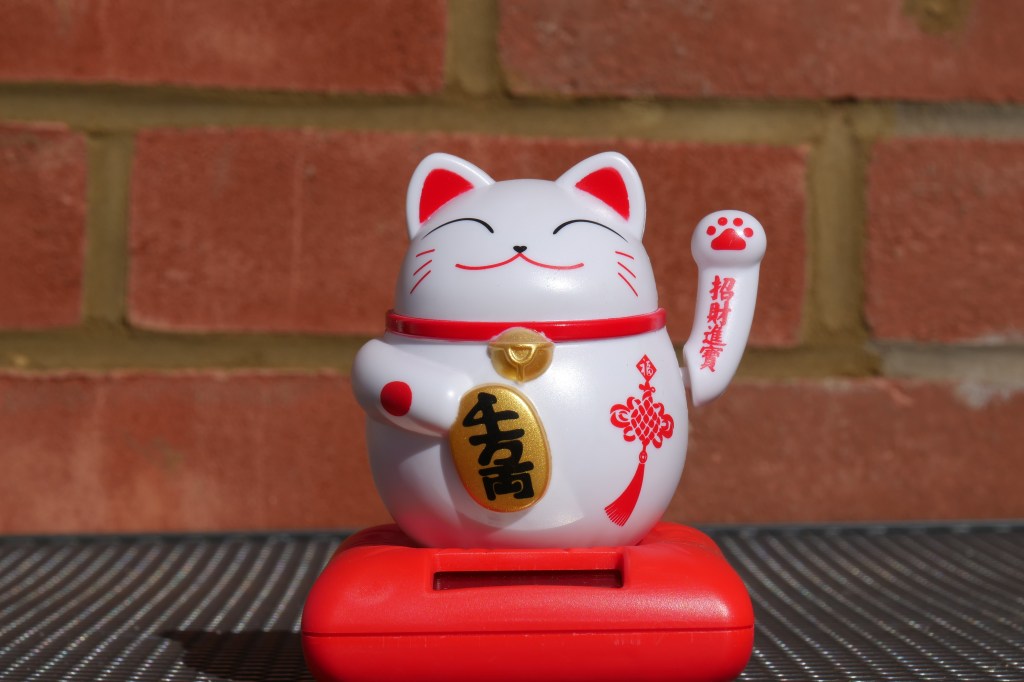
At the same aperture you can clearly see that there are no difference whatsoever in the detail and actually overall in the picture you don’t notice anything.

Shooting a subject far from the background

For the second shot I have moved the widget away from the wall.

Shot at 60mm
Shot at 44mm
Shot at 29mm

Again there is no difference in the level of detail of the widget however looking at the background we can see that

  • The 60mm shot reveals one brick and less than one quarter
  • The 44mm shot reveals one brick and a half
  • The 29mm shot reveals two bricks

So while the subject is exactly the same as the 60mm lens has a narrower field of view we see much less of the background.

This means that if you are shooting a nudibranch on the sand or something flat on a rock you won’t notice anything however if there is space behind the subject you will capture much more of that resulting in less subject isolation.

Underwater Comparison 30 vs 60 mm

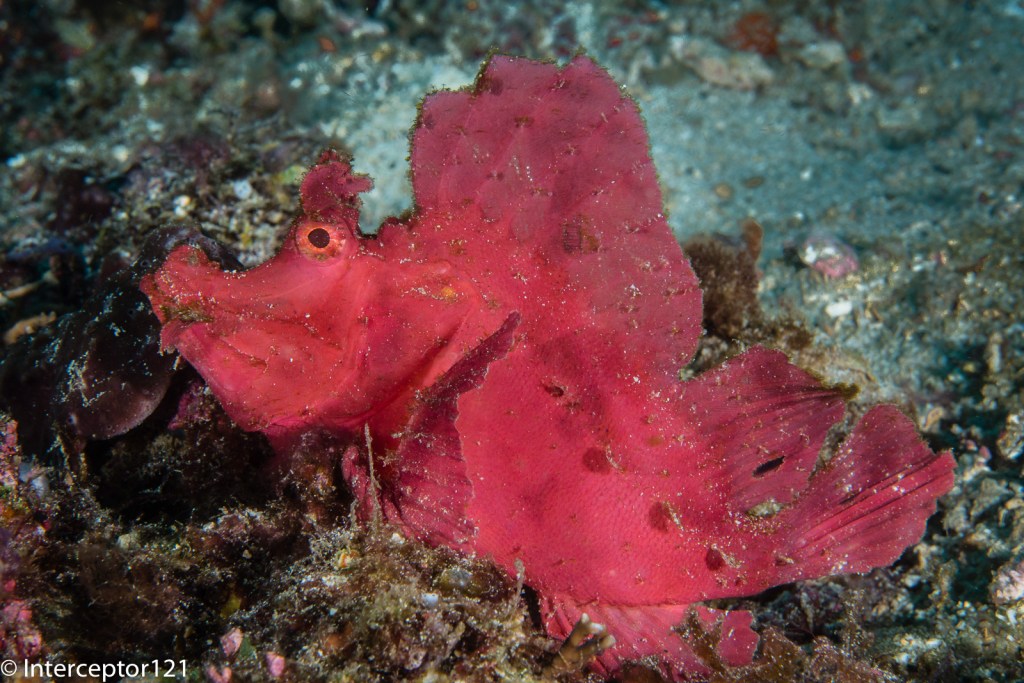
In the first shot the Rhinopia is taken with a 60mm lens

Rhinopia Olympus 60mm

In the second shot the same Rhinopia with the 30mm (in a different place to be fair)

I have marked up with red the areas that with a longer focal length would have been minimised.

Which Lens to choose?

Now that we have clarified that depth of field is not a consideration and as each macro lens will have the same magnification there are only two factors that matter:

  1. Working distance
  2. Isolation from background

The 60 mm will have a longer working distance and at the same magnification will isolate the subject better from busy backgrounds, the 60 mm is also better for skittish subject because of the longer working distance. I have this lens and I have borrowed the 30mm in couple of occasions but do not have the 30mm yet.

There are however situations where longer working distance is not a benefit, specifically when the visibility is poor and there are suspended particles or the subject is really large.

In the example below I was at one meter from the two frogfish, a 30mm would have been better however the shot came OK.

Hairy frogfish Olympus 60mm

Conclusion

I believe the Olympus 60mm is a must lens to have. To date I have not felt the need for the Panasonic 30mm that is indeed a very sharp lens because I have always managed to pull out the shots. However for someone diving in murky water and focussing on nudibranches or subject laying flat on the seabed the Panasonic 30mm could be a better choice. I also want to say that using the 14-42mm at 42mm for me is actually a better choice for portraits and with a close up lens works very well with small subject not super macro and therefore as I already own the 14-42mm and various diopter for me the 30mm is not on the shopping list.