Fisheye Lenses for Underwater myths vs reality

There are several myths surrounding fisheye lenses when it comes to underwater use.

A quick tour to underwater photography guide usually a good source of information.

Myth Busting

Properties of fisheye lens as per UWPG:

  • They usually focus very close
  • They are small and light
  • When shooting ultra-wide angle, you benefit from a large depth of field
  • You can get very close to large subjects, maximizing color and sharpness
  • They perform well behind dome ports with good corner sharpness, and they don’t need a diopter
  • You usually need at least 2 strobes with good angle of coverage to properly light the entire area.

Some of the above statements are correct in absolute, some are correct but not specific to fisheye lenses and some are just incorrect.

Fisheye lenses usually focus very close -> true for the most recent fisheye lenses, not true for some older models

They are small and light -> Not true. Canon 8-15mm and Nikon 8/15mm are fairly chunky lenses with lots of glass

When shooting ultra-wide angle, you benefit from a large depth of field -> not a property of the fisheye lens but of the focal lens. In fact due to the extreme field of view Fisheye lenses have issues of depth of field.

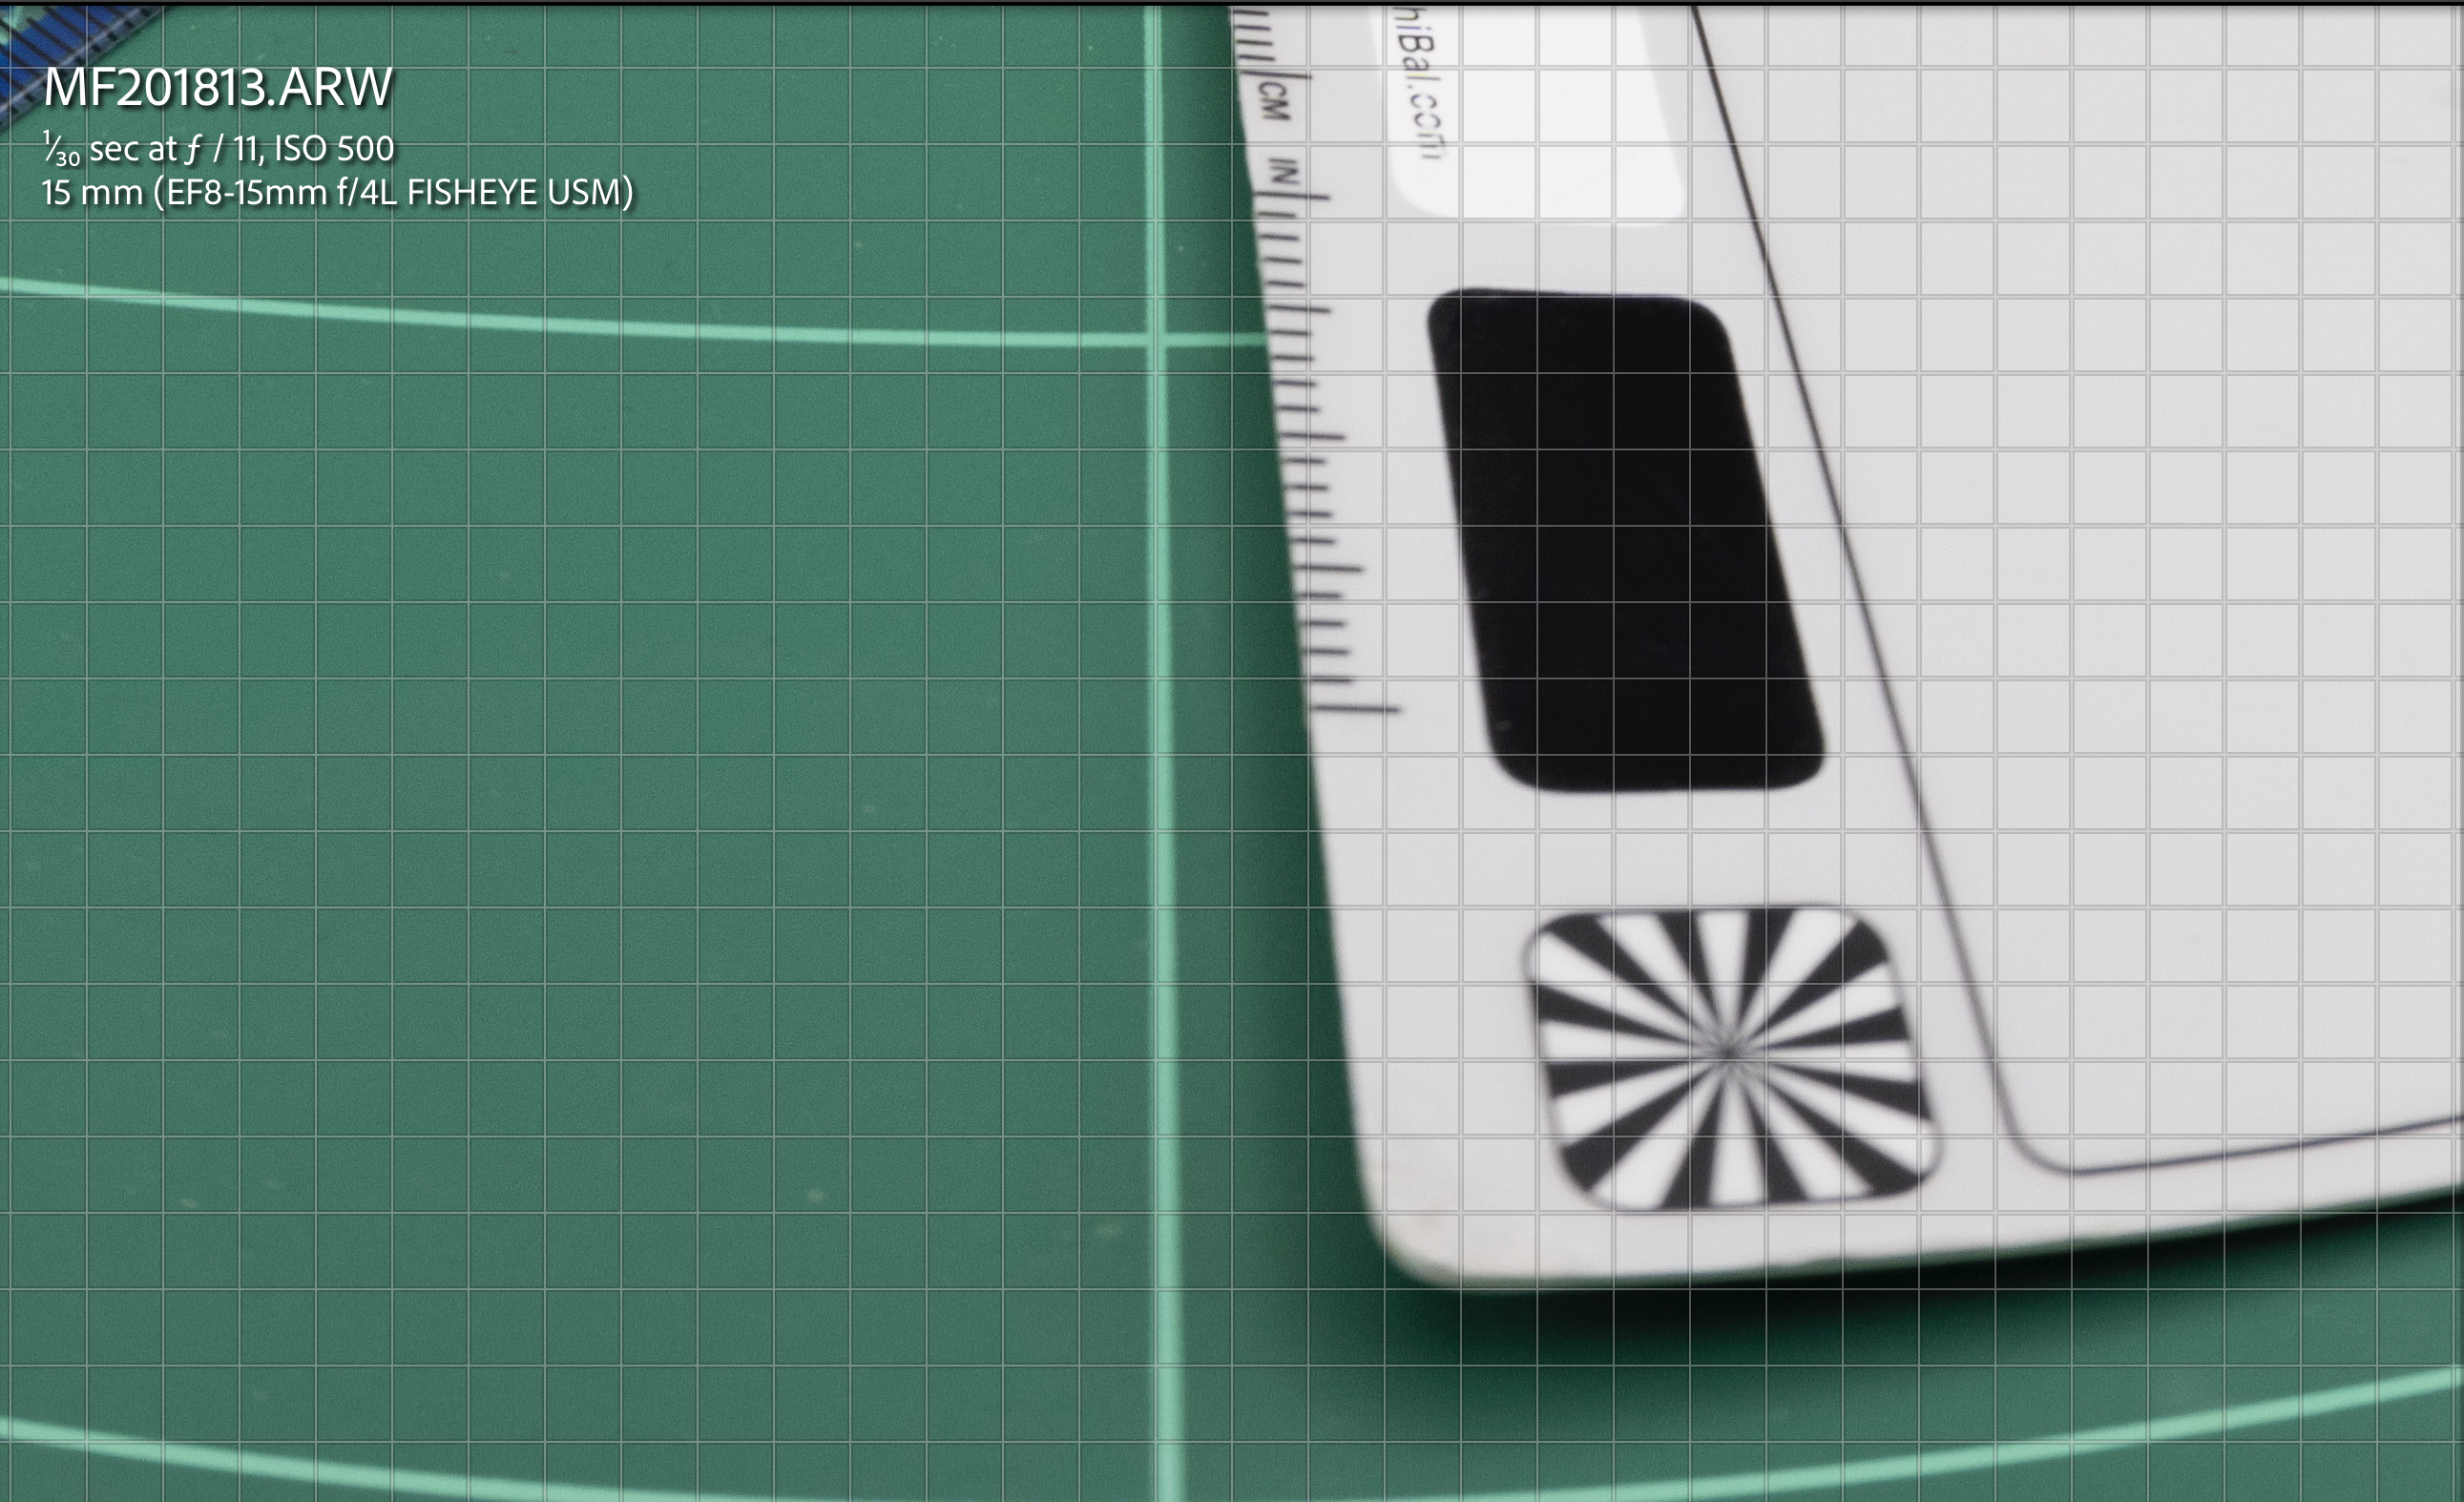
This is a tea towel shot with a rectilinear lens. Note how sharp the target is at f/5.6

Rectilinear f/5.6

This is the same target at the same distance with the Canon 8-15mm at f/5.6 note how the edges are blurry and the blur starts very near centre.

fisheye f/5.6

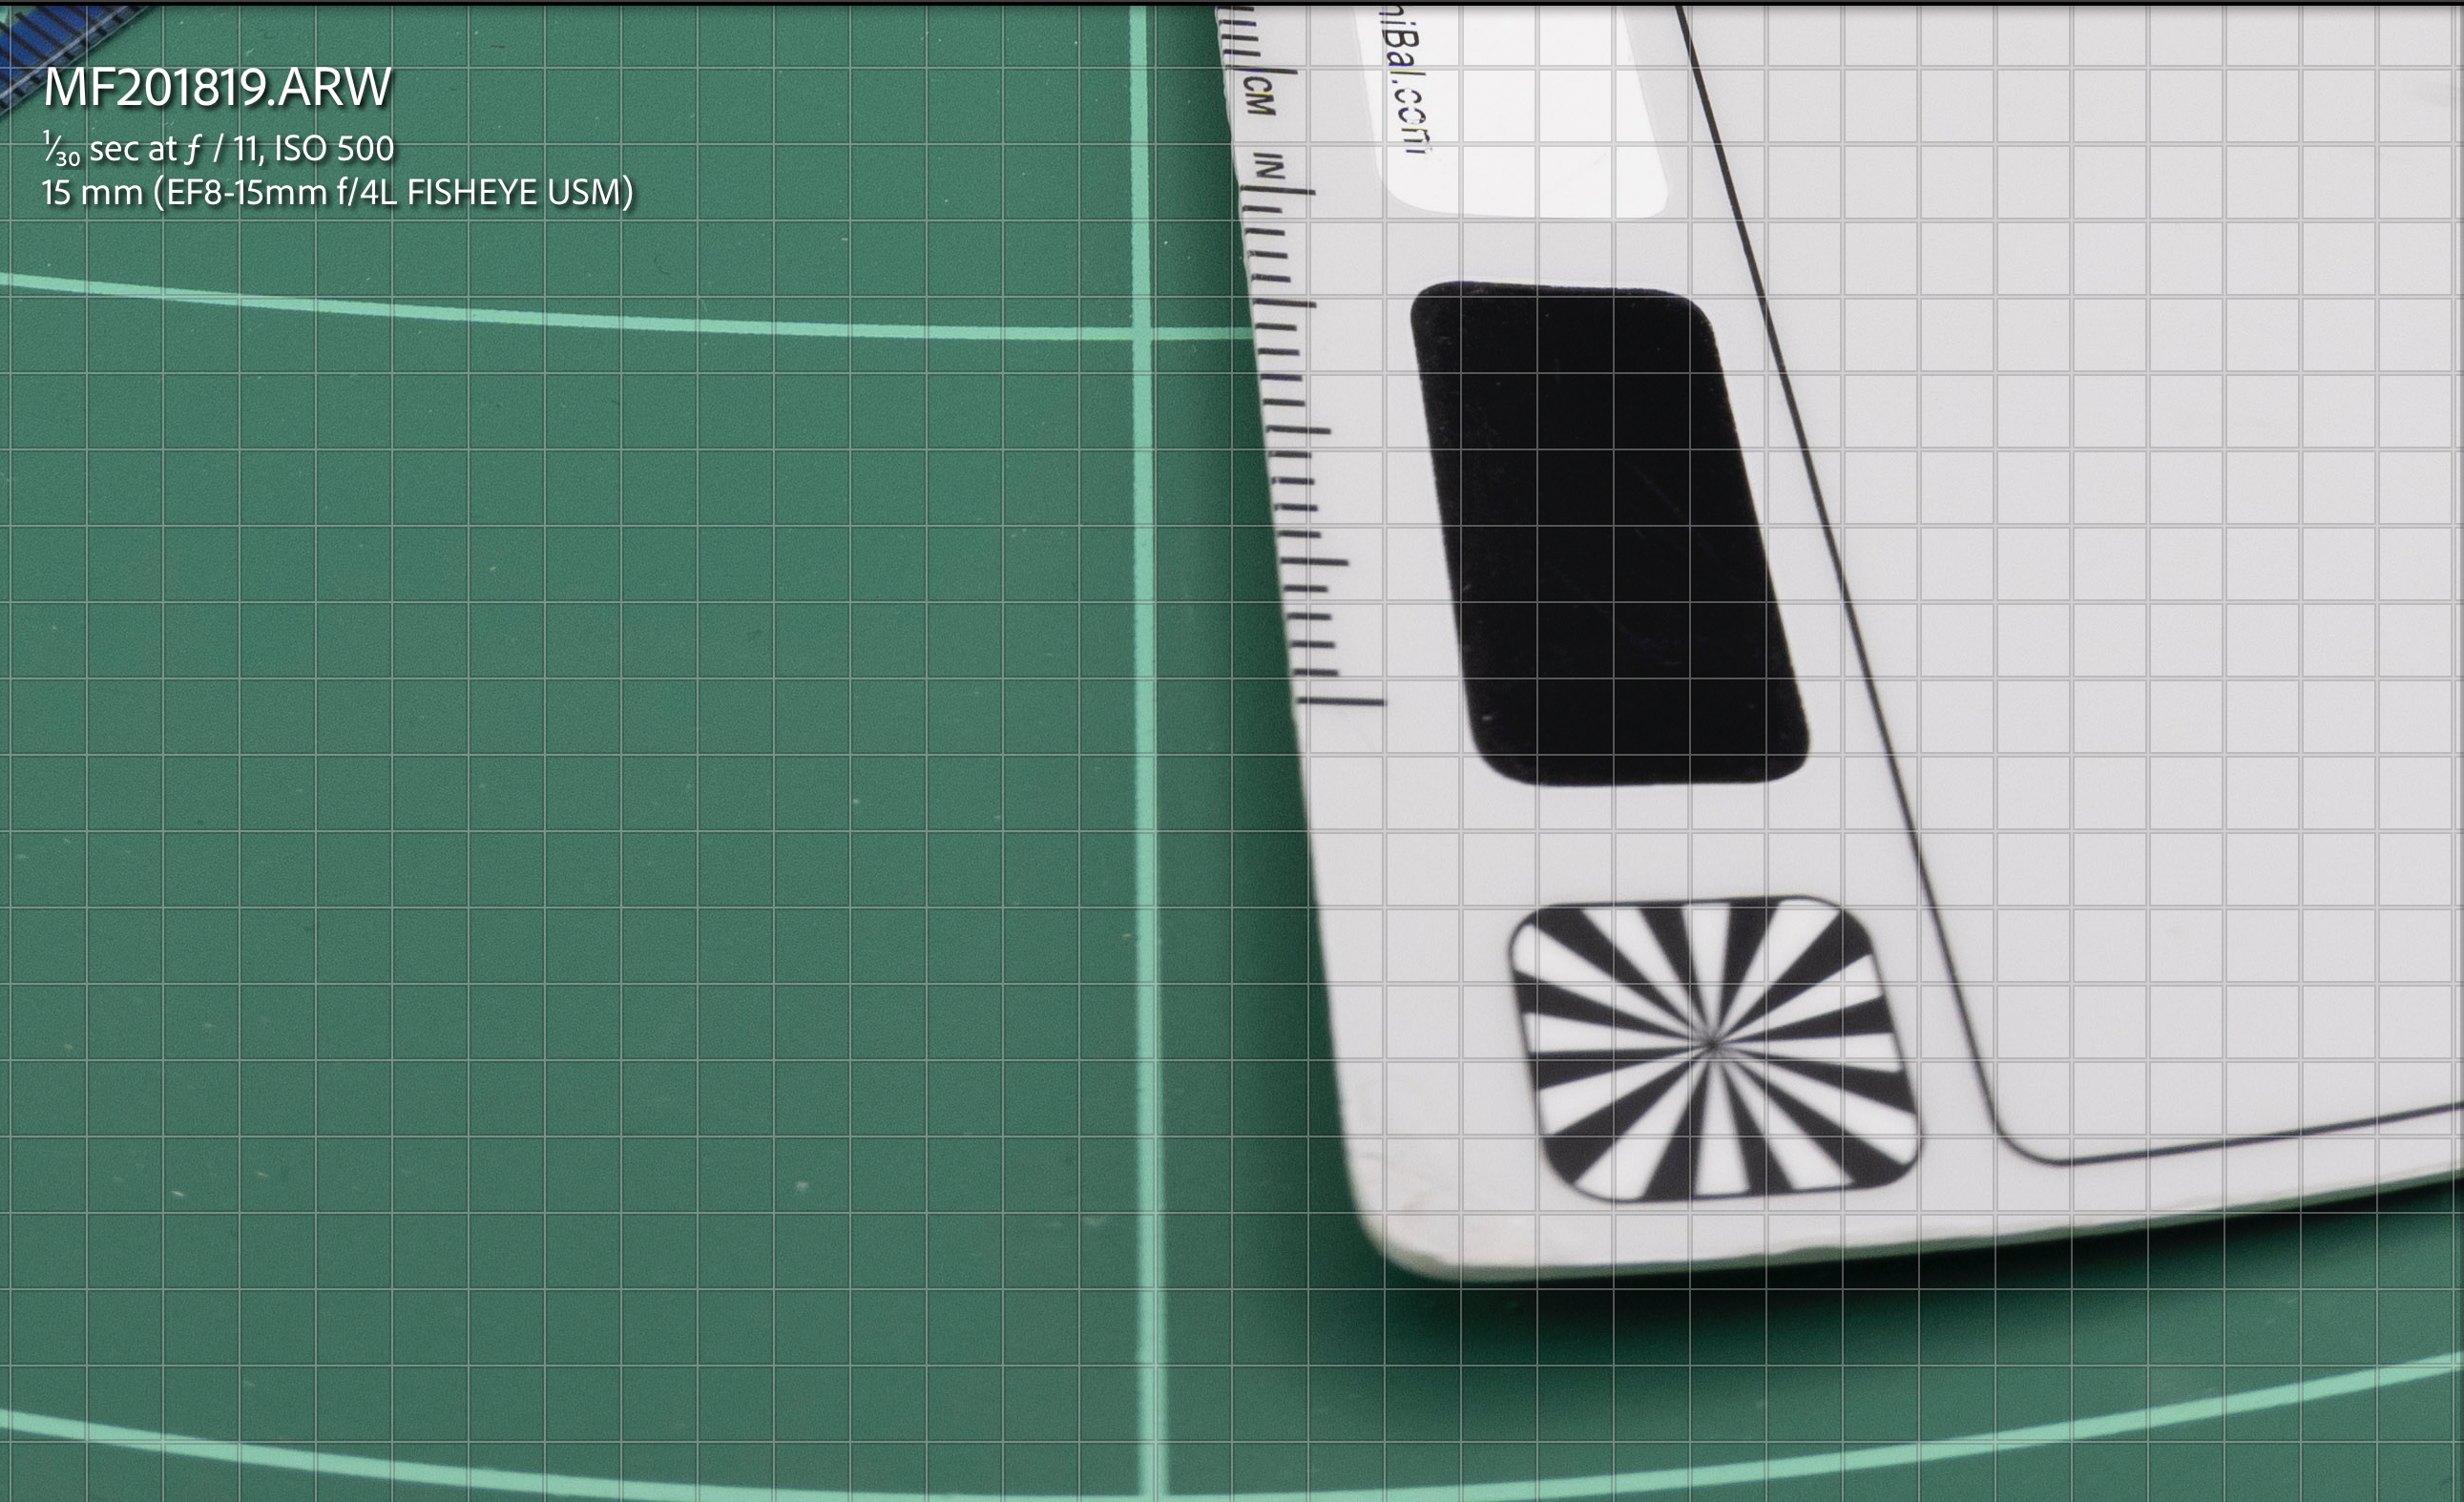
You need to stop down the lens to f/16 to start getting coverage for the edges.

fisheye f/16

You can get very close to large subjects, maximizing color and sharpness -> This is a consequence of close working distance and wide field of view however sharpness is another story

As we have seen before fisheye shots at close distance are generally not that sharp especially at the edges.

They perform well behind dome ports with good corner sharpness, and they don’t need a diopter This happens to be true in practice and it is a major benefit for the underwater shooter

We will dive in detail in this topic.

You usually need at least 2 strobes with good angle of coverage to properly light the entire area. Fisheye lenses cover an aspect ratio wider than the format aspect ratio and result in limited vertical angle of coverage. Fisheye lenses are ideal for two strobes except the very far edges.

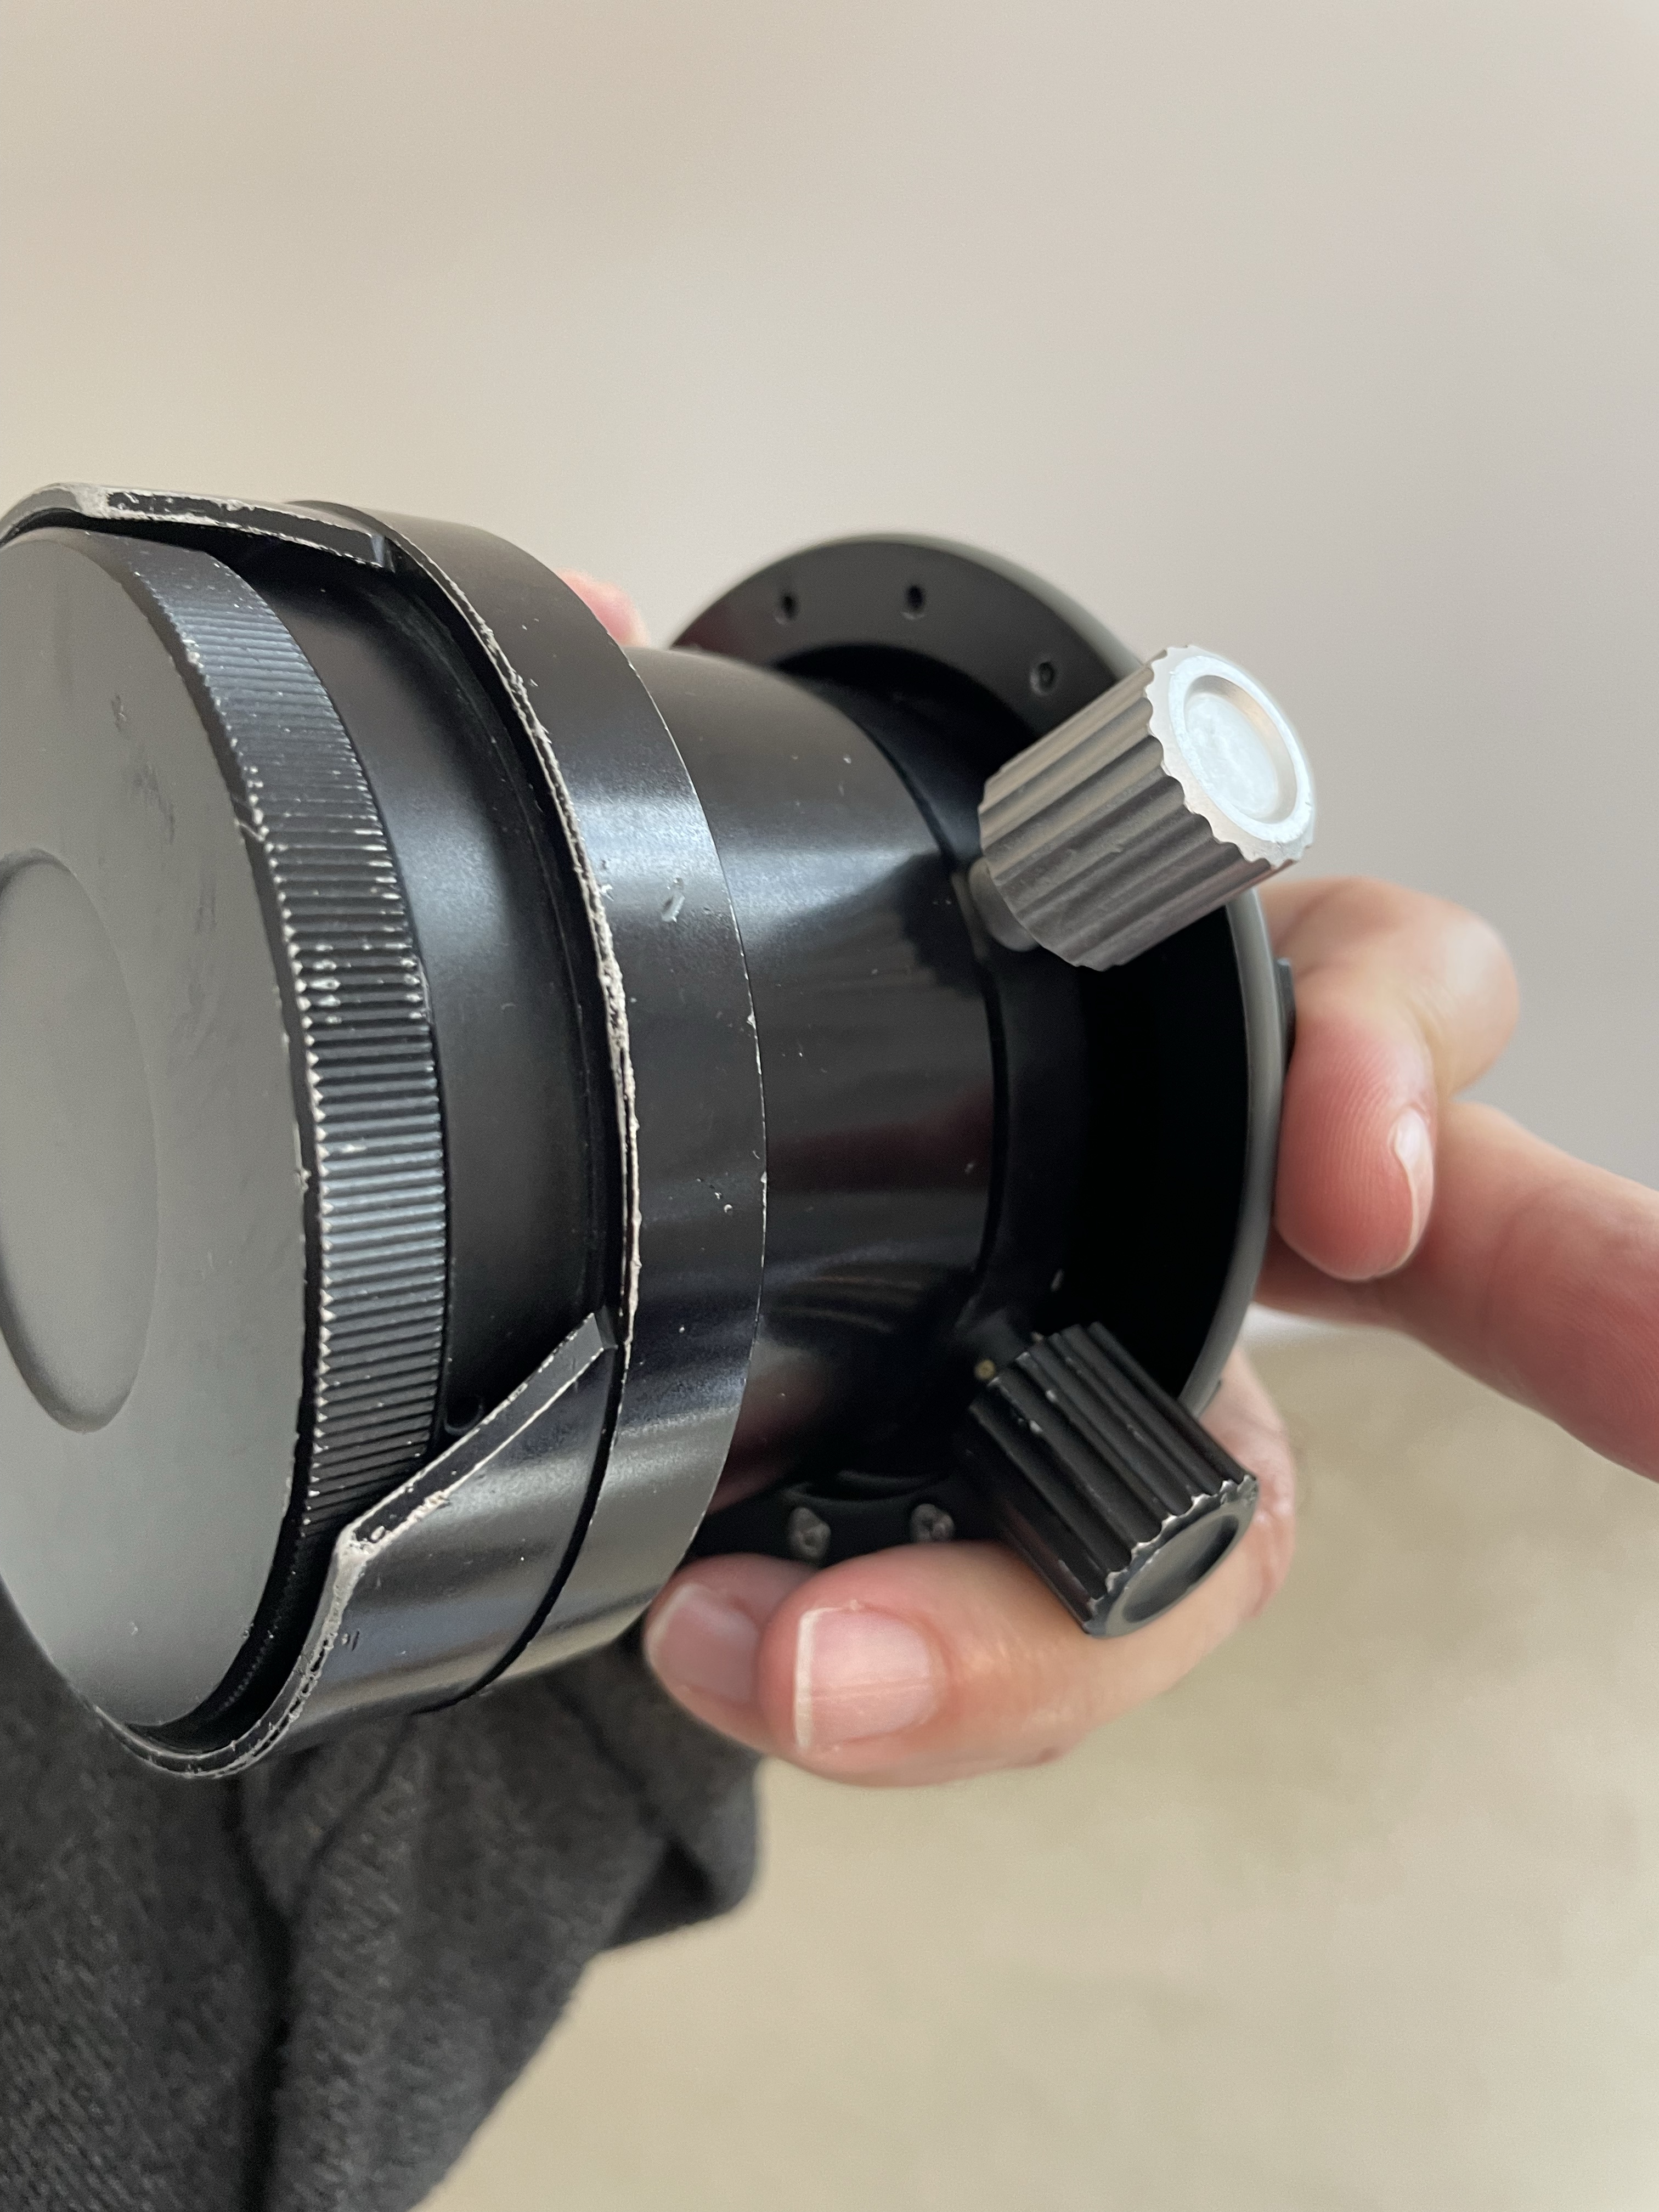
Canon 8-15mm specifications.

Horizontal field of view: 142 degrees

Vertical field of view: 91 degrees

A barrel gives an idea of the fisheye lens distortion

Let’s ignore the edges and assume we are a one meter.

Horizontal field of view 2*tan(71)=5.8 meters

Vertical field of view 2*tan(45.5)=2.03

Aspect Ratio = 2.85:1

The issue with fisheye lenses is that the frame is really very wide much wider than it is tall. This means some of the edges on the horizontal axis will be normally dark unless you are very very close.

Fisheye lenses and Dome Ports

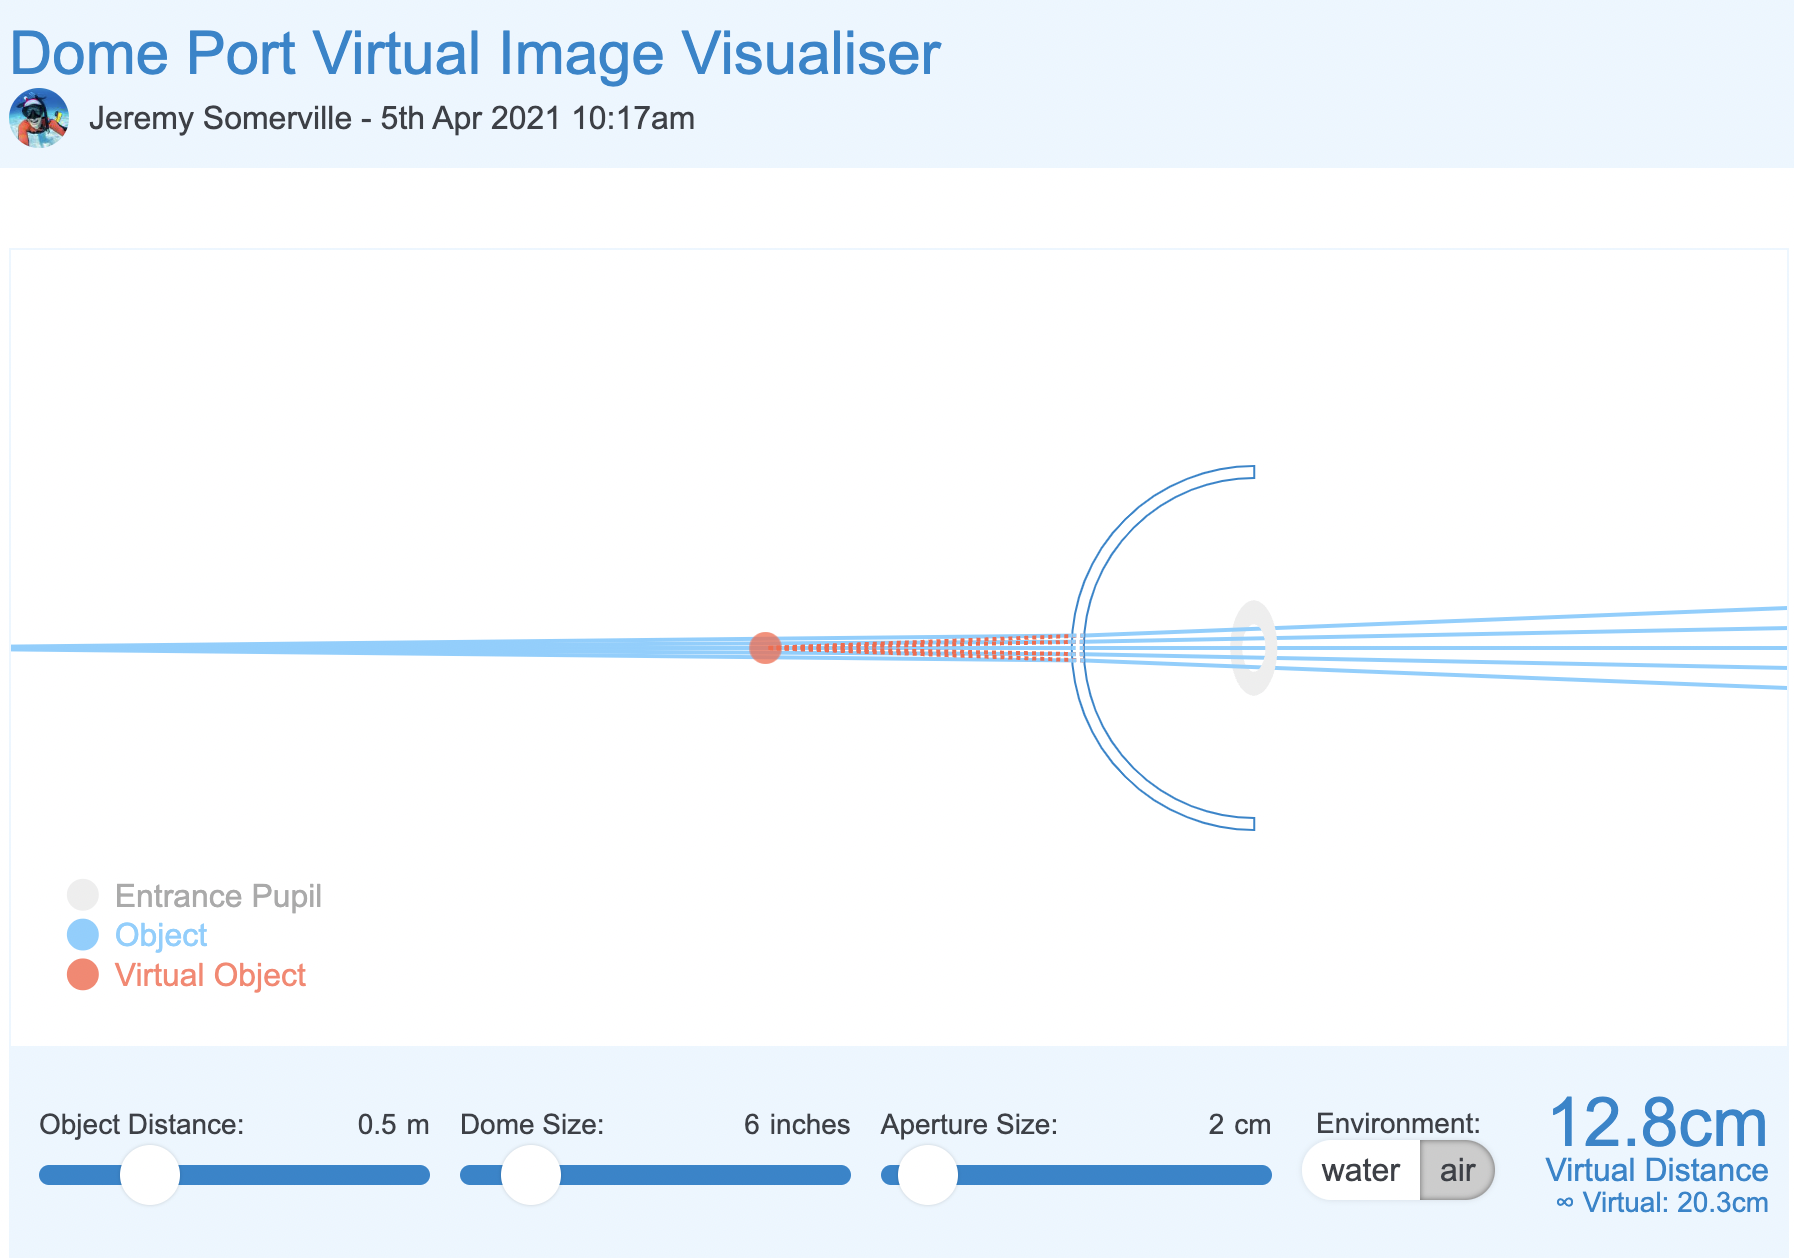
A dome is simply a lens with a single element that has the property to retain the air field of view of a lens.

A dome is a lens with a lot of field of curvature simply because it is bent.

Using the dome port visualiser we can see that the effect of a dome is to bring the image closer to where it really is.

The net effect of a dome port is to increase the depth of field as infinity focus is reached much sooner.

A dome port has several side effects the main ones are:

  • Spherical aberration
  • Field of curvature

A fisheye lens works opposite to a dome. The centre of the frame is closer to the lens the edges are further away.

Domes, field of curvature and Fisheye lenses

In order to understant how the barrel distortion works in combination with a dome port and a fisheye lens we can build a small simulation in a light box where the edges of the frame are closer than a flat target.

Target in a lightbox focussed head on

We can see that despite the edges are quite blurry this image is actually better than our flat target.

f/11 centre

At f/11 the image is not perfect but we can see that most details off centre are not looking bad at all.

f/11 edge
f/11 detail crop

it is definitely blurry but not as bad as the tea towel as if the way the element are laid out improves the image in the corners.

And this is exactly the point: the items as laid out emulating the curvature of a dome improve the fisheye lens performance.

By f/16 the image is almost all sharp.

f/16 centre
f/16 edge
F/16 Centre 100%

One trick is not to focus in the back of the frame but find a middle point this means we can find additional depth of field in front of the target.

Focus mid way

Let’s see how this goes. at f/11 we already get some better results.

f/11 off centre
f/11 edge off centre

f/11 off centre crop

At f/16 we get some additional improvement but is not as major as the original f/16

f/16 off centre

Looking at the other areas there are some minor improvements but generally less as we close down the aperture.

f/16 off centre
f/16 off centre 100% crop detail

In conclusion the layout of the image elements helps the fisheye lens to achieve better image quality this can be futher improve focussing off centre however closing down the aperture results in the best results regardless.

In short we can improve an image at f/11 by shooting off centre in a strategic point to improve depth of field but ultimately aperture plays a bigger role in improving performance of the fisheye lens.

A similar reasoning can be applied to dome size vs closing down the aperture.

We can plot a scenario in the dome simulator tool.

In the starting example our aperture is 4cm to similate our 15mm lens at f/4.

6″ dome f/4 simulator

We now reduce the aperture to 2cm which is more or less f/8

6″ dome f/8 simulation

And finally to 1cm which is more of less f/14. In reality this is mm not cm but should make you understand that aperture matters more than anything else.

6″ dome f/14 smulation

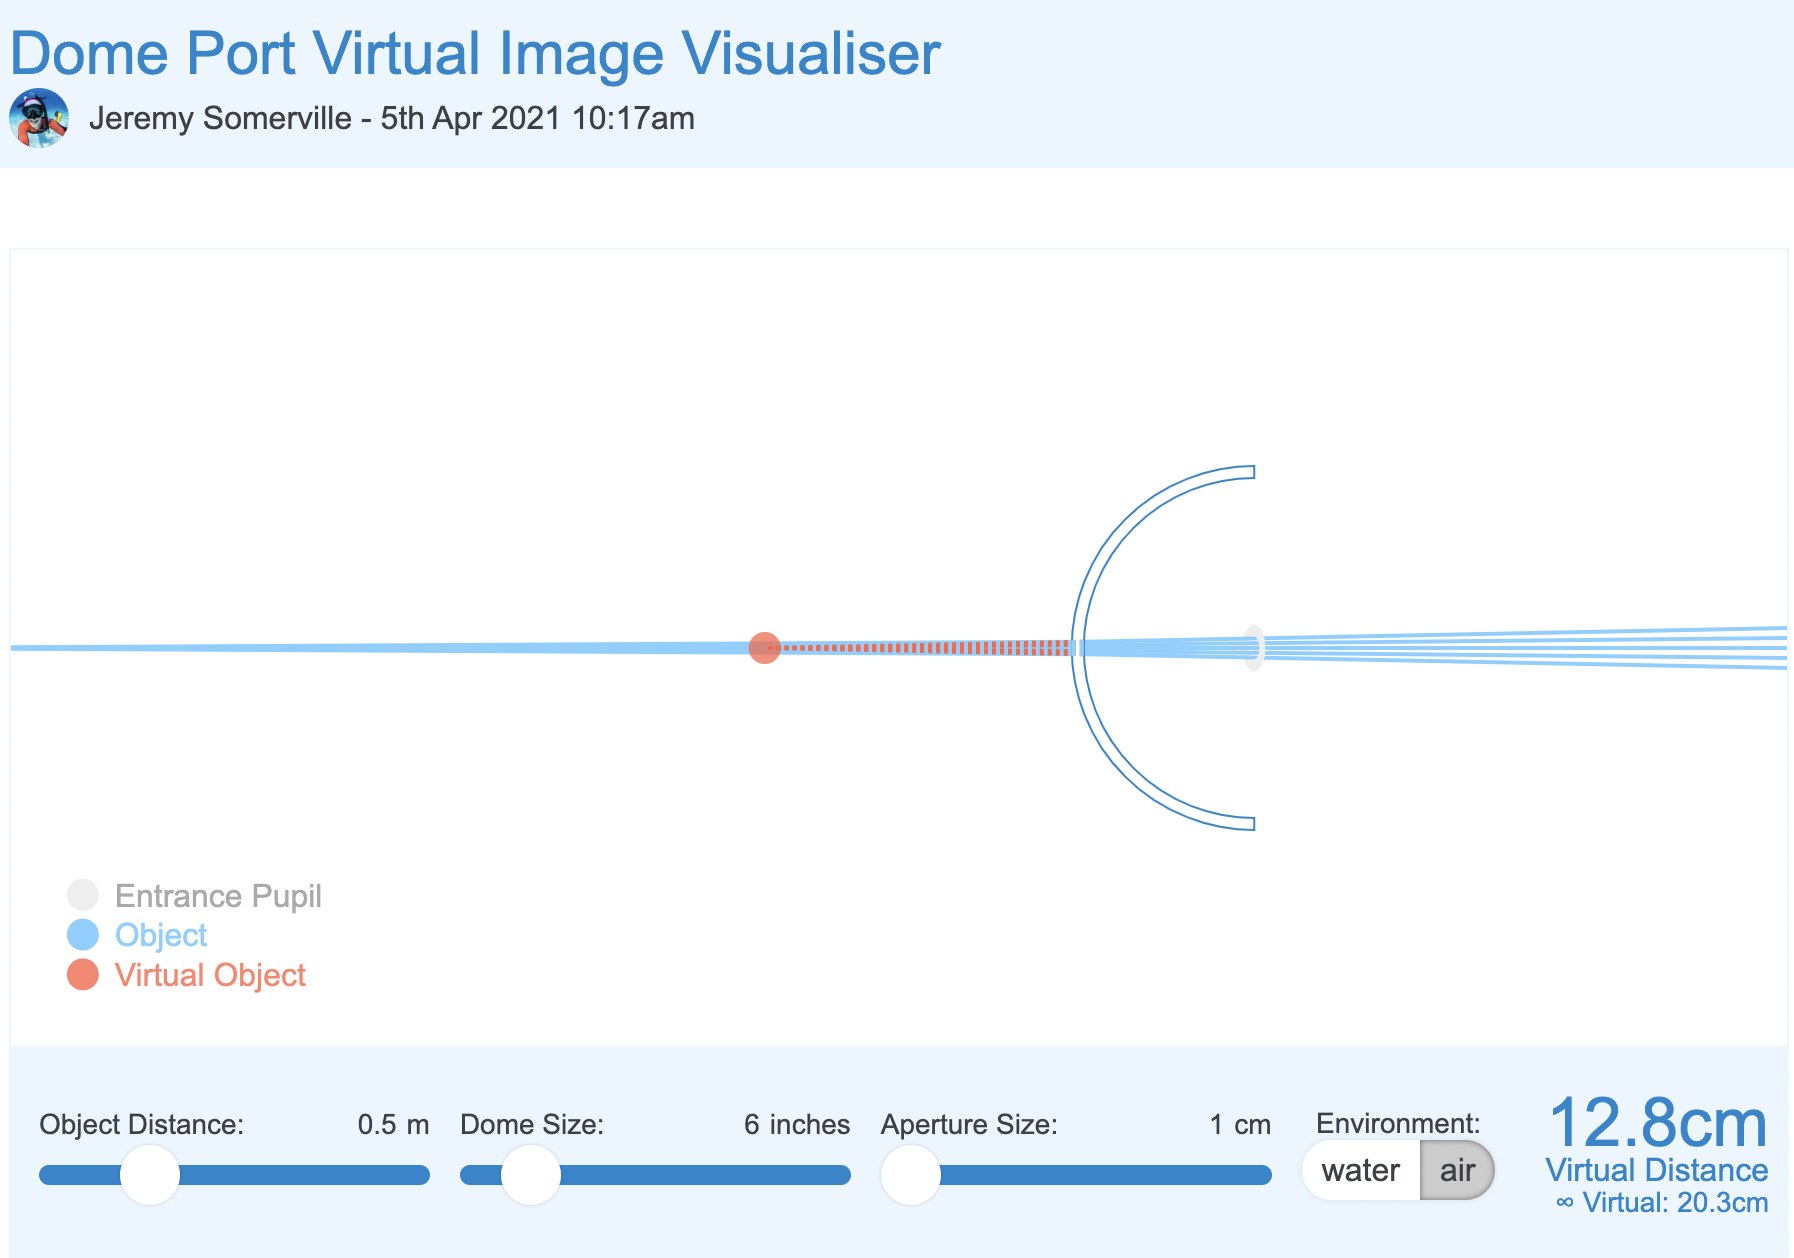
What we can see is that by reducing the aperture the light rays passing through the dome converge and this means stray light is reduced and as consequence spherical aberrations are decreased.

Let’s now introduce dome size which is the equivalent of depth of field in the mix in our light box shooting off centre.

12″ dome f/8 simulation

We can see that with a double size dome the converging effect on the light rays is not as significant as the aperture is already small, but nonetheless is present. This is consistent with our f/11 off centre use case.

Finally at aperture completely closed.

12″ dome f/14 simulation

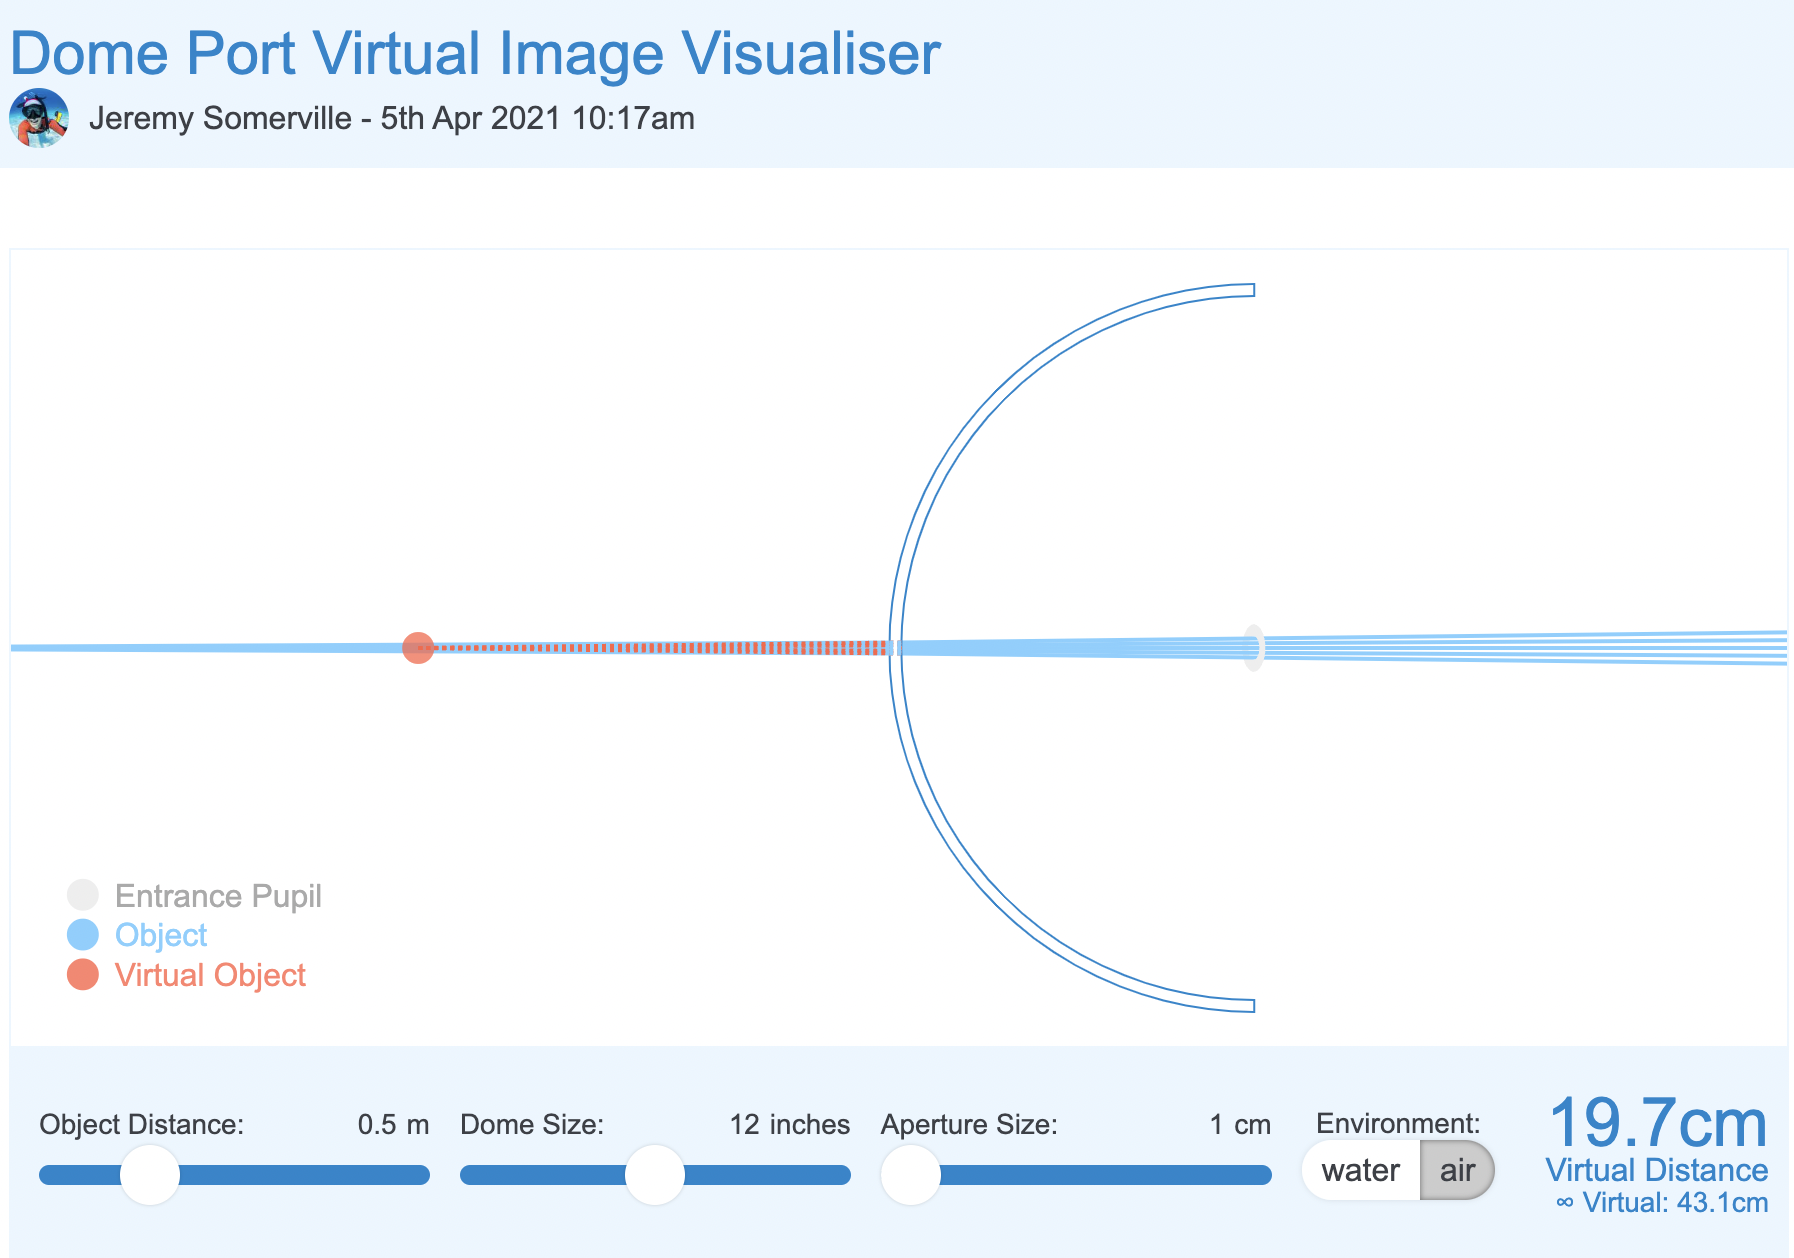
Although virtual distance has increased significantly the effect of the large dome on the stray rays is not significant here aperture rules.

What does all of the above mean?

I realise this was a bit geeky.

To summarise a dome has two issues one is spherical aberration for the very shape of the dome. This is mostly cured by closing down the aperture. Dome size has limited effect here unless you shoot wide open and with apertures from f/14 we can see that large dome vs small dome does not really matter.

However when it comes to field of curvature large dome helps the situation but because fisheye lens have barrel distortion and this has a counter effect to dome shape curvature therefore dome size matters much less to a fisheye lens than it would to a rectilinear lens.

Some additional insight in this post. And the summary finding here.

The takeaway message is this: stopping down the aperture improves field curvature and astigmatism somewhat, improves coma a lot, and improves spherical aberration most of all. The sum total of these effects changes our ‘area of best focus’, which is what we photographers really mean when we say ‘field curvature’. 

We could paraphrase this by saying:

A dome port increases depth of field and a fisheye lens, due to barrel distortion, benefits from a dome port. Optical aberrations introduced by the dome are mostly addressed by stopping down the aperture. The size of the dome port does not matter too much when using a fisheye lens and the benefit on aberrations of a much larger size dome is likely to be minimal when we look at that simulator. Focussing appropriately mitigates residual issues of field of curvature of the dome for the fisheye lens.

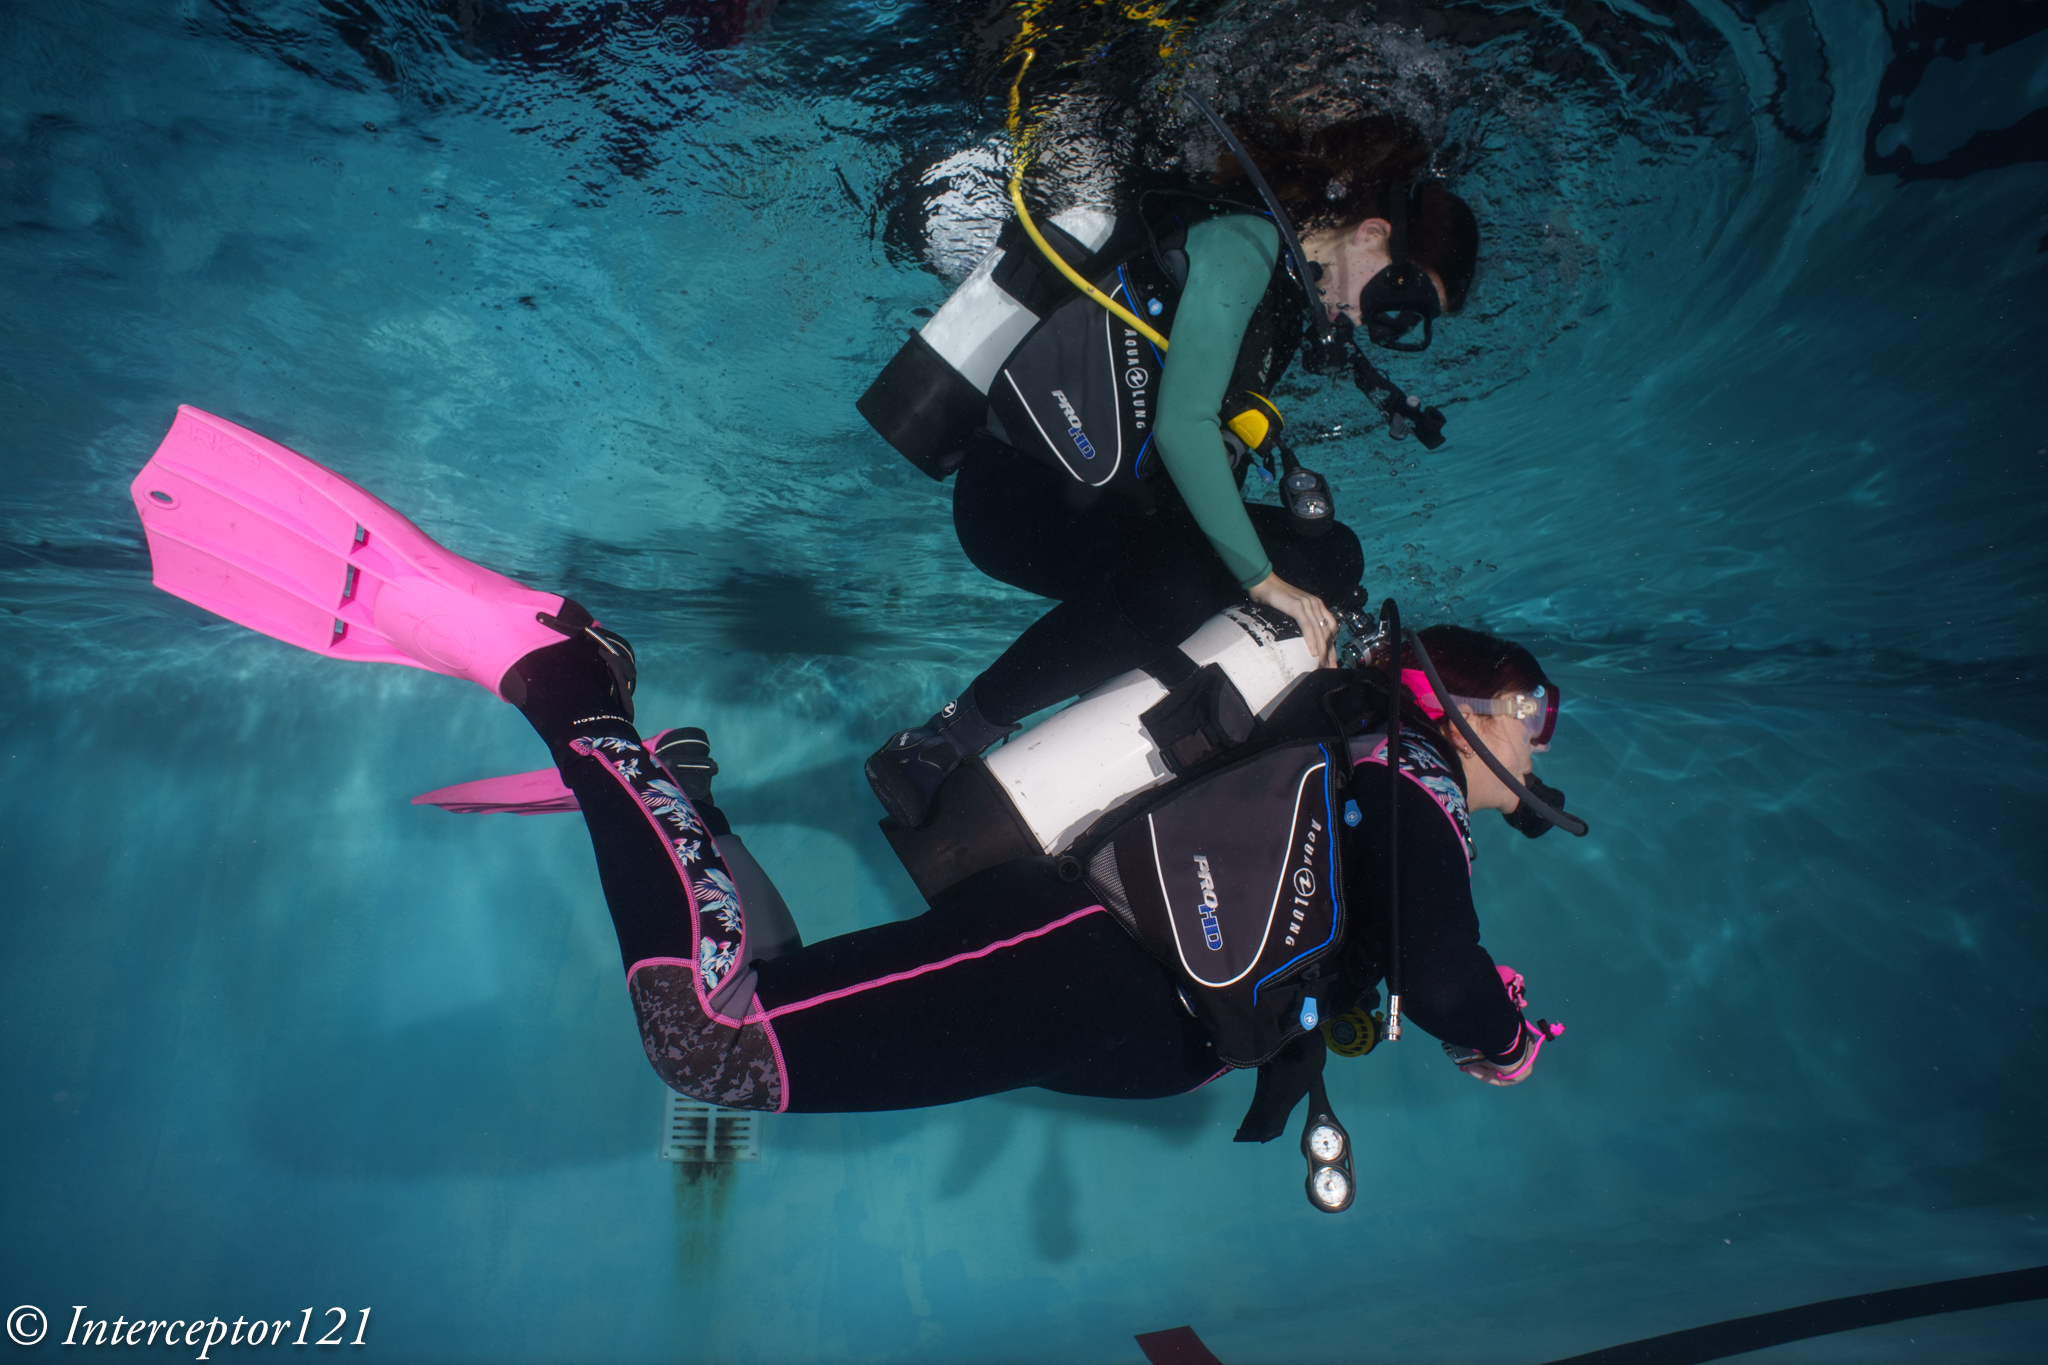
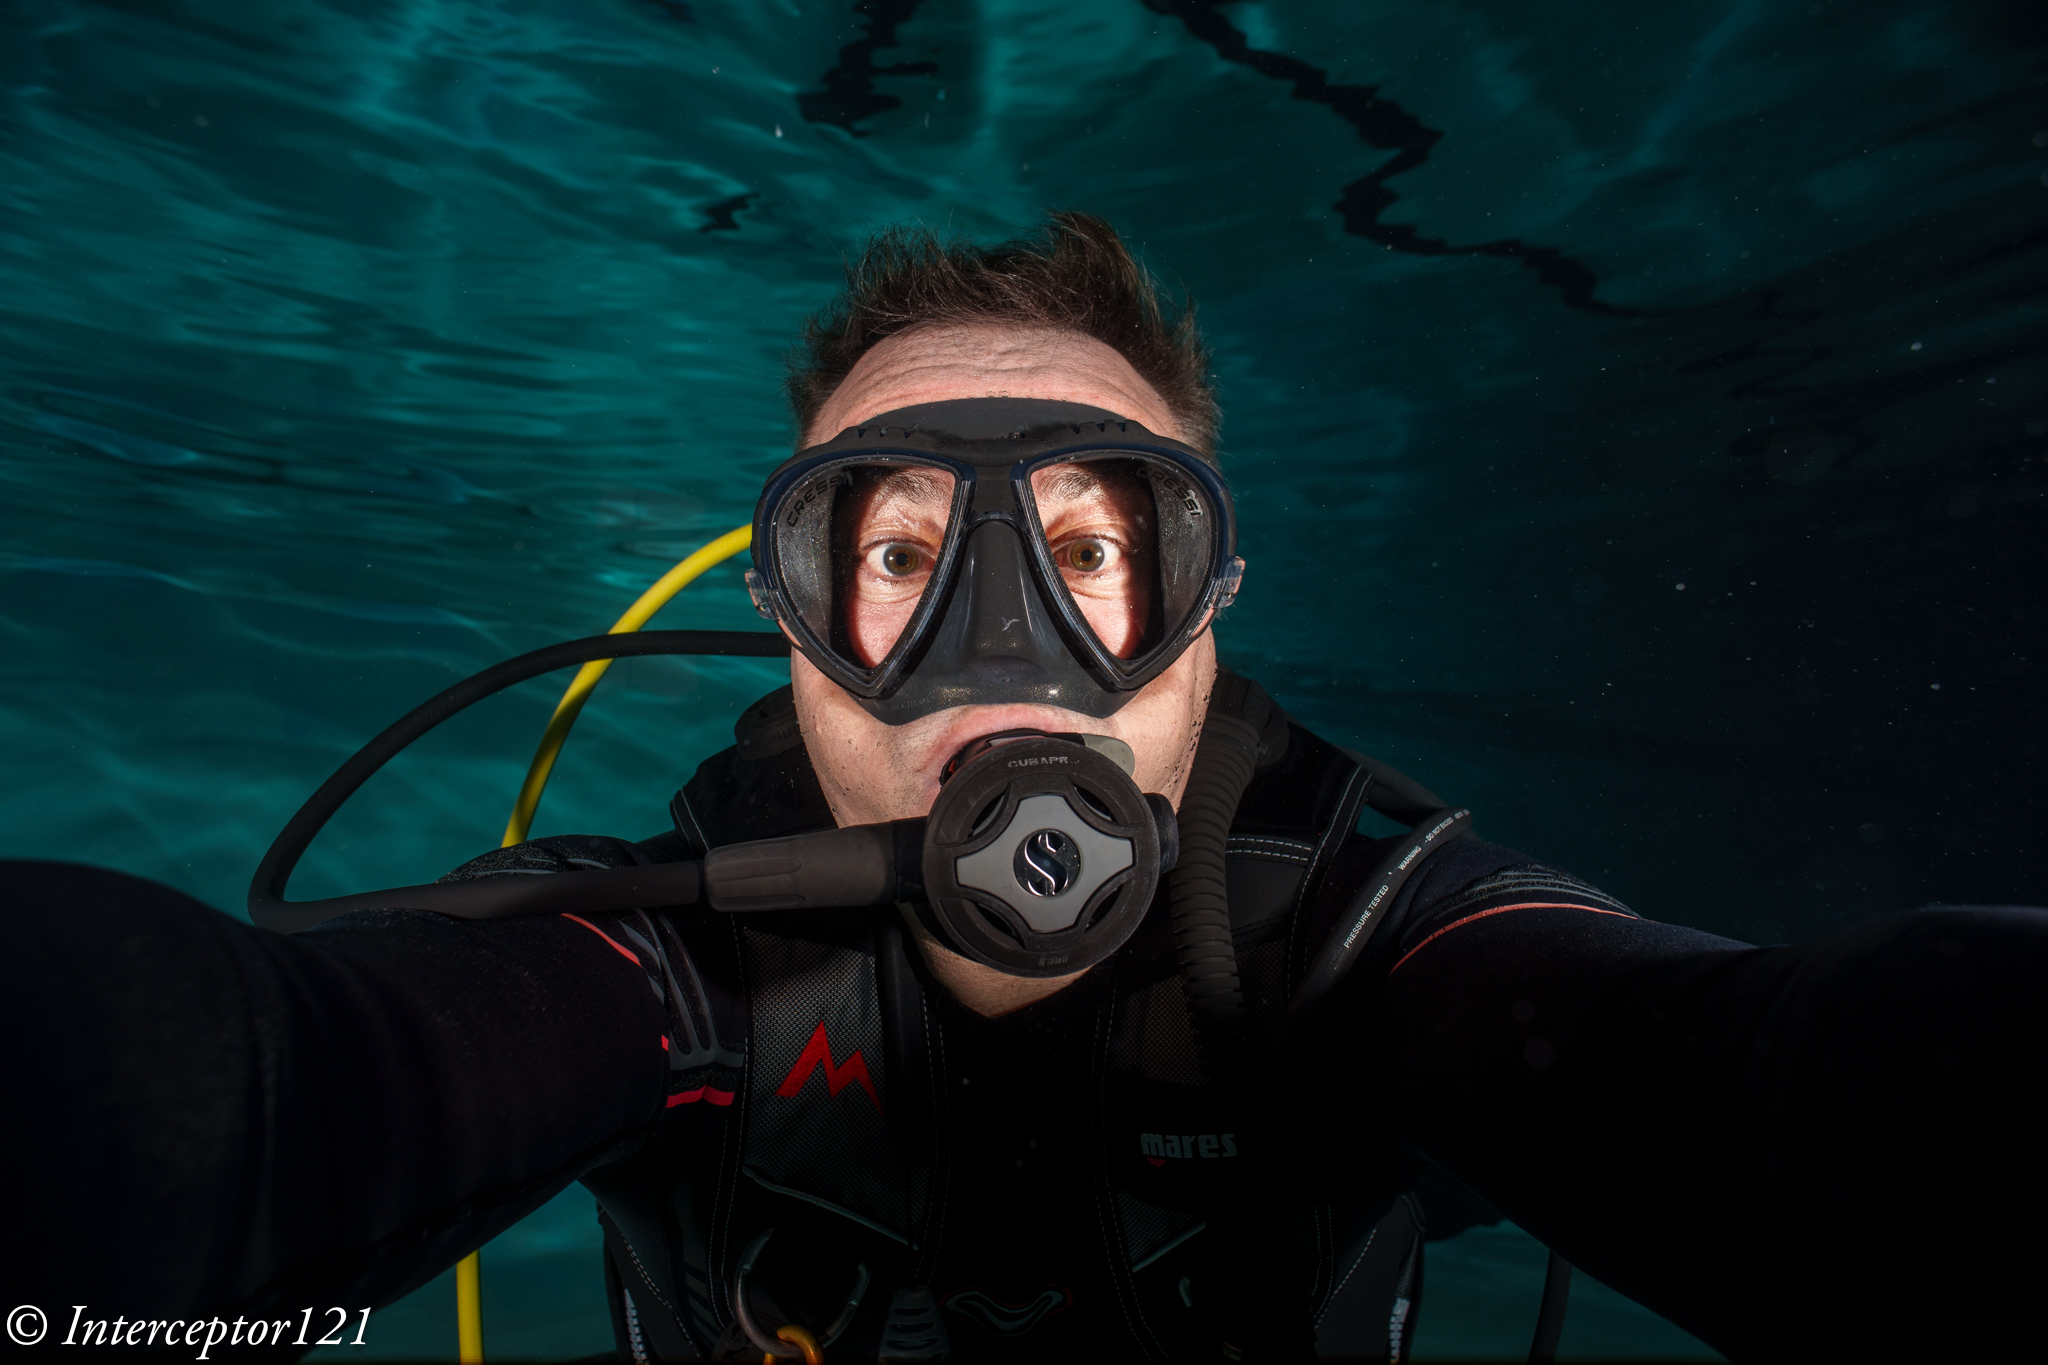
Underwater proof of concept

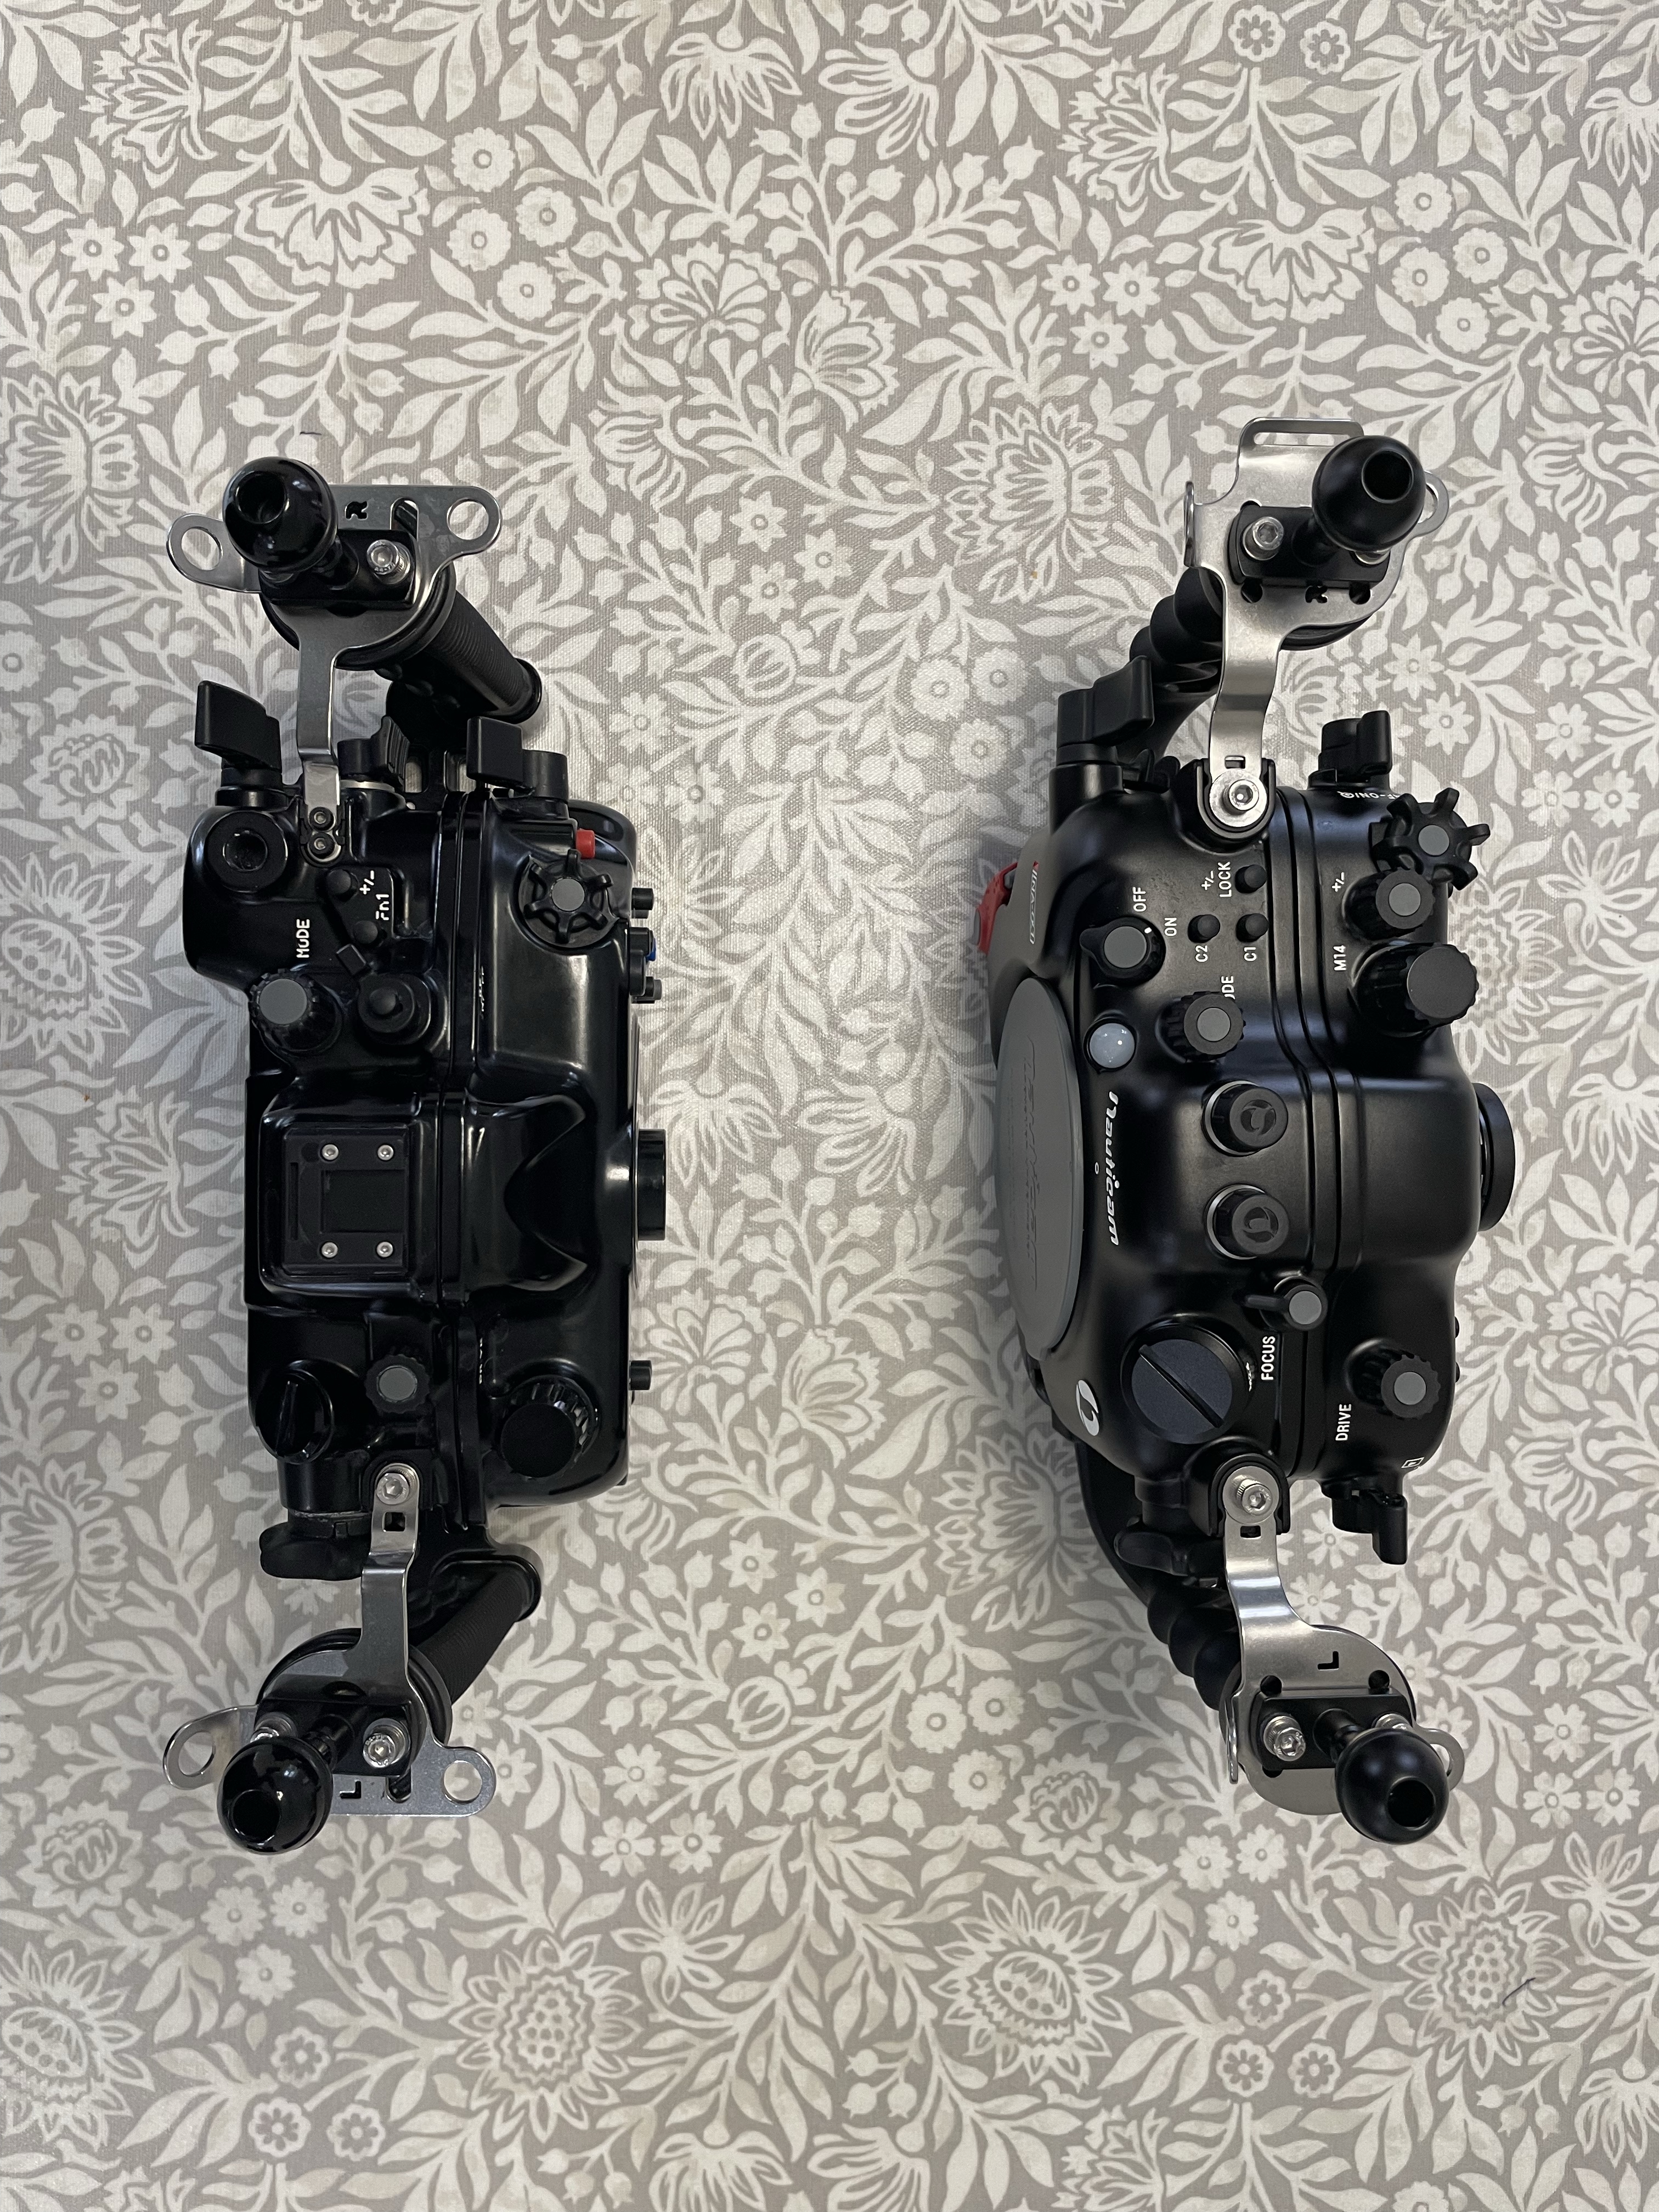
I took my Sony A1 with a Canon 8-15mm first and then with a WWL-1 that behaves very much like a fisheye lens.

Let’s have a look at some images shot with Nauticam 140mm dome.

The two buddies at f/8

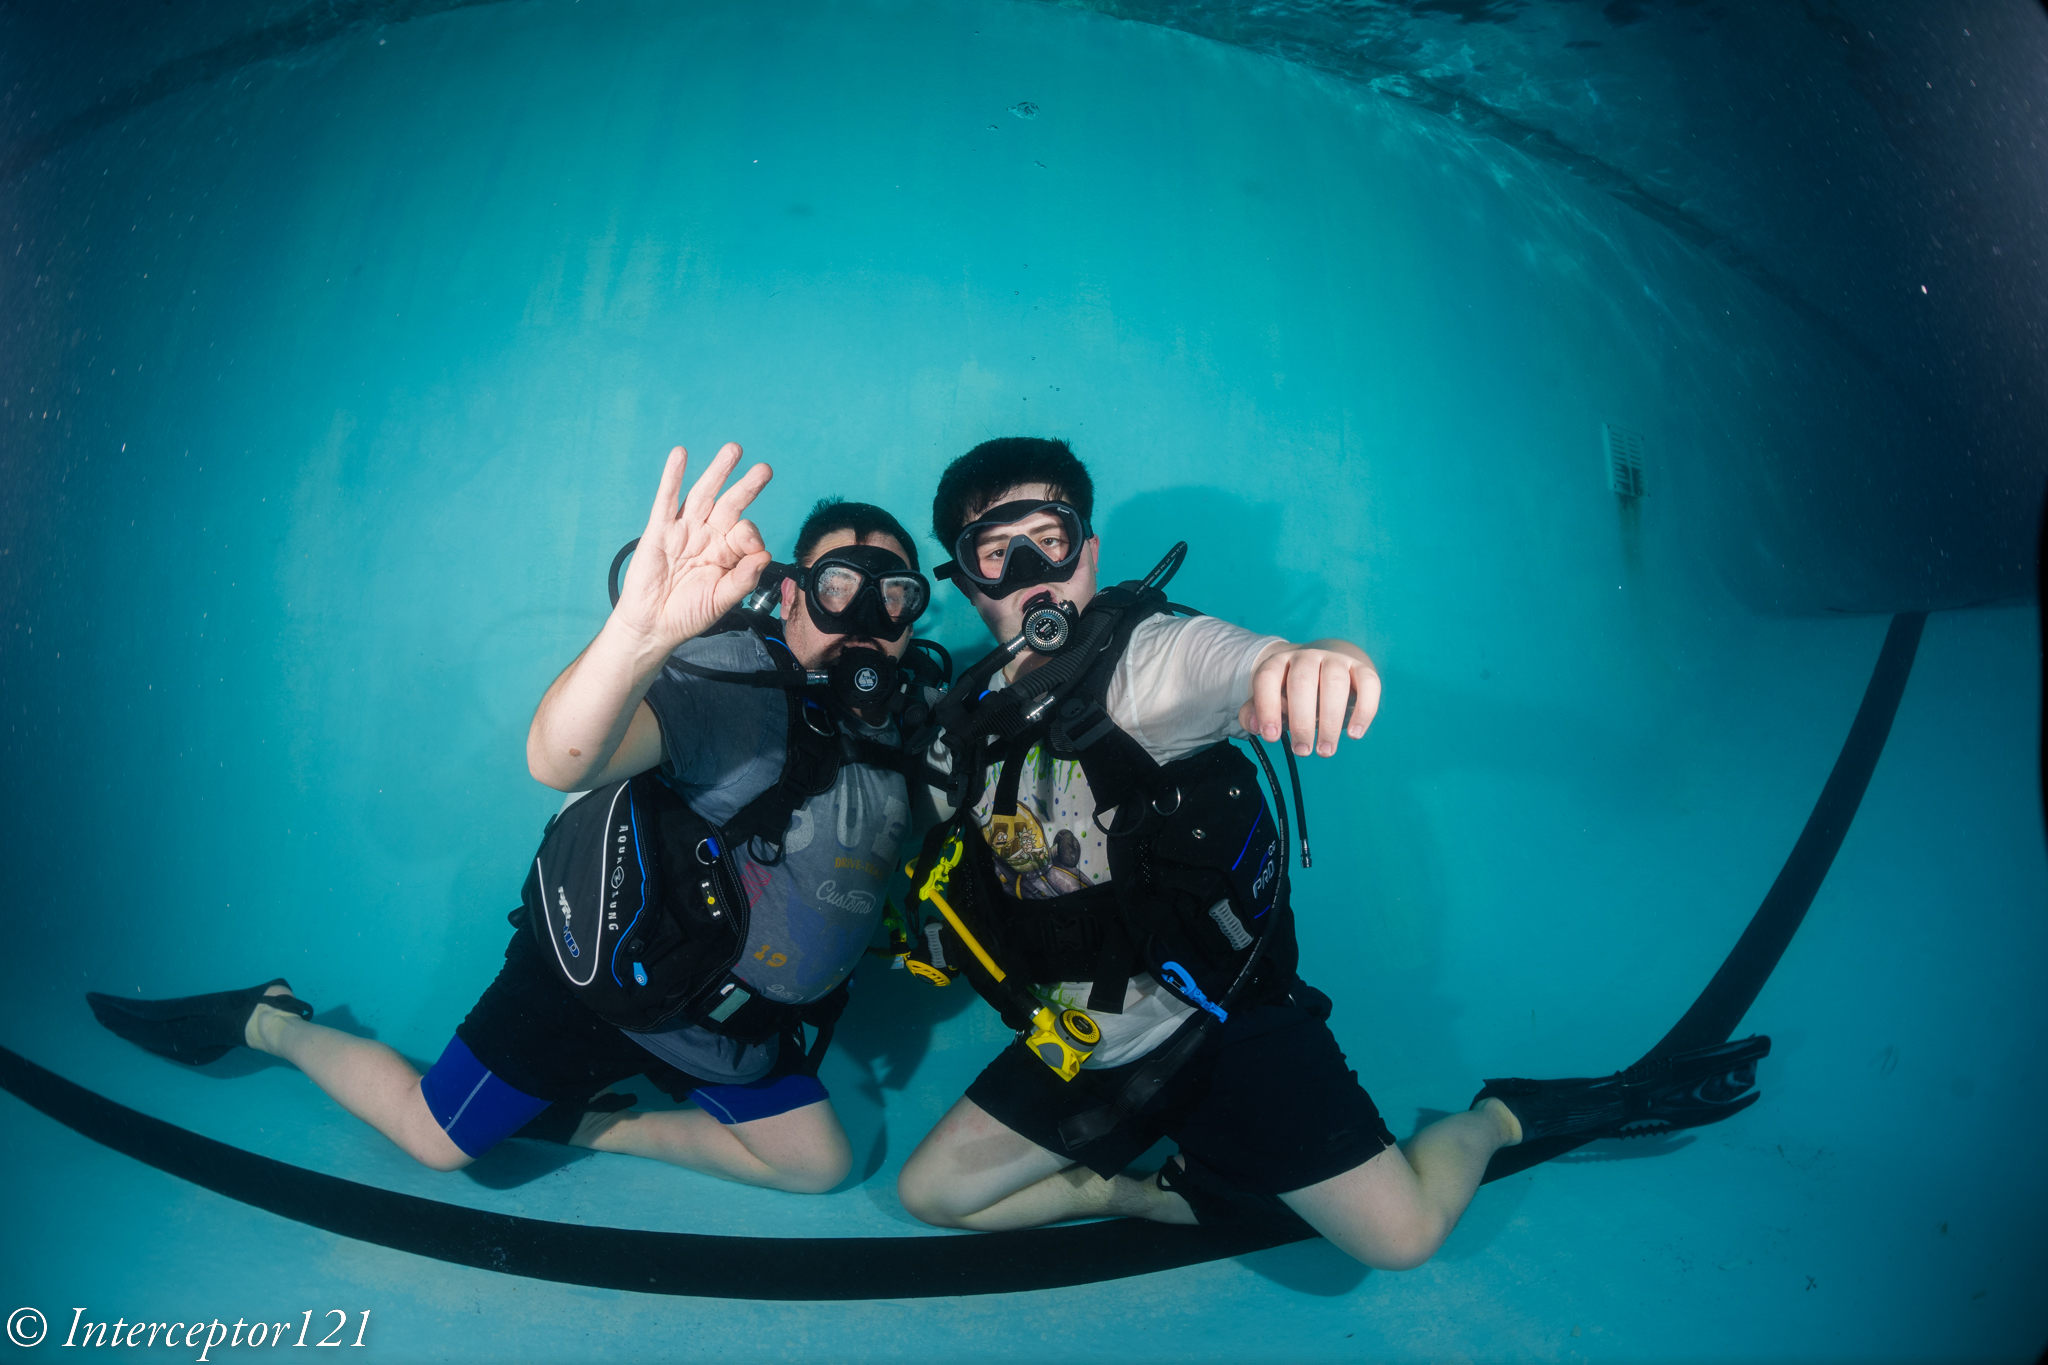
The image above sees two buddies in the frame almost flat with their fins going back in the frame however the result is much better than the lightbox example as result of distance and dome port increasing field of view and adding curvature to bring the fins in.

This however does not resolve all issues if you focus near like in this example focussed on the eye of the croc

Focus on the eye at f/8

Here the eye is close resulting in the tail being blurred this is an effect of close distance and lack of depth of field despite the dome.

More interesting the nose is even more blurred as the dome brings that even close and blurs away due to field of curvature as the focus point is behind.

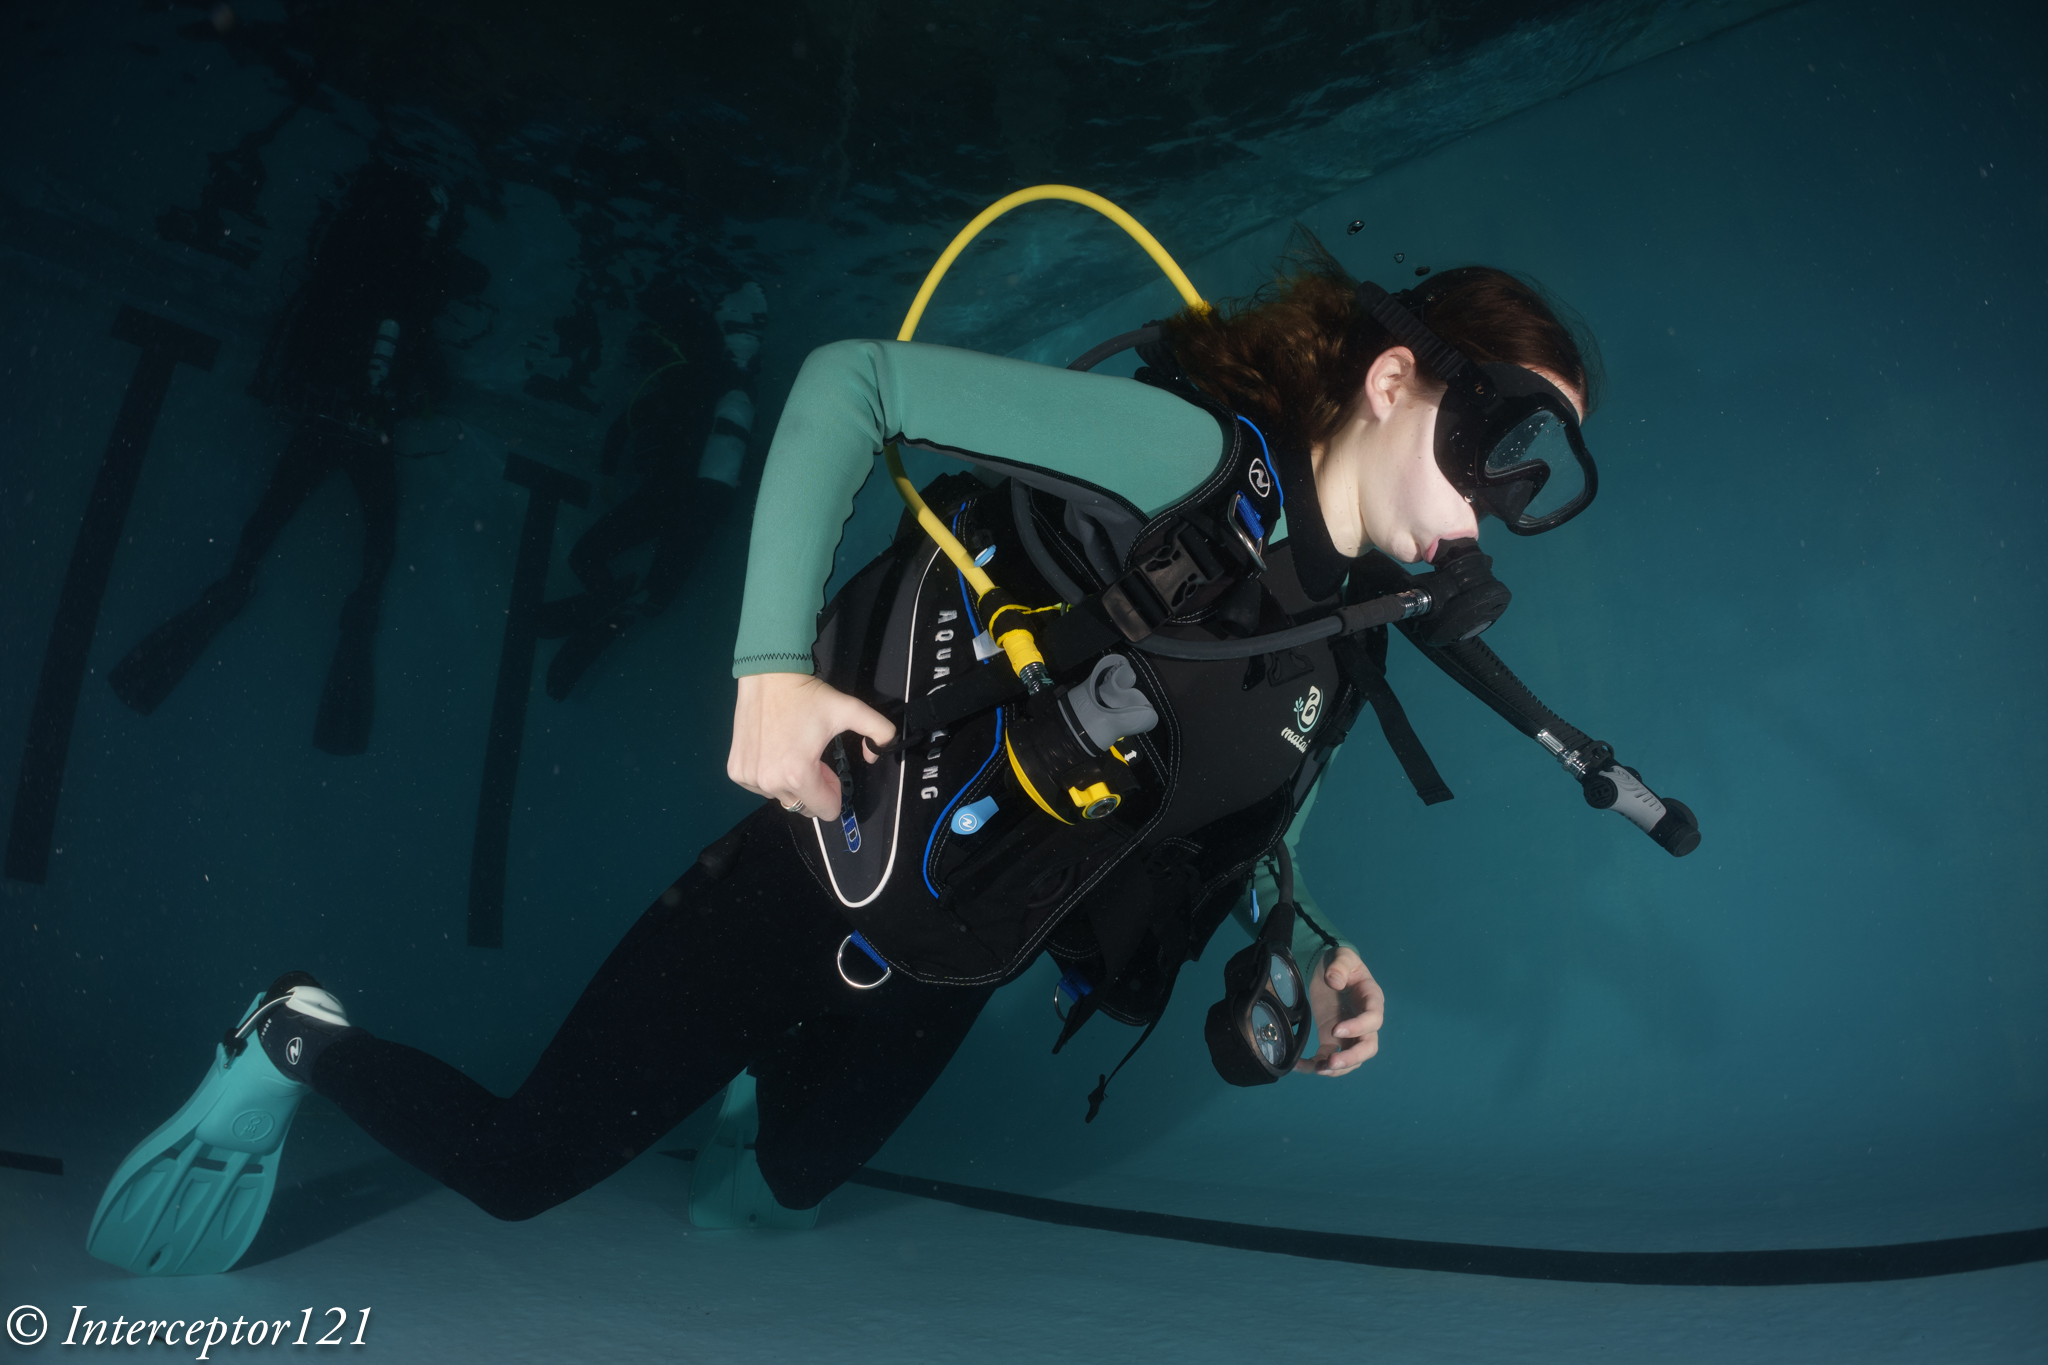
In this other example instead of focussing on the eye the focus goes mid frame so the fins are still in decent shape even if deep in the frame at f/8.

Focus midway

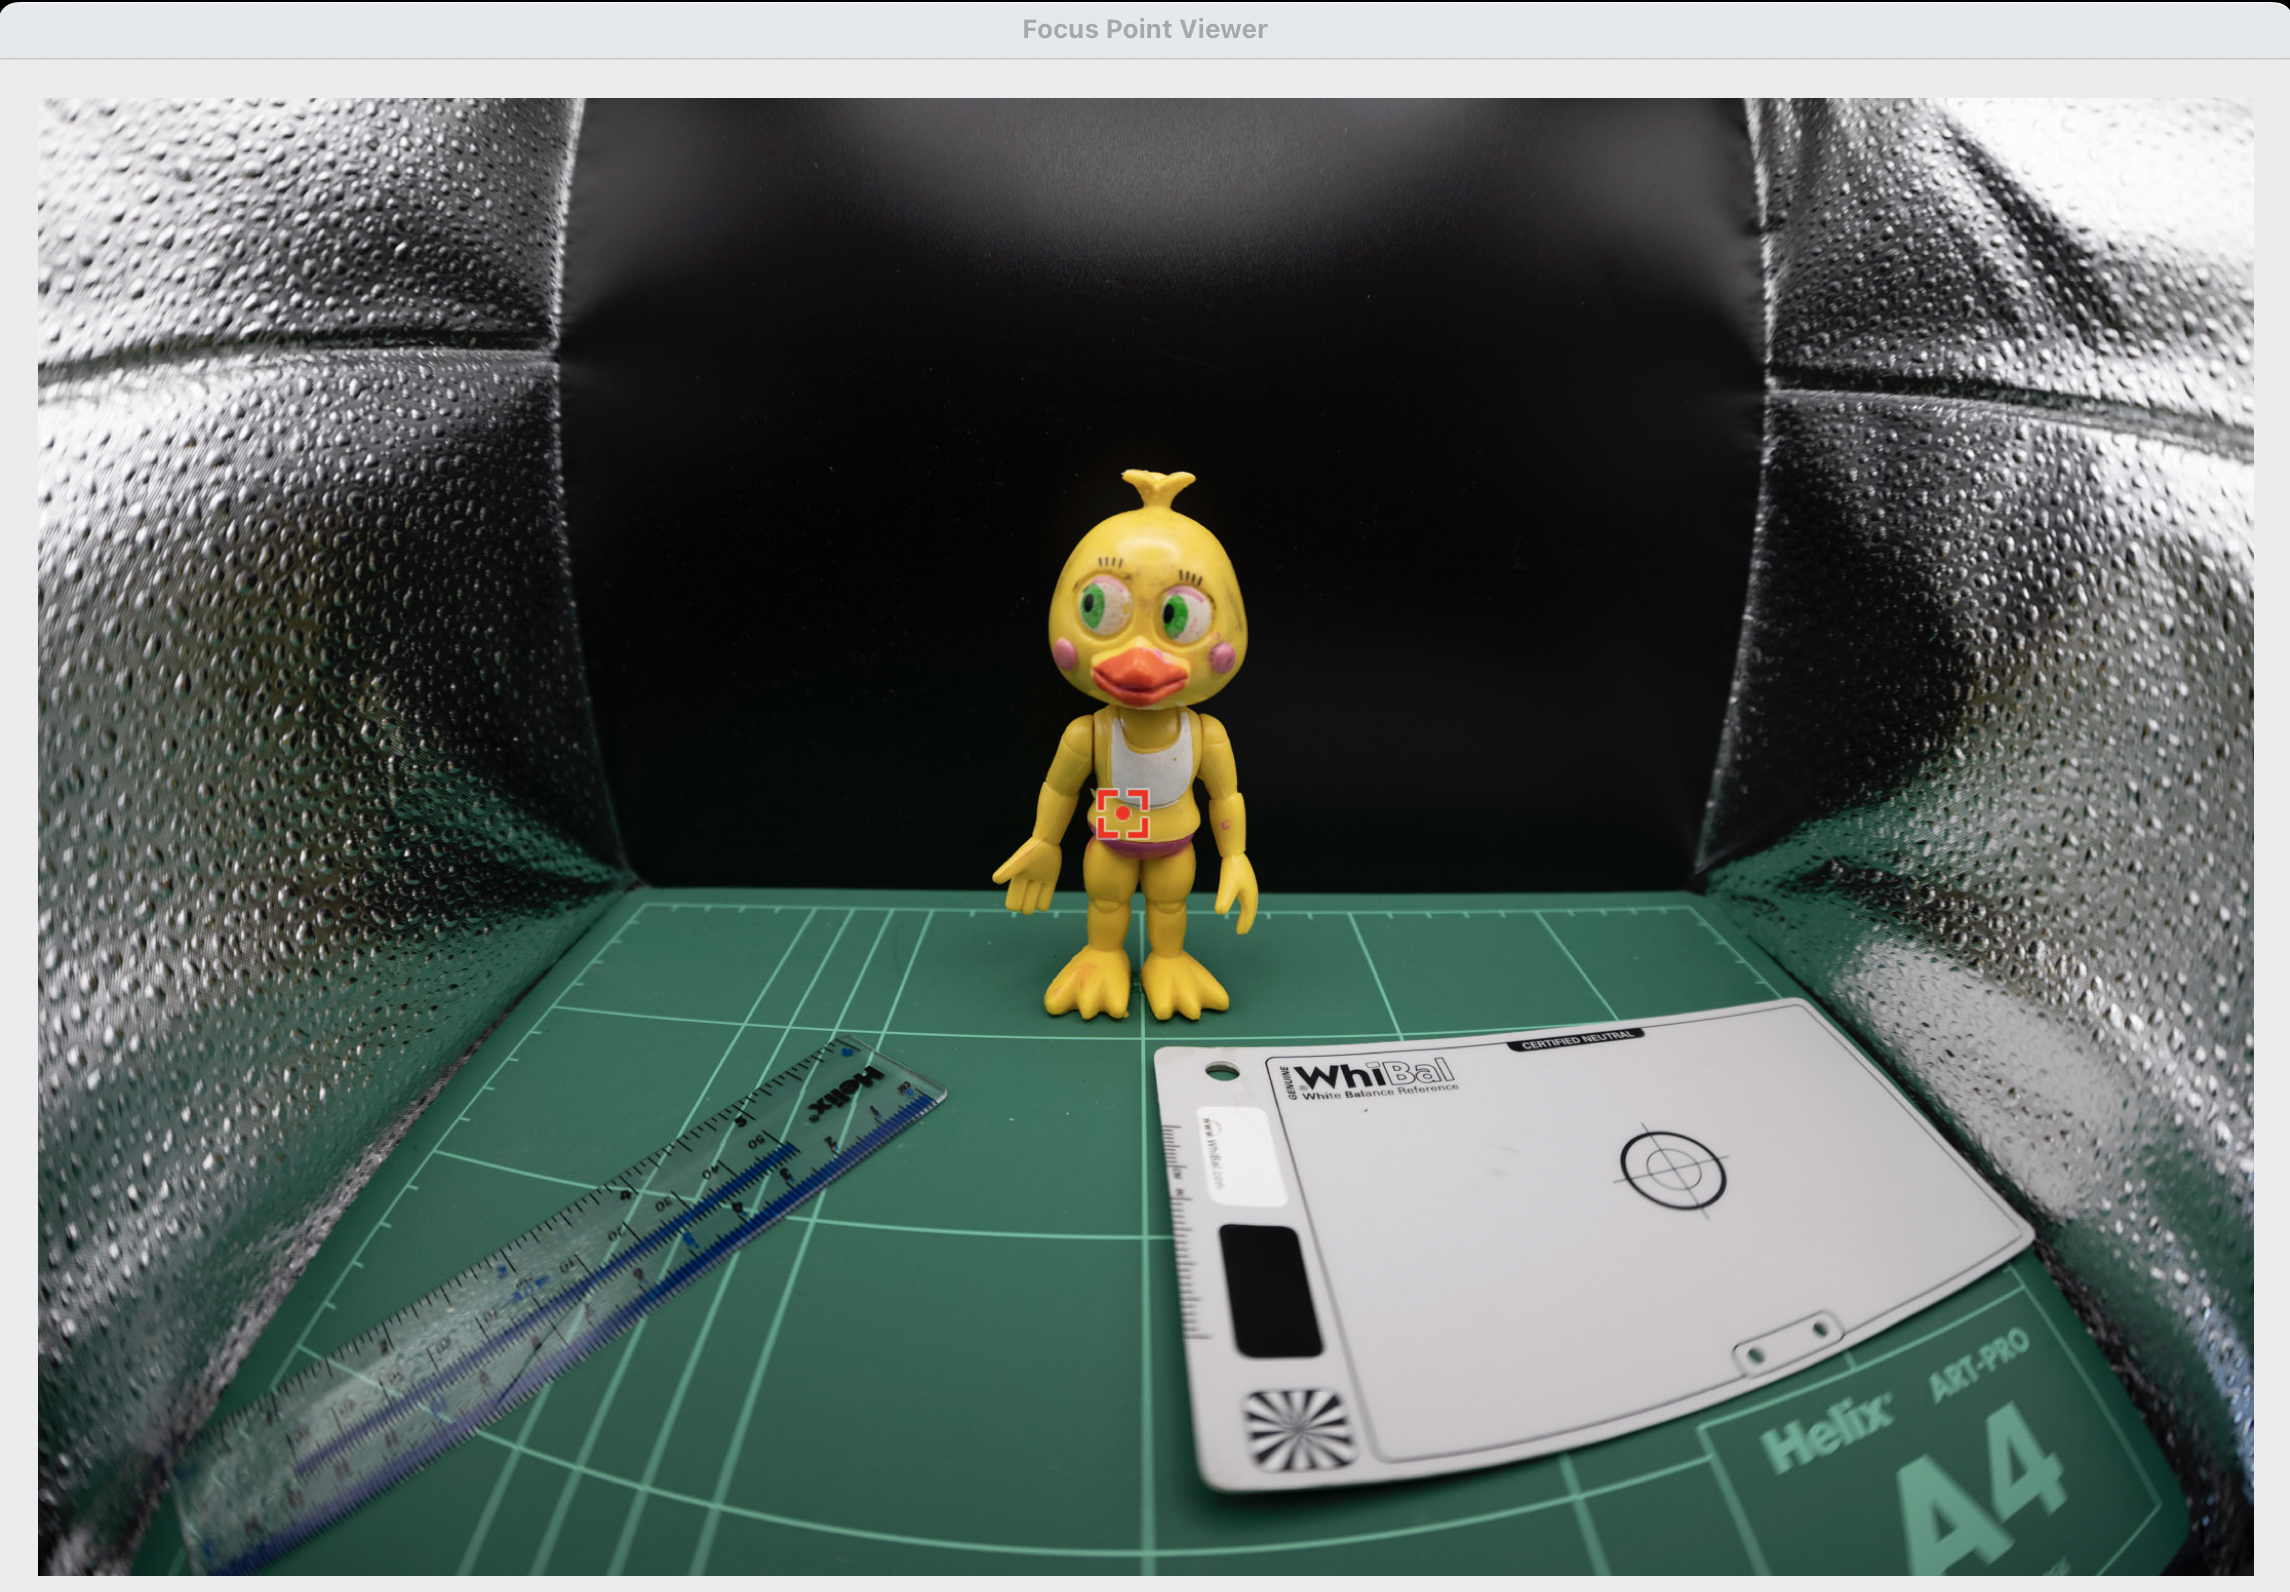
In order to prove the concept even more I took some props underwater.

First let’s have a look a shot at f/8 with the WWL-1.

Close up at f/8

As we can see the image is not too bad even in the close area but it is definitely better at f/11

Close up at f/11

What happens if we position the target off centre?

Contrary to our topside example the situation does not improve by focussing on the edge to further prove the issue here is NOT depth of field.

Focus off centre f/8

Here a detail crop the image is still fuzzy despite then focus is right on the spot. Depth of field is not the issue.

Edge focus at f/8

And finally we close down the aperture to f/11.

Edge at f/11

Crop at 100%

Edge at f/11

So here we can see that the underwater interface provides already for the depth of field but moving the focus at the edges does not have such a good effect.

Why? Because this is likely to do with aberrations of the lens itself as shown in my previous post on the Sony 28-60mm.

The combined 28mm with WWL-1 at f/8 means 20/8-2.5 mm aperture when stopped down to f/11 this becomes small enough to cure aberrations (less than 1cm with reduced field of view is sufficient).

For the same reason ASPC and MFT will be able to shoot at wider aperture not because of depth of field but due to smaller lens aperture.

15mm fisheye at f/14 –> 1.07mm physical aperture

8mm MFT fisheye at f/8 –> 1mm physical aperture

Again it is not the depth of field but the aperture size to cure most aberrations.

Conclusion

All Nauticam port chart recommend the 140mm dome and not larger domes. This is aligned with the theory behind this post that dome size ultimately matters but not as much as stopping down the lens and that fisheye are naturally helped by dome port geometry.

This conclusion also extends to water contact optics which are composed by a fisheye like demagnifier and an integrated dome port.

As long as the rear element of the lens is big enough the increased size of the lens does not result in proportional improvement of performance.

To support the empirical evidence of this article you can read this review of the 140mm dome by Alex Mustard.

By coincidence Alex recommends shooting at f/14 or f/16 which means a physical aperture of 1mm which cures all sorts of aberrations.

Considering that the benefit of a much larger dome may be as small as 1/2 to 2/3 aperture stops you may consider going the opposite way and get a very small dome which will result in additional spherical aberration and will need to be stopped down more when shooting very close.

If you use the Nauticam system there are only two ports that are a full emisphere and therefore able to contain a fisheye lens field of view:

  • 140mm optical glass fisheye port
  • 4.33″ acrylic dome port

I happen to own both those ports and in a future article will compare and contrast the two. I will also revisit the topic of dome ports and rectilinear lenses which is obviously different from fisheye lenses.

Underwater Strobe Triggers for Sony cameras

When I got my A1 I looked at strobe triggering together with lenses housing and ports as for photography you will be mostly shooting with underwater strobes.

I got in contact with Shane Smith and Cindy Shaw and I asked them what they used and what their experiences were.

Shame has recently been highly commended for UPY and provided me a detailed breakdown of the Turtle TTL trigger. I recommend having a look at his website for great shots with Sony A1 here.

Cindy instead had a Nauticam manual trigger and we exchanged some messages on the burst functionality and the rear curtain sync.

Shane also owns a Nauticam trigger and both confirmed that this trigger only works with mechanical shutter and front curtain.

I use rear curtain on certain shots so I went on the lookout for a trigger that would support it that was not TTL.

I do not want to open a discussion on manual vs TTL however I shoot flash top side and even there I never use TTL unless I have to do a documentary/product shot and I have no time to prepare.

Strobe Trigger Options for Sony

I went on the lookout for options and my research included the following manufacturers:

  • Nauticam
  • UWTechnics
  • TRT Electronics

The following table is a summary of the various units I have directly or inderectly assessed.

BrandModelPrice (€)TTLRear CurtainHSSBurstMultishotPowerProgramming required
NauticamMini Flash Trigger294NoNoNoYesNoBatteryNo
UWTechnics11075- HSS/TTL Converter485YesYesYesYesNoBatteryNo
Turtle ManualTurtle Manual299NoYesYesYesNoRechargeableNo
Turtle Smart TTLTurtle Smart387YesYesYesYesYesRechargeableYes
Strobe Triggers for Sony

Only Turtle triggers seemed to offer all the features I was looking for so I contacted Pietro Cremone at fotosub shop after a long discussion with Turtle electronics technical team who did some remote tests for me on an A1. The A1 can trigger flash with electronic shutter and this is something I was looking for.

Turtle Manual vs TTL

The turtle TTL trigger has all the feature of the manual in addition it offers TTL of course and a cool feature called multishot.

I personally do not have any interest in TTL but my main issue with this product is that in order to change for example from front to rear curtain you need to reprogram it.

I wanted a solution with no computer where I could control all settings from the camera and is not TTL. This is achieved only by the Manual Turtle Trigger.

Turtle Manual Trigger In detail

The turtle manual trigger is really a joy to use and is extremely well built.

The first consideration is that it is housed with no electronics showing so an occational drop of water is not going to fry it. The second is that the battery is rechargeable. I have experience with Nauticam trigger that suddenly my strobes would stop firing consistently as the battery was low without warning. The fact that you can recharge the trigger each day or whenever you like is a great feature.

USB charging with standard micro USB

The second consideration is that the unit is really small and light.

In a hand

Finally the version I got had a convenient rubber part to inser in the housing strobe trigger sockets. This is a part from the TTL trigger that will allow to fire with cheaper cables and does not come as standard on the manual trigger, you need to request an upgrade which I warmly recommend.

So I set the trigger in my A1 housing and so far after around 1000 shots it has not failed once.

Installed

Turtle Manual controls

The good news is that well there are no controls everything is set in the camera menu. Here are the steps for my A1 but all Sony cameras are pretty much the same.

  1. MENU →  (Exposure/Color) → [Flash] → [Flash Mode] → desired setting.

Menu item details

 Flash Off:The flash does not operate.

 Fill-flash:The flash works every time you trigger the shutter. (Front Curtain)

 Slow Sync.:The flash works every time you trigger the shutter. Slow sync shooting allows you to shoot a clear image of both the subject and the background by slowing the shutter speed.

 Rear Sync.:The flash works right before the exposure is completed every time you trigger the shutter. Rear sync shooting allows you to shoot a natural image of the trail of a moving subject such as a moving car or a walking person.

This means I can set the flash mode each shot if I want to without changing any settings on the strobe or elsewhere.

In order to access the HSS mode you need to turn wireless mode on

  1. MENU →  (Exposure/Color) → [Flash] → [Wireless Flash] → [On].

This is not wireless mode but the trigger tells the camera HSS is supported and you get a indicator WL HSS. Your shutter speed is not capped anymore.

Unless you have an HSS capable strobe this setting should be left Off otherwise your photos will have the shutter in the image. I do not have HSS strobes but if you own Retra this is very useful.

Other positive points of the Turtle trigger:

  • Supports electronic shutter (only applicable to A9/A1 series)
  • Supports Speed priority with A1 (1/400 on mechanical shutter)
  • It works with SINGLE core and cheap cables when used with the upgraded LED unit

I had sourced two expensive multicore Nauticam fiber cables after my Nauticam trigger refused to shoot consistently and now with the turtle am back at shooting my 15 years old Sea and Sea cables.

Well seasoned Sea and Sea Fiber cables

It also works with ebay single core fiber home made cables.

Probably the only limitation for me is the burst speed. With electronic shutter the A1 goes at 6 fps the trigger would only fire once probably a limitation of the internal LED recharging circuit.

However in mechanical shutter it would work with the Low speed setting of 3 fps.

Take into account that the strobe will deplete its charge when you shoot continuously and the recharge time that are typical mean that when the capacitor holding the charge is empty the strobe will stop firing or fire at much lower power.

Consider the following Log2(burst speed)->minimal output power reduction required in stops for practical use.

In my case log2(3)=1.58 round up to 2 stops reduction of strobe power.

With Sea and Sea YS-D2 maximum power 32 maximum sustained burst rate 32 – 2 stops = 16 this is the maximum you can fire your strobes at.

Realistically you are not going to be able to shoot smaller aperture than f/11 with a diffuser before the strobe starts loosing power in the following shots unless you increase your ISO. This however is plenty for me and frankly it was more academic.

I want one how do I get it?

If you are UK based please send £285 using this link and one will be shipped to you within two weeks. This will ensure you have two years warranty and no paperwork import duties etc to deal with due to Brexit. The trigger will have the higher power LED as in this article.

If you are in Europe I recommend fotosub shop of the friend Pietro Cremone he deals in larger quantities and can offer great prices. Otherwise order directly from Turtle Electronics.

Nikkor UW15 on Sony Mirrorless for photography – Worth it?

Nauticam makes some really interesting adapters and ports for Sony cameras, one of them allows you to use vintage Nikkor lenses on full frame mirrorless cameras.

I decided to source the UW15 as I am planning to use it for video after seeing the results on the movie Avatar.

The challenge of the Nikkor lenses is that they are entirely manual with aperture and focus knobs. This is generally not an issue for videography which is my intended use but I wanted to check how does this lens work for photography as many people still rave about it.

Lenses compatible with the adapter are UW 15, UW 20 and UW 85 full manual. Later autofocus lenses are not supported.

The Rig

My rig is a classic derivation from wide angle with 8″ and 12″ arm segments and my trusty (!) Sea and Sea YS-D2.

Nikkor 15mm rig

The Nikkor weights around 600 grams and gives almost zero lift so this rig was over 300 grams negative in fresh water.

Before using it you need to assemble the lens on the adapter.

Nauticam Nikonos Adapter

You have two parts that can be removed to allow the lens to mount depending on your preference. I set the lens with the display upright so I could try and see it while shooting.

Nauticam Nikkor adapter top side

The controls are located on the left side side and bottom which is where I normally have my levers.

Nauticam Nikkor adapter controls

On the right you will see the display scales.

Nikkor UW15 Aperture and Focus Display

I have to say I was a bit nervous setting this on my A1 considering that this is a lens that is 25 years old at least but the vacuum test was fine so ready to go to the pool with the friends at Rec2Tec Bletchley.

The UW 15 Construction

The Nikkor lenses were generally rectilinear. The 15mm has a field of view equivalent to 20mm so only 94 degrees on the diagonal.

The approach was to correct the water distortion until such point when the image becomes rectilinear and eliminate other aberrations.

I have to say that the amount of chromatic aberrations is practically non existant.

White balance slate

Rectilinear lenses have gone out of fashion since dome ports with fisheye distortion being the preferred look for wide angle in modern underwater photography. For video though straight lines have a value.

Pool Session

Using this lens on the Sony A1 proved challenging for photography. Nailing the focus using peaking did not feel particularly precise.

Not so sharp focus

Some shots may have been sharp enough on film resolution but with the 50 megapixels of the A1 even the slightest misfocus shows.

Is it in focus?

My productivity was quite low at the beginning as I was trying to get a hand of the lens.

The lens itself is by all means extremely sharp even for my camera.

Grid

I worked out that I could not do what I normally do which is to frame first and focus after as by the time I had nailed the focus things would have moved so I decided to set the focus and move forward or back until I thought I had my target in focus.

The situation started to improve.

DSD student with Instructor David Allen

I felt I had worked out how to use the lens so started looking for some subjects. During those sessions you see all sort of stuff as people practice their skills.

Riding

Considerations on the controls

I believe that the average underwater photographer shooting digital will find it very hard to use this lens and will end up shooting at f/8 or smaller apertures so that focussing becomes easier. The lens is especially challenging as it is not particularly wide so you do need strobe power.

DSD Student

I found really hard the lack of display of aperture and focus position. The lens is designed for much smaller Nikonos housing, with my A1 housing being more bulky you need to actually turn and look at the lens to check your settings so many times I did not have the right aperture of focus and it all was pretty laborious. In a video situation for wide angle this lens will work just fine with set and forget at 4K but to nail focus on a high megapixel camera is a hard task.

When you do get the focus though the image is outstanding.

Just married

I tried a selfie to check the focus scale and it worked well.

Selfie

Consider that the most shots were at f/5.6 or f/8.

Dave

As you have no exif data it is impossible to remember what you shot unless you write it down on a slate.

Is it worth it?

The answer depends on your use case and if you already had the lens.

The following use cases fit the Nikkor UW 15 pretty well:

  1. Videos of sharks or pelagic that do not come too close where ambient light is low
  2. Photos at mid range with fairly static scenes where you want straight lines for example fashion models

The lens is definitely not easy to use for dynamic shots, situations where you need to get very close (as it does not focus very close) and where you need to continuosly adjust focus.

In terms of costs in GBP you are looking at:

£474 Nauticam Nikonos Adapter 37202

£300-500 Second hand Nikkor UW15

Obviously if you already have the lens and you are in one of the above use cases I would recommend you get an adapter and give it a go perhaps looking on the second hand market.

If instead you do not have the lens I would say not to bother unless money is no object, you are in the two use cases above and you have sufficent dexterity to control this lens.

Undewater photography has moved forward a great deal thanks to autofocus and although the Nikkor UW 15 is really sharp getting critical focus right is not easy. When it comes to video where you do not normally use autofocus for wide angle this lens is really interesting.

You can shoot at f/5.6 even f/4 subjects in the distance in ambient light with extremely clear and sharp detail at a fraction of the cost of other water contact optics. If you do not own any of the WACP or WWL I would say the UW 15 deserves some considerations but only if your command of depth of field and focus is very good otherwise it is better to pass.

Moving to Full Frame without increasing bulk or at least not excessively!

Many things have changed since Helen housed her Canon Ixus65 in a polycarbonate housing.

Compact cameras are practically extinct and those left have either a port system as the lens is too long or a shorter 24-70mm equivalent lens which is not useful.

Nauticam developed the N85 port system for Sony APSC (also small form factor) and Micro Four Thirds and since mid 2010s those are the prevaling systems for interchangeable lens system underwater.

APSC in the mirrorless Sony format and today Fuji has lacked native fisheye lenses and been plagued by slow flash sync speed and challenges of battery life.

When it comes to DSLR there is no significant size difference between APSC and full frame when you look at the body but moving into lenses there is a substantial difference with the Tokina 10-17mm being the lens of choice for a compact set up for both Nikon and Canon shooters.

Moving to full frame DSLR has meant historically larger ports bigger lenses and a lot more weight especially if you consider larger domes or the newer water contact optics all in excess of 2Kg and frequently more.

When you look at mirrorless the newer Nikon and Canon systems all use the N120 port system so there is no size difference between DSLR and Mirrorless.

In addition if you are already using N120 dome ports like I am you will soon find out that depending on your housing the weight benefit is not entirely there even for Sony camera whose housing are lighter and use the N100 port system. However housing are in general lighter up to 800 grams less.

Today if you want to have a portable ILC camera for photography you are really only looking at the Olympus/ OM Systems range.

If you have made the choice to get larger N120 ports or you have a Panasonic GH series your housing is already pretty big and moving to full frame will impact only when it comes to certain ports.

Let’s dive into this topic.

Here a first perspective of the A1 housing vs the GH5 housing.

GH5 vs A1 front view

Rear side view

Rear view note how the Sony has joystick controls

And finally top view

Head to Head

You can see that the A1 housing is a bit thicker a bit wider but not a great deal and the GH5 is taller.

Dimensions340mm (W) × 169mm (H) × 125mm (D)
A1 Dimensions
Dimensions331mm (W) × 184mm (H) × 110mm (D)
GH5 Dimensions

Looking at the weight on the scale

NA-GH5 2454 grams
NA-A1 Weight

Difference is 320 grams the weigtht are higher than reported as there is a vacuum valve installed.

This means that as the GH5 system was already heavy due to the clam shell housing the difference in weight will come from the lenses and ports.

As I use the N120 system for wide angle already the difference in that use case would come from larger adapter weight or larger ports.

For flat ports on the N85 system there will be instead a weight disadvantage due to the different diameter but this is less than the delta between N85 and N120.

In my future posts I will show my port system for the Sony A1 that has the objective of:

  1. Reducing bulk without totally compromising image quality
  2. Use as much as possible ports I already had
  3. Reduce the overall number of parts and adapters
  4. Offer complete focal range coverage for wide angle

As you will see my macro choices will not go into a direction of reducing weight or bulk but there is a reason for that. You could argue that by using the GH5 and the N120 system I had already killed portability and that is true however unless you want to shoot native lenses on Olympus system there are no real better options to keep image quality and still be relatively light.

Stay tuned for the next articles that will introduce my choices for:

Index of articles with my choice of lenses and ports (continuosly updated):

  1. Fisheye zoom port
  2. Fisheye
  3. WWL-1 wet lens
  4. Rectilinear lens
  5. Macro