It is not a mystery that even the new Mark IV version has issues with custom white balance.
The ergonomics have not changed and you need to go into photo mode to set custom white balance but generally underwater results are poor. Using filters is therefore a necessity also on the new 4K version.
RX100 Mark IV Video Behavior
The RX100 offers now a 4K 100 mbps mode and can use picture profiles.
I have used a modified version of PP6 that use the cine2 gamma curve, I have however changed the colour to the Pro mode and changed a number of other settings in my last video in Puerto Galera.
The water was green and murky but this gives you an idea of what you can get.
Filter Options and Wide Angle
Although the Nauticam WWL-1 is the best lens for the RX100 it does not take filters and therefore is not adequate for video.
In this review clip you can see the options available on the market.
In terms of wide angle you have two options for 4K:
Inon UWL-H100
Inon UWL-100
Both lenses work fine in 4K however the older UWL-100 achromat does vignette in photo mode.
The UWL-H100 offers a very wide field of view also in HD mode with no vignette and accepts the mangrove/deeproof filter.
This filters is loaded with magenta so I suggest adjusting the tint in the auto white balance mode to +2 green.
The UWL-100 works fine in 4K and is wider than the UWL-H100 however has only the M67 mount. If you have one of those lenses you can use the Ikelite 6442 filter. This filter required you to remove the rubber ring on the lens and does work quite well except has a yellow cast to it you can reduce by changing the tint to +2 blue and increasing also magenta to +1.
For flexibility purposes probably the UWL-H100 is better as it takes the bayonet but the UWL-100 is really wide and has a little less fringing. Some people do like the UR/PRO filters better.
I hope you find this post useful and good luck with getting the best colours from your Sony RX100 Mark IV
The Lumix G X 14-42 Power Zoom lens is designed for video with a silent motor zoom controlled by a slider that is quite effective to use.
The focal range in 4:3 format is 14-42mm which corresponds to 29-87mm in the standard 35mm format (the crop factor is 2.08 36/17.3 and not 2 how commonly thought in the classic 3:2 aspect ratio).
This lens is not exactly a best in class in terms of performance especially considering quite a bit of vignetting at wide end and distortion that anyway gets corrected nicely in camera for most. A detailed review is here http://www.photozone.de/olympus–four-thirds-lens-tests/765_pana14423556hd
You can see that this is lens is quite sharp at 2868 LW/PH to give you an idea the much more expensive Lumix 12-35mm reaches 3110 LW/PH though sharpness drops at corners to around 2100-2200.
Another interesting characteristic is that this lens performs best at f/3.5-f/5.6 which is close to the widest aperture as we will use this lens with the Nauticam flat port 35 this is all good news.
Nauticam Macro Port 35
The lens fits very nicely inside the port leaving space for small filters and close up lenses but not really a lot.
The lens does not really move much between 14 and 42 mm and reaches his longest at 14mm.
I have tried using a set of Inon diopters to see the degree of magnification you can get.
This shot is with an Inon UCL-165 +6.06 diopter.
Lumix G X 14-42 PZ @ 42mm with Inon UCL-165
The smallest frame width with this lens is 42mm however in video mode using the ex tele converter option this becomes a much smaller area achieving in fact super macro easily with the added benefit of larger depth of field.
If you are into pixel peeping you can see some chromatic aberration on the edges this is a combination of the lens and the wet diopter.
I also tried stacking an UCL-165 with the UCL-330 this achieves a capture width of 32mm so we are in super macro zone.
Lumix G X 14-42 PZ @ 42mm with Inon UCL-165+330 Stacked
Image quality does not get much worse but there are some internal reflections here on the white surface as the Inon lenses are not coated externally.
Finally I wanted to see if the Inon UCL-100 would work and it does achieving super macro without any fringing. If you want to use this lens for pygmy sea horse photography and do not want to get an Olympus 60mm this or the sub see 10 are the close up lenses to get, also the nauticam SMC is in the same range.
Lumix G X 14-42 PZ @ 42mm with Inon UCL-100
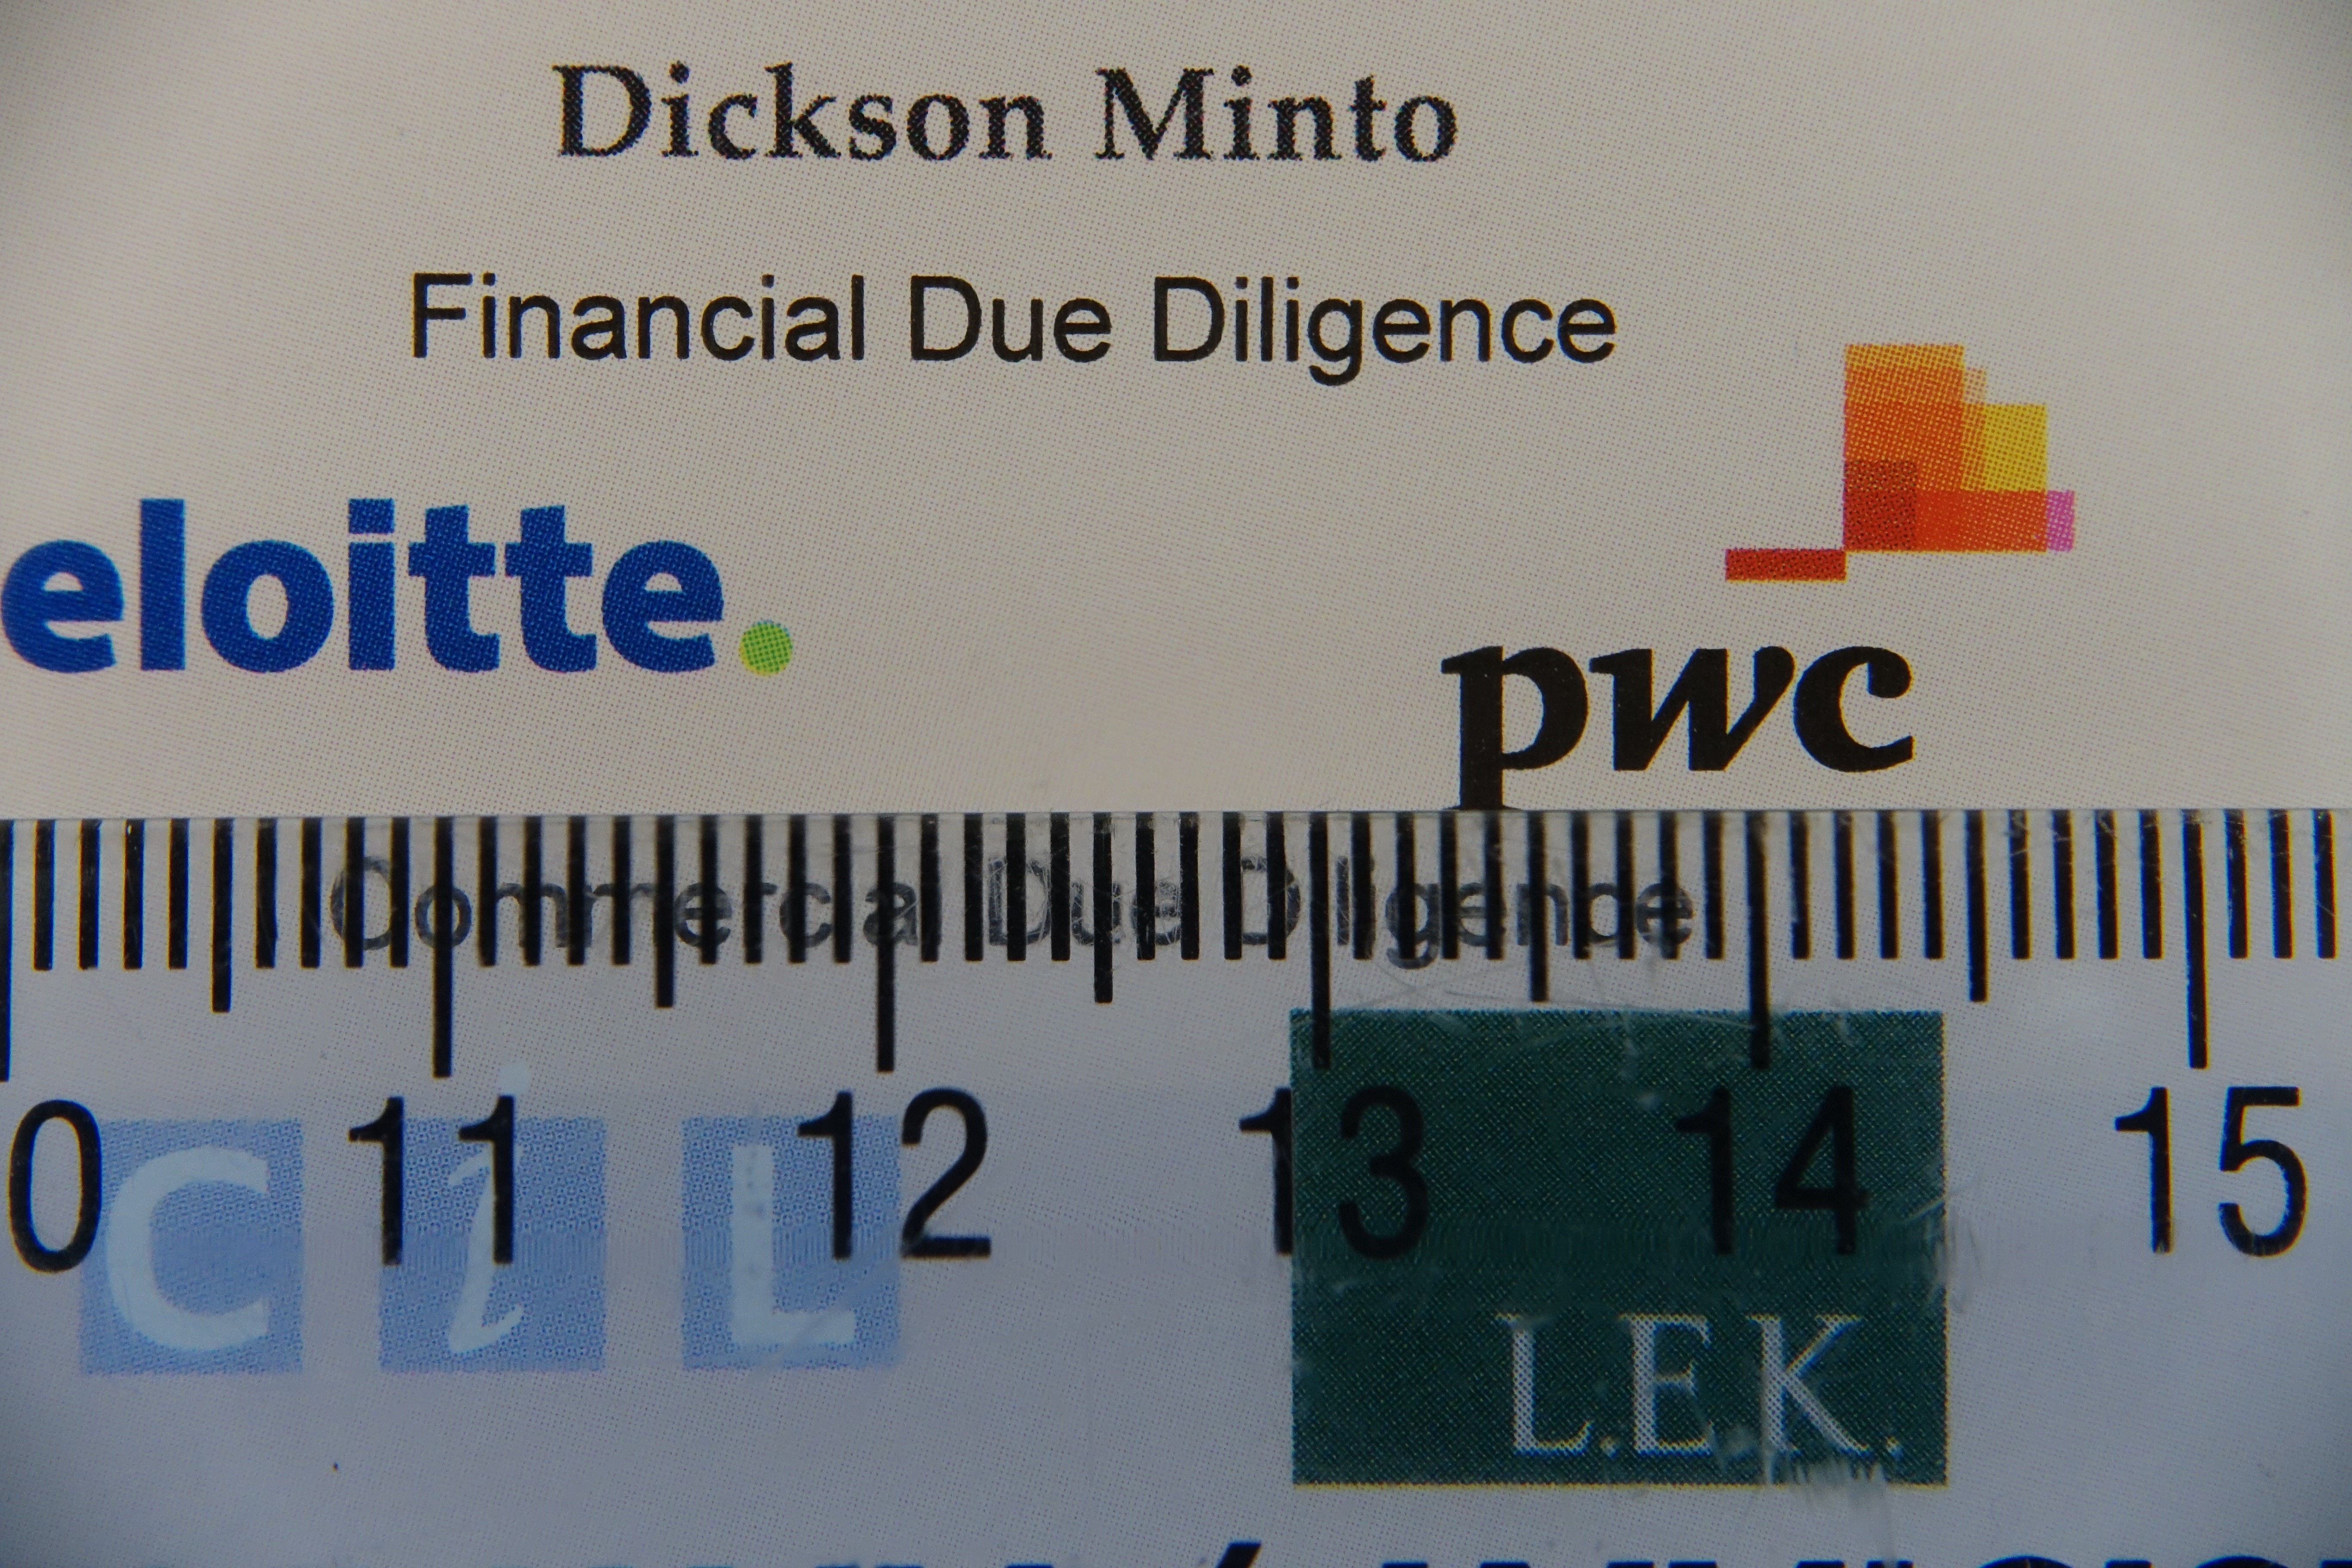
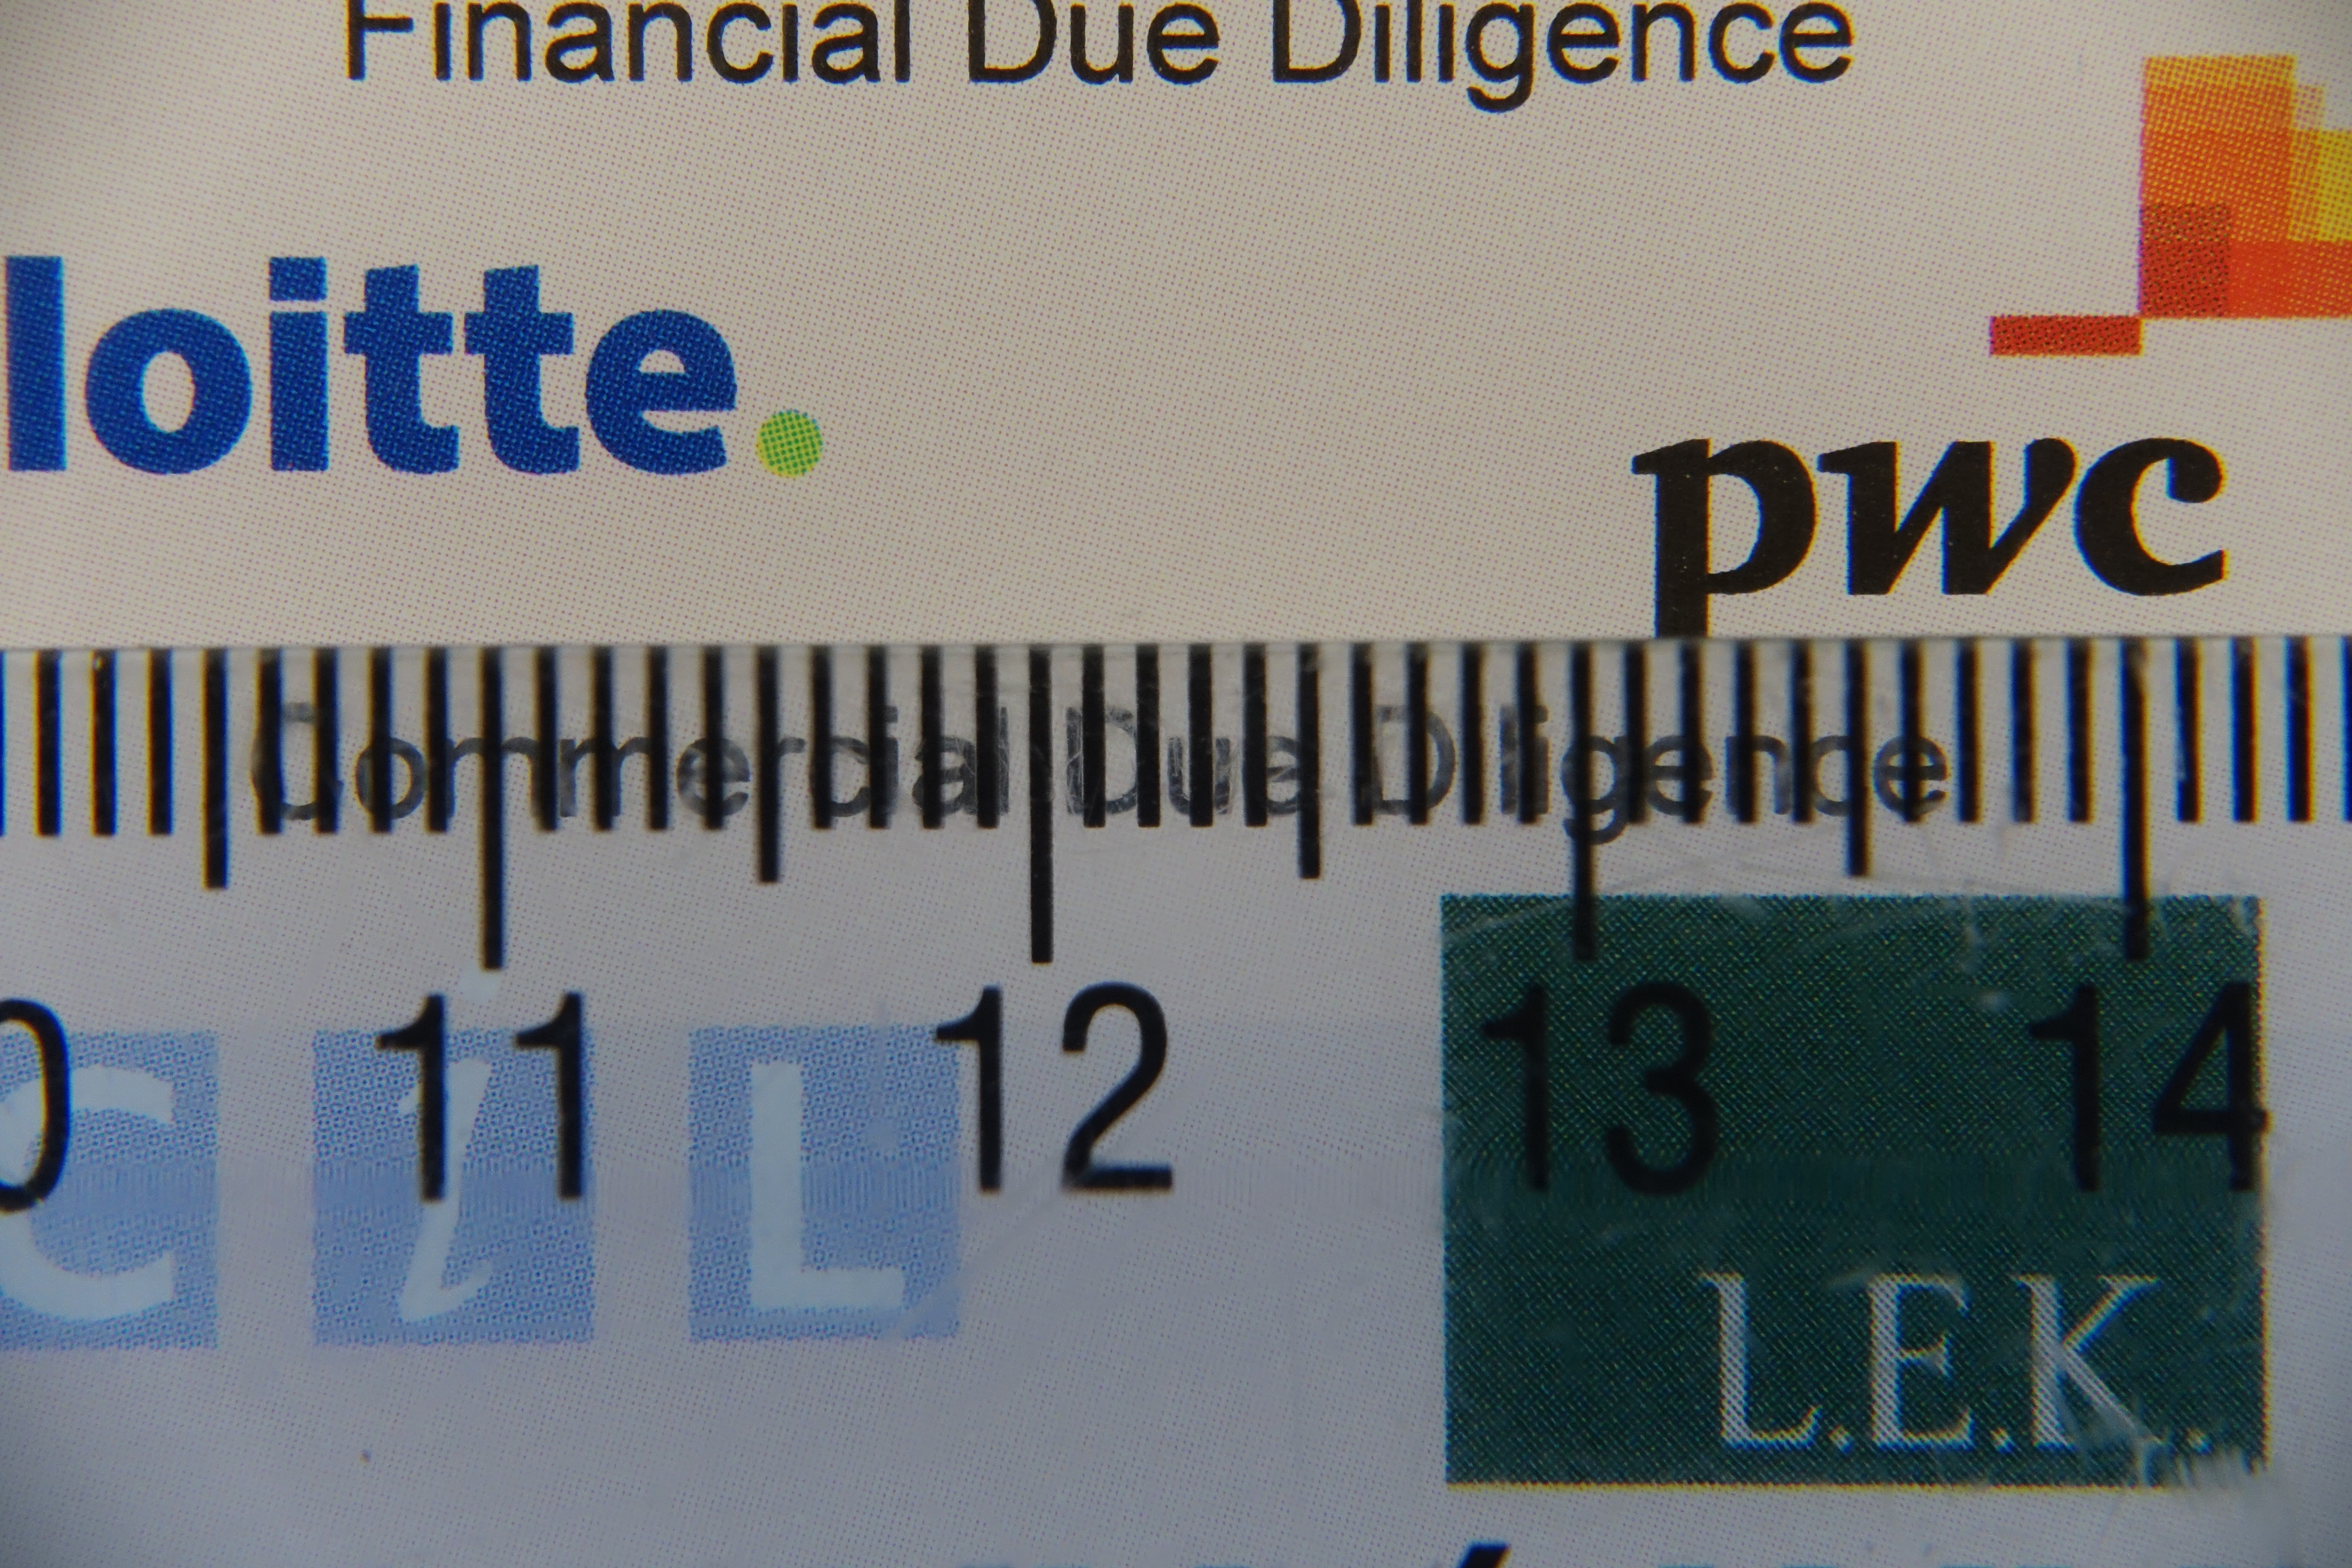
Now onto what is really good of this lens port combination and this is the versatility as you can attach the Inon UWL-H100 and get a very wide 18mm flat wide angle that is very sharp indeed as per previous images
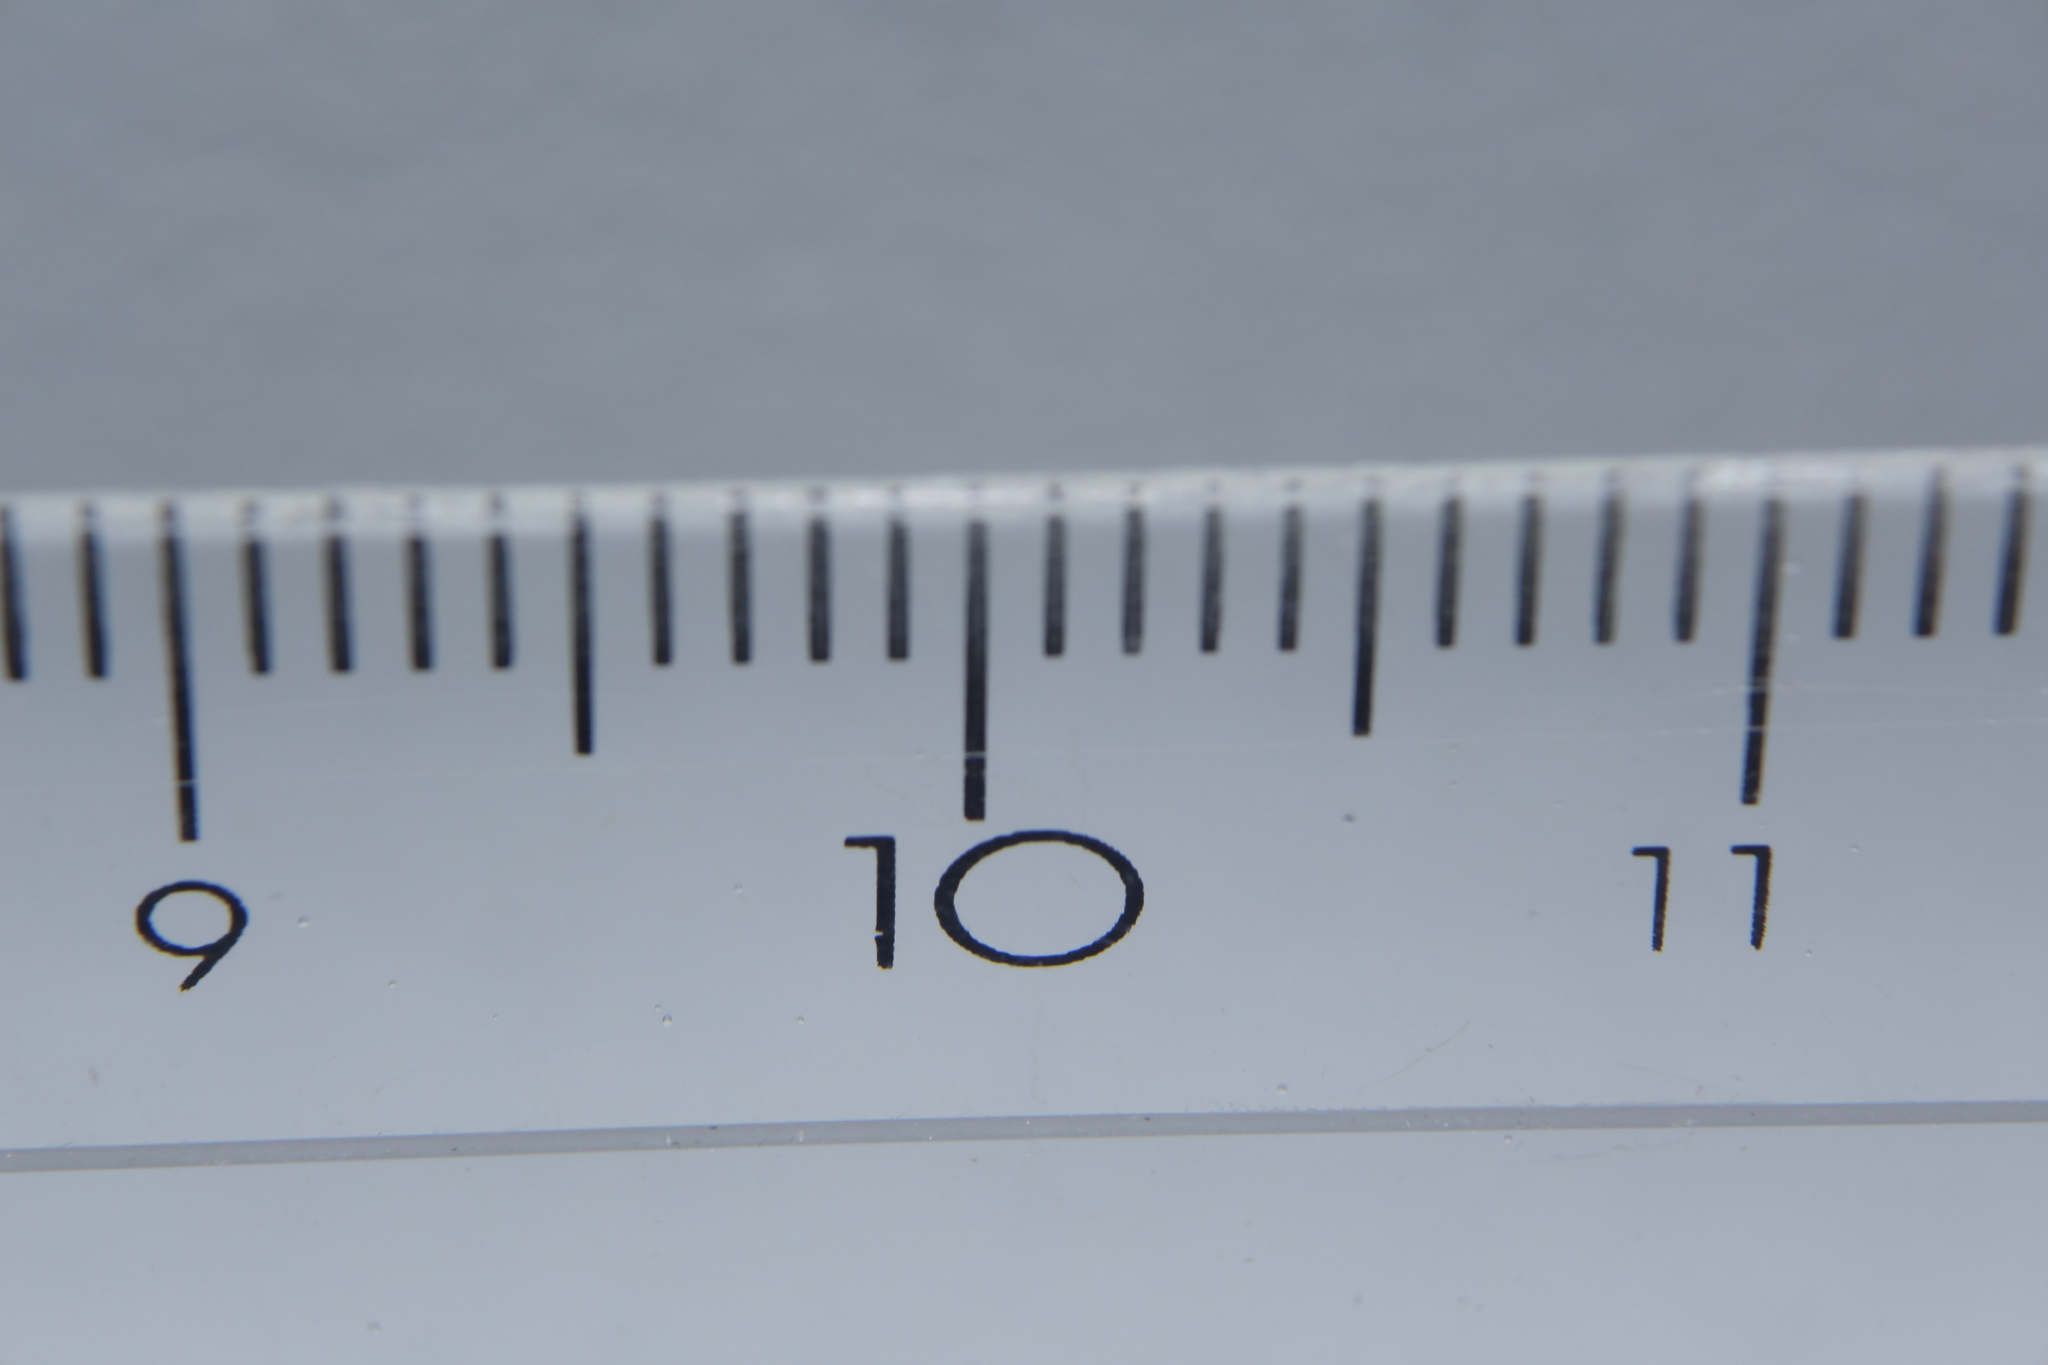
Nauticam 35 Port with Inon UWL-H100 on Panasonic Lumix 14-42mm
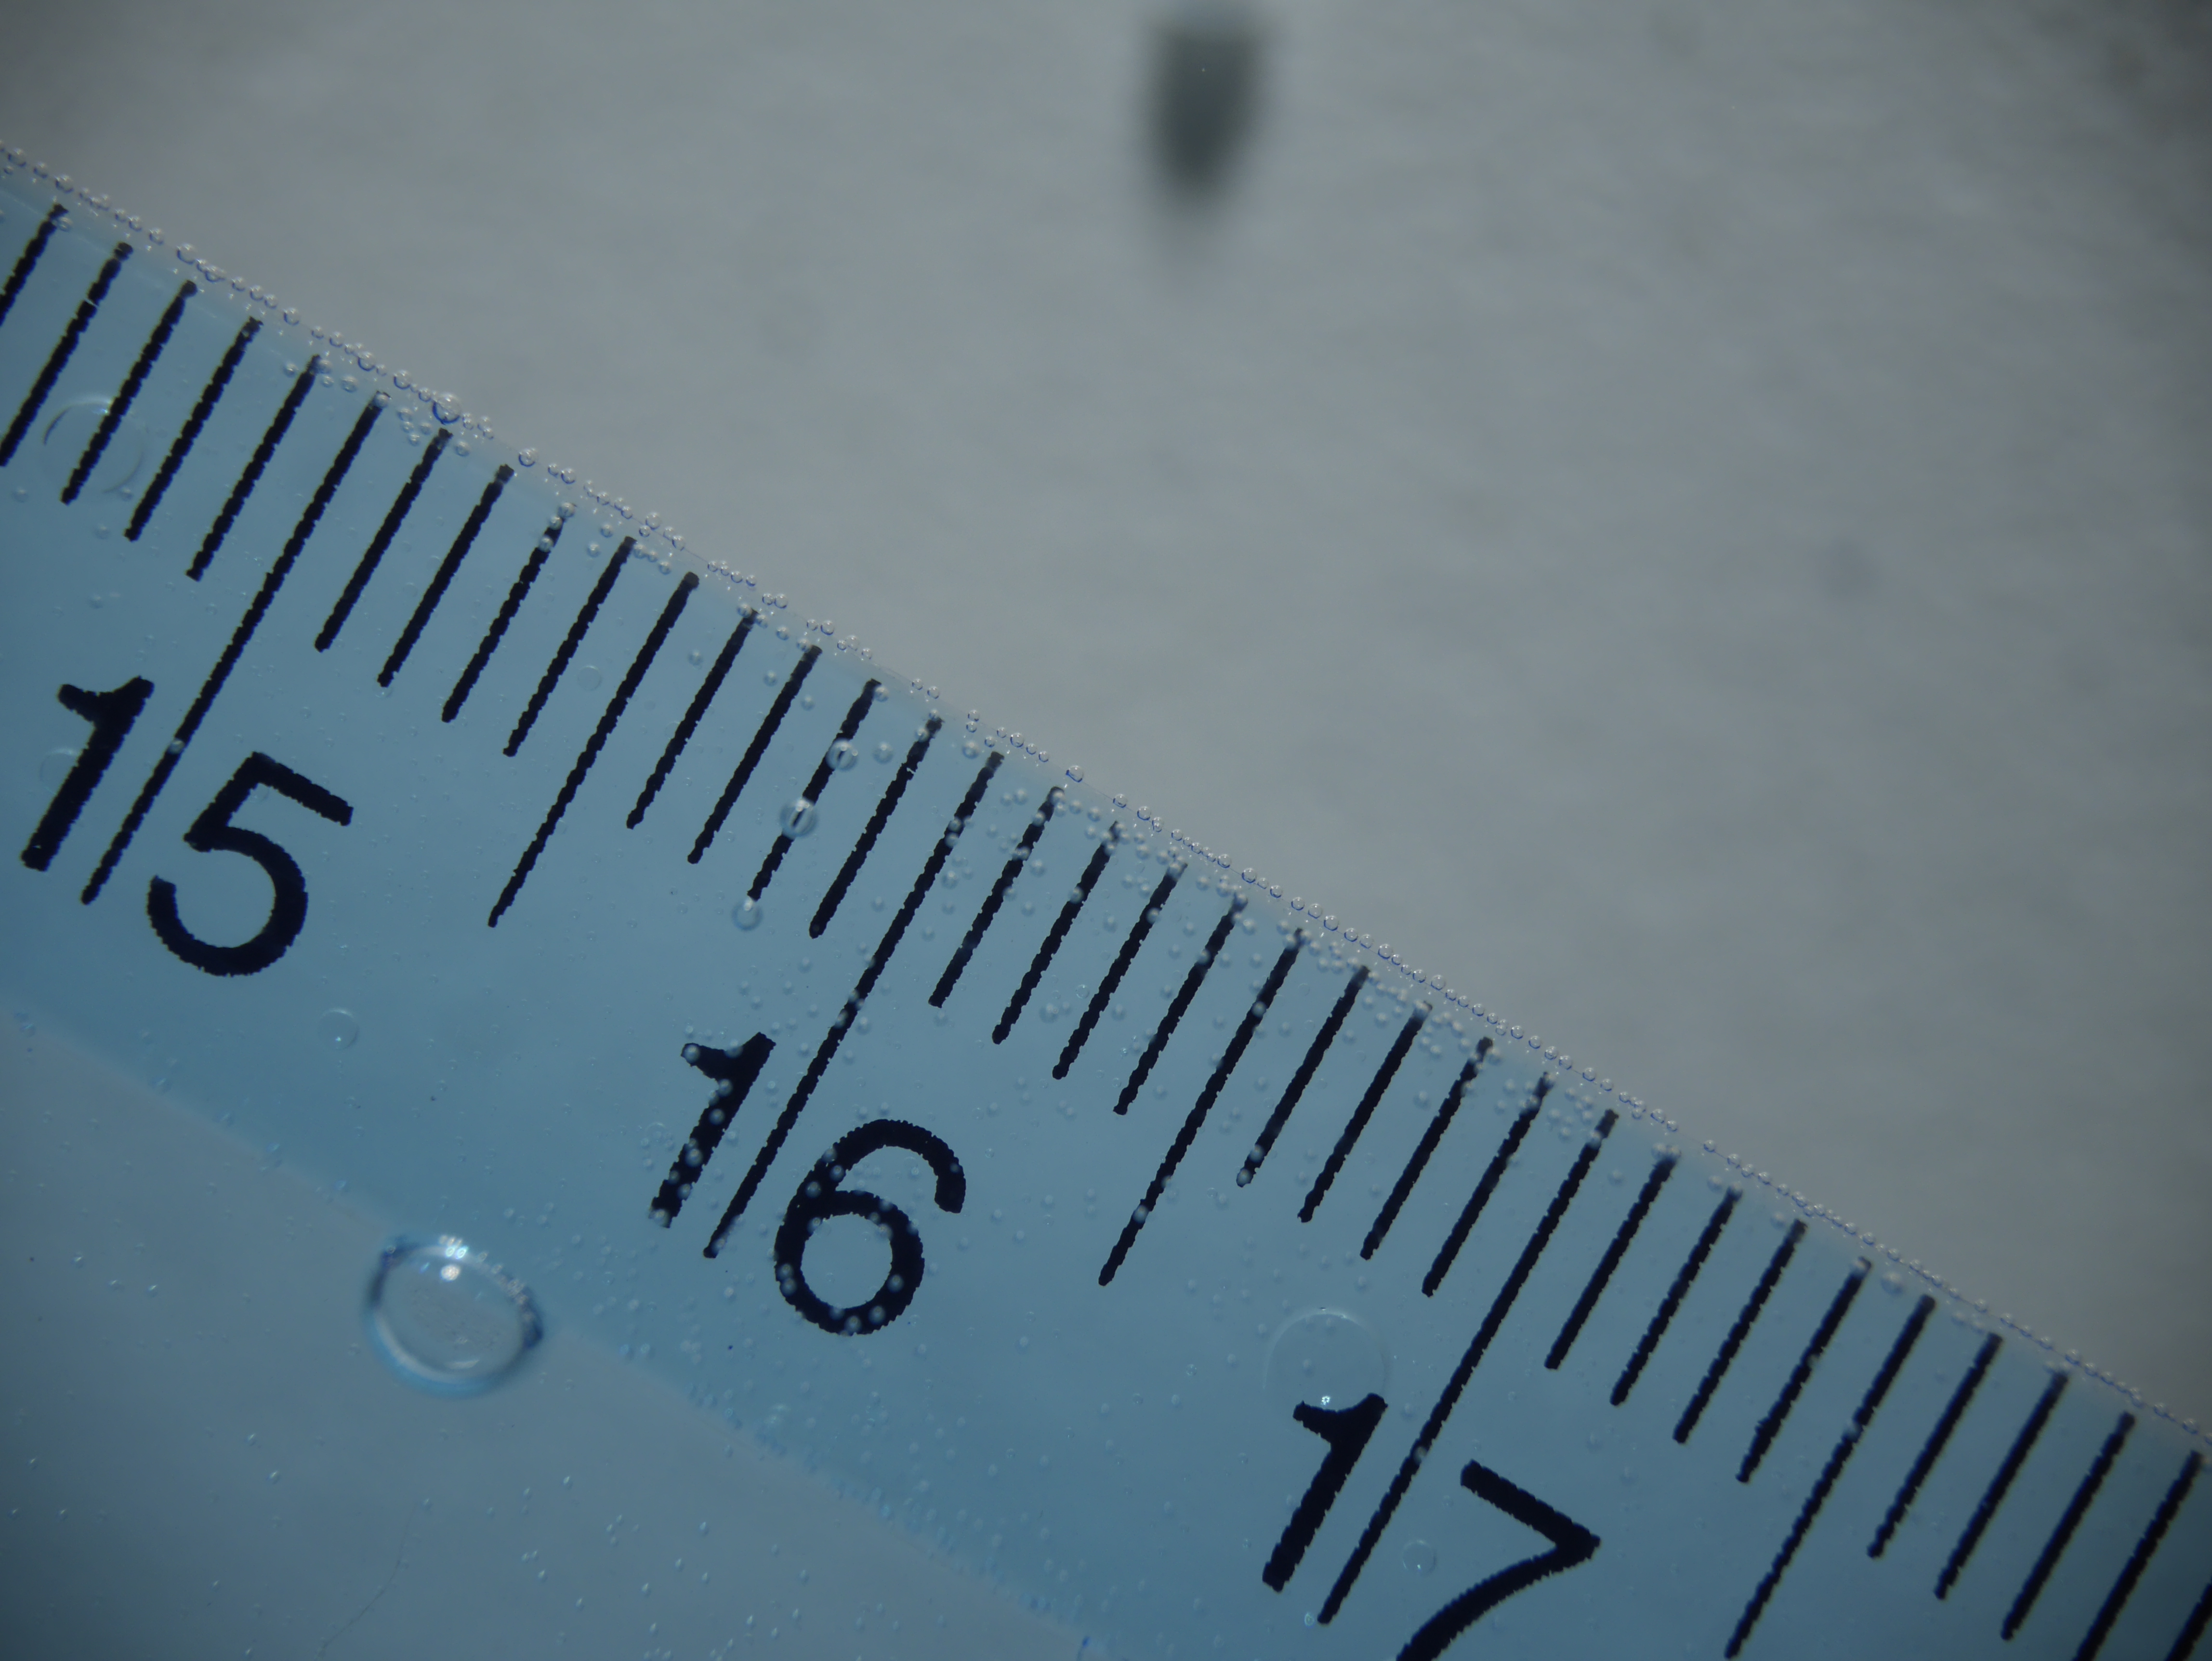
Consider that this image is taken at f/3.5 and the ruler is in the corner at ISO 1600 and you can see that sharpness is more than acceptable.
More interesting is that for some reason with this lens you can fully zoom through even down to 42mm without soft corners.
I have no idea how this is possible but it works just fine.
So if you are a video junkie you can cover the whole 100 degrees wide to super macro with this lens the Nauticam 35 Macro Port the Inon UWL-H100 and the UCL-100. For video it gets even cheaper with the UCL-165. You can of course use the flat port to do nice fish portrait in the mid-range of the zoom.
I forgot to mention the zoom gear which is actually pretty expensive because of the complex spring design.
The total cost for the Nauticam 35 with zoom gear is $510 plus of course the lens itself $290 total of $800.
Inon UWL-H100 + LD adapter = $654
Inon UCL-100 = $282
Inon UCL-165 = $205
Wet Lenses Still total = $936
Wet Lenses Video total = $859
Let’s compare to getting an Olympus 9-18mm with 4″ wide angle port and the Olympus 60mm with 30 extension ring total price $2129.
Price gap for stills $393 but you now also have a mid range lens for portraits, personally I don’t really like the Olympus 9-18 behind that port comparing side by side images taken with the 14-42 PZ and Inon lens I am not sure the Olympus is any better and definitely needs diopters due to mushy corners. For macro the 60mm Olympus lens has the advantage of increased working distance but is a very specific lens that you would only use for really small stuff.
For what concerns video you would probably look at the Panasonic 7-14 and forget the Olympus 60mm the combination is worth $1800 which is a difference of $636. Again the issue with rectilinear lenses and dome ports is there and the 7-14 does not take diopters.
So if we were to use the lenses on land no doubt you would need additional glass but in water wet lenses can be quite cost effective especially if you use a micro four third camera for video.
Peter Rowlands uses a Panasonic GX7 with Inon UWL-H100 and dome successfully and I am joining that club now.
Stay tuned for more tests next to come will be the Panasonic Fisheye 8mm with the 4.33″ dome which is another essential buy for the micro four third cameras underwater, obviously for pictures and not video.
Following from my previous post I managed to get together a clip out of the 5 dives I did
The first day was somewhat plagued by visibility a bit lower than the norm for the location but the second day was fabulous
For this trip I brought with me the Inon UWL-H100 and the red push on filter from deep roof H20 and the Inon UCL-330 as I was expecting medium size fish and nothing really small
Here is the outcome
I am quite happy how things turned out so let me share the settings with you
First I shot most of the footage in 25p AVCHD mode only some small sections are shot at 50p and actually I did not need to slow down any of the material.
For the wide shots I used steady shot in normal mode and shutter priority at 1/50th. With the filter on I had auto white balance with tint correction G2 A1. I noticed that the camera was giving red tint in some situation and so added a bit of green back. The Amber correction instead is for the RX100 itself the camera does not have vibrant yellow and is a bit blue.
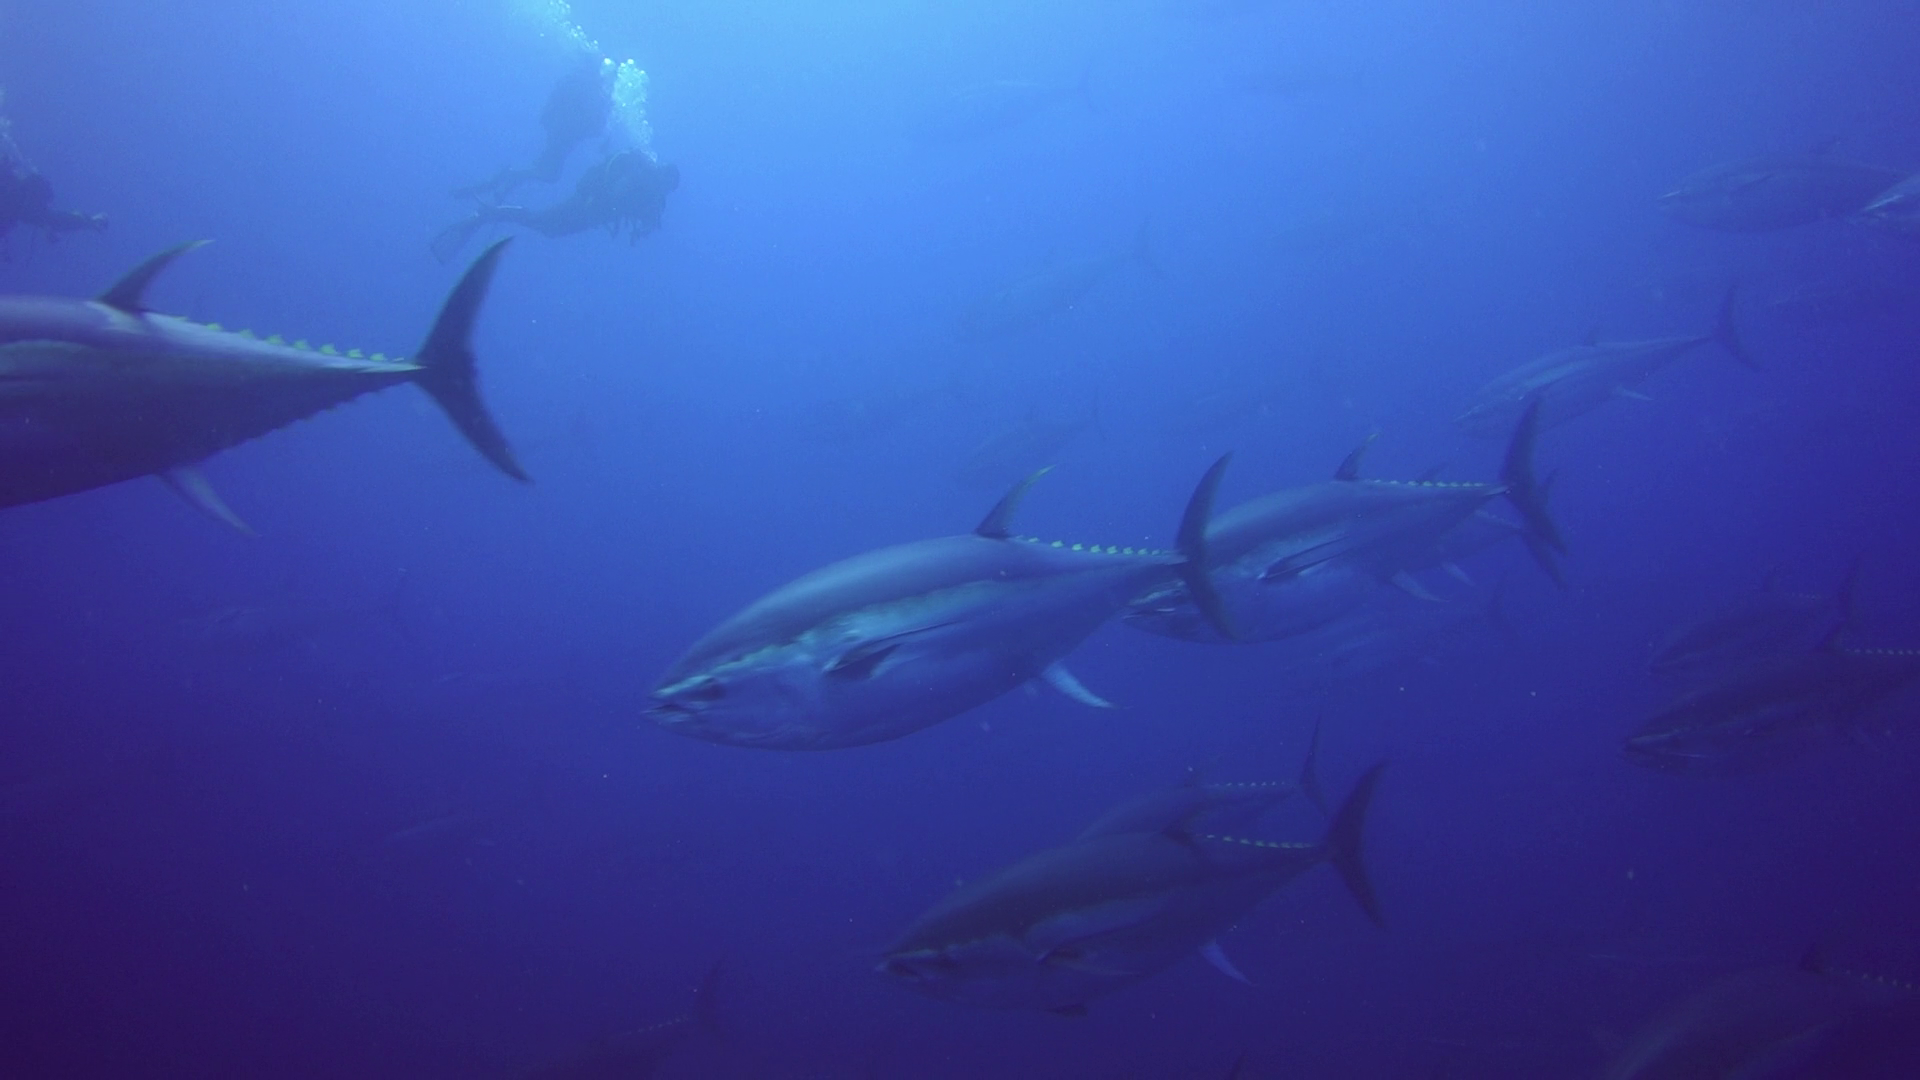
Tunas – AWB with filter
For the first time I use creative mode changing the standard contrast to -3 in order to prevent crushing of blacks.
Exposure was set all along to -1/3 and metering to multi area with AUTO ISO limited 160-800.
I think the results are so good that in fact I have performed no colour correction to any shots in ambient light.
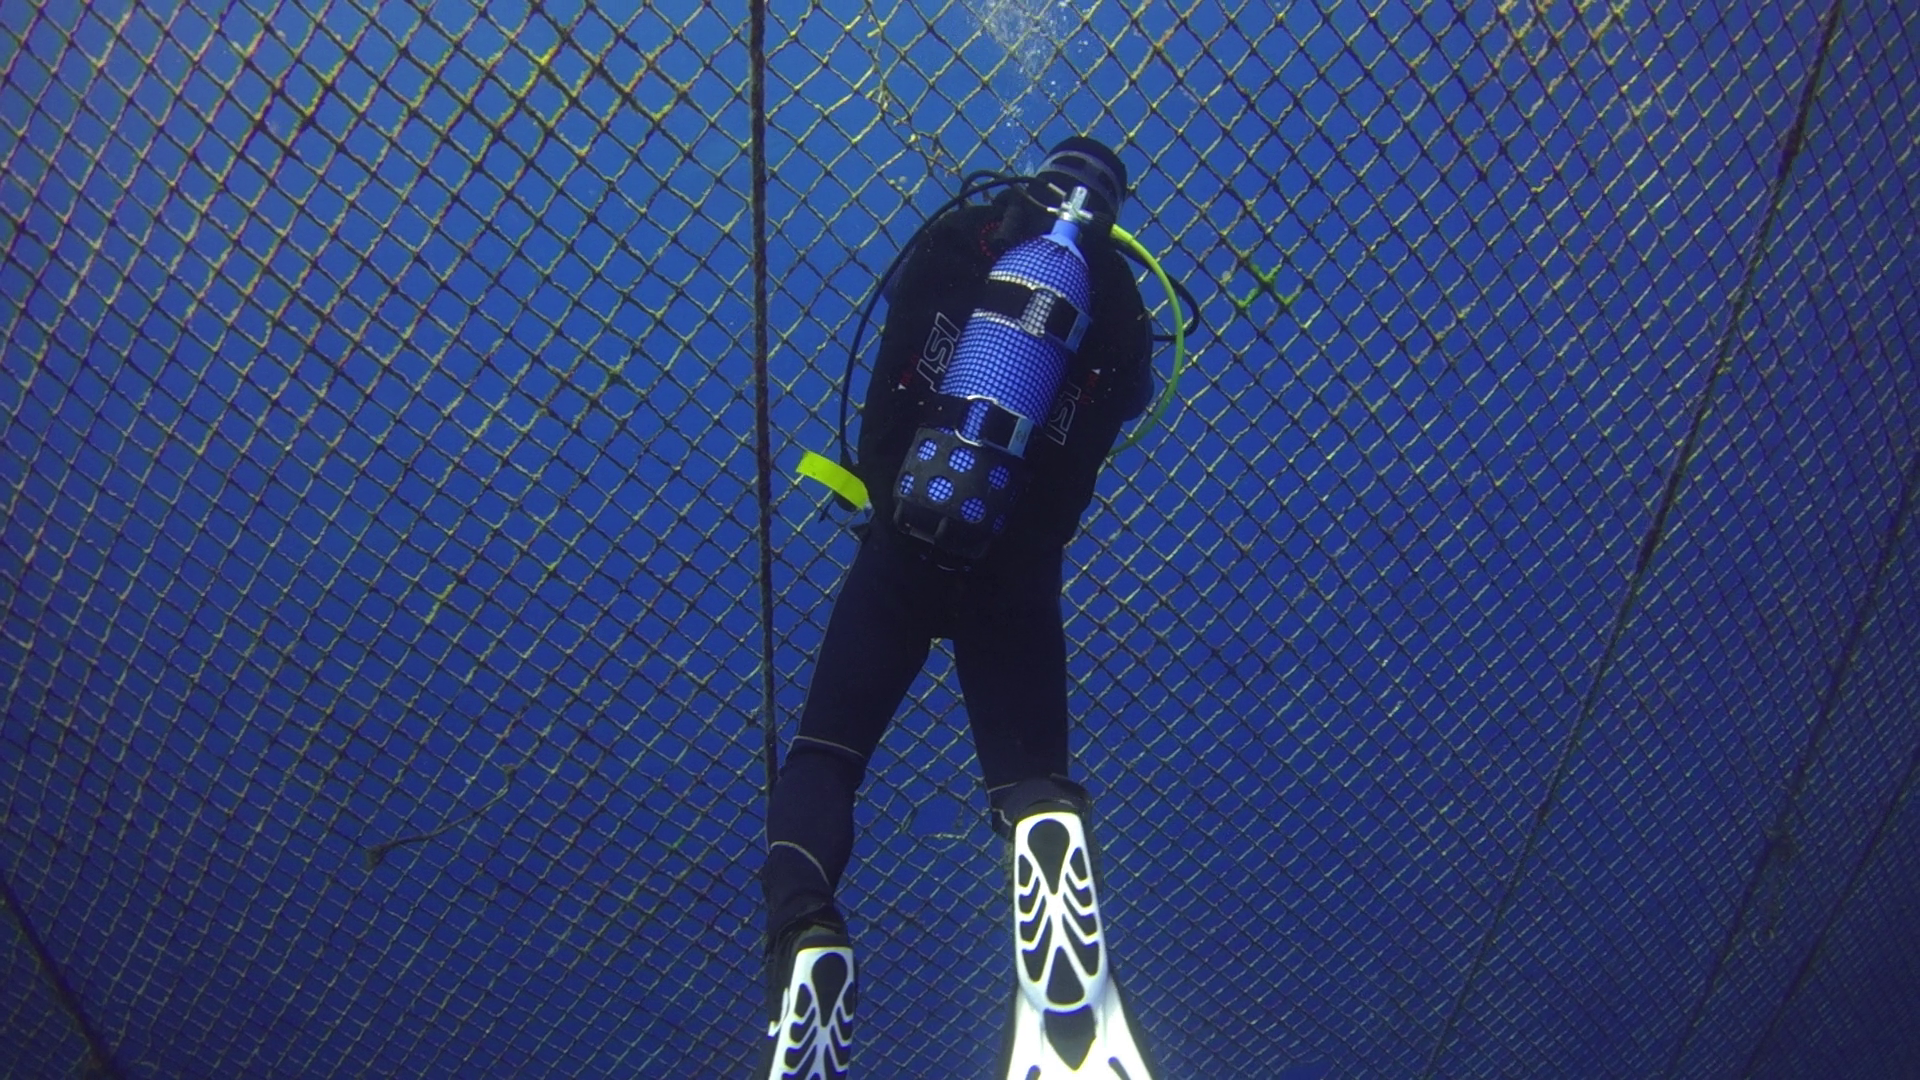
Opening the tuna farm – AWB with filter
For shots with lights I set up first colour temperature to 6500K and A1 to match the lights but then in some of the far shots this resulted a bit cold so I adjusted very slightly in post the temperature.
Seahorse – AWB UCL330
Only 40″ are adjusted in the whole video in essence is as shot and the editing took me half hour.
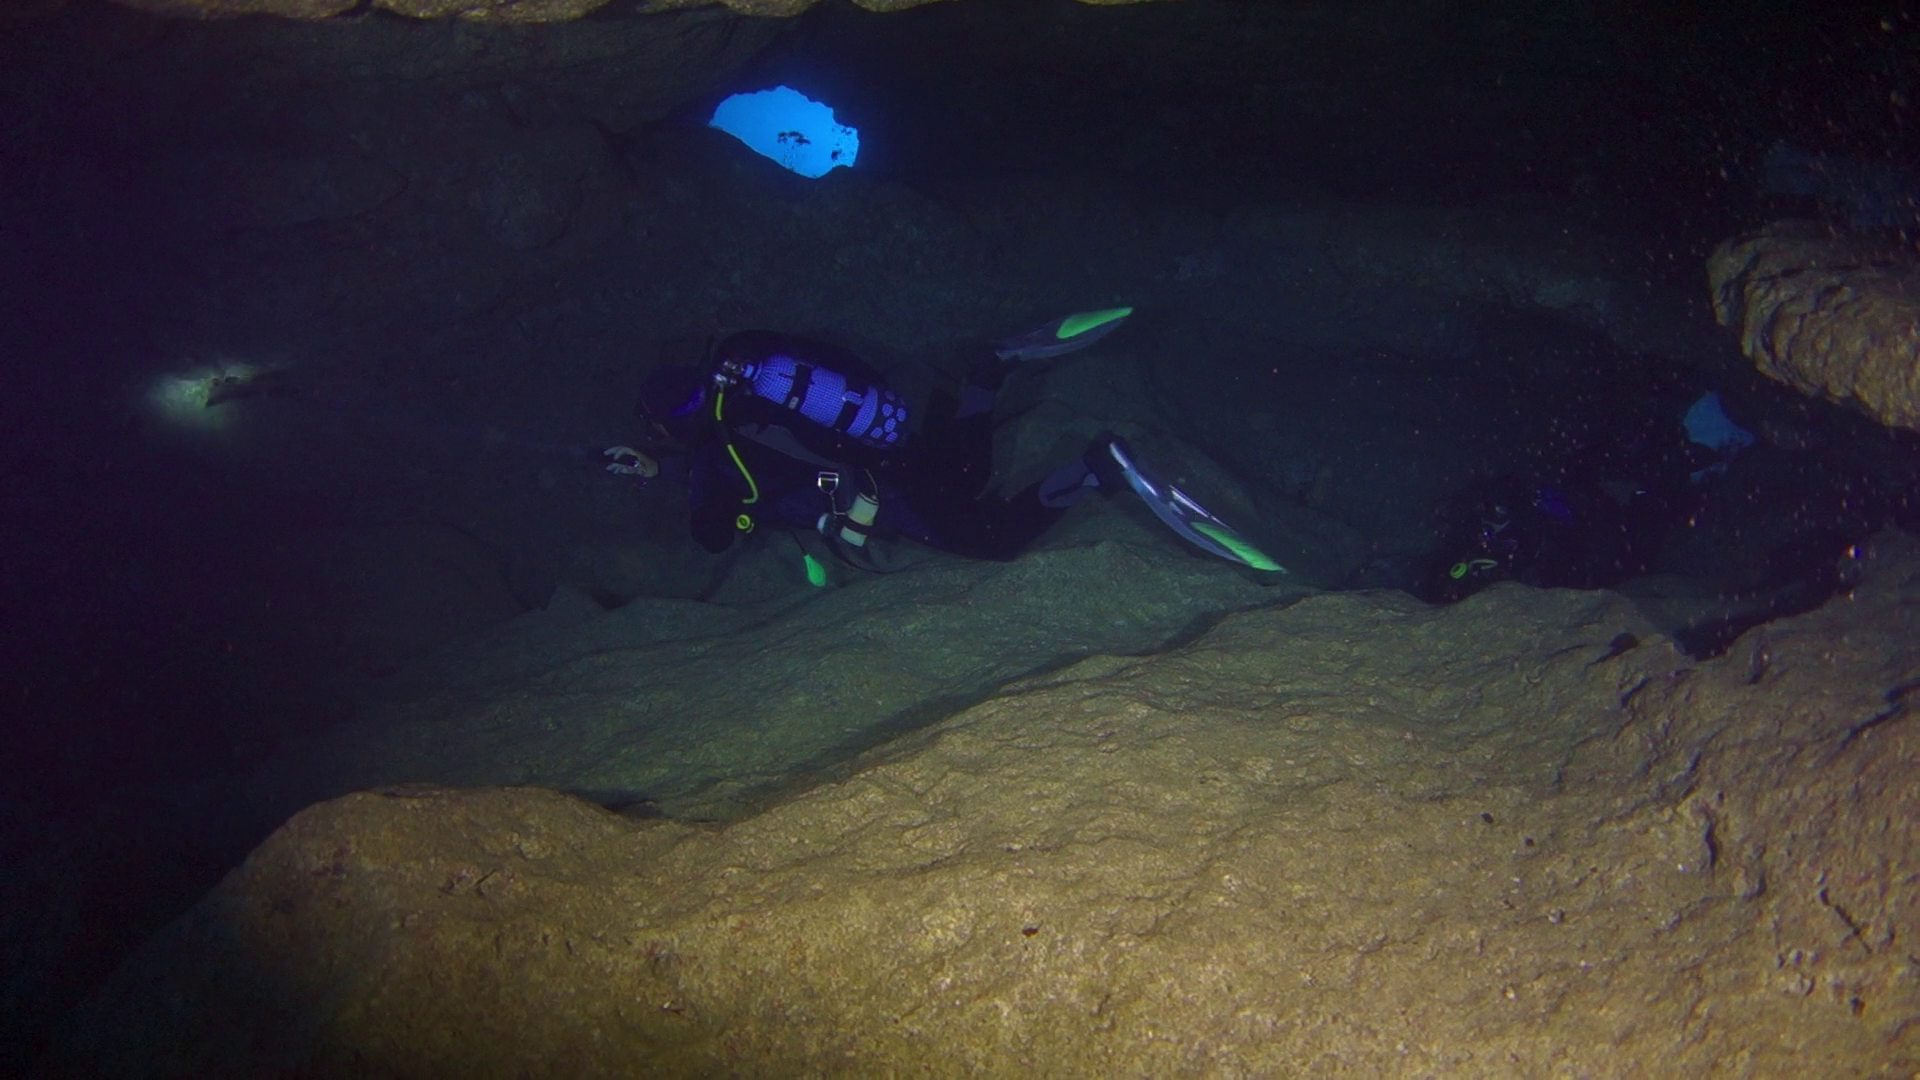
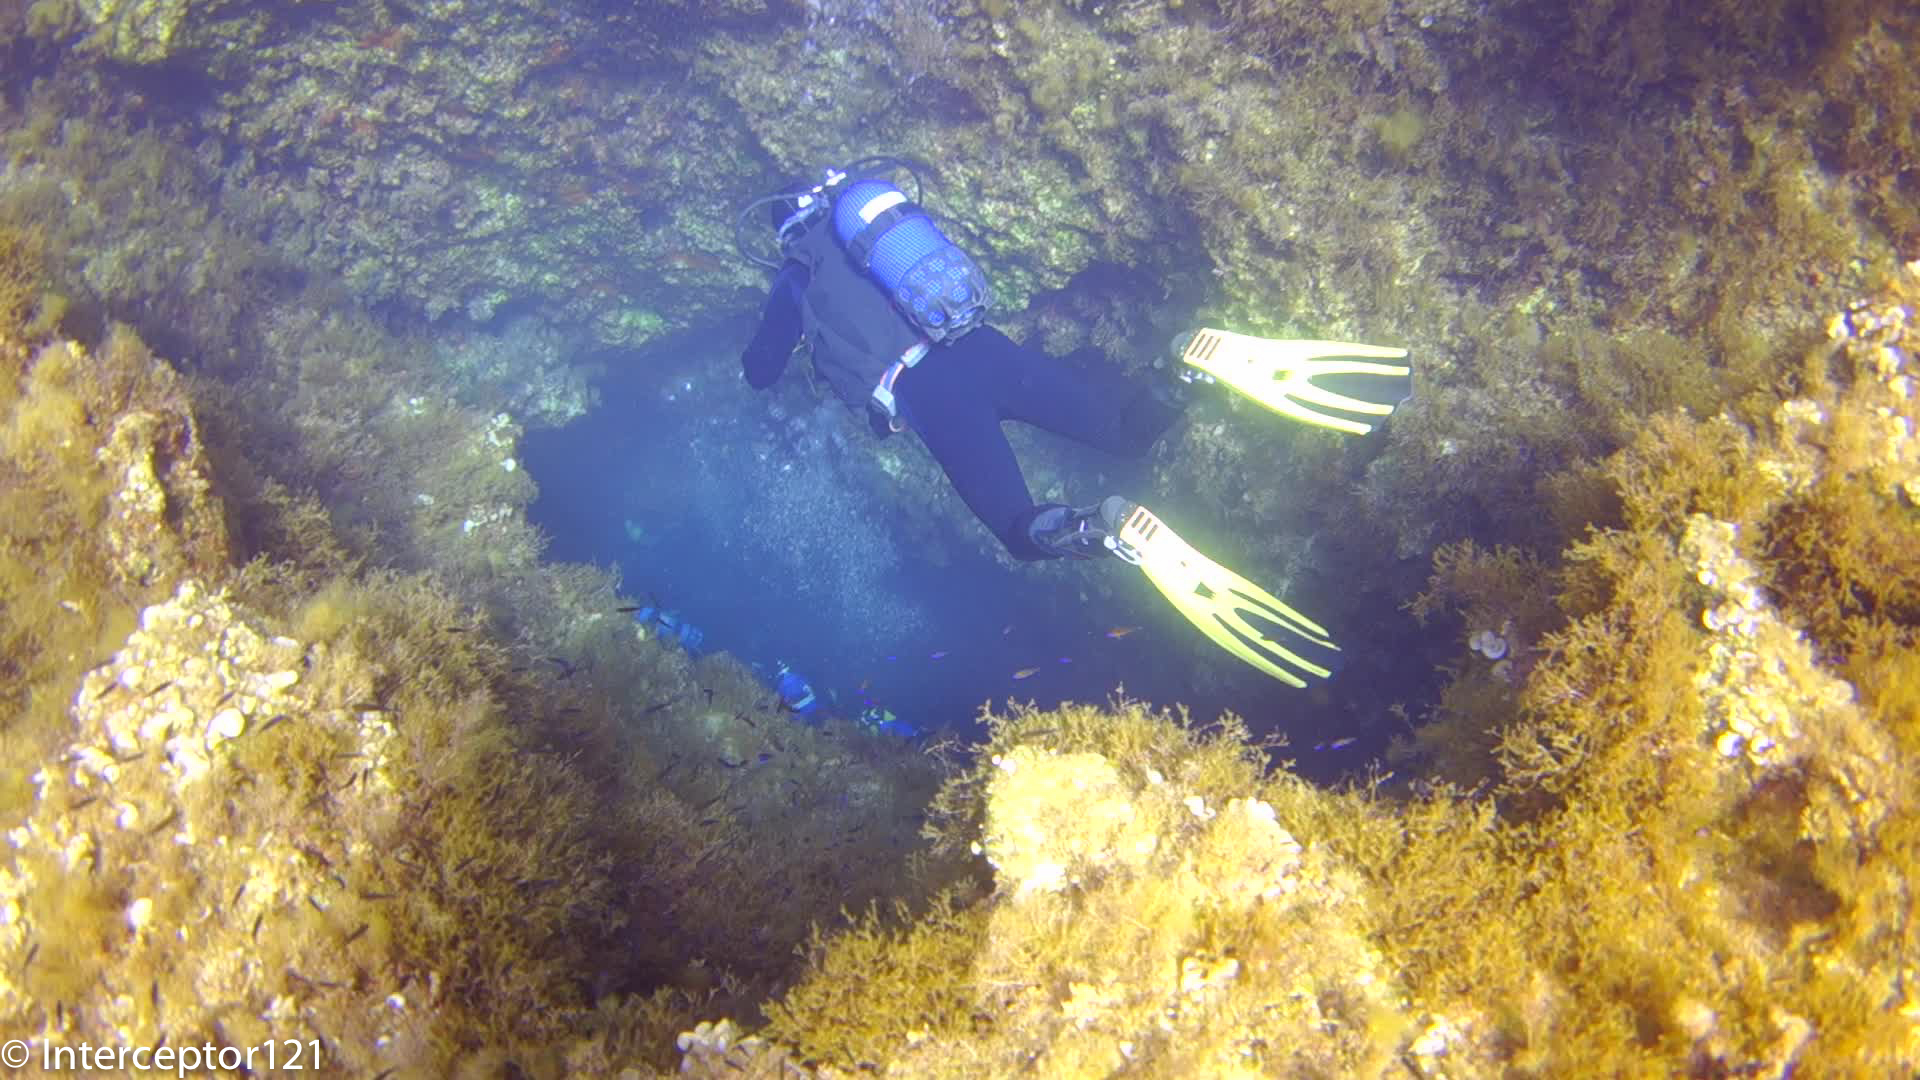
In cave – AWB no filter
I did a bit of analysis and the camera was operating for most at ISO200 with aperture around f/3.5 – f/4.0 which is really the sweet spot of the lens.
I did have some challenges using the UCL330 for some nudibranches that really required a stronger lens so they look a bit small, there was also surge so I had to fight with focus problems but all in all very happy.
Nudibranch – AWB UCL330
The longer working distance of the UCL330 (20-30 cm or 8″ to 1′) proved challenging on walls as you are too far to hang on to anything or use a stick. I will bear this in mind in the future.
For the close up shots I used steady shot active.
I also wanted to say that a few times the camera did manage to white balance properly however the results were not exciting and frankly not worth the hassle. Using the filter is just so much better with the auto white balance.
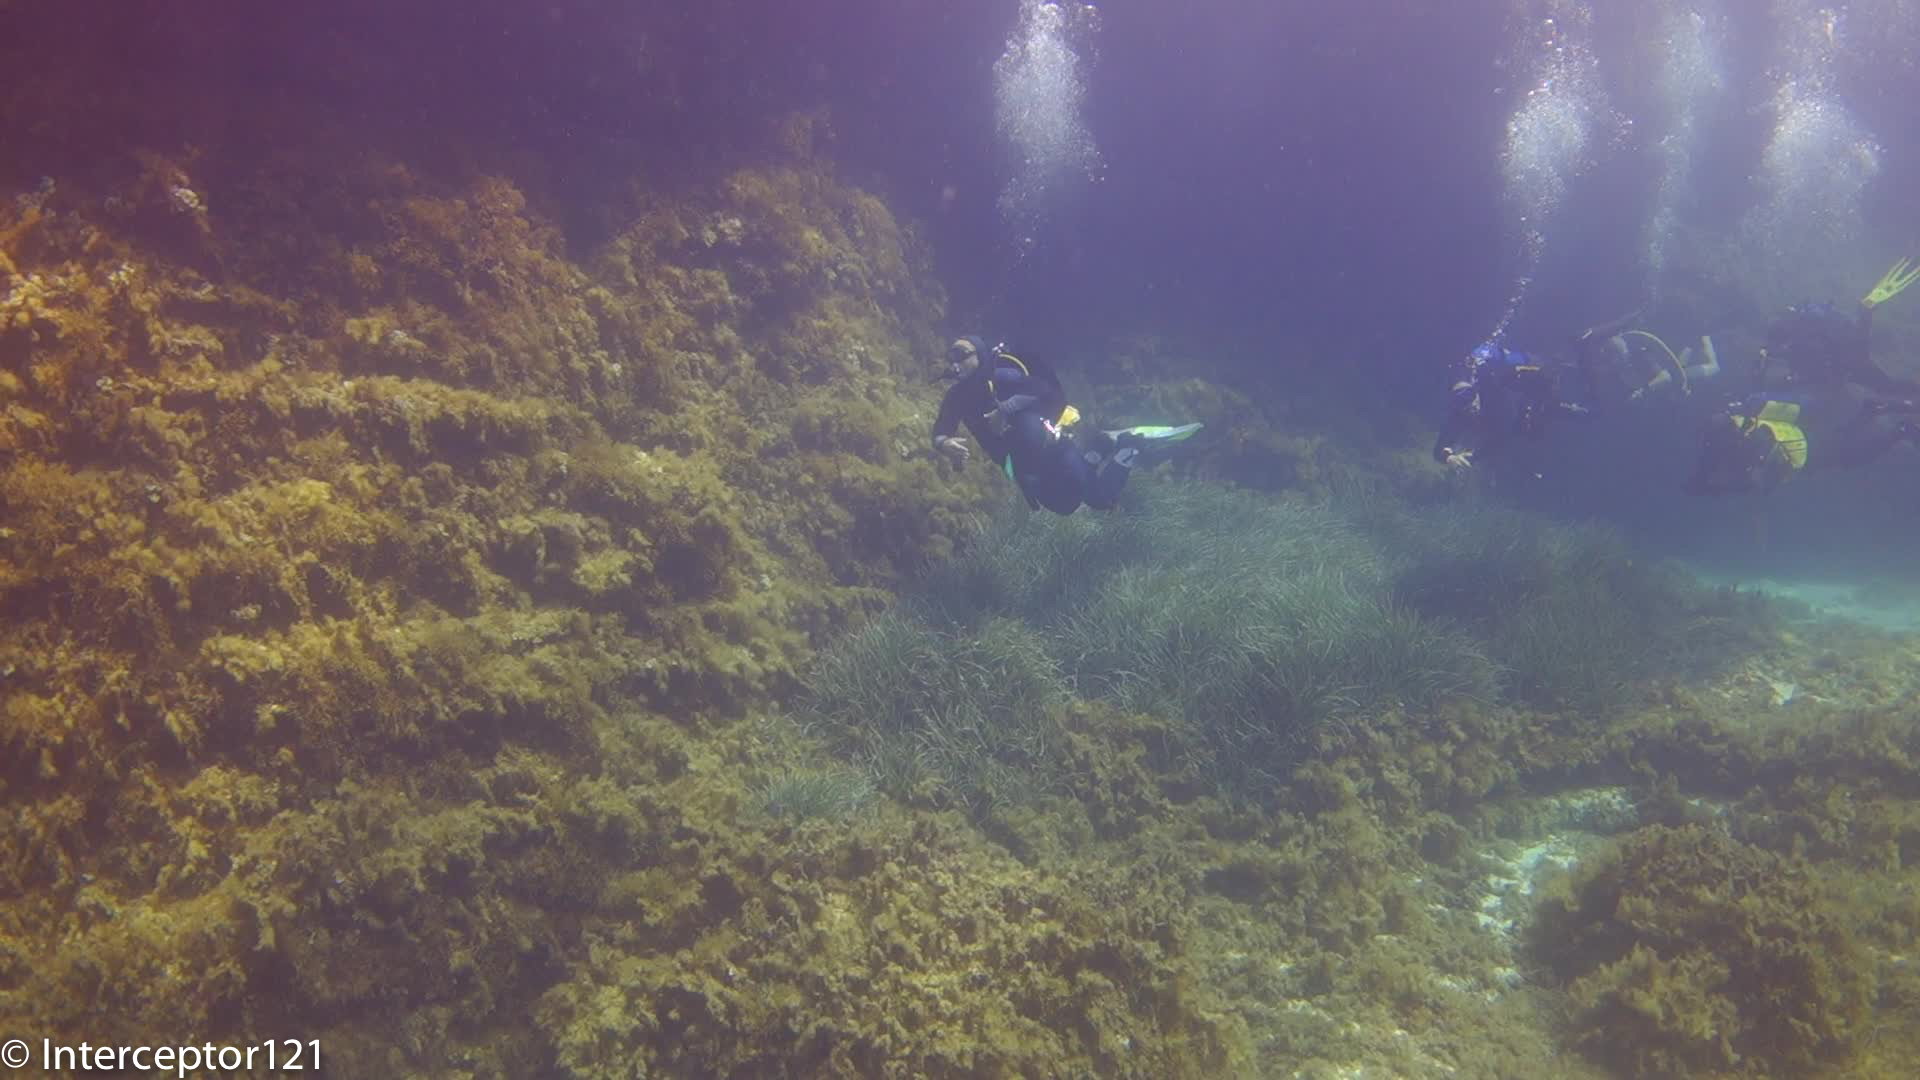
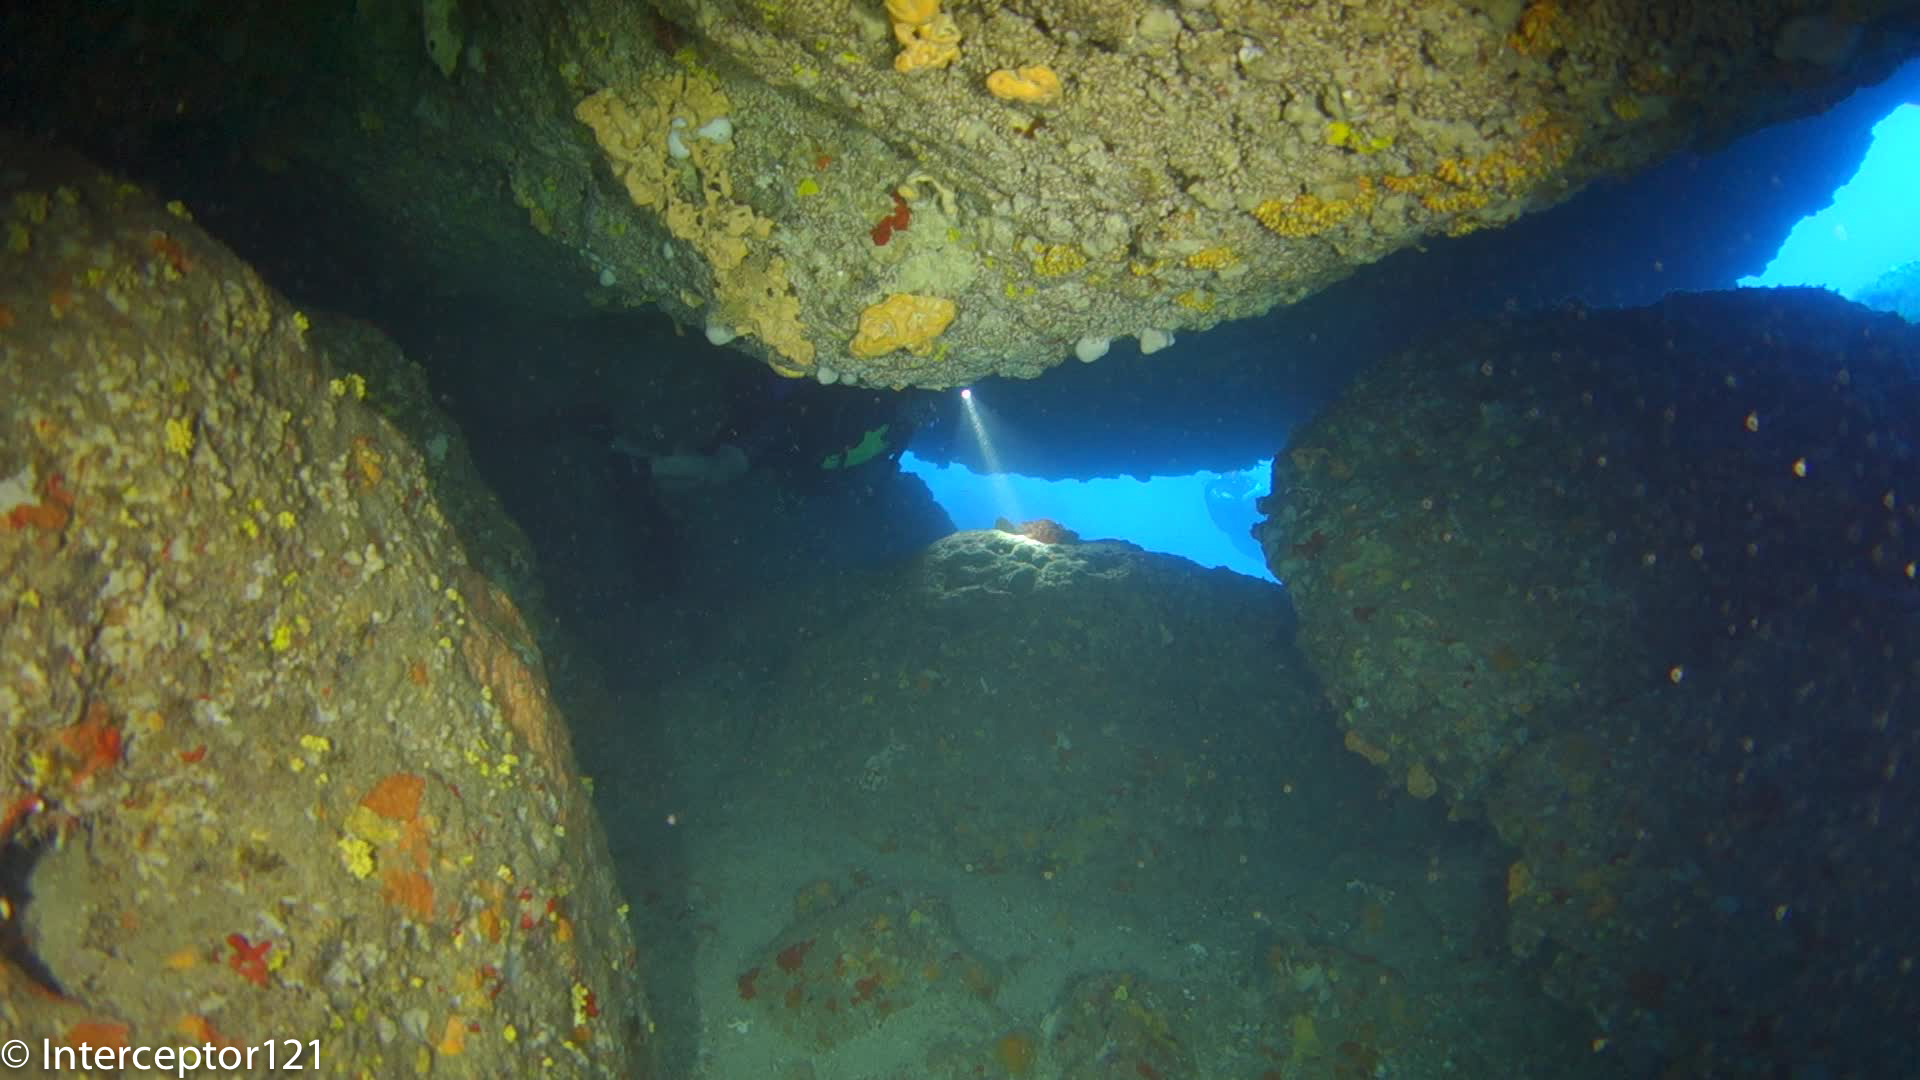
I am currently in Malta for few days relaxing and I manage to squeeze in some dives. The Mediterranean sea is nothing sensational (from a pure diving point of view) but does offer clear water, and some brisk thermoclines, and a combination of algae, blue water, caves and silvery fish that is challenging on the dynamic range of our little RX100.
The purpose of this trip is mostly to refine the video settings and go more in depth in few topics. I wanted to try specifically the following:
Metering modes
Creative modes
Stabiliser modes
Tracking focus
Medium size fish portraits
White balance
Caves and low light
Some of my settings will be the same and I am not intending to changed them those are:
Auto ISO: 160 – 800
DRO: Auto
Starting off with metering, the first attempt was to try and use the camera on 0 exposure compensation with centred weighted average metering.
Entering Cave Fairly Bright
Pretty soon I realised this gave issues of banding of the blue water, this was apparent not only in backlit shots but also in normal wide angle of fish in specific cases. So after dive number 1 I changed it to the standard -0.3 from dive 2.
I set a new creative style with contrast at -3 in the hope to recover detail and seem to be working fine with the shots still having plenty of contrast.
Lowered Constrast on -3
I also tried spot metering for close up but it makes no sense the video lights are too wide and ended up with burned highlights at the edges of the frame so back to centred weighted average for close up shots.
Spot metering
So when it comes to metering my settings are:
Wide angle: multi area
Close up: centered weighted average
I did some tests with stabiliser in steadyshot mode, this gives back some field of view and the lens offers 100 degrees diagonal and 90 horizontal, I actually think a bit more anyway with fairly stable conditions this worked fine. At longer focal length for close up I am still using active mode.
Schooling Fish 100 fov
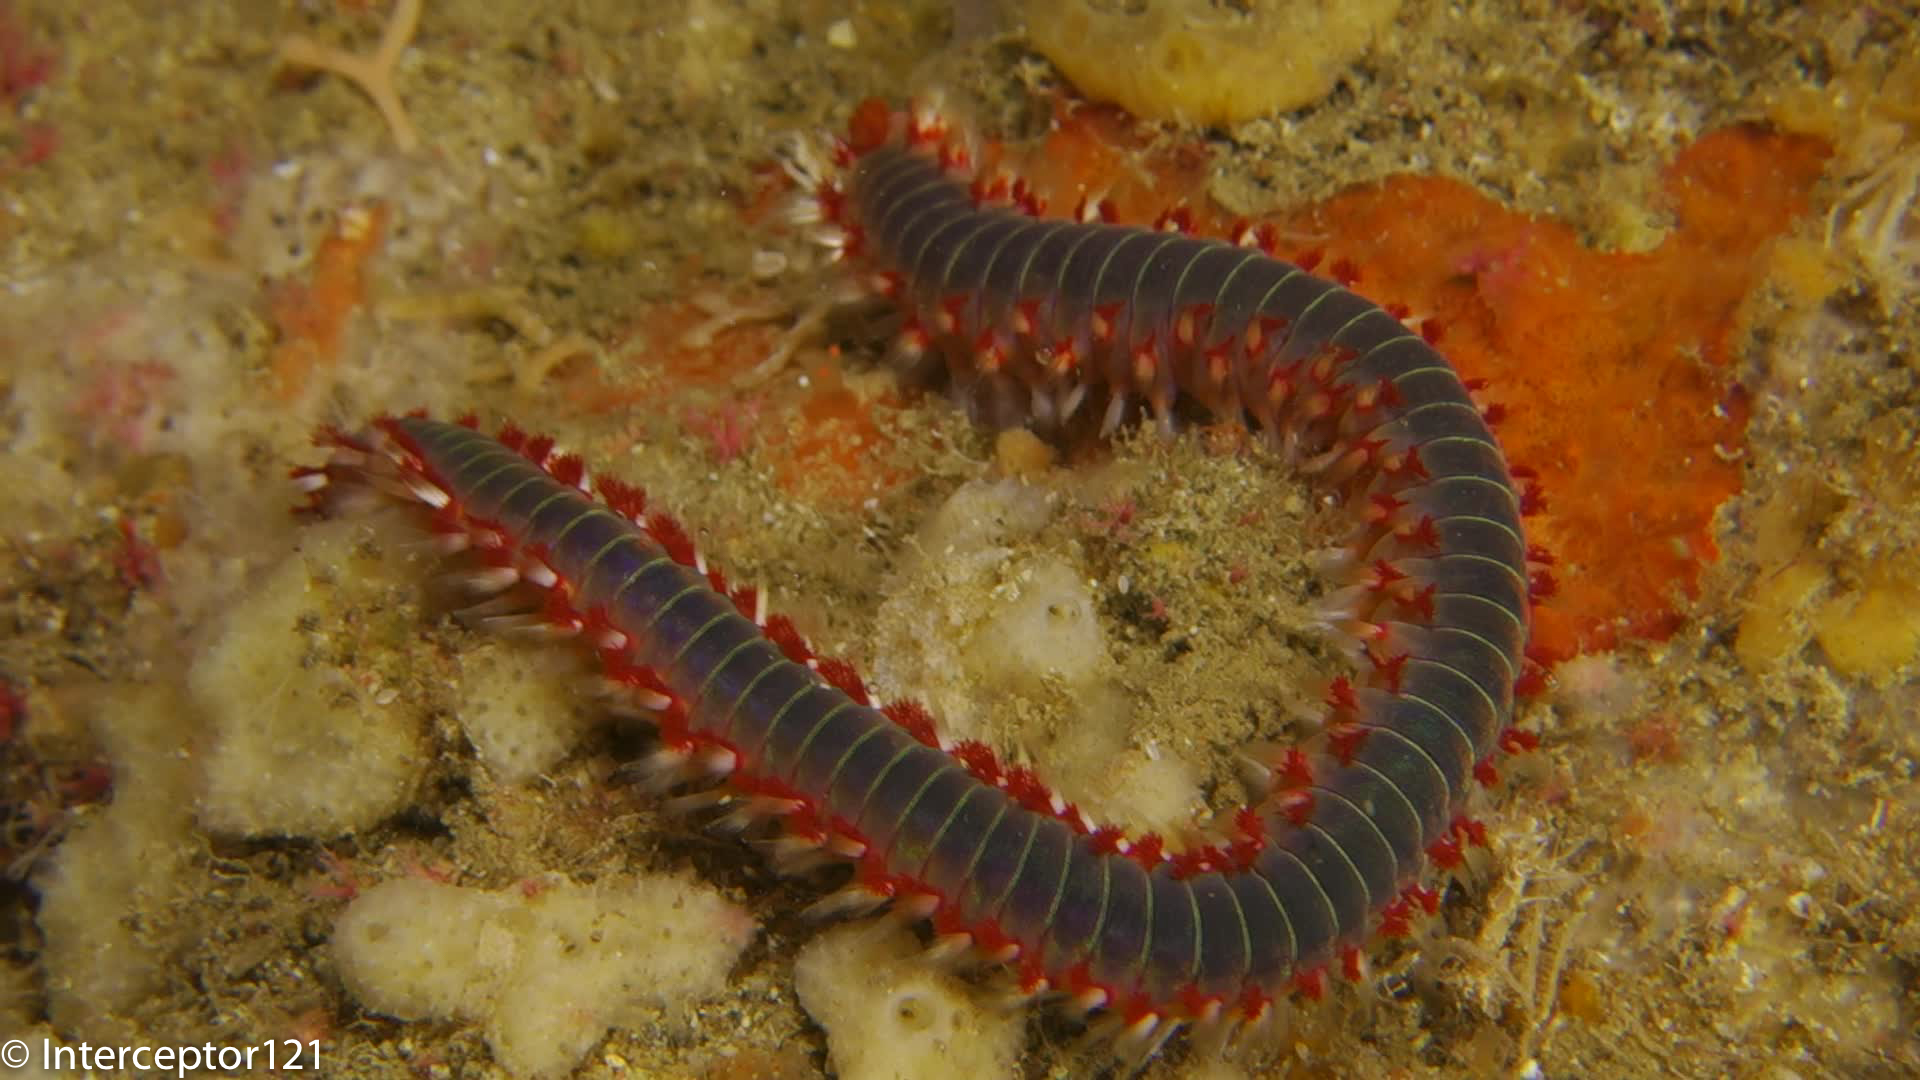
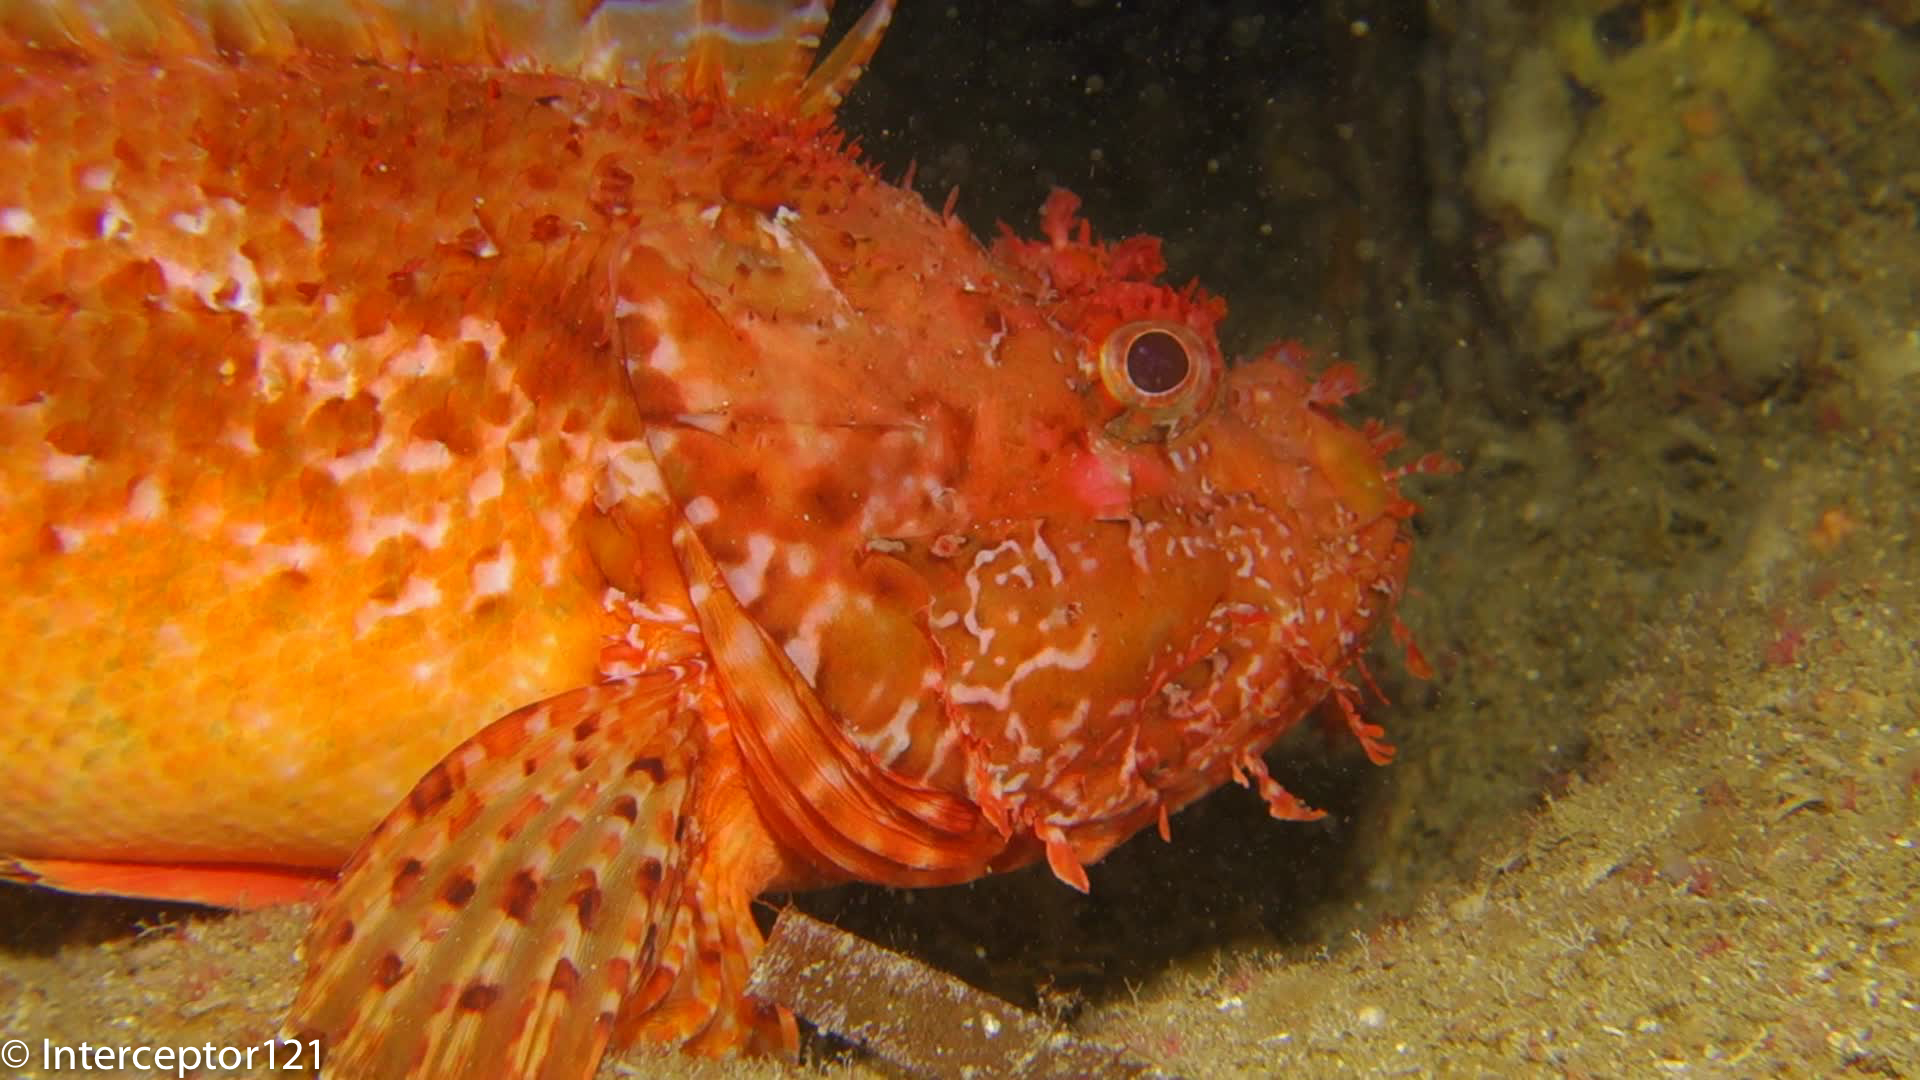
I have a +3 diopter for this test as I realised in my last still trip I don’t have a lens for medium size fish, the lens worked very well and I also tried the camera tracking focus but it seems it won’t work with fireworms or similar. So either keep normal focus or manual with peaking.
Tracking focus failRock FIsh UCL 330
White balance has been a subject of discussion, I did manage this time to white balance a few times but to be honest it was not worth the effort there is a better correction of the purple hue of the filter but this can be corrected setting Green to 1 or 2 in AWB. I also changed the AWB to include a correction with Amber 1 as per examples. Very happy with the results I think this is the final set up with this filter lacking a proper orange filter.
AWB corrected
Shooting in low light was rewarding with ISO maxed out at 800. I am becoming less and less a fan of video lights in cave due to the amount of backscatter am getting. I think I will default at using the lights as dive torches instead of wide beams of even leaving them off for effect.
Once again Sony has updated their RX100 camera with a stunning new release that will surely be a market leader at least until the release of the new promised Panasonic large compact sensor with 4K video recording.
So the question is again is it worth throwing our hard-earned money to this new model and housing or should we stay with what we have got? The Mark I and II are still available at reduced price though it is becoming harder to find Mark I housing as new.
The answer to the question is: it depends on what you are planning to do with your RX100, for some users an upgrade may not be required or even not advised let’s see why. no don’t waste any time with the Mark III.
Every time a new camera is released and reviewed I get a bunch of emails with subject: New Camera XYZ what do you think?
The best reviews you find online are made by sites that specialize in land photography and no consideration is given to underwater use. So not necessarily a camera that is a top performer on land will remain such underwater as this depends on specific characteristics that may be different or even opposite to land requirements.
So those reviews cannot be taken as they are they need interpretation. Personally I use two sites for camera reviews imaging resource and dxo mark I use the first to understand ergonomics, performance and to compare images with other cameras side to side, and the second to check sensor quality and lenses. Imaging resource has made a good article to compare the various RX100 on land read it here
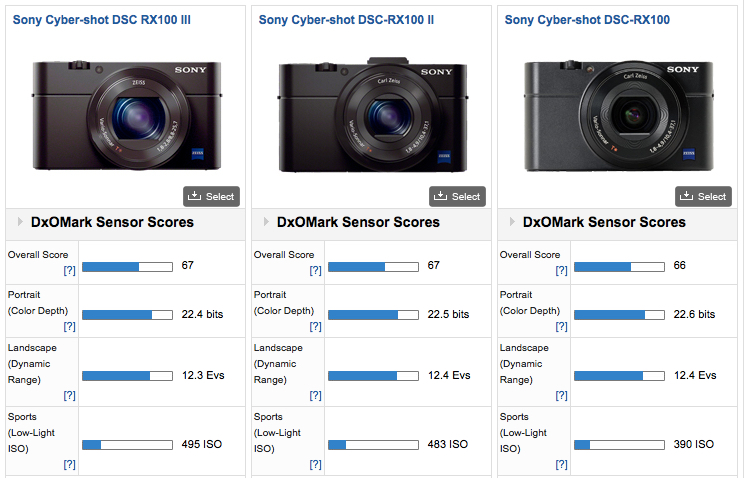
If you look at a sensor comparison on DXOMark you would conclude that there is no need to upgrade at all if you use your camera primarily for still pictures as the sensor are practically identical in performance as this table demonstrates:
RX100 Sensor Ratings
As you can see the differences in dynamic range, color depth or ISO are pretty much intangible.
However there are other metrics that are also important let’s see which ones and why.
Flash Recycling
We want our camera on board flash to recycle quickly after a full dump as the RX100 has only TTL flash and the flash can’t set to a minimum manual setting without consequences. Those are the flash recycling times at full output (a full dump will always occur when you don’t aim strobes directly at the subject for example wide angle)
Mark I: 7.2 seconds
Mark II” 4.4 seconds
Mark III: 3.3 seconds
The Mark III is pretty quick and the Mark II is acceptable the first release is definitely too slow.
Minimum Capture Area & Zoom
What is the smallest area that can be captured at wide end at the closest focus distance? This gives you an idea of out of the box close up performance
I do not have precise metrics yet but looking at comparable images on imaging-resource seems like the Mark III is worse than the Mark I and II of at least 20% with a capture width around 90mm versus the already not very good 76mm of the Mark I and II.
To fix this issue we use close up lenses in water that fix to a great extent the focal length and then zoom in to achieve magnification which means longer camera lens more magnification I roughly estimate that the Mark III will be worse of a factor of 0.7x so things will look 1.4x bigger with the Mark III this is terrible news for macro shooters as it means you need to be on top of the subject to fill the frame, this is in some cases not possible.
I have estimated that you need 11 diopters to achieve 1:1 macro so the Subsee 10 and Inon UCL100 that gave real macro on the Mark I and II won’t be sufficient. With two UCL-165 or Dyron 7 you are looking at 2.58″ or 6.5 cm from the back of the first close up lens that means you will be right on top of the subject which is not really an option.
Update July 18th: Nauticam has confirmed that even with their SMC lens the most powerful diopter on the market the capture area is 38mm wide so does NOT achieve 1:1 macro as I suggested…
Lens Focal Range
The new mark III has a 24-70mm lens compared to the 28-100mm of the Mark I and II what does this mean?
Less magnification with close up lenses and no real 1:1 macro
Vignetting or even not possible to use fisheye lenses designed for 28mm lenses
This means that with the Mark III your scene selection will be restricted compared to the 150 to 24 of the mark I and II.
Update 23 July I have done some tests that confirm my suspicions please look at the following frames. The Mark III once zoom to 28mm actually works fine with the Mark II housing except the power button.
RX100 Mark III with Inon UCL-165 Close up lens
With a single Inon UCL-165 (+6.06 in water) the minimum capture area width is 5.4 cm which is bigger than the Mark II 4.8 cm. Not only that the distance from the top of the lens is only 9cm.
With stacked UCL-165+UCL330 total power 9.09 diopter we get this
Stacked UCL-165+UCL330
4.4 cm width however we start running into problems as the minimum distance from the lens is only 4cm.
We finally achieve 1:1 with two stacked UCL-165 however the distance from the top of the lens is 3cm definitely too little
two UCL-165 stacked
I have also tried the Mark III at 28mm and it still vignettes with the Inon UWL-H100 in air until around 30mm. Instead the old UWL-100 28AD is fine at 28mm either way image looks narrower than with the Mark II but this may be an issue with the old housing.
So basically no macro with the Mark III and no decent fisheye as expected.
Underwater Photography Conclusion
Due to the reasons above the best camera for the job is the RX100 Mark II, with the Mark I coming close but being penalized by the strobe recycle time, the Mark III really is not an option for the serious shooter due to limitations of the lens.
Let’s have a look at some other features of the Mark III that are not relevant for stills as much as they are for video.
ND filter
Shooting at the surface with plenty of ambient light or on land can create problems if you want to follow the 180 shutter rule, the ND filter of the Mark III ensures your footage will be smooth on land and in water. Take into account that on land you can apply optical ND filters (I have it for the Mark II) so this is really for underwater use when you are shooting at 1/50 or 1/60 shutter speed and the scene is too bright when you hit f/11 and the lowest possible ISO. Having now tested this feature I confirm it is really valid on land on a bright day to keep the aperture wide.
Clear Image Zoom
This is a special digital zoom with edge enhancement that only worked on JPEG stills on Mark I and II but is now available on video on the mark III. This means an additional 2x zoom is available bringing the focal length to 140mm that is more than adequate for macro. This is not an option on RAW images so irrelevant for still users.
23 July update Having done some tests for macro video (as stacking two diopters is not an option) the image quality suffers but anyway this is all you are left with lacking any other options.
Clear image zoom 1.5x on single UCL-165
Image stabilizer
The Mark III adds a further stabilizer mode with additional crop that takes the lens to 96mm equivalent in video mode. This is well worth for super macro hand-held footage and effectively provides an option where you can either use the super steady shot and no clear image zoom when hand-held or leave on only the optical stabilizer and use clear image zoom. If you shoot macro on walls and not on flat sand this is a well worth feature.
Update 23 July 2014
Following a side by side comparison you can find on this link
It follows that there is really no 5 axis stabilisation and only an additional mode with more crop with correction for rolling shutter that anyway does not really work!
Full Sensor Readout Video
The mark III reads the whole sensor not just alternate lines when capturing video this increases should increase the resolution to a great degree and increases the perceived resolution and clarity of your videos. However this does not seem to correspond to real life tests. See this sample with a side by side comparison the Mark III looks visibly worse than its predecessor even on the higher bitrate XAVC!!!
Video Formats
The Mark II introduced a well welcomes 24 Mbps 24/25 fps mode now the Mark III introduces a 50 Mbps mode in XAVC (that can be rewrapped into normal MP4) that produces even better footage although it will be quite demanding on your workstation and most likely some of your home devices will struggle playing the files (my Apple Tv 3rd generation only plays up to 25 Mbps) when uploading files online this will downgrade to 8 Mbps so won’t matter unless you have a good player at home. improves nothing and requires manipulation as the files are actually not MP4 compliant as they have WAV audio (!) they are also inside the AVCHD folder which is painful. As seen above seems like the encoding has got worse on the AVCHD files and only the higher bitrate compares but still does not match the mark II at the lower 24 Mbps!!!
HDMI connection
You can now connect the Mark III to an external HDMI recorder if you are into that kind of semi pro usage. For the normal user this is not relevant: if you are into spending that money probably you have already a DSLR or a Panasonic GH4.
Video Auto Focus
The auto focus in video has got worse you can see an example in the stabiliser test, and actually plenty of frames are blurred on the mark III. Awful!
Underwater Video Conclusion
The Mark I with only a 28 Mbps 50/60p mode is definitely a poor choice, the Mark II is acceptable to most users. and the mark III promises even better performance if you are a serious video user and have another camera to take pictures the Mark III may be well worth it.
The Mark III despite some useful feature is actually a let down and perform worse in practical terms than the mark II that remains my camera of choice.
Summary
If you have a Mark I camera and are frustrated with flash recycling you should be looking at a cheaper upgrade to the Mark II.
If you have a Mark II and your priority is photography upgrading is NOT recommended.
If you don’t have any RX100 get yourself a Mark II or wait for the new Panasonic as the Mark III is pretty much a pile of crap.
Is it the first time I am actually sending back a camera and invoking consumer rights but when I spoke to the camera shop they told me they had other returns and this is not really an upgrade!!!
The above image was shot at 100mm equivalent with one diopter with the RX100 Mark II. You won’t be able to fill the frame with the same close up lens and the Mark III camera
The time finally came for our trip to Galapagos and I was ready with a set of think rubber suits to overcome the cold water. I just bought a 5mm Oneill Sector (wonderful suit) a 3mm hooded vest, kevlar gloves and a 5mm 4th Element short john. Well the short john was not used and for most I used just the wetsuit and a set of O’Neill Thermo X unders (very recommended) as El Nino is coming and the water was warmer at 25-27C or 77-80F.
This means lack of schooling hammerhead at shallow depth close to the reef, they were in the blue. We had however our good dose of schooling barracuda, tuna (in the 1000s) and even galapagos sharks
This is the video I produced
If you have problems with playing in your country use vimeo instead
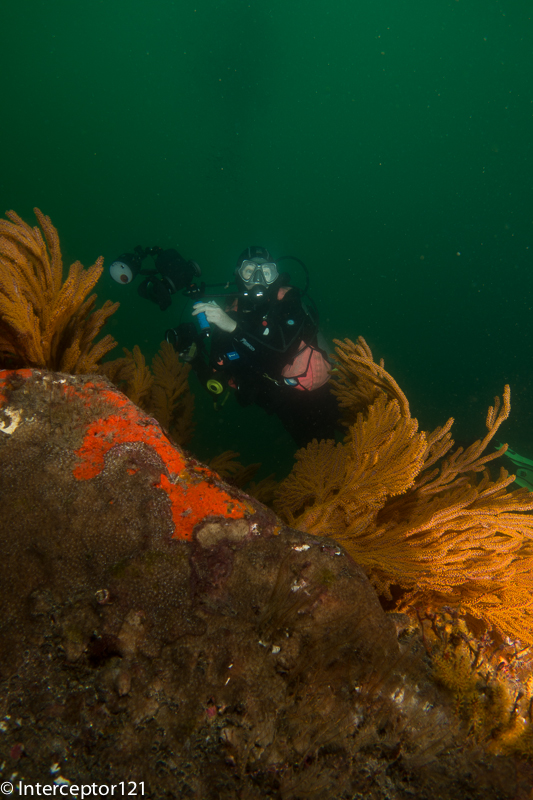
The conditions were difficult with low visibility and in some sites very green water as you can see here
Questions will come about what I used etc etc so here is the list
Sony RX100II in Nauticam housing
FIx adapter for Inon LD mount
Inon UWL-H100
Deeproof blue water filter
Sola video lights 1200 (just few shots of the barracudas and some close ups)
Combination of arms and sometimes no arms
Ultralight tray TR-DM with extension and handles
The video has been produced with iMovie 9.0.4 no stabilization performed except the scene with the moray eels mating (very mild)
I shot the whole trip in shutter priority 1/50th of a second in the 25 fps 24 Mbps format. After some tests at home I have decided to use this mode as I can’t physically play the 50 fps files the camera produces on any of my devices differently. The 25 fps gives a film look and very smooth footage. This format is only available on the RX100II and not on the original RX100 so the consideration I made at the time for video settings of the RX100 remain valid.
The benefit of 1/50th shutter speed is a full f/stop of light the disbenefit is that at the surface and for backlit shots this is too slow, in those cases I go back to program mode or increase shutter speed to 1/100 or 1/200 or more.
For what concerns the editing I import the raw files in iMovie without using the conversion and then export with x264 using very slow preset and level 4.0 compatibility to use it with my appleTv.
I do minimal color correction in some cases I had to eliminate the red color cast of the filter when shooting upwards, to do that I change the white balance to top yellow until i remove the cast.
In some cases I had to put the green gain to the max for the same problem but in all other cases there is NO color correction in post.
When you work with AVCHD cameras the footage is compressed and the key is to get it right in camera.
As Galapagos conditions were challenging, although less than I expected, I used gloves in some dives to hang on to the barnacles and I also modified the set up to completely eliminate the lights.
I would dive with two 3″ segments and two 6″ Inon Mega float arms when I had the lights on and for other shots in ambient light I would have this set up here that looks odd but it is very effective and almost neutral at only 120 grams in water. The position of the floats means the camera stays upright at all times.
Compact tray for ambient light
I would put a single Sola light on top of the housing not for video purpose but to signal the dive master when I was a bit far in the murky or dark waters. I used this set up on almost all blue water dives (Darwin and Wolf) and the normal set up with lights for the South and West sites with murky or green water.
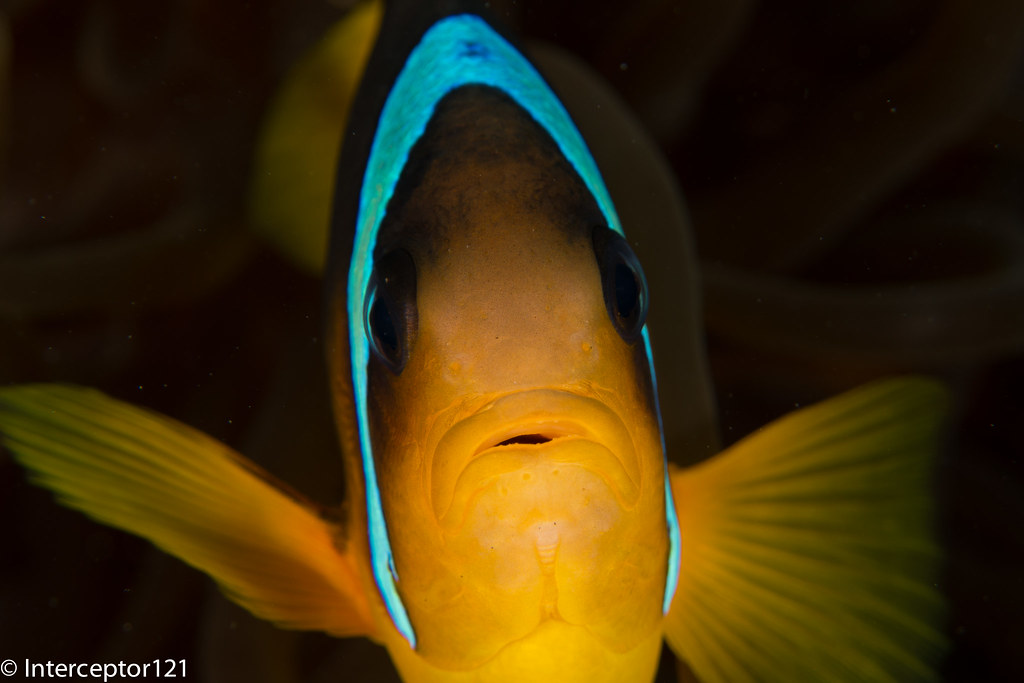
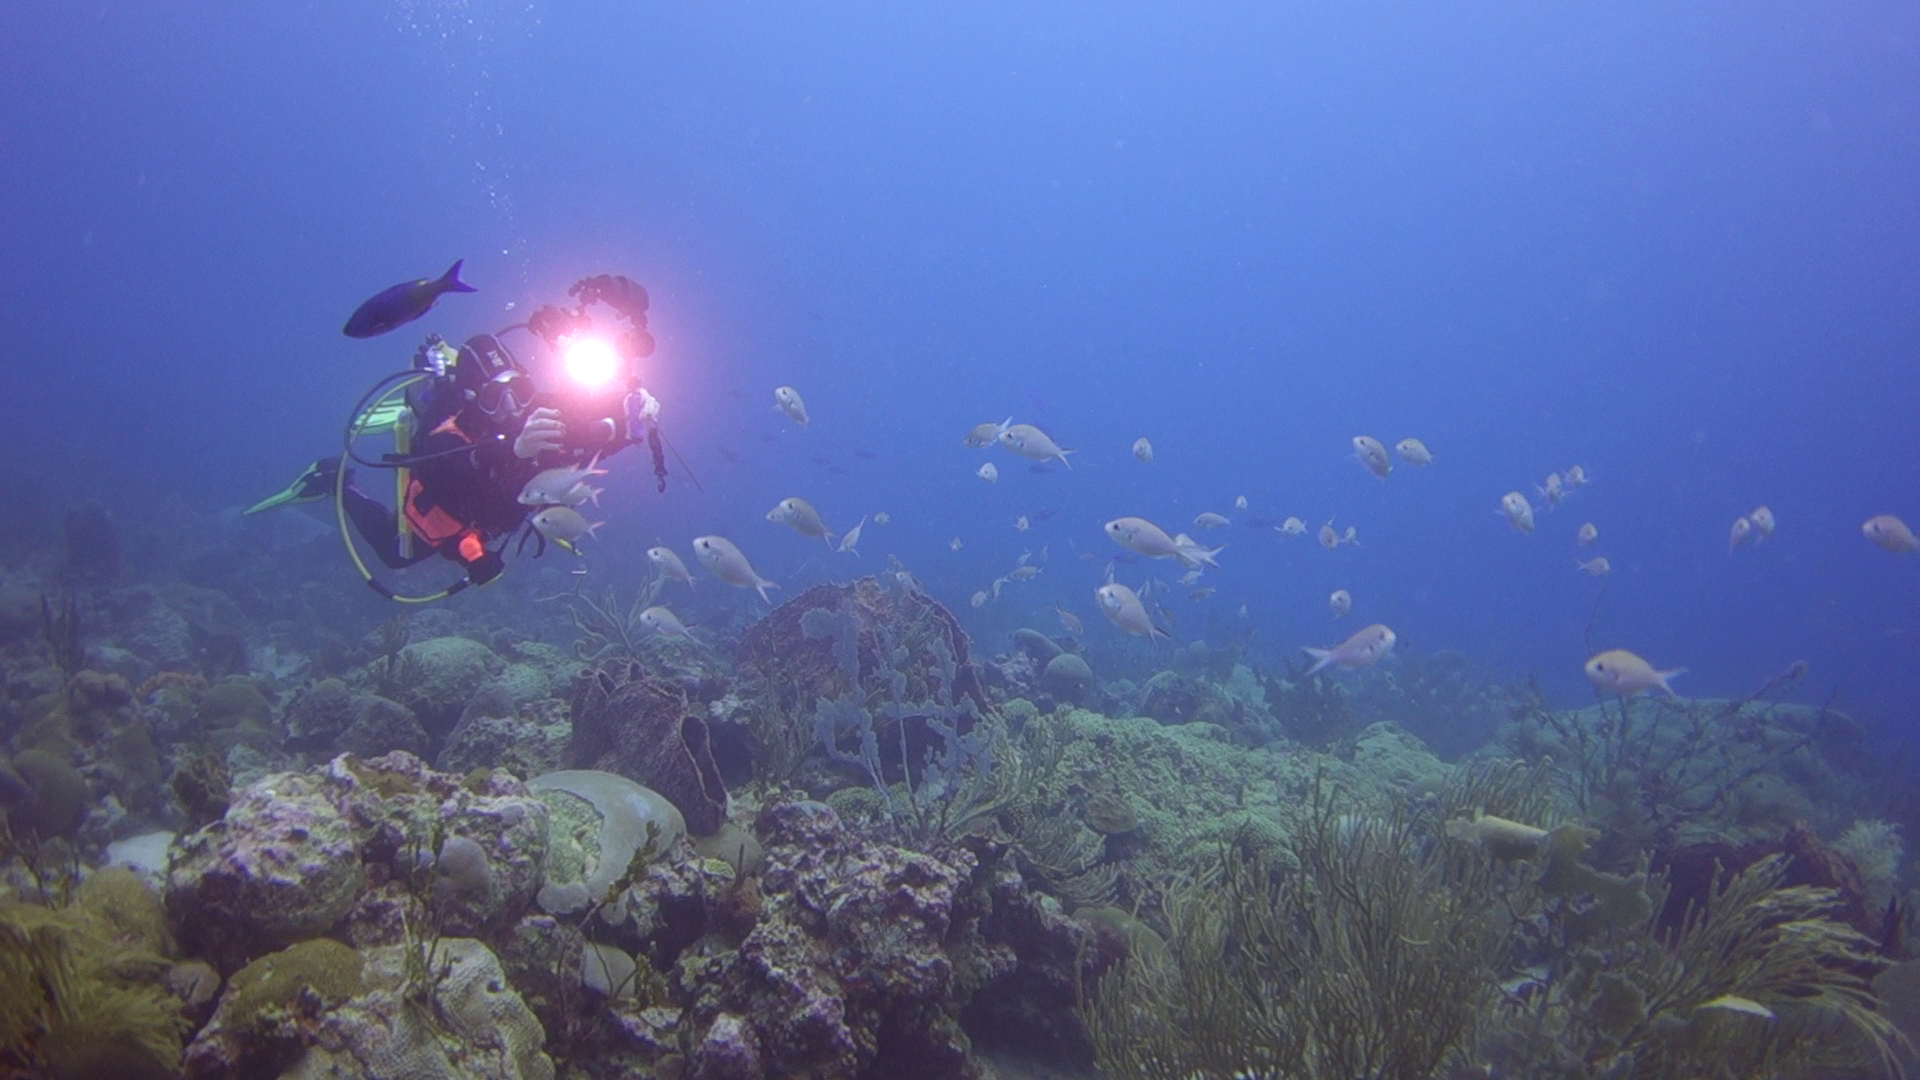
There will be a separate post on the photos, I did a total of 18 dives with the camera of which 4 where photo and 14 video. You can see an example in the featured image.
I have now ran some statistics on the final clip that I produced
I used a total of 41 video clips:
ISO average was 273 with the following breakdown
2 clips at 160
30 clips at 200
6 clips at 400
3 clips at 800
f/stop average was 3.1 hyperfocal distance on average 1.16 meters. So if I were able to shoot without filter I would have not gained anything in terms of sharpness as most subjects were further away
I would consider the Galapagos and the dive trip I did not the best in terms of brightness and visibility so I would conclude that the RX100II with the Inon UWL-H100 and a red filter is the best set up for wide angle video in terms of performance, ease of use and flexibility.
Over a year ago I wrote a set of posts for the RX100 and some of the quirks of this wonderful little camera.
Steadyshot – aka Image Stabilizer
The RX100 has a specific Active mode for video not available when taking stills. I described the differences between those two modes in this post
Everyone is so obsessed of having the widest possible field of view that other more important considerations are completely missed out.
If you have ever shot a video with a GoPro underwater you know how bad is the quality of the image in the corners, this is because the flat port combined with the gopro lens create many optical aberrations.
Our RX100, especially the original Mark I, also has an issue in the corners, this is not just an underwater issue is also true on land. The lens on the camera has a lot of distortion and when corrections are applied to the image this effectively creates corner softness.
When we add a wide angle lens the image quality in the corners deteriorates further especially if the lens is flat creating a lot of chromatic aberrations that you can see in pictures with a blue or yellow halo around the edges.
Standard Steadyshot
Now the good news the Active steady shot mode crops the image of a factor of 1.15x getting rid of the majority of the corner softness.
There is of course a price to pay which is the loss of some of the angle of view. According to my calculation if you use an Inon UWL-H100 you start from more than the declared 100.8º more around 104º in fact. When the active mode is on this drops to around 95º. Remember all those values represent the largest incident angle that means the diagonal field of view.
Active Steadyshot
A lens with 100º diagonal field of view means 90º horizontal. So after the active mode is engaged our horizontal field of view looks more like 84º which is equivalent to a 20mm lens. This is sufficient for most close wide angle shots and plenty for ambient light videos of large fish or wrecks. I generally suggest to keep the Active mode on, of course if you can be in a fixed position and hold the camera really steady you can also use the standard mode and obtain more field of view. There is a chance though that you will need to crop the extra field of view if you need to stabilize in the editing phase.
For macro shots without a tripod the steadyshot is a must and helps greatly. I do not even see a reason to take it off if you have a tripod as the RX100 does not have a particularly small capture area.
Digital Zoom
This brings the second subject: digital zoom, if you shoot pictures you avoid it as what you are doing is to crop the image, something you can do yourself in processing. In video though there is very little quality loss as we use just 2 megapixels of the 20 of the RX100 camera. In my test you can use digital zoom until the 2x multiplier is reached, this corresponds to 7.2x magnification and see no noticeable degradation in the image quality. The other benefit is that the depth of field is the same despite the magnification so you can save yourself stacking two diopters with all the difficulties that follow in terms of focus.
Max Optical Zoom with UCL-165
Digital zoom is always on in video mode and I recommend to use it with a single close up lens before embarking on dual diopters or a strong single diopter. Also take into account that with a single +6 diopter your working distance is around 4″ which is ideal for most critters except pygmy seahorse and bobtail squid or some shrimps.
Digital Zoom 2x with UCL-165
Video Lights
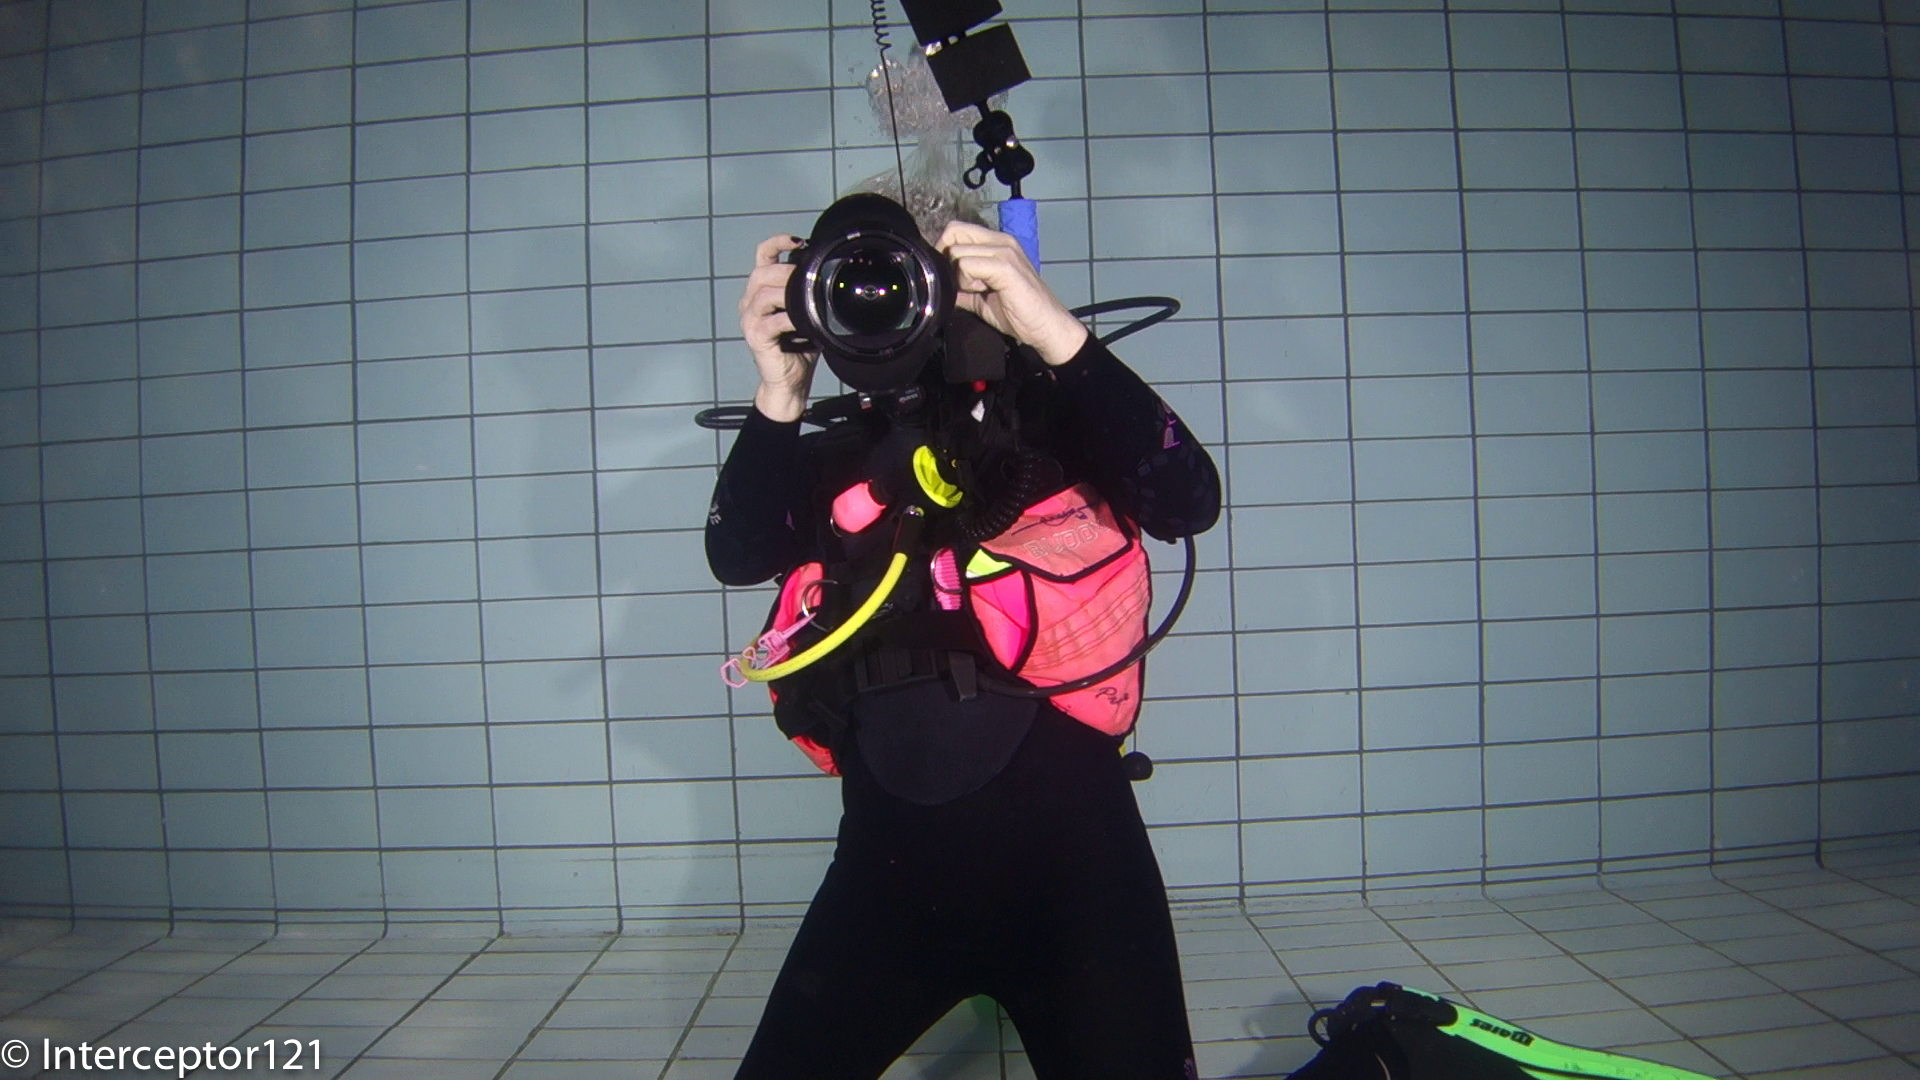
In another post I have explained that getting hung up about light angle coverage is not really the only thing to consider, there is also luminous flux and quality of light. With my Sola 1200 I can cover something between 2 and 4 feet away with decent results further away is just back scatter. Generally this is ok for some close portrait work and close wide angle and of course not sufficient to cover part of a wreck or much larger subjects. You may decide not to bother at all with lights for wide angle and just render your deep wreck dives in black and white in this case consider that a pair of Sola Dive 800 at $399 are a high quality macro set up, function as dive light and provide some decent close wide angle portrait illumination. For macro shots you need much less than that, I set my fill light at minimum (300 lumens) and the main light at 2/3 which is 600 lumens, I can shoot at f/11 with this light intensity. You can see me shooting in the feature image.
So after a few months since I got the Nauticam housing I finally had the time to get in the water and try it on.
I was in Barbados for a week and although the diving was not exactly outstanding I did have enough to test the camera behavior.
The link to the videos are here for YouTube at 1080p
or if you prefer Vimeo at 720p
The footage was all taken at 1080p50 the highest mode of the RX100. The RX1oo can work in both PAL and NTSC standard but I chose the PAL mode just to avoid the annoying NTSC message at startup. The clip has been edited with iMovie 9.0.9 and then exported in 1080p25 using Xencoder codec for quicktime in high profile. Youtube then reconverts it to its own specifications, but at least I have the highest possible starting point.
As mentioned the RX100 shoots at shutter speed of 1/100 in 50p mode and this suited me fine in case I wanted to produce a 60p clip for viewing on the computer as currently no online system supports it.
As discussed in the previous post I shot all wide angle in camera Program mode. This allowed me to use the left control wheel button to call the white balance set menu that in video is not available. I set the picture format to 16:9 so that would show similar on the screen. I did notice that when I actually started the movie recording the crop of the active steadyshot kicked in with a reduction of field of view of around 9 degrees or a 1.14 zoom equivalent.
However the active steady shot was well worth it as I have not used any stabilization for any part of this clip and therefore not introduced any extra cropping.
The wide angle shots with the RX100 are an absolute breeze when you use a filter and there is no need for custom white balance until it gets too deep to actually use a filter. I struggled getting decent results with custom white balance, the 9900 K error came pretty much every time except when in shallow water and balancing on sand. Also the results were off with too much magenta tint to the point I had always to correct it.
Ultimately I kept the filter and the camera in Auto White balance and did not bother doing a custom reading at all. The results were excellent.
SS Stavronikita AWB
In deeper water the filter started making the image a bit dark so I took it off and used a temperature setting of 9900K with Magenta and Amber at the maximum.
For close up at distances over 20cm I still shot in program and had good results. When getting super close or macro I used Movie mode in Aperture priority mode with aperture set at f/11. Towards the end of the clip you can see a shot of a small pink frogfish that is done like that. The close up on the eye is shot with two stacked Inon UCL165 the depth of field is really small as you can see but still workable considering I hand held the camera at all time.
Pink Frogfish f/11
When I shot this arrow crab I had left the camera in program mode so it chose an aperture of f/5.6 you can see that whilst the mouth is in focus the arrow is not
Arrow Crab f/5.6
Similar situation with the pedersen shrimp where not everything is sharp in focus
Pedersen Shrimp f/5.6
Obviously I am being very exigent with my footage and in normal condition this is already good to very good.
So what I liked and what I did not like about the RX100 Mark II:
I liked:
The ergonomics and ease of use are outstanding
The camera performs incredibly well with a filter in auto white balance
The manual focus with peaking works extremely well
Dynamic range and colors are outstanding and not just for a compact
Image crisp even in the corners at f/1.8 compared to the Mark I this is extremely significant
The active stabilizer was great and meant to manipulation in post
Battery life is incredible
Performance in low light is excellent and better than the Mark I the camera never reached the ISO MAX of 800 I had set hitting a top of 640 at 30 meters
Autofocus at wide end in bright conditions is superb
The only think I hated was the custom white balance results an absolute disgrace, to the point that there is no benefit doing it. Not only that the few parts of the clip I had used it and correct it were still a bit off and required correction in post to a small extent.
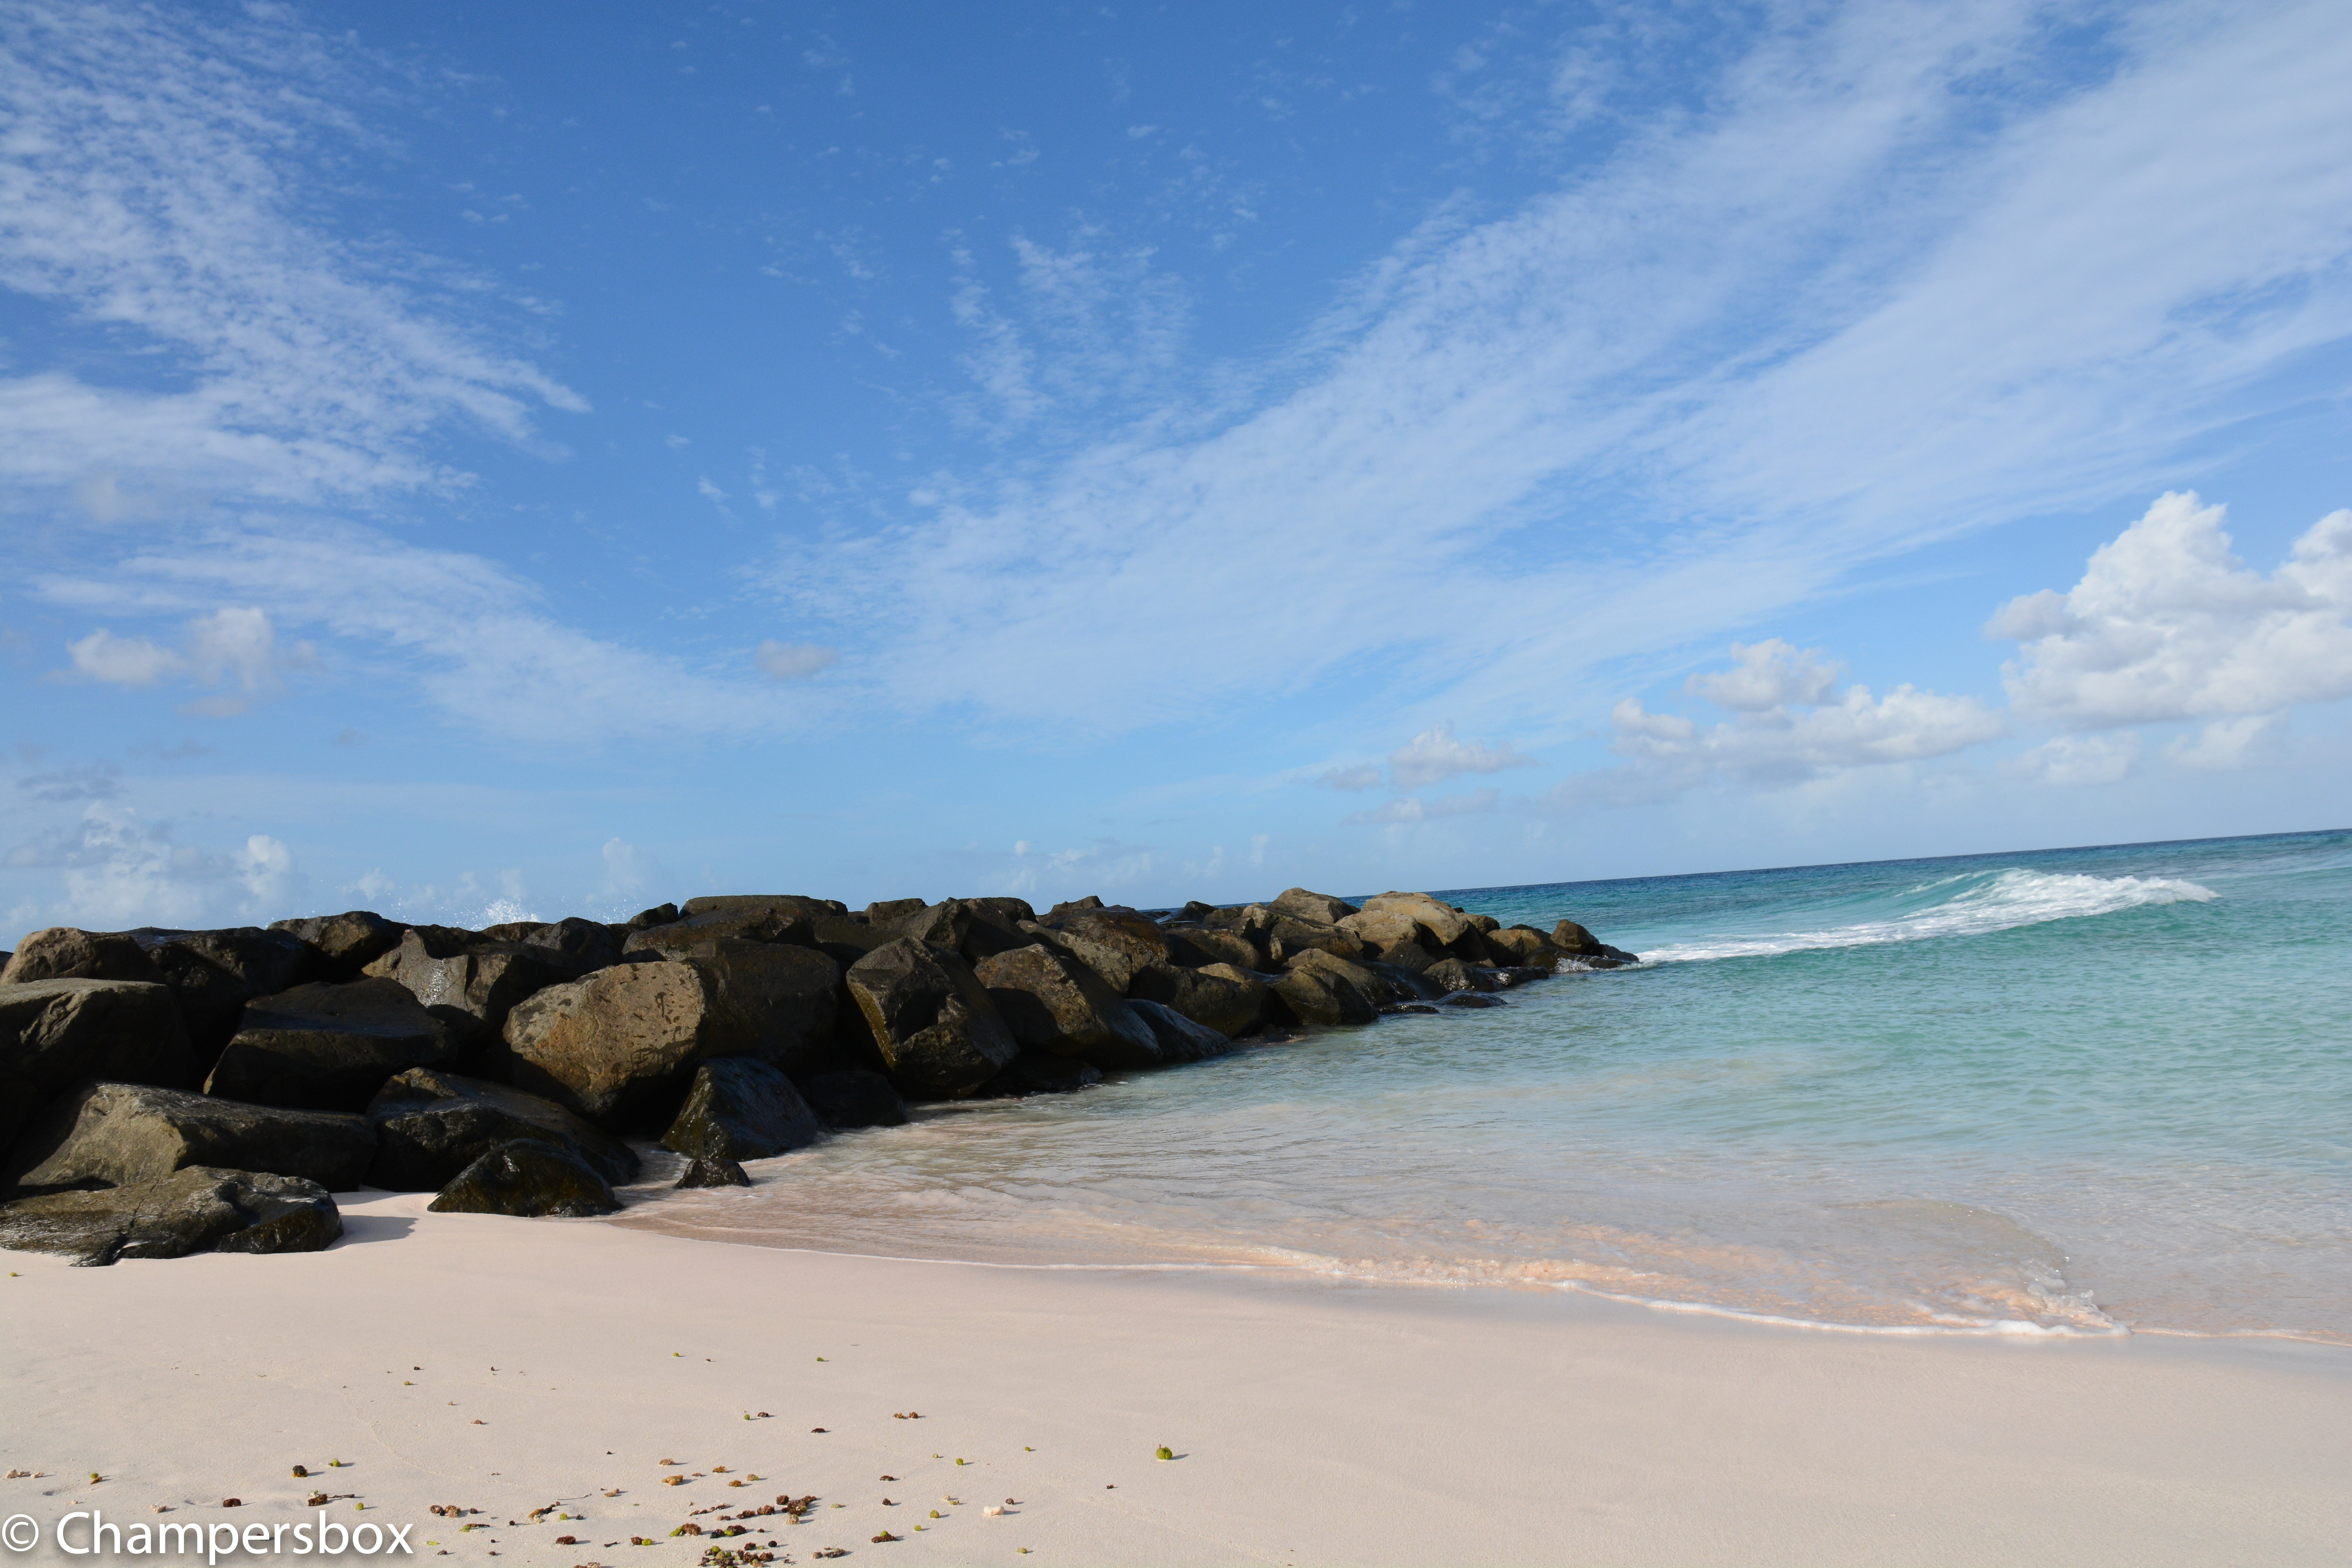
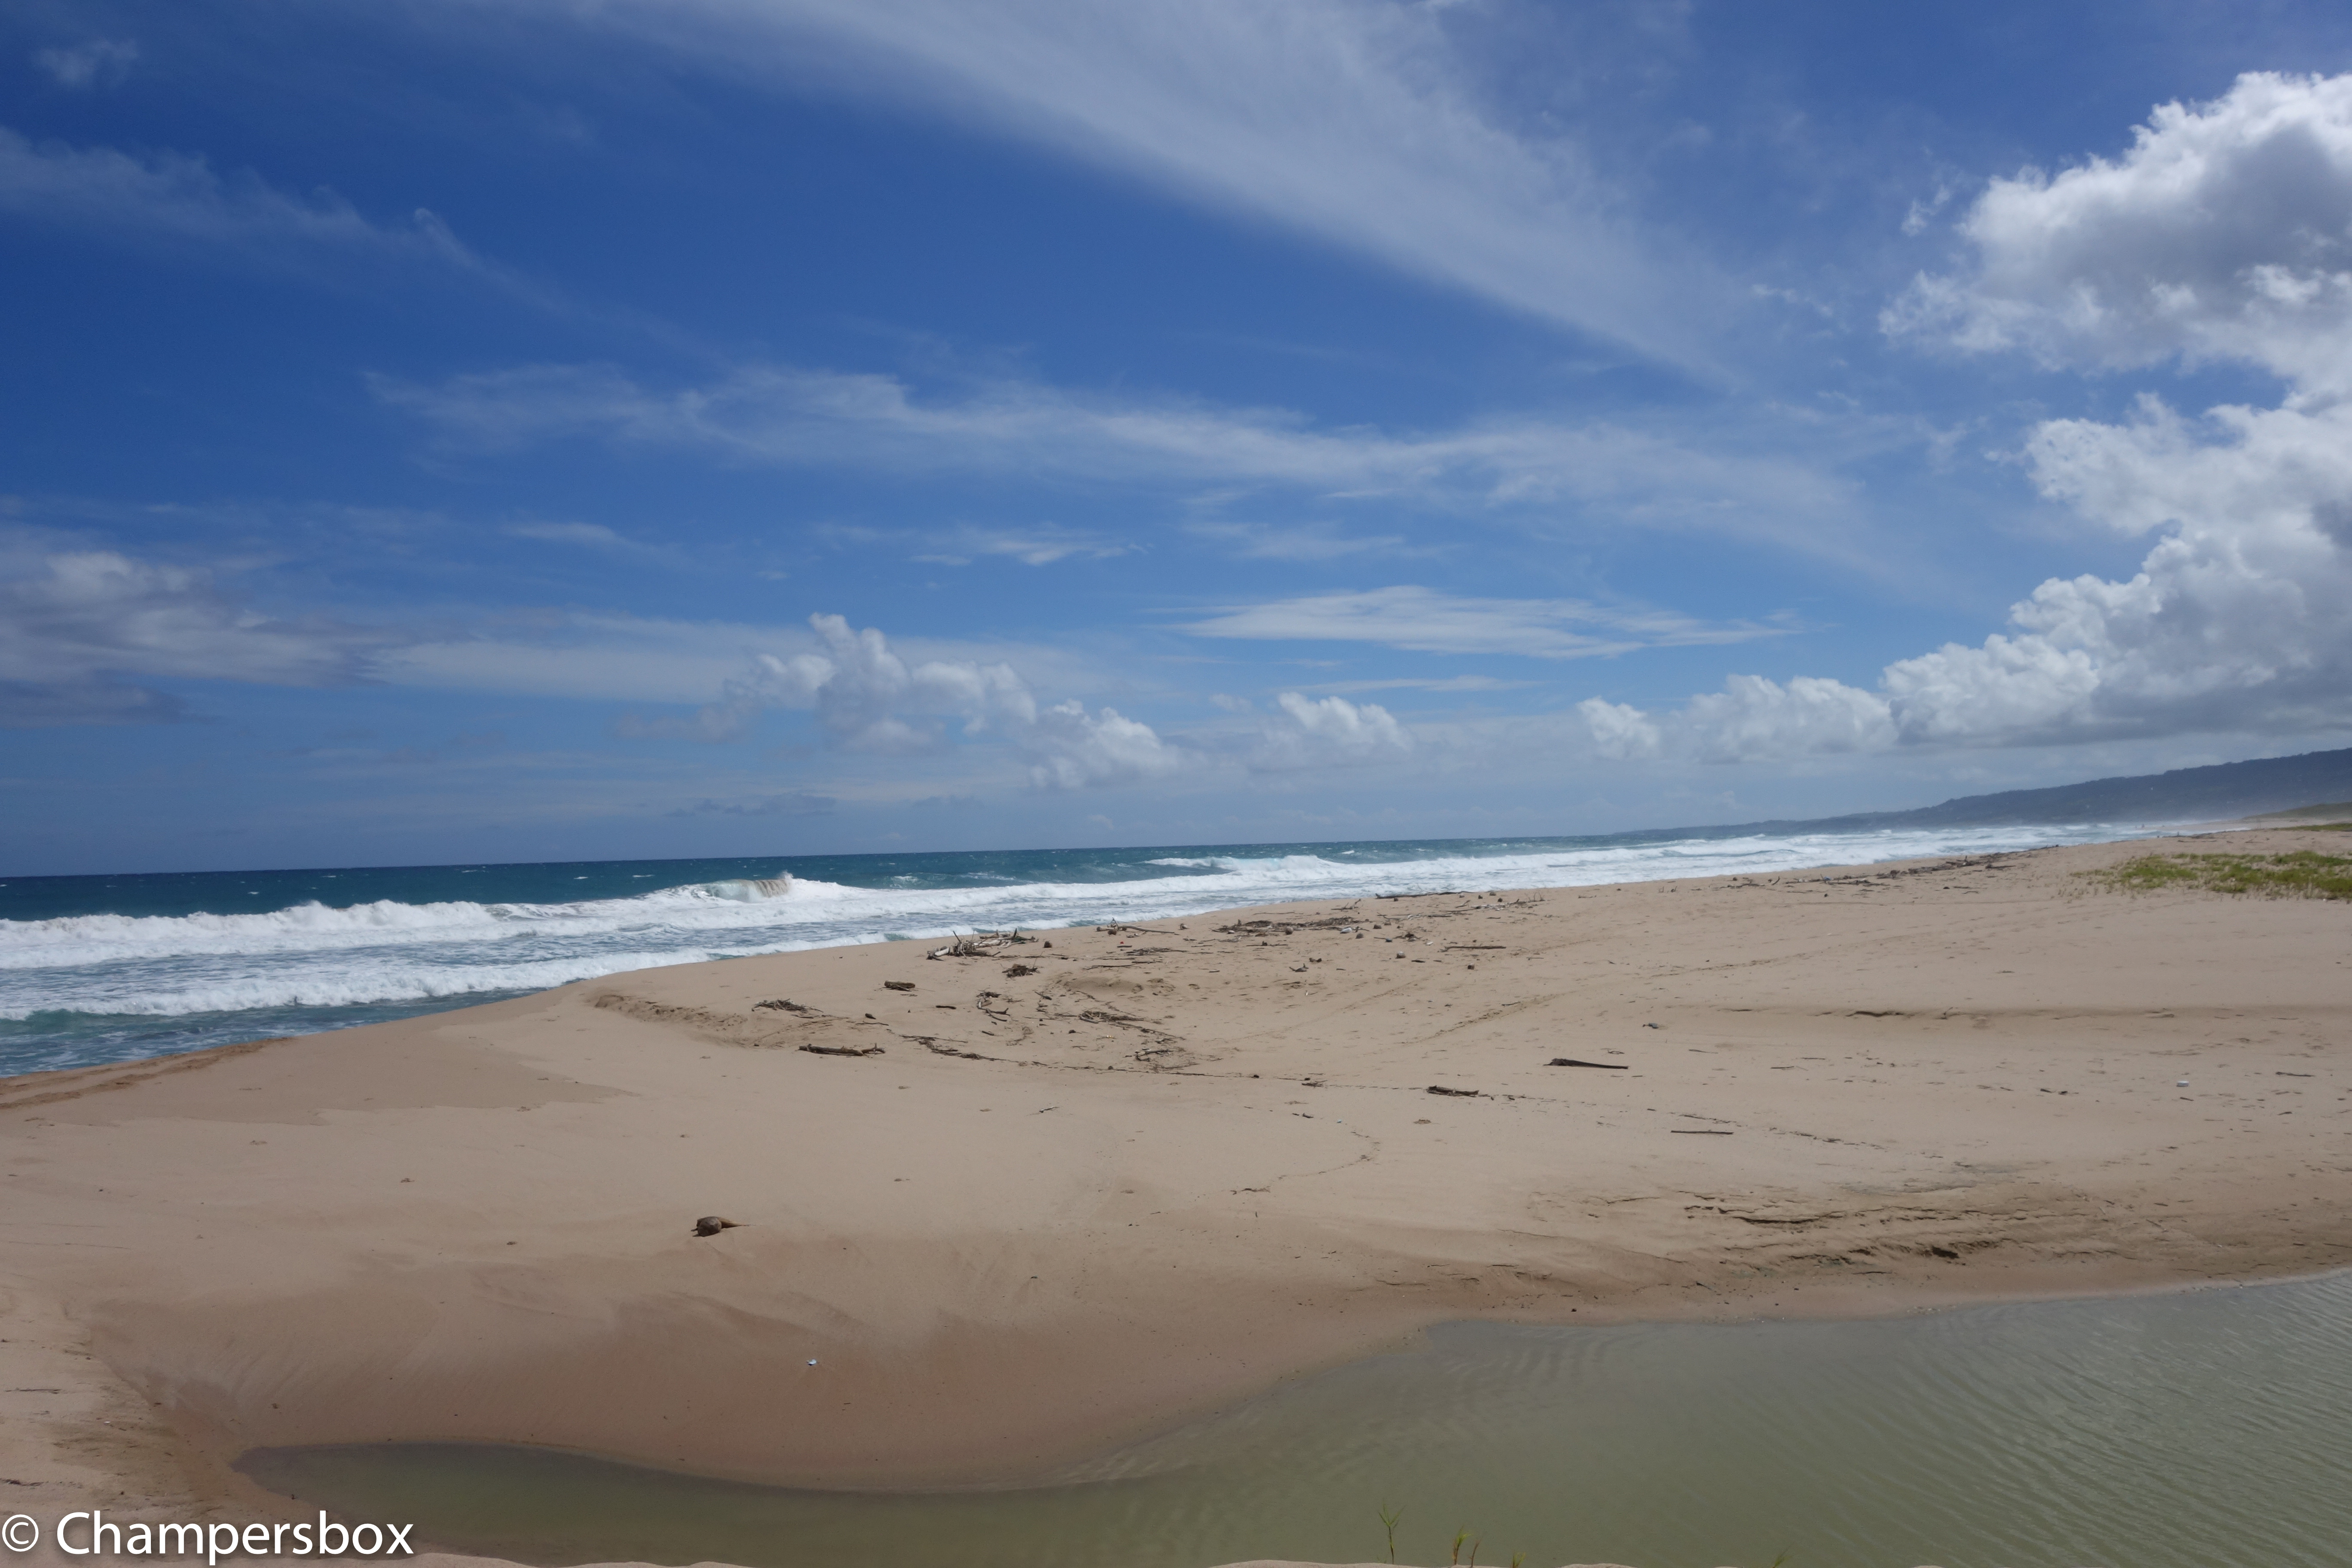
Also to consider some of the topside capabilities of the RX100 Mark II just to give an idea though this is not exactly the same location have a look as this shot with a Nikon D7100 with sigma 17-70 in comparison with the RX100 Mark II
Nikon D7100 Beach LandscapeRX100 Beach Landscape
There is a difference but considering the size of the RX100 and the fact it fits in a pocket I don’t think there can be that many complains. Obviously once you look at specific lenses for the DSLR things change but in the 28-100mm all purpose range I would say that the gap is not as much as double as the price of the two set ups.
So is the Sony RX100 the best compact underwater video set up? Definitely
Is the Mark II better than the original RX100? Yes and well worth an upgrade for video
How does it compare with the Panasonic LX7? The dynamic range and the colors are superior and produces footage that is simply better and sharper. Where the LX7 excels is at macro in clear waters, this is not because of magnification as the RX100 and LX7 perform exactly the same with diopters, and this is because of the LX7 amazing autofocus. However with a bit of silt or other objects in range there is need to switch to manual focus and there the RX100 is actually superior when using peaking even if the depth of field is actually less, the manual focus on the LX7 with the magnifier is not as good unfortunately.
So my ranking for video is:
1. Sony RX100 Mark II
2. Panasonic LX7
3. Sony RX100
I would also add that for stills the LX7 is even more rewarding at macro range due to the performance of autofocus.
It is not a mystery that the RX100 is capable of shooting excellent video. In fact in some comparisons with SLRs cameras there is little to no difference in the footage quality. The RX100 has many settings and options so which ones are important for underwater video? I will go and explain those that I find useful.
RX100 Video Behavior
Although the RX100 offers full manual control in video this option is not as useful as it seems. Now that many video editors support AVCHD progressive the 50p or 60p options are the more relevant as the footage can be slowed down to half speed and still offer a standard frame rate (50/60p at half speed is 25/30p).
The RX100 shoots video in program mode with shutter speeds of double the frame rate so 1/100 for PAL and 1/125 for NTSC that is excellent news. The camera will then drop to 1/50 or 1/60 when the max ISO is reached which is still acceptable. In Movie Program mode the camera shoots at the lowest possible ISO for the set shutter speed at the widest required aperture. The RX100 has a minimum ISO in video of 125 and the RX100 has it at 160, which is quite high.
Shooting Wide angle
I shoot all my wide-angle footage with the camera in Program Mode. By that I actually mean Photo Program Mode. Pressing the movie button in P mode results in the same behavior that shooting video in P mode. In order to be able to frame correctly I set the image format to 16:9 also for stills. This is also useful to capture ambient light landscapes. I started shooting in P because this allowed me to white balance quickly however I found out that the custom white balance on the RX100 Mark II is a total disaster and in fact I never use it as it gives weird results. I shoot with a red filter with Auto white balance on until approximately 25/27 meters and then I move to White Balance set to K (colour temperature) 9900K Tint set to M7+Y7. When shooting with lights I also use auto white balance. Generally speaking I only use the movie button and the white balance settings for wide angle.
Deep Wreck in Program Mode
Shooting Macro
When shooting with diopter at tiny subjects focus with the RX100 is a challenge. I set my video mode to Aperture priority with an aperture of f/11 and Auto ISO, the camera will always keep a shutter speed of double the frame rate which is ideal. If you light the subject properly the RX100 will always shoot at the lowest ISO maybe at 200 but not more. I use auto white balance for all my macro. I find it convenient to leave the video mode like this so that I only have P for wide angle and Movie – Aperture priority for video. If you prefer you can set those as memory recall 1 and 2 but I find that not as useful except you don’t need to use the control dial.
Frogfish at f/11
Settings for the Function Buttons
Many features that can be assigned to the function button are not available in video or not useful. I only have 4 settings in the function wheel:
ISO
Metering Mode – Always on evaluative
DRO – I set it to auto
Focus Mode – in video only constant and manual are available
To be perfectly honest I rarely change any of those except for testing the camera exposure. Even the metering mode can be left to evaluative all the time as when you shoot macro the area is so small and evenly illuminated that I have never had an issue with exposure.
Settings for the Control Wheel
I use the following assignments and I find them very useful:
Left: White balance
Centre: Manual Focus Toggle
Right: Exposure Lock
The bottom arrow is always assigned to exposure compensation and can’t be changed I set it to -0.3 eV all the time.
White Balance
The performance of custom white balance with the RX100 Mark II is shocking worse than the original RX100, 9 out of 10 I get a white balance error and the results are usually off with too much magenta. The only occasions where I do not get an error is in 6 meters or water (20 feet) on a sandy bottom. In other conditions it does not matter if you try with sand, tanks, hand, slates the outcome is shocking. The results can be used changing the tint to an M2 or even zero but generally using a filter and auto is just much easier and better. I assign the K setting to 9900K M7 for shooting at depth, This is painful because it means that unless you have a flat lens like an Epoque or Inon you can basically forget shooting video with the RX100 as the custom white balance is erratic at least.
The Inon UWL-H100 has only one red filter that is compatible and is made by deeproof. I find this filter excellent though I prefer plastic to glass I have to say it works a treat.
Results with White Balance Error 9900 Note the Magenta tingeSimilar scene with auto white balance and red filter
Focus
The RX100 focus automatically on the center when shooting video and does it very well,. Tracking focus is not as useful and by assigning the center button to manual focus it can be eliminated. When shooting macro it is essential to use peaking. I set it to low with white color. Generally with diopters there is only one focus distance so I move the camera until the peaking shows nice white and then press record trying to be steady. That’s pretty much it.
DRO
I keep the dynamic range optimizer to Auto. This means the ISO is most of the times set automatically to 200 to preserve dynamic range. When the scene is perfectly lit the ISO is chosen to be 160. I don’t see much difference between ISO 160 and 200 but if this bothers you set the DRO to off which means the camera will mostly shoot at ISO 160 in good light conditions.
ISO and Max ISO
I set the ISO Max to 800, having analysed a lot of my footage I have not found one example where the camera shot at ISO800 yet unless I had a filter and was at 30 meters. However I prefer the camera to drop the shutter speed and keep the ISO to 800 instead of going all the way down to 3200.
Zoom
In video the RX100 activates digital zoom even when you set it to off. This deteriorates the image so you need to pay attention that the middle notch corresponding to 3.6x is not exceeded or you will see artifacts in your footage.
Stabilizer
I use active steady shot thought this reduces the field of view as it does help with shake quite a lot with macro footage.
Other Settings to disable
There are a number of settings that are harmful in video either because they use battery or because they are counter productive I disable them all list includes:
Smile / Face Detection
Picture effects
Audio recording ( I do not like bubble sound)
Wind Noise Reduction
The following are only relevant for still but I like them off regardless.
As we know the Sony RX100 cameras, we will refer to both Mark I and II as the lens is the same, do not offer the best out of the box super close up performance.
To be clear no compact camera really does macro, as no compact can capture an area 36×24 mm in size without being on top of the subject and having a shadow cast on it.
The RX100 however are particularly unexciting as the capture area is pretty large at 76x51mm at the minimum focus distance of 5cm. This means a reproduction factor of less than 1:2 so things are half life size in traditional terms.
In water the minimum focus distance increases and so does magnification so performance is all in all the same.
This means that a typical small subject like a medium size nudibranch measuring 4cm will fill a bit more than half the frame, not great.
The problem can be addressed by close up lenses that have a set power that determines the focal length and working distance where we can use the full camera zoom.
So the close up lens sets the working distance whilst the camera zoom sets the magnification.
A typical close up lens will have a power of 5 or 6 diopters with a working distance in water of 200 or 165mm, what does it mean for the RX100?
I have done some testing in water using a ruler and an Inon UCL165 this is the result:
Single +6 diopter Inon UCL165
Our capture width is now 46mm so our 4cm nudibranch will nearly fill the frame. The working distance of this lens is 165mm so this is a very versatile solution as most critters have no problem being approached so close.
What happens with a +10 close up lens with a focal length of 100mm, this is another test
+10 Diopter UCL100
A +10 diopter like the Subsee or Inon UCL100 achieves exactly 35mm so life size macro. However a lens like this will not focus at longer focal distances without zooming out, furthermore there are plenty of subject that do not need this magnification.
Close up lenses can be stacked so this is the result of two + 6 diopters
Two stacked Inon UCL165
The width is now 32mm which is 1.1:1 so more than macro. This is adequate even for pygmy seahorse and with the incredible resolution of the RX100 cropping is not a big issue. Working distance is around 8.5cm which is still tolerated by small critters.
For completeness I have also tested a +16 combination
16 Diopters
At around 26mm this is 1.4:1 so real super macro, the working distance is however only 6.25cm which is really close and will scare most critters away.
Conclusions:
Without any close up lens the RX100 can only capture 5cm objects without extensive cropping
A close up lens with a working distance of 165mm allows for most of the critters we consider small but without super macro effects unless cropped
Two stacked +6 diopters offer super macro and can also be cropped for more suggestive effect
A single +10 close up lens achieves real macro however it is not versatile enough for every day usage
Stacking lenses does introduce chromatic aberration but this can be eliminated in photos and is barely noticed in video
Pay attention when you select your close up lenses that the focal distance that is in the specification is measured in water otherwise you will find yourself with a useless purchase