Why You need 1.4 lenses on Micro Four thirds

This post is NOT about underwater imaging. With the lockdown most of us have started using their cameras in the garden to shoot bugs, or birds or family members or abstracts.

In my instagram on the side you can see some examples of what I have been up to.

Shooting underwater is typically done at small apertures because of underwater optics issues. It is rare to shoot wide angle wider than f/5.6 on a MFT body or F/11 on full frame.

On land everything changes and you want to have as much light as possible coming into your camera to maximise dynamic range, bring out colours and minimised noise. Aperture controls not just how much light hits the sensor but also depth of field or I should say depth of focus.

Depth of field at equal level of magnification (size of the subject relative to the frame) depends only on the aperture of the lens. It does not matter if the lens is short or long once the subject fill your frame it is the f/number that influences depth of field.

2.8/2/1.4 is the Magic Number

Typically in full frame terms f/2.8 was a good lens, and the reason is quite simple if you shoot a classic 50mm lens from 1.5 meters away you will have 15 cm or half a foot depth of field. This is ideal to keep things in focus but also provide some background separation as objects blur as they move away from the area in focus. If you had a faster lens more light would go in the frame however you risk that nothing is in focus, for example nose and eye in focus and maybe ears not in focus.

And this is why 2.8 has been the magic number for full frame photography. If we move to an APSC sensor this becomes 2 and on MFT the magic number is 1.4. So 1.4 on a 25mm lens on MFT is equivalent to 2.8 on 50mm on full frame.

-20200211-13.jpg
Street Photography Night scene at 1.4

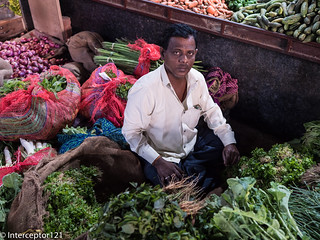
1.4 also gives plenty of light to your sensor so when you want to do some street photography or filming on MFT you can keep your ISO very low.

Exposure Value

Every scene has a level of illumination given in LUX and your camera needs to be able to expose for it with the right focus, with the required motion blur and lowest noise.

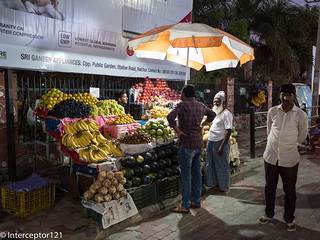
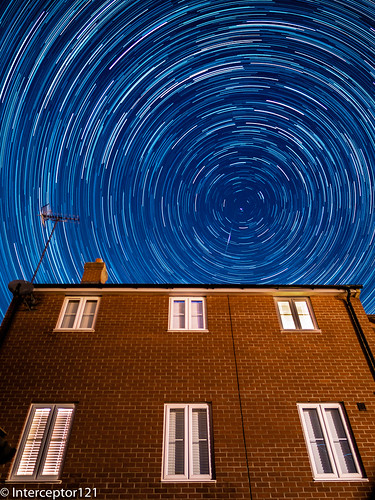
The scene in the image above is shot at f/1.4 1/60 ISO 640 let’s calculate the Ev taking into account the reference value is f/1 1 second and ISO 100.

1.4 means 1 stop 1/60 means 5.9 stops and 640 means 2.67 stops. So in total we have 6.9 stops of light taken away from aperture and shutter and 2.67 stops added by ISO gain. Total of 4.22 Ev using the formula Lux = 2.5 2^Ev we get 47 Lux which is the level of illumination of your living room in the evening with artificial lights.

If you had a slower lens like for example 2.8 to cover the same scene you needed to shoot at ISO 2500 this would have increased the noise, reduced the dynamic range and the colors.

2.8 Zooms are for outdoor

There are a number of great lenses for MFT cameras that are midrange zoom and have outstanding optical quality:

Panasonic 12-35
Olympus 12-40

The lenses above are constant aperture and weather sealed they are ideal for outdoor use however they do not offer a shallow depth of field for subject isolation as they really are f/5.6 in full frame equivalent and they are also slow meaning they will take you to the ISO 2500 zone if you try street photography or shooting movies in your living room.

Prime Rules

If you want fast lenses in MFT you need to have prime lenses, this is due to the physical constraint of the format.

Here my selection, I am not a fan of vintage lenses or full manual lenses, I like the best optical quality and if I want to add a vintage feel I do it in post.
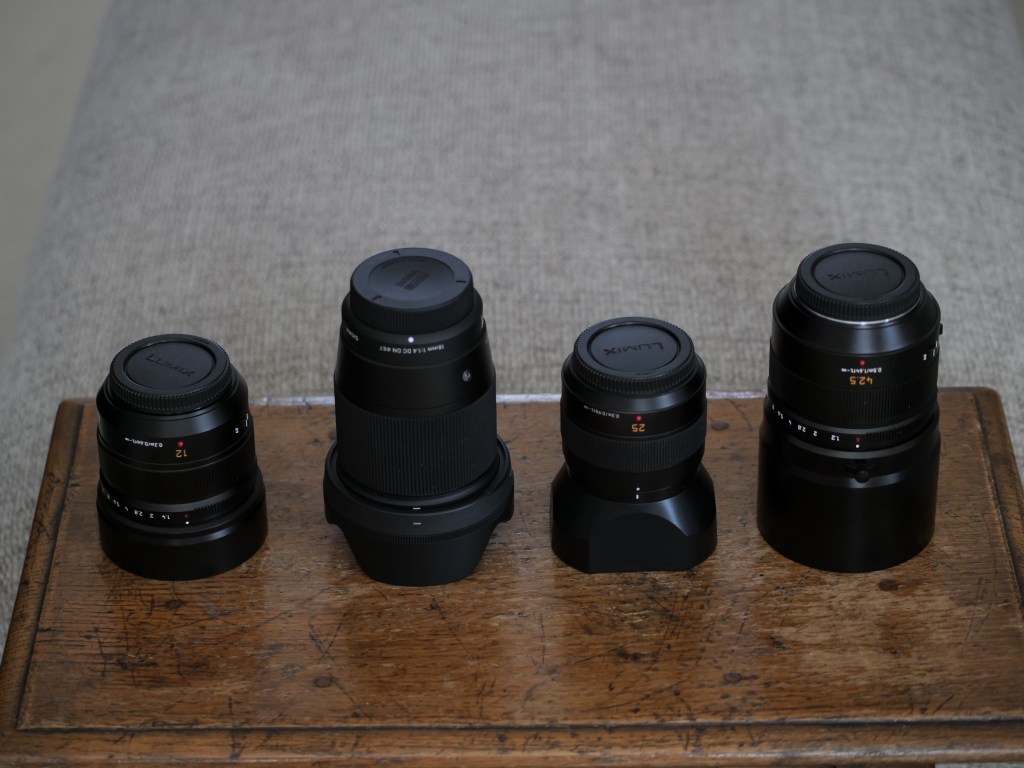
From left: Panasonic 12mm, Sigma 16mm, Panasonic 25mm, Panasonic 42.5 all (at least) 1.4 lenses

In more detail:

Panasonic 12mm 1.4

The Panasonic 12mm 1.4 is an expensive lens that I use for astrophotography and gimbals plus low light narrow room indoor shots.

It is weather sealed, extremely sharp and fast to focus and works in full auto focus on a gimbal.

Home Sweet Home
Star Trail with 12mm 1.4
Gimbal
Sigma 16mm 1.4

The Sigma 16mm 1.4 must be the best value prime on the market for MFT lenses. I use it in street photos and for videos. It is almost a 35mm full frame lens.

-20200213-11.jpg
street photography with Sigma 16mm
Garden Overview
Panasonic 25mm

The Panasonic 25mm is a workhorse for small group portraits and ideal lens for movie style video.

25mm 1.4
Kids video with 25mm
Nocticron 42.5

The Panasonic 42.5 Nocticron is probably the best portrait lens on MFT and one of the best lenses overall. It is an f/1.2 lens however in terms of actual transmission performs the same as f1/.4 lenses but with better rendering of out of focus areas.

Nocticron portrait

Why not Olympus/Others?

Of course there are equivalent primes from other brands for all focal lengths except the 12mm. They will perform equally and as long as they can go to 1.4 all is good. I use Panasonic bodies so tend to have Panasonic lenses and I buy Sigma since a long time but this is personal. There are tons of reviews on which lenses to choose etc etc but is not my place to do such comparisons. Edit since Olympus giveaway promotion in 2020 I have replaced the Sigma 16mm 1.4 with the Olympus 17mm 1.2 as they are equally bulky. The Oly pro is a fabulous lens but at the RRP suggested not affordable for many.

How about Video?

Even more essential to have fast primes for video as you are constrained in the shutter speed you can use.

Using a 1.4 lens at 1/50 you can shoot several scenes at different ISO

ISOLuxTypical Scene
200125Dark day
40063Indoors low lit areas
80032full overcast sunset/sunrise very dark indoor
160015Near twilight
32008After Twilight dark
64004dark
128002very dark
256001Candlelight
Aperture vs environment

For my purposes this adequate for reference underwater scenes at 3.5 means I can cover 100 Lux in ambient light in movie mode before turning on the lights.

Conclusion

If you find yourselves with grainy images or videos invest in fast lenses. A lens is the eye of your camera and the sensor is the brain. Think about getting better lenses before investing in a new camera and consider that if you need to go in lower light it is not always true that getting a bigger sensor will help considering the limitation of depth of field so you may want to think about lights.

do you need raw video?

We are finally there. Thanks to smaller companies that are keen to get a share of the market we now have at least two cameras with MFT sensor that are able to produce RAW video.

RAW Video and RED

It has been RED to patent the original algorithm to compress raw video data straight out of the sensor before the demosaicing process. Apple tried to circumvent the patent with their ProRes RAW but lost in court the legal battle and now has to pay licenses to Red. Coverage is here.

So RED is the only company that has this science, to avoid paying royalties Blackmagic Design developed an algorithm that uses data taken from a step of the video pipeline after demosaic for their BRAW.

I do not want to discuss if BRAW is better than RedCode or ProRes RAW however with a background in photography I only consider RAW what is straight out of the sensor Analag Digital Converter so for me RAW is RedCode or ProRes RAW and not BMRAW.

How big is RAW Video

If you are a photographer you know that a RAW image data file is roughly the same size in megabytes than the megapixels of your camera.

How is that possible I have a 20 Megapixel camera and the RAW file is only a bit more than 20 megabytes? My Panasonic RW2 files are 24.2 MB without fail out of 20.89 Megapixels so on average 9.26 bits per pixel. Why don’t we have the full 12 bits per pixel and therefore a 31 MB file? Well cameras are made of a grid of pixels that are monochromatic so each pixel is either red, green or blue. In each 2×2 matrix there are 2 green pixels, 1 red and 1 blue pixel. Through a series of steps of which on is to decode this mosaic into an image (demosaic) we rebuild an RGB image for display.

Each one of our camera pixels will not have the full 4096 possible tones, measures from DxoMark suggest that the Sony IMX272AQK only resolves 24 bits colours in total and 9 bits of grey tones. So this is why a lossless raw files is only 24.2 MB. This means that an 8K frame video in RAW would be 9.25 MB and therefore a 24 fps RAW video stream would be 222 MB/s or 1,776 Mb/s if we had equivalent compression efficiency. After chroma subsampling to 422 this would become 1184 Mb/s.

Cameras like the ZCam E2 or the BMPCC4K that can record ProRes 422 HQ approach those bitrates and can be considered virtually lossless.

But now we have ProRes RAW so what changes? The CEO of ZCAM has posted an example of a 50 fps ProRes RAW HQ files and this has a bitrate of 2255 Mb/s if this was 24 fps it would be 1082 Mb/s so we can see how my maths are actually stacking up nicely.

Those bit rates are out of reach of almost all memory card so an SSD drive support is required and this is where Atomos comes into the picture.

Atomos have decided to adopt ProRes RAW and currently offer support for Nikon, Panasonic and Zcam selected model.

ProRes RAW workflow

So with the ProRes RAW file at hand I wanted to test the workflow in Final Cut Pro X. Being an Apple codec all works very well however we encounter a number of issues that photographers have resolved a long time ago.

The first one is that RAW has more dynamic range than your SDR delivery space, this also happens with photos however programs work in larger RGB spaces like ProPhotoRGB at 16 bits and using tone mapping you can edit your images and then bring them back to an 8 bit jpeg that is not as good as the RAW file but is in most cases fine for everyone.

Video NLE are not in the same league of photo raw editors and usually deal with a signal that is already video is not raw data. So the moment you drop your ProRes RAW clip on a SDR timeline it clips as you would expect. A lot of work is required to bring back clips into an SDR space and this is not the purpose of this post.

To avoid big issues I decided to work on an HDR timeline in PQ so that with a super wide gamut and gamma there were no clipping issues. The footage drops perfectly into the timeline without any work required to confirm which is brilliant. So RAW for HDR is definitely the way forward.

ProRes RAW vs LOG

My camera does not have ProRes RAW so I wanted to understand what is lost going through LOG compression? For cameras that have an analog gain on sensor there is no concept of base ISO fixed like it happens on Red or ARRI cameras. Our little cameras have a programmable gain amplifier and as gain goes up DR drops. So the first bad news is that by using LOG you will lose DR from RAW sensors.

This graph shows that on the Panasonic GH5 there is a loss of 1 Ev from ISO 100 to 400 but still we have our 11.3 Ev minimum to play with. I am not interested in the whole DR but I just want to confirm that for those cameras that have more DR than their ADC allows you will have a loss with LOG as this needs gain and gain means clipping sooner.

Panasonic GH5 full resolution 20.9 MPixels DR

What is very interesting is that net of this the ProRes RAW file allowed me to test how good is LOG compression. So in this clip I have :

  1. RAW video unprocessed
  2. RAW video processed using Panasonic LOG
  3. RAW video processed using Canon LOG
  4. RAW video processed using Sony LOG

In this example the ZCAM E2 has a maximum dynamic range of 11.9 Ev (log2(3895)) from Sony IMX299CJK datasheet. As the camera has less DR than the maximum limit of the ADC there is likely to be no loss.

We can see that there are no visible differences between the various log processing options. This confirms that log footage is an effective way to compress dynamic range in a smaller bit depth space (12->10 bits) for MFT sensors.

The same ProRes RAW files processed using log from Panasonic, Canon and Sony shows no visual difference

Final Cut Pro gives you the option to go directly to RAW or go through LOG, this is because all your log based workflow and LUT would continue to work. I can confirm this approach is sound as there is no deterioration that I can see.

Is ProRes RAW worth it?

Now that we know that log compression is effective the question is do I need it? And the answer is it depends…

Going back to our ProRes RAW 1082 Mb/s once 422 subsampling is applied this drops to 721 Mb/s this is pretty much identical to ProRes 422 HQ nominal bit rate of 707 Mb/s. So if you have a Zcam and record ProRes RAW or ProRes 422 HQ you should not be able to see any difference. I can confirm that I have compressed such footage in ProRes 422 HQ and I could not see any difference at all.

However typically with photos a RAW files can hold heavy modifications while a JPEG cannot. We are used processing ProRes and there is no doubt that ProRes 422 HQ can take a lot of beating. In my empirical tests I can see that Final Cut Pro X is very efficient manipulating ProRes RAW files and in terms of holding modifications I cannot see that this codec provides a benefit but this may be due to the lack of capability of FCPX.

For reference Panasonic AVC Intra 422 is identical in terms of quality to ProRes 422 HQ though harder to process, and much harder to process than ProRes RAW.

Conclusion

If you have already a high quality output from your camera such as ProRes 422 HQ or Panasonic AVCI 400 Mbps with the tools at our disposal there is not a lot of difference at least for an MFT sensor. This may have to do with the fact that the sensor DR and colour depth is anyway limited and therefore log compression is effective to the point that ProRes RAW does not appear to make a difference, however there is no doubt that if you have a more capable camera, there is more valuable data there and this may be well worth it.

I am currently looking for Panasonic S1H ProRes RAW files. Atomos only supports 12 bits so the DR of the camera will be capped as RAW is linearly encoded. However SNR will he higher and the camera will have more tones and colors resulting in superior overall image quality, someone calls this incorrectly usable DR but is just image quality. it will be interesting to see if AVCI 10 bits and log is more effective than ProRes RAW 12 bits.

The definitive guide to hdr with the panasonic gh5/s1 in final cut pro x

First of all the requirements for HDR at home are:

  1. Log or HLG footage
  2. Final Cut Pro X 10.4.8
  3. Mac OS Catalina 10.15.4
  4. HDR-10 Monitor with 10 bit gamut

It is possible to work with a non HDR-10 monitor using scopes but is not ideal and only acceptable for HLG and in any case 10 bits is a must.

Recommended reading: https://images.apple.com/final-cut-pro/docs/Working_with_Wide_Color_Gamut_and_High_Dynamic_Range_in_Final_Cut_Pro_X.pdf

HDR Footage

In order to product HDR clips you need HDR footage. This comes in two forms:

  1. Log footage
  2. HLG

Cameras have been shooting HDR since years the issue has been that no consumer operating system or display were capable of displaying it. The situation has changed as Windows 10 and Mac Os now have HDR-10 support. This is limited for example on Mac Os there is no browser support but the Tv app is supported, while on windows you can watch HDR-10 videos on YouTube.

You need to have in mind your target format because Log and HLG are not actually interchangeable. HLG today is really only Tv sets and some smartphones, HDR-10 instead is growing in computer support and is more widely supported. Both are royalty free. This post is not about what is the best standard is just about producing some HDR content.

The process is almost identical but there are some significant differences downstream.

Let me explain why this graph produced using the outstanding online application LutCalc show the output input relationship of V-LOG against a standard display gamma for rec709.

V-LOG -> PQ

Stop diagram V-LOG vs Rec709

Looking at the stop diagram we can appreciate that the curves are not only different but a lot of values differ substantially and this is why we need to use a LUT.

Once we apply a LUT the relationship between V-LOG and Rec709 is clearly not linear and only a small parts of bits fit into the target space.

Output vs Input diagram for V-LOG and Rec709

We can see that V-Log fills Rec709 with just a bit more than 60% IRE so there will need to be a lot of squeezing to be done to fit it back in and this is the reason why many people struggle with V-Log and the reason why I do not use V-Log for SDR content.

However the situation changes if we use V-Log for HDR specifically PQ.

Stop Table V-Log to PQ

You can see that net of an offset the curves are almost identical in shape.

This is more apparent looking at the LUT in / out.

LUT in/Out V-Log to Rec2100 PQ

With the exception of the initial part that for V-Log is linear while PQ is fully logarithmic the curve is almost a straight line. As PQ is a larger space than that V-Log can produce on a consumer camera we do not have issues of squeezing bits in as PQ accommodates all bits just fine.

HLG

Similar to V-LOG HLG does not have a great fit into an SDR space.

Stop Table HLG to Rec709

The situation becomes apparent looking at the In/Out Lutted values.

HLG to Rec709

We can see that as HLG is also a log gamma with a different ramp up 100% is achieved with even less bits that V-Log.

So really in pure mathematical terms the fit of log spaces into Rec709 is not a great idea and should be avoided. Note with the arrival of RAW video we still lack editors capable to work in 16 bit depth space like photo editors do and currently all processes go through LOG because they need to fit into a 10/12 bits working space.

It is also a bad idea to use V-Log for HLG due to the difference of the log curves.

V-Log vs HLG

And the graph demonstrates what I said at the beginning. You need to decide at the outset your output and stick to a compatible format.

Importing Footage in Final Cut Pro X 10.4.8

Once we have HLG or LOG footage we need to import it into a Wide Gamut Library, make sure you check this because SDR is default in FCPX.

Library Settings

HLG footage will not require any processing, but LUTs have to be applied to V-LOG as this is different from any Rec2100 target spaces.

The most convenient way is to go into Organise workspace select all clips than press the i button and select General. Apply the Panasonic V-Log LUT to all clips.

Organise View the LUT option is not available in the Basic view so make sure you select General

Creating a Project

Once all files have been handled as required we create our HDR-10 project which in final cut means Rec2020 PQ.

For HLG project change colour space to HLG

The following screenshots demonstrate the effect of the LUT on footage on a PQ timeline.

LUT not applied footage looks dim as values are limited to 80%

With the LUT applied the V-LOG is expanded in the PQ space and the colours and tones come back.

LUTed clip on PQ timeline

We can see the brightness of the scene is approaching 1000 nits and looks exactly we we experienced it.

Once all edits are finished and just as last step we add the HDR Tools to limit peak brightness to 1000 Nits which is a requirement of YouTube and most consumer displays. The Scope flex slightly with an automatic highlight roll-off.

Exporting the Project

I have been using Panasonic AVCI 400 mbps so I will export a master file using ProRes422 HQ if you use a lower bitrate ProRes 422 may be sufficient but don’t go lower as it won’t be HDR anymore.

Export in ProRes 422 HQ

YouTube and other devices use default settings for HDR-10 metadata so do not fill the mastering display nor content information it is not required and you would not know how to fill it correctly with exception of peak brightness.

Converting for YouTube

I use the free program handbrake and YouTube guidelines for upload to produce a compatible files. It is ESSENTIAL to produce an mp4 file otherwise your TV and YouTube may not be able to display HDR correctly avoid any other format at all costs.

The finished product can be seen here

Home HDR Video HDR-10
HLG Documentary style footage

SDR version from HDR master

There are residual issues with this process one is the production of an SDR version. This currently works much better for HLG than HDR-10 which is interesting because HLG is unsupported on any computer so if you produce HDR HLG you are effectively giving something decent to both audiences.

For HDR-10 YouTube applies their own one fits all LUT and the results can be really bad. You may experience oversaturated colours in some cases, dark footage in others, and some clips may look totally fine.

At professional level you would produce a separate SDR grade however it is possible to improve the quality of YouTube conversion using specific techniques I will cover in a separate post.

Final Remarks

Grading in HDR is not widely supported the only tools available are scopes and Tone Mapping of your display. There is no concept of correct exposure for skin tones, in one scene those have a certain brightness and in another this changes again because this is not a 0-100% relative scale but goes with absolute values.

If you invested in a series of cinema LUT you will find none of them work and compresses the signal to under 100 nits. So there is less headroom for looks. There are other things you can do to give some vintage look like adding grain but you need to be careful as the incredible brightness of the footage and the details of 10 bits means if you push it up too much it looks a mess. Currently I am avoiding adding film grain and if I add it I blend it to 10%-20%.

One thing that is interesting is that Log footage in PQ does have a nice feel to it despite the incredible contrast. After all Log is a way to emulate film specifically Cineon, this is true for almost all log formats. Then you would have the different characteristics of each film stock, this is now our camera sensor and because most of them are made by Sony or Canon the clips tend to look very similar to each other nowadays. So if you want to have something different you need to step in the world of Red or ARRI but this is not in the scope of what I am writing here and what you my readers are interested in.

Am keeping a playlist with all my HDR experiments here and I will keep adding to it.

YouTube HDR Playlist

If you find this useful please donate using the button on the side and I will have a drink on you…Cheers!