Tag Archives: Dome Port

Methods to determine the appropriate dome port for a wide angle lens in an underwater housing

Warning this is an extremely technical article that I have written on request. If you are not familiar with optics, geometry, housings do not attempt to perform a calculation by yourself and rely on expert advice.

Background

The physics of dome ports are not new to underwater practitioners although not many people understand the formulas, it is well accepted that there is a correct way to size and position a dome port in order to optimise optical performance of a lens inside an underwater housing. I do not want to repeat the theory here but if you feel you need a refresher the excellent articles from the now passed David Knight and specifically the piece on dome port theory will be useful. For the purpose of this article I will consider only underwater imaging, split shots and over and under have different considerations and will be addressed separately in due course.

Practical Implications

For our purposes, what is interesting is that a dome port is able to restore the lens air field of view when the camera and lens are inside a housing. The theory says that this happens when the centre of the dome lies on the lens entrance pupil. But what happens if it does not?

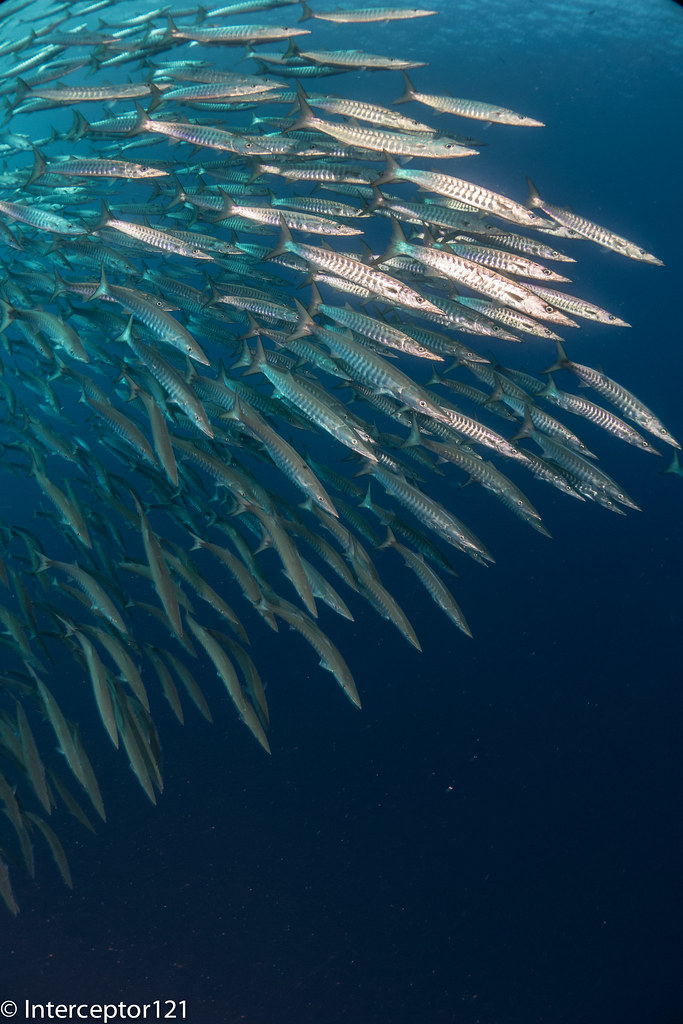
Jeremy Somerville has created a number of visualisers that although not totally correct give a good idea of the issues  involved. In particular the positioning of the dome port is something you may want to check. In short if the dome is not correctly positioned we lose field of view as result of distortion and increase the amount of chromatic aberrations. 

We also have to consider that the dome port being a single element lens has also issues of field of curvature and spherical aberrations which are additional to any considerations on positioning and require the user to stop down the lens to reduce the side effect. Those side effects are exacerbated when the dome is not correctly positioned to the point they cannot be corrected no matter how much you stop down the lens.

Choosing appropriate wide angle lenses

Minimum Focus Distance

One of the key takeaways of dome port theory is that if your lens is not able to focus close it may not work at all inside a dome, which in turn means your dome starts to become bigger and bigger to allow your lens to focus or you need to introduce close up lenses which further deteriorate optical quality.

More compact set ups and smaller domes require lenses that can focus close. In addition, due to the dome port optics, infinity focus will be reached at 3x the dome radius from the dome surface: your lens will work to a maximum focus distance well under one metre and closer to half a metre. This is a challenge for wide angle lenses that are designed for landscape and not usually optimised for close focus. One assumption that you cannot make is that a lens that is great for topside use will perform equally well behind a dome, or even more interesting a lens that is small and compact may require a quite sizable dome to work properly underwater which negates the size benefit to start with.

The dead Zone

The dead zone is where the camera cannot focus because our subject is too close. Our objective is to place the dead zone inside not outside our dome so that we can maximise the range we can use for imaging. It is not an issue if the dome radius is so big that the focus area falls well inside the dome, in fact it may be an advantage, but if the camera focus distance is outside the dome we are eating away useful range and at the point where the focus distance is so far that is outside the dome infinity point the camera will not focus at all.

By choosing a lens that can focus very close we accomplish two objectives:

  1. We reduce the size of the dome required
  2. We maximise the focus range that can be used.

I prefer lenses that have a minimum working distance around 20cm, and avoid anything that focuses from 25cm and beyond, this ensures good image quality and reasonably compact set ups.

Prime vs Zoom

Prime lenses have a fixed entrance pupil this means that once the dome is sized and positioned your job is done. Zoom lenses instead change in size or move the entrance pupil to accommodate changes in the field of view. This is bothersome as it means that if you determine your dome parameters at wide end this may not be correct at tele end. In addition as the angle of view is being reduced the curved surface of the dome will start looking more and more flat. This is a challenge but not one we need to address, as seen in the flat port theory lenses that are longer than 35mm suffer less from chromatic aberrations, therefore for our purposes we will treat zoom lenses like a prime lens whose focal length is the shortest our zoom can manage, i.e. the wide end of the zoom. At the tele end the dome with a zoom lens will look like a flat port but still have some benefit over it in terms of aberrations.

Zoom factor

Although we said we will consider the zoom lens as a wide tele, lenses with a zoom ratio much bigger than 2x will most definitely be problematic. This is the reason why zoom lenses with conservative ratios like a classic 16-35mm are bound to perform overall better  than say a 20-70mm lens. Lenses in the classic 24-70mm or 28-75mm range tend to have less problems because they are not that wide to start with and generally work well as long as they focus close, otherwise they will require larger domes. 

Example Cases

I have good experience after one year on e-mount and therefore I am going to list a few examples of lenses that are excellent topside quality but are bound to work not so well underwater as well as other lenses that have good potential at different price points.

Lenses requiring large domes for optimal performance

Sony 12-24mm F.2.8 GM – a high quality super wide zoom lens that is great for topside use. It has a minimum working distance of 28cm and is 13.7cm long. This lens will likely require a dome port with a radius in excess of 14.3 cm and a field of view of 122 degrees. A port like this is not standard on the market.

Sony 20-70mm F4 G – a versatile topside zoom with extensive zoom. It has a minimum working distance of 30 cm and is only 9.9 cm long this lens is likely to require a dome port over 20 cm in radius to perform at its best.

High Potential Lenses

Tamron 17-28mm F2.8 – A lens that is cost effective and sharp with a limited zoom range. It can focus as close as 19cm and with a size of 9.9cm will require a dome of just over 9cm to have the focus range inside the dome. 

Sony 16-35mm F2.8 GM2 – An excellent topside lens that has a good zoom range and can focus at 22cm. With a physical size reaching 12cm this lens is likely to work with domes that are not excessively large.

Sony 20mm F1.8 G – An amazing low light lens that can focus at 19 cm. With a physical size of 9cm this lens is likely to work with relatively small domes and produce outstanding image quality.

Comparison at equal field of view and different working distance.

Copyright Interceptor121 2023

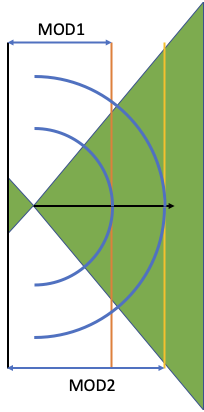
The graphic above illustrates how two lenses with equal field of view displayed in solid green require different dome radii depending on the minimum operating distance. The small inverse triangle is the area inside the lens up to the focal plane.

Lens1 will require the smaller dome so that the area not in focus falls inside the dome, if a larger dome is used this simply expands the focus range into the water proportionally to the increased dome radius. A lens with the same field of view but longer MOD2 will require a larger dome to ensure the area out of focus is inside the dome. A smaller dome can be used however the dead non focus area now moves into the water. As the infinity point is still set at 3x the dome radius from the surface using this smaller dome means less focus range can be used by the camera. Using too small domes deteriorates image quality because the compressed focus range has an impact on the overall image resolution.

Locating the Lens Entrance Pupil

In order to properly position the dome port we need to determine where the entrance pupil of our lens is. There are at least 4 methods that can be used to locate the entrance pupil of the lens.

Method 1 Look into the lens

It makes me smile when you read: locating the entrance pupil is easy just look into the lens and see where the aperture is. I do not find this easy at all, first lenses are increasingly complex in construction and second how do you place depth of the aperture correctly even if you can see it? The error margin of this method is very high.

Method 2 Non Parallax Point

If you are into panorama photography you know that you can locate the non parallax point which is the lens entrance pupil using a slide mount and a specific set of targets. 

A demonstration of this method is beyond this write up however if you want to go deeper into this this article should help you. This method has a good level of precision and panotools maintains an entrance pupil database for many DSLR lenses.

Method 3 Trigonometry

Once you know the lens field of view you can use various filter rings to determine the thickness where vignetting occurs. At that point you can simply calculate the distance from the edge of the entrance pupil by taking the ratio between the lens radius and the tangent of the angle of view. This gives good precision and does not require anything else than the lens itself and a few filters but can be approximated also for a lens you do  not own using standard roundings.

Method 4 Lens Design

There are some websites that have lens design drawings directly from patents. This will give you the exact location of the entrance pupil from the image plane and from the lens mount.

I use the site maintained by Bill Claff called the Optical Bench Hub. Unfortunately the database is not complete, some specific brands designs are scarce. The benefit of this method is that you can use it to make calculations before you buy the lens and it is 100% accurate.

Entrance Pupil Determination – Practical Examples

Case 1: Lens Design Available

Sony 20-70mm F4 G lens is a very versatile zoom, whe wide angle 20mm is sufficient for many situations and the tele end of 70mm good for close up work on land. This lens makes a good candidate for underwater use in terms of angle of view however it has a minimum operating distance of 30 cm which is far from ideal.

We locate the lens design on the Optical Bench Hub here.

The important parameters are I distance from the edge of the lens to the image plane (sensor) which is 115.04mm and P distance of the entrance pupil from the lens front.

The difference I – P = 91.79mm still accounts from the flange distance. Taking that out we get 73.79mm from the lens mount.

The lens has a minimum working distance of 300mm. If we subtract the entrance pupil distance from the image plane of 91.79mm we determine a minimum dome radius of 208.21mm which is rather large and in fact not available if not as a custom product.

Of course we can still go ahead and use a smaller dome radius however all the range between the MOD and the edge of the dome will be wasted and not produce an image in focus.

Sony 20mm F1.8 G lens is the modern equivalent of a Nikkor UW15 giving a field of view that is acceptable for most uses and excellent image quality.

We locate the patent on Optical Lens Hub here.

The lens has a MOD of just 19cm the distance I-P=80.91 a dome with a radius of 11cm will contain the entire non focus area. The entrance pupil is 62.91mm from the lens mount.

Case 2: Lens Design Not Available

The Tamron 17-28mm F2.8 is an affordable, fast and high quality wide angle lens with a somewhat limited zoom range. The lens is 99mm long and takes a 67mm filter thread. I used an ND1000 Hoya Pro filter with a thickness of 5.6mm, the lens external radius is 69mm with the filter on.

The lens nominal field of view is 103.70 degrees however all mirrorless lenses have software corrections. Ideally I need to know the real field of view however the error is normally 1 to 3% and does not influence the calculations too much.

If we consider a length of the lens and filter of 104.6mm and a radius of 34.5 mm for an angle of 51.85 degrees we obtain a distance from the lens mount of 77.5 mm and from the focal plane of 95.5 mm. Taking into account that the MOD is 190mm this gives a minimum radius of 94.5 mm for the dome which is very good news.

Sony has recently released the 16-35mm F2.8 GM2 with a MOD of just 22 cm. Using the same logic as before we calculate the entrance pupil to be 93.5 mm from the lens mount or 111.5 mm from the sensor. This means a dome radius of minimum 220-111.5=108.5 mm is required to contain the area not in focus inside the dome.

Dome Selection Part I – Field of View

The first thing that  we need to ensure is that the dome field of view can contain the lens field of view otherwise our main objective of preserving the air performance would be lost.

Unfortunately the specifications of dome ports on the market are somewhat lacking so you need to make do with what you have or ask for CAD details.

I use Nauticam that do produce good documentation, zen does this too 18809 18810 18812 18813 18815 N120 Optical Glass wide angle port.pdf

Here you can see that, ignoring the thickness of the glass for simplification purposes the various ports have the following field of view using the formula 2*arcsin(glass port diameter/curvature radius)

Part NumberDescriptionAngle of View (degrees)Widest Lens mm(Full Frame Eq)
18809180mm Optical Glass Wide Angle Port109.8 16
18812230mm Optical Glass Wide Angle Port II146.87
18813/18815250mm Optical Glass Wide Angle Port II102.7518

It is somewhat surprising to see that the larger port  in terms of size is the narrower in terms of field of view I believe this is a compromise in terms of weight.

Dome Selection Part II – Curvature Radius

Looking at field of view is not sufficient, we also want to ensure that the lens MOD is contained by the dome and therefore we need to take into account the actual radius of curvature of the port

  • 18809 180mm Optical Glass Wide Angle Port Radius 110mm
  • 18812 230mm Optical Glass Wide Angle Port II Radius 120mm
  • 18813/18815 250mm Optical Glass Wide angle port Radius 160mm

The port size goes with the curvature radius however somewhat surprisingly the difference between the 230mm and 180mm port is rather small making the choice between the two more a matter of field of view.

Amount of Recession of the Camera from the Port

Camera housings are not like skin, armed with a digital calliper you need to determine the distance between the lens mount and the housing port mount. Alternatively you can reverse engineer this once you have a lens port combination that is absolutely exact.

For the purpose of my calculations I have measured that my E-Mount camera is 27mm recessed inside the housing. This is important as it is needed to calculate the extension for the dome. If you are in a different format you need to measure this distance yourself.

Entrance Pupil to Housing Port

We have previously determined the entrance pupil from the lens mount and now we know how much this is recessed in the housing so we can calculate the required extension to reach the entrance pupil however this assumes the domes are hemispheres which in most cases they are not. Let’s leave this aside for one second and go back to our examples.

Sony 20-70mm F4 Entrance Pupil Distance = 73.79mm – Housing recession 27mm = 46.79mm from the housing

Sony 20mm F1.8 Entrance Pupil Distance = 62.91mmm – Housing recession 27mm = 35.91from the housing.

Tamron 17-28mm F2.8 → 50.5mm from the housing

Sony 16-35 F2.8 GM2 → 66.5mm from the housing

Wide Angle Ports

Again we need a calliper to determine the depth of the port as those are not full hemispheres. I have access to the 180mm dome and I know that the port is actually 8.5cm tall from mount to glass edge because I measured it. This means I need to add 25mm to the extension required. From the manual I estimate the 230mm port needs extra 13mm and the 250mm port 34mm. if you own those ports and want to provide me the exact measurement I will build a calculator for dummies.

Back to our examples with some real calculations:

Sony 20-70mm F4 Port required 250mm Wide angle Port. Extension required 46.79+34mm=80mm

Sony 20mm F1.8 Port Required 180mm Wide angle port. Extension required 35.9mm+25mm=60.9mm

Tamron 17-28mm F2.8 Port Required 180mm Wide angle port. Extension required 50.5mm+25mm=75.5mm

Sony 16-35 F2.8 GM2 Port Required 180mm Wide angle port. Extension required 66.5mm+25mm=91.5mm

If we are using the 35.5mm N100 to N120 adapter this means that the actual extension rings required are 

Sony 20-70mm F4 → 80-35.5=45 mm Part required N120 Extension Ring 45

Sony 20mm F1.8 → 60.9-35.5=25.4 mm Part Required N120 Extension Ring 25

Tamron 17-28mm F2.8 → 75.5-35.5=40 mm Part Required N120 Extension Ring 40

Sony 16-35mm F2.8 GM2 → 91.5-35.5=55 mm Part Required N120 Extension Ring 55

Nauticam Port Chart Check

LensExtension DeterminedExtension SuggestedDelta
Sony 20-70mm45 mm40 mm5 mm
Sony 20mm25NANA
Tamron 17-2840 mm40 mm0 mm
Sony 16-35GM255 mm50 mm5 mm

We can see that for the 20-70mm where the entrance pupil is known the Nauticam port chart is off 5mm. For the 17-28mm where design information is not known there is no discrepancy with my method and for the 16-35 GM2 there is a discrepancy of 5mm.

I checked the situation for the 16-35mm GM2. This lens has some distortion and therefore the uncorrected field of view is 109 degrees which is too big for the 180mm wide angle port. With my calculated 55mm if you remove distortion correction in camera you can see a tiny bit of shading from the dome petals but this goes away when distortion correction is active. Therefore I am satisfied that my calculations are more accurate. I contacted Nauticam who ran the MFT charts in their test rig and they said 55mm works well too. Although it is ideal to have the exact extension if you have one that is 5mm off the calculated value and the dome does not vignette you need to consider if the image quality you get is satisfactory and make your call.

I also tested this lens in a pool, you can read the review in this post.

What about other brands?

The challenge with other brands is the lack of documentation however you can contact the design department to obtain information on the dome port they should not be a secret. The other challenge is the availability of extension rings. The Nauticam system has a level of precision of 5mm which is excellent however I am under the definite impression that they run their tests using in most cases steps of 10mm and using as first approach how the lens fits the port, they do not go and attempt to determine the entrance pupil.You can observe that because when you look at a specific port say the 180mm wide angle and you apply the suggested extensions in all cases the lens edge is flush with the extension.

In most cases this turns out to be accurate however there are some cases where wider lenses need to be more recessed and narrower lenses need to stick out more.

Fisheye Lenses

When you use a fisheye lens with a complete hemisphere dome port the calculations remain the same however it is a bit simpler to proceed without data. If your fisheye has a diagonal 180 degrees view and your extension is too long you will see vignette in the corners. However if you push your fisheye lens closer to the glass you may be able to use a dome with a smaller field of view but the edge distortion will increase and so will chromatic aberrations. A classic example is the 230mm wide angle port used with a fisheye lens. The port has a field of view of 146.8 degrees which is far away from the required 174 degrees of a diagonal fisheye lens. 

Panotools provide entrance pupil for the Nikkor 8-15mm therefore we don’t need to go trial and error. The Canon 8-15mm Fisheye is on the Optical Bench Hub.

Following the same logic we determine that the entrance pupil is 129.98-18-17.98-27=67mm from the housing. Taking out 35.5mm for the adapter we get 31.5mm vs the 30mm on the Nauticam port chart. This means the lens will stick out from the dome opening and that is fine as a shorter lens would make it vignette. Try it if you have a 35mm extension you will see the vignette. If you have access to all extensions in steps of 5mm you can determine the correct one when the vignetting stops even without the entrance pupil position. Please note the above calculation is to use a Canon EF lens (flange distance 44mm) on E-Mount (flange distance 18mm) however if you work that out in the N120 Canon system with the additional gap for the more recessed housing you end up in exactly the same place.

Wrap Up

This article has shown that it is possible, with basic knowledge of trigonometry and access to lens, dome and camera design information to determine:

  • How well a lens may work
  • What is the minimum dome radius required to preserve the image quality
  • What is the extension required
  • How to find out the required field of view of your port

Without acquiring the actual lens camera or wide angle port. It is important to understand that if a lens is weak in air it won’t get better in water and in particular you need to appreciate that topside tests are not identical to use behind a dome that instead means working at very close focus well under one metre mostly around 30 to 50 cm. It may be worth it in some cases to rent a lens if available and take some tripod shots at close range. If you see really weak performance the lens may not be worth housing it at all.

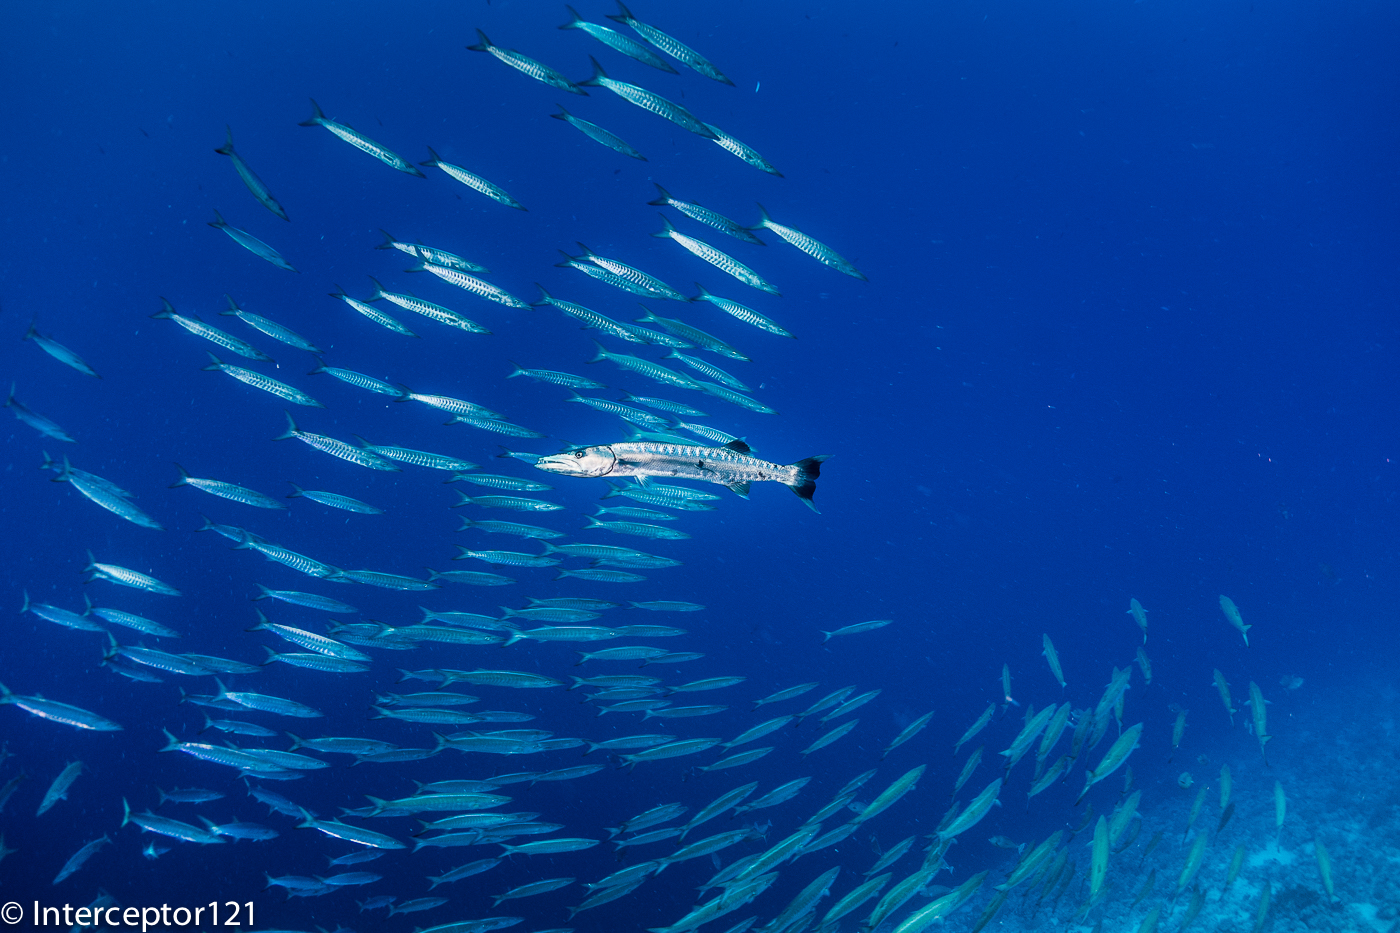
One of the misconceptions that has propagated in the last few years is that all rectilinear lenses offer poor performance compared to water contact optics and you need to stop down to very small apertures to have good edges. From my personal experience with the Tamron 17-28mm, I can conclude that this lens is far sharper than the water contact optics that require a similar investment and even beats more expensive options (WACP-C) however the rectilinear look is somewhat not in trend in underwater photography. Majority of photos want the centre to pop and this works better using fisheye lenses or distorted optics at close range. Still there is a place for rectilinear lenses: models, wrecks where shapes are known, even fish and marine life where the exact dimensions matter for scientific purposes.

I hope that this article allows you to have a more informed view of the key factors to look for in a lens that will ensure underwater performance is as good as it can be.

Open Water: Canon 8-15mm with Kenko 1.4 Teleconverter

In a previous post I described the use of the Canon 8-15mm as a zoom fisheye using the Kenko Teleplus HDpro teleconverted.

I had the opportunity to try this set up in Malpelo although in a situation that was not ideal for it.

I put this lens on expecting some wide angle school shots and instead it ended up being a dive with Galapagos sharks coming fairly close.

With the imminent launch of the Nauticam Fisheye Conversion Port many users will ask if they shoud invest in that or they can get decent quality at more affordable cost spending less then £800 for a teleconverter set up. I assume any Sony full frame E-mount shooters own both the Canon 8-15mm and the Sony 28-60mm.

Edit 9 March 2024

Studio Shots

I found some time to do some tests at f/16 distance 25cm which is typical of wide angle in a dome.

As you can see the kenko 1.4 TC does not loose any quality compared to the bare lens and looks more magnified at same focal lenght in the centre.

Canon 8-15 15mm f/16
Canon 8-15 1.4 15mm f16

Why is the quality the same? Probably the Canon 8-15mm is a better lens at 10.7mm that it is at 15mm and therefore even with the teleconverters result match. This corroborates my in water results.

Malpelo Shots Analysis

The dive was early in the morning and topside overcast resulting in a fairly dark dive.

The sharks came fairly close however as soon as the strobe fired they turned on their back. My impression was that this was more due to the noise of the strobe firing then the actual light.

All my shark shots are at f/8 1/30 ISO 500. As the shutter speed is quite low you have situations where the subject is sharp but some of the fish at the edges has some motion blur this is unrelated to the lens.

Profile

If you open the above image on a separate tab and zoom 100% you will see that the shark is pin sharp and so are the small fish on the same focal plane and the one behind. The reef on the left bottom corner is soft.

This has to be expected as the focal point is further back from the shark so the camera is out of depth of field on that corner.

The situation repeats in other shots like this one where the shark is even closer however the edge improves due to the reduced distance gap with the reef.

Checking in
Turn back

Again shot after shot the fact I was focussing on the shark that was deeper in the frame resulted in the left edge being soft, this has to be expected and there is nothing wrong with the set up the dome or else.

I took some shots really close on the reef at f/16 to make the point here the muray eel is sticking out of the reef so the edges look much better.

This other shot has an hawkfish in the edge you can still see the coloration and the eyeball of the fish.

Conclusion

In general terms shooting f/8 on full frame is not an example of small aperture in fact this is a setting for distant subjects almost and wide angle scenes. In the environmental situation I was in I could have increased the ISO to achive higher shutter speed and smaller aperture however this would have resulted in more noise and loss of resolution across the whole frame. My view is that for general wide angle where there is no clear subject you can try to focus closer to have the edges sharper however this is not always a possibility with sharks and things moving and furthermore there is rarely anything of interest in the edges.

This was my second time with this combination and I remain of the opinion that the teleconverter does not take anything away in the center of the frame and deteriorates the edges only just slightly and is therefore a worth addition. The nauticam FCP is not yet released and combined with the 28-60mm will for sure produce a more flexible set up because of the increased zoom range compared to the teleconverter however if this produces better image quality on the overlapping range remains to be seen. I expect it will cost considerably more than the £800 required to add the teleconverter to your Canon 8-15mm.

Canon 8-15mm with Kenko 1.4 Teleconverter

Since many years Canon and Nikon full frame users are able to use their respective 8-15mm with a teleconverter underwater, however this is not a very popular configuration.

In this article I will look at the Canon 8-15mm with the Kenko Teleconverter 1.4x for Sony full frame cameras.

First and foremost a teleconverter is not cropping the image it has optical elements. Cropping means reducing the resolution at sensor level while a teleconverter induces a deterioration of the image and possible defect but does not affect the sensor resolution. Generally 1.4x TC is much better than 1.4 crop. If you find yourself cropping a lot your fisheye shots or even using the 8-15mm in APSC mode the teleconverter may add some real value to you so read along.

Parts Required

In addition to the set up required to use the Canon 8-15mm you need 3 additional items:

Kenko Teleplus HD Pro 1.4 DGX
  • Kenko 1.4 Teleconverter
  • Canon 8-15+TC zoom gear
  • Extension ring N120 20mm
N120 Extension ring 20
Canon 8-15mm with Tc and gear

The benefits of this set up are clear:

  1. Unique field of view
  2. Smaller additional bulk
  3. Relatively low cost

Some readers have emailed asking if the Kenko is compatible with the Sigma MC-11. I do not recommend using the Sigma MC-11 with the Canon 8-15mm because it only supports single AF and it is unclear if the Kenko will work or not and how well. I have tested with the Metabones smart adapter and this is the one I recommend.

Field of view

The 8-15mm lens with teleconverter will give you access to a zoom fisheye 15-21mm with field of view between 175 and 124 degrees. This is a range not available with any other lens of water contact optic that stop normally at 130 or 140 degrees.

Additional Bulk

The additional items add circa 370 grams to the rig without teleconverter and make is 20mm longer due to the additional extension. The additional fresh water weight is circa 110 grams.

Cost

The latest version of the Kenko Teleplus 1.4X HD DGX can be found in UK for £149.

The 20mm extension ring II is £297 and the C815-Z+1.4 Zoom gear is £218. Note this is in addition to the 30mm extension required for the 8-15.

With a total cost of £664 you are able to obtain the entire set up.

The rig looks identical to the fisheye except is a bit longer. You have a choice of 140mm glass dome or 4.33″ acrylic dome see previous article.

Additional extension ring on otherwise identical rig

With the rig assembled I made my way to the pool with the local diving club.

Pool Session

The 8-15mm with teleconverter was my first pool session with the A1 on the 3rd of February I was very much looking forward to this but at the same time I had not practiced with the A1 underwater previously and did not have my new test props. I think the images that follow will give a good idea anyway.

15mm Tests

At 15mm (zoom position somewhere between 10 and 11 mm on the lens) the image is excellent quality in the centre and I find very difficult to tell this apart from the lens without TC except for the color rendering. I believe the Kenko takes a bit away from the Canon original color rendering.

Peter at 15mm f/11
Dad and Son 15mm f/8
Diver girl f/11

At close range you get the usual depth of field issues depending on where you focus but this is not a teleconverter issue.

CFWA 15mm f/8
Peter and croc

For comparison a 15mm image without TC.

VideoDiver

Zooming In

Obviously what is interesting it that you can zoom in here a set of shots at 16, 18, 21 mm.

16mm f/8
18mm f/8
21mm f/8

Finishing up with the required selfie.

21mm f/8

Conclusion

I enjoyed the teleconverter with the Canon 8-15mm and in my opinion in the overlapping focal length this set up provides better image quality of the WWL-1. I shot for most at f/8 as I was not very close and this actually shows the TC does not really degrade the image much.

You need to ask yourself when you will need 124 to 175 degrees diagonal and the answer is close up shots of mantas and whalesharks where a fisheye may be too much and 130 degrees may be too little. The set up also works if you want to do close up work and zoom in however I reserve the right to assess more in detail using my new in water props when I have some time.

Canon 8-15mm with 4.33″ Acrylic Dome for Sony A1

Following from a previous article about not increasing bulk I have considered a few options for the Canon 8-15mm fisheye.

The 8-15mm is not a small lens and due to the different flange distance between Canon EF mount for DSLR (44mm) and Sony E-Mount (18mm) we have a chunky 35.5mm N100 to N120 adapter port that makes the whole set up not that compact.

Dome Options 140mm vs 4.33″

The Nauticam port chart recommends the 140mm glass fisheye dome for the 8.15mm, this port is 69mm radius and is made with anti reflective optical glass and weights 630 grams.

140mm Glass Dome on Scale

There is another dome from Nauticam the 4.33″ acrylic but this does not feature on the port chart for the Canon 8-15mm.

I did some calculations and this dome should require the same extension so I ordered one conscious that this would be lighter but not necessarily increase the underwater lift due to a reduced volume.

4.33″ dome weight

Although there is a difference of 362 grams the smaller volume will result in less buoyancy 348g lift vs 688g lift for the 140mm so overall the additional buoyancy is only 22 grams.

4.33″ vs 140mm

The primary benefit of this smaller dome is that it gets you closer this in turn means that things will look bigger and as consequence depth of field will drop. Depth of field depends on magnification and as you will get closer it will drop compared to other domes. So larger domes have more depth of field not because they are larger when you are at close range but simply because your camera focal plane is standing further back.

To give an idea this is a little miniature shot with the 140mm dome with the target touching the glass port.

140mm dome close up

This is the same target with the 4.33″ dome.

4.33 dome

Side by side shows the difference in magnification.

Left 4.33″ dome right 140mm dome

If we look at the same detail we can see that the 140mm dome image detail is less blurred.

4’33 dome vs 140mm dome

We are on land here there is no water involved and the 140mm image is sharper at the edge simply because it is smaller.

As depth of field must be compared at equal magnification we can also bust another myth of larger domes vs smaller domes there is no increased depth of field you are just standing further back if you compared the front of the port instead of the focal plane.

Building the Rig

The extension required is still 30mm as for the 140mm dome,

Acrylic dome profile

The overall size of this dome means it is flush with the extension ring.

Port details the lens hood must be removed

This is the overall rig with the amount of flotation in this image it is around 600 grams negative in fresh water.

4.33 rig

Now that we know what to expect is time to get in the pool and take some shots. I got some miniature aquarium fixtures to simulate a close focus wide angle situation.

Pool Session

Once in water I set up my artificial reef and got shooting.

I was at the point of touching the props so I had to stand back a little. As expected the issue is depth of field.

Shots at f/11

For starter we try to get as close as possible and focus in line with the chick.

Fisheye f/11 Focus on back

Due to the extreme magnification the front details are quite soft. So from here I start moving backwards a little.

Still focussed on the chick the sharpness improves due to reduced magnification this is a simulation of a larger dome.

Fisheye f/11 Focus on chick

There still is severe blurring of the front detail at f/11. However due to the increased depth of field that the dome brings behind the focus point the rest looks pretty good.

Focussing on the middle of the frame at f/11 results in blurry details for the features in the front of the frame but much less blurry than before and the chick is still relatively sharp.

fisheye f/11 Focus on edge front

Focussing on the pink reef detail results in a better overall result in a counterintuitive way.

Shots at f/16

Stopping down the lens results in increased depth of field so more of the image is in focus however the overall sharpness drops. This is a good place to be if you don’t want to be too sophisticated with the choice of focus point and you are close.

You can get closer but the front detail is still a bit soft but acceptable.

Fisheye f/16 Focus on back

If you move your focus point a bit further in front the situation improves.

fisheye f/16 Focus on middle

At this point I decided to get into the picture with a white balance slate.

Fisheye f/16 Focus on back diver

Although the front is quite blurry due to the extreme close range the result is acceptable for the non pixel peeper.

Shots at f/22

We are here hitting diffraction limit and the image looses sharpness but we are after depth of field so be it.

fisheye f/22 Focus on duck

Now the depth of field is there although the detail in the centre is less sharp.

fisheye f/22 Focus on middle

Moving the focus point makes the image a bit better.

Time to insert the diver in the frame.

Fisheye f/22 Focus on back diver

Overall ok not amazing consider the dome is on the parts.

Conclusion

The small acrylic dome does quite well at close range, the limitations come from the depth of field and not from the water and the dome increases the depth of field behind the focus point. This is something that you can use to your advantage if you remember when you are in open water.

For shots that are further away you can shoot at f/11 and get excellent IQ there is no need to stop down further to improve the edges. Consider however that f/8 may be just too wide on full frame and introduce additional aberrations regardless of depth of field.

VideoDiver at f/11

Some numbers:

Nauticam 140mm Glass dome: £911

Nauticam 4.33″ Acrylic dome: £550

Price difference £361 or 40% however bear in mind that the primary benefit of the glass dome is to resist reflections and ghosting due to the coating and the fact you can keep the 8-15mm hood on.

Nauticam NA-LX100 4K Video Review

Following the previous review that was dedicated to still images we now go into the subject of 4K video with the Panasonic LX100 and related Nauticam LX-100.

Currently there are only two compact cameras that produce 4K video the Sony RX100 and the Panasonic LX100.

The housing for the Sony RX100 has a traditional M67 port whilst the LX100 uses the N50 compact port system.

This means you can use all your wet lenses with the RX100 without specific adapters. The LX100 has however a number of benefits.

This table compares the field of view of the two cameras in 4K video mode.

LX100
4K Horizontal FOV Vertical FOV Diagonal FOV Sensor width 35mm 3:2
26.00 71.90 44.40 79.50 15.80 23.86
81.00 26.20 14.90 29.90 15.80 74.40
RX100
4K Horizontal FOV Vertical FOV Diagonal FOV Sensor width 35mm 3:2
28.00 67.90 41.50 75.40 11.85 26.73
80.00 26.00 14.80 29.60 11.85 76.37

When the camera shoots in 4K mode the focal length remains the same however the camera uses a smaller part of the sensor. A normal micro four third sensor measures 17.3×12 mm whilst the 1″ sensor of the RX100 is 13.2×8.8 mm. Note that the LX100 does not use the whole sensor due to the multi aspect format that keeps the diagonal field of view unchanged regardless of the image format.

What we can see in the LX100 table is that although the focal length in 4K is 26mm the horizontal field of view is the same of a full frame camera with a lens of 23.86mm this means the field of view in 4K should be slightly wider than a picture taken by the LX100 in 4:3 format.

I put the camera on a tripod and took two sample shots, this is the first at 24mm in 4:3 format that I then cropped to 16:9.

4:3 Crop to 16:9
4:3 Crop to 16:9

This other shot is from exactly the same position taken extracting a 4K frame from a small video.

4K Photo 16:9
4K Photo 16:9

As stated the horizontal dimension is just a few mm wider in 4K 16:9.

What this means is that this is the same that any normal camera with a 24mm lens that then is cropped to movie format in terms of field of view.

The Sony RX100 does not have a multi aspect sensor and therefore the horizontal field of view drops more.

With the short port on the LX100 using a wet lens like the Inon UWL-H100 we can achieve more than 97° horizontal which is very wide and zoom all the way to 79° and if we use a wetmate or the mini dome cover the other range between 72° and 50°.

Practically the LX100 with wet lenses and wetmate or minidome gives you access to focal lengths between 15.5-21mm and again 24-35mm is like having an 8-18mm lens on a micro four third which is good for whale sharks and mantas this is even wider than the 7-14mm lens on a Panasonic GH4 in 4K and the LX100 has a (weak) optical stabiliser on the lens.

The RX100 mark IV instead can only cover between 96° and 90° before the wet lens stops working properly and we jump to 68° if using a wetmate.

UWL-H100 Flat Test Cards

This shot taken at around 15cm shows a nearly rectilinear and very wide image.

In short if you are after some super wide angle in 4K the LX100 is definitely the way to go.

From an ergonomic point of view I shoot video in shutter priority and let the camera work out ISO and aperture, this is relatively easy to do with the LX100 although the absence of custom memory modes on a mode dial is painful.

A control that can be quite useful due to the tendency of the LX100 to go focus hunting is to set the ae/af lock button to af-on. This requires the shutter to be set in release priority with this control you can use manual focus and force the LX100 to refocus when you hit the af-lock. This is a very useful feature.

Update 28 September the method described to fight focus hunting does not work in 4K. There is going to be another post with the best settings for 4K video for the LX100.

For what concerns macro both the LX100 and RX100 present their challenges due to the short zoom lens, the LX100 more so due to the horrible rectangular port. It can be argued that you can’t shoot wide and macro with the LX100 whilst you can do that with the RX100 however the strength of the LX100 is certainly in its very wide lens and the short port that combined with a flat wide angle lens can produce an extremely wide field of view able to cover practically almost any wide angle scene.

For macro the GH4 and upcoming GX8 are probably going to be better placed due to the higher crop factor giving focal lengths in excess of 100mm using the 14-42mm lenses.

If you want to get into 4K video and your focus is primarily wide angle the LX100 is an excellent device.

The WWL-1 on a Nauticam LX100


Nauticam NA-LX100 housing and port system review

Nauticam has given me the opportunity to test the housing for the Panasonic LX100 priced at $1,200 or £922 in UK.

As anticipated some time ago this housing features the new N50 mini port system for compact.

NA-LX100 aperture and format dial

The housing comes with the rectangular port as a standard, as the LX100 has a 24mm equivalent lens and the lens extends quite a lot between the shortest and longest focal length it is not possible to use an M67 long port or there will be vignetting.

In order to install the camera you need to set the aperture to f/16 and the aspect ratio to 4:3 with focus mode in normal and lift the zoom lever. Likewise to take the camera out of the housing.

LX100 housing preparation

Unfortunately as mentioned several times on this blog pincushion distortion severely affects the image at focal lengths shorter than 35mm equivalent as our in water test shot demonstrated. If you zoom in the corners you can see also extensive blur and chromatic aberrations.

LX100 flat port at 24mm

Furthermore the lack of an M67 port means you now need the Nautical flip diopter for rectangular port that costs $220 or £170.

When you eventually get to put a diopter on the lack of zoom means that magnification with traditional lenses is quite limited.

UL-165
NA-LX100 UCL-165

The frame width is 62mm with a single Inon UCl-165 and goes to 5cm when we stack another UCL-330.

UCL-165+330
NA-LX100 UCL-165+330

Image quality is ok except some blue fringing at the borders.

A single UCL-100 gives a frame width of 42mm.

UCL-100
NA-LX100 UCL-100

Apparently the Nauticam CMC ($320 or £240) gives 32mm frame width that is adequate for macro.

So if you are into macro you need to invest $1,200+$220+$320=$1,740 to have some decent magnification.

If you possess many clamps and cold shoe ball mounts you can buy an Inon M67 lens arm and use the lenses you have saving some $$$ but the magnification is limited unless you get the CMC.

For semi-wide angle a mini dome port is available at $280 or £216.

N50 3.5
N50 3.5″ Mini Dome

This restores the field of view in air however you can only zoom to 40mm before the camera can’t focus anymore. I have even tried with dry diopters on the camera there is no improvement.

Optical quality is great.

LX100 Mini Dome 24mm

Probably the most useful port is the N50 short port that has an m67 thread and allows to use wet wide angle lenses.

N50 Short Port
N50 Short Port

I went to Swanage but got the tide wrong visibility was shocking still gives an idea of the image quality of the LX100 with the Nauticam WWL-1 wet lens.

SWANAGE (4 of 4)
Atlantic Ocean Anemones

SWANAGE (3 of 4)
Kelp?

Upside down
Upside down

SWANAGE (1 of 4)
Myst!

If you have a Nauticam wet mate you can also use it with the short port and achieve the same or better sharpness than the minidome thought with some residual chromatic aberration.

LX100 Short Port Wet Mate 24mm

The big benefit is that if you find that your wet wide angle lens is too wide for what you are shooting you can change lens without changing the port.

NA-LX100 rear buttons

For what concerns the ergonomics of the LX100 they are quite intuitive on land.

One of the characteristics is the lack of a mode dial.

You have an auto position  for shutter speed and aperture and if you leave them as such the camera shoots in program mode.

Once you move the aperture the camera goes in aperture priority mode. Probably the worst situation is the shutter dial that once touched has to come down all the way from 1/4000 to whatever you need it to be.

Also you don’t have thirds of exposure for the shutter dial and for example to get 1/50 you need to go to 1/60 and then use the rear dial.

I found the ergonomics of the camera in water particularly annoying as I was shooting with gloves. I did like the nauticam trigger system for the shutter however the amount of hardware of the nauticam tray and its weight are not really an option for me.

The Panasonic LX100 is a very interesting camera on land but in water ends up quite uncomfortable and expensive. The housing with the 3 ports comes at $1,200+$180+$280 if you add the Nauticam CMC and the WWL-1 you end with a whopping $3,195 the camera costs another $800. Total investment $4,000.

This is a lot of money in my opinion considering that with another $300 you can get a Panasonic GX7 with GX7 housing, an Olympus 60mm with 65 macro port and a Panasonic 8mm fisheye with 4.33″ dome. The LX100 and GX7 share the same sensor but there is no doubt that the macro performance of a dedicated lens as well as the fisheye of the 8mm lens have no comparison.

In conclusion the Panasonic LX100 with NA-LX100 is a bit of a flop for stills the only use that I can think of is wide angle 4K video with the short port and a wet lens but other than that I don’t see how Nauticam is going to sell many of those units.

Guide to Micro Four Third Lens and Port selection for Underwater Photography

Micro Four Thirds camera have become increasingly popular for underwater photography especially for macro and close up subjects in the last years.

The micro four thirds standard is shared between Olympus and Panasonic however in terms of underwater use Olympus is on the forefront and in fact it produces their own poly-carbonate housings for all new models.

Nauticam has their own N85 port system for micro four third that as of today has 10 different ports, two extension rings and a large number of focus and zoom gear. You can also buy cheaper 3D printed gear to save a few bucks for majority of lenses.

The other interesting characteristic of the micro four third market is that since the introduction of the 16 megapixels sensors, there have not been any substantial improvement in image quality among the various model, we will have to see what the 20 megapixels sensor of the Panasonic GX8 will bring but all in all the camera choice is mostly one of ergonomics and features.

Olympus is quickly clearing stock but you can still found the OM-D E-M10 out there for £478 with kit lens. The might Panasonic GX7 is now £433 with kit lens. In US you can find both the Panasonic GX7 and the Olympus O-MD E-M100 for $599 with kit lens.

The Panasonic LX100 sets you at £589 in UK and $698 in US really if you are into photography and want a micro four third it is a no-brainer you get a previous version GX7 or OMD EM10 (as you can’t find an EM5 new) and happy days.

Now that you have committed to the camera you are into lenses and ports for underwater use. The Olympus housing costs on average 25% less than Nauticam and has less choice of ports for me really is not appealing so let’s assume we are into Nauticam. What lens or port to choose?

Both the Olympus 14-42 EZ and the Panasonic 14-42 II fit in the Nauticam 35 port and require 3D printed gear to operate. The flat port will be OK for fish portrait and if you already have wet lenses it is definitely recommended to buy the 35 macro port first especially if you shoot video.

Nauticam Macro 35 port

Deepshot zoom gear on the GX7

Both lenses do need a wet diopter to shoot small subjects in water as the smallest frame is around 7-9 cm width otherwise.

If you come from a compact camera most likely you have wet lenses and therefore you can re-use them for close range work.

Obviously a flat port for a 28mm equivalent lens is not a solution for wide angle.

First of all at the wide end due to water magnification the angle of view is the same of a 37mm lens which gives a field of view of just 60 degrees. The other point is that you really want to shoot at the tele end to avoid cluttering the background too much and typically in water those kit lenses work only at over 25cm from the port which means they are only good for medium size fish portraits.

The sequence of shots shows that even if the size of the cup is pretty much the same it looks much better at long focal length.

Cup at 28mm
Cup at 28mm

At 28mm you can see the glass in the frame on the right side and the window in the background.

Cup at 50mm
Cup at 50mm

At 50mm with similar size of the cup the glass is half gone and the cup looks nicer less of the window is showing.

Cup at 42mm
Cup at 42mm

at 42mm the glass is nearly out of the frames and the windows in the background is gone.

If you did not have any wet diopters the first additional lens and port to get will depend on your subjects, if you shoot macro you need a macro lens, if you shoot close focus wide angle you need a fisheye lens it is as simple as that.

Olympus 60mm and Nauticam 65 Port (35 + 30 mini extension)

The Olympus macro 60mm is the preferred lens combined with the Nauticam 65 port (or 35 port plus 30 extension). This lens can focus 10cm from the port and therefore can be used also in low visibility. Really there is no reason to use the more expensive 45mm Leica lens. The 60mm is great also for portrait work of small fish.

Cup at 60mm
Cup at 60mm

The same shot of the cup at 60mm means we now say goodbye to the glass due to the reduced angle of view. The increased working distance also means a more pleasant perspective.

I hope this explains why for underwater macro we want to shoot with long focal length as this helps us to get rid of the background so a longer lens will always be better than a zoom lens with a wet diopter and it will also give more magnification in case you have really small subjects.

If macro is not your priority and you are happy with kit lens and diopter for wide angle the first option is the Panasonic 8mm fisheye, that since the introduction of the Olympus 8mm pro fisheye has also reduced in price.

Panasonic 8mm Fisheye and Nauticam 4.33
Panasonic 8mm Fisheye and Nauticam 4.33″ Dome Port

This lens works best with the Nauticam 4.33″ dome port. If you shoot in 3:2 format you can also try the Nauticam 3.5″ wide angle port that makes the set up even smaller however there are no substantial improvements on how close you can get as the strobes will fail to lit properly anything that is right on the port without risking to see the strobe lights in the frame. The 3.5″ port will vignette in 4:3 image format though some users report success.

EDIT 7 September 2015

The issue of the 3.5″ port has been put forward again with the argument that it allows you to get closer than the 4.33″ dome with the Olympus EM5. I do not have an EM5 but I do have a Panasonic GX7 the end of the dome is 9 cm away from the focus point and this means that the dome allows you to get closer than the minimum focus distance of the lens of 10cm. As the dome is shorter than the minimum focus distance on the GX7 the 3.5″ port does not bring any benefit. Furthermore as trays are in general around 30cm you need to be around 15 cm anyway to be able to illuminate the subject properly with edge lighting, in virtue of this I remain convinced that the 3.5″ port does not bring any real benefit except is a bit cheaper and may vignette.

So your starter kit if you upgrade from compacts of you own a close up lens is Macro 35 port followed by Olympus 60mm and mini extension ring 30 or Panasonic fisheye 8mm with 4.33′ dome for wide angle.

Wide angle zoom lens are less of a priority but the choice is between the Olympus 9-18mm and the Panasonic 7-14mm bearing in mind that if you had a wet wide angle lens you may not even bother getting an intermediate wide angle zoom lens.

That’s all for now hopefully this will cover most of the ground for all new micro four third underwater shooters with kit lenses!

Panasonic Lumix G X Vario 14-42mm with Fisheye Converter DMW-GFC1

The Panasonic 8mm Fisheye lens for micro four third is a clear winner for close focus wide angle however the lack of zoom and the really wide 180º cover mean that there are many subjects that will look tiny in the frame.

The next option in terms of width is the Panasonic 7-14mm wide angle lens however this requires a large dome for optimal performance making the set up expensive.

Is there anything else left if you don’t want to buy a wet lens and you already have the Panasonic PZ 14-42 X Lumix G?

Panasonic produces an add on lens DMW-GFC1 that is declared to provide 10.5mm equivalent and reduce minimum focussing distance to 16 cm all specs can be found here.

This add on lens can be used with the 4.33″ dome for the 8mm fisheye and the 30 extension.

I took a few test shots and the results are pretty good.

This first shot is at f/5 and is very sharp in the centre.

Fisheye Converter f/5

Fisheye Converter f/5

Getting a bit closer and stopping at f/8 the results are pretty good for an adapter that is less than £100 on amazon.

Fisheye Converter f/8

Barrel distortion is contained so this combination may be good for wrecks where the fisheye effect is a bit disturbing.

If you have the Lumix G Vario X PZ 14-42mm you may want to invest in this little accessory before getting the much more expensive 8mm fisheye even if the Nauticam 30 extension is required. Later on the extension can be used with the flat port 35 and the Olympus 60mm for super macro and the 4.33″ dome of course with the 8mm.

I think it is amazing how much can be obtained out of this lens if we consider wet diopters, wet wide angle lenses and this adapter before you need to get a second lens.

This lens could also work for video with the Panasonic GH4 at 4K however zoom is not recommended with it.

Underwater Photography Workshops – My Tips

I thought the Red Sea workshop with Alex Mustard was brilliant to I thought of writing down my notes and sharing them with you.

This final post is a general one and has my lesson learned from attending the workshop, those that follow are generic tips that I think would be beneficial to anyone wanting to attend a similar experience.

Before the Workshop

The experience actually starts before you even attend the sessions key points for me include:

  • Ask questions about the workshop and how it works
  • Know your equipment
  • Take all the gear you have
  • Be fit and self reliant
  • Set your self objectives

I did not really ask many questions before going as Dr Mustard sent a very comprehensive document however this is not standard and it is better to ask in advance about the conditions, the dives, the type of training and generally how the workshops is organized. Some have talks, other have one to one, other are just dive trips where you ask when you need. Not all types fit everyone so better to make sure you go to one that matches your need.

Sadly even this time like in every trip I have come across people using their equipment or part of their equipment for the first time. The end results is wasted dives and opportunities, I cannot stress enough that testing your rig in a pool before going allows you to familiarize with it and make any corrections you need.

Pool Conditions
Pool Practice

Also take all the possible lens, ports, parts that may be useful. Once you are there you don’t want to have regrets about something you have left home. In my case all was there but I did not know about remote strobes otherwise I would have got myself a trigger as I have 2 Z240s.

Transformer Tray
In case of doubt exceed with equipment

In most of those workshops buddy system does not really apply so make sure you are self reliant and fit as the conditions allow to avoid embarrassing or even dangerous incidents. Once there dive within your comfort limit and if you don’t really have a buddy dive with a guide.

It is useful to know before you go what your objectives are, for example what type of shots you want to work on. This means you have something to do over and above the assigned tasks.

During the workshop

Once there you need to stay focused on your performance. Those are additional points to think about:

  • Deliver the assigned tasks
  • Go off the beaten track
  • Learn from other participants
  • Take notes

Sometimes during those workshop there are challenges or set shot that are suggested, this is your opportunity to compare your work with others and therefore you should make sure you deliver those also to find out if there are limits with your equipment.
Eggs
In the Red Sea workshop were given the task of taking pictures of cardinal fish with eggs in their mouth. I realized I could not fill the frame because I lacked a mid range close up lens and my camera would not focus closer.

In addition to the suggested shots you should make changes to those and try something different even if not totally different.

Ras Katy Sunset

There are many landscape split shots but not many portrait so why not try one results can be excellent and it is easier with a small dome.

Other participants also will give a go to the same shots or have better editing skills it is worth to watch and learn.

Trucks
My buddy was setting up a remote strobe I fired a few shots (unintentionally of course) so I got my own shot!

Finally take notes of what you did right and wrong and if you missed anything.

After the workshop

After the sessions are over still there is work to do over and above going over your pictures again.

  • Write down your lessons learned
  • Look at other people images
  • Order any equipment that you missed

Well it goes without saying that I put the notes together and summarized them here.

I also found great to connect to other people and then look at their gallery for other shots that we had not discussed before.

Finally I ordered myself an Inon UCL330, funny I had this lens and sold it not realizing the real use which is fish portraits!!!

That’s all for now if you go on a workshop soon I hope you find this useful.

Red Sea Workshop with Alex Mustard – Part VI Schooling Fish

On Friday we were up for our last 3 dives at Shark Reef the current had not changed but this time I decided to give more a go to the schooling fish after setting up all the backgrounds I wanted.

As you can see from the image on the title we had more of the usual divers chasing fish but this did not deter me this time as I developed a specific technique to do the dive that I used fully on the last two photo dives.

So after a bit of experimental shots like this one

Batfish school from Top

It was time to give it a proper go. To be honest is not that I like batfish that much and probably this is one fish that you can shoot in RAW in ambient light however if you do that you need to sacrifice quite a few ISO stops. With strobes the issue is to get the school in a formation that allows you to do a good job with lighting. This is my best shot for the session.
Schooling Batfish on Reef
What I like about this shot is the light on the fish or most of it where you can see yellow fins but also the background and a hint of surface.

Other fish that featured on the day were jacks but catching a school of those running past is quite hard unless the school is really big and they circle you.

Jacks Schooling
Jacks Schooling

In those type of formation you have all sort of issues with hightlights form the strobes in fact I was shooting 1/4 of power.

Giant trevallies made a more interesting single fish shot like this one.

Giant Trevally
Contrary to what you may think this is a shot with strobes otherwise you would not see the texture of the fish as you see it. Maybe a busy background but good technical exercise.

I also attempted a few anthias shots just to try a well tested technique to get them buzzing out the reef

Red Reefs
In the middle of the dives while I was waiting the barracuda school came out to play. Barracudas are quite tough as they require strobes to lit properly and I find the multitude of black and white shots that you see a bit boring as the fish texture is what makes the shot.

You have several challenges with the formation, if the school is big is difficult to take it all unless you are on the bottom or on the top. In the first case you need to control bubbles in the second you shoot the bottom so better be neat.

Anyway with a bit of patience I got the shot that I wanted

Arrows
It is impossible to illuminate properly all of them but this shot has got the right geometry and I think is quite pleasant.

On the second dive I was lucky to spend some time with a Giant Barracuda that was literally commanding the school at sight, very rewarding from a diving point of view I got so excited that I kept shooting with a relatively slow shutter speed however the fish that is lit by the strobe is well crisp.

Giant Barracuda issuing orders

This shot is much deeper than the previous so the blue is colder but still makes for an interesting shot.

On dive 3 I decided to do a bit of video although I had not taken my favorite lens so I had to apply a filter directly on the camera lens. Moreover I had forgot the setting Toy effect on from some other experiment and whilst this is off in RAW it came back in video so the result is a soft warmer image…yuk still was fun to put it together so here it goes

It was time to rinse the gear (if you could call that hosing it quickly on the dive platform) and get ready to leave the day after. On the last day we were asked to put together a selection of our best 10 pictures and were give a video with some gopro footage taken by the ops manager plus our slideshow. Considering the time it was spent to do it the result is excellent.I hope this has given you an idea of the workshop that I definitely recommend, on the next post I will write my personal lessons learned from such experience.