Producing and grading HDR content with the Panasonic GH5 in Final Cut Pro X

It has been almost two years from my first posts on HLG capture with the GH5 https://interceptor121.com/2018/06/15/setting-up-your-gh5-for-hlg-hdr-capture/ and last week Apple released Catalina 10.15.4 that now supports HDR-10 with compatible devices. Apple and in general computer are still not supporting HLG and it is unlikely this is ever going to happen as the gaming industry is following VESA DisplayHDR standard that is aligned to HDR-10.

After some initial experiments with GH5 and HLG HDR things have gone quiet and this is for two reasons:

  1. There are no affordable monitors that support HLG
  2. There has been lack of software support

While on the surface it looks like there is still no solution to those issues, in this post I will explain how to grade HLG footage in Final Cut Pro should you wish to do so. The situation is not that different on Windows and DaVinci Resolve that also only support HDR-10 monitors but I leave it to Resolve users to figure out. This tutorial is about final cut pro.

A word about Vlog

It is possible to use Vlog to create HDR content however VLOG is recorded as rec709 10 bits. Panasonic LUT and any other LUT are only mapping the VLOG gamma curve to Rec709 so your luminance and colours will be off.  It would be appropriate to have a VLOG to PQ LUT however I am not aware this exists. Surely Panasonic can create that but the VLOG LUT that comes with the camera is only for processing in Rec709. So, from our perspective we will ignore VLOG for HDR until such time we have a fully working LUT and clarity about the process.

Why is a bad idea to grade directly in HLG

There is a belief that HLG is a delivery format and it is not edit ready. While that may be true, the primary issue with HLG is that no consumer screens support BT.2020 colour space and the HLG gamma curve. Most display are plain sRGB and others support partially or fully DCI-P3 or the computer version Display P3. Although the white point is the same for all those colour spaces there is a different definition of what red, green and blue and therefore without taking into this into account, if you change a hue, the results will not be as expected. You may still white balance or match colours in HLG but you should not attempt anything more.

What do you need for grading HDR?

In order to successfully and correctly grade HDR footage on your computer you need the following:

  • HDR HLG footage
  • Editing software compatible with HDR-10 (Final Cut or DaVinci)
  • An HDR-10 10 bits monitor

If you want to produce and edit HDR content you must have compatible monitor let’s see how we identify one.

Finding an HDR-10 Monitor

HDR is highly unregulated when it comes to monitors, TVs have Ultra HD Premium Alliance and recently Vesa has introduced DisplayHDR standards https://displayhdr.org/ that are dedicated to display devices. So far, the Display HDR certification has been a prerogative of gaming monitors that have quick response time, high contrast but not necessarily high colour accuracy. We can use the certified list of monitors to find a consumer grade device that may be fit for our purpose: https://displayhdr.org/certified-products/

A DisplayHDR 1000 certified is equivalent to a PQ grading device as it has peak brightness of 1000 nits and minimum of 0.005 this is ideally what you want, but you can get by with an HDR-400 certified display as long as it supports wide colour gamut. In HDR terms wide gamut means covering the DCI-P3 colour space at least for 90% so we can use Vesa list to find a monitor that is HDR-10 compatible and has a decent colour accuracy. Even inside the HDR-400 category there are displays that are fit for purpose and reasonably priced. If you prefer a brand more orientated to professional design or imaging look for the usual suspects Eizo, Benq, and others but here it will be harder to find HDR support as usually those manufacturers are focussed on colour accuracy, so you may find a display covering 95% DCI-P3 but not necessarily producing a high brightness. As long as the device supports HDR-10 you are good to go.

I have a Benq PD2720U that is HDR-10 certified, has a maximum brightness of 350 nits and a minimum of 0.35, it covers 100% sRGB and REC709 and 95% DCI-P3, so is adequate for the task. It is worth nothing that a typical monitor with 350-400 nits brightness offers 10 stops of dynamic range.

In summary any of this will work if you do not have a professional grade monitor:

  • Look into Vesa list https://displayhdr.org/certified-products/ and identify a device that supports at least 90% DCI-P3, ideally HDR-1000 but less is ok too
  • Search professional display specifications for HDR-10 compatibility and 10 bits wide gamut > 90% DCI-P3


Final Cut Pro Steps

The easy way to have HDR ready content with the GH5 is to shoot with the HLG Photo Style. This produces clips that when analysed have the following characteristics with AVCI coded.

MediaInfo Details HLG 400 Mbps clip

Limited means that it is not using the full 10 bits range for brightness you do not need to worry about that.

With your material ready create a new library in Final Cut Pro that has a Wide Gamut and import your footage.

As we know Apple does not support HLG so when you look at the Luma scope you will see a traditional Rec709 IRE diagram. In addition, the ‘Tone Mapping Functionality’ will not work so you do not have a real idea of colour and brightness accuracy.

At this stage you have two options:

  1. Proceed in HLG and avoid grading
  2. Convert your material in PQ so that you can edit it

We will go on option 2 as we want to grade our footage.

Create a project with PQ gamut and enter your display information in the project properties. In my case the display has a minimum brightness of 0.35 nits and max of 350 and it has P3 primaries with a standard D65 white point. It is important to know those parameters to have a good editing experience otherwise the colours will be off. If you do not know your display parameters do some research. I have a Benq monitor that comes with a calibration certificate the information is right there. Apple screens are typically also P3 with D65 white point and you can find the maximum brightness in the specs. Usually around 500 nits for apple with minimum of 0.5 nits. Do not enter Rec2020 in the monitor information unless your monitor has native primaries in that space (there are almost none). Apple documentation tells you that if you do not know those values you can leave them blank, final cut pro will use the display information from colour sync and try a best match but this is far from ideal.

Monitor Metadata in the Project Properties

For the purpose of grading we will convert HLG to PQ using the HDR tools. The two variants of HDR have a different way to manage brightness so a conversion is required however the colour information is consistent between the two.

Please note that the maximum brightness value is typically 1000 Nits however there are not many displays out there that support this level of brightness, for the purpose of what we are going to do this is irrelevant so DO NOT change this value. Activate tone mapping accessible under the view pull down in the playback window this will adapt the footage to your display according to the parameters of the project without capping the scopes in the project.

Use HDR Tools to convert HLG to PQ

Finalising your project

When you have finished with your editing  you have two options:

  • Stay in PQ and produce an HDR-10 master
  • Delete all HDR tools HLG to PQ conversions and change back the project to HLG

If you produce an HDR-10 master you will need to edit twice for SDR: duplicate the project and apply the HDR tool from HLG to SDR or other LUT of your choice.

If you stay in HLG you will produce a single file but is likely that HDR will only be displayed on a narrower range of devices due to the lack of support of HLG in computers. The HLG clip will have correct grading as the corrections performed when the project was in PQ with tone mapping will survive the editing as HLG and PQ share the same colour mapping. The important thing is that you were able to see the effects of your grade.

Project back in HLG you can see how the RGB parade and the scope are back to IRE but all is exactly the same as with PQ

In my case I have an HLG TV so I produce only one file as I can’t be bothered doing the exercise two times.

The steps to produce your master file are identical to any other projects, I recommend creating a ProRes 422 HQ master and from there other formats using handbrake. If you change your project back to HLG you will get a warning about the master display you can ignore it.

121 with Paolo Isgro

Featured Image courtesy of Hannes Klostermann

Paolo Isgro lives in Belluno (Italy) in the Dolomites National Park, one of the most suggestive alpine locations in the world. Although he lives on the mountains and is fond of nature Paolo has been limited by his altitude sickness and therefore when he tried diving in 2002 he was immediately locked in.

Paolo is a scuba diver and has recently certified in free diving, he tries to travel as much as possible and he is keen to explore distant remote locations.

His work is accessible online on flickr https://www.flickr.com/photos/paolobl65/albums

Paolo has recently participated to a number of underwater photography competition, among his latest results:

Ocean Art 2019: 1 and 3 in the Super Macro category

Underwater Phographer of the Year 2020 2nd in behaviour category

Deep Visions 2019 1st in cetacean category

Deep Visions 2019 2nd in Macro category

Deep Visions 2019 best snoot image 


Questions and Answers 

When did you start underwater photography and why?

I started in 2006 during my first trip to Indonesia. Photography has been the natural evolution of my love for the ocean. I wanted to extend the emotions of the dives through images to keep as memories for me and others to enjoy. 

How much diving experience did you have when you started?

I had around 50 dives when I started. I have done other 900 dives since then, all with my camera.

Were you a land photographer before starting? 

I did not have significant photography experience prior to diving. I do like to take shots of the diving locations I visit however when I am at home I do not have sufficient time to dedicated to land photography.

Today my underwater photography is concentrated during my trips although I keep studying and learning when am home. 

What was your first underwater camera and housing?

My first camera was a Nikon E4600 point and shoot with a Fantasea housing. One year after I replaced it with an Olympus with a strobe and in 2009 I bought my first DSLR.

Paolo’s first camera

What is your current camera rig and why did you choose it?

For wide angle I use a  Canon 80D with Canon 8-15mm FE  or Tokina 10-17mm FE while for macro a Canon 7D with Canon 60mm lens. I also use Inon UCL-67 wet lenses and an inverted Canon 24mm Pancake for extreme super macro.

Paolo’s current Wide angle camera

I use Sea and Sea housing with a 45 degree viewfinder, I have developed my own trim system with self made floats on Stix arm segments. I have of course a macro port, a zen minidome and a 170 dome with 20 and 30 extensions.

Sea and Sea MDX-80D

My strobes are Inon Z330, OneUW 160 and Inon Z240 as remote snoot rig using triggerfish. I have several snoots including some self made in fiber optic.

I started using Sea and Sea housing in 2009 when I bought the DSLR and I have stayed with this brand ever since. Maybe there are better products now however I have found Sea and Sea to be very sturdy and reliable and I have invested in the ports and accessories so now is difficult to change.

For what concerns the camera right now I think Nikon is better than Canon however I had already built my set of lenses and I really like the reverse ring macro that canon offers. 

What is your favourite underwater photography discipline?

I started with macro and I have a lot of experience with it. I think macro is the easiest discipline in underwater photography you can start critter hunting with a dive guide and just keep shooting. When you have more experience, you start framing correctly and understanding the correct positioning as well as the lighting. Eventually you realise that the background can be at times more important than the subject and that it is not just about shooting but waiting for the subject to be ready for your shot, chasing the peak of the action.

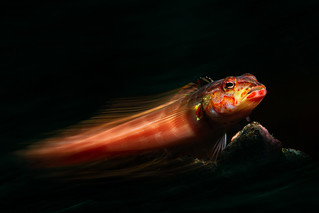
I have also spent time in developing special techniques with reverse rings or with mixed lighting or slow shutter speeds. Sometimes I use vintage lenses to get a special bokeh at very wide apertures. I try to constantly move forwards some experiments are very successful like super macro or slow shutter shots, others still to be improved like vintage lenses. I constantly look at the work of other photographers to understand if there is a technique I am interested in trying. Another point in favour of macro is that most key locations are accessible at reasonable cost, so once on location I recommend to hire a private guide to support you taking the shots and maximise the opportunities.

Ajiex Dharma  in Tulamben  and Obet Curpuz in  Anilao  are the guides that have helped me the most during my trips.

Wide angle is the discipline that today I find more interesting, especially large animals and the possibility to dive in spectacular dive sites. I think I still need to develop my wide angle photography.

Wide angle is the most complex discipline in underwater photography and I recommend to try it once you have already some experience. There are many challenges, firstly you need the location with the right mix of reefs and fish life, those tend to be more difficult to dive with currents, surge, or sometimes deep dives. Balancing ambient and strobe light is complex and requires more powerful strobes to cover fisheye lenses. I find particularly challenging to develop a wide angle vision to frame the shots in such a way that they have depth and energy in the frame. 

Selection of shots

Snoot :

IMG_1432
IMG_2289
IMG_1983
IMG_8839
01012016-IMG_9405
03012016-IMG_0175
28122015-IMG_7505
IMG_1367
IMG_4248
IMG_8030
IMG_2211

Accelerated panning with snoot :

_MG_5781
_MG_5886
_MG_6331
_MG_5845
_MG_5521
_MG_5459

supermacro with reverse ring :

Reverse Ring for Canon 24mm pancake
_MG_3309
_MG_3029
IMG_2612
IMG_2071

Macro with vintage lenses :

_MG_0411
_MG_1022
_MG_6732

Ambient light wide angle :

_MG_5715_openWith
_MG_6288_openWith
_MG_7100_openWith
_MG_7132
_MG_7337_openWith
_MG_6693_openWith

Wide angle :

_MG_7836
_MG_9791_openWith copia
_MG_9804
_MG_9007-1
_MG_2802
_MG_4335-1-1
_MG_4443
_MG_4339
_MG_4556
_MG_4491
_MG_4319-1-1
_MG_4812
_MG_4701
_MG_5058
_MG_4969

What has been to date your best trip from a photography viewpoint?

Triton Bay ( Indonesia )   has incredible variety of subjects : 5 different pygmy seahorse  (satomi , pontoi , severn, denise , bargibanti ),  whale sharks,  reef fish and invertebrates of west  papua .  The reefs offer incredible scenes in shallow water thanks to ambient light and the beaches are wonderful.

_MG_2906
IMG_7579
IMG_7922
IMG_7641
IMG_8181
IMG_7721
IMG_6440
IMG_6984
_MG_2353-2-2
_MG_2070-2-2
_MG_1967-2-3
IMG_6474
_MG_2167-2-2
_MG_2774-2-2
IMG_8486
IMG_8465
IMG_8035

How many trips have you done in the last 3 years and where?

Lately I have been lucky to make up to 3 trips per year. In the last 3 years I have been to Fiji/Tonga, La Paz, Socorro, Anilao, Tulamben, Gorontalo, Triton bay, Raja Ampat and Weda Halmahera. I prefer staying in resort for two reasons: I can repeat the same dive site over and over and I can stay for longer period of time. Clearly some locations are only accessible by boat but if there is a choice I would always stay in resort, typically I look for small locations with a limited capacity specialised in underwater photography. 

Has there been a defining moment where you think your photography improved significantly?

No. I am self-taught so I have had to study hard. I like to research the theory before trying and as I am far from the sea my progression has been steady and continuous.

It is really important to understand your own limitations and mistakes, this is a key point. Even if you get many likes on facebook or win a competition you don’t understand from there how to move forward and you get stuck in a loop. Having some friends that are experts and open minded that can give you some feedback is extremely useful. 

What is your personal favourite shot among all you have taken?

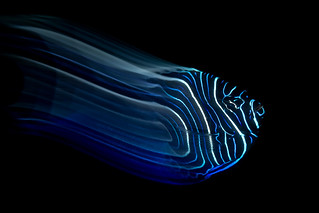
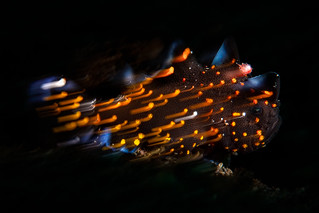
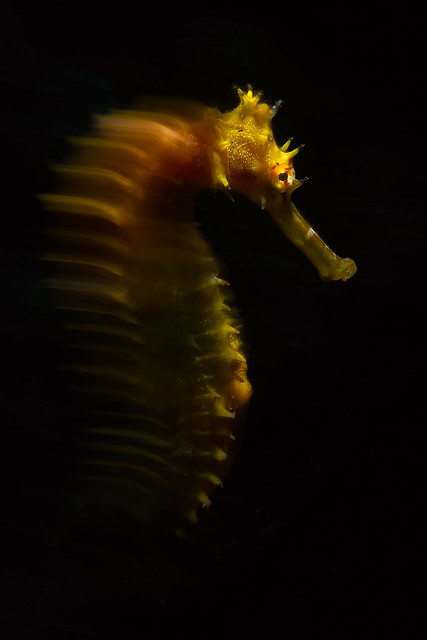
I think my shot with strobe and accelerated panning of this seahorse really gives the idea of a horse galloping in the wind!

_MG_5123

Do you want to be featured? Next article it could be you

Please get in touch!

Launch of 121 with…

Dear Readers

I hope you are staying safe with the COVID-19 pandemic please in case of doubt err on the safe side and check any advice that sound ‘original’.

In order to keep morale I have decided to start with a series of 121 Q&A with up and coming underwater photographer that have either won some competitions or created some emotionally engaging images in the last few years and MORE IMPORTANTLY are happy to share their work and ideas.

The first release will be on Saturday 28 March 2020 and will feature Paolo Isgro .

I believe Paolo has produced some really exciting macro images in the last years but I see the greatest potential for wide angle where he is producing more exciting images each trip.

If you are or know a photographer that wants to share his work please let me know and I will send out the questionnaire.

Stay safe

What is Dual Native ISO and does it matter to Underwater Video?

Dual native ISO is one of the most confusing topics in modern videography. Almost any professional camera Alexa, Varicam have dual native ISO. So what is it and does it matter to underwater shooters?

Sensitivity and ISO

Most of the confusion stems from the fact film no longer exists. When you had film you could choose different ASA or film sensitivities and once loaded in the camera you were stuck with it until it was finished.

With digital cameras having a memory storage you can flexibly change the ISO but there is some confusion about ISO and sensitivity so let’s have a look at some details.

Simplified digital camera schematic

In the schematic above the film represent the sensor. As with film the sensor has a fixed level of sensitivity that does not change.

The two triangles are gain circuits those will amplify the signal coming from the sensor that is still analog has yet to be converted into digital signal. A camera has typically a single gain circuit but some camera have two in this case we will have a dual gain circuit like the Panasonic GH5s or the Blackmagic Pocket Cinema Camera 4/6K.

Base or Native ISO?

When the gain circuit is set to 1 or passthrough an ISO measurement is taken according to ISO 12232 https://www.iso.org/standard/73758.html

It follows that as the amplifier is in pass through the camera can only have a single native ISO. So the whole definition of dual native ISO is incorrect and this should be called as Dual Gain camera as the sensor really has only 1 ISO. The ISO formula defines speed in lux*sec with the following formula this gives the native ISO of the sensor and then gain levels on the amplifier are mapped to an Ev or Stops scale.

It is worth noting that ISO values as seen on a camera are typically off and real values are lower, this is because manufacturers tend to leave headroom before clipping.

And how do I find out the native ISO of my camera? This is typically not defined clearly but generally is the lowest ISO you can set on the camera that is outside the extended range, where extended really means additional digital enhancement range.

For simplicity this is a snapshot of the GH5 manual where you can see that the native ISO is 200. The extended gain is below 200 and above 25600.

Panasonic GH5 manual

A method to check what gain circuitry is installed in the camera is to look at Read noise graphics from PhotonsforPhotos.

White dots map the extended ISO setting

When we look at a camera with a dual gain circuit the same graph has a different shape.

GH5s read noise shows the dual gain circuit, white dots are extended ISO

In the case of the Panasonic GH5s the sensor has a native ISO of 160, this is the value without any gain applied. You can also see that at ISO 800 when the high gain amplifier is active the read noise is as low as at ISO 320. This is why there is a common misconception that the GH5s native ISO is 800 but as we have seen it is not.

GH5s Manual

The GH5s manual mentions a dual native ISO setting, as we have seen this is actually an incorrect definition as the sensor has only 1 native ISO and this is 160.

The first low gain analog amplifier works from 160 to 800 ISO and the high gain amplifies works from 800 to 51200, values outside this range are only digital manipulation.

Gain and Dynamic Range

In order to understand dynamic range, defined as the Ev difference between the darkest and brightest part of the image, we can look at a DR chart.

Dynamic Range Plot for GH5s

This chart looks at photographic dynamic range (usable range) so it is much lower than the advertised 12 or 13 Ev from Panasonic but neverthless shows that dynamic range is always higher at the lowest ISO. This may or not be the native ISO, in the GH5s case is actually ISO 80 in the extended range. First of all is not possible to increase dynamic range by virtue of amplification so it is not true that the camera DR will be higher at say ISO 800. So why you find plenty of internet posts and video saying that the GH5s native ISO is 800? It is because of confusion between photo styles, gain and gamma curve.

Dual Native ISO VLOG Confusion

VLOG is a logarithmic gamma curve. https://en.wikipedia.org/wiki/Gamma_correction

When the gamma curve is logaritmics the camera will no longer reach saturation at the native ISO of 160 but will require an additional stop of light. This is explained in the manual where we can see that the values 160 and 800 have shifted to 320 and 1600.

A Standard Rec709 Photo Styles, E Vlog photo style

We can also see that when in variable frame rate the camera needs additional gain to record VLOG so the ranges are 320-2500 and 2500 25600. Values above 25600 are not implemented for VLOG because actually the camera has already at 51200.

So what has changed in the situation above are the base ISO of the Low and High gain setting depending on the gamma curve.

The compression of the gamma curve allows further dynamic range to be recorded despite higher noise due to a higher gain applied.

Comparison of Standard Styles and VLOG

From what we have seen before VLOG has higher dynamic range due to gamma curve compression compared to a standard photo style this has been measured by EBU. Full report here https://tech.ebu.ch/docs/tech/tech3335_s29.pdf

EBU DR Table

In terms of EV or stops HLG has more dynamic range than VLOG however is not grading ready and really is more an alternative to Like709. In this evaluation the knee function has not been activated so the real gap between HLG and Like709 is less than 4.3 Ev.

When it comes to VLOG vs CineLike D we can see that VLOG has a higher maximum exposure of cinelike D however in virtue of the additional gain applied also a higher minimum exposure resulting in 0.4 Ev less dynamic range. However what really matters is the maximum brightness as displays typically are not true black and a lot of the lower darks are just clipped.

Due to the difference of gamma curve and impact on ISO and the in variance of native ISO it is totally pointless to compare a linear style like CineLike with a log one (vlog) at same ISO setting. The comparison has to be done with VLOG set 1 stop higher ISO.

So most of the videos you see on YouTube comparing the two settings at same exposure settings are flawed and no conclusion should be drawn from there.

Because VLOG needs higher gain and higher gain means higher noise log footage in dark conditions may as well appear more grainy than linear photo styles. As VLOG really excels on highlights you need to evaluate case by case if it is worth using it or not for your project. In particular when the high gain amplifier is engaged it may make more sense to use CineLike D so that the gamma is not compressed and there are no additional artefacts due to the decompression of the dark tones.

Underwater Video Implications

When filming underwater we are not in situation of extreme brightness except specific cases and this is the reason why generally log profiles are not useful. However dual gain camera can be useful depending on the lens and port used.

In a macro situation generally we control light and therefore dual gain cameras do not offer an advantage.

For wide angle supported by artificial lights the case is marginally better and strongly depends on the optics used. If appropriate wet optics are used and aperture f-numbers are reasonably low the case for low gain cameras is not very high.

For ambient light wide angle on larger sensor cameras with dome ports dual gain cameras are mandatory to improve SNR and footage quality. This is even more true if colour correction filters are used and this is the reason a Varicam or Alexa with dual gain are a great option. However considering depth of field equivalence you need to assess case by case your situation. If you shoot systematically higher than ISO 800-1250 than a camera with dual gain is an absolute must even in MFT format.

Dark non tropical environments like kelp forest or Mediterranean are best fit for dual gain cameras

The Impact of APSC DSLR Phase-Out on Underwater photography

This post will be a bit surprising for those that think I am an MFT partisan and despise any other format, as you probably imagine that is far from truth. This post will look at the strength of the APSC DSLR segment.

If you follow the rumours and announcements of Canon and Nikon you are probably aware that Nikon is not planning any new professional APSC DSLR and Canon just released the last model with the 90D and will not be releasing a new 5D camera having just released the 1DX Mark III.

This is going to be a significant blow to underwater photographers around the world as today most of competition winners shoot an APSC DSLR camera, in particular the Nikon D500 is probably the most popular camera of serious underwater shooters.

What makes APSC DSLR Unique for Underwater Photography?

In an image we can understand what has made this format such a great option

The Tokina Fisheye zoom 10-17 f3.5-4.5 DX lens

The Tokina zoom fisheye is simply the best native option for wide angle underwater photography. It is cost effective and despite the apparent low quality on land it takes some amazing underwater pictures.

What makes this lens even more interesting is that it produces decent results with a small 4.33″ dome.

Nauticam 4.33 Acrylic dome for Tokina 10-17

There are several option acrylic and glass and if you want even better quality you can go for larger dimensions.

Today you can get the Tokina 10-17mm with his port for £1000 which is less than the cost of a Nauticam WWL-1 and much less than any WACP or Nikkor Nikonos vintage lenses.

Nauticam D500

Another extremely popular choice but this time for macro is the Sigma 105mm F2.8 EX DG OS HSM Macro Lens or otherwise the OEM Canon 100mm and Nikon 105mm macro lenses. Those have been taking some amazing super macro shots in the last 10 years plus thanks to 150+mm equivalent focal length.

APSC Mirrorless Cameras

Both Nikon and Canon have launched new mirrorless APSC and with that a new lens format. Sadly the Tokina 10-17mm autofocus will no longer work. This is a major blow and we need to understand if Tokina will delivery a Z mount version of their mythical lens.

Mirrorless cropped format has been the domain of Sony and Micro Four Thirds due Olympus and Panasonic for the last 5 years and it looks like there are no benefits at sensor level between 1.5, 1.6 and 2.0 crop that are meaningful.

Sony APSC and Micro Four Third beat or match latest APSC mirrorless offering from Canon and Nikon

The other issue is that Canon and Nikon mirrorless are also behind in terms of autofocus compared to MFT, while they already are matching or beating Sony.

As a new user would you buy an APSC camera from Nikon or Canon or prefer Sony? Would you just get a micro four thirds that at least has commitment from two brands and a complete set of lenses and ports for underwater use? Nikon themselves have branded their Z50 camera as a non professional unit and make self limiting design choices that are evidence that their commitment is for full frame, this is the only segment where they are making profits currently.

Future of Full Frame DSLR

Canon is definitely abandoning the DSLR ship and has some good mirrorless penetration with their 5DSR and have just announced the EOS R5 that will be the first unit with IBIS and have 8K video.

Nikon is still hanging to their upper range D series for full frame DSLR but it has been also moving strongly into full frame mirroless.

Both Canon and Nikon are no longer developing their DSLR lenses mounts.

Considering the domination of Nikon in the full frame underwater photography segment the full decline of DSLR will not happen for at least another 2 or 3 years but the time will come.

Conclusion

The extinction of APSC DSLR is not good news for underwater photography as currently no other format can match the choice of ports and lenses available to those shooters. There is a risk that a camera like a Nikon D500 becomes a precious 2nd hand commodity however shutters do wear out so this is not a sustainable path.

A few years ago we witnessed the death of compact cameras to phones and this was a first blow to entry level underwater photographers.

The upcoming death of APSC DSLR is going to hit deeper in the semipro user group however alternatives are available thought not matching the same flexibility of lenses and ports.

Our passion is getting increasingly more expensive as the digital camera market focusses on full frame and also more bulky and difficult to carry around.

Autofocus Systems for Underwater Photography

You will notice that the featured image is actually a bird in flight. When we think about fast autofocus birds in flights is what is really going to test performance.

This image was taken by my wife with a Nikon D7100 and a Sigma 70-200mm lens in the Galapagos Islands.

I also shoot birds with my Panasonic G9 and have a direct experience of focus systems for moving subjects and I can comfortably say that today AI has become more important than anything else for those kind of shots. Artificial intelligence predicts movement and ensures that once the camera has reached focus the first time it reacts automatically to movement without the need to refocus.

Let’s start from the basics first.

Types of Autofocus

There are two types of systems for auto focus in digital cameras:

  • Phase Detection
  • Contrast Detection

Both systems need contrast to focus despite the naming convention, so phase detection works on contrast too.

In situation of low light low contrast EVERY camera switches to contrast detection without exceptions.

Contrast Detection AF

This is the simplest and cheapest way to obtain focus and is what is typically implemented in compact cameras. Contrast detection moves the focus back and forth to find the maximum contrast and then locks on subject. This is sometimes perceived as hunting by the user when the camera fails to find focus.

Contrast detection is the most accurate method of autofocus as it looks for perfection without prioritising time. With exception of Panasonic no other major brands use contrast detection AF on high end or semipro models.

Phase Detection AF

With this technique the image goes through a prism and it is split then when the two parts match the subject is in focus and the focus locked.

Phase detection is less accurate than contrast detection in particular there are instances in which focus is achieved in front or behind the subject. This is the system implemented by Nikon, Canon, Olympus and Canon.

Hybrid AF

This system combines both methods, it starts with phase detect to determine the focus start and then uses contrast detect to make sure the focus is accurate. Sony is the main driver of this technology.

Low Light Focus

All autofocus methods need light to function without exception, when the scene is really dark cameras have some methods to achieve focus, this includes:

  • Using the lens widest aperture to focus
  • Bump the ISO and then adjust later
  • Auto focus illuminator and modelling lights

Generally low light is less than 1.25 Lux or candela per square meter representing a really dark scene.

Pro and Cons of Each System

If we look at the three systems each one has positive and negatives and depending on the subject this are more or less important.

SystemSpeedAccuracy
Phase DetectFasterLess accurate
Contrast detectSlowerMore accurate
HybridSlowestMore Accurate
AF comparison Table

Performance Requirement for Underwater Photography

Many underwater photographer think that they need a system that focus fast, can track moving objects and work well in the dark, this system of course does not exist.

In particular considering the availability of focus lights the performance in low light is definitely not a show stopper. More important are speed and accuracy. For the purpose of a comparison I have included here some models from Sony, Panasonic, Olympus, Nikon and Canon with a variety of formats representing some popular choices among underwater photographers.

I have included 3 performance metrics for comparison:

  • AF time
  • Low Light Low Contrast Ev
  • Low Light High Contrast Ev

The first measure tells you how quick the camera focuses in normal conditions, this is in my opinion the most important parameter as generally underwater photography is not below 1 Ev.

The second measure is the number of Ev of low light the camera can still focus with a low contrast subject, and finally the third is still a low light scenario with a high contrast subject. Let’s look at the results that are build using test data from imaging resource.

AF comparison table

I have used conditional formatting so green is good amber is average and red is bad for each category.

AF Time

First observation is that hybrid AF is very slow, second contrast AF as implemented by Panasonic is faster than most of DSLR peers in this table. If we consider 0.2 seconds as acceptable the full frame mirrorless Sony A7RIII has unacceptable performance. While the Nikon D850 AF is in another league both MFT Olympus and Panasonic are faster than other APSC and even the canon full frame.

Low Light Low Contrast AF

Mirrorless cameras dominate this category, the Panasonic GH5 can reach focus at -4.5 Ev that is practically dark on a low contrast subject, second is the Sony A7 RIII and third the Olympus OMD-EM1MKII.

In a low light scenario phase detection fails sooner so some of those cameras switch to contrast detection to achieve focus.

Low Light High Contrast AF

All cameras are able to work at least at -3 Ev so this is not a distinctive category, it is worth nothing that some phase detect system that failed in the low contrast target scenario perform well in this category but generally performance is pretty decent.

Why are your shot blurred?

Some people that have the camera in the table still struggle to get shots, why is that? I have found that for most users do not read instruction manuals and to make it worse modern camera have far too many AF settings. My GH5 for example has 6 options of AF area, 4 options for AF Mode, 3 parameters for tuning the AI (artificial intelligence) engine, plus additional custom modes to select the 225 focus points in any random shape you like. The average person will skip all of this and select one option and then fail the shots.

Conclusion

Surprisingly for some if we look overall at the camera that has green in all categories we find two mirrorless micro four thirds. Even more surprisingly both those cameras are faster to focus than APSC DSLR from Canon and Nikon although it is not really a great distance.

Typically when it comes to comparison between camera there is someone that says but camera X gets the shots blurred so speed does not matter. I talk by direct experience with outdoor and birds not just fish and I can tell you that each system will miss shots in burst mode but more importantly underwater photography is nowhere near requirements for birds in flight.

I have performed tests with a light meter at less than 1 candela per square meter with my GH5 with a 60mm macro lens and with my surprise it focuses just fine without the AF illuminator. I have to admit I do not really trust auto-focus so in most situation I use back button and peaking however based on my recent findings I need to trust autofocus a bit more it seems!

Choosing a Camera Format for Macro Underwater Photography

Following from my previous post I wanted to further investigate the implications of formats and megapixels on Macro Underwater Photography.

I also want to stress that my posts are not guides on which camera to choose. For Macro for example some people rely on autofocus so there is no point talking about sensors if your camera does not focus on the shot!

Macro underwater photography and fish portraits in general is easier than wide angle because is totally managed with artificial illumination, although some real masterpieces take advantage also of ambient light.

There are a number of misconceptions also here but probably on the opposite side of wide angle there is a school of thinking that smaller cameras are better for macro but is that really the case?

Myth 1: Wide angle lens -> More Depth of field than Macro

Depth of field depends on a number of factors you can find the full description on sites like Cambridge in Colour a good read is here.

A common misconception without even starting with sensor size is that depth of field is related to focal length and therefore a macro lens that is long has less depth of field than a wide angle lens.

If we look at a DOF formula we can see that the effect of focal length and aperture cancel themselvers

Depth of field approximation

A long lens will have a smaller field of view of a wide lens so the distance u will increase and cancel the effect of the focal length f.

The other variables in this formula are the circle of confusion c and the F-number N. As we are looking at the same sensor the c number is invariant and therefore at equal magnification the depth of field depends only on F number.

Example: we have a macro lens 60mm and a wide angle lens 12mm, and a subject at 1 meter with the 60mm lens. In order to have the same size subject (magnification) we need to shoot at 20cm with the 12mm lens at that point the depth of field will be the same at the same f-number.

So a wide angle lens does not give more depth of field but it gets you closer to a subject. At some point this gets too close and that is why macro lenses are long focal so you can have good magnification and decent working distance.

Myth 2: Smaller Sensor has more depth of field

We have already seen that sensor size is not in the depth of field formula so clearly sensor size is not related to depth of field so why is there such misconception?

Primarily because people do not understand depth of field equivalence and they compare the same f-number on two different formats.

Due to crop factor f/8 on a 2x crop sensor is equivalent to f/16 on a full frame and therefore as long as the larger sensor camera has smaller possible aperture there is no benefit on a smaller sensor for macro until there are available apertures.

So typically the smaller sensor is an advantage only at f/22 on a 2x MFT body or f/32 on a APSC compared to a DSLR. At this small aperture diffraction becomes significant so in real life even in the extreme cases there is no benefit.
Myth 3: Larger Sensor Means I can crop more

The high level of magnification of macro photography create a strain on resolution due to the effects of diffraction this has a real impact on macro photography.

We have two cases first case is camera with same megapixel count and different pixel size.

In our example we can compare a 20.3 MFT 2x crop camera with a 20.8 APSC 1.5x crop and a 20.8 full frame Nikon D5.

Those cameras will have different diffraction limits as they have pixels of 3.33, 4.2 and 6.4 microns respectively those sensor will reach diffraction at f/6.3, f/7.1 and f/11 respectively so in practical terms the smaller camera format have no benefit on larger sensor as even if there is higher depth of field at same f-number the equivalent depth of field and diffraction soon destroy the resolution cancelling the apparent benefit and confirming that sensor size does not matter.

Finally we examine the case of same pixel size and different sensor size.

This is the case for example of Nikon D500 vs D850 the two cameras have the same pixel size and therefore similar circle of confusion. This means that they will be diffraction limited at the same f-number despite the larger sensor. So the 45.7 megapixels of the D850 will not look any different from the 20.7 megapixels of the D500 and none will actually resolve 20.8 megapixels.

So what is the actual real resolution we can resolve?

Using this calculator you can enter parameters in megapixels for the various sensor size.

In macro photography depth of field is essential otherwise the shot is not in focus, for this exercise I have assumed comparable aperture and calculated the number of megapixels until diffraction destroys resolution

Formatf-NumberMP
MFT 2xf/117.1*
APSC 1.5xf/145.6
Full Framef/226.3
Resolution in Megapixels at constrained DOF

Note that the apparent benefit of MFT does not actually exist as the aspect ratio is 4:3 so once this is normalised to 3:2 we are back to the same 6.3 megapixels of full frame. APSC that has the strong reputation for macro comes last in this comparison.

So although you can crop more with more megapixels the resolution that you can achieve is dropping because of diffraction and therefore your macro image will always look worse when you crop even on screen as now most screens are 4K or 8 megapixels.

Other Considerations

For a macro image depth of field is of course essential to have a sharp shot however we have seen that sensor size is not actually a consideration and therefore everything is level.

Color depth is important in portrait work and provided we have the correct illumination full frame cameras are able to resolve more colours. We are probably not likely to see them anyway if we are diffraction limited but for mid size portraits there will be a difference between a full frame and any cropped format. In this graph you can see that there is nothing in between APSC and MFT but full frame has a benefit of 2.5 Ev and this will show.
The D850 has a clear benefit in color resolution compared to top range APSC and MFT

Conclusion

Surprisingly for most the format that has an edge for macro is actually full frame because it can resolve more colours. The common belief that smaller formats are better is not actually true however some of those rigs will definitely be more portable and able to access awkward and narrow spaces to what extent this is an advantage we will have to wait and see. It may be worth noting that macro competitions are typically dominated by APSC shooters whose crop factor is actually the worst looking at diffraction figures.

Choosing a Camera Format for Underwater Photography

The objective of this post is not to determine what is the best camera for underwater photography, as that is simply the best camera with the best housing and the best strobes and lenses. All needs to be seen as a system in order to take stunning images.

The purpose of this article is to provide some clarity and eliminate common misconceptions that seem to be hindering the decision making of a person wanting to take underwater photos. There is always a vested interested of camera manufacturers to drive sales as well as underwater photography equipment shops to push users to upgrade their gear as frequently as possible as that generates value to them, however this will not necessarily generate value to you the consumer, the only person injecting cash in this network.

I recently posted on WetPixel a discussion that to generate a debate about the gap between APSC and MFT cameras. This in turn made me do some more research on camera sensor and I found some information that is very insightful and confirms some of my suspicions I had years ago when I attended a workshop in the Red Sea with Alex Mustard. In that occasion I was the only user on the boat with a compact camera but managed to pull some decent shots and this made me realise that there are circumstances that equalise your equipment and make the gap in the image quality smaller to the point that a compact camera picture in some cases looks similar to a much larger sensor camera. Although I shoot micro four thirds underwater I have owned and shot DSLR full frame and cropped, film and digital, I have also had an array of compact cameras, so what you are going to read is not focused on one format being better than another.

Let’s discuss some of those misconceptions in more detail.

For those that do not understand optics of dome ports underwater the reason you need to stop down the aperture is NOT because you are looking for depth of field, in fact on land you would shoot a wide angle lens wide open and it would have plenty of depth of field. The reason to stop down the lens is the field of curvature of the dome which makes the areas off centre and on the edges soft this can only be fixed by stopping down the lens. So before you think I can shoot at f/4 on a APSC so what think that your pictures will be mostly blurry on the side and besides each format has got fast lenses so this is not a main consideration for what you are going to read.

Myth 1: Larger Sensor -> Better SNR

Signal to Noise ratio is an important factor in electronics as it allows to distinguish information from noise. Contrary to what most people think SNR is not related to sensor size.

There is an in depth demonstration on this website https://clarkvision.com/articles/does.pixel.size.matter/#etendue

The comprehension of some of the concept may be too hard for many so I will attempt a simplification. What R.J.Clark says is that you need to balance the amount of light hitting the sensor before drawing conclusion on SNR. For example assume a camera with a lens of 16mm on a full frame sensor and compare this with a camera with a lens of 8mm on micro four thirds, I am using MFT as crop factor is two and makes examples easier.

An exposure of f/8 on a 16mm lens on Full frame camera is equivalent to an exposure of f/4 on a 8mm lens on MFT. Those will send the same amount of light to the sensor at equivalent exposure. However the smaller sensor will have the same amount of light distributed on a surface that is 1/4 of the larger sensor and therefore if we equalise everything we have a situation whereby the exposure value are balanced and the SNR is pretty much identical because the gain or ISO value necessary was 1/4 of the larger sensor. This SNR 18% graph on DxOMark gives an idea. I have chosen 3 cameras with the same megapixel count to remove megapixels from the discussion.

The dotted line highlights that once ISO values are equalised sensor size has no impact on SNR

Once exposure is equalised the larger sensor has no longer a benefit this is due to the fact that the components of noise shot noise and read noise do not depend on sensor size.

However an important consideration is that ISO 100 does not actually mean the same gain in all systems and in fact a larger camera will have more photons than a smaller one at the same ISO level, this means that at the so called base ISO the larger sensor camera will have an advantage as the smaller sensor can’t decrease the ISO anymore and will need to close aperture. It also means that ISO 100 does not mean the same SNR amongst different formats. So when we compare two shots at the same ISO larger sensors will have more signal than smaller ones. This is the reason sometimes you hear things like why is my shot on my compact camera so noisy at ISO 400 compared to a full frame that looks so clean at ISO 400 but those ISO are not actually the same thing and the smaller sensor has much less photons at that identical ISO number.

Another consequence of this is that as the camera in questions have the same megapixel size larger pixels do not yield better SNR.

However with larger pixels holding more signal it is possible to extend the range of an amplifier to higher value of gain therefore larger pixel camera (less megapixel on the same size) will be able to work at higher ISO levels. This is the reason why MFT camera have a lower maximum ISO than full frame at same megapixel count.

Underwater we use strobes to counter colour absorption and never reach those high ISO levels. If you were shooting at night on land without a flash you may easily reach high ISO value like ISO 25800 or 64000 with strobes however we rarely reach even values like 1600.

Myth 2: Larger Sensor -> Better Dynamic Range

The characteristic that drives dynamic range is not actually sensor size but pixel size however at some point DR no longer grows with very large pixels.

This graph shows that the Panasonic GH5 has a respectable DR at low ISO however it drops faster than the D500 and 1DX MkII. Surprisingly for some the D500 has more DR than the larger pixel 1Dx MKII.

Dotted line for DOF equalisation purposes

If we look at the maximum possible DR and the ISO at which we would still have 7 bits colour and at least 10 stops of DR we have the following values:

CameraMax DRHighest Usable ISO
Canon 1DX MKII13.5 Ev3207
Nikon D50014 Ev1324
Panasonic GH513 Ev807
The larger pixel size makes usable DR go to higher ISO

Although the larger pixel camera does not hold the highest DR it is able to shoot at higher ISO and still keep a decent DR and color tone.

If we calculate the Ev between the ISO value we see that the MFT sensor is 2 Ev away and the APSC is 1.3 Ev away from full frame, this is pretty much in line with the crop factor and therefore once we equalise Depth of field there is no benefit between the various formats at same megapixel count, though the Nikon D500 is the camera that has the highest DR in absolute value. So if you have an extremely high amount of light the D500 would be able to product a high DR image. Underwater however this is rarely the case underwater so the conclusion is that if you are after a 20 Megapixel camera there is no material difference among the various formats in practical underwater use.

Myth 3: Larger Pixels are Better at equal sensor size

Although larger pixels are better at sustained dynamic range, for example in low light, evidence shows that as long as the camera is not limited by diffraction more megapixels are better.

I am comparing here 3 Nikon full frame cameras that have respectively 24, 36 and 47.8 Megapixels.

SNR is not impacted by pixel size

SNR is not impacted by the sensor resolution and this is due mostly to the fact that at similar size downsampling equalises the smaller pixels.

Dynamic range is also unaffected with more megapixels having better results

Looking at Dynamic range the situation is the same and actually the camera with more megapixels has an edge until ISO value become very high.

Color Sensitivity appears to benefit from Pixel Count

Finally the graph for color sensitivity, an important metric for shots with strobes and portrait work, confirms that more megapixels also bear better results.

Please note that this data is limited to sensor analysis and does not take into account the effect of very small pixels on diffraction and sharpness that is a topic on its own.

Choosing a Camera for Social Media

Today majority of people do not print their images and post them on social media or website. Those typically have a low resolution frequently less than 4 megapixels. Screens usually have low dynamic range, and JPEG images are generally limited to 12 Ev Dynamic Range this is a value that is at reach of any camera today starting from 1″ compact cameras but is unreachable to majority of computer screens or phones.

My suggestion for users that post on social media is to find the best camera that fits their budget and ergonomics and worry less about sensors, invest in optics either wet or lenses and port and strobes, as those will yield a higher return.

Today most cameras have a port system anyway so an advanced compact such as the Sony RX100 series or a Micro Four Third camera of small factor (Panasonic GX9 for example) are more than enough.

Choosing a Camera for Medium Size Print

I print my images typically on 16″x12″ or 18″x12″ paper or canvas.

Generally I want to have around 300 dpi so that means I need a 20 Megapixel camera as a minimum. This cuts out a large part of the smaller MFT cameras and also the compacts because the real life resolution is far from the declared pixels.

In my opinion, if you are a user that prints medium formats, a pro grade MFT or an APSC camera is all you need, besides the latest winner of UPY shoots an APSC with a Tokina lens and plenty of winners don’t use full frame.

For those who just want the Best

The best image quality today is produced by high megapixel full frame cameras there is no doubt about it. Full frame cameras however are subject to depth of field issues and as we have seen once you shoot at equal depth of field the benefit is for most eroded.

To get the best outcome of a high megapixel full frame camera you need to be able to shoot at the lowest possible ISO, this is almost impossible if you are shooting a fisheye lens behind a dome as your aperture of f/11 means very little light is hitting the sensor so your ISO will most likely hit 400 many times and at that point the benefit of full frame is gone.

I have looked at all technical details of Alex Mustard images on his book and nearly all shots taken with a full frame camera have at least ISO 400 or higher, with very few exceptions at 200 or lower.

So how to do you manage to shoot at the lowest possible ISO on full frame? You need to be able to shoot at wider aperture and this today means optics like the Nauticam WACP that have two stops benefit on a wide angle lens and three on a rectilinear lens behind a dome on full frame.

WACP retails at $4,500 plus sales tax

The WACP however has a field of view of 130 degrees and therefore is not as wide as a fisheye and unsuitable for close focus wide angle, recently Nauticam has released the WACP-2 that retails at $7,460 and can cover 140 degrees.

My consideration is that, if you are not prepared to spend money for a WACP like solution, then there is no point investing in a full frame system as the benefit goes away once you equalise depth of field.

The Nikon D850 once DOF is equalised performs worse than the old 7200 APSC

Conclusion

Underwater photography is an expensive hobby and every time I am on a boat and see how much money goes into equipment to product average photos this saddens me. While improving technique is only a matter of practice and learning, making the right choice is something we can all do once we have the correct data and information at hand.

I hope this post is useful and helps your decision making going forward.