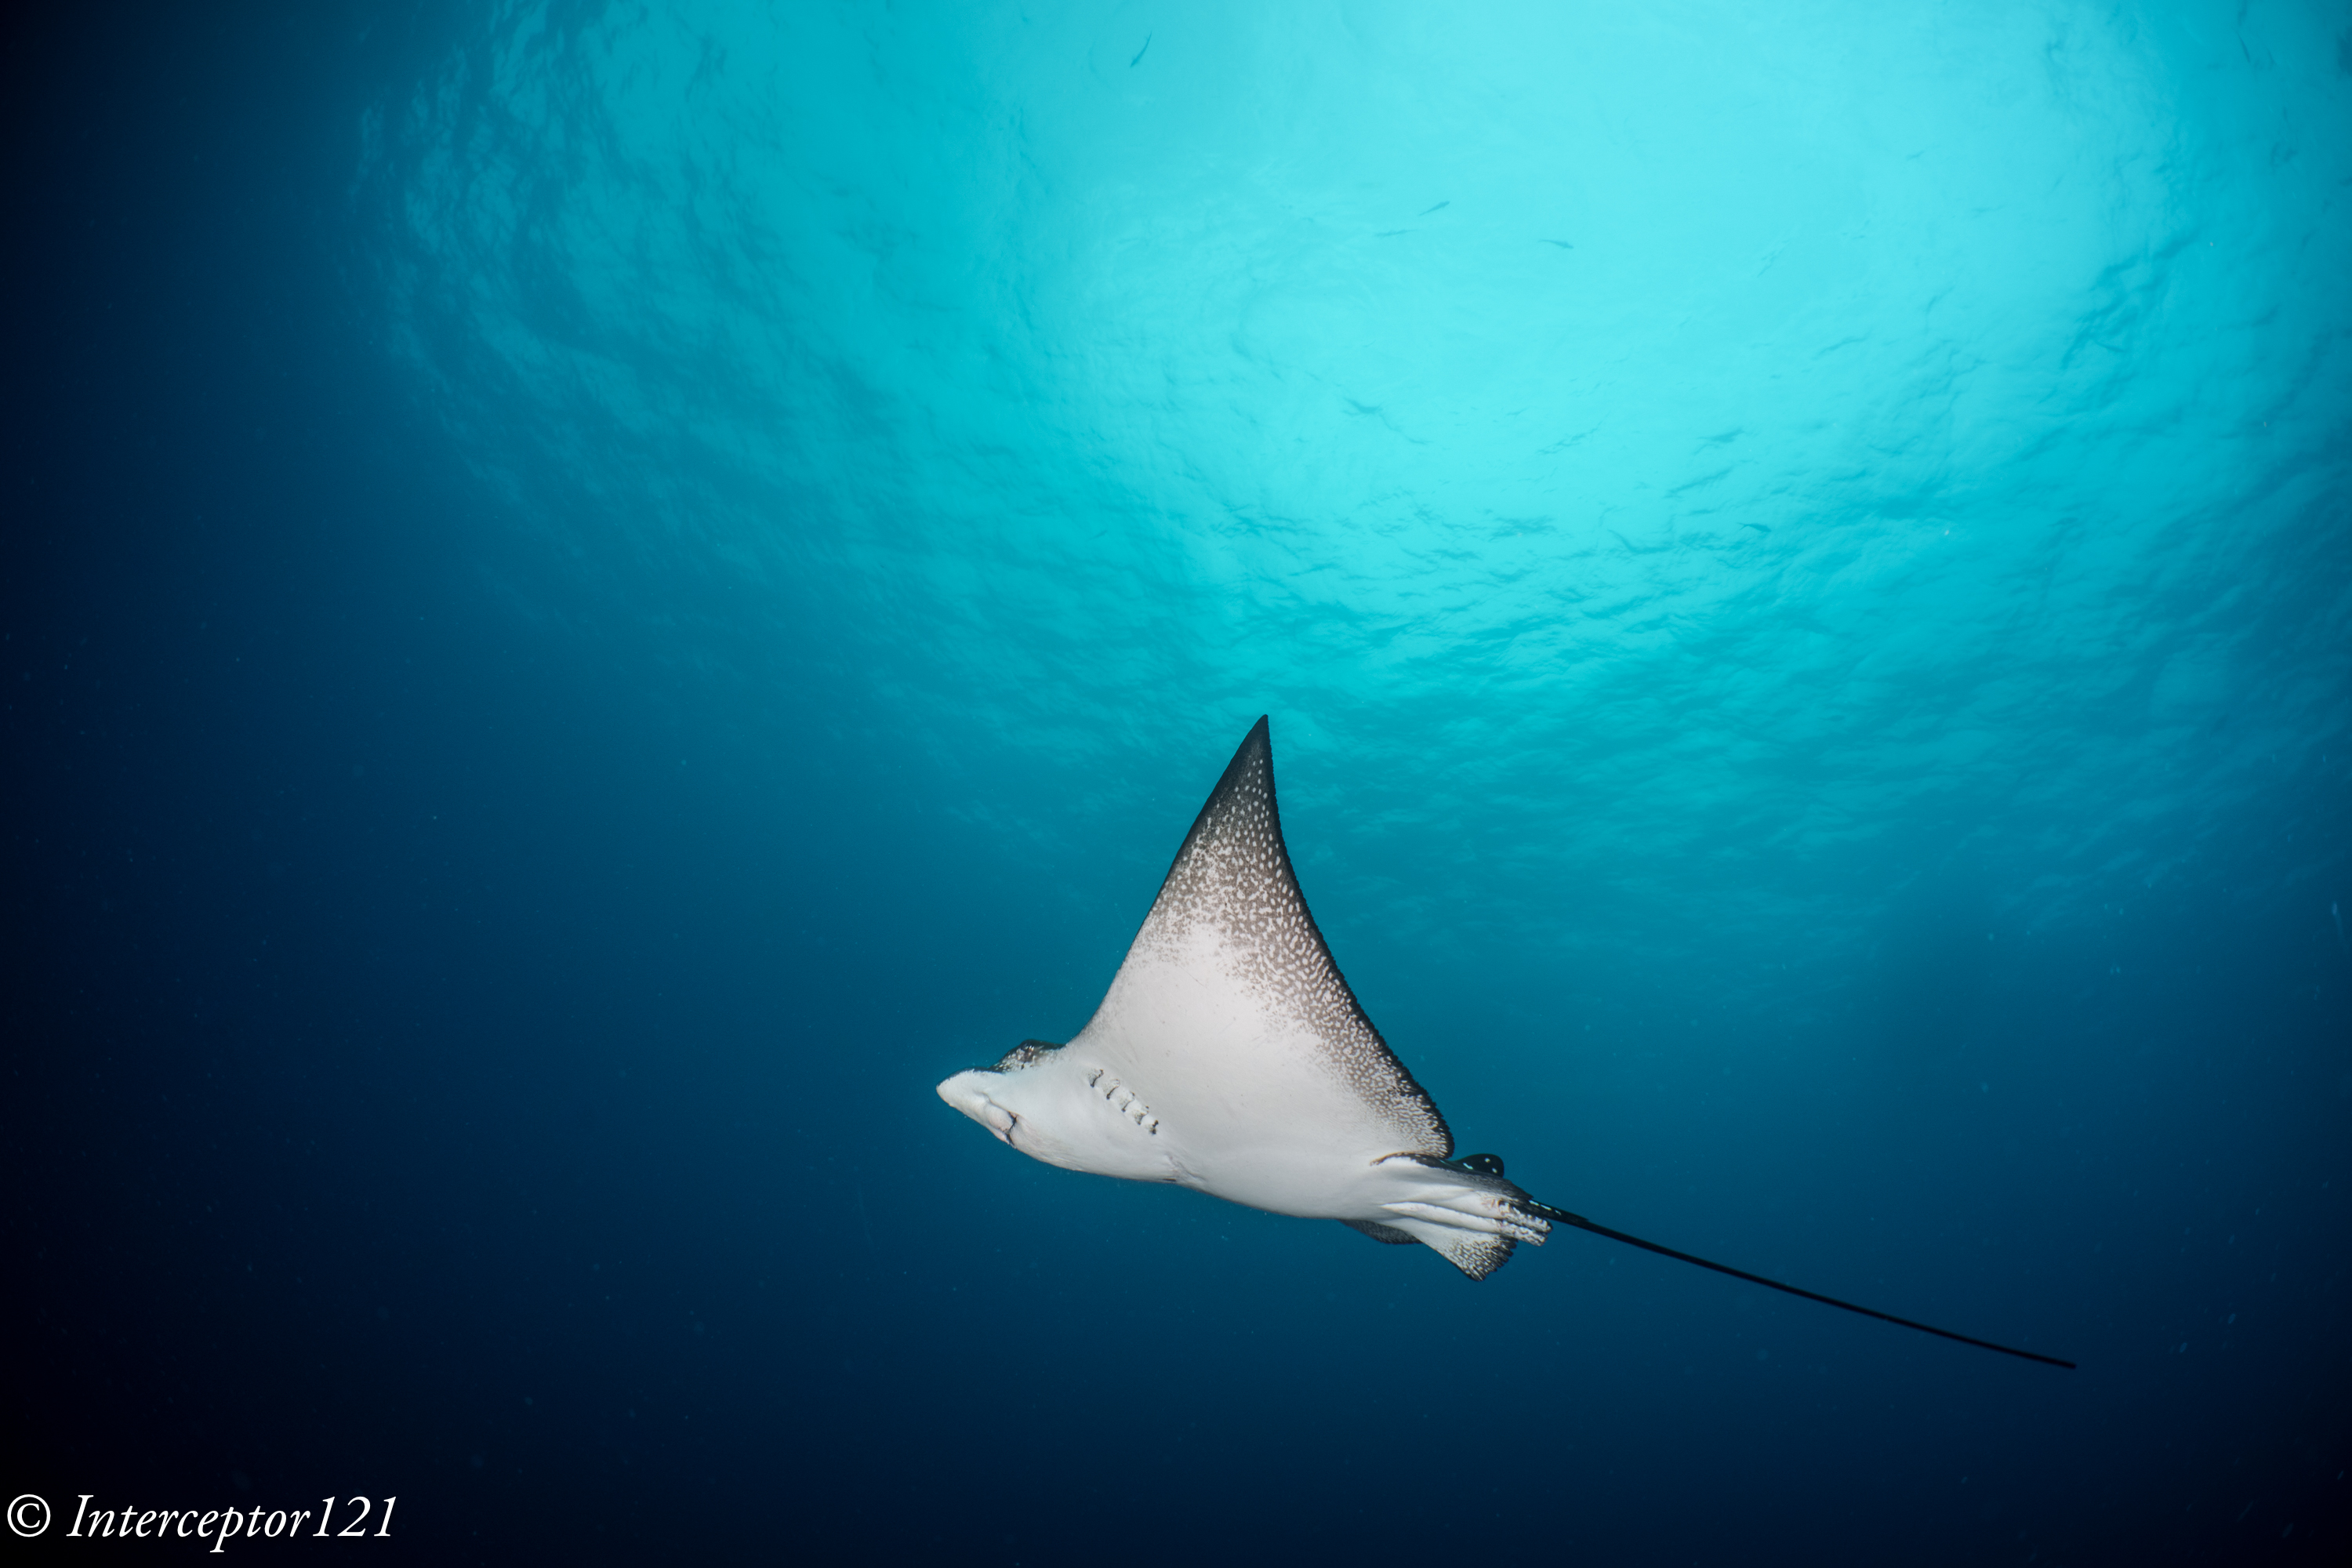
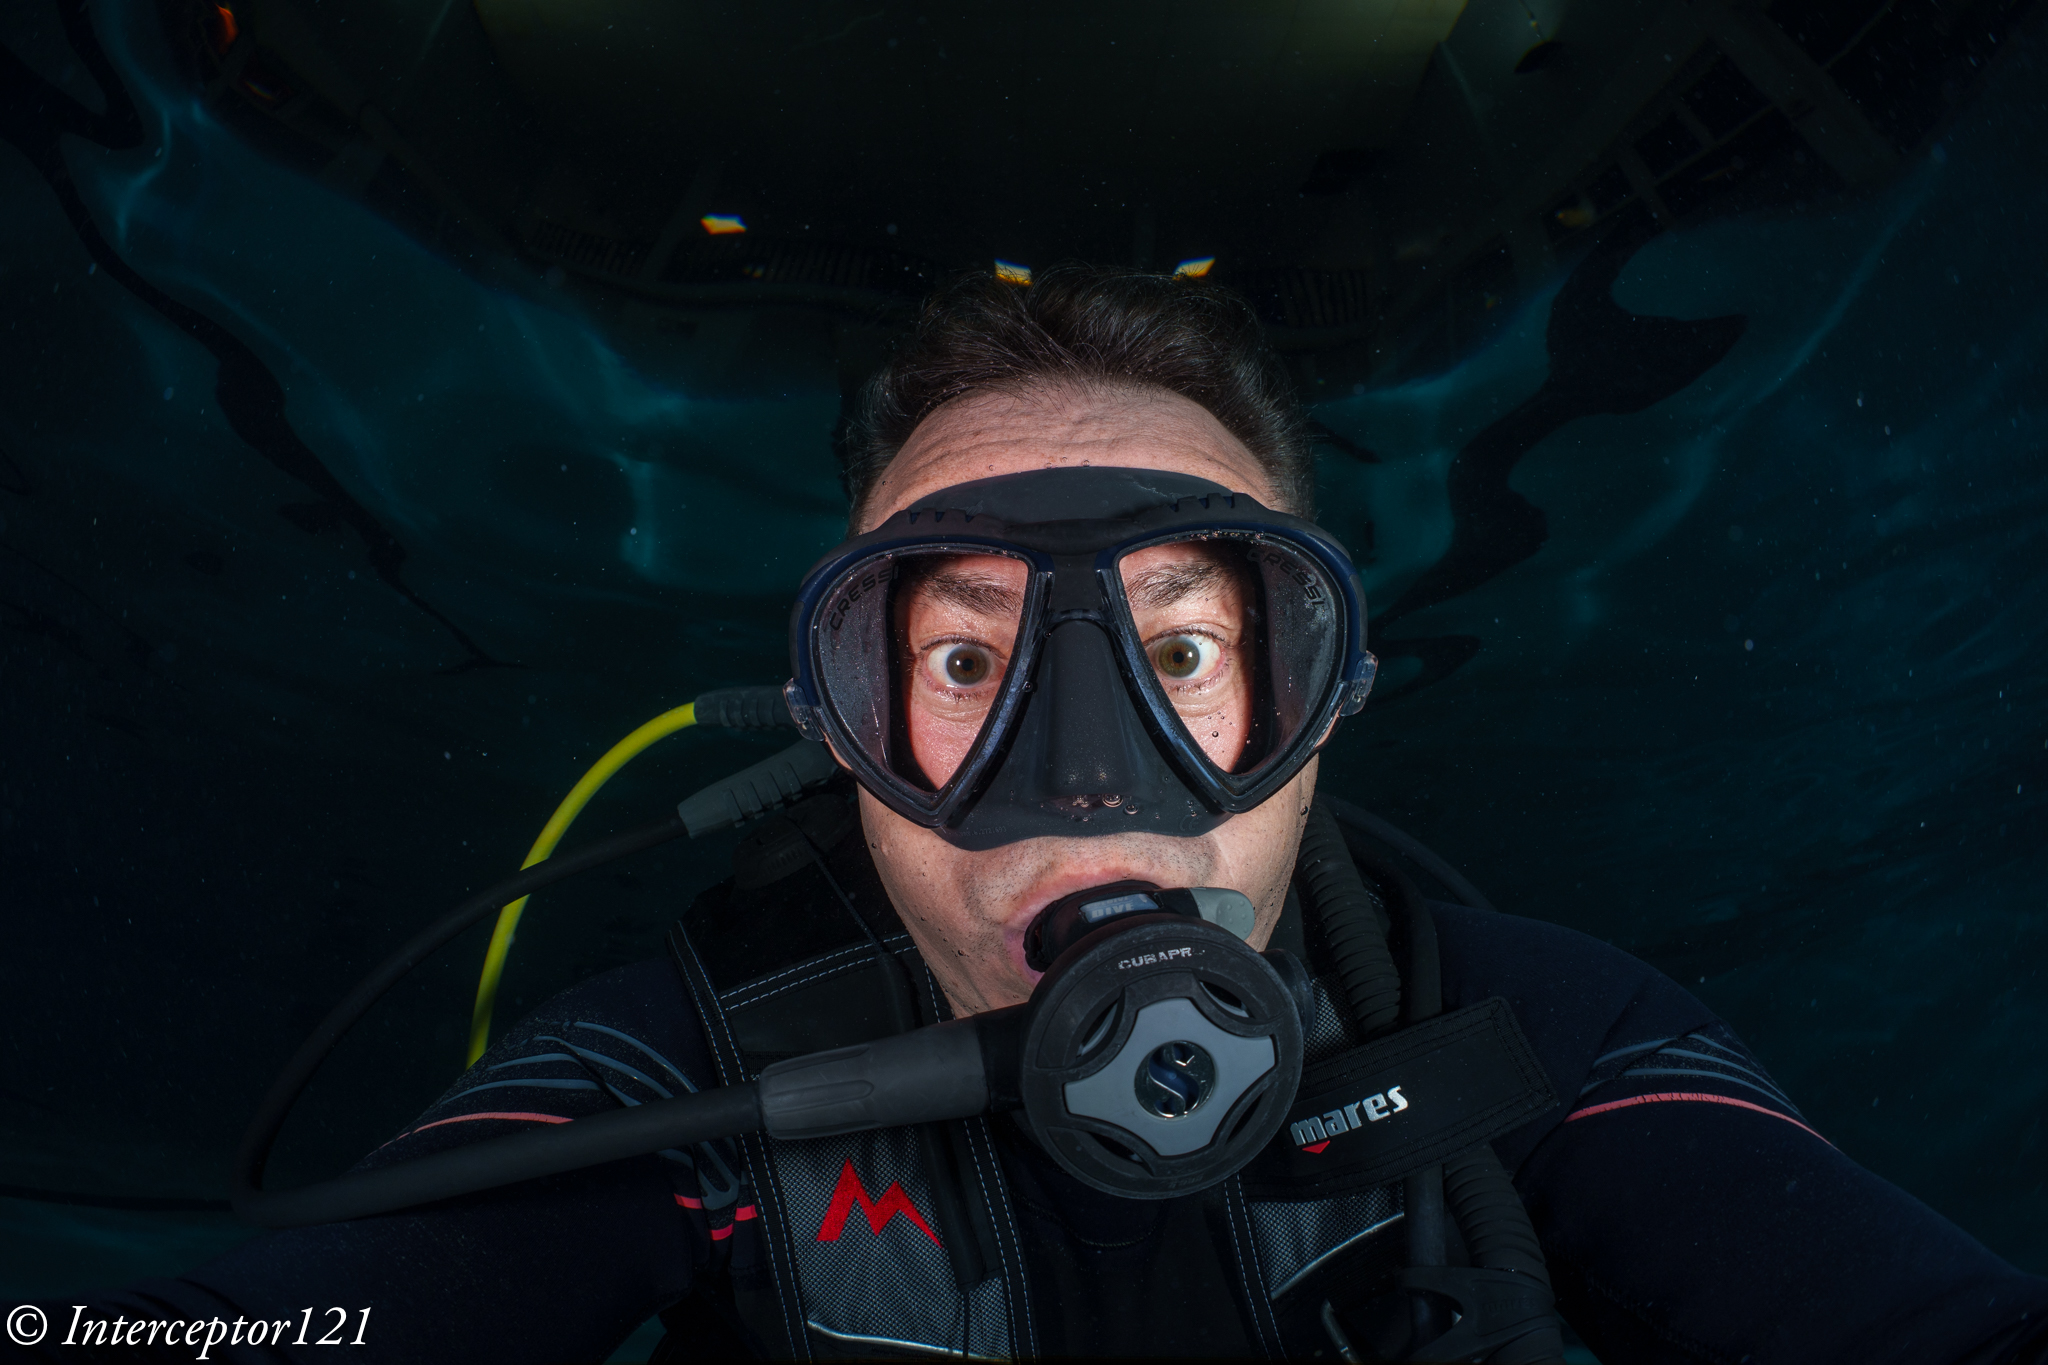
I have been watching and reading lots of content about the new Sony A1 II.
I own two A1 and I have been evaluating if an upgrade was worth it. My interest as an hybrid shooter taking photos and video is to have the most versatile camera on the market however I have so far decided not to move forward.
There is a very interesting video from Marc Galer
Look at timestamp 11:17 or for your convenience this the table of the features that according to Marc are worth the upgrade. I have then analysed if they are relevant to underwater shooters.
Feature
Underwater Relevant
Comment
Improved Subject Recognition
No
Insect can see a nudibranch but it is not better than just tracking
Precapture, Speedboost
No
Burst rate required are low
Improved steadyshot
No
No long exposures, flash freezes motion
Multi angle monitor
No
housing does not allow movement
Still movie dial
No
Irrelevant
Ability to change drive mode from dial or menu
No
Improved AWB and High ISO noise reduction
No
Dynamic active steady shot for movies
Yes
Video only
As you can see there is really no benefit in the upgrade from this point of view.
Additional considerations
the A1 II has the same identical sensor of the original A1 there is no image quality improvement
Sony has a tendency to boast on their stabilisation rating a test of the A9III conducted by optyczne reveals an improvement of 1 stop over the A1.
The body shape is the same of the A9III and you need a new housing.
Let’s talk about money I will refer to USD prices differences in other countries will be higher due to sales tax.
Sony A1 Camera
5498
Sony A1 II Camera
6498
Difference
1000
The arrival of the new mkII has meant a price drop for the A1 and there are also some trade in bonus options making it more attractive.
Housing A1
4657
Housing A1 II
4920
Delta
263
The new housing is more expensive than the previous unclear for which motivation but here we are.
In summary to get a new A1 II you need $1,263 more compared to an A1.
Here are some ideas of what to do with that money
Total Difference
1263
Sony 90mm Macro
1098
Sony 28-60mm
498
Sony 16-25
1198
Canon 8-15
1249
I suppose there are many other ways to spend the difference,
If I was a sport photographer I would definitely be tempted by precapture however I am not. I do have two bodies that I bought for resilience and backup so perhaps I would swap one for the mark II but I need some proper review to see if the steadyshot has already improved as that is the reason why I kept a Panasonic GH7. Telelens video without a tripod is not a possibility with the original A1.
Hope you found this useful if you decided to save $1,263 and want to buy me a drink click the donate button.
Warning this is an extremely technical article that I have written on request. If you are not familiar with optics, geometry, housings do not attempt to perform a calculation by yourself and rely on expert advice.
Background
The physics of dome ports are not new to underwater practitioners although not many people understand the formulas, it is well accepted that there is a correct way to size and position a dome port in order to optimise optical performance of a lens inside an underwater housing. I do not want to repeat the theory here but if you feel you need a refresher the excellent articles from the now passed David Knight and specifically the piece on dome port theory will be useful. For the purpose of this article I will consider only underwater imaging, split shots and over and under have different considerations and will be addressed separately in due course.
Practical Implications
For our purposes, what is interesting is that a dome port is able to restore the lens air field of view when the camera and lens are inside a housing. The theory says that this happens when the centre of the dome lies on the lens entrance pupil. But what happens if it does not?
Jeremy Somerville has created a number of visualisers that although not totally correct give a good idea of the issues involved. In particular the positioning of the dome port is something you may want to check. In short if the dome is not correctly positioned we lose field of view as result of distortion and increase the amount of chromatic aberrations.
We also have to consider that the dome port being a single element lens has also issues of field of curvature and spherical aberrations which are additional to any considerations on positioning and require the user to stop down the lens to reduce the side effect. Those side effects are exacerbated when the dome is not correctly positioned to the point they cannot be corrected no matter how much you stop down the lens.
Choosing appropriate wide angle lenses
Minimum Focus Distance
One of the key takeaways of dome port theory is that if your lens is not able to focus close it may not work at all inside a dome, which in turn means your dome starts to become bigger and bigger to allow your lens to focus or you need to introduce close up lenses which further deteriorate optical quality.
More compact set ups and smaller domes require lenses that can focus close. In addition, due to the dome port optics, infinity focus will be reached at 3x the dome radius from the dome surface: your lens will work to a maximum focus distance well under one metre and closer to half a metre. This is a challenge for wide angle lenses that are designed for landscape and not usually optimised for close focus. One assumption that you cannot make is that a lens that is great for topside use will perform equally well behind a dome, or even more interesting a lens that is small and compact may require a quite sizable dome to work properly underwater which negates the size benefit to start with.
The dead Zone
The dead zone is where the camera cannot focus because our subject is too close. Our objective is to place the dead zone inside not outside our dome so that we can maximise the range we can use for imaging. It is not an issue if the dome radius is so big that the focus area falls well inside the dome, in fact it may be an advantage, but if the camera focus distance is outside the dome we are eating away useful range and at the point where the focus distance is so far that is outside the dome infinity point the camera will not focus at all.
By choosing a lens that can focus very close we accomplish two objectives:
We reduce the size of the dome required
We maximise the focus range that can be used.
I prefer lenses that have a minimum working distance around 20cm, and avoid anything that focuses from 25cm and beyond, this ensures good image quality and reasonably compact set ups.
Prime vs Zoom
Prime lenses have a fixed entrance pupil this means that once the dome is sized and positioned your job is done. Zoom lenses instead change in size or move the entrance pupil to accommodate changes in the field of view. This is bothersome as it means that if you determine your dome parameters at wide end this may not be correct at tele end. In addition as the angle of view is being reduced the curved surface of the dome will start looking more and more flat. This is a challenge but not one we need to address, as seen in the flat port theory lenses that are longer than 35mm suffer less from chromatic aberrations, therefore for our purposes we will treat zoom lenses like a prime lens whose focal length is the shortest our zoom can manage, i.e. the wide end of the zoom. At the tele end the dome with a zoom lens will look like a flat port but still have some benefit over it in terms of aberrations.
Zoom factor
Although we said we will consider the zoom lens as a wide tele, lenses with a zoom ratio much bigger than 2x will most definitely be problematic. This is the reason why zoom lenses with conservative ratios like a classic 16-35mm are bound to perform overall better than say a 20-70mm lens. Lenses in the classic 24-70mm or 28-75mm range tend to have less problems because they are not that wide to start with and generally work well as long as they focus close, otherwise they will require larger domes.
Example Cases
I have good experience after one year on e-mount and therefore I am going to list a few examples of lenses that are excellent topside quality but are bound to work not so well underwater as well as other lenses that have good potential at different price points.
Lenses requiring large domes for optimal performance
Sony 12-24mm F.2.8 GM – a high quality super wide zoom lens that is great for topside use. It has a minimum working distance of 28cm and is 13.7cm long. This lens will likely require a dome port with a radius in excess of 14.3 cm and a field of view of 122 degrees. A port like this is not standard on the market.
Sony 20-70mm F4 G – a versatile topside zoom with extensive zoom. It has a minimum working distance of 30 cm and is only 9.9 cm long this lens is likely to require a dome port over 20 cm in radius to perform at its best.
High Potential Lenses
Tamron 17-28mm F2.8 – A lens that is cost effective and sharp with a limited zoom range. It can focus as close as 19cm and with a size of 9.9cm will require a dome of just over 9cm to have the focus range inside the dome.
Sony 16-35mm F2.8 GM2 – An excellent topside lens that has a good zoom range and can focus at 22cm. With a physical size reaching 12cm this lens is likely to work with domes that are not excessively large.
Sony 20mm F1.8 G – An amazing low light lens that can focus at 19 cm. With a physical size of 9cm this lens is likely to work with relatively small domes and produce outstanding image quality.
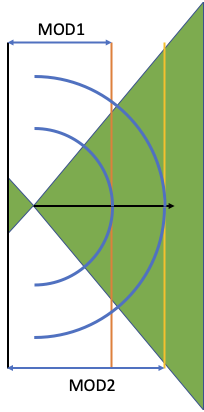
Comparison at equal field of view and different working distance.
The graphic above illustrates how two lenses with equal field of view displayed in solid green require different dome radii depending on the minimum operating distance. The small inverse triangle is the area inside the lens up to the focal plane.
Lens1 will require the smaller dome so that the area not in focus falls inside the dome, if a larger dome is used this simply expands the focus range into the water proportionally to the increased dome radius. A lens with the same field of view but longer MOD2 will require a larger dome to ensure the area out of focus is inside the dome. A smaller dome can be used however the dead non focus area now moves into the water. As the infinity point is still set at 3x the dome radius from the surface using this smaller dome means less focus range can be used by the camera. Using too small domes deteriorates image quality because the compressed focus range has an impact on the overall image resolution.
Locating the Lens Entrance Pupil
In order to properly position the dome port we need to determine where the entrance pupil of our lens is. There are at least 4 methods that can be used to locate the entrance pupil of the lens.
Method 1 Look into the lens
It makes me smile when you read: locating the entrance pupil is easy just look into the lens and see where the aperture is. I do not find this easy at all, first lenses are increasingly complex in construction and second how do you place depth of the aperture correctly even if you can see it? The error margin of this method is very high.
Method 2 Non Parallax Point
If you are into panorama photography you know that you can locate the non parallax point which is the lens entrance pupil using a slide mount and a specific set of targets.
A demonstration of this method is beyond this write up however if you want to go deeper into this this article should help you. This method has a good level of precision and panotools maintains an entrance pupil database for many DSLR lenses.
Method 3 Trigonometry
Once you know the lens field of view you can use various filter rings to determine the thickness where vignetting occurs. At that point you can simply calculate the distance from the edge of the entrance pupil by taking the ratio between the lens radius and the tangent of the angle of view. This gives good precision and does not require anything else than the lens itself and a few filters but can be approximated also for a lens you do not own using standard roundings.
Method 4 Lens Design
There are some websites that have lens design drawings directly from patents. This will give you the exact location of the entrance pupil from the image plane and from the lens mount.
I use the site maintained by Bill Claff called the Optical Bench Hub. Unfortunately the database is not complete, some specific brands designs are scarce. The benefit of this method is that you can use it to make calculations before you buy the lens and it is 100% accurate.
Entrance Pupil Determination – Practical Examples
Case 1: Lens Design Available
Sony 20-70mm F4 G lens is a very versatile zoom, whe wide angle 20mm is sufficient for many situations and the tele end of 70mm good for close up work on land. This lens makes a good candidate for underwater use in terms of angle of view however it has a minimum operating distance of 30 cm which is far from ideal.
We locate the lens design on the Optical Bench Hub here.
The important parameters are I distance from the edge of the lens to the image plane (sensor) which is 115.04mm and P distance of the entrance pupil from the lens front.
The difference I – P = 91.79mm still accounts from the flange distance. Taking that out we get 73.79mm from the lens mount.
The lens has a minimum working distance of 300mm. If we subtract the entrance pupil distance from the image plane of 91.79mm we determine a minimum dome radius of 208.21mm which is rather large and in fact not available if not as a custom product.
Of course we can still go ahead and use a smaller dome radius however all the range between the MOD and the edge of the dome will be wasted and not produce an image in focus.
Sony 20mm F1.8 G lens is the modern equivalent of a Nikkor UW15 giving a field of view that is acceptable for most uses and excellent image quality.
The lens has a MOD of just 19cm the distance I-P=80.91 a dome with a radius of 11cm will contain the entire non focus area. The entrance pupil is 62.91mm from the lens mount.
Case 2: Lens Design Not Available
The Tamron 17-28mm F2.8 is an affordable, fast and high quality wide angle lens with a somewhat limited zoom range. The lens is 99mm long and takes a 67mm filter thread. I used an ND1000 Hoya Pro filter with a thickness of 5.6mm, the lens external radius is 69mm with the filter on.
The lens nominal field of view is 103.70 degrees however all mirrorless lenses have software corrections. Ideally I need to know the real field of view however the error is normally 1 to 3% and does not influence the calculations too much.
If we consider a length of the lens and filter of 104.6mm and a radius of 34.5 mm for an angle of 51.85 degrees we obtain a distance from the lens mount of 77.5 mm and from the focal plane of 95.5 mm. Taking into account that the MOD is 190mm this gives a minimum radius of 94.5 mm for the dome which is very good news.
Sony has recently released the 16-35mm F2.8 GM2 with a MOD of just 22 cm. Using the same logic as before we calculate the entrance pupil to be 93.5 mm from the lens mount or 111.5 mm from the sensor. This means a dome radius of minimum 220-111.5=108.5 mm is required to contain the area not in focus inside the dome.
Dome Selection Part I – Field of View
The first thing that we need to ensure is that the dome field of view can contain the lens field of view otherwise our main objective of preserving the air performance would be lost.
Unfortunately the specifications of dome ports on the market are somewhat lacking so you need to make do with what you have or ask for CAD details.
Here you can see that, ignoring the thickness of the glass for simplification purposes the various ports have the following field of view using the formula 2*arcsin(glass port diameter/curvature radius)
Part Number
Description
Angle of View (degrees)
Widest Lens mm(Full Frame Eq)
18809
180mm Optical Glass Wide Angle Port
109.8
16
18812
230mm Optical Glass Wide Angle Port II
146.8
7
18813/18815
250mm Optical Glass Wide Angle Port II
102.75
18
It is somewhat surprising to see that the larger port in terms of size is the narrower in terms of field of view I believe this is a compromise in terms of weight.
Dome Selection Part II – Curvature Radius
Looking at field of view is not sufficient, we also want to ensure that the lens MOD is contained by the dome and therefore we need to take into account the actual radius of curvature of the port
18809 180mm Optical Glass Wide Angle Port Radius 110mm
18812 230mm Optical Glass Wide Angle Port II Radius 120mm
18813/18815 250mm Optical Glass Wide angle port Radius 160mm
The port size goes with the curvature radius however somewhat surprisingly the difference between the 230mm and 180mm port is rather small making the choice between the two more a matter of field of view.
Amount of Recession of the Camera from the Port
Camera housings are not like skin, armed with a digital calliper you need to determine the distance between the lens mount and the housing port mount. Alternatively you can reverse engineer this once you have a lens port combination that is absolutely exact.
For the purpose of my calculations I have measured that my E-Mount camera is 27mm recessed inside the housing. This is important as it is needed to calculate the extension for the dome. If you are in a different format you need to measure this distance yourself.
Entrance Pupil to Housing Port
We have previously determined the entrance pupil from the lens mount and now we know how much this is recessed in the housing so we can calculate the required extension to reach the entrance pupil however this assumes the domes are hemispheres which in most cases they are not. Let’s leave this aside for one second and go back to our examples.
Sony 20-70mm F4 Entrance Pupil Distance = 73.79mm – Housing recession 27mm = 46.79mm from the housing
Sony 20mm F1.8 Entrance Pupil Distance = 62.91mmm – Housing recession 27mm = 35.91from the housing.
Tamron 17-28mm F2.8 → 50.5mm from the housing
Sony 16-35 F2.8 GM2 → 66.5mm from the housing
Wide Angle Ports
Again we need a calliper to determine the depth of the port as those are not full hemispheres. I have access to the 180mm dome and I know that the port is actually 8.5cm tall from mount to glass edge because I measured it. This means I need to add 25mm to the extension required. From the manual I estimate the 230mm port needs extra 13mm and the 250mm port 34mm. if you own those ports and want to provide me the exact measurement I will build a calculator for dummies.
Back to our examples with some real calculations:
Sony 20-70mm F4 Port required 250mm Wide angle Port. Extension required 46.79+34mm=80mm
Sony 20mm F1.8 Port Required 180mm Wide angle port. Extension required 35.9mm+25mm=60.9mm
Sony 16-35 F2.8 GM2 Port Required 180mm Wide angle port. Extension required 66.5mm+25mm=91.5mm
If we are using the 35.5mm N100 to N120 adapter this means that the actual extension rings required are
Sony 20-70mm F4 → 80-35.5=45 mm Part required N120 Extension Ring 45
Sony 20mm F1.8 → 60.9-35.5=25.4 mm Part Required N120 Extension Ring 25
Tamron 17-28mm F2.8 → 75.5-35.5=40 mm Part Required N120 Extension Ring 40
Sony 16-35mm F2.8 GM2 → 91.5-35.5=55 mm Part Required N120 Extension Ring 55
Nauticam Port Chart Check
Lens
Extension Determined
Extension Suggested
Delta
Sony 20-70mm
45 mm
40 mm
5 mm
Sony 20mm
25
NA
NA
Tamron 17-28
40 mm
40 mm
0 mm
Sony 16-35GM2
55 mm
50 mm
5 mm
We can see that for the 20-70mm where the entrance pupil is known the Nauticam port chart is off 5mm. For the 17-28mm where design information is not known there is no discrepancy with my method and for the 16-35 GM2 there is a discrepancy of 5mm.
I checked the situation for the 16-35mm GM2. This lens has some distortion and therefore the uncorrected field of view is 109 degrees which is too big for the 180mm wide angle port. With my calculated 55mm if you remove distortion correction in camera you can see a tiny bit of shading from the dome petals but this goes away when distortion correction is active. Therefore I am satisfied that my calculations are more accurate. I contacted Nauticam who ran the MFT charts in their test rig and they said 55mm works well too. Although it is ideal to have the exact extension if you have one that is 5mm off the calculated value and the dome does not vignette you need to consider if the image quality you get is satisfactory and make your call.
I also tested this lens in a pool, you can read the review in this post.
What about other brands?
The challenge with other brands is the lack of documentation however you can contact the design department to obtain information on the dome port they should not be a secret. The other challenge is the availability of extension rings. The Nauticam system has a level of precision of 5mm which is excellent however I am under the definite impression that they run their tests using in most cases steps of 10mm and using as first approach how the lens fits the port, they do not go and attempt to determine the entrance pupil.You can observe that because when you look at a specific port say the 180mm wide angle and you apply the suggested extensions in all cases the lens edge is flush with the extension.
In most cases this turns out to be accurate however there are some cases where wider lenses need to be more recessed and narrower lenses need to stick out more.
Fisheye Lenses
When you use a fisheye lens with a complete hemisphere dome port the calculations remain the same however it is a bit simpler to proceed without data. If your fisheye has a diagonal 180 degrees view and your extension is too long you will see vignette in the corners. However if you push your fisheye lens closer to the glass you may be able to use a dome with a smaller field of view but the edge distortion will increase and so will chromatic aberrations. A classic example is the 230mm wide angle port used with a fisheye lens. The port has a field of view of 146.8 degrees which is far away from the required 174 degrees of a diagonal fisheye lens.
Panotools provide entrance pupil for the Nikkor 8-15mm therefore we don’t need to go trial and error. The Canon 8-15mm Fisheye is on the Optical Bench Hub.
Following the same logic we determine that the entrance pupil is 129.98-18-17.98-27=67mm from the housing. Taking out 35.5mm for the adapter we get 31.5mm vs the 30mm on the Nauticam port chart. This means the lens will stick out from the dome opening and that is fine as a shorter lens would make it vignette. Try it if you have a 35mm extension you will see the vignette. If you have access to all extensions in steps of 5mm you can determine the correct one when the vignetting stops even without the entrance pupil position. Please note the above calculation is to use a Canon EF lens (flange distance 44mm) on E-Mount (flange distance 18mm) however if you work that out in the N120 Canon system with the additional gap for the more recessed housing you end up in exactly the same place.
Wrap Up
This article has shown that it is possible, with basic knowledge of trigonometry and access to lens, dome and camera design information to determine:
How well a lens may work
What is the minimum dome radius required to preserve the image quality
What is the extension required
How to find out the required field of view of your port
Without acquiring the actual lens camera or wide angle port. It is important to understand that if a lens is weak in air it won’t get better in water and in particular you need to appreciate that topside tests are not identical to use behind a dome that instead means working at very close focus well under one metre mostly around 30 to 50 cm. It may be worth it in some cases to rent a lens if available and take some tripod shots at close range. If you see really weak performance the lens may not be worth housing it at all.
One of the misconceptions that has propagated in the last few years is that all rectilinear lenses offer poor performance compared to water contact optics and you need to stop down to very small apertures to have good edges. From my personal experience with the Tamron 17-28mm, I can conclude that this lens is far sharper than the water contact optics that require a similar investment and even beats more expensive options (WACP-C) however the rectilinear look is somewhat not in trend in underwater photography. Majority of photos want the centre to pop and this works better using fisheye lenses or distorted optics at close range. Still there is a place for rectilinear lenses: models, wrecks where shapes are known, even fish and marine life where the exact dimensions matter for scientific purposes.
I hope that this article allows you to have a more informed view of the key factors to look for in a lens that will ensure underwater performance is as good as it can be.
It is a long time I do not write post that are a real blog but the trip to Malpelo deserved it.
I decided to take two cameras with me so that I could shoot topside without the pressure of taking the camera outside the housing.
Things to know about Malpelo
Malpelo island is a small rocky island off the coast of Colombia and is not inhabited if we exclude the thousands of birds that live on it and the few soldiers that manage the outpost.
It is situated around 500 km away from mainland and is 1.5 km long for 640 meters wide at the best. The island is volcanic in nature and despite being a Sanctuary of Flora and Fauna has no vegetation on it.
During our stay we had several thunderstorm that resulted in small waterfall from the cracks on the rocks.
There is no mobile phone coverage as you sail off the coast and the only way to get signal is to use a satellite phone.
Malpelo has two weather seasons and dive conditions change considerably:
January to April – Dry season
May to December – Wet season
The main difference in addition to the fact that it rains is the water temperature and the depth of the thermocline.
Most people go to Malpelo to see hammerheads and as the weather gets warmer the thermocline goes deeper and so do the hammerheads.
On the other hand visibility improves during the wet season so if you are into video or photo you can get 20+ meters visibility compared to 10-15 in the dry season.
I went in June and this meant schooling hammerheads in the blue and thermocline at depth. I knew about it but other guests didn’t so they were either disappointed or pushing the dive guide out into the blue to see them which frankly was not ideal.
There are only two boats that visit Malpelo regularly the MV Ferox which is what I used and the Sea Wolf. The Ferox caters to more international travellers is entirely made of steel being a former Swedish minesweeper. The Sea Wolf hull is made of aluminum it is more comfortable in terms of living area but suffers the sea conditions much more. The clientele is more local or South American. The two boats have a set number of permits and at one time there is only one boat except on arrival and departure day when you may cross the other one.
The trip starts from the Intercontinental hotel in Cali and you get to Buenaventura after a 3+ hours coach ride in extremely bendy roads with many tunnels. You embark the MV Ferox ribs directly from the touristic port of Buenaventura. Due to the level of crime in this location you stay there the absolute minimum amount of time. The destination was not flagged as safe by my travel insurance as of June 2023.
I shot a little clip of the process of getting on the boat that should give a good idea.
Getting Aboard the MV Ferox
As you can see from the clip the boat is not exactly luxurious. I was in a full size cabin so I could set up my camera inside. All other cabins except the doubles were smaller. There is no dive deck as you dive from the RIBs and the upper deck was absolutely super slippery the moment you had some rain.
Transit to Malpelo
The Ferox leaves after dinner on day 1 and then travels non stop until arrival. Conditions were pretty calm during my crossing and the boat arrived in Malpelo at night.
MV Ferox Transit to Malpelo Sanctuary of Flora and Fauna
Once arrived the boat stayed on a mooring point on the north east of the island in front of la cara del fantasma dive site and close to the military outpost.
If you are prone to sea sickness please note that the boat is only attached to a single mooring point and therefore will move with the wind and the waves. In addition the generator providing light is quite noisy and goes on non stop. My earplugs were not good enough for a quiet night, I recommend you invest in heavy duty ones for shooting.
Dive Operation
The dive operation is absolutely superb in terms of logistics and organisation.
The two RIBS travel on the deck of the boat during the crossing and are dropped in using cranes upon arrival. The scuba gear that was set up during the crossing is loaded on the RIB by the crew and stays there for the duration of the trip until unloaded and then the RIB are lifted back on board.
Tanks are filled directly on the RIB, this set up is fantastic as you only have to make it to the boat while your camera gets passed to you. Due to the surface conditions anything different is not advised.
MV Ferox Dive Operation Set up
The Diving
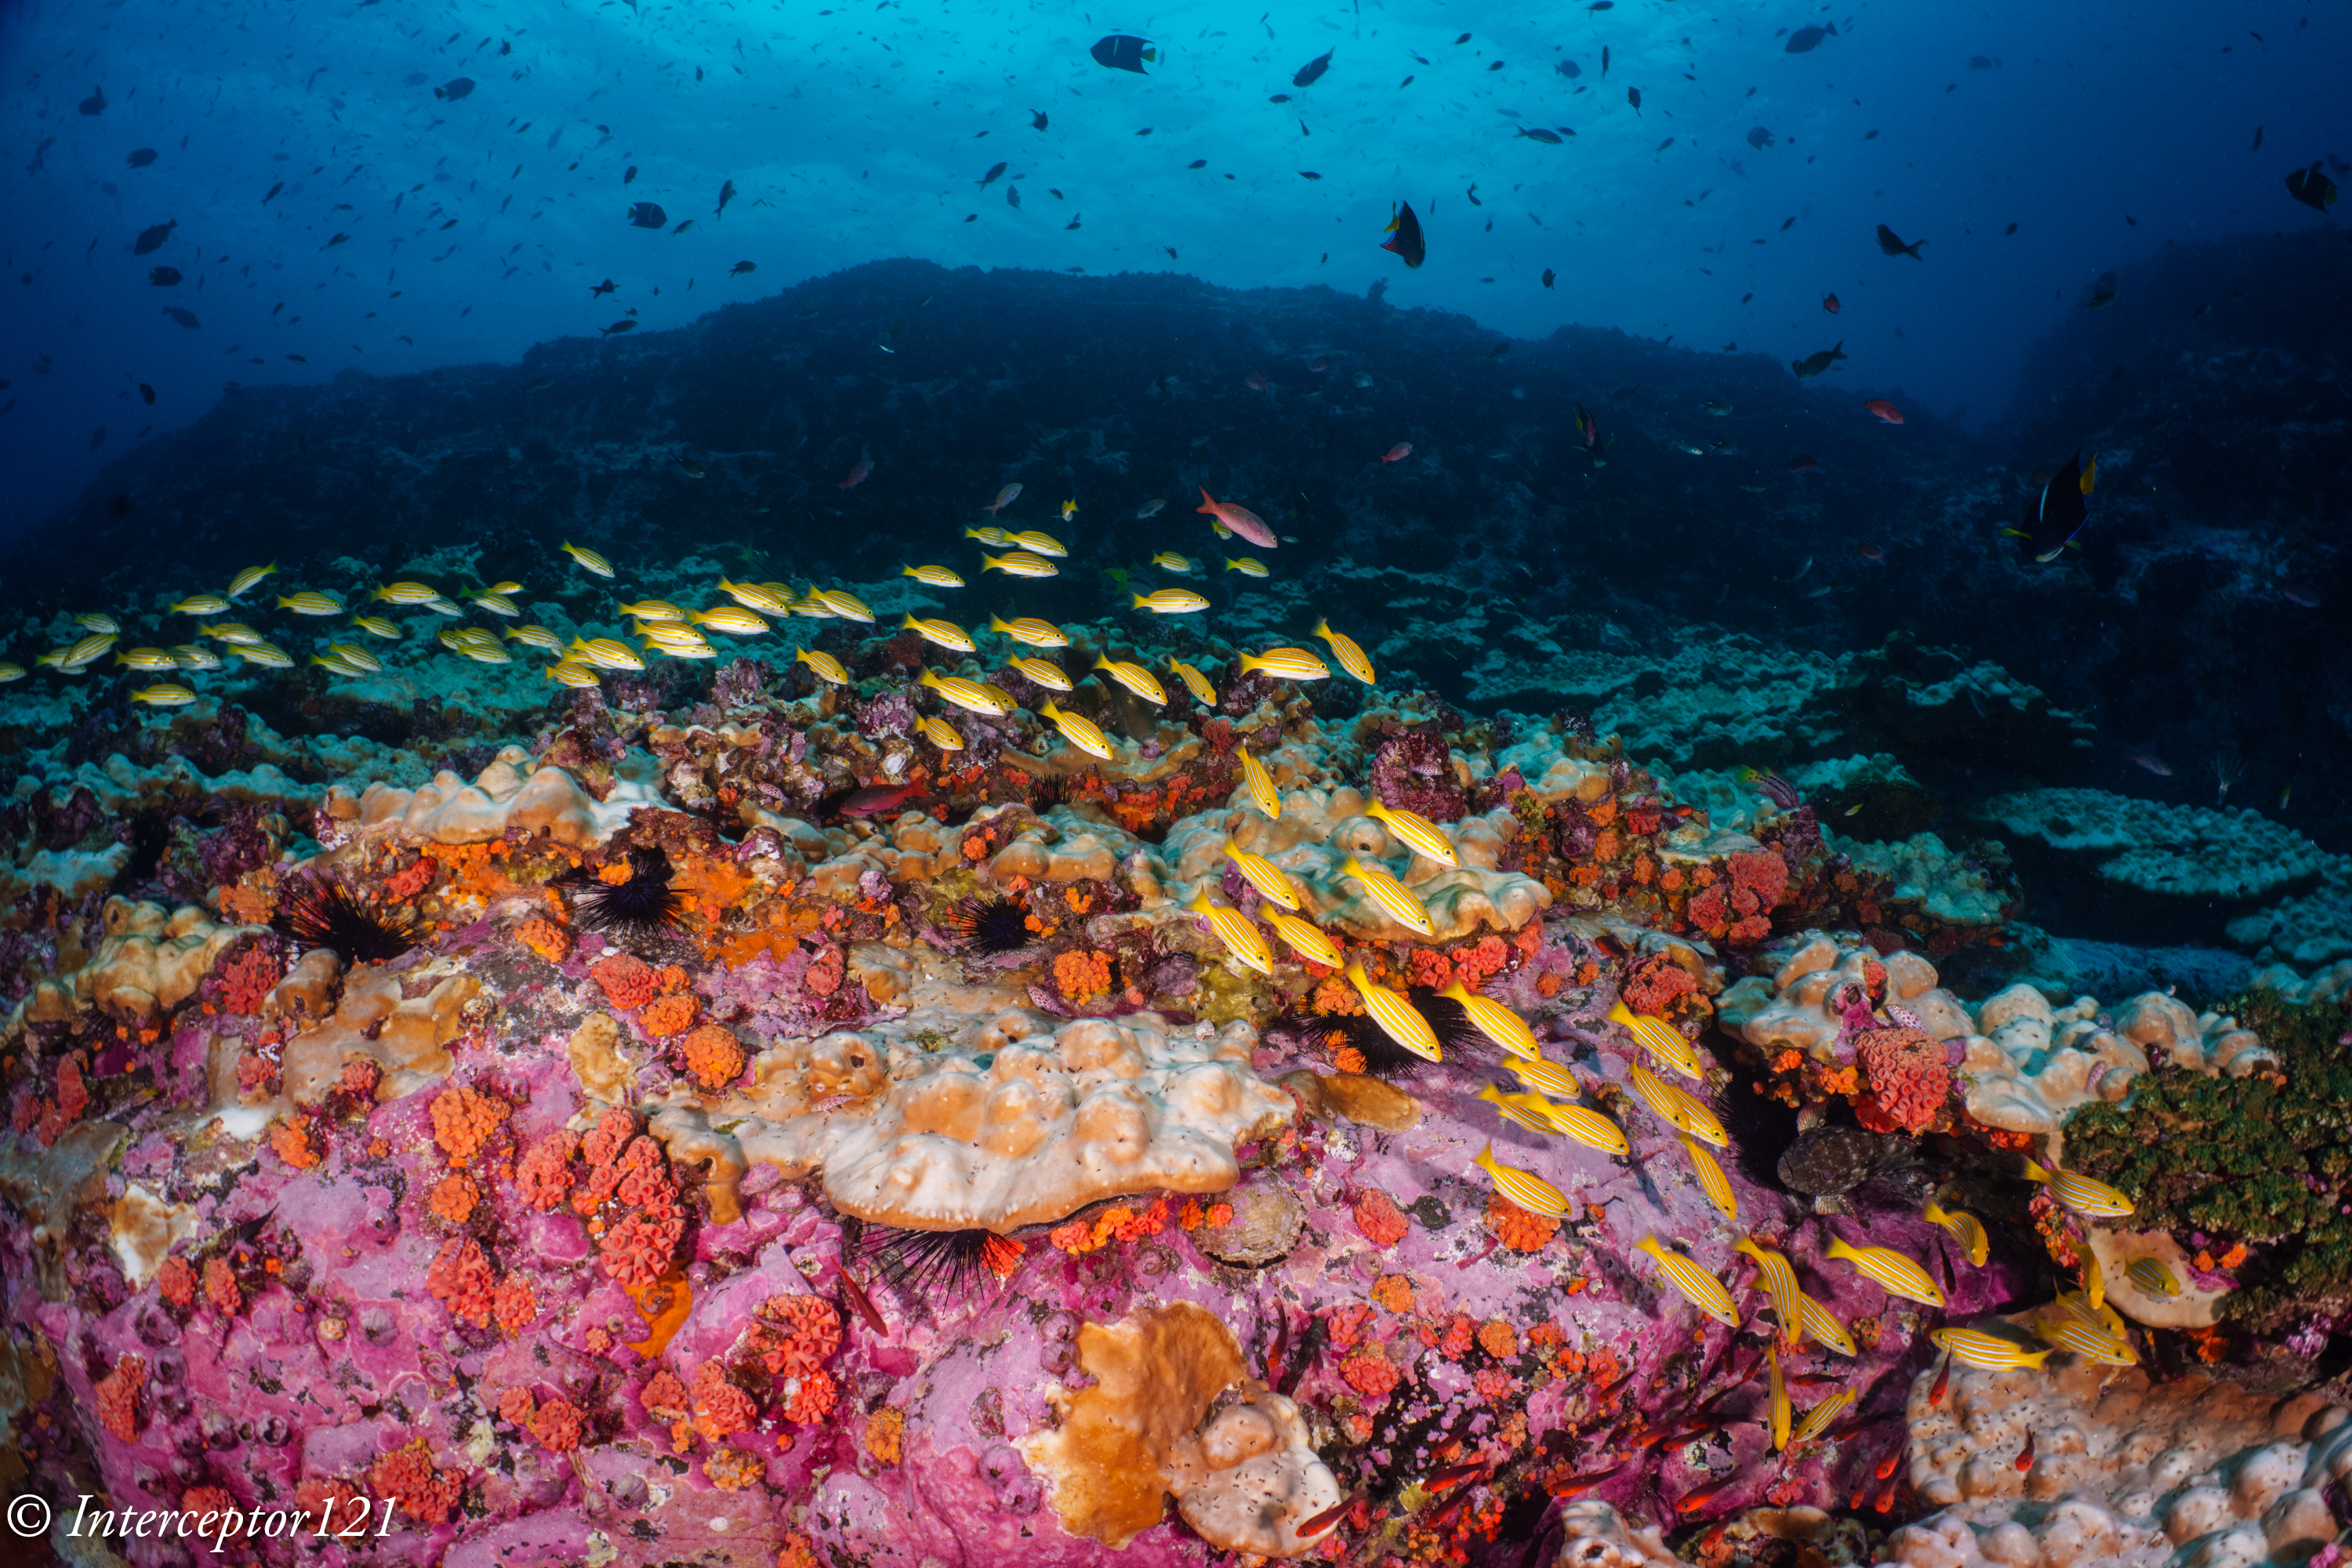
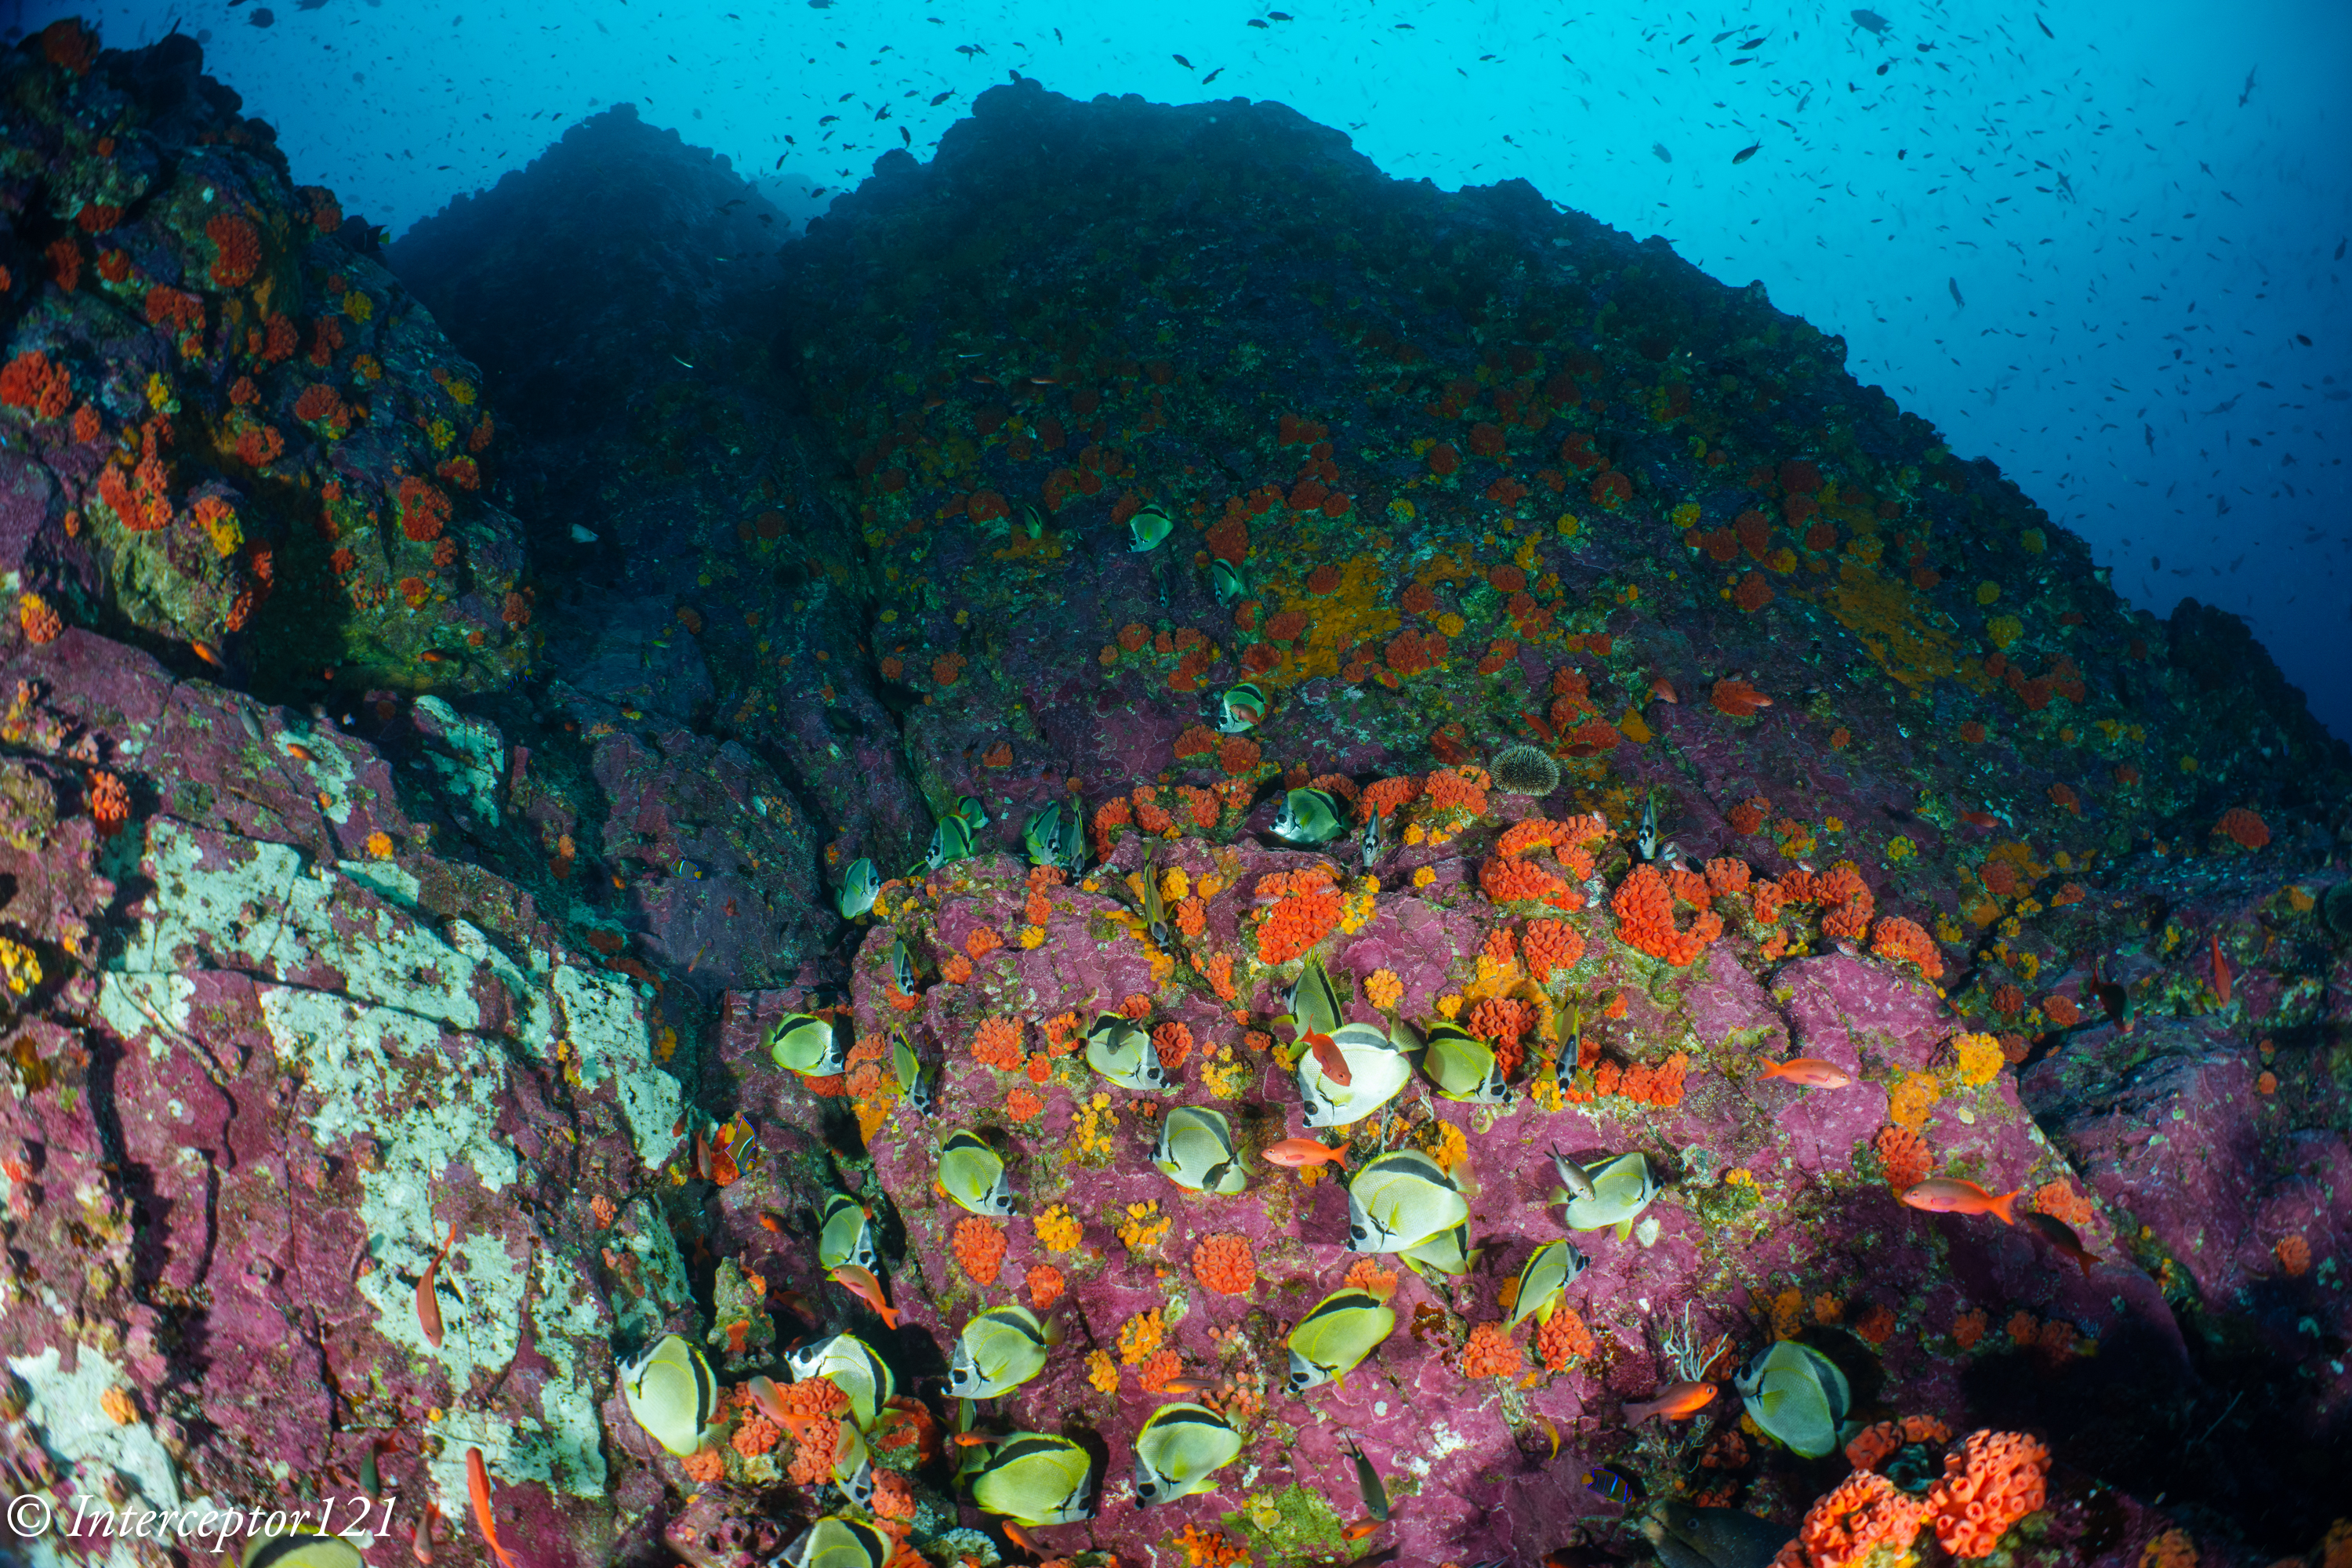
I was expecting absolutely barren rocks with no coral after reading several sources however this proved to be wrong. There are hard and soft corals, not as you would expect in Egypt, but plenty to have macro life which of course was not the main objective of anyone on the trip.
Soft Coral PinnacleSwayWrapped around fingerWrasseButterflies
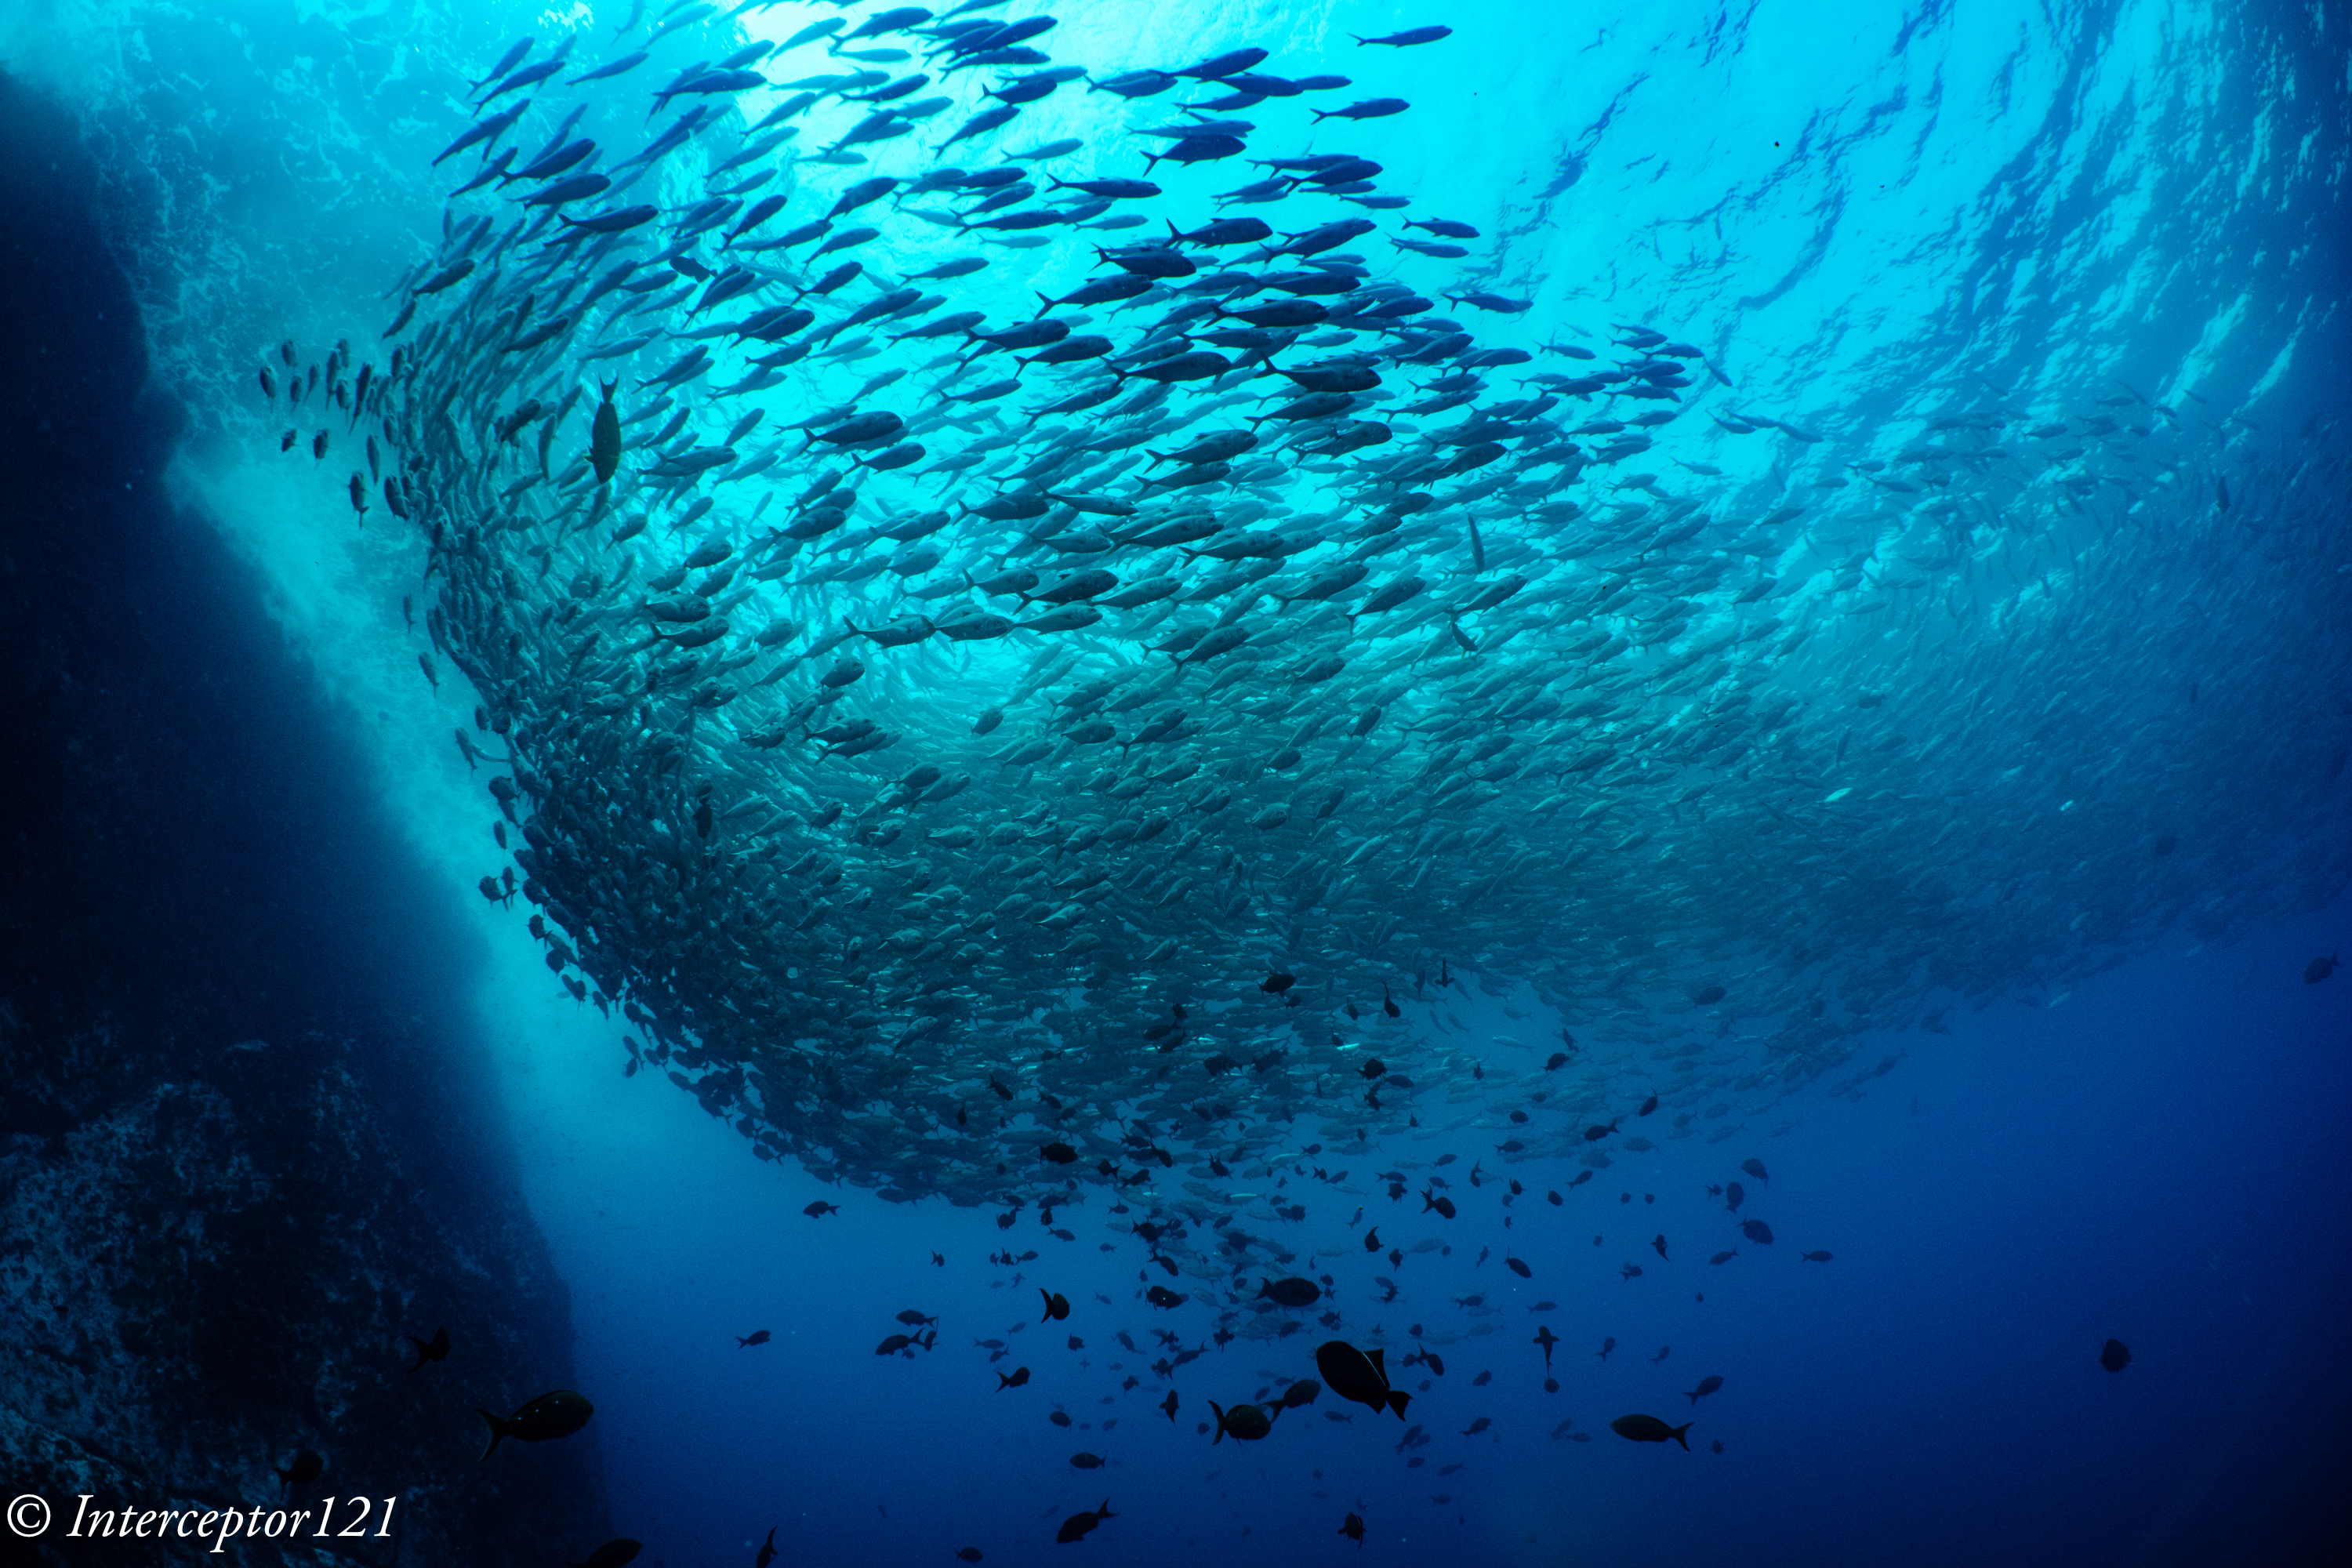
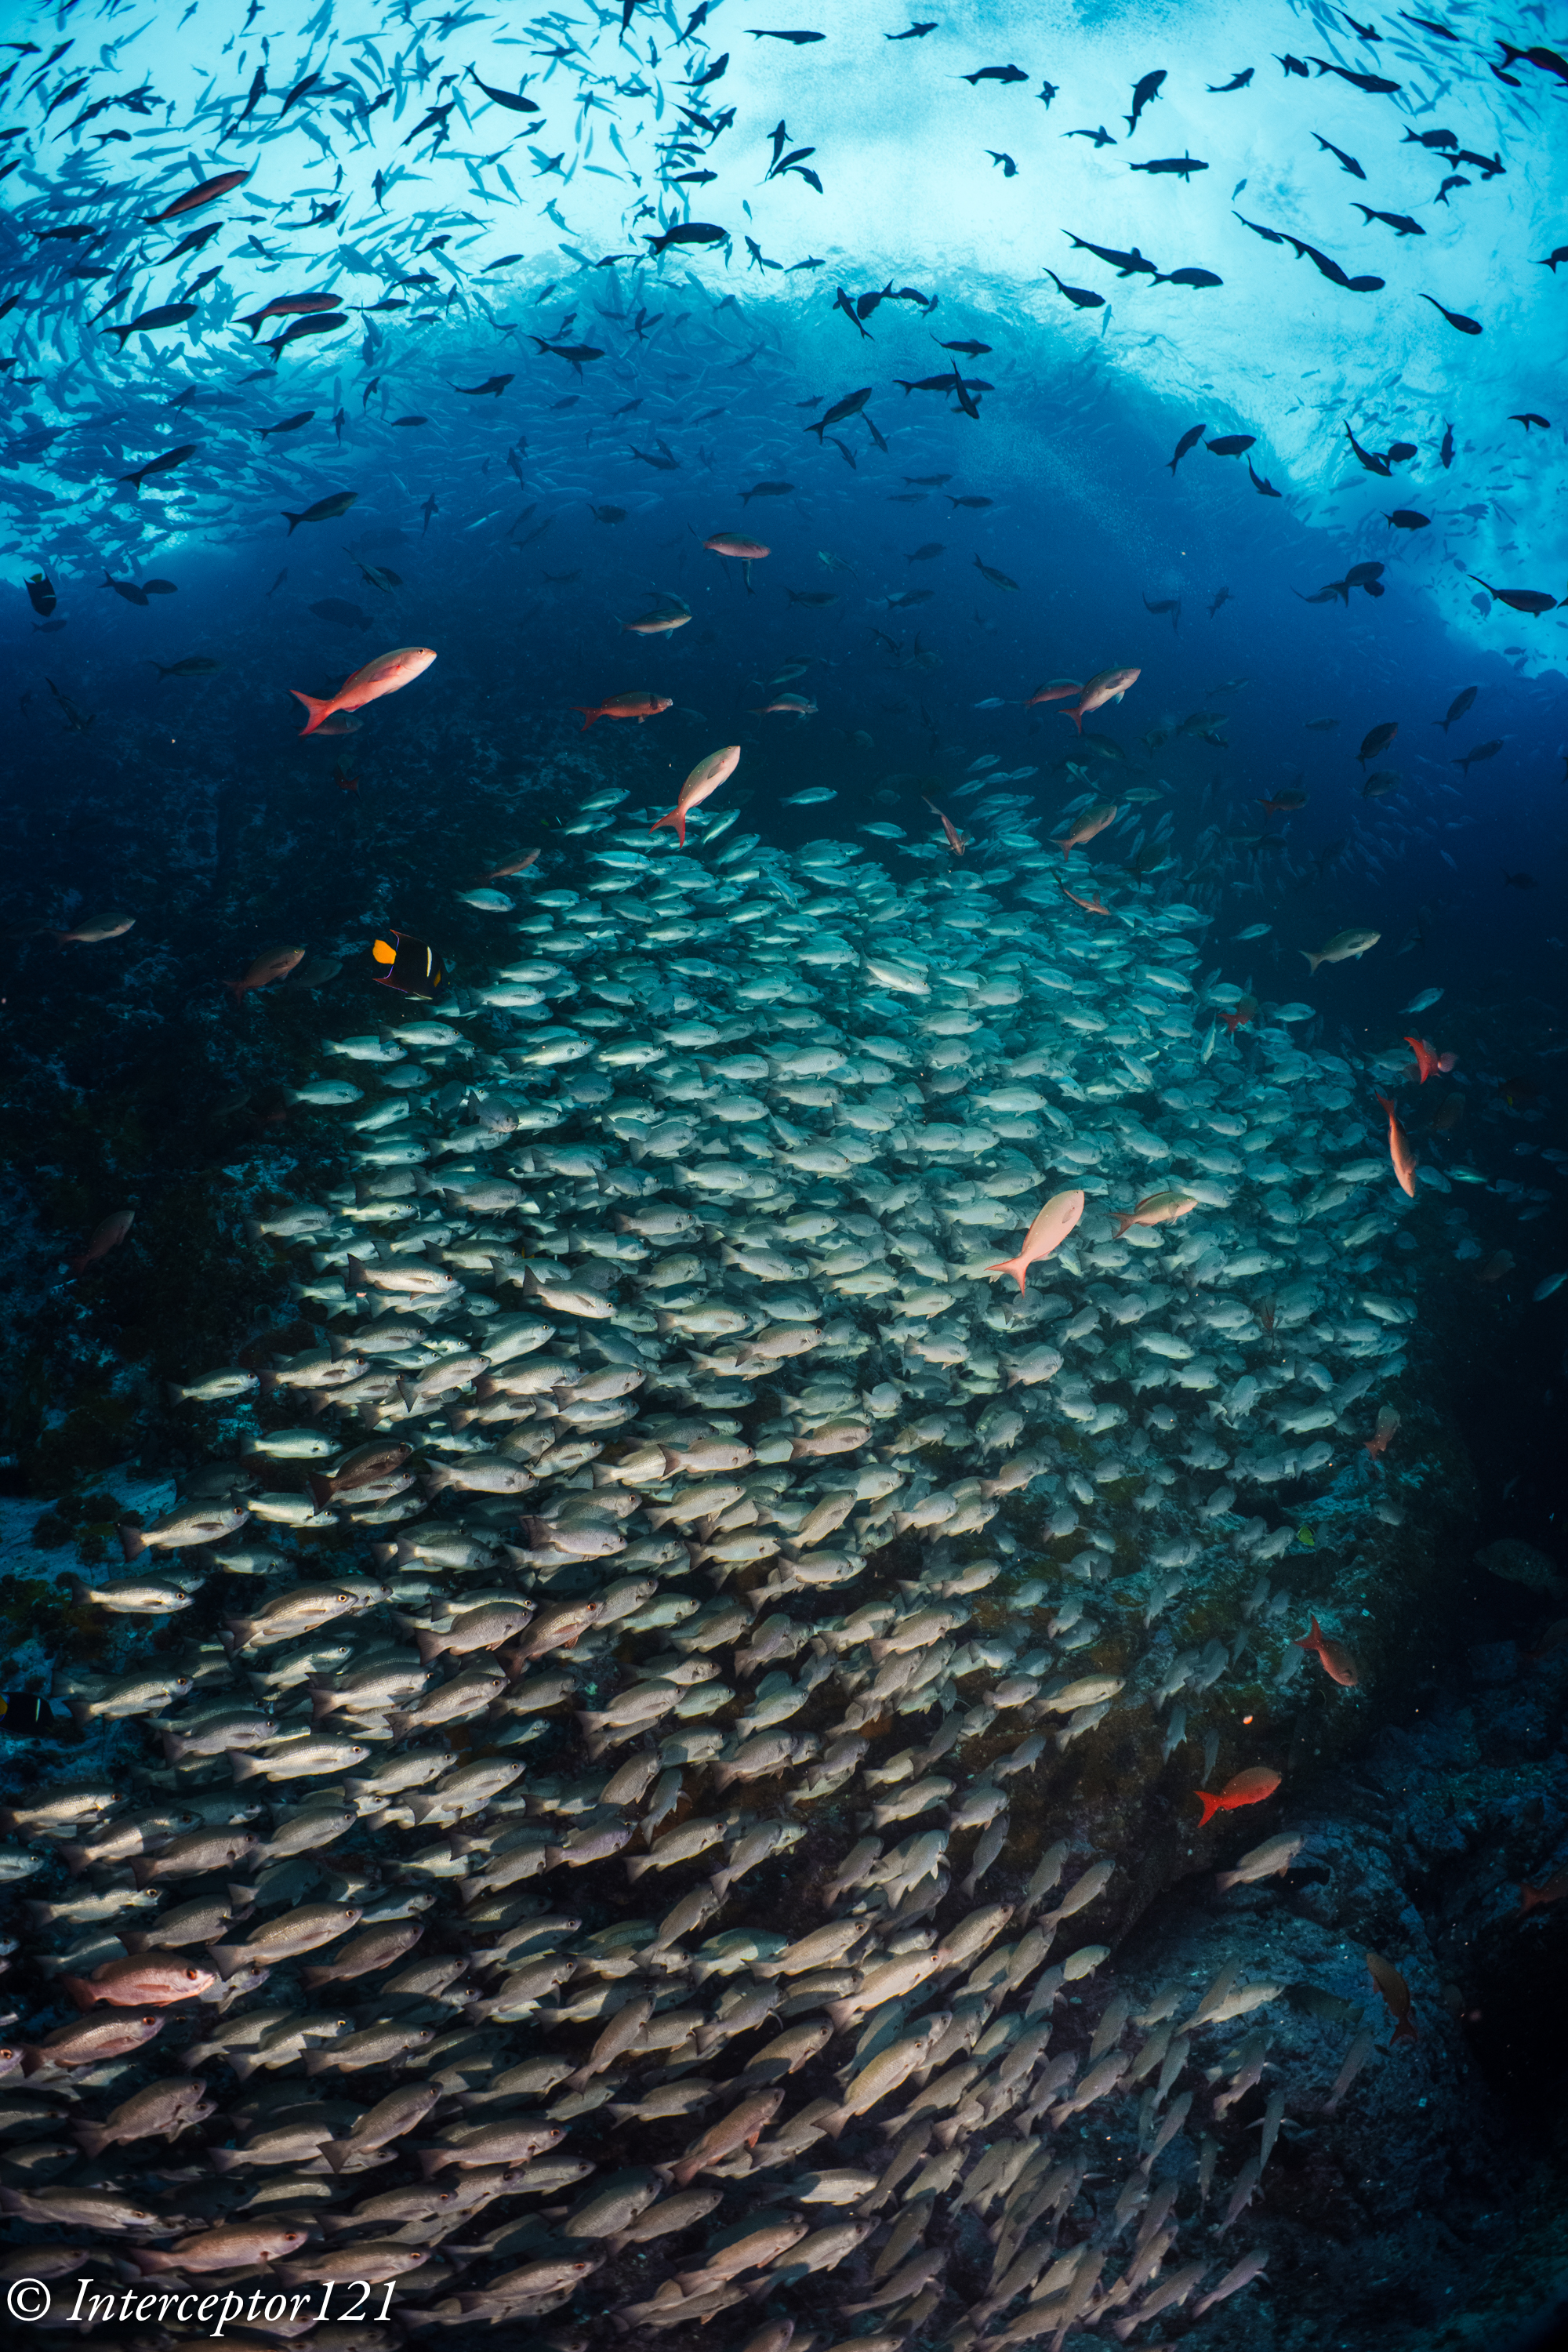
Fish Schools
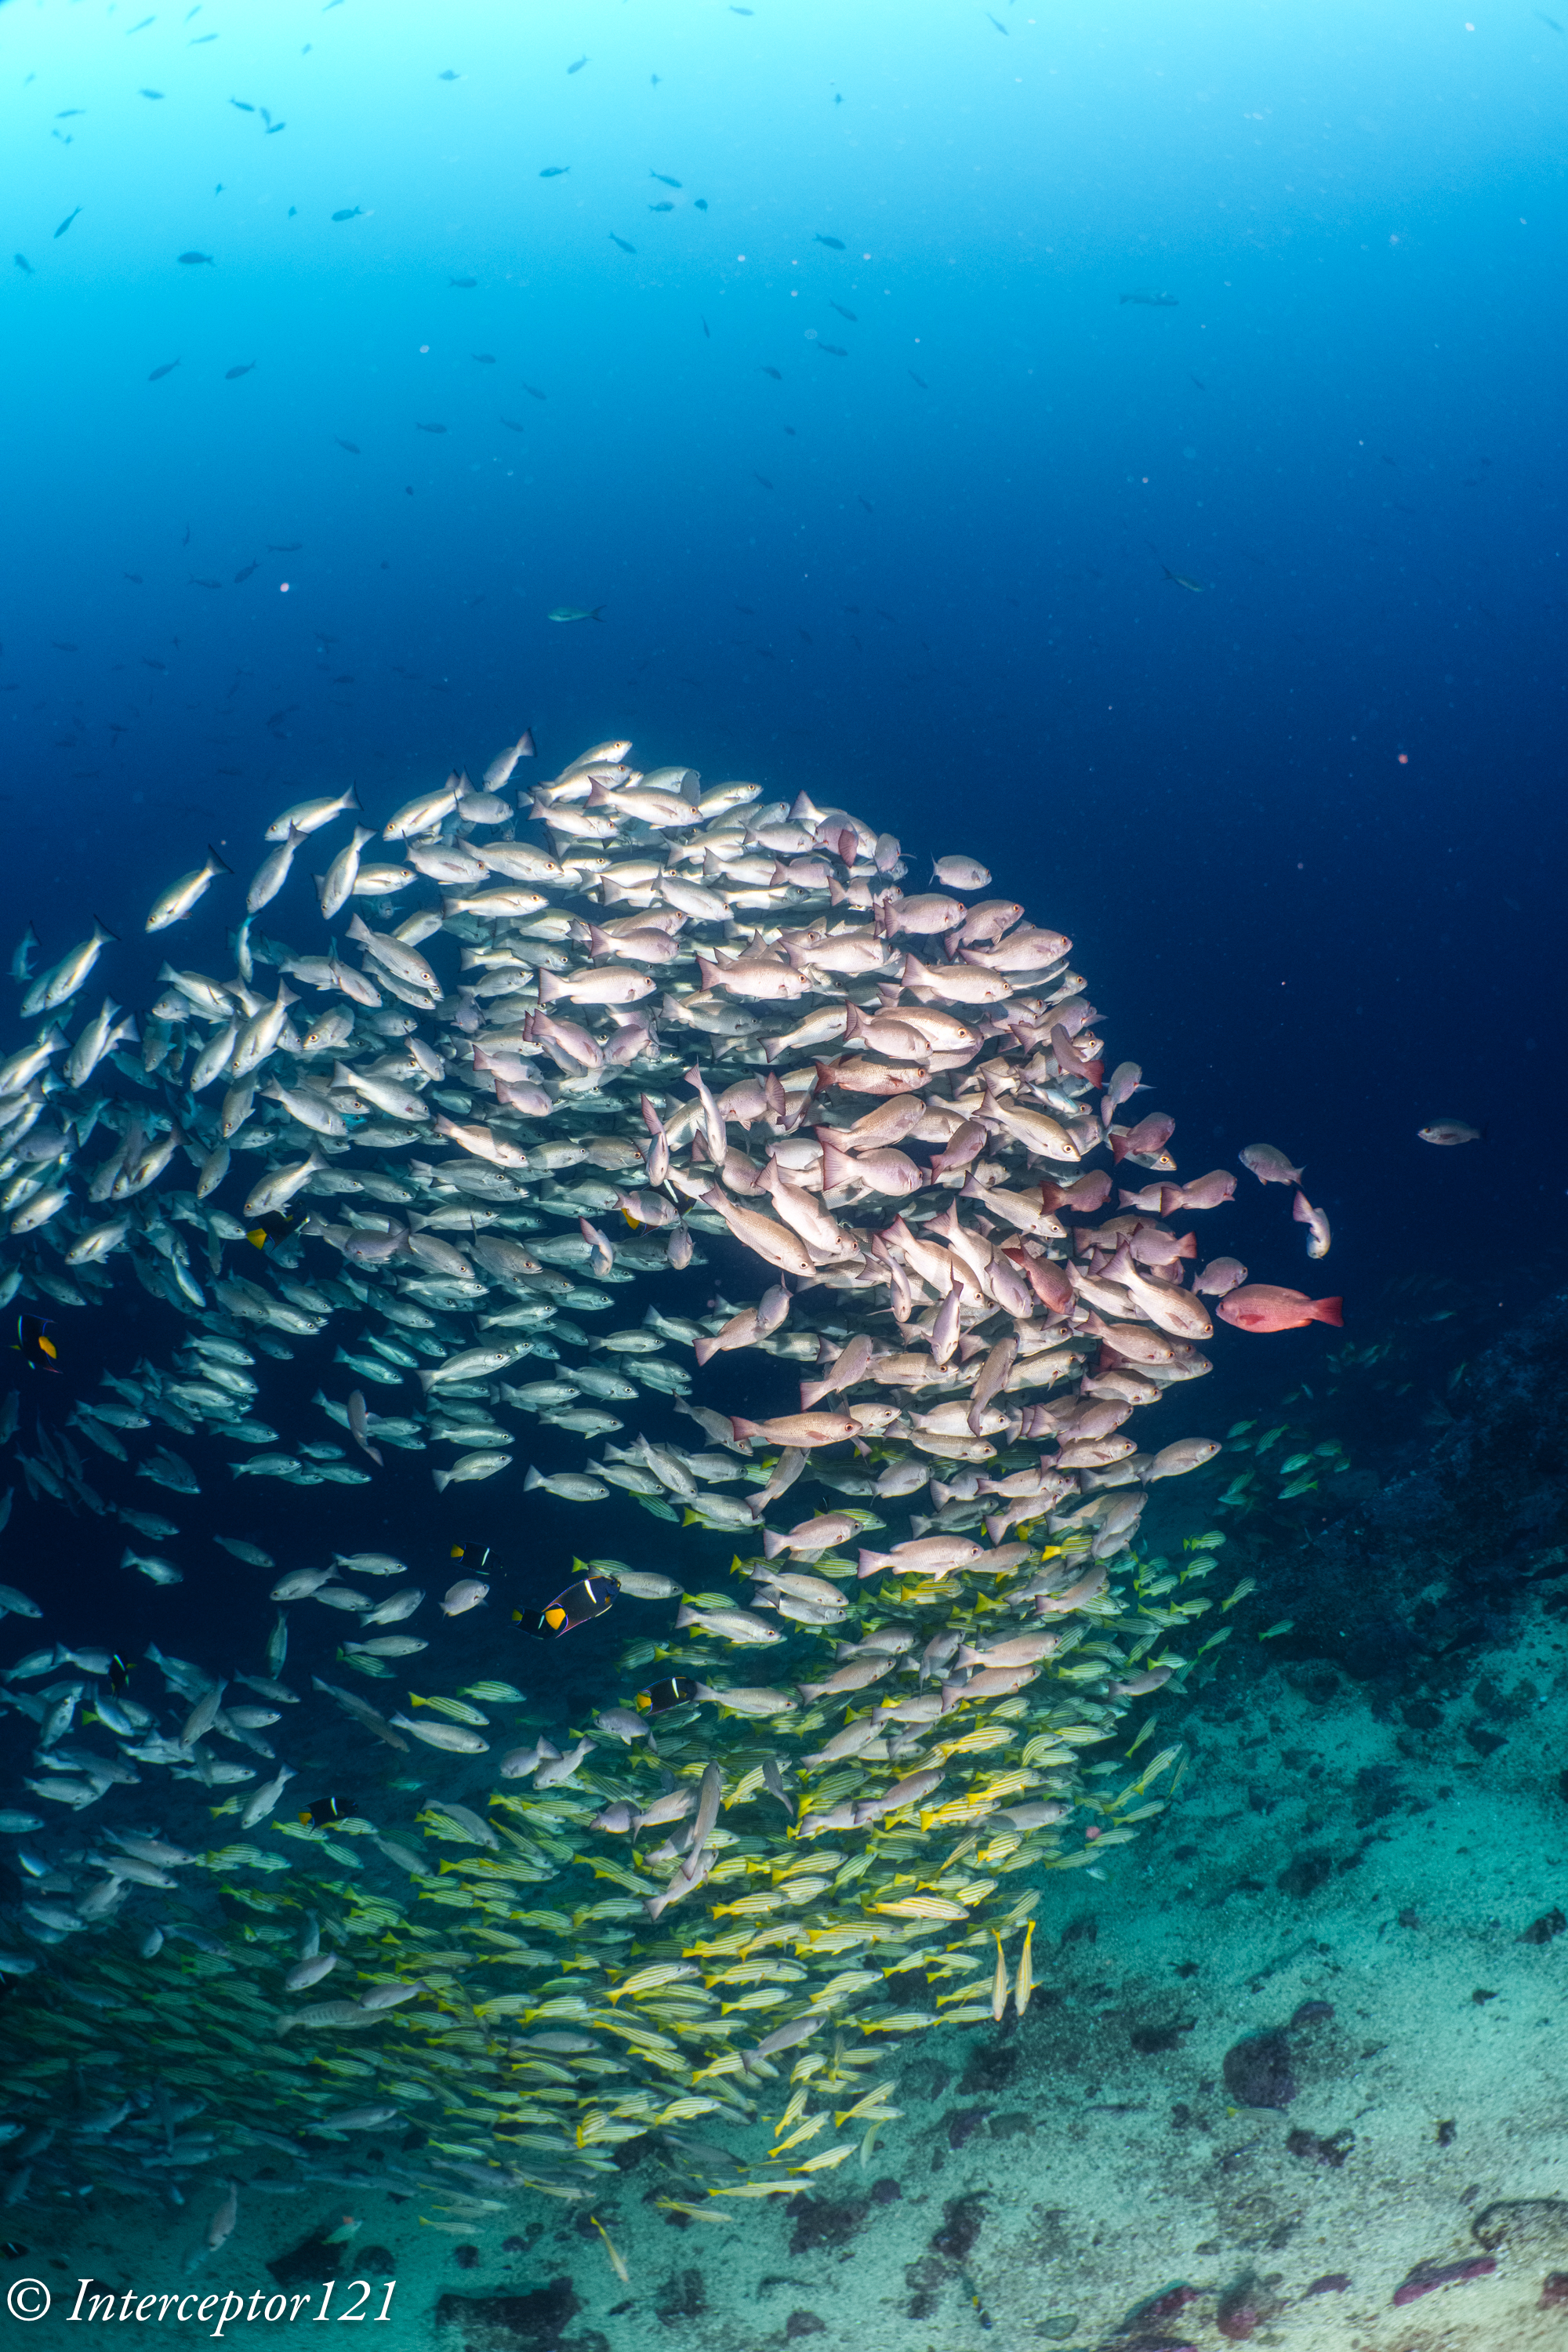
One of the most attractive features of Malpelo in the wet season are the huge aggregations of fish. When I say huge I mean that the lens I brought for that which is what I use in Egypt for the local school was simply not wide enough.
D’Artagnan Dive Site – Sanctuary of Flora and Fauna of Malpelo Island
The three mosqueteros, pinnacles to the north of the island were the best for schools.
Snappers at D’Artagnan ISnappers at D’Artagnan IISnappers at D’Artagnan III
For the great joy of photographers and videographers.
Selfie-shBreaking the school
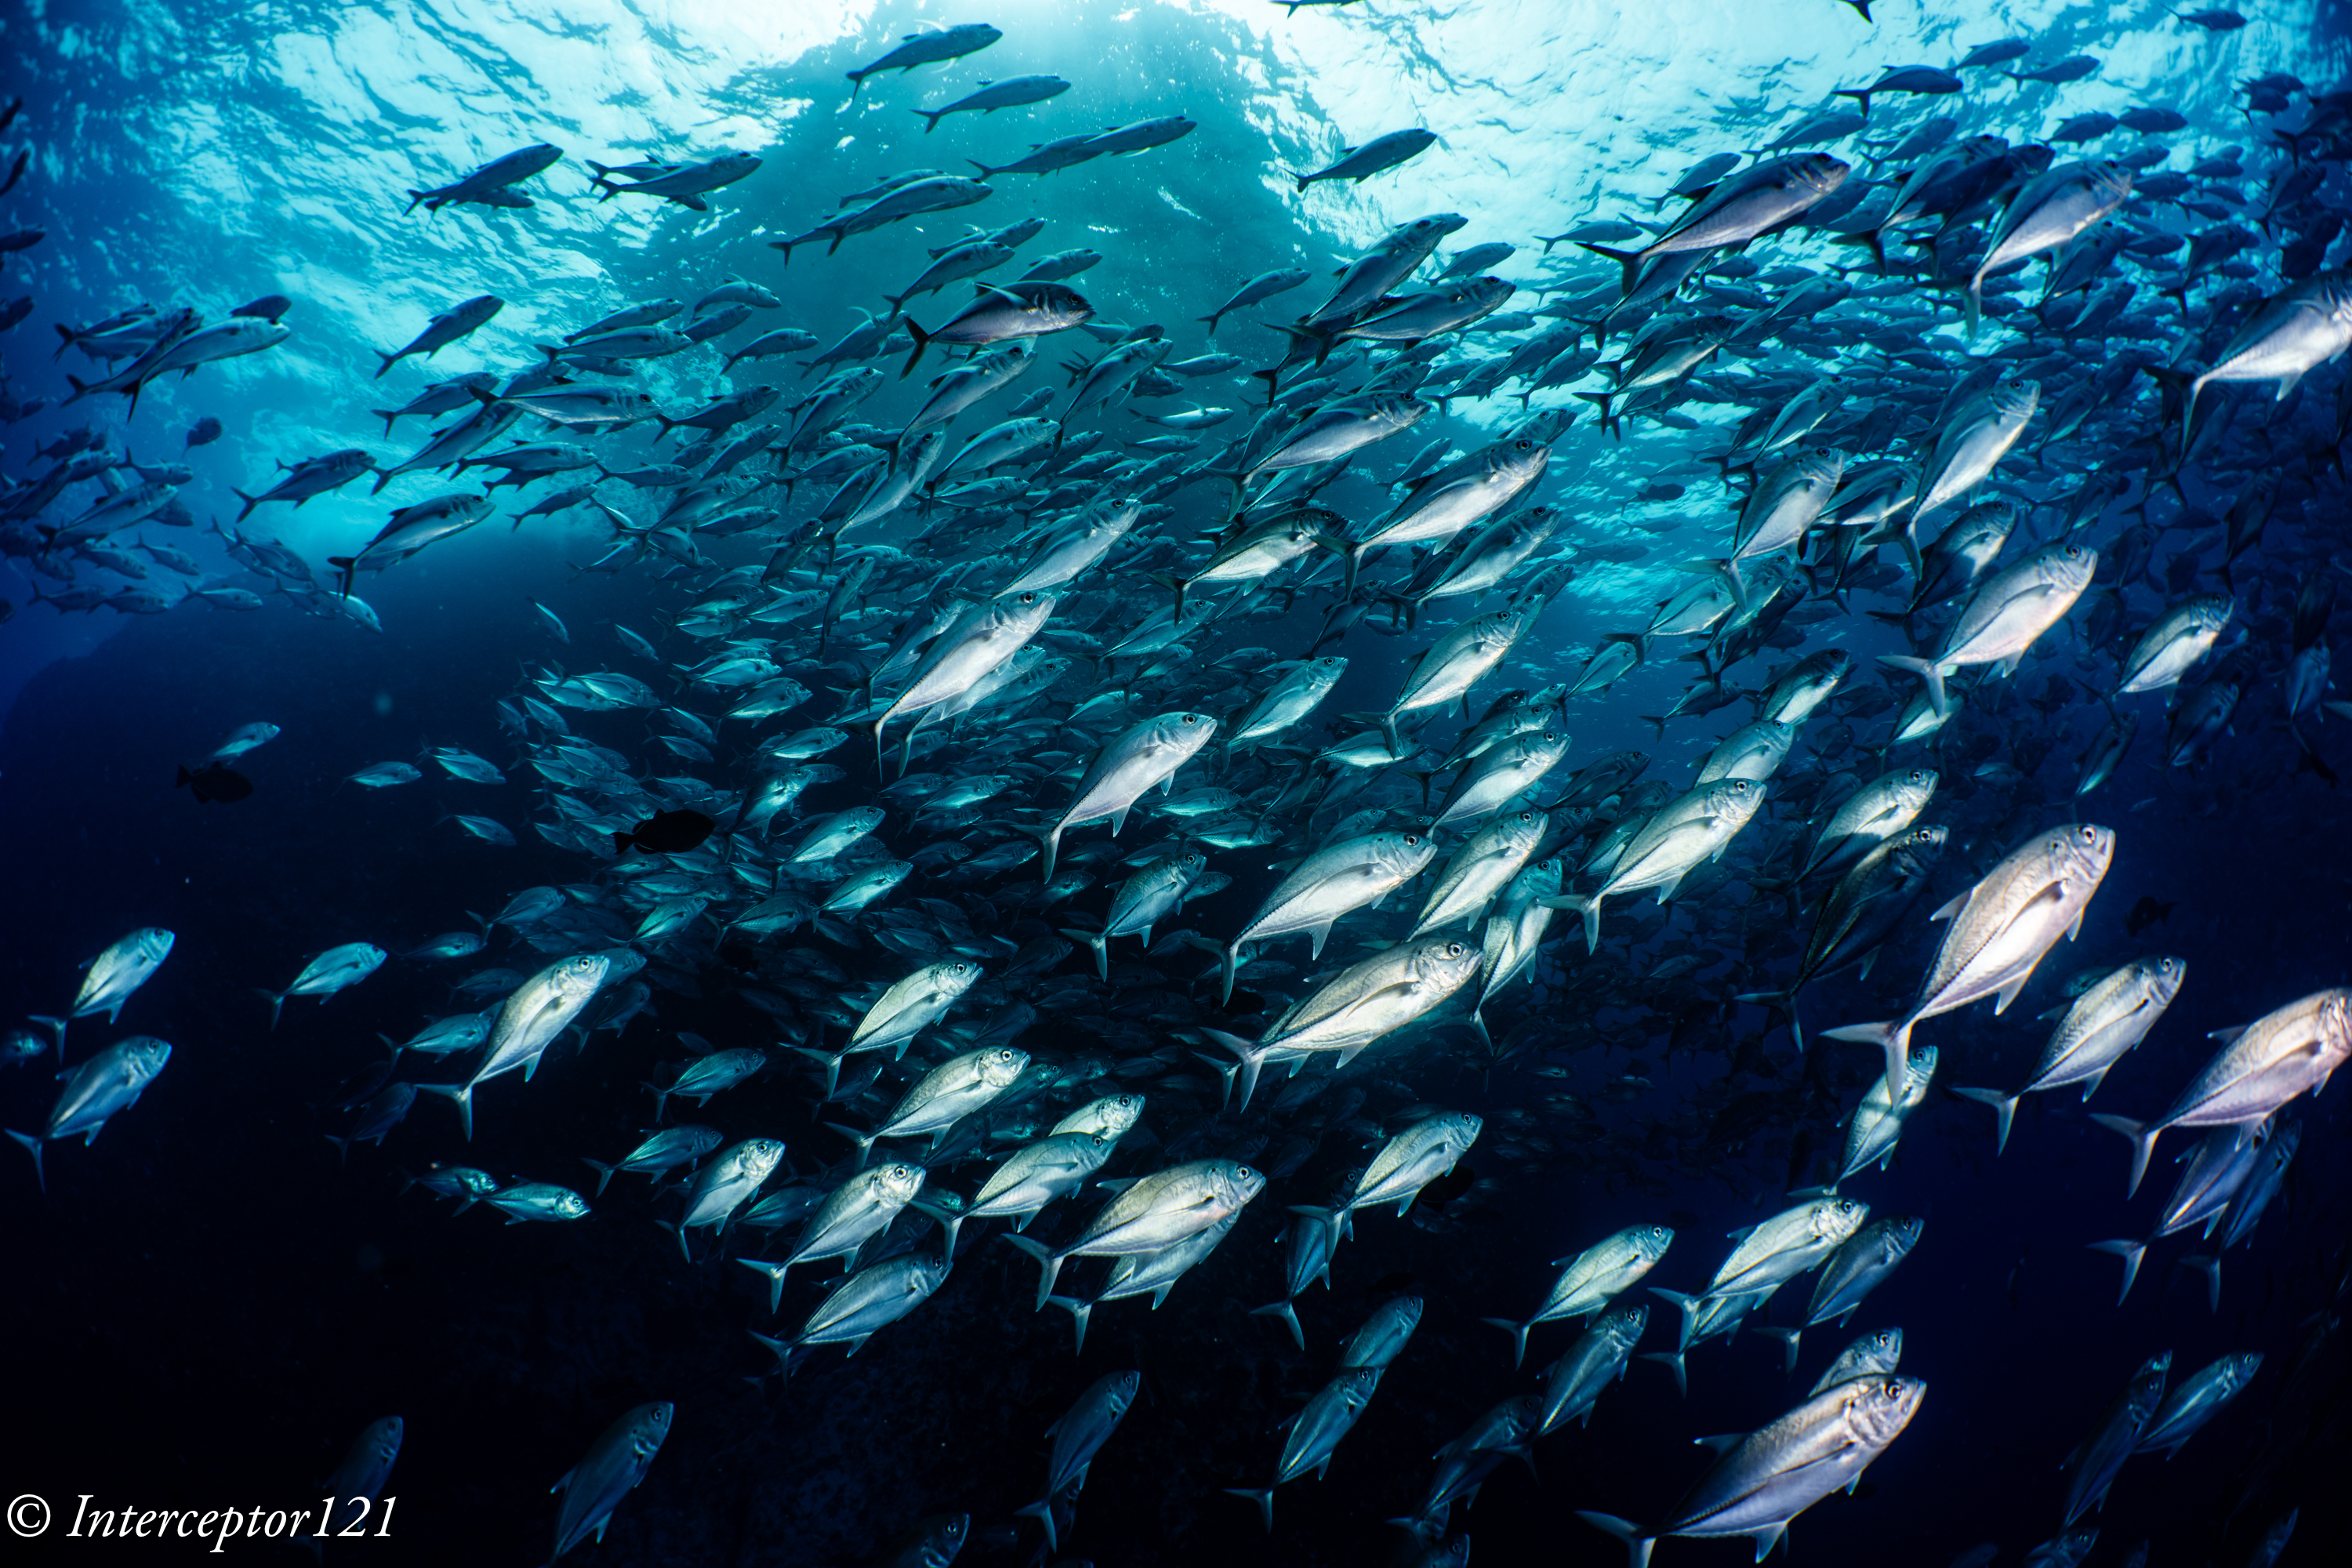
The school of trevallies there is no doubt the biggest school I have ever seen to date and lends itself to all sorts of wall to wall shots.
UpsideArrows downCoupleRed Mullets
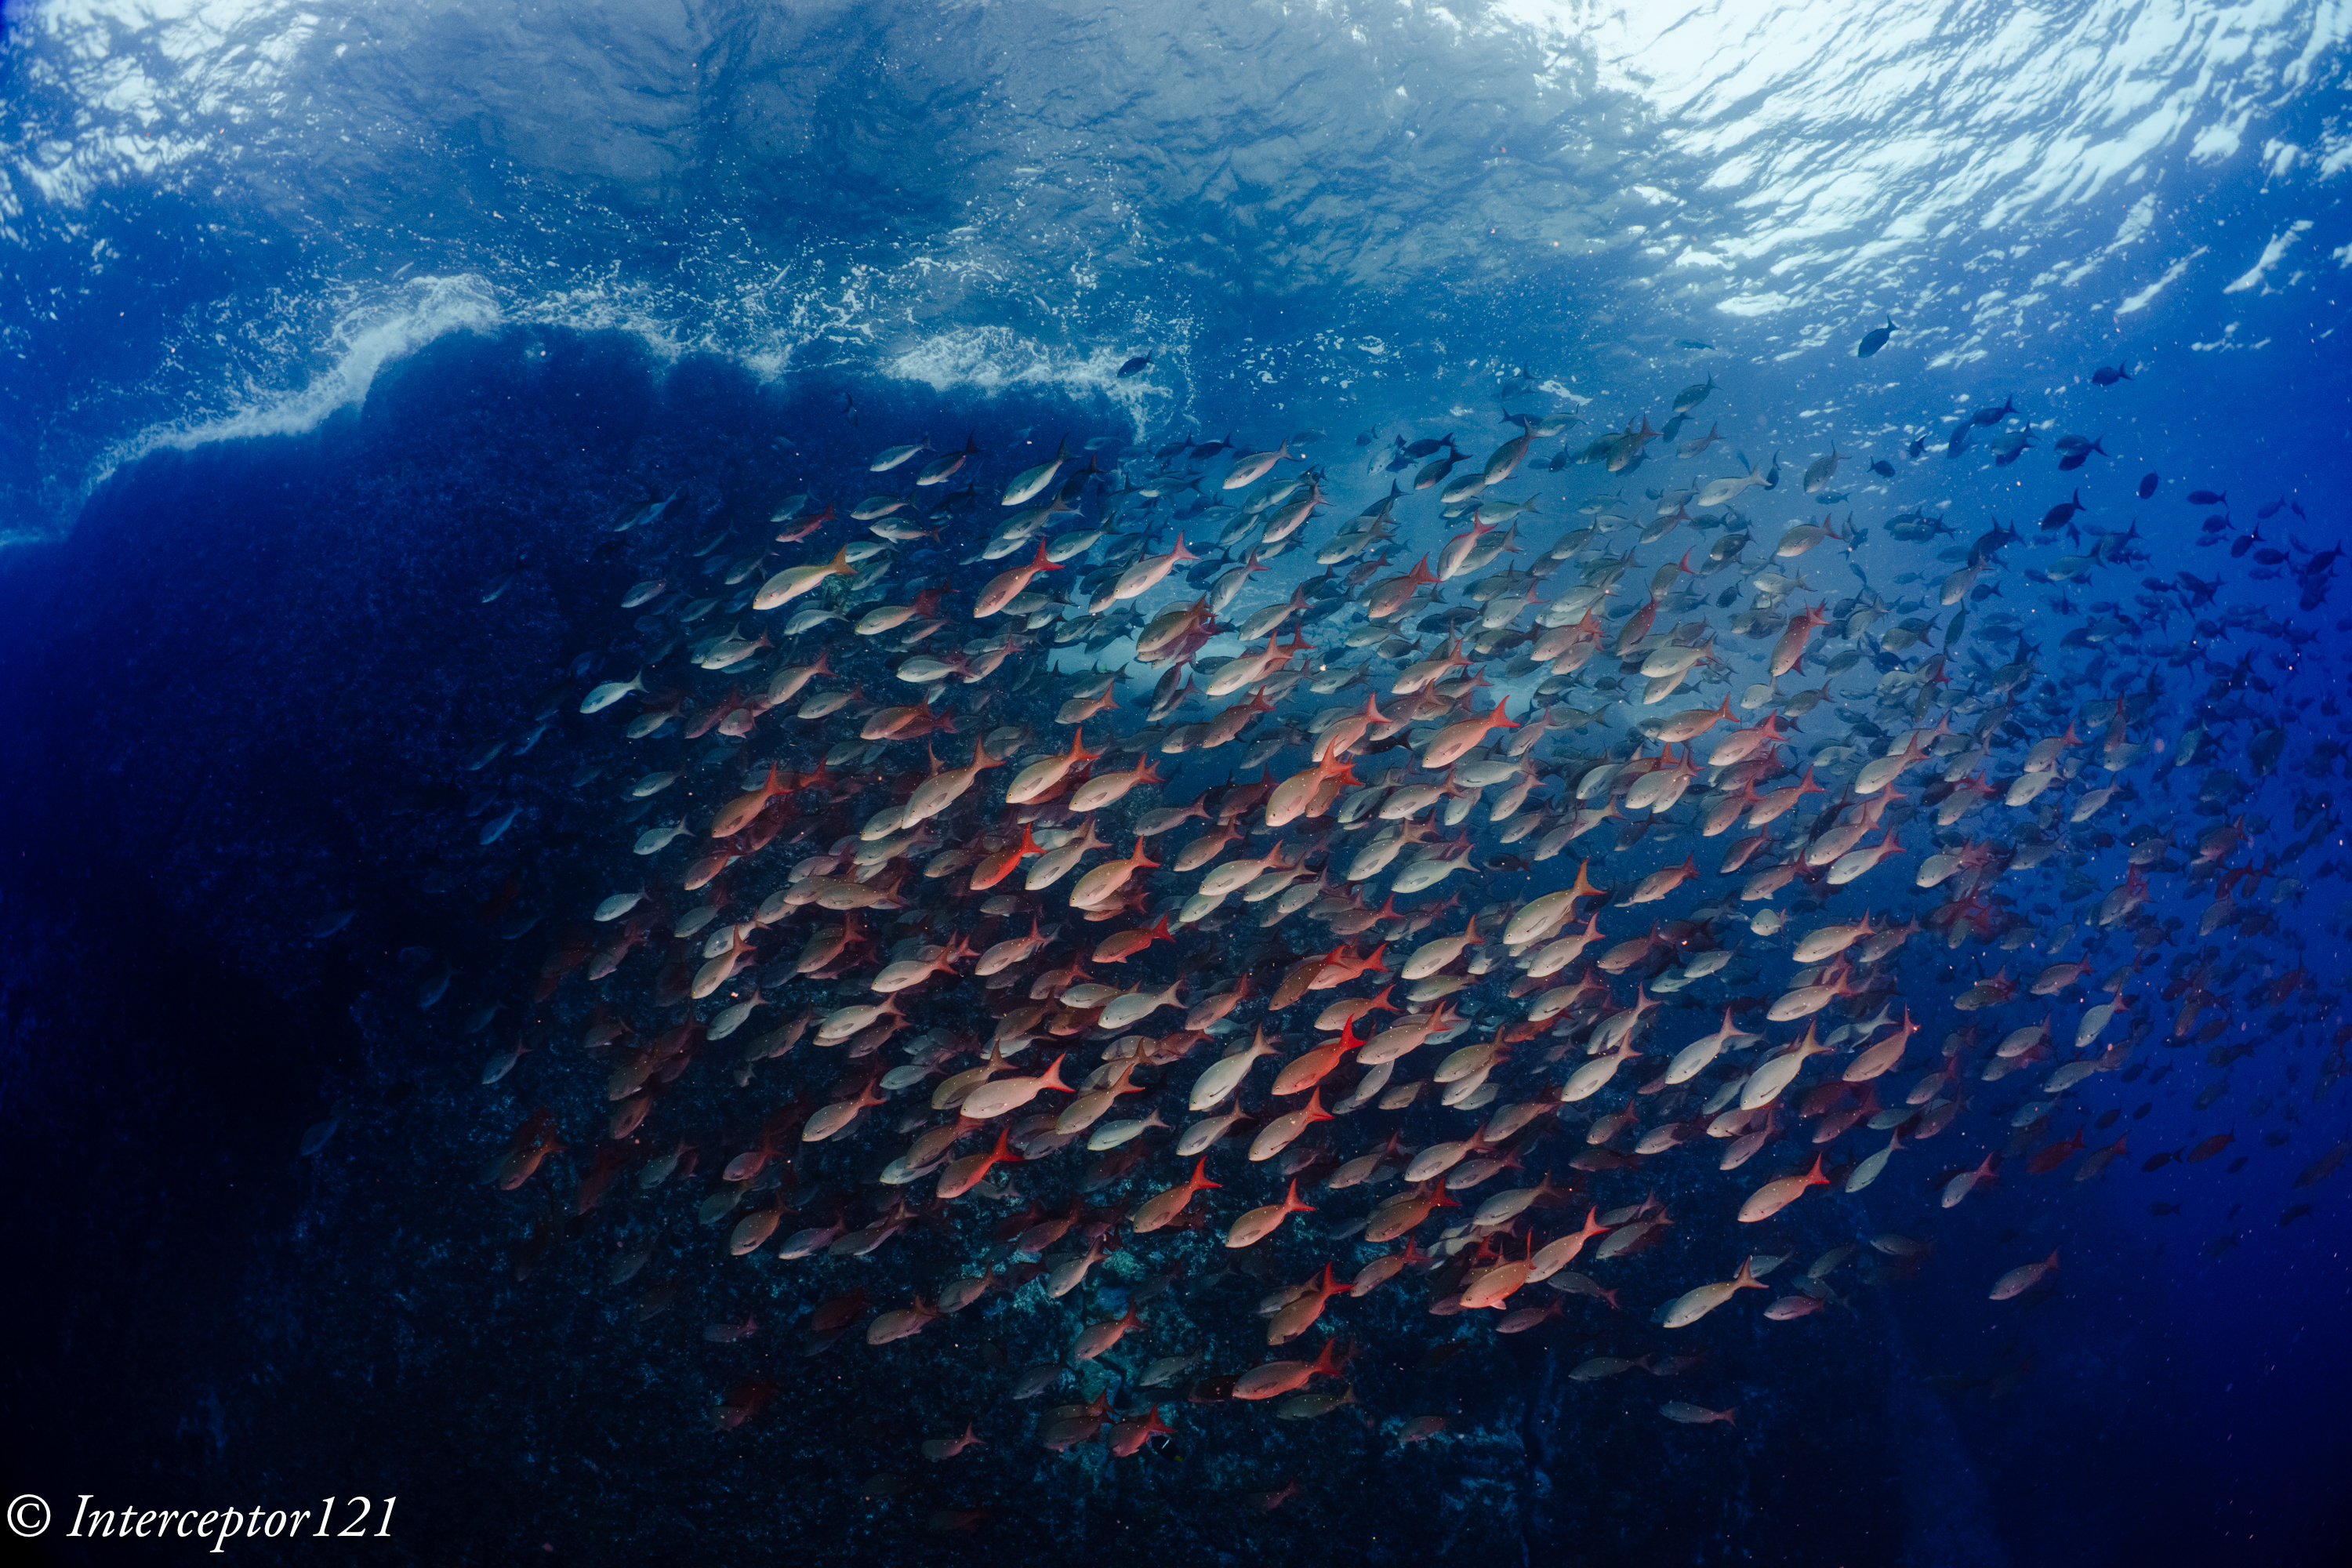
My absolute favourite were the snappers though due to the coloration.
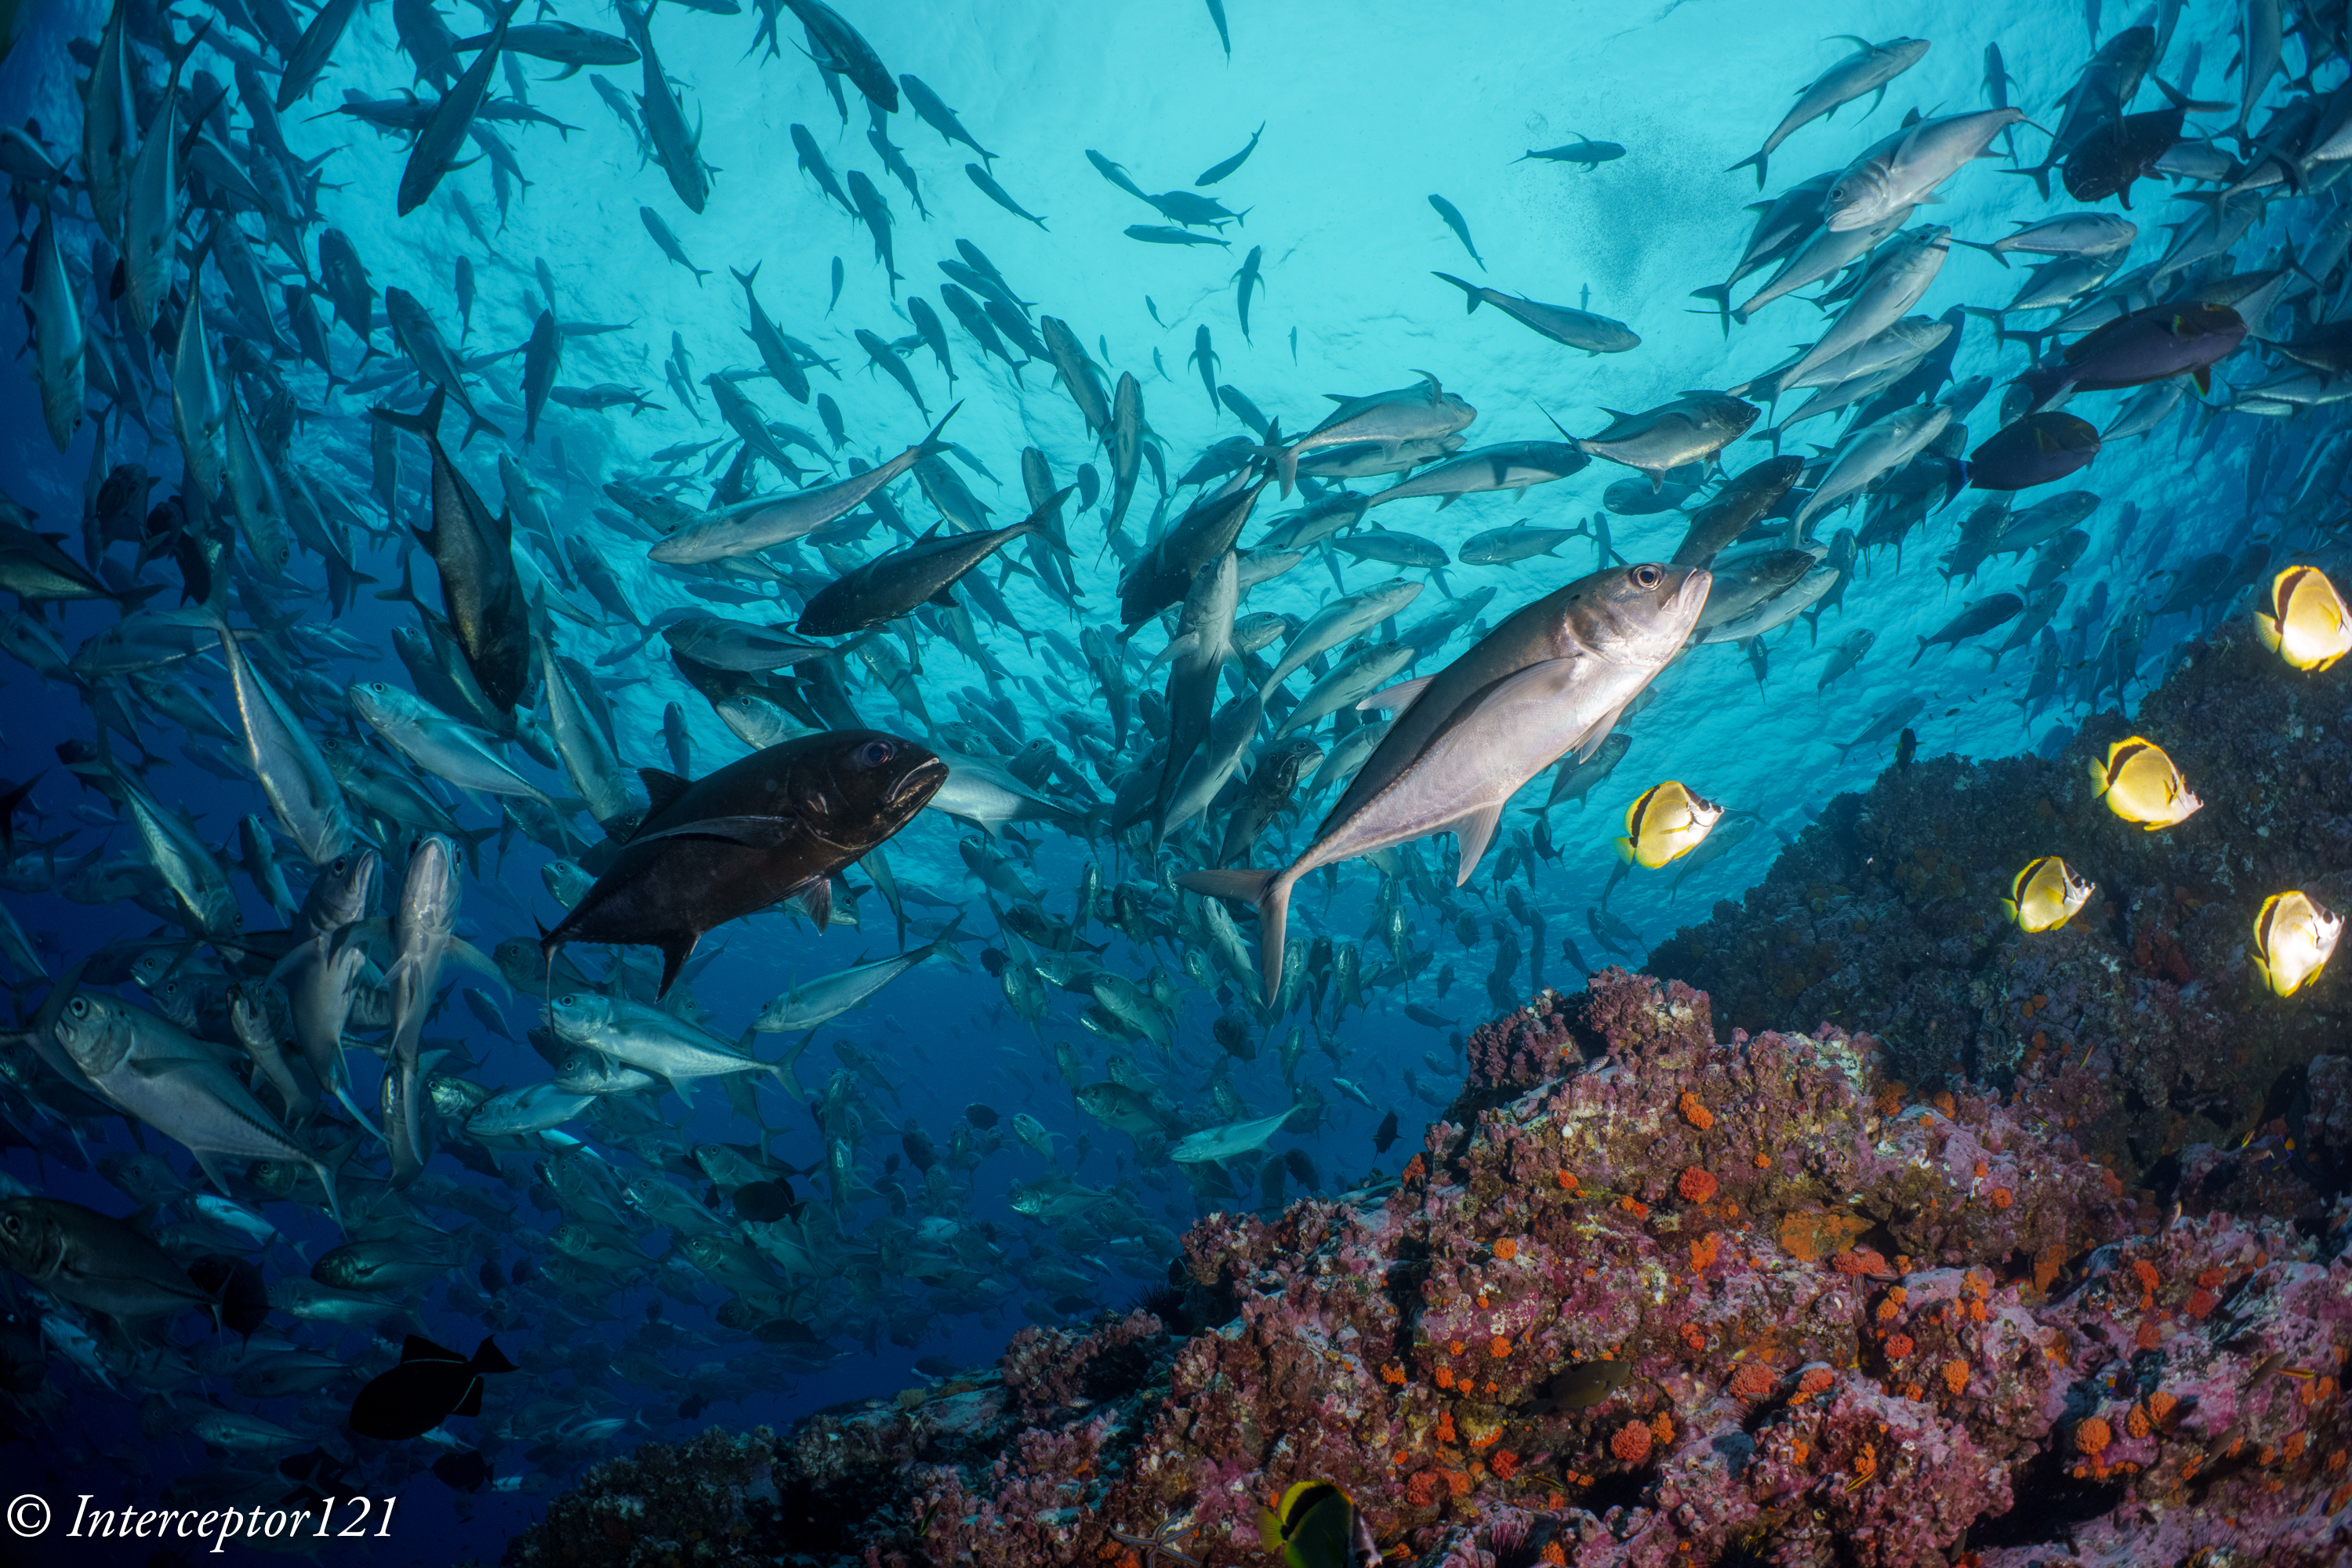
In a dive site I even saw two schools of different species in a sort of alliance.
Two Schools
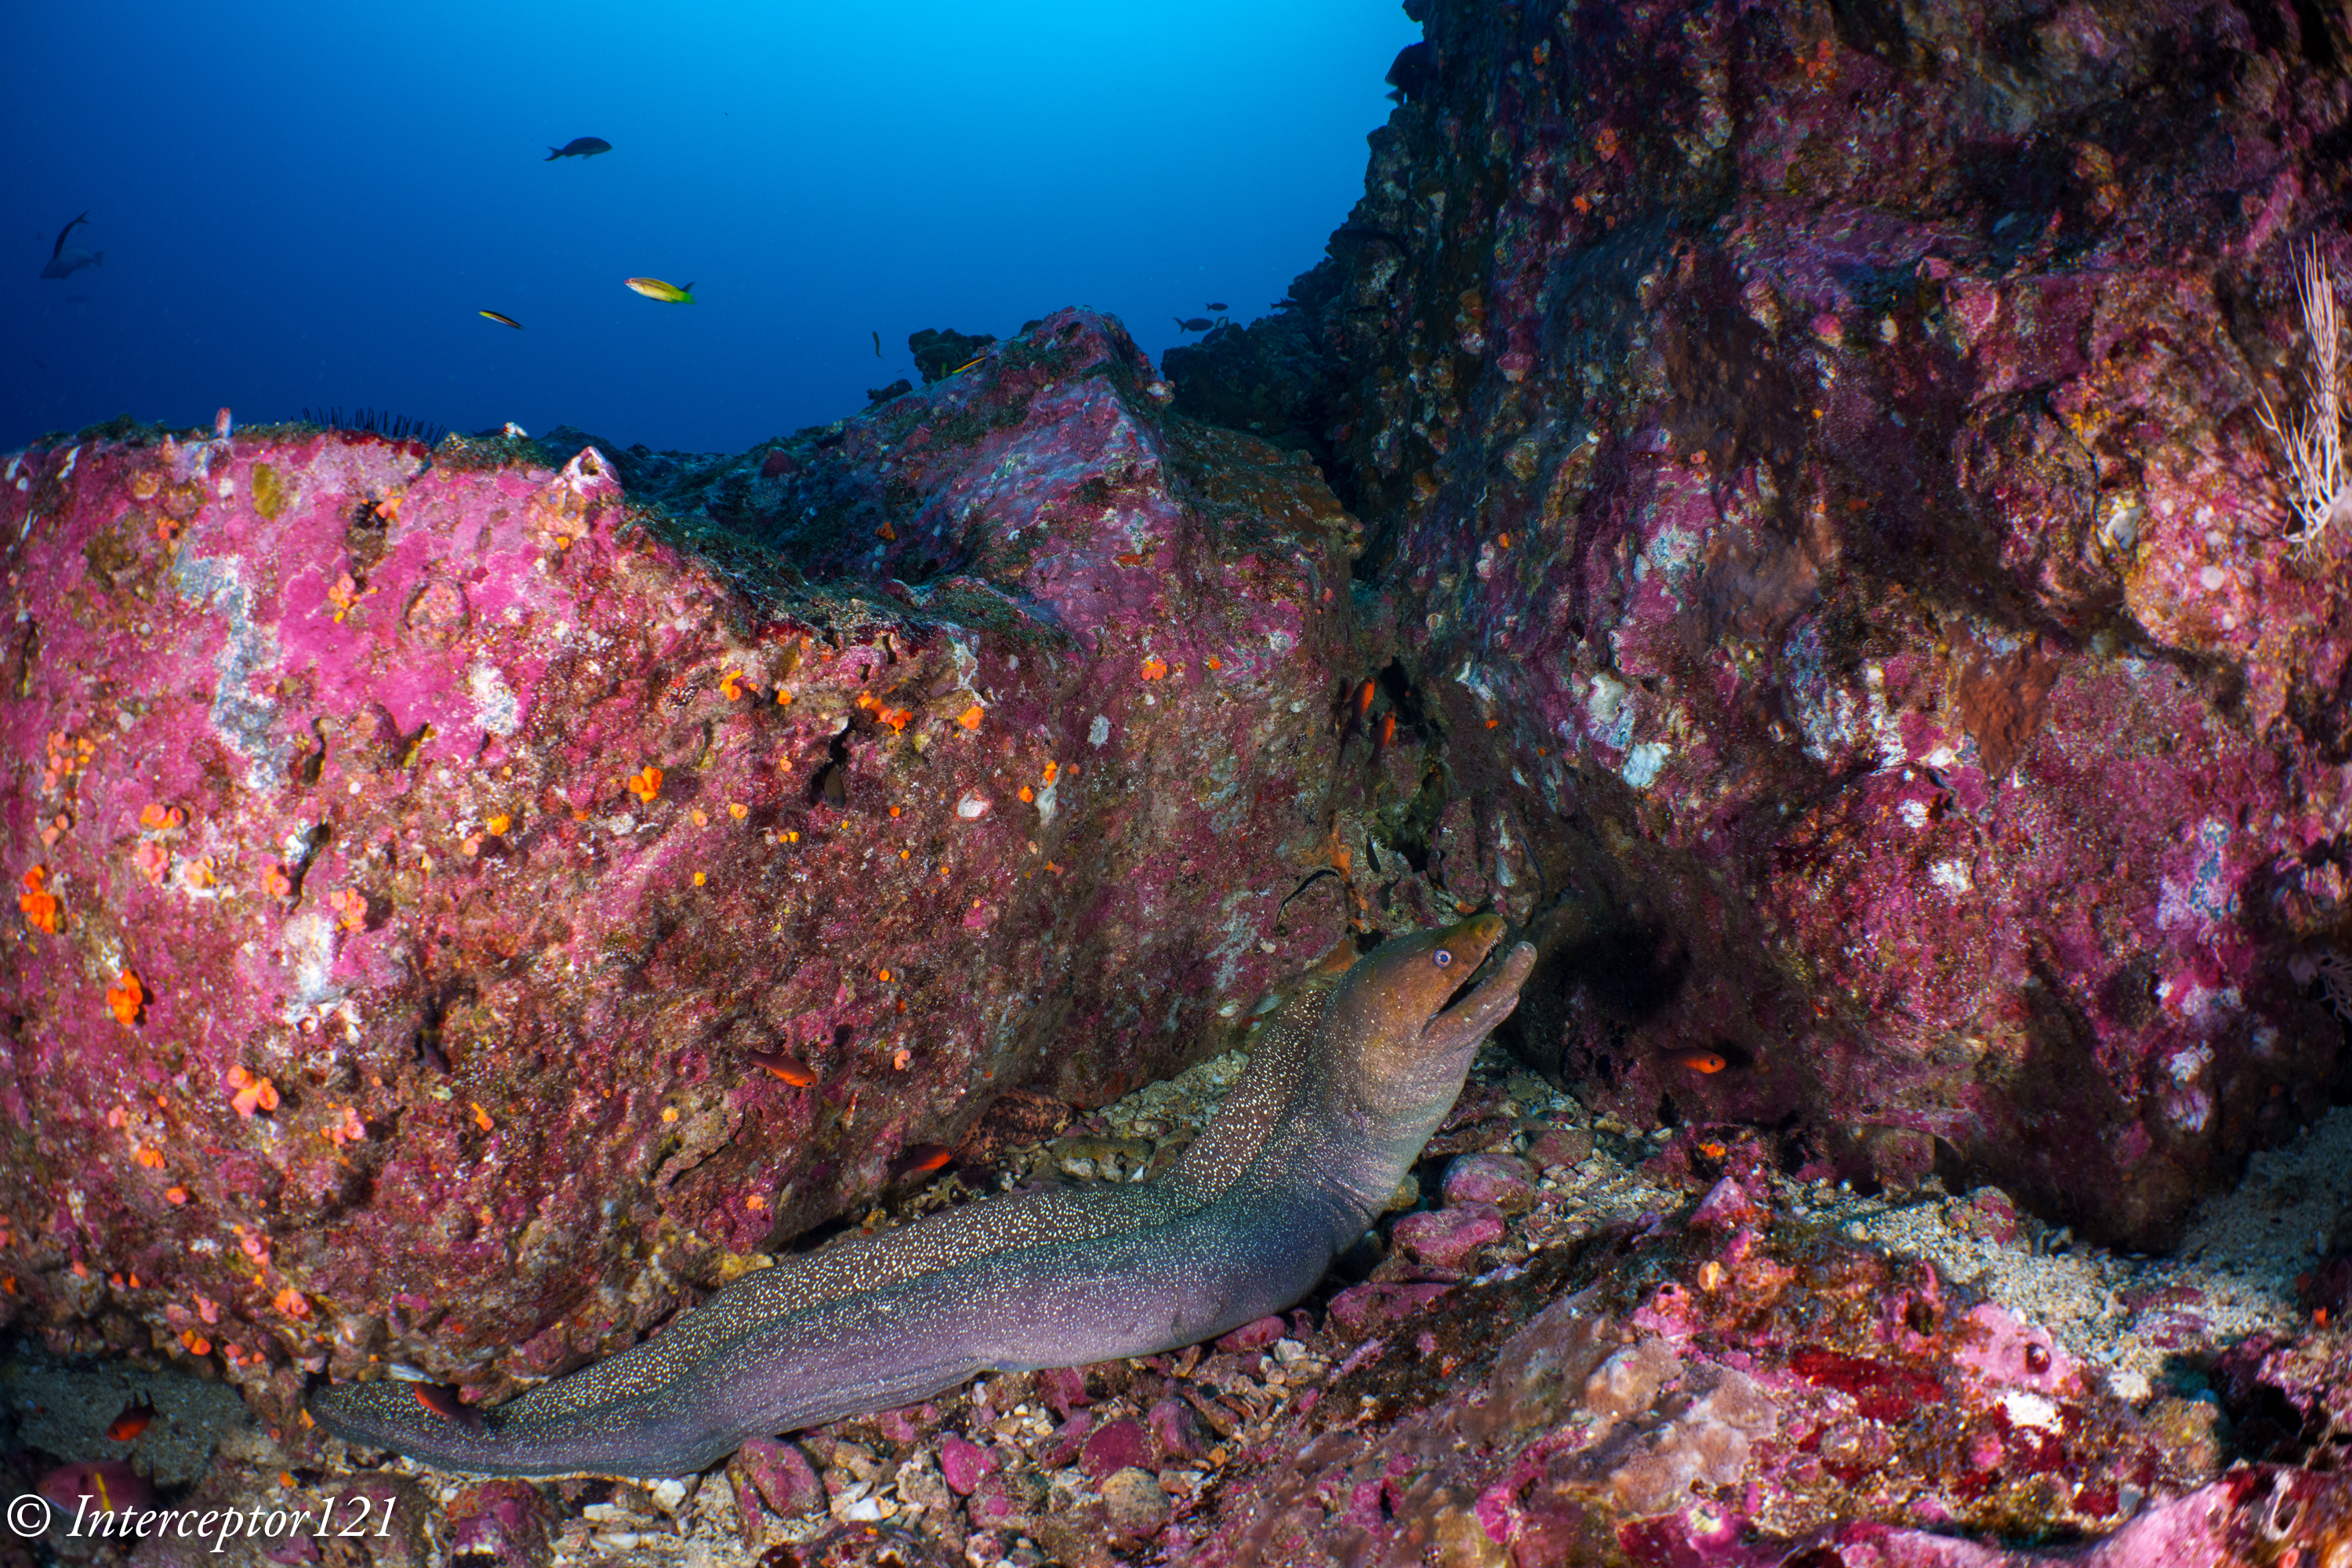
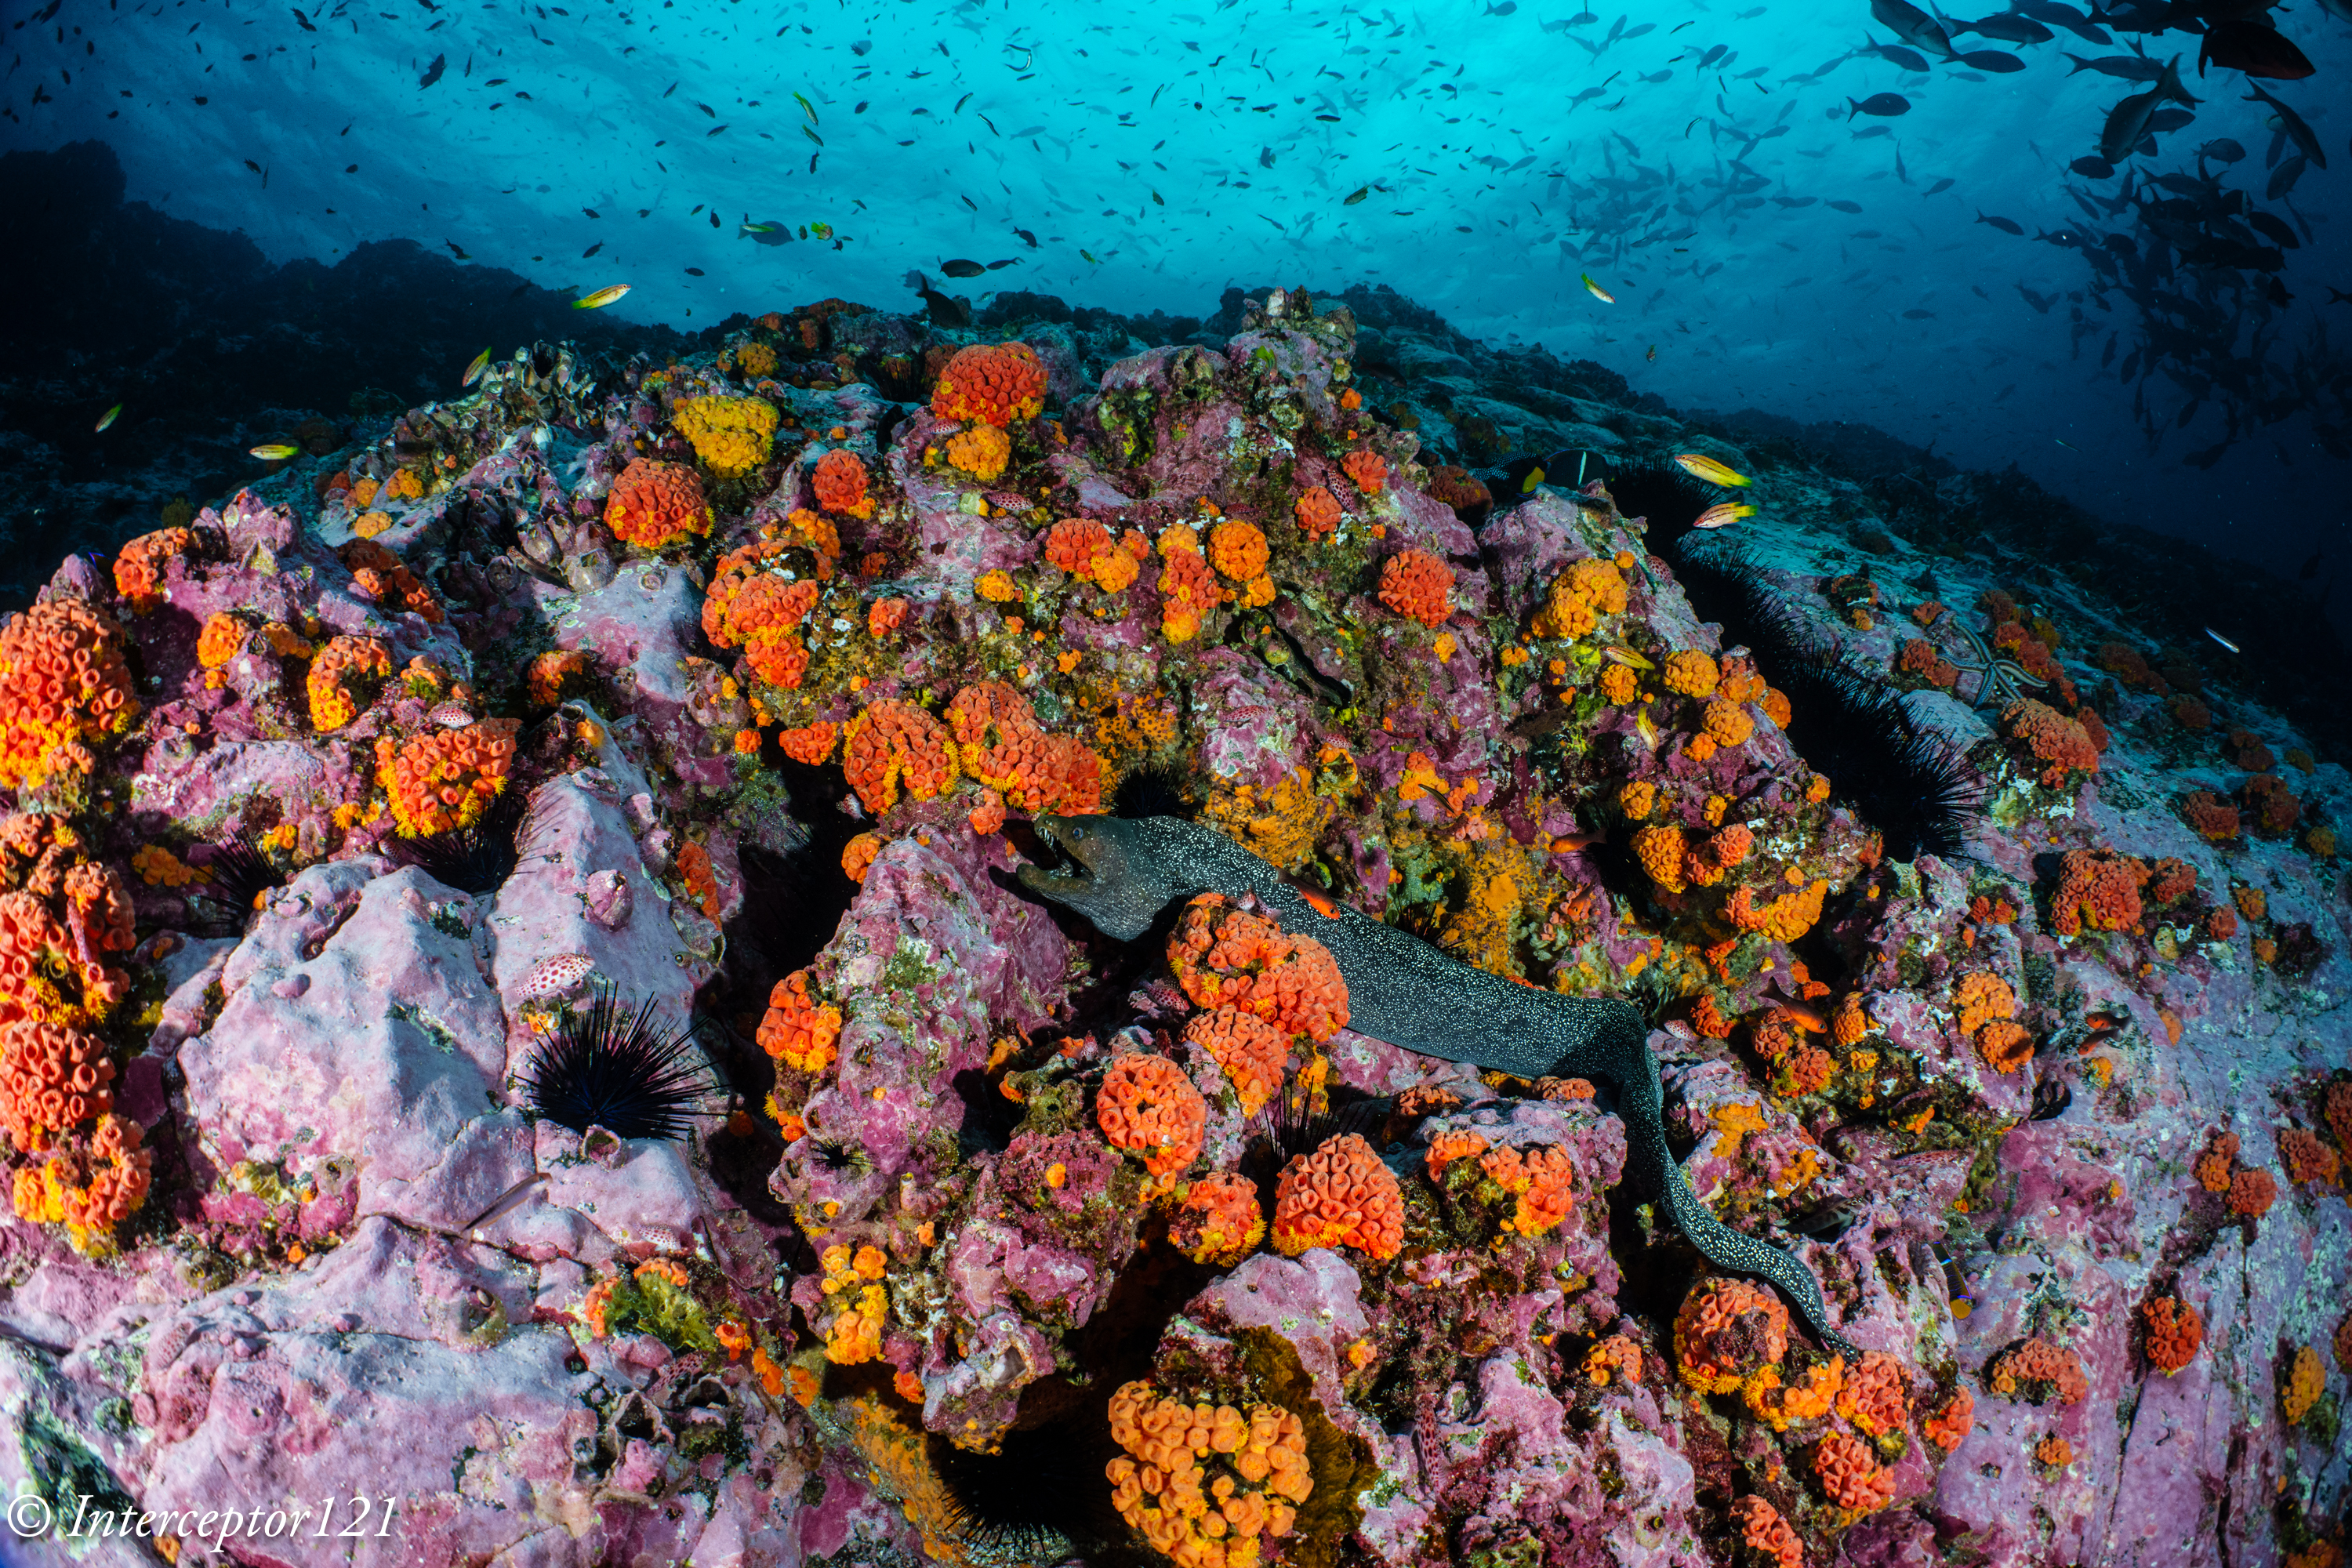
The Giant Moray – Queen of Malpelo
Although people go to Malpelo for sharks a special mention goes to the amount of (free swimming) giant morays. The population is huge and this fish is really a pleasure to watch and capture with your camera.
El Arrecife – the check diveMoray on RedSpongersHowling
There are of course other reef fish and some of the least shy hawkfish I have ever seen.
Hard Coral
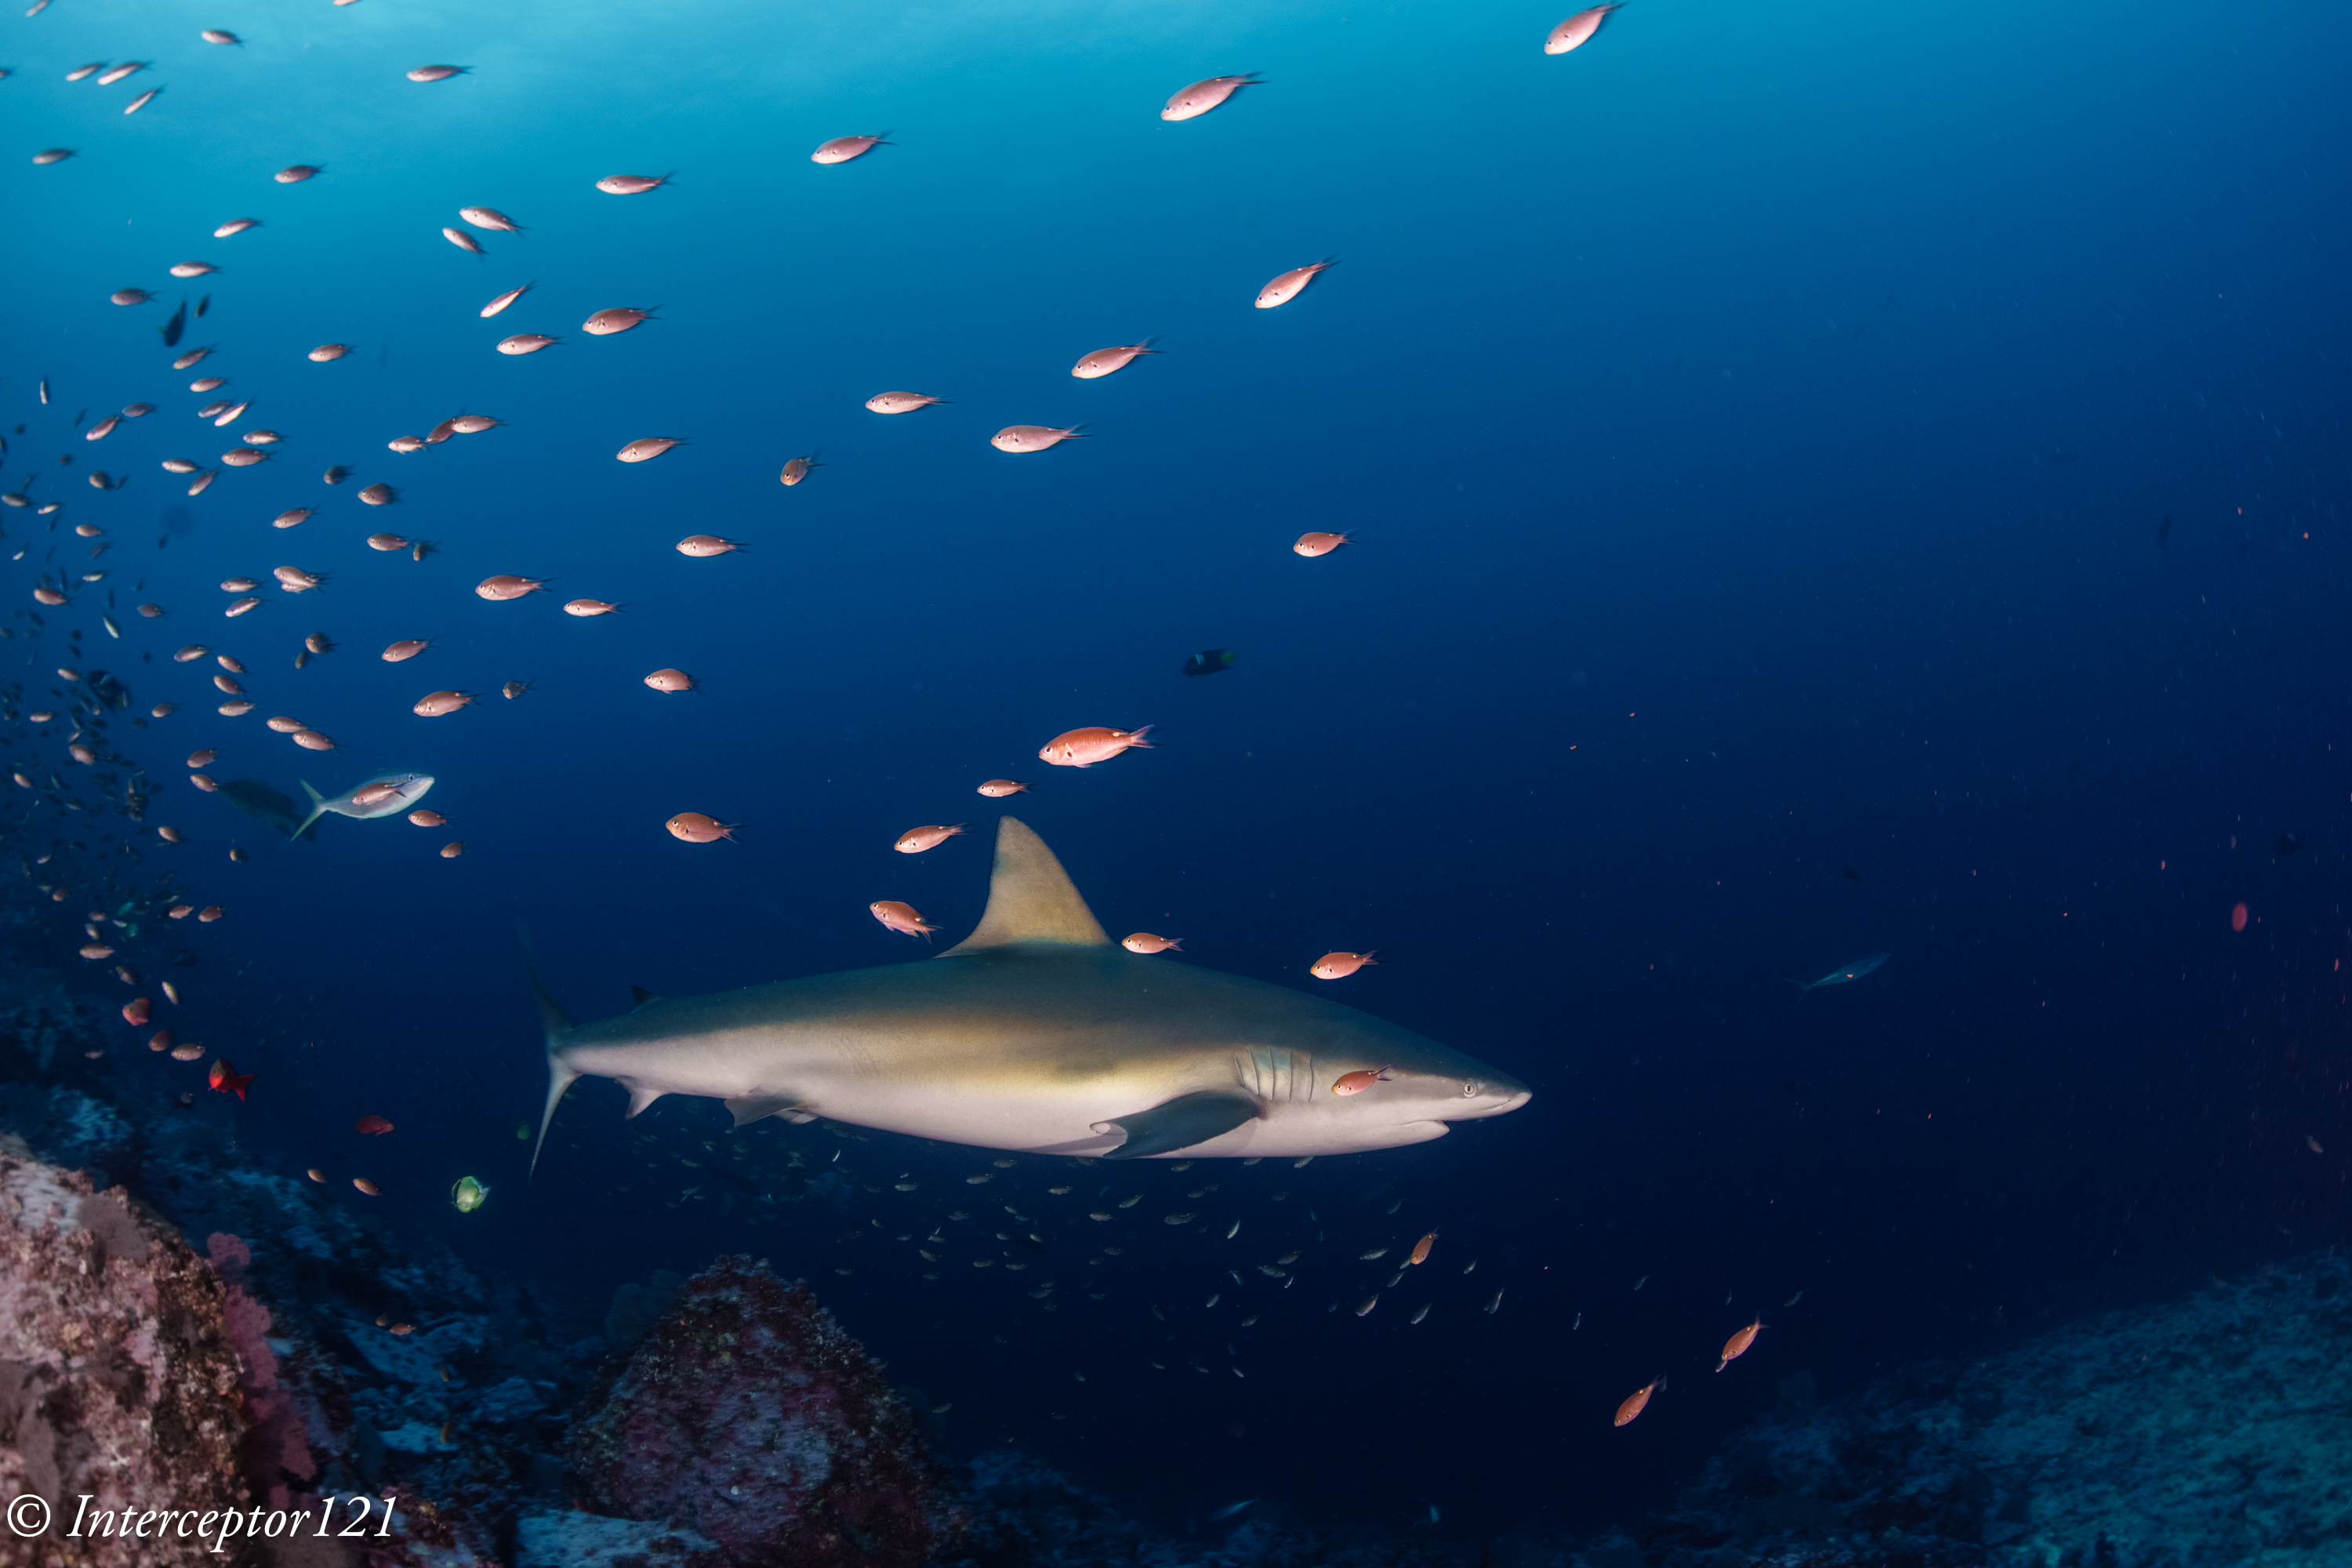
What about Sharks?
And here comes the elephant in the room. Did we see hammerheads? Yes however the largest school was circa 12 and far away in the blue.
Guides discourage using strobes or video lights when those point to the blue (why would you do that anyway?) but it is ok to beam the sharks with light when you shoot against the reef.
La Nevera is probably the best site for hammeheads due to the strategically placed cleaning stations.
La Nevera
However there are other sharks in Malpelo with warmer water.
Firstly Galapagos shars some specimen really large as well and they do come close.
Sharks tend to turn back as they hear your shutter or your strobes makes a ready sound hence the reason some of those look like turning back. I had a Canon 8-15mm with 1.4 TC for those shots so the shark are closer than they look.
Other subjects that are easier to capture are eagle rays saw up to six together. By no means a large aggregation but quite easy to track.
Eagle and RiccardoFly highWhitetip down
White tip sharks were quite common as well.
We also saw tiger sharks which is one of the reason we did not see many silky sharks (they can eat them) on the same sites. Humpback whale were seen in the distance and a whale shark came under our rib after a dive at El Monstruo.
Whale shark at Baio del Monstruo
Crew
Special mention to the dive guides of the Ferox, I was with a spanish speaking group with Richi Valens who did an awesome job. The other guide Sten is also very well known and long time guide in Malpelo having worked with previous operator departing from Panama.
The whole boat crew were very helpful and the food was light for once: not the usual fatty foods that you experience on some other liveaboards. Beers were $2 per can but a whole bucket was served free after the last dive.
The skippers of the two RIBS are just incredible for the mix of agility, seamanship, strength pulling up BCD with one hand from the tank neck.
Conservation Efforts
While there we met Camilo Abella a park ranger with a degree un biology and excellent English more info on the efforts of the rangers here
A catamaran from Biodiversity Colombia patrols the island at all times to stop ilegal fishing oh sharks. They stay on the boats in 3 months shifts to keep things as they are.
I left a donation when I was there and I hope you will do the same after reading this blog.
Few Other Considerations
I guess many people will be thinking is Malpelo for me or not? And the answer does change a lot depending on your preferences and priorities.
If you need a luxury liveaboard and mind rough surface conditions Malpelo is generally not for you. I would also add that for photographers wanting to take pictures of hammerhead sharks there are places where this is considerably easier. Cocos Island where you can sit on the bottom waiting for sharks is definitely a safer option than Malpelo where contact with the bottom is broadly not allowed, unless with a few fingers if there is ripping current. Even Galapagos despite the reputation has considerably easier diving conditions. To understand how tough it is in Malpelo you need to look at the entry and exit on the tenders. In Galapagos you will still get in and out the tender with your gear in Malpelo that is very risky business. Many dive require short crossings from one pinnacle to another with strong currents and most people are forced to dive with 15 liters tank. If your air consumption is too bad and you are on 12 liters your are told you need to change by the guides to avoid cutting it short for the group. You are also asked to go higher and dive with the bubble of the group if you are running low but this is not a great idea.
In terms of safety you need a surface marker buoy, a flashlight; a beacon to find you in case you are lost is provided. I also carried a knife and a reel which I had to use in one occasion. During the trip I realised that smaller domes are really to be preferred I had a difference of 20 bars air consumption when switching from WWL-1 with its 5.5″ dome to a larger 180mm wide angle port. In addition I got strain on my left arm for carrying my 7 kg video rig in and out the rib and in and out the cabin depite getting help. Super heavy rigs are not ideal for the rollback negative entries required on each site. Going in and waiting for the skipper to pass the camera is not a good idea either as the group could have drifted.
Would I go back? Immediately and next time in the dry season.
Since the very first release I was told by Nauticam that the WWL-1 had been tested on Sony full frame with the 28mm f/2 lens and since then more lenses have been added to the compatibility list and the WWL-1 itself has had a redesign called WWL-1B, this lens has an integrated float collar and I do not know if there is any difference in the optics but I assume there is none.
Nauticam WWL-1B
Nauticam has since released a number of other water contact optics with dry mount and today you have a choice of at least 3 flavours for your Sony full frame camera that provide the 130 degrees diagonal field of view.
Model
Price (€)
Weight (kg)
Diameter (mm)
Depth (mm)
Max Filter size (mm)
WWL-1
1424
1.35
156
97
52
WACP-C
2930
2.24
170
145.5
72
WACP-1
4604
3.90
194
176
82
Summary Table Nauticam 0.36x Water Contact Optics
The three lenses provide the same field of view but they are different in size and mount. A useful way to see is that as the lens physical size grows you require a larger underwater optic.
The Sony E-Mount is still the only full frame format compatible with the WWL-1 in virtue of some really small and compact lenses. As you can see from the table above the WWL-1 rear element is large enough for 28mm lenses that have a maximum filter size of 52mm.
Two E-mount full frame lenses the 28/2mm prime and the 28-60mm zoom are compatible with the WWL-1.
As you move towards the WACP-C you can also use the 28-70mm lens which is one of the worst kit lenses on the market but will give you a longer tele end and finally the WACP-1 gives access to the Tamron 28-75mm and Sigma 24-70mm two lenses that have much higher quality than the smaller Sony lenses but have some restriction in terms of zoom range.
Underwater Performance Context
There are quite long discussions about which water contact optic to get for your Sony full frame once you have the 28-60mm zoom and some comparison in terms of sharpness.
In simple terms you can think of the following equation:
Underwater Performance = Land performance X Port Factor
Port Factor is always less than 1 which means a lens will never do in water as well than it does on land. Looking at my analysis of the 28-60mm corroborated by other test you know before buying any water contact lens that the lens has its own limitations and no matter how good is the port performance will only go down. However this may still be a better option compared to a standard dome port.
I do not have access (yet) to the other two water contact optics however I have a good idea of how the WWL-1 perform and how the Sony 28-60mm performs topside. If you want a refresh look at this article.
To understand how a water contact optic works you can go back all the way to the Inon UWL-100.
The idea of this lens designed for compact cameras is to demagnify the camera master lens to enlarge the field of view. You could then get an optional dome that will enable the lens to expand the underwater field of view from 100 to 131 degrees.
Back in 2015 I compared the Inon UWL-H100 with dome with the WWL-1 and concluded that the WWL-1 was giving better results when used on the same camera. It is now time to see if the WWL-1 can be used also on a full frame system.
Sony A1 WWL-1 Rig
The WWL-1 requires the flat port 45 to be used on a Sony full frame underwater housing. The lens will be attached using the same bayonet adapter that has been available for several years now.
Nauticam Bayonet Mount for WWL-1
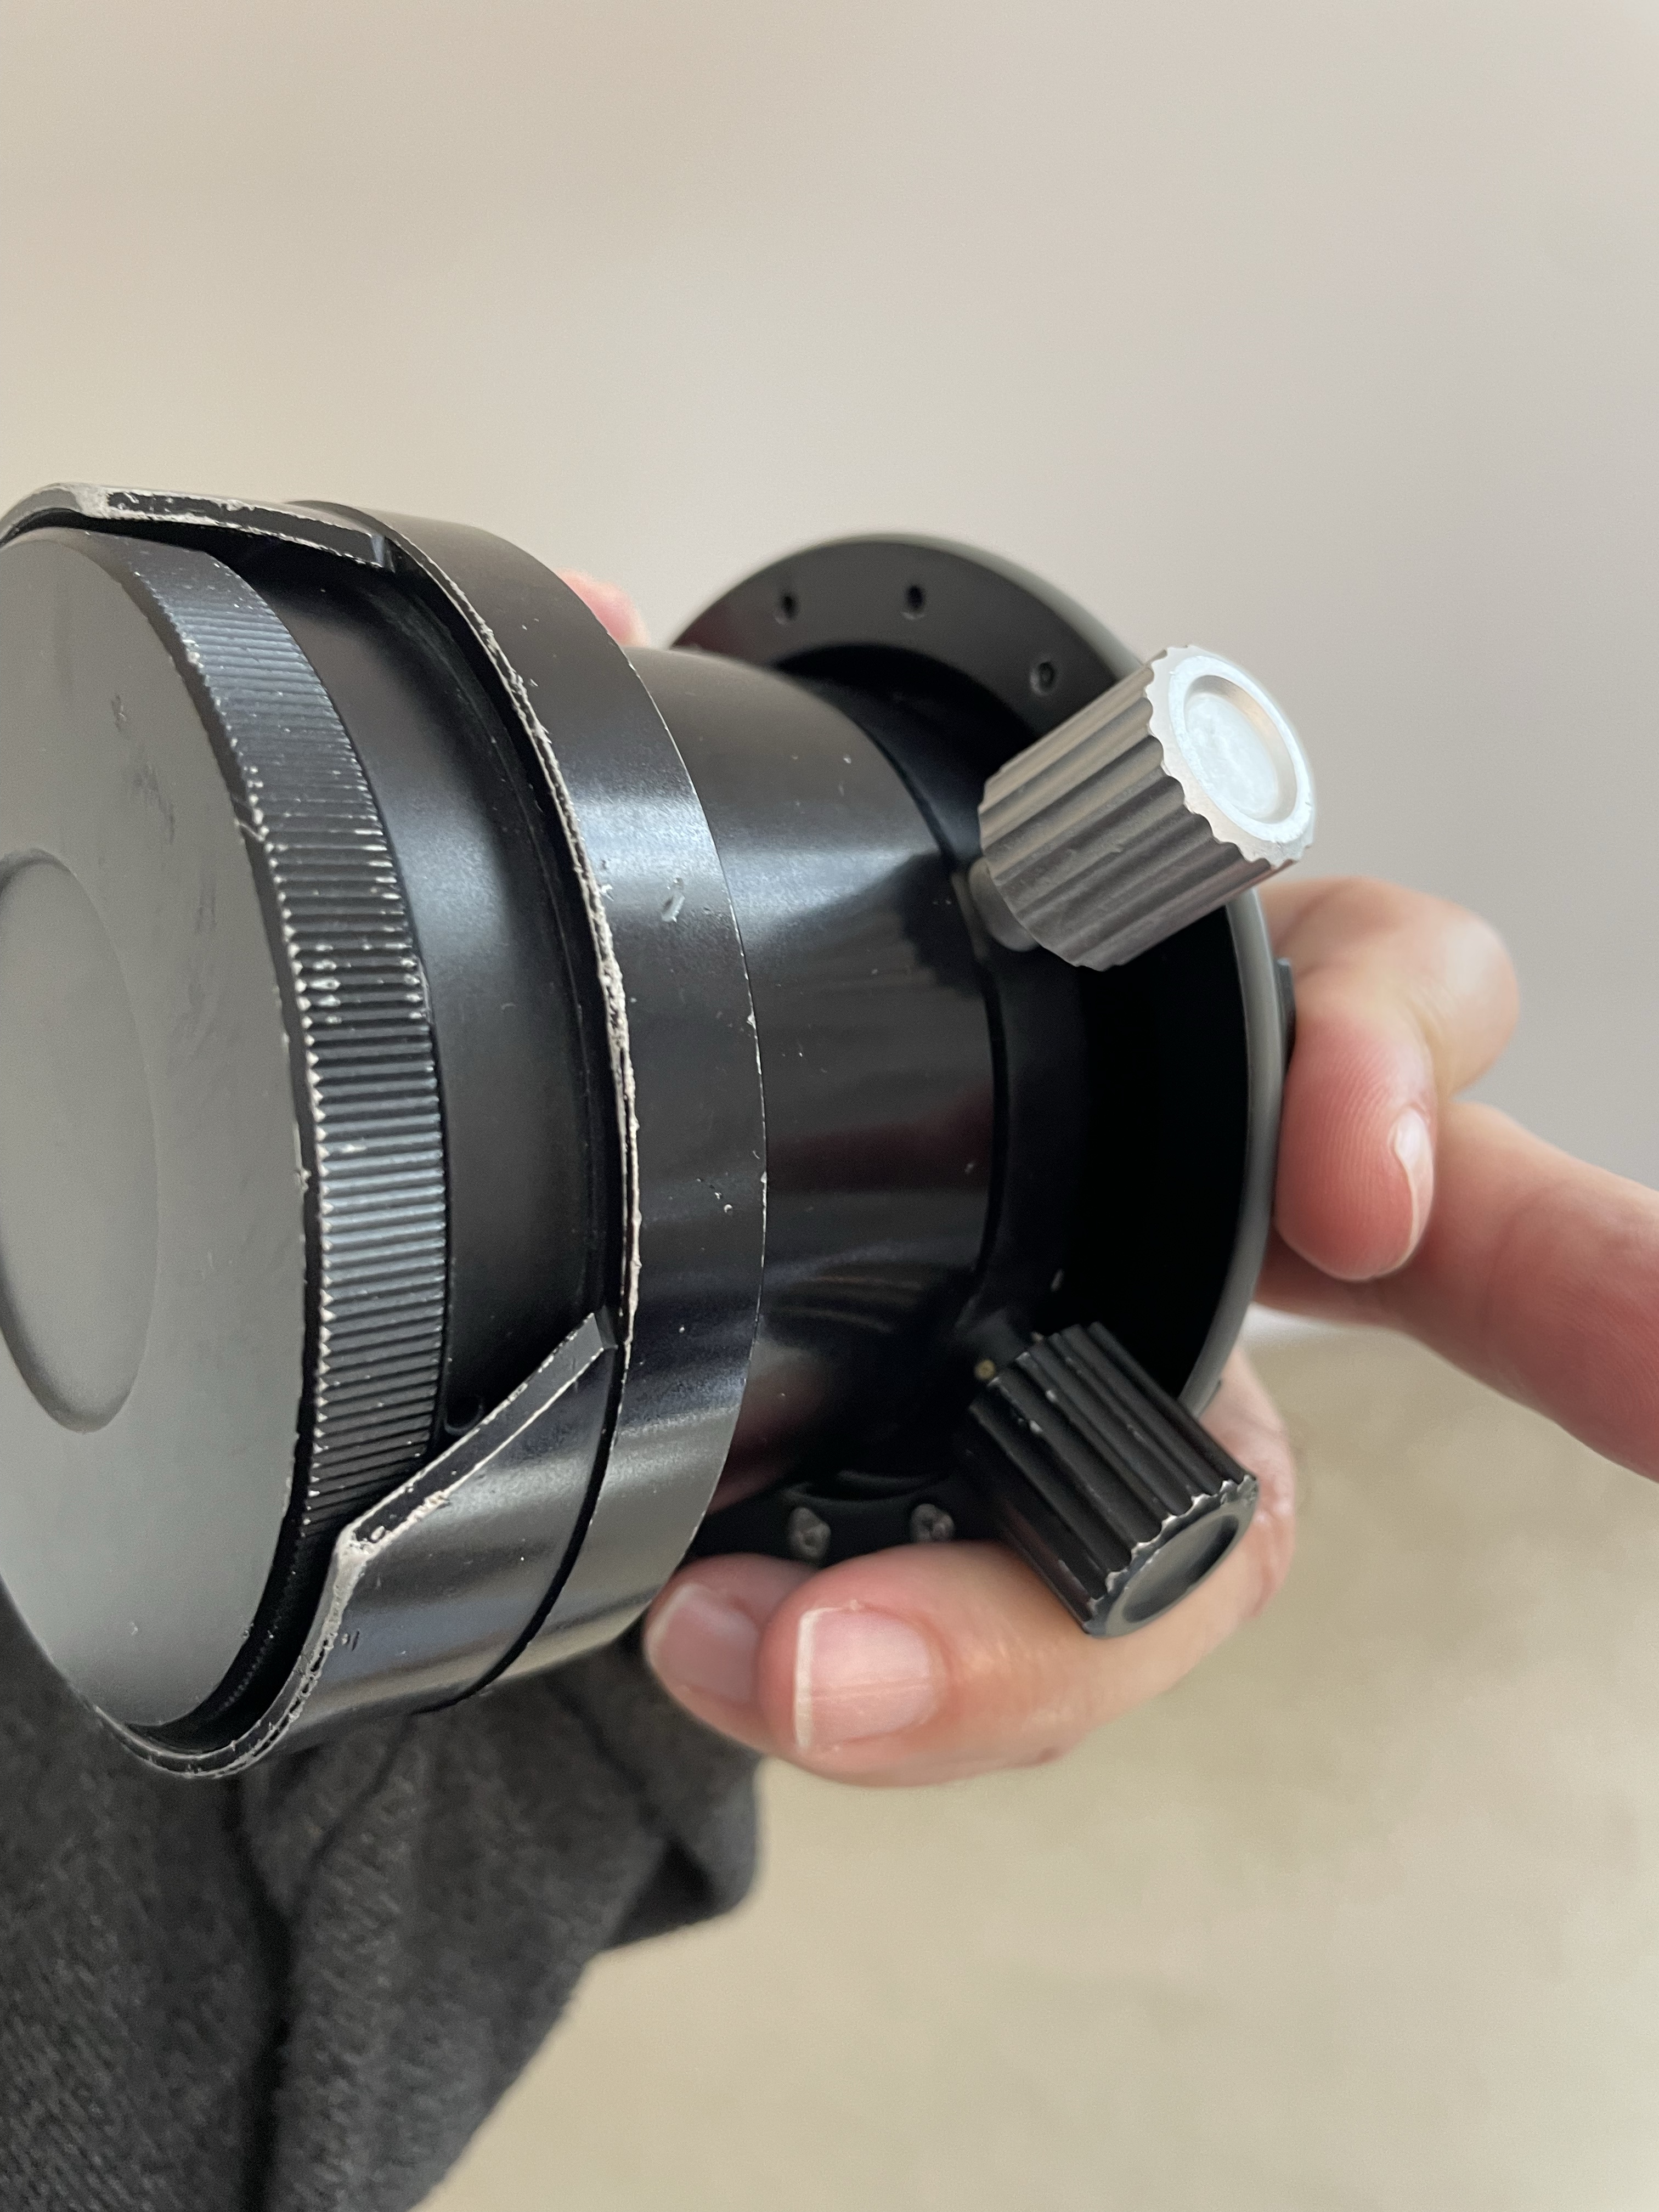
I have removed the focus knob from the port as I found it inconvenient. The focus knob may be useful with the flat port but for the WWL-1 that is afocal is definitely not required.
WWL-1 topside view
Once you add the flat port the overall length is very much the same of the WACP-C but this will require an extension ring resulting in overall 30mm additional length.
Overall the rig is very similar in weight to the Canon 8-15mm with the Acrylic Dome Port 5.5″.
WWL-1 front side view
Pool Tests
With the rig assembled I went for a pool session with the objective of finding out what was the overall performance of the system.
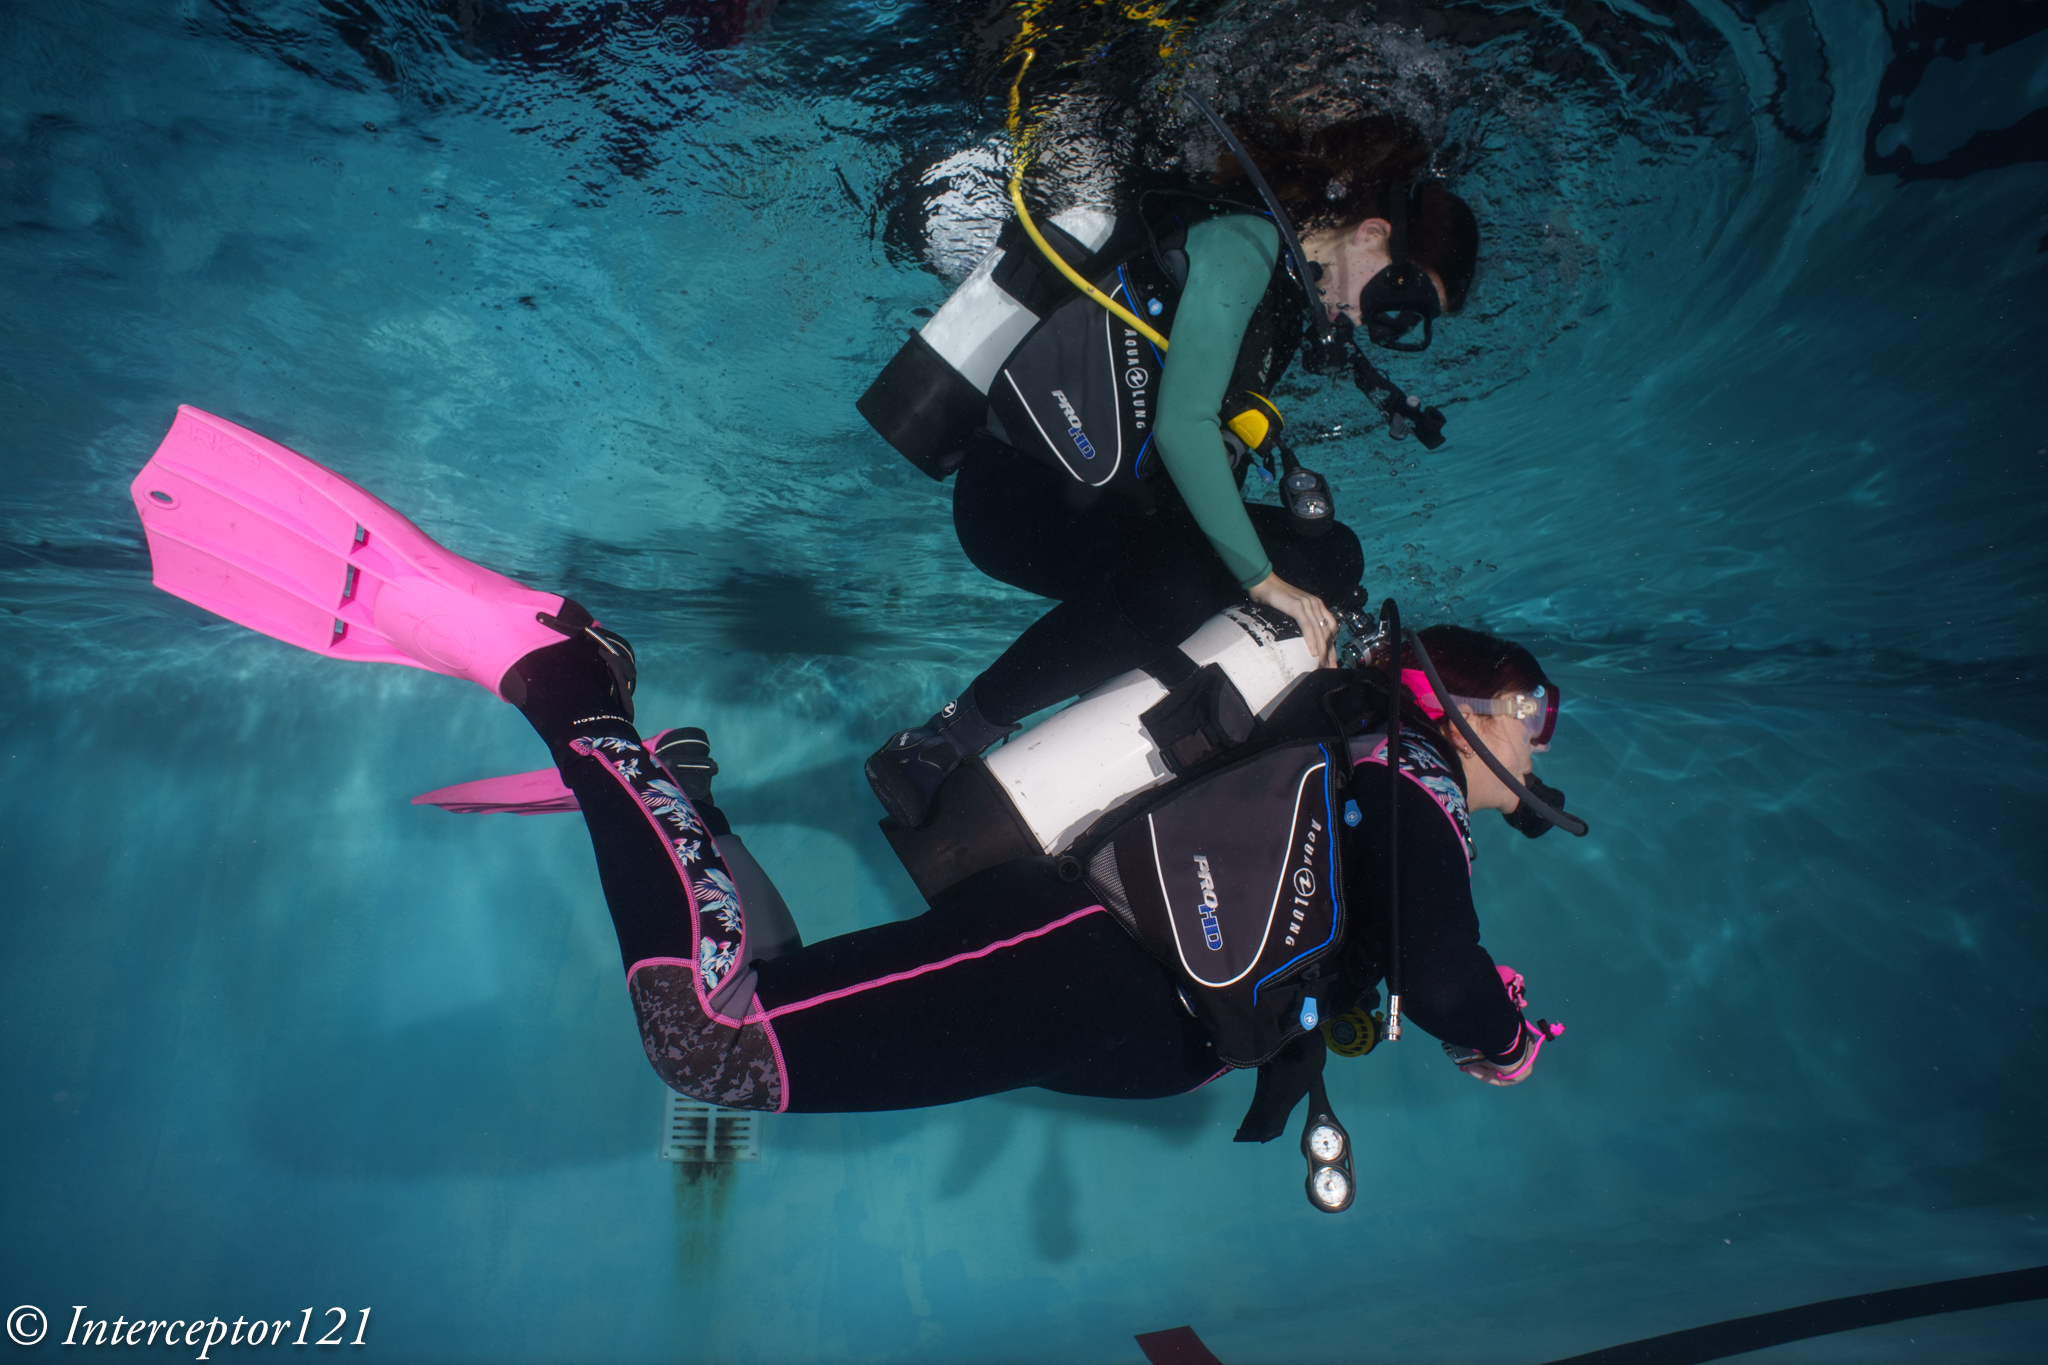
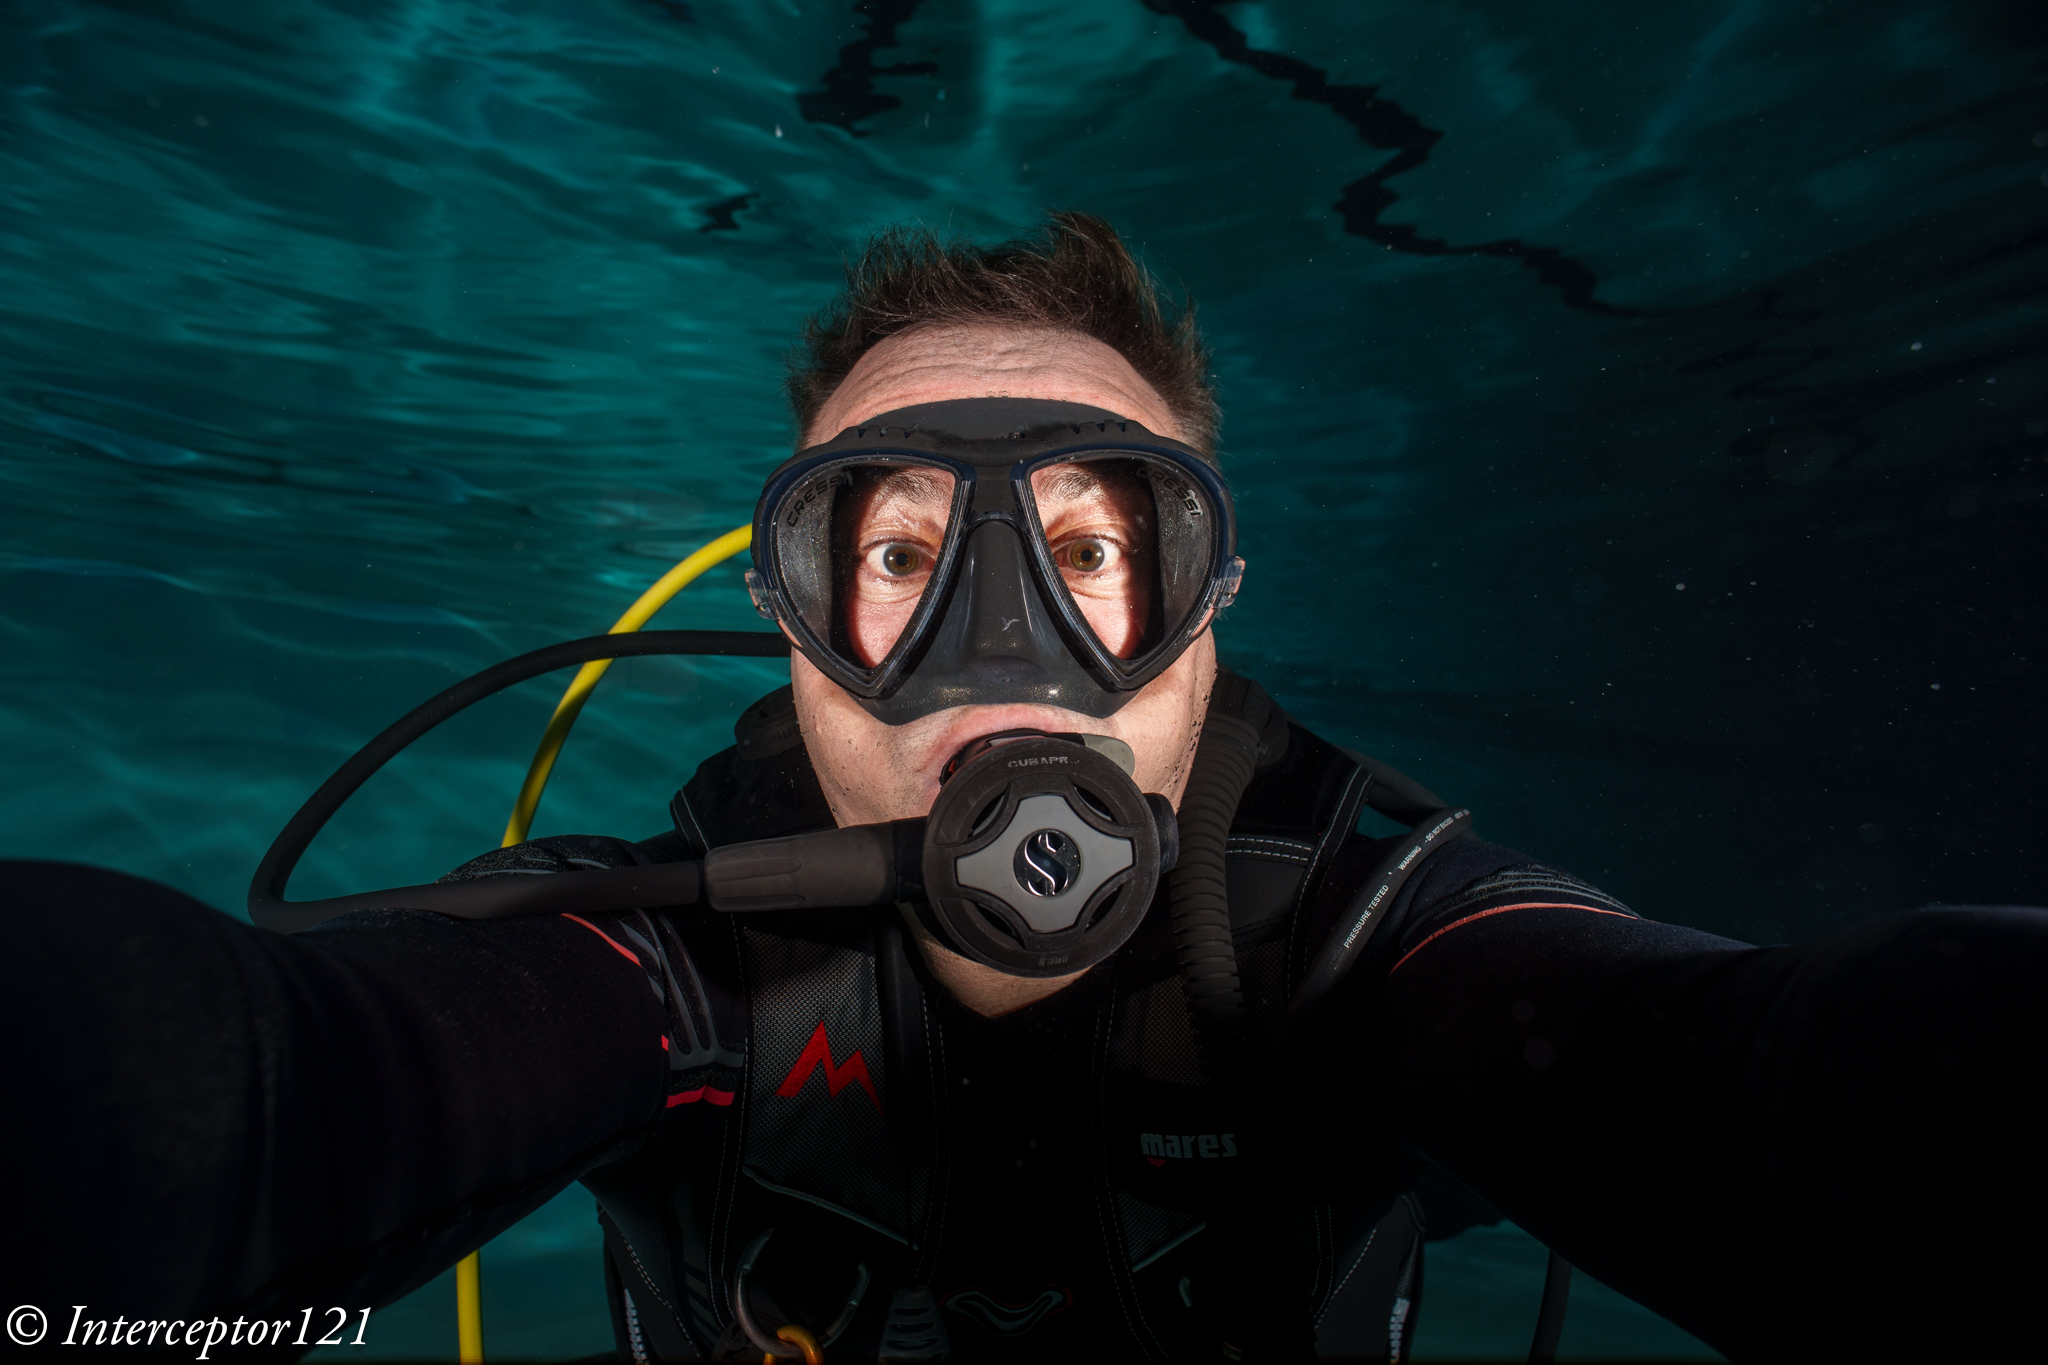
What follows are a series of test shots of divers.
David f/8Kid f/8f/11 side shot
WWL-1 selfie 28mmDiver f/10
In general I found the lens to be sharper in the centre at f/8 but closing down to f/11 was required if there was something in the corners.
Edge Sharpness
I was intrigued by a number of discussions on edge sharpness and after several exchanges with Shane Smith he was clear that the lens needs to be stopped down to f/11 for best results.
After the session in the pool I would agree with Shane however I was curious if this was an issue of the WWL-1 or the 28-60mm lens itself.
This image quite simple has something at the edges and has focus in the centre at f/8.
Closeup f/8
You will notice that the part of the frame closer to the camera is fairly blurry.
So I did another experiment placing the slate on the edge.
Fuzzy f/8
The edges were quite fuzzy. I wanted to exclude this was an issue of depth of field so I focussed right on the corner.
f/8 focus on corner
This is the resulting image and is still soft on the edge.
fuzzy f8 focus
I then took the same shot at f/11 with focus on centre.
Closeup f/11
The image at the edges is better. Then moved the slate to the edge.
edge f/11
The image improved overall regardless of the focus point indicating this is not a depth of field issue but some other defect of the lens, most likely as the lens meridional and sagittal resolution are different we have an example of astigmatism.
Edge 100% crop f/11Blurry f/8 edge focussed on edge
The sharpness improves closing down the lens regardless of where the lens is focussing consistent to the MTF charts.
Looking back at land test shots we can see something very similar.
Edge at f/11 topsideEdge at f/8 top side
In conclusion it is not about the WWL-1 but about the lens itself.
Comparison to Rectilinear lenses
While the WWL-1 can offer a diagonal feld of view of 130 degrees the image is distorted and the lens can only offer 107 degrees horizontally and 70 vertically. Is like saying that the horizontal field of view is similar to a 13mm rectilinear lens while the vertical is is more like 17mm. A fair comparison is probably a 14mm rectilinear lens but as the WWL-1 is a fisheye like optic a direct comparison is not entirely possible. In my opinion as the image is distorted is more appropriate to compare the WWL-1 with a fisheye with teleconverter and when I look at what the canon 8-15mm with kenko 1.4 tc can produce for me the results are very similar, I would say the Canon has in fact an edge however the field of view are not comparable except when the WWL-1 is at the widest and the canon with the tc at the maximum zoom. I would go as far as to say that the canon + TC at f/8 is as good as the WWL-1 at f/11.
Canon 8-15mm with TC at 21mm f/8
Conclusion
If you have the WWL-1 from your previous rig it makes absolutely sense to get the Sony 28-60mm and flat port. This combination will give you decent (but not sensational) shots and work very well for 4K video at reduced resolution. I do not believe that this lens can resolve the full 50 or 60 megapixels of the A1 or A7R4 or A7R5 even topside.
If you are starting from scratch I would recommend to think careful at your intended use case. If you want angles wider than 130 degrees and already have the Canon 8-15mm you may want to check the kenko telecovenverter before you buy a new port as all you need is a 20mm extension ring and a zoom gear.
If you really like the field of view range of 69-130 degrees you need to consider which water contact optic you need.
I am still looking for a test WACP-C but until then my general guidance would be to consider simply if you prefer a dry or wet mount.
A dry mount has the benefit of being ready to go as you hit the water, without the need to remove bubbles between the wet lens and the port. As photographer a dry mount may be the best way forward.
If you intend to use your camera for video and insert filters between the lens and the flat port or you require the lens to be removed in water then go for the WWL-1.
Rigorous comparisons between WACP-C and WWL-1 are not yet available but the first indications are that the difference in image quality is very small therefore I would not loose my sleep there and look more at overall ergonomics.
The final consideration is should you get the WACP-1 instead? Based on my assessment of the Sony 28-60mm I would think this is not particularly wise even if this choice is very popular. Personally I always believe that the master lens needs to be good enough to justify the cost of the water optic so I would like to see how the Tamron 28-75mm performs however no test images are available so I am not in a position to conclude.
In my case having seen what the Sony 28-60mm lens can do I am not planning to invest in a WACP-C but I would be very interested in testing one.
The WWL-1 gets my approval also on full frame but it is not going to give me the same resolution than the Canon 8-15mm or the Sony 90mm macro will give. I look forward to testing some rectilinear lenses to see how those compare and this will happen in a week from now so stay tuned.
Costs to get one for your Sony full frame excluding lens:
WWL-1B €1,424
Bayonet adapter €102
N100 45 flat port €494
Total €2,020 vs WACP-C + N100 Extension Ring 30 €3,333
Nauticam makes some really interesting adapters and ports for Sony cameras, one of them allows you to use vintage Nikkor lenses on full frame mirrorless cameras.
I decided to source the UW15 as I am planning to use it for video after seeing the results on the movie Avatar.
The challenge of the Nikkor lenses is that they are entirely manual with aperture and focus knobs. This is generally not an issue for videography which is my intended use but I wanted to check how does this lens work for photography as many people still rave about it.
Lenses compatible with the adapter are UW 15, UW 20 and UW 85 full manual. Later autofocus lenses are not supported.
The Rig
My rig is a classic derivation from wide angle with 8″ and 12″ arm segments and my trusty (!) Sea and Sea YS-D2.
Nikkor 15mm rig
The Nikkor weights around 600 grams and gives almost zero lift so this rig was over 300 grams negative in fresh water.
Before using it you need to assemble the lens on the adapter.
Nauticam Nikonos Adapter
You have two parts that can be removed to allow the lens to mount depending on your preference. I set the lens with the display upright so I could try and see it while shooting.
Nauticam Nikkor adapter top side
The controls are located on the left side side and bottom which is where I normally have my levers.
Nauticam Nikkor adapter controls
On the right you will see the display scales.
Nikkor UW15 Aperture and Focus Display
I have to say I was a bit nervous setting this on my A1 considering that this is a lens that is 25 years old at least but the vacuum test was fine so ready to go to the pool with the friends at Rec2Tec Bletchley.
The UW 15 Construction
The Nikkor lenses were generally rectilinear. The 15mm has a field of view equivalent to 20mm so only 94 degrees on the diagonal.
The approach was to correct the water distortion until such point when the image becomes rectilinear and eliminate other aberrations.
I have to say that the amount of chromatic aberrations is practically non existant.
White balance slate
Rectilinear lenses have gone out of fashion since dome ports with fisheye distortion being the preferred look for wide angle in modern underwater photography. For video though straight lines have a value.
Pool Session
Using this lens on the Sony A1 proved challenging for photography. Nailing the focus using peaking did not feel particularly precise.
Not so sharp focus
Some shots may have been sharp enough on film resolution but with the 50 megapixels of the A1 even the slightest misfocus shows.
Is it in focus?
My productivity was quite low at the beginning as I was trying to get a hand of the lens.
The lens itself is by all means extremely sharp even for my camera.
Grid
I worked out that I could not do what I normally do which is to frame first and focus after as by the time I had nailed the focus things would have moved so I decided to set the focus and move forward or back until I thought I had my target in focus.
The situation started to improve.
DSD student with Instructor David Allen
I felt I had worked out how to use the lens so started looking for some subjects. During those sessions you see all sort of stuff as people practice their skills.
Riding
Considerations on the controls
I believe that the average underwater photographer shooting digital will find it very hard to use this lens and will end up shooting at f/8 or smaller apertures so that focussing becomes easier. The lens is especially challenging as it is not particularly wide so you do need strobe power.
DSD Student
I found really hard the lack of display of aperture and focus position. The lens is designed for much smaller Nikonos housing, with my A1 housing being more bulky you need to actually turn and look at the lens to check your settings so many times I did not have the right aperture of focus and it all was pretty laborious. In a video situation for wide angle this lens will work just fine with set and forget at 4K but to nail focus on a high megapixel camera is a hard task.
When you do get the focus though the image is outstanding.
Just married
I tried a selfie to check the focus scale and it worked well.
Selfie
Consider that the most shots were at f/5.6 or f/8.
Dave
As you have no exif data it is impossible to remember what you shot unless you write it down on a slate.
Is it worth it?
The answer depends on your use case and if you already had the lens.
The following use cases fit the Nikkor UW 15 pretty well:
Videos of sharks or pelagic that do not come too close where ambient light is low
Photos at mid range with fairly static scenes where you want straight lines for example fashion models
The lens is definitely not easy to use for dynamic shots, situations where you need to get very close (as it does not focus very close) and where you need to continuosly adjust focus.
In terms of costs in GBP you are looking at:
£474 Nauticam Nikonos Adapter 37202
£300-500 Second hand Nikkor UW15
Obviously if you already have the lens and you are in one of the above use cases I would recommend you get an adapter and give it a go perhaps looking on the second hand market.
If instead you do not have the lens I would say not to bother unless money is no object, you are in the two use cases above and you have sufficent dexterity to control this lens.
Undewater photography has moved forward a great deal thanks to autofocus and although the Nikkor UW 15 is really sharp getting critical focus right is not easy. When it comes to video where you do not normally use autofocus for wide angle this lens is really interesting.
You can shoot at f/5.6 even f/4 subjects in the distance in ambient light with extremely clear and sharp detail at a fraction of the cost of other water contact optics. If you do not own any of the WACP or WWL I would say the UW 15 deserves some considerations but only if your command of depth of field and focus is very good otherwise it is better to pass.
Many things have changed since Helen housed her Canon Ixus65 in a polycarbonate housing.
Compact cameras are practically extinct and those left have either a port system as the lens is too long or a shorter 24-70mm equivalent lens which is not useful.
Nauticam developed the N85 port system for Sony APSC (also small form factor) and Micro Four Thirds and since mid 2010s those are the prevaling systems for interchangeable lens system underwater.
APSC in the mirrorless Sony format and today Fuji has lacked native fisheye lenses and been plagued by slow flash sync speed and challenges of battery life.
When it comes to DSLR there is no significant size difference between APSC and full frame when you look at the body but moving into lenses there is a substantial difference with the Tokina 10-17mm being the lens of choice for a compact set up for both Nikon and Canon shooters.
Moving to full frame DSLR has meant historically larger ports bigger lenses and a lot more weight especially if you consider larger domes or the newer water contact optics all in excess of 2Kg and frequently more.
When you look at mirrorless the newer Nikon and Canon systems all use the N120 port system so there is no size difference between DSLR and Mirrorless.
In addition if you are already using N120 dome ports like I am you will soon find out that depending on your housing the weight benefit is not entirely there even for Sony camera whose housing are lighter and use the N100 port system. However housing are in general lighter up to 800 grams less.
Today if you want to have a portable ILC camera for photography you are really only looking at the Olympus/ OM Systems range.
If you have made the choice to get larger N120 ports or you have a Panasonic GH series your housing is already pretty big and moving to full frame will impact only when it comes to certain ports.
Let’s dive into this topic.
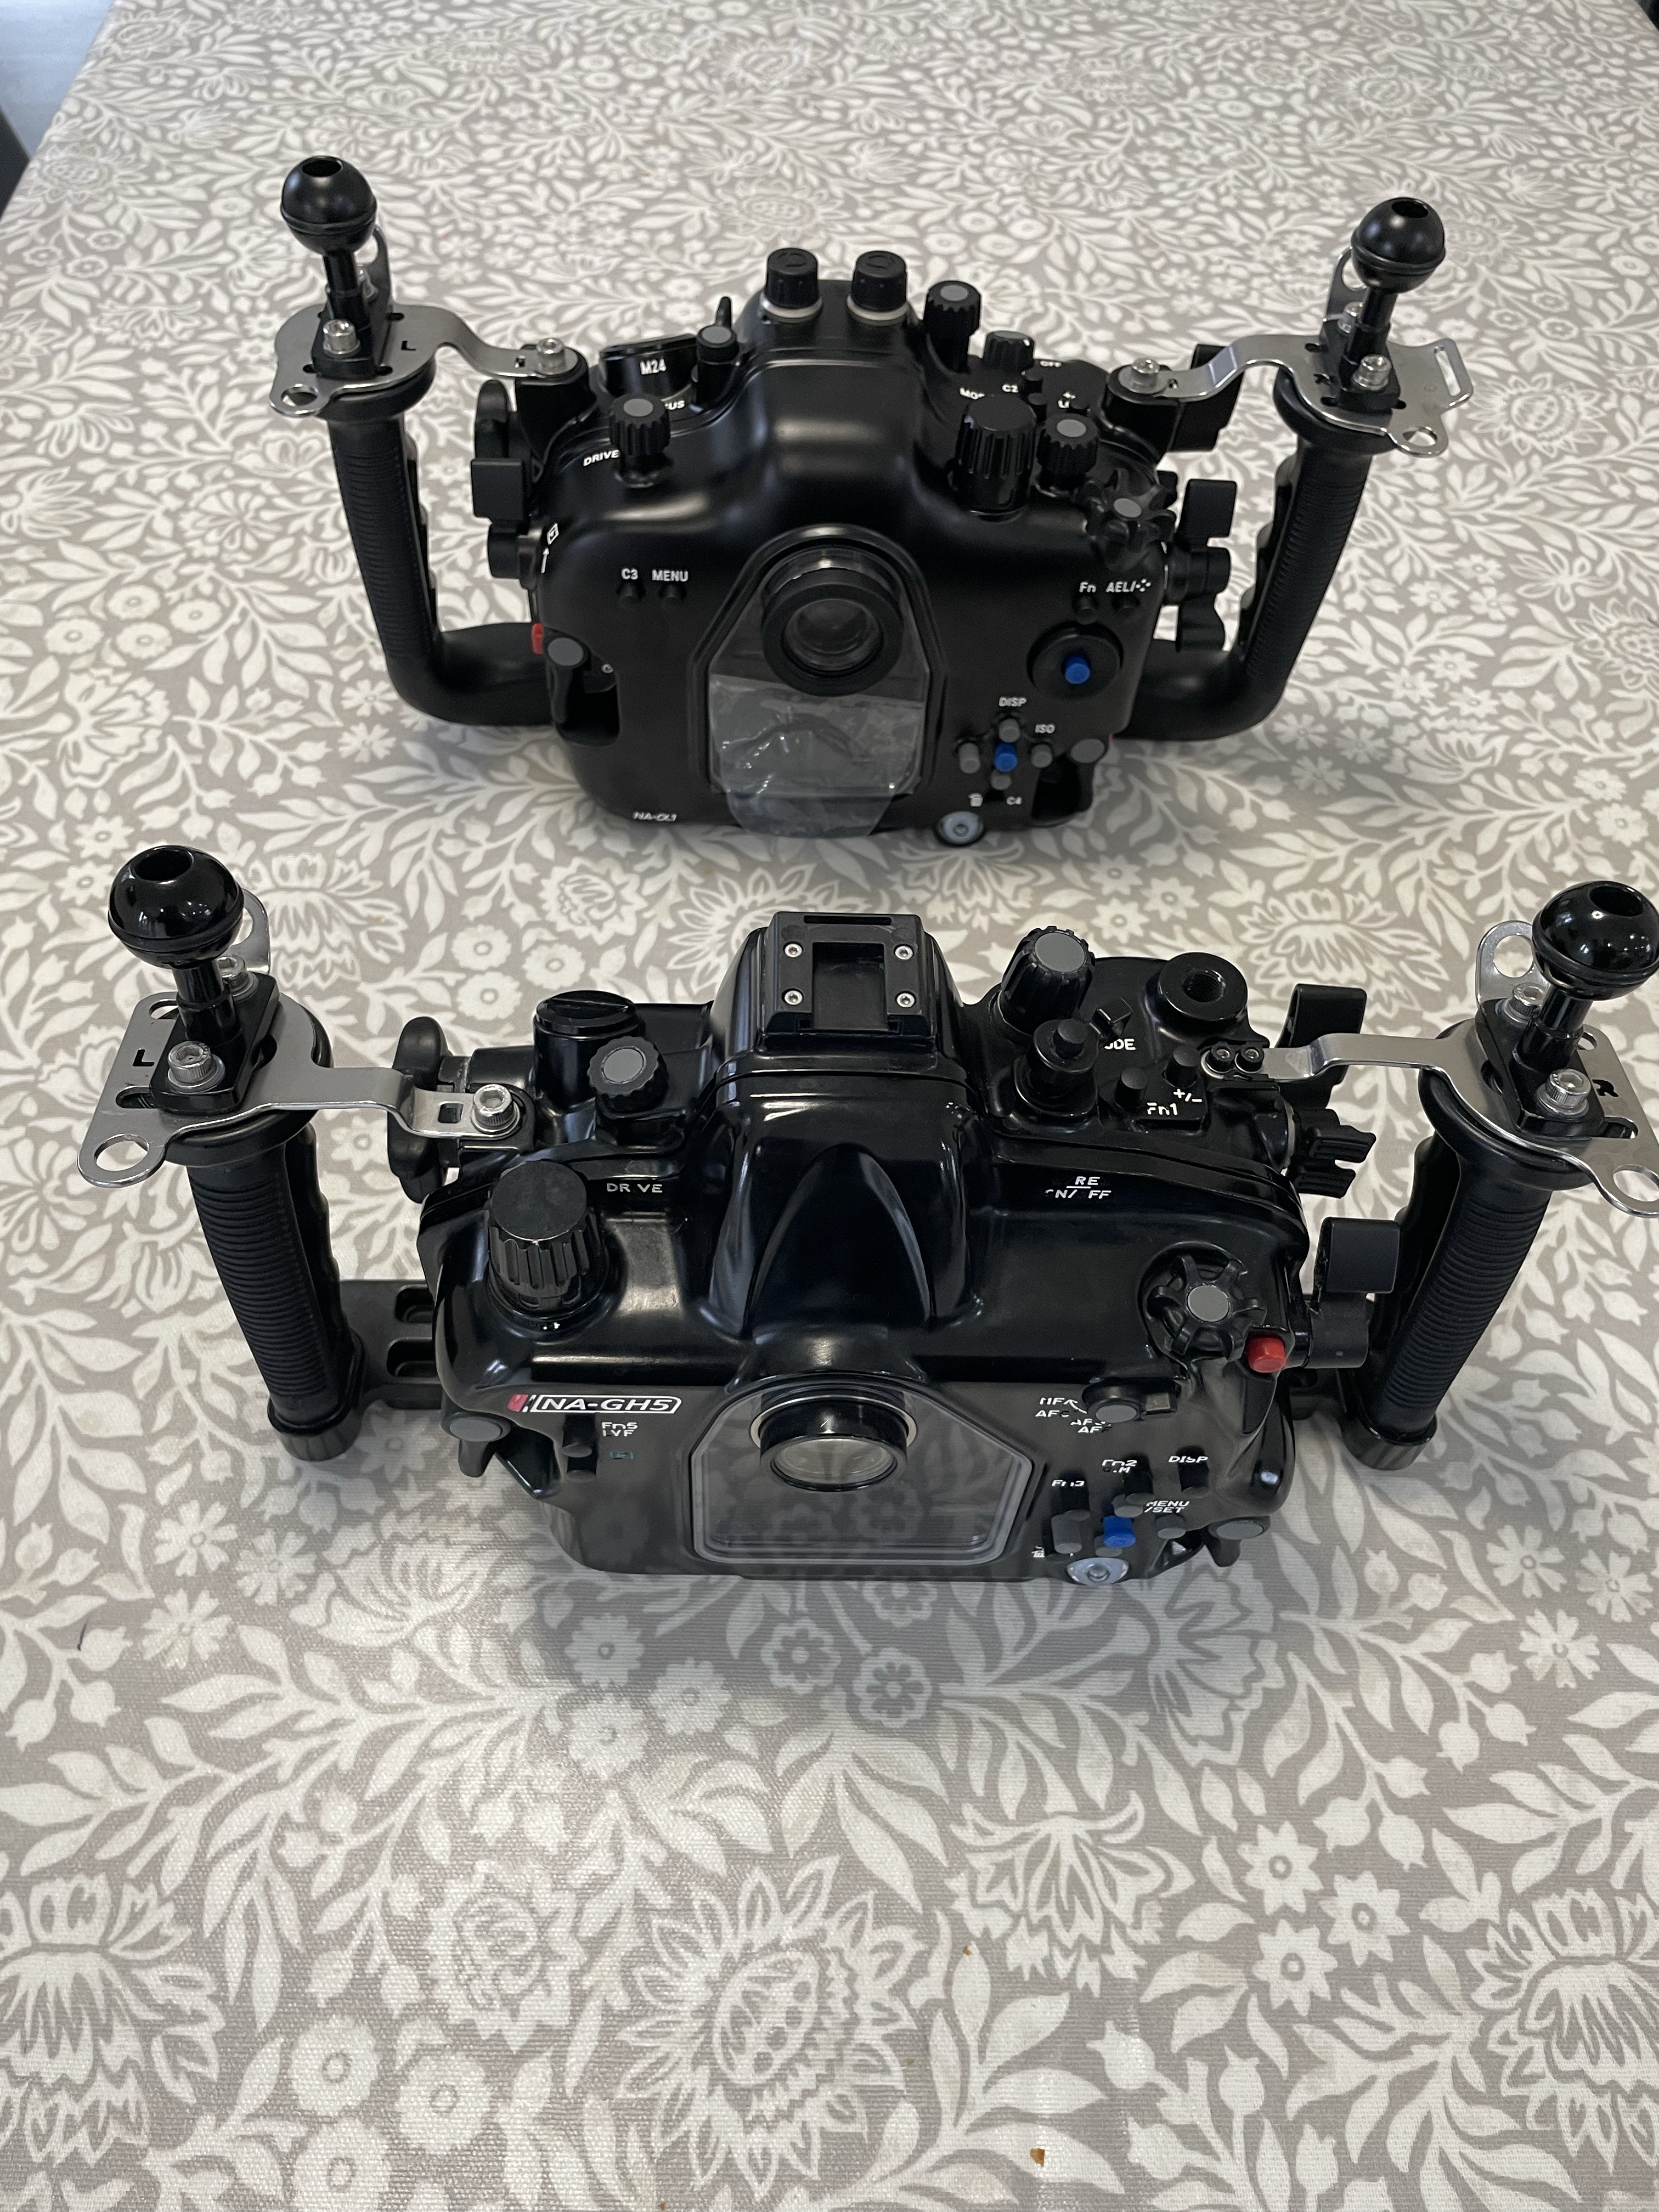
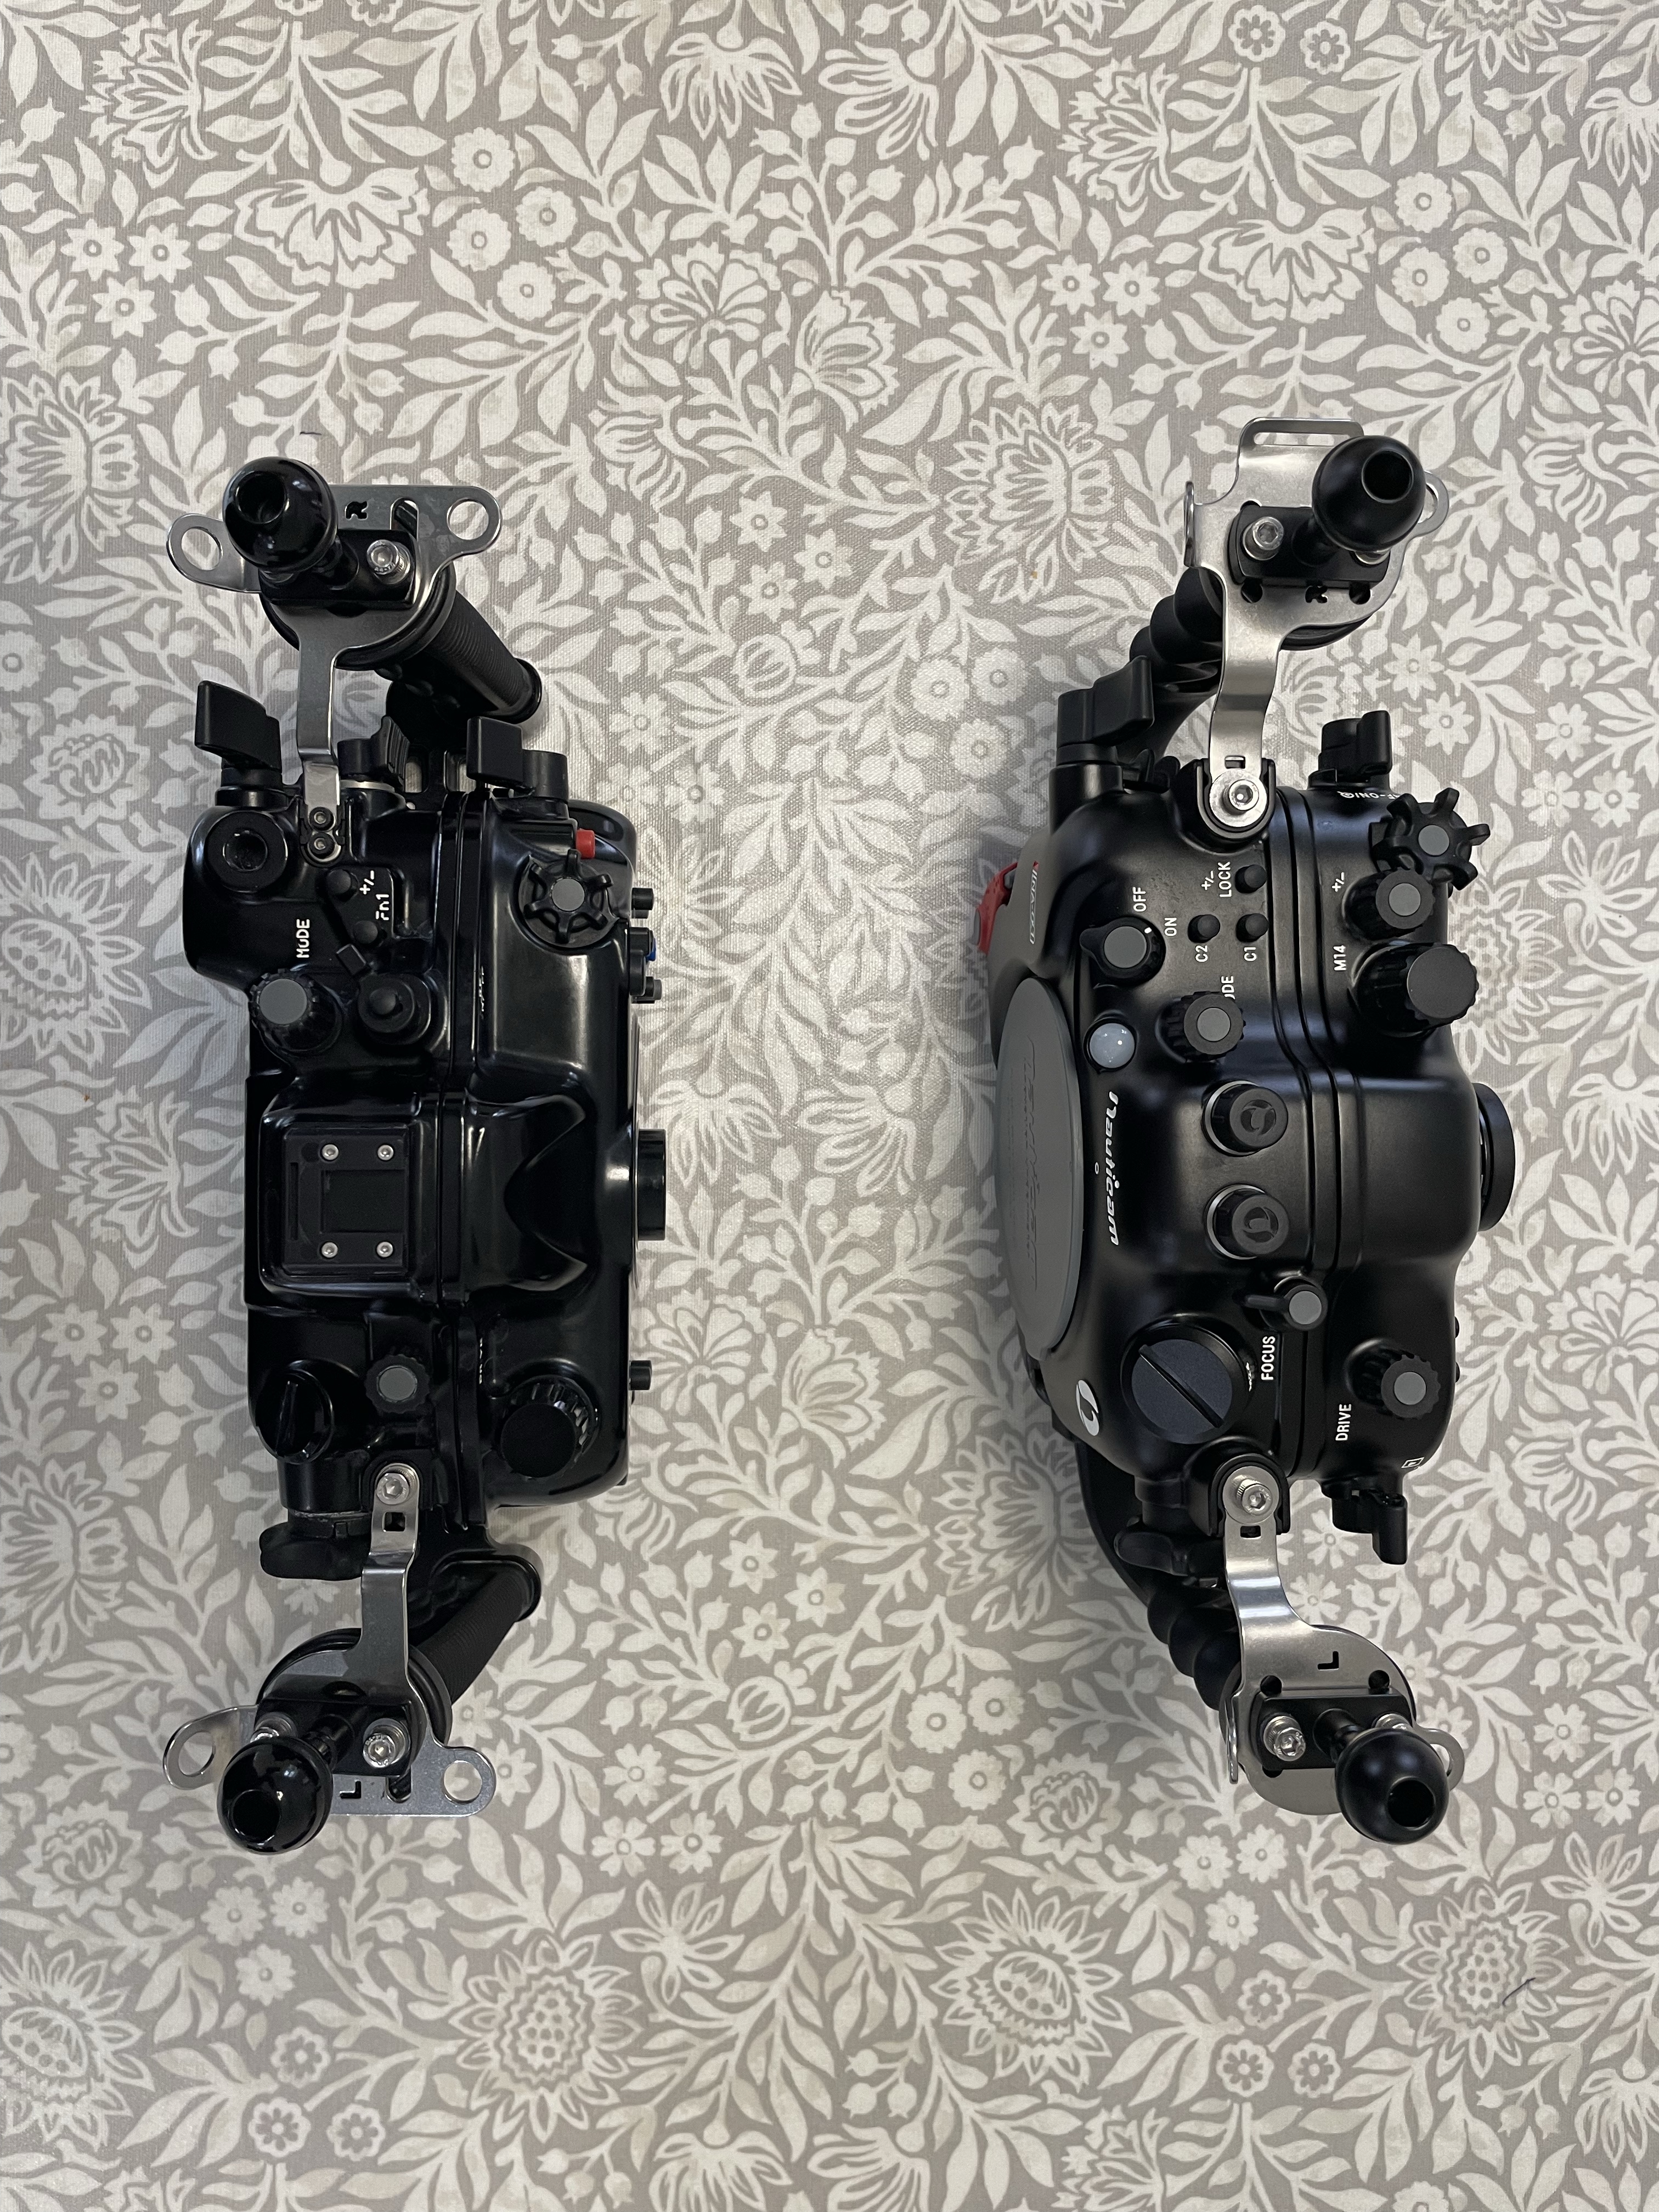
Here a first perspective of the A1 housing vs the GH5 housing.
GH5 vs A1 front view
Rear side view
Rear view note how the Sony has joystick controls
And finally top view
Head to Head
You can see that the A1 housing is a bit thicker a bit wider but not a great deal and the GH5 is taller.
Dimensions
340mm × 169mm (H) × 125mm (D)
A1 Dimensions
Dimensions
331mm × 184mm (H) × 110mm (D)
GH5 Dimensions
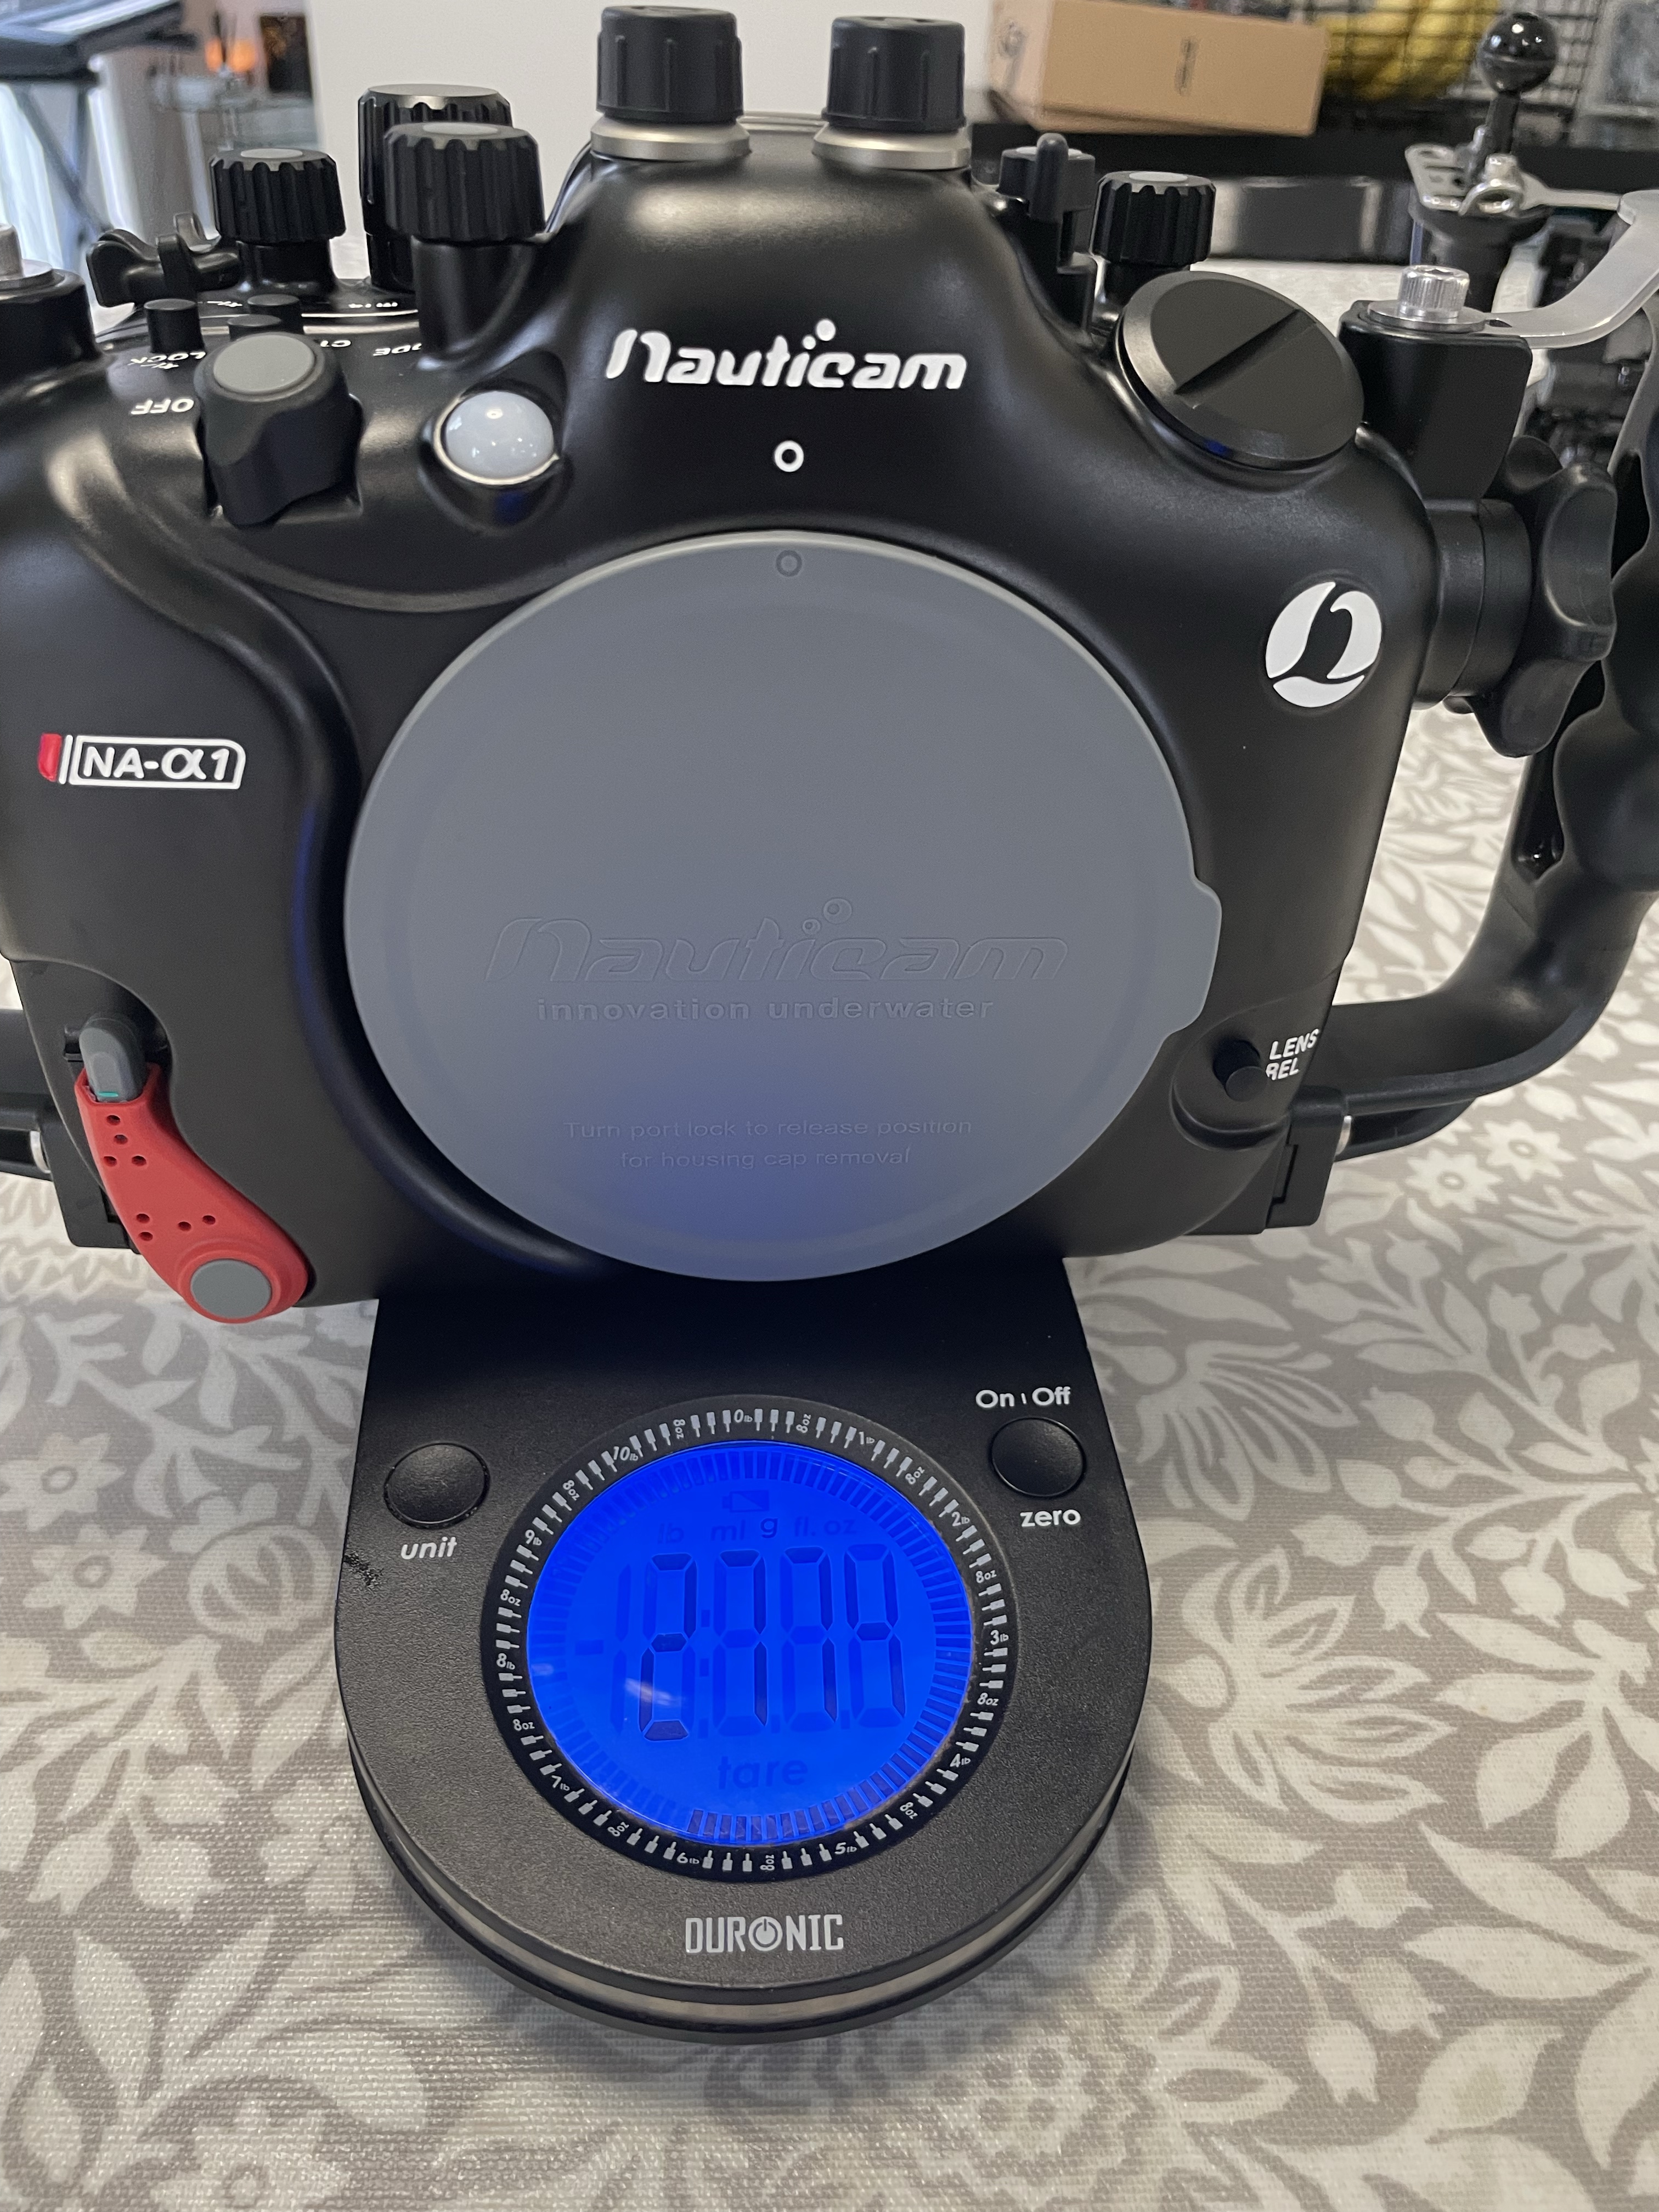
Looking at the weight on the scale
NA-GH5 2454 gramsNA-A1 Weight
Difference is 320 grams the weigtht are higher than reported as there is a vacuum valve installed.
This means that as the GH5 system was already heavy due to the clam shell housing the difference in weight will come from the lenses and ports.
As I use the N120 system for wide angle already the difference in that use case would come from larger adapter weight or larger ports.
For flat ports on the N85 system there will be instead a weight disadvantage due to the different diameter but this is less than the delta between N85 and N120.
In my future posts I will show my port system for the Sony A1 that has the objective of:
Reducing bulk without totally compromising image quality
Use as much as possible ports I already had
Reduce the overall number of parts and adapters
Offer complete focal range coverage for wide angle
As you will see my macro choices will not go into a direction of reducing weight or bulk but there is a reason for that. You could argue that by using the GH5 and the N120 system I had already killed portability and that is true however unless you want to shoot native lenses on Olympus system there are no real better options to keep image quality and still be relatively light.
Stay tuned for the next articles that will introduce my choices for:
Index of articles with my choice of lenses and ports (continuosly updated):
A few weeks ago I went diving in Swanage with BSOUP the British Society of Underwater Photographers that I have recently joined.
I was looking forward to some local diving so when I found out that they were organising a trip I managed to get on.
I drove there the night before and I was number two on the pier the next day.
It was a deceiving clear morning with perfect conditions on land.
I had two cameras one in the housing and one for land use so I took a few snaps.
Once parked on the pier I was informed by two friends that dive locally all the time that it was better to wait when the water level was a bit higher.
At that point it did look like a great day however there was a bit of wind.
I had my GH5M2 with the Panasonic 45mm macro that I acquired last year and has become my favourite macro lens.
I jumped in the water one of the first to find out the visibility was well maybe 1 meter? I could not see the LCD screen of the camera due to the suspended particles and had to use the viewfinder
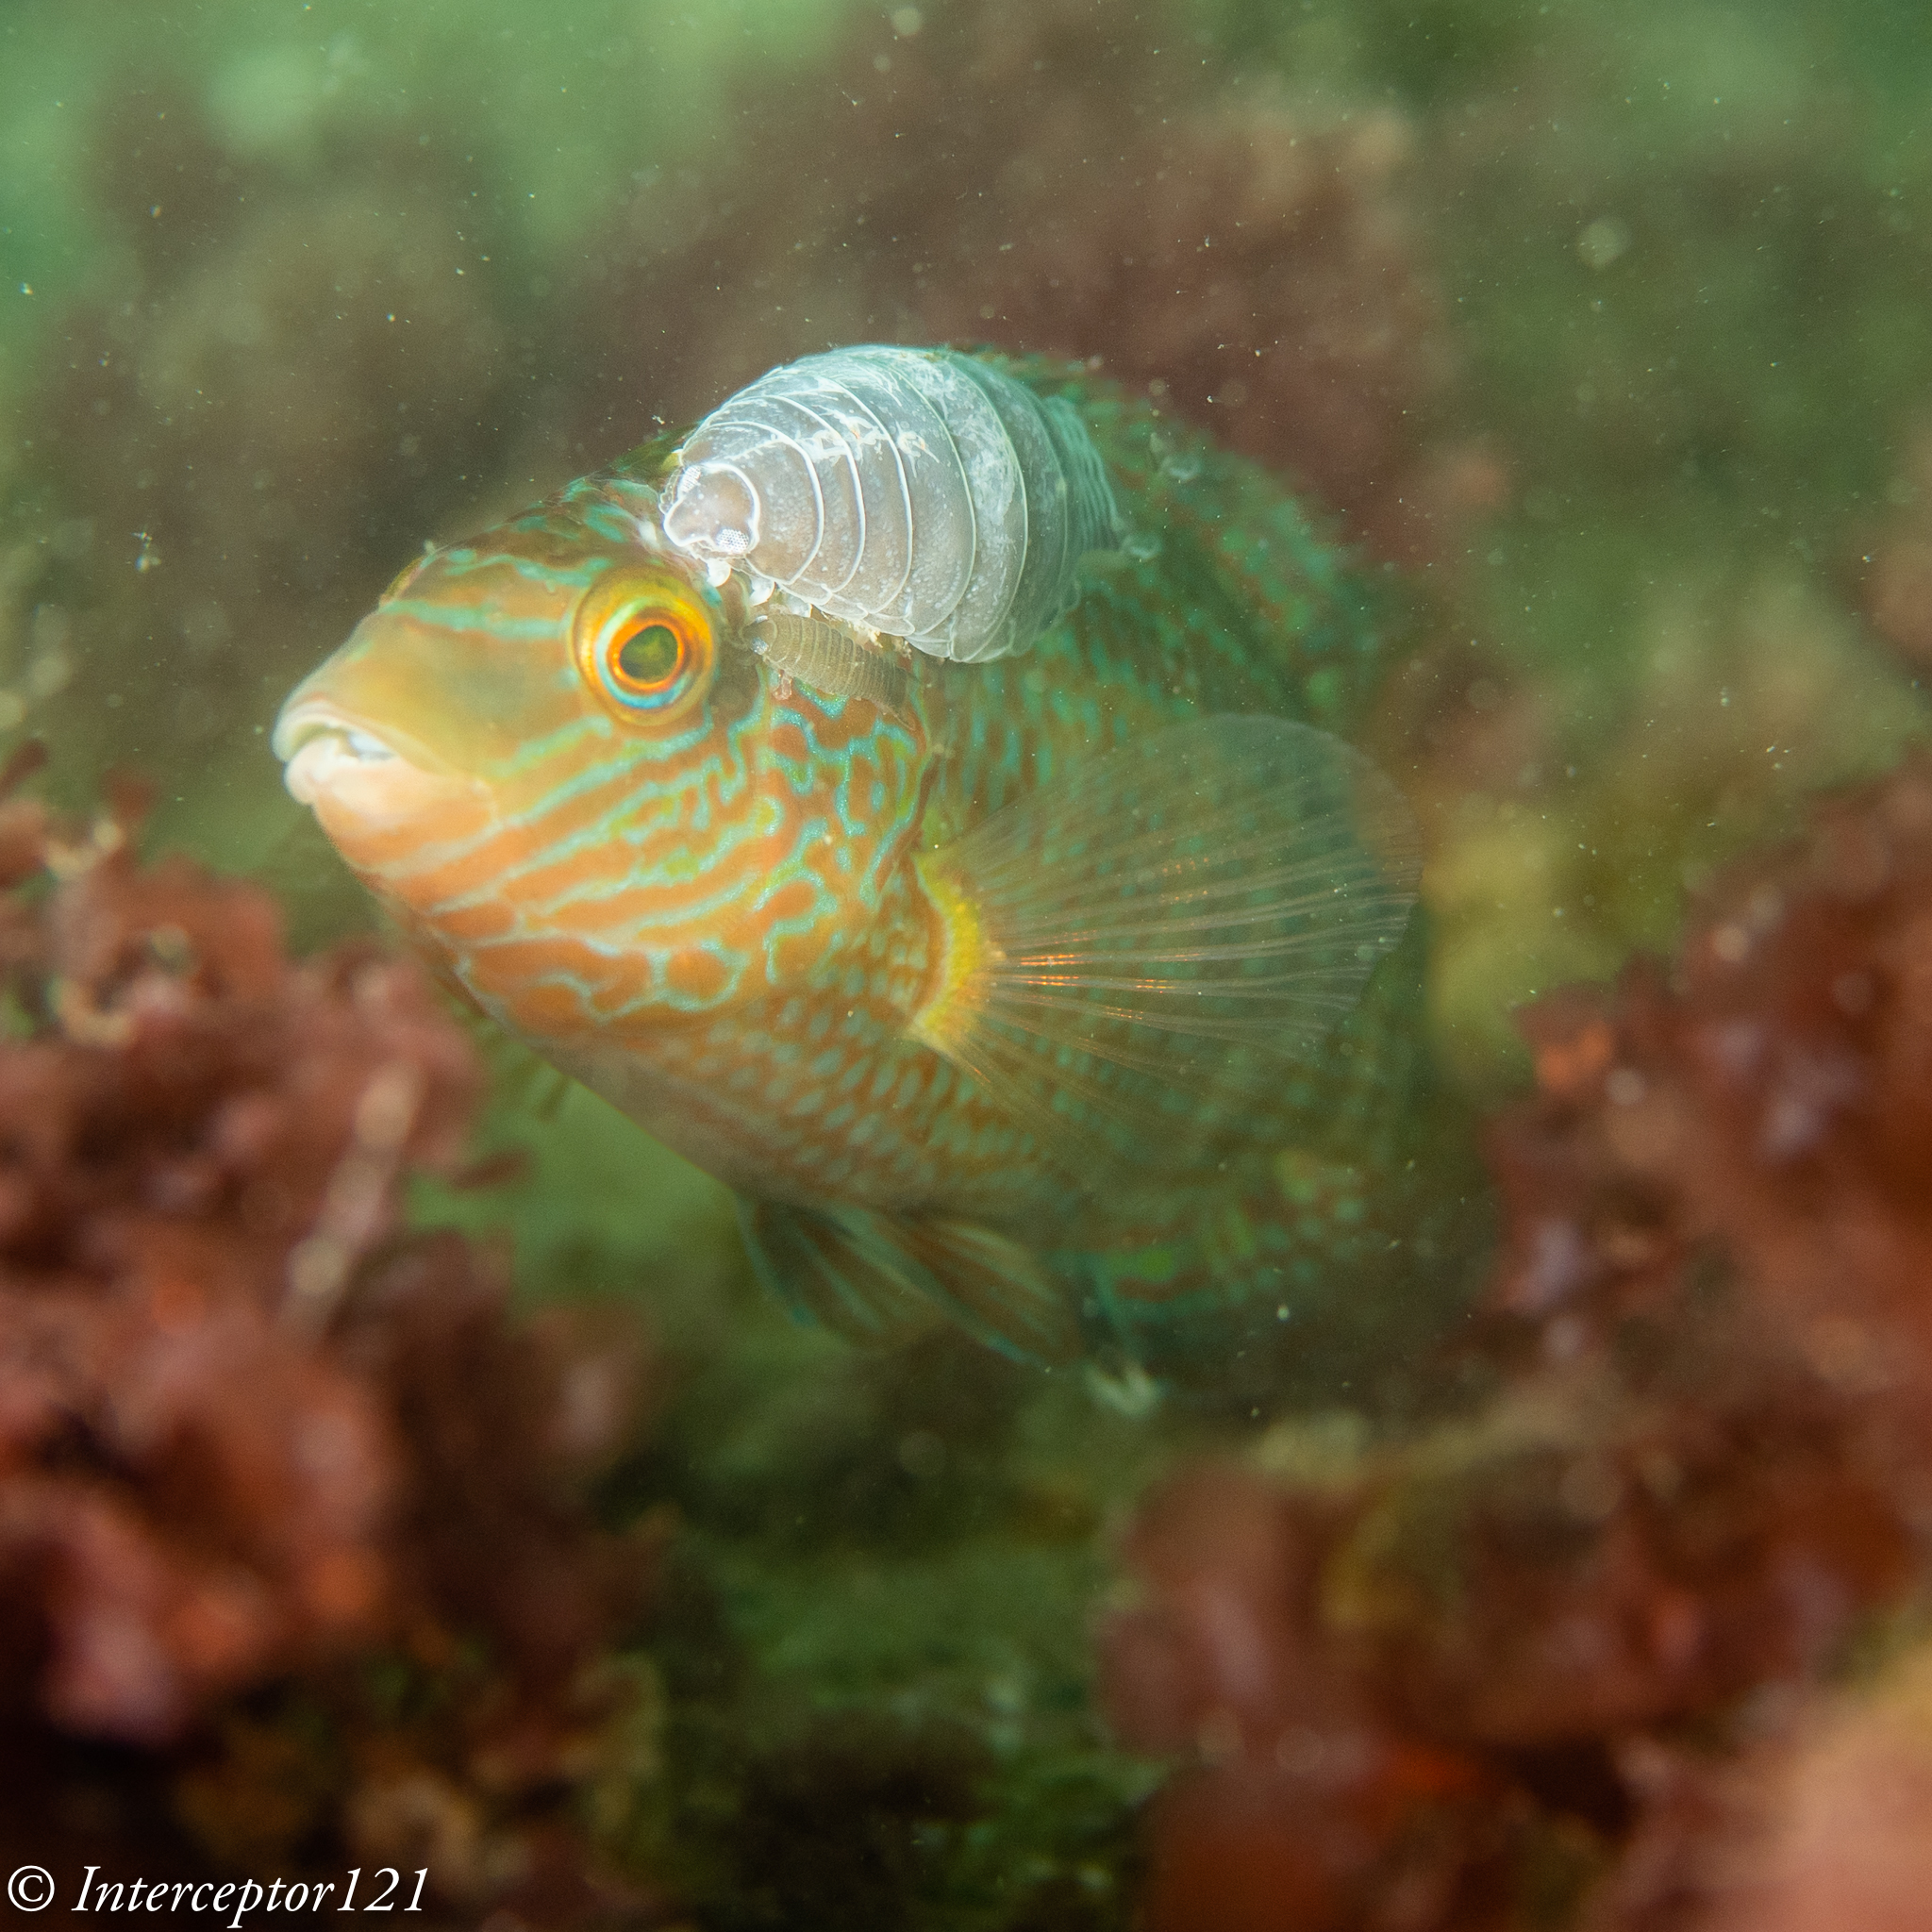
One of the first things I say was this corkwing wrasse with a massive parasite near its eye.
Unfortunately I did not have a snoot or strobes suited for the challenge so I spend the first dive training myself on how to get the least amount of back scatter. Mind you when there are particles you will have backscatter not matter what you do.
Static subjects are ideal for testing so I had a go at some really simple stuff.
And again some anemone the object was to get the cleanest possible shot.
When I was reasonably happy I moved to some more interesting subject I gave up on blennies as I knew everyone would have shot some and besides my strobes were not the best for the situation and I found a cooperating cuttlefish.
I can tell you that to get this clean shot it took me quite a while but on reflection despite being very low I could not even see a hint of the surface so bad the conditions so I decided to get really close.
I wanted to emulate a profile of a person or perhaps an elephant not sure but I took a number of shots waiting for the tentacles to be in the right position and this is my best shot for the day.
I would say it is quite creepy but after all I had something decent and when I presented the shot in the club review at the sailing club it got some good feedback.
Now with that in mind let’s have a look at some shots taken in clearer water this is from Sorrento Peninsula.
You can see that clearer water improves contrast and sharpness as you would expect however as the UK shot was very close the gap is not as big.
And this is a shot from last time I was in the red sea
This is super macro so again suspended particles are not as important.
However if we look at a mid-range shot similar to the whole cuttelfish the situation is very different.
Here we are in Italy.
And finally here in the red sea.
For as much as we may love our local dive site there is a degree of adaptation but also a restriction on the variety of shots we can take.
When I was working as resident dive instructor I remember the guidelines we were passed one was really funny and said:
“if the visibility is crap you don’t say that to the guests what you say is today we are going to focus on macro” then you make sure you choose a site where there is some.
I am looking forward to my boat in the Red Sea end of July remember if you follow me on instragram there may be some voucher codes to be used for discount.
If like me you have been trying to make the most of your local dive site you deserve to get yourself in clear water where you can actually see further away than your arm. Of course we do have some good days in England sometimes 5 even 8 meters but I tale Egypt and their 25+ meters any day of the week!
A closing thought on conditions and land photography, in fact even if visibility is not an issue most times unless you have fog, overcast days, excessively clear days do not make great land pictures either so we can say we are always on a quest chasing light and conditions.
The GH6 has the same USB power capabilities introduced in the GH5M2.
In this video I show you what I use with my cameras.
Initially with the GH5 I could only use a dummy battery kit and this will continue to work however it may have challenges with mechanical shutter or very high bitrate codecs of the GH6.
Therefore the recommended solution is a PD Power Bank
Pay attention to the checks you need to do as your power bank needs to deliver 9V 3A which usually means at least 45W better 65W