Tag Archives: Tips

Nikkor UW15 on Sony Mirrorless for photography – Worth it?

Nauticam makes some really interesting adapters and ports for Sony cameras, one of them allows you to use vintage Nikkor lenses on full frame mirrorless cameras.

I decided to source the UW15 as I am planning to use it for video after seeing the results on the movie Avatar.

The challenge of the Nikkor lenses is that they are entirely manual with aperture and focus knobs. This is generally not an issue for videography which is my intended use but I wanted to check how does this lens work for photography as many people still rave about it.

Lenses compatible with the adapter are UW 15, UW 20 and UW 85 full manual. Later autofocus lenses are not supported.
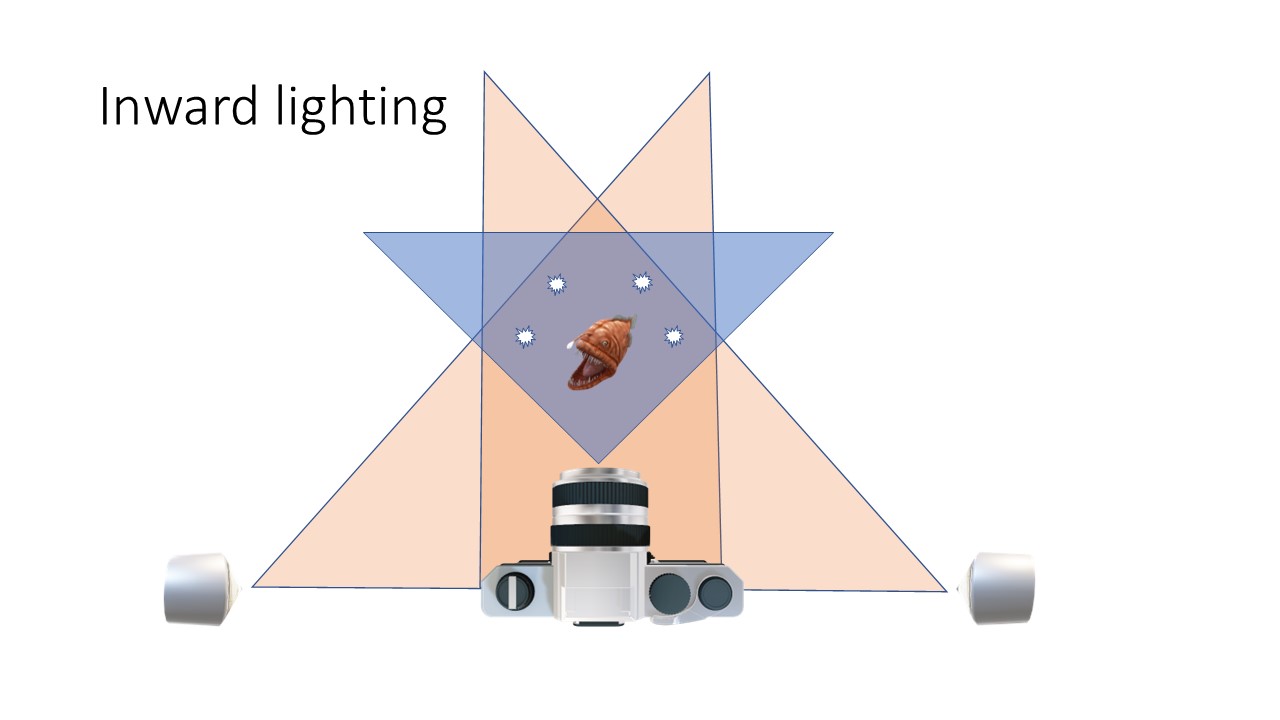
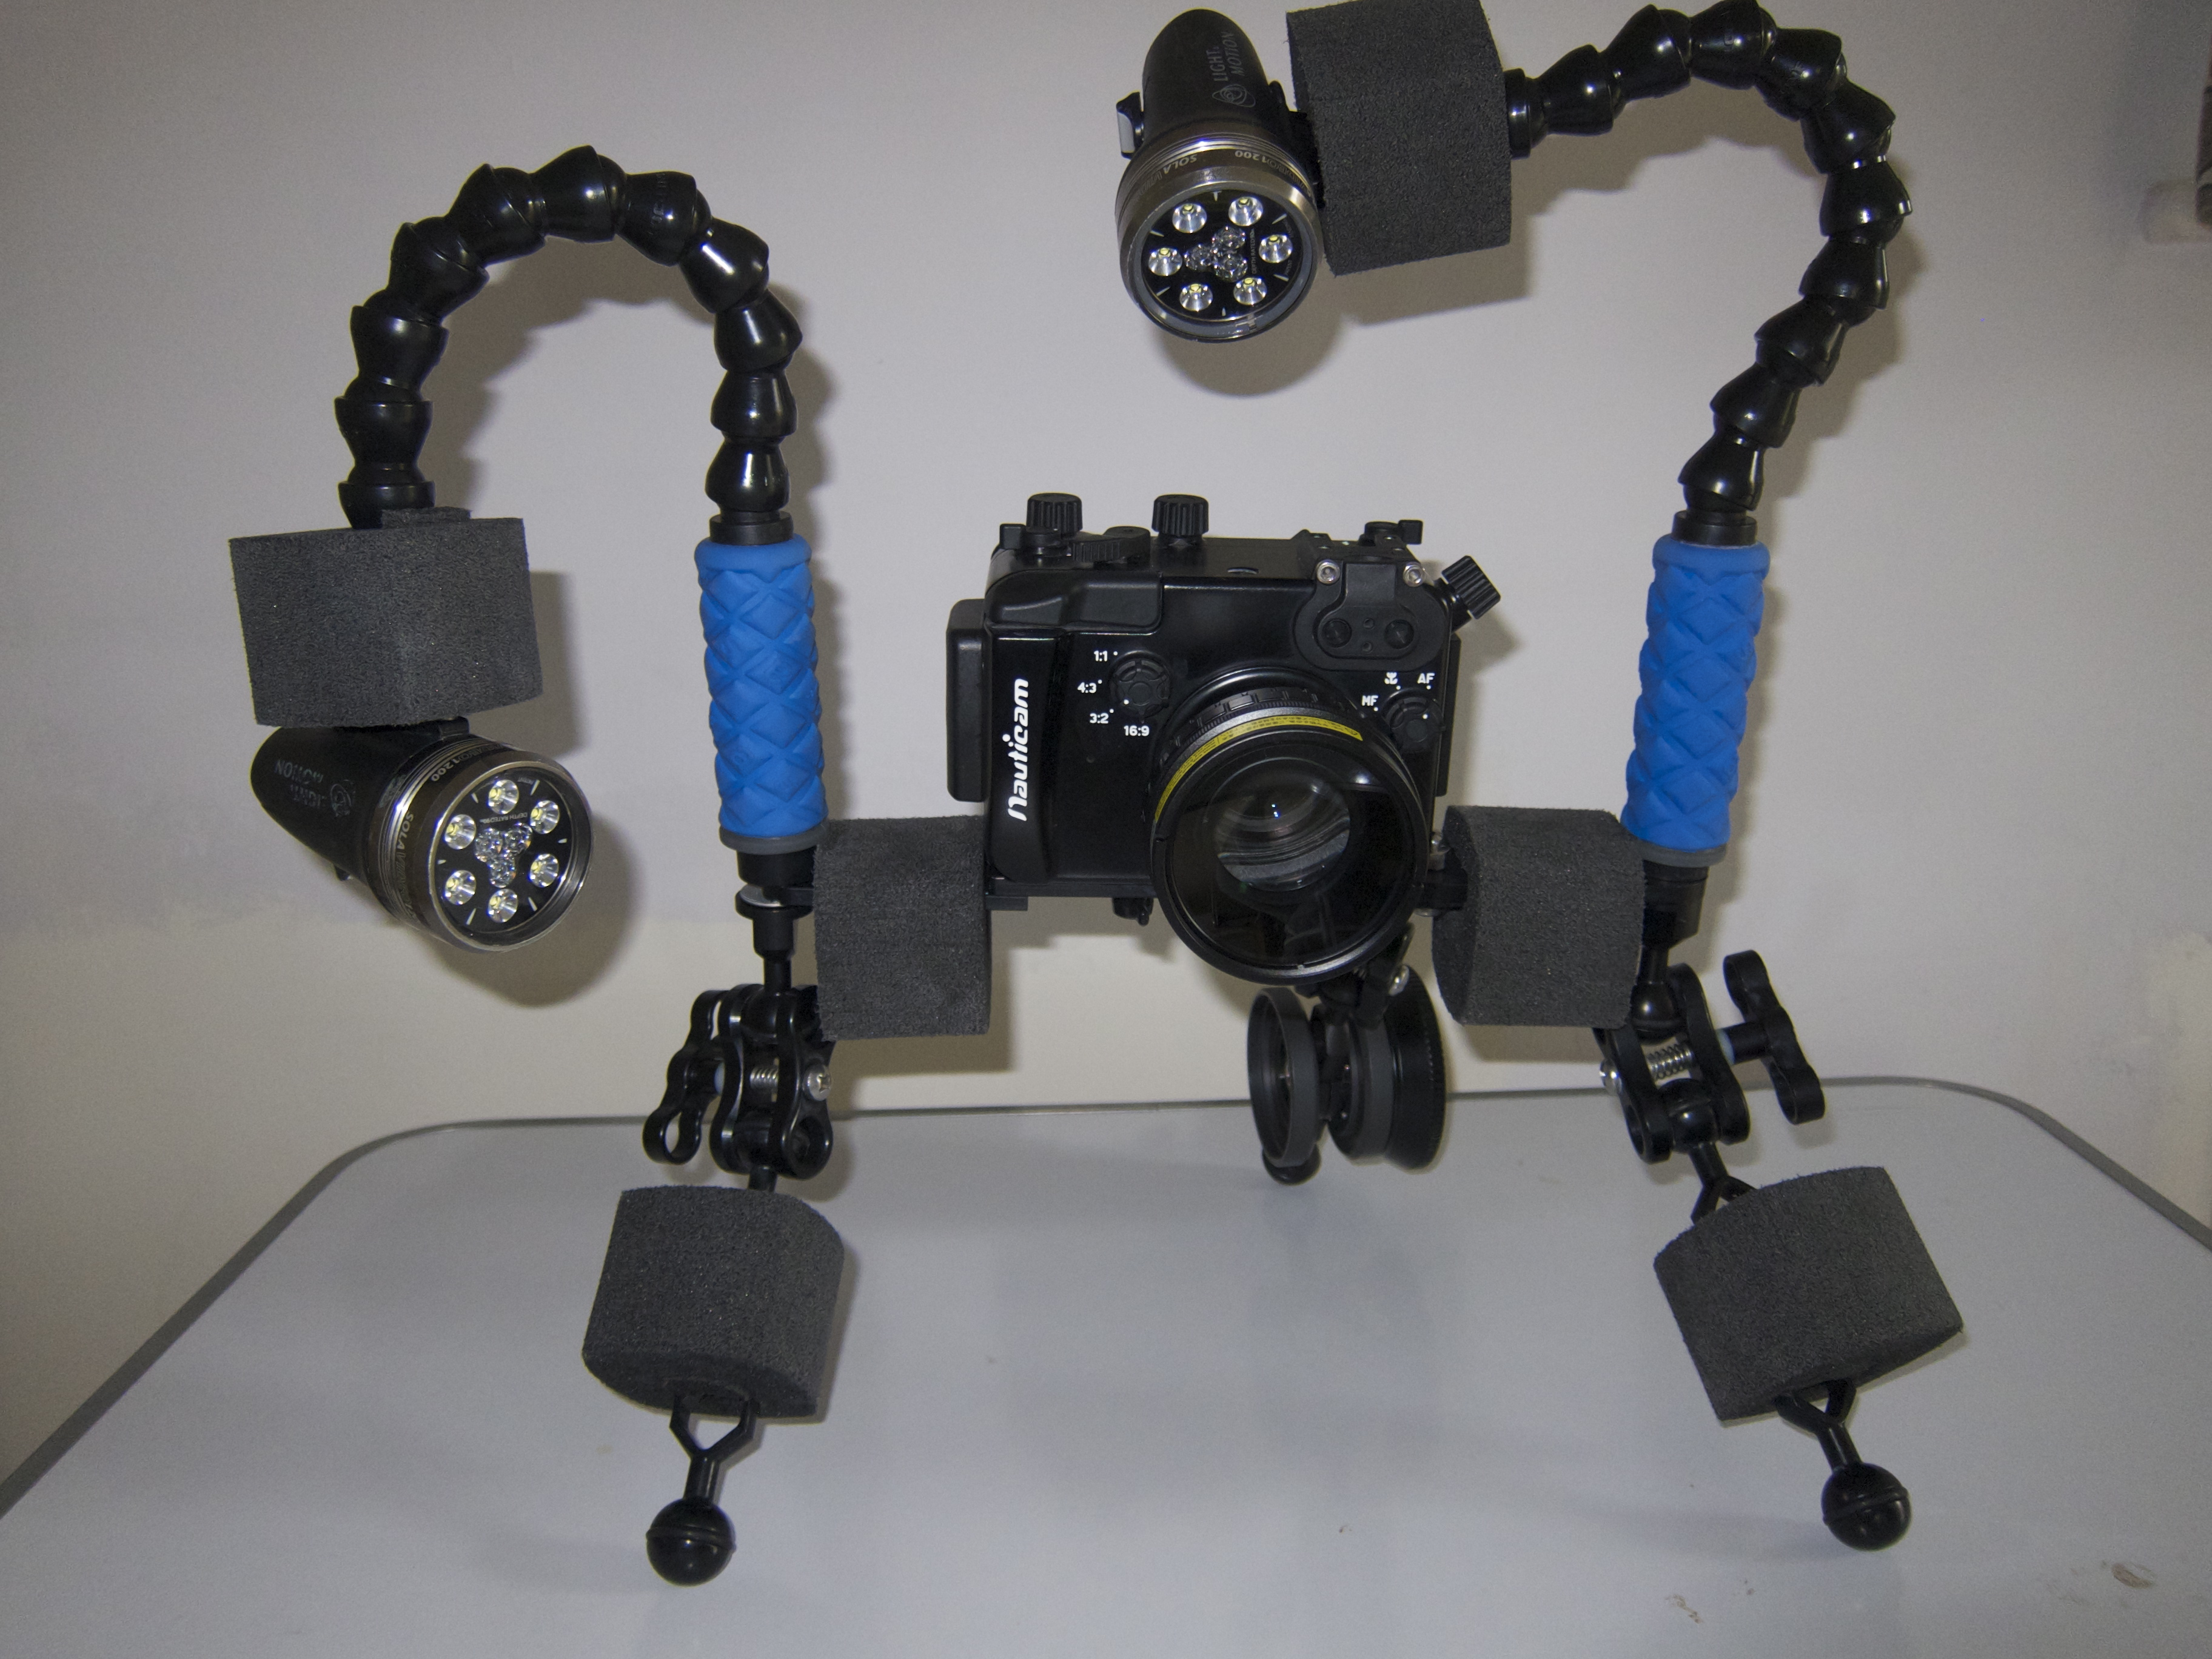
The Rig

My rig is a classic derivation from wide angle with 8″ and 12″ arm segments and my trusty (!) Sea and Sea YS-D2.

Nikkor 15mm rig

The Nikkor weights around 600 grams and gives almost zero lift so this rig was over 300 grams negative in fresh water.

Before using it you need to assemble the lens on the adapter.

Nauticam Nikonos Adapter

You have two parts that can be removed to allow the lens to mount depending on your preference. I set the lens with the display upright so I could try and see it while shooting.

Nauticam Nikkor adapter top side

The controls are located on the left side side and bottom which is where I normally have my levers.

Nauticam Nikkor adapter controls

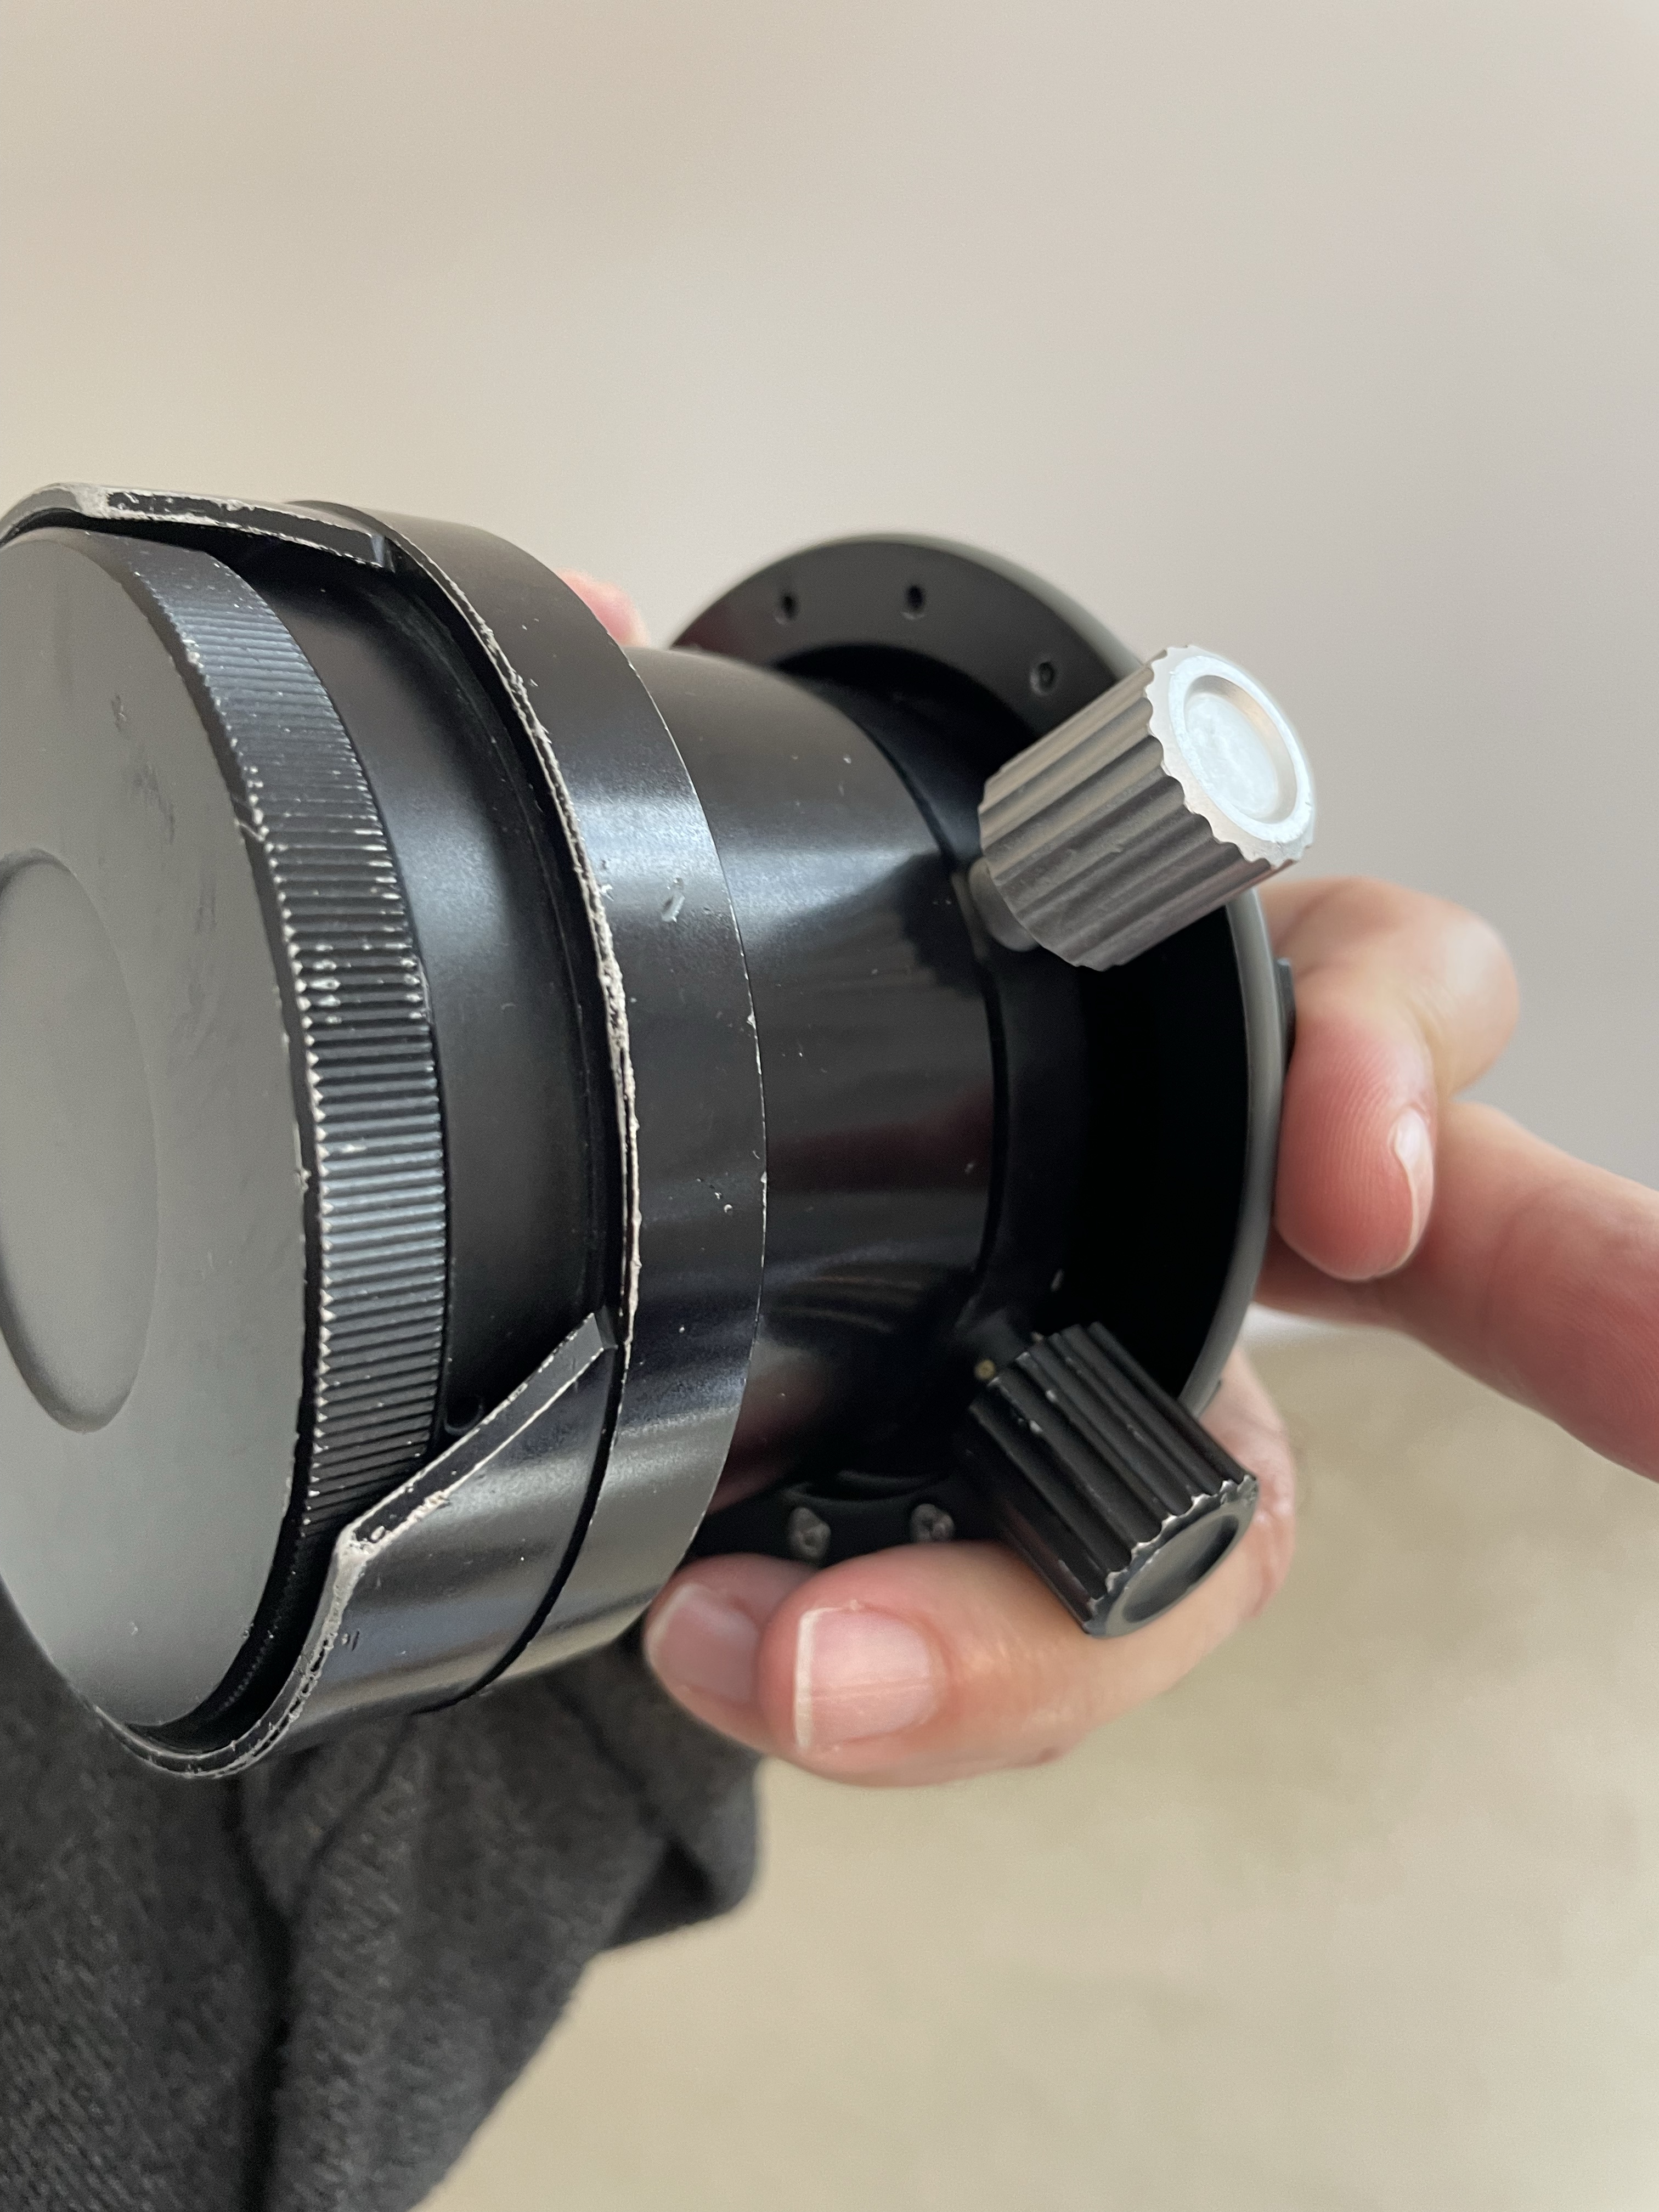
On the right you will see the display scales.

Nikkor UW15 Aperture and Focus Display

I have to say I was a bit nervous setting this on my A1 considering that this is a lens that is 25 years old at least but the vacuum test was fine so ready to go to the pool with the friends at Rec2Tec Bletchley.

The UW 15 Construction

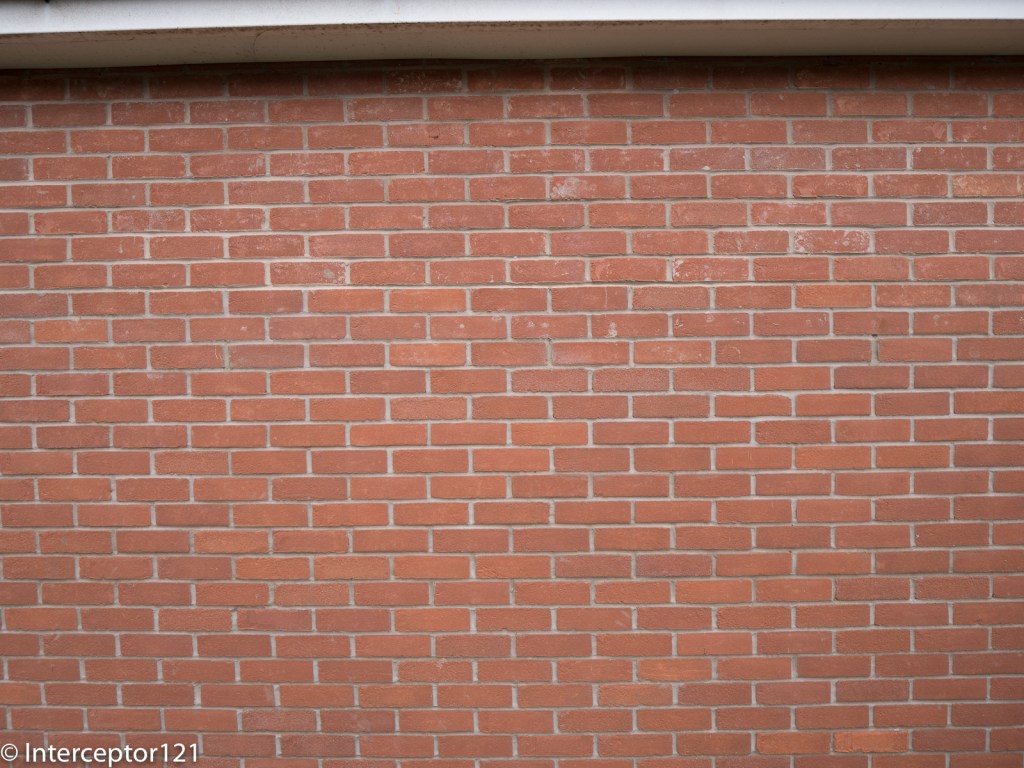
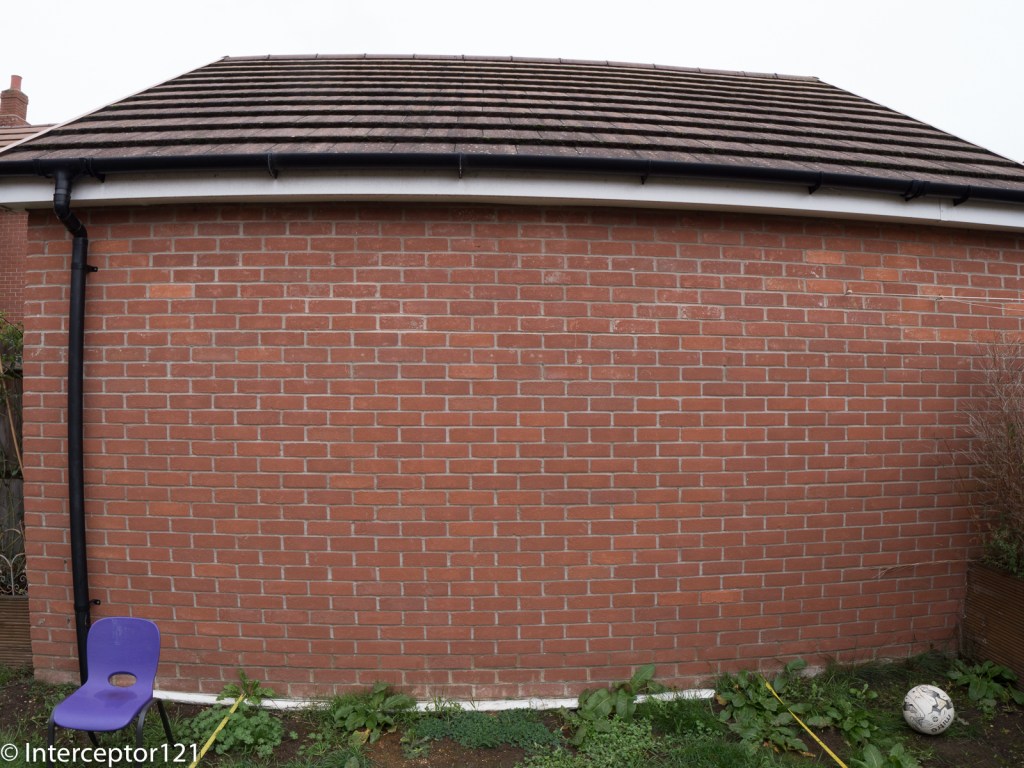
The Nikkor lenses were generally rectilinear. The 15mm has a field of view equivalent to 20mm so only 94 degrees on the diagonal.

The approach was to correct the water distortion until such point when the image becomes rectilinear and eliminate other aberrations.

I have to say that the amount of chromatic aberrations is practically non existant.

White balance slate

Rectilinear lenses have gone out of fashion since dome ports with fisheye distortion being the preferred look for wide angle in modern underwater photography. For video though straight lines have a value.
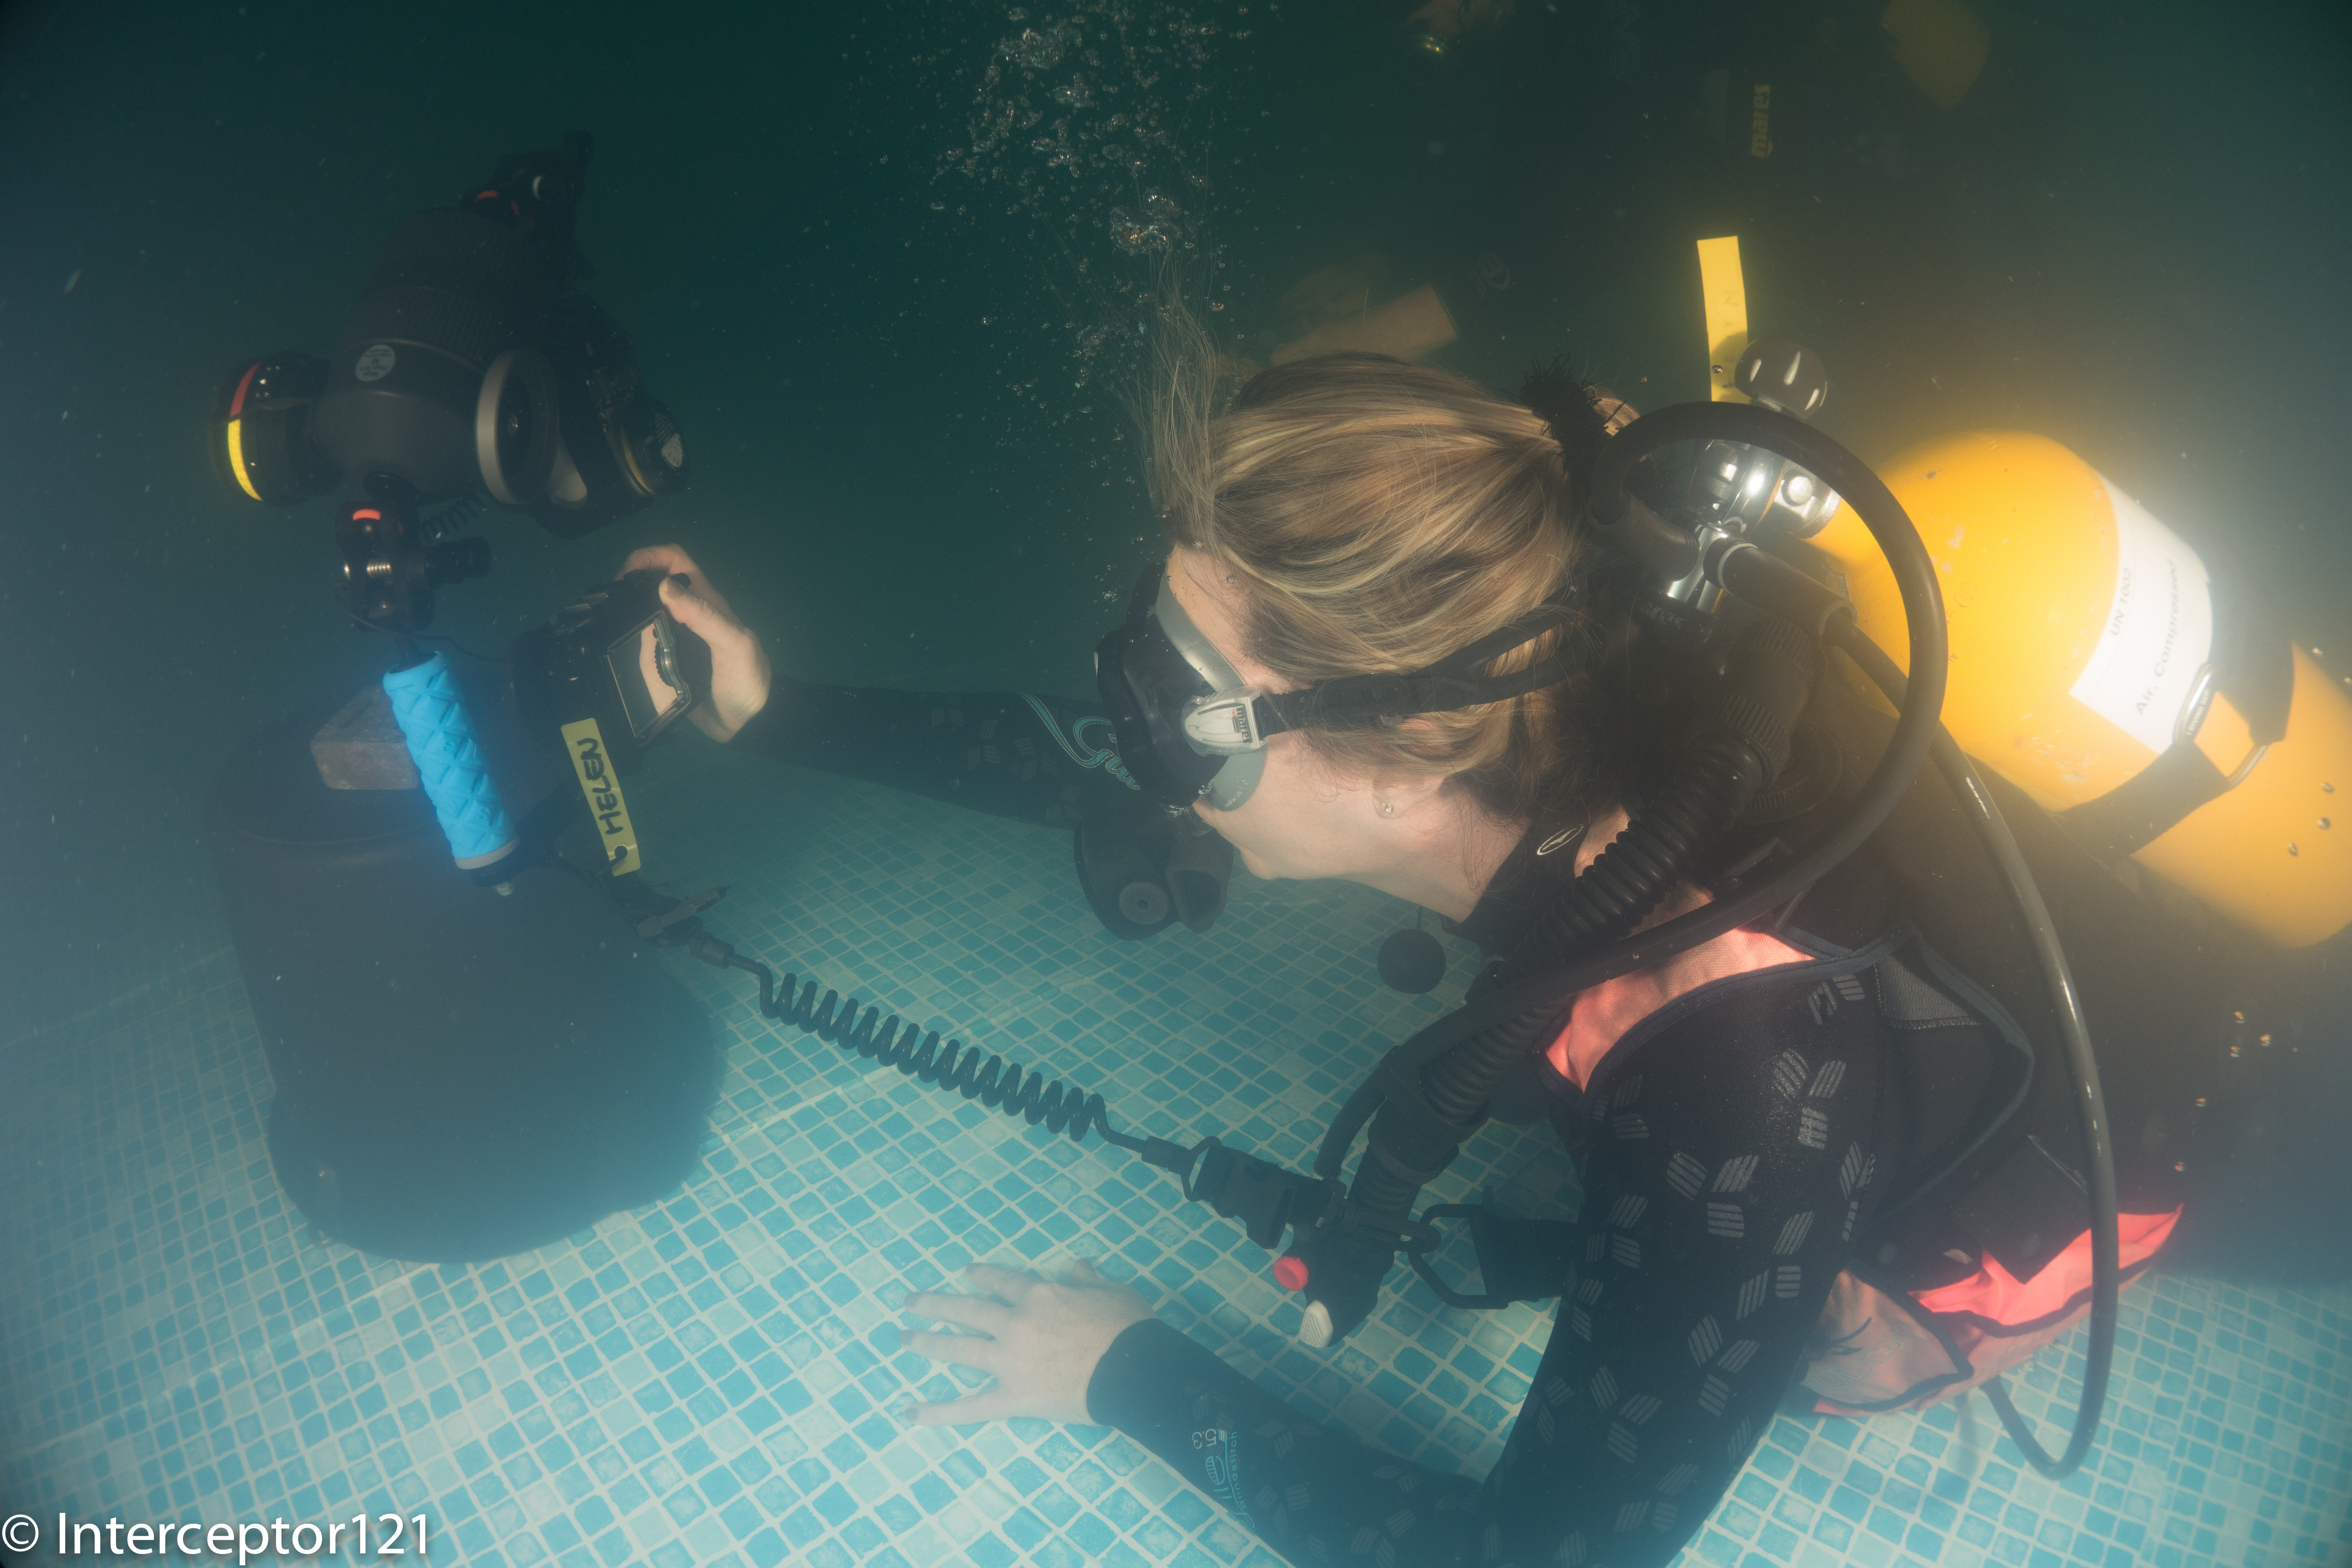
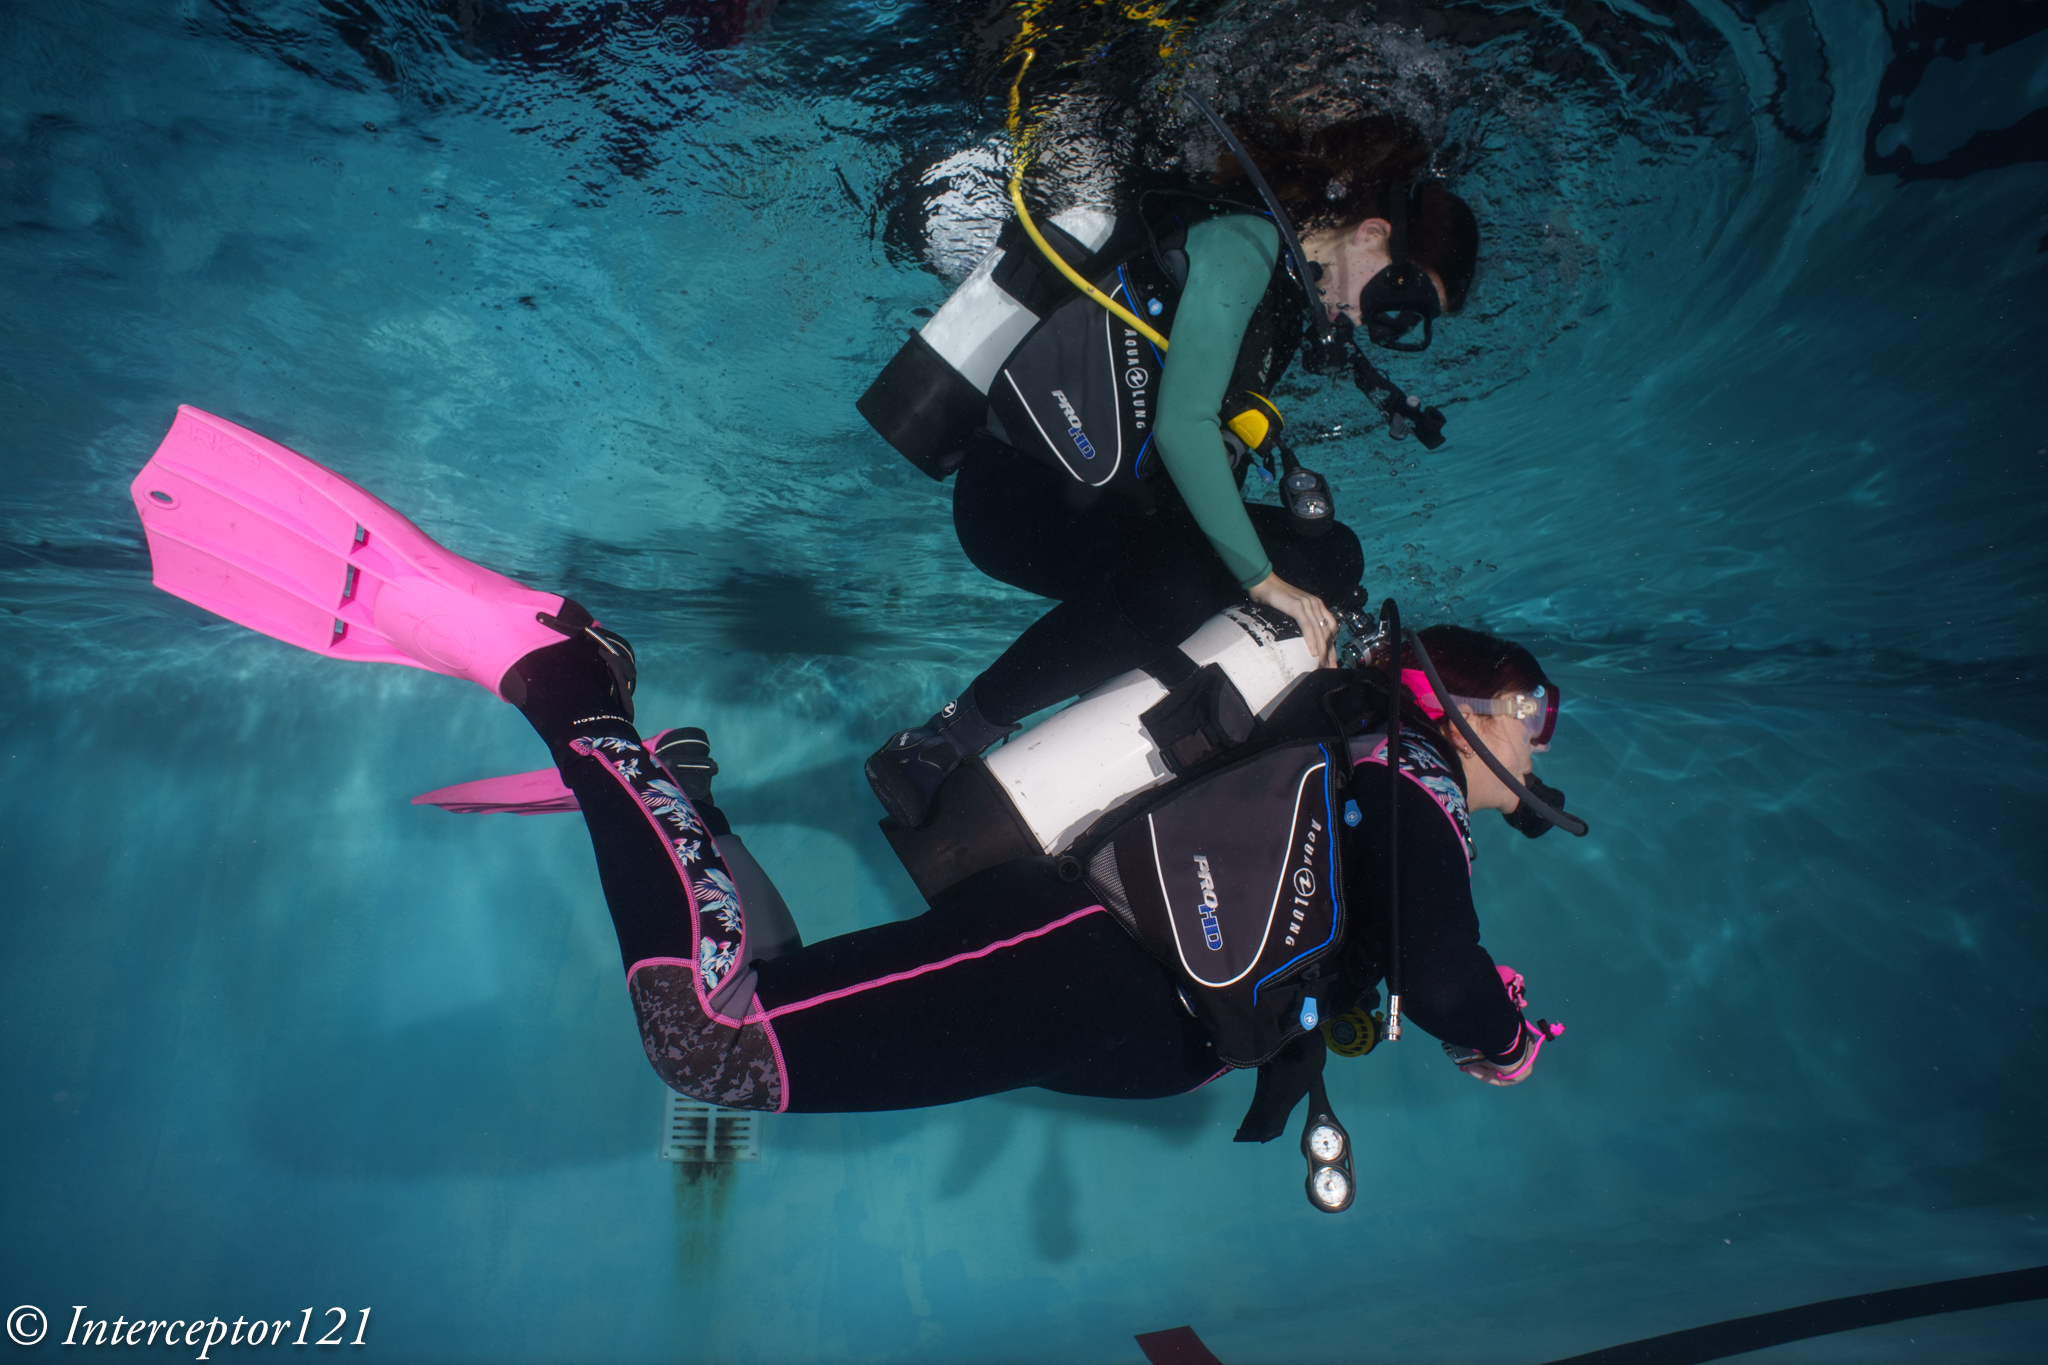
Pool Session

Using this lens on the Sony A1 proved challenging for photography. Nailing the focus using peaking did not feel particularly precise.

Not so sharp focus

Some shots may have been sharp enough on film resolution but with the 50 megapixels of the A1 even the slightest misfocus shows.

Is it in focus?

My productivity was quite low at the beginning as I was trying to get a hand of the lens.

The lens itself is by all means extremely sharp even for my camera.

Grid

I worked out that I could not do what I normally do which is to frame first and focus after as by the time I had nailed the focus things would have moved so I decided to set the focus and move forward or back until I thought I had my target in focus.

The situation started to improve.

DSD student with Instructor David Allen

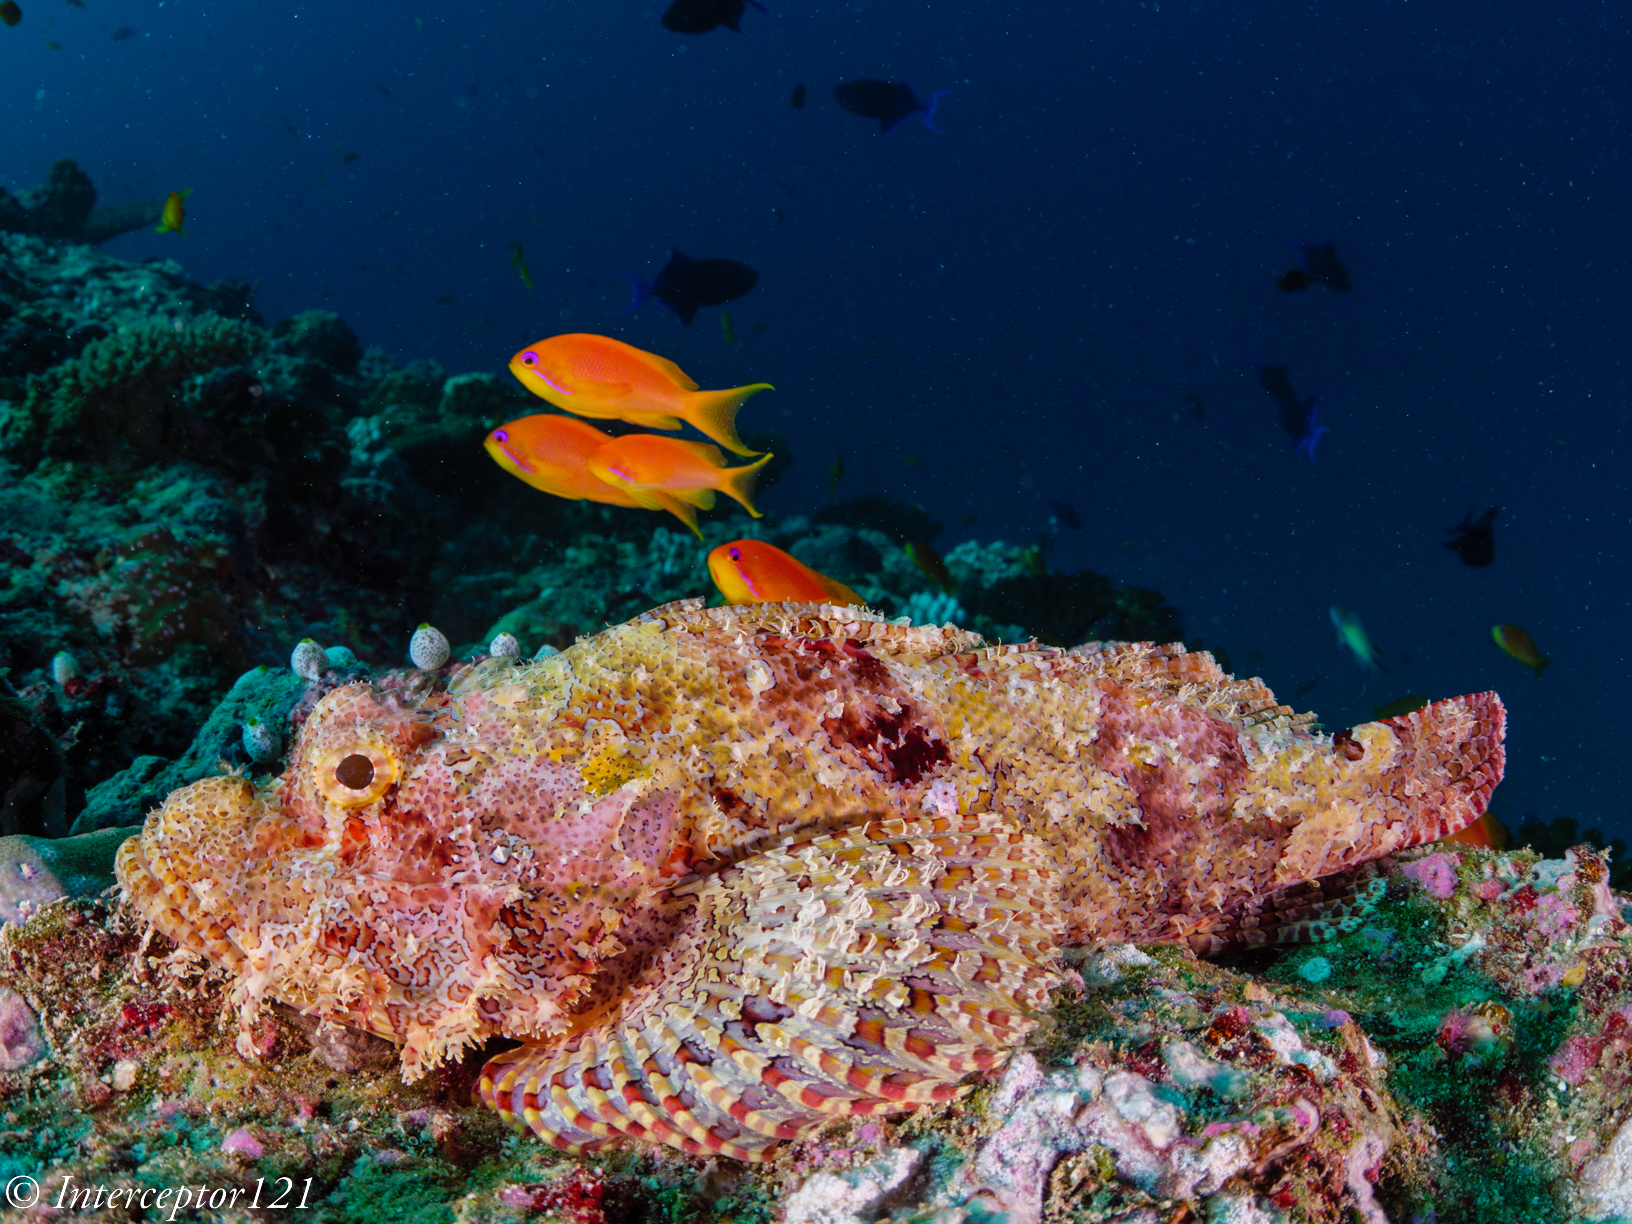
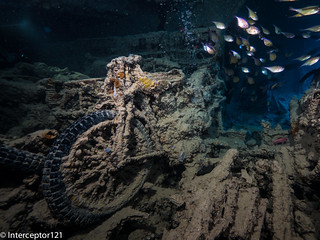
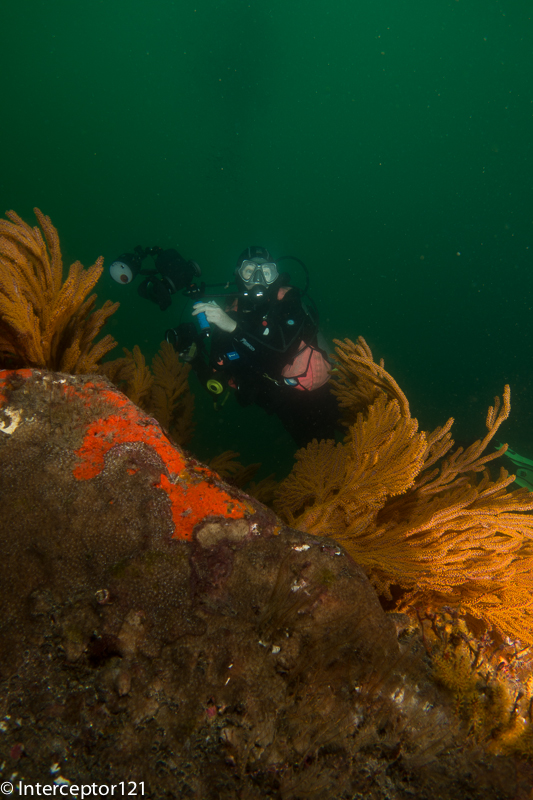
I felt I had worked out how to use the lens so started looking for some subjects. During those sessions you see all sort of stuff as people practice their skills.

Riding

Considerations on the controls

I believe that the average underwater photographer shooting digital will find it very hard to use this lens and will end up shooting at f/8 or smaller apertures so that focussing becomes easier. The lens is especially challenging as it is not particularly wide so you do need strobe power.

DSD Student

I found really hard the lack of display of aperture and focus position. The lens is designed for much smaller Nikonos housing, with my A1 housing being more bulky you need to actually turn and look at the lens to check your settings so many times I did not have the right aperture of focus and it all was pretty laborious. In a video situation for wide angle this lens will work just fine with set and forget at 4K but to nail focus on a high megapixel camera is a hard task.

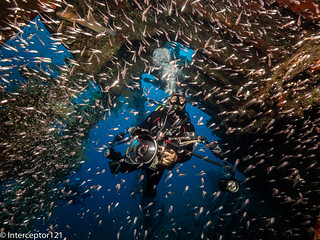
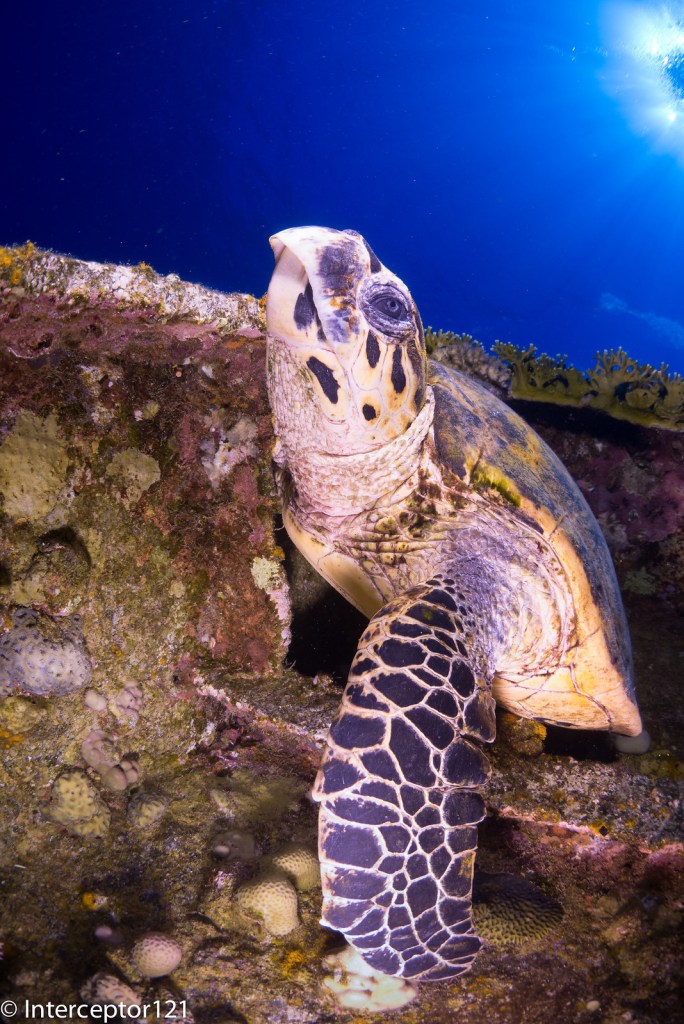
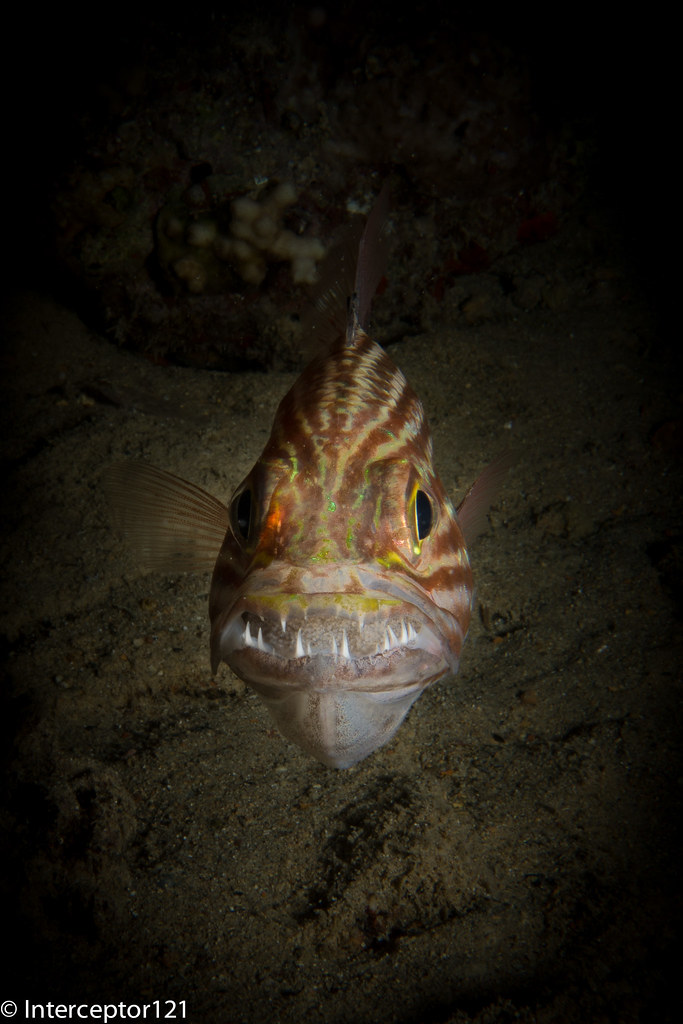
When you do get the focus though the image is outstanding.

Just married

I tried a selfie to check the focus scale and it worked well.

Selfie

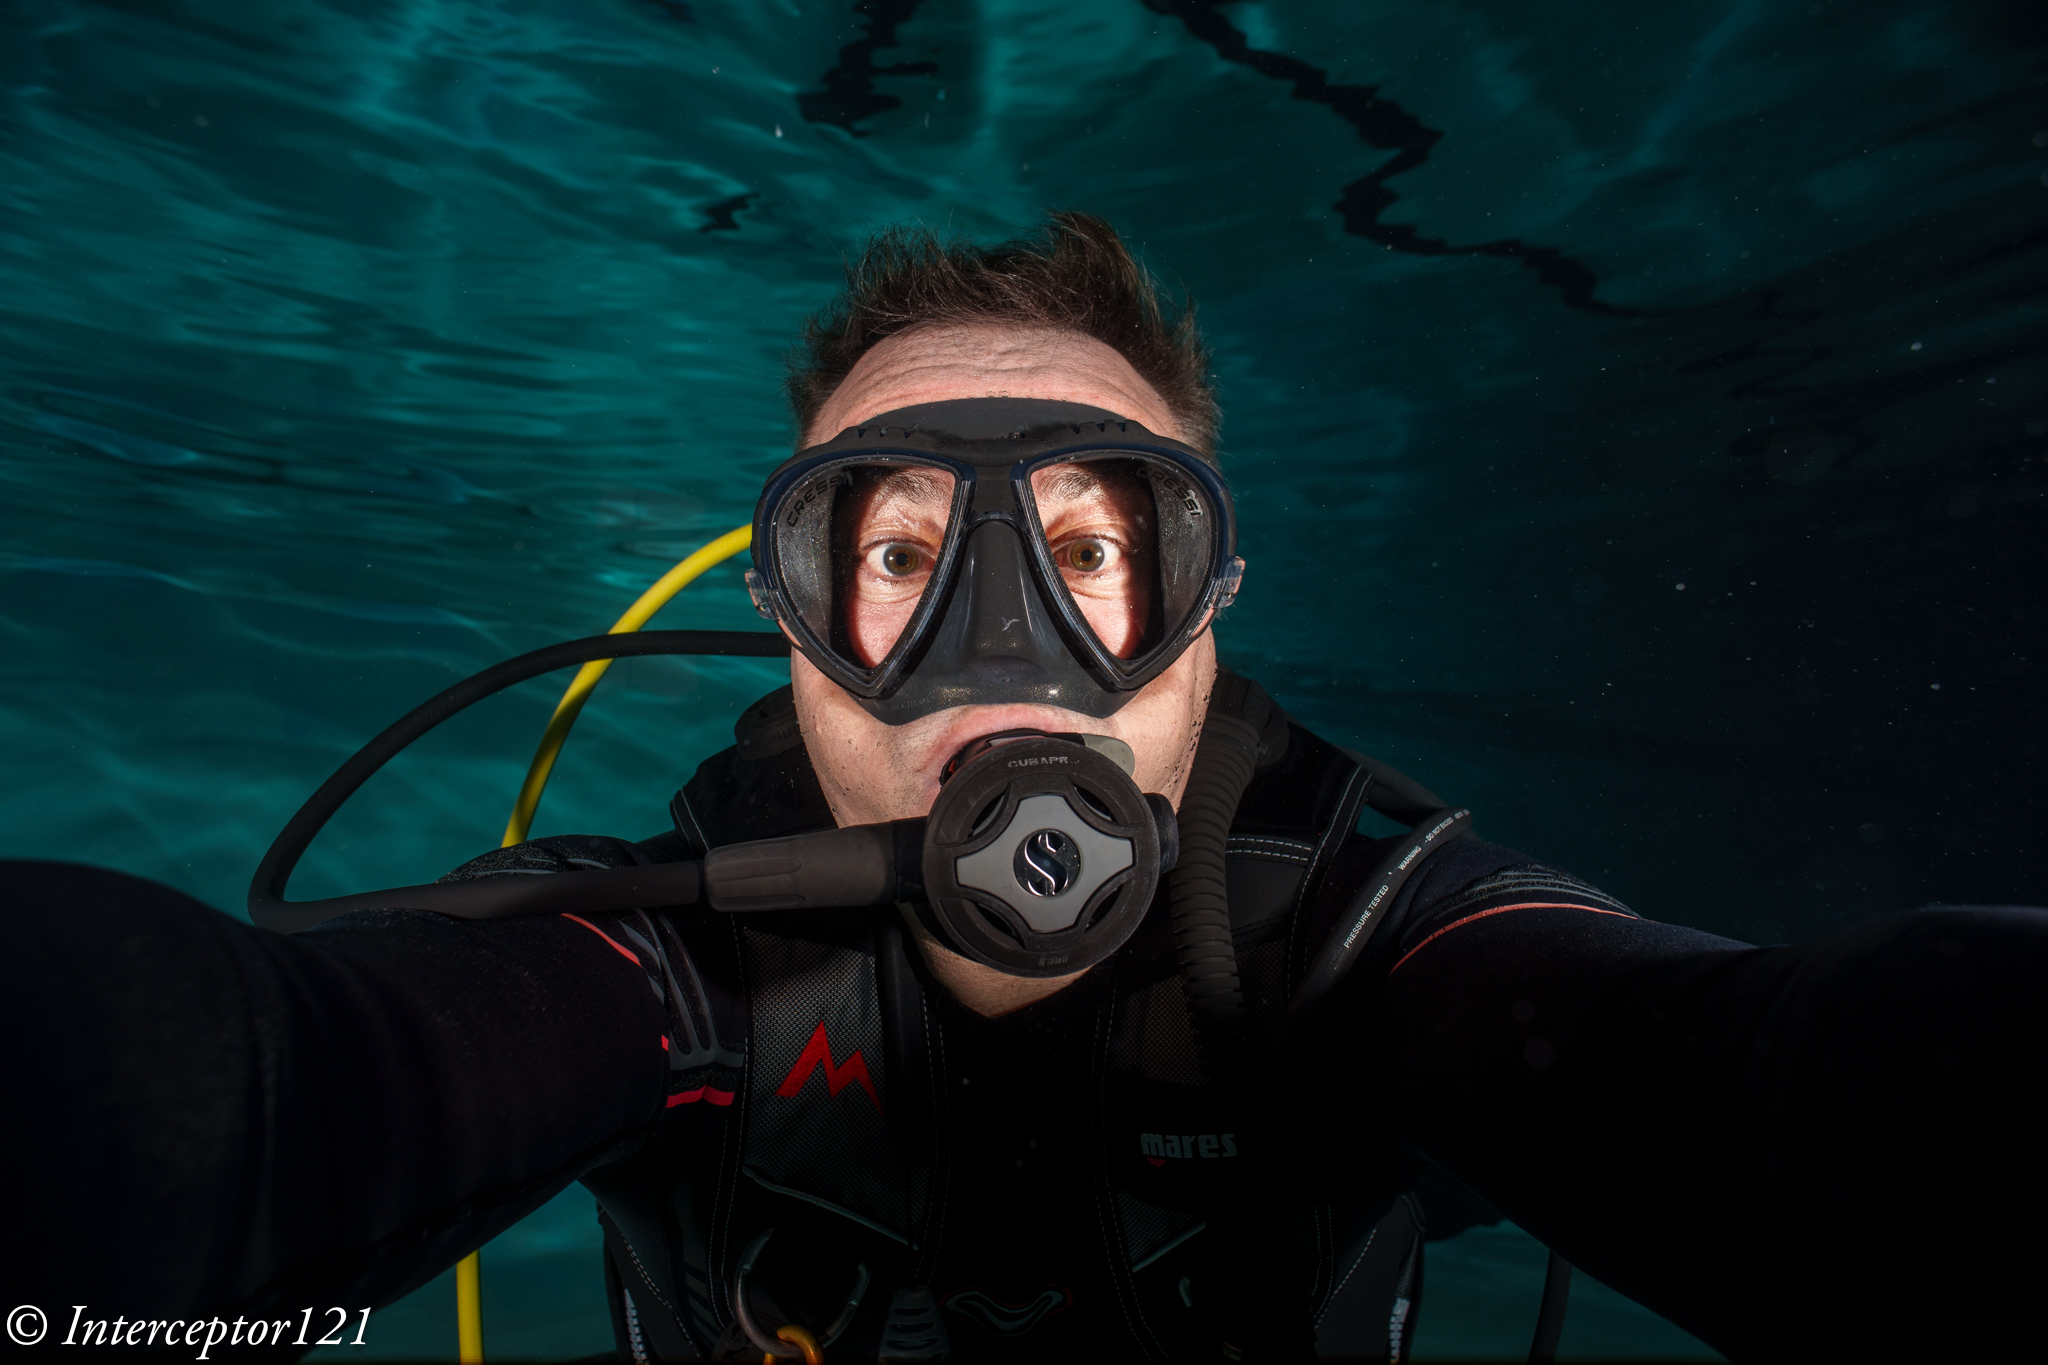
Consider that the most shots were at f/5.6 or f/8.

Dave

As you have no exif data it is impossible to remember what you shot unless you write it down on a slate.

Is it worth it?

The answer depends on your use case and if you already had the lens.

The following use cases fit the Nikkor UW 15 pretty well:

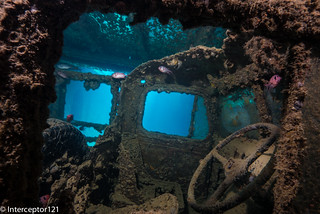
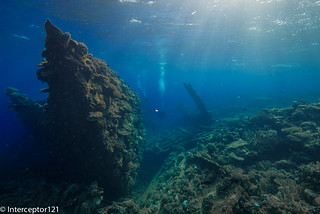
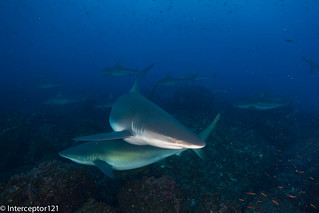
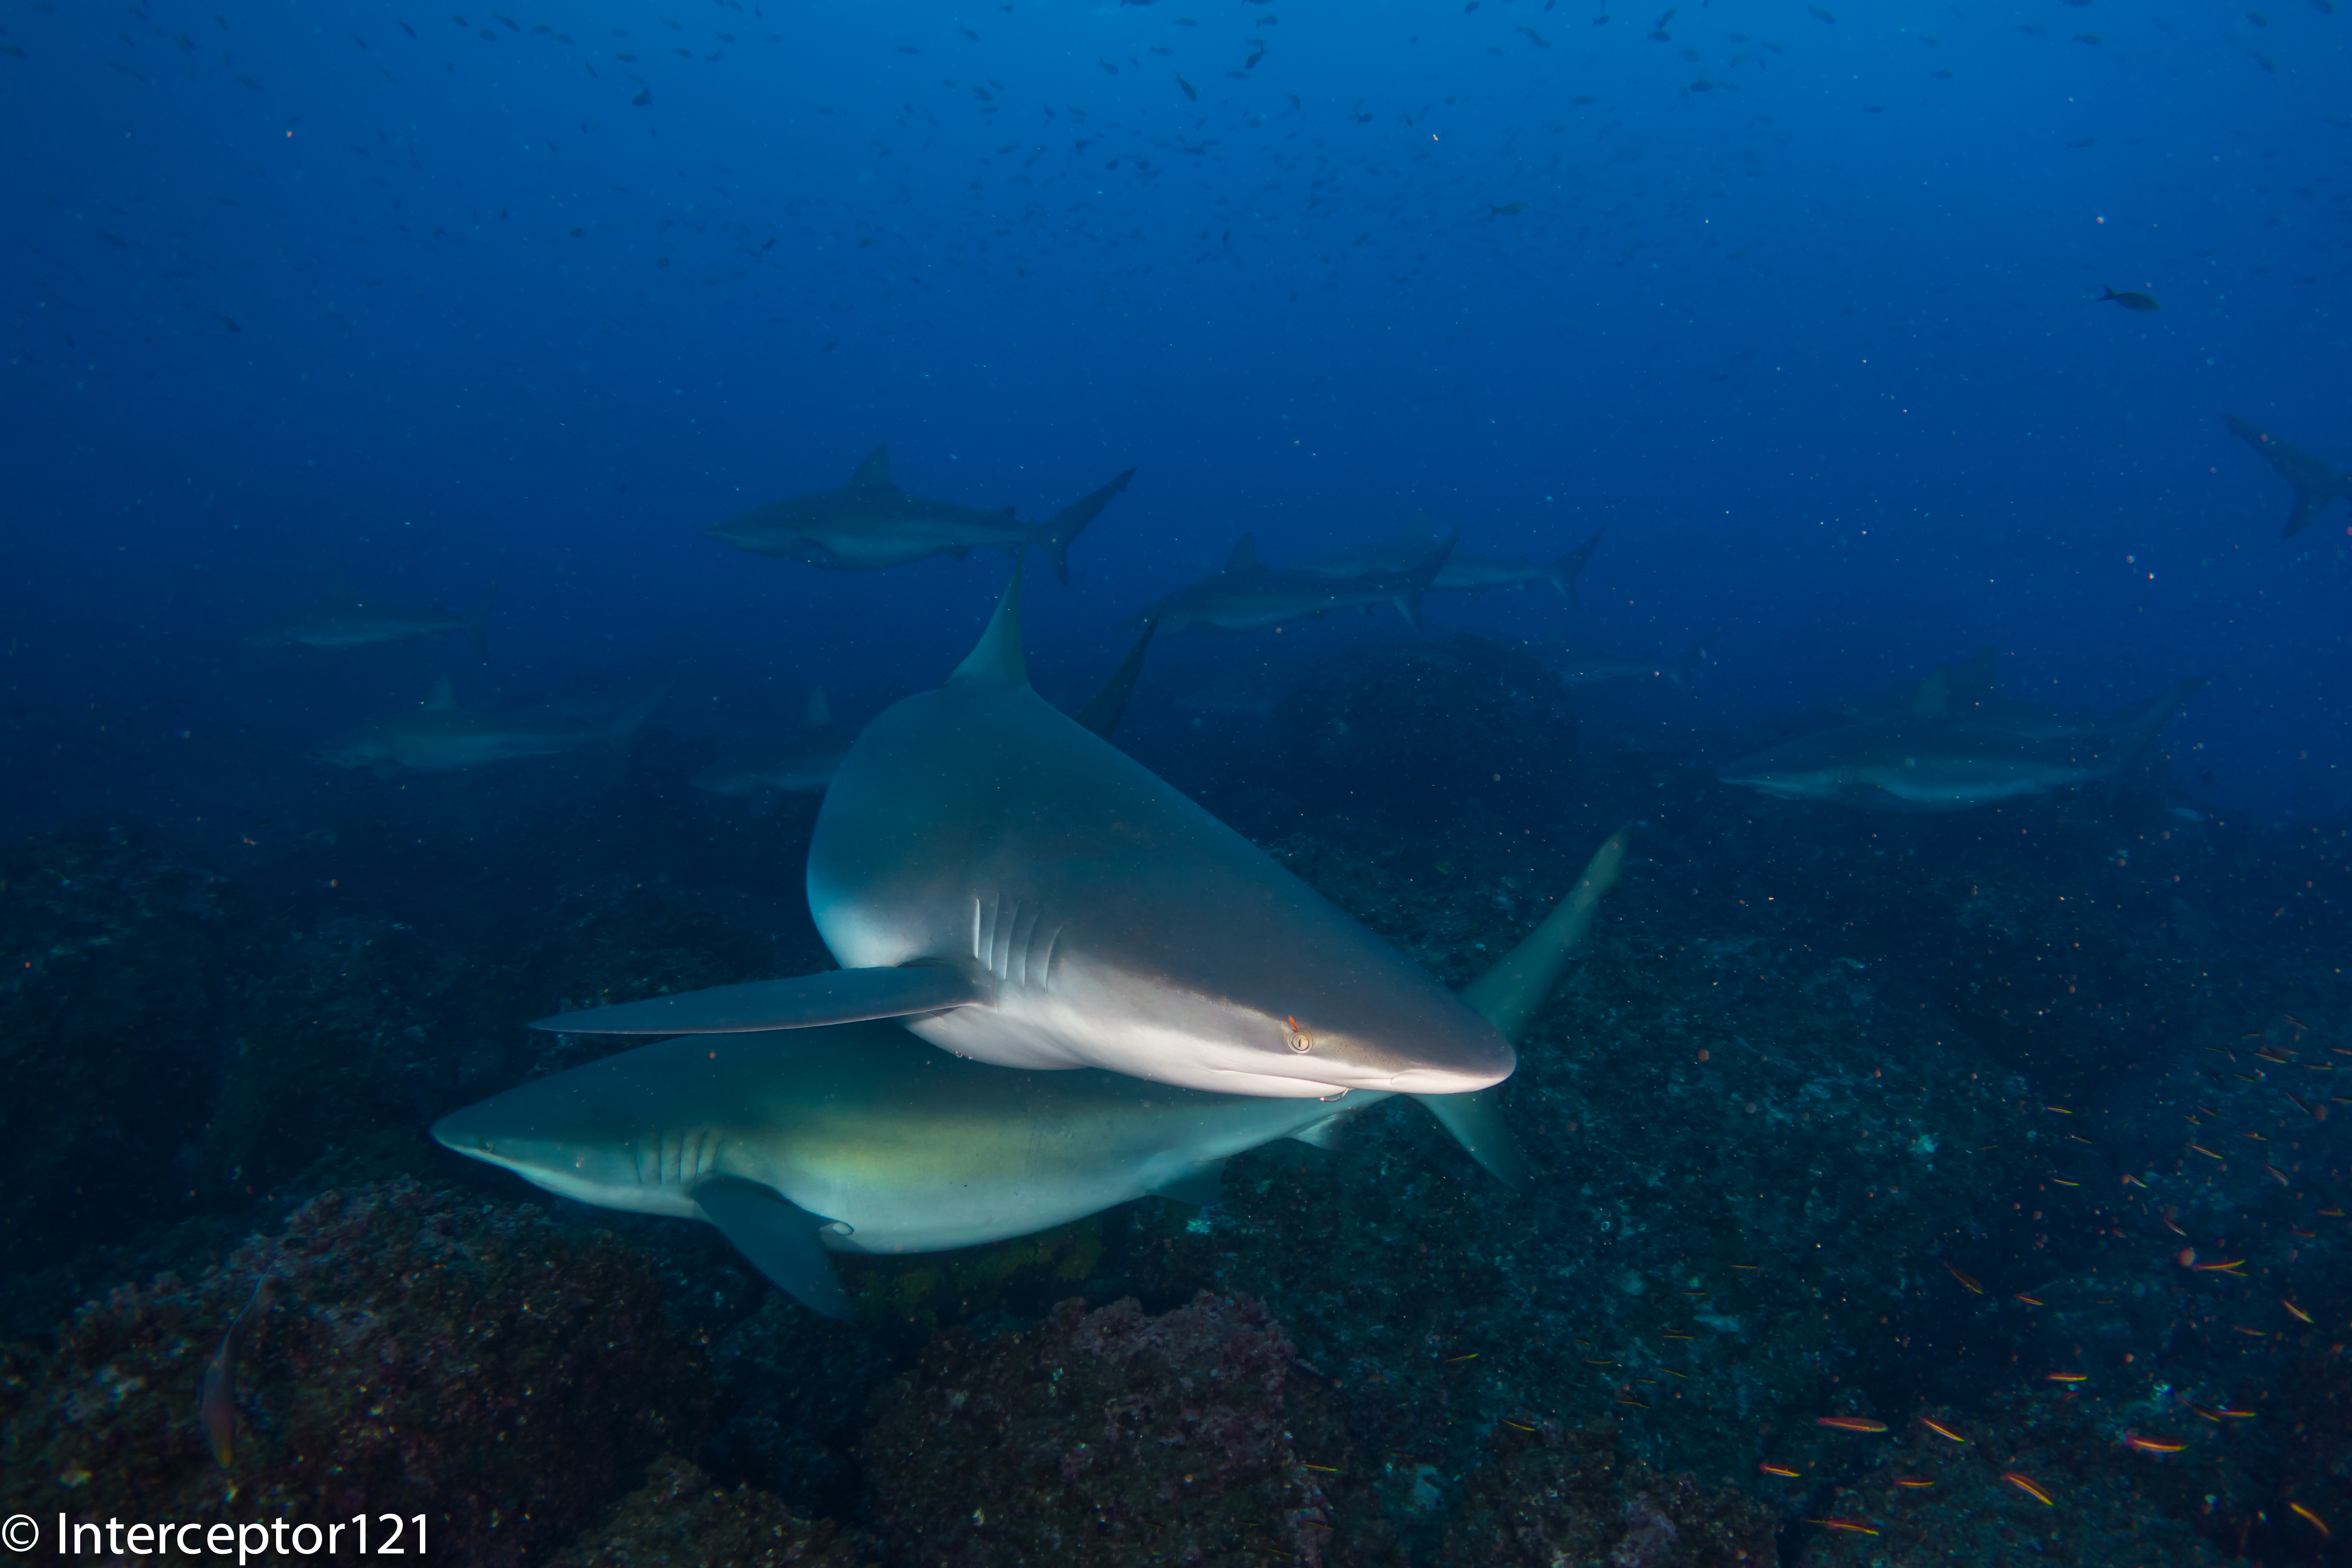
  1. Videos of sharks or pelagic that do not come too close where ambient light is low
  2. Photos at mid range with fairly static scenes where you want straight lines for example fashion models

The lens is definitely not easy to use for dynamic shots, situations where you need to get very close (as it does not focus very close) and where you need to continuosly adjust focus.

In terms of costs in GBP you are looking at:

£474 Nauticam Nikonos Adapter 37202

£300-500 Second hand Nikkor UW15

Obviously if you already have the lens and you are in one of the above use cases I would recommend you get an adapter and give it a go perhaps looking on the second hand market.

If instead you do not have the lens I would say not to bother unless money is no object, you are in the two use cases above and you have sufficent dexterity to control this lens.

Undewater photography has moved forward a great deal thanks to autofocus and although the Nikkor UW 15 is really sharp getting critical focus right is not easy. When it comes to video where you do not normally use autofocus for wide angle this lens is really interesting.

You can shoot at f/5.6 even f/4 subjects in the distance in ambient light with extremely clear and sharp detail at a fraction of the cost of other water contact optics. If you do not own any of the WACP or WWL I would say the UW 15 deserves some considerations but only if your command of depth of field and focus is very good otherwise it is better to pass.

A deep dive into inward lighting

Background

It was Christmas 2018 and my wife Helen hands me over an envelope with an unexpected gift: two hours tuition with Alex Mustard (on land). Alex was travelling and I was busy with work so I only managed to get the session arranged in spring 2019. At that time I had just returned from a Hammerhead expedition in the Bahamas.

Prior to boarding the boat I did two days diving at Blue Heron bridge. I must admit shooting macro is not my favourite discipline but the shots were very disappointing: they all looked flat fish ID style images of various critters on the sea bed.

I showed the images to Alex who gave me a session on inward lighting for macro and we took several shots of coffee mugs or other widgets on his kitchen table. I wish I had had that session before going on that trip, but things never quite work as you would think.

Since then, I have done mostly wide angle with the occasional macro or fish portrait. I have  not really had the chance to give this technique a proper go. Inward lighting for macro requires to position your strobes behind the subject or in line with it and this is sometimes not exactly practical. The same technique, that had been initially introduced by Martin Edge, can be applied, with some changes, to close focus wide angle images.

Inward Lighting Diving in Italy

During this summer I had the opportunity to visit the Sorrento Peninsula again and dive with the friends at Punta Campanella Diving Centre. On day one of diving, the plan was to visit the dive site called Banco di Santa Croce, a group of offshore pinnacles ranging from 12 to 50 meters depth where there is abundance of groupers, rockfish, anthias occasional eagle rays and plenty of gorgonians. Usually, the visibility is terrible in the first meters and then clears up after the thermocline around 15 meters, however, on the day the visibility was pretty bad until around 30 meters. After a set of pretty deep gorgonian shots and seeing that the groupers were very un-cooperative, I went above the thermocline on the shallower pinnacle to see what I could shoot. Visibility was pretty bad with murky green water and a high number of suspended particles and I had an 8-15mm zoom fisheye on my Panasonic GH5M2 (similar to a Tokina lens on APSC). All of a sudden, I see a large “scorfano” (rockfish a variety of scorpion fish) swimming over the reef to change its resting location.

I take the first shot trying to minimise backscatter.

While the backscatter control worked reasonably well, I was faced with another fish ID style fish portrait with some ugly background: an overall anonymous shot, at least for my tastes. At this point I thought of giving inward lighting another go even though I had a zoom fisheye lens and was attempting some kind of fish portrait, with the ambient around the fish looking quite ugly.

I moved the strobes in line with the focal plane of the camera pointing right at the handles and started with the strobes wide, getting closer to the housing until I got the level of light I wanted.

First attempt was quite dark but the image started to look more interesting.

Eventually I got the light I wanted on the fish

now it was the time to make the image more interesting, trying to get some attitude out of this cooperative rockfish.

After a few attempts I managed to get the shot I wanted before the fish decided to swim away in a position no longer suitable for the composition I wanted.

Inward Rockfish

As you can see, I kept quite a low f/number I wanted to make sure only the fish head was sharp and limit the depth of field through the frame. This is a fisheye zoom at 15mm on micro four thirds so f/5.6 still has some depth of field but not too much. In my opinion the position of inward strobes works particularly well with subjects that have depth and are not flat on the focal plane of the camera like in this example. The lighting creates very strong shadows and texture that gives the fish an attitude.

A few days later I am on another dive site shooting wide angle again and I notice a large hermit crab on the seafloor. I try a crossed strobe shot and with my horror I notice many large particles backscattering over the black background.

I change the strobe position for inward lighting wide angle and place myself so I would get some blue water in the background that would reduce the contrast of the particles.

The first repositioning works well: I get strong shadows and light more from one side as I wanted.

Then the hermit decides to go for a wander, first it is repositioned so that I get a more frontal shot.

Then it literally legs it so I get a shot that for me is quite funny, as you can see a group of breams swimming in the other direction against the blue water.

Hermit on a run

This technique has resulted in a few shots that are above average certainly not outstanding but decisively different that bring out the character of both critters in my opinion.

Technical Explanation

I want to try and provide some details and technical explanation of what I think is happening with the strobe positioning and the subject.

This is a standard position for close up frontal shots.

From the diagram you can see that the area where the lens and the strobes beams overlap can generate backscatter. As the strobes are aligned with the lens the phenomena can be really strong, as demonstrated in the first hermit crab shot.

There are two issues with this positioning: first if the subject is sitting on the sea bed and you cannot get water behind you will see the background no matter how fast the shutter speed goes. Moreover If you try to close the aperture you will need to increase strobe power which will result in more backscatter.

This is a position that I use for inward lighting when I use a wide-angle lens.

You can notice a few things. First is that the subject is only hit by the edges of the beam and only from one side of the strobe so the intensity of the light is greatly reduced. This can be a challenge if you have a true fisheye as you will need to have really strong strobes as you place them further away from you to cover a wider area.

The second Is that the light beams are pointed to each other which in turn means strong shadows and a lot of texture on your subject.

Thirdly any suspended particles will reflect away from the incident angle of the lens resulting in attenuation, but of course not elimination, of backscatter effects.

Finally, the area behind the subject is not covered by the strobes at all and lends itself to either dark background or ambient light as in my two examples in this article.

Here are some additional tips on the strobes; settings. I personally use diffusers in this set up otherwise the position of the strobes needs to go forward and this can create backscatter at the edges or you could even see the strobes in the frame. Second you need several attempts to work out the distance vs power vs aperture equation. If you are interested in a dark background you need to increase the shutter speed as far as you can but on the other end control the aperture so you get the visual effect you want, in my case open so that the background is not sharp in focus. If you want to have the blue water background in the shot then you need to reduce the shutter speed and increase the aperture so you get plenty of depth of field to show as much as possible of the environment, this may result in your strobes working at full power just to paint your subject enough to standout. It takes a while to work out how to proceed and it is better to decide at the outset how you want to compose the shot so that you do not spend too much time doing trial and error as your subject may decide to leave the scene and interrupt the cooperation.

Another scorpionfsh this time from the Maldives

Post processing

I believe image editing is almost as important as making an image so I have included some post processing tips trying not to get too technical. To simplify, I will only say that the camera captures a lot more information than your image preview or your raw converter show when you import your images. Some of the inward lighting shots may look initially really dark, especially those at fast shutter speed. Do not despair if your camera has good ability to preserve colours in the shadows you still have an outstanding image potentially sitting there, so unless you did not get your focus right do not delete immediately images that appear underexposed.

The second suggestion is to avoid pressing the Auto button on your photo editing program because that will balance the exposure across the entire scene and take away any character from your image.

Generally inward images like the ones I have shot look fairly dark straight out of camera and you do not want to compensate exposure. My recommendation is to use a mask on the subject and adjust exposure very slightly and only if you got it very wrong. Instead pull up the whites and the highlights to make your subject stand out. I avoid any change of clarity, sharpening etc: the images have minimal, but selective, processing.

Another crucial consideration is that because you are using only the very edge of your strobe beams, the colour rendering index and warmth of your strobes may end up far away from normal conditions and using the white balance picker may result in strange effect as the lighting is not even across the frame. I recommend you increase the colour temperature and tint until you get something that you are happy with instead of going for recipes.

At the very end see if you want to clone out debris or some residual backscatter, this technique needs you to get very close to the subject and due to the strobe position backscatter on the focus point is minimised however it could still happen on the sides of the frame.

For what concerns cropping in a specific aspect ratio there is no hard and fast rule: I tend to shoot those close ups at 1:1 lately if the subject is somehow rounded but can go 16:9 if it is a fish sitting sideways on the seabed. Generally, I decide on the crop very early in the process but the good thing is that, as you will just make minor adjustment with masks on the subject, cropping will not change anything.

Closing notes

I have used a Panasonic GH5M2 with a Canon 8-15mm and Metabones smart adapter. My rig set up is described on this link. An APSC camera with a Tokina 10-17mm or a camera with a wet optics WWL-1 or similar or even WACP is adequate for shots like those described in this article. A full fisheye will have a much wider field of view and your subject may look very small or you may not be able to illuminate it correctly, a WAM (wide angle macro) solution may be better but that is an entirely different technique. I use a set of Sea and Sea YS-D2 despite the reputation for low reliability they have worked fine for everything I do until now. I am also convinced that shots like those described in this article can be taken with any camera type as long as you know how to and have adequate lenses and field craft, so if you have read up to now I recommend you give it a go and try and apply my suggestions adjusting the to your taste.

Panasonic GH5 Cage Rigs

If you have a GH5 (Mark I, II or S) you are probably not just doing underwater video but also taking scenes on land. In fact perhaps you are reading this blog and you do not even use your camera underwater.

Either way you know by now that shooting video just with your camera handheld is not a terribly good idea and the tools required are different from photography where once you have a tripod a remote shutter and a bunch of filters are practically set.

Video requires quite a bit of hardware. I have gone through this process and even tried to adapt some of my underwater hardware but it was really bulky and at the end you are better off with proper gear so I use Smallrig.

Smallrig is a Chinese company that makes tons of various bits for your camera for a variety of situations. The first item you need is a cage and they have just released a new updated version for the GH5 cameras.

Clicking the image above will take you to Amazon UK where you can check details of the item.

The cage is the starting point and you can put your camera strap the weight of 190 grams does not add terribly to the camera and in any case if you have a GH5 you are used to carry some more weight. The cage lives permanently on my GH5 unless I put it in the underwater housing.

I am now going to go through a series of set up that I use with some other components as well but first some words of warning.

Smallrig suggests to use a Nato handle on the left hand side however this blocks the HDMI side port from opening. In addition the arri locating pins are too high and if you use a side handle in arri format it will hang and not be level with the cage.

I wrote Smallrig to tell them and they accepted the feedback the reality is that they do not test designs with camera they run 3D simulations and they do not go and open all the ports, plugs etc. So the only handles that actually work with this cage and do not impede any functionality are in this article.

Monopod/Tripod Rig for Wildlife shooting

The basic rig for monopod and handheld work (this means you hold the camera steady and you do not move) has a top handle and a side handle plus a small microphone and if required an LCD shade.

Cage plus top and side handle microphone and LCD shader
Front view of the Handheld set up

I have gone through a series of handles for this cage and I have settled for the following items:

We are looking at £180 for all this hardware this stuff is not cheap however I just can’t emphasize how more ergonomic and effective this is compared to holding the camera directly.

I have this rig used it for my deer film project.

The Deer Watcher was shot with this rig on a monopod

Handheld Rig

There are situations where setting up a gimbal is too much and you want to take simple footage handheld just using the camera IBIS. This works very well with a standard zoom lens like the Panasonic DG Leica 12-60mm or the Lumix 12-60mm.

In those situations is better to have two handles and the set up needs to be as light as possible.

Handheld Rig for walking shots

You will notice that the handles are smaller and they are also lighter. If you walk with your camera you are typically using the LCD and with two handles you are able to be much more steady if you were just gripping the camera.

Handheld Rig rear view

You can also use the EVF instead of the LCD if you prefer to have three points of contact with the camera.

You will need two Mini Side Handles 2916.

Follow Focus Video Rig

In those situation where you are in a studio or controlled environment you can use manual focus for pulling and usually you also have a monitor to have precise exposure. I tend to use this on a fluid video head and sturdy tripod for indoor shots.

Focus Pulling Rig

Here I am shooting the mighty PanaLeica 10-25mm and I have my trusted Swit CM-55c field monitor.

Focus pulling rear view

I have an atomos ninja however since the GH5M2 has 60 fps in camera at 10 bits I only use it in bright outdoor scenes and the SWIT is just better in terms of tools and lighter.

Side view

With the new linear focus option for manual focus you can have a complete 360 degree turn of the wheel for manual focus if you so wish or shorter runs if preferred. I use 300 degrees.

You will need the Mini Follow Focus 3010 and then as monitor support you can go for a Universal Magic Arm with Small Ballhead – 2157 if your monitor is light. If you have a recorder you will need a Swivel and Tilt Monitor Adjustable Mount with Cold Shoe Mount – 2905 or if you prefer a similar item with Nato or screw mount. I find the cold shoe more versatile.

Wrap Up

It can be a bit daunting to search for the right items that do the job when you want to use your cage I hope this article will help you making the right choices and save time without having to do the trial error and return process I have done in the last year!

Using Rectilinear Wide Lenses Underwater

I was checking the technical details of Alex Mustard Underwater Photography Master Class and the majority of wide angle pictures are taken with a fisheye lens. In the section about shooting sharks Alex says that he prefers to shoot sharks with a fisheye otherwise they look ‘skinny’.

If you look online on underwater video forums you frequently see comments on problems with wide angle lenses connected with the use of a rectilinear wide angle lens in a dome.

The two most common complaints are soft corners and distortion.

Soft corners are due to a combination of lens optical issues and dome port optics. In short any lens is to some extent curved and therefore if you shoot a flat surface the image may be sharp in the centre and softer as you move to the corners. Issues with field of curvature are corrected stopping down the lens. The issue with field of curvature happens everywhere not just underwater.

Right now there are four wide angle lens that can be housed for a micro four third camera:

Olympus 9-18mm

This lens has a nice working range that allows to capture 100 degrees diagonal at widest setting and still has a 35mm equivalent at the tele end. This is a pretty little lens at $699 is the most affordable option that can be put in a housing. You will need a wide angle port and the zoom gear. The whole combination for your Nauticam housing comes at $1,399. This lens can also be combined with a glass dome but this will make the whole combination much more expensive and you may want to think about getting a better lens instead.

Olympus 7-14mm

This is an outstanding lens especially on land due to the fast f/2.8 aperture. It is expensive at $1,299.99 and very heavy and bulky. The lens does not fit through the N85 port opening and requires a port adapter this gives the extra benefit of a focus know but with such a wide lens is not really useful due to high depth of field. You will need a 180mm glass dome and the zoom gear for the lens to complete the set up ending at a whopping $3159.99.

Panasonic 7-14mm

I have owned this lens and I have to say that at $799 is the right compromise between wide field of view and price. Furthermore once you get the zoom gear you have the option of a cost effective acrylic dome that will give you a very wide set up for $1589.99. There are reports of poor performance with this lens and it is true that is not as sharp in corners but the results are perfectly acceptable if you stop at f/8 in close shots.

Steering Wheel Truck
Panasonic 7-14mm with acrylic dome 9mm f/8
Exploring the Chrisoula
Panasonic 7-14mm with acrylic dome 7mm f/5

This lens is prone to reflections and flare however once you add the N120 port adapter and the 180mm glass dome this will get you to $2819 at that point you may want to consider the Olympus combination instead.

Panasonic Leica 8-18mm

This is my favourite lens is sharp does not suffer from field of curvature issues and has a very useful zoom range 16-35mm in 35mm equivalent. The zoom gear and the 7″ acrylic dome will take you to 1889.99 that is an excellent price point. The lens is not prone to reflection or flare and as the 7″ dome has the same curvature radius than the 180mm dome it will produce very similar results.

Encircled
Panasonic 8-18mm in 7 acrylic dome f/8
Sunset Neat
Panasonic 8-18mm at 8mm f/10

The significant size of the acrylic port and the fact it floats make it ideal for split shots and this is the lens that gives me the best results.

This lens can also take port adapter that allows you to use the 180mm glass dome. This adds up to $2919.99 if you experience bad reflections and shoot frequently in the sun it may be worth it but I have not had any issue so far with this lens probably because of its nano coating.

I have found the 7mm focal length too problematic for dome ports and the amount of perspective distortion excessive generally it would be preferred to shoot at 9mm and narrower however this maybe insufficient for wreck interiors if you want a rectilinear look.

Perspective Distortion

One of the regular complaints of video shooters especially in wrecks or caves is that the edges look horrible and distorted and that there is an issue with the corners pulling. This is in fact not an issue but a problem with perspective as you shoot very wide angle. The following test shots will illustrate that the issue happens on land and has nothing to do with dome ports.

Shot at f/2.8 with Panasonic 8-18mm at 8mm shows sharp corners
Image with objects in edges at 8mm

As we can see the football looks like an oval and the chair is pulled. This is due to a perspective issue and is not a lens problem. When you shoot underwater video the objects on the edges of the frame change shape creating this pull effect that most people dislike.

Same scene at 9mm

At 9mm the amount of perspective distortion is reduced and this is the reason why 18mm on 35mm equivalent is one of the favourite focal length for rectilinear video and the maximum angle that should be used in small spaces to avoid the pulling edges.

One of the reason why a lens like the Nauticam WWL-1 is preferred for video is because the corners look sharp but is that really true?

Not really let’s apply some barrel distortion to simulate the WWL-1 to the image that looked badly distorted.

Barrel distortion applied -60 8mm

Now the football looks circular as we have applied -60 barrel distortion, obviously the rest of the image is now bent but this seems not to be of a concern to most people!

Barrel distortion -30 9mm

It needs much less correction to bring the 9mm shot into shape and for sure between the 8mm and 9mm the 9mm is the dimension that produces the most acceptable results.

It has to be said that in video with 16:9 aspect ratio most of the issue will be cropped away at the edges but the distortion in the middle of the frame will remain. For the same reason the 9mm image will appear practically rectilinear with no issues

16:9 crop still showing the edge ‘pulling’ at 8mm

16:9 crop looks straight at 9mm

I hope this post was useful there are four options for micro four thirds shooters to use rectilinear lenses I have settled for the Panasonic 8-18mm as in most cases it is still possible to control the perspective issue, I found this impossible at 7mm.

Bike on Hold 2
Bike in hold 2 on SS Thistlegorm Panasonic 8-18 at 8mm
Bubbling Bike
Shot at 7mm showing the front tyre pulling outside the frame

Obviously if you shoot in the blue this problem will not be visible however rectilinear lenses are popular with wreck shooters and I think this posts gives an idea of the challenges at play.

Finally I would discourage the use of the 7-8mm focal length range for video to those that want to have a rectilinear look.

From this post I started supporting Bluewater Photo in US for my links because it still provides multi brand and choice and because I learnt a lot from Scott Gietler Underwater photography guide back in the days where there was no internet resource to learn from.

CREATIVE strobe filters for wide angle

When people think about creating lighting technique for underwater photography a few things come to mind and usually it is about tools. Snoots for example have become very popular and help the underwater photographer to increase separation of the subject from the background. I have seen some people jumping in the water with a black slate to create an artificial black background, clearly is much easier to do that for macro as everything is at end and typically the subjects are not fast moving or the diver is not fast moving.

Then of course there is strobe positioning, classic, inward, crossed, rabbit ears, backlighting etcetera here goes a long list of options.

At the end however some pictures just seem to “pop” more than others, and this usually has to do with the colours and the contrast and with the blue.

It is not a coincidence that the term Mustard Blue is what has made some shots from Alex Mustard re-known and if you read his underwater photography masterclass there is a whole section ‘The sea is blue’ where Dr. Mustard goes on about the importance of exposure and background blue.

His suggestions are to:

  1. Dial in an underexposure (for the water) around -2/3 to -1 1/3 Ev
  2. Using warm strobes

It is worth stressing out that the primary reason why the camera gets fooled by the conditions underwater is because colours gets absorbed and blue lights gets scattered instead creating that milky glare at times when the water has lots of suspended particles.

If shoot an auto mode with exposure compensation at zero your pictures will for most part come out washed out and lacking contrast underwater and this is one the primary reasons photographer like Dr Mustard do not follow the expose to the right rules.

Underexposure for the water is obtained by keeping the aperture and ISO constant as they are aligned to the strobes and changing the shutter speed accordingly. Obviously if you are shooting video your shutter speed is most likely fixed so you need to find alternative ways to get your blue as you want it but generally you would still underexpose probably not as much.

With regards to warm strobes this is a fairly subtle point linked to the camera auto white balance mechanism.

Most flash strobes have colour temperatures between 5500 and 6500 K and therefore are not at all particularly warm.

Inon Z240 Standard and Warm diffuser

Inon has developed warming diffusers for their Z240 range and I believe also for the most recent Z330 range. They are available in 4600K and 4900K temperature. I definitely recommend the 4600K version over the 4900K as it has a stronger effect.

So how does a warm strobe work in order to get a richer blue?

Table of light sources – Olympus education

When we shoot with strobes the camera is set to auto white balance, and will average for most the subject we hit with our strobes to calculate the average colour temperature and tint.

The camera auto white balance operates between 2500K and 7500K typically so a warm strobe is likely to set the colour to 4600K instead of the typical 5500K the ‘extra’ 900K do not really do anything to the subject that will anyway we white balance but give an extra kick to the blue background. Underwater colour temperature is usually higher than 9000K and easily reaches 14000K (purple tone in the water) at depth. So the warm strobes are particularly effective in shallower and clearer water as they push the blue to a darker tint like in this example taken around 12 meters.

f/8 1/125 ISO 125

You can see how deep is the blue other example taken on the Barge at less than 10 meters.

Portrait in deep blue…

So what happens if you don’t have a warm strobe or if there aren’t warm diffusers for the strobe you have, or maybe you don’t want to spend the money for them?

Amazon comes to the rescue

If your strobe is around 5250 with diffusers (like Sea and Sea YS-D2 or Inon S2000/Z240/D200) get a 1/8 CTO

Rosco Cinegel sun 1/8 CTO, 20×24″ Color Correction Lighting Filter

You can find this filter also under Lee on colour 231, with a little amount you can get a half sheet that is enough for a few strobes.

This filter has a negligible -0.3 Ev light loss and will bring your strobe down to around 4600K .

If you have a fairly cool strobe you need a 1/4 CTO

Rosco un 1/4 CTO 20X24 Amber – Rosco RS340911

If you have something different you can try a mired shift calculator here

http://www.leefilters.com/lighting/mired-shift-calculator.html

Be careful not to exceed with this technique or subject will turn too warm.

An alternative and perhaps counterintuitive approach is to use cooling filters.

In this case the strobe light will become colder to emulate the water colour and the camera will need to be set to custom white balance.

In almost all cameras except Olympus that reach 14000K colour temperatures are limited to 10000K however they can be further enhanced to reach 11000K if you have an adjustment panel like the Panasonic or Sony cameras. Pushing the adjustment to the A gives extra 1K. This technique with a bare lens has however a limitation as when the custom white balance caps the colours go completely off.

In order to see what can the colour temperature setting do we can compare a normal grey card shot with one where the colour temp is 11000K and magenta is pushed to the max.

Grey card bare lens
Maxed out Custom White balance on Panasonic GH5

In order to cool down the strobes you need a cyan filter, the custom white balance can correct up to 2 stops Cyan but no more. You can trim a sheet of Rosco 4360 to fit into your diffuser as below. This takes around 1 stop Ev off the strobe.

Sea and Sea diffuser with a Cyan 60 gel

It important to stress that the predominant colour in blue and blue water is cyan not blue and this is what gives the washed out scattering. We want to keep the deep blues and get rid of light blue and green which ultimately is cyan the colour of water.

So the strobe will emulate the water and the camera custom white balance will set the colour restoring what was lost and giving us a full correct spectrum. This however only works until the water colour temperature gets to 11000K and this is not as deep as you may think it could be a low as 9-10 meters. A cyan 60 filter is approximately 9500K. You can see the colour in the image below.

Cyan 2 Stop results in Colour Temperature around 9500K

In this technique the strobe is not used to give colour but to eliminate shadows the custom white balance is going to give a deep colour that penetrates the whole frame so any subject in the distance will be colourful as well.

The benefit of this technique is that you may use wider apertures and even slower shutter speeds like in this 1/60 example here.

batfish formation 1/60 f/5.6 ISO 200

You can clearly see the orange colours of the anthias far behind in the frame.

The ultimate stretch of this technique is to combine a filter like the magic filter this can be used with both a Cyan 2 stops and also a Cyan 3 stops in deeper water. This technique is taxing on exposure as your strobes are half power and your exposure has 1 2/3 stops less however this is easily recovered as you tend to shoot at slower shutter speeds of 1/30 to 1/60 instead of 1/125 to 1/200 because the filter will give you the deeper blues.

Magic filters on WB slate

The magic filter adds around 3000K to you camera custom white balance ability reaching the 14000K where the water starts turning purple blue. To that regards due to the amount of red I do not recommend going to deep with the magic and keep it to a max of 13 meters as recommended on their website.

The magic filter is almost a perfect match for the Cyan 60 filter if you overlap them over the lens you get almost a neutral grey card the temperature is only 150K off while the tint is around 5 notches toward green in Lightroom.

Magic Filter + Cyan 60 results in almost neutral grey card

This cave shot I believe gives an idea and is taken with filter on lens and strobes.

Magic filter plus Cyan 60

I have also tried the magic filter with Cyan 90 however there are some side effect to consider. Firstly you get Cyan cast on the image at shallower depths. Second the magic filter has a tendency to turn purple below a certain depth so I recommend to use the magic with the Cyan 60 as you are certain that the foreground subject and the strobe filter will give you a neutral colour. If you are in deeper water and the temperature is above 10000K this will only result in a deeper blue and a warmer light on the subject that once RAW corrected will look just fine.

Conclusion

In this post I have tried to give you some tips on how to use gels to give deeper blue or richer colours to your wide angle. I would recommend to start with warming diffusers and then move to cyan filters and finally to magic filter and cyan filter in combination.

I will be demonstrating extensively this techniques during my 2020 Red Sea Liveaboard

A final word for video shooters. I am not aware of any add on warming diffusers for video lights and generally I have not seen LED warmer than 5000K therefore unless you shoot at 60p 1/125 it will be very hard to get deep blue at shallow depths without a lens filter.

See my other post for video specific tips.

Full size images are available on my flickr pages all images here are reduced to 1600 pixels for storage purposes.

Getting the best underwater colours for your 4K Sony RX100 Mark IV

It is not a mystery that even the new Mark IV version has issues with custom white balance.

The ergonomics have not changed and you need to go into photo mode to set custom white balance but generally underwater results are poor. Using filters is therefore a necessity also on the new 4K version.

RX100 Mark IV Video Behavior

The RX100 offers now a 4K 100 mbps mode and can use picture profiles.

I have used a modified version of PP6 that use the cine2 gamma curve, I have however changed the colour to the Pro mode and changed a number of other settings in my last video in Puerto Galera.

The water was green and murky but this gives you an idea of what you can get.

Filter Options and Wide Angle

Although the Nauticam WWL-1 is the best lens for the RX100 it does not take filters and therefore is not adequate for video.

In this review clip you can see the options available on the market.

In terms of wide angle you have two options for 4K:

  1. Inon UWL-H100
  2. Inon UWL-100

Both lenses work fine in 4K however the older UWL-100 achromat does vignette in photo mode.

The UWL-H100 offers a very wide field of view also in HD mode with no vignette and accepts the mangrove/deeproof filter.

This filters is loaded with magenta so I suggest adjusting the tint in the auto white balance mode to +2 green.

The UWL-100 works fine in 4K and is wider than the UWL-H100 however has only the M67 mount. If you have one of those lenses you can use the Ikelite 6442 filter. This filter required you to remove the rubber ring on the lens and does work quite well except has a yellow cast to it you can reduce by changing the tint to +2 blue and increasing also magenta to +1.

For flexibility purposes probably the UWL-H100 is better as it takes the bayonet but the UWL-100 is really wide and has a little less fringing. Some people do like the UR/PRO filters better.

I hope you find this post useful and good luck with getting the best colours from your Sony RX100 Mark IV

Underwater Photography Workshops – My Tips

I thought the Red Sea workshop with Alex Mustard was brilliant to I thought of writing down my notes and sharing them with you.

This final post is a general one and has my lesson learned from attending the workshop, those that follow are generic tips that I think would be beneficial to anyone wanting to attend a similar experience.

Before the Workshop

The experience actually starts before you even attend the sessions key points for me include:

  • Ask questions about the workshop and how it works
  • Know your equipment
  • Take all the gear you have
  • Be fit and self reliant
  • Set your self objectives

I did not really ask many questions before going as Dr Mustard sent a very comprehensive document however this is not standard and it is better to ask in advance about the conditions, the dives, the type of training and generally how the workshops is organized. Some have talks, other have one to one, other are just dive trips where you ask when you need. Not all types fit everyone so better to make sure you go to one that matches your need.

Sadly even this time like in every trip I have come across people using their equipment or part of their equipment for the first time. The end results is wasted dives and opportunities, I cannot stress enough that testing your rig in a pool before going allows you to familiarize with it and make any corrections you need.

Pool Conditions
Pool Practice

Also take all the possible lens, ports, parts that may be useful. Once you are there you don’t want to have regrets about something you have left home. In my case all was there but I did not know about remote strobes otherwise I would have got myself a trigger as I have 2 Z240s.

Transformer Tray
In case of doubt exceed with equipment

In most of those workshops buddy system does not really apply so make sure you are self reliant and fit as the conditions allow to avoid embarrassing or even dangerous incidents. Once there dive within your comfort limit and if you don’t really have a buddy dive with a guide.

It is useful to know before you go what your objectives are, for example what type of shots you want to work on. This means you have something to do over and above the assigned tasks.

During the workshop

Once there you need to stay focused on your performance. Those are additional points to think about:

  • Deliver the assigned tasks
  • Go off the beaten track
  • Learn from other participants
  • Take notes

Sometimes during those workshop there are challenges or set shot that are suggested, this is your opportunity to compare your work with others and therefore you should make sure you deliver those also to find out if there are limits with your equipment.
Eggs
In the Red Sea workshop were given the task of taking pictures of cardinal fish with eggs in their mouth. I realized I could not fill the frame because I lacked a mid range close up lens and my camera would not focus closer.

In addition to the suggested shots you should make changes to those and try something different even if not totally different.

Ras Katy Sunset

There are many landscape split shots but not many portrait so why not try one results can be excellent and it is easier with a small dome.

Other participants also will give a go to the same shots or have better editing skills it is worth to watch and learn.

Trucks
My buddy was setting up a remote strobe I fired a few shots (unintentionally of course) so I got my own shot!

Finally take notes of what you did right and wrong and if you missed anything.

After the workshop

After the sessions are over still there is work to do over and above going over your pictures again.

  • Write down your lessons learned
  • Look at other people images
  • Order any equipment that you missed

Well it goes without saying that I put the notes together and summarized them here.

I also found great to connect to other people and then look at their gallery for other shots that we had not discussed before.

Finally I ordered myself an Inon UCL330, funny I had this lens and sold it not realizing the real use which is fish portraits!!!

That’s all for now if you go on a workshop soon I hope you find this useful.

Sony RX100 White Balance Woes

In one of my first posts on this blog I covered the subject of setting white balance with the Sony RX100.

It may be useful to have a quick recap on the topic:

  • For pictures setting a custom white balance is not useful if you shoot in RAW as the amount of correction in post processing is far superior*
  • For video (that is shot in compressed format) setting the appropriate white balance for your shots is essential

There are exceptions to this rule, some people like to set custom white balance even in RAW when they shoot ambient light pictures. This is because changing the white balance shifts the histogram and therefore if you had taken a shot with an incorrect white balance you may retrieve wrong information from the histogram. Personally I do not do this most of the ambient light shots I judge by eye and not histogram or are silhouettes anyway but may be useful to know.

The other exception is when you shoot a raw video format with bit rates in excess of 100 Mbps, in that case the footage is captured in a bland format lacking any real depth and contrast and things are corrected in post processing. This does not apply to any consumer camera that works in AVCHD or Mp4 with bit rate lower than 50 Mbps in any case.

It follows that setting the appropriate white balance for our videos is something that is important otherwise our clips will look dull, green or have some sort of color cast we do not like.

As many of you RX100 I have experience with the infamous Custom White Balance 9900K error. In theory if you set your custom white balance with the camera in P mode over a neutral target this error should only occur if the color temperature is out of range (>9900K) unfortunately this is not the case and you get this error pretty much always with our beloved camera. At the beginning I thought that this was due to my cheap PADI slate, but after various attempts against my hand, sand, buddy’s tank, the sun I have to think there is some genuine issue here.

So I got myself whibal card, that on my test on land performs amazingly well with both the RX100 and the Nikon D7100.

The first thing we can realize is that the auto white balance setting is rather cool in outdoor scenes, whilst it tends to be warmer in indoor scenes with artificial light.

Auto White Balance
Auto White Balance

When you take a custom white balance the colors appear warmer and the bluish cast departs and the yellows come back.

DSC01608

This is particularly bad news if you shoot underwater without a filter and think of using auto white balance as those results will be pretty ugly.

The whibal card has a specific black mark that if illuminated tells you the white balance reading is incorrect because of reflections. I thought this was the key to the 9900 Error, unfortunately I was wrong.

It just fails 100% reliably really painful so I could not get rid of my trusted red filter for the Galapagos trip. I even tried setting the white balance with the filter and it would fail as well.

So I went back to auto white balance and red filter and I am pretty happy with the results, many people have asked me if I have manipulated the footage in post processing as the colors look very deep and some have even said unnatural. Even so shooting at 1/50 means a relatively low ISO and in the specific trip another f/stop of aperture was not really significant but I would have like to have the option of working without the filter, sadly this was not an option.

For what concerns white balance just a few things I want to say:

1. At depth there is no color anyway so what your eye can see it is not what it is, the proof is when you use lights or strobes things look much better than the naked eye. Using your visual as a reference can produce dull results.

2. You have to set an appropriate white balance for your scene, this means removing the cast. If a scene has no cast and the colors look saturated this is not a white balance issue on its own but may due to the camera settings. The RX100II is one of the less saturated camera on the market. The mark I instead is pretty saturated take this into account.

3. Footage that looks dull IS in fact ugly. The fact you set custom white balance with or without a filter does not mean that results is the perfect result, there is no such thing in fact and as colors disappear at depth white balance is not that effective anyway

Nick Hope sometime ago published some interesting tests on wetpixel

http://wetpixel.com/forums/index.php?showtopic=16970&page=8#entry122288

It turns out that there is more than meets the eye.

Just to clarify the only color correction in my Galapagos clip is:

1. In the scene of the dolphins I was pointing the camera upwards and did not have time to take the filter off so ended up with a red cast, I performed a white balance adjustment in iMovie on the opposite value of the tint I was getting until I liked it.

2. In the scene where there is a group of Galapagos sharks and the close up of the eagle ray I have reduced the blue gain as it was over saturated

In all other cases the only changes were increase of contrast or reduction of brightness. When the water was green like at the end in the Punta Vicente Roca scene I did not touch it to make it look artificially blue.

Again for those who ask I use a deeproof push on filter for the Inon UWL-H100 this filter is my preferred for the only reason that is actually the only one available on the market that fits on the lens. Personally I would much prefer a plastic filter like the ikelite/URPRO but this one is glass. It seems to correspond to a deep sunset 2700K with magenta tint of +5 on the RX100 but I have no tools to measure it I can only say it works.

So my recommendation for the RX100 is to get this solution as the Inon lens has the best optical quality and a hood that comes very handy to reduce flare. There are other lenses that fit the RX100 but have no hood. Obviously an not even considering the fisheye style lenses as distortion is ugly and placing a filter under the lens is a very bad idea.

Galapagos: Sony RX100 Mark II Photos

I have mentioned the conditions we found in Galapagos in the previous post so no need to repeat myself.

One of the things I was told before going is that the last dive of the day tends to be pretty dark so not good for video, therefore I used this for photos were I was expecting to use strobes at all times.

I made a mistake as I should have taken the still rig also on the second cousins rock dive anyway I am quite happy on how things turned out considering I did only 4 dives and took 117 photos I am pretty happy I could pick 20 that I consider decent.

The whole set is here

Watching you

The rig I decided to pack at the end had 6+8 inches segment so it looked pretty cumbersome on land.

Photo RIg on Land
Photo RIg on Land

In water the setup looked like a glider with a significant wing span

Photo Rig Underwater

The reason why I took arms so long is that I was expecting sharks to be 4-6 feet away and quite a bit of particles in the water.

I was right. Just have a look at the following two shots, the first taken with a Canon S95 and a single 8″ arm.

Turtle with single strobe 8" arm
Turtle with single strobe 8″ arm

You can see the considerable amount of backscatter despite the 1/1600 shutter speed.

This is another turtle on the same dive

Turtle with twin strobes

This time two strobes on the longer arms are used, even at 1/320 this looks neat. The turtle looks bigger as the lens is not as wide as the previous, shooting distance is the same.

The arms proved to be good for the sharks as expected, I used aperture of f/4 for most shots, ISO 100/200 and shutter 1/60 to 1/125

This is emotionally the best shot

Galapagos Shark Watching me

Later on in the snorkeling trips I took couple of split shots.

Unfortunately the weather was not good and the sky cloudy so I had to play with the graduated filter.

Galapagos Penguin Split Shot

The purist will notice that the water line is not neat, as I am shooting with a wet lens the back of the lens has water as well so to avoid to see that I shoot portrait with the back of the lens in the water, which is a limitation but on a good day will produce interesting shots regardless, also the lens is only 9cm diameter and is flat (Inon UWL-H100)

I took some close ups but even the sea horses were huge so no need for close up lenses.

Giant Pacific Seahorse

Funny enough I took this at f/5.6 1/60 after reading on DXOMark that the RX100 resolution is actually better at f/5.6 than it is at f/11.

The lens is at 35mm equivalent at the shooting distance I used the depth of field is only a couple of cm and as the background is quite plain I did not bother trying a black background that I could possibly not even achieve. This was a TTL shot whilst all the sharks and wide angle were taken with the strobes in manual.

Another great feature on land of the RX100 is the panorama, which I used in Bartolome and other places

Bartolome Panorama
Bartolome Panorama

In general the conditions were very difficult and I am happy with what I could achieve in just 4 dives.

I will be taking the same arms and strobes configuration to the Red Sea in a few weeks but with the Inon UWL-100 with dome. I expect better results as the conditions are usually fabulous in comparison, probably I could do with shorter arms but once in water the set up is not heavy so I will keep it like that


Galapagos: Sony RX100 Mark II Video

The time finally came for our trip to Galapagos and I was ready with a set of think rubber suits to overcome the cold water. I just bought a 5mm Oneill Sector (wonderful suit) a 3mm hooded vest, kevlar gloves and a 5mm 4th Element short john. Well the short john was not used and for most I used just the wetsuit and a set of O’Neill Thermo X unders (very recommended) as El Nino is coming and the water was warmer at 25-27C or 77-80F.

This means lack of schooling hammerhead at shallow depth close to the reef, they were in the blue. We had however our good dose of schooling barracuda, tuna (in the 1000s) and even galapagos sharks

This is the video I produced

If you have problems with playing in your country use vimeo instead

The conditions were difficult with low visibility and in some sites very green water as you can see here

Green waterQuestions will come about what I used etc etc so here is the list

  • Sony RX100II in Nauticam housing
  • FIx adapter for Inon LD mount
  • Inon UWL-H100
  • Deeproof blue water filter
  • Sola video lights 1200 (just few shots of the barracudas and some close ups)
  • Combination of arms and sometimes no arms
  • Ultralight tray TR-DM with extension and handles

The video has been produced with iMovie 9.0.4 no stabilization performed except the scene with the moray eels mating (very mild)

I shot the whole trip in shutter priority 1/50th of a second in the 25 fps 24 Mbps format. After some tests at home I have decided to use this mode as I can’t physically play the 50 fps files the camera produces on any of my devices differently. The 25 fps gives a film look and very smooth footage. This format is only available on the RX100II and not on the original RX100 so the consideration I made at the time for video settings of the RX100 remain valid.

The benefit of 1/50th shutter speed is a full f/stop of light the disbenefit is that at the surface and for backlit shots this is too slow, in those cases I go back to program mode or increase shutter speed to 1/100 or 1/200 or more.

For what concerns the editing I import the raw files in iMovie without using the conversion and then export with x264 using very slow preset and level 4.0 compatibility to use it with my appleTv.

I do minimal color correction in some cases I had to eliminate the red color cast of the filter when shooting upwards, to do that I change the white balance to top yellow until i remove the cast.

In some cases I had to put the green gain to the max for the same problem but in all other cases there is NO color correction in post.

When you work with AVCHD cameras the footage is compressed and the key is to get it right in camera.

As Galapagos conditions were challenging, although less than I expected, I used gloves in some dives to hang on to the barnacles and I also modified the set up to completely eliminate the lights.

I would dive with two 3″ segments and two 6″ Inon Mega float arms when I had the lights on and for other shots in ambient light I would have this set up here that looks odd but it is very effective and almost neutral at only 120 grams in water. The position of the floats means the camera stays upright at all times.

Compact tray for ambient light

I would put a single Sola light on top of the housing not for video purpose but to signal the dive master when I was a bit far in the murky or dark waters. I used this set up on almost all blue water dives (Darwin and Wolf) and the normal set up with lights for the South and West sites with murky or green water.
There will be a separate post on the photos, I did a total of 18 dives with the camera of which 4 where photo and 14 video. You can see an example in the featured image.

I have now ran some statistics on the final clip that I produced

I used a total of 41 video clips:

ISO average was 273 with the following breakdown

  • 2 clips at 160
  • 30 clips at 200
  • 6 clips at 400
  • 3 clips at 800

f/stop average was 3.1 hyperfocal distance on average 1.16 meters. So if I were able to shoot without filter I would have not gained anything in terms of sharpness as most subjects were further away

I would consider the Galapagos and the dive trip I did not the best in terms of brightness and visibility so I would conclude that the RX100II with the Inon UWL-H100 and a red filter is the best set up for wide angle video in terms of performance, ease of use and flexibility.