Tag Archives: fish portraits

Fisheye Zoom for Micro Four Thirds

Looking at Nauticam port chart the only option for a fisheye zoom is to combine the Panasonic PZ 14-42 with a fisheye add on lens. This is a solution that is not that popular due to low optical quality.

So micro four thirds users have been left with a prime fisheye lens from Panasonic or Olympus…until now!

Looking at Nauticam port chart we can see that there is an option to use the Speedbooster Metabones adapter and with this you convert your MFT camera to a 1.42x crop allowing you to use Canon EF-M lenses for cropped sensor including the Tokina 10-17mm fisheye. This is certainly an option and can be combined with a Kenko 1.4x teleconverter giving you a range of 14.2 to 33.8 mm in full frame equivalent or 7.1 to 16.9 mm in MFT terms fisheye zoom of which the usable range is 8 -16.9 mm after removing vignetting.

A further issue is that the Speedbooster gives you another stop of light limiting the aperture to f/16 while this is generally a bonus for land shooting in low light underwater we want to use all apertures all the way to f/22 for sunbursts even if this means diffraction problems.

Wolfgang Shreibmayer started a trend time ago in WetPixel https://wetpixel.com/forums/index.php?/topic/61629-canon-ef-lenses-on-mft-cameras/ to use full frame lenses and in this post I want to do a deep dive on what is for me the most interesting lens option the Canon 8-15mm fisheye.

This lens on full frame can be used for a circular and diagonal fisheye but Wolfgang has devised a method to use it as an 8-15mm fisheye zoom on MFT.

Part list – missing the zoom gear

What you need are the following:

  • Canon EF 8-15mm f/4L fisheye USM
  • Metabones Smart Adapter MB_EF_m43_BT2 or Viltrox EF-M1 Adapter
  • A 3D printed gear extension ring
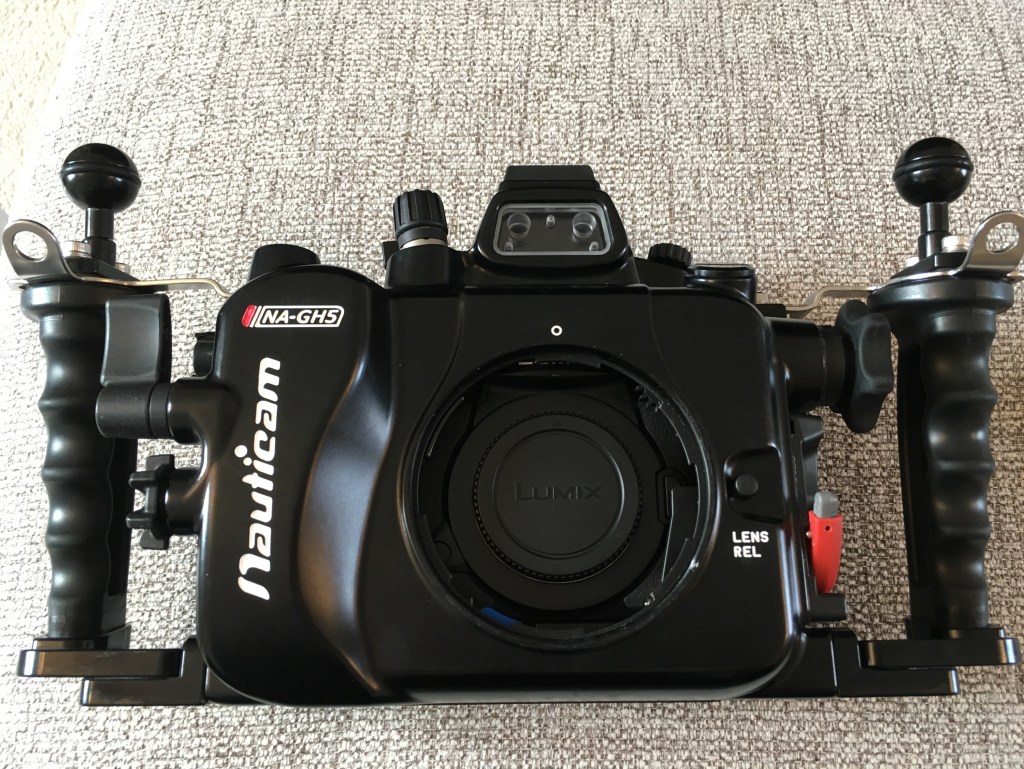
  • Nauticam C-815Z zoom gear
  • Nauticam 36064 N85 to N120 34.7mm port adapter with knob
  • Nauticam 21135 35mm extension ring with lock
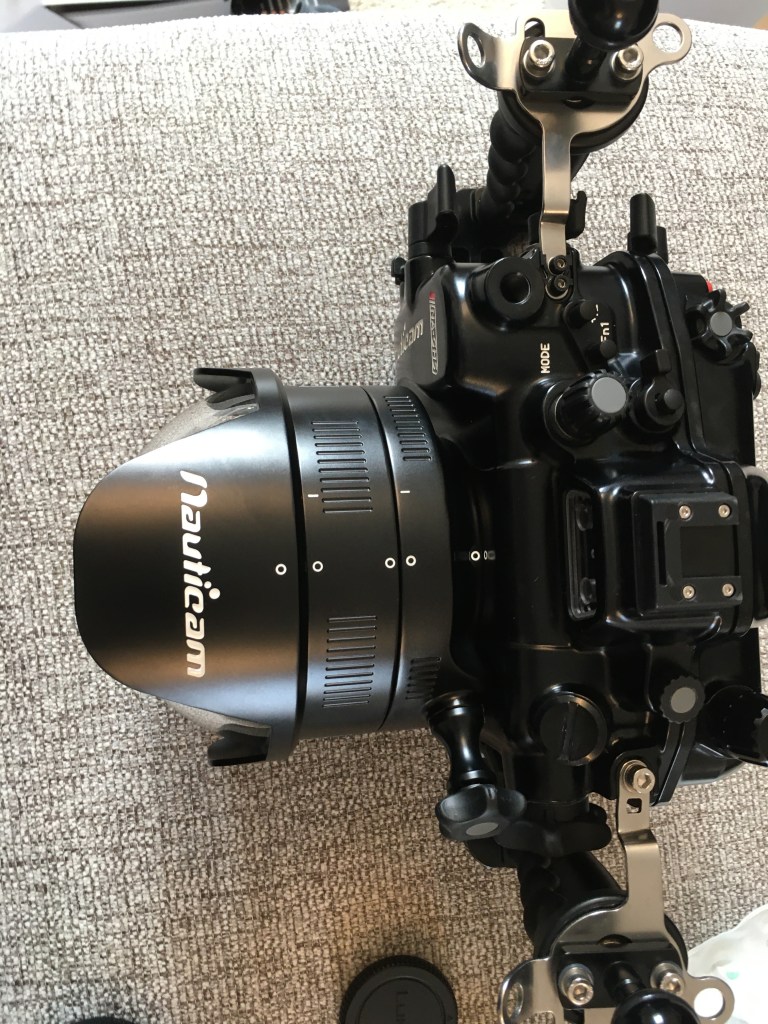
  • Nauticam 18810 N120 140mm optical glass fisheye port

The assembly is quite complicated as the lens won’t fit through the N85 port. It starts with inserting the camera with no lens in the housing.

GH5 body only assembly
Camera in housing without port

The next step is to fit the port adapter

Attach N85 N120 Metabones adapter

Then we need to prepare the lens with the smart adapter once removed the tripod mount part.

Canon 8-15 on Metabones Smart Adapter IV

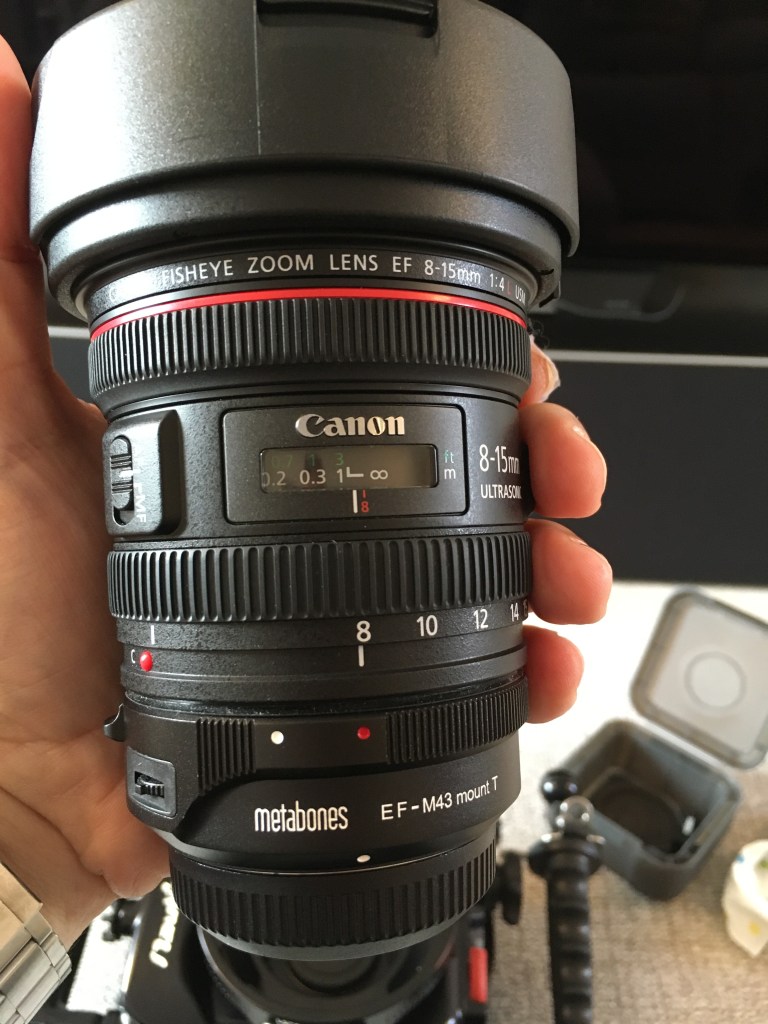
As the port is designed for the speed booster the lens will be few mm off therefore the gear will not grip. Wolfgang has devised a simple adapter to make it work.

gear extension ring
Zoom gear on lens

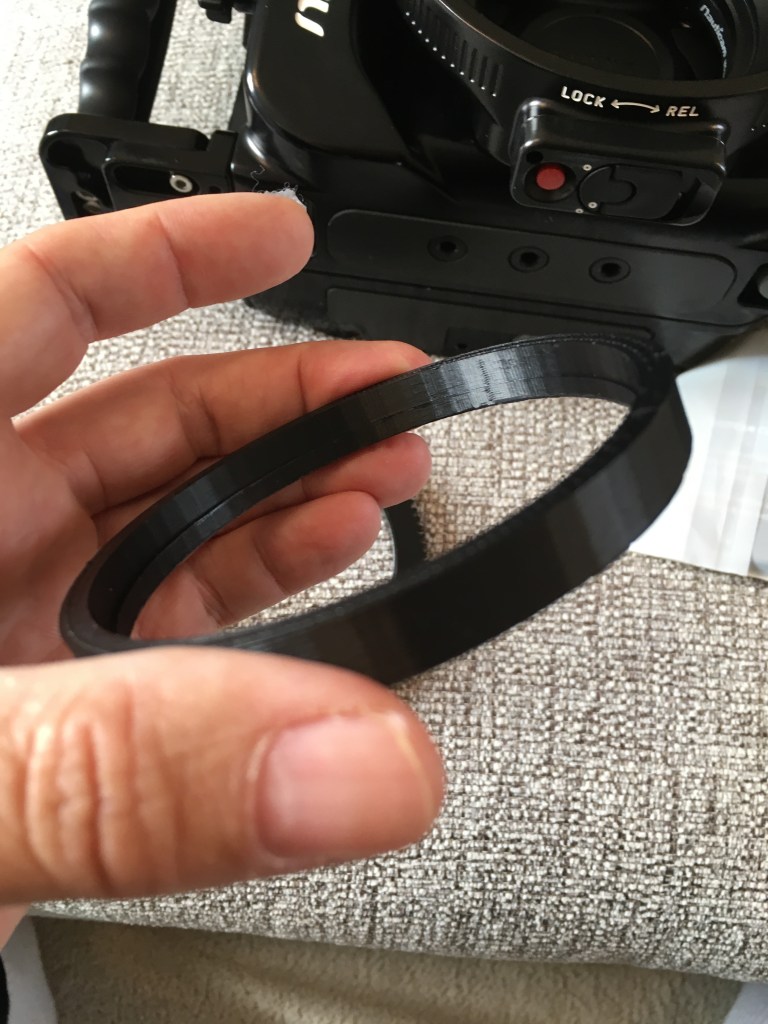
This shifts the gear backwards allowing to grip on the knob.

3D design is here

Lens inserted on housing

Looking at nauticam port chart an extension ring of 30mm is recommended for the speedbooster and now we have extra 5mm in length Wolfgang uses a 35mm extension. however looking at the lens entrance pupil I have concluded that 30mm will be actually better positioned. Nauticam have confirmed there won’t be performance differences. You need to secure the ring on the dome before final assembly.

Fisheye dome and extension
Full assembly top view
Side front view

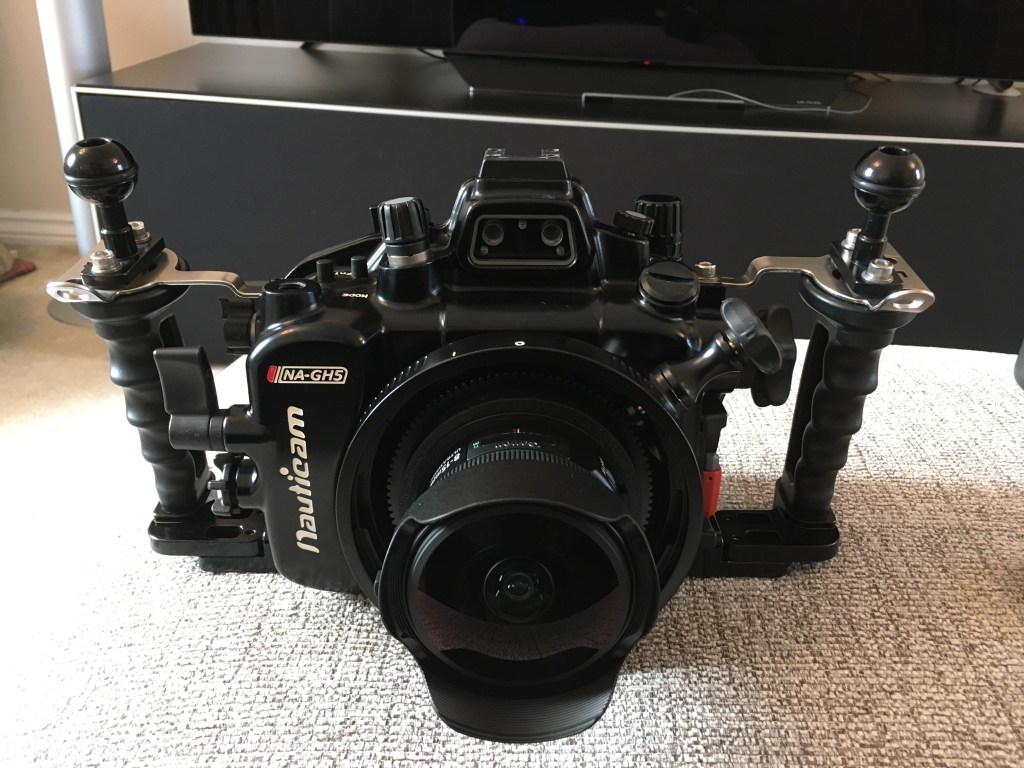
The rig looks bigger than the 4.33 dome but the size of the GH5 housing is quite proportionate. It will look bigger on a traditional small size non clam style housing.

The disassembly will be made again in 3 steps.

Disassembly

I am not particularly interested in the 1.4x teleconverter version consider that once zoomed in to 15mm the lens is horizontally narrower than a 12mm native lens so there is no requirement for the teleconverter at all.

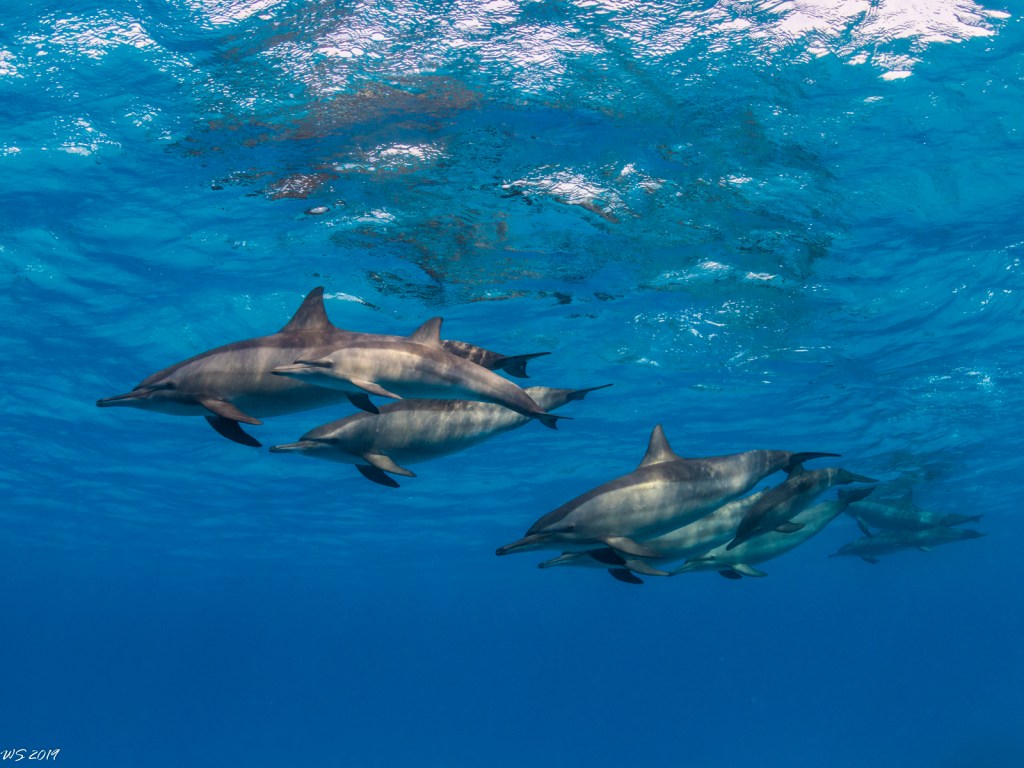
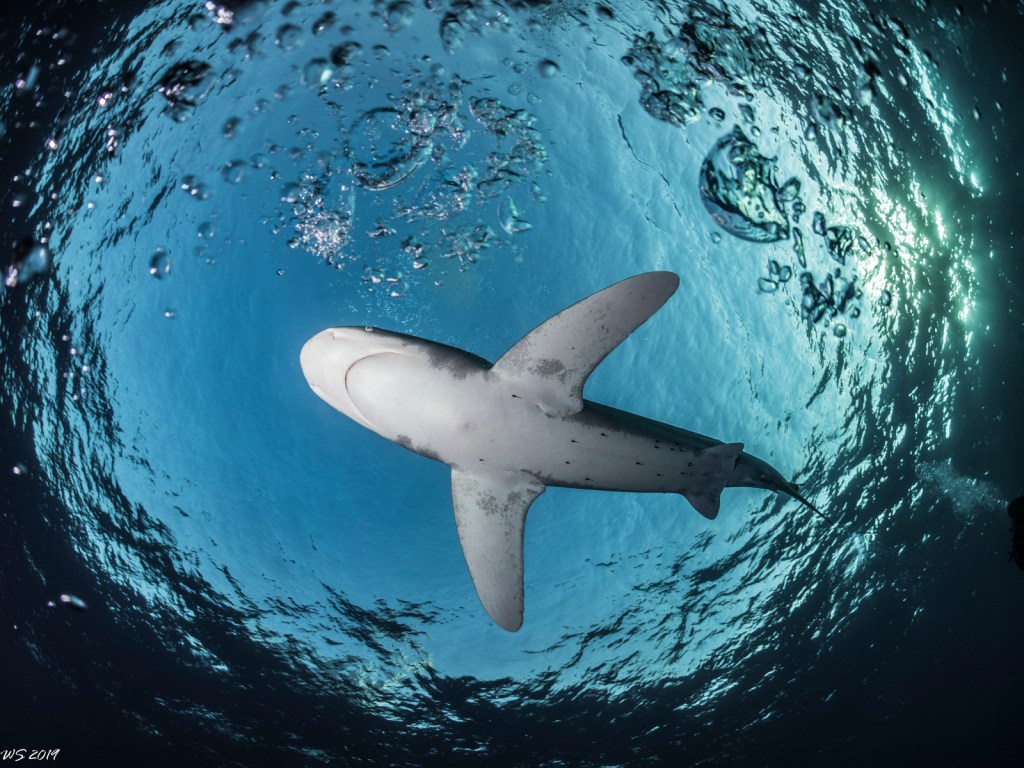
This table gives you an idea of the working range compared to a rectilinear lens along the horizontal axis as diagonal is not a fair comparison. The lens is very effective at 8-10mm where any rectilinear would do bad then overlaps with an 8-18mm lens. The choice of lens would be dictated by the need to have or not straight lines. The range from 13mm is particularly useful for sharks and fish that do not come that close.

Focal lengthHorizontalVerticalDiagonalHorizontal Linear EqWidthHeightDiagonal
8130.995.9170.217.31321.64
9114.984.7147.8
10102.575.9131.06.9
1192.668.7117.88.3
1284.562.9107.29.5
1377.757.998.410.8
1472.053.790.911.9
1567.050.184.613.0

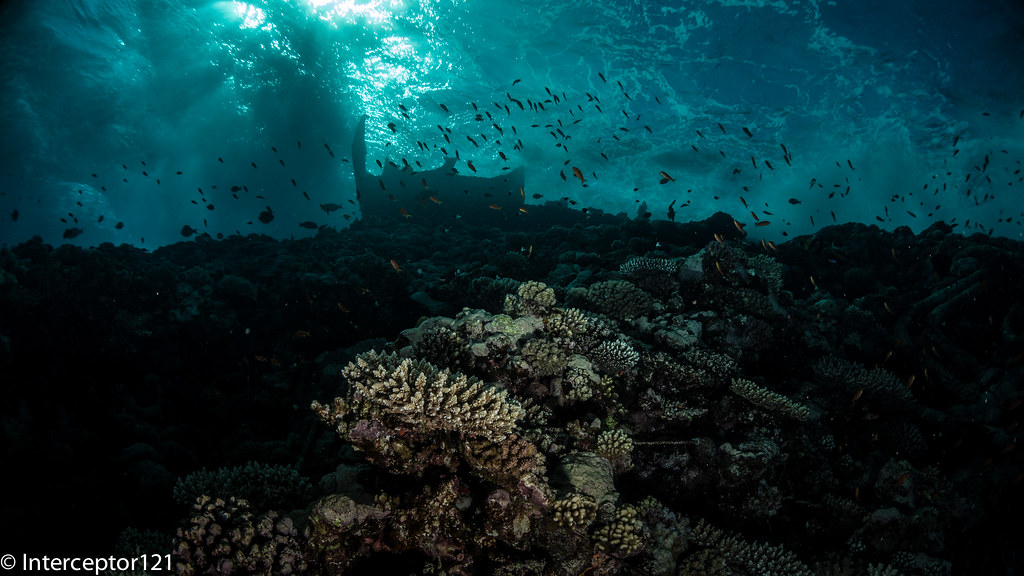
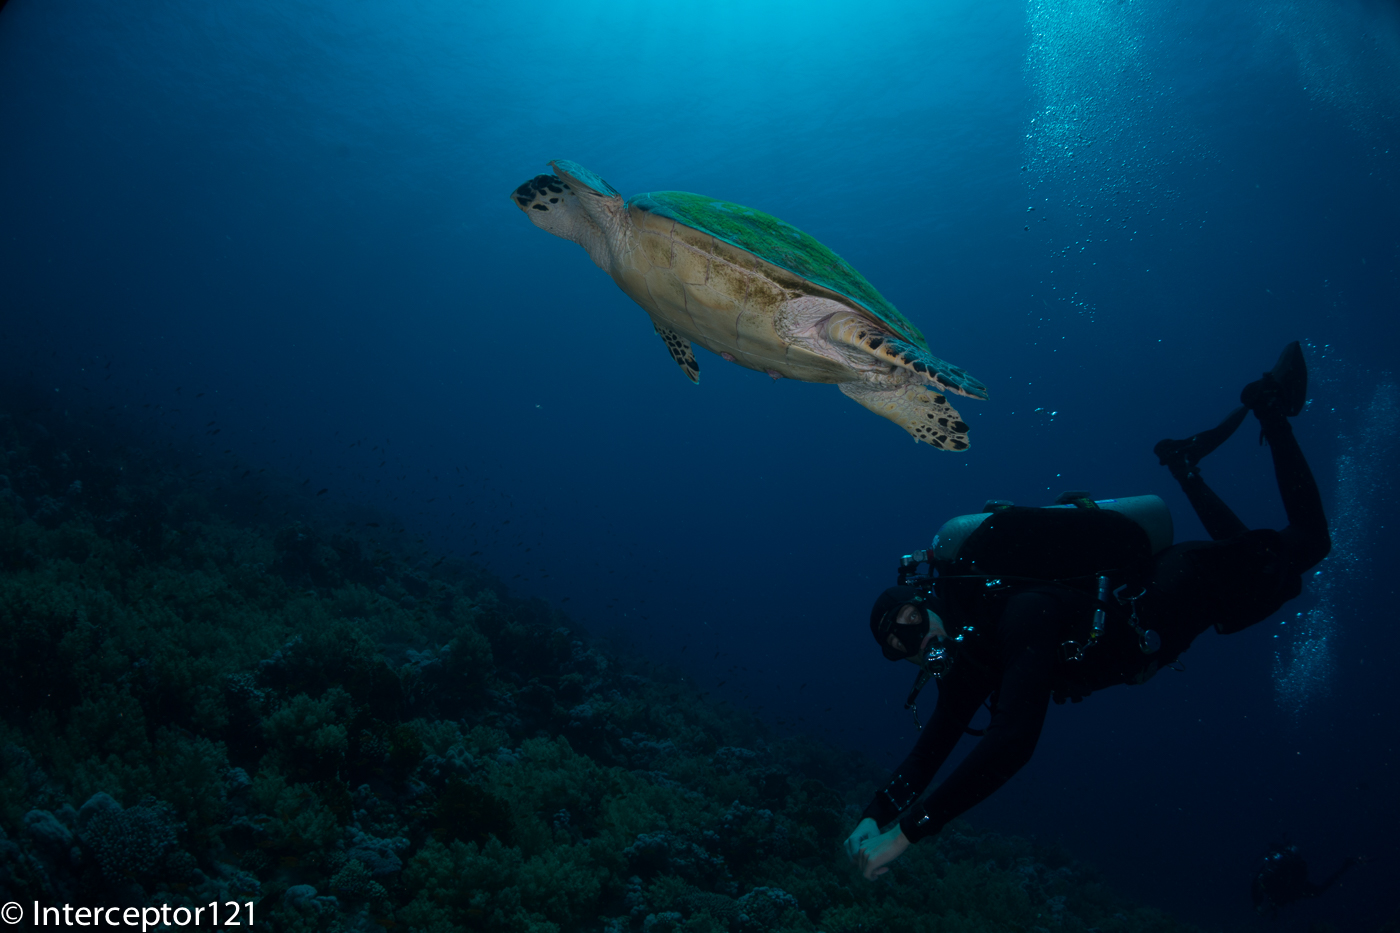
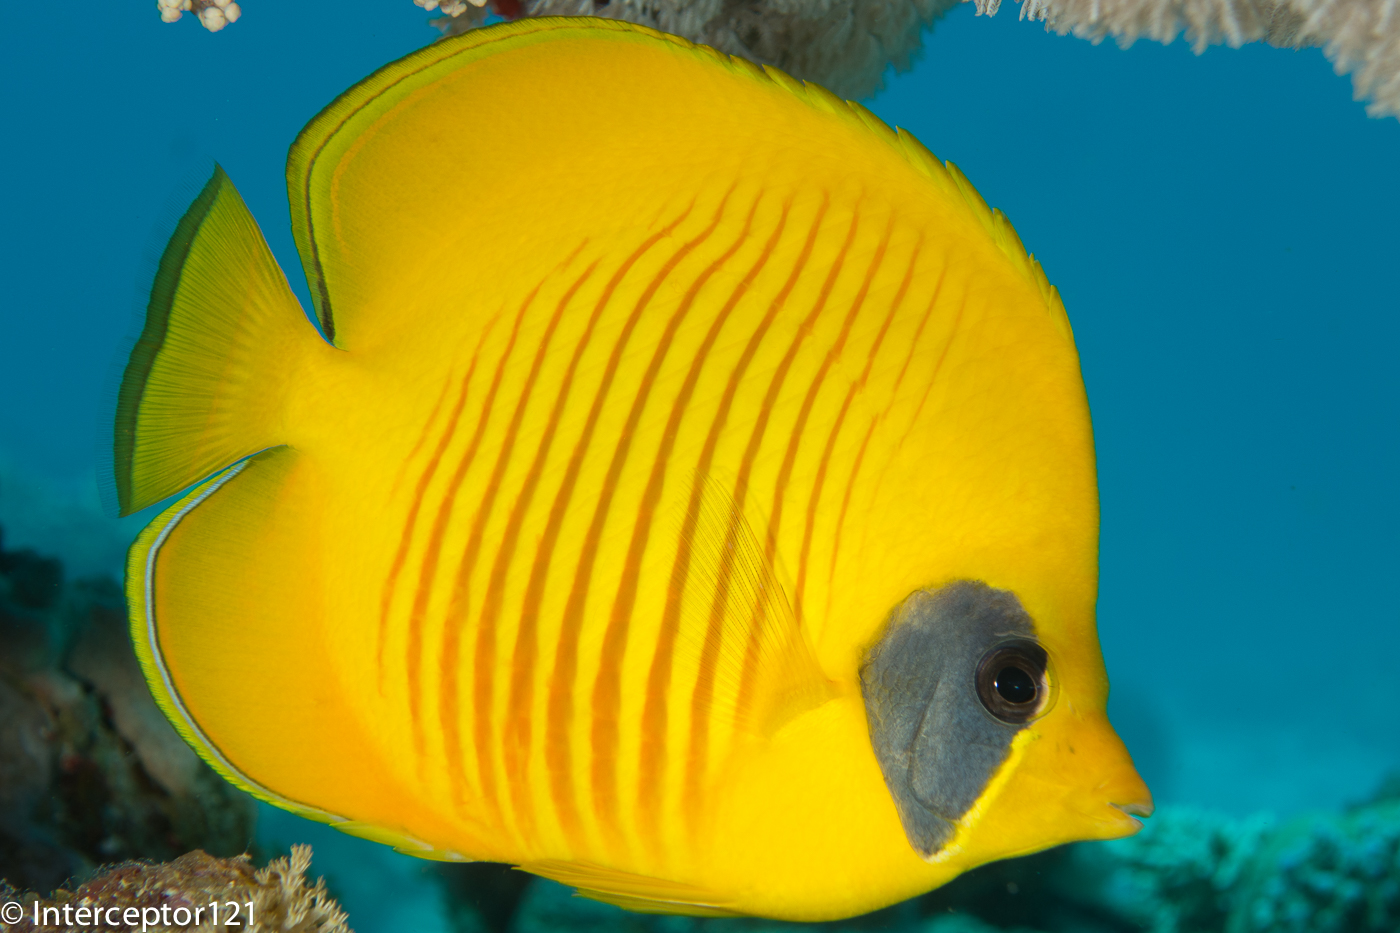
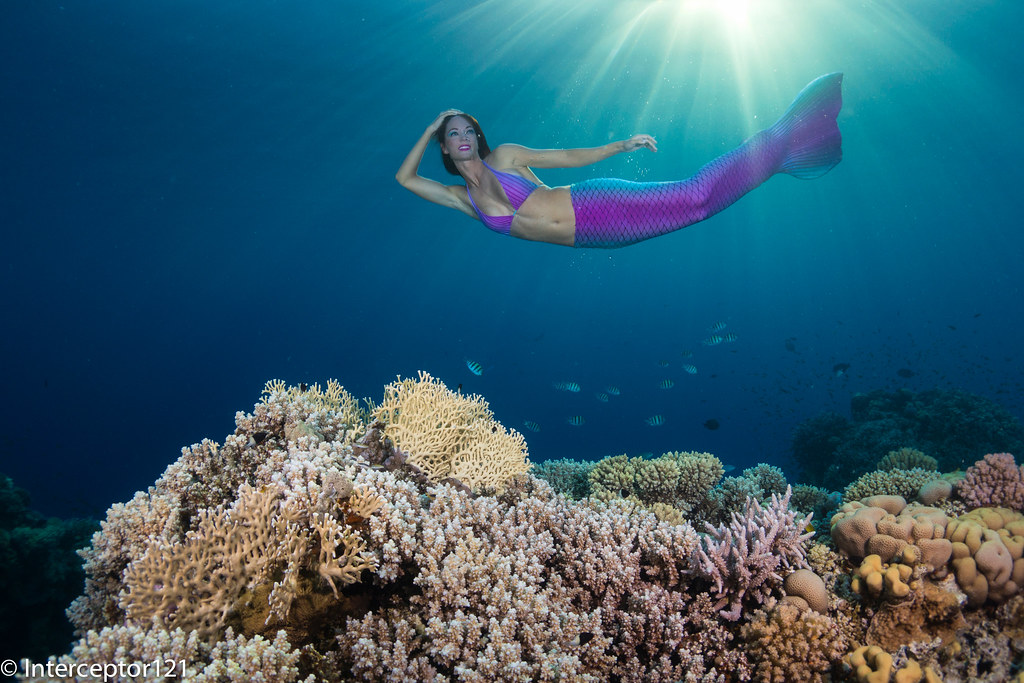
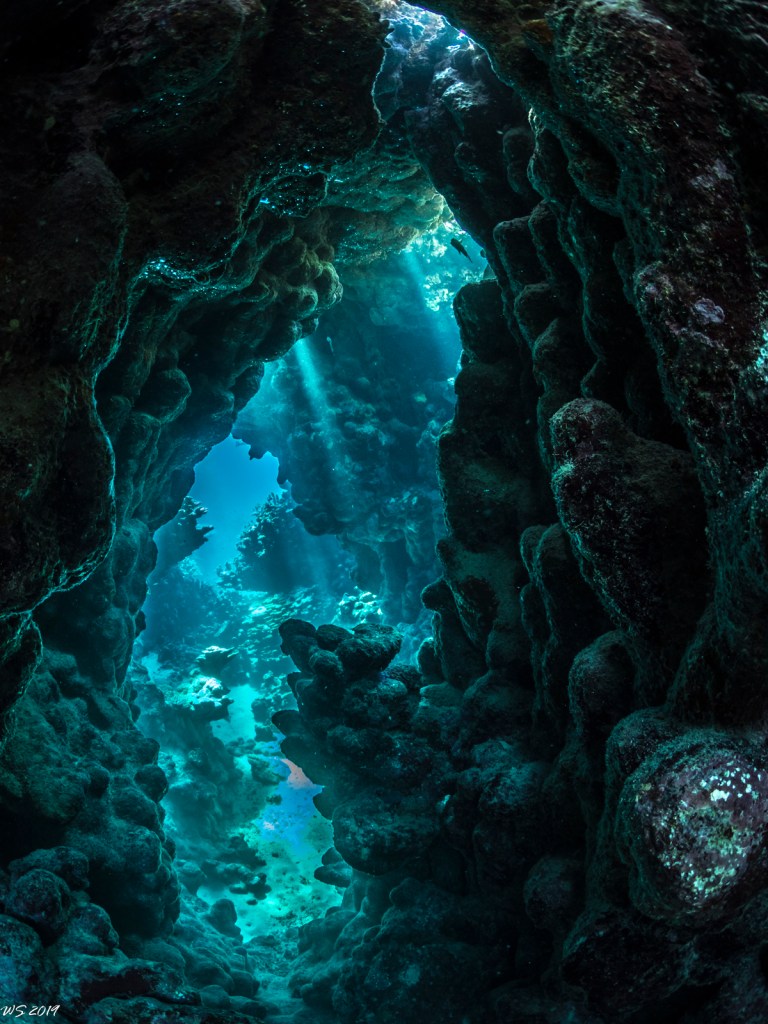
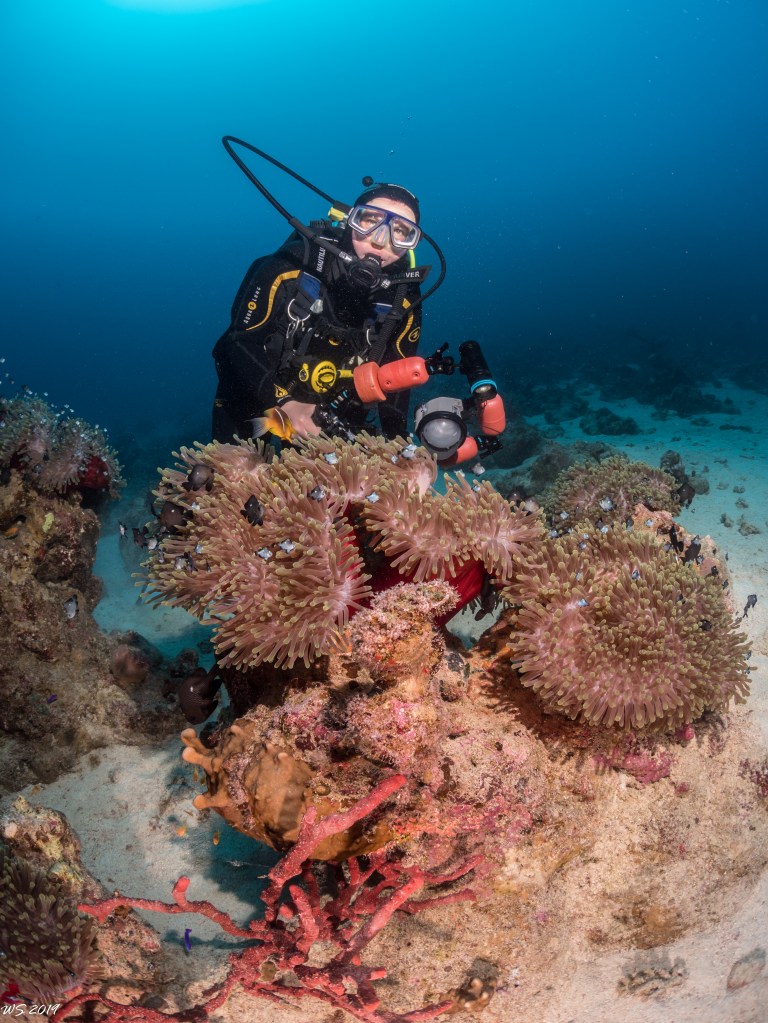
Wolfgang has provided me with some shots that illustrate how versatile is this set up.

8mm end surface shot
Caves 8mm
15mm end close up
Dolphins at 15mm
Diver close up at 8mm
Snell windows 8mm
Robust ghost pipefish @15mm

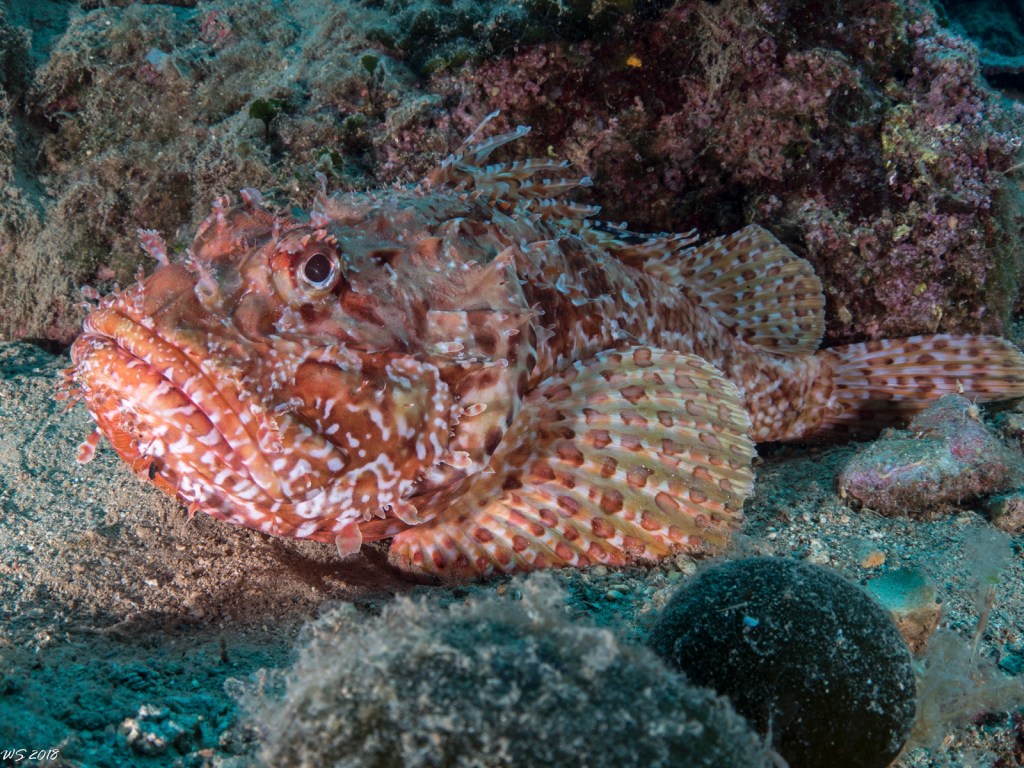
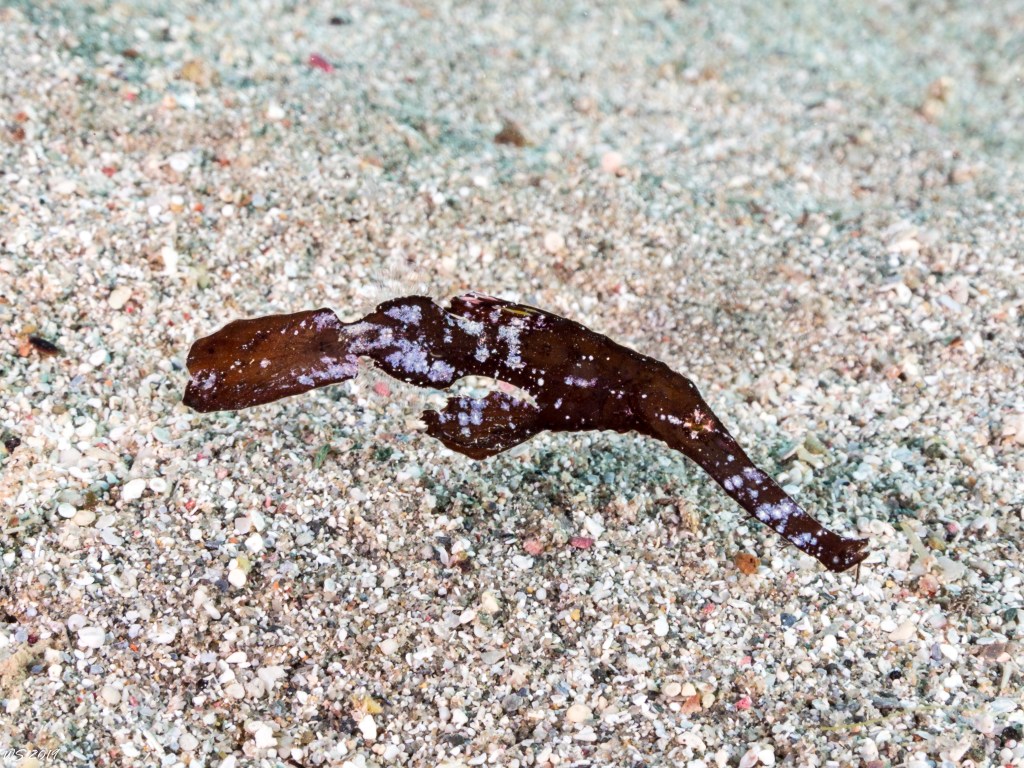
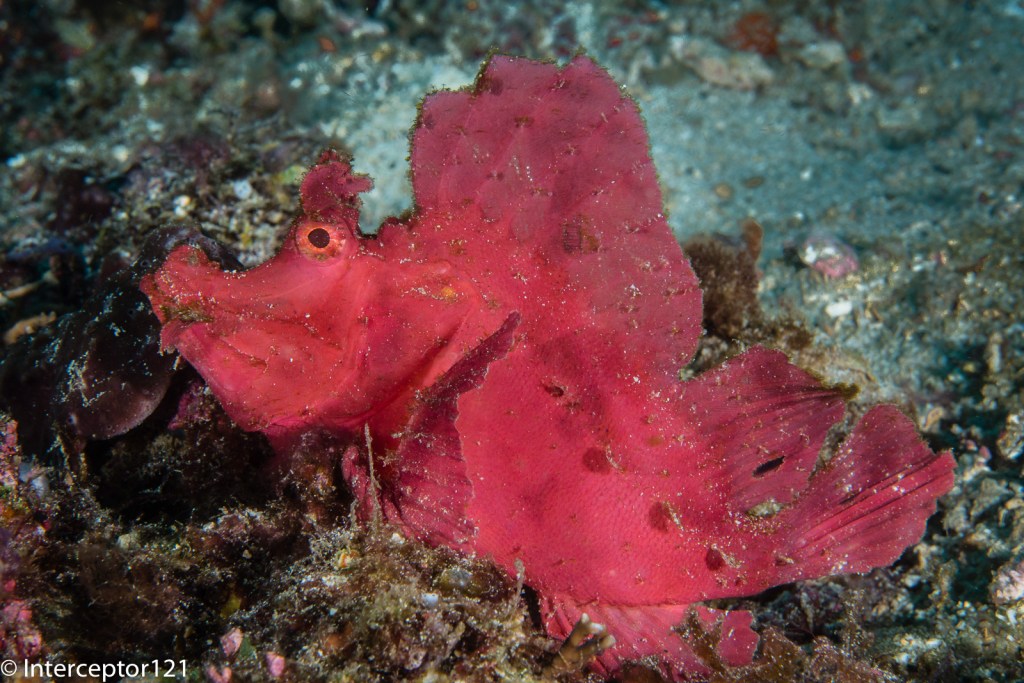
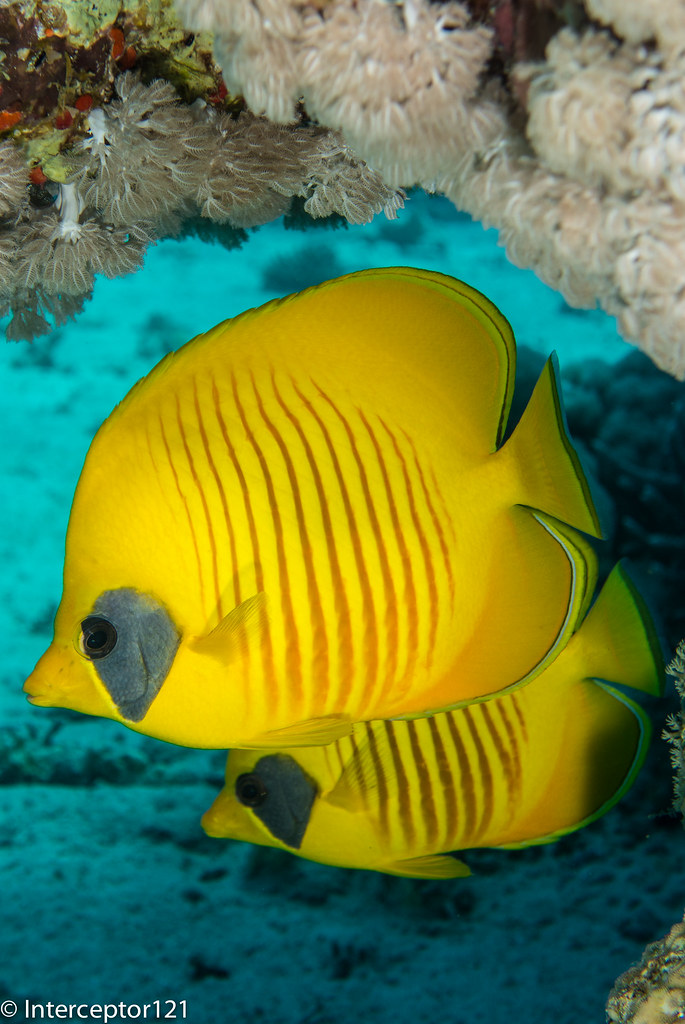
As you can see you can even shoot a robust ghost pipefish!

The contrast of the glass dome is great and the optical quality is excellent. On my GH5 body there is uncorrected chromatic aberration that you can remove in one click. Furthermore lens profiles are available to de-fish images and make them rectilinear should you want to do so.

I would like to thank Wolfgang for being available for questions for providing the 3D print and the images that are featured here on this post.

If you can’t print 3D and need an adapter ring I can sell you one for £7 plus shipping contact me for arrangements.

Amazon links UK

Canon EF 8-15 mm f/4 fisheye USM lens

Viltrox EF-M1 Mount Adapter

Note: it is possible to use a Metabones Speed Booster Ultra in combination with a Tokina 10-17mm zoom fisheye and a smaller 4.33″ acrylic dome.

UK Cost of the canon option: £3,076

Uk Cost of the Tokina option: £2,111

However if you add the glass dome back

UK Cost of Tokina with glass dome: £2,615

The gap is £461 and if you go for a Vitrox adapter (would not recommend for the speedbooster) the difference on a comparable basis is £176 which for me does not make sense as the Canon optics are far superior.

So I would say either Tokina in acrylic for the cost conscious or Canon in glass for those looking for the ultimate optical quality.

which macro lens to pick for your gh5 or micro four third

I see many posts on line debating which macro lens is best for your micro four third system.

If I refer to the Nauticam system we have 4 macro lenses:

  • Olympus 30mm
  • Panasonic 30mm
  • Panasonic 45mm
  • Olympus 60mm

For the purpose of this article I will skip the Olympus 30mm as the Panasonic lens is known to be sharper and will focus on the other 3 lenses.

DxOMark is a popular tool for comparison as it gives you the results on one page. I have run it for the Oly 60 and the Pana 30 and 45 on the 20 Mpix OMD E-M1 MKII

DxOMark Comparison on Olympus OMD E-M1 MKII

Surprisingly the much more expensive Leica performs worse than the other cheaper models, this is confirmed on all internet sites running other type of tests.

What we can see is that there is little difference between the Panasonic 30mm and Olympus 60mm when it comes to image quality so whichever lens you choose your subject at the same level of magnification and aperture will have more or less the same detail.

Common Misconception: Shorter focal length give more depth of field

Many people think that using a longer lens is harder because there is less depth of field this is actually incorrect conceptually.

Let see why

Using an online calculatore like Dofmaster https://www.dofmaster.com/dofjs.html

Enter for the Panasonic GH5 the following parameters

Circle of confusion: 0.015 mm

Focal length 30mm

Distance 10.5 cm (minimum distance of the 30mm Macro)

Aperture f/11

Result Total depth of field 0.3cm

Now enter

Focal Length 60mm

Distance 21 cm (as it achieves the same magnification)

Aperture f/11

Result Total depth of field 0.3cm

So depth of field is not a consideration when choosing a macro lens…

Shooting a subject close to the background

In the following 3 shots am taking an image of a widget at f/11 at 29-44-60 mm on a Leica 12-60 (it is just easier it makes no difference to the outcomes)

Shot at 60mm
Shot at 44mm
Shot at 29mm

At the same aperture you can clearly see that there are no difference whatsoever in the detail and actually overall in the picture you don’t notice anything.

Shooting a subject far from the background

For the second shot I have moved the widget away from the wall.

Shot at 60mm
Shot at 44mm
Shot at 29mm

Again there is no difference in the level of detail of the widget however looking at the background we can see that

  • The 60mm shot reveals one brick and less than one quarter
  • The 44mm shot reveals one brick and a half
  • The 29mm shot reveals two bricks

So while the subject is exactly the same as the 60mm lens has a narrower field of view we see much less of the background.

This means that if you are shooting a nudibranch on the sand or something flat on a rock you won’t notice anything however if there is space behind the subject you will capture much more of that resulting in less subject isolation.

Underwater Comparison 30 vs 60 mm

In the first shot the Rhinopia is taken with a 60mm lens

Rhinopia Olympus 60mm

In the second shot the same Rhinopia with the 30mm (in a different place to be fair)

I have marked up with red the areas that with a longer focal length would have been minimised.

Which Lens to choose?

Now that we have clarified that depth of field is not a consideration and as each macro lens will have the same magnification there are only two factors that matter:

  1. Working distance
  2. Isolation from background

The 60 mm will have a longer working distance and at the same magnification will isolate the subject better from busy backgrounds, the 60 mm is also better for skittish subject because of the longer working distance. I have this lens and I have borrowed the 30mm in couple of occasions but do not have the 30mm yet.

There are however situations where longer working distance is not a benefit, specifically when the visibility is poor and there are suspended particles or the subject is really large.

In the example below I was at one meter from the two frogfish, a 30mm would have been better however the shot came OK.

Hairy frogfish Olympus 60mm

Conclusion

I believe the Olympus 60mm is a must lens to have. To date I have not felt the need for the Panasonic 30mm that is indeed a very sharp lens because I have always managed to pull out the shots. However for someone diving in murky water and focussing on nudibranches or subject laying flat on the seabed the Panasonic 30mm could be a better choice. I also want to say that using the 14-42mm at 42mm for me is actually a better choice for portraits and with a close up lens works very well with small subject not super macro and therefore as I already own the 14-42mm and various diopter for me the 30mm is not on the shopping list.

Red Sea Workshop with Alex Mustard – Part V Tiran & Mermaids

As the currents were not playing ball we decided to head to Tiran to dive Jackson reef.

I love jackson as a dive and a video dive but I was a bit vary from a photography point of view as lighting can be a problem.

Anyway there was an option for a hammerhead dive in the early morning or a first dive on Jackson followed by a second before returning to Ras Katy for an afternoon and sunset dive.

Hammerhead are found on the back of Jackson reef when there are shallow thermoclines with the surface at 26C the chances were low however I had alternative ideas for that dive.

As foreseen there were no hammerheads so towards the end of the dive I tried a few shots of the Lara Wreck (that is on the surface) through the Snell window despite the strong surf.

The resulting shot is currently my desktop theme and is here.
Lara from the reef
I tried to get the wreck on the surface, the breaking surf, the sunball, some fish or at least silhouette of fish and the hard coral to give a dramatic moody look to the image.

On dive two was time to have a relaxing dive with not much effort on photos. I saw few tunas at around 28 meters that is unusual and a turtle and some other critters though the shots are not particularly exciting.

In one occasion a dive guide came to be all excited as he had seen a turtle so I went there and bumped into our own guides that were out for a fun dive.

Turtle and Dive Guide

They usually are asked to get out of the frame instead I took the shot for their facebook perusal.

When the turtle had enough she shot off to the surface and I tried a silhouette however I forgot the strobe on

Failed Silhouette
Failed Silhouette

Nothing that lighroom can’t fix and this is the resulting shot after adjustment

Silhouette after lightroom

Not bad huh?

Back at Ras Katy I tried few more portraits like this one

Fish Portrait
Fish Portrait

Though my favorite is another
Masked Butterflies

At sunset I was part of the mermaid group, we had a model Katrin Felton  suprising what a phenomena Mermaid tails have become.

We had a 2-3 shots in different poses however only the first was successful as the snell windows was ruined by one of the photographer that keept shooting with strobe…and getting in the way as she did not listen to the briefing properly well no big deal.

Anyway I gave it a shot afterwards Kat was not particularly happy about the barrel distortion that she said makes her look fat! Unfortunately I did not have a rectilinear lens anyway if you find yourself in this kind of set up make sure you have one.

Mermaid Kat I
All in all it was a bit of fun again I tried to include some fish, the reef, the mermaid, the sun rays. I looked at other pictures of the mermaid and I think she can’t appreciate how important is not to see the knees too much but I guess she likes to focus more on her figure on how slim she looks lol!

All in all another great day and a different perspective on shooting model underwater.