Nauticam entered the wet lenses market with their SMC close up wet lens that was optimized for DSLR.
Then it released the CMC compact macro converter for compact cameras and micro four thirds and finally the Wet Wide Angle Lens I that is compatible with compacts, micro four thirds and also full frame cameras with 28mm equivalent lens.
Up to now all lenses were using the traditional M67 mount as most of the lenses, even the close up ones, are pretty heavy this means going for the dive with the same lens. Nauticam has developed the flip diopter adapter for flat ports to overcome this issue.
Flip Diopter on Nauticam RX100 IV
The flip diopter is a good solution for micro four thirds and DSLR but looks rather cumbersome on compacts as the image shows.
I asked Nauticam for a bayonet adapter and specifically if they could develop something for the Inon LD bayonet system that so far has been the reference for wet lenses for compacts and micro four thirds cameras.
LD mount converter on RX100 IV
Edward told me that due to the fact that the WWL-1 lens rear element is so large the Inon LD system was not an option so they went off and developed their own system.
M67 bayonet mount converter
I would like to thank Nauticam again for making those parts available before general availability.
Looking a bit closer to it you can see that due to the specific construction with two concentric rings you need a special tool to apply the adapter on the port.
M67 bayonet mount converter The large item is to attache the mount to the port
Obviously as the Nauticam lenses use an M67 thread new adapter needed to be developed.
Mount converter for CMC/SMC
Nauticam does not use ABS plastic and uses aluminum for all their parts.
Now that the items have a bayonet adapter there is a need for a lens holder to put on the arms.
Lens holder looks too big for a 5″ arm segment
The lens holder is too big for a standard 5″ segment but looks in proportion with a longer segment.
Lens holder on 8″ arm segment
The adapter is larger than the LD mount and a bit big for compacts to the point that even with a tray the adapter tips the rig back.
Another challenge is that this system is designed for Nauticam lens that have protruding rear element so when used with standard lenses there is a gap between the port and the wet lens that can be counter productive, not the end of the world and frankly the Inon system has the same problem. This however means that if you wanted to use this system with a different wide angle wet lens this would be suboptimal.
I am waiting for Nauticam to ship me back the WWL-1 so I can show how that lens performs on this system.
Another observation of course is that if you use this system for wide angle the super heavy WWL-1 and the fact that the adapter only works on a normal segment means your rig will be very heavy in water. I am going to discuss with Nauticam the possibility to have the adapter on a float arm however their carbon arms do not have any mounting point to be used.
Stay tuned for a full review of this adapter with the new 29 macro port that looks very promising for video.
Youtube now supports double frame rate video 50p and 60p so what?
That is actually a legitimate question look at this example here which is a short clip from a trip to Barbados in 2013, this was originally shot on a Sony RX100 Mark II in AVCHD progressive 1080@50p 28 Mbps
If you don’t see the 50p option is because your browser operating system does not support it. You need the latest version of browser and operating system and a machine fast enough plus enough bandwidth. So for Mac this means OS X Yosemite and Safari and for Windows you need 8.1 and IE9.
I hope you enjoyed the clip now check this other one which is a instead shot at 25p with the same camera at 24 Mbps/
I think you can see by yourself which one looks better and it is the 25p clip despite an overall lower bitrate.
There are a number of reasons:
Underwater clips do not have a lot of action as you may think so extra frames go a bit to waste
The encoding which is how the clip is first recorded by the camera is not really that different.
The human eye does a great job at interpolating missing frames anyway
There is not really much more data in the 50p file compared to its 30p rendition
The image quality if you look at a still frame is better in the 25p clip.
There are of course benefits in shooting at double frame rate if you want to slow down the footage 50% speed but for what concerns your normal shooting you would say for that clip you could not tell.
Let’s think about it in simple terms if you have a clip shot at 25p with 24 Mbps you would expect something not quite double but a bit more for 50p instead you only have 28 Mbps. To be more precise you have 22 Mbps vs 26 Mbps video which is 18% more in Sony’s case. So that is not really much information more.
What is more interesting is the structure of the data what follows now is a bit technical but bear with me.
GOP Structure Row 1 and 3 Sony AVCHD 25p and AVDHD progressive 50p
The first and third rows are representation of Sony 25p and 50p clips. The green bar are I frames that you can think of like a JPEG image, the red bars are P frames or prediction the only contain a delta from the previous frame not a full image.
You can see that in the first row there are 12 P red bar between each green I bar. This means that the GOP or group of picture is composed of a sequence IPPPPPPPPPPPP that repeats indefinitely.
On the 3 row there is a representation of a Sony 50p clip you can see that now there are 23 P frames between two I frames.
So the increment in full frame is limited however if we look at the sizes we see that the I frames in the 25p clip are 12% bigger and also the P frames are smaller.
So in short if you look at the image quality the 25p clip has more information in the full frames as well as for the predicted frames whilst the 50p clips has more frames but overall with less quality.
Which means that unless you are shooting something that is really action packed or you want to do slow motion there is no actual benefit but instead a deterioration when you shoot AVCHD progressive underwater.
Note: if instead we were shooting at higher bitrates for the 50p the story would be different but at similar bitrate it goes as above.
You will also have noticed stream 2 and 4 in the image above I repeat them again here
GOP Structure Panasonic AVCHD 25p and AVCHD progressive 50p
The second and fourth stream are generated by a Panasonic camera and they look different. You will notice now the existence of frames with the tag B and also that some of the P frames have a green slice.
This means that Panasonic AVCHD implementation has two features that Sony does not have:
1. It has B frames which not only predict future frames from the past frames but can also reference future frames in the prediction (sounds crazy but it works basically the frames are stored in memory before past ones are saved)
2. It has slices for images so on one frame there can be an element of prediction from a previous frame and another element completely newly generated for example if the prediction was completely in a part of picture where there was a lot of movement.
H264 encoding has motion compensation so things that do not change are referenced and new parts are predicted or in this case partially created from scratch.
So the Panasonic encoding algorithm is much superior to the Sony one for AVCHD this explains why a small camera like the Panasonic LX7 could produce video to compete with a larger sensor RX100 with almost double number of megapixels.
What makes me laugh is when photography magazines jump to conclusion on the video quality of a camera shooting a static frame!
Of course if there is not movement the camera with the best IQ in still pictures will prevail however when you record motion all of that becomes somewhat less relevant as compression impacts the quality.
So the more effective compression algorithm of Panasonic beats Sony to the point that even a larger sensor size seems not to matter.
This explains why when you take a real life clip Panasonic cameras perform better in video despite a worst image quality in still images.
The difference between the 28 Mbps and 24 Mbps follows pretty much the same trend of the Sony clips there is not enough bitrate to justify the double frame rate unless there is a lot of action in your clip.
So to conclude if you are shooting AVCHD the normal 24/25p more will have better image quality and will be more suitable to scenes with a lot of dynamic range, will give more colour and contrast. If there is really a lot of action or you want to slow down the clip shoot in 50p bearing in mind that image quality will actually drop if you look at a still frame in isolation.
Underwater contrary to what you may expect things do not actually go that fast and most of the movement is in a specific part of the frame or in a limited part of it so AVCHD 24/25p gives better results.
Finally when looking at a camera for video check for real clips do not look at resolution charts designed for still images as they give very little indications on the quality of your videos. Also if there are any tests make sure those are on the JPEG images that share similar processing engine not on RAW files are you are not shooting RAW video. And finally consider that at similar bitrate some manufacturer have a clear edge on others when it comes to real time compression in our example Panasonic produces similar quality to a Sony camera with overall a better sensor but poorer compression.
In a previous post last year I had mentioned that a move to an interchangeable lens camera was unlikely however seeing the latest generation of compact on the market also have a port system it is time to reconsider the options.
During the Christmas holiday Panasonic put up a double cash-back promotion which meant you could get a Panasonic GX7 with kit lens with £100 off the retail effective price.
On the web you could find the GX7 with the 14-42mm G Mega OIS for £449 and combined with the 20mm f/1.7 for £579. The 14-42mm is actually a good lens but knowing I had to get the Lumix G X Vario PZ 14-42mm I opted for the 20mm f/1.7 a very bright lens that seemed good for occasional photos.
So I got myself the X Vario PZ 14-42mm and also the Lumix G 12-32mm Mega OIS as I thought I needed something midrange but did not want to spend a lot of money for the 12-35mm Panasonic and especially did not want to entertain a 6″ wide angle port.
Foliage Detail 12-32 mm
I actually think this lens has better IQ than the 12-42mm PZ
14-42mm PZ
The 12-32mm is the kit lens that used to come with the GX1 so is not a massively popular lens. A quick look at the Nauticam Port Chart confirms this lens takes the same macro port 35 of the 14-42 PZ, this port through a 30mm extension can be used to house the Olympus 60mm Macro. So went ahead and contacted Alex at Nauticam UK to get a quote on the housing. It turns out that there are no stocks of the NA-GX7 so had to wait until yesterday to receive mine.
I asked Alex to lend me a Nauticam Wetmate as I thought this could be used on the 35 port with the 12-32mm Panasonic lens in case the Inon UWL-H100 vignettes.
I was not quite sure of the physics of the wet mate so I got myself some close up filters in case there were focus issues.
The 12-32mm won’t focus in water with the wet mate until you add a +1 close up filter.
12-32mm with +1 diopter and wet mate on macro port 35
Once you get focus the image quality seems pretty decent despite being shot at ISO 1250 f/3.5. However this configuration would start having focus problem past 15mm so I put on a + diopter and tried again until 20mm or 40mm in 35 equivalent terms.
12-32mm at 20mm with +2 diopter and wet mate on macro 35 port
Quality is pretty good and the chromatic aberration are probably coming from the cheap diopter more than the wet-mate.
I am quite happy with those results although I have to admit the wet mate with the 67mm thread is a pain to take on and off in water and also is not coated so scratches easily.
Nauticam has still to confirm if the 4.33″ dome port can offer full zoom with the 12-32mm, I suspect it will with the help of a +2 diopter. The alternative is the 20mm extension with the 3.5″ wide angle port, in future perspective this is interesting for wide angle macro photography but not so much right now so will go with the 4.33″ dome.
I also did some tests with the Inon UWL-H100 28LD, once again the Fix M67-LD adapter let me down the screws had melted into the aluminium despite the tender loving care and broken the adapter I could however take some shots without the hood before that happened.
Panasonic 12-32mm with Inon UWL-H100 at 12mm
There are some dark corners but all in all the result could be acceptable equivalent focal length in 16:9 is 16.5mm which is approximately 105 degrees.
There seems to be some variability and some times I would get black corners more. Considering I will switch to the Nauticam LD adapter that vignettes more this at the end is not so interesting. The image is also a bit distorted.
With the Panasonic Lumix G X Vario PZ 14-42mm instead there are no issues of vignette even in 4:3 aspect ratio.
Panasonic 14-42 PZ with Inon UWL-H100
The camera focuses literally on the glass.
What is even more interesting is that the camera lens combination keeps sharp focus all across the zoom range all the way to 42mm or 84mm equivalent.
Pamasonic 14-42mma t 42mm with Inon UWL-H100
Fringing is contained and generally the image is sharp across the frame considering we are at ISO 3200.
I also did a test with the UCL-330 and using the Extended Teleconverter function available in video I could achieve 32mm width frame with the 12-32mm lens!!!
The other positive note is that this is a 1″1 pixel read without artefacts and moire so generally quality is very high.
I think the PZ 14-42mm with the Inon UWL-H100 and a single UCL-165 makes a fine combination to shoot all purpose stills wide and macro in one dive. For video I will have to determine if the UCL-330 is a better choice considering the extended tele converter feature.
A few other features of the GX7 that really make this camera a video machine include the flicker free video recording that allows you to fix the shutter speed if you had to press the video record button when you are taking stills. Normally the camera would work in P more and not respect any shutter rule, with this feature you are telling the camera to shoot in shutter priority.
The GX7 has also the capability of altering the gamma curve for contrast which is great and a number of picture style presets of which I recommend the Scenery one for underwater use if you white balance.
I did some low light comparisons with the Sony RX100 and despite two full f/stops advantage for the RX100 lens the GX7 still resolved more detail at ISO 3200 versus the RX100 ISO 800 which was a bit surprising.
The AVCHD implementation at 24 Mbps will be my favourite underwater mode unless I am shooting macro and is a full IPB codec unlike the IP only with no B frames that Sony provides. That must be reason why the image quality in video is better even at two stop higher ISO.
In case you are looking for the holy grail for Nauticam micro four thirds camera to do a bit of everything the Macro Port 35 and the Panasonic G X Vario 14-42mm Power Zoom are highly recommended. Probably the image quality is not as good as the Panasonic 7-14mm although in my opinion with the Inon lens the results are very similar to the Olympus 90-18mm with 4″ wide angle port. Macro again is acceptable but not amazing with wet lenses. I will have to test more I am concerned the UCL-100 may not work with this port. For a mid range lens the 12-32mm costs one third of the 12-35mm Power OIS and once I receive the 4.33′ dome I will do more tests, meanwhile an option is to use the wet mate that works until 20mm before you have to take it off. The 4/33″ dome should have better image quality but maybe I will be surprised there too.
Finally with the 30 extension you can transform the macro 35 into a 55 port ready for some serious macro with the Olympus 60mm so I think having only one flat port, an extension ring and one dome to cover fisheye photography, portraits, wide angle, close up and macro is not bad at all. And for video most likely is the only port you will ever need together with the Inon UWL-H100 which is expensive but every flexible indeed.
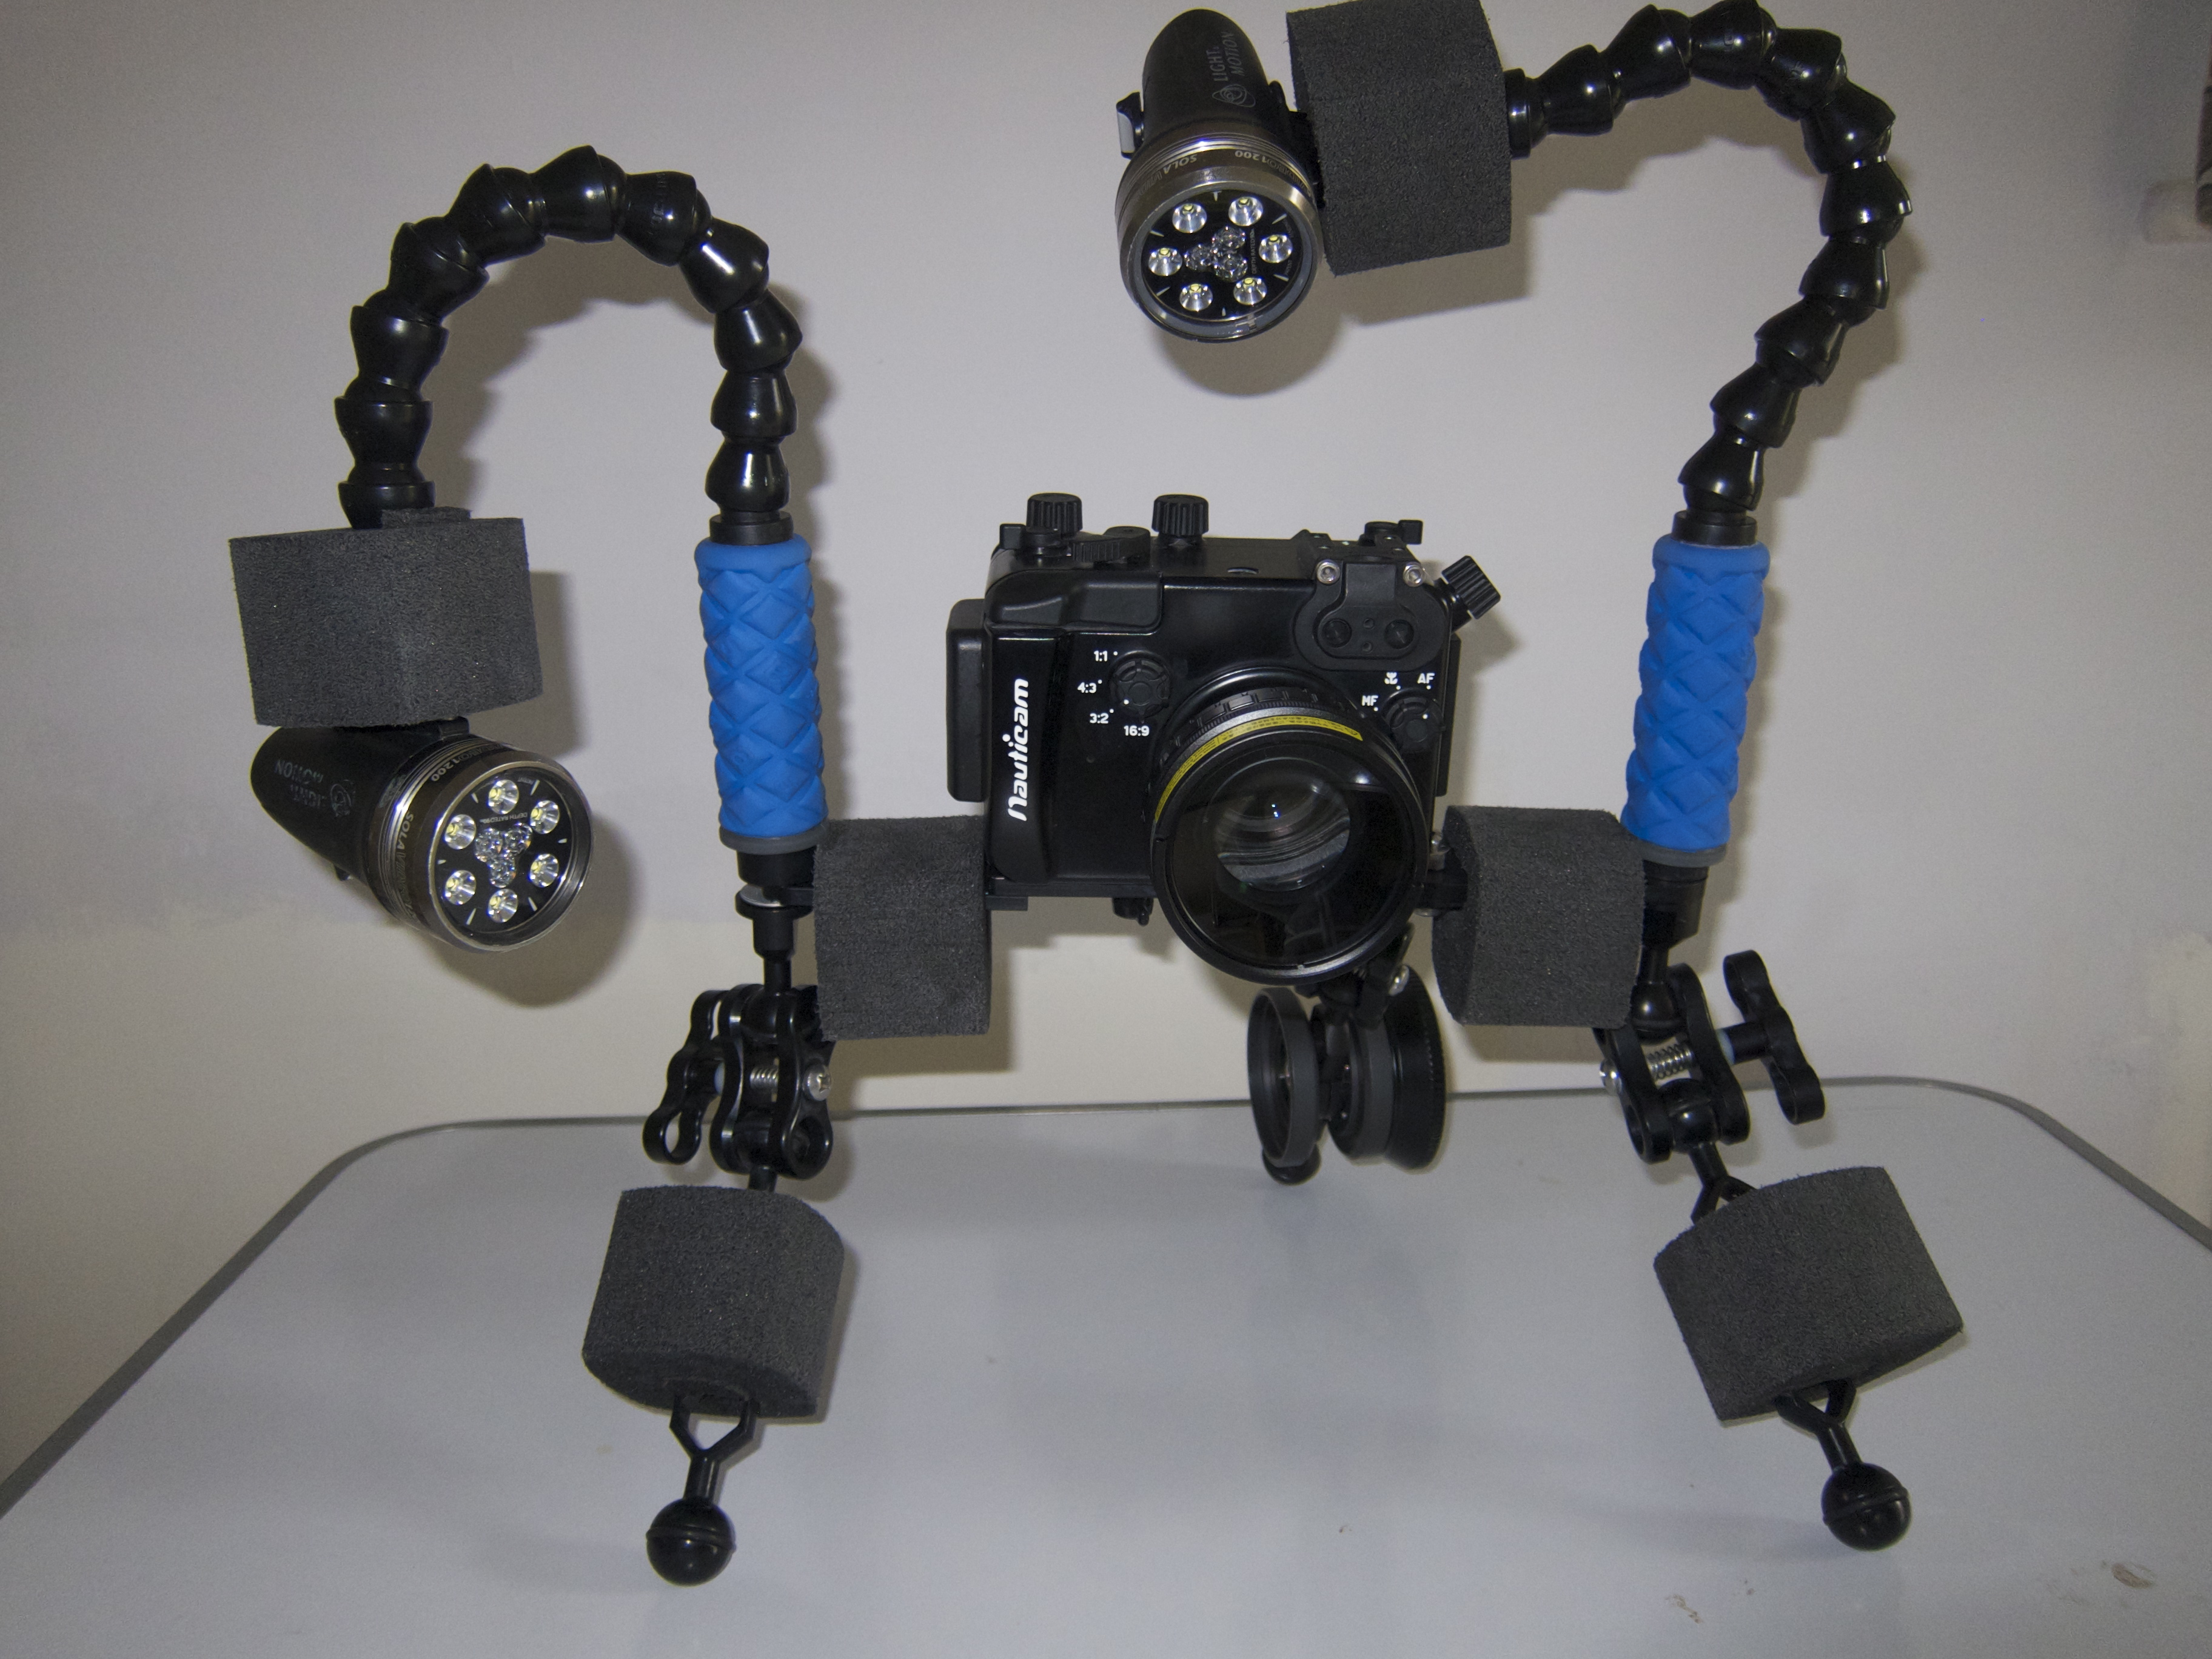
I will post more images of the rig once I have nailed all options in terms of lenses and arms.
With the arrival of the new Nauticam N50 port system for advanced compacts I believe we say goodbye to using a large sensor compact underwater.
We already saw some signs when Sony released the RX100 Mark III with a 24-70mm equivalent lens, this effectively killed any use of the camera for macro. The new Panasonic LX100 has a similar problem with a 24-75mm lens but on top it has the new N50 port system in the nauticam housing or a severely limited functionality in the Ikelite version. It is obvious that the Panasonic LX100 will have similar sever limitations for macro but also with only 10 Megapixels really not be a strong competitor.
The last kid on the block is the Canon G7X, this camera looks very similar to the Sony RX100 Mark II and has a 24-100 zoom range that on land is very useful with an aperture of f/2.8 at tele end that is really interesting for land use. However this camera in the Nauticam version has the same port system N50.
So why has Nauticam introduced this? Both the Canon G7X and the Panasonic LX100 have fairly long lenses in terms of physical size and the zoom mechanism is such that the lens is retracted at wide end. This means that there is quite a gap between the lens and the port and wet lenses in those conditions have issues of both corner softness and chromatic aberrations. So Nauticam has introduced a short port with zoom blocked so that wet lenses can be used.
Effectively this is like diving with a fixed 18mm lens on your camera behind a dome with no zoom capability, taking the wet lens off results in horrible pincushion distortion so not really appealing.
Pincushion Distortion at 24mm with flat port
The dome port does not allow the use of the full zoom at least without a diopter, so this is of limited use too for video.
Cost wise the new housing with the port system are around $1,200 in the US with additional $350 for the dome and $180 for the flat wide port. We are approaching the low end of Micro 4/3 Nauticam housing prices and are more expensive than Olympus OEM options but without the same flexibility and quality in terms of lenses.
It is clear that the Sony RX100 Mark I and II will remain one of a kind and this is the reason why they remain popular few years after launch.
Following from my previous post I managed to get together a clip out of the 5 dives I did
The first day was somewhat plagued by visibility a bit lower than the norm for the location but the second day was fabulous
For this trip I brought with me the Inon UWL-H100 and the red push on filter from deep roof H20 and the Inon UCL-330 as I was expecting medium size fish and nothing really small
Here is the outcome
I am quite happy how things turned out so let me share the settings with you
First I shot most of the footage in 25p AVCHD mode only some small sections are shot at 50p and actually I did not need to slow down any of the material.
For the wide shots I used steady shot in normal mode and shutter priority at 1/50th. With the filter on I had auto white balance with tint correction G2 A1. I noticed that the camera was giving red tint in some situation and so added a bit of green back. The Amber correction instead is for the RX100 itself the camera does not have vibrant yellow and is a bit blue.
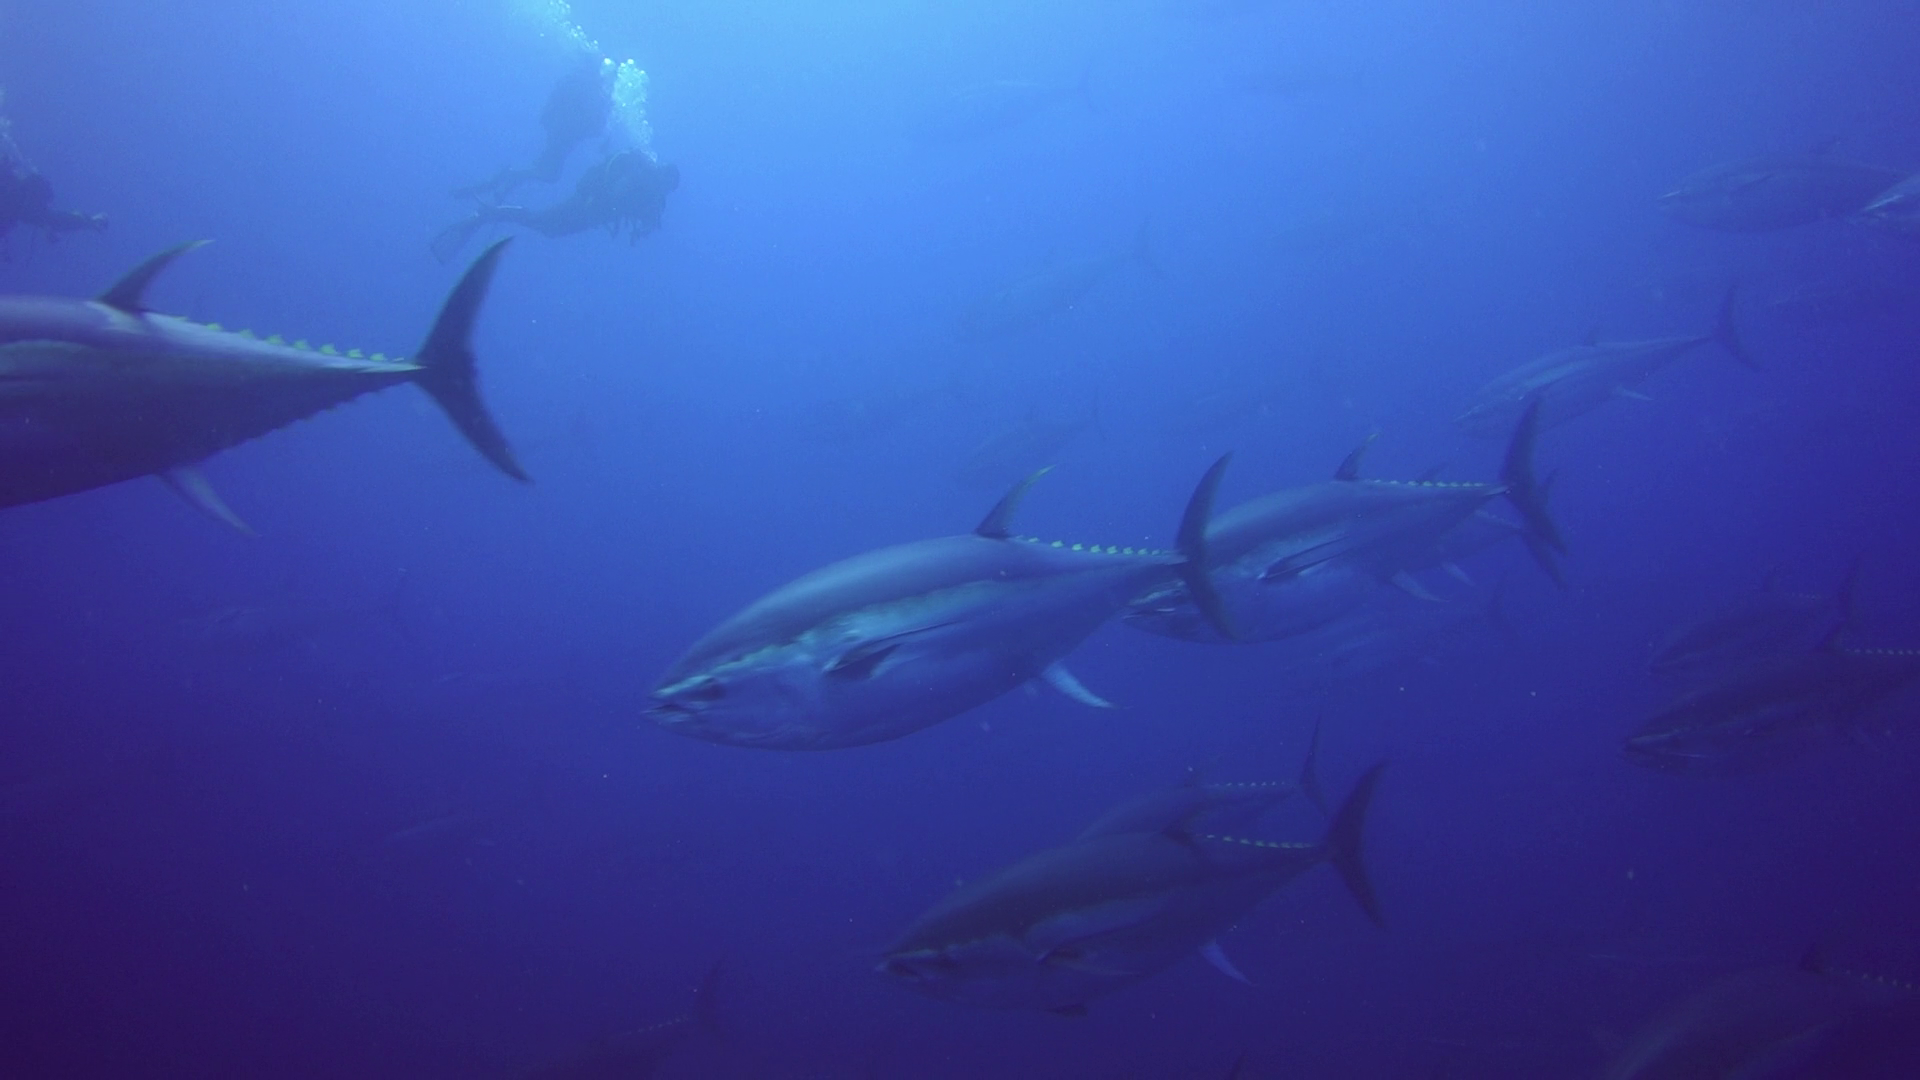
Tunas – AWB with filter
For the first time I use creative mode changing the standard contrast to -3 in order to prevent crushing of blacks.
Exposure was set all along to -1/3 and metering to multi area with AUTO ISO limited 160-800.
I think the results are so good that in fact I have performed no colour correction to any shots in ambient light.
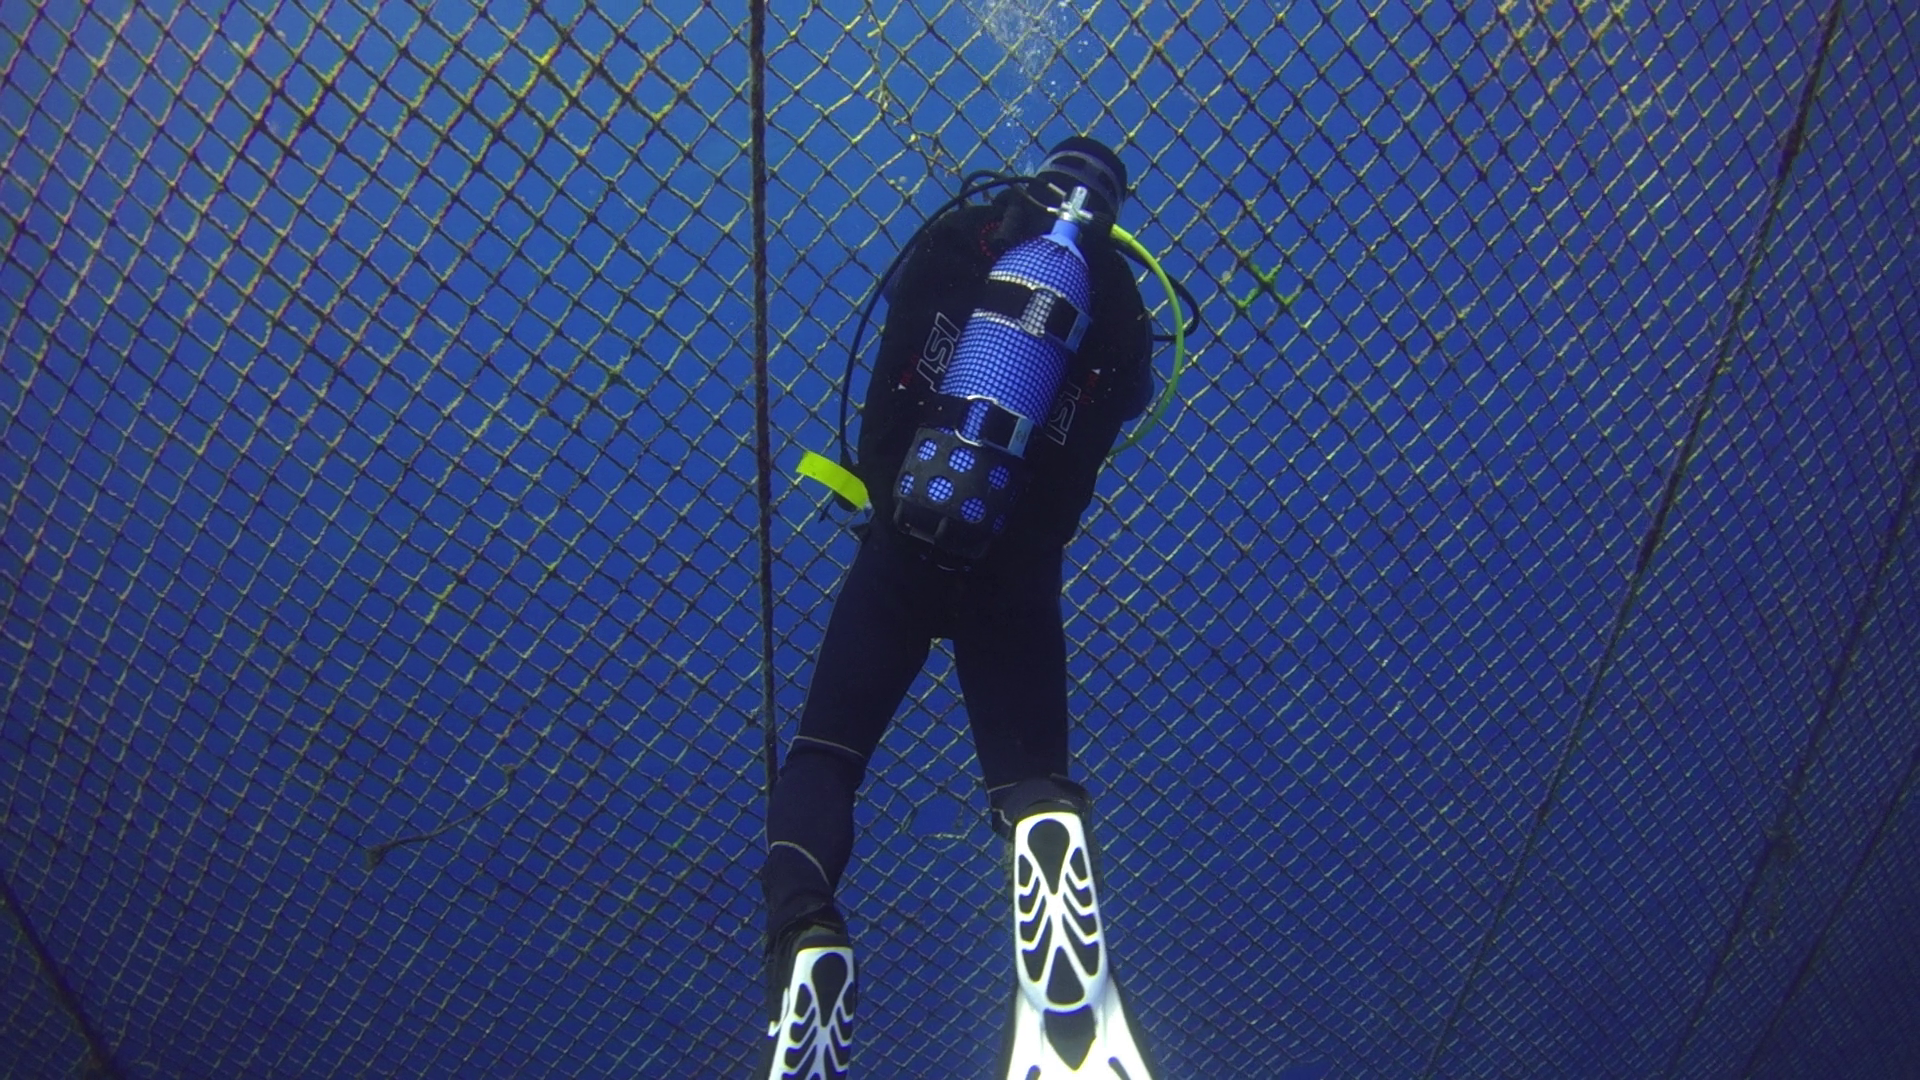
Opening the tuna farm – AWB with filter
For shots with lights I set up first colour temperature to 6500K and A1 to match the lights but then in some of the far shots this resulted a bit cold so I adjusted very slightly in post the temperature.
Seahorse – AWB UCL330
Only 40″ are adjusted in the whole video in essence is as shot and the editing took me half hour.
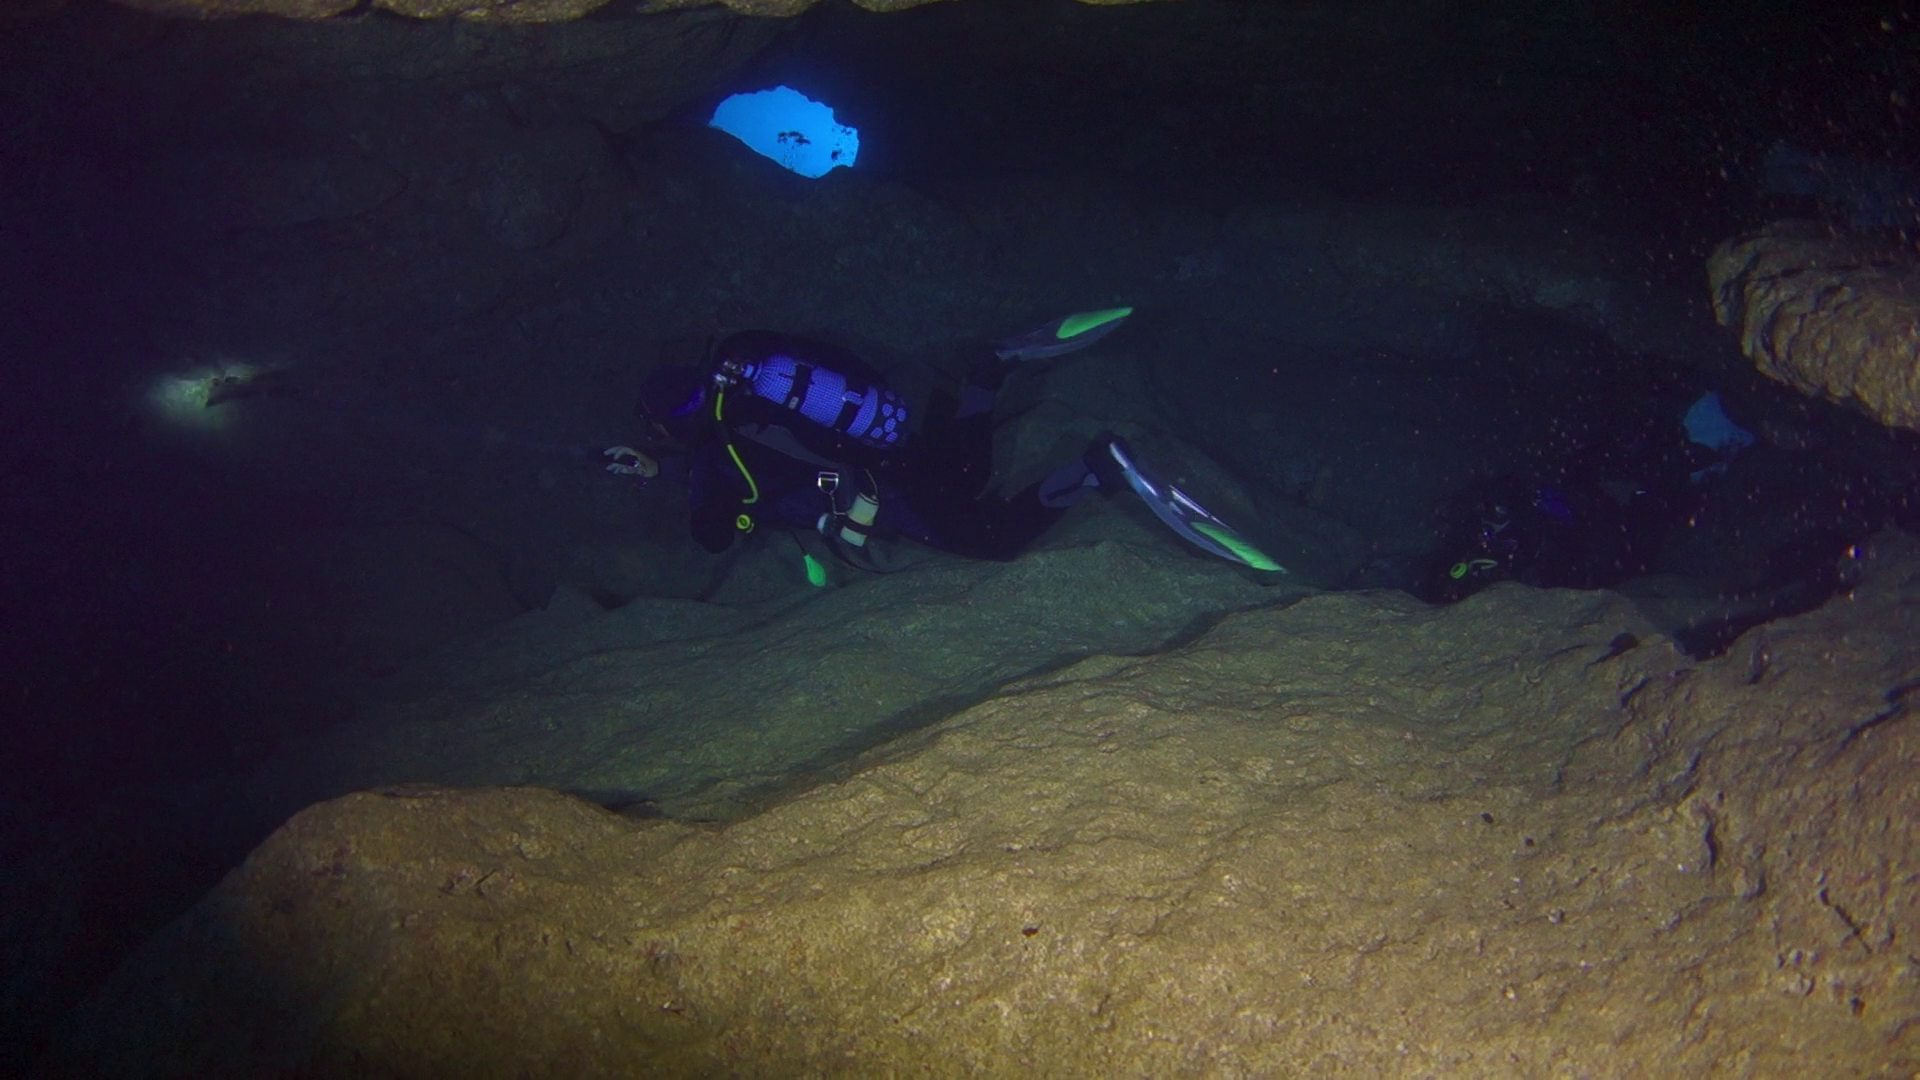
In cave – AWB no filter
I did a bit of analysis and the camera was operating for most at ISO200 with aperture around f/3.5 – f/4.0 which is really the sweet spot of the lens.
I did have some challenges using the UCL330 for some nudibranches that really required a stronger lens so they look a bit small, there was also surge so I had to fight with focus problems but all in all very happy.
Nudibranch – AWB UCL330
The longer working distance of the UCL330 (20-30 cm or 8″ to 1′) proved challenging on walls as you are too far to hang on to anything or use a stick. I will bear this in mind in the future.
For the close up shots I used steady shot active.
I also wanted to say that a few times the camera did manage to white balance properly however the results were not exciting and frankly not worth the hassle. Using the filter is just so much better with the auto white balance.
I receive so many queries about equipment that I thought I would put some of my items on sale.
My cupboard is near enough to explode and I need to streamline the equipment I have. Currently I have 3 strobes, a huge selection of ball and clamp arms, 3/4 and 1/2 locline arms, float arms, floats, video lights, tray bases, around 15 clamps and some 6 macro wet lenses and 3 wide angle wet lenses with 3 different mounts.
I guess it is time for a clear up so I will add a section with items on sale where I will list some of the combination items.
The idea is to provide a full set of lenses or a tray + float solution as those seem to be the most asked for items in my set up.
So if you look on the menu you will see the link Sales items with details of the various sets. I can also sell the items individually but I think this makes little sense as I’d rather do that on ebay.
Many people read my posts and then go to gear shops but there there is always a little mistake or problem getting the whole set up from here you avoid that. I priced the items based on 50% of retail UK price and I would ship to UK and Europe, other overseas will attract import duty so it is not worth it in my opinion.
If there is anything you like use the contact form on the relative page to inquiry
I thought the Red Sea workshop with Alex Mustard was brilliant to I thought of writing down my notes and sharing them with you.
This final post is a general one and has my lesson learned from attending the workshop, those that follow are generic tips that I think would be beneficial to anyone wanting to attend a similar experience.
Before the Workshop
The experience actually starts before you even attend the sessions key points for me include:
Ask questions about the workshop and how it works
Know your equipment
Take all the gear you have
Be fit and self reliant
Set your self objectives
I did not really ask many questions before going as Dr Mustard sent a very comprehensive document however this is not standard and it is better to ask in advance about the conditions, the dives, the type of training and generally how the workshops is organized. Some have talks, other have one to one, other are just dive trips where you ask when you need. Not all types fit everyone so better to make sure you go to one that matches your need.
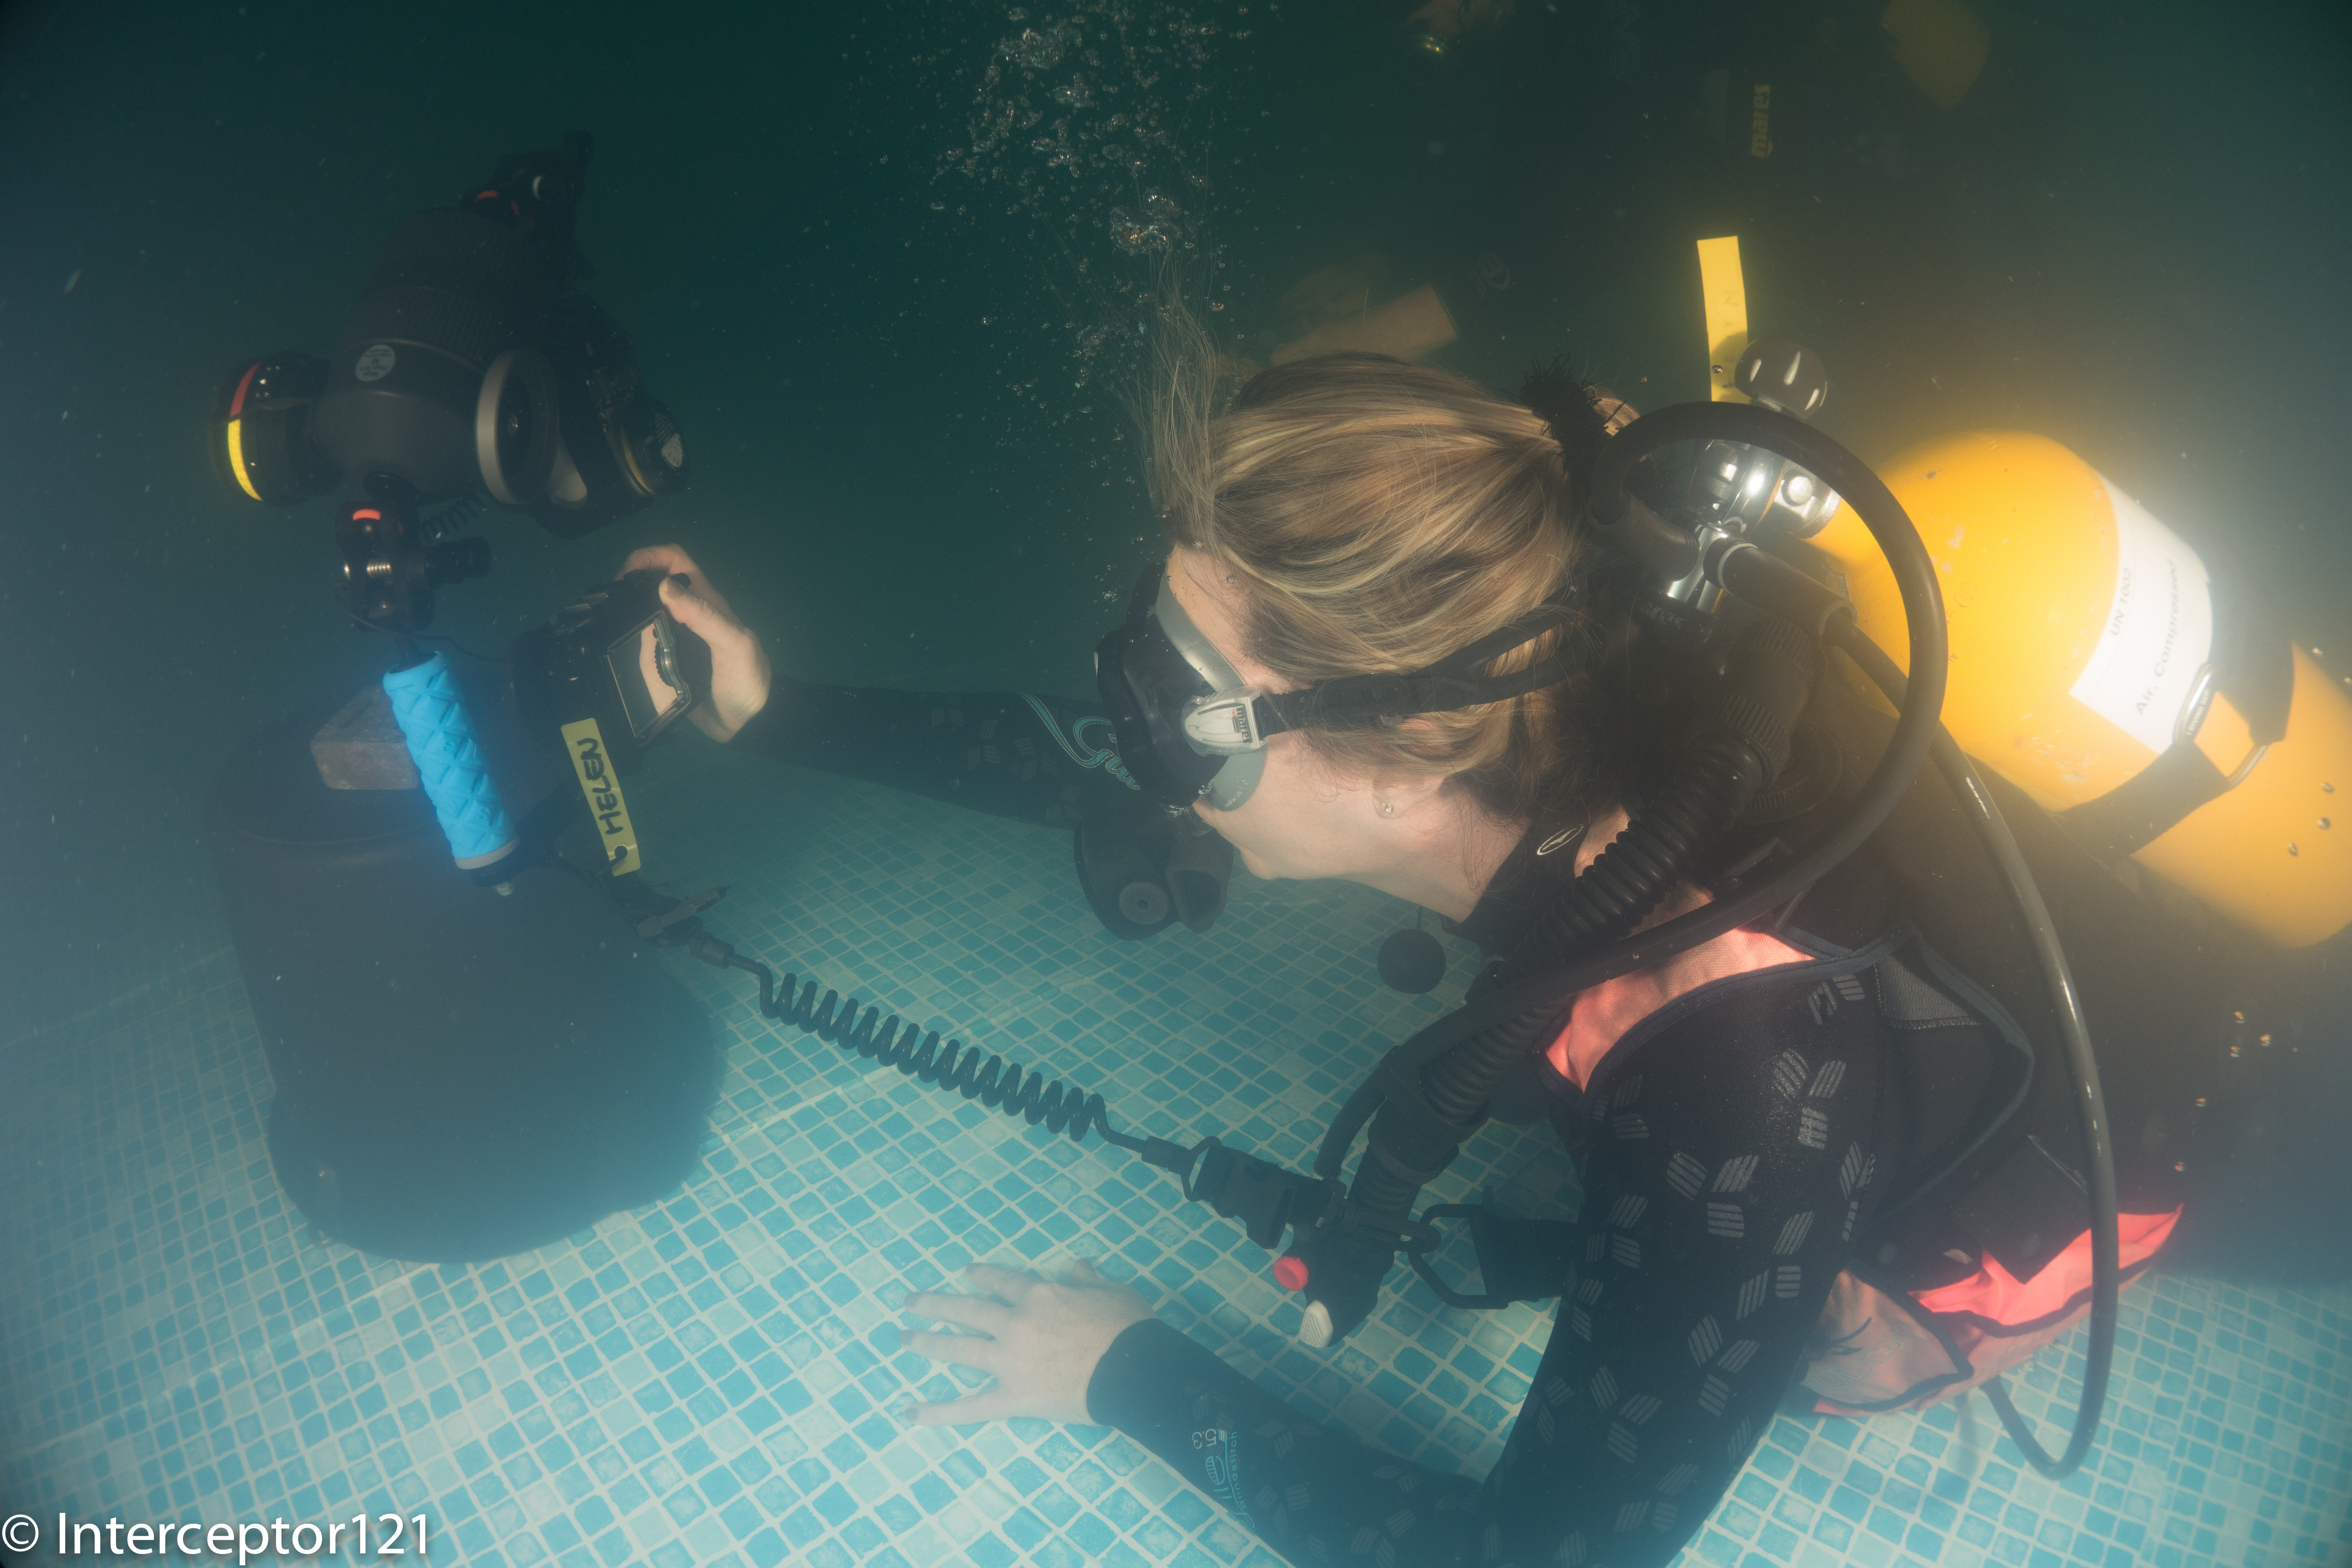
Sadly even this time like in every trip I have come across people using their equipment or part of their equipment for the first time. The end results is wasted dives and opportunities, I cannot stress enough that testing your rig in a pool before going allows you to familiarize with it and make any corrections you need.
Pool Practice
Also take all the possible lens, ports, parts that may be useful. Once you are there you don’t want to have regrets about something you have left home. In my case all was there but I did not know about remote strobes otherwise I would have got myself a trigger as I have 2 Z240s.
In case of doubt exceed with equipment
In most of those workshops buddy system does not really apply so make sure you are self reliant and fit as the conditions allow to avoid embarrassing or even dangerous incidents. Once there dive within your comfort limit and if you don’t really have a buddy dive with a guide.
It is useful to know before you go what your objectives are, for example what type of shots you want to work on. This means you have something to do over and above the assigned tasks.
During the workshop
Once there you need to stay focused on your performance. Those are additional points to think about:
Deliver the assigned tasks
Go off the beaten track
Learn from other participants
Take notes
Sometimes during those workshop there are challenges or set shot that are suggested, this is your opportunity to compare your work with others and therefore you should make sure you deliver those also to find out if there are limits with your equipment.
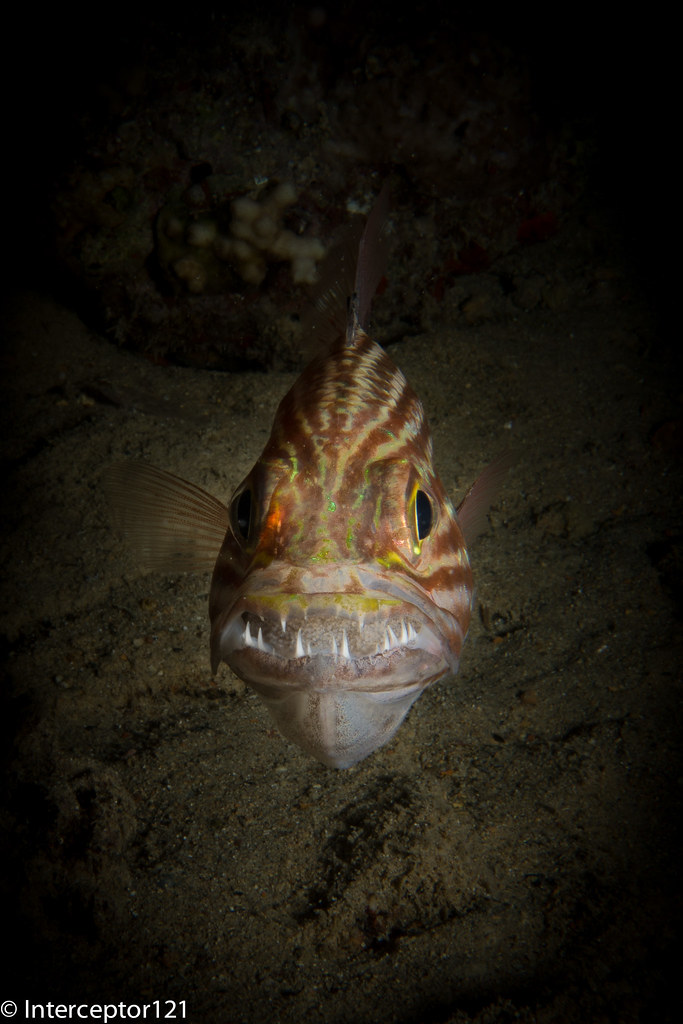
In the Red Sea workshop were given the task of taking pictures of cardinal fish with eggs in their mouth. I realized I could not fill the frame because I lacked a mid range close up lens and my camera would not focus closer.
In addition to the suggested shots you should make changes to those and try something different even if not totally different.
There are many landscape split shots but not many portrait so why not try one results can be excellent and it is easier with a small dome.
Other participants also will give a go to the same shots or have better editing skills it is worth to watch and learn.
My buddy was setting up a remote strobe I fired a few shots (unintentionally of course) so I got my own shot!
Finally take notes of what you did right and wrong and if you missed anything.
After the workshop
After the sessions are over still there is work to do over and above going over your pictures again.
Write down your lessons learned
Look at other people images
Order any equipment that you missed
Well it goes without saying that I put the notes together and summarized them here.
I also found great to connect to other people and then look at their gallery for other shots that we had not discussed before.
Finally I ordered myself an Inon UCL330, funny I had this lens and sold it not realizing the real use which is fish portraits!!!
That’s all for now if you go on a workshop soon I hope you find this useful.
On Friday we were up for our last 3 dives at Shark Reef the current had not changed but this time I decided to give more a go to the schooling fish after setting up all the backgrounds I wanted.
As you can see from the image on the title we had more of the usual divers chasing fish but this did not deter me this time as I developed a specific technique to do the dive that I used fully on the last two photo dives.
So after a bit of experimental shots like this one
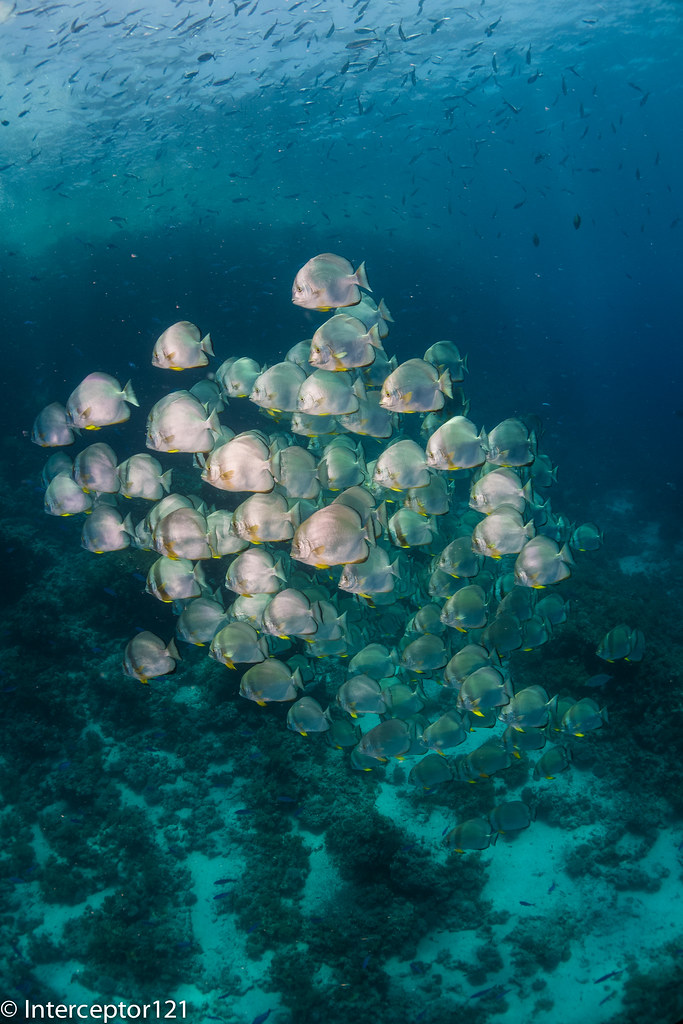
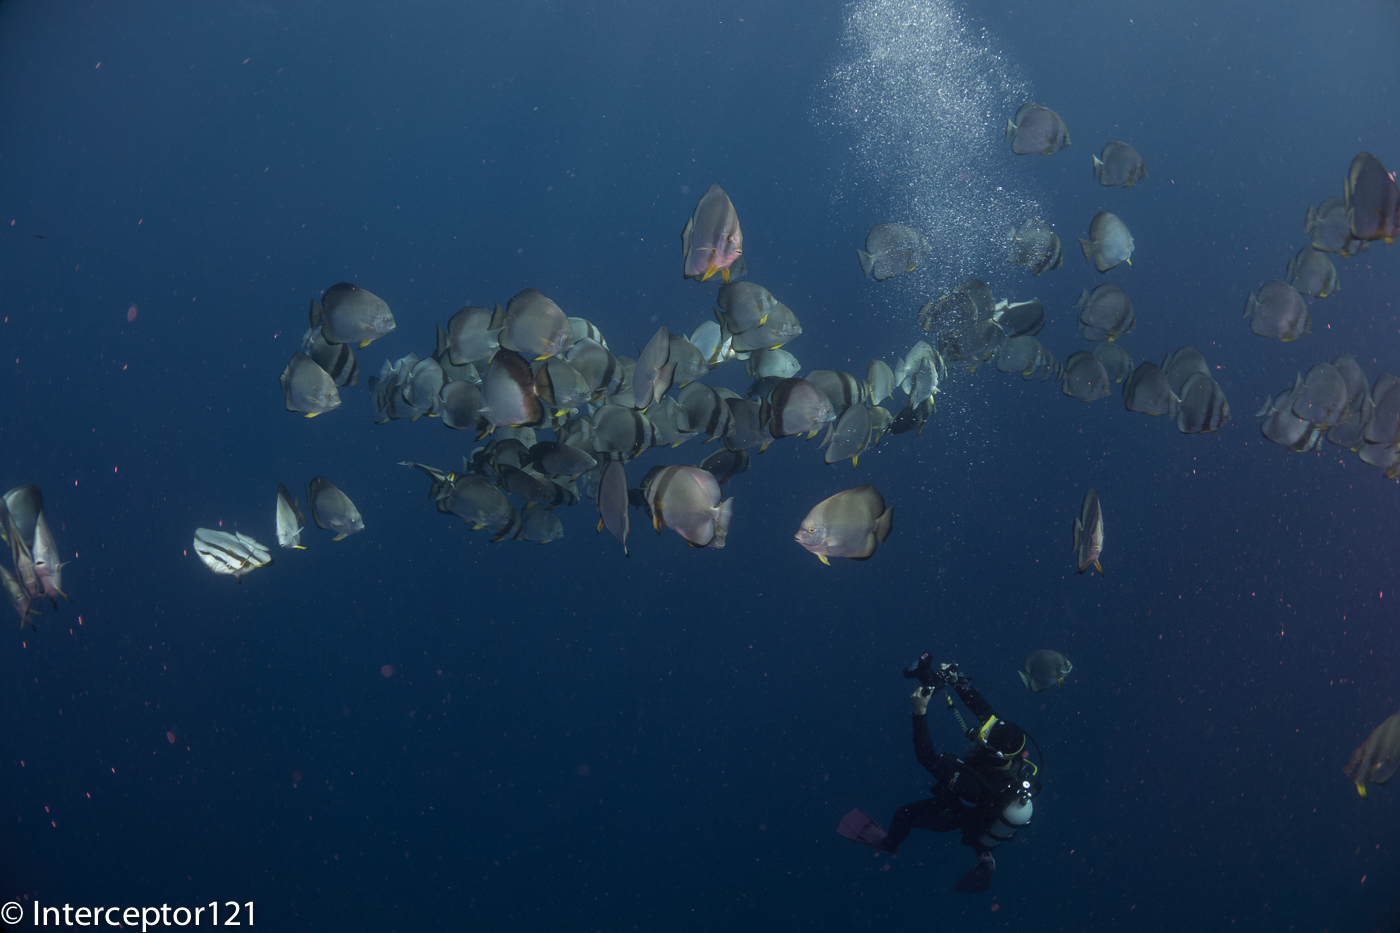
Batfish school from Top
It was time to give it a proper go. To be honest is not that I like batfish that much and probably this is one fish that you can shoot in RAW in ambient light however if you do that you need to sacrifice quite a few ISO stops. With strobes the issue is to get the school in a formation that allows you to do a good job with lighting. This is my best shot for the session.
What I like about this shot is the light on the fish or most of it where you can see yellow fins but also the background and a hint of surface.
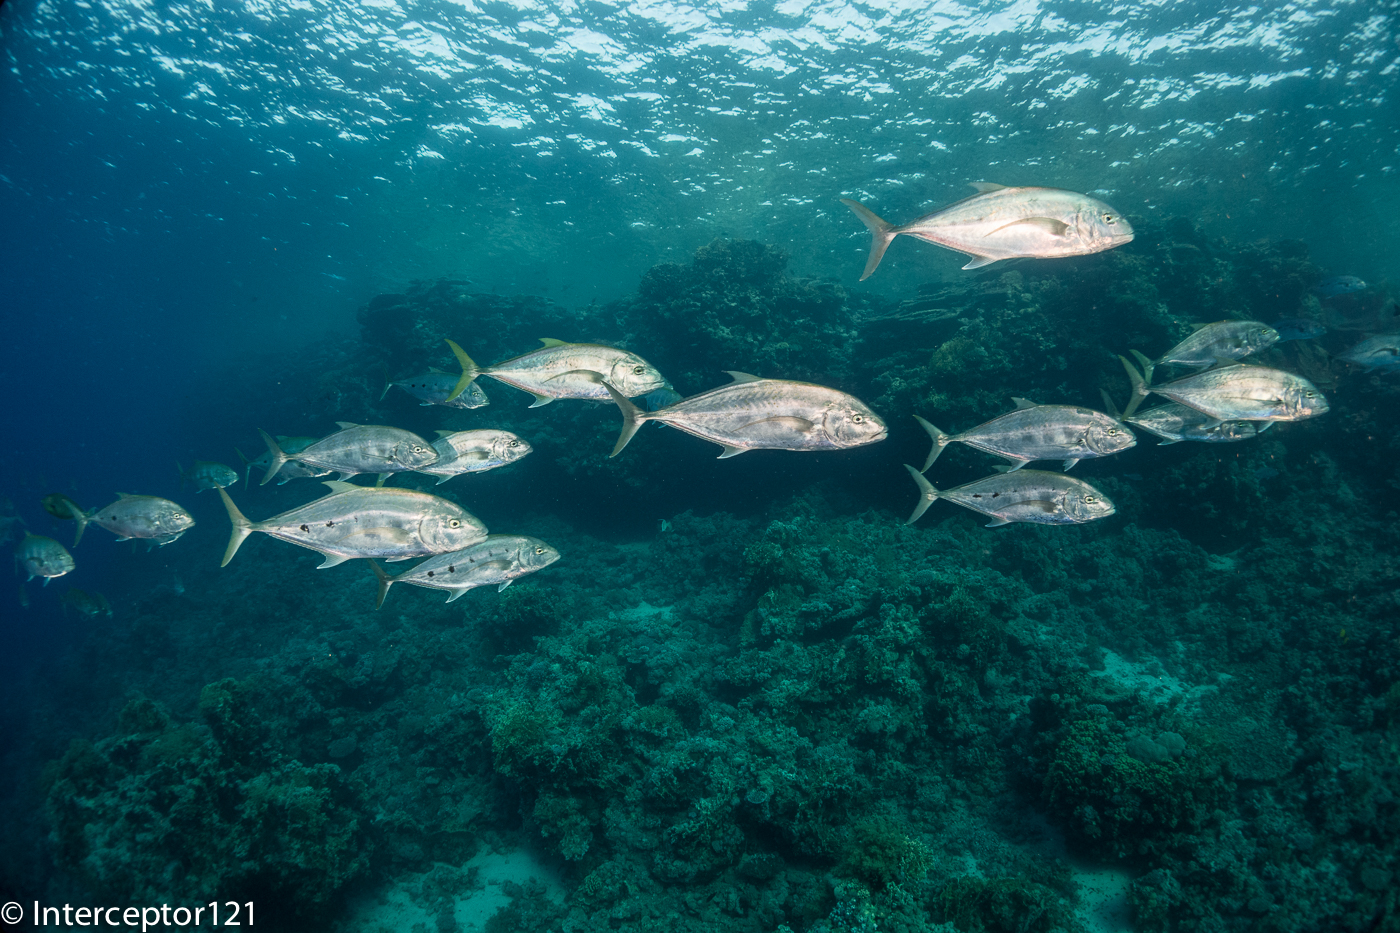
Other fish that featured on the day were jacks but catching a school of those running past is quite hard unless the school is really big and they circle you.
Jacks Schooling
In those type of formation you have all sort of issues with hightlights form the strobes in fact I was shooting 1/4 of power.
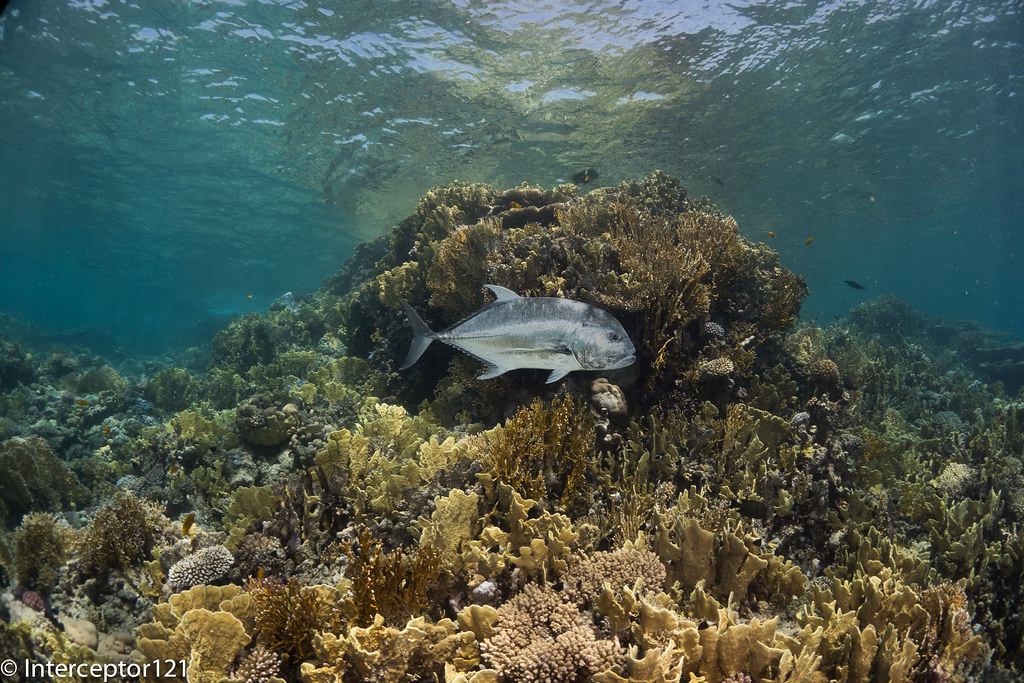
Giant trevallies made a more interesting single fish shot like this one.
Contrary to what you may think this is a shot with strobes otherwise you would not see the texture of the fish as you see it. Maybe a busy background but good technical exercise.
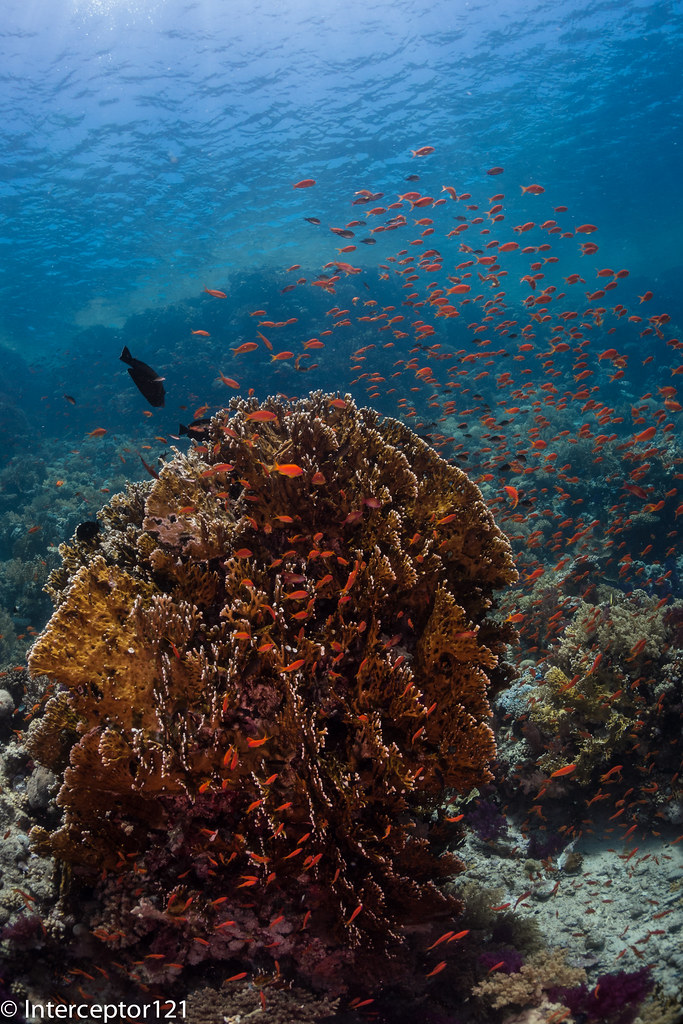
I also attempted a few anthias shots just to try a well tested technique to get them buzzing out the reef
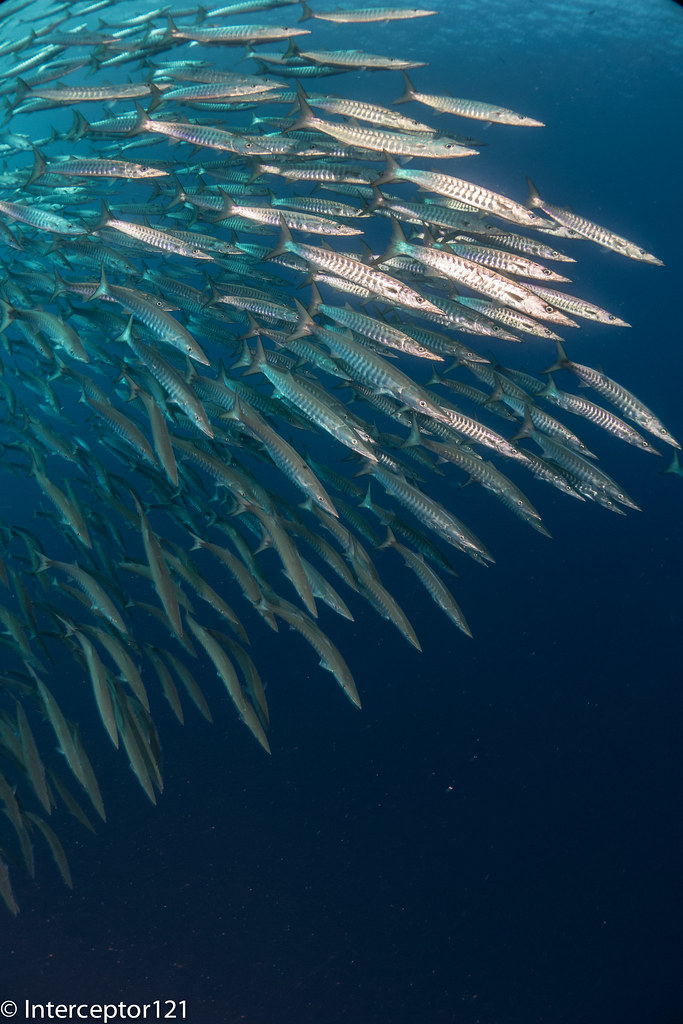
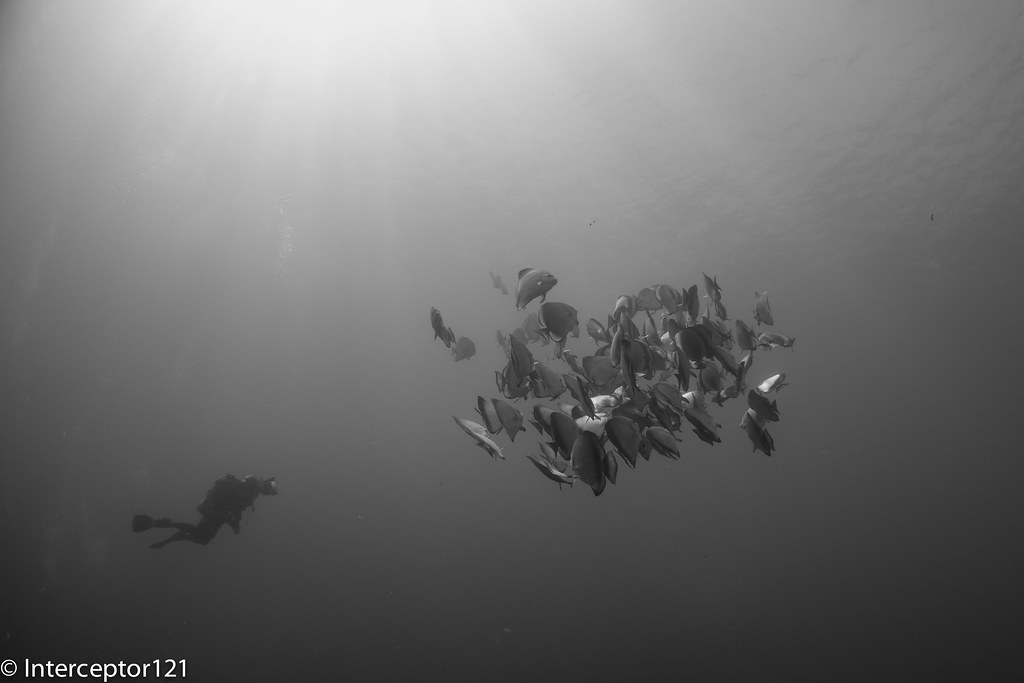
In the middle of the dives while I was waiting the barracuda school came out to play. Barracudas are quite tough as they require strobes to lit properly and I find the multitude of black and white shots that you see a bit boring as the fish texture is what makes the shot.
You have several challenges with the formation, if the school is big is difficult to take it all unless you are on the bottom or on the top. In the first case you need to control bubbles in the second you shoot the bottom so better be neat.
Anyway with a bit of patience I got the shot that I wanted
It is impossible to illuminate properly all of them but this shot has got the right geometry and I think is quite pleasant.
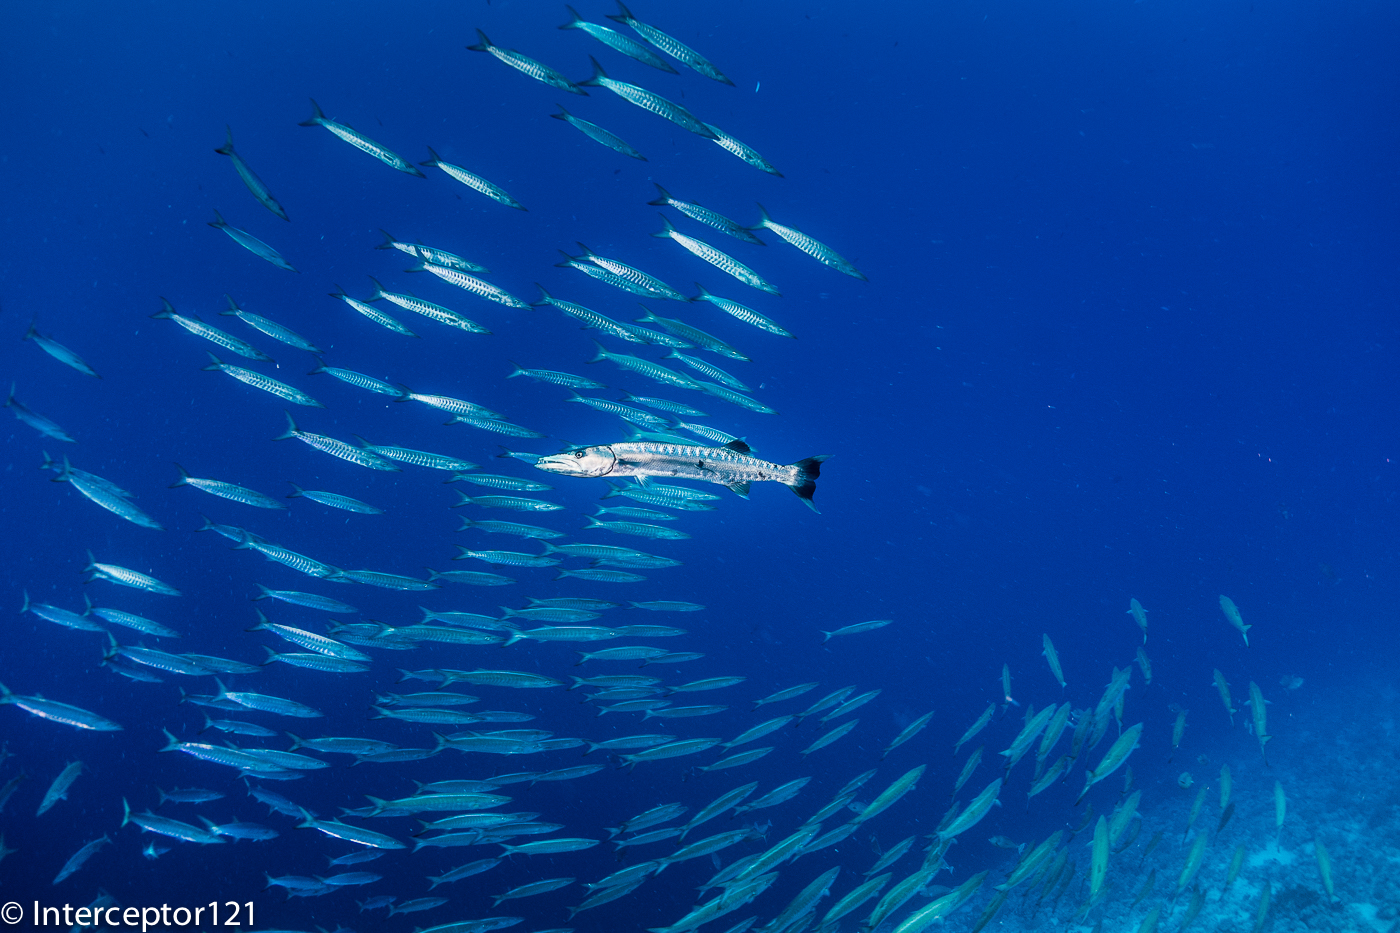
On the second dive I was lucky to spend some time with a Giant Barracuda that was literally commanding the school at sight, very rewarding from a diving point of view I got so excited that I kept shooting with a relatively slow shutter speed however the fish that is lit by the strobe is well crisp.
Giant Barracuda issuing orders
This shot is much deeper than the previous so the blue is colder but still makes for an interesting shot.
On dive 3 I decided to do a bit of video although I had not taken my favorite lens so I had to apply a filter directly on the camera lens. Moreover I had forgot the setting Toy effect on from some other experiment and whilst this is off in RAW it came back in video so the result is a soft warmer image…yuk still was fun to put it together so here it goes
It was time to rinse the gear (if you could call that hosing it quickly on the dive platform) and get ready to leave the day after. On the last day we were asked to put together a selection of our best 10 pictures and were give a video with some gopro footage taken by the ops manager plus our slideshow. Considering the time it was spent to do it the result is excellent.I hope this has given you an idea of the workshop that I definitely recommend, on the next post I will write my personal lessons learned from such experience.
As the currents were not playing ball we decided to head to Tiran to dive Jackson reef.
I love jackson as a dive and a video dive but I was a bit vary from a photography point of view as lighting can be a problem.
Anyway there was an option for a hammerhead dive in the early morning or a first dive on Jackson followed by a second before returning to Ras Katy for an afternoon and sunset dive.
Hammerhead are found on the back of Jackson reef when there are shallow thermoclines with the surface at 26C the chances were low however I had alternative ideas for that dive.
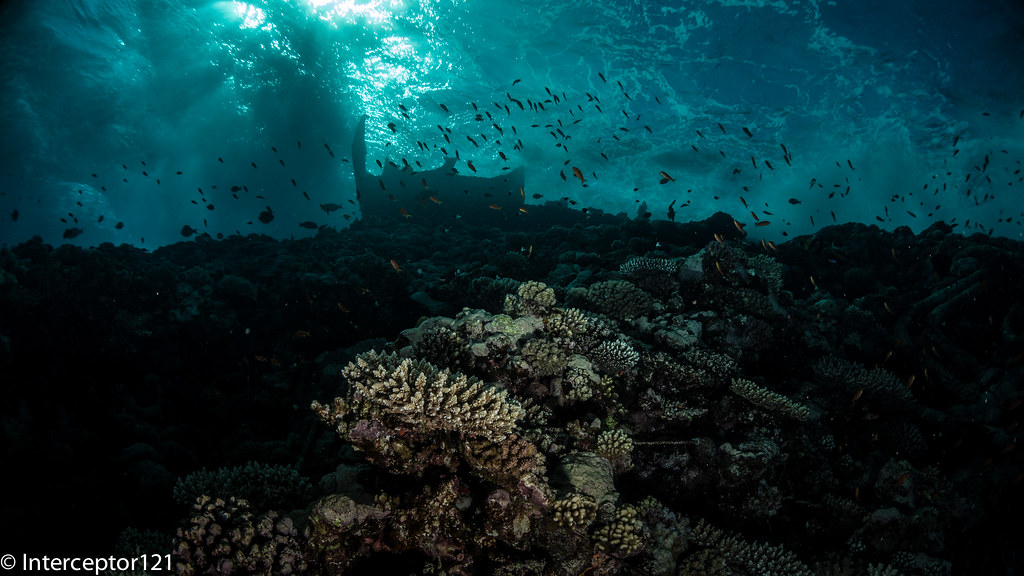
As foreseen there were no hammerheads so towards the end of the dive I tried a few shots of the Lara Wreck (that is on the surface) through the Snell window despite the strong surf.
The resulting shot is currently my desktop theme and is here.
I tried to get the wreck on the surface, the breaking surf, the sunball, some fish or at least silhouette of fish and the hard coral to give a dramatic moody look to the image.
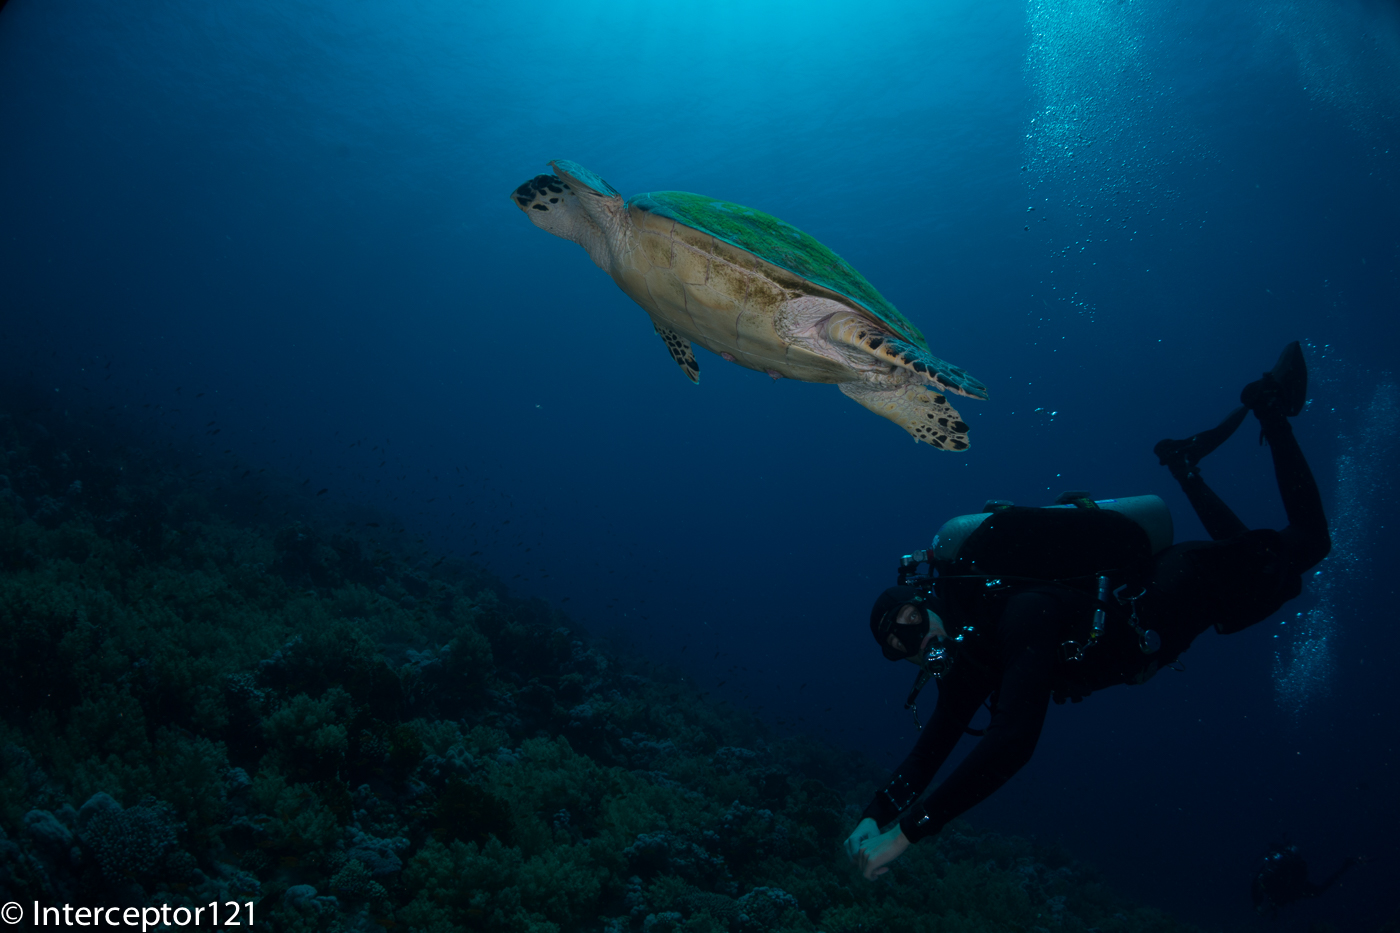
On dive two was time to have a relaxing dive with not much effort on photos. I saw few tunas at around 28 meters that is unusual and a turtle and some other critters though the shots are not particularly exciting.
In one occasion a dive guide came to be all excited as he had seen a turtle so I went there and bumped into our own guides that were out for a fun dive.
Turtle and Dive Guide
They usually are asked to get out of the frame instead I took the shot for their facebook perusal.
When the turtle had enough she shot off to the surface and I tried a silhouette however I forgot the strobe on
Failed Silhouette
Nothing that lighroom can’t fix and this is the resulting shot after adjustment
Silhouette after lightroom
Not bad huh?
Back at Ras Katy I tried few more portraits like this one
Fish Portrait
Though my favorite is another
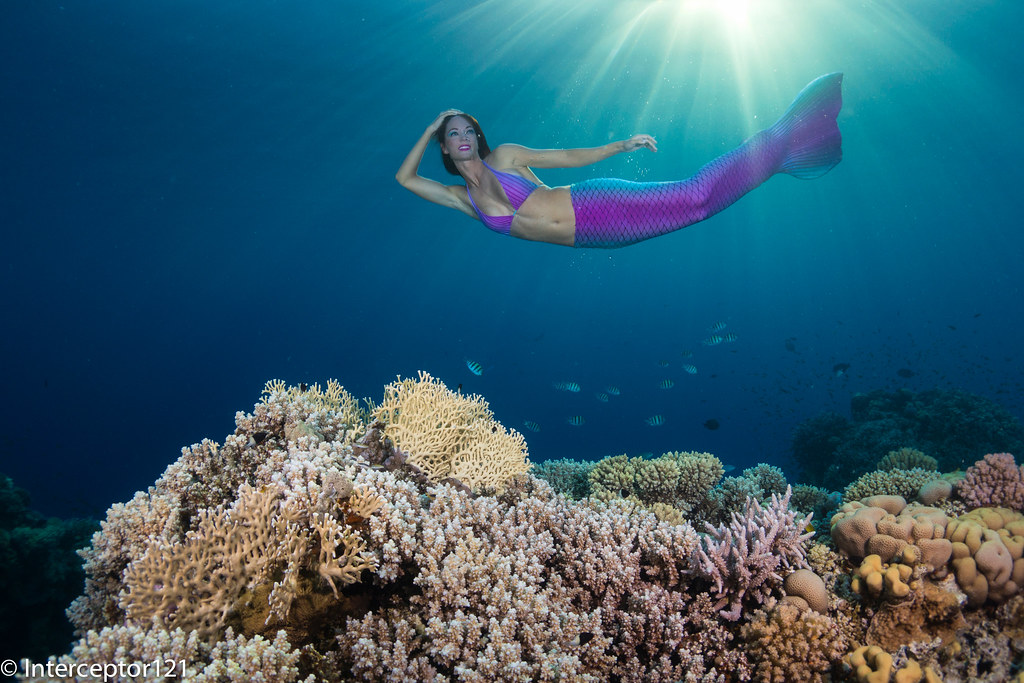
At sunset I was part of the mermaid group, we had a model Katrin Felton suprising what a phenomena Mermaid tails have become.
We had a 2-3 shots in different poses however only the first was successful as the snell windows was ruined by one of the photographer that keept shooting with strobe…and getting in the way as she did not listen to the briefing properly well no big deal.
Anyway I gave it a shot afterwards Kat was not particularly happy about the barrel distortion that she said makes her look fat! Unfortunately I did not have a rectilinear lens anyway if you find yourself in this kind of set up make sure you have one.
All in all it was a bit of fun again I tried to include some fish, the reef, the mermaid, the sun rays. I looked at other pictures of the mermaid and I think she can’t appreciate how important is not to see the knees too much but I guess she likes to focus more on her figure on how slim she looks lol!
All in all another great day and a different perspective on shooting model underwater.
After the first 3 days of workshop we got into the core of it and Alex talked about schooling fish and how to take shots.
We had 4-5 varieties to choose from:
Batfish
Surgeonfish
Barracuda
Jacks
Snappers
Detailed information was given in terms of how to best approach the fish depending on their behavior and also about the etiquette in terms of letting other people best positioned taking their shot first.
The surgeon fish are not that photogenic and actually quite messy I tried to take some shots when the current was pumping and they were all aligned close to the bottom at Yolanda however to me this is not that exciting as a shot. Other people got better results but I frankly was not that bothered about Surgeons. Probably as the fish is pretty dark and does not reflect the strobe much. The featured image close to the title shows what I mean.
During this trip the current was not going north to south as usual but there was near to no current at shark reef and current going outward at yolanda corner. This means the snappers that usually sit at the edge of shark reef were not out to play.
We were left with barracuda, batfish and jacks to choose from. On day 4 I only see few giant trevally but not many schooling jacks so had to focus on barracuda and batfish.
Unfortunately the barracuda were far from the reef and a bit too deep and did not really want to entertain chasing them so I tried with the batfish. Obviously there were not only us but also other boats so it was a bit of a competition for fish.
Encirclement
Also you always managed to get someone in the frame or bubbles
Shooting Batfish Below
So I focused on trying to get the best backgrounds for the pictures to come like in this case.
Also had some fun taking images of the others and the batfish one or two came out pretty good.
Creative angles
It is quite hard to have the discipline to respect rules when you are with other 18 photographer on the boat so the competitions had to be expected and I was not that bothered.
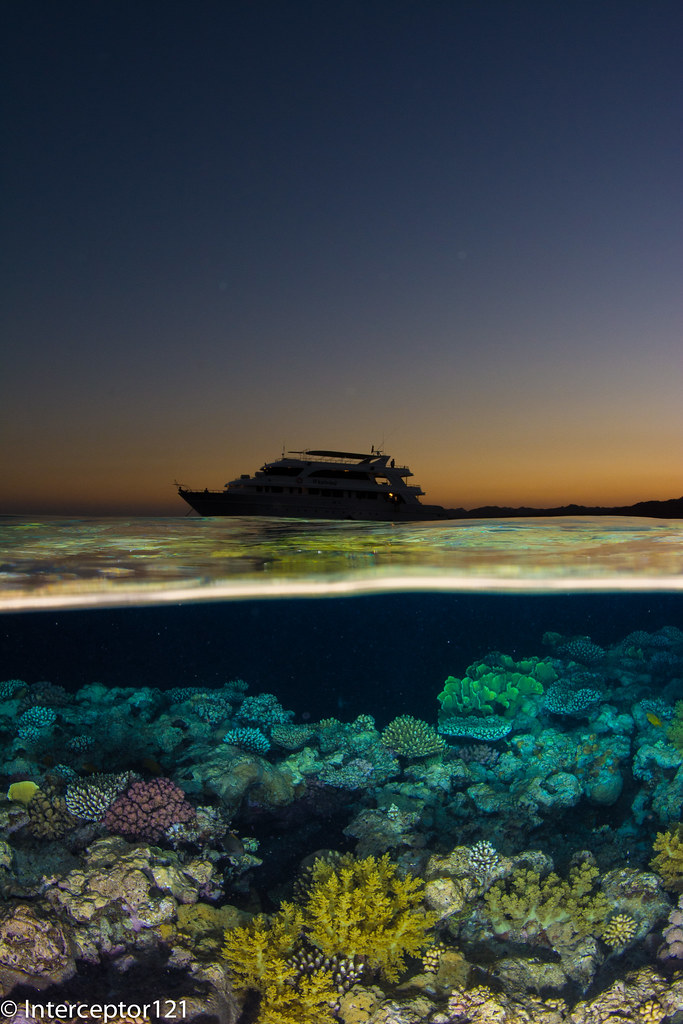
In the evening we headed back to Ras Katy and I borrowed a Nikon D7100 from Nauticam UK. I asked to have a 9″ dome for the split shot and jumped in the water with the idea of just doing that.
This is my best shot
Personally I do not like split shots where the surface line is very distorted to avoid that you need to make sure your lens is near to rectilinear and it is better to shoot portrait as there is little distortion on that axis. What I wanted to capture in this shot is layers, the reef, water under and over, the boat and sunset colors.
I think it came out pretty good but it is painful to take 100 shots just to get one right and I wish I had some fish in the frame but never mind is good enough like this. The water was not really flat so that was an additional challenge as you can see the wave breaks on the lens creating a little thicker line but overall a good shot.