Tag Archives: float arms

Tuition Day with Martin Edge

During the London Dive Show I attended a talk from Martin where he covered a number of shooting situations and how to deal with them in terms of composition and settings.

There was a promotion for a two for one tuition day with him that my buddy was keen to take so few months later we made our way to Dorset for a day of underwater photography with Martin.

This will be my first day of shooting with the RX100 Mark II albeit in a pool with my new arms and lenses so I was looking forward to it.

We arrived in Poole the night before and got ready for an 8.30 start with Martin.

We started off with a review of some basic exposure concepts and then looked at competition winning pictures and trying to identify what makes a wow picture. It was extremely useful!

Afterwards we went through our trips pictures so he could see what needed improving. Then look at what was needed for the next trip.

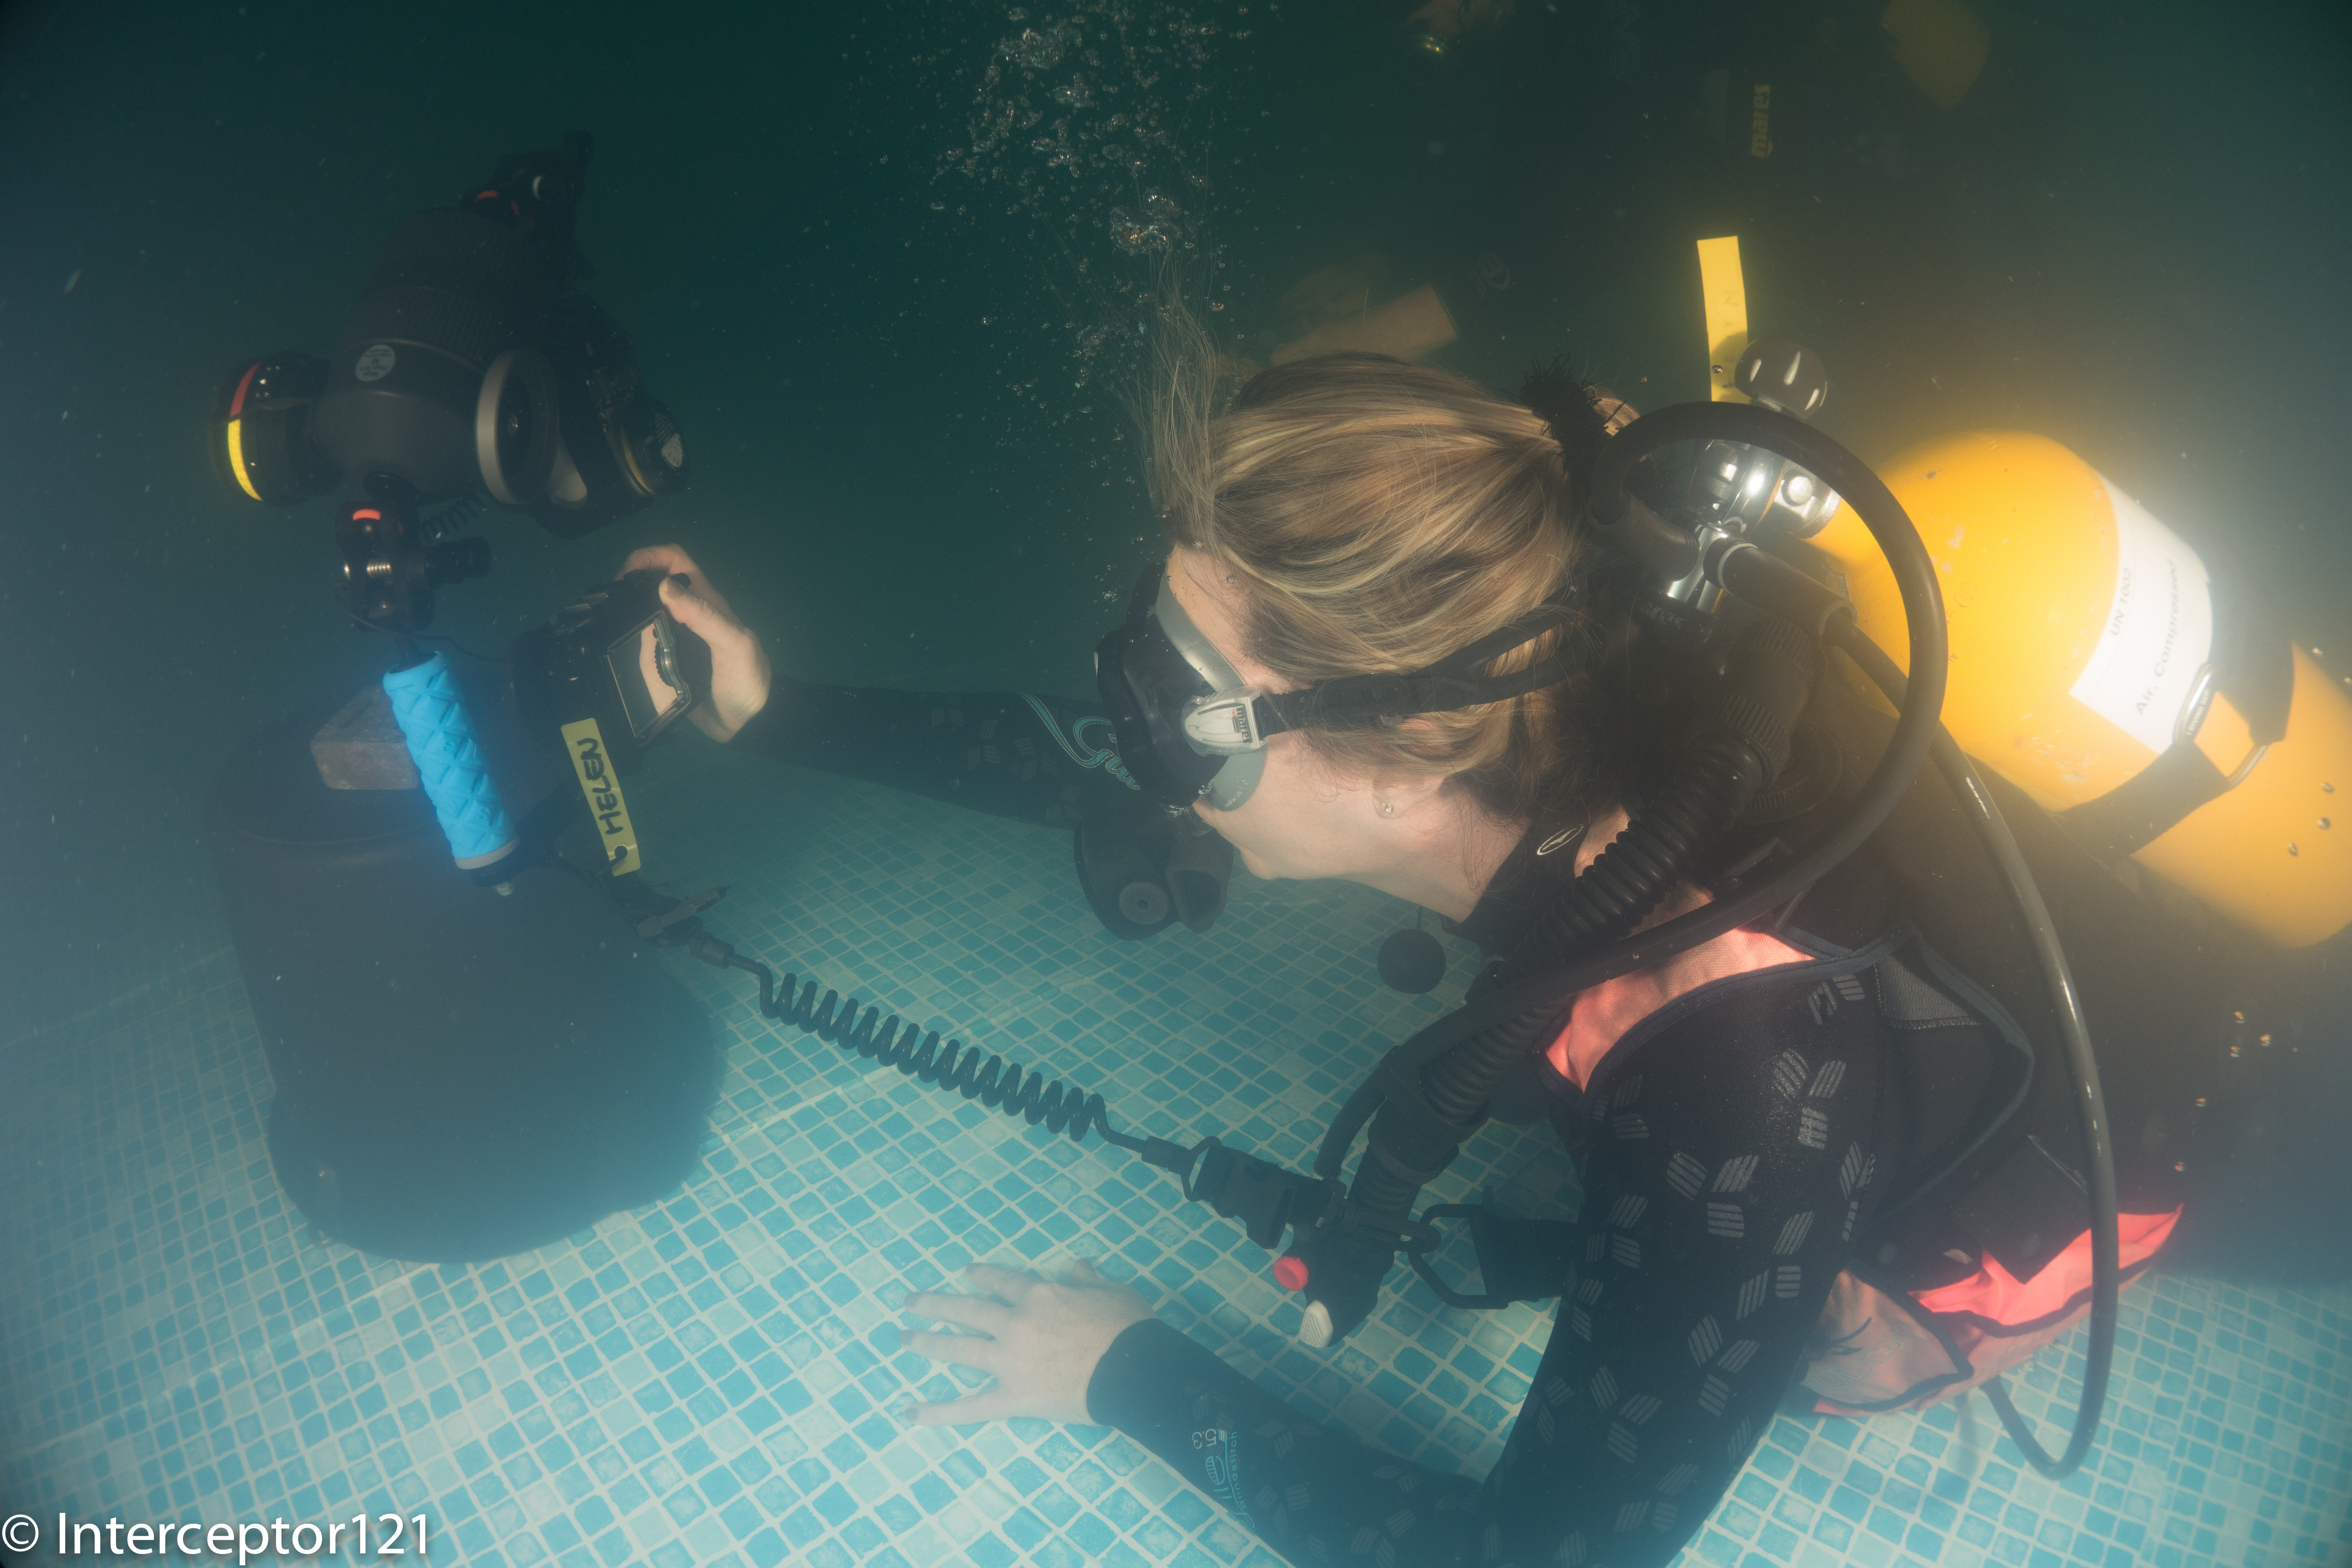
With that in mind we set up to jump in the pool to take some pictures the objective was to improve my buddy close ups and portraits as apparently her wide angle is as good as it gets with the Canon S95 used see featured image on this post.

Pool conditions were low visibility and plenty of suspended particles as the pool is used for kids swimming lessons let me give you an idea!

Pool Conditions
Pool Conditions

The first task was to shoot a frog with a view of eliminating shadows in its mouth. Start with one strobe and finish off with two.

Frog at 28mm
Frog at 28mm

The frog with the bare port gives you an idea of the size and the complexity of the task with one strobe. There are shadows in his mouth.

Frog at 50mm
Frog at 50mm

I then shot a portrait at 50mm, the reason why you see shadows more on the left is because I set the strobe at different powers.

Frog single diopter
Frog single diopter

The magnification of the RX100 is little so I went on with a first Inon UCL-165 and full zoom at 100mm equivalent. Note that everything is pretty much sharp at f/11.

Frog Double Diopter
Frog Double Diopter

With two Inon UCL-165 focusing on the mouth will result in this and the eyes being in focus and the rest blurred because of lack of depth of field.

Octopus fisheye
Octopus fisheye

I then moved to an Octopus rich of textures. I took the first shot with my Inon UWL-100 28AD with dome.

Octopus at 28mm
Octopus at 28mm

The same octo at 28mm fills the frame much more of course.

Octopus at 50mm
Octopus at 50mm

The Octopus at 50mm looks even better. I have topped up the lighting on this one.

Octopus single diopter

I then took this guy with a single UCL-165 note the depth of field insufficient to keep the back of the head in focus, results though are exceptional.

Octopus double diopter

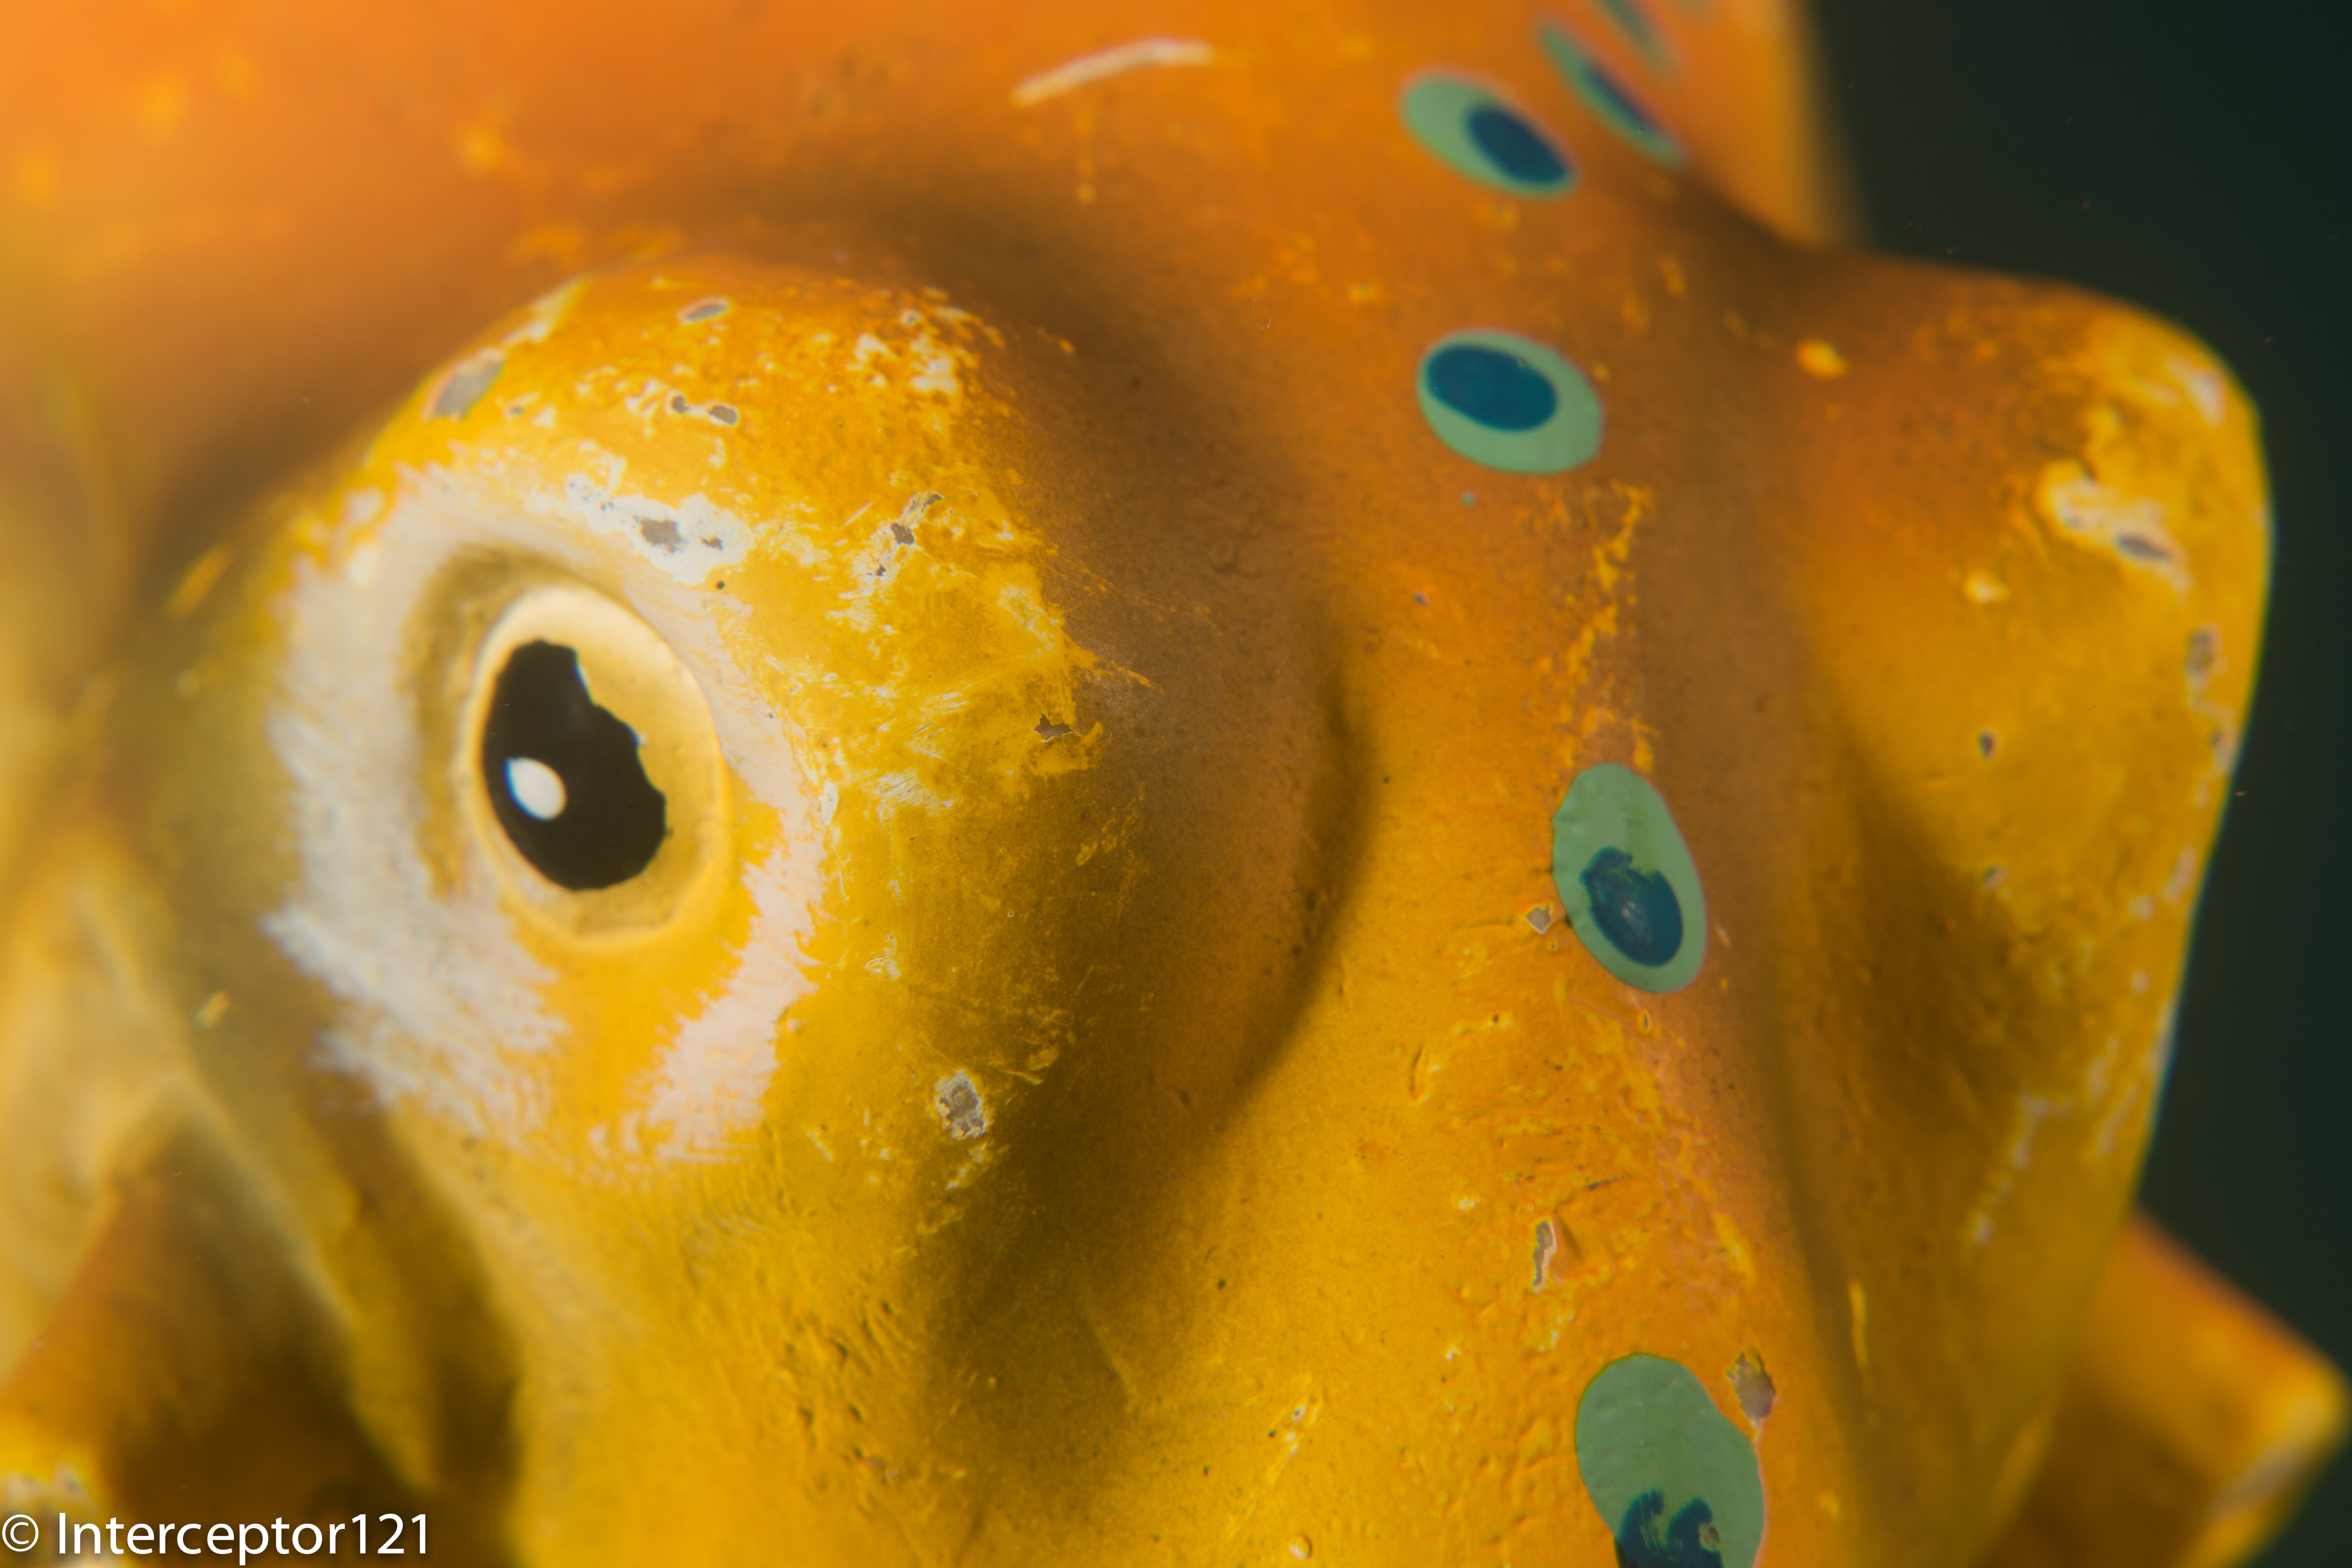
With two close up lenses we go back to the depth of field problem even at f/11.

I thought I had at that point nailed all focus and strobe issues, especially considering I shot with single auto focus, I did not bother using manual focus at all with exception of some double diopter shots.

I then tried a few surface reflections with the fisheye this being the best.

Falcon Fisheye
Falcon Fisheye

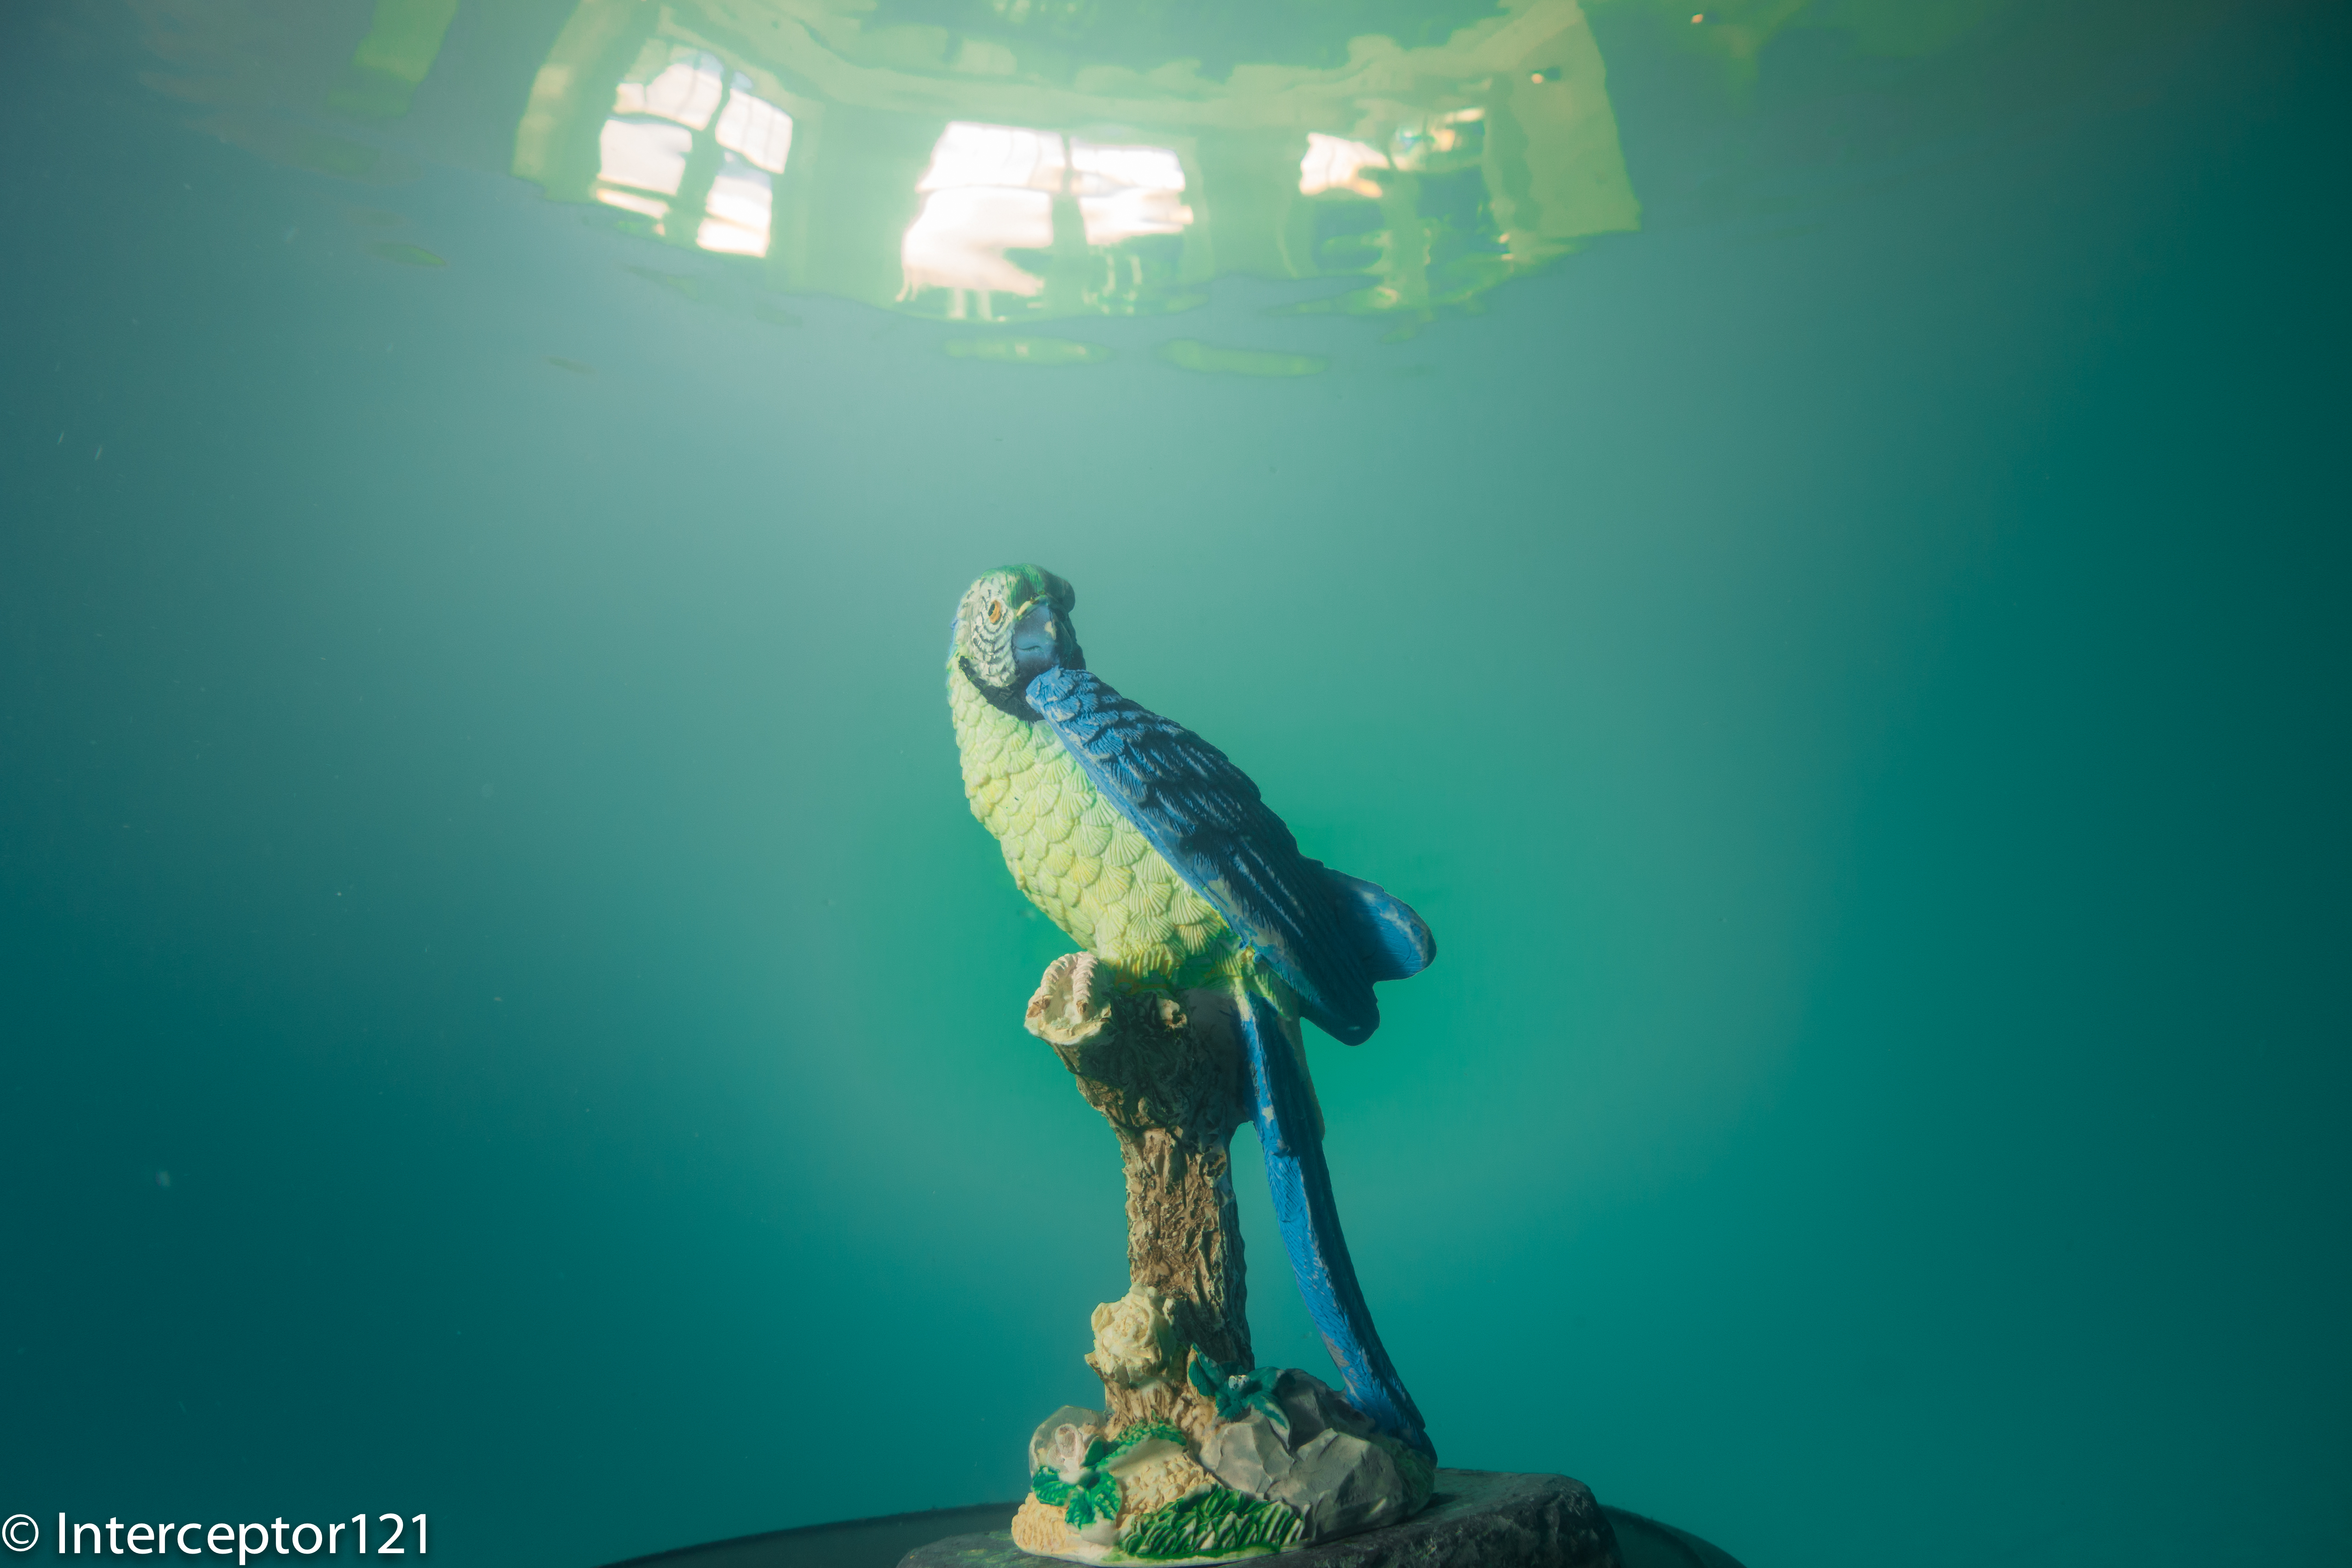
You can see the outside of the pool and the windows on the top.

Family Fisheye
Family Fisheye

Afterwards made my own composition of statues for a fisheye shot that I think came out very well. The Z240 performed extremely well in both TTL and external auto as well as manual.

Child with dog
Child with dog

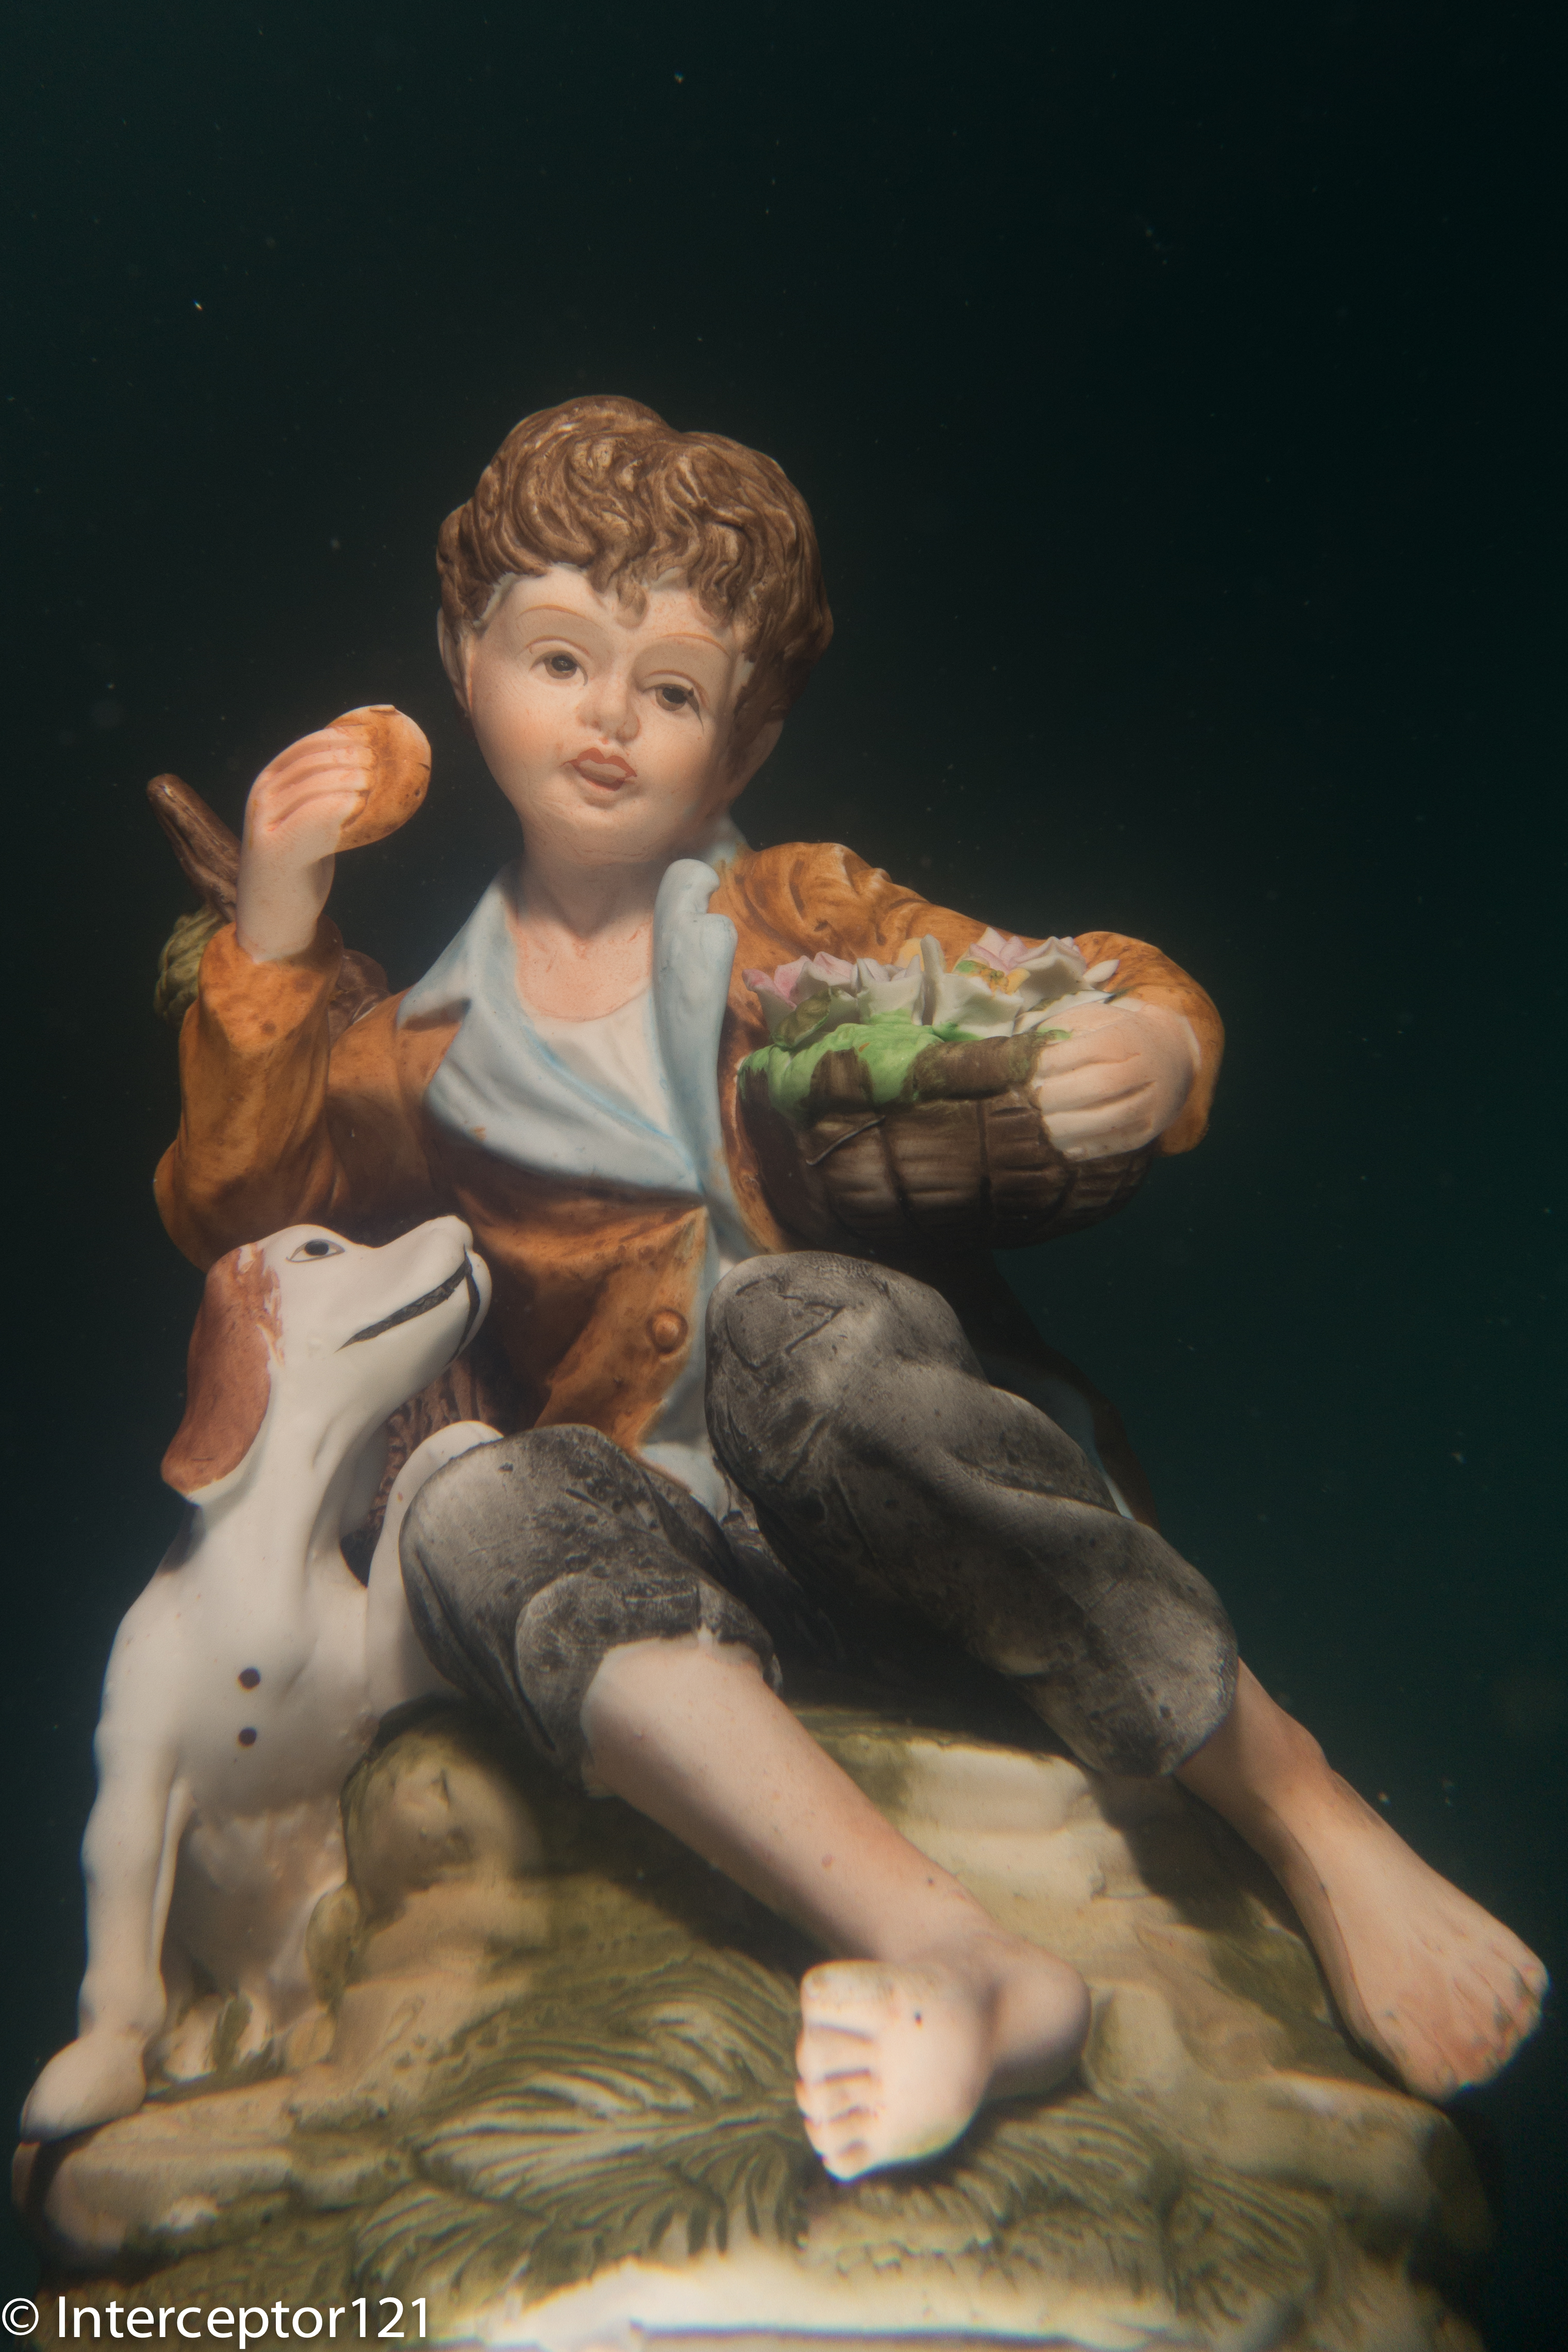
Martin asked me to have a go at the child with the dog as it is extremely difficult to lit up properly.

I went for an alternative strobe placement with light from the bottom as if it was in a gallery. He was impressed with the results.

Lion Mouth Single Diopter

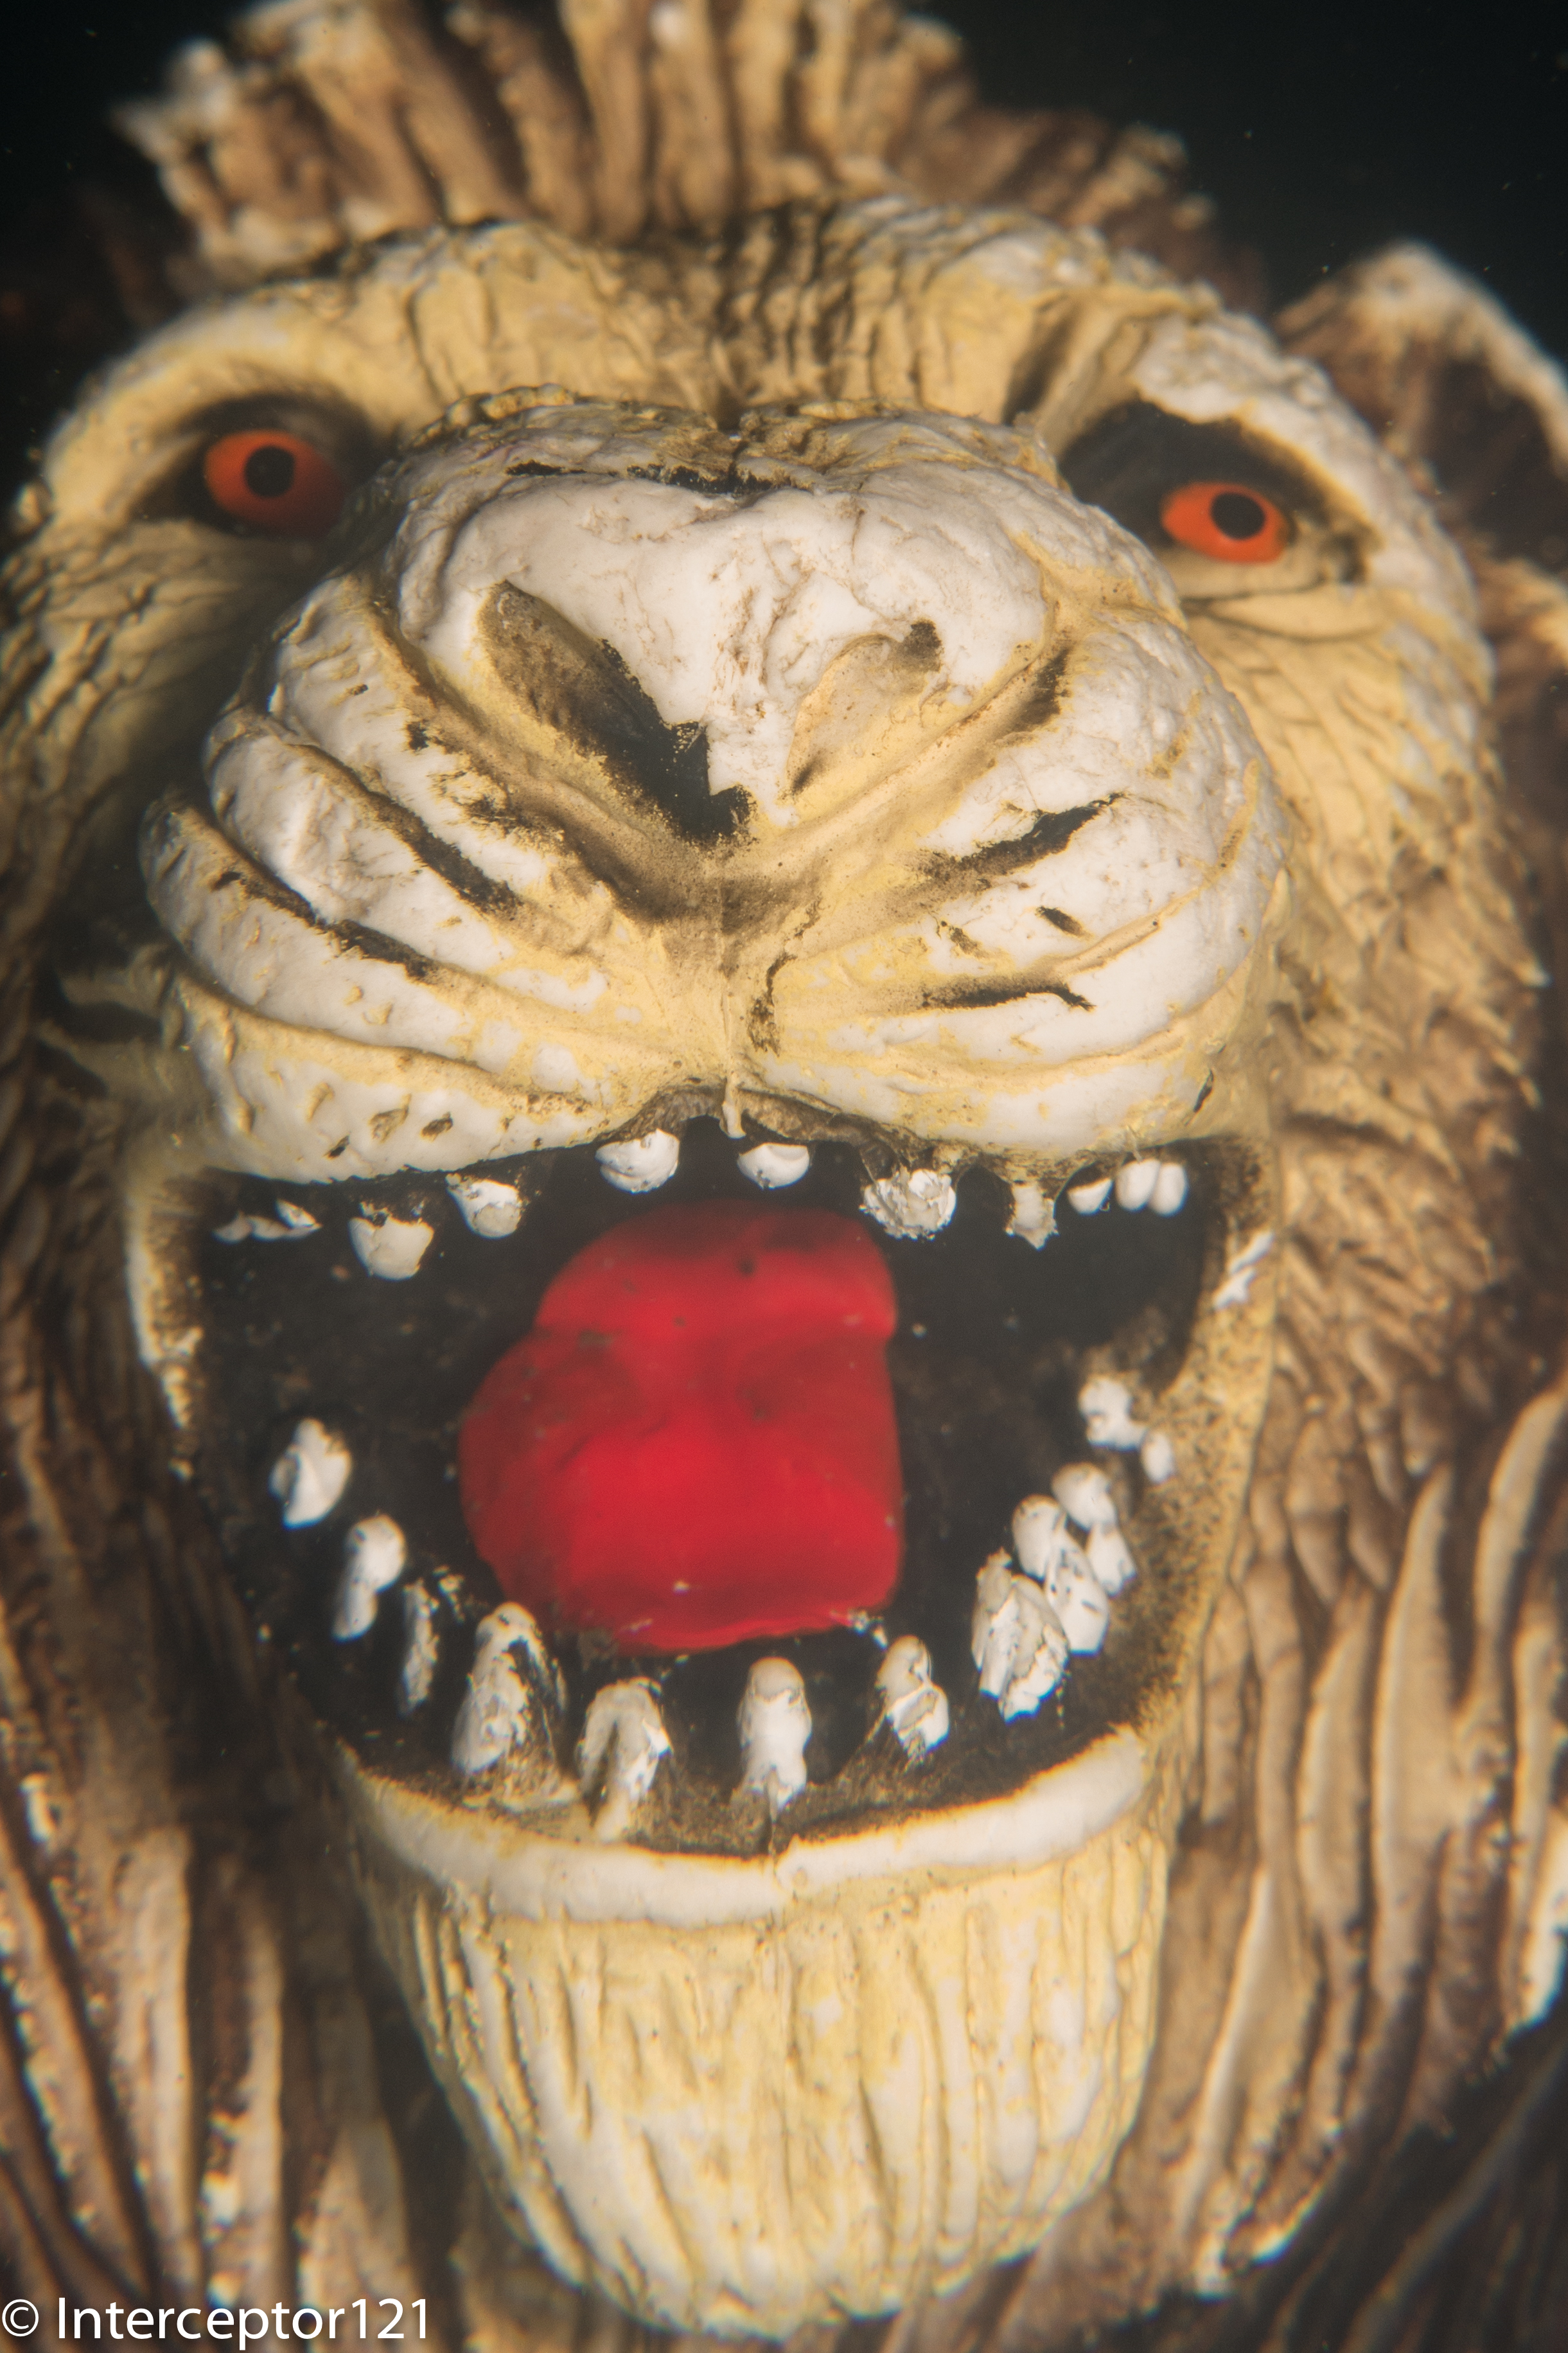
To finish off my last task was the tongue and eyes of a lion that I shot with a single UCL-165.

Overall a great day and I definitely recommend you the tuition day with Martin. He is a great person and extremely good at teaching I can see the benefits my buddy had right away.

Lessons learned on the RX100

There were a few things that I learned about my RX100 still rig mode that I want to share with you.

  • The autofocus is incredible. I even used this for macro. If the camera does not focus is because you don’t have enough depth of field and that is it.
  • Best macro performance is with a single diopter and also had a benefit of an increased working distance, this means the shots will need cropping for extremely small critters
  • Two diopters resulted in near bokeh with less than 1mm in focus and difficult to autofocus (though the LCD is great and I could see if things were in focus or not I think this is personal and I would recommend DMF to others)
  • Performance at wide angle with the UWL-100 28AD with dome is stellar
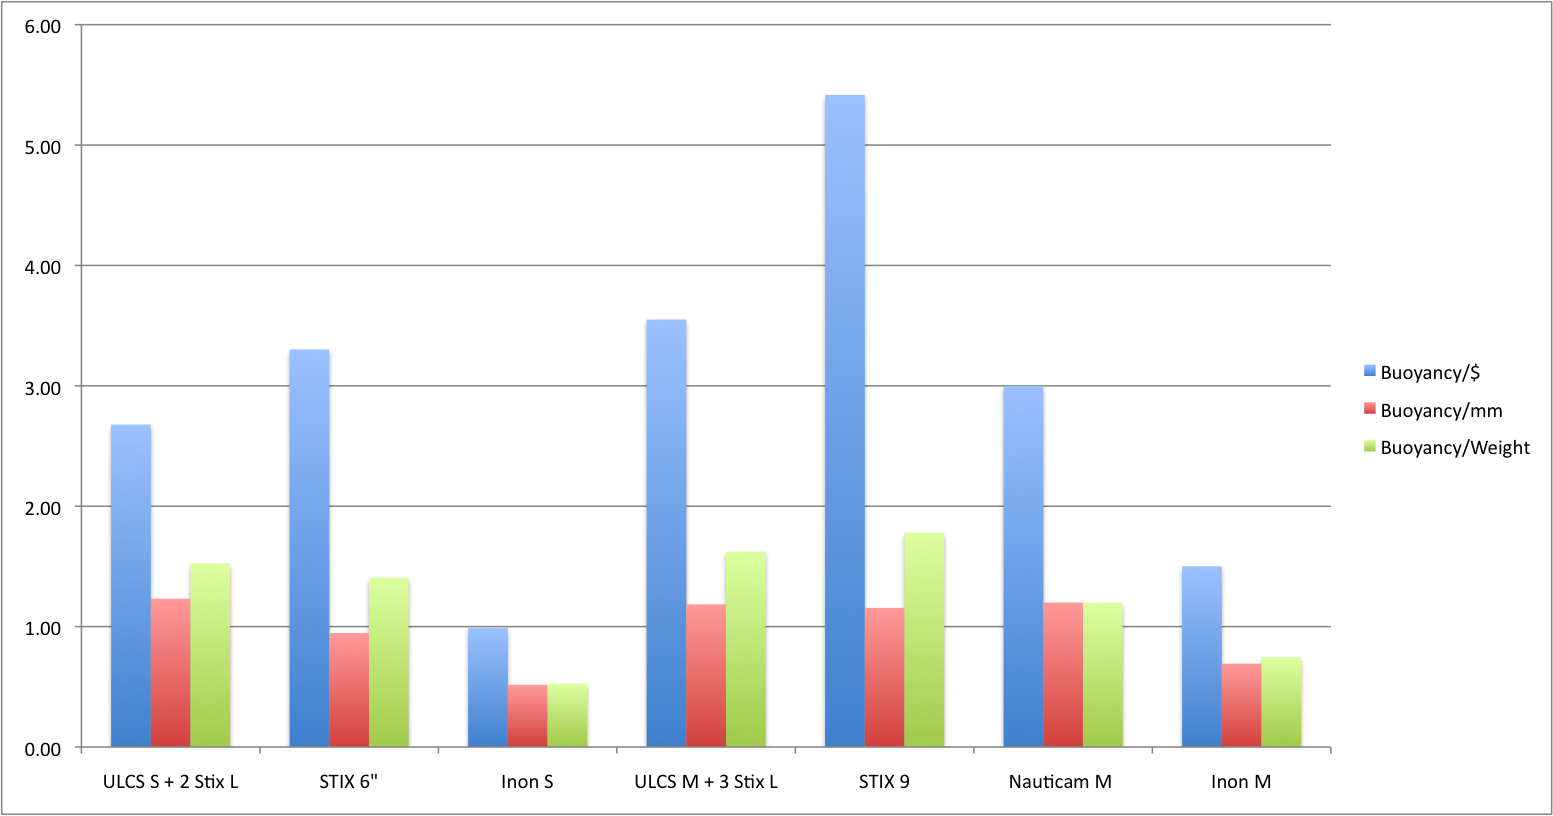
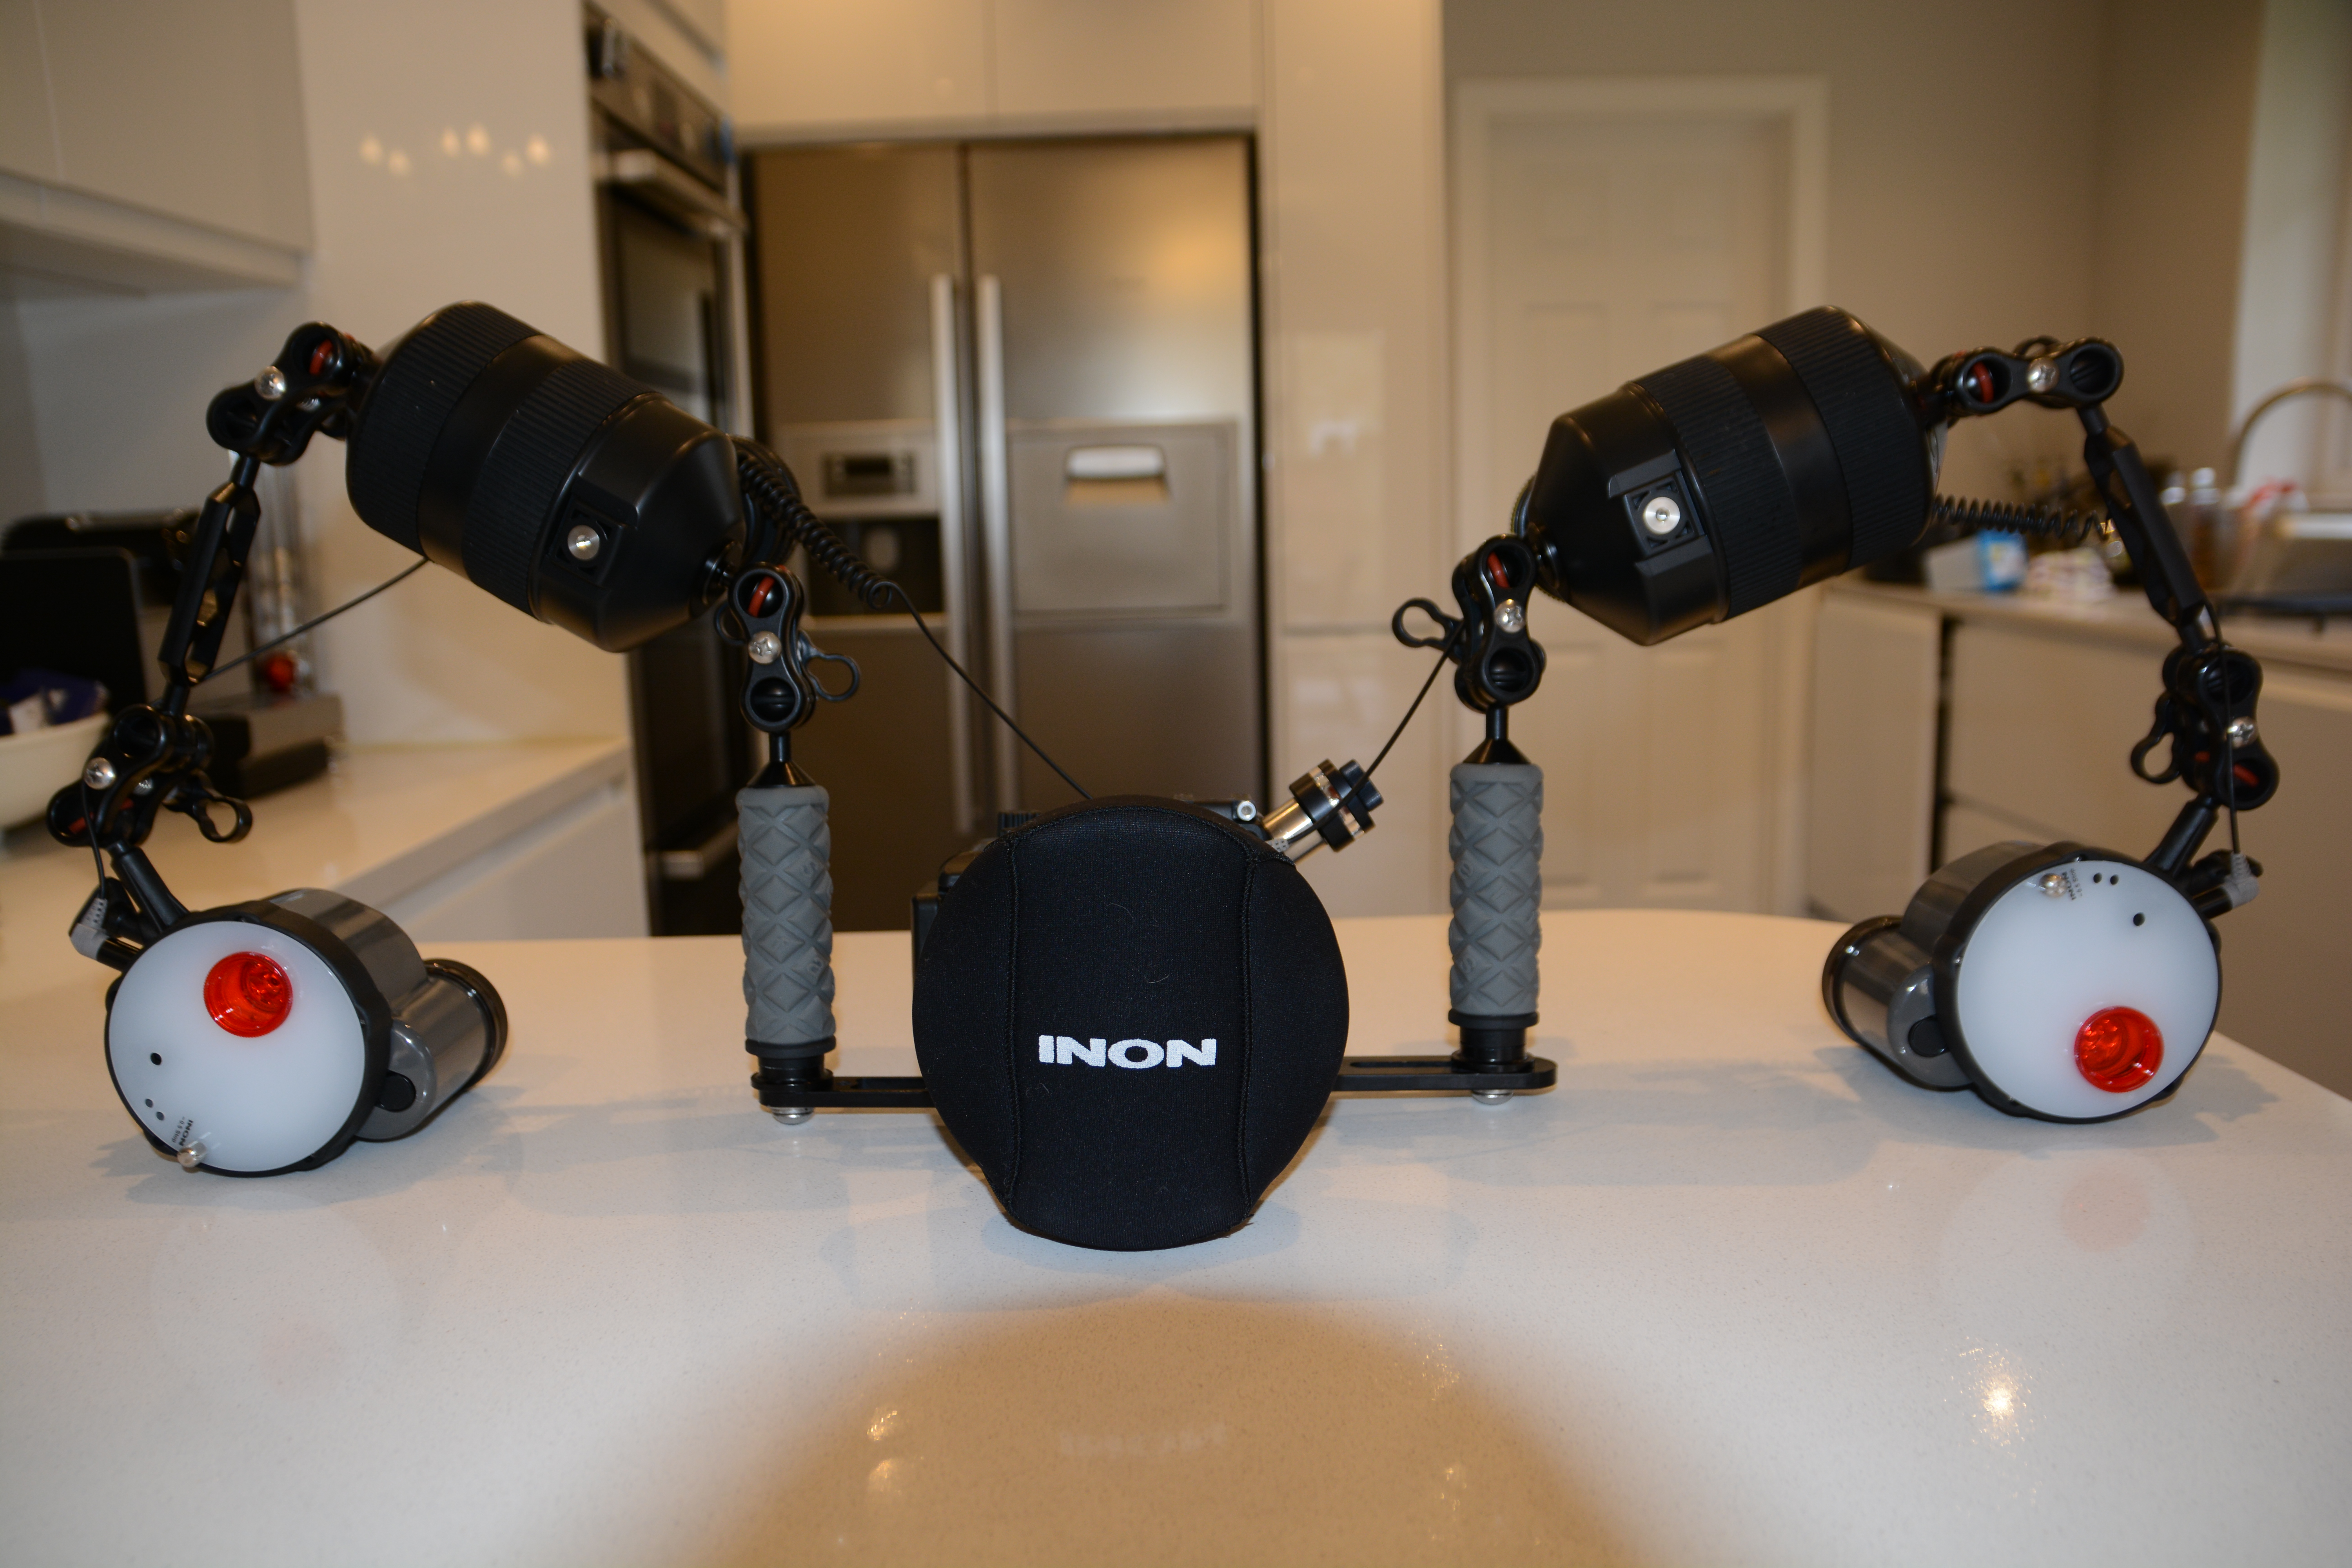
  • Inon float arms (I used two 6″ segments) were perfect with lens holders on it.
  • Inon Z240 twin set with one in TTL and the second in external auto delivered creative lighting without headaches, remember to buy the AUTO diffuser that does not come with the strobe
  • Strobes in manual allowed for even more creativity and the level of precision compared to sea and sea was staggering
  • Despite pool conditions the RX100 focused well in low light and much better than the Canon S95 that was returning focus error on the same exposures. I will not bother having a focus light with this camera and only have a single sola on night dives

That’s all for now any question just drop a comment


Increase the your rig’s buoyancy using floats or float arms

As you add up lenses and accessories to your underwater photography or compact video rig you start experiencing an increase in weight first on land and afterwards in water.

My current rig for photography weights in excess of 5 Kg (11 lbs) and in water this is very near to 2 Kg (4.4 lbs). The housing and the hardware are usually the main culprit but even strobes or lights can easily add weight. As you add more and more components the weight of your rig ramps up.

I use locline arms for video and this greatly helps reducing weight both in and outside water. My compact video rig is around 500 grams or 1.1 lbs in water but also very lights outside water. The Sola lights really help with their incredibly compact size. The heaviest items are the tray and handle and the lenses.

Sony RX100 Mark II Underwater Video Rig

For my video rigs I use STIX jumbo floats on the tray and on the locline segments. Each one of those floats gives around 160 grams 5.6 Oz lift in water.

Stix floats are available as large and jumbo format more information directly on the 4th generation designs web site here

For stills I use aluminum arms as I find them more precise but also need longer arms and be able to sustain a heavier weight for a strobe outside water. Strobes frequently weight over half a kg with batteries, this is too much for a 1/2″ locline arm and stiffer 3/4″ segments are required. I don’t particularly like the 3/4″ segments and I prefer ball and clamp solutions. 3/4″ segment can hold easily a strobe but can’t be really too long.

This is my basic still set up I had for the Panasonic LX7

Photo Rig Front
LX7 Photo Rig Front

Even in this case I tried to use as many floats as possible to keep it light around the usual half Kg 1.1 lbs underwater weight.

For my RX100 I have two strobes and arms with 8″ and 5″ long segments.

The 5.5 Kg rig in hand

As you can read this is 5.5 Kg on land and even with 6 Jumbo stix floats the underwater weight is over 680 grams or 1.5 lbs this for me is a bit too much to carry around so I started looking into alternative solutions.

Left Inon Mega M - Center ULCS 8" with 3 Jumbo Floats - Right ULCS 5" with 2 Large Floats
Left Inon Mega M – Center ULCS 8″ with 3 Jumbo Floats – Right ULCS 5″ with 2 Large Floats

The ultralight buoyancy arms provide too little lift in my opinion to be worth using so I looked at float arms in carbon or plastic material as an alternative. I came across Inon and Nauticam products and so I ran some comparison based on some metrics I have defined myself.

Update 16 March I also include Stix float arms now.

Those are:

  1. Buoyancy per $: how much lift do you get per $ spent
  2. Buoyancy per mm: how much lift do you get per mm effective length*
  3. Buoyancy per gram: how much lift do you get in relation to the on land weight of the arm

*effective length is measured from the center of the arm balls

I refer to US $ prices just for convenience the same would apply even more in UK/Euro terms so here are some results

Standard Float Arms

You would use standard float arms if you have an acrylic dome on an SLR or mirror-less or a plastic housing that gives considerable lift as those solution give limited lift in water ranging from 75 to 333 grams.

Arm Type Buoyancy Cost Total Weight Depth Rating
ULCS S + 2 Stix L 154 $57.50 101 40m/130ft
Stix 6″ L 142 $43.00 101 40m/130ft
Inon S 75 $75.95 142 70m/230ft
ULCS M + 3 Stix L 237 $66.75 146 40m/130ft
Stix 9″ L 260 $48.00 146 40m/130ft
Nauticam M 240 $80.00 200 100m/330ft
Inon M 135 $89.95 181 70m/230ft

I have compared an ULCS 5″ and 8″ segment with Nauticam 60 mm diameter and Inon arms of the same diameter 52 mm or 2″. Those are the results. Update the new graph also includes Stix arms made of aluminum with plastic balls  and their own floats.

Standard Float Arms Key figures

In this category you can see that a STIX  arm with large floats beats a carbon or plastic float arms on all metrics in fact on the shorter segment nauticam does not even produce a float arm solution.

An ULCS 5″ segment with 2 large floats give a lift of 154 grams or 5.4 Oz and an 8″ segment a good 237 grams or 8.5 Oz, Stix arms offer 142 and 260 grams respectively in the 6″ and 9″ lengths.

This solution gives more lift in water and is lighter on land I see no benefits investing in a float arm in this range of buoyancy and for this reason I have not even considered ULCS buoyancy arms. A pack of large stix floats costs $25 for 4 units of 99 grams or 3.5 Oz lift each and those can be moved on your arm segments making it a very flexible option.

Mega Floats

I define as mega floats anything that offers at least 2 grams lift for each mm effective length. I put the Stix arms in this category even if they fall short in this metric as they are comparable and cost effective.

Each one of those solutions will provide in excess of 274 grams or 9 Oz lift in water.  In this category we have the ULCS arms with Stix jumbo floats as the most agile solution at 2.5″ or 63.5 mm diameter, this has the benefit of not requiring extra long clamps to fold two segments with floats fully. Nauticam and Inon both have segments with 90 mm and 97 mm diameter. Inon segments have an extra benefit compared to Nauticam for compact camera users using wet lenses as they can support up to 2 single lens holder for each segment as in the picture earlier in this post. Stix arms made of plastic are the cheapest in this category though can’t offer the same amount of buoyancy of carbon or ABS arms.

Arm Type Buoyancy Cost Total Weight Depth Rating
ULCS S + STIX J 274 $62.50 122 40m/130ft
STIX 6″ 284 $43.00 122 40m/130ft
Inon S Mega 390 $82.95 219 70m/230ft
Nauticam S Mega 375 $90.00 240 100m/330ft
Inon M Mega 650 $93.95 295 70m/230ft
ULCS M + STIX J 416 $74.25 175 40m/130ft
STIX 9″ 425 $51.00 178 40m/130ft
Nauticam M Mega 655 $120.00 275 100m/330ft

Those are the results:

Mega Float Arms Key Figures

Stix float arms score higher on a Buoyancy/$ metric and also lead the way in terms of buoyancy/weight ratio however the amount of lift offered is limited and this solution does score low on the buoyancy/mm metric. Especially in the medium segment around 8/9 inches you can see that there is not much difference on a buoyancy/$ between a 9″ stix arm and an Inon M mega.

You do get a problem with this big arms if you want to fold the segments on themselves. Currently ULCS provides the AC-CSB clamp for 2″ arm segments but even with that you can’t fold two mega arms.

Inon Mega + ULCS Large

Here a few example of the issue I mentioned a mega arm with a 5″ segment with float reaches maybe 30º and without the float around 20º

Mega float + 5" segment
Mega float + 5″ segment

Ultimately I do not think is a big issue as you can use the strobe adapter segment and still achieve all possible positions for your light anyway if you are concerned do get a couple of the longer clamps.

This is my rig with the float arms it does look neat compared to the version with STIX floats

Sony RX100 Mark II rig with Inon Mega float arms

Conclusion

Unless you have a plastic housing or a housing nearly neutral in water floats or float arms at 2″ diameter are not really effective, produce limited lift and are not a really cost effective way to add buoyancy to your rig. 2″ floats can be used to trim your rig in case larger floats are too buoyancy but are not a primary way to achieve the purpose. For example if I wanted to make my rig neutral I could add 2 large Stix floats on each arm.

Stix floats offer a lot of flexibility as you can take them off arm segments and put them elsewhere in a flexible way. Stix floats are also an option just within recreational limits 40m/130ft past this depth the floats loose buoyancy and eventually crush. Stix do offer custom materials float that resist greater depths on request.

Mega arms are a bit clumsy but do provide the lift needed and are cost effective even if a bit heavy on land. My preference if you use wet lenses is for the Inon arms, those are the most cost effective and provide the most lift and can also support lens holders. Inon arms are rated for 70 m/230 ft if you go deeper you need the Nauticam arms that ca go down to 100 m/330 ft. So for technical photographer float arms are really the only way forward in terms of off the shelf solutions. Obviously you can get bespoke solution using submarine grade divinycell but that is beyond the expertise and reach of a normal user.

How much lift do you need?

To calculate the buoyancy of your rig you can use manufacturers data sheets (Inon is brilliant, ULCS does provide some weights, housing manufacturers usually don’t). Failing that you can calculate this item by item using a graduated measuring container or last resort put your whole rig in water and use a luggage scale.

Caution

I balance my rig to have it neutral WITHOUT wet lenses this is for safety reasons. If you use a heavy wide angle wet lens and your rig is overall neutral the moment you take the lens off the port your rig will start to go up. Likewise if you had to loose your lens your rig would float and could escape to the surface. If you want to balance the overall rig you need to find a solution to balance the lenses themselves otherwise severe risks of runaway ascent chasing the rig could incur