Nauticam has recently released a new Macro port 29 that is shorter than the 35 and is designed for optimal compatibility with the following lenses and the WWL-1 Wet lens.
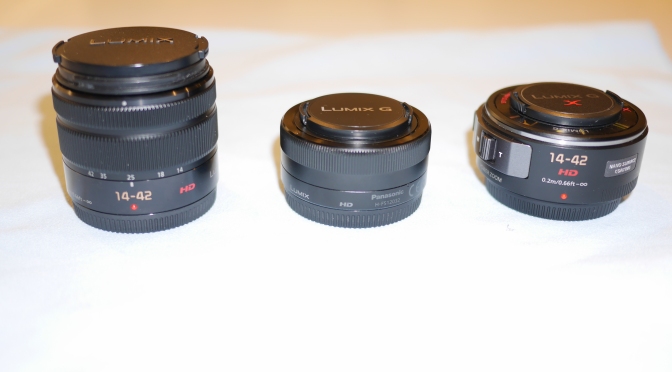
Olympus M.Zuiko Digital ED 14-42mm f/3.5-5.6 II R
Panasonic Lumix G Vario 12-32mm f/3.5-5.6 ASPH Mega OIS
Panasonic Lumix G X Vario Power Zoom 14-42mm f/3.5-5.6 Power OIS
I have had the port and wet lens for a few days and those are my observations with the Panasonic lenses as I do not own the Olympus.
In general terms none of those lenses are amazing in terms of optical quality and only the Panasonic lenses are stabilized. This is not so important for still images but an advantage for video.
The Panasonic power zoom is better than the Olympus however the lens has issue of vignetting and pretty high chromatic aberration. The Panasonic 12-32mm is surprisingly good and has similar resolution and less issues of fringing.
I attached the 29 Macro Port to my GX7 housing and took some tests shots in the sink with the WWL-1 petals touching the subject.
Panasonic G X 14-42 PZ Port 29
The image is wide and the corner sharpness is great with minimal to no chromatic aberrations.
The 12-32mm lens does not vignette at wide end and gives similar performance to the PZ lens with the benefit of increased field of view.
Panasonic 12-32mm Port 29
The shots are taken at f/4 ISO 1600.
For comparison I mounted the 4.33″ dome and the 8mm fisheye and took a similar shot.
8mm Fisheye
The field of view is wider but of course distortion in the corners is very high to the point they become garbled.
Clearly if you do need a fisheye lens the 8mm is still the choice however the WWL-1 has the advantage that you can use the full zoom and a field of view of around 130° with a 28mm equivalent lens and around 135° with 24mm equivalent.
One thing that is interesting is the use of the 12-32mm with the Macro 29 port combined with the Panasonic GH4 in 4K.
The crop factor of 1.2x means that the focal length with this lens at 4K 16:9 is 31.38mm. This makes this port compatible with a number of flat wide angle lens of the old generation.
Specifically the old Inon UWL-100 would give a field of view of 100° equivalent to 18mm in 4K. The additional benefit is that you can use the Ikelite UR/PRO push on filter and the full zoom. At the tele end 83.7mm may be a bit short however the fact that you have a fully rectilinear lens and you can use a push on filter is a big advantage.
The Macro port 29 is also compatible in normal mode with the Inon UWL-H100 at 24mm equivalent as per image.
Inon UWL-H100 Port 29
The field of view appears narrow as the lens can get closer to the subject compared to the WWL-1. The optical quality is excellent with minimum fringing.
In summary the Macro Port 29 is a must purchase for the following users:
4K Panasonic GH4 video users
4K Panasonic GX8 Users
HD and Still images micro four third users wanting a full wet lens set up
The 12-32mm lens also give almost the same field of view of the Panasonic 7-14mm with wide angle port at much lower cost when coupled with an Inon UWL-H100 allowing use at apertures of f/4 and f/5.6 with one to two stops advantages on the 7-14mm.
On a final note for the users of the Macro 35 port Nauticam has now released the zoom gear for the Panasonic 14-42mm II Mega OIS. This lens is better than all of those discussed in this post in terms of optical quality and it comes as kit lens on lower end Panasonic cameras. If you already have the Macro Port 35 and a kit lens or if you don’t have any lens or port this is definitely the best option in terms of cost and optical quality
Following the previous review that was dedicated to still images we now go into the subject of 4K video with the Panasonic LX100 and related Nauticam LX-100.
Currently there are only two compact cameras that produce 4K video the Sony RX100 and the Panasonic LX100.
The housing for the Sony RX100 has a traditional M67 port whilst the LX100 uses the N50 compact port system.
This means you can use all your wet lenses with the RX100 without specific adapters. The LX100 has however a number of benefits.
This table compares the field of view of the two cameras in 4K video mode.
LX100
4K
Horizontal FOV
Vertical FOV
Diagonal FOV
Sensor width
35mm 3:2
26.00
71.90
44.40
79.50
15.80
23.86
81.00
26.20
14.90
29.90
15.80
74.40
RX100
4K
Horizontal FOV
Vertical FOV
Diagonal FOV
Sensor width
35mm 3:2
28.00
67.90
41.50
75.40
11.85
26.73
80.00
26.00
14.80
29.60
11.85
76.37
When the camera shoots in 4K mode the focal length remains the same however the camera uses a smaller part of the sensor. A normal micro four third sensor measures 17.3×12 mm whilst the 1″ sensor of the RX100 is 13.2×8.8 mm. Note that the LX100 does not use the whole sensor due to the multi aspect format that keeps the diagonal field of view unchanged regardless of the image format.
What we can see in the LX100 table is that although the focal length in 4K is 26mm the horizontal field of view is the same of a full frame camera with a lens of 23.86mm this means the field of view in 4K should be slightly wider than a picture taken by the LX100 in 4:3 format.
I put the camera on a tripod and took two sample shots, this is the first at 24mm in 4:3 format that I then cropped to 16:9.
4:3 Crop to 16:9
This other shot is from exactly the same position taken extracting a 4K frame from a small video.
4K Photo 16:9
As stated the horizontal dimension is just a few mm wider in 4K 16:9.
What this means is that this is the same that any normal camera with a 24mm lens that then is cropped to movie format in terms of field of view.
The Sony RX100 does not have a multi aspect sensor and therefore the horizontal field of view drops more.
With the short port on the LX100 using a wet lens like the Inon UWL-H100 we can achieve more than 97° horizontal which is very wide and zoom all the way to 79° and if we use a wetmate or the mini dome cover the other range between 72° and 50°.
Practically the LX100 with wet lenses and wetmate or minidome gives you access to focal lengths between 15.5-21mm and again 24-35mm is like having an 8-18mm lens on a micro four third which is good for whale sharks and mantas this is even wider than the 7-14mm lens on a Panasonic GH4 in 4K and the LX100 has a (weak) optical stabiliser on the lens.
The RX100 mark IV instead can only cover between 96° and 90° before the wet lens stops working properly and we jump to 68° if using a wetmate.
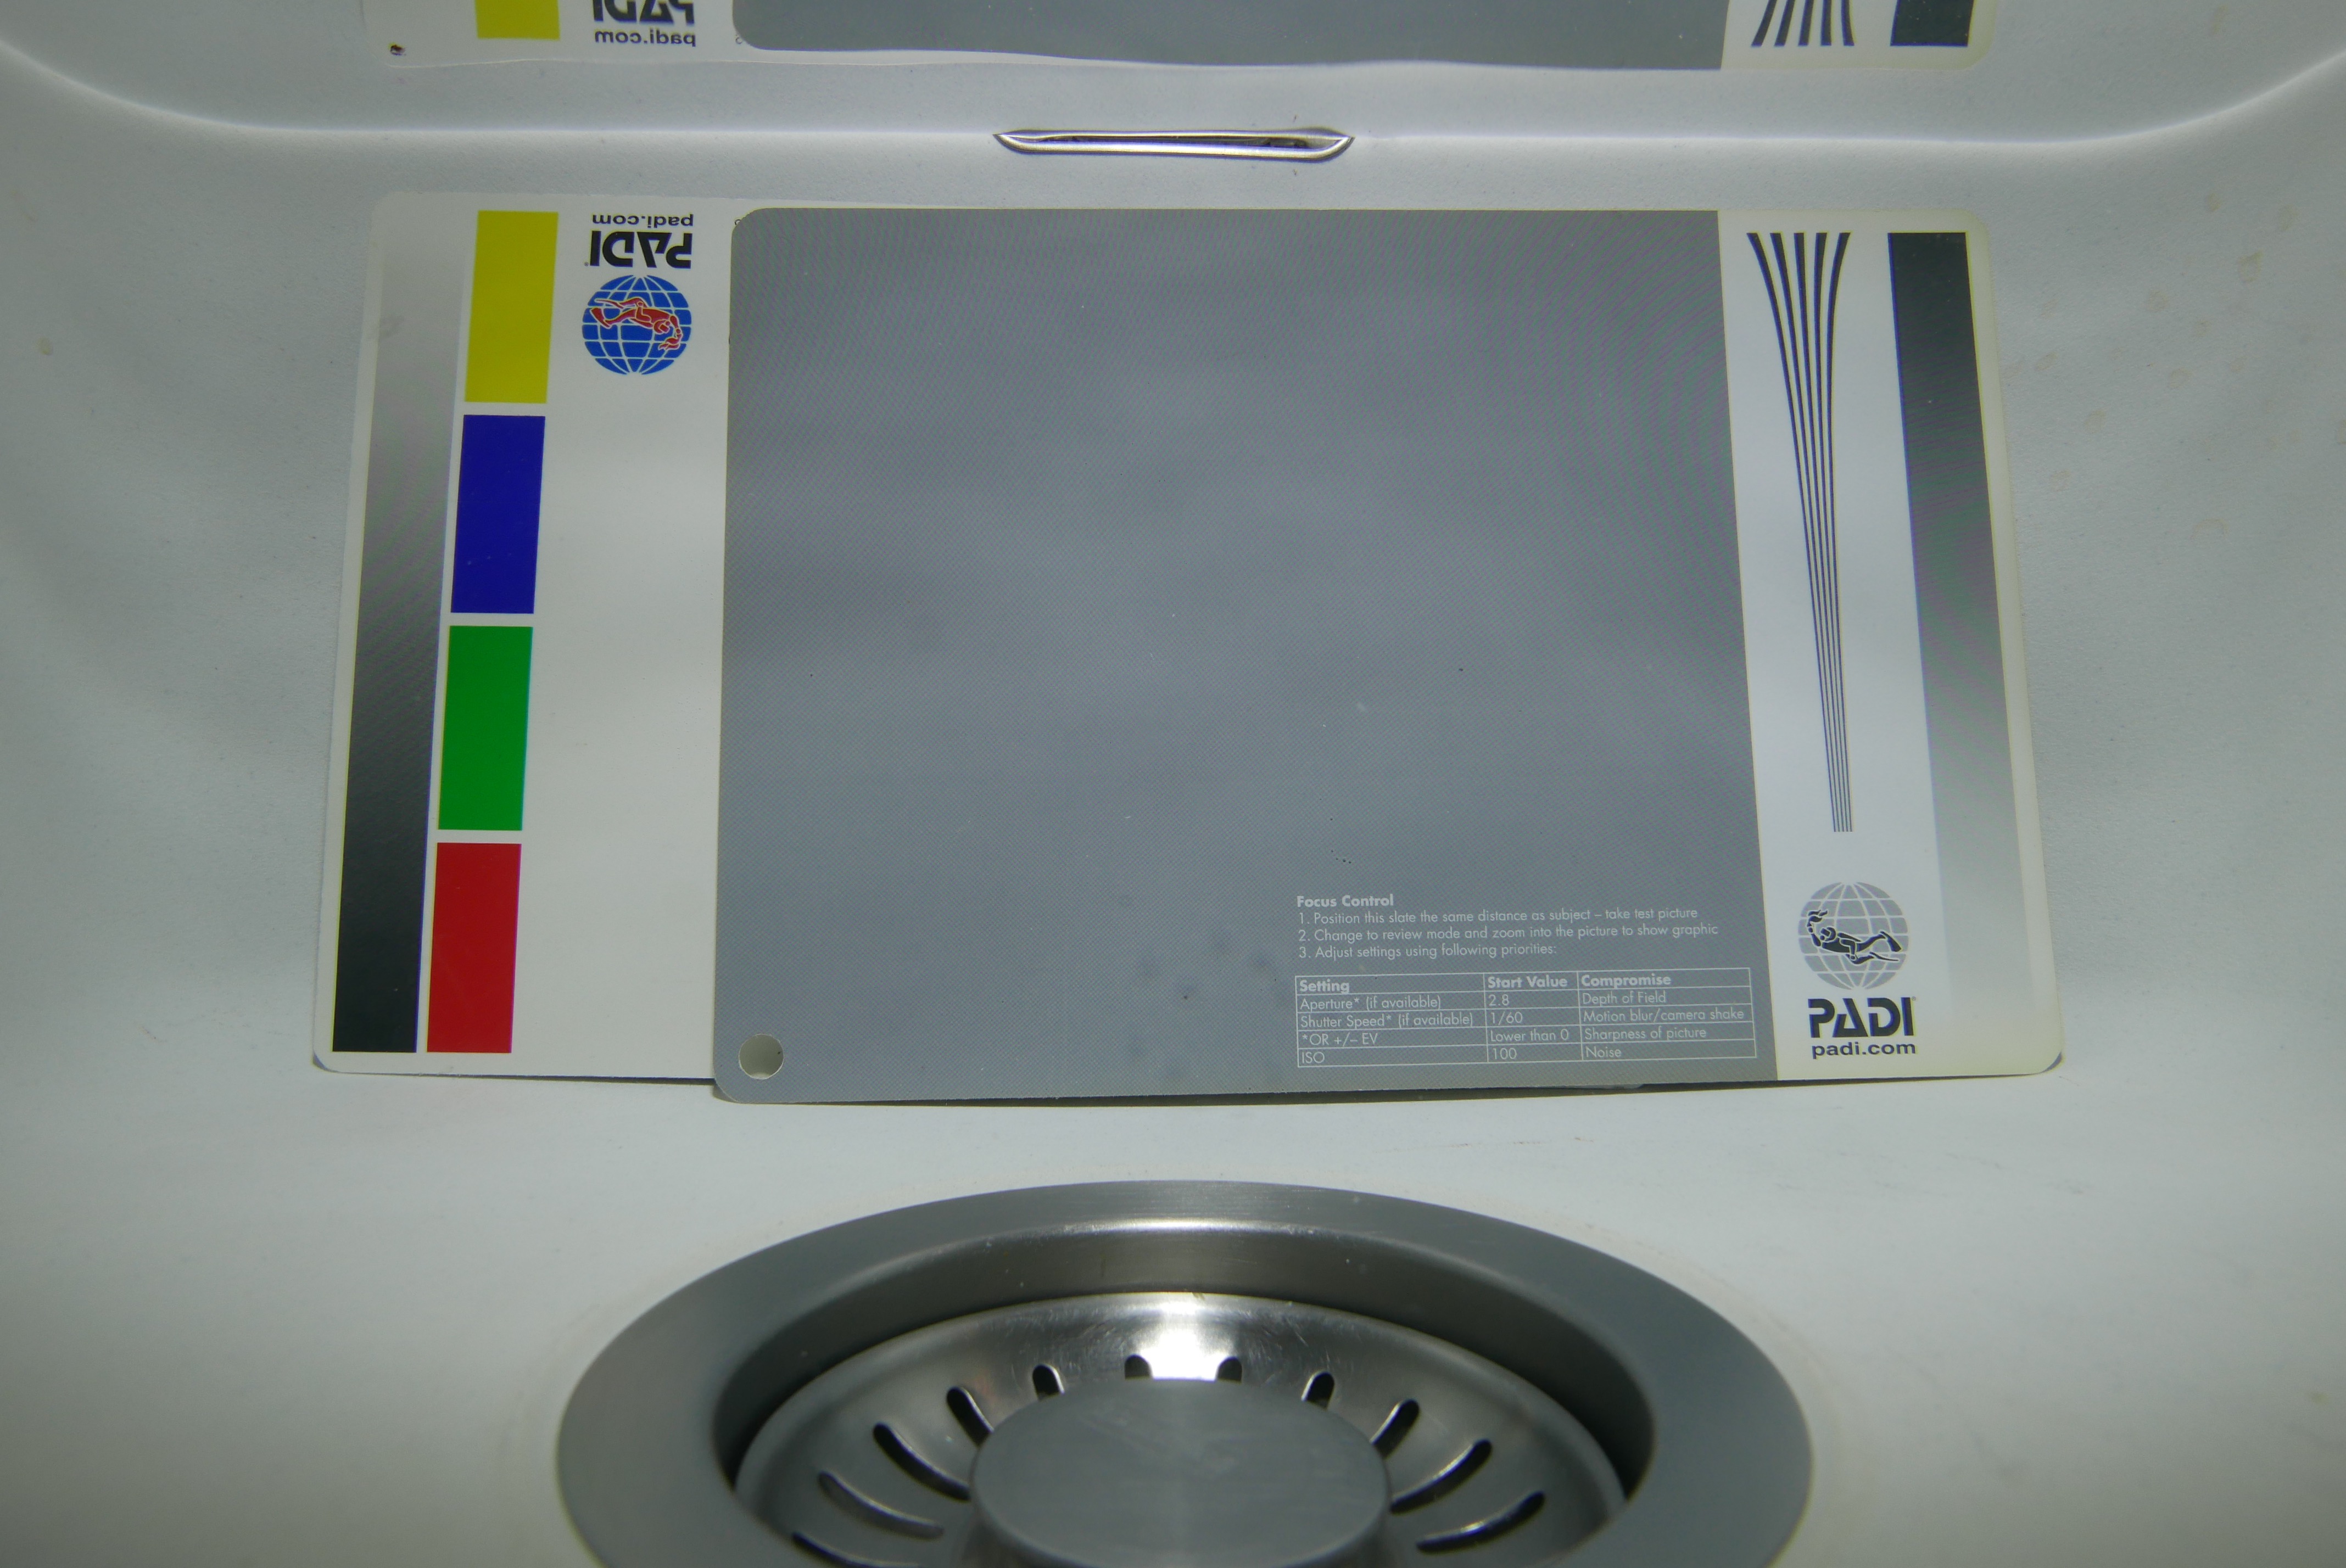
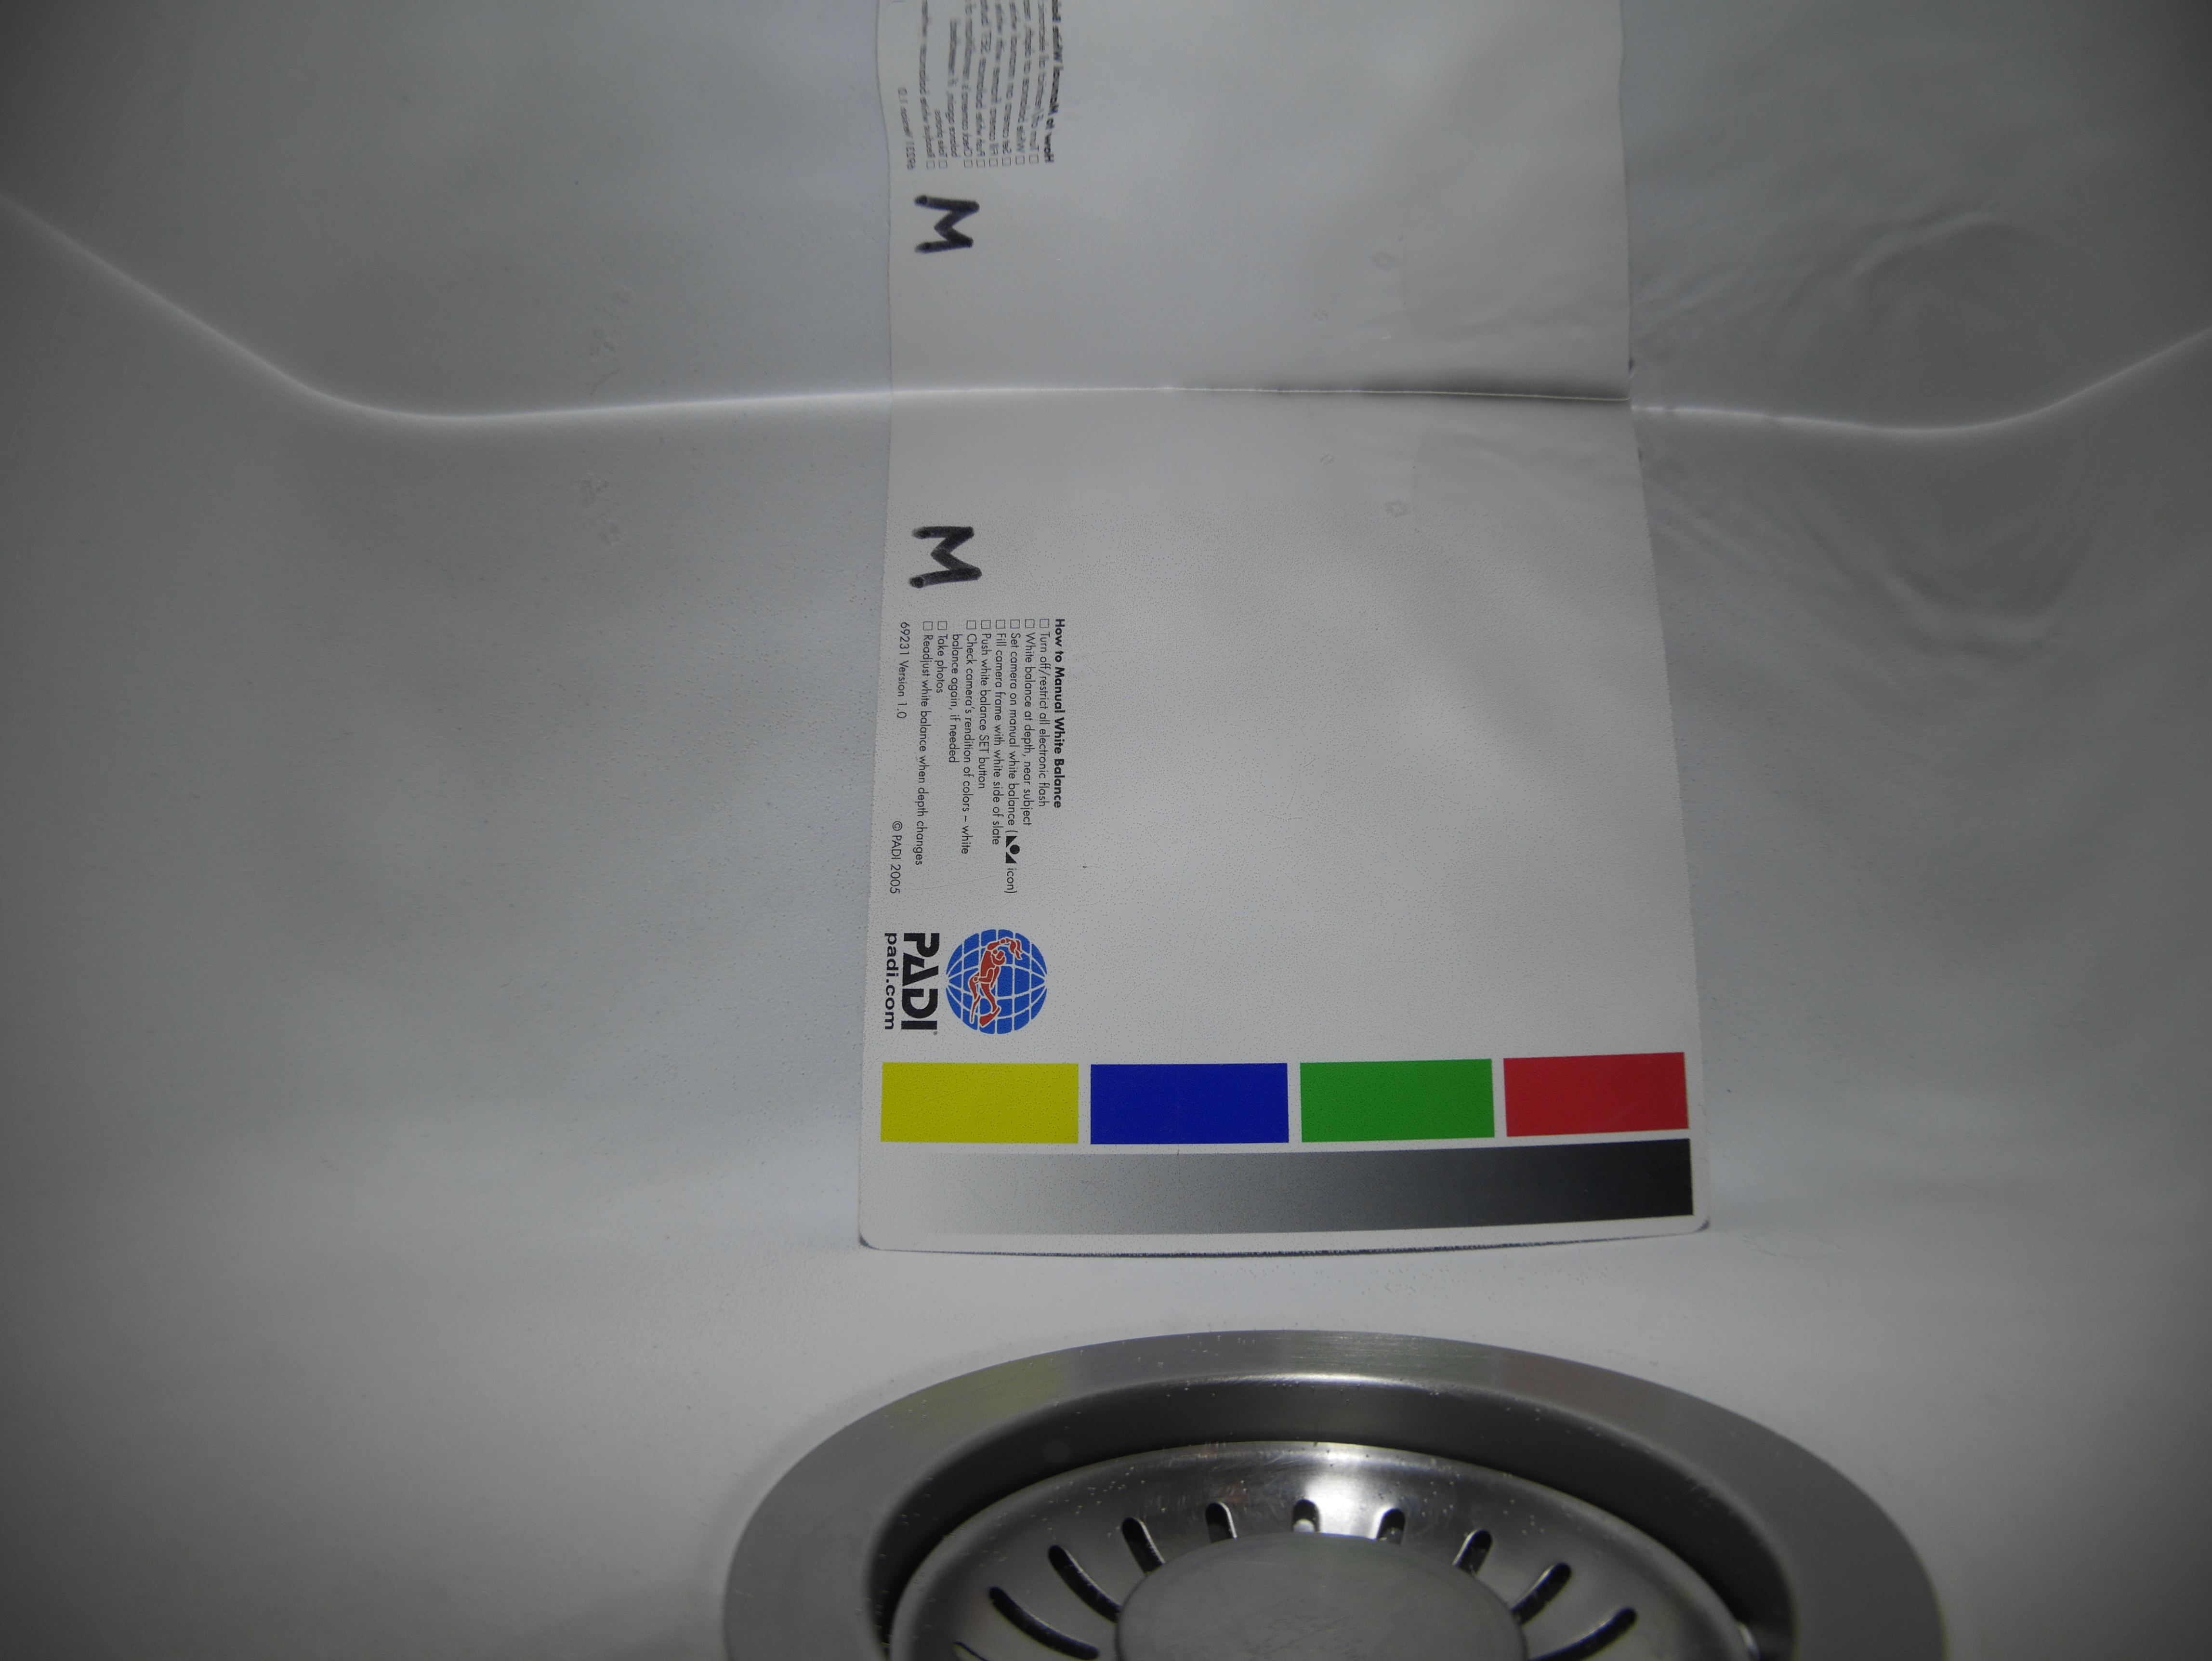
UWL-H100 Flat Test Cards
This shot taken at around 15cm shows a nearly rectilinear and very wide image.
In short if you are after some super wide angle in 4K the LX100 is definitely the way to go.
From an ergonomic point of view I shoot video in shutter priority and let the camera work out ISO and aperture, this is relatively easy to do with the LX100 although the absence of custom memory modes on a mode dial is painful.
A control that can be quite useful due to the tendency of the LX100 to go focus hunting is to set the ae/af lock button to af-on. This requires the shutter to be set in release priority with this control you can use manual focus and force the LX100 to refocus when you hit the af-lock. This is a very useful feature.
Update 28 September the method described to fight focus hunting does not work in 4K. There is going to be another post with the best settings for 4K video for the LX100.
For what concerns macro both the LX100 and RX100 present their challenges due to the short zoom lens, the LX100 more so due to the horrible rectangular port. It can be argued that you can’t shoot wide and macro with the LX100 whilst you can do that with the RX100 however the strength of the LX100 is certainly in its very wide lens and the short port that combined with a flat wide angle lens can produce an extremely wide field of view able to cover practically almost any wide angle scene.
For macro the GH4 and upcoming GX8 are probably going to be better placed due to the higher crop factor giving focal lengths in excess of 100mm using the 14-42mm lenses.
If you want to get into 4K video and your focus is primarily wide angle the LX100 is an excellent device.
Nauticam has given me the opportunity to test the housing for the Panasonic LX100 priced at $1,200 or £922 in UK.
As anticipated some time ago this housing features the new N50 mini port system for compact.
NA-LX100 aperture and format dial
The housing comes with the rectangular port as a standard, as the LX100 has a 24mm equivalent lens and the lens extends quite a lot between the shortest and longest focal length it is not possible to use an M67 long port or there will be vignetting.
In order to install the camera you need to set the aperture to f/16 and the aspect ratio to 4:3 with focus mode in normal and lift the zoom lever. Likewise to take the camera out of the housing.
LX100 housing preparation
Unfortunately as mentioned several times on this blog pincushion distortion severely affects the image at focal lengths shorter than 35mm equivalent as our in water test shot demonstrated. If you zoom in the corners you can see also extensive blur and chromatic aberrations.
LX100 flat port at 24mm
Furthermore the lack of an M67 port means you now need the Nautical flip diopter for rectangular port that costs $220 or £170.
When you eventually get to put a diopter on the lack of zoom means that magnification with traditional lenses is quite limited.
NA-LX100 UCL-165
The frame width is 62mm with a single Inon UCl-165 and goes to 5cm when we stack another UCL-330.
NA-LX100 UCL-165+330
Image quality is ok except some blue fringing at the borders.
A single UCL-100 gives a frame width of 42mm.
NA-LX100 UCL-100
Apparently the Nauticam CMC ($320 or £240) gives 32mm frame width that is adequate for macro.
So if you are into macro you need to invest $1,200+$220+$320=$1,740 to have some decent magnification.
If you possess many clamps and cold shoe ball mounts you can buy an Inon M67 lens arm and use the lenses you have saving some $$$ but the magnification is limited unless you get the CMC.
For semi-wide angle a mini dome port is available at $280 or £216.
N50 3.5″ Mini Dome
This restores the field of view in air however you can only zoom to 40mm before the camera can’t focus anymore. I have even tried with dry diopters on the camera there is no improvement.
Optical quality is great.
LX100 Mini Dome 24mm
Probably the most useful port is the N50 short port that has an m67 thread and allows to use wet wide angle lenses.
N50 Short Port
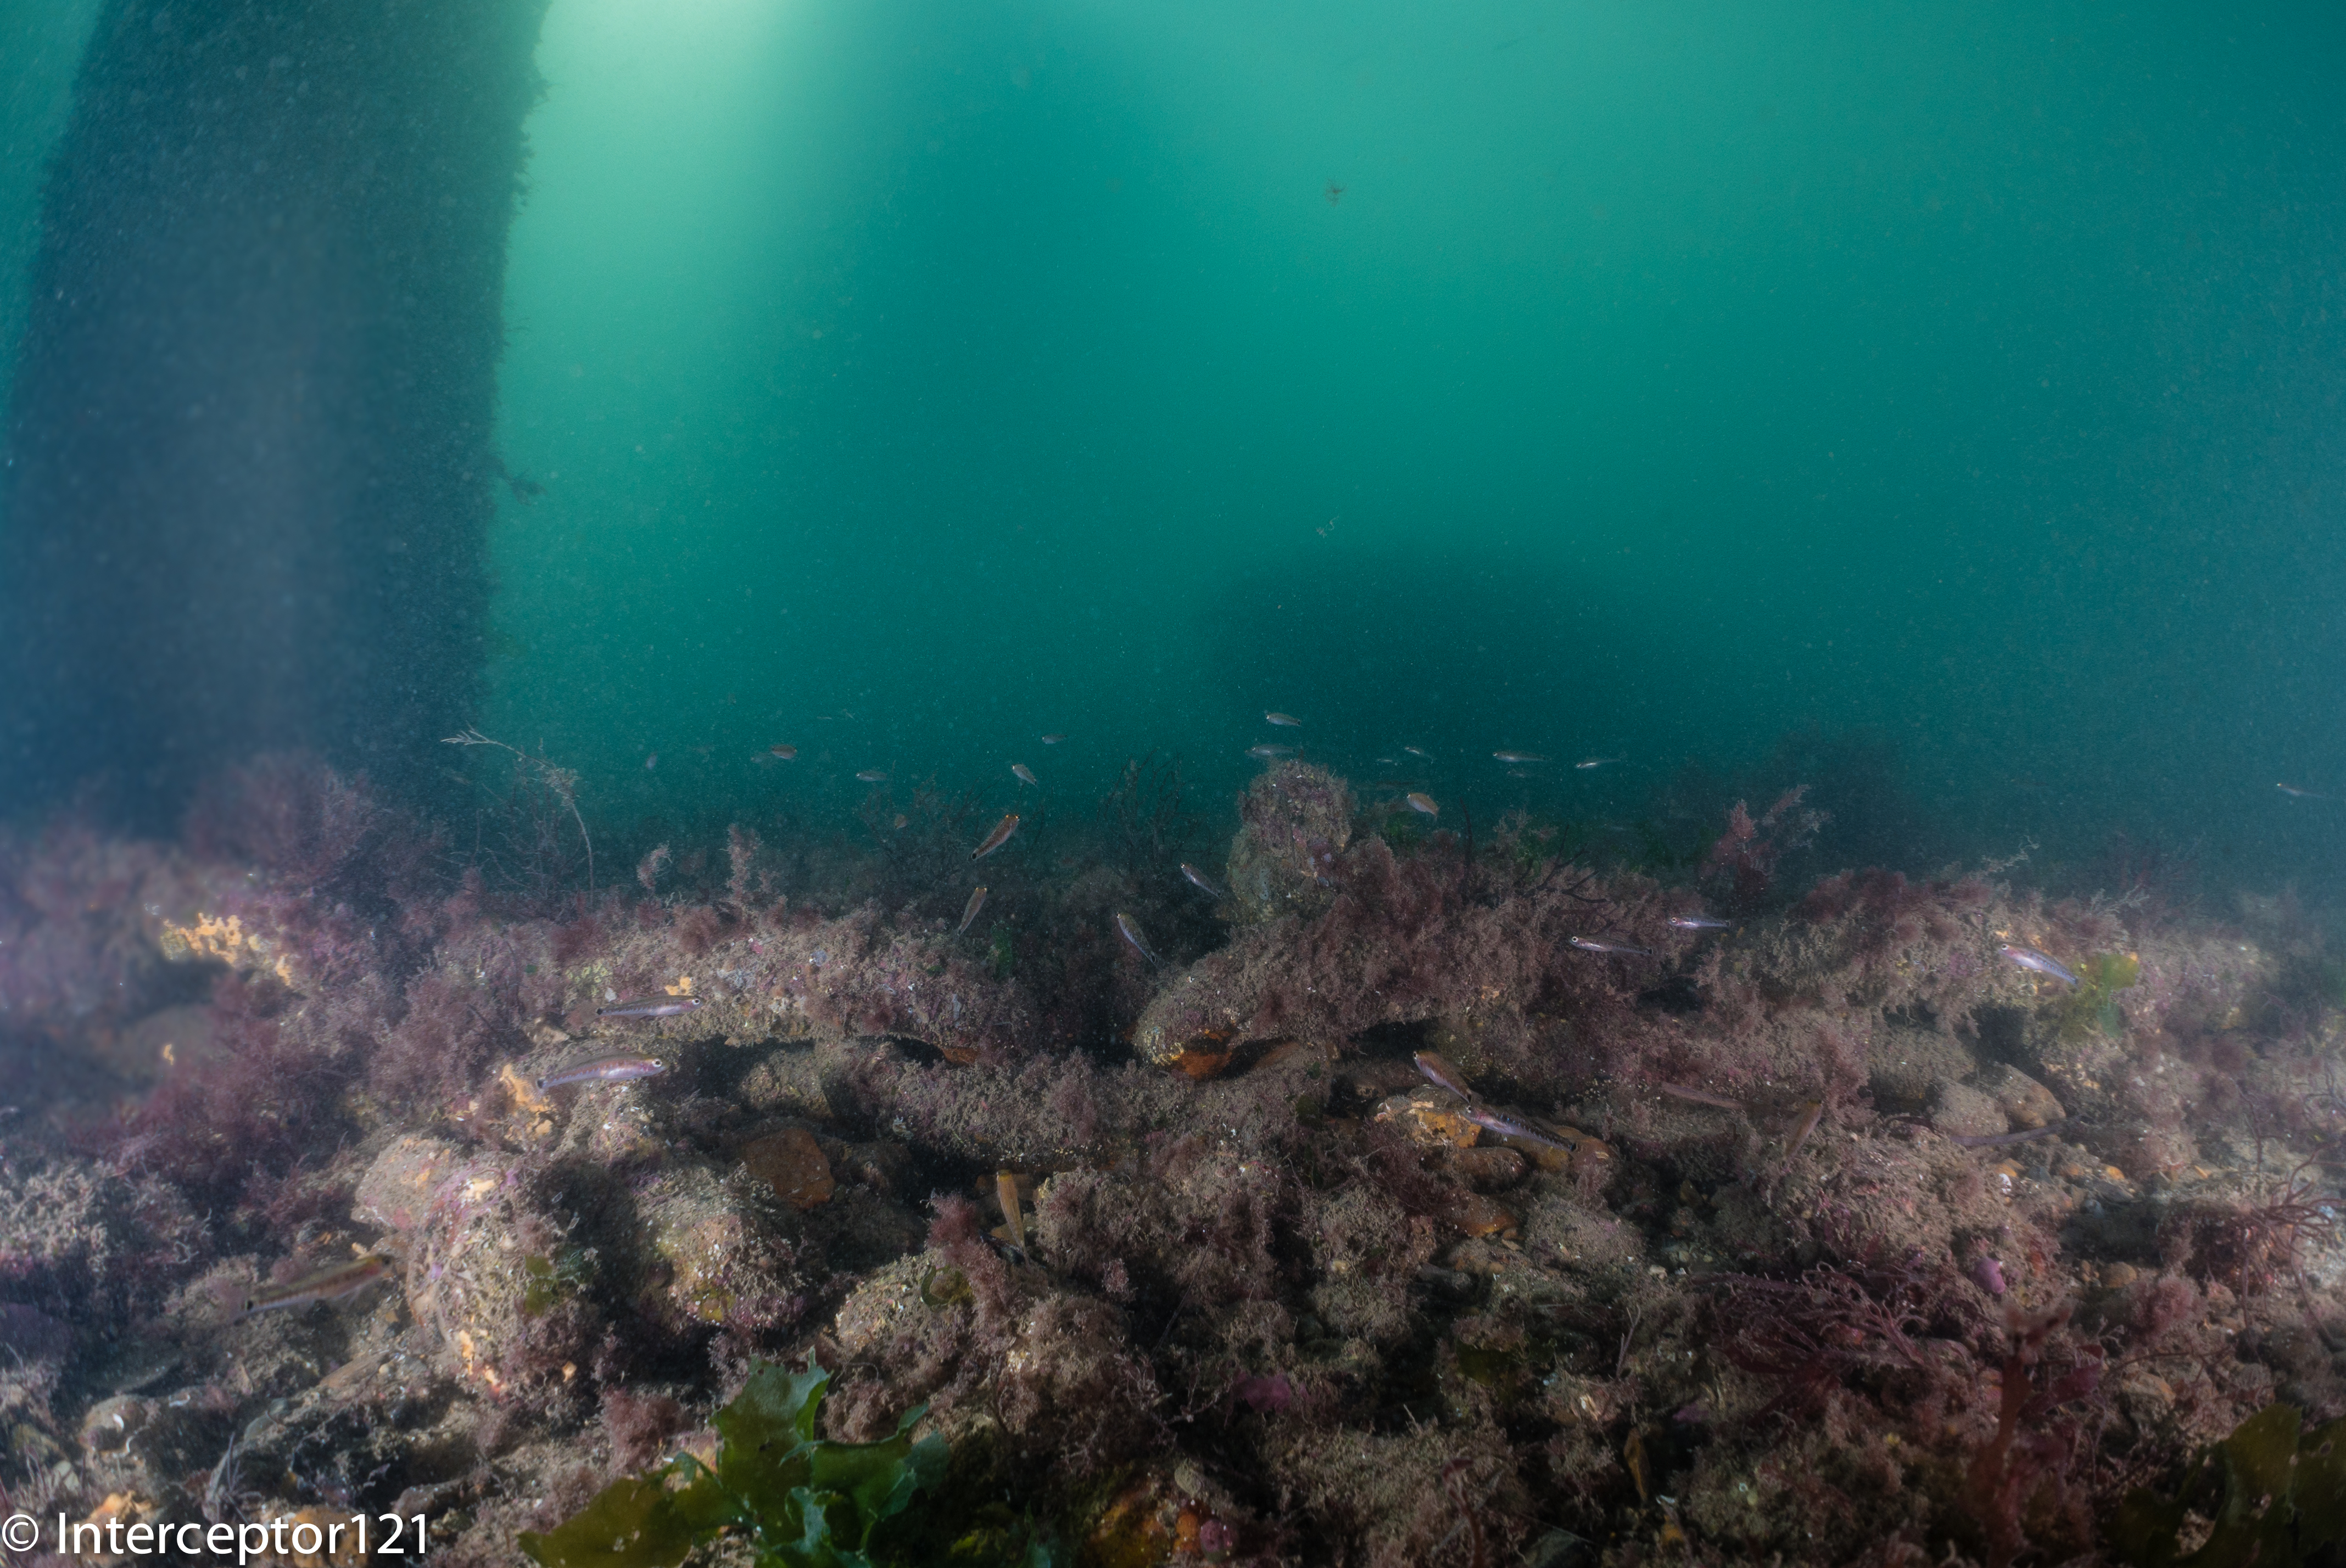
I went to Swanage but got the tide wrong visibility was shocking still gives an idea of the image quality of the LX100 with the Nauticam WWL-1 wet lens.
Atlantic Ocean AnemonesKelp?Upside downMyst!
If you have a Nauticam wet mate you can also use it with the short port and achieve the same or better sharpness than the minidome thought with some residual chromatic aberration.
LX100 Short Port Wet Mate 24mm
The big benefit is that if you find that your wet wide angle lens is too wide for what you are shooting you can change lens without changing the port.
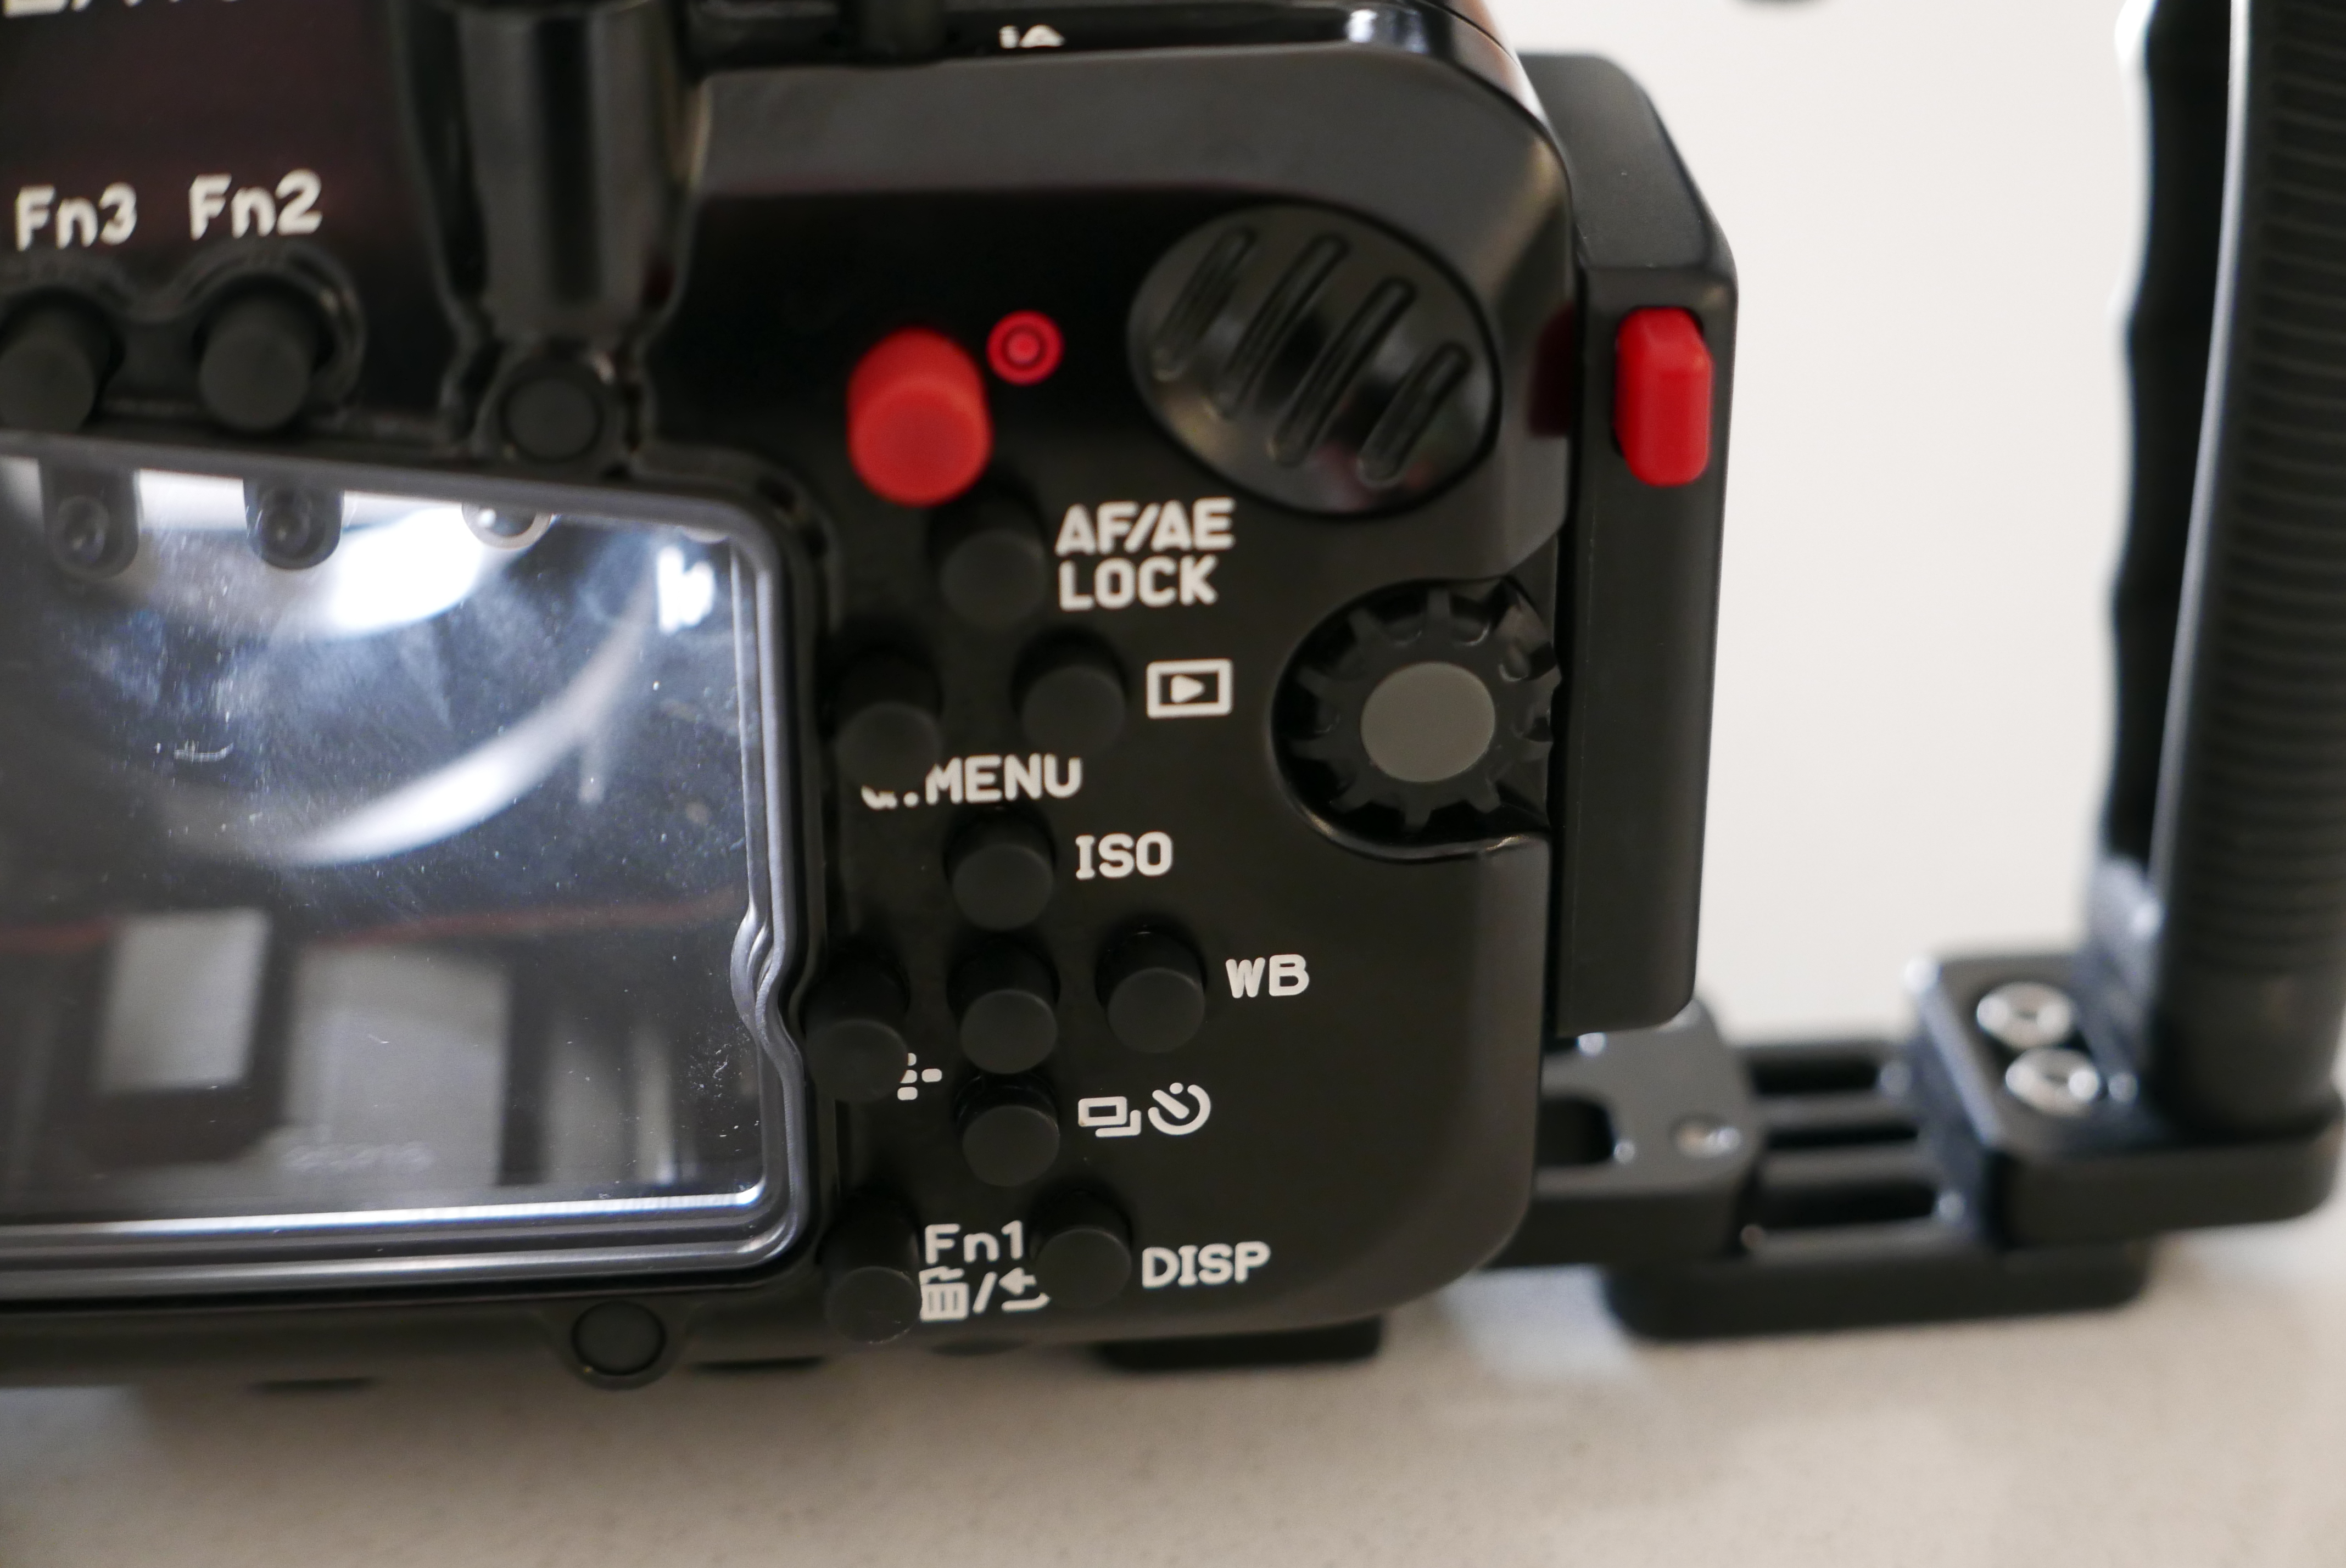
NA-LX100 rear buttons
For what concerns the ergonomics of the LX100 they are quite intuitive on land.
One of the characteristics is the lack of a mode dial.
You have an auto position for shutter speed and aperture and if you leave them as such the camera shoots in program mode.
Once you move the aperture the camera goes in aperture priority mode. Probably the worst situation is the shutter dial that once touched has to come down all the way from 1/4000 to whatever you need it to be.
Also you don’t have thirds of exposure for the shutter dial and for example to get 1/50 you need to go to 1/60 and then use the rear dial.
I found the ergonomics of the camera in water particularly annoying as I was shooting with gloves. I did like the nauticam trigger system for the shutter however the amount of hardware of the nauticam tray and its weight are not really an option for me.
The Panasonic LX100 is a very interesting camera on land but in water ends up quite uncomfortable and expensive. The housing with the 3 ports comes at $1,200+$180+$280 if you add the Nauticam CMC and the WWL-1 you end with a whopping $3,195 the camera costs another $800. Total investment $4,000.
This is a lot of money in my opinion considering that with another $300 you can get a Panasonic GX7 with GX7 housing, an Olympus 60mm with 65 macro port and a Panasonic 8mm fisheye with 4.33″ dome. The LX100 and GX7 share the same sensor but there is no doubt that the macro performance of a dedicated lens as well as the fisheye of the 8mm lens have no comparison.
In conclusion the Panasonic LX100 with NA-LX100 is a bit of a flop for stills the only use that I can think of is wide angle 4K video with the short port and a wet lens but other than that I don’t see how Nauticam is going to sell many of those units.
The Panasonic 8mm Fisheye lens for micro four third is a clear winner for close focus wide angle however the lack of zoom and the really wide 180º cover mean that there are many subjects that will look tiny in the frame.
The next option in terms of width is the Panasonic 7-14mm wide angle lens however this requires a large dome for optimal performance making the set up expensive.
Is there anything else left if you don’t want to buy a wet lens and you already have the Panasonic PZ 14-42 X Lumix G?
Panasonic produces an add on lens DMW-GFC1 that is declared to provide 10.5mm equivalent and reduce minimum focussing distance to 16 cm all specs can be found here.
This add on lens can be used with the 4.33″ dome for the 8mm fisheye and the 30 extension.
I took a few test shots and the results are pretty good.
This first shot is at f/5 and is very sharp in the centre.
Fisheye Converter f/5
Getting a bit closer and stopping at f/8 the results are pretty good for an adapter that is less than £100 on amazon.
Fisheye Converter f/8
Barrel distortion is contained so this combination may be good for wrecks where the fisheye effect is a bit disturbing.
If you have the Lumix G Vario X PZ 14-42mm you may want to invest in this little accessory before getting the much more expensive 8mm fisheye even if the Nauticam 30 extension is required. Later on the extension can be used with the flat port 35 and the Olympus 60mm for super macro and the 4.33″ dome of course with the 8mm.
I think it is amazing how much can be obtained out of this lens if we consider wet diopters, wet wide angle lenses and this adapter before you need to get a second lens.
This lens could also work for video with the Panasonic GH4 at 4K however zoom is not recommended with it.
I thought the Red Sea workshop with Alex Mustard was brilliant to I thought of writing down my notes and sharing them with you.
This final post is a general one and has my lesson learned from attending the workshop, those that follow are generic tips that I think would be beneficial to anyone wanting to attend a similar experience.
Before the Workshop
The experience actually starts before you even attend the sessions key points for me include:
Ask questions about the workshop and how it works
Know your equipment
Take all the gear you have
Be fit and self reliant
Set your self objectives
I did not really ask many questions before going as Dr Mustard sent a very comprehensive document however this is not standard and it is better to ask in advance about the conditions, the dives, the type of training and generally how the workshops is organized. Some have talks, other have one to one, other are just dive trips where you ask when you need. Not all types fit everyone so better to make sure you go to one that matches your need.
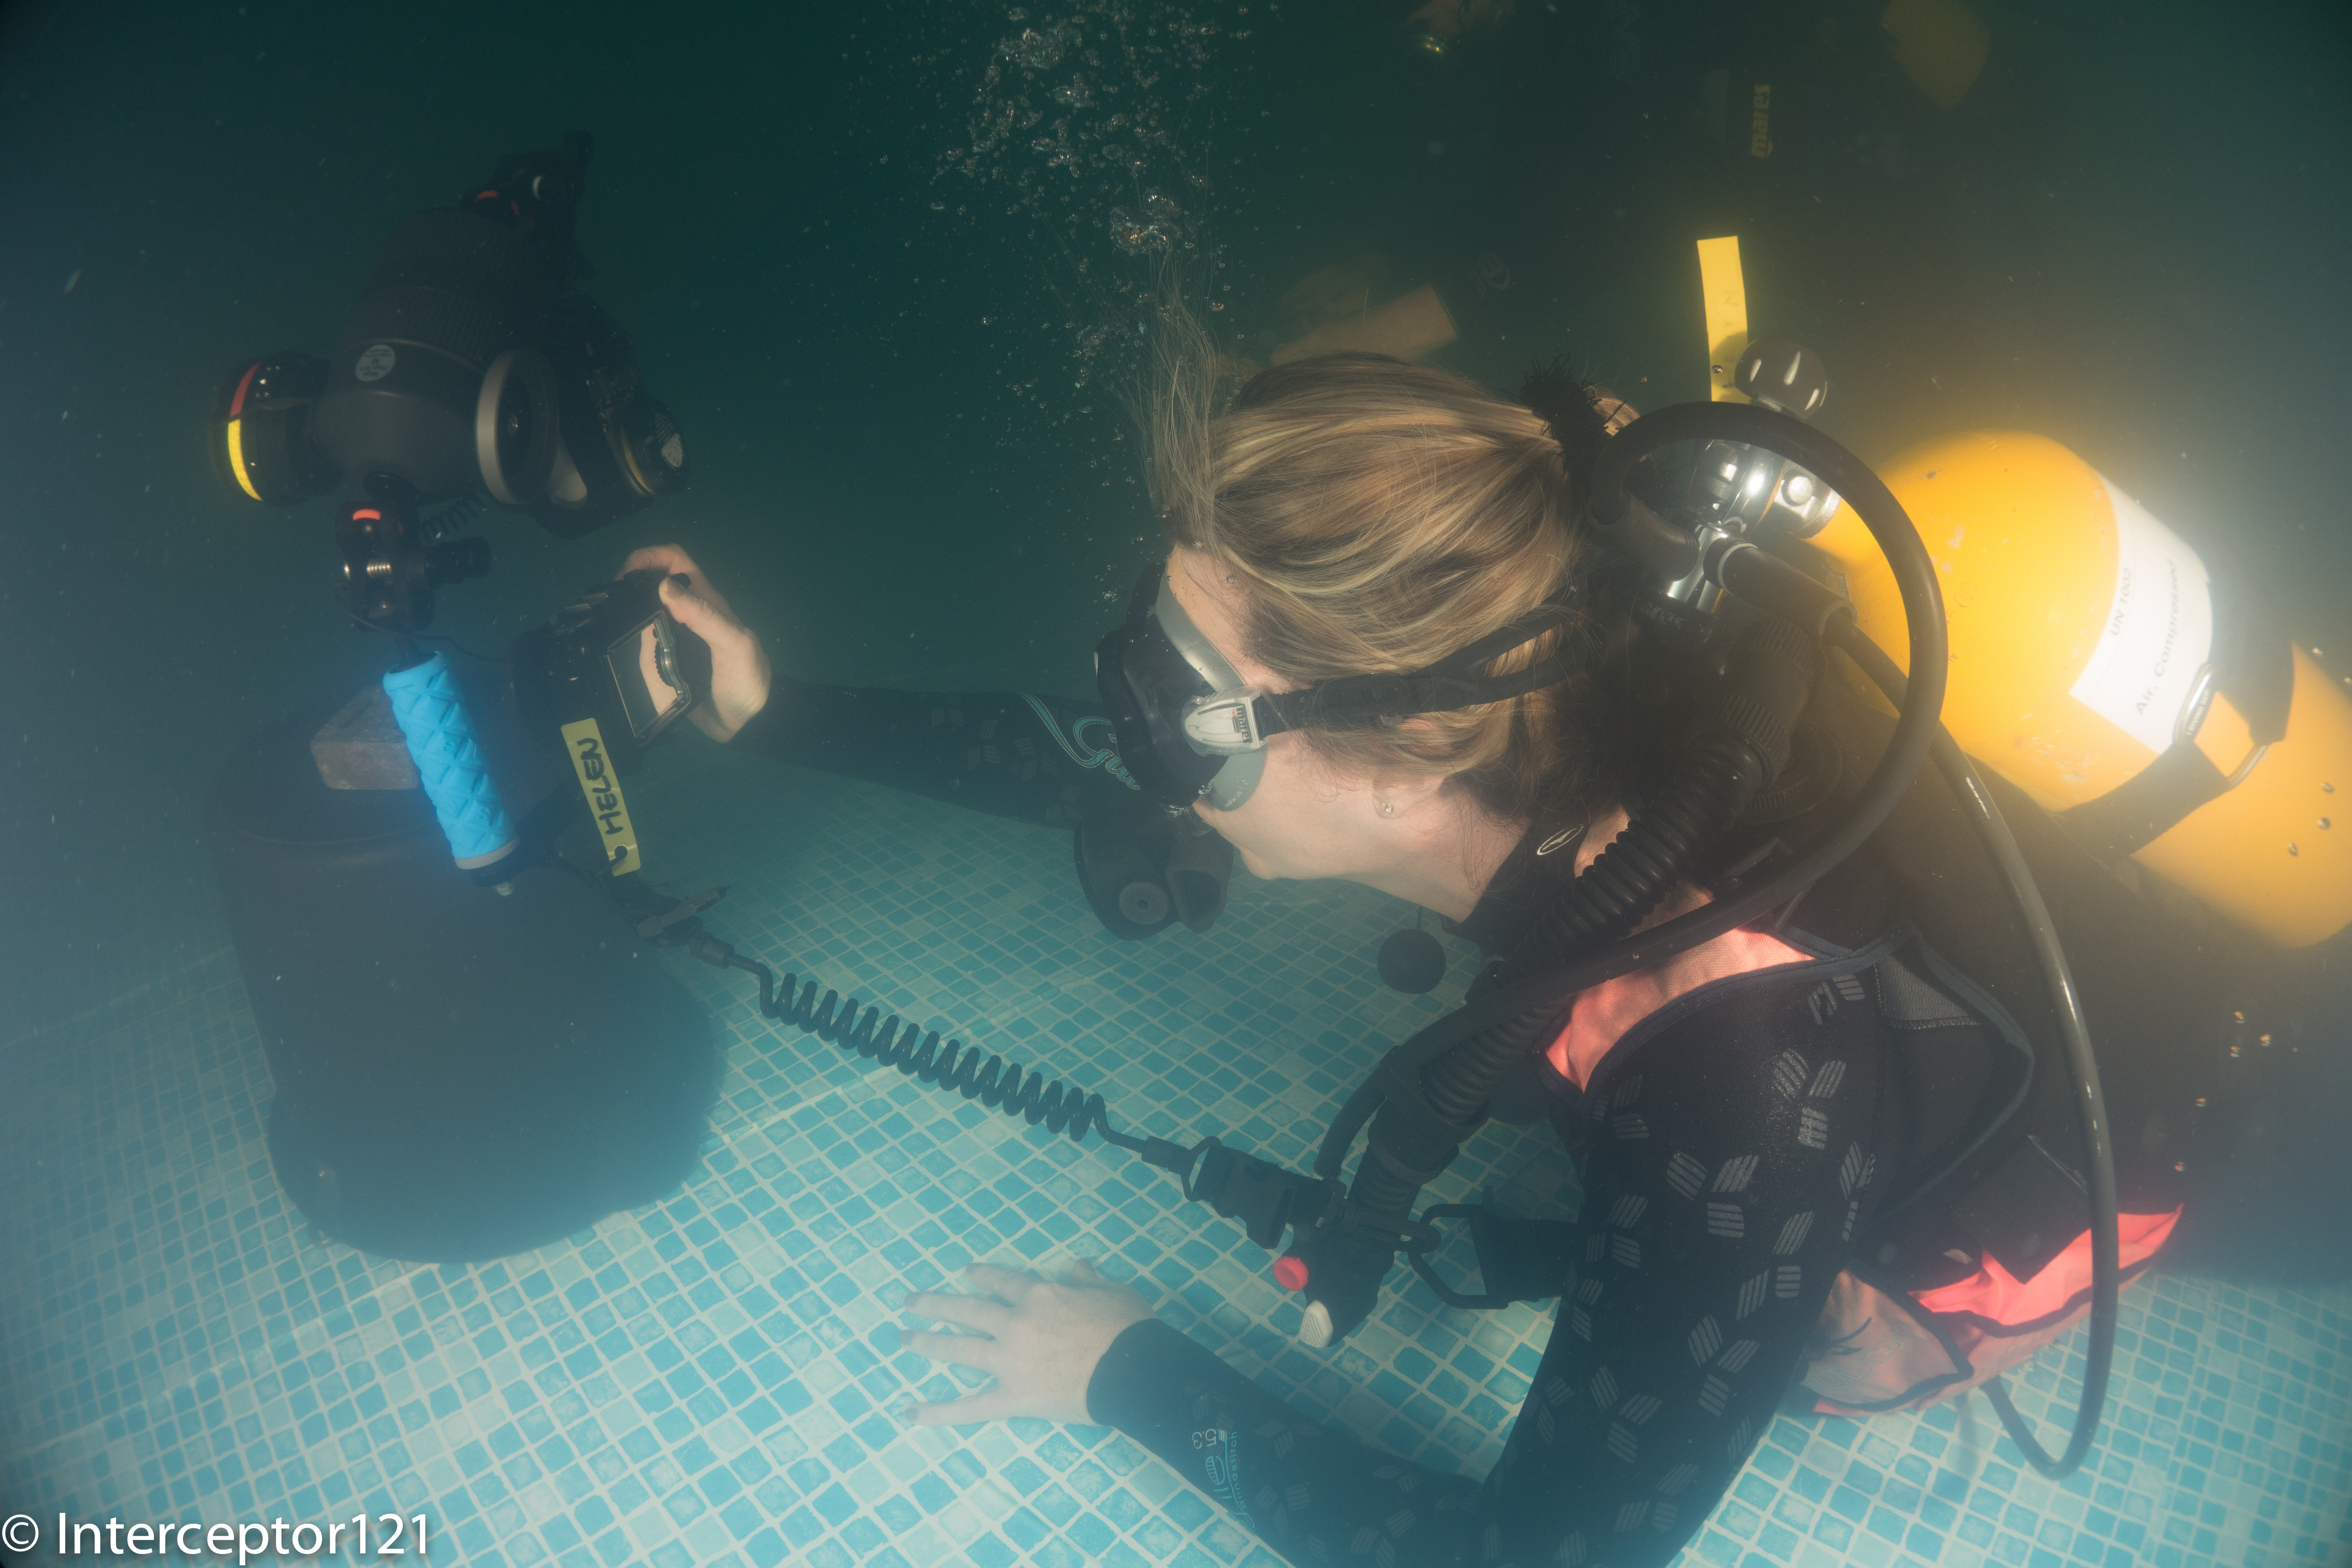
Sadly even this time like in every trip I have come across people using their equipment or part of their equipment for the first time. The end results is wasted dives and opportunities, I cannot stress enough that testing your rig in a pool before going allows you to familiarize with it and make any corrections you need.
Pool Practice
Also take all the possible lens, ports, parts that may be useful. Once you are there you don’t want to have regrets about something you have left home. In my case all was there but I did not know about remote strobes otherwise I would have got myself a trigger as I have 2 Z240s.
In case of doubt exceed with equipment
In most of those workshops buddy system does not really apply so make sure you are self reliant and fit as the conditions allow to avoid embarrassing or even dangerous incidents. Once there dive within your comfort limit and if you don’t really have a buddy dive with a guide.
It is useful to know before you go what your objectives are, for example what type of shots you want to work on. This means you have something to do over and above the assigned tasks.
During the workshop
Once there you need to stay focused on your performance. Those are additional points to think about:
Deliver the assigned tasks
Go off the beaten track
Learn from other participants
Take notes
Sometimes during those workshop there are challenges or set shot that are suggested, this is your opportunity to compare your work with others and therefore you should make sure you deliver those also to find out if there are limits with your equipment.
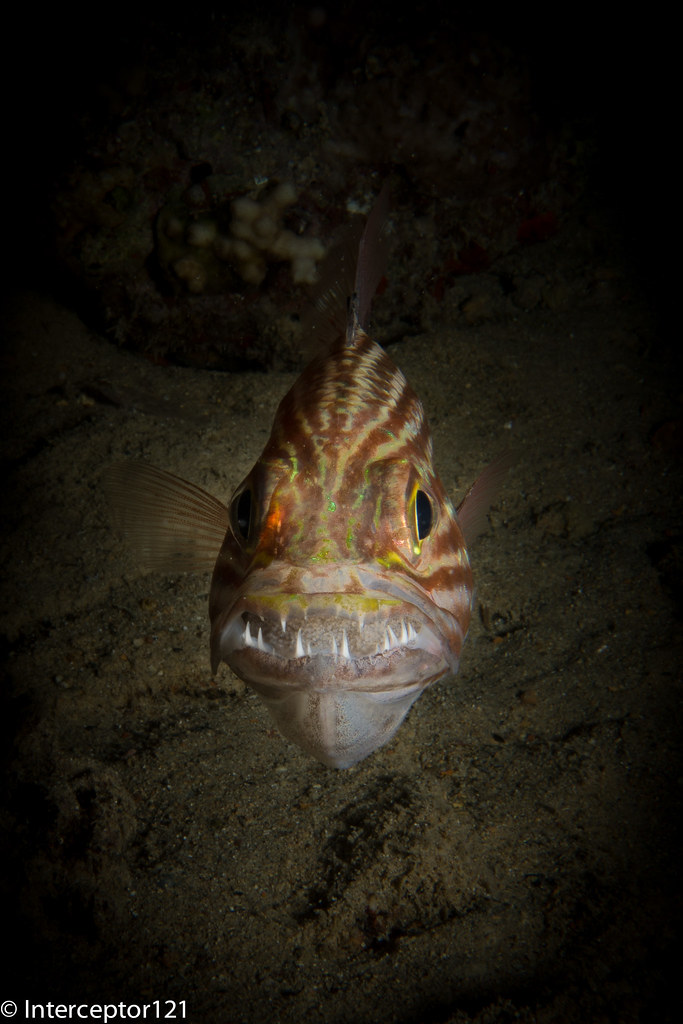
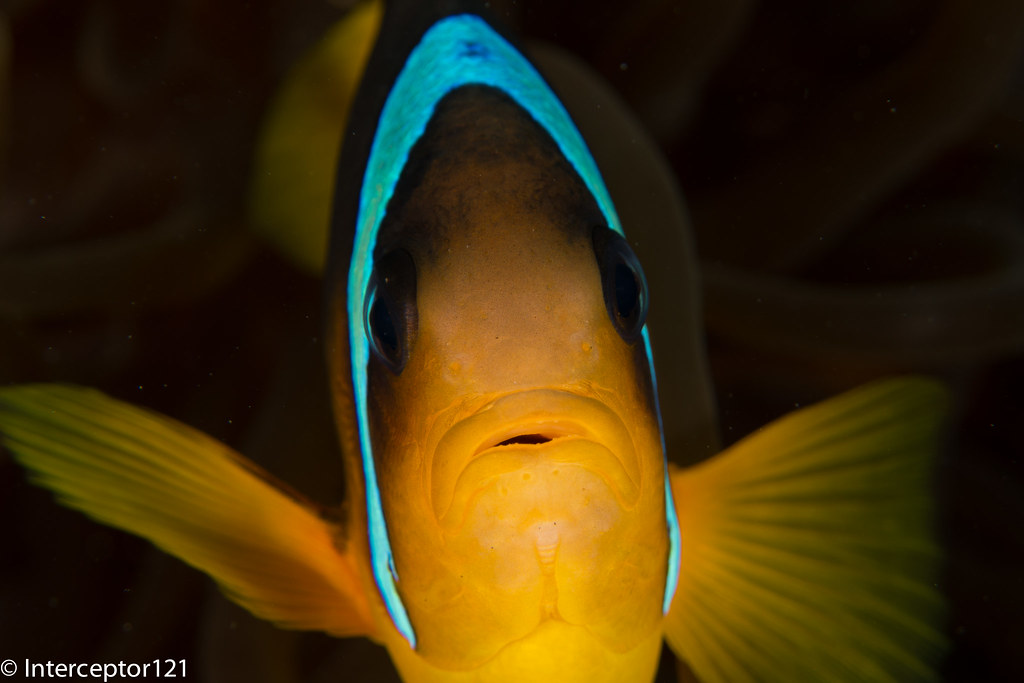
In the Red Sea workshop were given the task of taking pictures of cardinal fish with eggs in their mouth. I realized I could not fill the frame because I lacked a mid range close up lens and my camera would not focus closer.
In addition to the suggested shots you should make changes to those and try something different even if not totally different.
There are many landscape split shots but not many portrait so why not try one results can be excellent and it is easier with a small dome.
Other participants also will give a go to the same shots or have better editing skills it is worth to watch and learn.
My buddy was setting up a remote strobe I fired a few shots (unintentionally of course) so I got my own shot!
Finally take notes of what you did right and wrong and if you missed anything.
After the workshop
After the sessions are over still there is work to do over and above going over your pictures again.
Write down your lessons learned
Look at other people images
Order any equipment that you missed
Well it goes without saying that I put the notes together and summarized them here.
I also found great to connect to other people and then look at their gallery for other shots that we had not discussed before.
Finally I ordered myself an Inon UCL330, funny I had this lens and sold it not realizing the real use which is fish portraits!!!
That’s all for now if you go on a workshop soon I hope you find this useful.
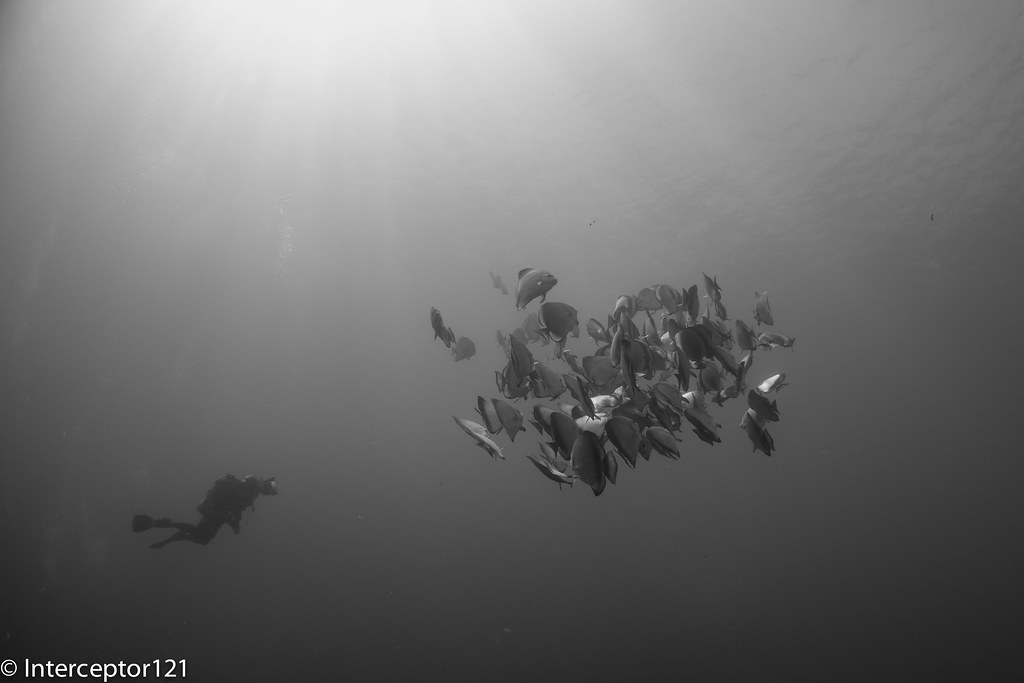
On Friday we were up for our last 3 dives at Shark Reef the current had not changed but this time I decided to give more a go to the schooling fish after setting up all the backgrounds I wanted.
As you can see from the image on the title we had more of the usual divers chasing fish but this did not deter me this time as I developed a specific technique to do the dive that I used fully on the last two photo dives.
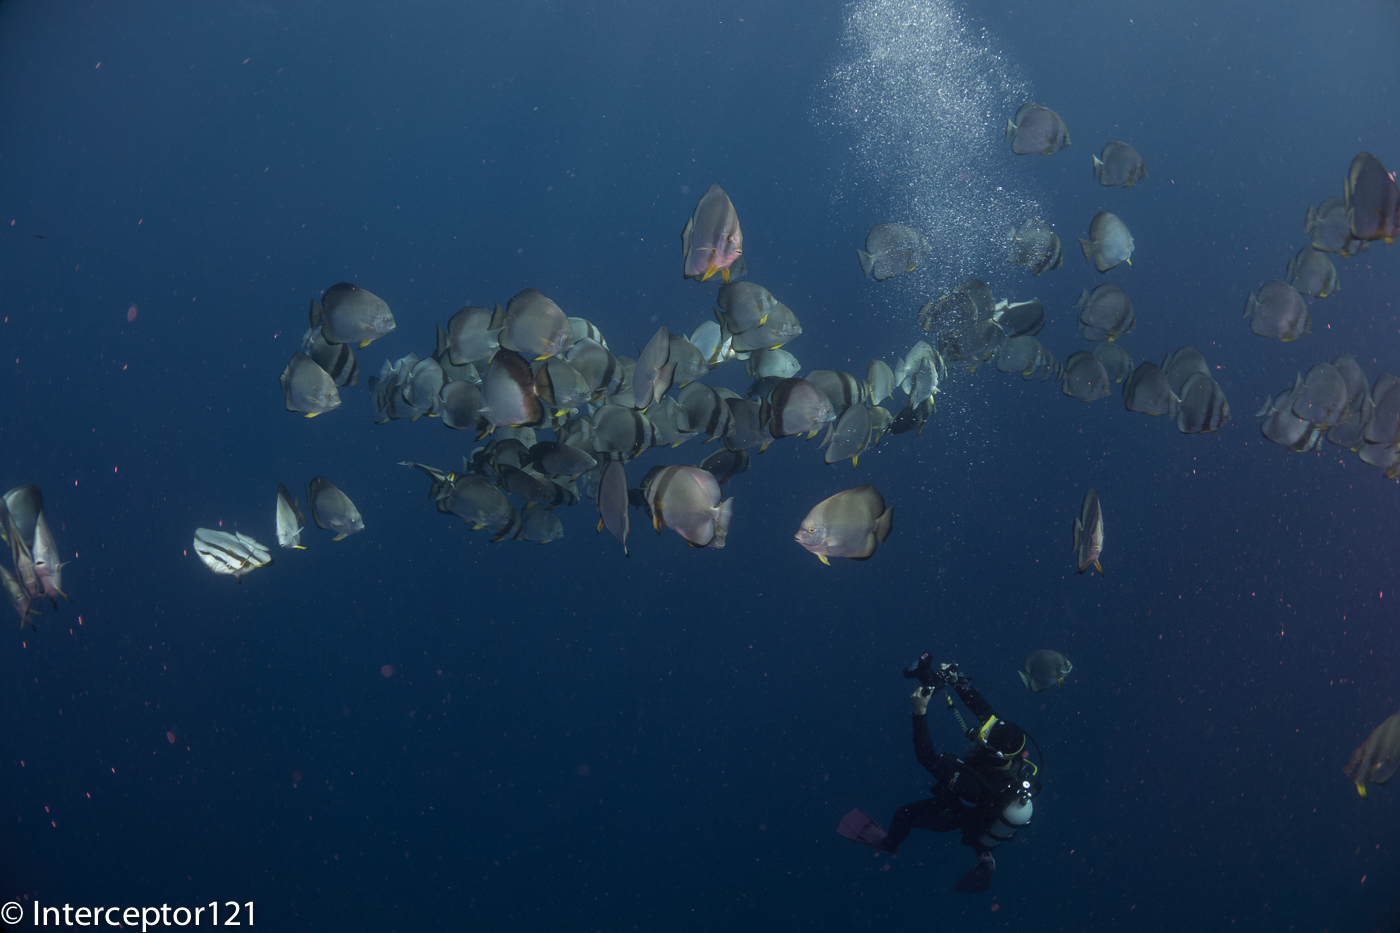
So after a bit of experimental shots like this one
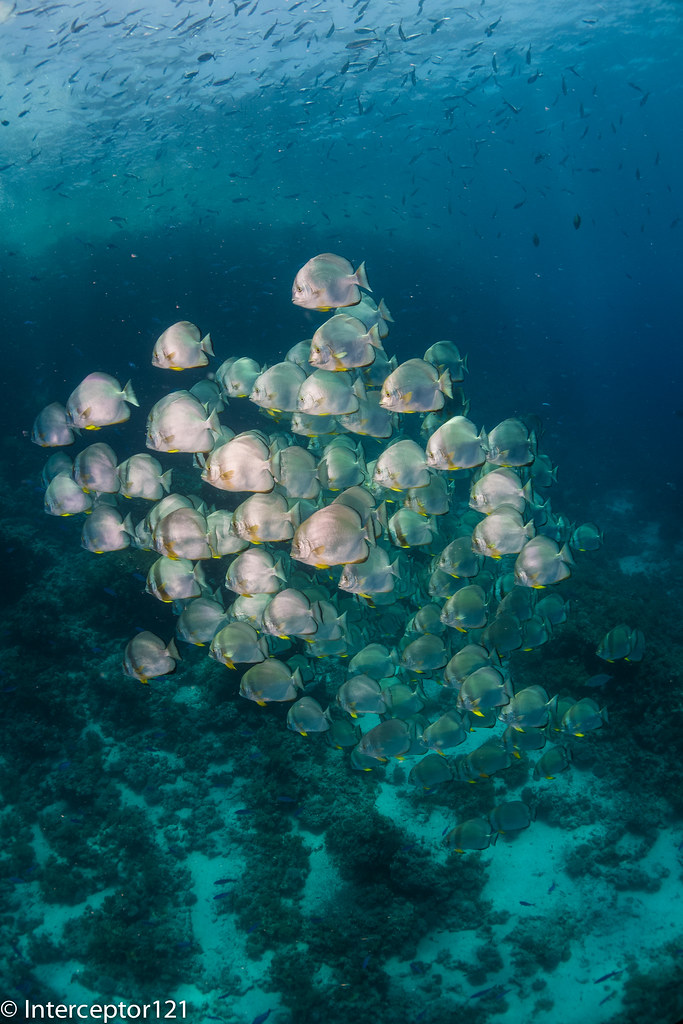
Batfish school from Top
It was time to give it a proper go. To be honest is not that I like batfish that much and probably this is one fish that you can shoot in RAW in ambient light however if you do that you need to sacrifice quite a few ISO stops. With strobes the issue is to get the school in a formation that allows you to do a good job with lighting. This is my best shot for the session.
What I like about this shot is the light on the fish or most of it where you can see yellow fins but also the background and a hint of surface.
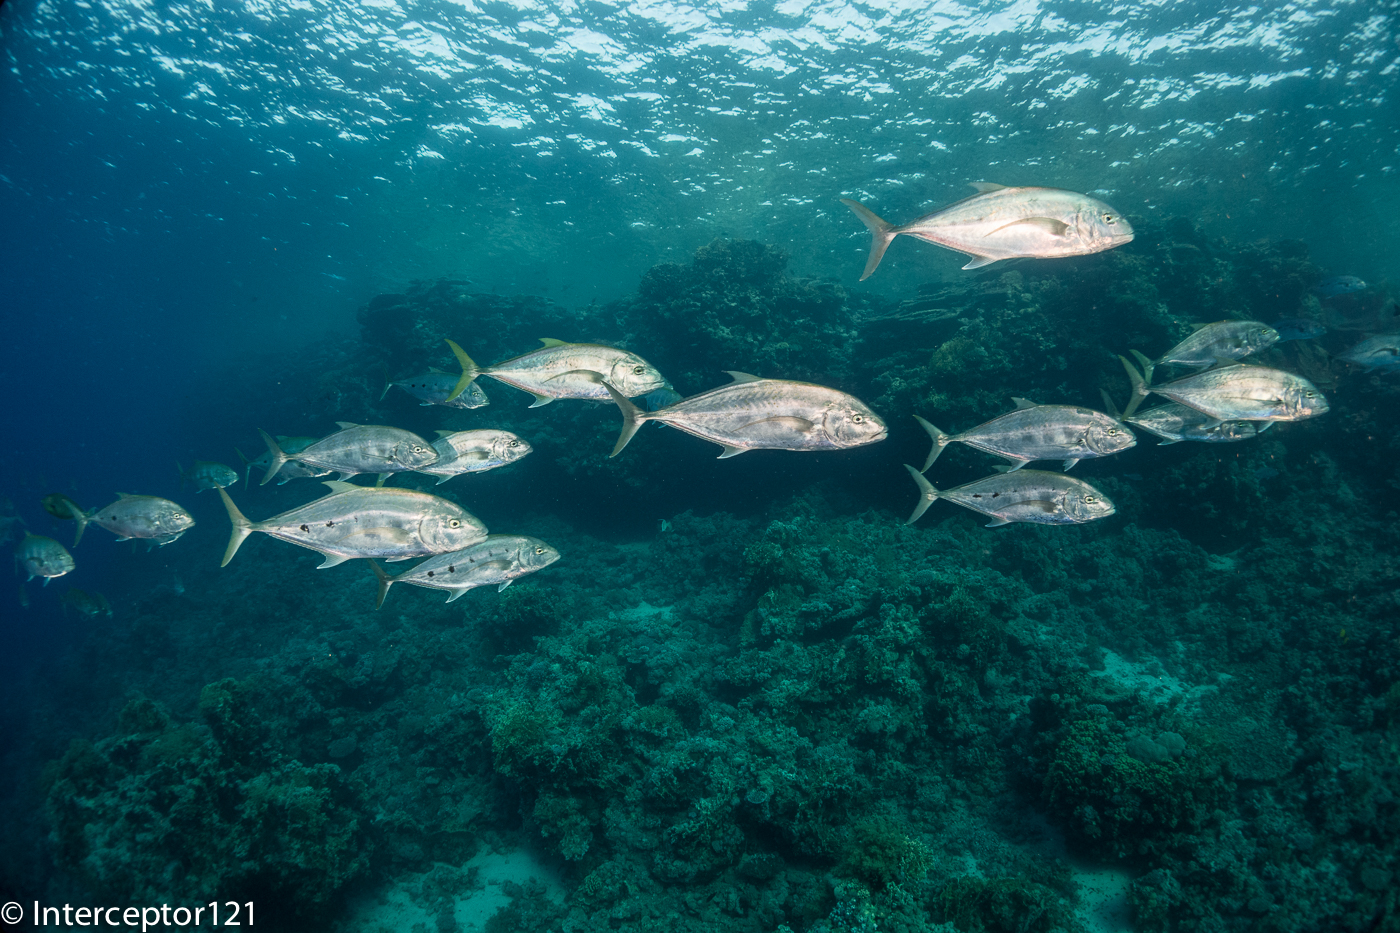
Other fish that featured on the day were jacks but catching a school of those running past is quite hard unless the school is really big and they circle you.
Jacks Schooling
In those type of formation you have all sort of issues with hightlights form the strobes in fact I was shooting 1/4 of power.
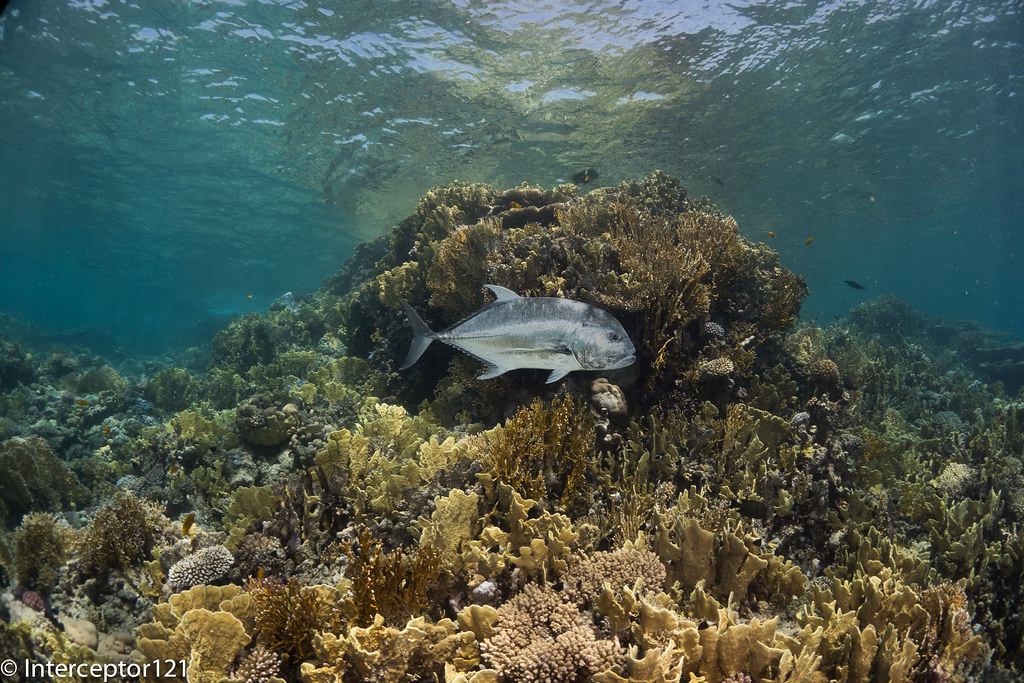
Giant trevallies made a more interesting single fish shot like this one.
Contrary to what you may think this is a shot with strobes otherwise you would not see the texture of the fish as you see it. Maybe a busy background but good technical exercise.
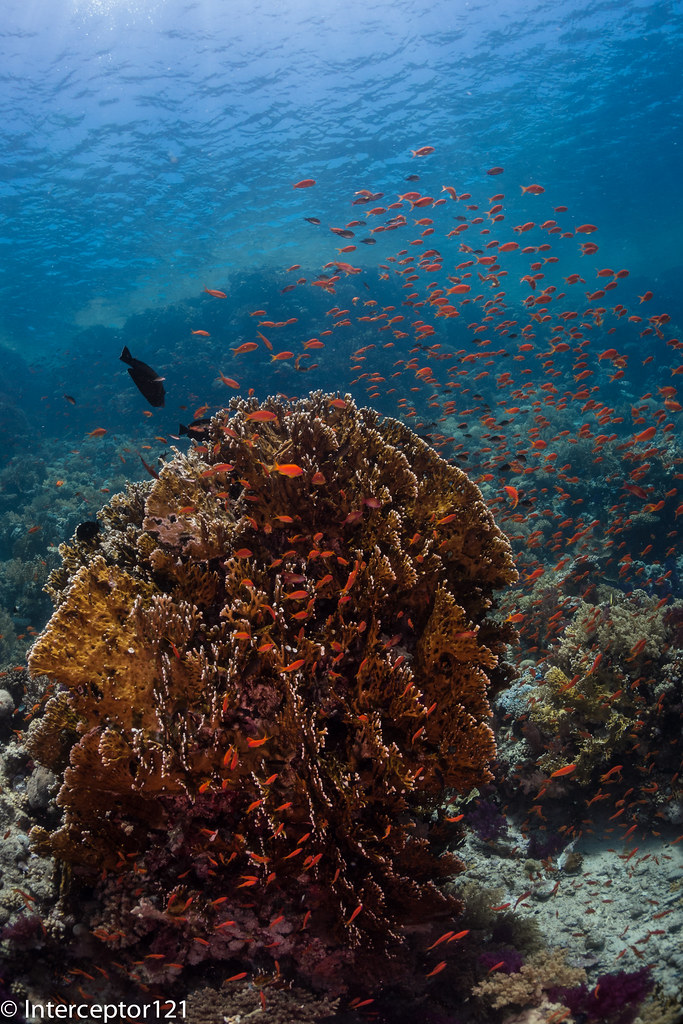
I also attempted a few anthias shots just to try a well tested technique to get them buzzing out the reef
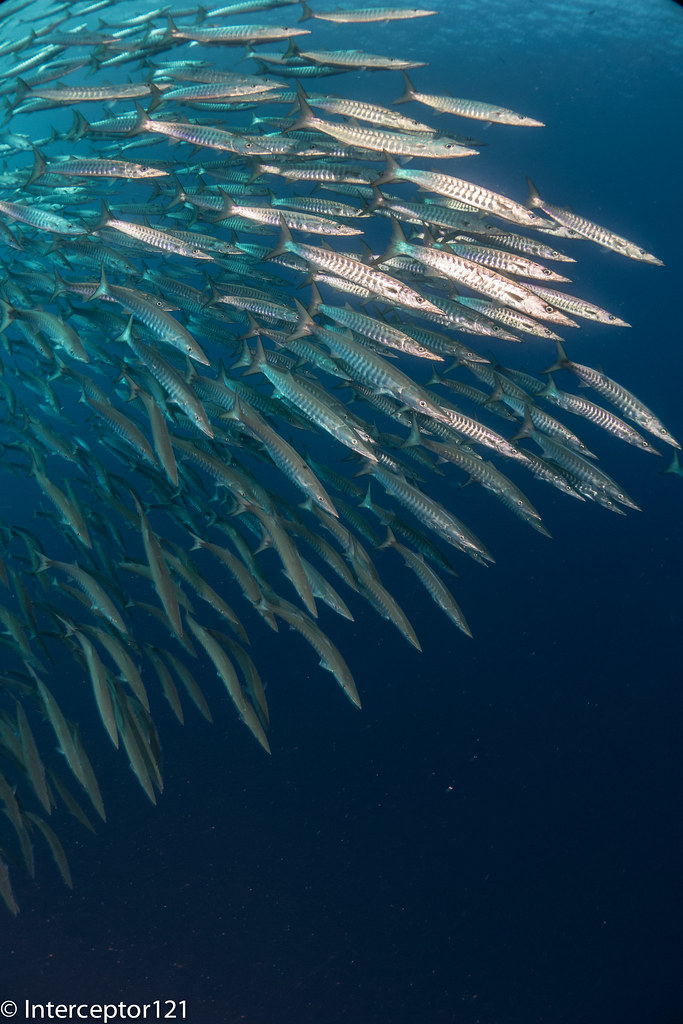
In the middle of the dives while I was waiting the barracuda school came out to play. Barracudas are quite tough as they require strobes to lit properly and I find the multitude of black and white shots that you see a bit boring as the fish texture is what makes the shot.
You have several challenges with the formation, if the school is big is difficult to take it all unless you are on the bottom or on the top. In the first case you need to control bubbles in the second you shoot the bottom so better be neat.
Anyway with a bit of patience I got the shot that I wanted
It is impossible to illuminate properly all of them but this shot has got the right geometry and I think is quite pleasant.
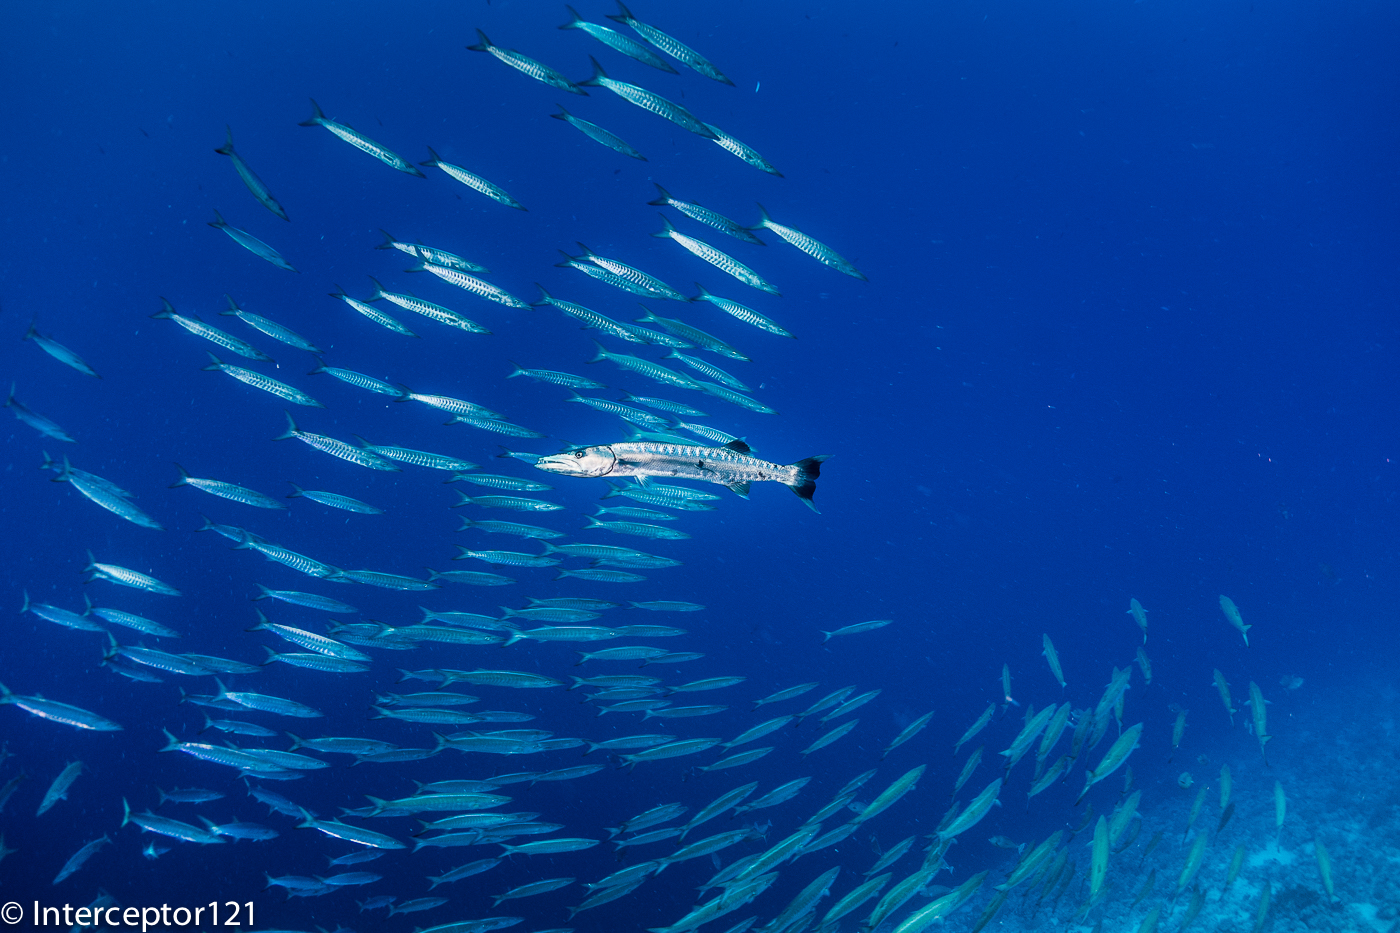
On the second dive I was lucky to spend some time with a Giant Barracuda that was literally commanding the school at sight, very rewarding from a diving point of view I got so excited that I kept shooting with a relatively slow shutter speed however the fish that is lit by the strobe is well crisp.
Giant Barracuda issuing orders
This shot is much deeper than the previous so the blue is colder but still makes for an interesting shot.
On dive 3 I decided to do a bit of video although I had not taken my favorite lens so I had to apply a filter directly on the camera lens. Moreover I had forgot the setting Toy effect on from some other experiment and whilst this is off in RAW it came back in video so the result is a soft warmer image…yuk still was fun to put it together so here it goes
It was time to rinse the gear (if you could call that hosing it quickly on the dive platform) and get ready to leave the day after. On the last day we were asked to put together a selection of our best 10 pictures and were give a video with some gopro footage taken by the ops manager plus our slideshow. Considering the time it was spent to do it the result is excellent.I hope this has given you an idea of the workshop that I definitely recommend, on the next post I will write my personal lessons learned from such experience.
After the first 3 days of workshop we got into the core of it and Alex talked about schooling fish and how to take shots.
We had 4-5 varieties to choose from:
Batfish
Surgeonfish
Barracuda
Jacks
Snappers
Detailed information was given in terms of how to best approach the fish depending on their behavior and also about the etiquette in terms of letting other people best positioned taking their shot first.
The surgeon fish are not that photogenic and actually quite messy I tried to take some shots when the current was pumping and they were all aligned close to the bottom at Yolanda however to me this is not that exciting as a shot. Other people got better results but I frankly was not that bothered about Surgeons. Probably as the fish is pretty dark and does not reflect the strobe much. The featured image close to the title shows what I mean.
During this trip the current was not going north to south as usual but there was near to no current at shark reef and current going outward at yolanda corner. This means the snappers that usually sit at the edge of shark reef were not out to play.
We were left with barracuda, batfish and jacks to choose from. On day 4 I only see few giant trevally but not many schooling jacks so had to focus on barracuda and batfish.
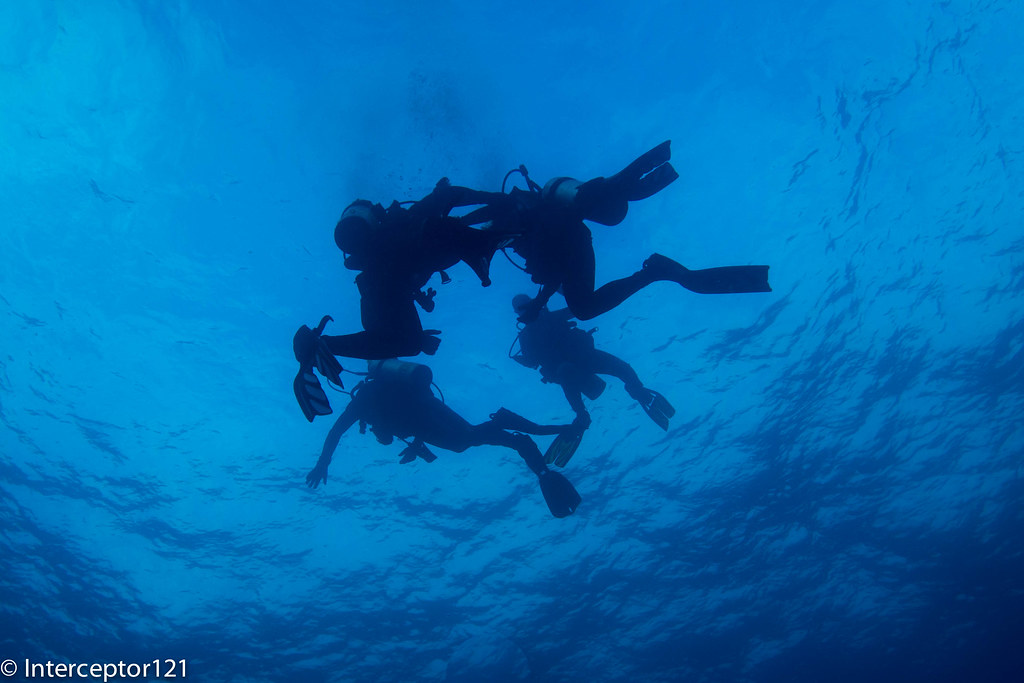
Unfortunately the barracuda were far from the reef and a bit too deep and did not really want to entertain chasing them so I tried with the batfish. Obviously there were not only us but also other boats so it was a bit of a competition for fish.
Encirclement
Also you always managed to get someone in the frame or bubbles
Shooting Batfish Below
So I focused on trying to get the best backgrounds for the pictures to come like in this case.
Also had some fun taking images of the others and the batfish one or two came out pretty good.
Creative angles
It is quite hard to have the discipline to respect rules when you are with other 18 photographer on the boat so the competitions had to be expected and I was not that bothered.
In the evening we headed back to Ras Katy and I borrowed a Nikon D7100 from Nauticam UK. I asked to have a 9″ dome for the split shot and jumped in the water with the idea of just doing that.
This is my best shot
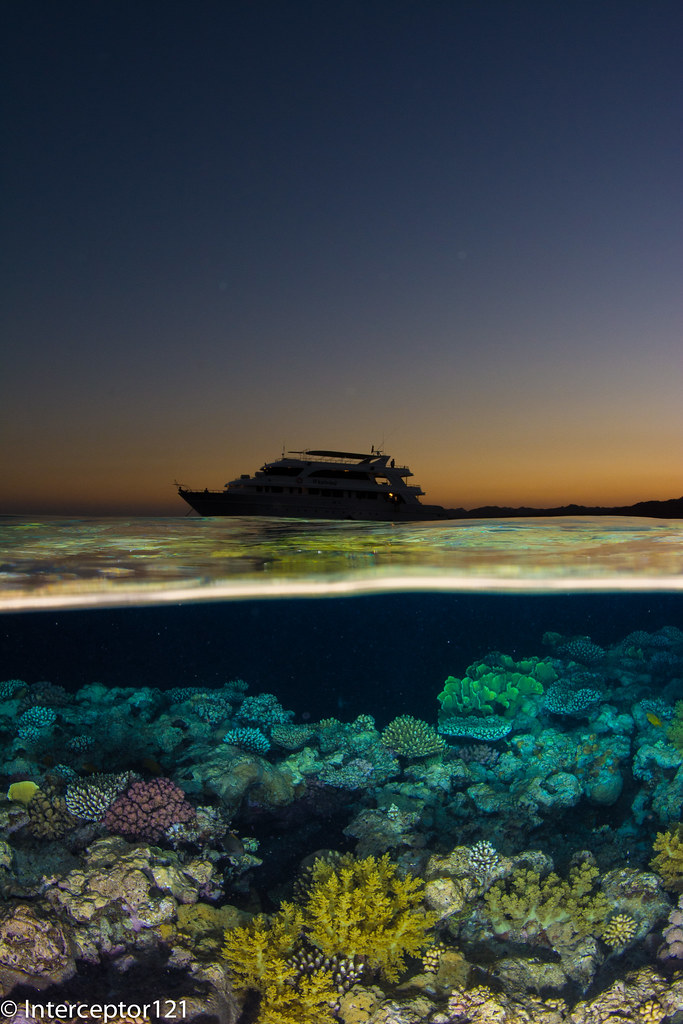
Personally I do not like split shots where the surface line is very distorted to avoid that you need to make sure your lens is near to rectilinear and it is better to shoot portrait as there is little distortion on that axis. What I wanted to capture in this shot is layers, the reef, water under and over, the boat and sunset colors.
I think it came out pretty good but it is painful to take 100 shots just to get one right and I wish I had some fish in the frame but never mind is good enough like this. The water was not really flat so that was an additional challenge as you can see the wave breaks on the lens creating a little thicker line but overall a good shot.
Once again Sony has updated their RX100 camera with a stunning new release that will surely be a market leader at least until the release of the new promised Panasonic large compact sensor with 4K video recording.
So the question is again is it worth throwing our hard-earned money to this new model and housing or should we stay with what we have got? The Mark I and II are still available at reduced price though it is becoming harder to find Mark I housing as new.
The answer to the question is: it depends on what you are planning to do with your RX100, for some users an upgrade may not be required or even not advised let’s see why. no don’t waste any time with the Mark III.
Every time a new camera is released and reviewed I get a bunch of emails with subject: New Camera XYZ what do you think?
The best reviews you find online are made by sites that specialize in land photography and no consideration is given to underwater use. So not necessarily a camera that is a top performer on land will remain such underwater as this depends on specific characteristics that may be different or even opposite to land requirements.
So those reviews cannot be taken as they are they need interpretation. Personally I use two sites for camera reviews imaging resource and dxo mark I use the first to understand ergonomics, performance and to compare images with other cameras side to side, and the second to check sensor quality and lenses. Imaging resource has made a good article to compare the various RX100 on land read it here
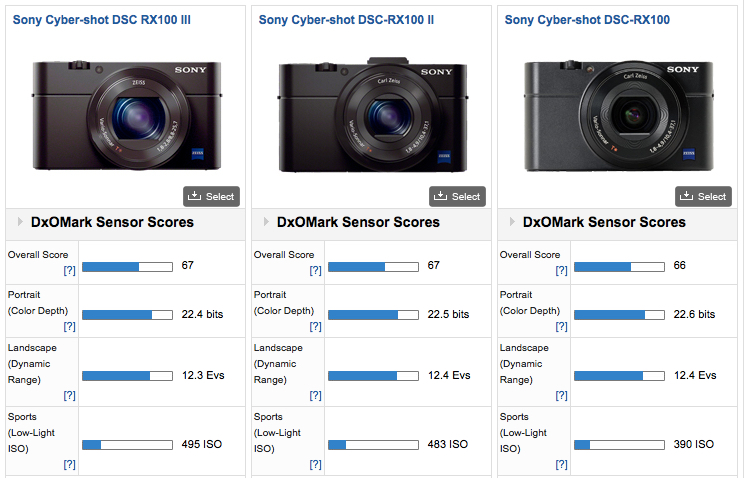
If you look at a sensor comparison on DXOMark you would conclude that there is no need to upgrade at all if you use your camera primarily for still pictures as the sensor are practically identical in performance as this table demonstrates:
RX100 Sensor Ratings
As you can see the differences in dynamic range, color depth or ISO are pretty much intangible.
However there are other metrics that are also important let’s see which ones and why.
Flash Recycling
We want our camera on board flash to recycle quickly after a full dump as the RX100 has only TTL flash and the flash can’t set to a minimum manual setting without consequences. Those are the flash recycling times at full output (a full dump will always occur when you don’t aim strobes directly at the subject for example wide angle)
Mark I: 7.2 seconds
Mark II” 4.4 seconds
Mark III: 3.3 seconds
The Mark III is pretty quick and the Mark II is acceptable the first release is definitely too slow.
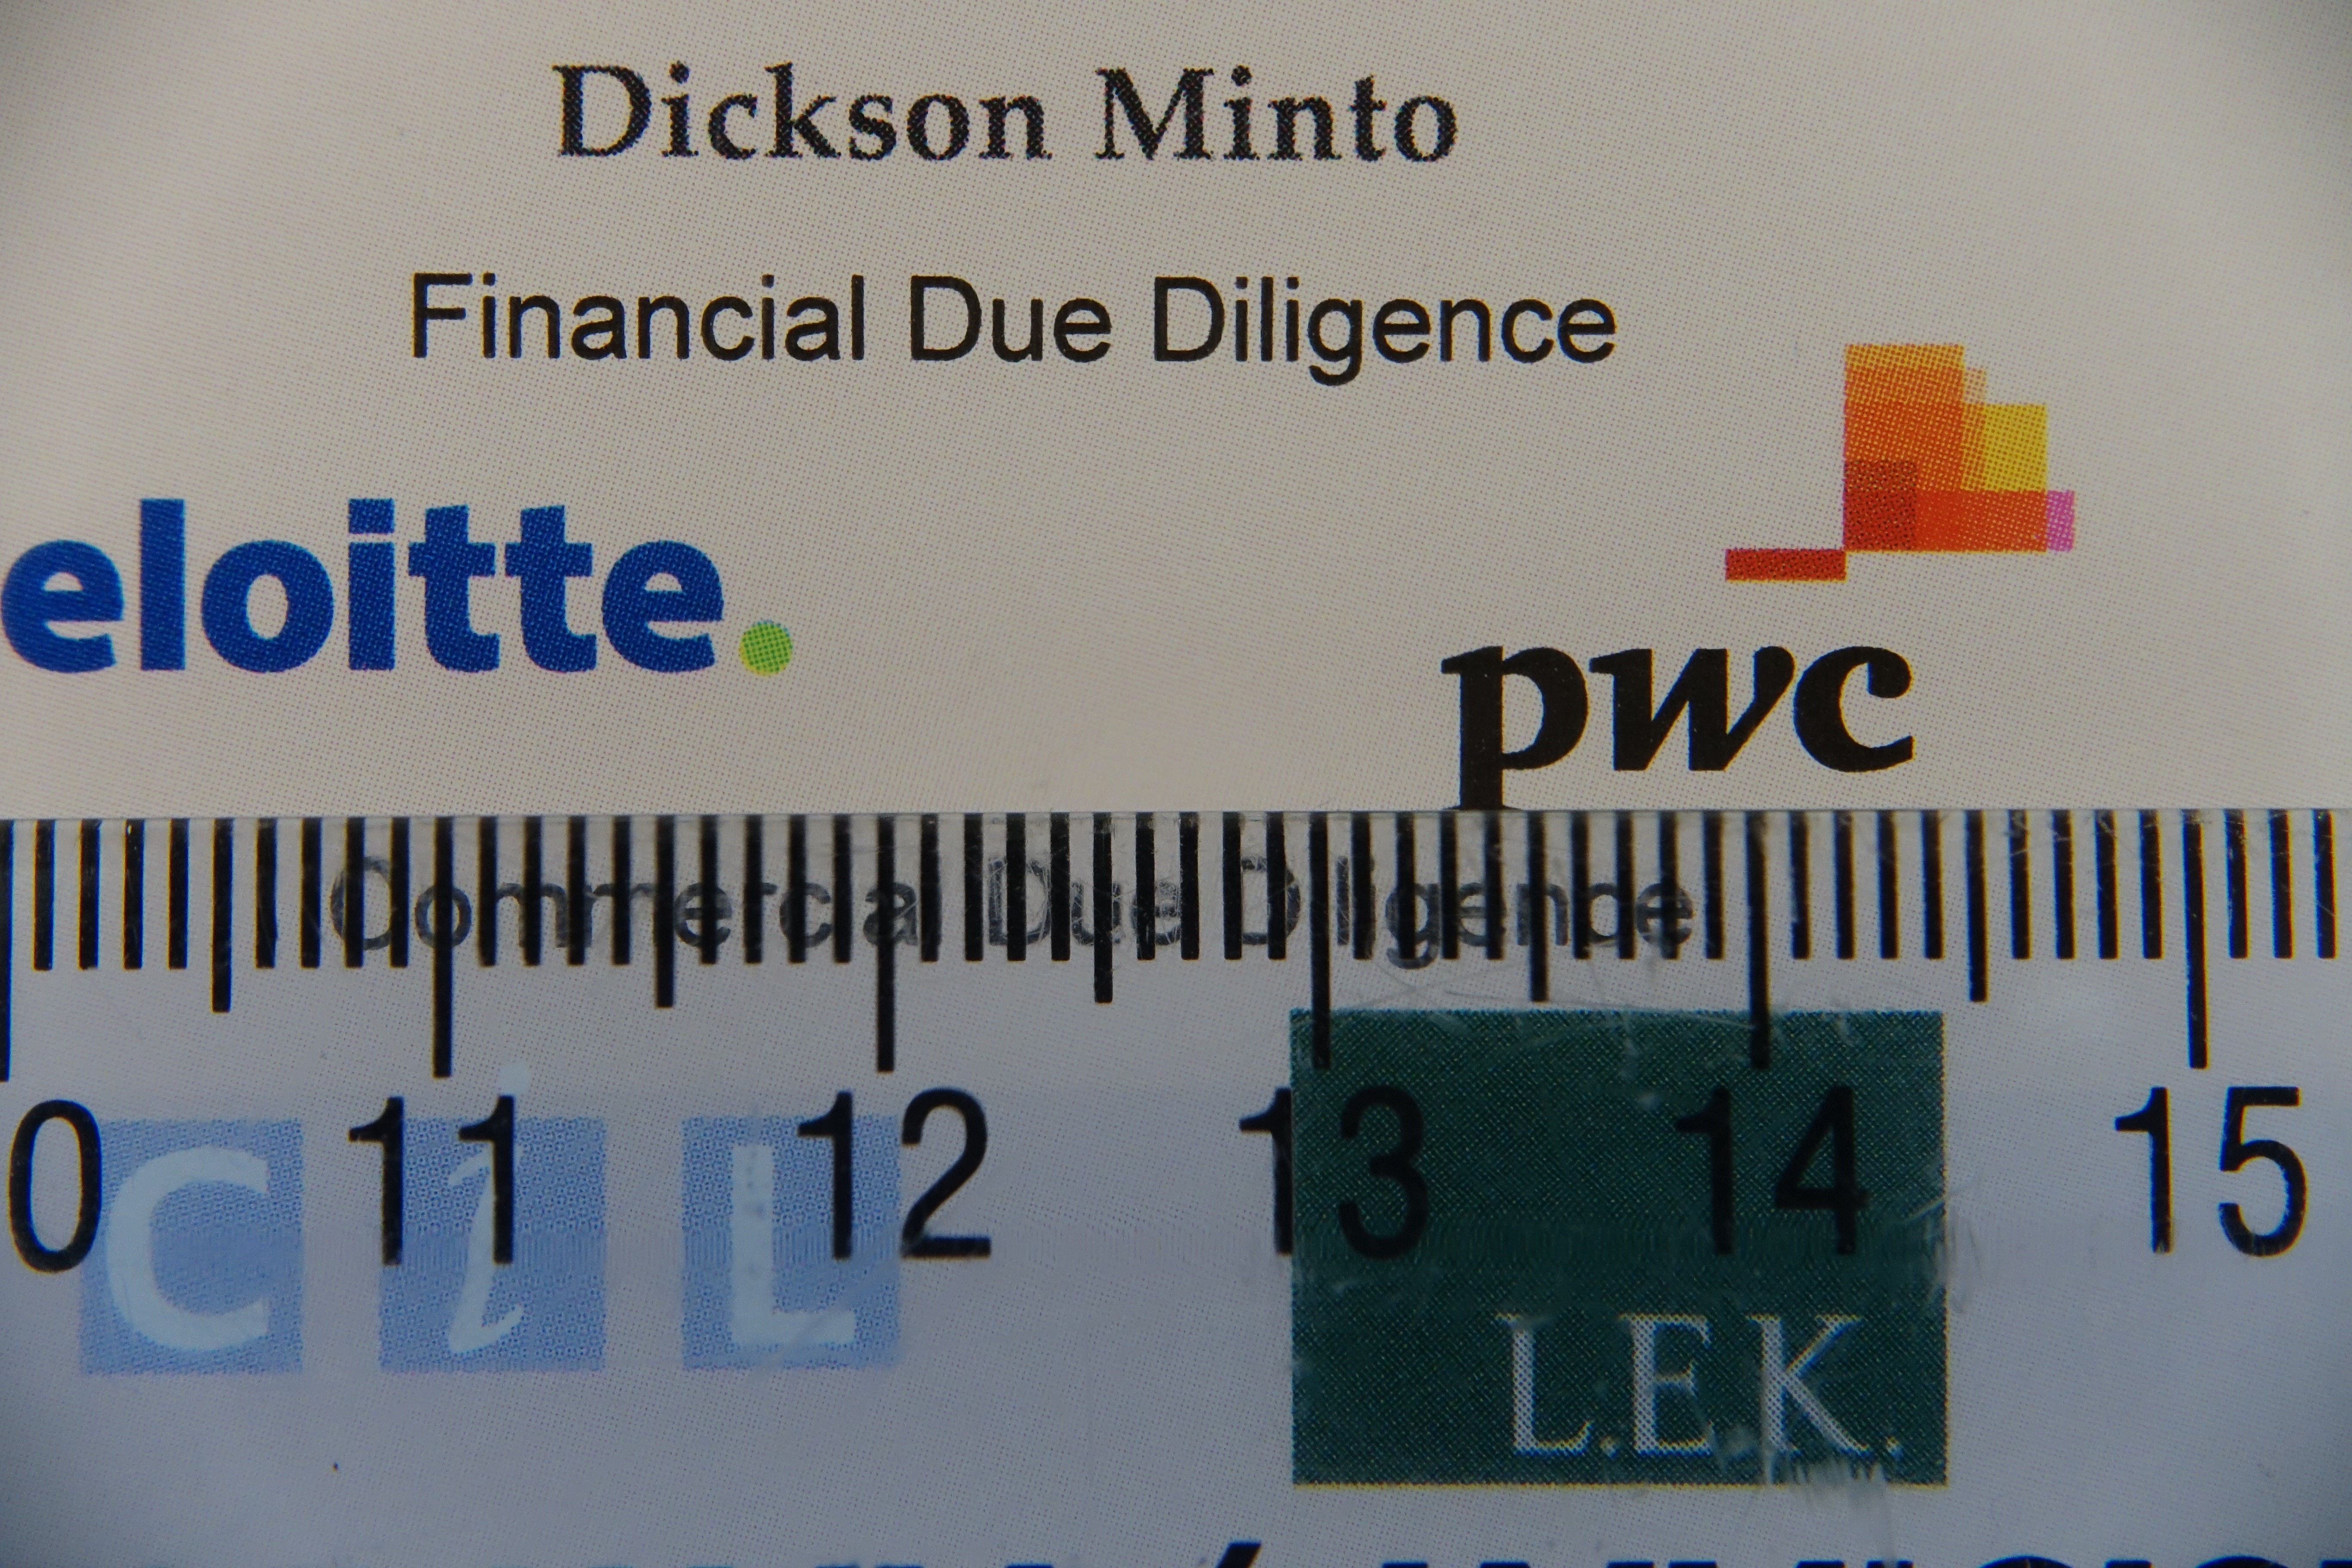
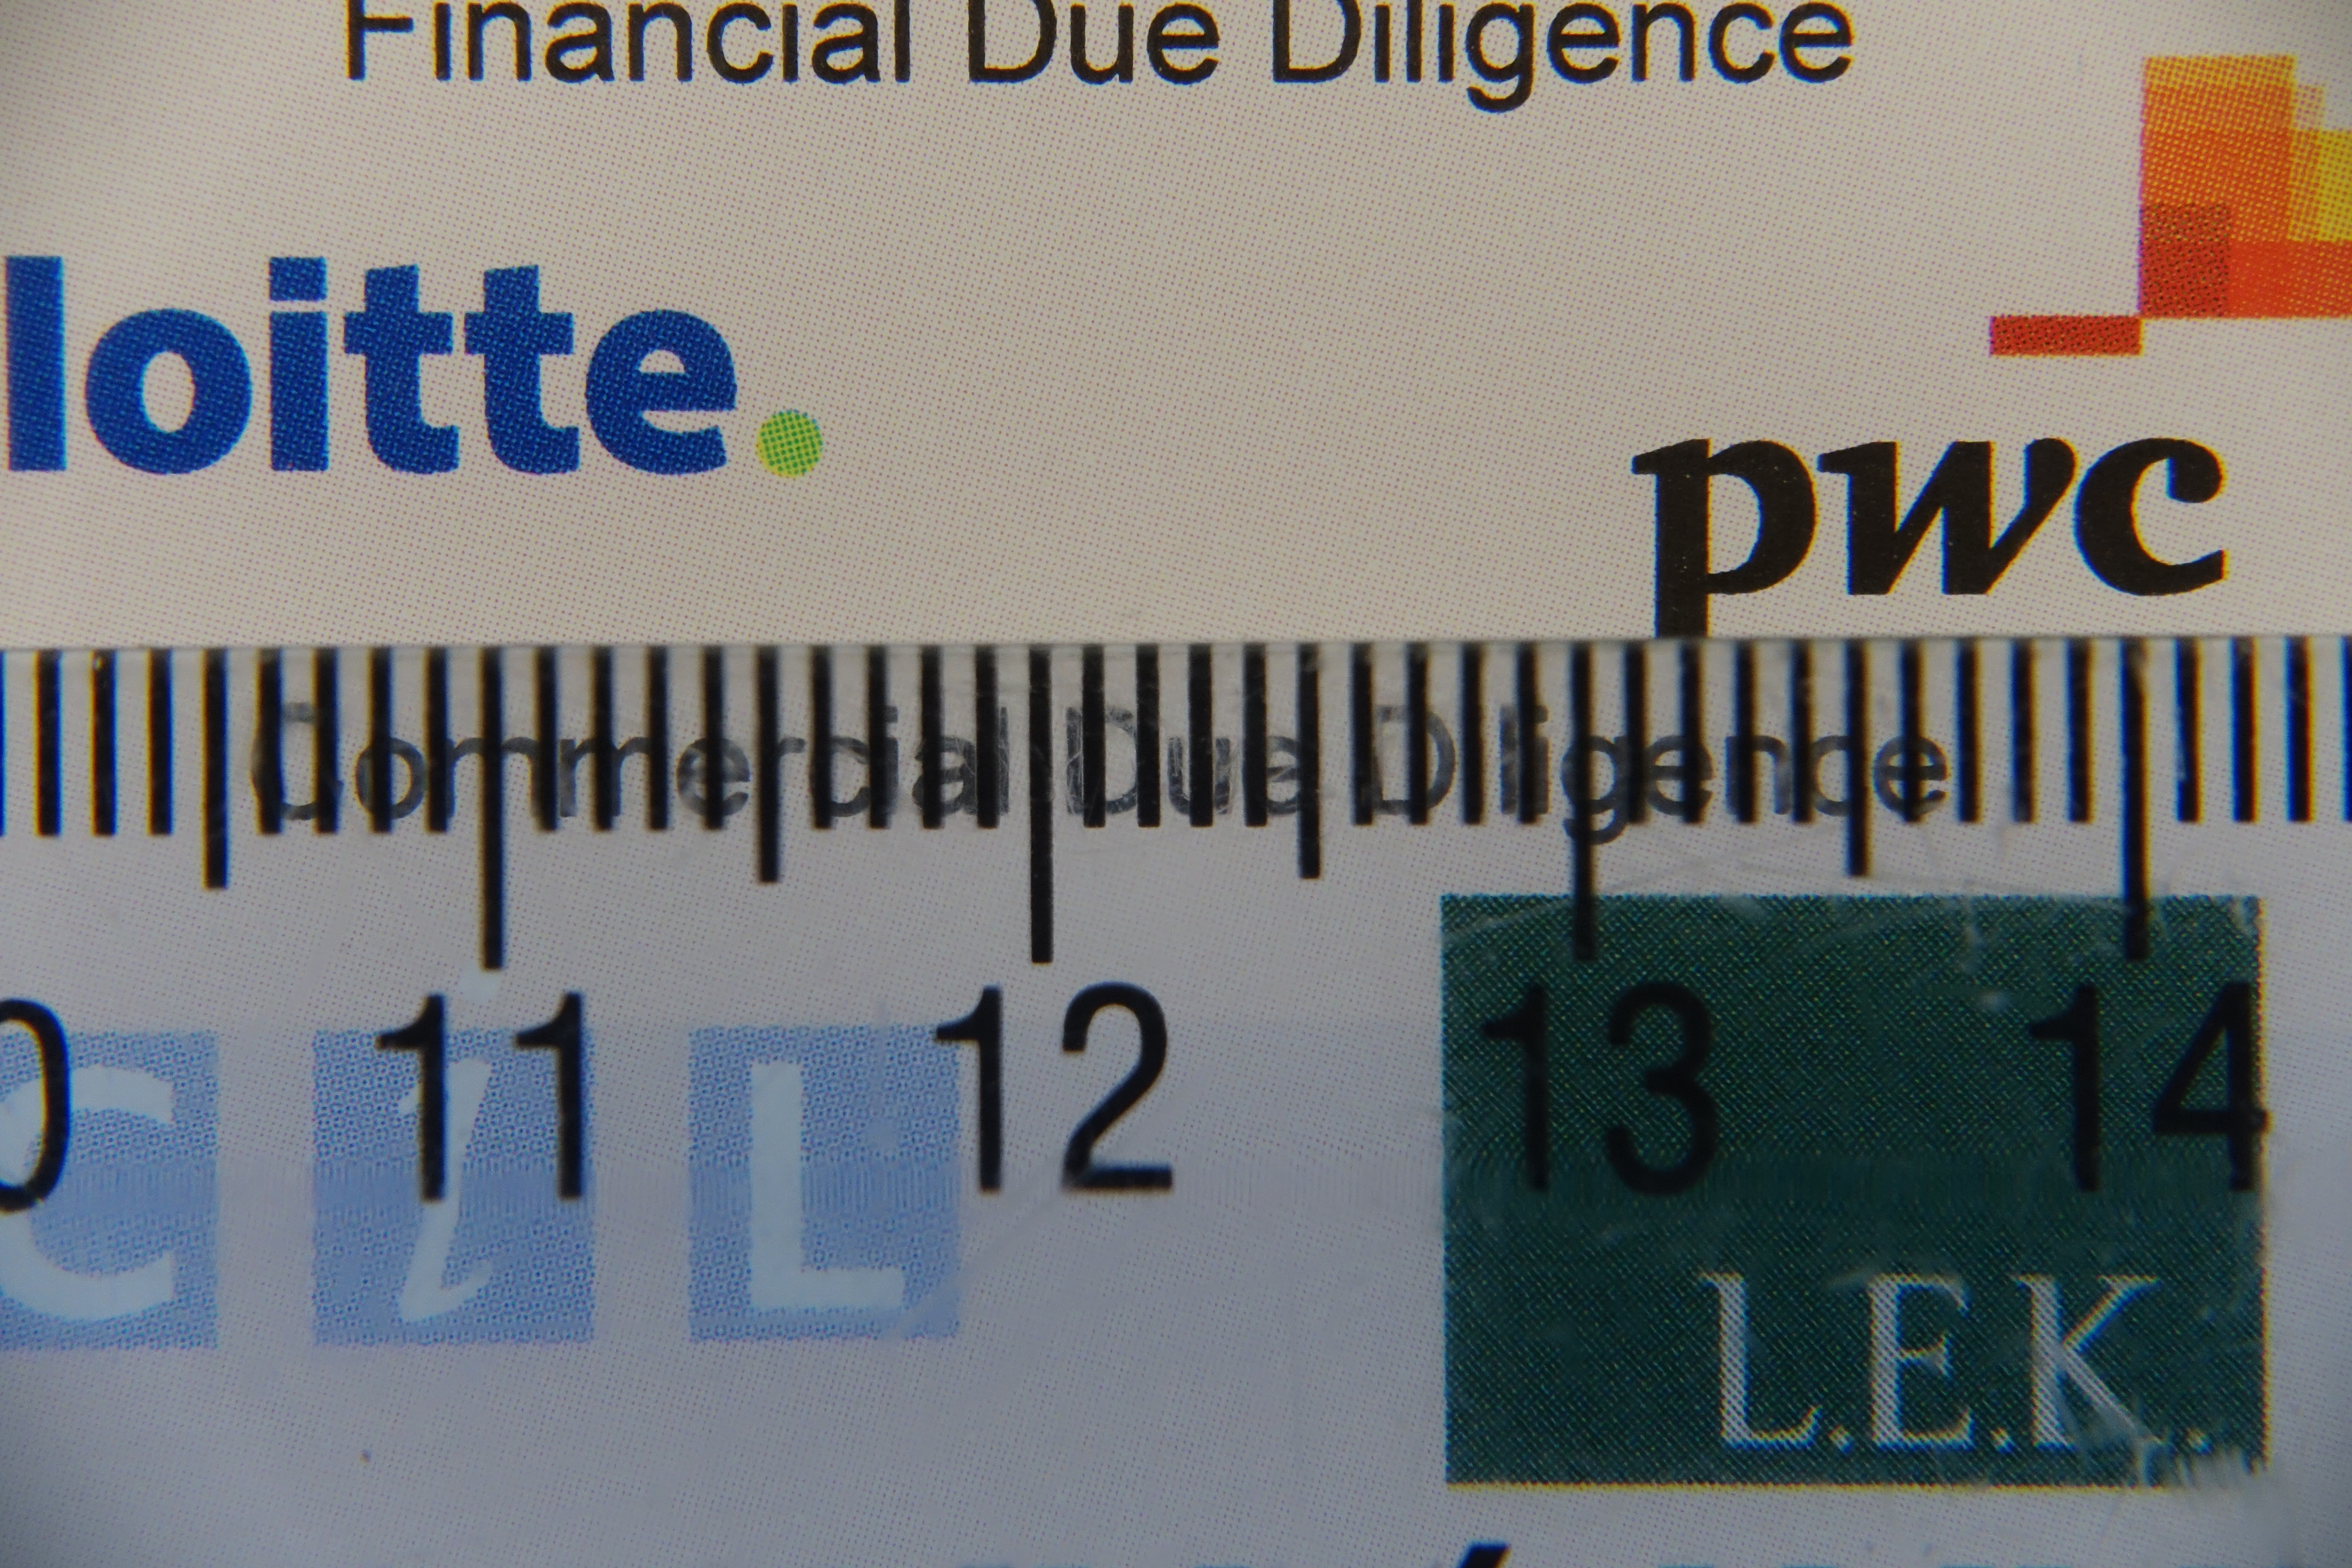
Minimum Capture Area & Zoom
What is the smallest area that can be captured at wide end at the closest focus distance? This gives you an idea of out of the box close up performance
I do not have precise metrics yet but looking at comparable images on imaging-resource seems like the Mark III is worse than the Mark I and II of at least 20% with a capture width around 90mm versus the already not very good 76mm of the Mark I and II.
To fix this issue we use close up lenses in water that fix to a great extent the focal length and then zoom in to achieve magnification which means longer camera lens more magnification I roughly estimate that the Mark III will be worse of a factor of 0.7x so things will look 1.4x bigger with the Mark III this is terrible news for macro shooters as it means you need to be on top of the subject to fill the frame, this is in some cases not possible.
I have estimated that you need 11 diopters to achieve 1:1 macro so the Subsee 10 and Inon UCL100 that gave real macro on the Mark I and II won’t be sufficient. With two UCL-165 or Dyron 7 you are looking at 2.58″ or 6.5 cm from the back of the first close up lens that means you will be right on top of the subject which is not really an option.
Update July 18th: Nauticam has confirmed that even with their SMC lens the most powerful diopter on the market the capture area is 38mm wide so does NOT achieve 1:1 macro as I suggested…
Lens Focal Range
The new mark III has a 24-70mm lens compared to the 28-100mm of the Mark I and II what does this mean?
Less magnification with close up lenses and no real 1:1 macro
Vignetting or even not possible to use fisheye lenses designed for 28mm lenses
This means that with the Mark III your scene selection will be restricted compared to the 150 to 24 of the mark I and II.
Update 23 July I have done some tests that confirm my suspicions please look at the following frames. The Mark III once zoom to 28mm actually works fine with the Mark II housing except the power button.
RX100 Mark III with Inon UCL-165 Close up lens
With a single Inon UCL-165 (+6.06 in water) the minimum capture area width is 5.4 cm which is bigger than the Mark II 4.8 cm. Not only that the distance from the top of the lens is only 9cm.
With stacked UCL-165+UCL330 total power 9.09 diopter we get this
Stacked UCL-165+UCL330
4.4 cm width however we start running into problems as the minimum distance from the lens is only 4cm.
We finally achieve 1:1 with two stacked UCL-165 however the distance from the top of the lens is 3cm definitely too little
two UCL-165 stacked
I have also tried the Mark III at 28mm and it still vignettes with the Inon UWL-H100 in air until around 30mm. Instead the old UWL-100 28AD is fine at 28mm either way image looks narrower than with the Mark II but this may be an issue with the old housing.
So basically no macro with the Mark III and no decent fisheye as expected.
Underwater Photography Conclusion
Due to the reasons above the best camera for the job is the RX100 Mark II, with the Mark I coming close but being penalized by the strobe recycle time, the Mark III really is not an option for the serious shooter due to limitations of the lens.
Let’s have a look at some other features of the Mark III that are not relevant for stills as much as they are for video.
ND filter
Shooting at the surface with plenty of ambient light or on land can create problems if you want to follow the 180 shutter rule, the ND filter of the Mark III ensures your footage will be smooth on land and in water. Take into account that on land you can apply optical ND filters (I have it for the Mark II) so this is really for underwater use when you are shooting at 1/50 or 1/60 shutter speed and the scene is too bright when you hit f/11 and the lowest possible ISO. Having now tested this feature I confirm it is really valid on land on a bright day to keep the aperture wide.
Clear Image Zoom
This is a special digital zoom with edge enhancement that only worked on JPEG stills on Mark I and II but is now available on video on the mark III. This means an additional 2x zoom is available bringing the focal length to 140mm that is more than adequate for macro. This is not an option on RAW images so irrelevant for still users.
23 July update Having done some tests for macro video (as stacking two diopters is not an option) the image quality suffers but anyway this is all you are left with lacking any other options.
Clear image zoom 1.5x on single UCL-165
Image stabilizer
The Mark III adds a further stabilizer mode with additional crop that takes the lens to 96mm equivalent in video mode. This is well worth for super macro hand-held footage and effectively provides an option where you can either use the super steady shot and no clear image zoom when hand-held or leave on only the optical stabilizer and use clear image zoom. If you shoot macro on walls and not on flat sand this is a well worth feature.
Update 23 July 2014
Following a side by side comparison you can find on this link
It follows that there is really no 5 axis stabilisation and only an additional mode with more crop with correction for rolling shutter that anyway does not really work!
Full Sensor Readout Video
The mark III reads the whole sensor not just alternate lines when capturing video this increases should increase the resolution to a great degree and increases the perceived resolution and clarity of your videos. However this does not seem to correspond to real life tests. See this sample with a side by side comparison the Mark III looks visibly worse than its predecessor even on the higher bitrate XAVC!!!
Video Formats
The Mark II introduced a well welcomes 24 Mbps 24/25 fps mode now the Mark III introduces a 50 Mbps mode in XAVC (that can be rewrapped into normal MP4) that produces even better footage although it will be quite demanding on your workstation and most likely some of your home devices will struggle playing the files (my Apple Tv 3rd generation only plays up to 25 Mbps) when uploading files online this will downgrade to 8 Mbps so won’t matter unless you have a good player at home. improves nothing and requires manipulation as the files are actually not MP4 compliant as they have WAV audio (!) they are also inside the AVCHD folder which is painful. As seen above seems like the encoding has got worse on the AVCHD files and only the higher bitrate compares but still does not match the mark II at the lower 24 Mbps!!!
HDMI connection
You can now connect the Mark III to an external HDMI recorder if you are into that kind of semi pro usage. For the normal user this is not relevant: if you are into spending that money probably you have already a DSLR or a Panasonic GH4.
Video Auto Focus
The auto focus in video has got worse you can see an example in the stabiliser test, and actually plenty of frames are blurred on the mark III. Awful!
Underwater Video Conclusion
The Mark I with only a 28 Mbps 50/60p mode is definitely a poor choice, the Mark II is acceptable to most users. and the mark III promises even better performance if you are a serious video user and have another camera to take pictures the Mark III may be well worth it.
The Mark III despite some useful feature is actually a let down and perform worse in practical terms than the mark II that remains my camera of choice.
Summary
If you have a Mark I camera and are frustrated with flash recycling you should be looking at a cheaper upgrade to the Mark II.
If you have a Mark II and your priority is photography upgrading is NOT recommended.
If you don’t have any RX100 get yourself a Mark II or wait for the new Panasonic as the Mark III is pretty much a pile of crap.
Is it the first time I am actually sending back a camera and invoking consumer rights but when I spoke to the camera shop they told me they had other returns and this is not really an upgrade!!!
The above image was shot at 100mm equivalent with one diopter with the RX100 Mark II. You won’t be able to fill the frame with the same close up lens and the Mark III camera
Snell’s window is a phenomenon by which an underwater viewer sees everything above the surface through a cone of light of width of about 96 degrees [From Martin Edge: Underwater Photography].
During my last Gapapagos Trip there was a bit of an issue in terms of photography subjects, in essence most of them were fairly big like sharks, turtles, eagle rays and of course divers.
After a while shooting or trying to shoot those uncooperative models I had the idea to try and do different things such as silhouettes and Snell windows. You can also combine both as we did in this case.
So what do you need to shoot image of a Snell window:
1. A lens that is wide enough, you need a bit more than 96º field of view to take the whole window
2. Something interesting on the surface (if you have calm water you can see right through)
3. An interesting subject as silhouette to contrast the clear water if there are waves and you can’t easily see through.
A normal flat wet wide angle lens for our compact camera is not sufficient to capture the snell’s windows as in this example
Divers at Safety Stop – taken with Inon UWL-H100 at wide end
Take into account that even with a fisheye lens on an SLR you can’t capture the Snell’s window on the vertical axis as the field of view will fall short a few degrees.
With a compact camera a semifisheye lens will capture the edges of the window if correctly aimed on the diagonal and horizontal dimensions and will fall short on the vertical.
Snell window divers exiting the water or ascending – UWL-04 semi fisheye lens Canon S95
I am reporting some of the calculated field of view for the most popular lenses at present for compact at 3:2 image format
Wet Lens
Diag FOV
Hor Fov
Ver FOV
Flare/Ghost
UWL-04
151.95
123.22
79.85
Ghost Possible
UWL-100 28AD
149.01
120.97
78.48
No
UWL-28
160.56
129.75
83.81
Both
UWL-H100
157.85
127.71
82.58
No
All those lenses will take a good Snell’s window I have not tried the UWL-28 and I have some concerns this lens may flare as it usually does but I do not know for sure.
Both the Inon lenses produce sharp images with no defect.
In general small sensor cameras like the Canon S series will work fine with the fix/idas lenses and should produce good results also of normal shots through the water.
Using the UWL-04 or UWL-28 with large sensor cameras like the RX100 there could be a sharpness issue a larger apertures so make sure you close that at f/8 or smaller instead of using the shutter speed to balance exposure if you want to go through the water.
Snell’s windows are uncommon with compact camera shooters as they are considered an advanced subject but they can be taken. I will be taking more in a next trip to Egypt I hope for calm surface conditions so I can go through the surface with the shots. Failing that this is very easy to practice in a swimming pool.
During the London Dive Show I attended a talk from Martin where he covered a number of shooting situations and how to deal with them in terms of composition and settings.
There was a promotion for a two for one tuition day with him that my buddy was keen to take so few months later we made our way to Dorset for a day of underwater photography with Martin.
This will be my first day of shooting with the RX100 Mark II albeit in a pool with my new arms and lenses so I was looking forward to it.
We arrived in Poole the night before and got ready for an 8.30 start with Martin.
We started off with a review of some basic exposure concepts and then looked at competition winning pictures and trying to identify what makes a wow picture. It was extremely useful!
Afterwards we went through our trips pictures so he could see what needed improving. Then look at what was needed for the next trip.
With that in mind we set up to jump in the pool to take some pictures the objective was to improve my buddy close ups and portraits as apparently her wide angle is as good as it gets with the Canon S95 used see featured image on this post.
Pool conditions were low visibility and plenty of suspended particles as the pool is used for kids swimming lessons let me give you an idea!
Pool Conditions
The first task was to shoot a frog with a view of eliminating shadows in its mouth. Start with one strobe and finish off with two.
Frog at 28mm
The frog with the bare port gives you an idea of the size and the complexity of the task with one strobe. There are shadows in his mouth.
Frog at 50mm
I then shot a portrait at 50mm, the reason why you see shadows more on the left is because I set the strobe at different powers.
Frog single diopter
The magnification of the RX100 is little so I went on with a first Inon UCL-165 and full zoom at 100mm equivalent. Note that everything is pretty much sharp at f/11.
Frog Double Diopter
With two Inon UCL-165 focusing on the mouth will result in this and the eyes being in focus and the rest blurred because of lack of depth of field.
Octopus fisheye
I then moved to an Octopus rich of textures. I took the first shot with my Inon UWL-100 28AD with dome.
Octopus at 28mm
The same octo at 28mm fills the frame much more of course.
Octopus at 50mm
The Octopus at 50mm looks even better. I have topped up the lighting on this one.
Octopus single diopter
I then took this guy with a single UCL-165 note the depth of field insufficient to keep the back of the head in focus, results though are exceptional.
Octopus double diopter
With two close up lenses we go back to the depth of field problem even at f/11.
I thought I had at that point nailed all focus and strobe issues, especially considering I shot with single auto focus, I did not bother using manual focus at all with exception of some double diopter shots.
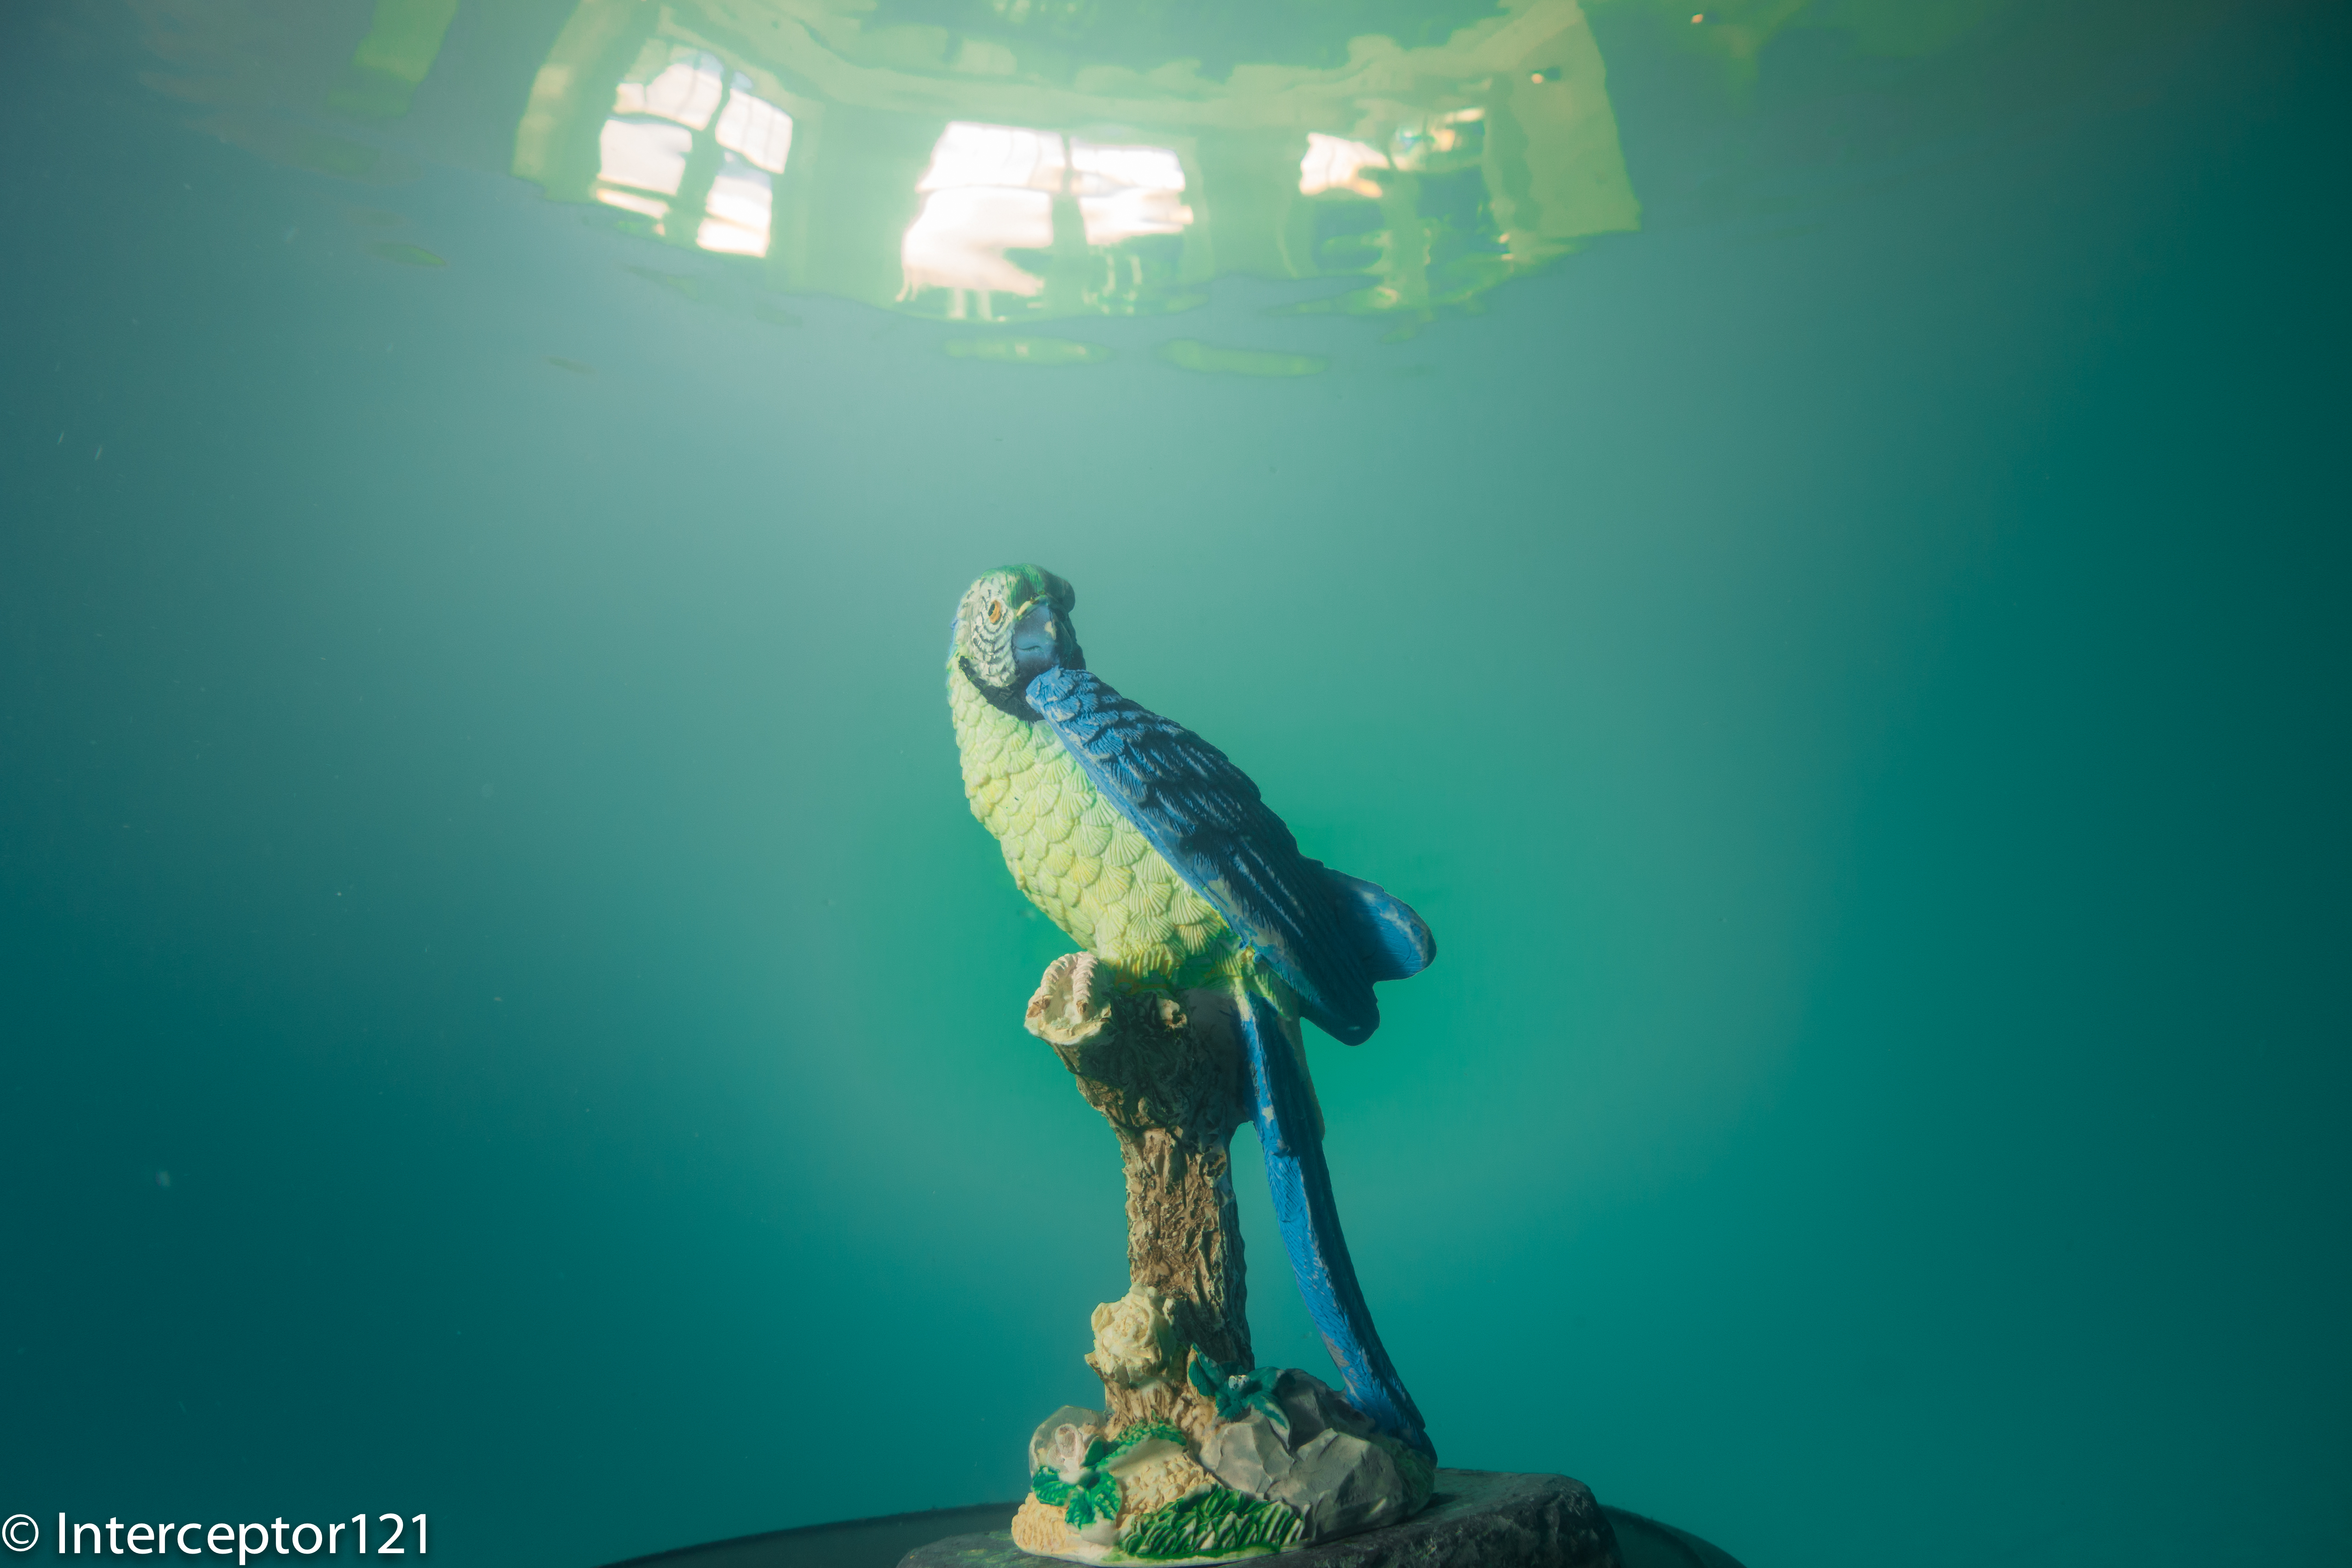
I then tried a few surface reflections with the fisheye this being the best.
Falcon Fisheye
You can see the outside of the pool and the windows on the top.
Family Fisheye
Afterwards made my own composition of statues for a fisheye shot that I think came out very well. The Z240 performed extremely well in both TTL and external auto as well as manual.
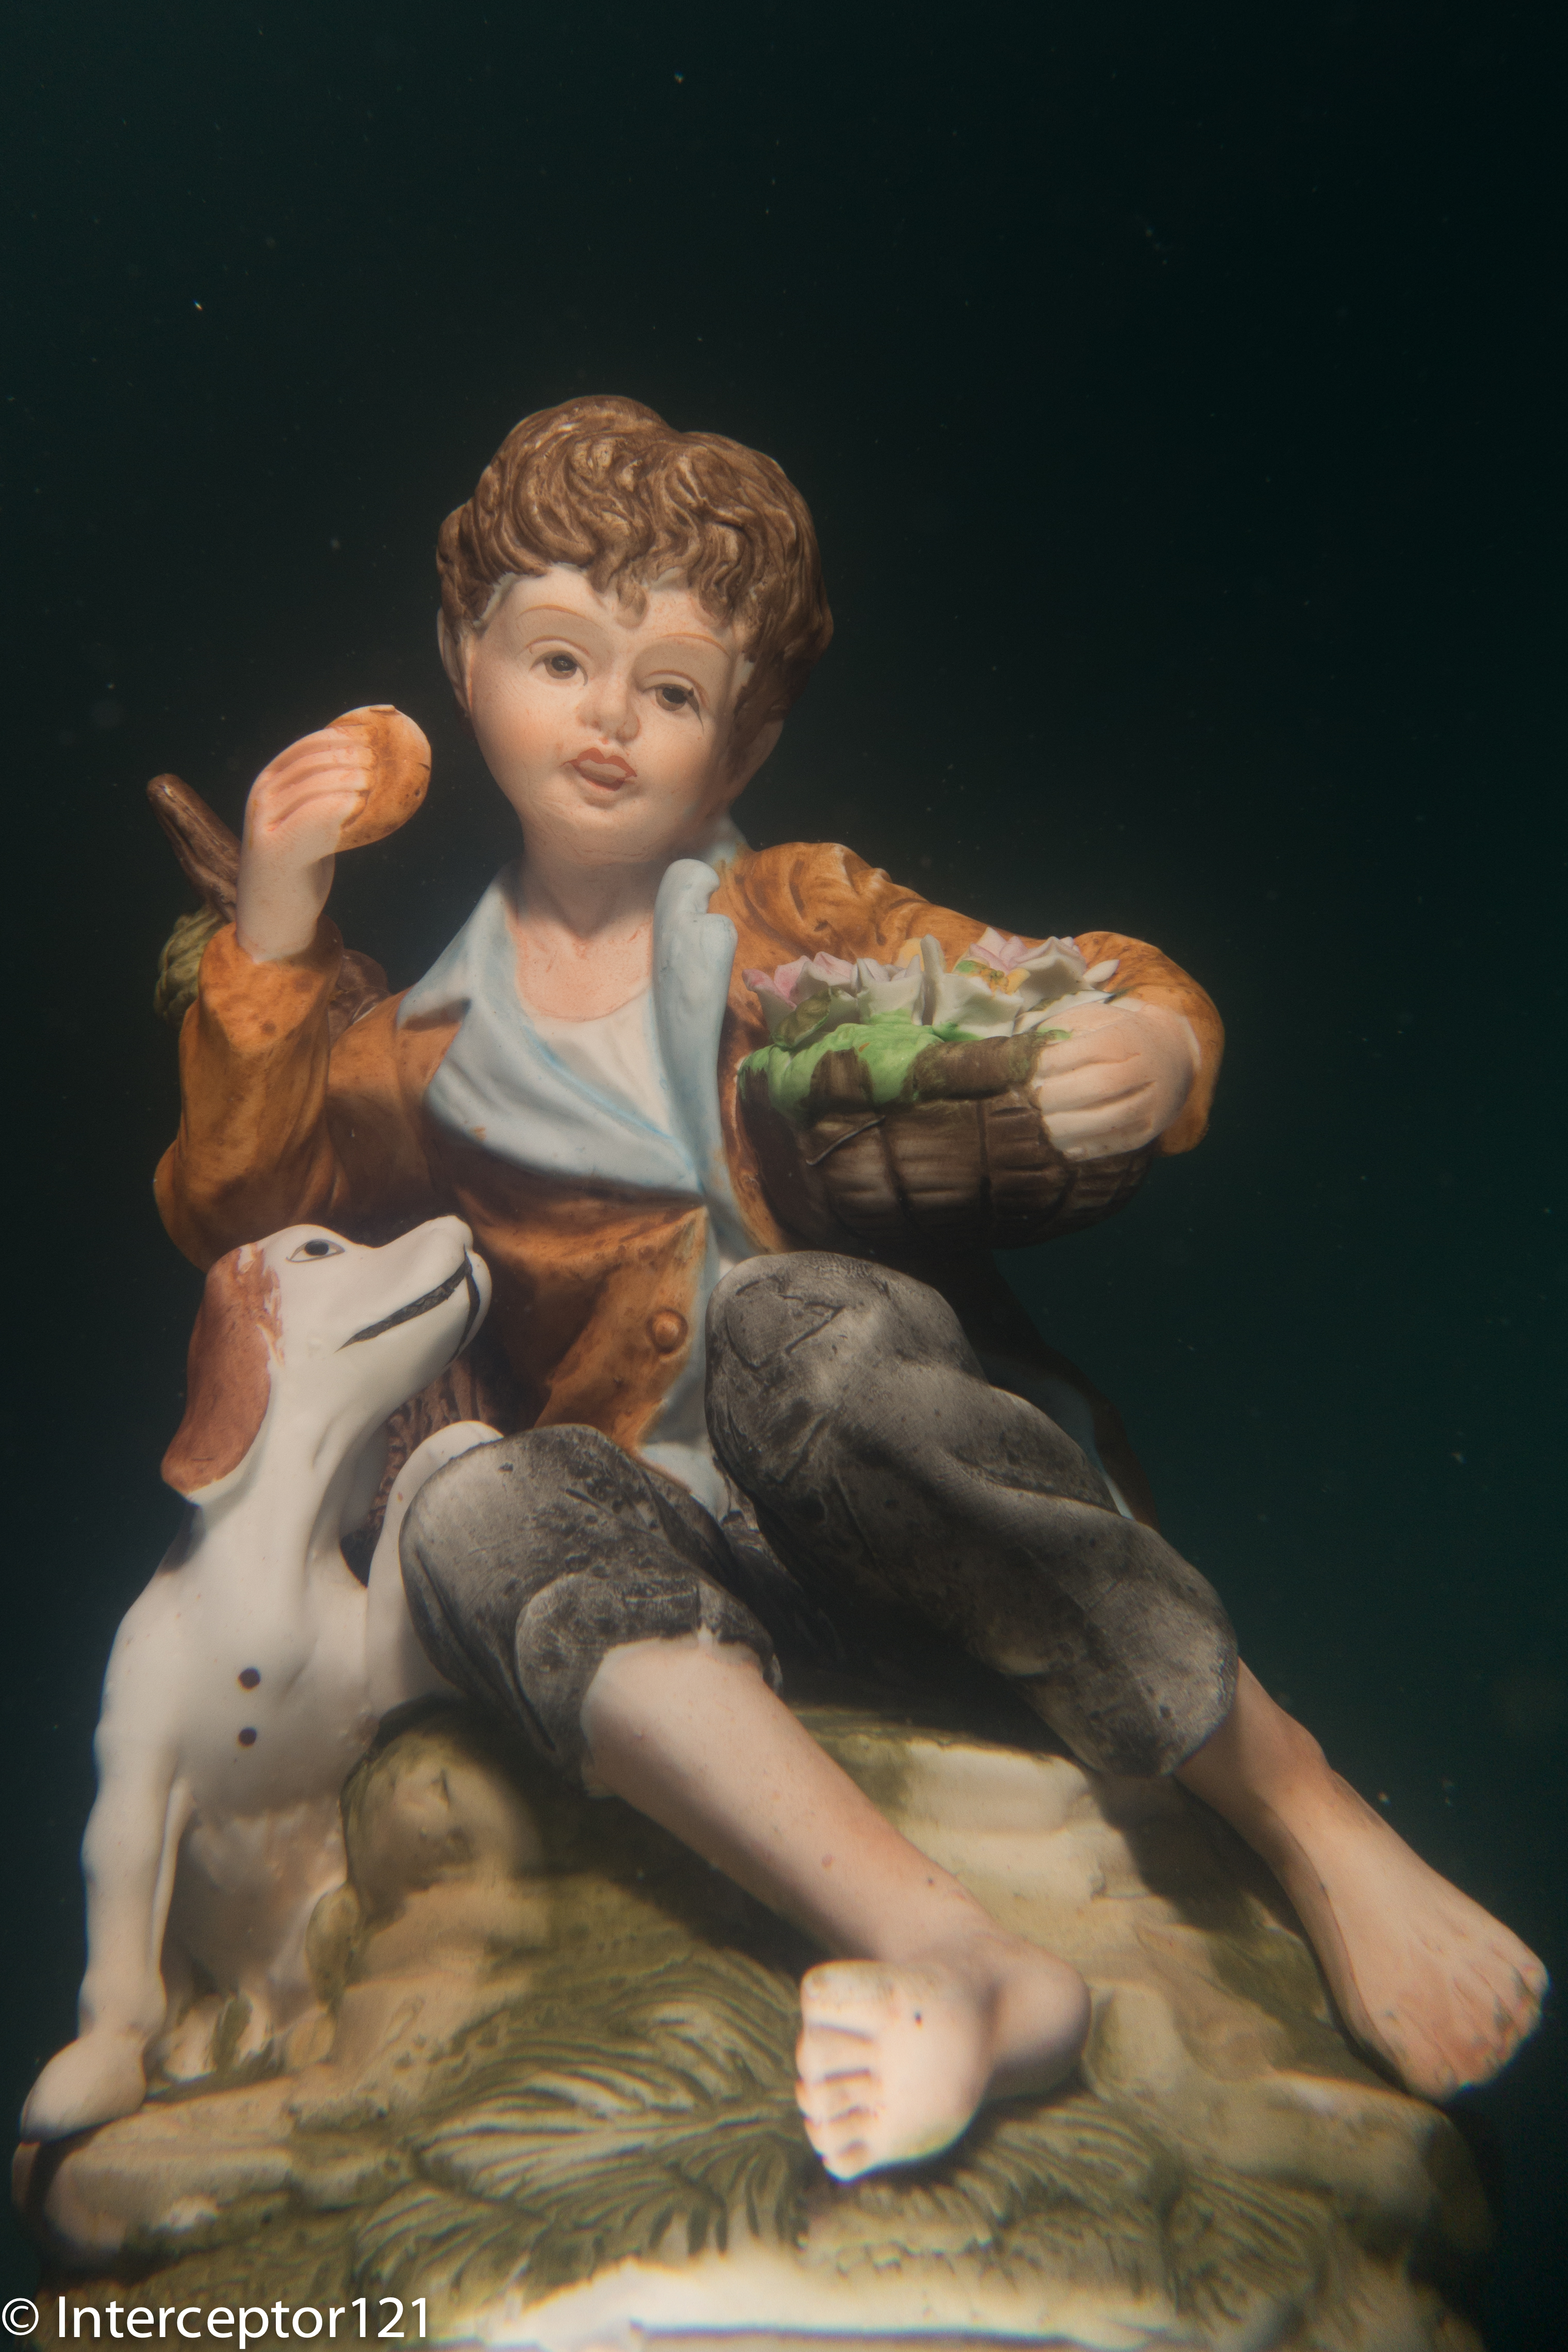
Child with dog
Martin asked me to have a go at the child with the dog as it is extremely difficult to lit up properly.
I went for an alternative strobe placement with light from the bottom as if it was in a gallery. He was impressed with the results.
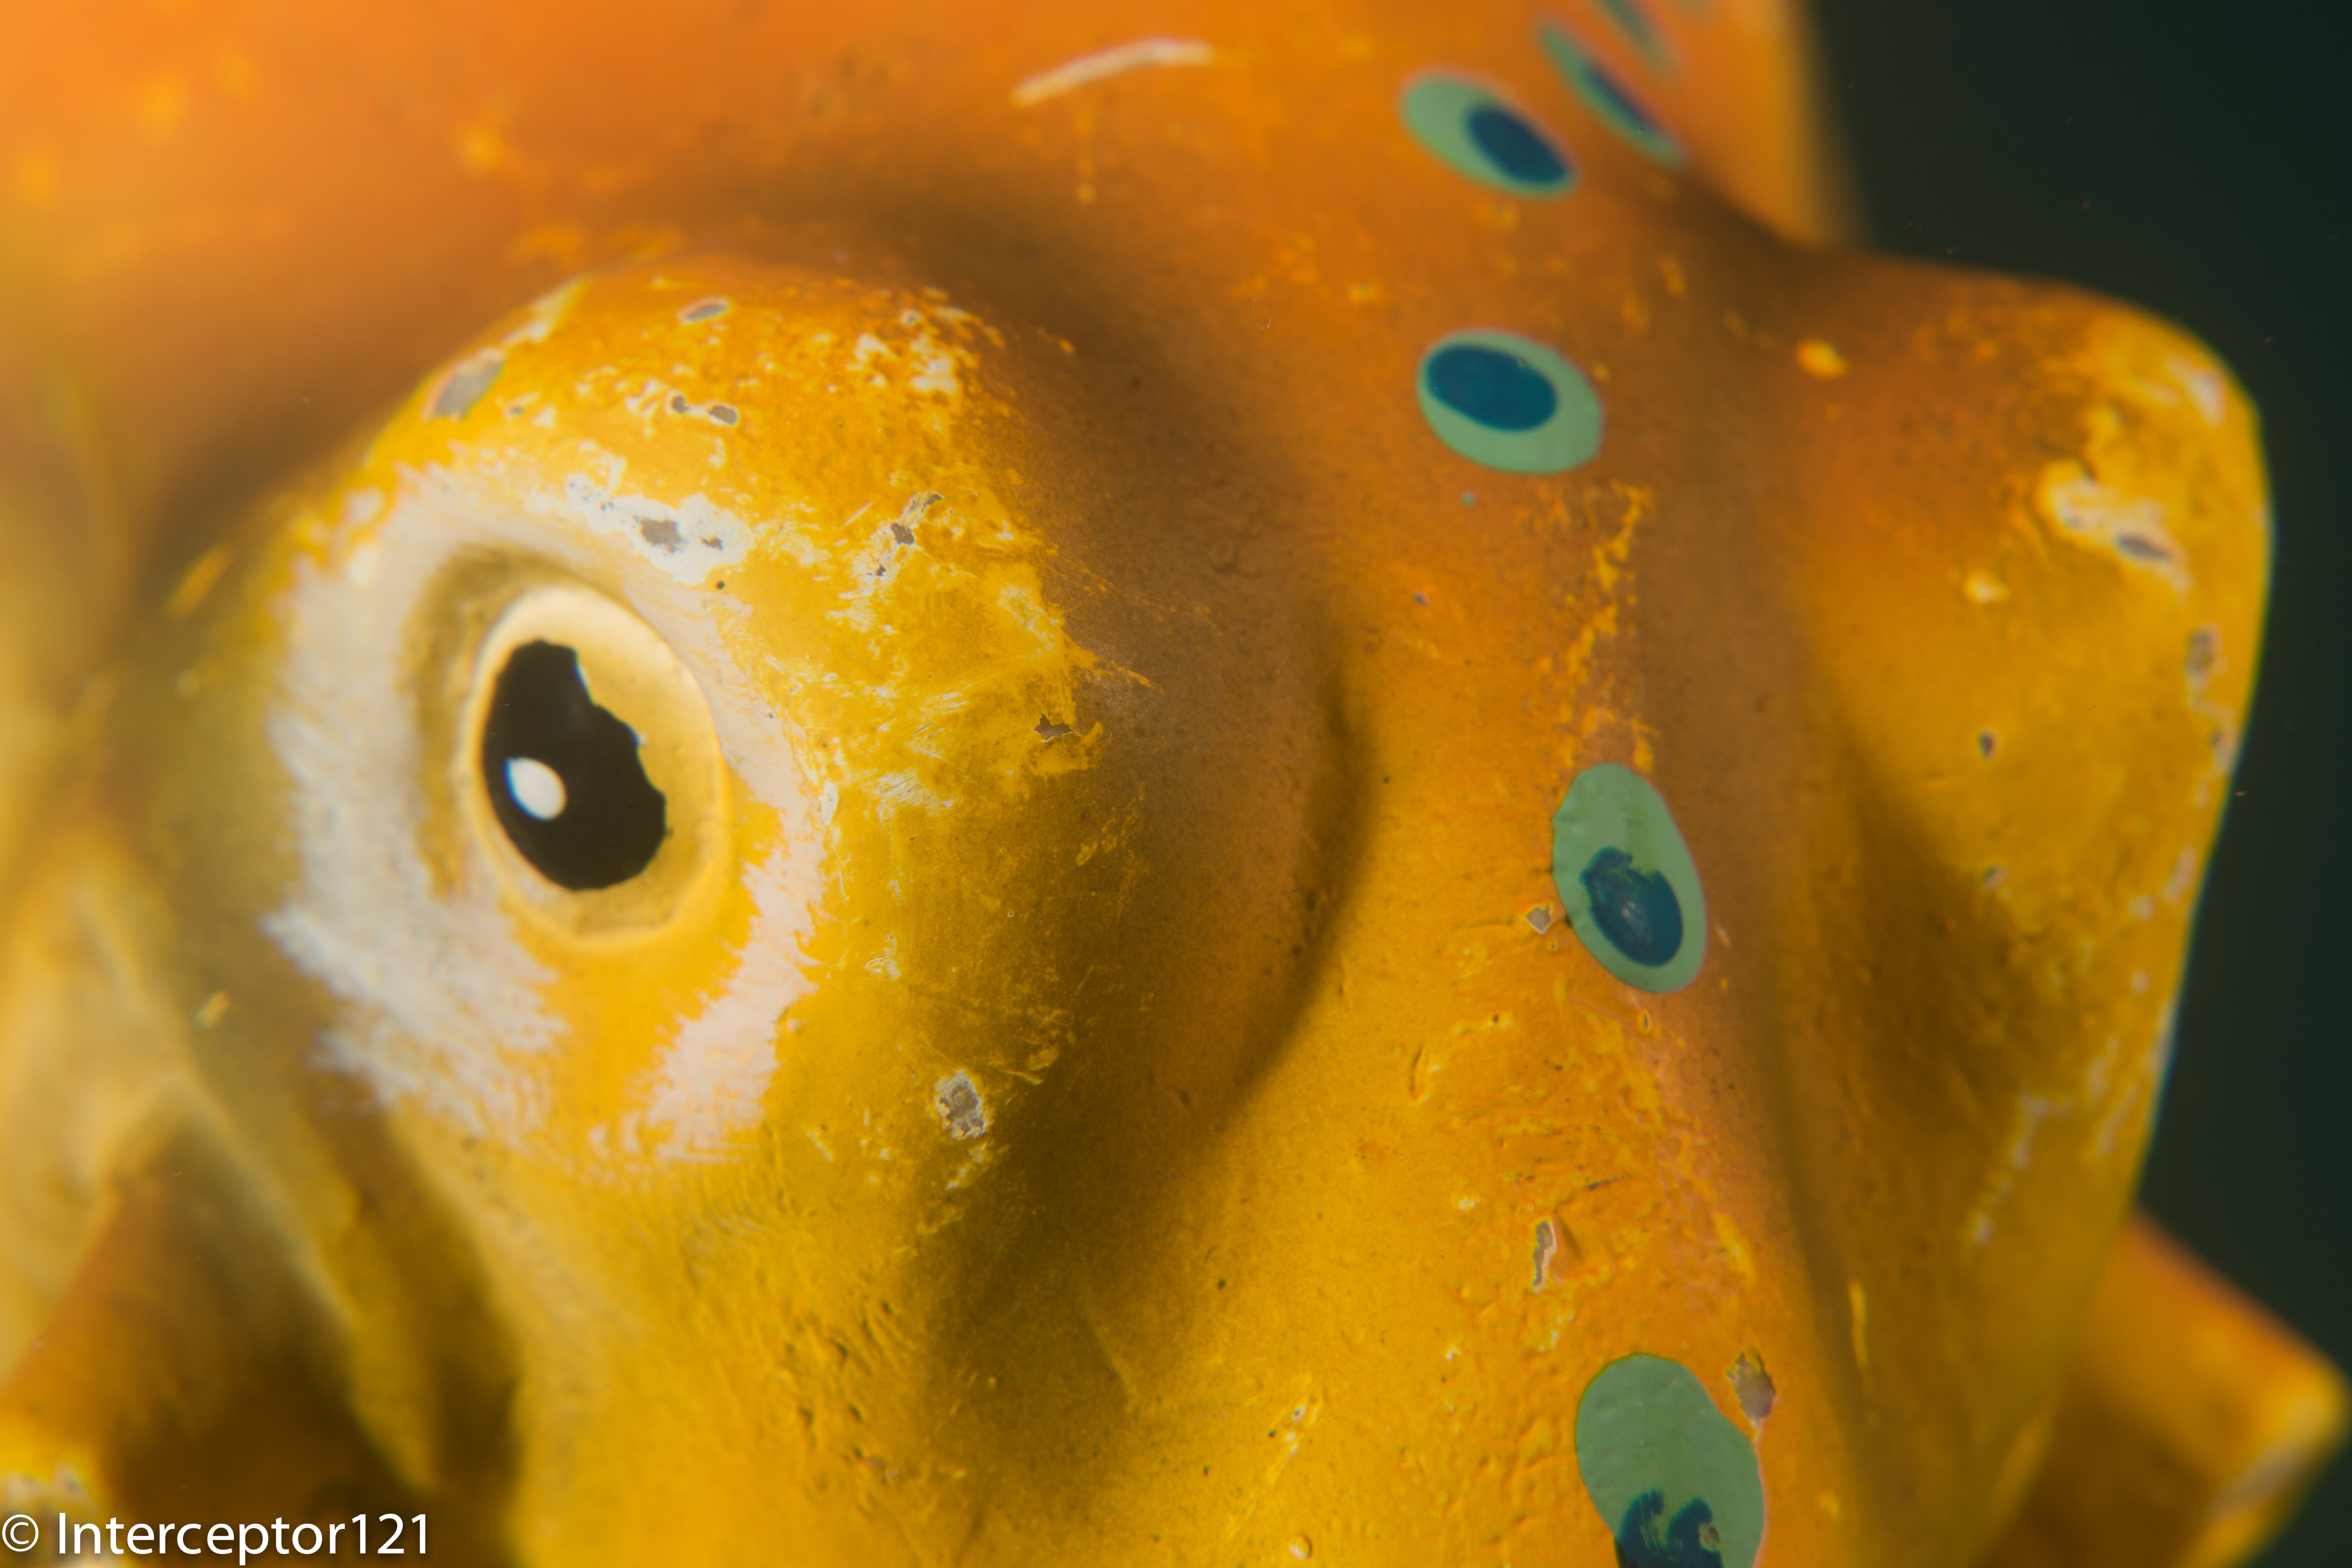
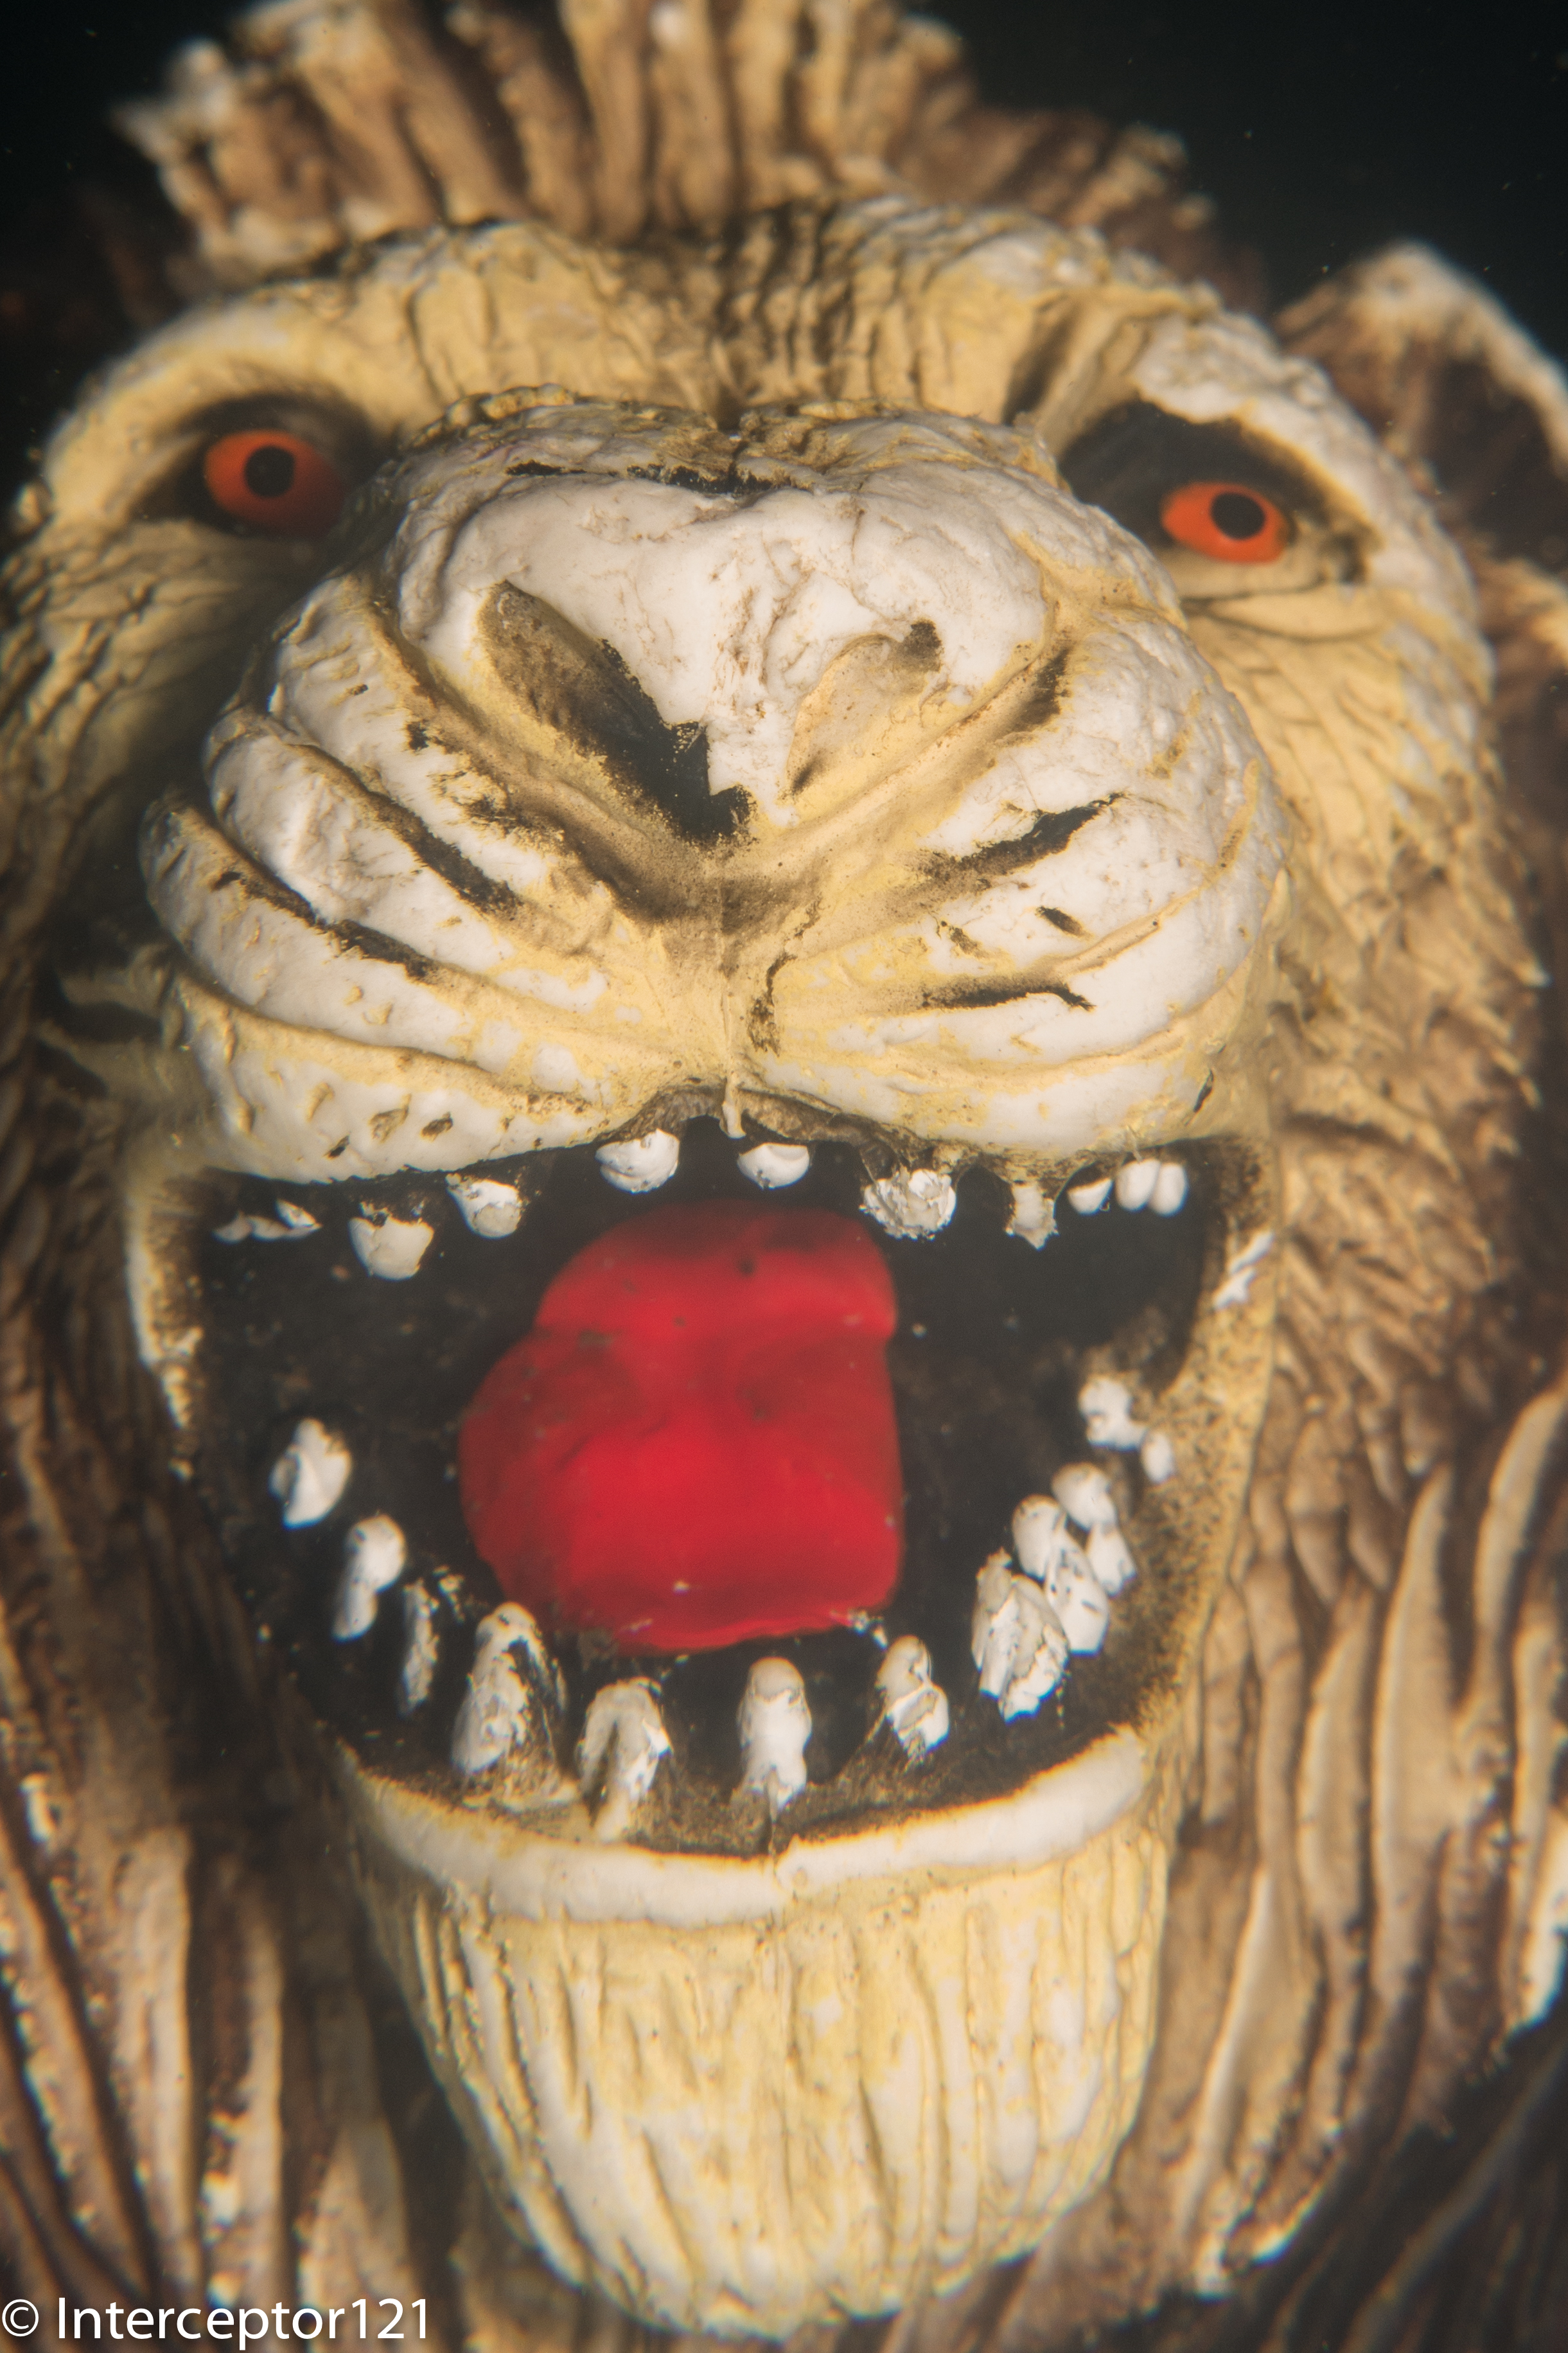
Lion Mouth Single Diopter
To finish off my last task was the tongue and eyes of a lion that I shot with a single UCL-165.
Overall a great day and I definitely recommend you the tuition day with Martin. He is a great person and extremely good at teaching I can see the benefits my buddy had right away.
Lessons learned on the RX100
There were a few things that I learned about my RX100 still rig mode that I want to share with you.
The autofocus is incredible. I even used this for macro. If the camera does not focus is because you don’t have enough depth of field and that is it.
Best macro performance is with a single diopter and also had a benefit of an increased working distance, this means the shots will need cropping for extremely small critters
Two diopters resulted in near bokeh with less than 1mm in focus and difficult to autofocus (though the LCD is great and I could see if things were in focus or not I think this is personal and I would recommend DMF to others)
Performance at wide angle with the UWL-100 28AD with dome is stellar
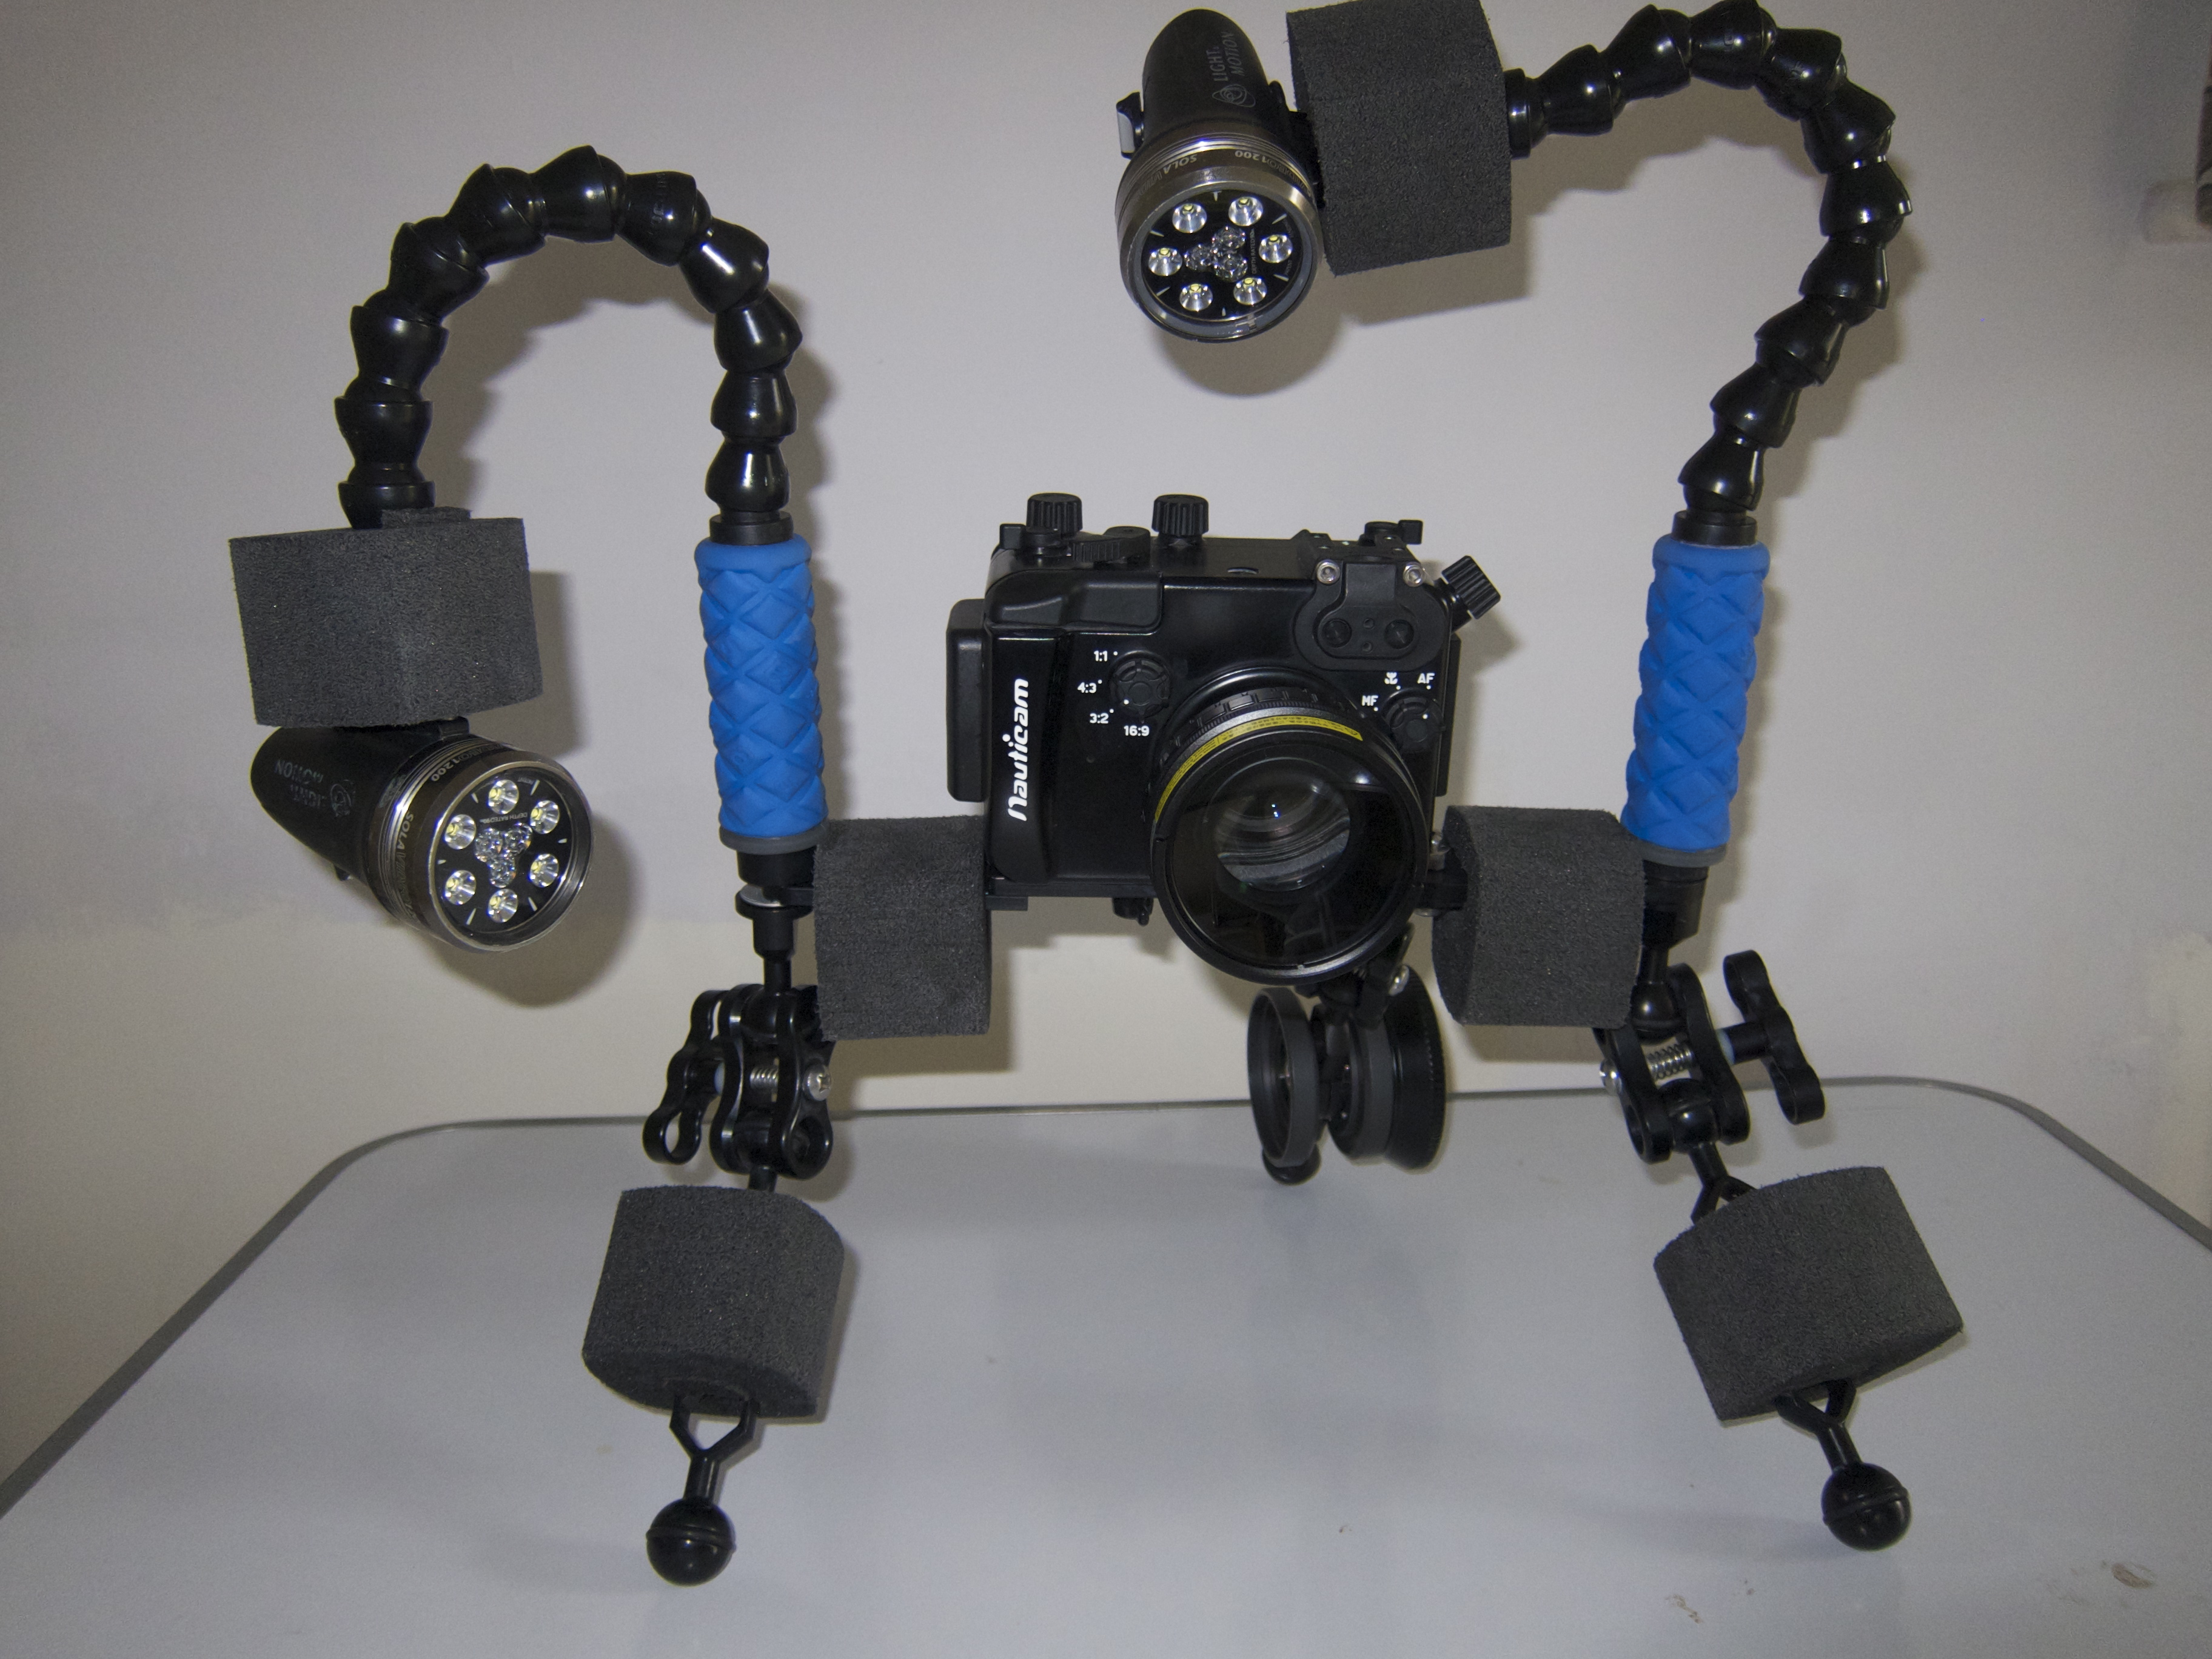
Inon float arms (I used two 6″ segments) were perfect with lens holders on it.
Inon Z240 twin set with one in TTL and the second in external auto delivered creative lighting without headaches, remember to buy the AUTO diffuser that does not come with the strobe
Strobes in manual allowed for even more creativity and the level of precision compared to sea and sea was staggering
Despite pool conditions the RX100 focused well in low light and much better than the Canon S95 that was returning focus error on the same exposures. I will not bother having a focus light with this camera and only have a single sola on night dives
That’s all for now any question just drop a comment