Category Archives: filter

Barbados: First Sony RX100 Mark II Feature

So after a few months since I got the Nauticam housing I finally had the time to get in the water and try it on.

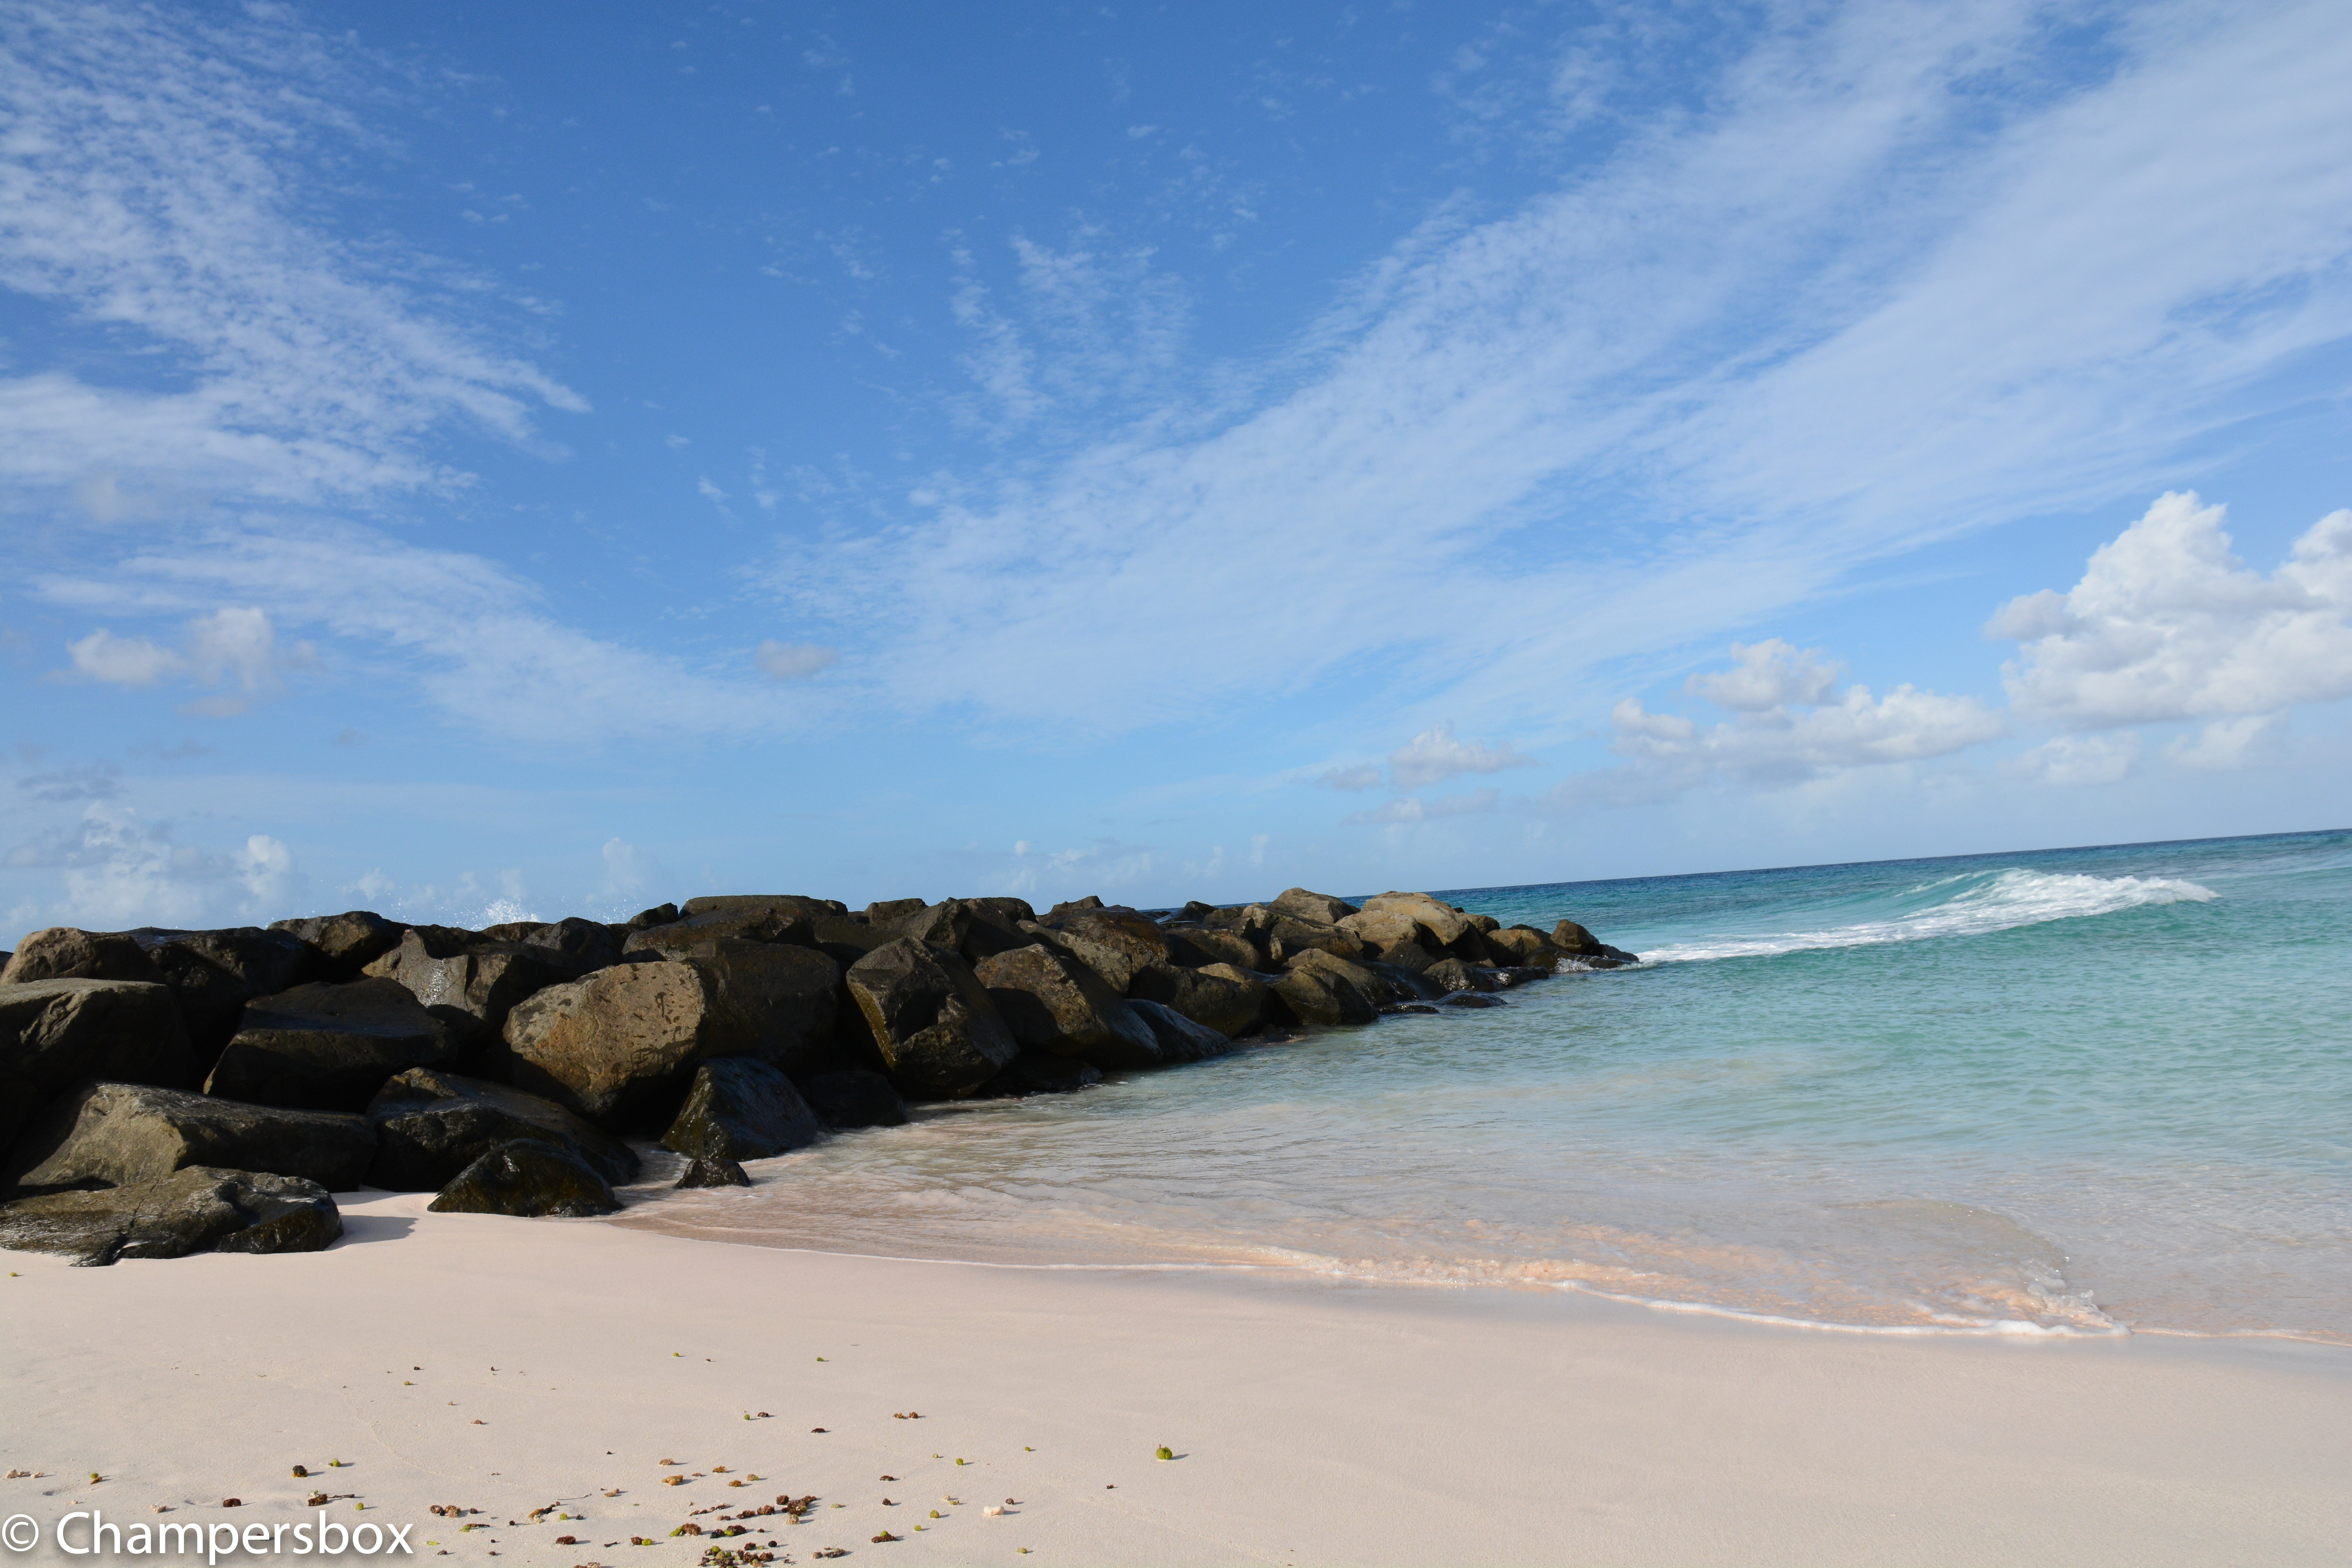
I was in Barbados for a week and although the diving was not exactly outstanding I did have enough to test the camera behavior.
The link to the videos are here for YouTube at 1080p

or if you prefer Vimeo at 720p

The footage was all taken at 1080p50 the highest mode of the RX100. The RX1oo can work in both PAL and NTSC standard but I chose the PAL mode just to avoid the annoying NTSC message at startup. The clip has been edited with iMovie 9.0.9 and then exported in 1080p25 using Xencoder codec for quicktime in high profile. Youtube then reconverts it to its own specifications, but at least I have the highest possible starting point.

As mentioned the RX100 shoots at shutter speed of 1/100 in 50p mode and this suited me fine in case I wanted to produce a 60p clip for viewing on the computer as currently no online system supports it.

As discussed in the previous post I shot all wide angle in camera Program mode. This allowed me to use the left control wheel button to call the white balance set menu that in video is not available. I set the picture format to 16:9 so that would show similar on the screen. I did notice that when I actually started the movie recording the crop of the active steadyshot kicked in with a reduction of field of view of around 9 degrees or a 1.14 zoom equivalent.

However the active steady shot was well worth it as I have not used any stabilization for any part of this clip and therefore not introduced any extra cropping.

The wide angle shots with the RX100 are an absolute breeze when you use a filter and there is no need for custom white balance until it gets too deep to actually use a filter. I struggled getting decent results with custom white balance, the 9900 K error came pretty much every time except when in shallow water and balancing on sand. Also the results were off with too much magenta tint to the point I had always to correct it.

Ultimately I kept the filter and the camera in Auto White balance and did not bother doing a custom reading at all. The results were excellent.

SS Stavronikita
SS Stavronikita AWB

In deeper water the filter started making the image a bit dark so I took it off and used a temperature setting of 9900K with Magenta and Amber at the maximum.

For close up at distances over 20cm I still shot in program and had good results. When getting super close or macro I used Movie mode in Aperture priority mode with aperture set at f/11. Towards the end of the clip you can see a shot of a small pink frogfish that is done like that. The close up on the eye is shot with two stacked Inon UCL165 the depth of field is really small as you can see but still workable considering I hand held the camera at all time.

Pink Frogfish f/11
Pink Frogfish f/11

When I shot this arrow crab I had left the camera in program mode so it chose an aperture of f/5.6 you can see that whilst the mouth is in focus the arrow is not

Arrow Crab
Arrow Crab f/5.6

Similar situation with the pedersen shrimp where not everything is sharp in focus

Pedersen Shrimp
Pedersen Shrimp f/5.6

Obviously I am being very exigent with my footage and in normal condition this is already good to very good.

So what I liked and what I did not like about the RX100 Mark II:

I liked:

  • The ergonomics and ease of use are outstanding
  • The camera performs incredibly well with a filter in auto white balance
  • The manual focus with peaking works extremely well
  • Dynamic range and colors are outstanding and not just for a compact
  • Image crisp even in the corners at f/1.8 compared to the Mark I this is extremely significant
  • The active stabilizer was great and meant to manipulation in post
  • Battery life is incredible
  • Performance in low light is excellent and better than the Mark I the camera never reached the ISO MAX of 800 I had set hitting a top of 640 at 30 meters
  • Autofocus at wide end in bright conditions is superb

The only think I hated was the custom white balance results an absolute disgrace, to the point that there is no benefit doing it. Not only that the few parts of the clip I had used it and correct it were still a bit off and required correction in post to a small extent.

Also to consider some of the topside capabilities of the RX100 Mark II just to give an idea though this is not exactly the same location have a look as this shot with a Nikon D7100 with sigma 17-70 in comparison with the RX100 Mark II

Nikon D7100 Beach Landscape
RX100 Beach Landscape

There is a difference but considering the size of the RX100 and the fact it fits in a pocket I don’t think there can be that many complains. Obviously once you look at specific lenses for the DSLR things change but in the 28-100mm all purpose range I would say that the gap is not as much as double as the price of the two set ups.

So is the Sony RX100 the best compact underwater video set up? Definitely

Is the Mark II better than the original RX100? Yes and well worth an upgrade for video

How does it compare with the Panasonic LX7? The dynamic range and the colors are superior and produces footage that is simply better and sharper. Where the LX7 excels is at macro in clear waters, this is not because of magnification as the RX100 and LX7 perform exactly the same with diopters, and this is because of the LX7 amazing autofocus. However with a bit of silt or other objects in range there is need to switch to manual focus and there the RX100 is actually superior when using peaking even if the depth of field is actually less, the manual focus on the LX7 with the magnifier is not as good unfortunately.

So my ranking for video is:

1. Sony RX100 Mark II

2. Panasonic LX7

3. Sony RX100

I would also add that for stills the LX7 is even more rewarding at macro range due to the performance of autofocus.

Any questions please drop a comment

Sony RX100M2– First Impressions

I have  been fortunate to receive one of the first RX100M2 that have reached the market so I thought of sharing with you my first impression and what I believe will be the potential for underwater imaging use.

This is the link to the unboxing video of the camera

I posted a summary of the RX100 capabilities for underwater video some time ago on this blog the post is here:

Probably the best thing is to revisit my review and update any significant differences between the RX100 Mark 2 and the original version which is still on the market and will remain at least until the end of 2013.

Key Strengths

Bright Lens –  Not changed

The RX100M2 has exactly the same lens of its predecessor RX100, it is true that when zoomed the minimum aperture drops down to f/4.9 however this is not a concern for underwater imaging as usually long focal lengths are for macro and we are interested in very small aperture to allow for greater depth of field.

Low Noise – Improvement!

In virtue of the new retro illuminated sensor the mark 2 has one full f-stop advantage over the original RX100. This means that ISO800 is a breeze and potentially we could go as low as ISO1600. I would not do that but what it means is a cleaner image at depth in ambient light.

Image Quality – Improvement

Image quality is outstanding and the lack of aggressive contract and sharpness filters in the default settings means more room for correction in post processing.

Video Mode Control – no change

The RX100 had complete control on video mode and the mark 2 maintains the standard. Very important is that the program mode is excellent and keeps the shutter speed at 1/100 or 1/125 when used in active mode which is ideal for 50/60p smooth footage.

Manual Focus – no change

Same as for the RX100

Battery Life – Improvement

According to Sony battery life has improved from an already outstanding CIPA 330 to a declared value of CIPA 350. The new Mark 2 has also an hot shoe so in theory if any manufactures produces a wired TTL enabled housing this means plenty of shooting before changing the battery pack. We suspect though that only ikelite will have this option on the housing.

Active Steadyshot – no change

I initially slagged the RX100 stabilization system based on performance on land. However at a more in depth analysis it turns out that the RX100 active steadyshot, even if at cost of an image crop is very effective for sudden camera movement and for high magnification macro. The Stabilizer is not as sticky as others so when you eventually vibrate it does not jump. Although the performance for stills is poor to irrelevant and so is the normal mode the active mode is very effective for underwater use. The mark 2 is built exactly with the same algorithm and combination of optical and electronic.

Tedious Workarounds Comparison

Some of the ergonomics of the RX100 are not the best and seriously deduct from an otherwise excellent experience, the most annoying issues:

Lack of focus lock – no change

For some reason Sony decided to skip on this essential feature, the workaround involves switching to manual focus however it is then possible to accidentally change focus if the front ring is set to control focus. The RX100M2 has the same issue.

Setting Custom White Balance in Video – No change

Setting custom white balance is only possible in the still modes, while in fact if you shoot RAW don’t actually need white balancing. This is the largest non sense of this camera that requires the user to navigate out into Program to ensure white balance is set correctly and you don’t end up with the Custom WB Error message. Though this is annoying is not such a killer as it would initially seem if you take your movies in one of this still modes which is valid for wide angle and ambient light shot. For macro you will need to switch to movie mode aperture priority in AWB. If you keep this discipline this is issue is mitigated. The RX100M2 does not change this and I believe this is due to the fact that the shutter button that is used to set custom white balance is disabled in video.

Lack of 24/25/30 progressive modes at 1080HD – Improvement!

The RX100M2 shoots at 50/60p as well as 25/24p in addition to that you can switch between PAL and NTSC which is great!!!

AVCHD – Improvement!

The RX100M2 has not only the progressive modes at double frame rate but also AVCHD 1.0 compliant format, this means that if you choose the 24M 24/25 p mode you can import with all editing programs without issue. Not only that but if you use the wireless import utility this converts also the AVCHD progressive files in mp4 for you. This is  great improvement

Key Weaknesses comparison

The RX100 had also some key weaknesses let’s see how the mark 2 fares.

Macro Performance – no change 

Exactly the same as its predecessor the RX100M2 has a minimum focus distance of 5cm on land that becomes around 7 in water. Like with the RX100 because of the large capture area you will need diopters for macro shots. On a positive note once you have a close up lens the performance is incredible when coupled with manual focus with peaking.

Stabilizer

Sony has adopted a lens shift approach in this camera instead of the sensor shift of the higher end alpha, maybe due to large size of the sensor compared to the camera body. They have then added some software processing in camera but the results are just average. There are many other cameras that do better than the RX100.

Soft Corners at Wide End – Improvement

The RX100 first generation had soft corners until f/5.6 the situation changes dramatically as we can see in this test card comparison shot. Not sure if there was an issue with the RX100 original sensor but this looks excellent and as sharp as the panasonic LX7 or Canon G15.

Look for yourself!!!

Left RX100M2 Right RX100

No Neutral Density Filter – marginal deterioration

As its predecessor there is no neutral density also on the mark2. A little tip for video is to shoot with filters that take away 1 1/3 f-stop. This is not ideal but helps. There were some speculation that because the minimum ISO in RAW is now 100 instead of 80 sunballs would be more difficult to shoot. 1/3 of an f-stop does not really make any difference I believe this is more a statement so that the RX100 housing that are in stock sell out at full price.

Other features

I have to say that the tilting screen is fantastic to shoot on a tripod on lens. I doubt any housing can accommodate for this but the feature is outstanding

IMG_6772
Tilt screen side view

And this is the rear

RX100M2 tilt screen
RX100M2 tilt screen

Conclusion

So the question is should I buy the RX100M2 or the RX100 maybe grabbing a deal? Recsea has already announced a housing for the mark 2 and Nauticam is working on it. I believe that when it comes to still photography the difference between the two cameras are not substantial as many shots are with strobes I have however noticed a much faster internal flash cycle time. I do not want to be definite but looks like a full dump takes around  seconds to recharge. Also to be considered that in US the price difference is $100 so definitely the Mark2 is the way forward. In UK/Europe the difference on the list price is £150/€180 which is much more.

So I would say if you are planning to use the camera for video go for the RX100M2 the improvements are significant both in terms of video formats but also in terms of sharpness at wide apertures. If your main interest is photography and you live in US go for the mark 2 in Europe instead I would grab a deal on the RX100 when the price of the housing drops.

I am waiting for a test housing from Nauticam as soon as I have it I will post an unboxing video followed by some pool tests.

Underwater Video Tips: Improving your Polar Pro Red Filter for GoPro

Just before leaving to North Sulawesi and in the process of packing I realised I had not completed the tweak of my GoPro Hero2 Set up.

I do not use the GoPro for video but for time lapse however the modification that I will present here is valid for both video and stills or time lapse.

Some users of the PolarPro filter have noticed that when you point the camera to the sunball or on a very bright day there is quite a bit of flare with this filter in the image corners.

Flare occurs when stray light enters the frame and reduces contrast giving a result a picture with washed out colours.

Flare is more relevant to wide angle and is usually reduced with lens hoods however our GoPro does not have anything like that and due to the large field of view probably it is better to be so otherwise the hood would be visible.

So what can we do to improve our polarpro filter and why does it flare more than others in the first place?

The PolarPro is the lowest price push up filter for the gopro and the reason is that its build is very simple. All other filters will have a dark rubber ring on the edge that has the dual effect to secure the filter to the housing and eliminate the stray light that may enter from the side. The polarpro is one single piece of acrylic and does not have this ring around the lens.

So let’s build one cheaply all you need is genuine gaffer tape, to make it look better I suggest black matt gaffer.

Pull enough length to cover the whole external ring of the polar pro filter and lay it on it to go from the edge of the front side back to the where the lateral panel ends. Once you have measured the approximate length make note of the width and then remove the gaffer. Pull the tape so that it rips at the width required and then tape the exterior making sure the smooth part is on the front side. Then create another strip a bit longer for the inner part. Make sure it is going straight and with no bubble and then once you get to the opening for the button come outside and overlap the exterior ring.

Once finished it should look like this

Modified PolarPro Front

This is the other side you notice the part we ripped of the gaffer is on the outer side

Back
Back


Gaffer type does not mark and will stay there for a good number of dives. I am going to test this and see how long it goes but I expect more than 20 dives before it falls apart.

What you have seen here can be done for the Hero3 filters and it is actually simpler as the filter has no button opening


There has been a new Mako product coming at the low cost end and that one has a rubber ring so I would recommend trying it if you don’t have a filter already

Underwater Video Tips: Polar Pro Red Filter for GoPro

Time for part two of the filter discussion that involves a review of the PolarPro Red Filter for GoPro

You can see in the featured image how the retail package presents, it is pretty simple inside we find the filter itself, a tether and a little bag to store the filter that also serves the purpose of cleaning it.

This is the cheapest removable filter for Gopro at a price of $29.99 and it is also available in Magenta version, that for reason explained in the previous post I recommend to skip entirely.

This is the image on the back of the package with the product details

_DSC0173

The declared working depth is 10 to 70 feet or 3-21 meters. For what we have seen in the previous post this is somewhat optimistic and will be true only in ideal conditions of blue sky and 100 feet visibility in clear blue water, in different conditions the maximum depth will be less.

The filter is made of Optical acrylic and there are no defects on it, it is fairly light and snap comfortably on and off the GoPro dive housing.

It may be worth seeing what is the effect of this filter on the GoPro

PolarProGoPro

As we can see the polar pro red filter actually casts a light magenta tint on the gopro image.

This is the same image without the filter

DCIM100GOPRO

So as a Hero2 user would I spend $29.99 for Polar Pro or $83.00 for the SRP dome the only true removable filters? Or should we say what do I get for additional $53?

Let’s have a look at performance of the two filters in daylight those are measured with another camera that can set a custom white balance keeping fixed shutter speed and ISO and seeing how the aperture changes:

             Polar Pro                                             UR/PRO

Temperature                  3200K                                                  2900K

Tint                                  M7                                                         M5

Fstop loss                       1+1/3                                                     1+1/3

So the UR/PRO is warmer than the Polar Pro and has got little tint to it. It may be useful to compare using a camera with custom white balance how the histograms look if we fix the white point and then apply the filters.

This is an image captured with a Sony RX100 after white balance

_DSC0176

The colours look natural as they should be we now put the PolarPro filter on the RX100 lens keeping the same shutter and ISO the camera opens the aperture to compensate for the light loss

_DSC0177

Warmer image with a magenta tint

If now we push the URPRO on the RX100 lens we get this image

_DSC0178

The image is globally warmer and has no obvious tint.

Let’s now have a look at the histograms this is the original image

NofilterRX100

Nice histogram pretty balanced, let’s have a look at the histogram with the PolarPro

PolarproRX100HistogramWe see the blue and green reduced but a behavior with spikes for all colors, this is due to the tint of the filter

If we look at the UR/PRO the histogram is typical of a color shift to warm

URPRORX100HistogramNote the lack of spikes and more balanced profile

Both the UR/PRO and PolarPro settle at identical exposure ISO400, f/2.5 1/50 of a sec with a 1 and 1/3 f-stop loss from the camera without filter that has a f/4 aperture.

So what does this mean? The UR/PRO behaves like a camera CTO filter most likely a CTO 1+1/2 if not double shifting the color temperature down in a similar fashion for the whole spectrum as it does not have a tint.

The PolarPro does the same with a less warm bottom end and a clear magenta tint that acts as a green filter. The magenta also creates spikes in the green and blur that are characteristic of a selective filter.

So which one is better? Overall the UR/PRO can’t be faulted as it does not introduce any tint and is warmer will most likely work in blue water at greater depths, how much greater is impossible to say. The UR/PRO is also very well balanced the proof is in the Gopro photo in auto there is no hue of any type which means this filter can be put in the camera at fairly shallow depths and still perform well.

The PolarPro seems to be a combination of a CTO filter plus a minus quarter or half green, this filter will be less effective at depth but work well both as red filter in blue water and because of the tint also in greenish water. It will however generate unnatural tint in blue water.

The ergonomics of the PolarPro are great the light piece of plastic is essential a design copy of the GoPro flat port cap the button is accessible and you can see the display if you need to. For $29.99 you can’t ask for more especially as it does well in water that is greener too. I can imagine it will require some tint correction in post in really blue water but this I have only seen in the Bahamas or Turks and Caicos anywhere else the green tinge was there and this cheap filter will take care of it. Also the Auto WB of the GoPro seem to love green so this will really do well in most occasions and I look forward to test it in fresh water where so far I have not used any filter.

Now that we know how the filter is done and what it can do how do we justify this?

A number of explanations, we have to hope that there has been no manipulation of the clips, so let’s continue with this assumption:

  1. The water color in California is quite green as there is plenty of kelp and algae
  2. The PolarPro has a magenta tint, the URPRO is just warming the color temperature
  3. The SRP dome has a design issue as there is a layer of water between the lens and the filter that may absorb color and can’t be recovered
  4. The GoPro White balance itself is pretty green

The combination of those factors could explain the difference in performance in this test.

Now coming to the Hero3 what about SRP Blurfix 3 versus PolarPro considering the filter themselves are the same?

The SRP blurfix is now closer to the lens so not affected by water between lens and filter, it has a 55mm thread which means you can add a polarizer very useful for outdoor shots on the boat, total cost:

SRP Naked $32 + Red Filter $77 + Polarizer $31 = $140

Polar Pro Red Filter $29.99 + PolarPro Polarizer $29.99 = $60

A hefty $80 difference for a piece of equipment the Hero3 that costs $399 is this justified? If we take out the Polarizer and consider the SRP dome for Hero3 at $77 the difference is still $47.

I would say it depends, for the average user that has an Hero2 or Hero3 and uses it at normal depths and is not after the maximum quality the PolarPro is just fine affordable and keep the overall cost down, it can also be removed and the ergonomics are great.

If instead you want to use the filter at greater depths and especially in water that are really blue the URPRO cannot be beaten however the price differential is substantial.

Now some people will say hang on a minute filters have to be tested in water etc etc. Well that is not definitive either because filters perform differently in different conditions, different locations so there is not an absolute best ever this is why cameras have custom white balance. Filters are not rocket science there is a lot that can be foreseen just by looking at histograms and temperature and we can set our expectations quite easily.

If you are in the market for a removable GoPro filter at $29.99 the PolarPro Red filter is a killer as it works well in green water too.

If instead you are not after a removable filter just get yourself a sheet of Lee double CTO and a pair of scissors and cut it to go inside the housing, this will cost 50 cents and be perfectly fine.

If you are a perfectionist and want to push your gopro to the maximum working depth of a filter and want a removable option the SRP UR/PRO is for you.

Underwater Video Tips: Using filters with your GoPro or Compact Camera

Filters Test

Following a number of posts about filters in various GoPro forums I decided to check in detail the behavior of the UR/PRO filters and see what is that they really do.

I guess the reason is that people do not really know or want to know the physics behind it and prefer to entertain many discussion that involve trial and error.

One of the most interesting one is this clip here that generated some ferocious comments by some users of other products that of course were not pleased having spent money that their choice seemed not to be the best.

To understand a bit more about what filters do we need to look at light temperature graphs like the one below.

techcolour-temp-chart

Light colour is measured in K and high value means cold blue light and low values represent warm red light.

As we know underwater red gets absorbed approximately at a rate of 1 f-stop every 2.5 meters we go deeper compared to blue light with the result that red colour disappears pretty quick followed by green to become completely blue at depth.

Some time ago cameras were shooting film not digital and there was no way to correct colours when the film itself got developed. So to perform some decent underwater photography people used strobes and fisheye lenses to get really near and blast the reef with light in order to restore the real colors.

This worked very well for close shots but was useless for wide angle at distance, so color correcting filters that could go underwater were developed for ambient light photography.

So what is a CC filter? A common misconception is that filters add colours to the picture, whilst this is practically true this is technically incorrect.

So what does a CC filter really do? As the word says it filters light, more specifically filters selected part of the color spectrum. This is done at expense of available light so if we use a filter we will have less total light or for our purposes exposure. This is well explained on the URPRO website where they talk about film sensitivity, if you use a filter you will loose 1 f-stop so use a higher ISO film.

http://www.urprofilters.com/content.do?region=FilterInstructions

The filter can be designed for different purposes and depending on its color and opacity will be more or less aggressive. If you read very carefully the urpro website says that there is a maximum distance that the filter will be effective at.

UNDERWATER FILTER DISTANCE

Photographically and visually reds, oranges and other warm colors become dominated by the natural blue-green (cyan) effects of the water when it is more than 8-10 feet deep.

Because all water is a continuous filter, the deeper a subsea photographer goes beneath the surface, the more colors are naturally “filtered out” of the spectrum.

As a result, the depth of the water must be added to the distance between the camera (or flash) and the subject to give the underwater filter distance. Use the following formula to determine the correct underwater filter distance:

+ Depth of water above the photographer
+ Distance from camera (or flash) to subject


= Underwater filter distance

Scuba divers using a still camera or a movie camera must combine the depth of the water plus the distance of the camera from the subject. This sum should not exceed 80 feet for color negative films and video, and should not exceed 30 feet for color slides. In all cases, the best color is achieved when the camera is close to the subject!

What that means is that the working distance of the distance is not the same as depth so you can push a filter say down to 24 meters but then the distance to subject needs to be zero. So if you are shooting something 3 meters or 10 feet away in 21 meters of 70 feet that as much as you can get.

When it comes to underwater use we are mostly interested in eliminating blue in tropical waters or green in cold algae waters.

In order to eliminate blue that has a high colour temperature we need warm colors typically something around orange. This will some of the blue beams and also part of the green beams and will produce filter light that is of a warmer color and will look ‘more red’.

But how much does for example a URPRO orange filter for blue water really warm up the light?

I have done some empirical tests with my Sony RX100 in a day where the Sony would measure a temperature of 6500K which pretty much correspond to cloudy day indoor.

Filter

The URPRO orange filter which is the same that is on the SRP filter for GOPRO measured 2800K with a tint of 5 Magenta. It also measured an overall absorption of 1 and 1/3 fstop of total light. I measure this filter instead of the one I have (which is not SRP and we can cover why in another place) because I think the SRP is the market lead at this time and it uses UR/PRO filters.

So the URPRO orange filter has approximately a 3700K warming effect with a strong magenta tint. This means that a camera with auto white balance and an average lens like a GoPro can restore some color in the image until the overall color of the light is around 10,000K in water. After that the filter essentially stops working and the light absorption is so much that it just becomes plain noise. I think this website gives a good idea

http://www.seos-project.eu/modules/oceancolour/oceancolour-c01-p07.html

So the reason why the picture stops having any red and starts looking green is that there is no red left in the light!

The breaking point seems to be around 18-21 meters or 60-70 feet and corresponds to our personal experiences I would say.

So what about custom white balance? We are pretty much in the same situation we can re-balance the camera up to 10,000K and add magenta or orange tint to the picture but you reach a point where there is too much red color noise.

The other advantage of custom white balance is that there is no light absorption so the picture ends up being less noisy as at the same aperture a loss of 1 and 1/3 fstop is like saying doubling the ISO from 800 to 1600 to capture the same scene. This is the reason a camera with custom white balance will always outperform the same camera with a filter at depth in terms of picture noise.

And what about Magenta filters? This is an interesting one as magenta filter absorb little light around 1/3 of fstops for URPRO and warm up the colour very little around 700-800K with a magenta tinge more prominent. A magenta filter will therefore absorb less light in total and introduce just a tint to the image.

From my tests a magenta filter is totally worthless on a camera that can white balance and frankly not that good at depth on camera with auto mode only. The reason is that light will get cold very soon at depth and the camera will be outside the AUTO white balance operating range (2700-7000  on average) pretty soon.

So what it means for users of GoPro cameras? The summary is pretty much like this:

  • In blue water filters are worth down to around 18 meters or 60 feet
  • In green water filters are worth even less as the color temperature very soon reaches a temperature where the auto white balance of the gopro is out of range

Although I have not yet measured I would think probably max 10 meters and that is it as I had similar results with my Sanyo that has same sensor size of the gopro and actually a faster lens.

Hope gopro users find this post useful as well as other users of compact camera to shoot video in ambient light.

In the next post I will compare the optical quality of the SRP dome port with the PolarPro snap on filter that generated such a debate on youtube and we will see why this filter could perform better than the SRP dome.

Sony RX100 – Summary of Underwater Video Performance

Few months ago this clip came out

Many people including me got really excited about this camera and had a go at underwater video with it

Now it is time for an end of year review and summary of my experience with the Sony RX100.

Without a doubt the camera is a game changer and there are some feature that are especially suited to underwater video.

Key Strengths

Bright Lens

The RX100 does very well in low light this is a strong selling point for underwater video, even in cloudy days the camera does extremely well

Low Noise

The camera performs very well in video mode up to ISO 800, the level of background noise is really low and the footage clearly benefits from it

Image Quality

The quality of video if we focus on the center, as well at the telephoto end is impressive. Color rendering is very accurate and there is even the option of using Adobe RGB. The dynamic range of the camera is excellent and the image is vibrant.

Video Mode Control

There is full manual control in Video mode and the option for aperture and shutter priority. The program mode does very well. Only an Auto ISO option in manual is missing but this is negligible. Indeed the most interesting mode is aperture priority.

Manual Focus

The peaking function works very well and it is really a strong feature of this camera, it is also very usable underwater

Battery Life

You can easily do 3 dives with the RX100 without having to open the case which is great and actually unusual these days when even a gopro does not last one hour.

Active Steadyshot

I initially slagged the RX100 stabilization system based on performance on land. However at a more in depth analysis it turns out that the RX100 active steadyshot, even if at cost of an image crop is very effective for sudden camera movement and for high magnification macro. The Stabilizer is not as sticky as others so when you eventually vibrate it does not jump. Although the performance for stills is poor to irrelevant and so is the normal mode the active mode is very effective for underwater use.

Tedious Workarounds

Some of the ergonomics of the RX100 are not the best and seriously deduct from an otherwise excellent experience, the most annoying issues:

Lack of focus lock

For some reason Sony decided to skip on this essential feature, the workaround involves switching to manual focus using the function dial however it is then possible to accidentally change focus.

Setting Custom White Balance in Video

Setting custom white balance is only possible in the still modes, while in fact if you shoot RAW don’t actually need white balancing. This is the largest non sense of this camera that requires the user to navigate out into Program to ensure white balance is set correctly and you don’t end up with the Custom WB Error message. Really an awful issue that Sony should try to fix in a firmware update

Lack of 24/25/30 progressive modes at 1080HD

Sony thought that for some reason you either shoot interlaced or you go directly at double frame rate with a 25 or 30 progressive mode only available at reduced bit rate and resolution of 1440×1080 with rectangular pixels. Why did they do that is a total mystery. You are therefore forced to shoot at the highest mode of 1080p50 or 1080p60 that produces large files difficult to digest by many programs. Sony decided to keep a bunch of interlaced modes despite the fact that there are no programs that can edit those without conversion and that CRT Tvs don’t exist since a little while.

AVCHD

Sony embraced AVCHD maybe because their software handles it well but what about the rest of the world? Mp4 is the standard for video clips on the internet and AVCHD adds absolutely no feature to it for simple video recording. Files have to be systematically converted, sometimes with commercial software, to be used with mainstream non linear editors, not only most would not recognize the files at double frame rate.

Key Weaknesses

The RX100 has also some key weaknesses that limit its own performance and can’t be cured by workarounds.

Macro Performance

The camera does an awful job at close range and needs a diopter even to shoot basic macro. To shoot super macro you need +12 diopters and this requires high quality lenses to avoid chromatic aberrations in the image. The focus mechanism with diopter is a bit of a mystery to work out at times. Once you manage to focus the image quality is great. However the need for a +5 diopter as a starter makes this set up expensive and cumbersome to handle in water compared to others.

Stabilizer

Sony has adopted a lens shift approach in this camera instead of the sensor shift of the higher end alpha, maybe due to large size of the sensor compared to the camera body. They have then added some software processing in camera but the results are just average. There are many other cameras that do better than the RX100.

Soft Corners at Wide End

I was going crazy looking at pictures taken with different wet wide-angle lens to check which lens was best, at the end of hours of observation I took some shots on lend at the wide end. The issue is not with the wet lenses is with the camera itself, it has very soft corners until at least f/5.6 and not the sharpest corners anyway afterwards. This cannot be cured and is a key weakness that is not so apparent in stills where you can crop quite a lot 20 megapixels but obvious in video.

No Neutral Density Filter

The RX100 has a bright lens and low noise however in video the ISO starts at 125, in many situation near the surface the camera maxes out at f/11 and then starts increasing shutter speeds to 200 400 800 and so on producing scatty mechanical images. Neutral density filters have been implemented for ages in cheaper camera and take away 2-3 f-stops allowing the camera to operate at wide aperture. For some reason Sony decided not to do anything about this. On land this is an even stronger limitation in bright days.

A final remark that I want to include for all those that use the RX100 for still photography that indeed is the real strength of this camera.

Another key weakness is the strobe recycle time not an issue in video of course but creating several issues of missed shots for photographer

In conclusion the RX100 can produce great footage but has some limitation that need to be taken into account.

If you go muck diving on flat surfaces with a couple of diopters and good video lights it is of course all looking wonderful but the situation changes when you cannot lay down as in my seahorses video

With two Inon UCL165AD stacked it is really hard to get some decent footage and due to the large sensor the depth of field at such level of magnification is pretty much zero.

But the limits show up more in the wide angle where the soft corners come up no matter what you do as very seldom you are able to shoot at f/5.6 or higher at depth below 12 meters or 40 feet

Whoever wants to try the RX100 for video please get in touch if you have more questions and happy 2013!!!

Sony RX100 – Tips for underwater video part 9 Wide Angle Shots and Lenses

During my last trip to Raja Ampat I had finally the opportunity to take the wide angle lenses in a real life situation and test that they were working to satisfaction. As some people know I really like my set of Inon AD lenses and although the RX100 has a 28mm equivalent lens I put together a bespoke adapter to reuse the lenses I already have. At the time of the trip I did not have the final prototype but only a pre-release which meant I could no use the fisheye as I had an alignment issue with the dome so I only used the flat UWL105AD.

There are two videos that are of interest one is the Raja Ampat North sites which is below.

In the north visibility was at best fair and I was struggling with the set up as I had not tested the push up filter. What happened is that the black ring created vignetting so I had to reverse the rubber ring on the lens until I could push the filter deeper. In the video you can see clearly a vignetting issue around 3:50 on the wobbegong approach where I had not yet resolved this problem. The video has no image stabilization nor cropping and it shows! There are also occasional soft corners as due to the low level of visibility and lack of light the camera was working around f1.8 or f2.0 aperture most of the time. This does create soft corners on the RX100 when you have something in close focus because I always shoot at the lowest ISO as I have found that increasing aperture and working with high ISO creates a mayhem of chromatic issues.

Anyway once I got a few dives and the problems were ironed out we also moved down to Misool where conditions where much better. This is the Misool video.

Here because of the increase of light and better conditions the image is sharper due to smaller aperture settings. I did not use the RX100 to take any stills as I wanted to focus entirely on video.

Once I got home I bought a fix M67-28AD adapter PRO, that allows you to adjust the AD lens so that the dome petals are in the right place. I tested it in the bathtub with the UFL165AD and the UWL105AD, in terms of vignetting as we shoot stills at 3:2 the working focal length is 34mm on the zoom or 12.8mm.

This is a shot of the bare lens

Bare Port

You can see the characteristic pincushion distortion that the bare port creates, this is the main reason together to demagnification to have a wet wide angle lens note the purple fringing is evident.

This is a shot at f5.6 with the UFL165AD.

UFL165AD 12.8mm

Despite the zoom the lens performs great and it is very wide. If we look at a 100% zoom of the corner

UFL165AD 100% crop

We can see that at this aperture the corners are sharp and there is a very small amount of red and blue fringing.

Let’s look at the Inon UWL105AD

UWL105AD 12.8mm

If we zoom into the corner this is what we get

UWL105AD 100% crop

Also here there is tiny blue and yellow fringing but the results are comparable to some shots I have been sent taken with the Inon UWLH-100 28LD.

Finally this is the UWL105AD with a 16:9 aspect ratio and 33mm equivalent zoom, this is interesting as it is the way the camera behaves in active steady shot without zoom.

UWL105AD 16-9 100 crop

As you can see even better performance in the corners as the port is closer to the back of the lens with the RX100 because of how zooming is implemented.

For who is interested I sell spacer rings and special screws that you can attach to the fix adapter at $45 get in touch if you have some old AD lenses and you want to reuse them with the RX100. Especially as the UFL165AD has incredible performance with stills and nothing can beat the flexibility of this lens and its very light weight in water let alone the speedy bayonet mount.

A final word about filters, in video filters are essential to restore colour however they also take away 1 1/2 f-stop of light so in low light the footage may get too grainy and it is actually better to work only with white balance.

I have heard many people commenting about the dreaded white balance error 9900K message of the RX100. So why is this happening?

It seems that the RX100 cannot white balance if the exposure is outside the -2 or +2 Ev range. If you do continue and ignore the error message you may end up with strange results.

So how to fix this? Contrary to what I said in my post about white balance I have worked out that it is best to set a custom white balance in P mode and not in M, this is because the camera will adjust exposure and never issue an error message. If you want to keep white balancing in M make sure you are within the allowed range of exposure.