Snell’s window is a phenomenon by which an underwater viewer sees everything above the surface through a cone of light of width of about 96 degrees [From Martin Edge: Underwater Photography].
During my last Gapapagos Trip there was a bit of an issue in terms of photography subjects, in essence most of them were fairly big like sharks, turtles, eagle rays and of course divers.
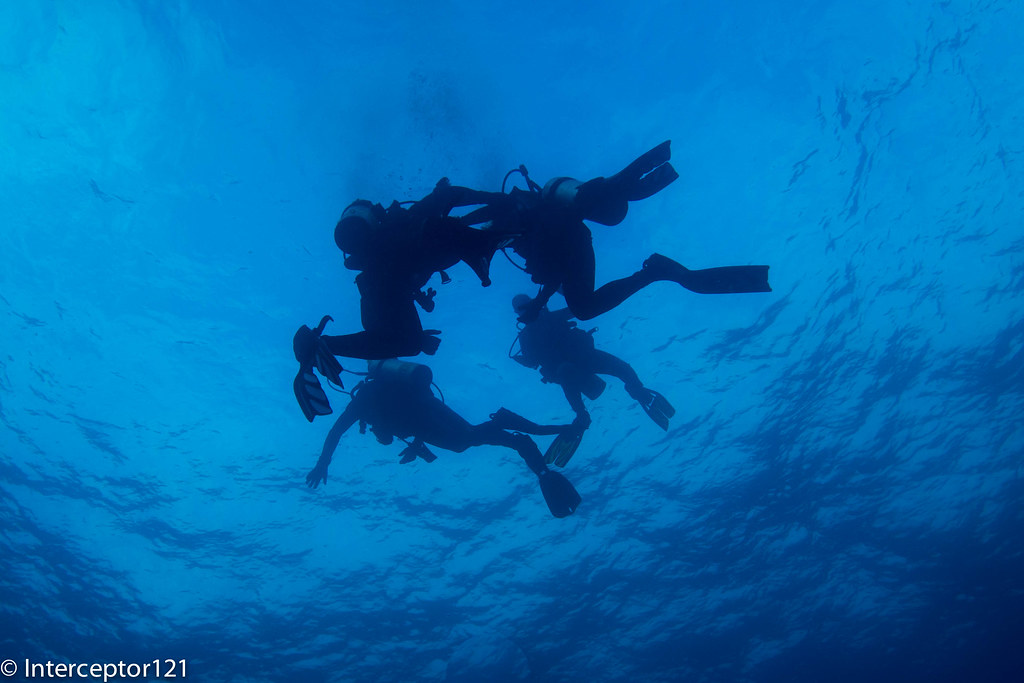
After a while shooting or trying to shoot those uncooperative models I had the idea to try and do different things such as silhouettes and Snell windows. You can also combine both as we did in this case.
So what do you need to shoot image of a Snell window:
1. A lens that is wide enough, you need a bit more than 96º field of view to take the whole window
2. Something interesting on the surface (if you have calm water you can see right through)
3. An interesting subject as silhouette to contrast the clear water if there are waves and you can’t easily see through.
A normal flat wet wide angle lens for our compact camera is not sufficient to capture the snell’s windows as in this example
Divers at Safety Stop – taken with Inon UWL-H100 at wide end
Take into account that even with a fisheye lens on an SLR you can’t capture the Snell’s window on the vertical axis as the field of view will fall short a few degrees.
With a compact camera a semifisheye lens will capture the edges of the window if correctly aimed on the diagonal and horizontal dimensions and will fall short on the vertical.
Snell window divers exiting the water or ascending – UWL-04 semi fisheye lens Canon S95
I am reporting some of the calculated field of view for the most popular lenses at present for compact at 3:2 image format
Wet Lens
Diag FOV
Hor Fov
Ver FOV
Flare/Ghost
UWL-04
151.95
123.22
79.85
Ghost Possible
UWL-100 28AD
149.01
120.97
78.48
No
UWL-28
160.56
129.75
83.81
Both
UWL-H100
157.85
127.71
82.58
No
All those lenses will take a good Snell’s window I have not tried the UWL-28 and I have some concerns this lens may flare as it usually does but I do not know for sure.
Both the Inon lenses produce sharp images with no defect.
In general small sensor cameras like the Canon S series will work fine with the fix/idas lenses and should produce good results also of normal shots through the water.
Using the UWL-04 or UWL-28 with large sensor cameras like the RX100 there could be a sharpness issue a larger apertures so make sure you close that at f/8 or smaller instead of using the shutter speed to balance exposure if you want to go through the water.
Snell’s windows are uncommon with compact camera shooters as they are considered an advanced subject but they can be taken. I will be taking more in a next trip to Egypt I hope for calm surface conditions so I can go through the surface with the shots. Failing that this is very easy to practice in a swimming pool.
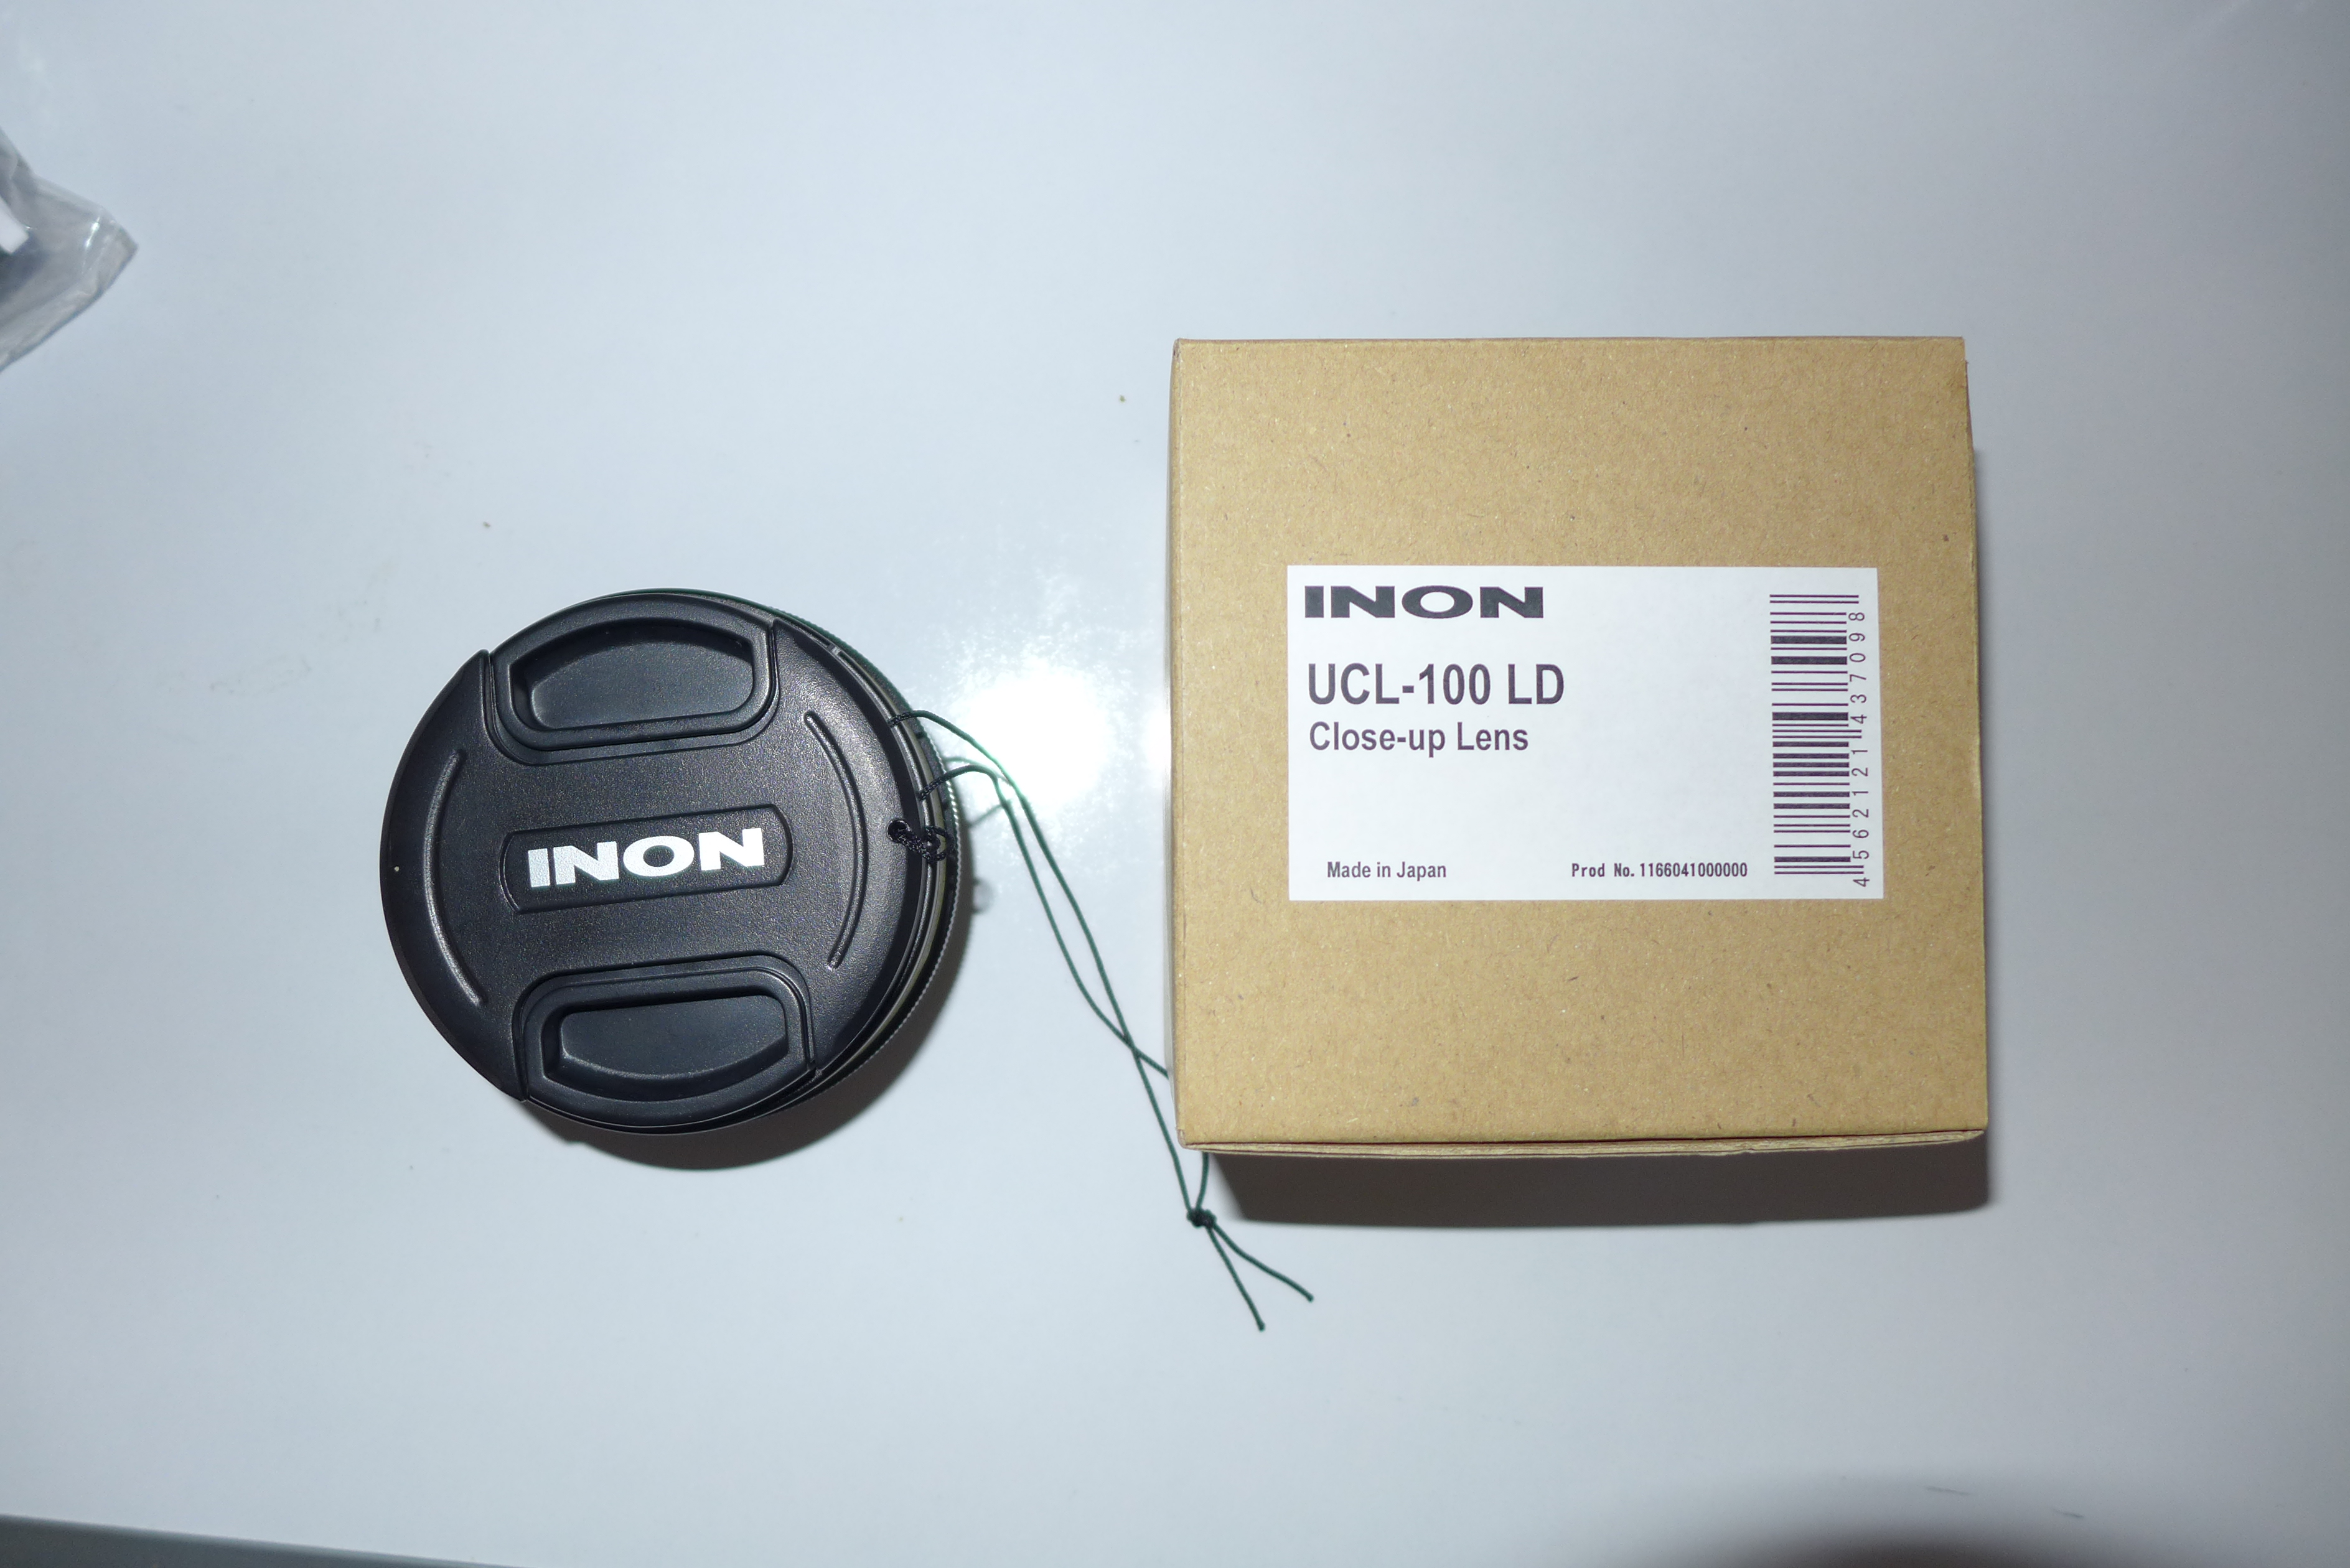
Inon introduced a new close up lens in February of this year the UCL100. So why did Inon come up with this after the very successful UCL165 series? Probably some pressure from products like Subsee that produce better quality images than the Inon lenses and more and more lenses with similar performance to the existing Inon lenses. So what is different about the UCL100? First of all this lens is heavy 243/269 grams in the LD/M67 version in air that become 130/151 grams in water double than the UCL165. The lens is made of 3 elements instead of two and is very similar to a Subsee this is more evident taking a look at the lens on land.
This shot is taken with the bare port at 50mm.
LX7 50mm
This is the same shot at the same working distance using the UCL100 note the magnification.
LX7 UCL100 50mm
The lens behaves like a magnifying glass exactly as the Subsee, Inon has made some effort to try to reduce vignetting, this picture is taken on land at 28mm.
UCL100 Fix Land 28mm
Note a little dark bottom right corner, the lens in fact vignettes at 24mm this is due to the huge size of the LX7 lens and may not happen with other cameras.
Here we can see the rear of the lens from the Fix adapter side. The lens sits very close to the glass port.
UCL100 rear lens attached to Fix LD adapter
I have opted for a bayonet version of this lens as I will use the fix as m67 adapter if I had to dive with the wet mate.
If you are a photographer I would definitely recommend the LD bayonet version over the M67 as it is easier to remove and attach in water.
There are some other very interesting characteristics of this lens. Usually a diopter works only around a certain working distance for a given zoom so the issue with such a powerful close up lens is that if we are far away from the working distance the lens is not usable.
The UCL100 instead is quite flexible and has a huge swing of working distances for a given focal length as in the table below.
Zoom Position
Min
Max
90
60
100
70
45
115
50
20
130
35
10
200
28
0
300
All values are in mm.
So the lens keeps working well far away the nominal 100mm and due to the construction also gives a magnifying effect this means that it is possible to take this lens in water as the only close up lens and there will not be too much of a limitation if for some reason we can’t get that close to the subject. A swing of 40mm at telephoto end is excellent and this becomes 70mm at 70mm zoom and 110 at 50mm.
What about image quality most of you will know by now how specific I am when it comes to aberrations, this is a crop of an image taken with the UCL165
Inon UCL165 Fringing
You can see the yellow and purple halo around the zero.
This is a detail of the same ruler in water with the UCL100
Inon UCL100 Detail
The image is a bit soft because of the aperture used but absolutely free of any fringing that is astounding for this level of magnification, the quality of the image is same as Subsee.
This lens comes with a lens front and back cover, the front lens is a clip with lanyard. The UCL100 can also be stacked with other M67 lenses if you need more!!!
Inon UCL100
With the LX7 the UCL100 achieves a reproduction ratio of 1.1:1 compared to the 1.4:1 of an Inon UCL165. The limitation of the zoom of the LX7 shows a bit here as even the Sony RX100 gets nearly a 1:1 with this lens but the strength of the focus of the LX7 are second to no other camera in this segment so I look forward to using this lens on some really small stuff.
The UCL100 is priced at $282 in US and £275 in UK versus $225/£210 of Subsee so why would you bother getting this lens from Inon instead? I think the main selling point of this lens in addition to the image quality and magnification power is the fact that the lens operates until wide end and has a very wide range of working distances so you are not stuck just around the 100mm nominal focal lenght. This allows use of the full zoom from wide to tele that in video is especially important. For pictures I am not so sure the additional cost is justified as stills are usually at full telephoto end.
There is always a lot of confusion around macro photography and close up lenses. It is useful to set some definitions right before going into selecting the appropriate lens.
In traditional terms a macro photograph is one where the image of the subject on the sensor is the same size of the subject itself. As photography is based on 35mm film this means that a macro photograph is one where the vertical size of the frame measures 24mm. If we look at high-end compact cameras there are very few that are able to capture an area smaller than 35×24 mm, among those the Canon G15 or the Panasonic LX7. Majority of other cameras capture around 60-65mm wide and 40-42mm tall frames usually at the widest end with distances of 1-3 cm from the subject. As compact camera sensors are small strictly speaking there are no compact cameras on the market that can capture an object as small as their sensor.
So as far as we are concerned all that matters is that the height of the frame is same or smaller than 24mm as if we were shooting with a full frame DSLR.
Seems macro but it is not! 1:1.2
For an SLR user the choice of a close up lens is quite straightforward as usually there will be a 100mm lens behind a flat port. This lens gives a magnification of 1:1 usually with a closest focus distance of 12” or 30cm. To achieve more with the same lens there is the need of a close up lens that works with a similar principle of a magnifying glass.
A close up lens will have a determined focal length or maximum working distance, beyond which it will not focus. If you hold a close up lens at the focus distance and look inside it you will notice that the object will appear larger as you step back from the lens and smaller as you get closer to it. The camera lens behaves in a similar way. Once you reach the working distance of the close up lens is the zoom that moves the lens forward or back and effectively provides the magnification. The close up lens only shorten the working distance allowing you to get closer.
Close up lens are measured in diopters this is the ratio between 100cm and the lens focal length. So a lens with a focal length of 20cm is a +5 diopter. A 100mm lens at 30cm once placed at 20cm from the object would achieve a 1.5:1 magnification. So with a 100mm lens in a flat port and a +5 diopter we are able to capture images larger than life-size with a DSLR full sensor. A +10 diopter would give a magnification of 2.1:1.
So how much power do we need to shoot macro with a compact camera? Is it the same than with a DSLR? Are there other considerations that apply?
The first issue is that because compact camera have fixed lens there is no way to predict at a given focal length if we will achieve macro or not. A compact camera zoomed to 100mm equivalent is not the same as a full sensor camera with a 100mm lens: in most cases the capture area is much larger. In fact there is no way to know if our lens will or not achieve our objective of taking a macro shot just looking at the camera specs. To make matters more complicated it is not always possible to get too close to our subject, this may be because there is no physical way to get closer or because we do not want to freak out the marine life that we want to capture. In general I like to leave some breathing space to subjects, as a minimum 3 inches or 7.5cm are needed and a bit more. This means that more than a lens with more than 12 power is generally a bit too close to the subject.
So how do we work out what diopters we need for our lens? Unfortunately we will only know after we have actually tested it, this is of course not very good!
Another possible approach is to define what is the working distance that we can realistically sustain with our equipment and the conditions we dive in.
Generally it is always possible to get between 20cm and 10cm and in some cases also under 10cm. This corresponds to 5 – 10 diopters and sometimes more for example 12. Considering that plenty of marine life is actually one inch or larger to capture a frame where the subject is filling it we do not actually need real life-size macro. In practical terms this means that for a compact with zoom of 100mm a lens with 6 diopters is fine with less or more depending on the camera zoom and focus ability. So for general purpose a close up lens between 5 and 7 is perfectly fine, this corresponds to working distances between 14 and 20 cm or a bit less from the back of the close up lens so actually closer from the front of the lens itself. For very small subjects around 1.5 cm like a pygmy seahorse we would be looking at 10 to 12 diopters, more is impossible as we would be crashing into the critter. This means a working distance between 8 and 10 cm or 3 to 4 inches from the front of the lens or 3 to 5 cm or 1 to 2 inches from the close-up lens that would still allow a small space for our lights.
Macro Shot 1:1
Will we achieve real life size macro with this? It depends, to give some context my Panasonic LX7 that only has a 90mm zoom will capture a 32mm tall frame with 6 diopters power, strictly speaking this is not macro, and 20mm with two stacked 6 lenses achieving a 1,2:1 super-macro.
Super Macro 1.7:1
There are also other consideration that apply, if all we have is a +10 diopter we need to get very close to our subjects for our lens to start working, in all those situation where we cannot get close we would run into problems. If we look at a videographer with a 10x 400mm zoom camcorder they most likely only need a 2-3 diopter because with the range of zoom available they can comfortably achieve macro staying over a foot away from the subject. So the advice is to always have a 5-6 lens for general work and another 10-12 for smaller subject or if the lenses are stack-able two 5-6 this will cover all possible situations with a camera with a 90-140mm equivalent zoom.
I thought of concluding this blog with some recommendations so those are my recommended close up lenses based on personal use or looking at pictures of others:
DSLR: Reefnet Subsee both 5 and 10 with 100mm lens on full frame or 60mm on 1.5x cropped sensor. The new Inon UCL100 is also worth checking but it is more expensive.
Note that the Inon UCL165 focal length of 165mm is from the back of the lens so the power is 6.06. Dyron lens are reported as 7 diopters however they are then declared 165mm underwater which is actually 6.06 exactly as the Inon.
Optical quality of both lenses is similar so I guess it depends on price what would be the choice. Inon is available with bayonet mount that maybe a big advantage for some cameras like the Sony RX100.
Whilst the Subsee give the best optical quality they are bulky and not flexible so I would not consider those for a compact rig. Inon and Dyron are lighter and more portable and can be stacked, a single diopter will be in most cases sufficient for good close up work with two required only for the smallest critters. It has also to be considered that at least for stills chromatic aberration can be removed in the editing phase, not so for video, but there generally goes unnoticed unless is really heavy. The Dyron and Inon lenses have the level of quality that the aberration cannot be noticed. This muck diving video has plenty of macro and close up with diopters note that no chromatic aberration is visible, shot with single or double Inon UCL165
There are other brands like FIT or époque but there seems to be quite some confusion as their specs are either air values or magnification that as we appreciate depends on the lens used. From tests I have seen the FIT 16 seems less powerful than an Inon 6 and same of a Subsee 5 and they are expensive so not an option for me.
What other tips are useful for shooting with close up lenses? The first is to make sure to use small apertures to have the maximum depth of field.
Contrary to what many believe the diopter itself does not create an issue of shallow depth of field is the size of the subject and the magnification that create the problem. With diopters most times we are at the maximum possible magnification with a total depth of field of few millimeters, it is important to operate at aperture values for a compact camera of f/8 and if available smaller.
For pictures is it also advised to use very fast shutter speed to avoid motion blur that the shake of the camera could create, usually 1/250 or faster unless using a tripod or a solid base. Video is not usually shot with high shutter speed, if available use double frame rate and shutter of 1/100 or 1/125 depending on the PAL or NTSC video system. This will allow half speed slow motion in editing that could prove useful.
Lights are also very important for close up, for still cameras they allow the camera to focus and for video they are needed to actually take the shot. For still cameras a strobe is essential, as video lights do not perform well at high shutter speed.
A final advice is to use the lowest ISO or gain available to ensure the quality of the picture or footage is the best possible, as we are close and have lights this should not be an issue at all. Most macro stills are shot in manual, for video if a manual mode is not available pumping the lights up results in the camera closing the aperture and reducing the ISO. If manual mode is available it is possible to set shutter, aperture and ISO and then measure the exposure that the light give until a satisfactory value is achieved.
Some people will recognize the Canon PowerShot A570IS, the Canon S95 and the Panasonic LX7. The first shot VGA video, the second 720p HD and the last AVCHD 50/60p. If you look carefully you can also see how the front aperture of the lens gets progressively bigger and bigger.
Year after year compact cameras are becoming more powerful having electronics that allow higher resolution and image quality, I think the GoPro is a demonstration of what you can do pushing the limits of simple optics using ultra integrated electronics.
Compact cameras like the A570IS used to have lenses that would be equivalent to a full film camera with a 35mm lens, this has been a popular choice for long time. Some years go Olympus and afterwards Canon, Sony and others started offering plastic housing for those cameras to take them underwater this was the start of consumer underwater photography.
There are however a number of challenges using a 35mm camera for underwater photos and the most obvious is the field of view, because of the magnifying effect of water those compact had really narrow coverage that limit them to close up of macro shots. However a little time after wet wide angle lenses come into the market and offered range of coverage up to 100º some manufacturers also produced seme-fisheye lenses with coverage of 165º the most well known being the Inon UFL165AD.
All went well and compact camera photographer could take wet lenses with them and in one dive take pictures of a nudibranch as well as of a wreck thanks to removable lens in water.
Then the consumer market pushed manufacturers to increase field of view so it was the start of 28mm equivalent cameras like the Canon S90, this format is still very popular with the Canon G series and the new Sony RX100, in addition to that there was more and more demand for extended zoom so that the camera could be useful in all situations, today is not uncommon to have compact cameras with 20x zoom.
The introduction of 28mm equivalent cameras meant that the cameras would vignette with a lens designed for 35mm so wet lenses had to be readjusted and re-designed. The extensive zoom by this you mean over 4x meant that the wet lens would be so far from the camera lens that effectively no wet lens would be useful, this has been the curse of the Canon G series a great camera that never had any good wet wide angle solution until very recently with introduction of zoom wide lenses from Inon.
The other bad news is that at 28mm the flat port of the housing introduces already pincushion distortion and fringing as we can see from this photo
Bare Port RX100 wide end
We can see the effect of pincushion distortion in the deformation of the shape of the slate, it is quite apparent when you look at the lines and how skewed they are you can also see a purple tinge to it.
A wet wide angle lens not only expands field of view but also corrects pincushion distortion and chromatic aberration, this is the key reason why some form of wide angle is always required.
In the last two years manufacturers have come up with 24mm equivalent cameras, such as the Canon S100, Olympus XZ-1 and Panasonic LX5, unfortunately those camera have even more pincushion distortion, and for this reason should never be used in water at wide end to take pictures without post correction that can be quite hard to achieve so as a matter of fact many people live with ugly deformed pictures.
Those cameras make it even more difficult for wet lenses to work and to date there are very few lenses that work without vignetting, those lenses require a wide aperture on the side of the camera also to allow larger and larger image sensors that camera makers use like the LX7 in the feature image.
LX7 Flat port Wide end
To give a demonstration of why is a bad idea to take your 24mm camera in water without any wide angle lens we just have to look at the picture above. Shocking!
So with 24mm cameras we are stuck, the wet lenses with dome that work well with the 28mm cameras end up vignetting so badly that all the advantage is lost when you zoom in. In effect with a 24mm camera all we can aim is 100-110° field of view that for stills is not really that much, there are exceptions like the Canon S100 but in general terms options are limited.
Camcorders on the other hand always had a range between 30mm and 150mm if not more with extensive zoom, you would have needed a dome port atteched to the housing that would allow zoom to give the same functionality in water or diopters to zoom at close range.
A user of a Sony camcorder in a gates housing would be looking at 30mm like a very wide lens!!! Typically you need fathom lenses to reach 90° and lenses with 110° coverage cost $4,000+ so definitely not affordable to the average shooter.
Where does this leave us? Well surprise good news for all 24mm compact users that want to shoot high quality video there are plenty of options that don’t break the bank!!!
When zoom cameras like the Canon G7 come into the market some manufacturers like Fantasea, H2O tools, Ikelite started producing wet domes.
Those domes are made of two lenses with an air space and if set really close to the housing port have the effect of restoring the original field of view of the camera. Now for a 28mm equivalent like the Canon G series this is not that exciting as we are talking about 75º diagonal but for the 24mm camera users we are talking of 84° diagonal coverage, a value that a professional camcorder user would be very happy with. In addition you can also use the zoom which means that if the camera has really close focusing distance a wet dome is all you may need for 85% of shooting circumstances.
So when I got the Panasonic LX7 this is what I was planning and I got a Nauticam Wet-Mate this is the slate from before at the same distance
LX7 with Nauticam Wet-Mate
As you can see the image is not only wider but also rectilinear no barrel distortion as if we were shooting on land.
Personally I do not like barrel distortion for video, and this is the reason I don’t like videos shot with fisheye lenses so this suits me fine. Of course 84° are not really wide for large wrecks, whale sharks or similar for those situations you still need a wet-wide angle lens but the Nauticam Wet-Mate costs $250 plus taxes so you really can’t complain.
At telephoto the flat port does not have pincushion distortion but it could be painful to remove the wet mate in the water the good news is that with the wet-mate you can still make use of the full zoom so if your camera has a really short focusing distance this may be good enough for most situations.
To finish off this is the Nauticam Wet-Mate, there are as I said similar products made by other brands. It is build of Aluminum with two lenses with a sealed airspace, construction seems very similar to some fix products.
Nauticam Wet Mate
So if you have a 24mm compact camera that takes HD video and you are frustrated with still there is a whole world in front of you with those dome adapters you could be well set for underwater video at very little investment.
Those are just some cameras that have high quality HD video the list is of course longer:
Canon S100/S110
Panasonic LX5/LX7
Olympus XZ-1/2
And the good news is that you do not need an aluminum housing just something that takes a wet dome, Ikelite for example has 67MM thread on most housings for those cameras.