The American manufacturer is the first to reach the market with a polycarbonate housing for the Panasonic LX100.
Specifications
200 ft (60m) depth rating
Controls for all camera functions except Diopter Adjustment Dial, Aspect Selector Switch, Front Control Ring, and Focus Selector Switch
Ikelite 5-pin bulkhead with TTL circuitry
Near neutral buoyancy in fresh water
Weight 4.7 lb (2.1 kg)
Dimensions 7 x 6 x 6 in (18 x 15 x 15 cm) including projections
3.9-inch (99 mm) diameter glass lens port
The first thing that we notice is that not all controls are accessible, is this going to be an issue?
Diopter Adjustment Dial – this is normally set fixed
Aspect Selector Switch – this does not change during the dive
Front Control Ring – this controls manual focus and is important
Focus Selector Switch – this switches between macro and normal focus mode an is important if you don’t use a close up lens
As the LX100 with a 24mm lens is not going to be really a photographer dream Ikelite could have spared an expensive TTL converter but I requested confirmation from the manufacturer and they said only a TTL version is planned – not good for us!
Ikelite LX100 Front View
The housing looks a bit bulky as usual but considering that for video we access a limited set of controls this is not going to be a major problem except maybe the rear metal buttons.
Rear View
Probably the best feature of this housing are the accessories.
The housing comes with a large 3.9″ flat round port that per-se is not good for much, however you can add the WD-4 Dome and the macro M67 adapter to improve matters. The WD-4 dome is a glass removable dome that is sharp and will restore the lens field of view and allow for some zooming, the macro adapter allows to mount M67 close up lenses as a push on.
Probably the feature that will miss the most is the focus mode switch as the rest can work quite nicely with focus lock.
Cost wide the housing is $750 with the WD-4 and the Macro adapter this totals at $1115 plus taxes.
The nauticam housing is rumored to be $1,100 without ports so this ikelite housing could be competitive and we like the port system a lot for simplicity even if the choices are a bit limited as all in all this is good enough for video if combined with a selection of diopters. The lack of the focus mode switch could create some challenges in portrait work with the bare port but a series of mid range close up lenses can fix the issue.
In my opinion the 4K mode of the LX100 is as good as the GH4 there are however fewer options and control and rolling shutter seems to be an issue with the LX100.
Nevertheless the 4K video mode blows the Sony RX100 series away in any version so I guess for land use the Panasonic DMC-LX100 truly is the camera to beat.
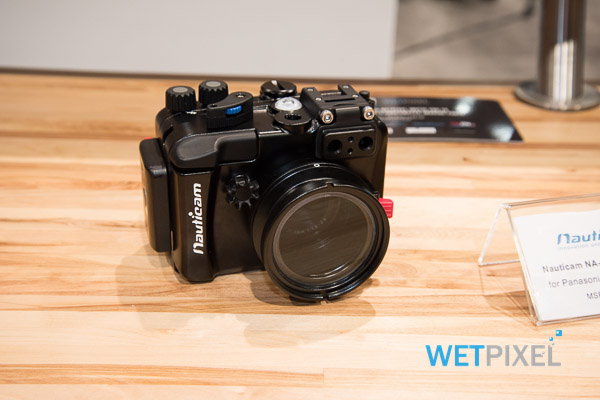
I have been waiting patiently for housing and now is confirmed that Nauticam will come up with a housing in early 2015. Wetpixel has a special on Dema on their news section and this has images of the LX100 housing prototype.
The housing has a changeable port system similar to a micro 4/3 and 3 ports were shown at Dema
Panasonic LX100 Flat Port
The rectangular flat port is very similar to the Recsea housing for the Canon G series.
Many people get very excited to read that the LX100 has a minimum focussing distance of 3 cm at wide end but this is as such not so exciting as it seems. Due to the wide field of view of 84º diagonal this means that the area captured at the minimum distance is somewhere in the region of 1:1.25 reproduction ratio. So this is not real life macro. This compares to the much smaller area of the older LX7 that had a 1.25:1 and as such offered super macro out of the box (though nobody would shoot macro at wide end or be 1 cm away from the subject).
Which means that the LX100 will need diopters with this flat port to achieve macro and more specifically a close up lens with power in water of 10 to achieve macro. This corresponds to the Subsee 10 or the Inon UCL100 or the Nauticam SMC.
The flat port is nothing to get very excited as in water the camera will behave as a 32-100mm equivalent lens camera and a field of view of only 68º.
The other option displayed was a mini dome port.
Nauticam LX100 Mini Dome Port
This looks around a 4″ dome, if this is the case the camera will not only maintain the land focal length 24-75mm but also potentially be compatible with a flip diopter as the one used with the micro 4/3.
This is a hope more than a guess, Nauticam please ensure you can apply a flip diopter to the dome port as that would be the best all round option for this housing. As previously noted 24mm is wide enough for reef scenes and with a +10 diopter, and possibly an additional +5 or +6 this becomes a great solution for underwater video. At 4K the focal length changes to 26-81mm which is still acceptable.
24mm is not enough for wreck dives or whale sharks so here it comes the wide option.
Nauticam LX100 Wide wet lens
I am not sure if this port will work at all with the zoom but it is declared to offer 110º and therefore a 0.63x magnification.
Nauticam has declared that standard wet lenses do not work with the LX100 and hence they have come up with this specific port system.
Looking at the G7X housing this seems to be just a special adapter with a set of wet lenses more than real ports
Nauticam G7X Housing
Anyway we will have to wait but my favorite option would be the mini dome especially if the flip diopter holder for 4″ dome can be used.
If this is not the case I would have a major problem with this housing as the lens out of the box is not good enough to be used as is. I am slightly confused also by that weird rectangular port considering that 32mm is not wide enough for anything I can’t comprehend the reason for its existence.
We will have to wait and see. I have contacted Nauticam asking if the dome can have a flip diopter holder. Will keep you posted
Final Note: the Panasonic LX100 is not an option for stills as the RX100 Mark III, a 24-75mm lens is not good enough and the lack of fisheye options combined with the short zoom is definitely a no go.
Right now for stills I would still consider the Sony RX100 Mark II as the winner until we get confirmation of that lenses can the Canon G7X use.
Following the failed test on the Nauticam Electrical Sync Cord bulkhead I was out in the market to check what else could be done with the M16 port on the RX100 Mark II housing.
I bumped into the leak sentinel while at the London Dive Show. As you may know Nauticam provides now a vacuum system with temperature compensation on all new micro 4:3 and DSLR housings. Also older models can be retrofitted but not the RX100 because essentially the moisture sensor is much simpler.
So if the Nauticam housing has already a moisture sensor why bother adding a vacuum test. The advantages are numerous:
A moisture sensor still requires the housing to be put into water to be tested
A moisture sensor starts beeping when water has already made its way into the housing, if you are in a situation where you have a mandatory safety stop or a deco stop you don’t want really to have the additional stress of a camera flood.
With a leak sensor you can check the integrity of the housing before the dive and without putting it in water
You can rapidly change battery and the likes and not worry if you have compromised the seal of your housing
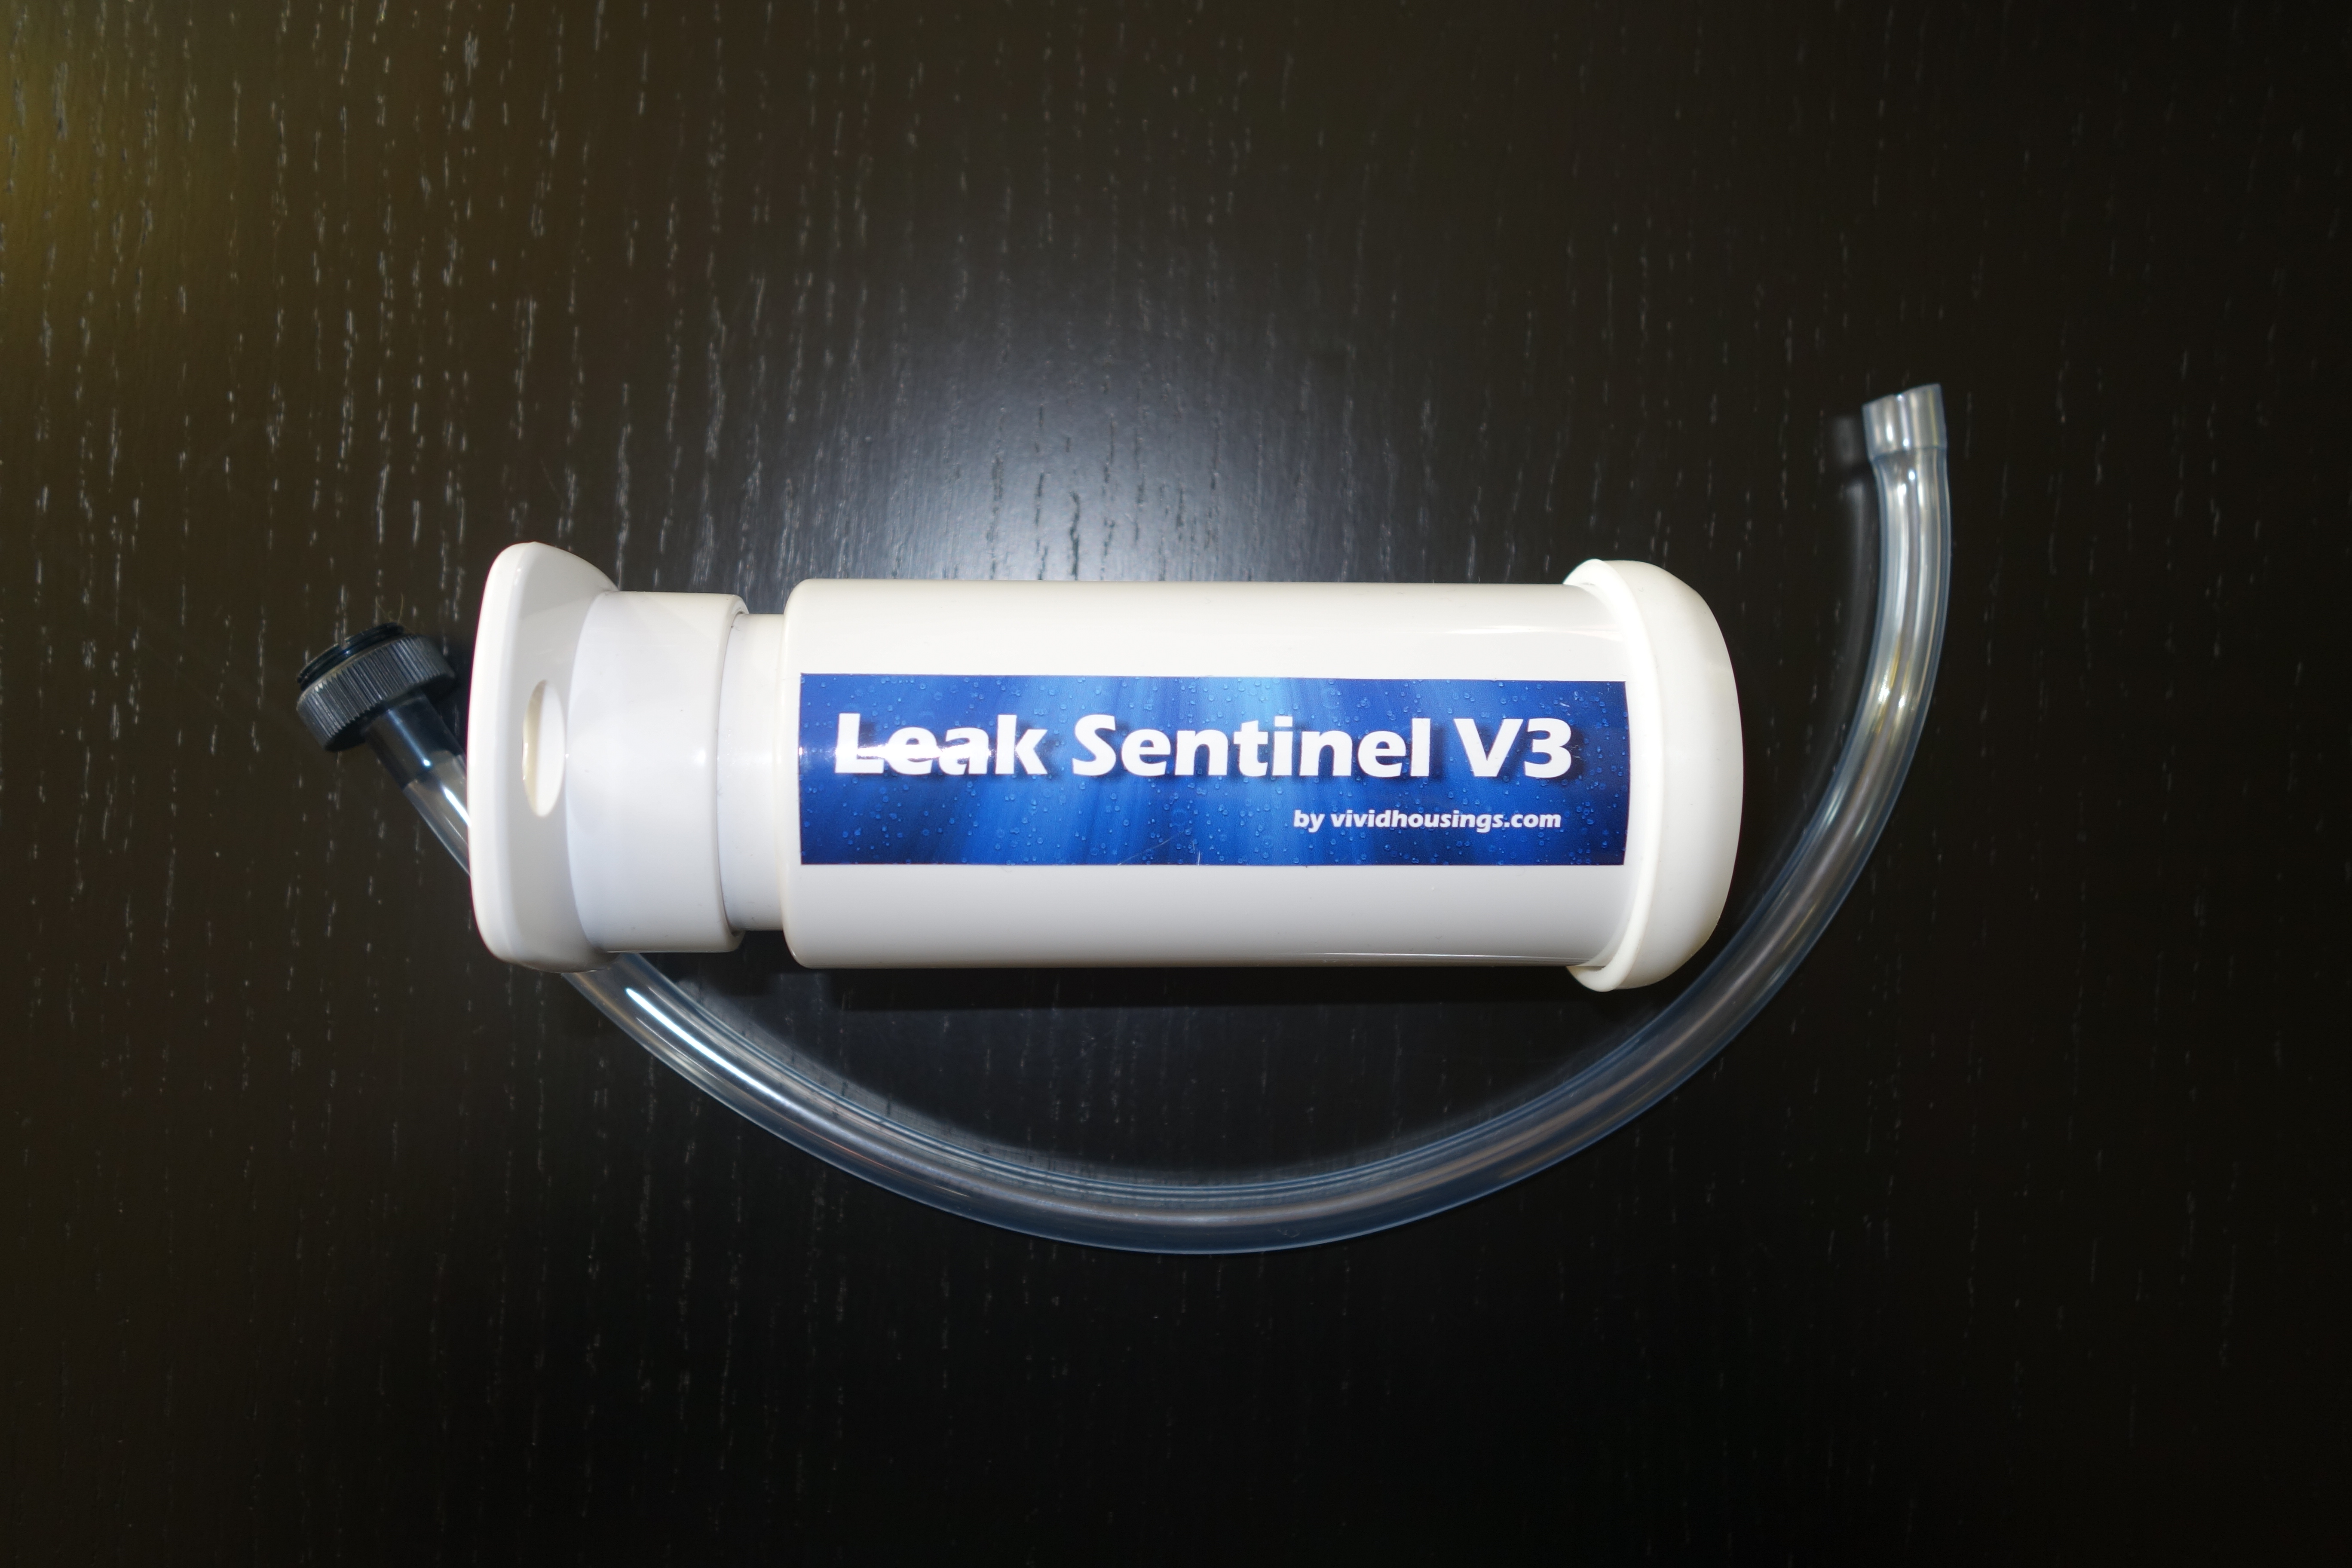
With all of this in mind I went off and contacted Vivid housings
After an email exchange about the design of the product I was convinced that it was worth getting it so I ordered one and after just 3 days it turned up in my post directly from Slovenia.
The system comes with an M16 adapter to screw on the housing bulkhead. The best way to remove the cap on the Mark II housing is using a CR2032 battery like the one of the moisture sensor.
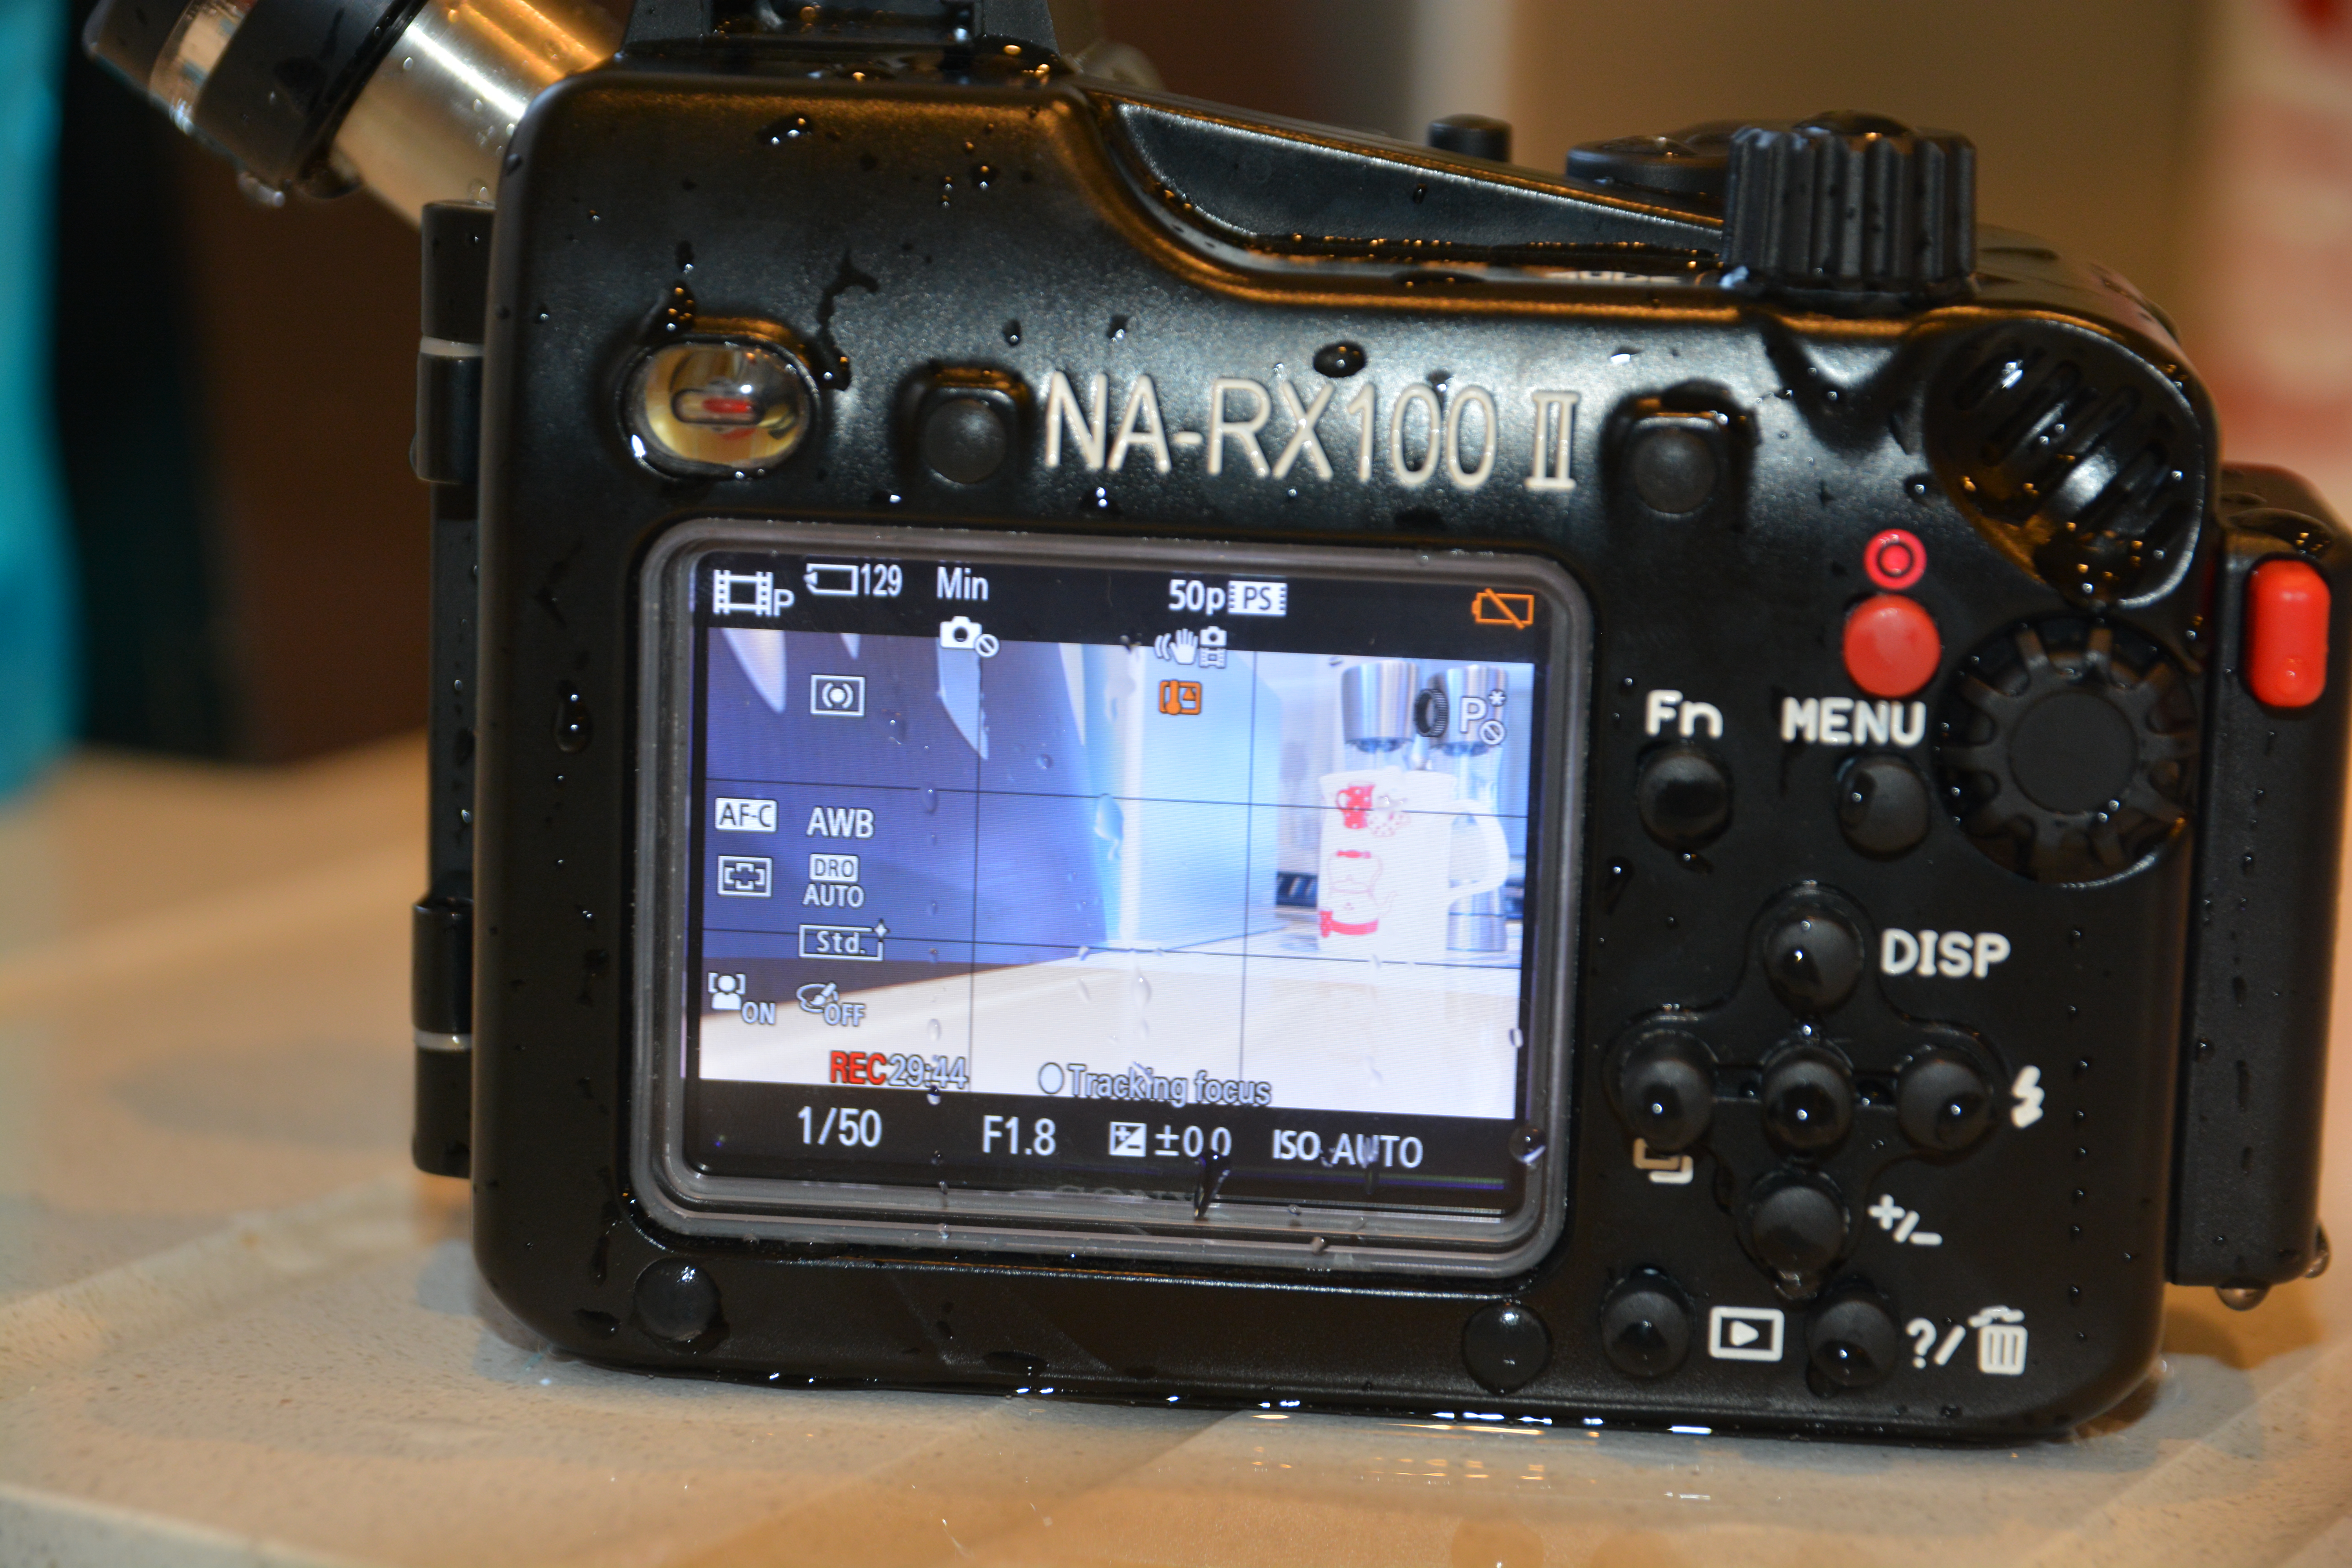
I set up the system on the housing as in the featured image and started my preparation. It takes 3 pump strokes to get a green light and the instructions say to add between half and a full stroke to make sure it is not on the edge. I had 4 full strokes.
I prepared the housing and camera in a room at 21C and waited 20 minutes before putting it in water at 15C.
I then put the camera in video recording mode for one hour, the Rx100 has a limit at 30′ so I had to record two files. After one hour the system was still showing a green light I took it out of the water and follow the depressurization procedure and extracted the camera. Measuring the temperature inside the battery compartment the sensor indicated 28C.
Now this made me think to the fact that this solution, although equipped with a temperature sensor, does not actually manage temperature compensation. If you know anything about physics you know that the following is true for an gas also known as Gay Lussac law
the pressure of a gas of fixed mass and fixed volume is directly proportional to the gas’s absolute temperature
As our housing is rigid and not compressible this means that the ratio between temperature and pressure is constant.
This also means that if the temperature increases because the camera warms up with use the vacuum will drop (pressure increases), this could create a false positive.
I therefore performed the following steps
I immersed in water at 32C and started shooting a video clip.
After around 50 minutes the led started to alternate red and green. The camera has the temperature warning indicating a possible temperature close to 40 degrees
I kept the camera in water pretty sure there was no leak and then at 60 minutes took it out of the water
After few minutes outside water in a room at 21C the light went back to green
The camera temperature in the battery compartment was 36C
Water Temperature MeasureTemperature warning
The ambient pressure was 1016 mpa so I estimate I created around 750mpa inside the housing with 4 full strokes, however as the camera sustained an increase of 19 degrees from 21 to 40 the pressure sustained an increase of 6.5% bringing it in the warning area of the leak sentinel and generated a false positive.
Now there are a few considerations to be done:
1. If you shoot pictures even firing the flash is unlikely to get the camera as hot as when you shoot video
2. The water in the dive will seldom be 30C anyway
3. It is preferable to prepare the camera in a temperature as close as possible to the diving temperature and in the driest environment available
4. It is possible to estimate the amount of vacuum each pump strokes gives and compensate for the temperature changes
The worst possible scenario is a video camera housing prepared in an air conditioned environment this is the only scenario where temperature compensation is useful.
Generally the suggestion of the user manual to give one or half pump strokes should be changed. Say that I have a large housing and it takes 10 strokes to create the vacuum, I would suggest another 3 strokes is diving in warm water otherwise the possibility of false positives is increased.
Vacuum Pump
For what concerns the RX100 and only for very warm water shooting a lot of video there is a theoretical possibility that the camera overheats, and if the housing had been assembled in a much colder room, this gives a false positive.
To minimize this possibility prepare your housing at the normal ambient temperature of your dive site is generally the best practice for tropical diving. I also do not recommend practices like preparing your housing in a cold air conditioned cabin, some people think they avoid condensation not thinking that a 20+ degrees thermal shock does do any good to the camera.
Ultimately at €200 including worldwide shipping I can definitely recommend the leak sentinel to all RX100 users. Considering the cost of your investment even at the price of the RX100 Mark II of $750/£649/€699 this is a good tool and more than anything give you the extra reassurance of having a watertight housing, and also helps you in all your situations where you have a battery change or you have to open the housing before the end of your day.
It is not a mystery that the RX100 is capable of shooting excellent video. In fact in some comparisons with SLRs cameras there is little to no difference in the footage quality. The RX100 has many settings and options so which ones are important for underwater video? I will go and explain those that I find useful.
RX100 Video Behavior
Although the RX100 offers full manual control in video this option is not as useful as it seems. Now that many video editors support AVCHD progressive the 50p or 60p options are the more relevant as the footage can be slowed down to half speed and still offer a standard frame rate (50/60p at half speed is 25/30p).
The RX100 shoots video in program mode with shutter speeds of double the frame rate so 1/100 for PAL and 1/125 for NTSC that is excellent news. The camera will then drop to 1/50 or 1/60 when the max ISO is reached which is still acceptable. In Movie Program mode the camera shoots at the lowest possible ISO for the set shutter speed at the widest required aperture. The RX100 has a minimum ISO in video of 125 and the RX100 has it at 160, which is quite high.
Shooting Wide angle
I shoot all my wide-angle footage with the camera in Program Mode. By that I actually mean Photo Program Mode. Pressing the movie button in P mode results in the same behavior that shooting video in P mode. In order to be able to frame correctly I set the image format to 16:9 also for stills. This is also useful to capture ambient light landscapes. I started shooting in P because this allowed me to white balance quickly however I found out that the custom white balance on the RX100 Mark II is a total disaster and in fact I never use it as it gives weird results. I shoot with a red filter with Auto white balance on until approximately 25/27 meters and then I move to White Balance set to K (colour temperature) 9900K Tint set to M7+Y7. When shooting with lights I also use auto white balance. Generally speaking I only use the movie button and the white balance settings for wide angle.
Deep Wreck in Program Mode
Shooting Macro
When shooting with diopter at tiny subjects focus with the RX100 is a challenge. I set my video mode to Aperture priority with an aperture of f/11 and Auto ISO, the camera will always keep a shutter speed of double the frame rate which is ideal. If you light the subject properly the RX100 will always shoot at the lowest ISO maybe at 200 but not more. I use auto white balance for all my macro. I find it convenient to leave the video mode like this so that I only have P for wide angle and Movie – Aperture priority for video. If you prefer you can set those as memory recall 1 and 2 but I find that not as useful except you don’t need to use the control dial.
Frogfish at f/11
Settings for the Function Buttons
Many features that can be assigned to the function button are not available in video or not useful. I only have 4 settings in the function wheel:
ISO
Metering Mode – Always on evaluative
DRO – I set it to auto
Focus Mode – in video only constant and manual are available
To be perfectly honest I rarely change any of those except for testing the camera exposure. Even the metering mode can be left to evaluative all the time as when you shoot macro the area is so small and evenly illuminated that I have never had an issue with exposure.
Settings for the Control Wheel
I use the following assignments and I find them very useful:
Left: White balance
Centre: Manual Focus Toggle
Right: Exposure Lock
The bottom arrow is always assigned to exposure compensation and can’t be changed I set it to -0.3 eV all the time.
White Balance
The performance of custom white balance with the RX100 Mark II is shocking worse than the original RX100, 9 out of 10 I get a white balance error and the results are usually off with too much magenta. The only occasions where I do not get an error is in 6 meters or water (20 feet) on a sandy bottom. In other conditions it does not matter if you try with sand, tanks, hand, slates the outcome is shocking. The results can be used changing the tint to an M2 or even zero but generally using a filter and auto is just much easier and better. I assign the K setting to 9900K M7 for shooting at depth, This is painful because it means that unless you have a flat lens like an Epoque or Inon you can basically forget shooting video with the RX100 as the custom white balance is erratic at least.
The Inon UWL-H100 has only one red filter that is compatible and is made by deeproof. I find this filter excellent though I prefer plastic to glass I have to say it works a treat.
Results with White Balance Error 9900 Note the Magenta tingeSimilar scene with auto white balance and red filter
Focus
The RX100 focus automatically on the center when shooting video and does it very well,. Tracking focus is not as useful and by assigning the center button to manual focus it can be eliminated. When shooting macro it is essential to use peaking. I set it to low with white color. Generally with diopters there is only one focus distance so I move the camera until the peaking shows nice white and then press record trying to be steady. That’s pretty much it.
DRO
I keep the dynamic range optimizer to Auto. This means the ISO is most of the times set automatically to 200 to preserve dynamic range. When the scene is perfectly lit the ISO is chosen to be 160. I don’t see much difference between ISO 160 and 200 but if this bothers you set the DRO to off which means the camera will mostly shoot at ISO 160 in good light conditions.
ISO and Max ISO
I set the ISO Max to 800, having analysed a lot of my footage I have not found one example where the camera shot at ISO800 yet unless I had a filter and was at 30 meters. However I prefer the camera to drop the shutter speed and keep the ISO to 800 instead of going all the way down to 3200.
Zoom
In video the RX100 activates digital zoom even when you set it to off. This deteriorates the image so you need to pay attention that the middle notch corresponding to 3.6x is not exceeded or you will see artifacts in your footage.
Stabilizer
I use active steady shot thought this reduces the field of view as it does help with shake quite a lot with macro footage.
Other Settings to disable
There are a number of settings that are harmful in video either because they use battery or because they are counter productive I disable them all list includes:
Smile / Face Detection
Picture effects
Audio recording ( I do not like bubble sound)
Wind Noise Reduction
The following are only relevant for still but I like them off regardless.
I have just received this week the NA-RX100II housing also known with product code 17408
This housing is essentially identically to the already very successful NA-RX100 more specifically it looks identically to the NA-RX100V video version.
This looks apparent if we look at the left side of the housing where a screw can attach a bulkhead
HDMI/Electric Sync port
According to Nauticam you can attach both the SmallHD 4.3 LCD monitor to use as external monitoring for video or an electrical sync cord to attach a strobe via a hot shoe 5 pin connector. This will not support TTL but will allow to fire an external strobe without triggering the internal flash. This means that there will not be any issue of recycle time especially true at wide angle or when using strobe with edge lighting.
Now I believe this is great news for those underwater photographer that are downgrading from DSLR as this was probably one of the key limitation of the RX100 that will now be overcome.
Remember that the RX100II seems to have other significant improvements with respect to the Mark I in terms of corner sharpness that can make this already excellent camera an absolute killer.
I wonder if it is possible to enable and disable the hot shoe and use both electrical and optical connectors as in macro TTL the camera performs very well indeed and this would only be available with optical connections.
If you are interested in the mini video review of this housing you can find it here
I will do some tank tests for corner sharpness in the next days so stay tuned
The housing is priced at £699 in UK as it was with the Mark I so should be $950 in US. Great value for the additional bulk head port!
Update the M16 port on the side will have an hot shoe accessory but won’t have an HDMI bulkhead, this because there is not enough space to connect the HDMI cable on the bottom of the RX100. The V version will have some more space under the camera to allow the cable to go in
I thought of doing a debrief of the settings I use as I see few people that have bought this camera and have few niggles to go through and the obvious learning curve of new equipment so here we go.
Which Video Setting
It is always possible to reduce detail if needed so always shoot in the highest mode AVCHD progressive that in the menu is called PSH this records at 28 Mbps.
Which Mode to Use for Video
The LX7 has a one touch video mode that is accessible in still mode. When you press this button, even if the camera is in Aperture or Shutter priority and even in Manual, the movie clip is recorded in Program mode.
It follows that the mode to use to have full control is the creative video mode accessible through the mode dial.
Standard Setting for Creative Video Mode
I use the Shutter priority setting submenu in this mode. This is because the LX7 does not follow the 180 degrees shutter rule in video program mode.
Set your shutter speed to 1/100 for PAL and 1/125 for NTSC so that your shutter speed is double of the frame rate (1/50 for PAL and 1/60 for NTSC).
Exposure Lock Button
I never use the manual or the aperture priority mode as I find the lens fairly sharp even in macro and very small subjects. When I have changing light I point the camera to the exposure I want and the click Exposure Lock. To disable focus lock you need to go into the menu and set the button to AE lock only.
Exposure Control
I personally find the standard exposure of the LX7 underwater far too bright. So using the exposure compensation dial found by pressing the shutter speed wheel I dial down to -2/3. This is personal sometimes I even go down to -1.
ISO and Max ISO
The LX7 has a very bright lens even at telephoto end and this lens produces also a very sharp image. In the worst case of deep water with low light I found that having an underexposed but cleaner picture at ISO400 is better than letting the camera go all the way to high ISO. So in the menu I set ISO MAX to 400 or in some cases I push this down to 800. I set the ISO to Auto as the camera generally keeps it very low anyway.
Autofocus
I leave autofocus for video mode to on and I ensure that the autofocus is set to single area. Be careful as the default setting is face detection and that does not work well underwater! Multi area and tracking are not available in video mode.
Zoom
In video you can extend the 90mm lens to 180 with the iZoom and to 360mm with digital zoom. I set iZoom to on and Digital zoom to off as I have seen that the iZoom is very useful in macro and the picture quality is not visibly affected.
Metering Mode
I use multi metering for landscapes and centred weighted for close ups and macro.
iDynamic
This is a tricky setting; generally I keep it off or on Low as the standard settings clip the highlights. In doubt turn it off.
Photo Style
This setting controls contrast, sharpness, saturation and noise reduction. I use the standard setting that is a little bit oversaturated. If you do a lot of colour corrections in post processing use the Natural setting. The footage will be less saturated and a bit less sharp with less noise reduction.
White Balance
I use two custom settings WB1 and WB2 one for shooting with ambient light and the other one with lights that I only use in special circumstances.
Stabiliser
I leave this on and it does not affect the field of view.
Zoom Resume
Zoom resume has to be left off as this delays the camera ready to shoot time and ends up with missed opportunities.
Menu Resume
It is useful to leave this on.
Custom Menus
I record all my settings for shooting in ambient light in the C1 mode this has all the settings are describes and recalls the Custom White Balance 1.
I then set another menu C2-1 with auto white balance for shooting with lights and menu C2-2 for shooting with lights and WB2.
This is an example video shot with those settings and no additional lenses this is with video lights and auto white balance little to no correction in post processing.
This other video is with some grading applied and ambient light for most
Some people will recognize the Canon PowerShot A570IS, the Canon S95 and the Panasonic LX7. The first shot VGA video, the second 720p HD and the last AVCHD 50/60p. If you look carefully you can also see how the front aperture of the lens gets progressively bigger and bigger.
Year after year compact cameras are becoming more powerful having electronics that allow higher resolution and image quality, I think the GoPro is a demonstration of what you can do pushing the limits of simple optics using ultra integrated electronics.
Compact cameras like the A570IS used to have lenses that would be equivalent to a full film camera with a 35mm lens, this has been a popular choice for long time. Some years go Olympus and afterwards Canon, Sony and others started offering plastic housing for those cameras to take them underwater this was the start of consumer underwater photography.
There are however a number of challenges using a 35mm camera for underwater photos and the most obvious is the field of view, because of the magnifying effect of water those compact had really narrow coverage that limit them to close up of macro shots. However a little time after wet wide angle lenses come into the market and offered range of coverage up to 100º some manufacturers also produced seme-fisheye lenses with coverage of 165º the most well known being the Inon UFL165AD.
All went well and compact camera photographer could take wet lenses with them and in one dive take pictures of a nudibranch as well as of a wreck thanks to removable lens in water.
Then the consumer market pushed manufacturers to increase field of view so it was the start of 28mm equivalent cameras like the Canon S90, this format is still very popular with the Canon G series and the new Sony RX100, in addition to that there was more and more demand for extended zoom so that the camera could be useful in all situations, today is not uncommon to have compact cameras with 20x zoom.
The introduction of 28mm equivalent cameras meant that the cameras would vignette with a lens designed for 35mm so wet lenses had to be readjusted and re-designed. The extensive zoom by this you mean over 4x meant that the wet lens would be so far from the camera lens that effectively no wet lens would be useful, this has been the curse of the Canon G series a great camera that never had any good wet wide angle solution until very recently with introduction of zoom wide lenses from Inon.
The other bad news is that at 28mm the flat port of the housing introduces already pincushion distortion and fringing as we can see from this photo
Bare Port RX100 wide end
We can see the effect of pincushion distortion in the deformation of the shape of the slate, it is quite apparent when you look at the lines and how skewed they are you can also see a purple tinge to it.
A wet wide angle lens not only expands field of view but also corrects pincushion distortion and chromatic aberration, this is the key reason why some form of wide angle is always required.
In the last two years manufacturers have come up with 24mm equivalent cameras, such as the Canon S100, Olympus XZ-1 and Panasonic LX5, unfortunately those camera have even more pincushion distortion, and for this reason should never be used in water at wide end to take pictures without post correction that can be quite hard to achieve so as a matter of fact many people live with ugly deformed pictures.
Those cameras make it even more difficult for wet lenses to work and to date there are very few lenses that work without vignetting, those lenses require a wide aperture on the side of the camera also to allow larger and larger image sensors that camera makers use like the LX7 in the feature image.
LX7 Flat port Wide end
To give a demonstration of why is a bad idea to take your 24mm camera in water without any wide angle lens we just have to look at the picture above. Shocking!
So with 24mm cameras we are stuck, the wet lenses with dome that work well with the 28mm cameras end up vignetting so badly that all the advantage is lost when you zoom in. In effect with a 24mm camera all we can aim is 100-110° field of view that for stills is not really that much, there are exceptions like the Canon S100 but in general terms options are limited.
Camcorders on the other hand always had a range between 30mm and 150mm if not more with extensive zoom, you would have needed a dome port atteched to the housing that would allow zoom to give the same functionality in water or diopters to zoom at close range.
A user of a Sony camcorder in a gates housing would be looking at 30mm like a very wide lens!!! Typically you need fathom lenses to reach 90° and lenses with 110° coverage cost $4,000+ so definitely not affordable to the average shooter.
Where does this leave us? Well surprise good news for all 24mm compact users that want to shoot high quality video there are plenty of options that don’t break the bank!!!
When zoom cameras like the Canon G7 come into the market some manufacturers like Fantasea, H2O tools, Ikelite started producing wet domes.
Those domes are made of two lenses with an air space and if set really close to the housing port have the effect of restoring the original field of view of the camera. Now for a 28mm equivalent like the Canon G series this is not that exciting as we are talking about 75º diagonal but for the 24mm camera users we are talking of 84° diagonal coverage, a value that a professional camcorder user would be very happy with. In addition you can also use the zoom which means that if the camera has really close focusing distance a wet dome is all you may need for 85% of shooting circumstances.
So when I got the Panasonic LX7 this is what I was planning and I got a Nauticam Wet-Mate this is the slate from before at the same distance
LX7 with Nauticam Wet-Mate
As you can see the image is not only wider but also rectilinear no barrel distortion as if we were shooting on land.
Personally I do not like barrel distortion for video, and this is the reason I don’t like videos shot with fisheye lenses so this suits me fine. Of course 84° are not really wide for large wrecks, whale sharks or similar for those situations you still need a wet-wide angle lens but the Nauticam Wet-Mate costs $250 plus taxes so you really can’t complain.
At telephoto the flat port does not have pincushion distortion but it could be painful to remove the wet mate in the water the good news is that with the wet-mate you can still make use of the full zoom so if your camera has a really short focusing distance this may be good enough for most situations.
To finish off this is the Nauticam Wet-Mate, there are as I said similar products made by other brands. It is build of Aluminum with two lenses with a sealed airspace, construction seems very similar to some fix products.
Nauticam Wet Mate
So if you have a 24mm compact camera that takes HD video and you are frustrated with still there is a whole world in front of you with those dome adapters you could be well set for underwater video at very little investment.
Those are just some cameras that have high quality HD video the list is of course longer:
Canon S100/S110
Panasonic LX5/LX7
Olympus XZ-1/2
And the good news is that you do not need an aluminum housing just something that takes a wet dome, Ikelite for example has 67MM thread on most housings for those cameras.
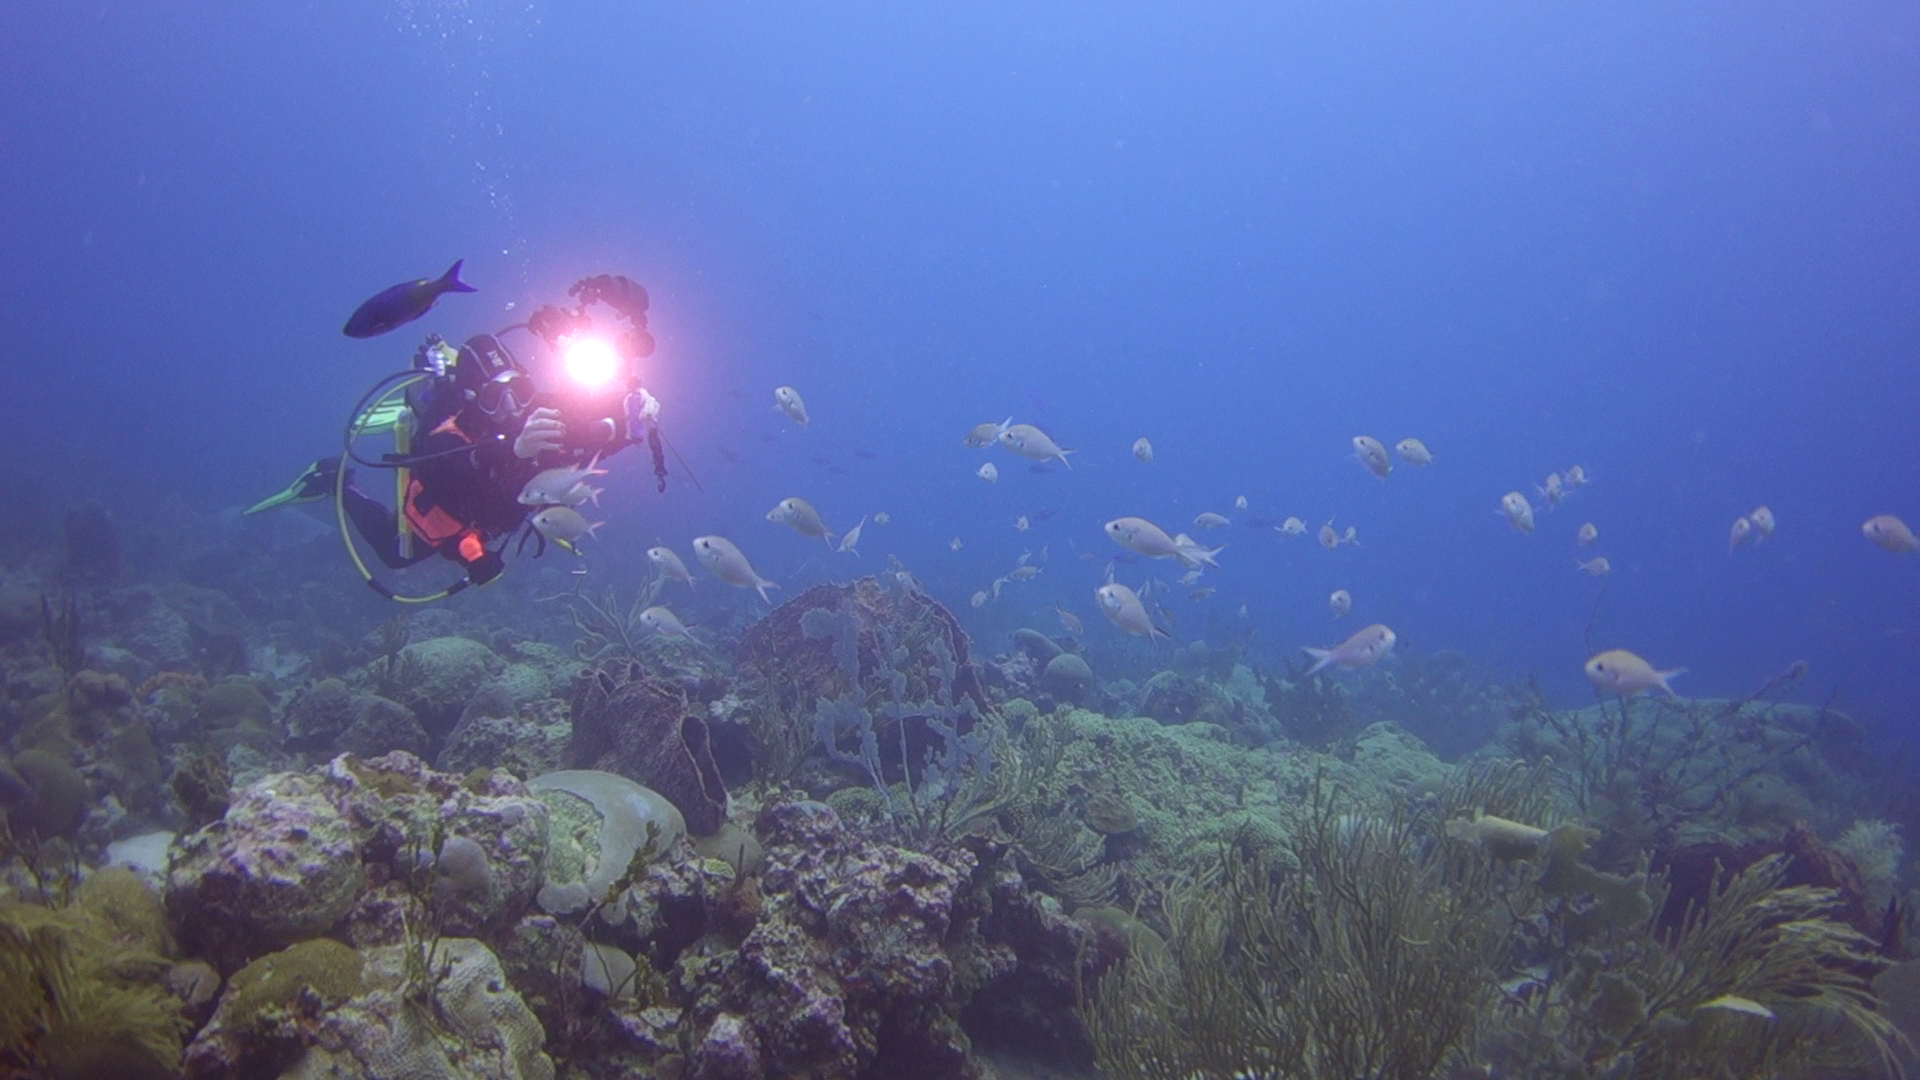
My previous testing of underwater video with the Sony RX100 has been quite successful I was initially pretty hard on myself but I would say the performance was as good as it could have been taking into account the conditions
Most of my videos considering the conditions look better than dedicated single chip camcorders on the market and as good as some badly shot 3-chip camcorders
It is worth noting that a decent camera in a good housing like Gates or Light and Motion costs in excess of $3,000 without any lenses or lights, whilst with the same amount of money you can get a complete set up for a high end compact camera with included two sola 1200 and various lenses.
The restrictions of a still camera though still apply at least to the Sony RX100 and those are:
No use of zoom at wide angle with wet lenses (problem of set up not specific to RX100)
Clumsy operation of functions like white balance
having to change wet lenses multiple times in the same dive because close up performance is average
So is there something else out there that at similar or lower price point can get us high quality underwater video?
I believe there is and it is the Panasonic Lumix DMC-LX7, this camera has a bright f/1.4 lens with good sharpness, a 24mm lens and more effective ergonomics than the Sony.
Obviously I am talking about video here as I do believe the RX100 is the camera to beat in terms of compact for still pictures. For video especially at wide angle we are shooting mostly with ambient light and the corner softness of the RX100 does show with wide apertures. So whilst for your photos at close focus wide angle with a strobe the camera does an outstanding job for an HD video at 1080p the image does not look that crisp.
I am glad I got the RX100 as this is going to be the next camera for stills once I abandon the Canon S95.
Ok moving on to the Panasonic LX7 I did a little stress test pointing at the fireplace in low light to see how the two cameras respond, the clips are done 1 minute after the other so have similar ambient light available. It is clear that the LX7 is a winner in virtue of the brighter lens not only that the wider 24mm lens against the 28mm of the Sony shows a clear advantage.
Now what else is good about the LX7 the major feature are definitely the ergonomics, let’s have a look at the rear controls.
Panasonic LX7 rear buttons
The first button of interest is the AF/AEL lock that you can configure to lock focus, exposure or both. Now having this with one touch means that any shot of moving fish in front of the camera or a dive into a cave will resist the camera hunting for focus or trying to change the exposure.
The other button of interest is the WB you can recall and set white balance in any non automatic mode including video, in addition there are two custom settings for white balance and you can alter the tint after setting that is great.
The ISO button is also very useful but mostly for picture and a half press will tell you what combination of aperture, shutter and ISO the camera would shoot at.
This also brings one of the weaknesses of the camera and is the camera’s video Program submode. For some reason this behaves like the still camera program mode so does not take into any account the 180 shutter rule, so be careful and never use the camera in Creative Video mode with the Program submode as results will not be good.
So how should you shoot video with your Panasonic LX7? Simple you should shoot in shutter speed priority or in specific cases in manual.
I think the shutter speed priority is the simplest starting point, so let’ assume you are in the PAL system where video is 25 frames per second you should set shutter priority and speed of 1/50 for wide angle with ISO in Auto. Depending on available light the LX7 will keep the lens at widest aperture and ISO until needed and then start closing the lens, this is fine for us as it is better to have lower noise image than huge depth of field.
If you want to influence depth of field for example in a macro situation when you are zooming in a lot you can take a half press and set the ISO manually until you have the aperture you like. The LX7 sets ISO in 1/3 of f-stop so the fine-tuning possible is incredible.
I would not trust the camera aperture priority mode as the LX7 will quite happily reduce the shutter speed all the way to 1/30 of a second before increasing the ISO and this would give blurred footage.
Shooting macro with the LX7 may require you to operate at double frame rate modes of 50 or 60 fps in that case again in shutter priority mode or manual start with a shutter of 1/100 or 1/125 and pump up your lights until you see the aperture closing. If the image is still soft increase the ISO manually to get where you want to be take into account that this camera has really a lot of corner sharpness so in general it is not needed to get to small aperture as much as it is with other cameras.
So which housing for the LX7? I have done a quick review of the Nauticam in the unboxing video here
This housing is really impressive and makes the camera actually even easier to operate when outside the housing!
Now with all those good things why is the LX7 not as good as the RX100 for still pictures:
Too wide lens: 24mm makes it difficult to get wide angle lenses and impossible to use a fisheye
Resolution is only 10MP in RAW pictures this shows, not in video though
Smaller sensor again the performance at the same ISO is better with the RX100 when you have a strobe
For video some of those drawbacks become actually plus points:
The 24mm lens when coupled with the Nauticam wet mate dome has 84° field of view in water that is good for most situations
Smaller sensor means more depth of field at same aperture
Another factor to consider with regards to the LX7 is the 1cm minimum focus distance, this means that diopters are only needed for super macro very small subjects as the capture area of the camera is incredibly small less than half the RX100.
Other plus points of the LX7
Neutral density filter, -3 f-stops means the camera will not jump to shutter speeds of 1/1000 in bright sunlight but stay at the normal speed with the lens wide open
Stabiliser: the LX7 optical stabiliser is rock solid and gives the same performance of the RX100 active stabiliser without any cropping of reduction of the field of view
A normal Mp4 1080p video mode at 20 Mb/s bitrate that is great for general purpose wide angle
In the next post we will have a look at the Nauticam Wet Mate and the diopter that I have chosen for the LX7
I have a been a bit busy lately fighting with the MTS video files that the RX100 produces, I finally have an automated tool that converts all files into MP4 ready for iMovie that works a breeze.
Anyway this post is not about that workflow but about housing choices. I have received quite a few inquiries about housing choices and although I am not associated with any manufacturer or reseller I thought it would be a good idea to share my thinking.
When I had to choose a housing for the Canon S95 I chose a Recsea, in fact my buddy uses it, the latest WHC-S95D for still pictures and it looks pretty much like this.
A few bits got me frustrated with the Recsea housing one was the rear control.
This may look great but I have been frustrated when underwater the pressing of the buttons was mistaken for rotating the dial itself.
The other thing that I thought was pretty poor was the cold shoe for the focus light, this is a small piece of metal and the screws need to be treated with thread lock if you don’t want to lose it underwater.
Not to mention the mode dial that is really stiff.
Finally the bottom of the housing where the screws go is made of steel threads, in fact you should be careful not to leave an aluminum tray in salt water as it might corrode the housing. This may seem unlikely but I have seen other Recsea housing with huge speckles that mean corrosion.
Recsea produced a housing for the Canon S100 that introduced a front ring like the one on the camera itself but the housing remains the same of the S95 for the other features.
The choice of the Recsea housing over others at the time was mainly because it was easier and more cost-effective to get adapters for the Inon AD lenses I have.
So when the new housing for the RX100 came out, first on the market from Recsea, I studied carefully the pictures to see how specific issues had been addressed. In essence the housing for the RX100 is the same of the Canon S100 and has the same annoyances that I did not like with the S95.
So I waited until Nauticam came out with their product, which is in fact made by the same plant that did the Fisheye-fix for the S90/95/100 we can recognize the same features in this housing.
The first is that there is no integrated rear dial, the buttons are separated from the rotation, this means the housing is very precise and there is never confusion in button presses and response from the camera.
The second is the top of the housing itself, the mode dial is smooth and the cold shoe is top quality as it was the fix s100.
The cold shoe is robust and takes easily not only adapters for 1/2″ loc-line but also 3/4″ which is great.
Finally as it was on the fix housing the bottom of the housing has got two zinc plates to act as cathodes and avoid corrosion.
There are other two incredible plus points of the Nauticam housing:
the moisture alarm, I don’t recall seeing one for a compact but the Nauticam has got it and it works as well
The housing has an M67 thread that allows you to mount lenses without adapters
Personally I don’t like M67 wide angle options for the RX100 as those are heavy lenses in water however if you already have them than you are sorted.
What about the Ikelite housing? Ikelite had issues of sticky buttons with the Canon S100 so for the Rx100 they have gone back to a large form factor. Personally I don’t believe a polycarbonate housing of such size is very appealing however if money is lacking this is the only choice at the bottom. It does not come anywhere near the quality and features of Nauticam or Recsea.
There is also another housing from Patima that has just been released, I have just seen the pictures and it does not look particularly attractive, the closing latch looks ancient, the rear section has button and dials too close and the control ring control placed on top of the camera is just unpractical. It is priced at source at $699 so 27% cheaper than the Nauticam, but this comes at a price: there are plenty of design shortcuts that may create usage issues underwater.
In conclusion the Nauticam I believe offers the best quality and value for money for the RX100, with the exception of the front ring being operated in a traditional mode I don’t see any faults with this set up and I would recommend it for both video and stills, if you don’t have that amount of money and you want to use your RX100 just for video then the Ikelite is worth a try, but not if you want to use the camera also for stills. Nothing specific to Ikelite but transparent housing give too many issues with strobes to even bother.