I have been fairly busy with work and actually there have not been many things to look at on the digital compact market until Photokina.
Possibly the most interesting news is the release of the Panasonic DMC-LX100 which is coming in the UK stores on the 20th of October at £699 list price the same of the Sony RX100 Mark III.
Looks like the Panasonic will beat the RX100 Mark III quite easily on the video compartment due to the ability to shoot 4K the few samples I have seen compared to the GH4 show that with a normal lens the two cameras give pretty much the same result
Moreover the fact that the LX100 has a 12.8 Megapixels sensor with constant diagonal field of view means that at 16:9 for video the resolution for stills is 11 Megapixels and the crop to get to 8 Megapixels of 4K is minimum.
In fact the camera reports a 26-81mm focal length equivalent in movie mode at all resolutions in video. This is different from the Panasonic GH4 where the 4K crop includes considerable reduction of the field of view.
This has a positive and a negative implication, the positive is of course the field of view at wide, the negative is that the zoom of only 81mm means little magnification in macro.
The LX100 has a close focusing distance of 30 cm and this means to achieve 1:1 you need at least 9 diopters so an achromatic lens like the subsee 10 or the Inon UCL-100 is what is required, this means a working distance around 3″ from the back of the lens which really means 2″ from the front a bit close similar issue of the RX100 Mark III
However with 4K there is a lot of resolution to play with and looking at the manual it seems iZoom is available in all modes so maybe even a weaker diopter and a bit of iZoom produce good results. Most likely with a camera like this one a Subsee 5 with iZoom is more useable than a 10 diopter but this needs to be confirmed.
Some people will think why bother with all of this as maybe there will not even be a housing, well some sources tell me that my favorite housing manufacturer will in fact produce a unit for the DMC-LX100
I have not handled the camera so I do not know how the zoom works, the lens seems somewhat similar to the LX7 and therefore could work with the Inon UWL-H100 but this needs to be confirmed.
Reading the instruction manual the only disappointment is the lack of an ND filter, Panasonic has put a 43mm thread on this camera lens, surely more flexible than the electronic ND filter however this was quite a good feature underwater.
Also Auto ISO work in manual so you can leave your desired shutter speed and even aperture for your subject and rely on the camera large sensor to do the rest. The LX7 worked quite well even at f/1.4 so I am not sure this will really be needed however with a base ISO of 200 and a micro 4:3 sensor this camera could work just fine at f/4 pretty much at any depth we shall see
So it is only a matter of waiting to see what the housing will allow or not.
For all the still fans out there, this camera is going to be disappointing for macro worse than the RX100 Mark III my recommended set up remains the Sony RX100 Mark II for wide and close and decent macro, super macro is out of range with a 1″ sensor but this is another story.
If you want to understand why check this graph from dpreview
Following from my previous post I managed to get together a clip out of the 5 dives I did
The first day was somewhat plagued by visibility a bit lower than the norm for the location but the second day was fabulous
For this trip I brought with me the Inon UWL-H100 and the red push on filter from deep roof H20 and the Inon UCL-330 as I was expecting medium size fish and nothing really small
Here is the outcome
I am quite happy how things turned out so let me share the settings with you
First I shot most of the footage in 25p AVCHD mode only some small sections are shot at 50p and actually I did not need to slow down any of the material.
For the wide shots I used steady shot in normal mode and shutter priority at 1/50th. With the filter on I had auto white balance with tint correction G2 A1. I noticed that the camera was giving red tint in some situation and so added a bit of green back. The Amber correction instead is for the RX100 itself the camera does not have vibrant yellow and is a bit blue.
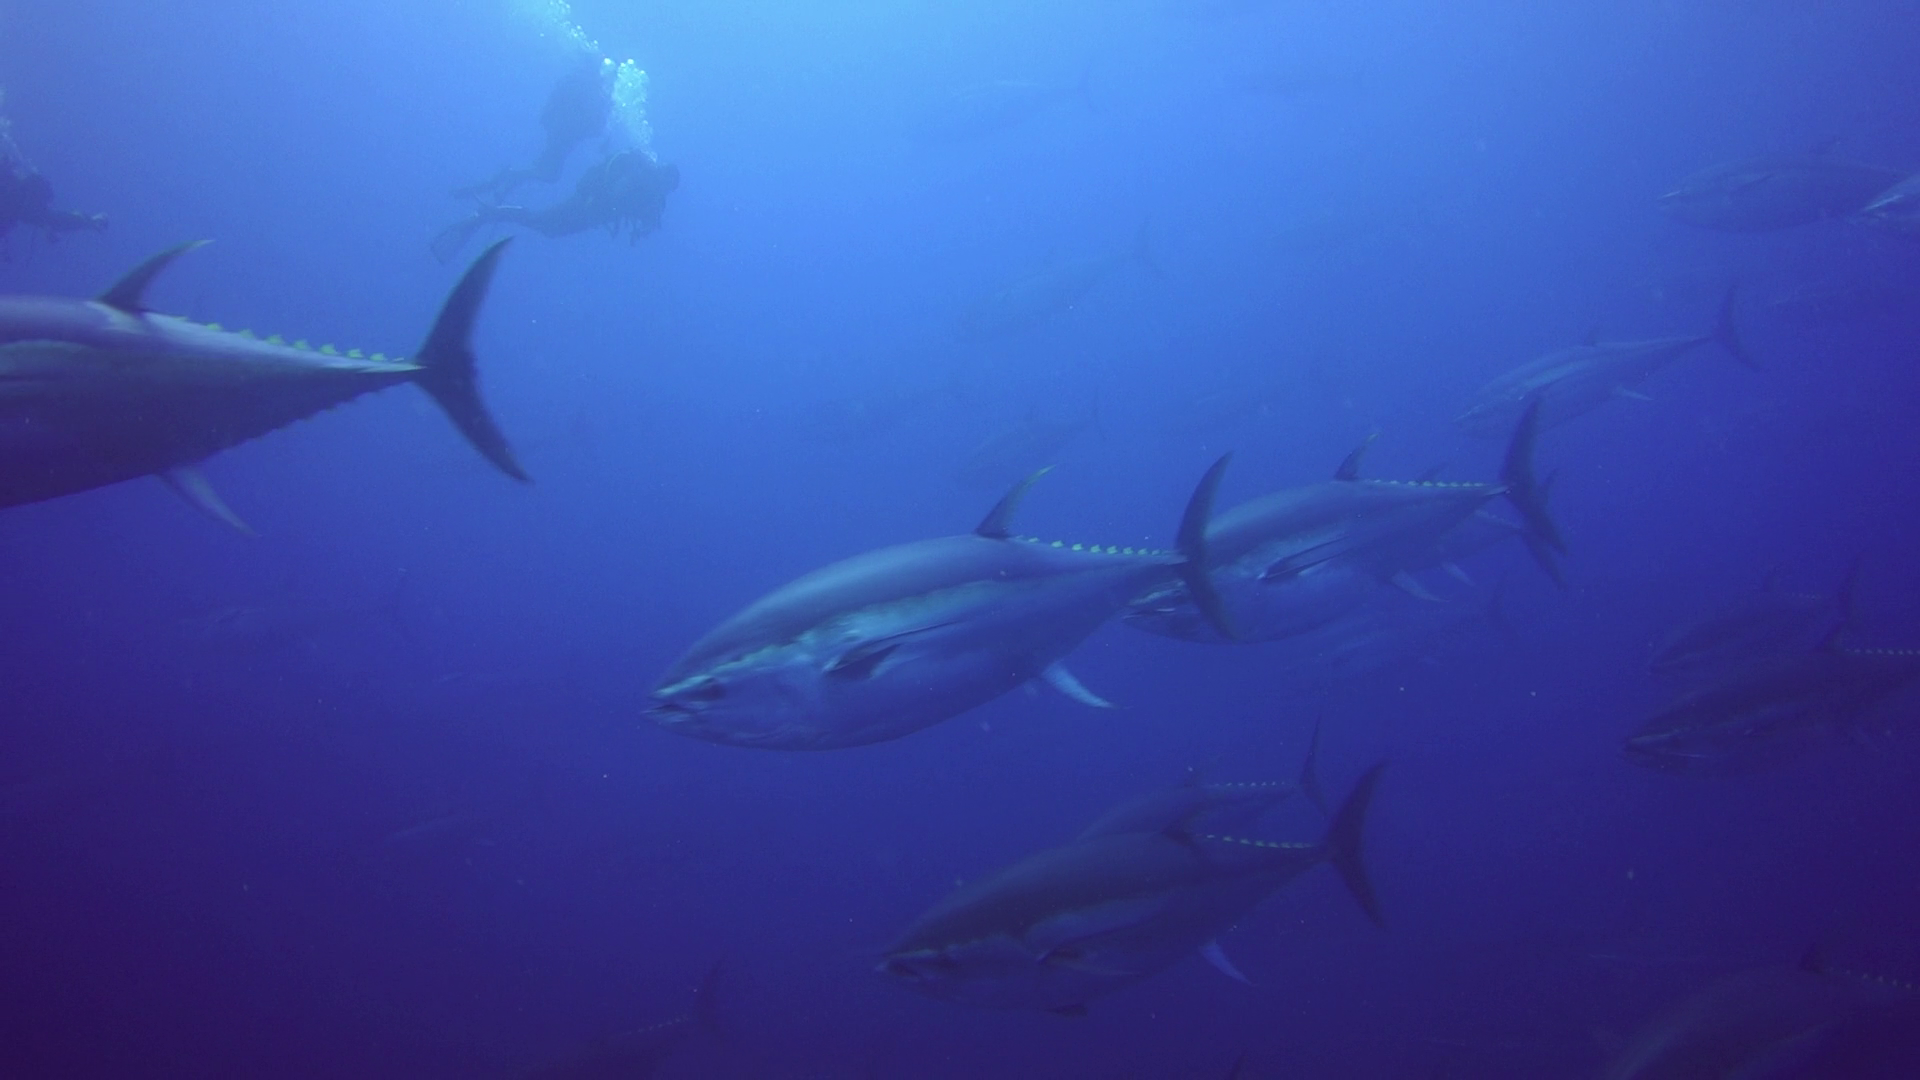
Tunas – AWB with filter
For the first time I use creative mode changing the standard contrast to -3 in order to prevent crushing of blacks.
Exposure was set all along to -1/3 and metering to multi area with AUTO ISO limited 160-800.
I think the results are so good that in fact I have performed no colour correction to any shots in ambient light.
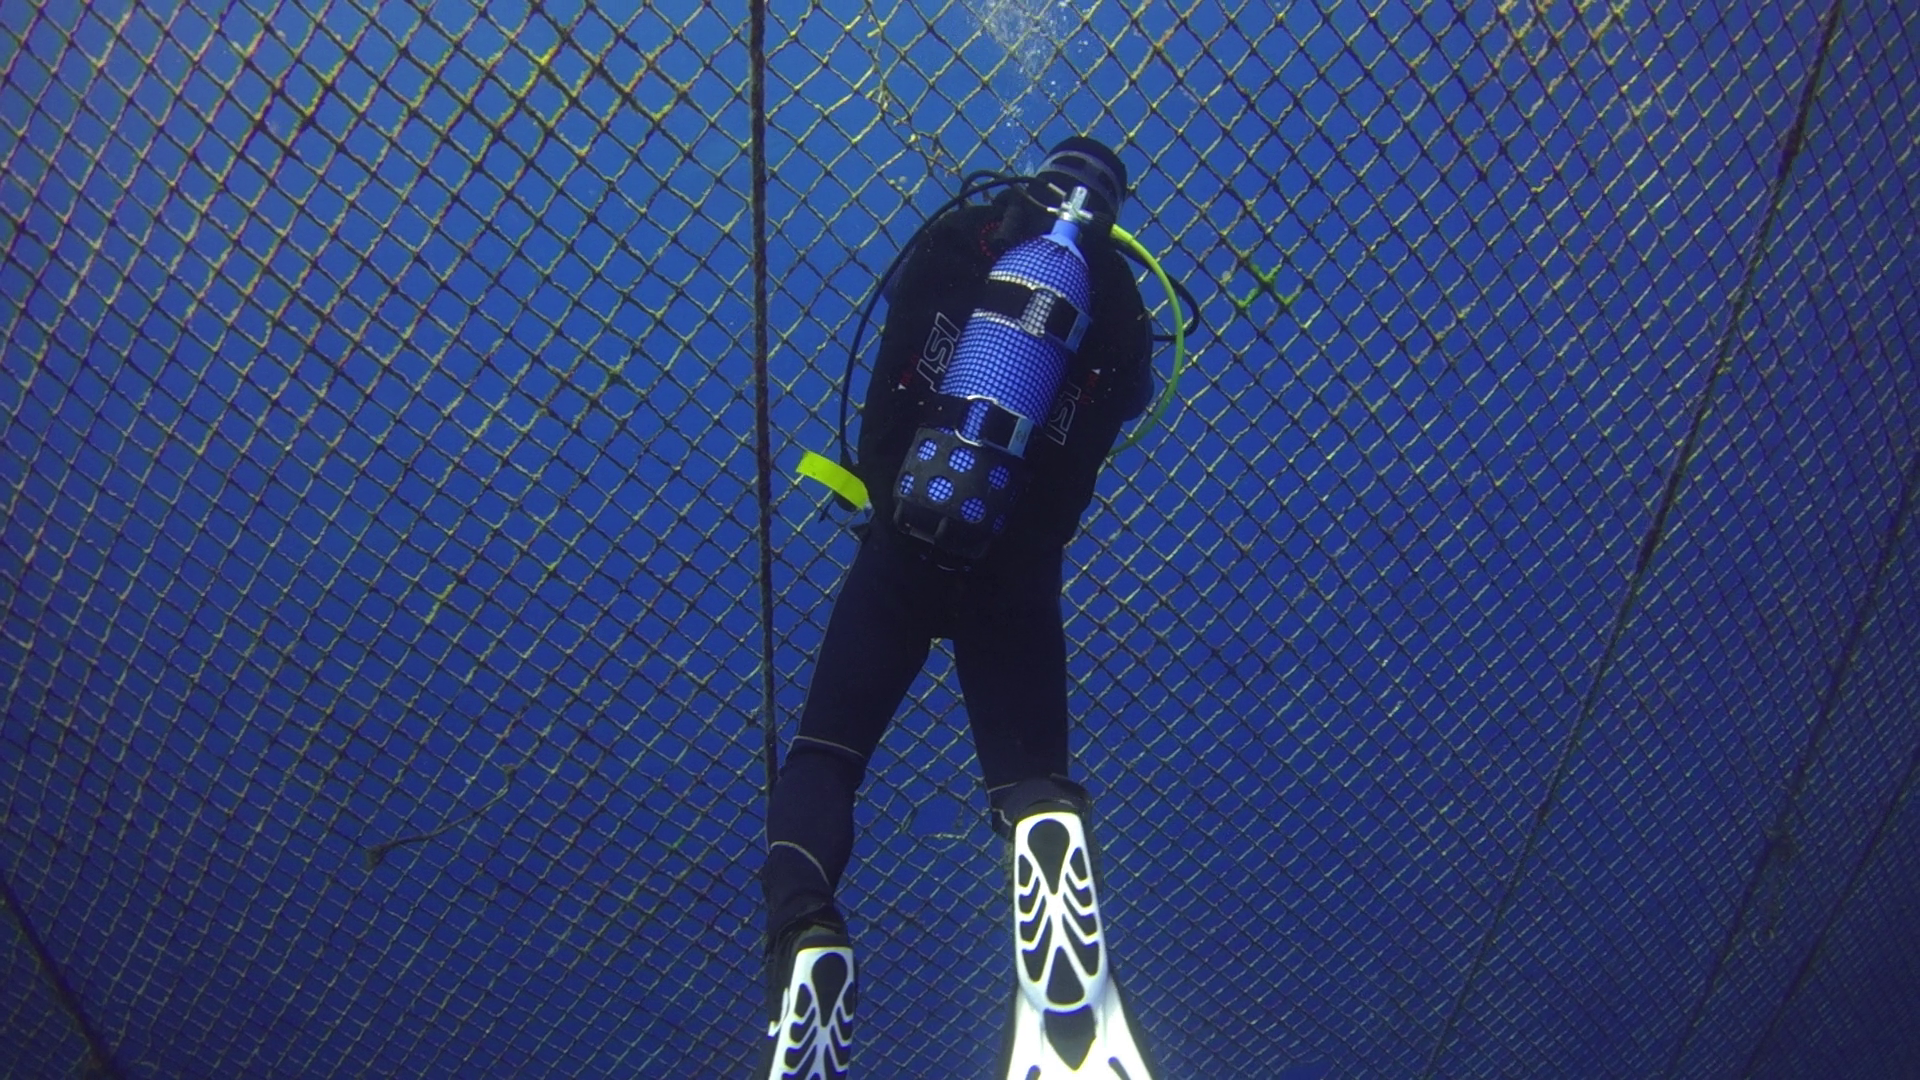
Opening the tuna farm – AWB with filter
For shots with lights I set up first colour temperature to 6500K and A1 to match the lights but then in some of the far shots this resulted a bit cold so I adjusted very slightly in post the temperature.
Seahorse – AWB UCL330
Only 40″ are adjusted in the whole video in essence is as shot and the editing took me half hour.
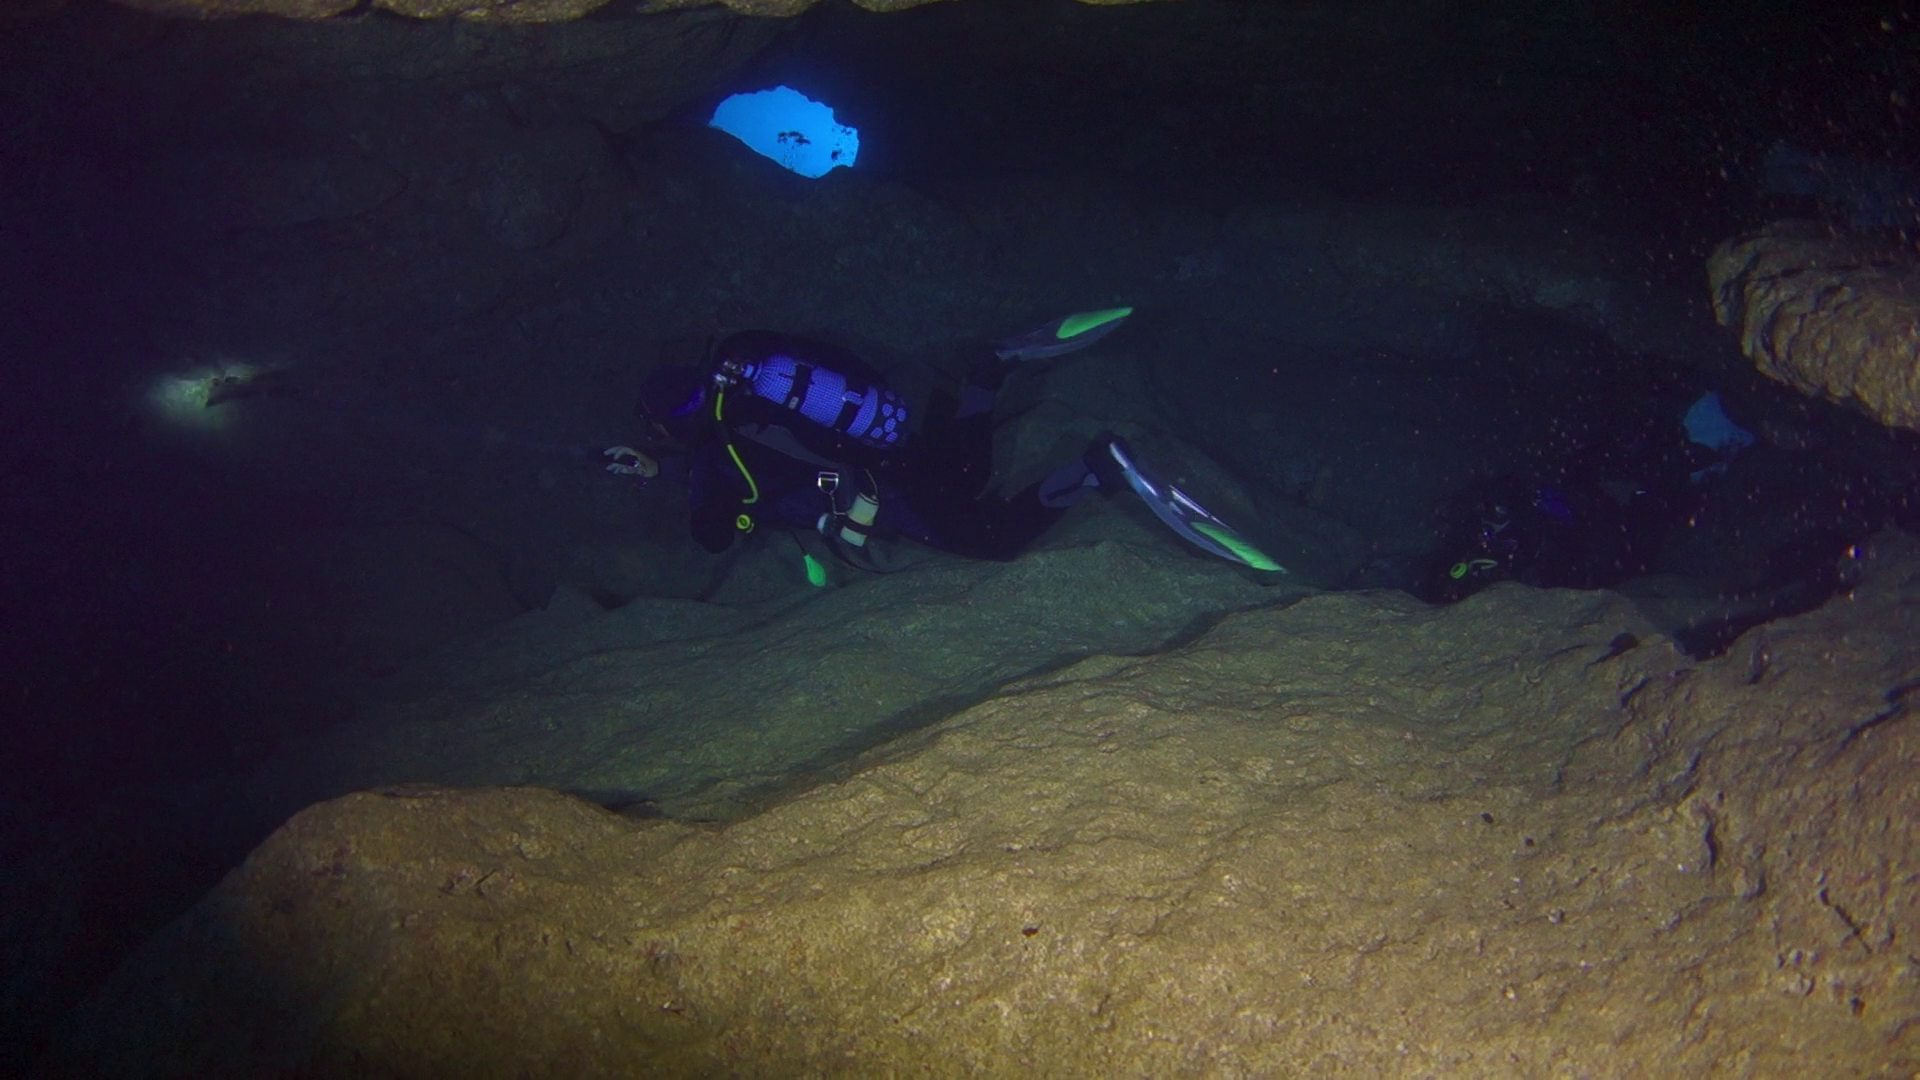
In cave – AWB no filter
I did a bit of analysis and the camera was operating for most at ISO200 with aperture around f/3.5 – f/4.0 which is really the sweet spot of the lens.
I did have some challenges using the UCL330 for some nudibranches that really required a stronger lens so they look a bit small, there was also surge so I had to fight with focus problems but all in all very happy.
Nudibranch – AWB UCL330
The longer working distance of the UCL330 (20-30 cm or 8″ to 1′) proved challenging on walls as you are too far to hang on to anything or use a stick. I will bear this in mind in the future.
For the close up shots I used steady shot active.
I also wanted to say that a few times the camera did manage to white balance properly however the results were not exciting and frankly not worth the hassle. Using the filter is just so much better with the auto white balance.
I receive so many queries about equipment that I thought I would put some of my items on sale.
My cupboard is near enough to explode and I need to streamline the equipment I have. Currently I have 3 strobes, a huge selection of ball and clamp arms, 3/4 and 1/2 locline arms, float arms, floats, video lights, tray bases, around 15 clamps and some 6 macro wet lenses and 3 wide angle wet lenses with 3 different mounts.
I guess it is time for a clear up so I will add a section with items on sale where I will list some of the combination items.
The idea is to provide a full set of lenses or a tray + float solution as those seem to be the most asked for items in my set up.
So if you look on the menu you will see the link Sales items with details of the various sets. I can also sell the items individually but I think this makes little sense as I’d rather do that on ebay.
Many people read my posts and then go to gear shops but there there is always a little mistake or problem getting the whole set up from here you avoid that. I priced the items based on 50% of retail UK price and I would ship to UK and Europe, other overseas will attract import duty so it is not worth it in my opinion.
If there is anything you like use the contact form on the relative page to inquiry
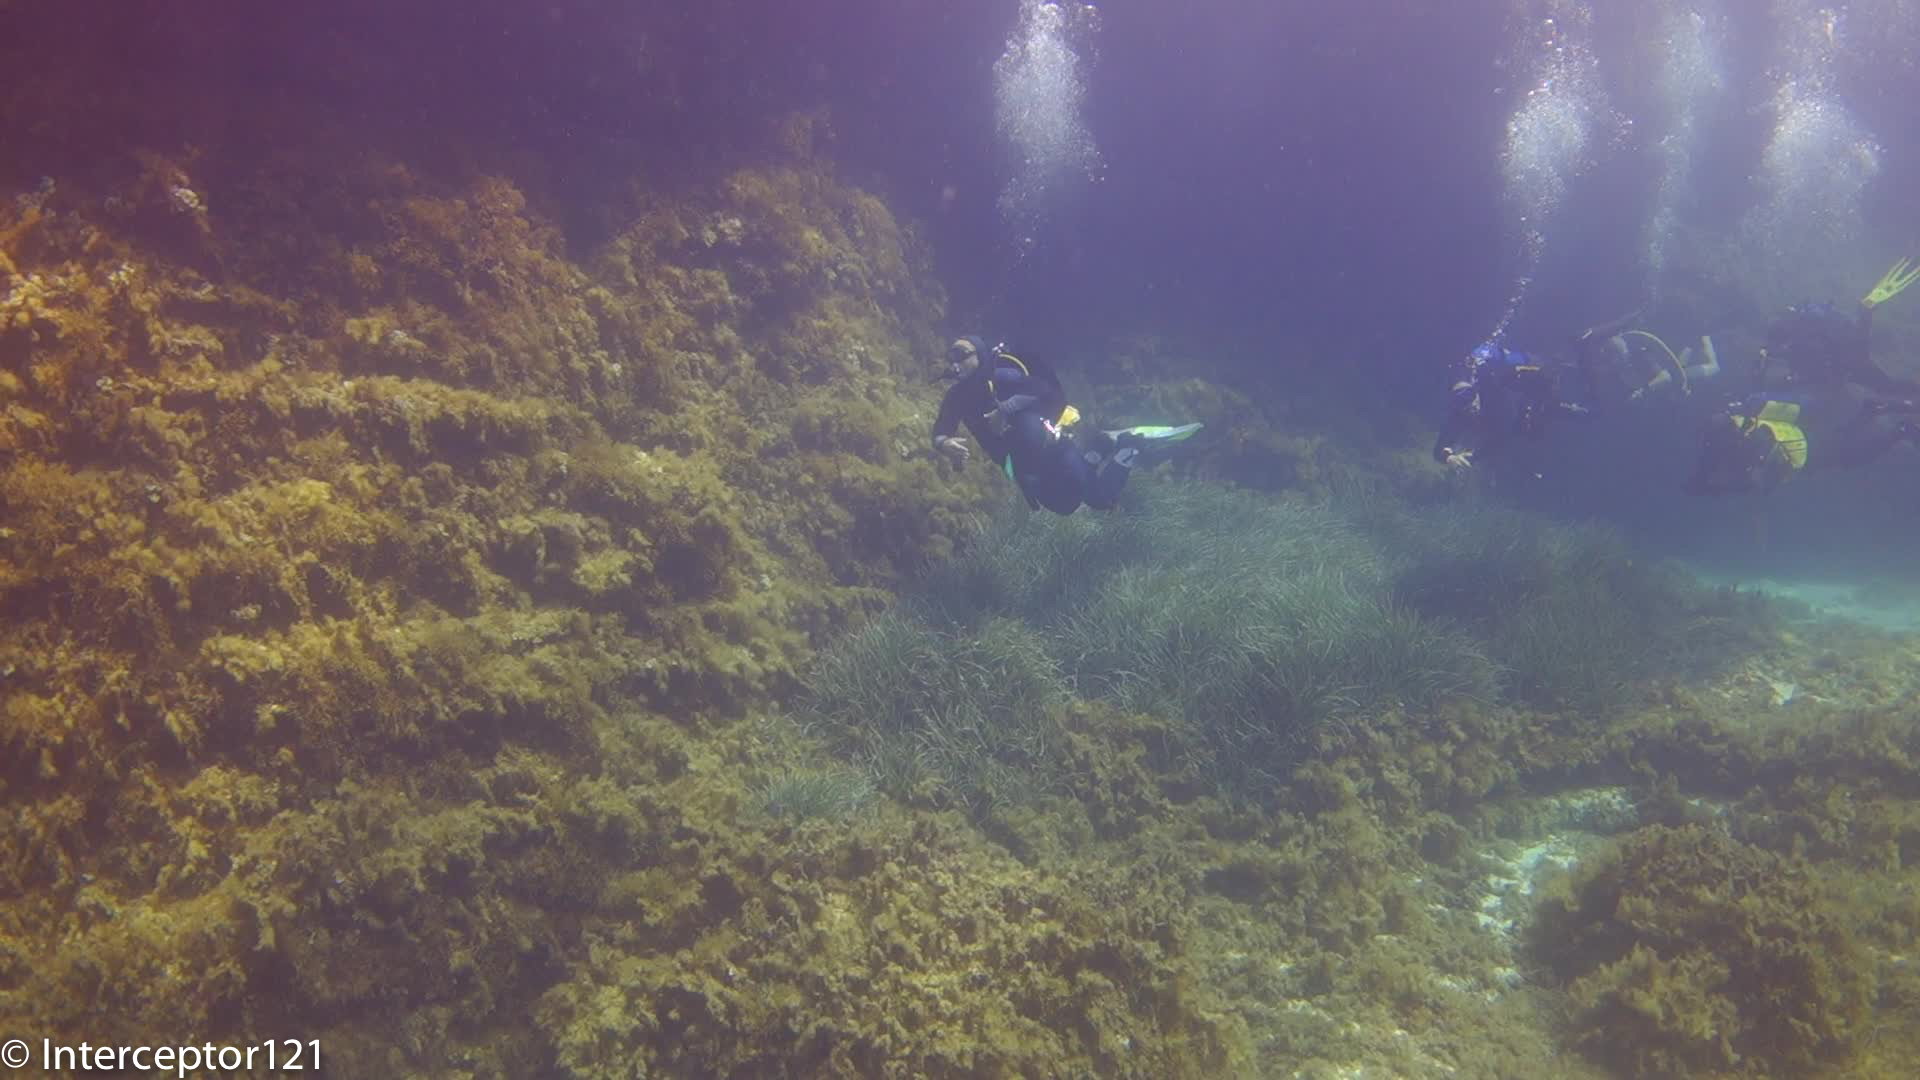
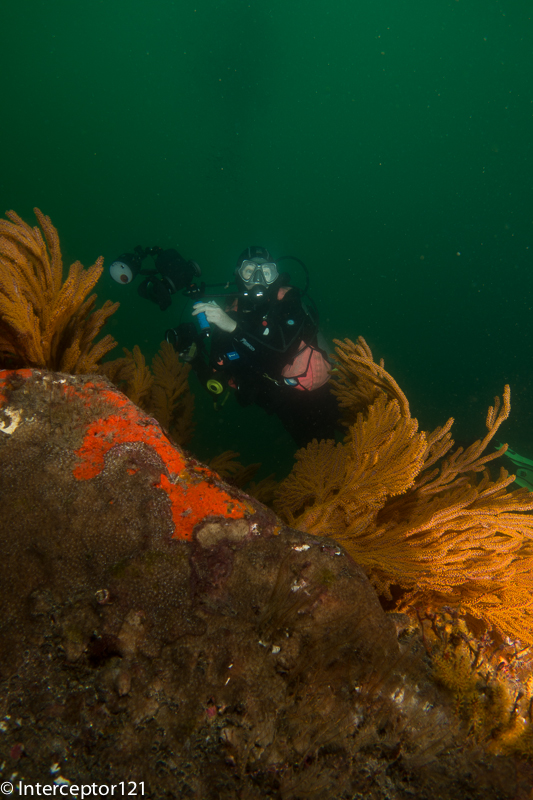
I am currently in Malta for few days relaxing and I manage to squeeze in some dives. The Mediterranean sea is nothing sensational (from a pure diving point of view) but does offer clear water, and some brisk thermoclines, and a combination of algae, blue water, caves and silvery fish that is challenging on the dynamic range of our little RX100.
The purpose of this trip is mostly to refine the video settings and go more in depth in few topics. I wanted to try specifically the following:
Metering modes
Creative modes
Stabiliser modes
Tracking focus
Medium size fish portraits
White balance
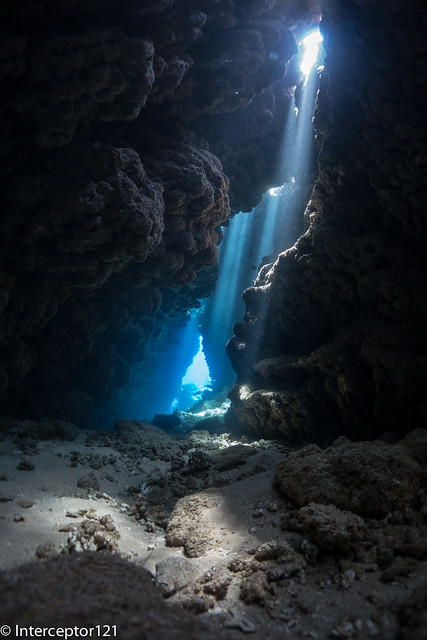
Caves and low light
Some of my settings will be the same and I am not intending to changed them those are:
Auto ISO: 160 – 800
DRO: Auto
Starting off with metering, the first attempt was to try and use the camera on 0 exposure compensation with centred weighted average metering.
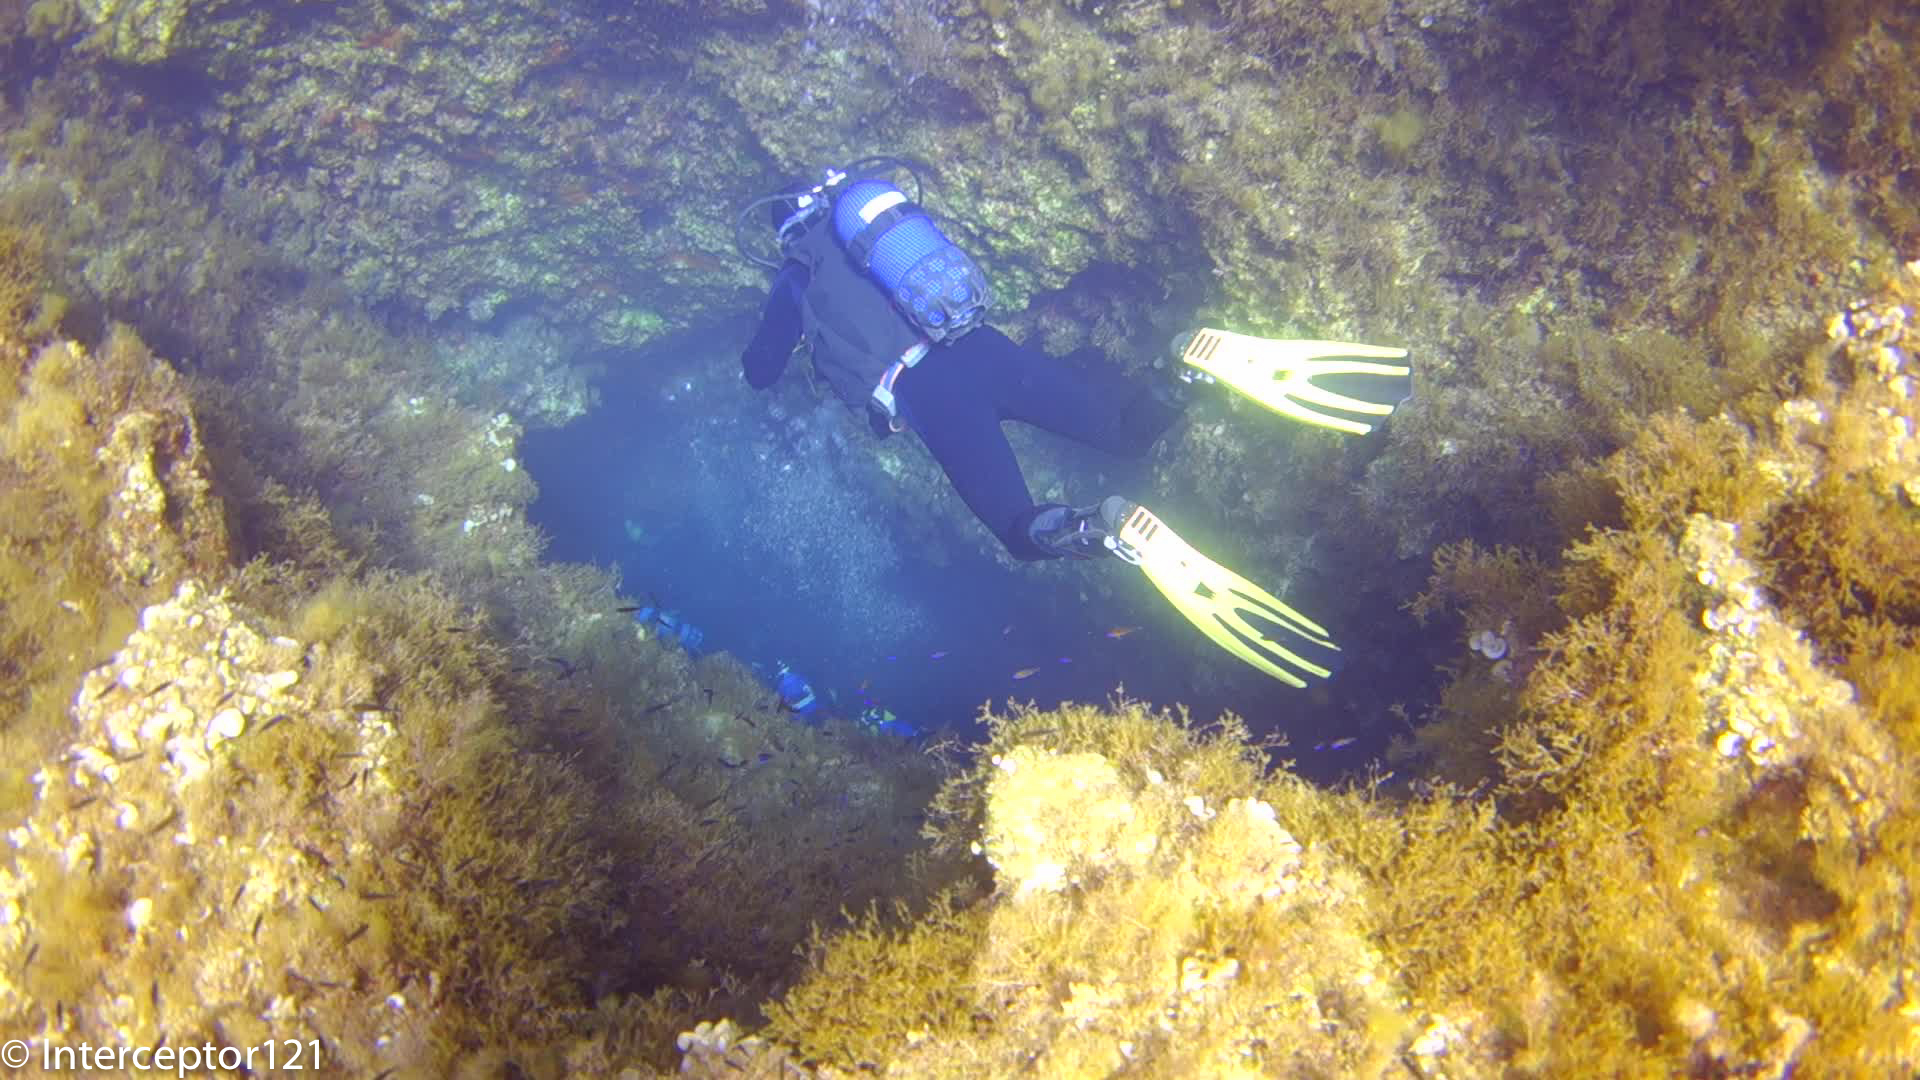
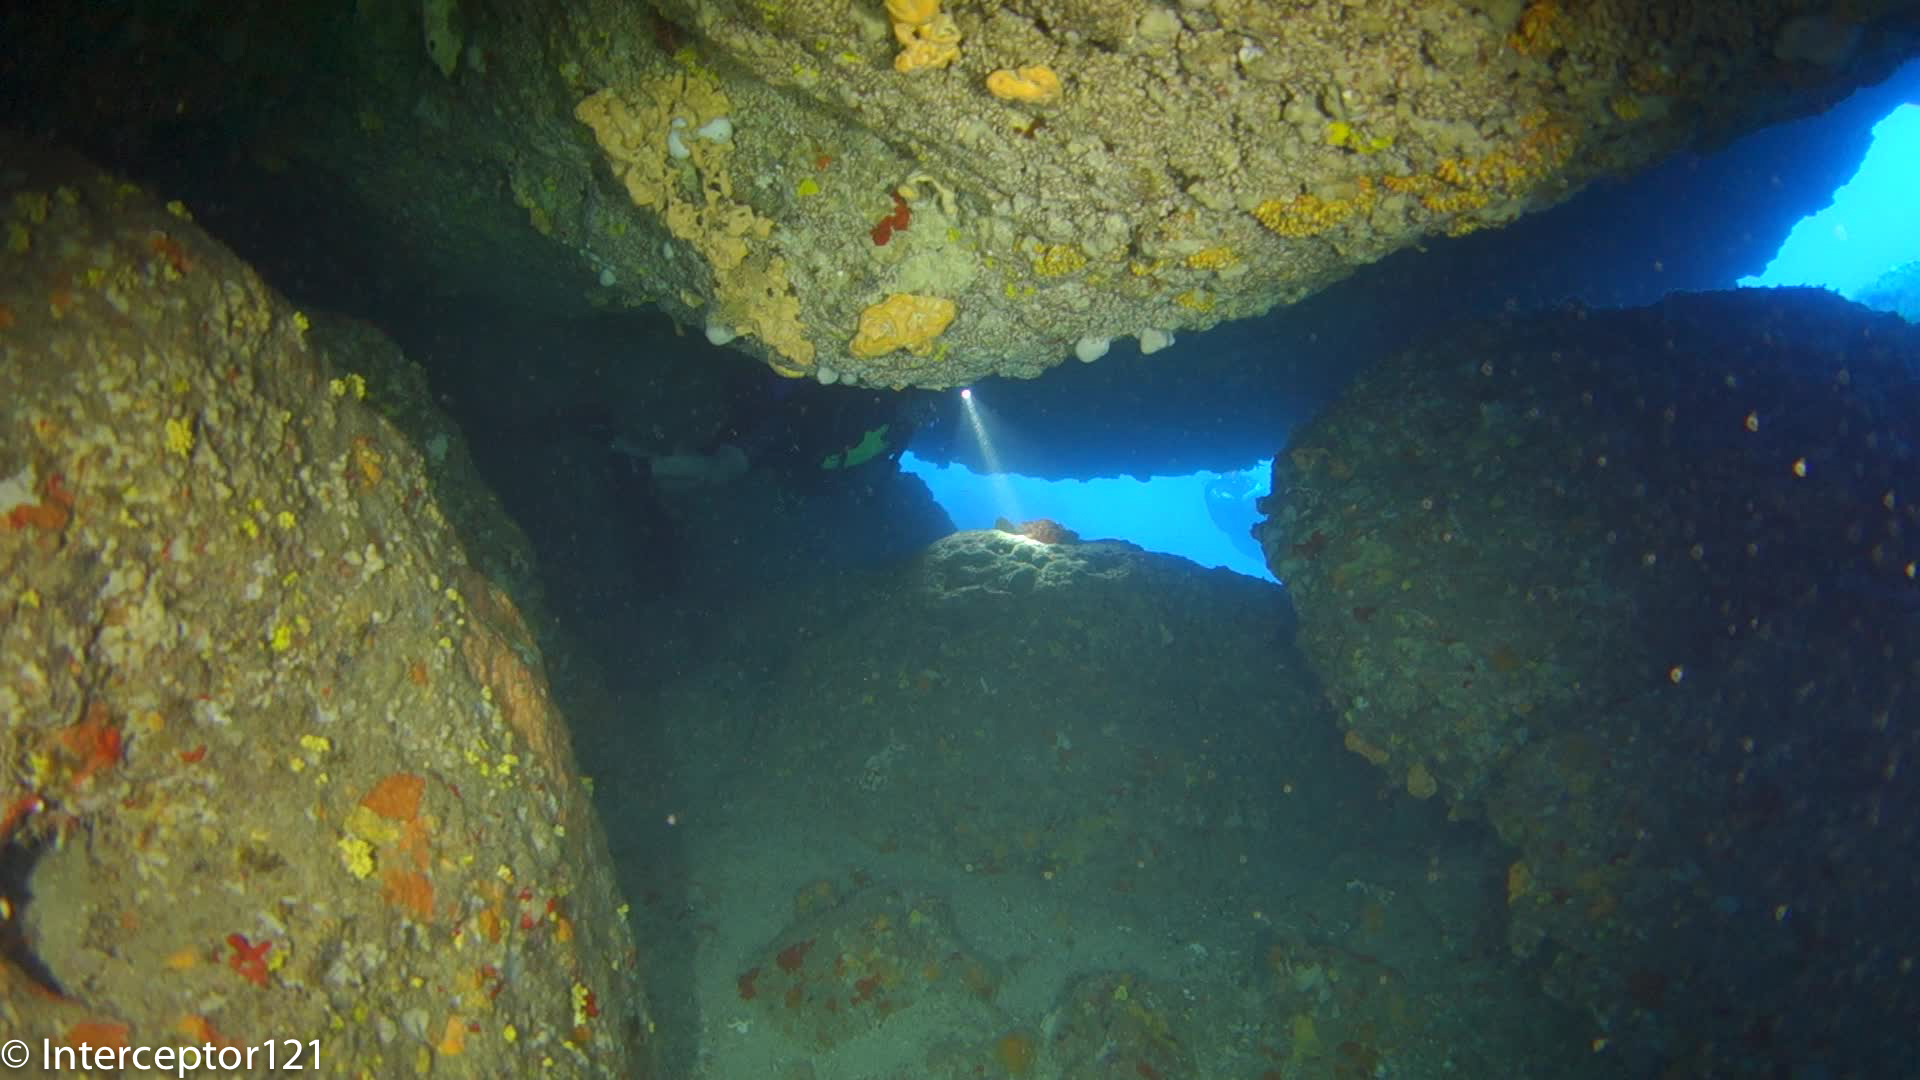
Entering Cave Fairly Bright
Pretty soon I realised this gave issues of banding of the blue water, this was apparent not only in backlit shots but also in normal wide angle of fish in specific cases. So after dive number 1 I changed it to the standard -0.3 from dive 2.
I set a new creative style with contrast at -3 in the hope to recover detail and seem to be working fine with the shots still having plenty of contrast.
Lowered Constrast on -3
I also tried spot metering for close up but it makes no sense the video lights are too wide and ended up with burned highlights at the edges of the frame so back to centred weighted average for close up shots.
Spot metering
So when it comes to metering my settings are:
Wide angle: multi area
Close up: centered weighted average
I did some tests with stabiliser in steadyshot mode, this gives back some field of view and the lens offers 100 degrees diagonal and 90 horizontal, I actually think a bit more anyway with fairly stable conditions this worked fine. At longer focal length for close up I am still using active mode.
Schooling Fish 100 fov
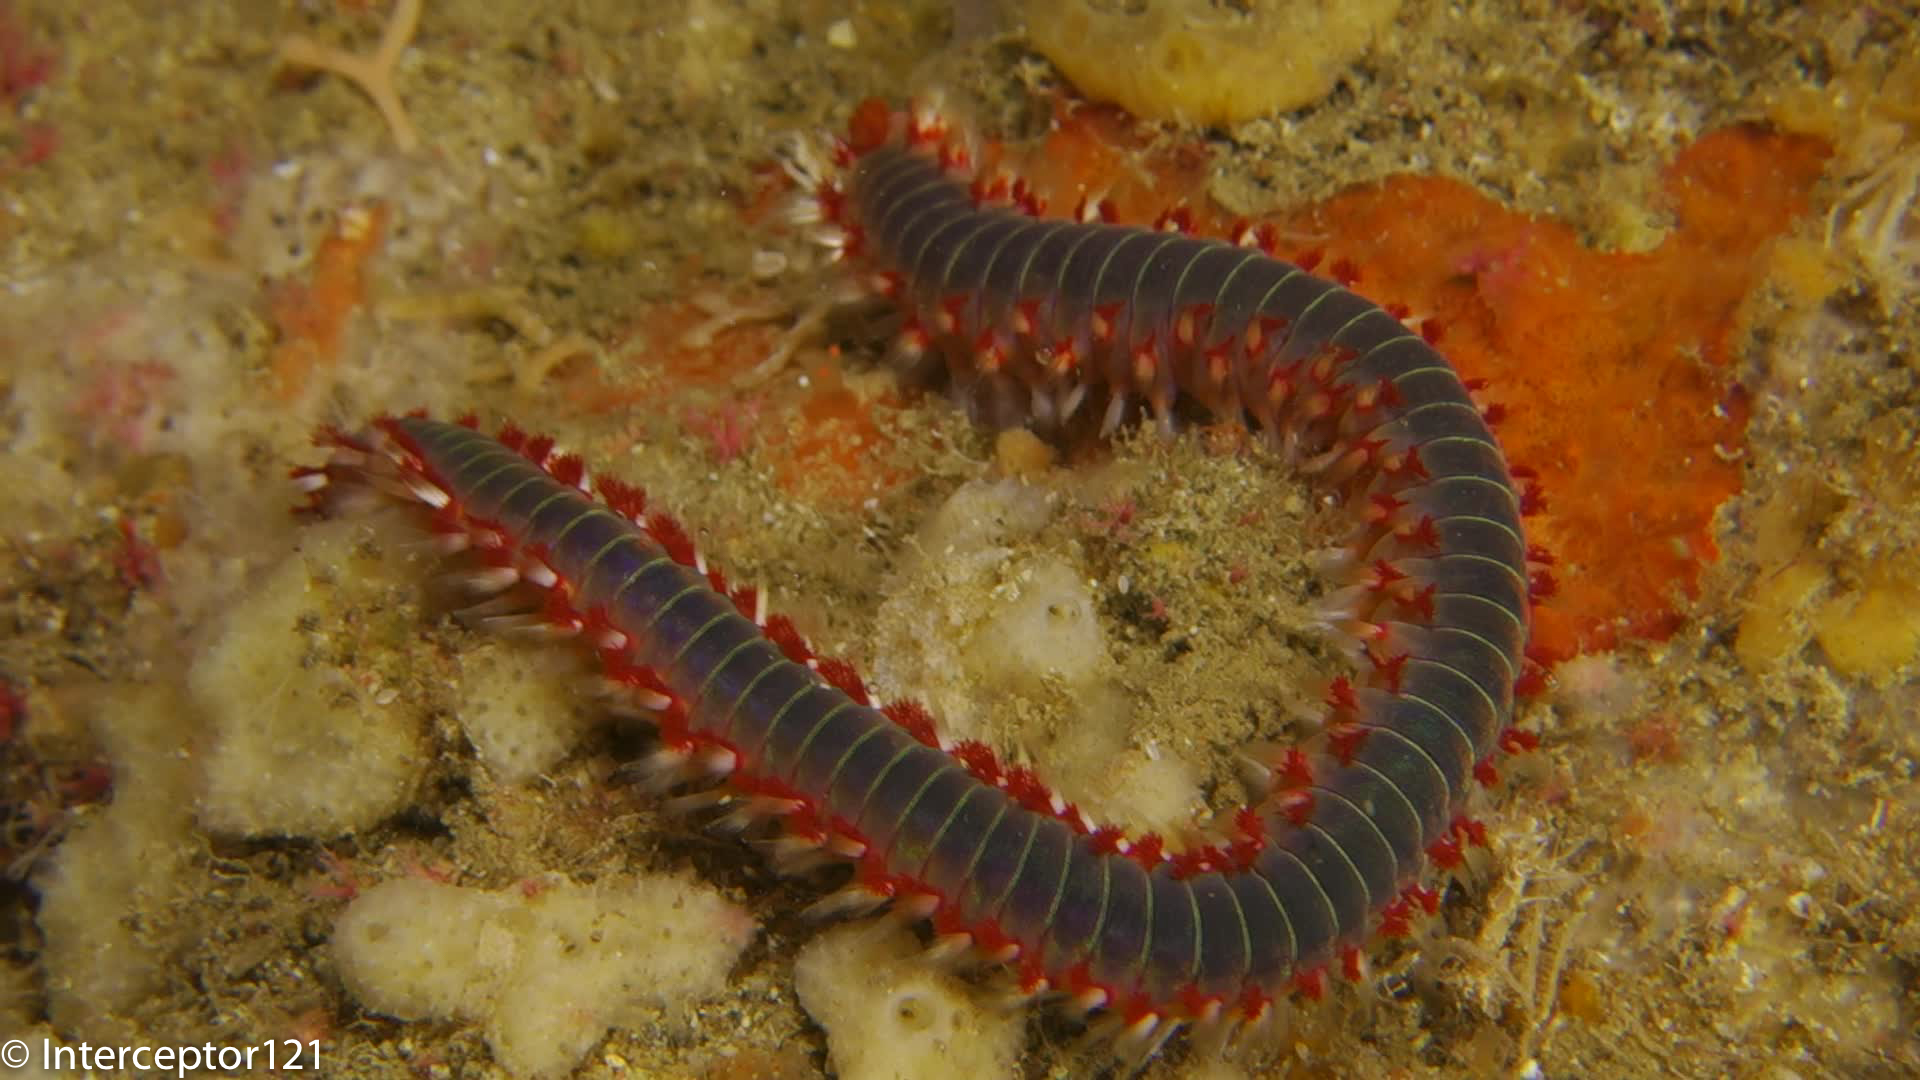
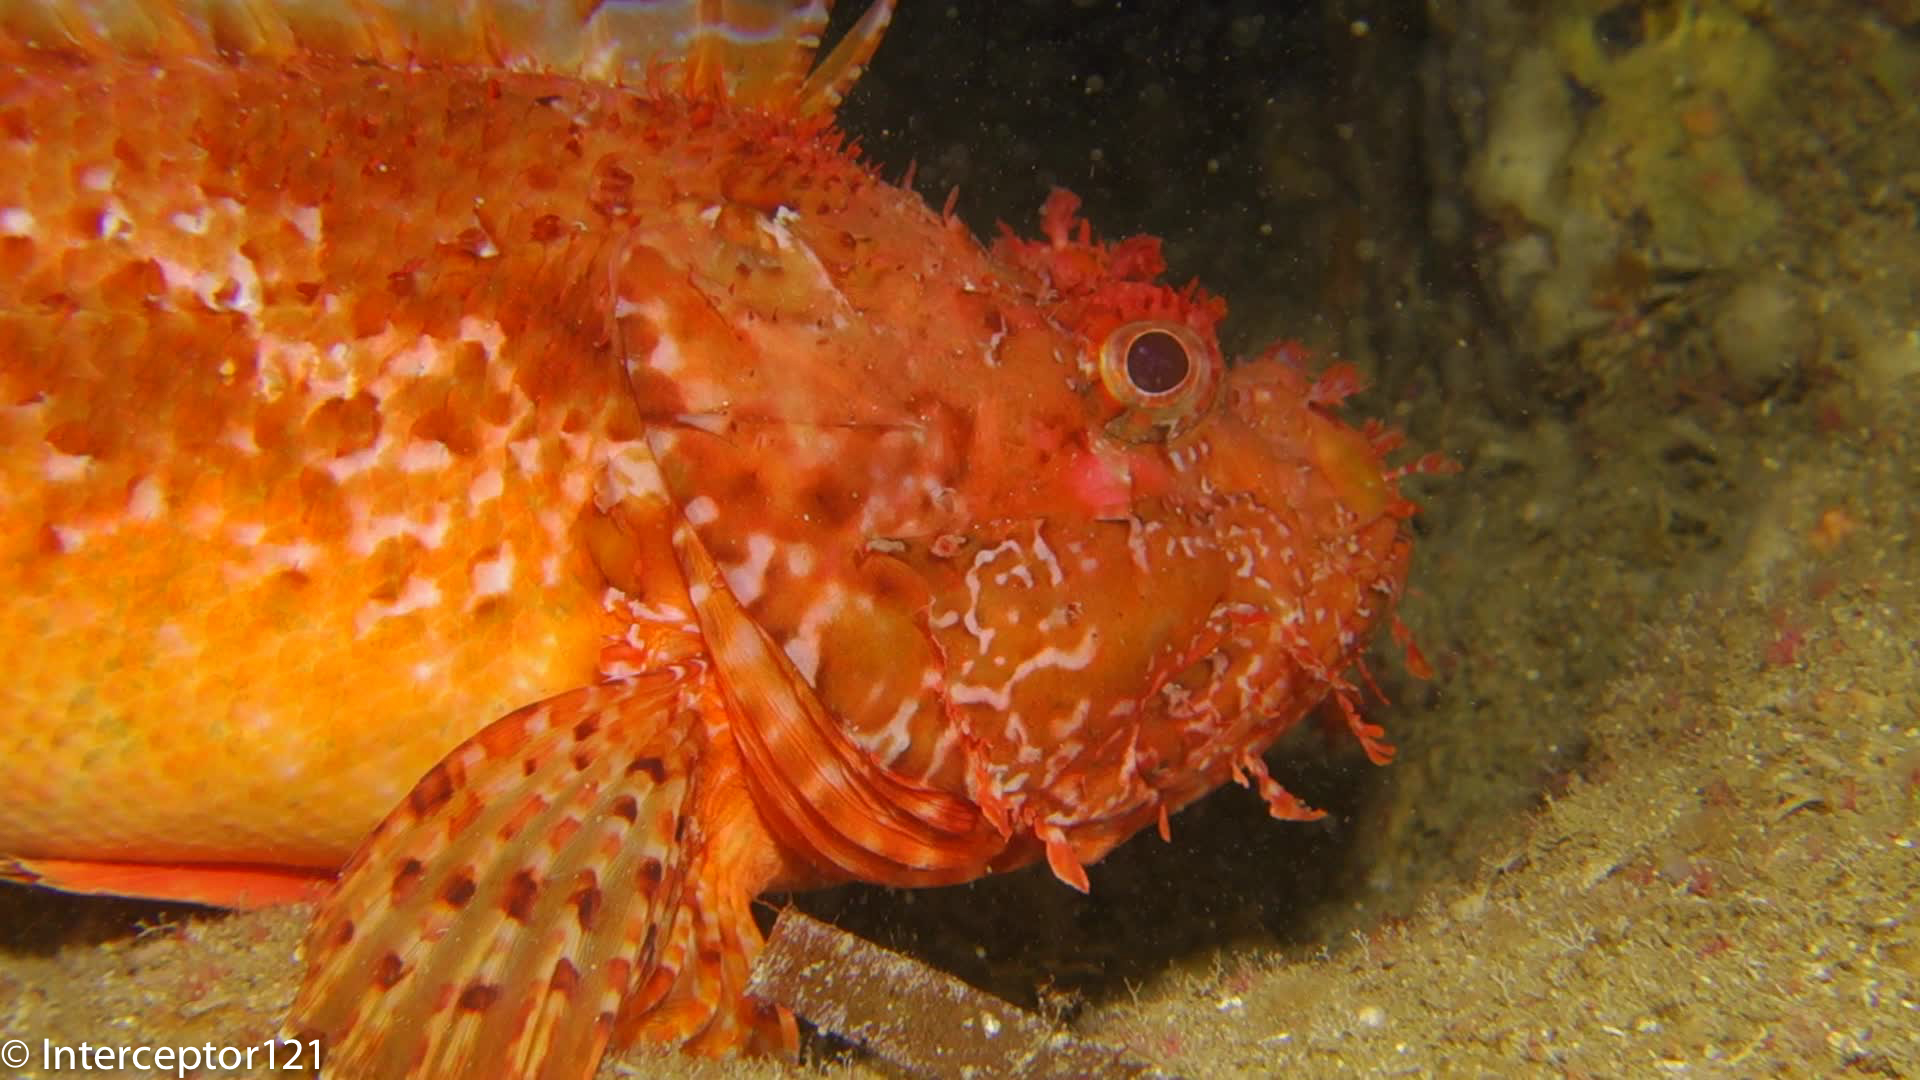
I have a +3 diopter for this test as I realised in my last still trip I don’t have a lens for medium size fish, the lens worked very well and I also tried the camera tracking focus but it seems it won’t work with fireworms or similar. So either keep normal focus or manual with peaking.
Tracking focus failRock FIsh UCL 330
White balance has been a subject of discussion, I did manage this time to white balance a few times but to be honest it was not worth the effort there is a better correction of the purple hue of the filter but this can be corrected setting Green to 1 or 2 in AWB. I also changed the AWB to include a correction with Amber 1 as per examples. Very happy with the results I think this is the final set up with this filter lacking a proper orange filter.
AWB corrected
Shooting in low light was rewarding with ISO maxed out at 800. I am becoming less and less a fan of video lights in cave due to the amount of backscatter am getting. I think I will default at using the lights as dive torches instead of wide beams of even leaving them off for effect.
Once again Sony has updated their RX100 camera with a stunning new release that will surely be a market leader at least until the release of the new promised Panasonic large compact sensor with 4K video recording.
So the question is again is it worth throwing our hard-earned money to this new model and housing or should we stay with what we have got? The Mark I and II are still available at reduced price though it is becoming harder to find Mark I housing as new.
The answer to the question is: it depends on what you are planning to do with your RX100, for some users an upgrade may not be required or even not advised let’s see why. no don’t waste any time with the Mark III.
Every time a new camera is released and reviewed I get a bunch of emails with subject: New Camera XYZ what do you think?
The best reviews you find online are made by sites that specialize in land photography and no consideration is given to underwater use. So not necessarily a camera that is a top performer on land will remain such underwater as this depends on specific characteristics that may be different or even opposite to land requirements.
So those reviews cannot be taken as they are they need interpretation. Personally I use two sites for camera reviews imaging resource and dxo mark I use the first to understand ergonomics, performance and to compare images with other cameras side to side, and the second to check sensor quality and lenses. Imaging resource has made a good article to compare the various RX100 on land read it here
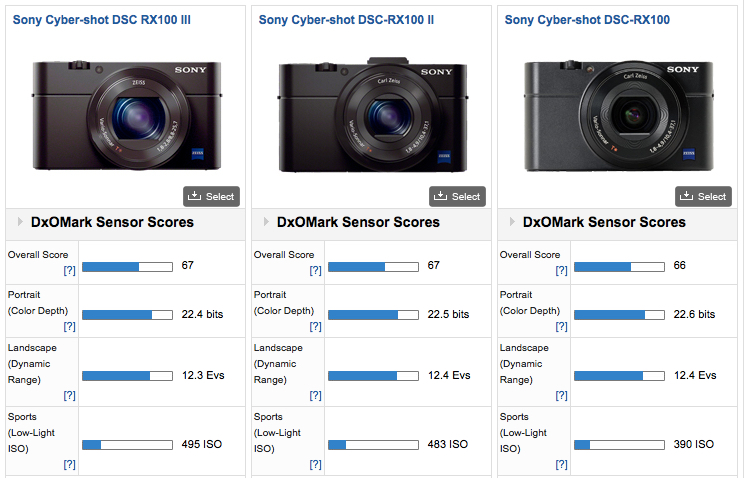
If you look at a sensor comparison on DXOMark you would conclude that there is no need to upgrade at all if you use your camera primarily for still pictures as the sensor are practically identical in performance as this table demonstrates:
RX100 Sensor Ratings
As you can see the differences in dynamic range, color depth or ISO are pretty much intangible.
However there are other metrics that are also important let’s see which ones and why.
Flash Recycling
We want our camera on board flash to recycle quickly after a full dump as the RX100 has only TTL flash and the flash can’t set to a minimum manual setting without consequences. Those are the flash recycling times at full output (a full dump will always occur when you don’t aim strobes directly at the subject for example wide angle)
Mark I: 7.2 seconds
Mark II” 4.4 seconds
Mark III: 3.3 seconds
The Mark III is pretty quick and the Mark II is acceptable the first release is definitely too slow.
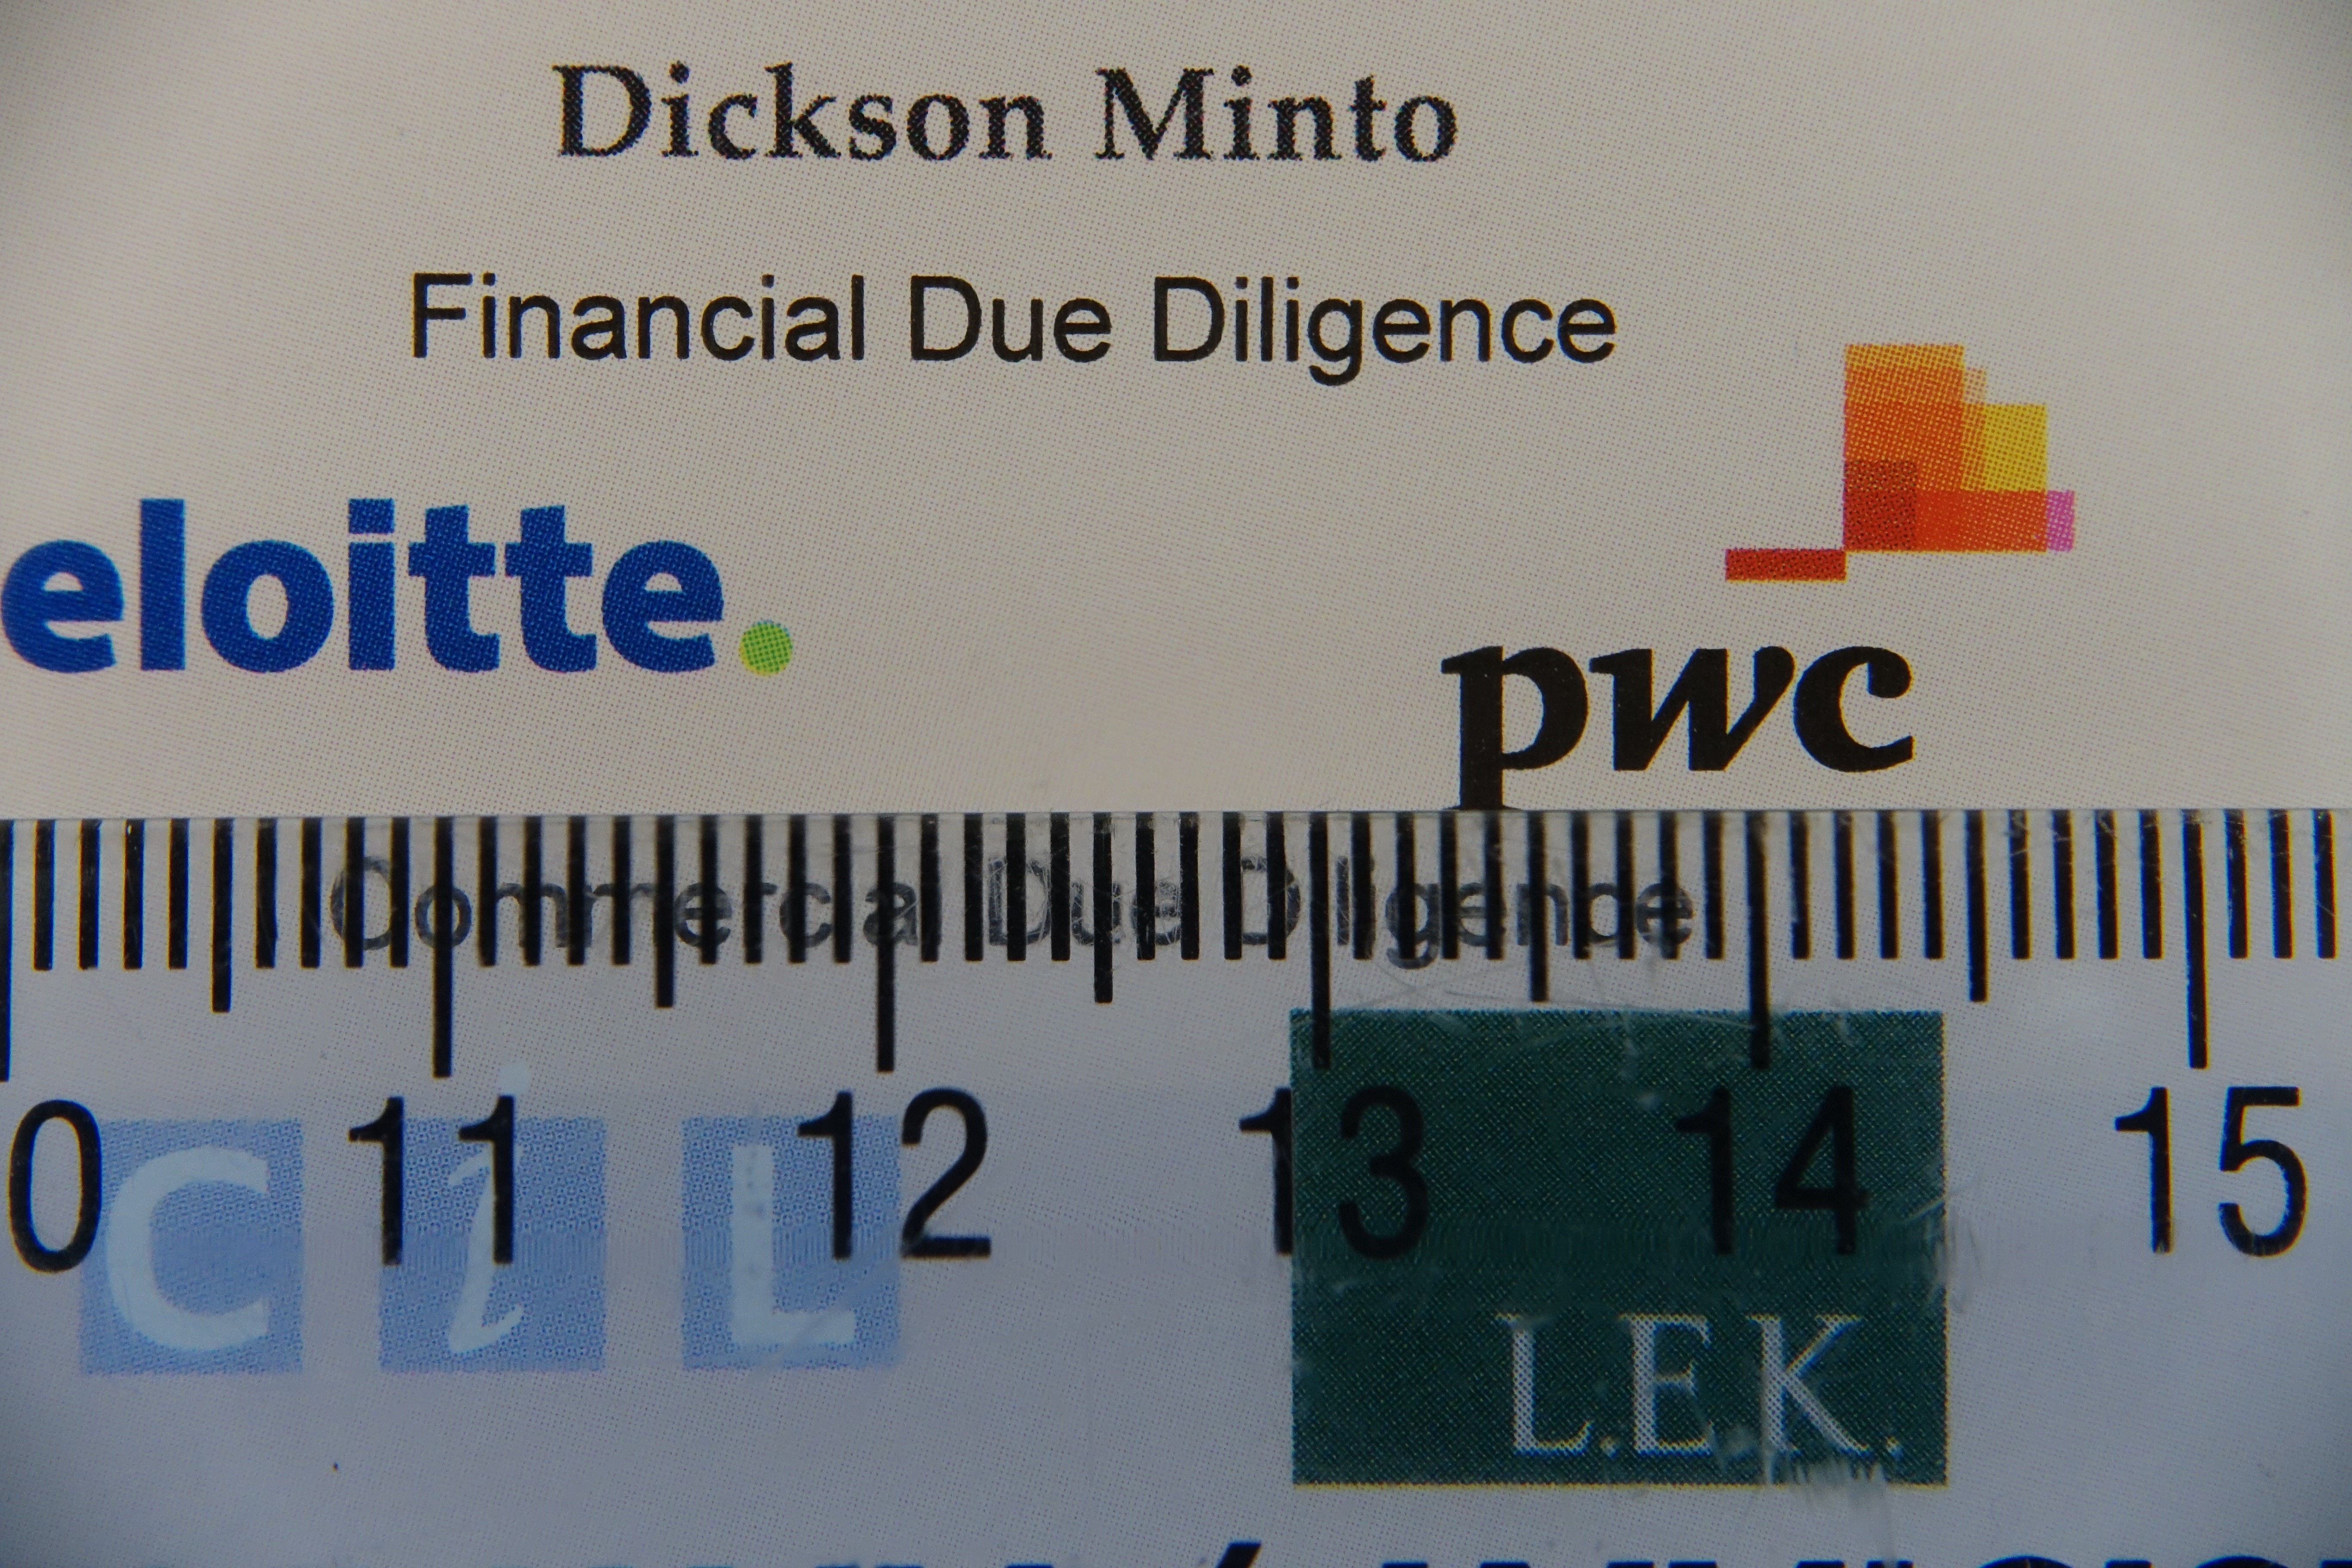
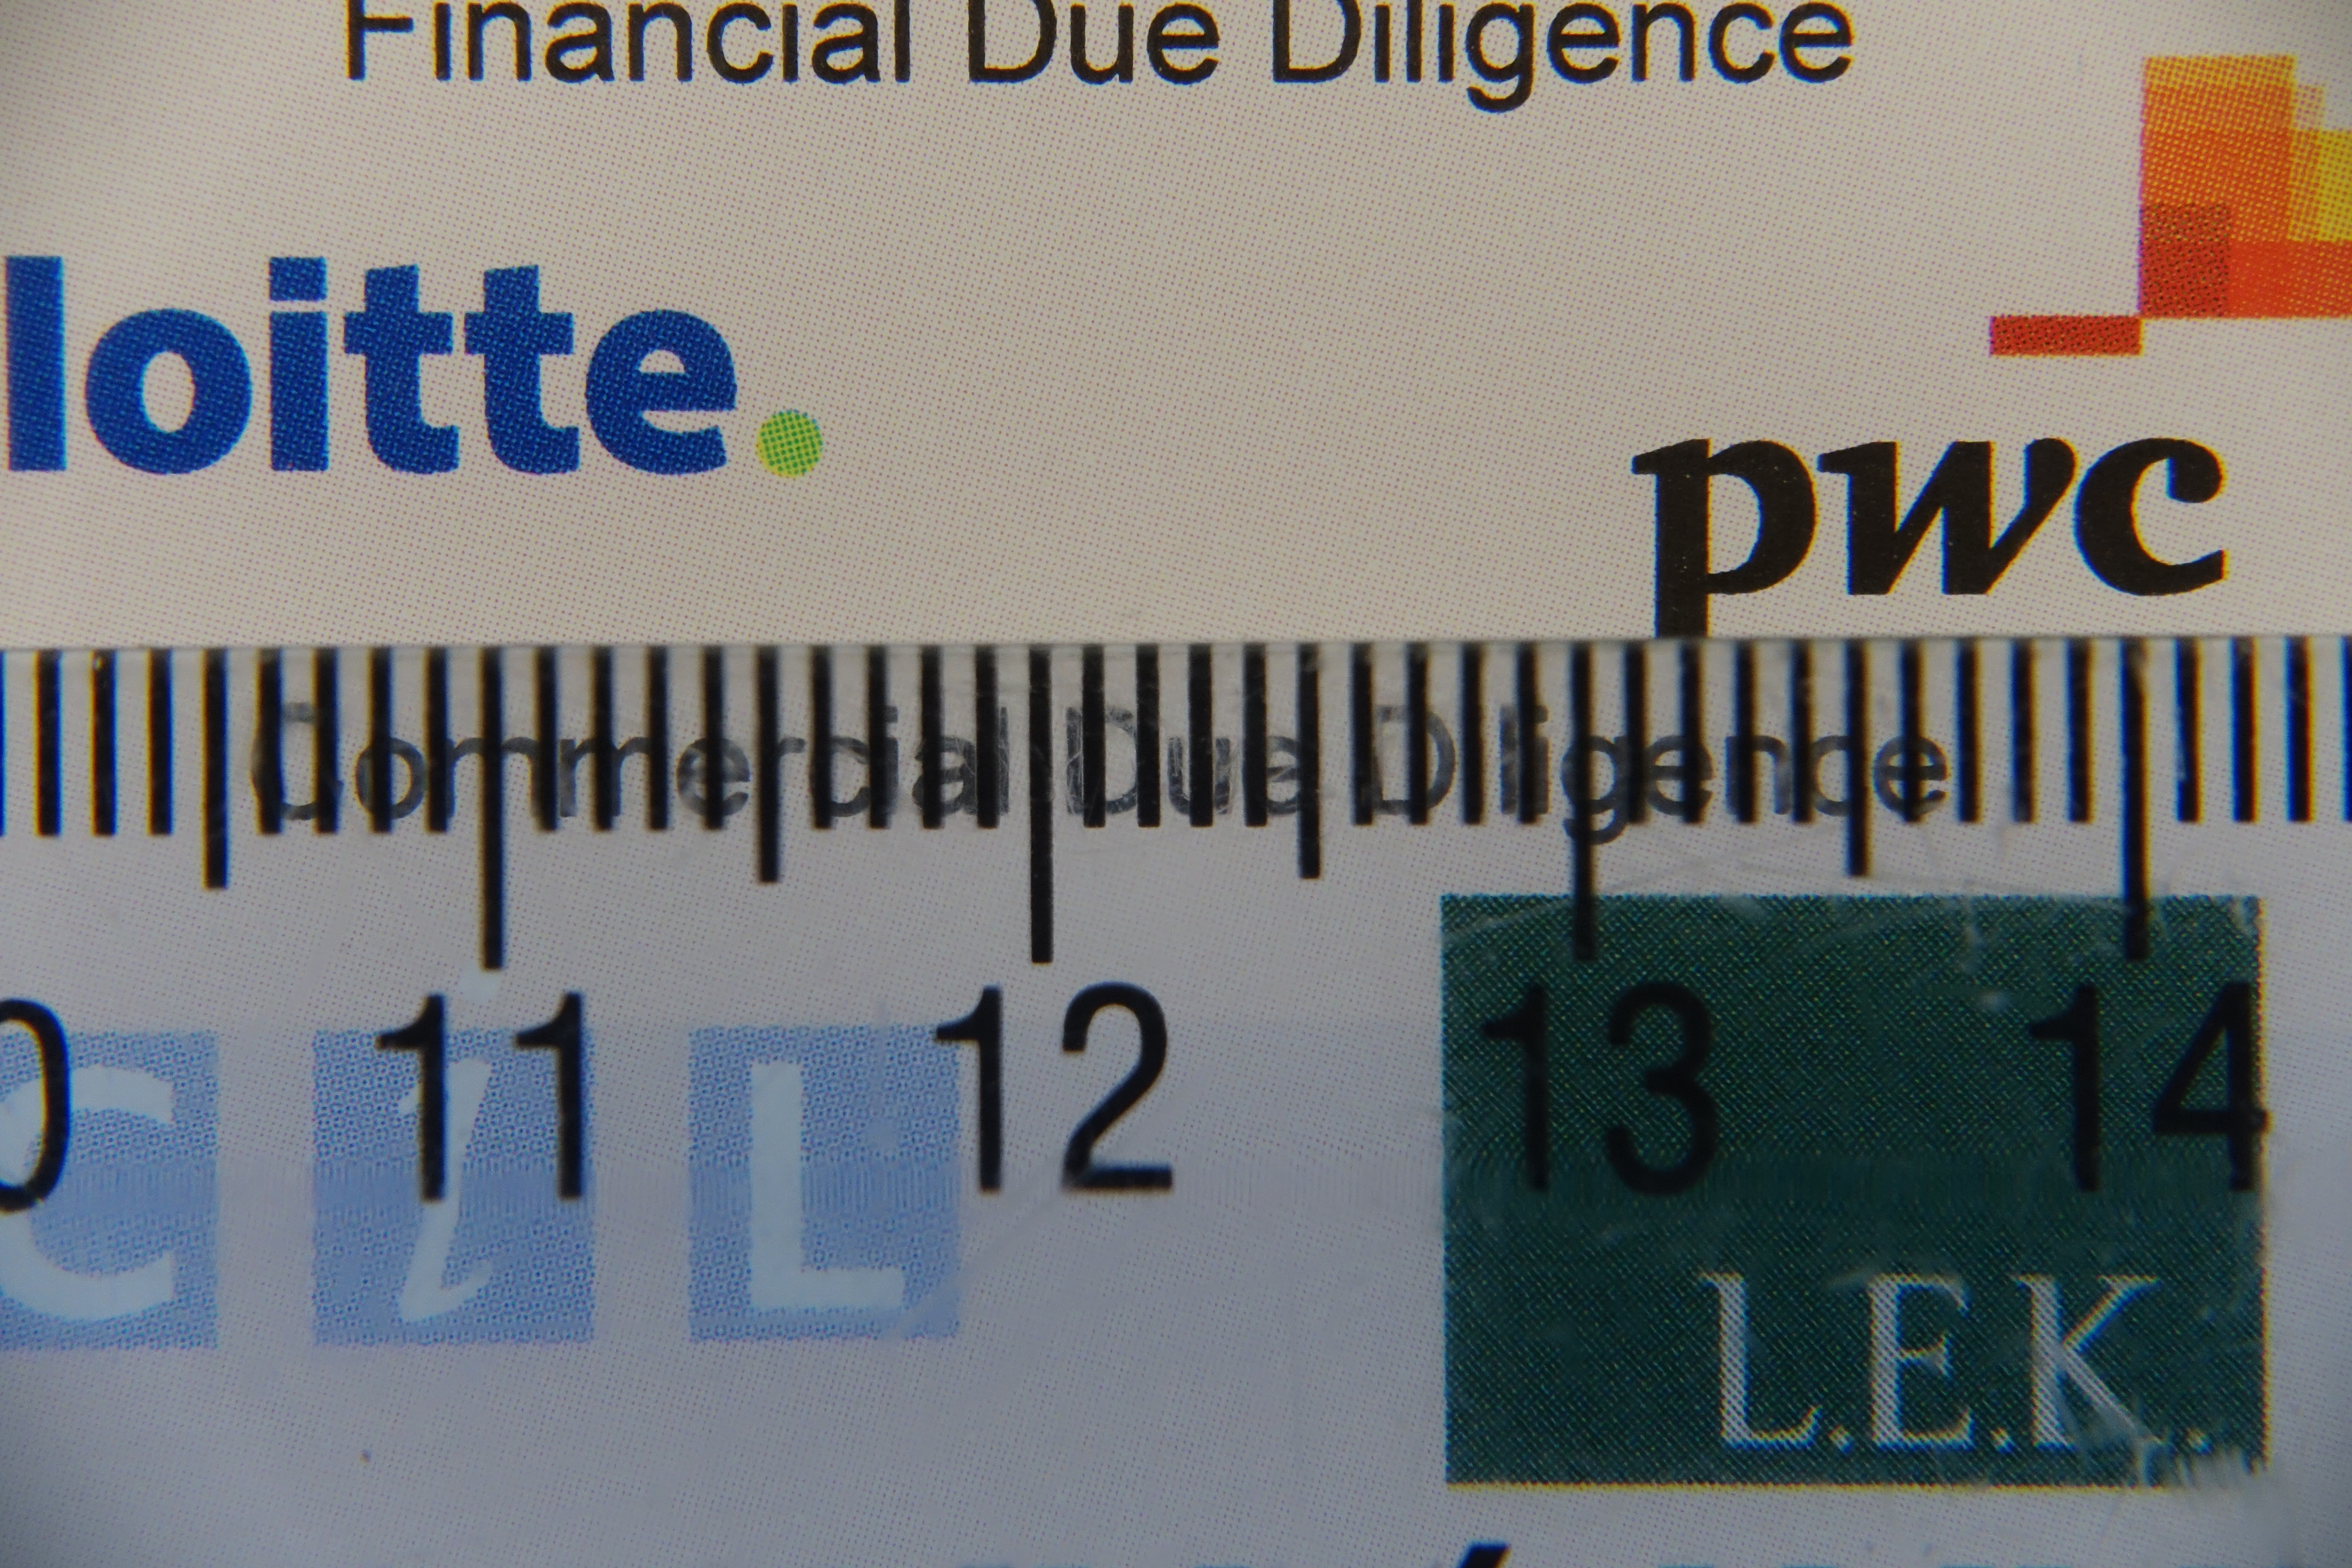
Minimum Capture Area & Zoom
What is the smallest area that can be captured at wide end at the closest focus distance? This gives you an idea of out of the box close up performance
I do not have precise metrics yet but looking at comparable images on imaging-resource seems like the Mark III is worse than the Mark I and II of at least 20% with a capture width around 90mm versus the already not very good 76mm of the Mark I and II.
To fix this issue we use close up lenses in water that fix to a great extent the focal length and then zoom in to achieve magnification which means longer camera lens more magnification I roughly estimate that the Mark III will be worse of a factor of 0.7x so things will look 1.4x bigger with the Mark III this is terrible news for macro shooters as it means you need to be on top of the subject to fill the frame, this is in some cases not possible.
I have estimated that you need 11 diopters to achieve 1:1 macro so the Subsee 10 and Inon UCL100 that gave real macro on the Mark I and II won’t be sufficient. With two UCL-165 or Dyron 7 you are looking at 2.58″ or 6.5 cm from the back of the first close up lens that means you will be right on top of the subject which is not really an option.
Update July 18th: Nauticam has confirmed that even with their SMC lens the most powerful diopter on the market the capture area is 38mm wide so does NOT achieve 1:1 macro as I suggested…
Lens Focal Range
The new mark III has a 24-70mm lens compared to the 28-100mm of the Mark I and II what does this mean?
Less magnification with close up lenses and no real 1:1 macro
Vignetting or even not possible to use fisheye lenses designed for 28mm lenses
This means that with the Mark III your scene selection will be restricted compared to the 150 to 24 of the mark I and II.
Update 23 July I have done some tests that confirm my suspicions please look at the following frames. The Mark III once zoom to 28mm actually works fine with the Mark II housing except the power button.
RX100 Mark III with Inon UCL-165 Close up lens
With a single Inon UCL-165 (+6.06 in water) the minimum capture area width is 5.4 cm which is bigger than the Mark II 4.8 cm. Not only that the distance from the top of the lens is only 9cm.
With stacked UCL-165+UCL330 total power 9.09 diopter we get this
Stacked UCL-165+UCL330
4.4 cm width however we start running into problems as the minimum distance from the lens is only 4cm.
We finally achieve 1:1 with two stacked UCL-165 however the distance from the top of the lens is 3cm definitely too little
two UCL-165 stacked
I have also tried the Mark III at 28mm and it still vignettes with the Inon UWL-H100 in air until around 30mm. Instead the old UWL-100 28AD is fine at 28mm either way image looks narrower than with the Mark II but this may be an issue with the old housing.
So basically no macro with the Mark III and no decent fisheye as expected.
Underwater Photography Conclusion
Due to the reasons above the best camera for the job is the RX100 Mark II, with the Mark I coming close but being penalized by the strobe recycle time, the Mark III really is not an option for the serious shooter due to limitations of the lens.
Let’s have a look at some other features of the Mark III that are not relevant for stills as much as they are for video.
ND filter
Shooting at the surface with plenty of ambient light or on land can create problems if you want to follow the 180 shutter rule, the ND filter of the Mark III ensures your footage will be smooth on land and in water. Take into account that on land you can apply optical ND filters (I have it for the Mark II) so this is really for underwater use when you are shooting at 1/50 or 1/60 shutter speed and the scene is too bright when you hit f/11 and the lowest possible ISO. Having now tested this feature I confirm it is really valid on land on a bright day to keep the aperture wide.
Clear Image Zoom
This is a special digital zoom with edge enhancement that only worked on JPEG stills on Mark I and II but is now available on video on the mark III. This means an additional 2x zoom is available bringing the focal length to 140mm that is more than adequate for macro. This is not an option on RAW images so irrelevant for still users.
23 July update Having done some tests for macro video (as stacking two diopters is not an option) the image quality suffers but anyway this is all you are left with lacking any other options.
Clear image zoom 1.5x on single UCL-165
Image stabilizer
The Mark III adds a further stabilizer mode with additional crop that takes the lens to 96mm equivalent in video mode. This is well worth for super macro hand-held footage and effectively provides an option where you can either use the super steady shot and no clear image zoom when hand-held or leave on only the optical stabilizer and use clear image zoom. If you shoot macro on walls and not on flat sand this is a well worth feature.
Update 23 July 2014
Following a side by side comparison you can find on this link
It follows that there is really no 5 axis stabilisation and only an additional mode with more crop with correction for rolling shutter that anyway does not really work!
Full Sensor Readout Video
The mark III reads the whole sensor not just alternate lines when capturing video this increases should increase the resolution to a great degree and increases the perceived resolution and clarity of your videos. However this does not seem to correspond to real life tests. See this sample with a side by side comparison the Mark III looks visibly worse than its predecessor even on the higher bitrate XAVC!!!
Video Formats
The Mark II introduced a well welcomes 24 Mbps 24/25 fps mode now the Mark III introduces a 50 Mbps mode in XAVC (that can be rewrapped into normal MP4) that produces even better footage although it will be quite demanding on your workstation and most likely some of your home devices will struggle playing the files (my Apple Tv 3rd generation only plays up to 25 Mbps) when uploading files online this will downgrade to 8 Mbps so won’t matter unless you have a good player at home. improves nothing and requires manipulation as the files are actually not MP4 compliant as they have WAV audio (!) they are also inside the AVCHD folder which is painful. As seen above seems like the encoding has got worse on the AVCHD files and only the higher bitrate compares but still does not match the mark II at the lower 24 Mbps!!!
HDMI connection
You can now connect the Mark III to an external HDMI recorder if you are into that kind of semi pro usage. For the normal user this is not relevant: if you are into spending that money probably you have already a DSLR or a Panasonic GH4.
Video Auto Focus
The auto focus in video has got worse you can see an example in the stabiliser test, and actually plenty of frames are blurred on the mark III. Awful!
Underwater Video Conclusion
The Mark I with only a 28 Mbps 50/60p mode is definitely a poor choice, the Mark II is acceptable to most users. and the mark III promises even better performance if you are a serious video user and have another camera to take pictures the Mark III may be well worth it.
The Mark III despite some useful feature is actually a let down and perform worse in practical terms than the mark II that remains my camera of choice.
Summary
If you have a Mark I camera and are frustrated with flash recycling you should be looking at a cheaper upgrade to the Mark II.
If you have a Mark II and your priority is photography upgrading is NOT recommended.
If you don’t have any RX100 get yourself a Mark II or wait for the new Panasonic as the Mark III is pretty much a pile of crap.
Is it the first time I am actually sending back a camera and invoking consumer rights but when I spoke to the camera shop they told me they had other returns and this is not really an upgrade!!!
The above image was shot at 100mm equivalent with one diopter with the RX100 Mark II. You won’t be able to fill the frame with the same close up lens and the Mark III camera
I have recently received a number of messages asking me why I am not upgrading to a micro 4:3 set up.
There are several reasons why I am not doing that even if my photo rig is nearly as heavy as a micro 4:3 or even a DSLR and have to do mostly with video not with stills.
I will try and touch on the key points in this post, please remember those are subjective and by no mean a criticism to other people that use 4:3 set up for video.
Note: my perspective is one of a typical non professional user that has limited time to get the best shots. This is not an absolute point of view it is clear that if you are a ‘pro’ and have much more time to spend to get few seconds of footage many considerations do not apply.
Composition
The way I have learned to love underwater video is the composition opportunities that it gives. My main source of inspiration is John Boyle and his book that remains the only valid handbook for what I am concerned even if it is a little old.
One of the classics of underwater video is the sequence: wide-medium-close-super close. On a micro four third in order to have good quality you would choose a macro lens or a wide angle lens, both those choices will prevent a number of shots you either do close and super close or wide and medium and maybe close but not super close.
With a camera with a fixed lens with a range of 28-100mm and wet lenses you can cover the whole spectrum of shots although you may need to swap lenses during the shot the possibility is there.
Optical Quality
Some users try to use one lens to catch all, usually the choice is a Panasonic 14-42mm or an Olympus 12-50mm. However this is not as exciting as it seems in the first place. I have run some comparisons on the optics on DXOMark assuming the 4:3 are on a Panasonic GH3 that really is a mini SLR you can see the results by yourself
Comparison Panasonic 14-42 vs RX100II vs Olympus 12-50
The RX100II gives better quality than both those lenses and especially it does it at f/1.8 versus the f/3.5 of f/4 of the other lenses.
The RX100 does have issues of distortion and chromatic aberration at the edges because of the extensive correction but is overall sharper at wider aperture. This is very important for video that is shot at ambient light.
Wet Lenses
You can add M67 lenses to the Panasonic 14-42 and the 35 macro port (am talking about Nauticam ports here) the results will be worse than the RX100 as the starting point is worst. There is no M67 mount to use the Olympus 12-50mm lens, I will try to see if the flip diopter can do that without vignette but still this gives only 24mm against the 18mm of the RX100 with an Inon wet lens.
Video Quality
The only cameras that are decent are Panasonic as Olympus video is pathetic. However only the GH3/4 have anything better than a compact in terms of recording formats. The new Sony RX100 Mark III with 50 mbps 24/25p seems almost equally interesting.
Stabilisation
Micro 4:3 cameras do not have in camera stabilization in video mode and most of the lenses (the 14-42 is an exception) do not have optical stabilizers to contain costs. It follows that close ups are shaky and even wide angle has jumps.
Conclusion
With all the considerations above it follows the only real set up would be a lens with a stabilizer, the only available that can also shoot close up with a wet lens is the 14-42mm Panasonic. However this lens seems to have worst optical quality than the on-board lens of the RX100II (I have checked some real life shots myself). The only benefit left is the higher bit rate recording format and this is only if you go on a GH3/GH4, with higher recording formats available for the RX100 Mark III and with an announced Panasonic LX8 with potential 4K I personally do not see a reason to jump on the 4:3 wagon for video. I do believe though that if you take mainly stills there is a compelling reason for 4:3 as you can have one camera fitting almost everything and smaller to pack than a DSLR (but not that much and forget about 200-400mm f/2.8 tele lenses).
In one of my first posts on this blog I covered the subject of setting white balance with the Sony RX100.
It may be useful to have a quick recap on the topic:
For pictures setting a custom white balance is not useful if you shoot in RAW as the amount of correction in post processing is far superior*
For video (that is shot in compressed format) setting the appropriate white balance for your shots is essential
There are exceptions to this rule, some people like to set custom white balance even in RAW when they shoot ambient light pictures. This is because changing the white balance shifts the histogram and therefore if you had taken a shot with an incorrect white balance you may retrieve wrong information from the histogram. Personally I do not do this most of the ambient light shots I judge by eye and not histogram or are silhouettes anyway but may be useful to know.
The other exception is when you shoot a raw video format with bit rates in excess of 100 Mbps, in that case the footage is captured in a bland format lacking any real depth and contrast and things are corrected in post processing. This does not apply to any consumer camera that works in AVCHD or Mp4 with bit rate lower than 50 Mbps in any case.
It follows that setting the appropriate white balance for our videos is something that is important otherwise our clips will look dull, green or have some sort of color cast we do not like.
As many of you RX100 I have experience with the infamous Custom White Balance 9900K error. In theory if you set your custom white balance with the camera in P mode over a neutral target this error should only occur if the color temperature is out of range (>9900K) unfortunately this is not the case and you get this error pretty much always with our beloved camera. At the beginning I thought that this was due to my cheap PADI slate, but after various attempts against my hand, sand, buddy’s tank, the sun I have to think there is some genuine issue here.
So I got myself whibal card, that on my test on land performs amazingly well with both the RX100 and the Nikon D7100.
The first thing we can realize is that the auto white balance setting is rather cool in outdoor scenes, whilst it tends to be warmer in indoor scenes with artificial light.
Auto White Balance
When you take a custom white balance the colors appear warmer and the bluish cast departs and the yellows come back.
This is particularly bad news if you shoot underwater without a filter and think of using auto white balance as those results will be pretty ugly.
The whibal card has a specific black mark that if illuminated tells you the white balance reading is incorrect because of reflections. I thought this was the key to the 9900 Error, unfortunately I was wrong.
It just fails 100% reliably really painful so I could not get rid of my trusted red filter for the Galapagos trip. I even tried setting the white balance with the filter and it would fail as well.
So I went back to auto white balance and red filter and I am pretty happy with the results, many people have asked me if I have manipulated the footage in post processing as the colors look very deep and some have even said unnatural. Even so shooting at 1/50 means a relatively low ISO and in the specific trip another f/stop of aperture was not really significant but I would have like to have the option of working without the filter, sadly this was not an option.
For what concerns white balance just a few things I want to say:
1. At depth there is no color anyway so what your eye can see it is not what it is, the proof is when you use lights or strobes things look much better than the naked eye. Using your visual as a reference can produce dull results.
2. You have to set an appropriate white balance for your scene, this means removing the cast. If a scene has no cast and the colors look saturated this is not a white balance issue on its own but may due to the camera settings. The RX100II is one of the less saturated camera on the market. The mark I instead is pretty saturated take this into account.
3. Footage that looks dull IS in fact ugly. The fact you set custom white balance with or without a filter does not mean that results is the perfect result, there is no such thing in fact and as colors disappear at depth white balance is not that effective anyway
Nick Hope sometime ago published some interesting tests on wetpixel
It turns out that there is more than meets the eye.
Just to clarify the only color correction in my Galapagos clip is:
1. In the scene of the dolphins I was pointing the camera upwards and did not have time to take the filter off so ended up with a red cast, I performed a white balance adjustment in iMovie on the opposite value of the tint I was getting until I liked it.
2. In the scene where there is a group of Galapagos sharks and the close up of the eagle ray I have reduced the blue gain as it was over saturated
In all other cases the only changes were increase of contrast or reduction of brightness. When the water was green like at the end in the Punta Vicente Roca scene I did not touch it to make it look artificially blue.
Again for those who ask I use a deeproof push on filter for the Inon UWL-H100 this filter is my preferred for the only reason that is actually the only one available on the market that fits on the lens. Personally I would much prefer a plastic filter like the ikelite/URPRO but this one is glass. It seems to correspond to a deep sunset 2700K with magenta tint of +5 on the RX100 but I have no tools to measure it I can only say it works.
So my recommendation for the RX100 is to get this solution as the Inon lens has the best optical quality and a hood that comes very handy to reduce flare. There are other lenses that fit the RX100 but have no hood. Obviously an not even considering the fisheye style lenses as distortion is ugly and placing a filter under the lens is a very bad idea.
The time finally came for our trip to Galapagos and I was ready with a set of think rubber suits to overcome the cold water. I just bought a 5mm Oneill Sector (wonderful suit) a 3mm hooded vest, kevlar gloves and a 5mm 4th Element short john. Well the short john was not used and for most I used just the wetsuit and a set of O’Neill Thermo X unders (very recommended) as El Nino is coming and the water was warmer at 25-27C or 77-80F.
This means lack of schooling hammerhead at shallow depth close to the reef, they were in the blue. We had however our good dose of schooling barracuda, tuna (in the 1000s) and even galapagos sharks
This is the video I produced
If you have problems with playing in your country use vimeo instead
The conditions were difficult with low visibility and in some sites very green water as you can see here
Questions will come about what I used etc etc so here is the list
Sony RX100II in Nauticam housing
FIx adapter for Inon LD mount
Inon UWL-H100
Deeproof blue water filter
Sola video lights 1200 (just few shots of the barracudas and some close ups)
Combination of arms and sometimes no arms
Ultralight tray TR-DM with extension and handles
The video has been produced with iMovie 9.0.4 no stabilization performed except the scene with the moray eels mating (very mild)
I shot the whole trip in shutter priority 1/50th of a second in the 25 fps 24 Mbps format. After some tests at home I have decided to use this mode as I can’t physically play the 50 fps files the camera produces on any of my devices differently. The 25 fps gives a film look and very smooth footage. This format is only available on the RX100II and not on the original RX100 so the consideration I made at the time for video settings of the RX100 remain valid.
The benefit of 1/50th shutter speed is a full f/stop of light the disbenefit is that at the surface and for backlit shots this is too slow, in those cases I go back to program mode or increase shutter speed to 1/100 or 1/200 or more.
For what concerns the editing I import the raw files in iMovie without using the conversion and then export with x264 using very slow preset and level 4.0 compatibility to use it with my appleTv.
I do minimal color correction in some cases I had to eliminate the red color cast of the filter when shooting upwards, to do that I change the white balance to top yellow until i remove the cast.
In some cases I had to put the green gain to the max for the same problem but in all other cases there is NO color correction in post.
When you work with AVCHD cameras the footage is compressed and the key is to get it right in camera.
As Galapagos conditions were challenging, although less than I expected, I used gloves in some dives to hang on to the barnacles and I also modified the set up to completely eliminate the lights.
I would dive with two 3″ segments and two 6″ Inon Mega float arms when I had the lights on and for other shots in ambient light I would have this set up here that looks odd but it is very effective and almost neutral at only 120 grams in water. The position of the floats means the camera stays upright at all times.
Compact tray for ambient light
I would put a single Sola light on top of the housing not for video purpose but to signal the dive master when I was a bit far in the murky or dark waters. I used this set up on almost all blue water dives (Darwin and Wolf) and the normal set up with lights for the South and West sites with murky or green water.
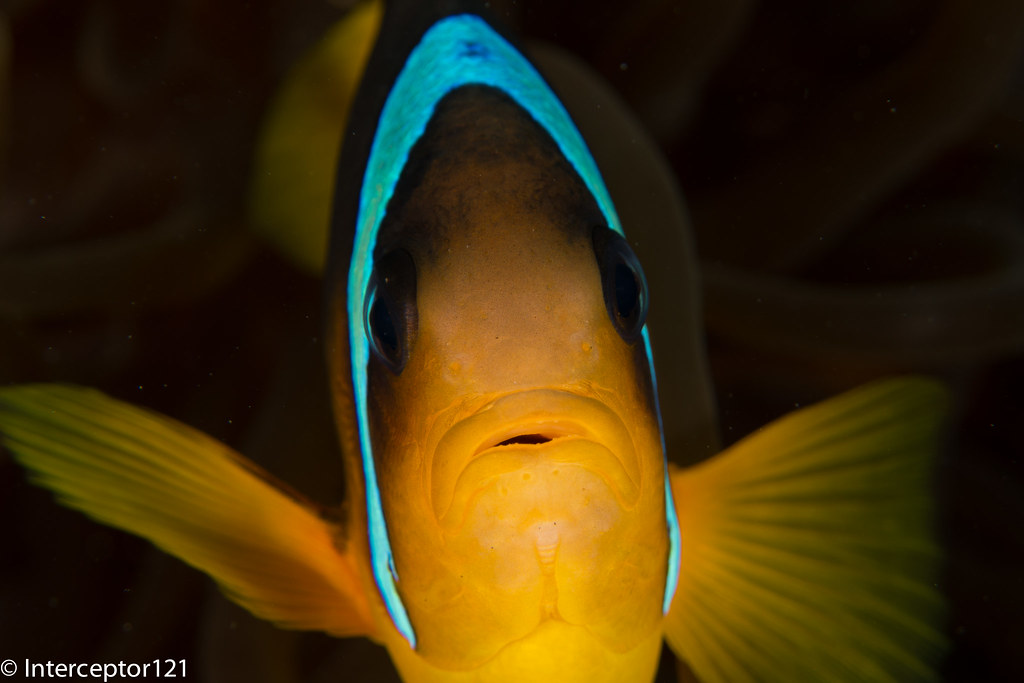
There will be a separate post on the photos, I did a total of 18 dives with the camera of which 4 where photo and 14 video. You can see an example in the featured image.
I have now ran some statistics on the final clip that I produced
I used a total of 41 video clips:
ISO average was 273 with the following breakdown
2 clips at 160
30 clips at 200
6 clips at 400
3 clips at 800
f/stop average was 3.1 hyperfocal distance on average 1.16 meters. So if I were able to shoot without filter I would have not gained anything in terms of sharpness as most subjects were further away
I would consider the Galapagos and the dive trip I did not the best in terms of brightness and visibility so I would conclude that the RX100II with the Inon UWL-H100 and a red filter is the best set up for wide angle video in terms of performance, ease of use and flexibility.
After the various Backscatter, Bluewater photo, and other shops compact cameras reviews I thought of putting my 10 pence in as well.
Most of those reviews you find are written by people who shoot DSLR and then occasionally go and take a compact in water to see how it goes. For what concerns underwater use I only shoot compact and I believe I know how to navigate into features and limitations of compact camera quite well so here is my view on the subject.
The first hint when you look at a high-end compact camera is to check if Nauticam makes a housing for it. If not maybe your camera is not as good after all. There are some exceptions of course.
Categories
I have ranked compacts according to the following shooting categories:
Movie
Ambient Light
Macro
Portraits
Close Focus Wide Angle
All purpose cameras
When possible there will be a top 3 in each category.
The Compacts
I have considered only the following cameras
Canon G16
Canon S120
Olympus XZ-2
Panasonic LX7
Sony RX100II
The Fuji X20 is a potential addition but I have not found anyone that actually shoots it underwater so I abstain from judging here.
Best Cameras for Movie
In order to score in this category the cameras need to have full manual exposure control in movie mode and be able to shoot double frame rates for the system of choice PAL or NTSC.
This is my appraisal:
Sony RX100II
Panasonic LX7
N/A
Canon cameras do not offer exposure control in movie mode, Olympus video is pathetic. Not possible to even consider a number 3 here.
Best Cameras for Ambient Light
Here I consider shots without strobes with a view angle of 100º diagonal you need a wet wide-angle lens to take those shots.
Here are the rankings:
Sony RX100II
Panasonic LX7
Canon S120
Olympus lags behind in image quality and the Canon G16 does not have any wet lens that allows to take those shots without strobes.
Best Cameras for Macro
I am looking here at shots are real 1:1 reproduction ratio and how easy is to take those shots in terms of autofocus and depth of field. In order to achieve this level of magnification a close up wet lens is necessary for all cameras. No compact camera achieves real macro with the bare port underwater.
Here are the results:
Canon G16
Canon S120
Panasonic LX7
The Canon G16 in virtue of a 140mm focal length at telephoto end gives the highest magnification ratio, the Canon S120 follows closely same image quality less magnification. The Panasonic LX7 has only a 90mm equivalent lens however the autofocus is incredible so you can use +10 diopters very easily and it is the only camera to really offer Bokeh.
The Olympus XZ-2 lags in terms of image quality, the RX100II has great image quality but little magnification, you need a +10 diopter to give a 1:1 reproduction ratio and focus is difficult because of shallow depth of field due to the large sensor.
Best Cameras for Portraits
Here we are considering shots with the bare port at 35mm focal length using strobes. Here is the ranking:
Sony RX100II
Panasonic LX7
Canon S120 & Canon G16
Whilst the RX100II has the best image quality it comes a bit as a surprise why the LX7 gives better images than the Canon. The reason is that Canon tend to have a very unbalanced color range with over saturated red. This does not go away with RAW images as it affects the whole spectrum. It is possible to correct this using blue diffusers for strobe but this is just a patch, the LX7 tend to give much better balanced images.
Best Cameras for CFWA
Close focus wide-angle is shot with a fisheye like lens, using strobes typically at small apertures here are the rankings:
Sony RX100II
Canon G16
Canon S120
It is quite clear that the RX100II with the widest choice of fisheye lens and the highest dynamic range is the best camera for the job, but the addition of the Inon Zoom lens helps getting the G16 in this category, the S120 follows with similar results. The LX7 does not offer a fisheye options sadly and the XZ-2 lags behind in image quality compared to the two canons.
Best Versatile Still Cameras
Here I look at cameras that can shoot all type of shots from macro to ambient light.
Sony RX100II
Canon S120
Olympus XZ-2
The lack of fisheye options cuts out the LX7 and the poor performance of zoom wide-angle lens at wide end kicks the G16 out.
Best Overall Camera Still and Movie
Taking the previous list and eliminating the cameras that do not offer exposure control in movie mode this is the result
Sony RX100II
NA
NA
So the Sony RX100II is the only real all round camera and this explains why it beats the other in terms of sales.
As you add up lenses and accessories to your underwater photography or compact video rig you start experiencing an increase in weight first on land and afterwards in water.
My current rig for photography weights in excess of 5 Kg (11 lbs) and in water this is very near to 2 Kg (4.4 lbs). The housing and the hardware are usually the main culprit but even strobes or lights can easily add weight. As you add more and more components the weight of your rig ramps up.
I use locline arms for video and this greatly helps reducing weight both in and outside water. My compact video rig is around 500 grams or 1.1 lbs in water but also very lights outside water. The Sola lights really help with their incredibly compact size. The heaviest items are the tray and handle and the lenses.
Sony RX100 Mark II Underwater Video Rig
For my video rigs I use STIX jumbo floats on the tray and on the locline segments. Each one of those floats gives around 160 grams 5.6 Oz lift in water.
Stix floats are available as large and jumbo format more information directly on the 4th generation designs web site here
For stills I use aluminum arms as I find them more precise but also need longer arms and be able to sustain a heavier weight for a strobe outside water. Strobes frequently weight over half a kg with batteries, this is too much for a 1/2″ locline arm and stiffer 3/4″ segments are required. I don’t particularly like the 3/4″ segments and I prefer ball and clamp solutions. 3/4″ segment can hold easily a strobe but can’t be really too long.
This is my basic still set up I had for the Panasonic LX7
LX7 Photo Rig Front
Even in this case I tried to use as many floats as possible to keep it light around the usual half Kg 1.1 lbs underwater weight.
For my RX100 I have two strobes and arms with 8″ and 5″ long segments.
The 5.5 Kg rig in hand
As you can read this is 5.5 Kg on land and even with 6 Jumbo stix floats the underwater weight is over 680 grams or 1.5 lbs this for me is a bit too much to carry around so I started looking into alternative solutions.
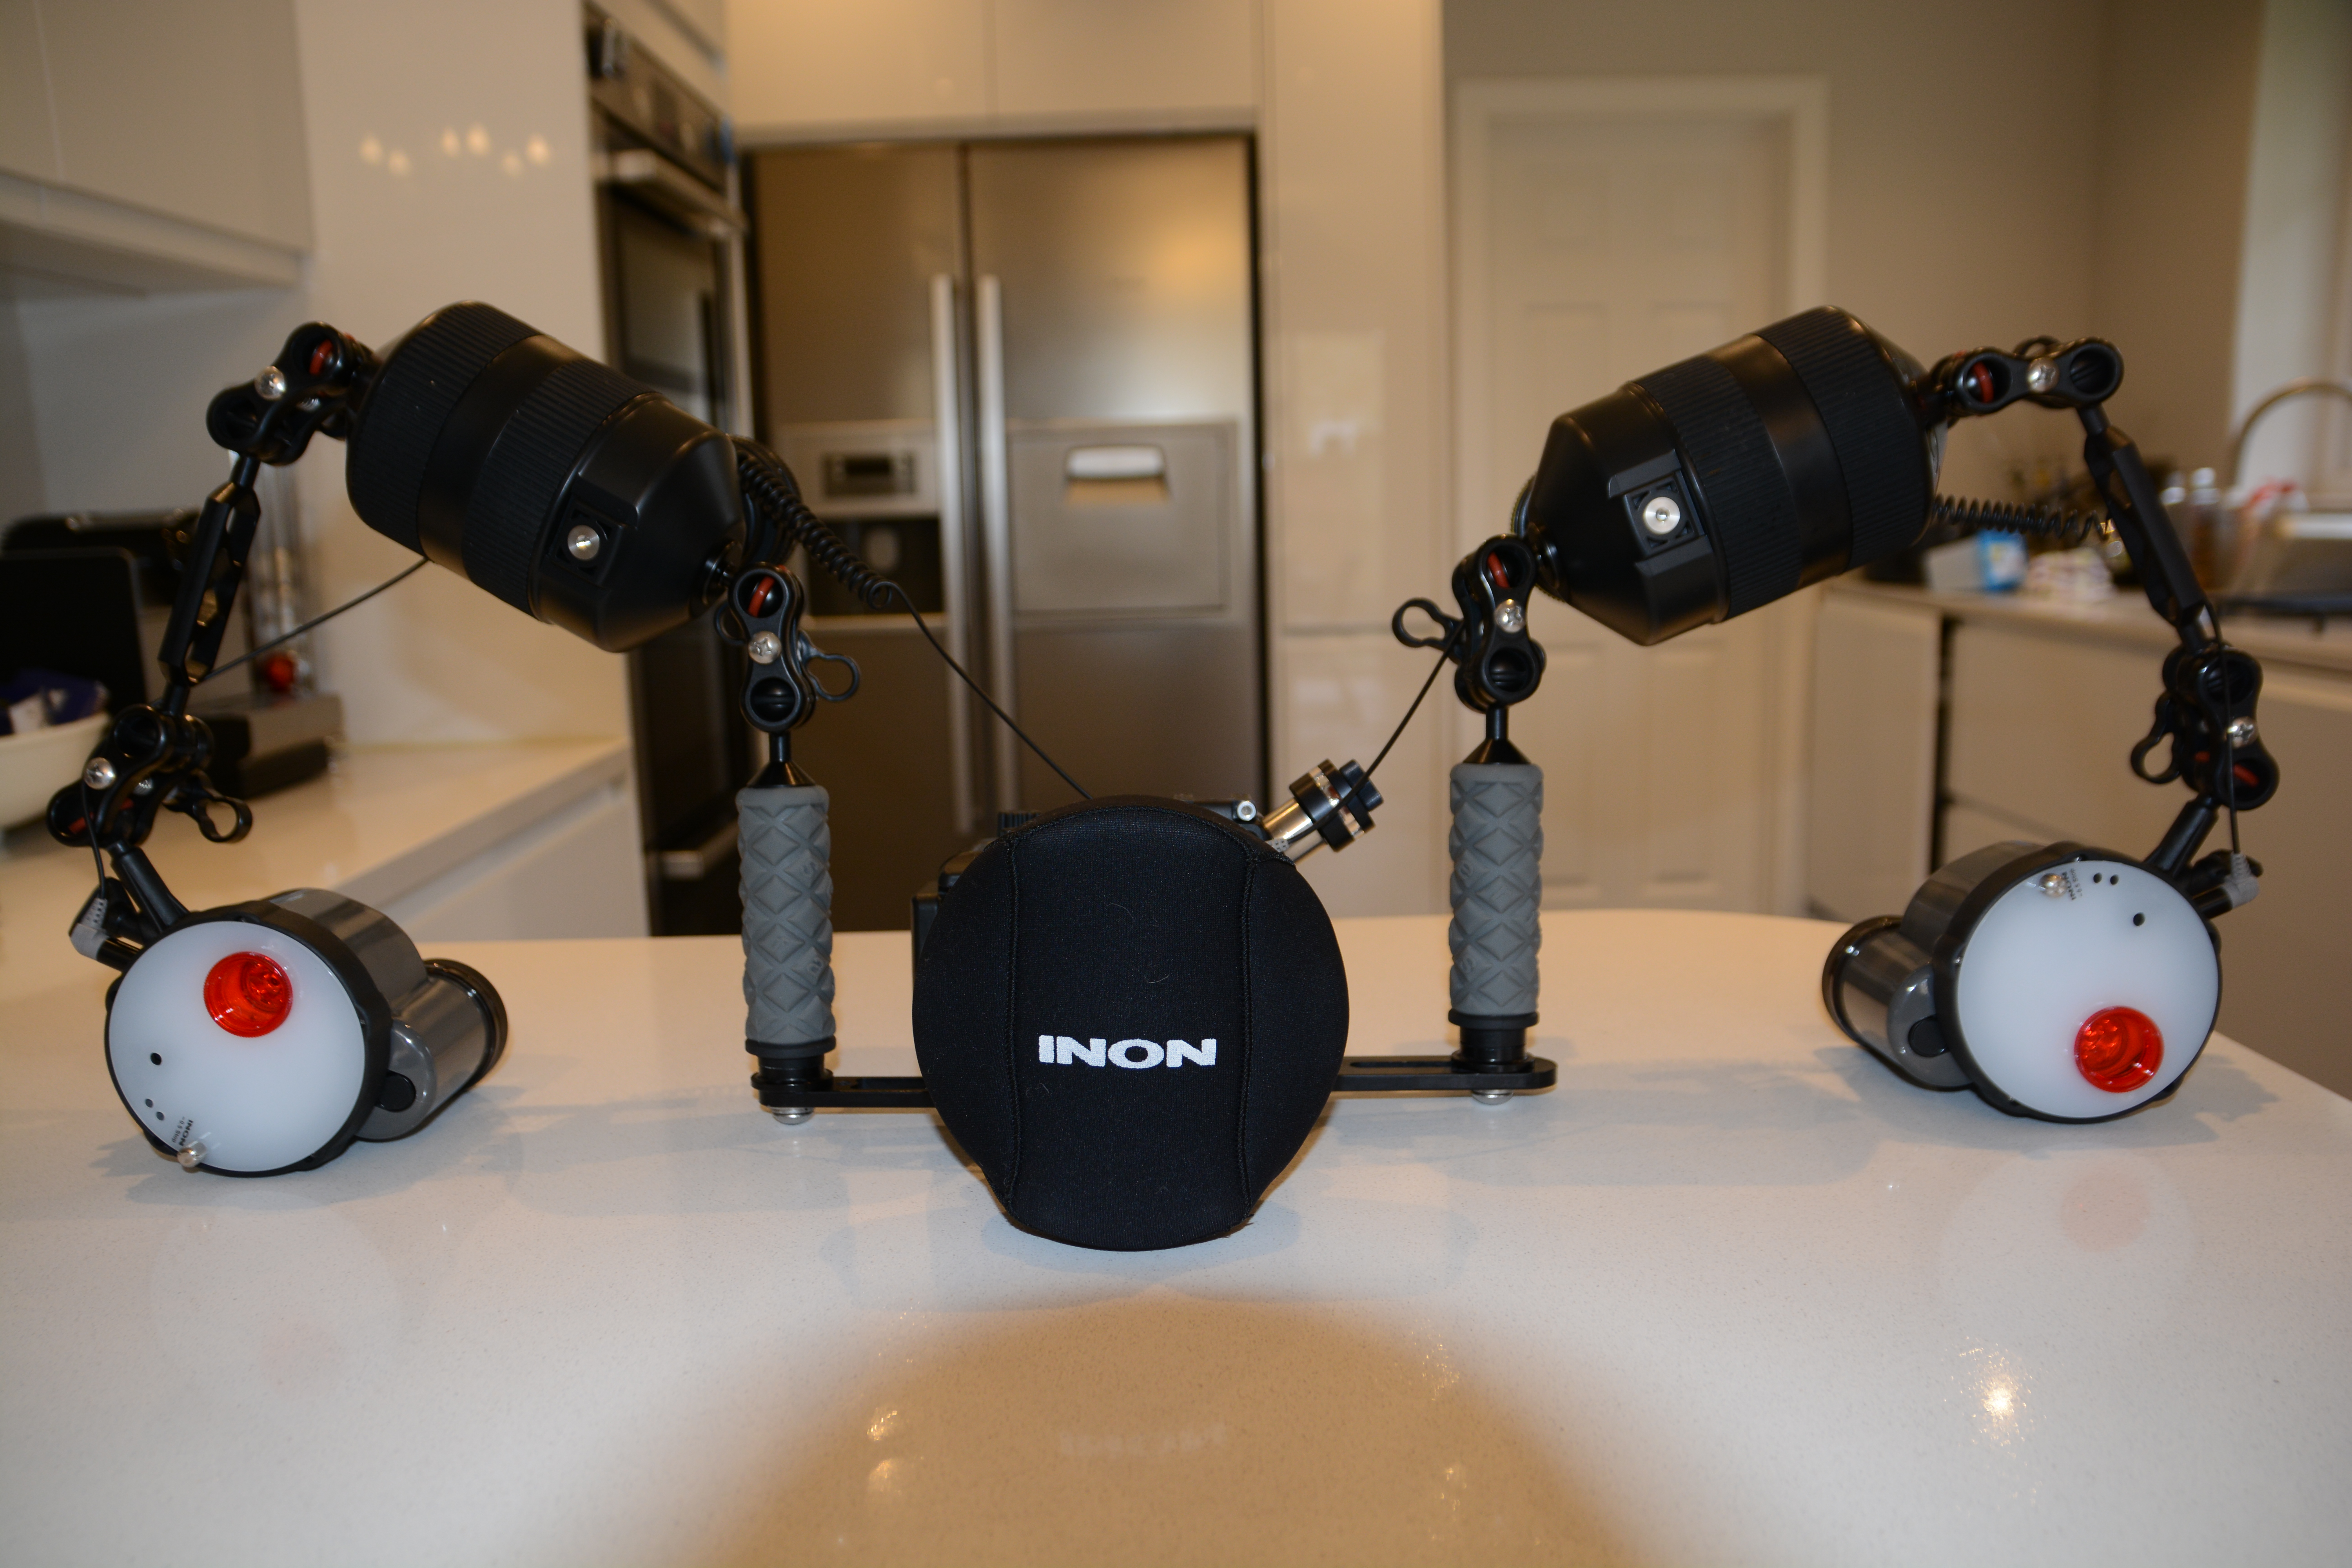
Left Inon Mega M – Center ULCS 8″ with 3 Jumbo Floats – Right ULCS 5″ with 2 Large Floats
The ultralight buoyancy arms provide too little lift in my opinion to be worth using so I looked at float arms in carbon or plastic material as an alternative. I came across Inon and Nauticam products and so I ran some comparison based on some metrics I have defined myself.
Update 16 March I also include Stix float arms now.
Those are:
Buoyancy per $: how much lift do you get per $ spent
Buoyancy per mm: how much lift do you get per mm effective length*
Buoyancy per gram: how much lift do you get in relation to the on land weight of the arm
*effective length is measured from the center of the arm balls
I refer to US $ prices just for convenience the same would apply even more in UK/Euro terms so here are some results
Standard Float Arms
You would use standard float arms if you have an acrylic dome on an SLR or mirror-less or a plastic housing that gives considerable lift as those solution give limited lift in water ranging from 75 to 333 grams.
Arm Type
Buoyancy
Cost Total
Weight
Depth Rating
ULCS S + 2 Stix L
154
$57.50
101
40m/130ft
Stix 6″ L
142
$43.00
101
40m/130ft
Inon S
75
$75.95
142
70m/230ft
ULCS M + 3 Stix L
237
$66.75
146
40m/130ft
Stix 9″ L
260
$48.00
146
40m/130ft
Nauticam M
240
$80.00
200
100m/330ft
Inon M
135
$89.95
181
70m/230ft
I have compared an ULCS 5″ and 8″ segment with Nauticam 60 mm diameter and Inon arms of the same diameter 52 mm or 2″. Those are the results. Update the new graph also includes Stix arms made of aluminum with plastic balls and their own floats.
Standard Float Arms Key figures
In this category you can see that a STIX arm with large floats beats a carbon or plastic float arms on all metrics in fact on the shorter segment nauticam does not even produce a float arm solution.
An ULCS 5″ segment with 2 large floats give a lift of 154 grams or 5.4 Oz and an 8″ segment a good 237 grams or 8.5 Oz, Stix arms offer 142 and 260 grams respectively in the 6″ and 9″ lengths.
This solution gives more lift in water and is lighter on land I see no benefits investing in a float arm in this range of buoyancy and for this reason I have not even considered ULCS buoyancy arms. A pack of large stix floats costs $25 for 4 units of 99 grams or 3.5 Oz lift each and those can be moved on your arm segments making it a very flexible option.
Mega Floats
I define as mega floats anything that offers at least 2 grams lift for each mm effective length. I put the Stix arms in this category even if they fall short in this metric as they are comparable and cost effective.
Each one of those solutions will provide in excess of 274 grams or 9 Oz lift in water. In this category we have the ULCS arms with Stix jumbo floats as the most agile solution at 2.5″ or 63.5 mm diameter, this has the benefit of not requiring extra long clamps to fold two segments with floats fully. Nauticam and Inon both have segments with 90 mm and 97 mm diameter. Inon segments have an extra benefit compared to Nauticam for compact camera users using wet lenses as they can support up to 2 single lens holder for each segment as in the picture earlier in this post. Stix arms made of plastic are the cheapest in this category though can’t offer the same amount of buoyancy of carbon or ABS arms.
Arm Type
Buoyancy
Cost Total
Weight
Depth Rating
ULCS S + STIX J
274
$62.50
122
40m/130ft
STIX 6″
284
$43.00
122
40m/130ft
Inon S Mega
390
$82.95
219
70m/230ft
Nauticam S Mega
375
$90.00
240
100m/330ft
Inon M Mega
650
$93.95
295
70m/230ft
ULCS M + STIX J
416
$74.25
175
40m/130ft
STIX 9″
425
$51.00
178
40m/130ft
Nauticam M Mega
655
$120.00
275
100m/330ft
Those are the results:
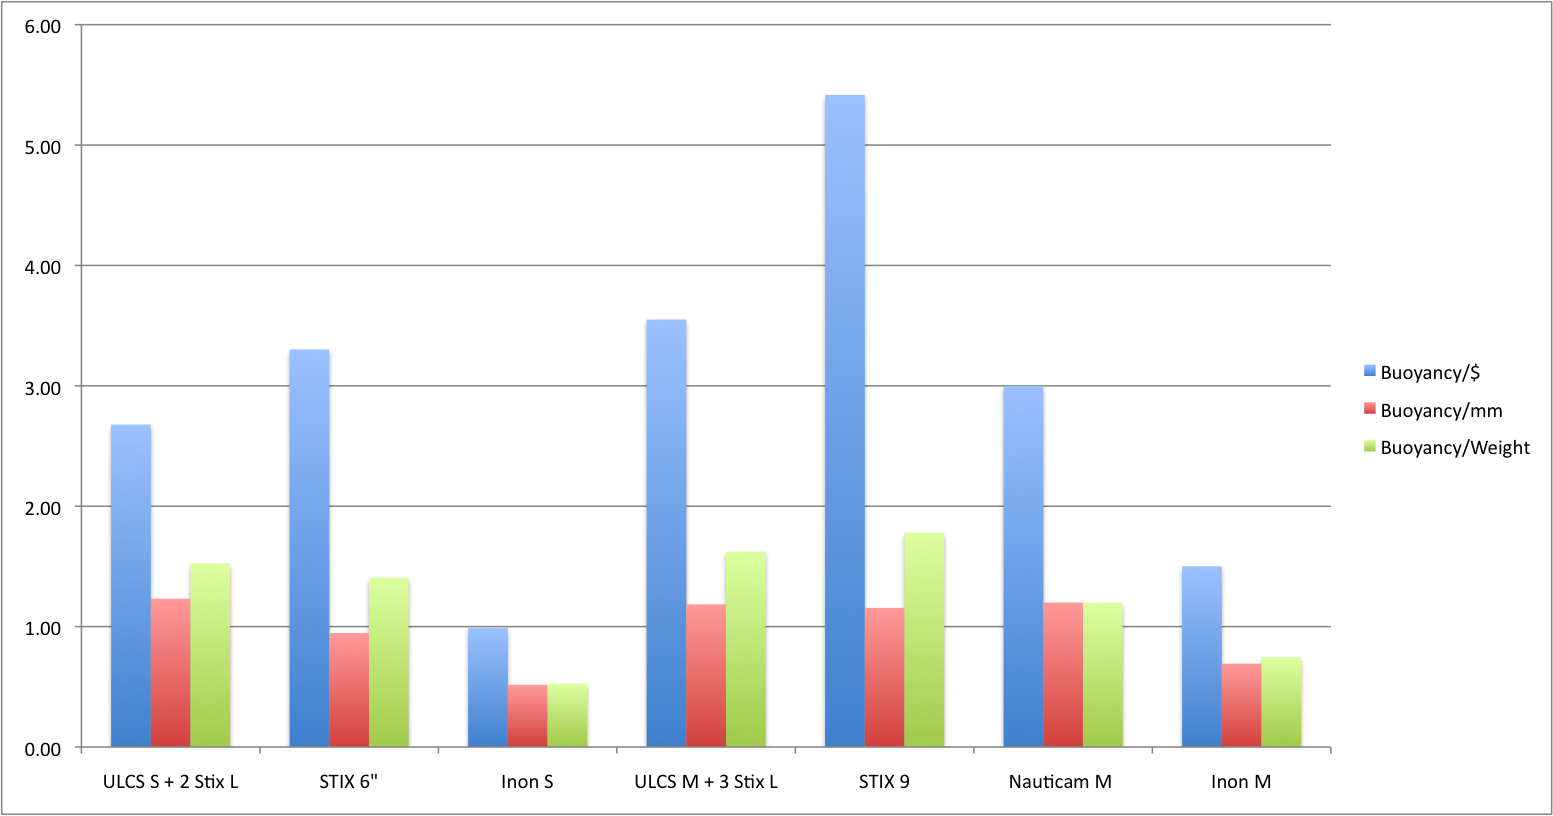
Mega Float Arms Key Figures
Stix float arms score higher on a Buoyancy/$ metric and also lead the way in terms of buoyancy/weight ratio however the amount of lift offered is limited and this solution does score low on the buoyancy/mm metric. Especially in the medium segment around 8/9 inches you can see that there is not much difference on a buoyancy/$ between a 9″ stix arm and an Inon M mega.
You do get a problem with this big arms if you want to fold the segments on themselves. Currently ULCS provides the AC-CSB clamp for 2″ arm segments but even with that you can’t fold two mega arms.
Inon Mega + ULCS Large
Here a few example of the issue I mentioned a mega arm with a 5″ segment with float reaches maybe 30º and without the float around 20º
Mega float + 5″ segment
Ultimately I do not think is a big issue as you can use the strobe adapter segment and still achieve all possible positions for your light anyway if you are concerned do get a couple of the longer clamps.
This is my rig with the float arms it does look neat compared to the version with STIX floats
Sony RX100 Mark II rig with Inon Mega float arms
Conclusion
Unless you have a plastic housing or a housing nearly neutral in water floats or float arms at 2″ diameter are not really effective, produce limited lift and are not a really cost effective way to add buoyancy to your rig. 2″ floats can be used to trim your rig in case larger floats are too buoyancy but are not a primary way to achieve the purpose. For example if I wanted to make my rig neutral I could add 2 large Stix floats on each arm.
Stix floats offer a lot of flexibility as you can take them off arm segments and put them elsewhere in a flexible way. Stix floats are also an option just within recreational limits 40m/130ft past this depth the floats loose buoyancy and eventually crush. Stix do offer custom materials float that resist greater depths on request.
Mega arms are a bit clumsy but do provide the lift needed and are cost effective even if a bit heavy on land. My preference if you use wet lenses is for the Inon arms, those are the most cost effective and provide the most lift and can also support lens holders. Inon arms are rated for 70 m/230 ft if you go deeper you need the Nauticam arms that ca go down to 100 m/330 ft. So for technical photographer float arms are really the only way forward in terms of off the shelf solutions. Obviously you can get bespoke solution using submarine grade divinycell but that is beyond the expertise and reach of a normal user.
How much lift do you need?
To calculate the buoyancy of your rig you can use manufacturers data sheets (Inon is brilliant, ULCS does provide some weights, housing manufacturers usually don’t). Failing that you can calculate this item by item using a graduated measuring container or last resort put your whole rig in water and use a luggage scale.
Caution
I balance my rig to have it neutral WITHOUT wet lenses this is for safety reasons. If you use a heavy wide angle wet lens and your rig is overall neutral the moment you take the lens off the port your rig will start to go up. Likewise if you had to loose your lens your rig would float and could escape to the surface. If you want to balance the overall rig you need to find a solution to balance the lenses themselves otherwise severe risks of runaway ascent chasing the rig could incur