Tag Archives: macro

Panasonic GH7 Review for Underwater Photography – Image Quality and Housing Ergonomics

This is my second post on the Lumix GH7. After discussing in detail autofocus which was for me top priority I want to cover more in detail image quality and ergonomics.

Image Quality 

The GH6 was not a step forward in terms of image quality from the GH5M2. I have owned all the models GH5, GH5M2, GH6, GH7 and from a photography point of view the pinnacle has been the GH5M2 which was a more significant step forward from the original model most people think. I have provided test data to photonstophotos for all the follow up models and this graph summarises the situation when it comes to RAW PDR.

What this tells you is that both the GH5M2 and GH7 are a step forward from the original GH5 while the GH6 was an improvement only from ISO 800. Considering that underwater on micro four thirds you will always be shooting ISO 100-200 the GH6 was not really adequate for photo performance. It is true that the GH5 has been really the target of video shooters however GH stands for Hybrid cameras and the series has been made of models that could do very good video and photos. The GH6 was really a video beast the GH7 that has the same body is back on the GH5 tradition of top performing hybrid camera.

A few key improvement over the GH5 include:

  • Increased resolution 25 Megapixels vs 20.2 
  • New RAW files with 16 bits depth
  • Dual Gain Output Circuit
  • Back illuminated sensor

The GH7 does have some interesting topside features like the ability to record pre-burst images and reach 60 fps with continuous autofocus but those are more for the bird shooter and not applicable to underwater use. Panasonic declares that image quality may drop for shutter speed slower than 1/15 at ISO 100 and therefore this should be your slowest setting also underwater. I do not see this as a limitation even for panning shots.

Many users confuse resolution and megapixels. Spatial resolution is computed on a single dimension in line per millimetre. Therefore the increase in resolution compared to the GH5 and GH5M2 is only 11.4% (5776/5184) this is not exactly life changing but more pixels are always better than less pixels bearing in mind that pixel size and image overall noise are NOT related.

With regards to the dual gain output circuit the increase in peak dynamic range compared to the GH5M2 is only 0.3 Ev (10.17 vs 9.87) and is entirely due to the fact that base sensitivity is now ISO 100 instead of 200. 

In the ISO range between 200 and 2500 the GH7 is not better than the GH5M2 and from ISO 3200 it gets better in virtue of noise reduction. Again we are never going to shoot ISO 3200 underwater so this is for us of limited interest.

Perhaps the most interesting feature of the GH7 are the new 16 bits RAW files.

A typical wide angle image has a size of 38 MB which is rather large considering the 25 Megapixels, for reference Sony A7 IV files are around 42 MB. There are several discussion about the efficiency of Panasonic compression but we are not going to go and deep dive on this. What matters to use is how much beating the raw files can take.

Modern cameras exhibit peak dynamic range when underexposed 3 stops from a grey card (I know this sounds strange but is a fact). The way to assess how much beating a file can take is to select one image where your strobe did not fire or was too weak for the situation and increase exposure three stops and see the resulting image.

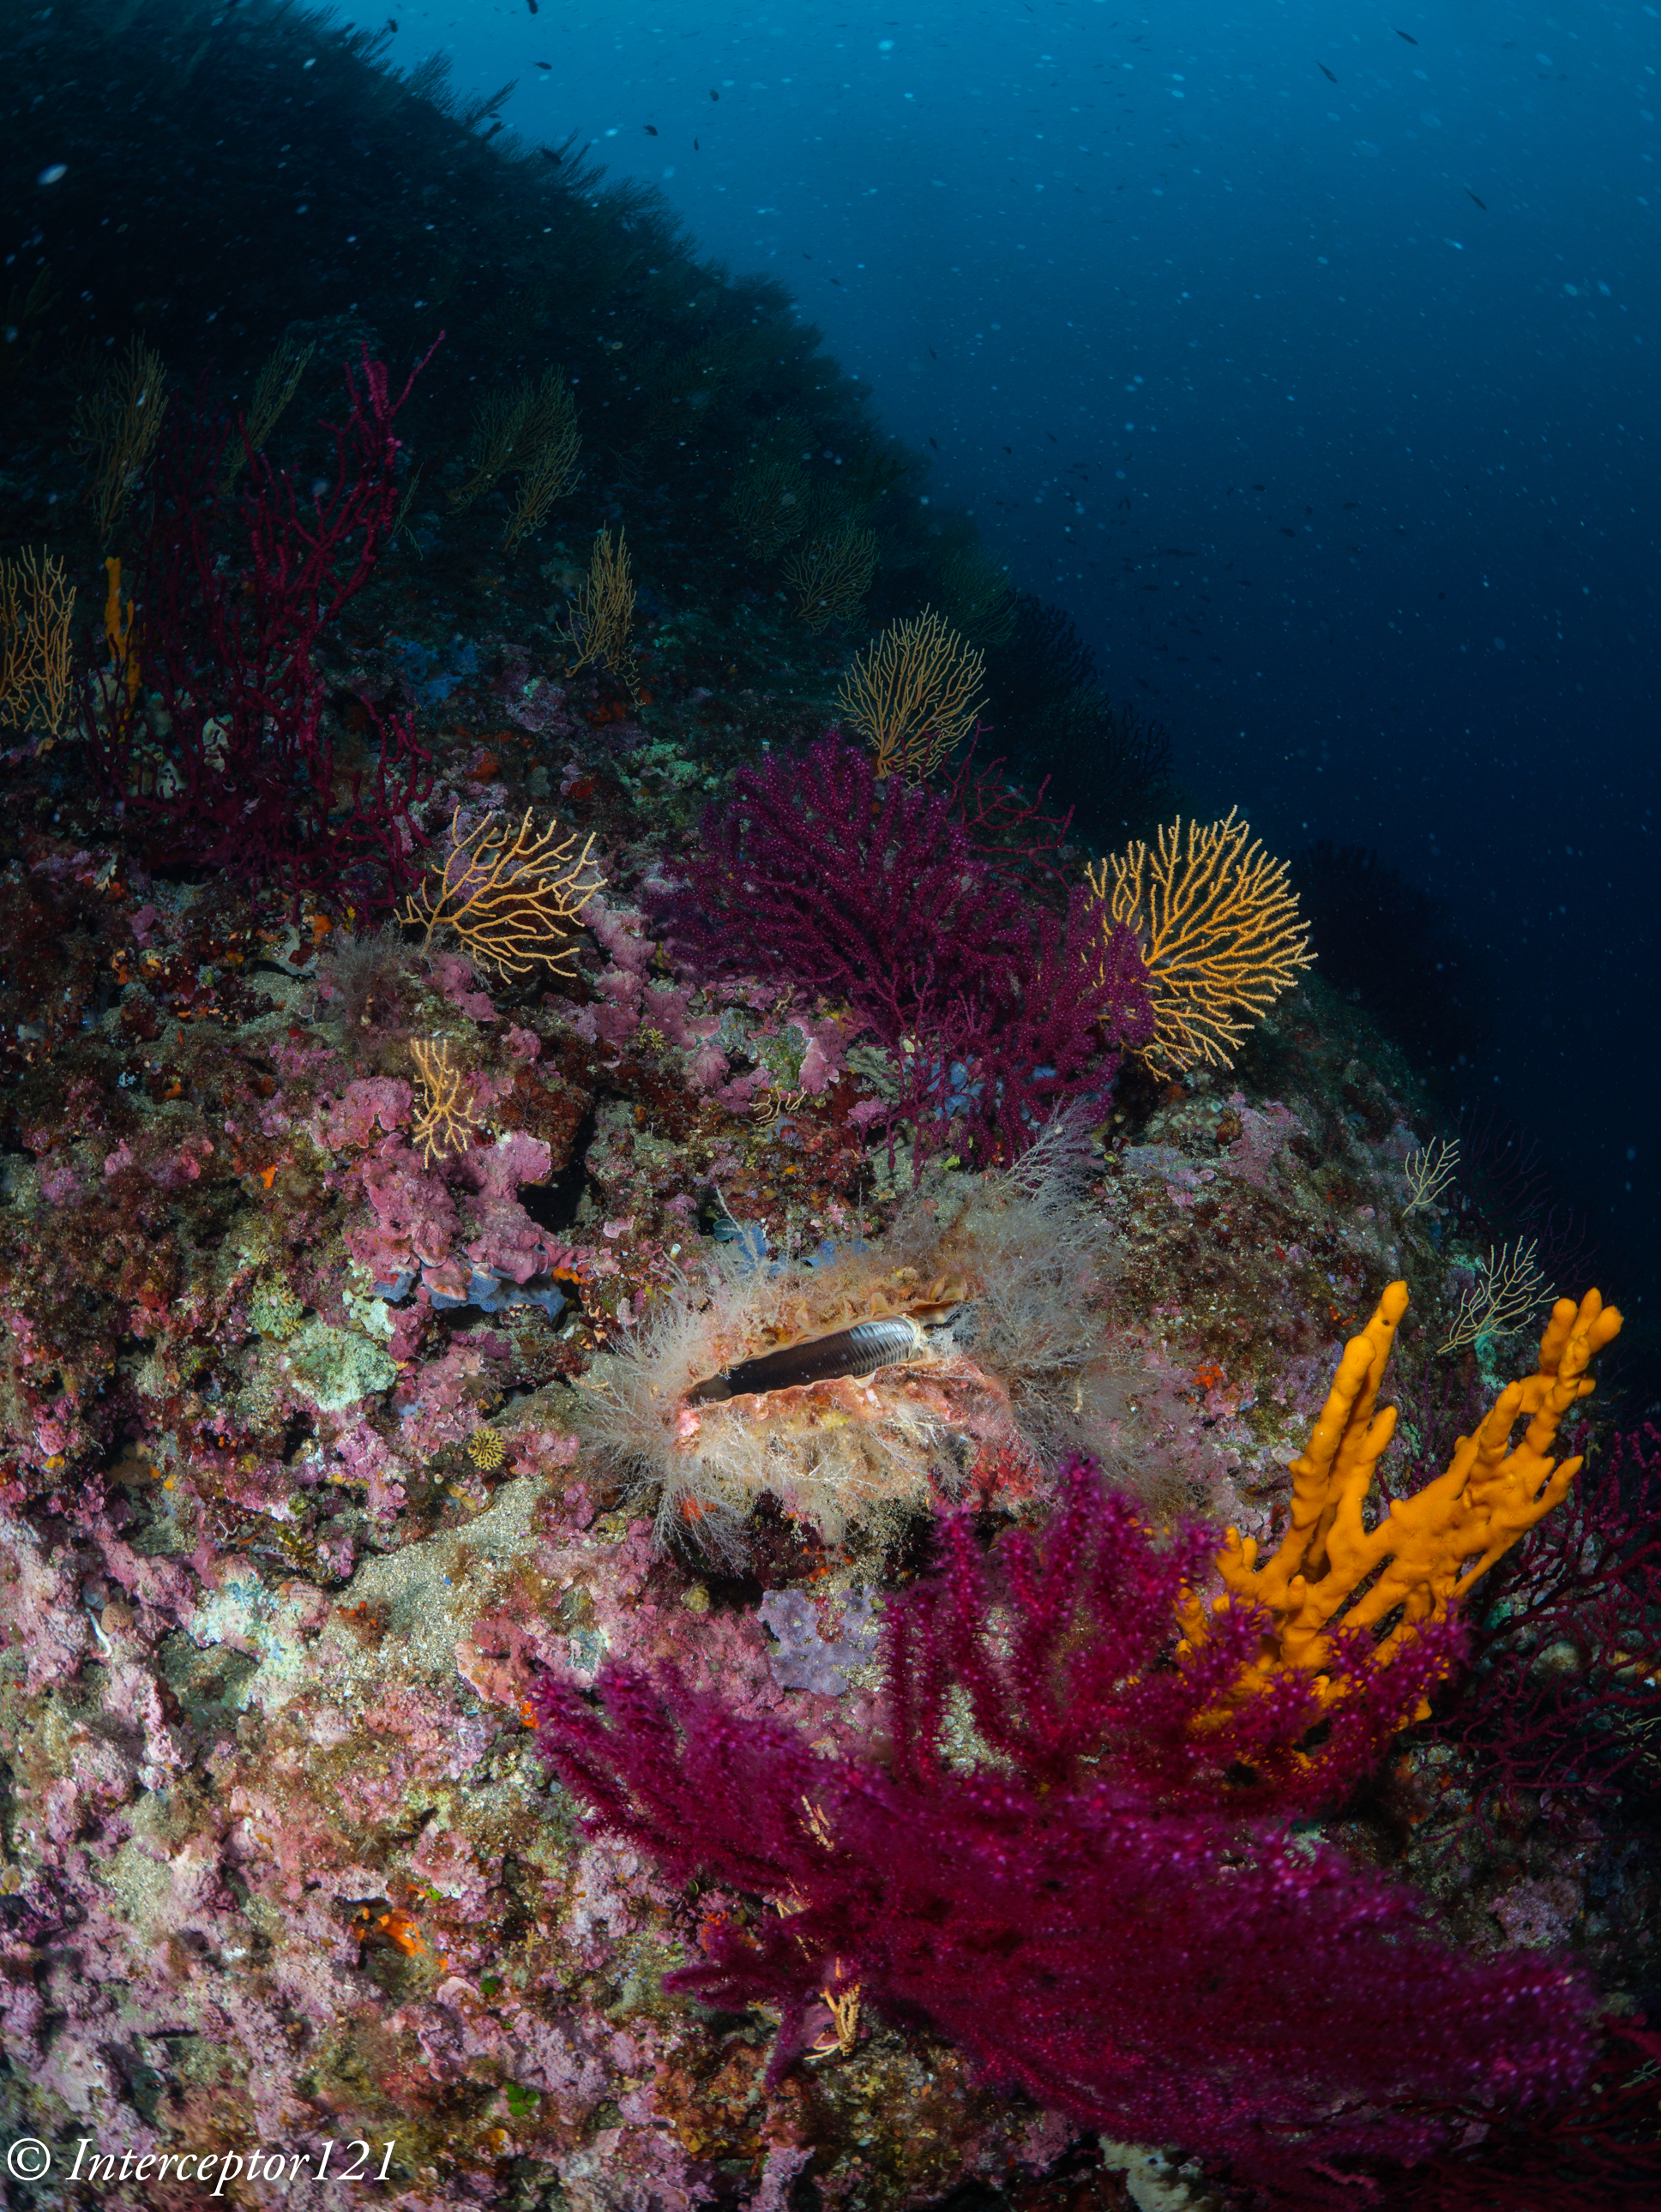
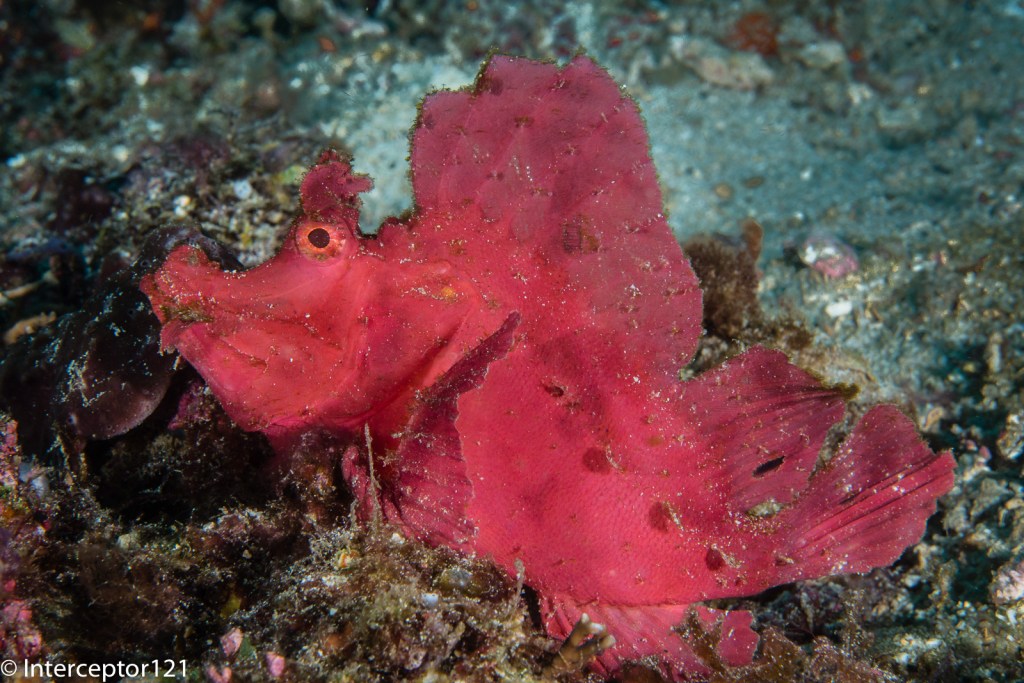
This is an underexposed image as an example where I had forgotten to turn up the strobes.

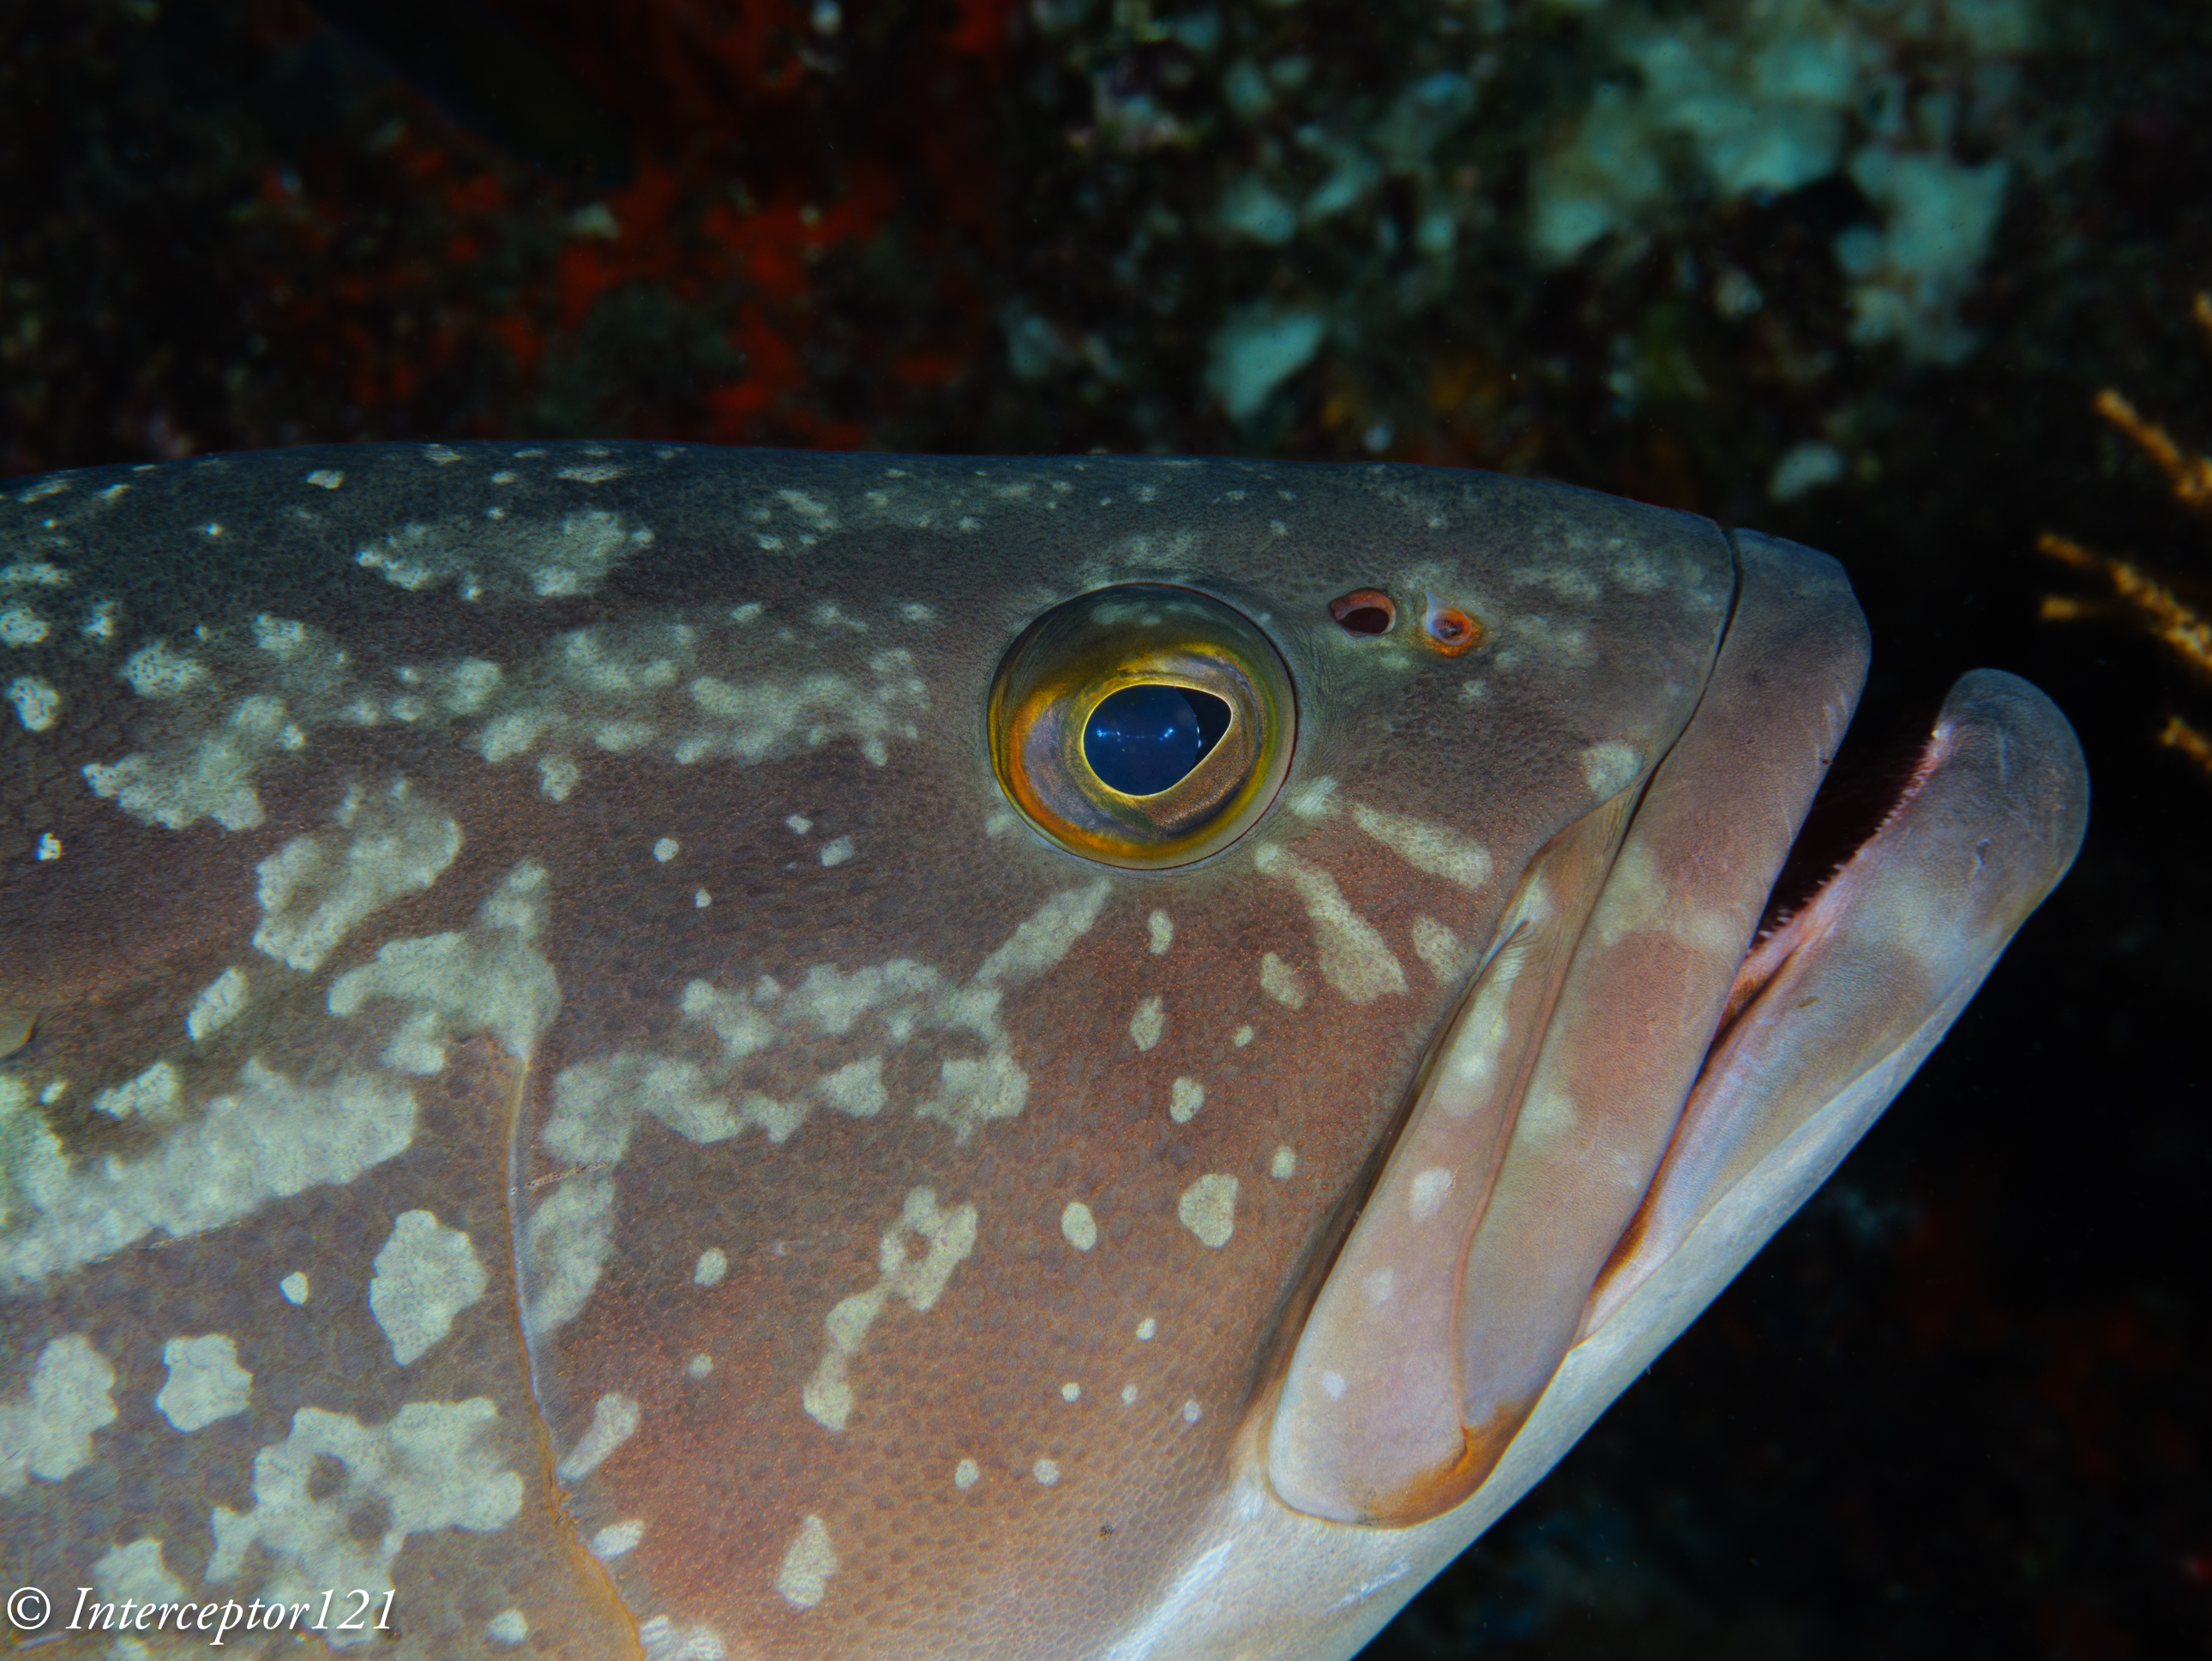
This is the image applying +3 exposure and other corrections.

The camera can easily take +3 adjustment as well as shadows up to 100% which is an excellent result.

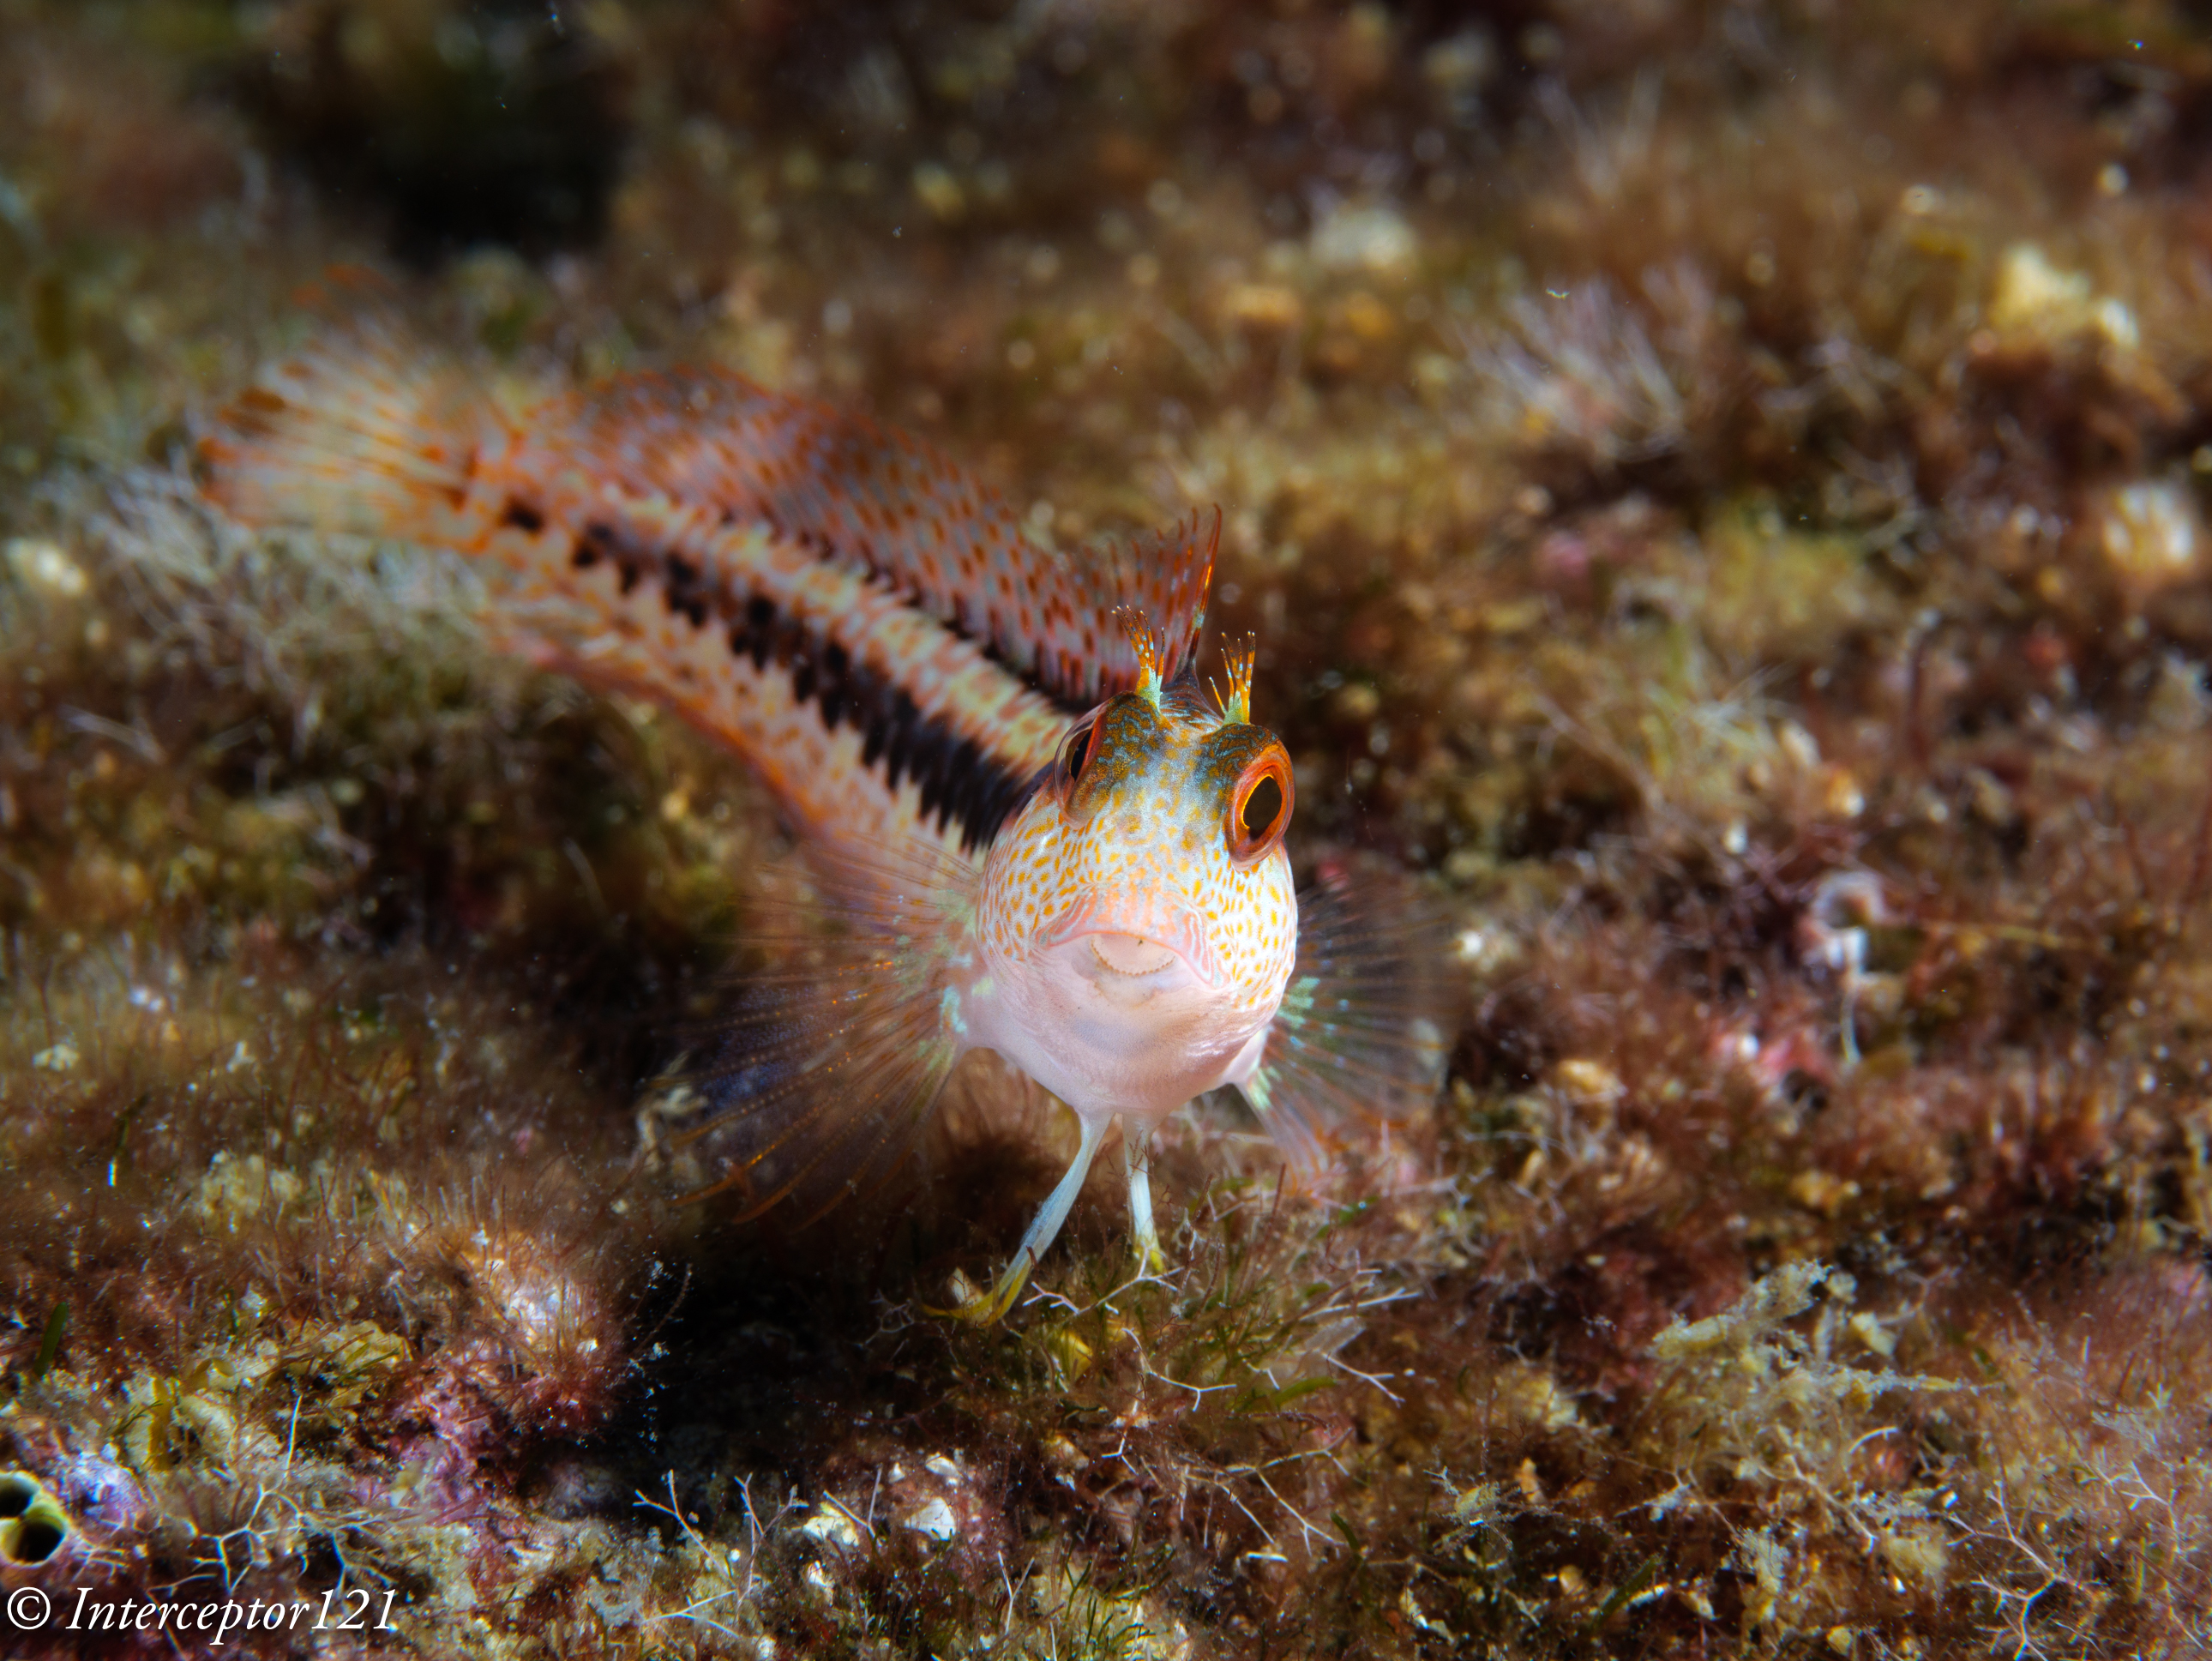
The other aspect of image quality is of course the lens and we can here use the excellent canon 8-15mm in the entire zoom range.

Compared with my A1 in a similar shot I can say that at the edges the GH7 is superior and in the centre the difference in actual resolution is small to non-existent despite half the pixels.

Full resolution shot GH7
Full resolution shot A1

This is because the lens shot at f/16 drops considerably in resolution compared to f/8 which are the equivalent apertures in full frame to micro four thirds. The files are full resolution I let you do the pixel peeping.

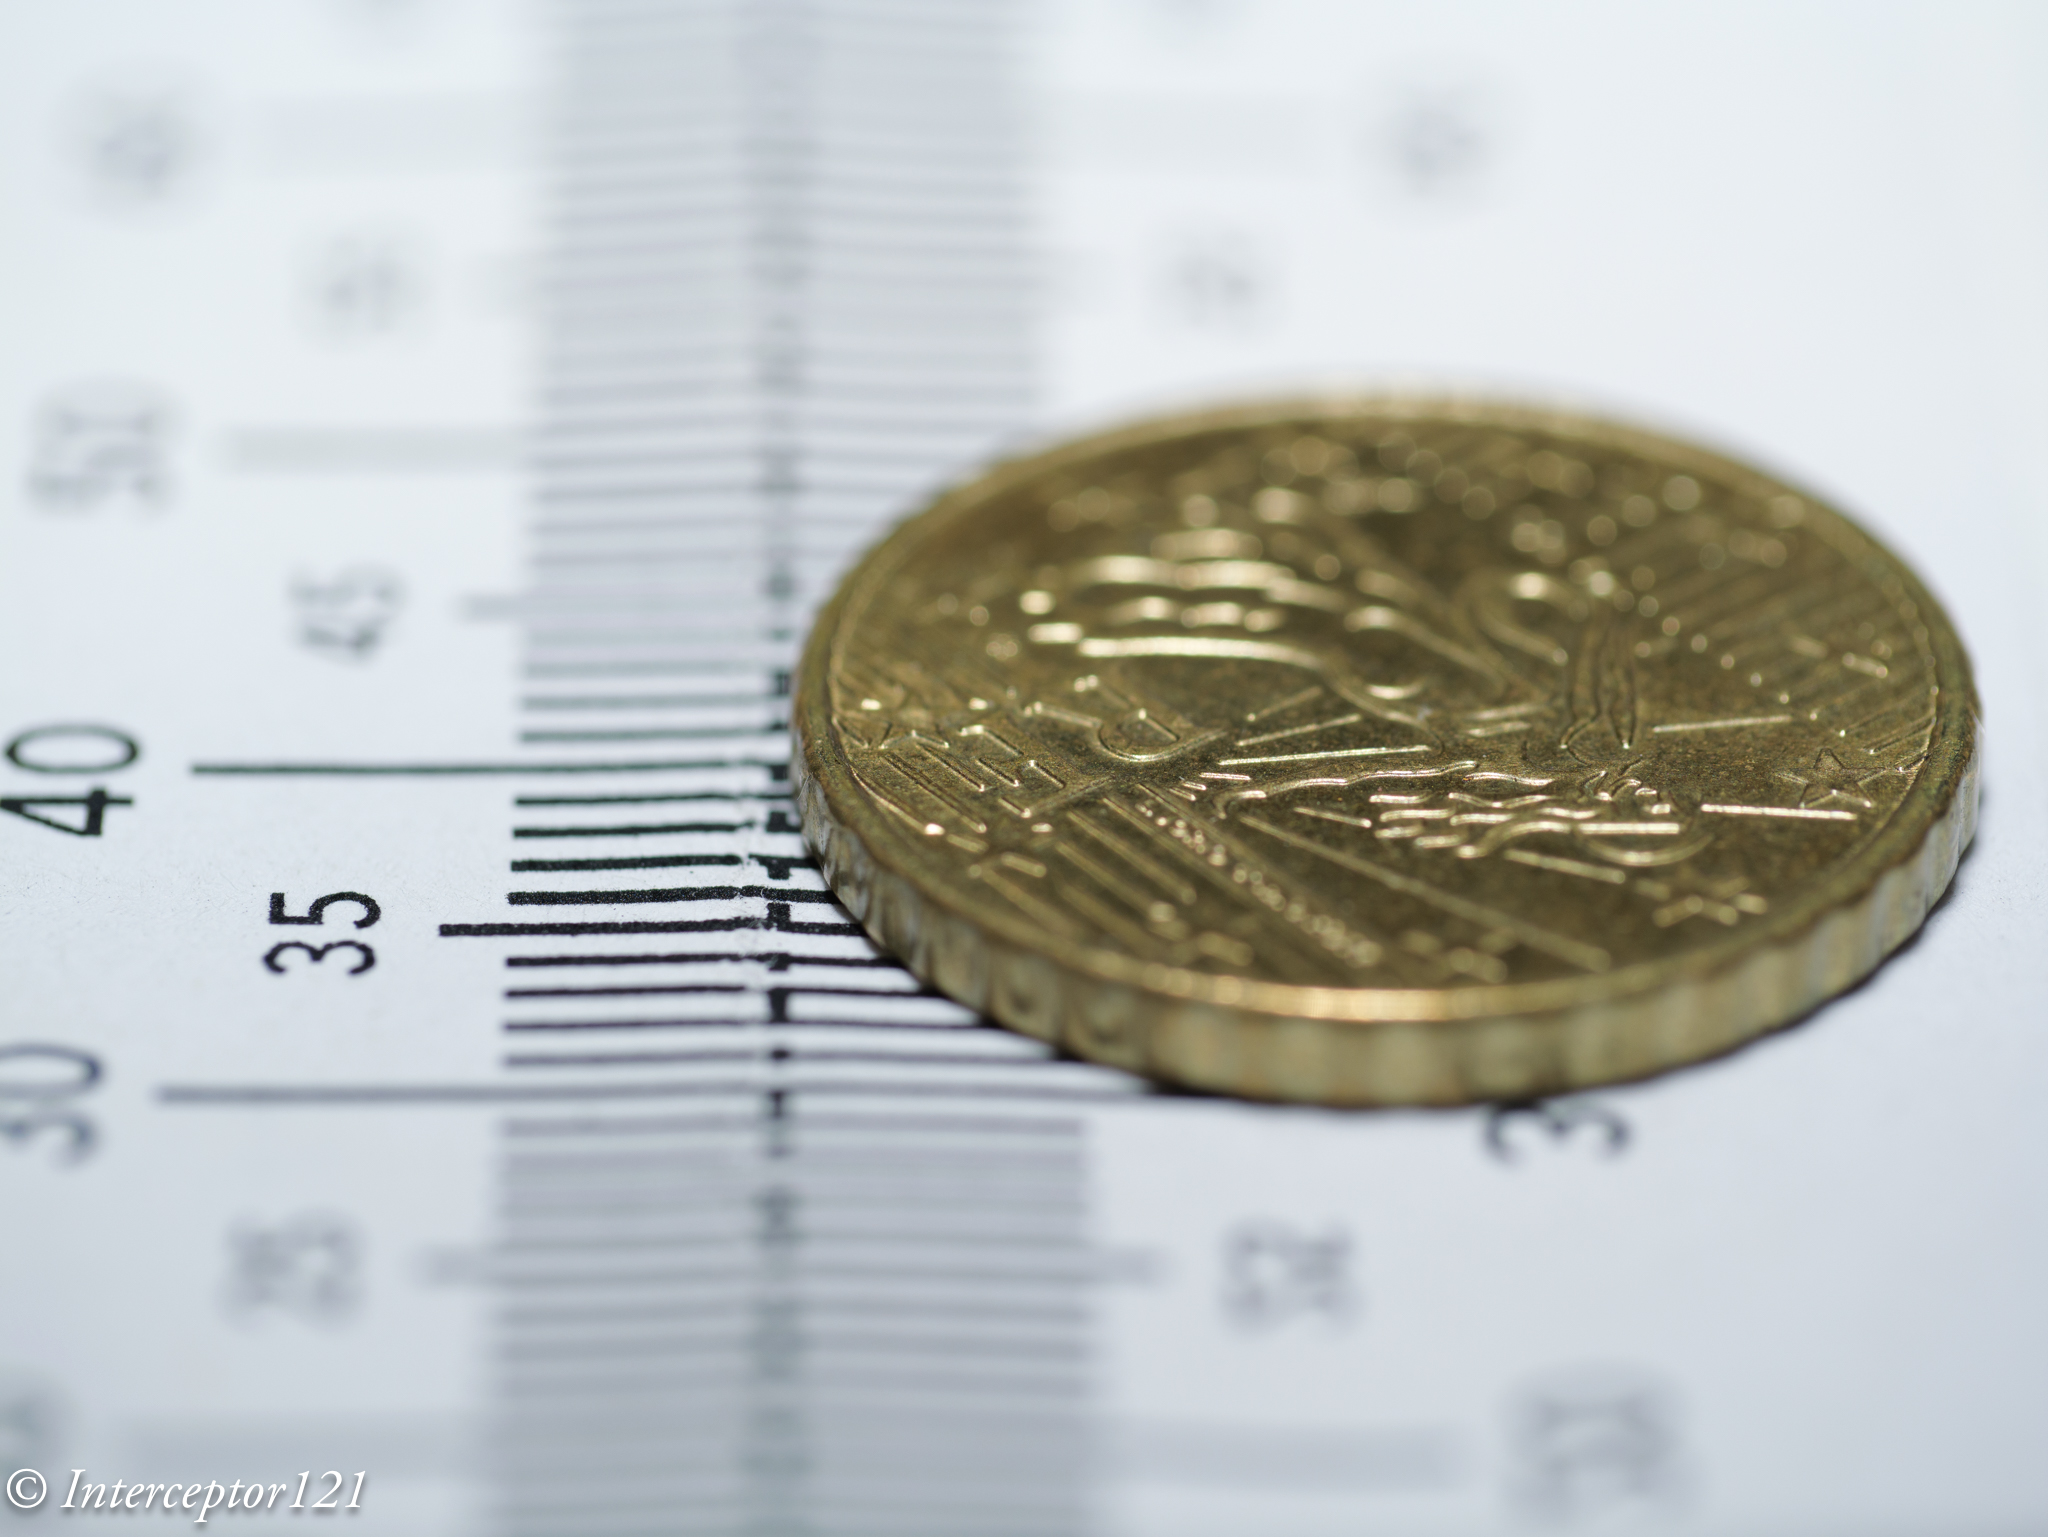
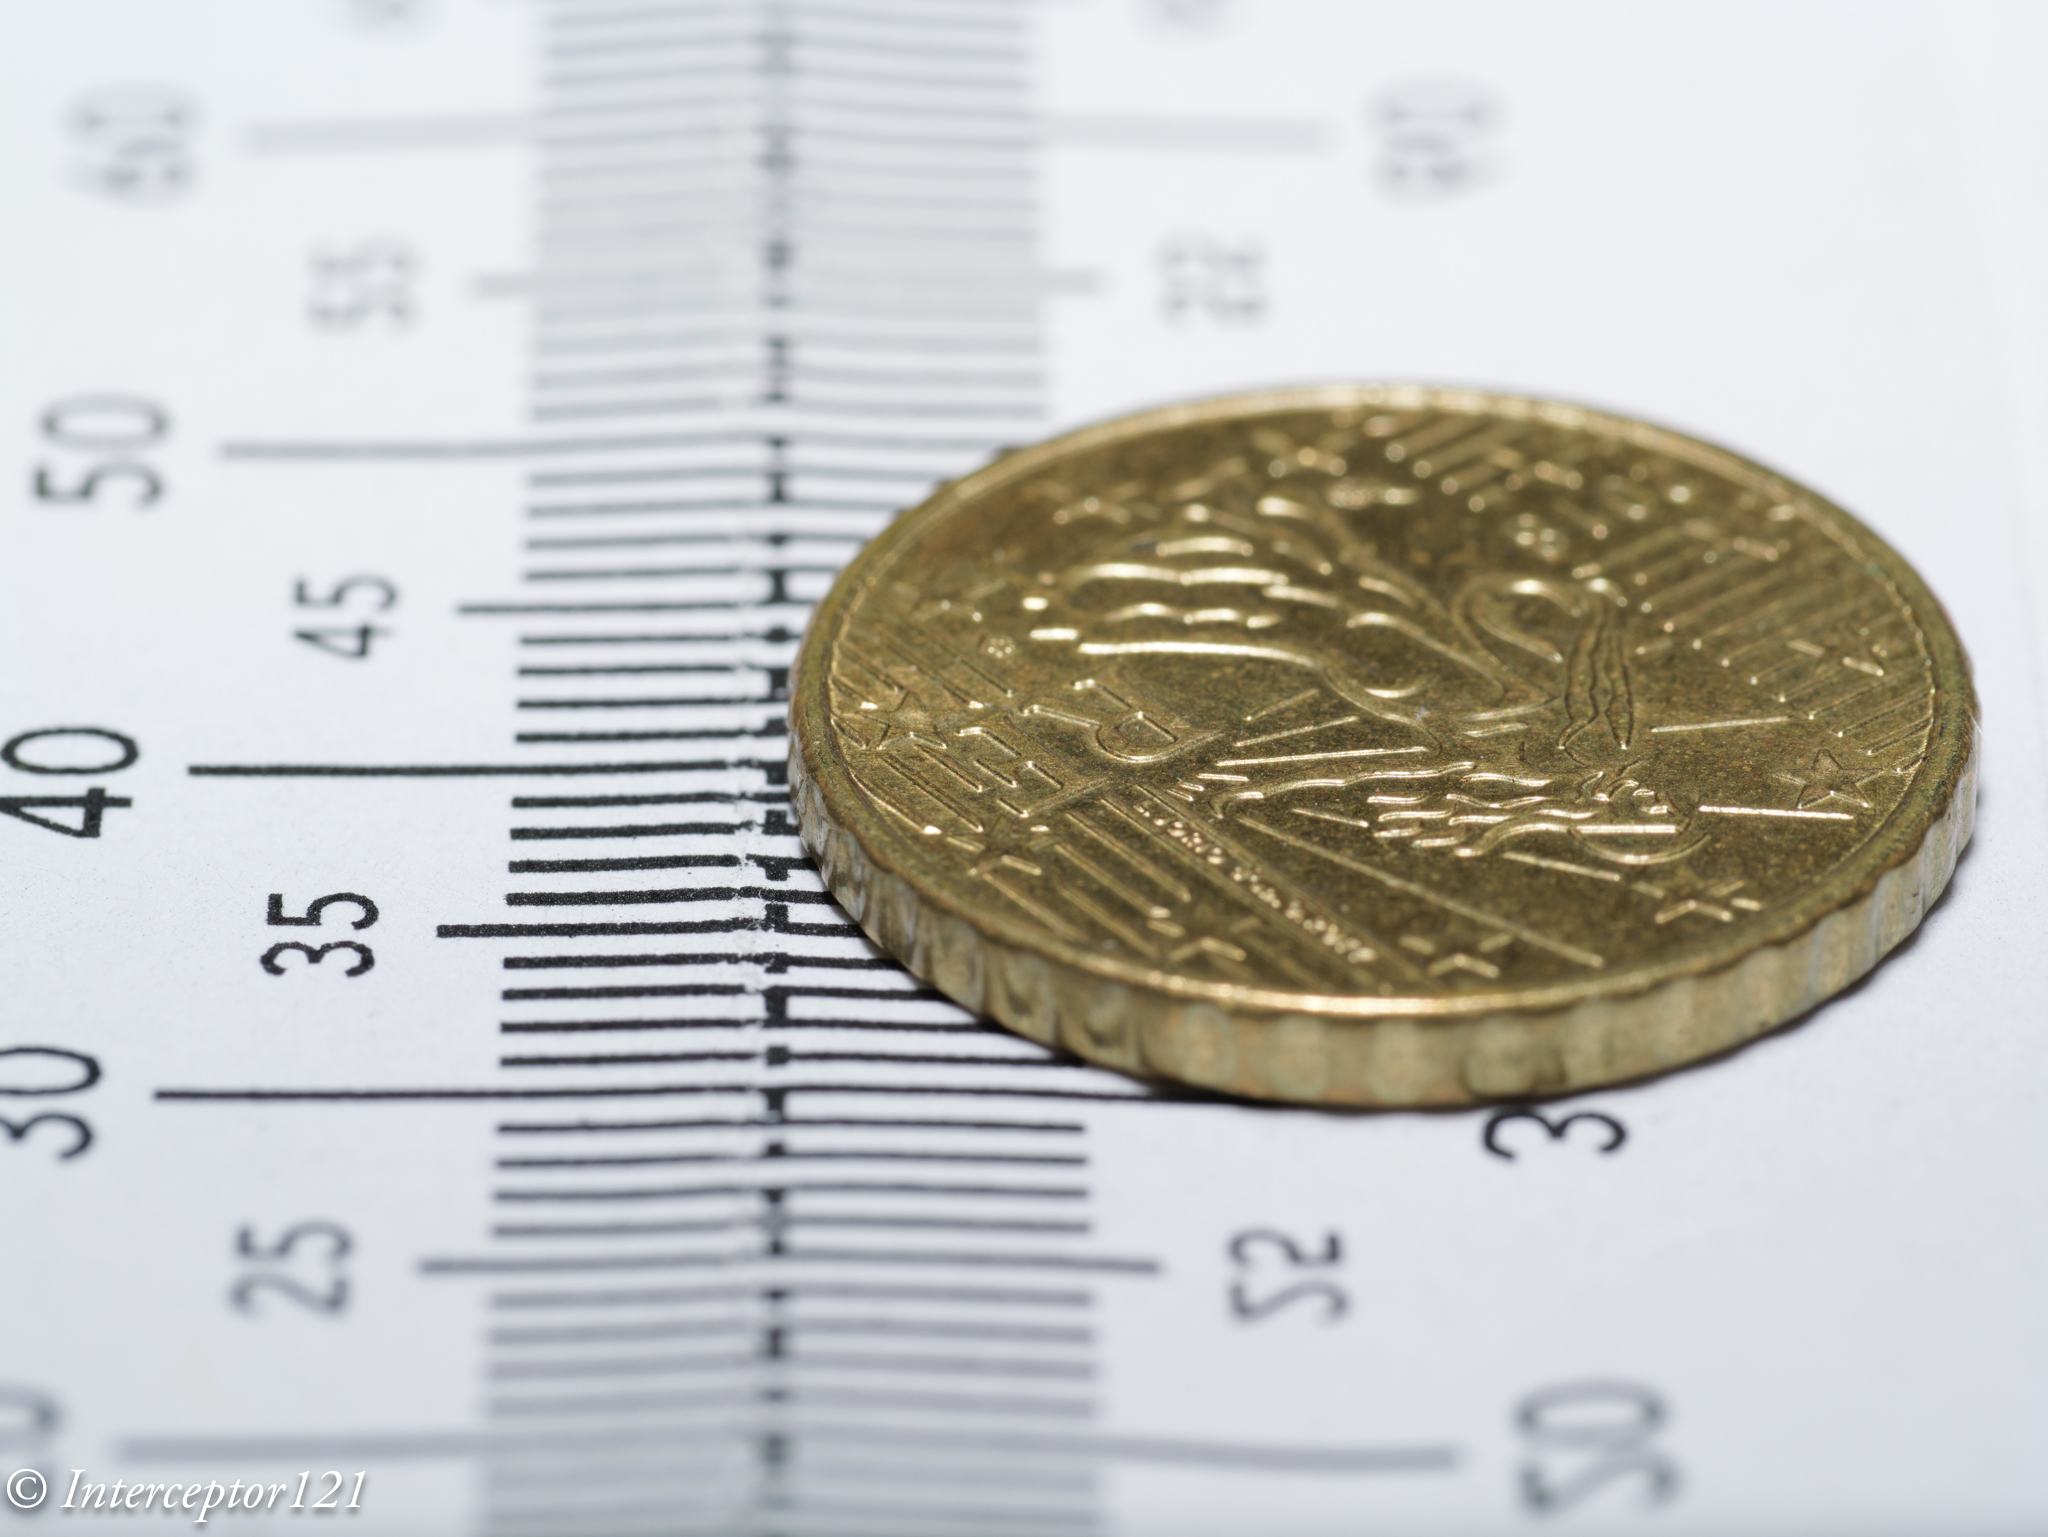
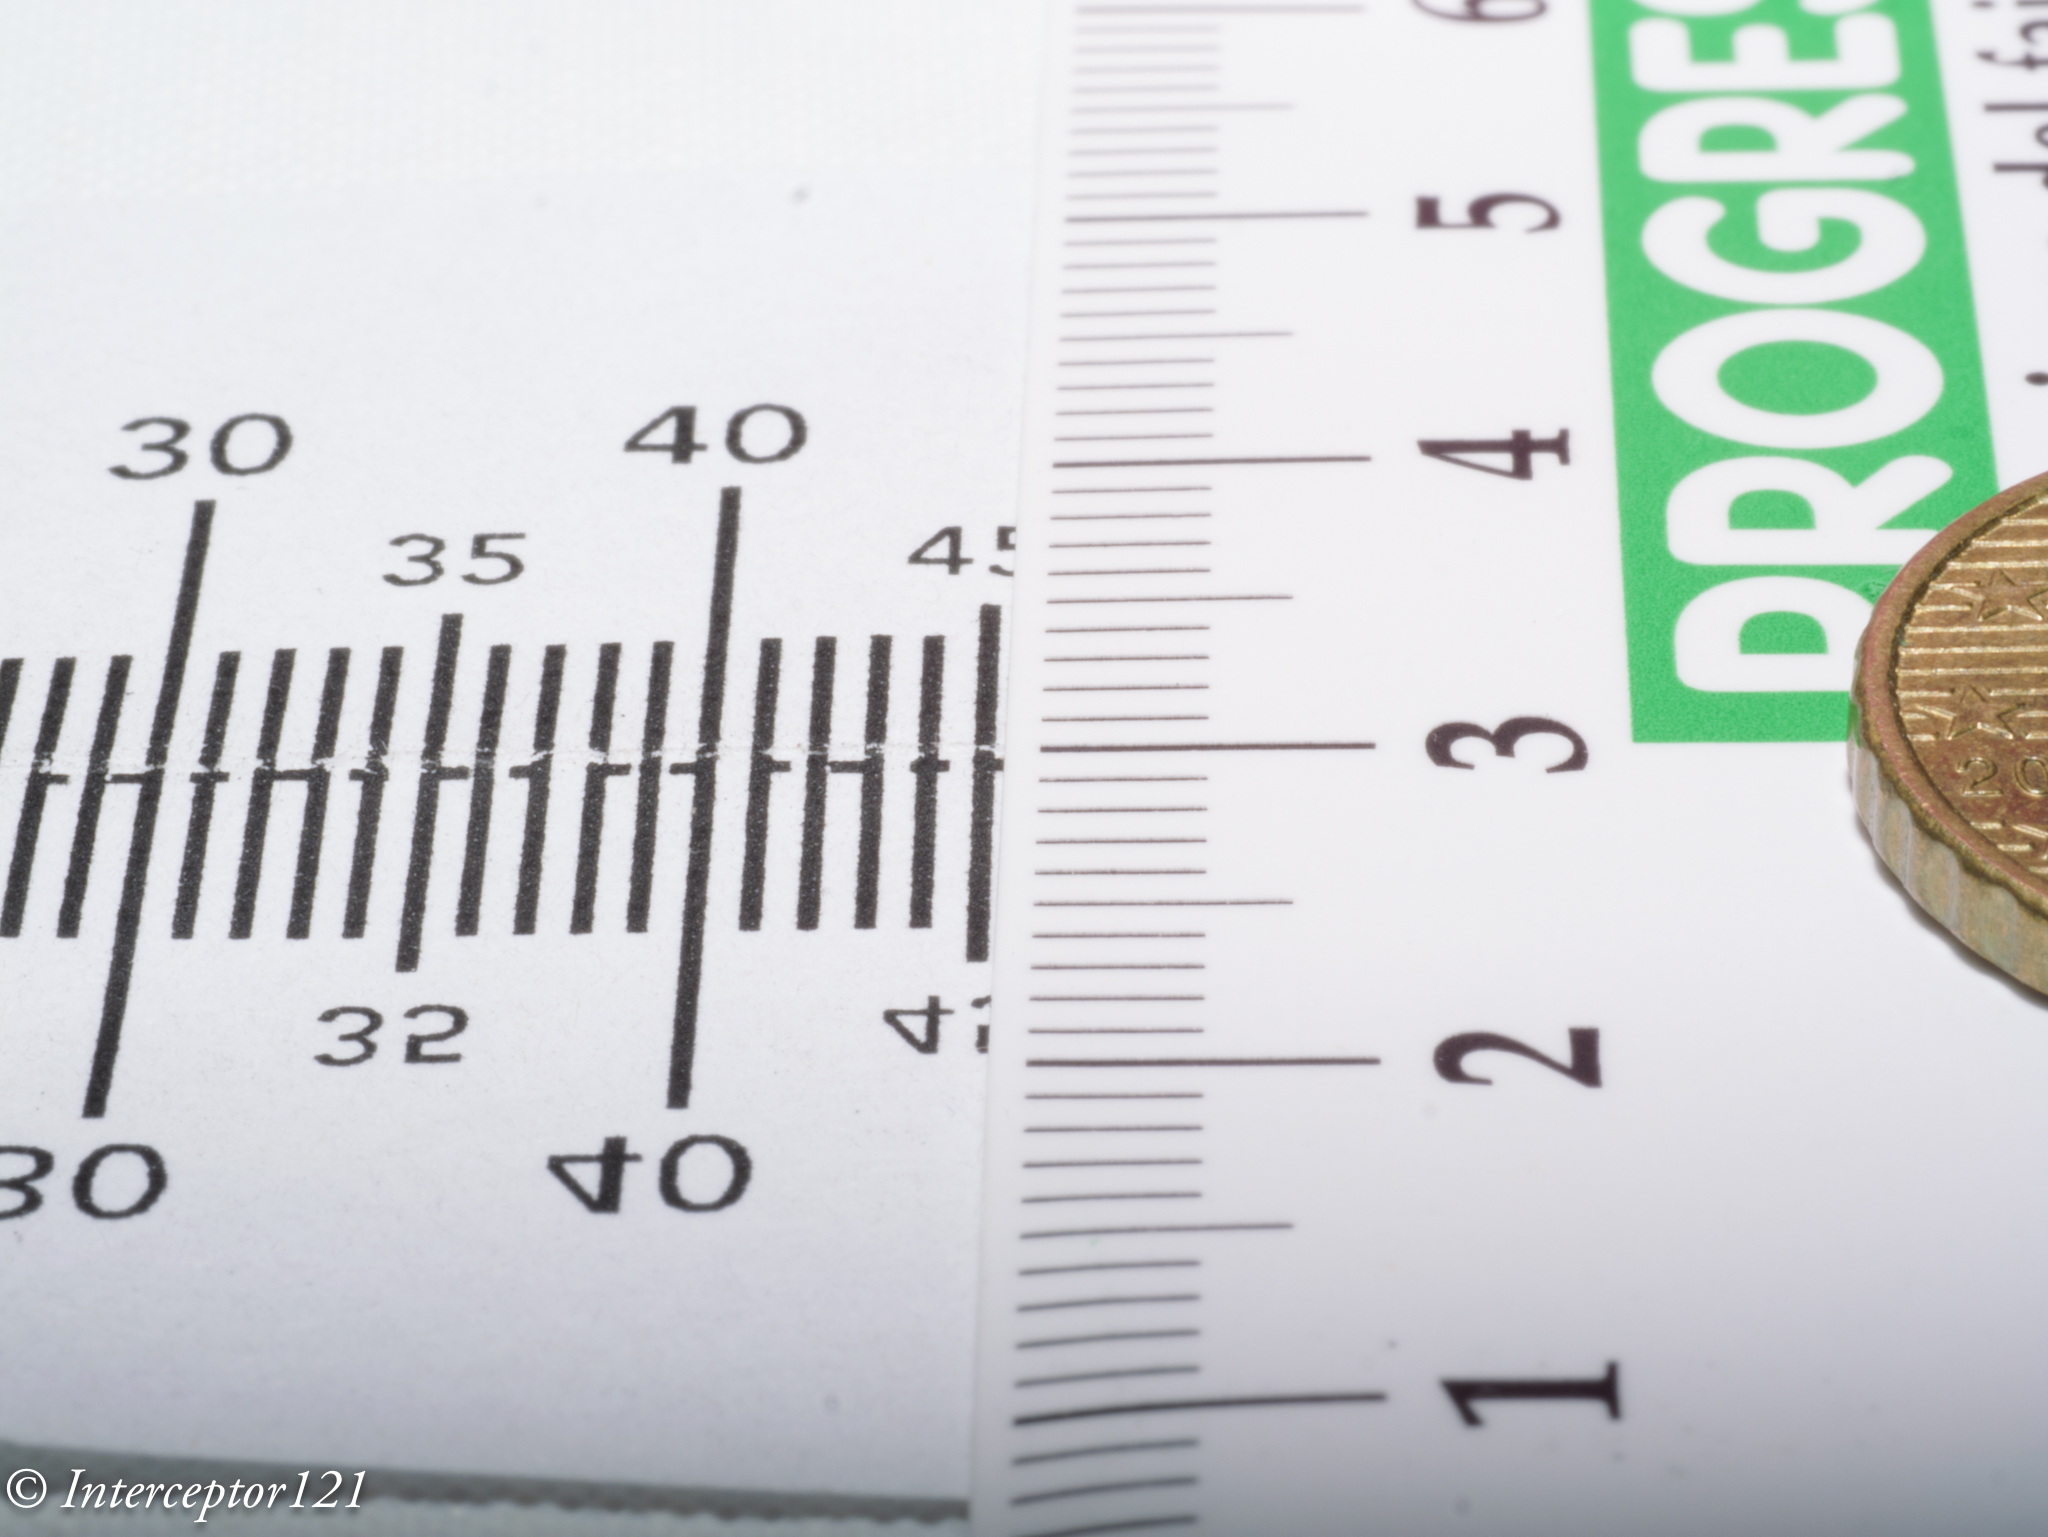
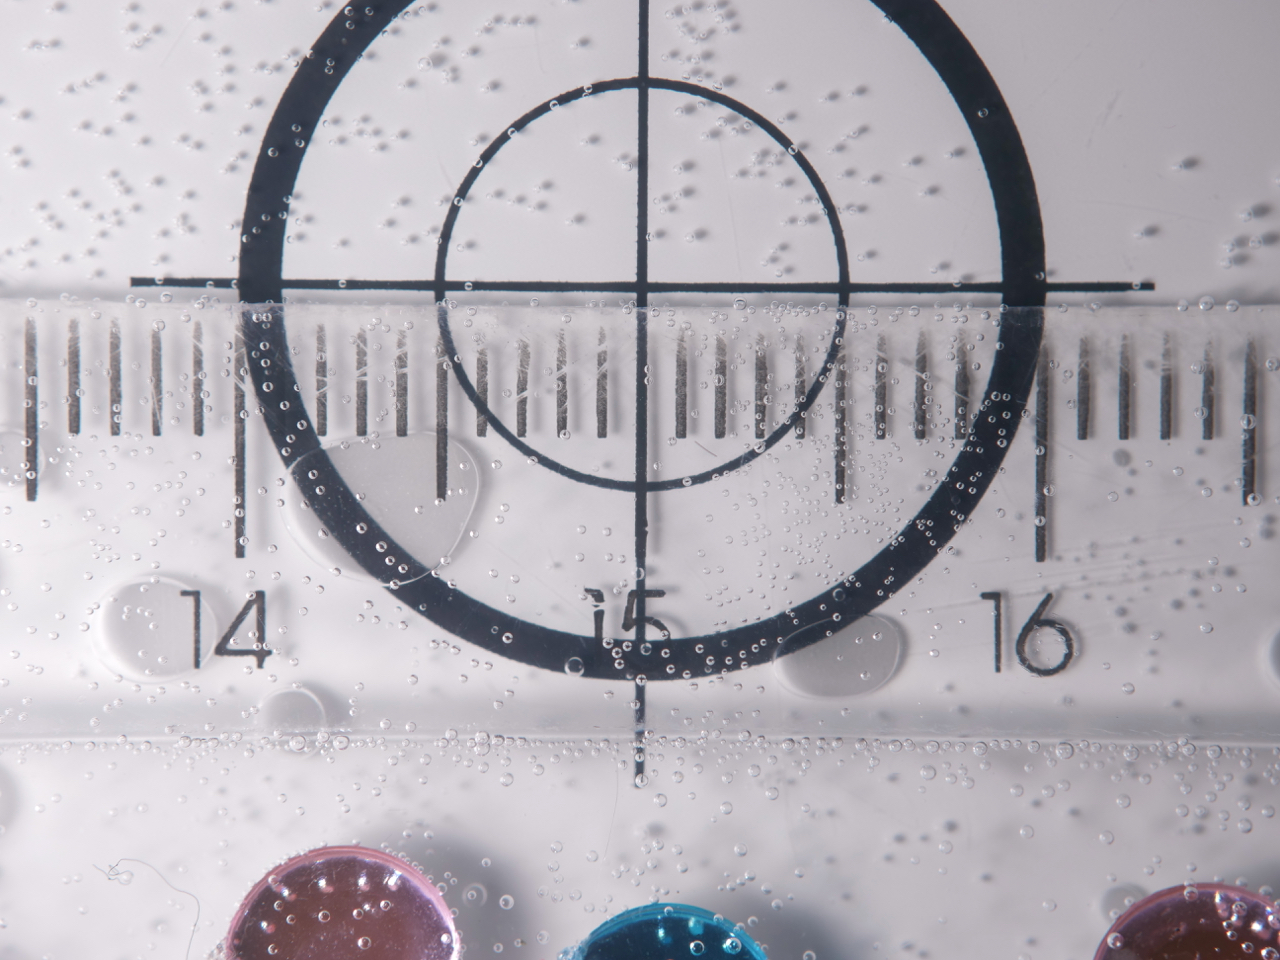
This resolution chart shows the underlying reason when the lens goes from f/8 to f/16 looses 30% of the resolution. Taking into account the smaller pixels of the GH7 this could mean an additional drop to the point the images are indeed very similar.

All in all the RAW files of the GH7 can take a lot of beating without issues as long as you do not clip the highlights like any other camera.

In general terms I feel the RAW files of the GH7 are similar in handling to my A1 and A7C II.
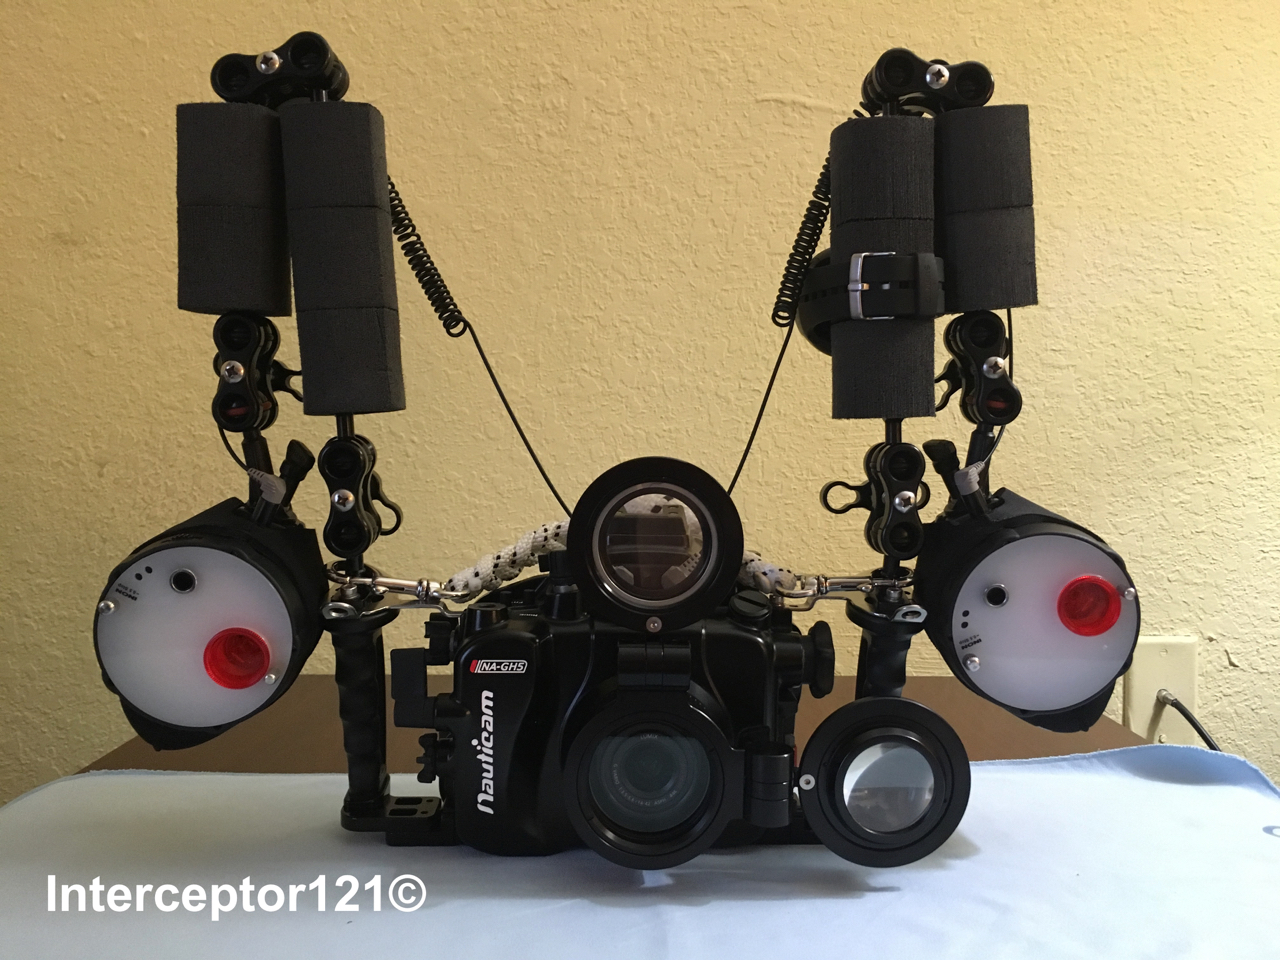
Dive Guide

Housing Ergonomics

Lets’ first cover the drawbacks of the Nauticam housing.

As mentioned in the autofocus post the housing does not give you access to the joystick which is a drawback. There are other two issues with the housing, the handles are angled forward, something typical of the Nauticam GH series that I continue not to understand. Why would the GH5 be any different from other cameras?

Not all function buttons are accessible in particular the two on the left side of the camera are not. Those are to be fair not the most important buttons and there is already a variety of buttons and controls available so except the joystick there will not be an issue underwater.

The lever under the front ring controls the function buttons 2 and 3 that correspond to the front two buttons of the camera.

FN2 FN3

I recommend using one for constant preview, hitting will circle through aperture simulation, shutter simulation or nothing and the other can be used to recall the focus limiter which is very important for macro shooting as explained in the previous post. The function button on the back can be your fn 9 to recall the focus area movement useful if you want to move it.

In total you have access to 3 function buttons as well as white balance, ISO, exposure compensation, focus mode, operation lock, EVF/LCD, quick button, menu and the four arrows, delete, mode, shutter mode, playback, movie, af on so there is nothing really missing. 

FN button instead of joystick control can be used to move the focus area

One very important feature is that the handles position can be adjusted, I move out the left handle so that the lens is central to the handles, on my A1 I needed to buy an extension as the port is closer to the left handle.

The housing also has an M10 accessory port as well as the ability to host M5 like the A1, and two ports for monitor and vacuum valve in addition to a cold show

While nauticam recommends the M5 accessory personally I find the cold shoe and especially the M10 port more suitable for focus light and external monitors.

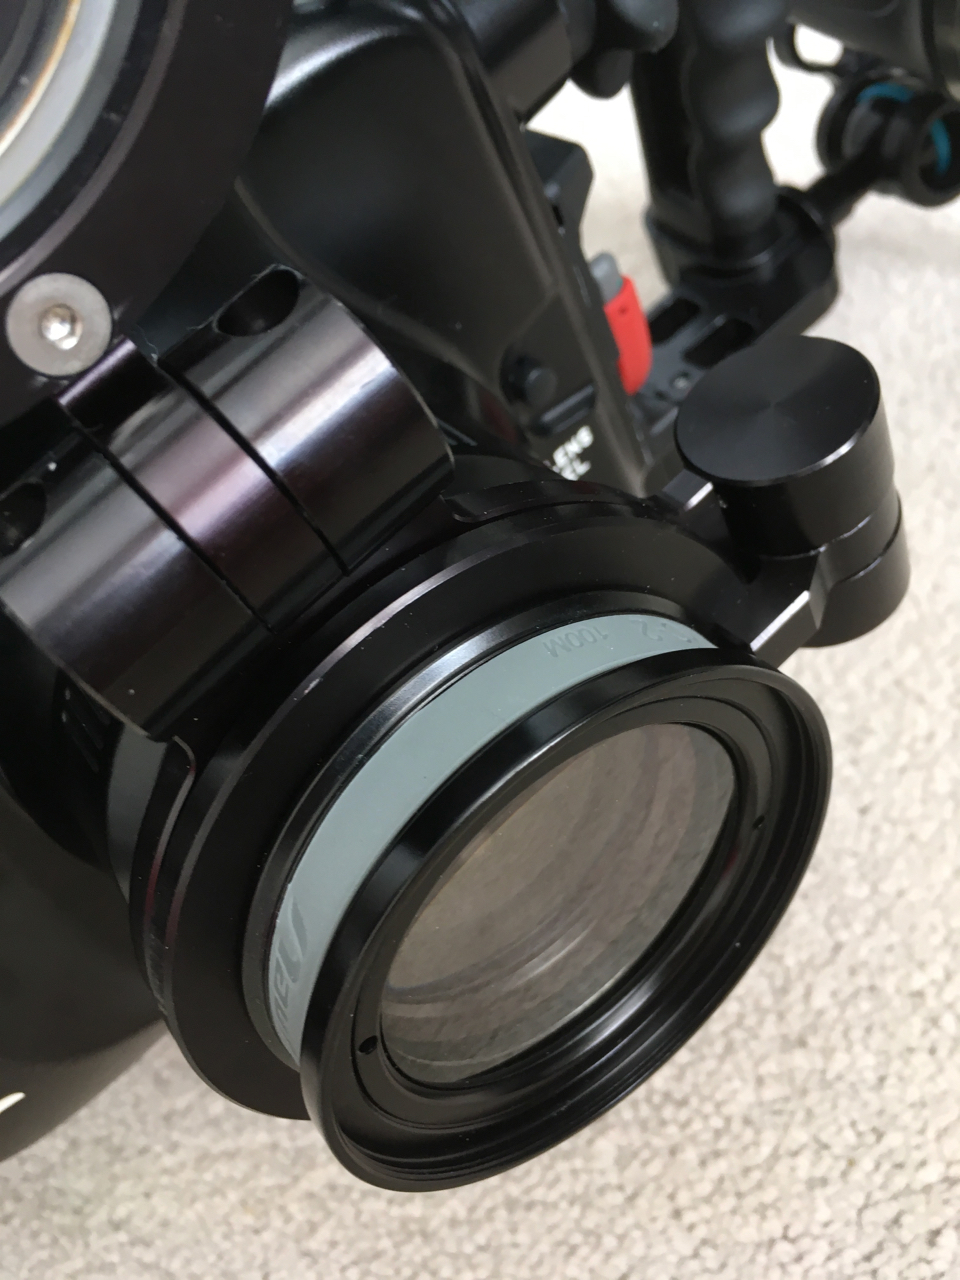
One awkward thing is the N120 to N85 adapter port has the release on the bottom of the camera but that is not a housing issue yet something to bear in mind. The housing is not small at 331x176x136 with a weight of 2.8 kg is indeed similar or equal to a full frame camera.

The final consideration is that the price of the GH6 housing that is compatible with the GH7 is very high, more than a Sony A7 IV, less than Sony A1 and way more than other smaller micro four thirds body as well as other full frame (the S5II housing costs less).

Who is the GH7 for?

The Panasonic GH7 is without a doubt one of the most capable hybrid mirrorless cameras on the market however due to the housing price is unlikely to be attractive to the masses. If you are cost conscious you can get the OM-1 for less due to the smaller housing, if you want performance several full frame cameras will incur similar cost. The real strength of the micro four thirds is the lens choice. You can cover everything with the Canon 8-15 or if you prefer with the Tokina 10-17 there are many wide and macro lenses and the huge depth of field means everything will be consistently sharp across the frame. The real strength of the GH7 though is hybrid use, if you want a camera equally capable of top range photos and videos you are looking at Sony A1 or Nikon Z8 or similar or the GH7 and here it becomes interesting for the latest Panasonic. In the near future I will provide some details of how the GH7 performs as a video capture device.

Panasonic GH7 Review for Underwater Photography – Autofocus

The GH7 is the first model of the GH line to feature Phase Detection Autofocus. This is probably the single most important feature for the underwater shooter and therefore I have thought of putting together this post to give my impression from shooting the camera both at wide angle and macro.

There will be a separate post on image quality to see how the camera performs and how far the files can be strecthed.

Please note that the camera focuses differently in video than it does for photos and therefore you should not draw any conclusion for video autofocus from this post except that due to phase detection the infamous DFD pulsing no longer occurs.

The GH7 is physically identical to its now phased out predecessor GH6 therefore the housing fits both the GH6 and GH7. I sourced a second hand Nauticam GH6 housing from my friend Pietro Cremone of Fotosub Italia. The GH7 uses the same Nauticam trigger as the GH5/6 series.

General Autofocus Settings for the GH7

If you look in the menu nothing has changed from the previous Panasonic cameras.

[SELECTING AF MODE]

You have a choice of focus areas as follows:

  • Tracking
  • Full sensor
  • Vertical
  • Zone
  • Single Area + (includes anything touching the focus area)
  • Single Area (limited to subjects fully inside the focus area)
  • Pinpoint

Pinpoint is only available for single autofocus and subject detection can be enabled for any zone. The camera can recognise humans, animals, motorcycles, cars, trains and aeroplanes. The Animal setting has a body only mode in which case it will detect multiple animals and eye and body in which case it will detect one animal. This detection method works with fish and if you want to use it I recommend animal body only for wide angle and eye body for fish portraits. What has changed inside is that now for continuous autofocus the camera uses phase detection while single autofocus still relies on Panasonic DFD which is a sophisticated contrast detection method. The camera defaults to single autofocus in low light and clearly indicates this in the display so that if you need continuous you know it is time to turn on your focus light. I did not get this indicator in open water once.

One issue I have is that the joystick is not available through the housing so I needed to set a button to highlight the focus area and press the arrows to move it when I needed it. This is a considerable handicap compared to the A1 which topside does not exist as the camera has a joystick that unfortunately the Nauticam housing cannot control.Not many Nauicam housing have a joystick but Sony full size bodies, Canon and Nikon top of the range do.

To resolve this and make operations quicker you need to customise your camera for underwater use. Change the joystick to Fn and assign focus area to the joystick. This will allow you to skip one step compared to focus area select where you need to navigate to access focus area.

[Joystick Setting]

character_default[D.FOCUS Movement] / [Fn] / [MENU] / [OFF]
Sets the joystick movement on the recording screen.
[D.FOCUS Movement]: Moves the AF area and MF Assist. (character_referenceAF Area OperationsRecord Using MF)
[Fn]: Operates as Fn buttons.
[MENU]: Operates as button_menu-set. Operations that can be performed by moving the joystick are disabled.
[OFF]: Disables the joystick.

You then go to the Function Button set up and set Fn9 to Focus Area Set.

Macro lenses tend to focus hunt and take a long time to move from infinity to your focus point, this is a problem in any format unless you use a focus limiter. The challenge when using a limiter on the lens is that in most cases once the camera is inside the housing and you have made a choice you cannot change it during the dive and therefore miss photo opportunities when the subject is outside your range.

The GH7 however has a software focus limiter feature that is extremely useful. You can set the focus between a near and far point and the camera will increase the focus speed significantly afterwards. This is also very useful to make sure that you do get close to fish.

[FOCUS LIMITER]

You can assign this feature to a function button to quickly turn it on and off.

For the purpose of my tests I did not use this feature as I wanted to stress the setup and thought of using it only if I had problems but I did not. I find this feature invaluable to ensure you get really close. I have discovered when using wet diopters that all the wet lens was doing was forcing me to get closer but indeed I could have used the naked lens to get the same shot. In consideration of the limited depth of field I rarely use wet diopters with dedicated macro lenses on micro four thirds as the imaging frame is as small at 17.3×13 mm in size.

One thing that may be worth for close up is to customise the AF settings, there are 4 different sets of parameters you can use and you can also customise the AF to be near or far in addition to recalling the focus limiter with a button.

[AF SETS]

In the future I will need to check more the tracking without subject detection that can be useful in some cases where the camera does not find a subject, however using a large single area and the cursor I could cover all shooting situations with no issues.

Wide Angle with the Canon fisheye 8-15mm

Let me start by saying that I am not a fan of shooting fisheye lenses with Continuous Autofocus as the depth of field is high and the focus range is so limited that rarely it matters.

With the GH7 I use the Canon fisheye 8-15mm using a metabones adapter and this in the past only supported single autofocus. I noticed some vignetting on the bottom side of the frame that I did not experience with the GH5 series and I need to double check but otherwise the setup is identical to what you see here on this website.

Metabones released firmware V4.10 on 12 July 2024 declaring continuous autofocus compatibility with the Panasonic G9M2 which has indeed the same AF system of the GH7.

The update also improves general performance. The link in case you do not have it is here.

I updated my adapter and I can confirm continuous autofocus works correctly with the Canon 8-15mm. Like it does with the Sony camera the focus is a bit wobbly however it works fine. Yet my preference unless you shoot a fish portrait with the fisheye is to use single AF.

I used zone focus with subject detection, the GH7 does recognise fish and fish eyes so it did not have problem locking onto this grouper.

Fish was not always recognised, especially in those cases where only one eye was visible and the fish was on busy background, however the MFT camera combined with the 8-15 means there is always depth of field to fix any issues of focus at wide angle. A better option is to use animal detection without eye focus especially for schooling fish.

As I said before this was more academic so in the following dives I switched to single autofocus for wide angle because it is faster on the metabones, I do the same on the A1. The GH7 focussed very well. Few shots for illustration of the already known superb image quality of the Canon 8-15mm combined with the GH7.

Diver with Grouper
Sea Stars
Tube
Giant Clam

Close up work with the Panasonic 45mm Macro

For close up work I use the PL 45mm because it has the best rendering on the MFT landscape. Here I used continuous autofocus by norm using a single area or zone.

I have been advised by Panasonic not to use tracking functionality however topside tests indicate it may work ok underwater. Many people get confused between tracking and subject detection so it may be worth some explanation. Tracking works with or without subject detection and allows you to choose an area on the frame that may or not correspond to a detected subject and then the focus points follow this area. It is especially useful when the camera does NOT detect a subject. Subject detection works differently: it uses the camera live feed to scan for shapes using a deep learning algorithm when a shape is identified the location of the focus points is passed to the autofocus engine to take the shot. Strictly speaking the camera is not tracking an area of choice but detecting one or multiple targets across the frame. This has a risk when there are multiple targets as the camera may jump from one to another however in close up work this is not generally an issue. If the camera detection works there is no need to use tracking as the subject detection mechanism is quicker and more effective. 

I activated subject detection with Single Area + and the camera identified all fish with eyes, in my case groupers, gobies and blennies. For nudibranchs I got a shape around the body most times. The subject detection for fish is way more successful than my A1 but I do not know how it compares with the latest implementation of the A7R V that has more detection modes like insect that may be relevant.

I took 255 shots in a dive with the 45mm of which 5 did not have a subject in focus and of those 2 had no subject as the fish had run off the frame.

For Macro you may want to activate auto review for 0.5 seconds, now this allows you to see where exactly the camera focused.

The Panasonic PDAF system focuses like a DSLR with the lens wide open. This is different from other mirrorless systems like Sony or Nikon and it means that when you stop down the lens the camera takes longer to take the shot and can potentially have focus shift, this is mitigated by the significant depth of field of the cropped format.

The GH7 focus right on the eye of this large grouper

I had a very high success rate as mentioned and only in a few circumstances the focus was off the eye but more because the fish had moved too quickly and I was at close range.

This focus system is excellent for shots wide open and you can easily obtain nice bokeh with eyes in sharp focus.

Subjects like nudibranchs can move fast or be on little algae that is swaying in the current, the MFT system with the huge depth of field available means you can achieve the effect you want easily. Different shots at various f stop

F4
F5.6
F8

The GH7 like the GH5 and GH6 can sync with the strobes at 1/400 using the Nauticam trigger which also supports rear sync. This is a value only the A1 can match and is very useful for close up work as it easily gives you dark backgrounds in the right conditions.

Take into account that the depth of field even at f/11 on MFT equivalent to f/22 on full frame is 1 cm at close range therefore some really small critters may even need f/16 or more.

I did not have a single shot with focus on the background which for me is quite impressive.

The 45mm maintains good sharpness even at f/10 and further but I did not stress the set up in my tests.

I had a focus light but I never had to turn it on because the GH7 focuses wide open, my strobes have a pilot light but this is only useful if you aim at the subject which in most cases I actually do, again there was no need to use it.

Conclusion

The Panasonic GH7 performs very well both at wide angle with a dome port and at close range with a macro lens. Continuous autofocus is reliable and appears to work fine without a focus light even when the shooting conditions are not easy. Subject detection recognises fish and fish eyes and makes shooting easy. The only remark is the lack of joystick control on the Nauticam housing that would make it even easier to work with single area focus, the operation is still possible but requires two button presses. I would trust the GH7 as much as I trust my A1 with the reservation of very dark environments that I did not have time to test.

In support of Depth of Field

The debate between resolution and depth of field is even more relevant today with the discontinuation of DSLR and the rapid growth of Mirrorless cameras.

I have been a mirrorless user since 10 years now and I am pretty familiar with the benefits and disbenefits of the system.

One of the main disbenefits I have found especially when moving up to the Sony E-Mount full frame system has been lack of depth of field in close up shots.

While the Canon RF and Nikon Z mount still allow apertures of f/32 on their macro lenses, the Sony 90mm Macro only goes up to f/22. This is indeed a serious limitation for macro shooting. The reason is unknown but all Sony E-mount lenses stop at f/22.

It may be that this is related to the loss of resolution due to diffraction.

On full frame sensor the diffraction limit is reached around f/20 however resolution starts to drop much sooner. Also consider that effective aperture of macro lenses is much smaller due to changes of the effective focal lenght, angle of view but this applies across the board and I do not want to make this post more complicated.

This is a resolution chart produced by lenstip for the Sigma FE 105 Macro. You can see that the resolution drops from a stellar value of 80 lp/mm at around 28 lp/mm at f/22, the lens has lost 65% of the peak resolution that was reached at f/4.

Depth of field however does matter in close up photography and has been one of the reason why I have recently invested in a Panasonic Lumix GH7.

Panasonic GH7 with 45mm macro in Nauticam NA GH6 housing

In the title image you see an example of shallow depth of field on a blenny. That image is shot at f/2.8 on the GH7 which is f/5.6 on the sony FE system and the depth of field is extremely thin.

I have taken some test shots using a ruler here the entire series on the GH7 from f/2.8 to f/22.

The fly is 4 cm long starting from f/2.8 and focusing between the eye you can see looking at the ruler that only few mm are in focus despite the frame is around 9cm so no even macro.

Fly 2.8

At f/4 the lens reaches peak resolution however the depth of field is still very small we can barely read the numbers on the ruler behind the fly.

Fly 4.0

By f/5.6 we have more depth of field but not enough to focus on the front antennas.

Fly 5.6

At f/8 we start seeing the back of the fly but it is not all in focus.

Fly 8.0

By f/11 the whole head antenna included is in focus but not the whole bug. And here if we were on the Emount full frame the story stops.

Fly 11

We continue to f/16 which sees the focus arriving to the wings. This is as far as you could get with the Nikon and Canon mirrorless.

Fly 16

Finally we hit f/22 equivalent to f/44 on full frame and not available on mirrorless the fly is in focus front to back.

Fly 22

What is not apparent in this set of images is how much resolution has been lost stopping down the lens.

To give more precise indication I shot a 10 cents euro coin of the diameter of 1cm.

This image has got more magnification and is almost 1:1 on micro four thirds. At f/2.8 we have practically a bit more than 1mm depth of field.

Coin 2.8

At f/4 peak sharpness of the lens the detail is great but the depth of field is still very limited perhaps 2.5 mm.

Coin 4.0

We keep going until we hit f/8 and later f/11

Coin 8.0
Coin 11

Not even at f/11 we have the whole coin in focus and we start loosing xy resolution due to diffraction.

f/16 is probably the best compromise for such high magnification image.

Coin 16

f/22 has the whole coin in focus however the resolution has dropped.

Coin 22

Yet if we need it we have our high depth of field scenario.

A few other examples at full frame 1:1 with frame width around 36mm.

The f/11 scenario equivalent to Sony 90mm f/22 has depth of field of around 1cm or less

Rulers 11


By f/16 we are hitting around 2 cm.

Rulers 16

Finally at f/22 we have 3cm depth of field more or less.

Rulers 22

I was recently diving in Italy let me show a few examples of what this means.

This flabellina is focussed on the head however as it is turning slightly away from me part of the body is soft. You would argue the head is what matters but lets’ continue.

At f/5.6 the nudibranch is more horizontal the shot is well in focus however you can only see part of the head.

Up 8

By f/8 we have it sorted consider that this is a small nudibranch not very deep laying almost on the focal plane.

This is instead paradoxically more difficult the nudi is flat on the sea bed however the body parts come into the camera so there is a risk of running out of depth of field here I stop down to f/10.

With the focus point on the back the bottom right under is not sharp!

Here other examples at f/10 where you can see the depth of field is not sufficient to cover the fish.

larger fish do not make necessarily things easy as in the example of this grouper.

At f/5.6 the fins are soft similar shot at f/10 improves the fins but does not cover the body.

Now you would ask why did I not go all the way to f/16 or f/22 simply because I wanted to simulate the limit of the Sony FE camera I have.

The other interesting fact is that if we look at this very old resolution chart for the Panasonic 45mm taken with a 12 megapixels Olympus E-PL1 we see that at f/11 equivalent to the f/22 of the sigma the lens hits 55 lp/mm.

This value is likely to be higher wit the GH7 that has double the pixel count indeed exceeding 60 lp/mm.

Comparing the Sigma 28 lp/mm * 24 mm frame height gives 1344 LP/PH while the Panasonic is giving 1560 LP/PH. Which means the smaller sensor seems to resist better to stopping down making it more suitable to high depth of field photography and one of the reasons why I acquired a GH7.

The problem historically with Micro Four Thirds was that autofocus even in the Olympus implementation was far behind and the camera could not track subjects. This is to an extent still true however the GH7 and OM-1 have powerful subject detection. The GH7 in particular can detect fish bodies and eyes.

In my last shots the camera would focus right on the eye on slow moving subjects. Fast moving subjects at high magnification were a few mm off but overall easy to compensate with the extra depth of field.

Conclusion

We are a times, me included, obsessed by resolution charts and pixel count and forget that images have depth. A good image needs to be tridimensional and depth of field is essential to achieve it in some cases even more important than absolute spatial resolution on the focal plane.

Micro Four Thirds cameras were historically lagging on autofocus due to weak tracking and this is to an extent still true, although the camera tracked fine my swaying in the water, however subject detection able to recognise fish means that the gap is essentially closed and overall you can produce a significant amount of good images without risk of blurred shots.

For information the GH7 like the GH5 syncs at 1/400 with the nauticam trigger and for wide angle rear sync is supported which gives another advantage to this micro four thirds camera over other formats, only the Sony A1 syncs that fast

Going Macro with Sony A1 and 90mm Macro Lens

I must admit Macro photography is not exactly my favourite genre both underwater and topside however I do enjoy a bit of critter hunting.

I was sure that the A1 would be an absolute beast for topside wildlife and underwater wide angle, however I did not feel comfortable at all with the performance of the Sony 90mm Macro lens.

It has a reputation for hunting and a lot of focus breathing that make it hard to use for topside focus stacking.

I have been playing with the lens topside and I did see examples of both so I was somewhat skeptical taking it underwater.

Camera Settings

I was perhaps over worried so I set up the camera for the worst case scenarios:

  • Focus limiter set to 0.3 – 0.5 meter
  • CAF priority set to Focus
  • Aperture drive – Focus priority

I went in with autofocus set to tracking flexible spot.

Port and Focus Gear

I have always mixed feelings for focus gears and mostly I use it to make sure I am hitting the minimum working distance and therefore maximu magnification.

Nauticam 37147 SE90-F focus gear for Sony 90m f/2.8

The focus gear for this lens is a large item and does not allow to operate the focus clutch. The operation is quite easy as the focus ring does not have an excessive long run.

I already own the 45 Flat Port that I use for the Sony 28-60mm and also have the 35.5 N120 to N120 port adapter so I thought how do I make this 105mm long?

Nauticam 21325 N120 to N100 25mm port adaptor

Nauticam makes convenient adaptor rings of various length to go from N120 to N100 port size. I got the 25mm that resulted in a saving of £441-260=£181 which I used to buy another part.

The rig as assembled looks like this. In effect even the 110 port starts wider and gets narrower.

Sony A1 Nauticam Macro Rig

Before going to the pool I realised the housing does not have an M10 mounting point but you can adapt one of the points that go to the bars connecting the angle. Will be done at some point. So I went in without focus light in a very very very dark pool.

Pool Session

As I packed my props I realised I did not really have any good macro target however a friend came to the rescue. An instructor of a diving center that uses the same pool brought a small leopard and octopus that sank and were perfect targets.

As you probably know I am obsessed by obtaining the absolute maximum performance from each lens. And this for a macro lens means shooting at the best aperture, for this lens f/4-5.6 and stacking. However this is not available underwater. You need to pull your shot from a single image and this means the lens won’t be at the best performance.

I started at f/11 which gives a respectable MTF50 and to be honest I am impressed!

Octopus f/11 angle
Tiger coming f/11

I then pushed the lens to f/16 I could see resolution dropping as depth of field was going up.

Octopus front f/16
Tiger side f/16

In order to get depth of field of an overall scene with the octopus I had to go all the way to f/22 diffraction zone.

Tiger f/22 side
Octopus wide f/22

Yes with the high resolution of the sensor those images are still ok or at least so they seem to me.

Tiger Bokeh f/2.8

I think this lens wide open makes an amazing bokeh that will probably be still there at f/4 so something to check.

Field Impression and Ergonomics

First of all I did not regret setting the lens to close range using the focus limiter. This will give you a frame 19 cm wide if you feel that is too small and you are just trying to get some fish portraits perhaps leaving this to full is a better idea. Likewise if your targets are bigger.

I did not get any hunting despite the dark conditions and I am not sure if this was due to this setting or if this helped.

CAF worked in all situations the A1 can practically see in the dark however in order to get focs tracking and eye detection working (it detected the eye of the leopard) I needed to switch on the focus light of the strobes.

I believe tracking and detection requires a level of scene brightness higher as the camera is effectively in video mode. When you half press the aperture drive meant it would focus thought it had not tracked anything. I got 2 shots not focussed on the subject because I moved.

The focus gear I believe is not required unless you want to do super macro or to make sure you are as close as you can get but I do not regret having it as the run is pretty short with the focus limiter is on.

Conclusion

Alex Mustard tried the 90mm with the A1 for blackwater and said it was better than the Nikon D850 with the 60mm which is a well known blackwater combination. My tests confirm this combination is very very powerful even in the dark and with a little bit of light it will focus on anything. If the lens goes back and forth is because you are close or over 1:1 reproduction ratio.

Overall my concerns apperad not justified and this combination is a solid performer. Probably next steps are getting an SMC magnifier to push this even further.

which macro lens to pick for your gh5 or micro four third

I see many posts on line debating which macro lens is best for your micro four third system.

If I refer to the Nauticam system we have 4 macro lenses:

  • Olympus 30mm
  • Panasonic 30mm
  • Panasonic 45mm
  • Olympus 60mm

For the purpose of this article I will skip the Olympus 30mm as the Panasonic lens is known to be sharper and will focus on the other 3 lenses.

DxOMark is a popular tool for comparison as it gives you the results on one page. I have run it for the Oly 60 and the Pana 30 and 45 on the 20 Mpix OMD E-M1 MKII

DxOMark Comparison on Olympus OMD E-M1 MKII

Surprisingly the much more expensive Leica performs worse than the other cheaper models, this is confirmed on all internet sites running other type of tests.

What we can see is that there is little difference between the Panasonic 30mm and Olympus 60mm when it comes to image quality so whichever lens you choose your subject at the same level of magnification and aperture will have more or less the same detail.

Common Misconception: Shorter focal length give more depth of field

Many people think that using a longer lens is harder because there is less depth of field this is actually incorrect conceptually.

Let see why

Using an online calculatore like Dofmaster https://www.dofmaster.com/dofjs.html

Enter for the Panasonic GH5 the following parameters

Circle of confusion: 0.015 mm

Focal length 30mm

Distance 10.5 cm (minimum distance of the 30mm Macro)

Aperture f/11

Result Total depth of field 0.3cm

Now enter

Focal Length 60mm

Distance 21 cm (as it achieves the same magnification)

Aperture f/11

Result Total depth of field 0.3cm

So depth of field is not a consideration when choosing a macro lens…

Shooting a subject close to the background

In the following 3 shots am taking an image of a widget at f/11 at 29-44-60 mm on a Leica 12-60 (it is just easier it makes no difference to the outcomes)

Shot at 60mm
Shot at 44mm
Shot at 29mm

At the same aperture you can clearly see that there are no difference whatsoever in the detail and actually overall in the picture you don’t notice anything.

Shooting a subject far from the background

For the second shot I have moved the widget away from the wall.

Shot at 60mm
Shot at 44mm
Shot at 29mm

Again there is no difference in the level of detail of the widget however looking at the background we can see that

  • The 60mm shot reveals one brick and less than one quarter
  • The 44mm shot reveals one brick and a half
  • The 29mm shot reveals two bricks

So while the subject is exactly the same as the 60mm lens has a narrower field of view we see much less of the background.

This means that if you are shooting a nudibranch on the sand or something flat on a rock you won’t notice anything however if there is space behind the subject you will capture much more of that resulting in less subject isolation.

Underwater Comparison 30 vs 60 mm

In the first shot the Rhinopia is taken with a 60mm lens

Rhinopia Olympus 60mm

In the second shot the same Rhinopia with the 30mm (in a different place to be fair)

I have marked up with red the areas that with a longer focal length would have been minimised.

Which Lens to choose?

Now that we have clarified that depth of field is not a consideration and as each macro lens will have the same magnification there are only two factors that matter:

  1. Working distance
  2. Isolation from background

The 60 mm will have a longer working distance and at the same magnification will isolate the subject better from busy backgrounds, the 60 mm is also better for skittish subject because of the longer working distance. I have this lens and I have borrowed the 30mm in couple of occasions but do not have the 30mm yet.

There are however situations where longer working distance is not a benefit, specifically when the visibility is poor and there are suspended particles or the subject is really large.

In the example below I was at one meter from the two frogfish, a 30mm would have been better however the shot came OK.

Hairy frogfish Olympus 60mm

Conclusion

I believe the Olympus 60mm is a must lens to have. To date I have not felt the need for the Panasonic 30mm that is indeed a very sharp lens because I have always managed to pull out the shots. However for someone diving in murky water and focussing on nudibranches or subject laying flat on the seabed the Panasonic 30mm could be a better choice. I also want to say that using the 14-42mm at 42mm for me is actually a better choice for portraits and with a close up lens works very well with small subject not super macro and therefore as I already own the 14-42mm and various diopter for me the 30mm is not on the shopping list.

Macro video with the Panasonic gh5

Broadly speaking with the GH5 as well as with any other camera you have four categories of close up work:

  1. Close-up – frame size 10 cm or 4″ and wider typically hand held
  2. Super close-up – frame size 5cm or 2″ preferably on tripod
  3. Macro – frame size below 2″ only on tripod
  4. Super macro – frame size below 1″

For still images a typical choice is the Olympus 60mm, this lens however is very narrow so for any subject that is not too small and for the first category of close up you end up having working distances well above one foot. This in turns means more water to go through and makes it virtually impossible to cover larger subjects.

If you make that choice is because you have skittish subjects that do not like proximity and are very small. Furthermore the Olympus 60mm has not stabilisation and therefore with our GH5 will only use in-body stabilisation. Another side effect of using this lens is that it is impossible to take shots of divers or anything else at medium range so the videos end up being a collection of very close shots that may please someone but result fairly boring.

Of course you can make this kind of video exciting to an extent like here

But at the end for me something like this is more fun although of course the quality is very different (I shot this years ago with a Panasonic LX7 and edited in iMovie)

The difference between the stunning video of Dustin and the basic video of mine is that you only have very close shots in the first one and frankly a slideshow of still images would be equally nice. There is no description of any sort of where is the fish what are the conditions or anything at all. You may argue that the stuff to see is not that nice but at the end this gives you a real idea of the diving where you go which is the purpose of my videos and majority of non Pro people. Furthermore medium size subjects that move like octopus, squids, crabs will almost always exhibit some kind of behaviour.

My macro video rig is built around the Panasonic 14-42 MKII which is the same lens I use for wide angle video with the Nauticam WWL-1. In effect am running video like a compact set up.

GH5 Macro Video Rig as at 29 March 2019

Ergonomics and lens

  1. The field of view with at 42mm is only 23 degrees horizontal and 13 degrees height this is ideal for portrait type of work
  2. I still use my old Sola 1200 video lights that can be used with a 20 degree beam creating a snoot like effect to better isolate your subject. It can be argued that color rendering index of newer lights is better but I think the narrow coverage of the lights is more important. Consider that at wide end the field of view is less than 60 degrees anyway with the flat port at 18mm
  3. I use two close-up lenses with a Saga dual flip diopter
  4. The rig as described is heavy in water more than 700 grams negative to ensure the required stability
  5. The tripod base has 2x 3″ segments and 1x 5″ segment to be as close as possible to the bottom this creates issue if you do not have a monitor as you need to have your face in the sand however once the shot is framed all is good

Close-up lenses

I use two close up lenses with this rig as the 14-42mm as a working distance in water around 26cm and a minimum frame size around 9cm that is pretty wide.

SubSee 5 wet lens

The SubSee 5 is in the sweet spot for the 14-42mm lens because it starts working pretty much when the 14-42mm can-t focus anymore and down to around 10-12 cm working distance. Minimum frame size is 46 mm

SubSee 5 + 14-42@42mm

Using the Ex-Tele feature in video means we can get to 33mm which is below the 36mm classic DSLR 1:1

When this is insufficient and the subjects are really tiny the next lens is the Nauticam CMC-2

Nauticam CMC-2 on Saga dual flip holder

The CMC-2 gives a frame size of 32mm as in this image

Panasonic 14-42@42mm with CMC-2

Using Ex-tele this becomes 23mm which is the same you get with the CMC-1 without ex-tele and is plenty for any purpose. It is theoretically possible to stack the two close up lenses but is not really necessary and the working distance too small. The CMC-2 works around 6-7 cm so you have still space for lights etc.

Olympus 60mm

Is there any use for this lens? Of course there is in case you want to capture a frame smaller than 23mm with the 60mm you can get down to 17mm with the bare lens to 12mm with the Ex tele, 9 mm with the CMC-1 and 6 mm with CMC-1 and ex tele. Will you be able to focus and work with the CMC-2 at 22mm from the subject is another discussion however for skittish subjects it gives you more working distance and this may be needed. I would recommend taking this lens with you for those cases but for video I do not see how you can really use the CMC-1. Please note the CMC-2 is useless with the 60mm as the working distance improvement is minimal to none.

PANASONIC GH5 my underwater still rigs

The Panasonic GH5 is well known to be a great camera for video and I can confirm that see my latest videos

Clearly the camera is fantastic and with the right set up that I will cover in future posts it takes amazing video.

I wanted to start however from photography as the GH5 also takes great still images.

First and foremost macro. In general terms the lens choice of other micro four third also applies to the GH5 so my favourite lens is the Olympus 60mm. Alternatively if you don’t have that lens and you don’t have extremely small subjects you can get good results with a zoom lens I use the Pana 14/42 MKII but other work well too.

In terms of arms strobes nothing changes so my current rig is based on a Nauticam NA-GH5 housing and two Inon Z240. I have each arm set with 1x 8″ and 1x 5″ arm segments you will notice that the longer arms is closer to the camera this because in macro you will usually shoot above the sand so this makes it easier.

For wide angle the situation changes slightly as I use a 12″ arm segment as in the rig below.

GH5 with WWL-1 wet lens and 8+12 arm segments

For wide angle the arms return to a standard situation with shorter segment close to the housing. The same configuration applies if you shoot the 8mm fisheye.

In terms of floatation the GH5 housing is heavy with the 35 macro port is 720 grams and with the fisheye 620 grams. For macro I like my set up to be negative so less floats . For wide angle in case you take slow shutter speed shots I also use the tripod kit for the NA-GH5 this is not as good as a complete tripod but works well in wrecks

In the next posts I will talk about video as here there is a question about diopters and which ones do I use. Lights is also a topic of contention and will discuss few options there too

As always please ask questions if you wish

Getting the best underwater colours for your 4K Sony RX100 Mark IV

It is not a mystery that even the new Mark IV version has issues with custom white balance.

The ergonomics have not changed and you need to go into photo mode to set custom white balance but generally underwater results are poor. Using filters is therefore a necessity also on the new 4K version.

RX100 Mark IV Video Behavior

The RX100 offers now a 4K 100 mbps mode and can use picture profiles.

I have used a modified version of PP6 that use the cine2 gamma curve, I have however changed the colour to the Pro mode and changed a number of other settings in my last video in Puerto Galera.

The water was green and murky but this gives you an idea of what you can get.

Filter Options and Wide Angle

Although the Nauticam WWL-1 is the best lens for the RX100 it does not take filters and therefore is not adequate for video.

In this review clip you can see the options available on the market.

In terms of wide angle you have two options for 4K:

  1. Inon UWL-H100
  2. Inon UWL-100

Both lenses work fine in 4K however the older UWL-100 achromat does vignette in photo mode.

The UWL-H100 offers a very wide field of view also in HD mode with no vignette and accepts the mangrove/deeproof filter.

This filters is loaded with magenta so I suggest adjusting the tint in the auto white balance mode to +2 green.

The UWL-100 works fine in 4K and is wider than the UWL-H100 however has only the M67 mount. If you have one of those lenses you can use the Ikelite 6442 filter. This filter required you to remove the rubber ring on the lens and does work quite well except has a yellow cast to it you can reduce by changing the tint to +2 blue and increasing also magenta to +1.

For flexibility purposes probably the UWL-H100 is better as it takes the bayonet but the UWL-100 is really wide and has a little less fringing. Some people do like the UR/PRO filters better.

I hope you find this post useful and good luck with getting the best colours from your Sony RX100 Mark IV

Panasonic GX7 First Test

So time has come for my first video with a micro four third camera the Panasonic GX7. I had only 3 dives in Sharm and conditions on Naama Bay beach were not the best but still good enough to give the set up a good try, this is the resulting video.

I used the Nauticam housing with the Macro 35 port and the M67-LD adapter so that I could use the Inon UWL-H100 wet lens.

As it is not possible to fix the position of the lens I had to take the hood off and therefore I used an Ikelite UR/PRO filter for the 100mm lens. I had to use gaffer tape on the lens and inside the filter or it would be loose but it worked.

The first dive was with the URPRO filter in auto white balance, I was hoping this would give me good results but instead everything came with a strong yellow cast.

From the second dive I used custom white balance and the results were much much better.

To give an idea of the issue this is a shot of a grey card with the UR/PRO filter on land with white balance fixed.

URPRO test card
URPRO test card

You can see what kind of effect the filter bear it is orange in colour.

Other than this I was pretty happy with the GX7 especially because I could use the full zoom with the wide angle lens this is the first time I see it working. The moray eel shot towards the end of the video is an example.

Back home I was not happy at all about the UR/PRO and the inability to work with auto white balance. Probably I could have played with the tint but it did not come to mind. So I got in touch with Peter Rowlands of Magic Filters to see if they had an option that would fit on the Ikelite mount. Peter sent me two sample and they fit perfectly in the ikelite frame, though this is not commercially available I guess you can request those if you are not happy with the ikelite UR/PRO.

This is the same test card with the magic auto filter.

DSC04030

You can see that it looks less orange and also slightly colder.

I did some tests and the UR/PRO is a warmer filter with 2700K temperature whilst the magic auto is 3200K. The magic is however more red and has more magenta tint than the UR/PRO.

For me this means that the magic will work better in auto and will require less custom white balance. However those 500K difference mean you will eventually need to custom white balance once you go below 18-21 meters. I know people say filter work until 21 meters anyway but I have tried with deeproof down to 30 and on a bright day it was still good.

So if you are not happy with the yellow cast of your UR/PRO in auto white balance is definitely worth giving magic filters a go.

The GX7 confirmed all the good features including the ex tele mode

Here the shrimps are shot with a single Inon UCL-165 and then the close up of the head uses ex tele that pushes well over super macro.

Look at the incredible ability to refocus in video mode. See how focus locks on the shrimps when I press the button.

Overall the GX7 can do pretty much everything on a single dive with a wet wide angle lens and a close up lens. You can cover from 100 degrees wide to super macro. The fact you can zoom with the wide angle removes the need to take the lens off at every occasion and in fact in the red sea you barely need to have any other lens.

I was not particularly happy with the lack of hood that the ikelite filter wants removed so I experienced the occasional flare. Still pretty good result.

The clip looks much better at home than it does on youtube where the gap with the RX100 seems much smaller.

So as far as video is concerned if you don’t need 4K the GX7 gives you extremely high quality footage and reasonable cost.

A final note I shot this video in 24p at home I can’t tell the difference with 25p see if you can see it!

Video Feature Sony RX100 Mark II in Malta

Following from my previous post I managed to get together a clip out of the 5 dives I did

The first day was somewhat plagued by visibility a bit lower than the norm for the location but the second day was fabulous

For this trip I brought with me the Inon UWL-H100 and the red push on filter from deep roof H20 and the Inon UCL-330 as I was expecting medium size fish and nothing really small

Here is the outcome

I am quite happy how things turned out so let me share the settings with you

First I shot most of the footage in 25p AVCHD mode only some small sections are shot at 50p and actually I did not need to slow down any of the material.

For the wide shots I used steady shot in normal mode and shutter priority at 1/50th. With the filter on I had auto white balance with tint correction G2 A1. I noticed that the camera was giving red tint in some situation and so added a bit of green back. The Amber correction instead is for the RX100 itself the camera does not have vibrant yellow and is a bit blue.

Tunas
Tunas – AWB with filter

For the first time I use creative mode changing the standard contrast to -3 in order to prevent crushing of blacks.

Exposure was set all along to -1/3 and metering to multi area with AUTO ISO limited 160-800.

I think the results are so good that in fact I have performed no colour correction to any shots in ambient light.

Opening the tuna farm
Opening the tuna farm – AWB with filter

For shots with lights I set up first colour temperature to 6500K and A1 to match the lights but then in some of the far shots this resulted a bit cold so I adjusted very slightly in post the temperature.

Seahorse
Seahorse – AWB UCL330

Only 40″ are adjusted in the whole video in essence is as shot and the editing took me half hour.

In cave
In cave –  AWB no filter

I did a bit of analysis and the camera was operating for most at ISO200 with aperture around f/3.5 – f/4.0 which is really the sweet spot of the lens.

I did have some challenges using the UCL330 for some nudibranches  that really required a stronger lens so they look a bit small, there was also surge so I had to fight with focus problems but all in all very happy.

Nudibranch
Nudibranch – AWB UCL330

The longer working distance of the UCL330 (20-30 cm or 8″ to 1′) proved challenging on walls as you are too far to hang on to anything or use a stick. I will bear this in mind in the future.

For the close up shots I used steady shot active.

I also wanted to say that a few times the camera did manage to white balance properly however the results were not exciting and frankly not worth the hassle. Using the filter is just so much better with the auto white balance.