Tag Archives: macro

Sony RX100M2– First Impressions

I have  been fortunate to receive one of the first RX100M2 that have reached the market so I thought of sharing with you my first impression and what I believe will be the potential for underwater imaging use.

This is the link to the unboxing video of the camera

I posted a summary of the RX100 capabilities for underwater video some time ago on this blog the post is here:

Probably the best thing is to revisit my review and update any significant differences between the RX100 Mark 2 and the original version which is still on the market and will remain at least until the end of 2013.

Key Strengths

Bright Lens –  Not changed

The RX100M2 has exactly the same lens of its predecessor RX100, it is true that when zoomed the minimum aperture drops down to f/4.9 however this is not a concern for underwater imaging as usually long focal lengths are for macro and we are interested in very small aperture to allow for greater depth of field.

Low Noise – Improvement!

In virtue of the new retro illuminated sensor the mark 2 has one full f-stop advantage over the original RX100. This means that ISO800 is a breeze and potentially we could go as low as ISO1600. I would not do that but what it means is a cleaner image at depth in ambient light.

Image Quality – Improvement

Image quality is outstanding and the lack of aggressive contract and sharpness filters in the default settings means more room for correction in post processing.

Video Mode Control – no change

The RX100 had complete control on video mode and the mark 2 maintains the standard. Very important is that the program mode is excellent and keeps the shutter speed at 1/100 or 1/125 when used in active mode which is ideal for 50/60p smooth footage.

Manual Focus – no change

Same as for the RX100

Battery Life – Improvement

According to Sony battery life has improved from an already outstanding CIPA 330 to a declared value of CIPA 350. The new Mark 2 has also an hot shoe so in theory if any manufactures produces a wired TTL enabled housing this means plenty of shooting before changing the battery pack. We suspect though that only ikelite will have this option on the housing.

Active Steadyshot – no change

I initially slagged the RX100 stabilization system based on performance on land. However at a more in depth analysis it turns out that the RX100 active steadyshot, even if at cost of an image crop is very effective for sudden camera movement and for high magnification macro. The Stabilizer is not as sticky as others so when you eventually vibrate it does not jump. Although the performance for stills is poor to irrelevant and so is the normal mode the active mode is very effective for underwater use. The mark 2 is built exactly with the same algorithm and combination of optical and electronic.

Tedious Workarounds Comparison

Some of the ergonomics of the RX100 are not the best and seriously deduct from an otherwise excellent experience, the most annoying issues:

Lack of focus lock – no change

For some reason Sony decided to skip on this essential feature, the workaround involves switching to manual focus however it is then possible to accidentally change focus if the front ring is set to control focus. The RX100M2 has the same issue.

Setting Custom White Balance in Video – No change

Setting custom white balance is only possible in the still modes, while in fact if you shoot RAW don’t actually need white balancing. This is the largest non sense of this camera that requires the user to navigate out into Program to ensure white balance is set correctly and you don’t end up with the Custom WB Error message. Though this is annoying is not such a killer as it would initially seem if you take your movies in one of this still modes which is valid for wide angle and ambient light shot. For macro you will need to switch to movie mode aperture priority in AWB. If you keep this discipline this is issue is mitigated. The RX100M2 does not change this and I believe this is due to the fact that the shutter button that is used to set custom white balance is disabled in video.

Lack of 24/25/30 progressive modes at 1080HD – Improvement!

The RX100M2 shoots at 50/60p as well as 25/24p in addition to that you can switch between PAL and NTSC which is great!!!

AVCHD – Improvement!

The RX100M2 has not only the progressive modes at double frame rate but also AVCHD 1.0 compliant format, this means that if you choose the 24M 24/25 p mode you can import with all editing programs without issue. Not only that but if you use the wireless import utility this converts also the AVCHD progressive files in mp4 for you. This is  great improvement

Key Weaknesses comparison

The RX100 had also some key weaknesses let’s see how the mark 2 fares.

Macro Performance – no change 

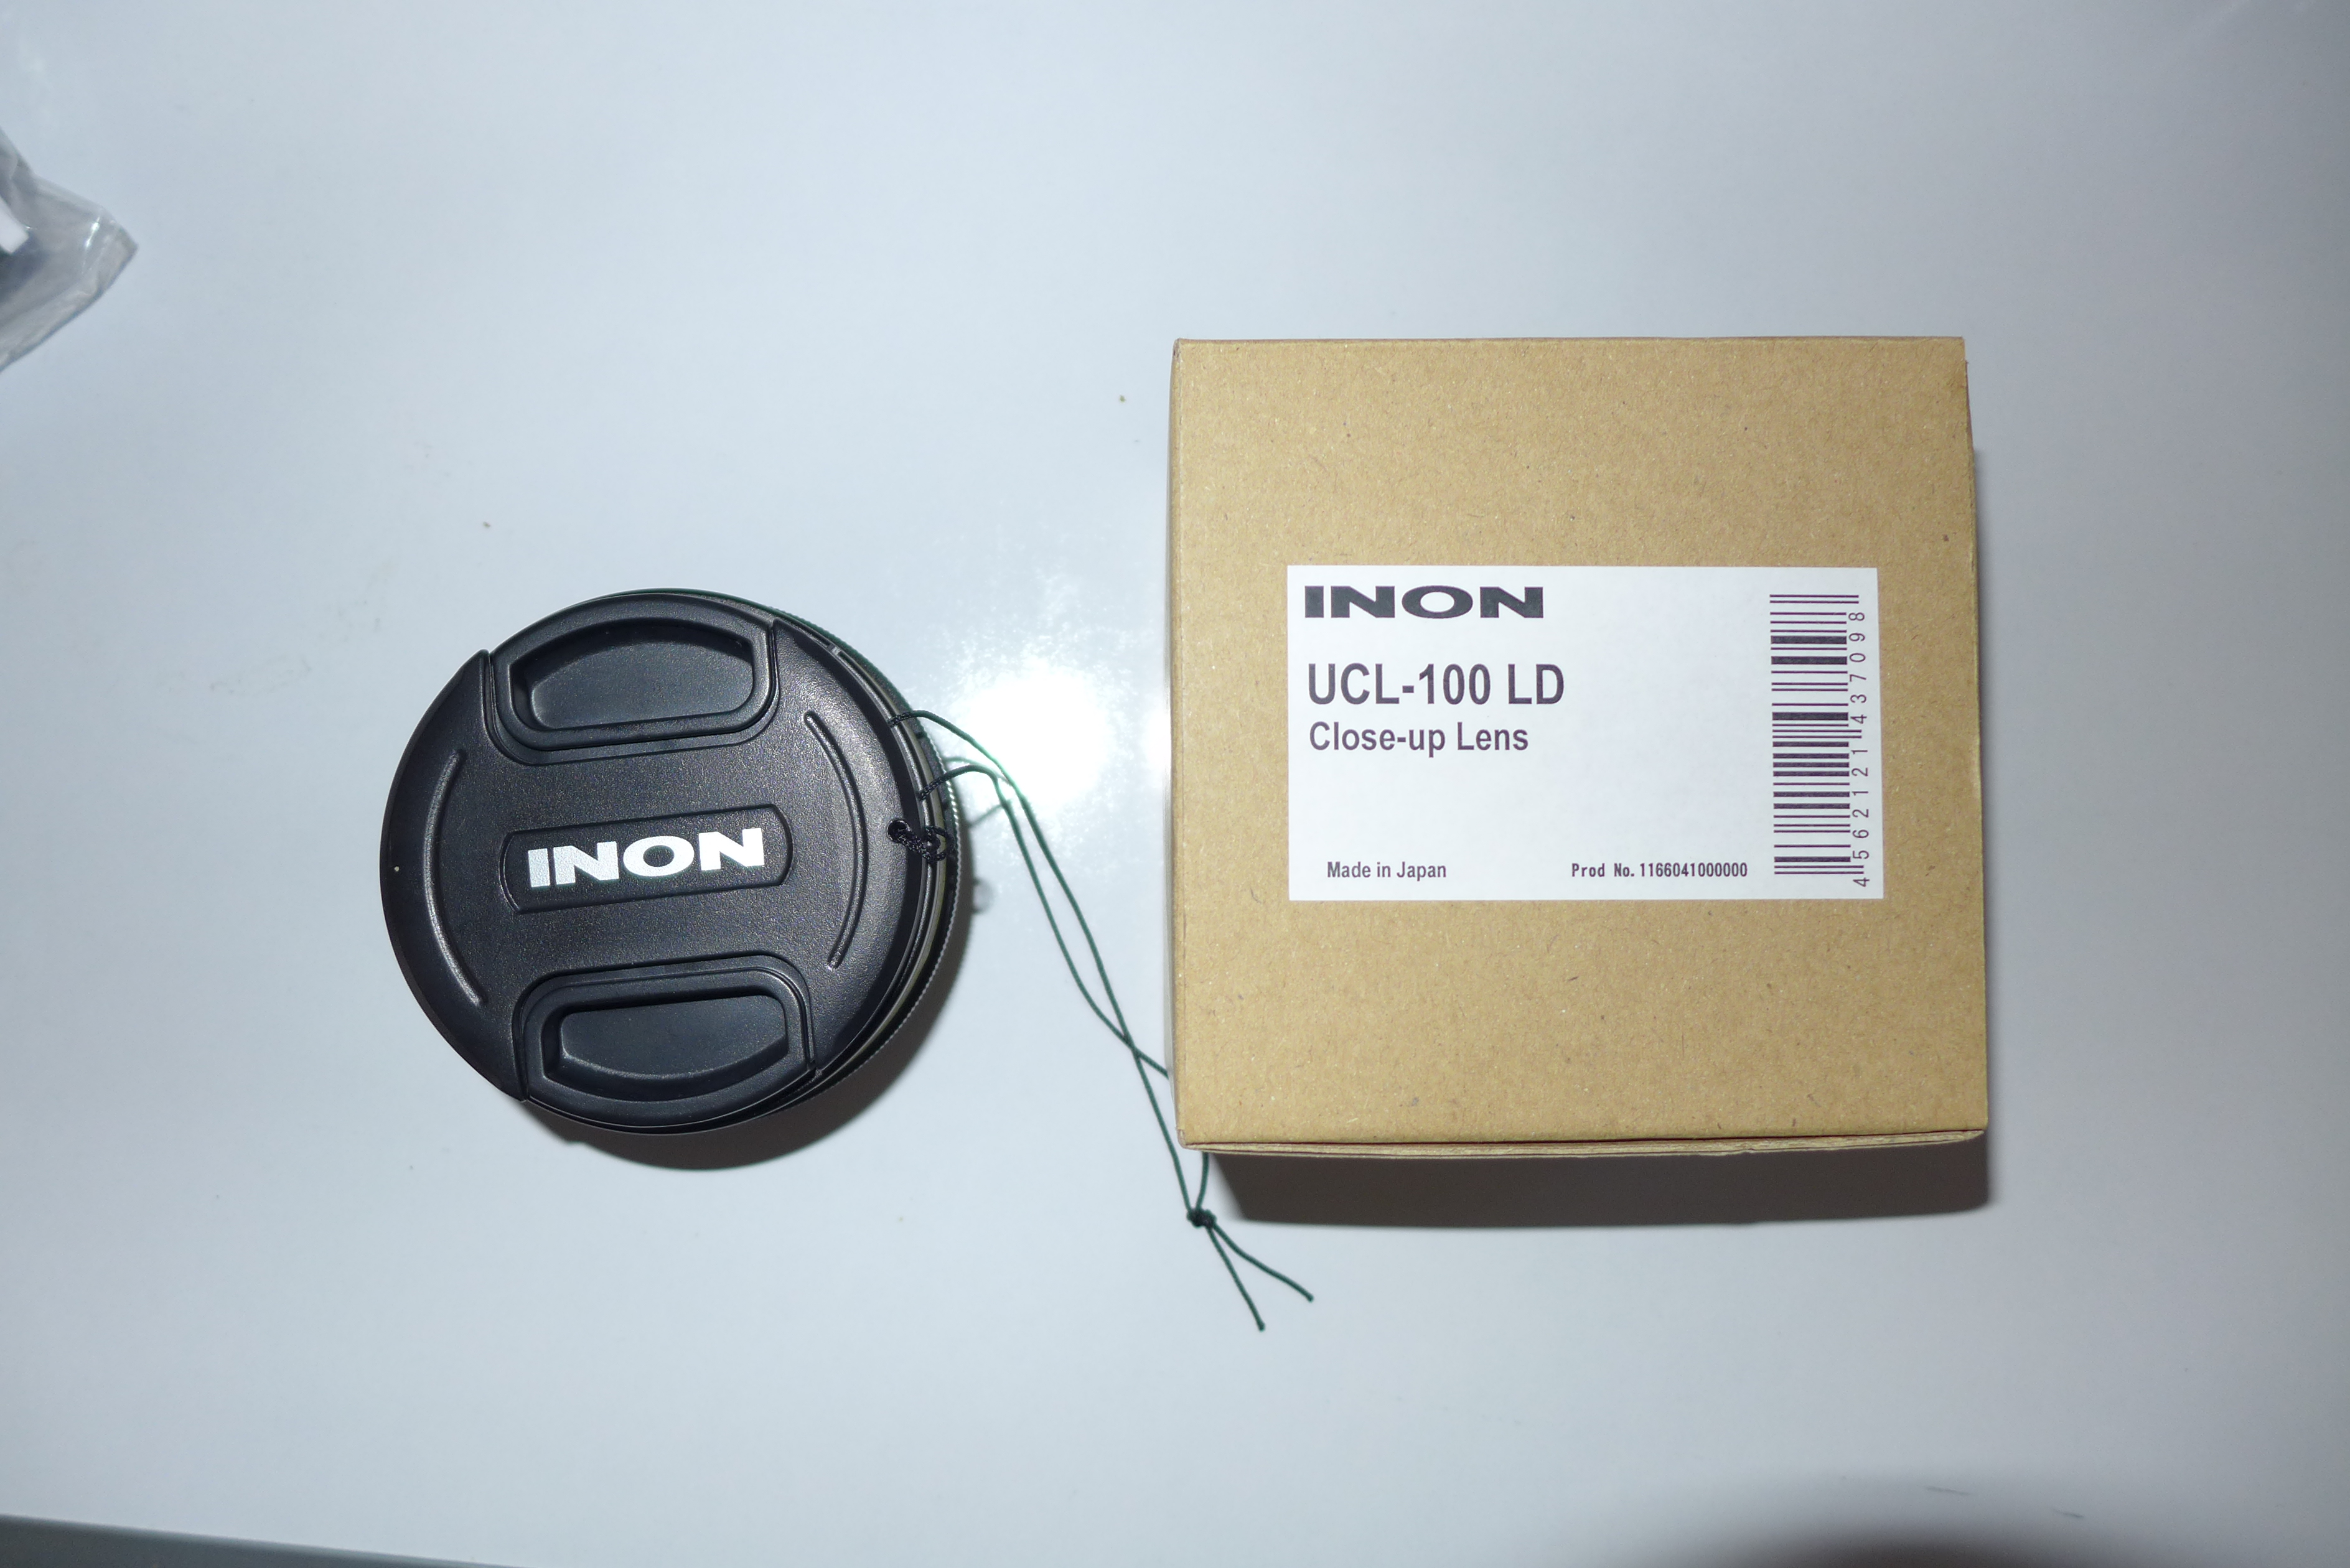
Exactly the same as its predecessor the RX100M2 has a minimum focus distance of 5cm on land that becomes around 7 in water. Like with the RX100 because of the large capture area you will need diopters for macro shots. On a positive note once you have a close up lens the performance is incredible when coupled with manual focus with peaking.

Stabilizer

Sony has adopted a lens shift approach in this camera instead of the sensor shift of the higher end alpha, maybe due to large size of the sensor compared to the camera body. They have then added some software processing in camera but the results are just average. There are many other cameras that do better than the RX100.

Soft Corners at Wide End – Improvement

The RX100 first generation had soft corners until f/5.6 the situation changes dramatically as we can see in this test card comparison shot. Not sure if there was an issue with the RX100 original sensor but this looks excellent and as sharp as the panasonic LX7 or Canon G15.

Look for yourself!!!

Left RX100M2 Right RX100

No Neutral Density Filter – marginal deterioration

As its predecessor there is no neutral density also on the mark2. A little tip for video is to shoot with filters that take away 1 1/3 f-stop. This is not ideal but helps. There were some speculation that because the minimum ISO in RAW is now 100 instead of 80 sunballs would be more difficult to shoot. 1/3 of an f-stop does not really make any difference I believe this is more a statement so that the RX100 housing that are in stock sell out at full price.

Other features

I have to say that the tilting screen is fantastic to shoot on a tripod on lens. I doubt any housing can accommodate for this but the feature is outstanding

IMG_6772
Tilt screen side view

And this is the rear

RX100M2 tilt screen
RX100M2 tilt screen

Conclusion

So the question is should I buy the RX100M2 or the RX100 maybe grabbing a deal? Recsea has already announced a housing for the mark 2 and Nauticam is working on it. I believe that when it comes to still photography the difference between the two cameras are not substantial as many shots are with strobes I have however noticed a much faster internal flash cycle time. I do not want to be definite but looks like a full dump takes around  seconds to recharge. Also to be considered that in US the price difference is $100 so definitely the Mark2 is the way forward. In UK/Europe the difference on the list price is £150/€180 which is much more.

So I would say if you are planning to use the camera for video go for the RX100M2 the improvements are significant both in terms of video formats but also in terms of sharpness at wide apertures. If your main interest is photography and you live in US go for the mark 2 in Europe instead I would grab a deal on the RX100 when the price of the housing drops.

I am waiting for a test housing from Nauticam as soon as I have it I will post an unboxing video followed by some pool tests.

Tips for Underwater Video – Tripods and Monopods

First of all I have to thank Mike on Scubaboard to get this in motion the original post is here

When you shoot macro and operate at high magnification even the smallest movement translates into shake, let’s think about it for one moment.

A macro image will have a frame size of 36×24 mm, this means that a move of half centimeter or 1/5 of an inch is equivalent to 20% vertical movement a considerable annoyance. When you shoot a picture this is not an issue because with a very high shutter speed you can freeze motion and there will be no blur like in this image.

Pygmy Seahorse 1.5 cm

Trying to take a video of a moving subject like this proves challenging, and you need to slow down the footage to avoid sea sickness like here

So how do we get outstanding macro footage? We need to be super stable and avoid any type of shake.

One possibility is a tripod. There are various examples of underwater tripods such those made by Ultralight example here

There are several inconveniences using a tripod first is that those are more suited to a camera than a tray that may have the tripod hole off centre, so if you use a tray for your set up and just want to occasionally put it on a tripod this gets complicated.

So that where Mike came into action and contacted ULCS to build a tripod out of a tray those are my results using the following parts:

Camera set up

  • TR-DM tray
  • TR-DUP Extention
  • 2x TR-DH handles
  • 2x 12 segments 12″ locline arms
  • 2x Sola 1200
  • Panasonic LX7 in Nauticam housing

Tripod set up (approx $310)

  • 3x 1420 ball base adapters
  • BA-FBd plate
  • 3x clamps
  • 3x 5″ arm segments

This gives something like this also called Ultimusmacro

UltimusMacro
UltimusMacro

I tried this set up and the key issue is that you are far away from the floor and end up with working distances of around 10-15 cm or 4-6″ those are suited to a +6 diopter but not more and best with camera with at least 105mm zoom.

This is a bit of an issue with my Panasonic LX7 as the max zoom is 90mm equivalent. So I came up with a mini-monopod that has several advantages:

  • Closer to sea floor
  • Less expensive
  • Lighter
  • More flexible

For the mini-monopod all you need is ($150)

  • 3x 1420 ball adapters (two female and one with screw or bolt) – alternatively 3x 3816 2x female and 1x 1420 with bolt if you use AC-AH handles with 3/8 hole
  • BA-FBd plate
  • 1 clamp
  • 1 8″ arm segment

This is the mini in action also called cyclop

Monopod
Monopod

In this configuration I also have a lens holder on the 8″ this gives even more stability
With a mini-monopod you can easily use +10 diopters as you are on the bottom. In my set up I have floats however the 3 1420 ball heads on the bottom are sufficient to have a stable platform that can be pointing down even more raising the arm segment.

In addition to this the monopod can be used to push the camera in remote places or approach critters in crevices or similar

I will be testing both in North Sulawesi starting next week I hope to come back with some great footage

For more pictures of the set up check the Panasonic LX7 link on the top of the page

Underwater Video Tips: Inon UCL100 Analysis

Inon introduced a new close up lens in February of this year the UCL100. So why did Inon come up with this after the very successful UCL165 series? Probably some pressure from products like Subsee that produce better quality images than the Inon lenses and more and more lenses with similar performance to the existing Inon lenses. So what is different about the UCL100? First of all this lens is heavy 243/269 grams in the LD/M67 version in air that become 130/151 grams in water double than the UCL165. The lens is made of 3 elements instead of two and is very similar to a Subsee this is more evident taking a look at the lens on land.

This shot is taken with the bare port at 50mm.

LX7 50mm
LX7 50mm

This is the same shot at the same working distance using the UCL100 note the magnification.

LX7 UCL100 50mm
LX7 UCL100 50mm

The lens behaves like a magnifying glass exactly as the Subsee, Inon has made some effort to try to reduce vignetting, this picture is taken on land at 28mm.

UCL100 Fix Land 24mm
UCL100 Fix Land 28mm

Note a little dark bottom right corner, the lens in fact vignettes at 24mm this is due to the huge size of the LX7 lens and may not happen with other cameras.

Here we can see the rear of the lens from the Fix adapter side. The lens sits very close to the glass port.

UCL100 rear lens attached to Fix LD adapter

I have opted for a bayonet version of this lens as I will use the fix as m67 adapter if I had to dive with the wet mate.
If you are a photographer I would definitely recommend the LD bayonet version over the M67 as it is easier to remove and attach in water.

There are some other very interesting characteristics of this lens. Usually a diopter works only around a certain working distance for a given zoom so the issue with such a powerful close up lens is that if we are far away from the working distance the lens is not usable.

The UCL100 instead is quite flexible and has a huge swing of working distances for a given focal length as in the table below.

Zoom Position Min Max
90 60 100
70 45 115
50 20 130
35 10 200
28 0 300

All values are in mm.

So the lens keeps working well far away the nominal 100mm and due to the construction also gives a magnifying effect this means that it is possible to take this lens in water as the only close up lens and there will not be too much of a limitation if for some reason we can’t get that close to the subject. A swing of 40mm at telephoto end is excellent and this becomes 70mm at 70mm zoom and 110 at 50mm.

What about image quality most of you will know by now how specific I am when it comes to aberrations, this is a crop of an image taken with the UCL165

Inon UCL165 Fringing

You can see the yellow and purple halo around the zero.

This is a detail of the same ruler in water with the UCL100

Inon UCL100 Detail
Inon UCL100 Detail

The image is a bit soft because of the aperture used but absolutely free of any fringing that is astounding for this level of magnification, the quality of the image is same as Subsee.

This lens comes with a lens front and back cover, the front lens is a clip with lanyard. The UCL100 can also be stacked with other M67 lenses if you need more!!!

Inon UCL100
Inon UCL100

With the LX7 the UCL100 achieves a reproduction ratio of 1.1:1 compared to the 1.4:1 of an Inon UCL165. The limitation of the zoom of the LX7 shows a bit here as even the Sony RX100 gets nearly a 1:1 with this lens but the strength of the focus of the LX7 are second to no other camera in this segment so I look forward to using this lens on some really small stuff.

The UCL100 is priced at $282 in US and £275 in UK versus $225/£210 of Subsee so why would you bother getting this lens from Inon instead? I think the main selling point of this lens in addition to the image quality and magnification power is the fact that the lens operates until wide end and has a very wide range of working distances so you are not stuck just around the 100mm nominal focal lenght. This allows use of the full zoom from wide to tele that in video is especially important. For pictures I am not so sure the additional cost is justified as stills are usually at full telephoto end.

Grenada Trip First LX7 release

I have just completed the first draft of the clips taken with the LX7 in my trip last week. Links are here:

Youtube may not work in some cases so use vimeo instead

For who wants to know the lens choice for wide angle was as follows

Wet mate: Molinere Sculpture Park, Purple Rain, Veronica L, Shark Reef

Inon UWL-H100: Bianca C (28-40 meters) , Northern Exposures, Southern Comfort, Quarter Wreck, Shake’em (20-32 meters)

You can see in the section of the Veronica L that missing those extra degrees field of view did not allow me to take the full wreck by side even if it was not that big. On couple of reef dives I already had the Inon on the previous wreck dive so I left it you can compare performance of the two lenses in terms of sharpness and flare. Generally I feel the wet mate has less flare and is sharper however it does have an issue of reflections as covered in the previous post.

As always I have used iMovie to edit the AVCHD progressive files that I converted to normal mp4 using the workflow in a previous post. There are no dramatic alterations of colour or exposure and no stabilization has been run in any part of the video (in some parts like the snake eel moving it shows) all was done with custom white balance using the camera functionality, considering how deep were some of the wrecks this is very good I believe.

I would love your comments this was mostly an exploration trip so it is interesting to compare to the RX100 Raja Ampat videos

Wet lenses choices for Panasonic LX7

When compact cameras were designed for 35mm it was quite common to shoot just with a camera and strobe; this allowed the average user to take decent close up pictures as long as the camera was capable of focusing within a couple of inches from the subject.

Years later manufacturers started introducing wider lenses first came 28mm equivalent and most recently 24mm, these cameras give an increased field of view on land of 75 and 84 degrees diagonal.

There is a common misconception that as the camera has a wider lens you don’t need to buy a wet lens for underwater activities. This is also reported in otherwise good articles like this one: http://www.scubaboard.com/forums/tips-techniques/46508-getting-started-amateur-underwater-photography-buying-your-first-camera.html

So why is it a bad idea to shoot just with the bare camera and no add-on lenses?

Two key reasons:

  1. Once in water the 84 degrees diagonal of a 24mm equivalent camera reduce to 54 or less because of the water medium
  2. At focal lengths shorter than 35mm pincushion distortion becomes stronger to the point the pictures are awful.
Pincushion Distortion at 24mm with flat port

So if you plan to use your wider compact camera underwater without lenses make sure you zoom to 35mm to avoid distortion.

This is the same picture at 35mm note how the image is now rectilinear.

Flat Port 35mm
Flat Port 35mm

At 35mm we are back were we were in the mid 2000 and all we can do is close-ups so there is no advantage having a wider lens for underwater use with a compact.

Another common misconception is that a compact camera takes great macro just with the internal flash. Firstly a macro picture has a 24mm height of the capture area, nearly no compacts on the market are capable of this: the Panasonic LX7 and the Canon G15 within the current range are the exceptions. However at 1cm distance the internal flash is completely obscured by the lens, which means there really is no macro without a strobe and a close up lens: all you can shoot are close-ups.

Flat Port Close Up
Flat Port Close Up

This explains the need for wet lenses in water, wide-angle lenses to increase the field of view and allow us to get closer and take advantage of artificial lighting, close up lenses that also allow us to get closer using the full zoom of the camera and shoot at increased magnification without being on top of our subject.

The needs of photography and video differ as lighting tools differ, photos require strobe to freeze motion, video instead uses fixed lights. Photos are also taken at much wider angle than videos and fisheye effect is accepted, an effect that in video is generally not welcome.

With this in mind what are the wet lens options for the Panasonic LX7?

It depends of course on the planned usage of the camera.

Underwater Photographers

The LX7 has extremely good close up capabilities out of the box, however the capture area is around 12×8 cm that is not exactly small. If we want our nudibranch of shrimp to fill more of the frame we need a close up lens.

From my tests the Inon UCL165 brings around 2.5x magnification with the LX7.

Inon UCL165
Inon UCL165

I have tried stacking two UCL165 but the amount of chromatic aberration is too much for my liking, I found that 9 diopters is the max before fringing becomes a real problem and I do not recommend stacking two of those lenses or two equivalent Dyron diopters. I think the most flexible set up is a UCL165 and UCL330, this covers all possible working distances. I do not have a UCL330 yet so I can confirm but I have taken shots with a very similar lens (Olympus PTMC-01) and the results are excellent with a capture area of 48×32 mm that is very close to real macro. The zoom of the LX7 is the real limit here as it maxes out at 90mm versus the 120 of a Canon S110 or 140 of the Canon G15.

For close focus and ambient light wide-angle the bad news is that there is no fisheye lens that works well with the LX7 this is due to the extremely large lens.

I have tested the Inon UWL-H100 and I had to wait for a new port to be delivered from Nauticam as their original one was too long and had vignetting even at 28mm. This lens yields more than 100 degrees diagonal and is my preferred choice for the LX7 for stills. There is however a good amount of blue and yellow fringing if I really have to be picky so the extended field of view comes at some price.

UWL-H100 28mm
UWL-H100 28mm

I use Inon lenses however a possible candidate is the Epoque DCL30, this lens is reported to work with 28mm equivalent cameras however the rear lens is smaller than the Inon so I believe this needs confirmation. There is a $70 difference in US and £70 here in UK between the two lenses and considering that a dome will not worth I encourage testing this lens as the results may be acceptable. I think bluewater photo markets this lens in US under their own brand.

Underwater Videographer

If you plan to use the LX7 for video the situation is different, as the camera close up performance is extremely good and usually macro video is very hard. Most time we shoot with ambient light and if visibility is acceptable getting that close is not so important considering the LX7 ability to manipulate white balance.

The first suggestion is to get a Nauticam Wet Mate, this is a sealed air dome that gives us back the air field of view and works extremely well without any chromatic aberration and extremely sharp corners. This lens keeps the image rectilinear that is also a good thing for video.

LX7 with Nauticam Wet-Mate
LX7 with Nauticam Wet-Mate (do not compare with the Inon Picture this is taken from further away)

For majority of reef dives the wet mate is all is needed as this also allows the full use of the zoom without soft corners that occur if you zoom into a wet wide-angle lens. This lens is the most versatile for general video use and costs $250, great value from Nauticam.

There are however specific situations where the wet mate is not sufficient, as before close up performance with the bare port is good but not great for smaller critter, so a close up lens would be the next addition, again an Inon UCL165 or a Dyron Double Diopter would work just fine and have the same power.

When shooting at closer distance with lights, or when there is large fish or wrecks a wet lens is important as the 84 degrees diagonal of the LX7 are actually only 76 horizontal. Again the Inon UWL-H100 is my choice but would check again for the Epoque DCL-30. One characteristic of the LX7 that is interesting is that the diagonal field of view of the camera remains constant when picture format changes, this means the horizontal field of view is larger at 16:9 movie mode than it is at 3:2 for pictures.

Field of view with the LX7

Those are the maximum angles of coverage horizontal of the LX7 as I measured them at 3:2:

  • Bare Port 24mm: 50°
  • Wet mate 24mm: 71.5°
  • Inon UWL-H100: 88°

At 16:9 there is a wider field of view of:

  • Bare Port 24mm: 54°
  • Wet mate 24mm: 76.2°
  • Inon UWL-H100: 93°

In general terms with the wet mate we can cover 1.56x the horizontal field of view of the flat port and with the wide-angle 2.1x.

The wide-angle offers an additional 35% over the wet mate don’t be mislead by the apparent small difference between 84° and 100° as those are diagonal measures not horizontal and those few degrees more count.

At 1 meter distance the maximum subject size with the wet mate in movie mode is 1.56 meters and with the wide-angle this becomes 2.1, that confirms that the wet-mate is good for general use and the wide-angle is only required for close scenes of larger fish or wrecks.

Those are the three lenses I have used for those tests. A final consideration is about the lens mount. I will use the LX7 for video so my choice has been a 67mm mount, because this is the only format that the wet-mate offers.

If I was using the LX7 only for pictures I would prefer the flexibility of the Inon LD mount even if this costs a bit more as it makes it so much easier to swap lenses in water when you have a bayonet mount.

Underwater Video Tips: Choosing a Close Up Lens for a Compact Camera

There is always a lot of confusion around macro photography and close up lenses. It is useful to set some definitions right before going into selecting the appropriate lens.

In traditional terms a macro photograph is one where the image of the subject on the sensor is the same size of the subject itself. As photography is based on 35mm film this means that a macro photograph is one where the vertical size of the frame measures 24mm. If we look at high-end compact cameras there are very few that are able to capture an area smaller than 35×24 mm, among those the Canon G15 or the Panasonic LX7. Majority of other cameras capture around 60-65mm wide and 40-42mm tall frames usually at the widest end with distances of 1-3 cm from the subject. As compact camera sensors are small strictly speaking there are no compact cameras on the market that can capture an object as small as their sensor.

So as far as we are concerned all that matters is that the height of the frame is same or smaller than 24mm as if we were shooting with a full frame DSLR.

Seems macro but it is not!
Seems macro but it is not! 1:1.2

For an SLR user the choice of a close up lens is quite straightforward as usually there will be a 100mm lens behind a flat port. This lens gives a magnification of 1:1 usually with a closest focus distance of 12” or 30cm. To achieve more with the same lens there is the need of a close up lens that works with a similar principle of a magnifying glass.

A close up lens will have a determined focal length or maximum working distance, beyond which it will not focus. If you hold a close up lens at the focus distance and look inside it you will notice that the object will appear larger as you step back from the lens and smaller as you get closer to it. The camera lens behaves in a similar way. Once you reach the working distance of the close up lens is the zoom that moves the lens forward or back and effectively provides the magnification. The close up lens only shorten the working distance allowing you to get closer.

Close up lens are measured in diopters this is the ratio between 100cm and the lens focal length. So a lens with a focal length of 20cm is a +5 diopter. A 100mm lens at 30cm once placed at 20cm from the object would achieve a 1.5:1 magnification. So with a 100mm lens in a flat port and a +5 diopter we are able to capture images larger than life-size with a DSLR full sensor. A +10 diopter would give a magnification of 2.1:1.

So how much power do we need to shoot macro with a compact camera? Is it the same than with a DSLR? Are there other considerations that apply?

The first issue is that because compact camera have fixed lens there is no way to predict at a given focal length if we will achieve macro or not. A compact camera zoomed to 100mm equivalent is not the same as a full sensor camera with a 100mm lens: in most cases the capture area is much larger. In fact there is no way to know if our lens will or not achieve our objective of taking a macro shot just looking at the camera specs. To make matters more complicated it is not always possible to get too close to our subject, this may be because there is no physical way to get closer or because we do not want to freak out the marine life that we want to capture. In general I like to leave some breathing space to subjects, as a minimum 3 inches or 7.5cm are needed and a bit more. This means that more than a lens with more than 12 power is generally a bit too close to the subject.

So how do we work out what diopters we need for our lens? Unfortunately we will only know after we have actually tested it, this is of course not very good!

Another possible approach is to define what is the working distance that we can realistically sustain with our equipment and the conditions we dive in.

Generally it is always possible to get between 20cm and 10cm and in some cases also under 10cm. This corresponds to 5 – 10 diopters and sometimes more for example 12. Considering that plenty of marine life is actually one inch or larger to capture a frame where the subject is filling it we do not actually need real life-size macro. In practical terms this means that for a compact with zoom of 100mm a lens with 6 diopters is fine with less or more depending on the camera zoom and focus ability. So for general purpose a close up lens between 5 and 7 is perfectly fine, this corresponds to working distances between 14 and 20 cm or a bit less from the back of the close up lens so actually closer from the front of the lens itself. For very small subjects around 1.5 cm like a pygmy seahorse we would be looking at 10 to 12 diopters, more is impossible as we would be crashing into the critter. This means a working distance between 8 and 10 cm or 3 to 4 inches from the front of the lens or 3 to 5 cm or 1 to 2 inches from the close-up lens that would still allow a small space for our lights.

Macro Shot 1:1
Macro Shot 1:1

Will we achieve real life size macro with this? It depends, to give some context my Panasonic LX7 that only has a 90mm zoom will capture a 32mm tall frame with 6 diopters power, strictly speaking this is not macro, and 20mm with two stacked 6 lenses achieving a 1,2:1 super-macro.

Super Macro 1.7:1
Super Macro 1.7:1

There are also other consideration that apply, if all we have is a +10 diopter we need to get very close to our subjects for our lens to start working, in all those situation where we cannot get close we would run into problems. If we look at a videographer with a 10x 400mm zoom camcorder they most likely only need a 2-3 diopter because with the range of zoom available they can comfortably achieve macro staying over a foot away from the subject. So the advice is to always have a 5-6 lens for general work and another 10-12 for smaller subject or if the lenses are stack-able two 5-6 this will cover all possible situations with a camera with a 90-140mm equivalent zoom.

I thought of concluding this blog with some recommendations so those are my recommended close up lenses based on personal use or looking at pictures of others:

  • DSLR: Reefnet Subsee both 5 and 10 with 100mm lens on full frame or 60mm on 1.5x cropped sensor. The new Inon UCL100 is also worth checking but it is more expensive.
  • Compact Camera: Inon UCL165 x2 or Dyron Double Macro lens x2

Note that the Inon UCL165 focal length of 165mm is from the back of the lens so the power is 6.06. Dyron lens are reported as 7 diopters however they are then declared 165mm underwater which is actually 6.06 exactly as the Inon.

Optical quality of both lenses is similar so I guess it depends on price what would be the choice. Inon is available with bayonet mount that maybe a big advantage for some cameras like the Sony RX100.

Whilst the Subsee give the best optical quality they are bulky and not flexible so I would not consider those for a compact rig. Inon and Dyron are lighter and more portable and can be stacked, a single diopter will be in most cases sufficient for good close up work with two required only for the smallest critters. It has also to be considered that at least for stills chromatic aberration can be removed in the editing phase, not so for video, but there generally goes unnoticed unless is really heavy. The Dyron and Inon lenses have the level of quality that the aberration cannot be noticed. This muck diving video has plenty of macro and close up with diopters note that no chromatic aberration is visible, shot with single or double Inon UCL165

There are other brands like FIT or époque but there seems to be quite some confusion as their specs are either air values or magnification that as we appreciate depends on the lens used. From tests I have seen the FIT 16 seems less powerful than an Inon 6 and same of a Subsee 5 and they are expensive so not an option for me.

What other tips are useful for shooting with close up lenses? The first is to make sure to use small apertures to have the maximum depth of field.

Contrary to what many believe the diopter itself does not create an issue of shallow depth of field is the size of the subject and the magnification that create the problem. With diopters most times we are at the maximum possible magnification with a total depth of field of few millimeters, it is important to operate at aperture values for a compact camera of f/8 and if available smaller.

For pictures is it also advised to use very fast shutter speed to avoid motion blur that the shake of the camera could create, usually 1/250 or faster unless using a tripod or a solid base. Video is not usually shot with high shutter speed, if available use double frame rate and shutter of 1/100 or 1/125 depending on the PAL or NTSC video system. This will allow half speed slow motion in editing that could prove useful.

Lights are also very important for close up, for still cameras they allow the camera to focus and for video they are needed to actually take the shot. For still cameras a strobe is essential, as video lights do not perform well at high shutter speed.

A final advice is to use the lowest ISO or gain available to ensure the quality of the picture or footage is the best possible, as we are close and have lights this should not be an issue at all. Most macro stills are shot in manual, for video if a manual mode is not available pumping the lights up results in the camera closing the aperture and reducing the ISO. If manual mode is available it is possible to set shutter, aperture and ISO and then measure the exposure that the light give until a satisfactory value is achieved.

Sony RX100 – Summary of Underwater Video Performance

Few months ago this clip came out

Many people including me got really excited about this camera and had a go at underwater video with it

Now it is time for an end of year review and summary of my experience with the Sony RX100.

Without a doubt the camera is a game changer and there are some feature that are especially suited to underwater video.

Key Strengths

Bright Lens

The RX100 does very well in low light this is a strong selling point for underwater video, even in cloudy days the camera does extremely well

Low Noise

The camera performs very well in video mode up to ISO 800, the level of background noise is really low and the footage clearly benefits from it

Image Quality

The quality of video if we focus on the center, as well at the telephoto end is impressive. Color rendering is very accurate and there is even the option of using Adobe RGB. The dynamic range of the camera is excellent and the image is vibrant.

Video Mode Control

There is full manual control in Video mode and the option for aperture and shutter priority. The program mode does very well. Only an Auto ISO option in manual is missing but this is negligible. Indeed the most interesting mode is aperture priority.

Manual Focus

The peaking function works very well and it is really a strong feature of this camera, it is also very usable underwater

Battery Life

You can easily do 3 dives with the RX100 without having to open the case which is great and actually unusual these days when even a gopro does not last one hour.

Active Steadyshot

I initially slagged the RX100 stabilization system based on performance on land. However at a more in depth analysis it turns out that the RX100 active steadyshot, even if at cost of an image crop is very effective for sudden camera movement and for high magnification macro. The Stabilizer is not as sticky as others so when you eventually vibrate it does not jump. Although the performance for stills is poor to irrelevant and so is the normal mode the active mode is very effective for underwater use.

Tedious Workarounds

Some of the ergonomics of the RX100 are not the best and seriously deduct from an otherwise excellent experience, the most annoying issues:

Lack of focus lock

For some reason Sony decided to skip on this essential feature, the workaround involves switching to manual focus using the function dial however it is then possible to accidentally change focus.

Setting Custom White Balance in Video

Setting custom white balance is only possible in the still modes, while in fact if you shoot RAW don’t actually need white balancing. This is the largest non sense of this camera that requires the user to navigate out into Program to ensure white balance is set correctly and you don’t end up with the Custom WB Error message. Really an awful issue that Sony should try to fix in a firmware update

Lack of 24/25/30 progressive modes at 1080HD

Sony thought that for some reason you either shoot interlaced or you go directly at double frame rate with a 25 or 30 progressive mode only available at reduced bit rate and resolution of 1440×1080 with rectangular pixels. Why did they do that is a total mystery. You are therefore forced to shoot at the highest mode of 1080p50 or 1080p60 that produces large files difficult to digest by many programs. Sony decided to keep a bunch of interlaced modes despite the fact that there are no programs that can edit those without conversion and that CRT Tvs don’t exist since a little while.

AVCHD

Sony embraced AVCHD maybe because their software handles it well but what about the rest of the world? Mp4 is the standard for video clips on the internet and AVCHD adds absolutely no feature to it for simple video recording. Files have to be systematically converted, sometimes with commercial software, to be used with mainstream non linear editors, not only most would not recognize the files at double frame rate.

Key Weaknesses

The RX100 has also some key weaknesses that limit its own performance and can’t be cured by workarounds.

Macro Performance

The camera does an awful job at close range and needs a diopter even to shoot basic macro. To shoot super macro you need +12 diopters and this requires high quality lenses to avoid chromatic aberrations in the image. The focus mechanism with diopter is a bit of a mystery to work out at times. Once you manage to focus the image quality is great. However the need for a +5 diopter as a starter makes this set up expensive and cumbersome to handle in water compared to others.

Stabilizer

Sony has adopted a lens shift approach in this camera instead of the sensor shift of the higher end alpha, maybe due to large size of the sensor compared to the camera body. They have then added some software processing in camera but the results are just average. There are many other cameras that do better than the RX100.

Soft Corners at Wide End

I was going crazy looking at pictures taken with different wet wide-angle lens to check which lens was best, at the end of hours of observation I took some shots on lend at the wide end. The issue is not with the wet lenses is with the camera itself, it has very soft corners until at least f/5.6 and not the sharpest corners anyway afterwards. This cannot be cured and is a key weakness that is not so apparent in stills where you can crop quite a lot 20 megapixels but obvious in video.

No Neutral Density Filter

The RX100 has a bright lens and low noise however in video the ISO starts at 125, in many situation near the surface the camera maxes out at f/11 and then starts increasing shutter speeds to 200 400 800 and so on producing scatty mechanical images. Neutral density filters have been implemented for ages in cheaper camera and take away 2-3 f-stops allowing the camera to operate at wide aperture. For some reason Sony decided not to do anything about this. On land this is an even stronger limitation in bright days.

A final remark that I want to include for all those that use the RX100 for still photography that indeed is the real strength of this camera.

Another key weakness is the strobe recycle time not an issue in video of course but creating several issues of missed shots for photographer

In conclusion the RX100 can produce great footage but has some limitation that need to be taken into account.

If you go muck diving on flat surfaces with a couple of diopters and good video lights it is of course all looking wonderful but the situation changes when you cannot lay down as in my seahorses video

With two Inon UCL165AD stacked it is really hard to get some decent footage and due to the large sensor the depth of field at such level of magnification is pretty much zero.

But the limits show up more in the wide angle where the soft corners come up no matter what you do as very seldom you are able to shoot at f/5.6 or higher at depth below 12 meters or 40 feet

Whoever wants to try the RX100 for video please get in touch if you have more questions and happy 2013!!!

Sony RX100 – Tips for Underwater Video Part 8 – Shooting at Night

If you are not freaked out by diving at night you know that it offers unique opportunities to see behavior and creatures not usually seen during the day like the monster snail in the featured image of this post.

During my recent trip in Raja Ampat we had the opportunity to see some really unique features, now for someone this fellow here is unusual enough

We had however made an indigestion of flamboyant cuttlefish in Dauin so that was not that exciting although having one of those walking towards the lens was pretty cool.

It is useful to compare the two still pictures of the flamboyant and the snail, you will notice that in featured image you can clearly understand the shot was taken at night whilst the flamboyant could have been just a day shot for how bright it is.

This leads us to tip number 1 for taking video at night which is never exceed with the lighting. We don’t have any ambient light to help and our lights are the only light source, it is very easy to exceed and wash out a scene with too much reflection from our subject.

I have lights that can be dimmed and I did not use more than half the power at night. It is also important to leave some form of dark halo around the frame to give really that night impression.

Coming to the light having bright lights on all the time also attracts lionfish, krill and plankton. On this trip I was literally attacked by krill to the point I had to switch off the lights for few minutes.

Back scatter is also more of a problem due to the particle in the water at night and the fact that they are more clearly reflecting our lights, if possible never illuminate a subject frontally to avoid the snow effect. Sometimes though, like in some sections of the video, there is just too much no matter how you angle the lights.

The real important part is the gear, I have video light that also change to spot and work as torches and are dimmable, this saves the effort of taking a torch with you and having to juggle with all the gear.

Other factor of relevance is that during a night dive you can’t really shoot wide angle as there is no ambient light, this limits the type of shots you can take so it is important to add something else to make the clip more interesting. It is also more difficult to film divers without blinding them so really there is less selection possible.

A final note are skittish critters that require a red filter, I have never been in this situation, usually I keep the lights low until time to take the shot and then go for it like for the eupalette shark towards the end of the clip. If you need to use a filter remember to set a custom white balance.

Talking of white balance every light has a specific temperature, mine are 6500K, it is a good idea to set the camera white balance to this temperature to neutralize the coldness of the light this is possible in video more on the RX100 but not all camera offer that option so you can start with auto mode to see how it works.

Anyway the video is the collection of the 7 night dives, some were not memorable but at least 4 were excellent you can see what I mean if you watch it in full and notice some of the specific quirks. I found the RX100 to perform very well and the footage is very clear. I used Movie mode P increasing or decreasing the power of the lights until I was getting the best compromise between aperture and too much light.

Sony RX100 – Tips for Underwater Video Part 7 – Macro Shots

Just came back from a 11 nights and 10 day diving on a liveaboard in Raja Ampat and I am in the process of putting together the summary videoclip for the trip. To have an idea of the kind of diving in this remote location you can have a look at the superb pictures that my buddy and fiance has taken on Raja Ampat 2012 Flickr Set

I had already gauged that the macro performance of the RX100 is far from outstanding and this trip just confirmed it.

To understand what I am talking about have a look at these two pictures both taken at 5 cm from the front port of the camera using a 3:2 format.

RX100Macro

The first image is shot with the RX100, note the shallow depth of field of the large sensor in P mode.

All looks good however if we take the same shot with a Canon S95 that has a 1/1.7″ sensor we get this result.

S95Macro

To make matters less complicated and don’t get too technical you can measure with a ruler the size of the memory card in the pictures. The S95 presents an image that is 26% longer than the RX100. It is like saying that compared to the RX100 the S95 has a 1.26x magnification.

In video diopters are not very popular because camcorders have small chips around 1/2.5″ and a 10x optical zoom and can focus at very short distance. So usually a no diopter is needed for regular macro work and a 4D is really only for pygmy seahorses.

With our RX100 however we need a 5D just to have a decent macro performance. Actually even a good size nudibranch looks small in the RX100 underwater without any lens. Moreover the RX100 has only a 3.6x zoom so even with a diopter that allows to focus a telephoto at closer distance things don’t really look that big so we are  looking at 5D for basic macro and 9D for super small critters.

The RX100 has a number of housing options with M67 thread as standard, this is the most popular format for diopters and there is ample choice there. If instead we want to use bayonet mounts we are pretty much limited to Inon or Seatool.

As discussed above we are  looking at a starting point of +5 diopter, this cuts immediately lenses like the Inon UCL330 out of the equation, if we look at the most popular and affordable lenses we are left with:

  1. Inon UCL165 6 diopters (1.5x) this lens is stackable
  2. Reefnet subsee 5 diopters (1.25x)
  3. Dyron +7 diopter (1.75x)
  4. FIT achromatic +8 (2x)
  5. Olympus +8 diopter (2x)
  6. Epoque DML-2 8.4 diopters (2.1x)
  7. Reefnet subsee 10 diopters (2.5x)

The first three options are adequate for most of the macro work with the RX100 and get you to fill the screen for almost all subjects except the smallest pygmy seahorses.

As we increase magnification we get the RX100 to a point where is very difficult to produce any decent footage. A 10+ diopter works very well for still pictures where you only have to take a single shot but for 10 seconds of decent footage is close to impossible to achieve focus without a tripod.

Looking at the featured image on this post this is a still picture with two Inon UCL165AD stacked at full telephoto. When I was in Raja Ampat I tried using two UCL165 it was very hard to get anything in focus however the performance is pretty good this is a snapshot taken from my footage.

Pygmy Snapshot

I posted all the pygmy footage on youtube

in this short clip I have a compilation of subjects, if you believed that an hippocampus bargibanti was tiny have a look at hippocampus denise, Pontohi and especially Satomi (1cm) in this clip to have an idea. All in all I am satisfied as I shot 12 minutes of seahorses and could use around 2 that were not too shaky. I do not use software stabilization as I don’t like the warping effect that CMOS sensor camera give so this is all done by hand. I did slow down some of the footage to half speed and this is were the 50 fps of the RX100 come really handy.

Other than Pygmy seahorses that are between 1.5 and 2.5 cm in size there is no need for such high magnification, in fact for the rest of the trip a single UCL165 has been more than adequate.

Looking at cost an Inon UCL165 costs less than a subsee 5  so that is the most cost effective option if you ever think you will need a very high magnification  and you are able to be super steady to avoid shake as it can be stacked with another UCL165 or an UCL330. Specifically having experienced the two UCL165 stacked I think that is probably too hard to handle so a combination UCl165+UCL330 should be the perfect choice for pygmy and similar at 9D alternatively a subsee 10seems the logical super macro choice.

A final tip is camera modes for macro, as discussed in a previous post aperture priority is the way to go and allows you to have enough depth of field so that you have sufficient part of the subject in focus. However this brings also the consideration about lighting. I took some shots in program mode with the RX100 and two Sola 1200, in some situations is quite hard to achieve f/8 or higher numbers with the two lights at the minimum power of 300 lumens with the lowest ISO. It follows that if you operate with a single light you need to have at least 800 lumens and put the light to the max, this may scare skittish critters and prevent you taking the footage you want. A possible solution is a red filter on the light followed by in camera white balance however a single light does produce harsh shadows and this needs to be taken into account.

In conclusion a diopter for macro work with the RX100 is a must so choose one that fits your needs and ensure you have sufficient lighting to support the small aperture required by the camera large sensor.