Tag Archives: Stabilization

Underwater Video Tips: Best video settings for Sony RX100

It is not a mystery that the RX100 is capable of shooting excellent video. In fact in some comparisons with SLRs cameras there is little to no difference in the footage quality. The RX100 has many settings and options so which ones are important for underwater video? I will go and explain those that I find useful.

RX100 Video Behavior

Although the RX100 offers full manual control in video this option is not as useful as it seems. Now that many video editors support AVCHD progressive the 50p or 60p options are the more relevant as the footage can be slowed down to half speed and still offer a standard frame rate (50/60p at half speed is 25/30p).

The RX100 shoots video in program mode with shutter speeds of double the frame rate so 1/100 for PAL and 1/125 for NTSC that is excellent news. The camera will then drop to 1/50 or 1/60 when the max ISO is reached which is still acceptable. In Movie Program mode the camera shoots at the lowest possible ISO for the set shutter speed at the widest required aperture. The RX100 has a minimum ISO in video of 125 and the RX100 has it at 160, which is quite high.
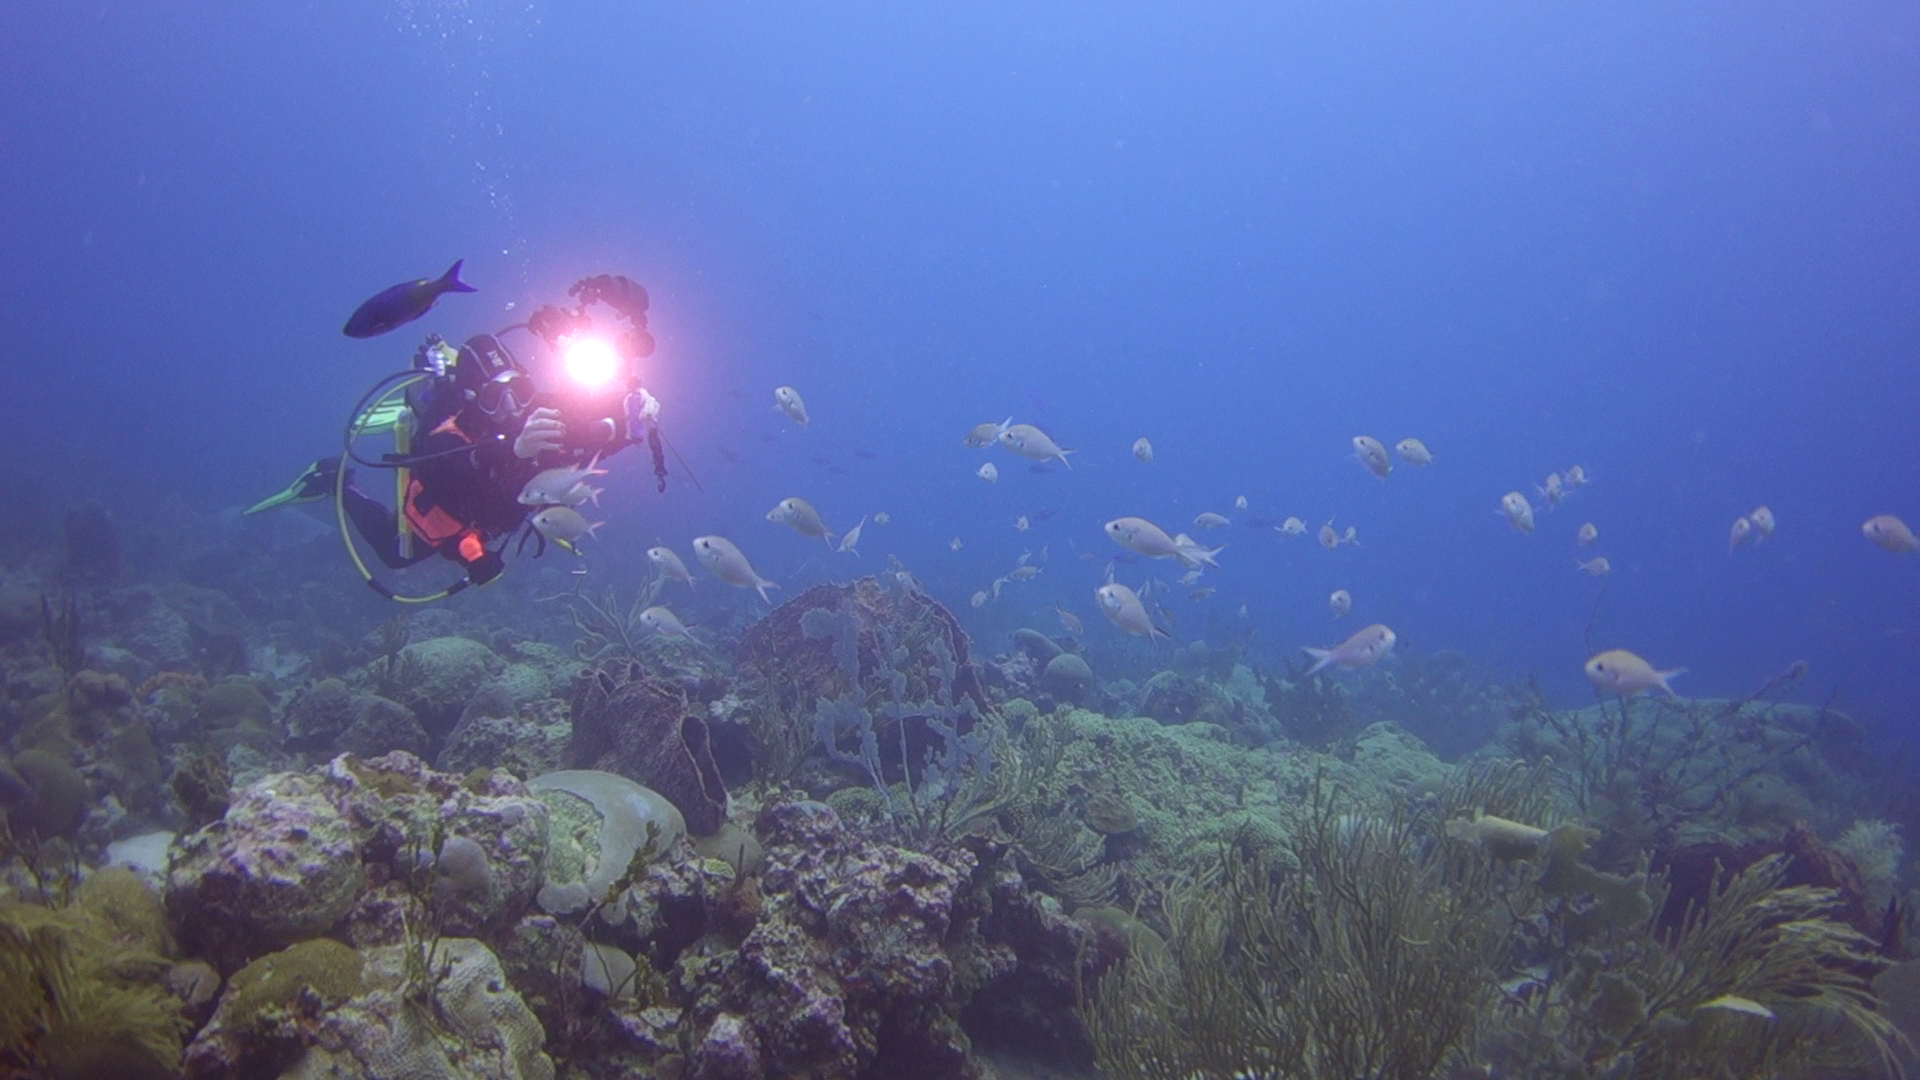
Shooting Wide angle

I shoot all my wide-angle footage with the camera in Program Mode. By that I actually mean Photo Program Mode. Pressing the movie button in P mode results in the same behavior that shooting video in P mode. In order to be able to frame correctly I set the image format to 16:9 also for stills. This is also useful to capture ambient light landscapes. I started shooting in P because this allowed me to white balance quickly however I found out that the custom white balance on the RX100 Mark II is a total disaster and in fact I never use it as it gives weird results. I shoot with a red filter with Auto white balance on until approximately 25/27 meters and then I move to White Balance set to K (colour temperature) 9900K Tint set to M7+Y7. When shooting with lights I also use auto white balance. Generally speaking I only use the movie button and the white balance settings for wide angle.
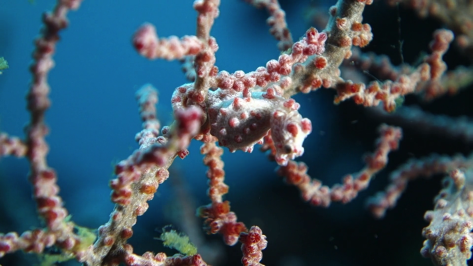
Deep Wreck in Program Mode

Shooting Macro

When shooting with diopter at tiny subjects focus with the RX100 is a challenge. I set my video mode to Aperture priority with an aperture of f/11 and Auto ISO, the camera will always keep a shutter speed of double the frame rate which is ideal. If you light the subject properly the RX100 will always shoot at the lowest ISO maybe at 200 but not more. I use auto white balance for all my macro. I find it convenient to leave the video mode like this so that I only have P for wide angle and Movie – Aperture priority for video. If you prefer you can set those as memory recall 1 and 2 but I find that not as useful except you don’t need to use the control dial.

Frogfish at f/11
Frogfish at f/11

Settings for the Function Buttons

Many features that can be assigned to the function button are not available in video or not useful. I only have 4 settings in the function wheel:

  1. ISO
  2. Metering Mode – Always on evaluative
  3. DRO – I set it to auto
  4. Focus Mode – in video only constant and manual are available

To be perfectly honest I rarely change any of those except for testing the camera exposure. Even the metering mode can be left to evaluative all the time as when you shoot macro the area is so small and evenly illuminated that I have never had an issue with exposure.

Settings for the Control Wheel

I use the following assignments and I find them very useful:

  • Left: White balance
  • Centre: Manual Focus Toggle
  • Right: Exposure Lock

The bottom arrow is always assigned to exposure compensation and can’t be changed I set it to -0.3 eV all the time.

White Balance

The performance of custom white balance with the RX100 Mark II is shocking worse than the original RX100, 9 out of 10 I get a white balance error and the results are usually off with too much magenta. The only occasions where I do not get an error is in 6 meters or water (20 feet) on a sandy bottom. In other conditions it does not matter if you try with sand, tanks, hand, slates the outcome is shocking. The results can be used changing the tint to an M2 or even zero but generally using a filter and auto is just much easier and better. I assign the K setting to 9900K M7 for shooting at depth, This is painful because it means that unless you have a flat lens like an Epoque or Inon you can basically forget shooting video with the RX100 as the custom white balance is erratic at least.

The Inon UWL-H100 has only one red filter that is compatible and is made by deeproof. I find this filter excellent though I prefer plastic to glass I have to say it works a treat.

Results with White Balance Error 9900
Results with White Balance Error 9900 Note the Magenta tinge
Similar scene with auto white balance and red filter

Focus

The RX100 focus automatically on the center when shooting video and does it very well,. Tracking focus is not as useful and by assigning the center button to manual focus it can be eliminated. When shooting macro it is essential to use peaking. I set it to low with white color. Generally with diopters there is only one focus distance so I move the camera until the peaking shows nice white and then press record trying to be steady. That’s pretty much it.

DRO

I keep the dynamic range optimizer to Auto. This means the ISO is most of the times set automatically to 200 to preserve dynamic range. When the scene is perfectly lit the ISO is chosen to be 160. I don’t see much difference between ISO 160 and 200 but if this bothers you set the DRO to off which means the camera will mostly shoot at ISO 160 in good light conditions.

ISO and Max ISO

I set the ISO Max to 800, having analysed a lot of my footage I have not found one example where the camera shot at ISO800 yet unless I had a filter and was at 30 meters. However I prefer the camera to drop the shutter speed and keep the ISO to 800 instead of going all the way down to 3200.

Zoom

In video the RX100 activates digital zoom even when you set it to off. This deteriorates the image so you need to pay attention that the middle notch corresponding to 3.6x is not exceeded or you will see artifacts in your footage.

Stabilizer

I use active steady shot thought this reduces the field of view as it does help with shake quite a lot with macro footage.

Other Settings to disable

There are a number of settings that are harmful in video either because they use battery or because they are counter productive I disable them all list includes:

  • Smile / Face Detection
  • Picture effects
  • Audio recording ( I do not like bubble sound)
  • Wind Noise Reduction

The following are only relevant for still but I like them off regardless.

  • AF illuminator
  • Red eye reduction
  • MF Assist

Sony RX100 – Which close up lens gives real macro?

As we know the Sony RX100 cameras, we will refer to both Mark I and II as the lens is the same, do not offer the best out of the box super close up performance.

To be clear no compact camera really does macro, as no compact can capture an area 36×24 mm in size without being on top of the subject and having a shadow cast on it.

The RX100 however are particularly unexciting as the capture area is pretty large at 76x51mm at the minimum focus distance of 5cm. This means a reproduction factor of less than 1:2 so things are half life size in traditional terms.

In water the minimum focus distance increases and so does magnification so performance is all in all the same.

This means that a typical small subject like a medium size nudibranch measuring 4cm will fill a bit more than half the frame, not great.

The problem can be addressed by close up lenses that have a set power that determines the focal length and working distance where we can use the full camera zoom.

So the close up lens sets the working distance whilst the camera zoom sets the magnification.

A typical close up lens will have a power of 5 or 6 diopters with a working distance in water of 200 or 165mm, what does it mean for the RX100?

I have done some testing in water using a ruler and an Inon UCL165 this is the result:

Single +6 diopter Inon UCL165

Our capture width is now 46mm so our 4cm nudibranch will nearly fill the frame. The working distance of this lens is 165mm so this is a very versatile solution as most critters have no problem being approached so close.

What happens with a +10 close up lens with a focal length of 100mm, this is another test

+10 Diopter UCL100
+10 Diopter UCL100

A +10 diopter like the Subsee or Inon UCL100 achieves exactly 35mm so life size macro. However a lens like this will not focus at longer focal distances without zooming out, furthermore there are plenty of subject that do not need this magnification.

Close up lenses can be stacked so this is the result of two + 6 diopters

Two stacked Inon UCL165

The width is now 32mm which is 1.1:1 so more than macro. This is adequate even for pygmy seahorse and with the incredible resolution of the RX100 cropping is not a big issue. Working distance is around 8.5cm which is still tolerated by small critters.

For completeness I have also tested a +16 combination

16 Diopters
16 Diopters

At around 26mm this is 1.4:1 so real super macro, the working distance is however only 6.25cm which is really close and will scare most critters away.

Conclusions:

  1. Without any close up lens the RX100 can only capture 5cm objects without extensive cropping
  2. A close up lens with a working distance of 165mm allows for most of the critters we consider small but without super macro effects unless cropped
  3. Two stacked +6 diopters offer super macro and can also be cropped for more suggestive effect
  4. A single +10 close up lens achieves real macro however it is not versatile enough for every day usage
  5. Stacking lenses does introduce chromatic aberration but this can be eliminated in photos and is barely noticed in video

Pay attention when you select your close up lenses that the focal distance that is in the specification is measured in water otherwise you will find yourself with a useless purchase

Sony RX100M2– First Impressions

I have  been fortunate to receive one of the first RX100M2 that have reached the market so I thought of sharing with you my first impression and what I believe will be the potential for underwater imaging use.

This is the link to the unboxing video of the camera

I posted a summary of the RX100 capabilities for underwater video some time ago on this blog the post is here:

Probably the best thing is to revisit my review and update any significant differences between the RX100 Mark 2 and the original version which is still on the market and will remain at least until the end of 2013.

Key Strengths

Bright Lens –  Not changed

The RX100M2 has exactly the same lens of its predecessor RX100, it is true that when zoomed the minimum aperture drops down to f/4.9 however this is not a concern for underwater imaging as usually long focal lengths are for macro and we are interested in very small aperture to allow for greater depth of field.

Low Noise – Improvement!

In virtue of the new retro illuminated sensor the mark 2 has one full f-stop advantage over the original RX100. This means that ISO800 is a breeze and potentially we could go as low as ISO1600. I would not do that but what it means is a cleaner image at depth in ambient light.

Image Quality – Improvement

Image quality is outstanding and the lack of aggressive contract and sharpness filters in the default settings means more room for correction in post processing.

Video Mode Control – no change

The RX100 had complete control on video mode and the mark 2 maintains the standard. Very important is that the program mode is excellent and keeps the shutter speed at 1/100 or 1/125 when used in active mode which is ideal for 50/60p smooth footage.

Manual Focus – no change

Same as for the RX100

Battery Life – Improvement

According to Sony battery life has improved from an already outstanding CIPA 330 to a declared value of CIPA 350. The new Mark 2 has also an hot shoe so in theory if any manufactures produces a wired TTL enabled housing this means plenty of shooting before changing the battery pack. We suspect though that only ikelite will have this option on the housing.

Active Steadyshot – no change

I initially slagged the RX100 stabilization system based on performance on land. However at a more in depth analysis it turns out that the RX100 active steadyshot, even if at cost of an image crop is very effective for sudden camera movement and for high magnification macro. The Stabilizer is not as sticky as others so when you eventually vibrate it does not jump. Although the performance for stills is poor to irrelevant and so is the normal mode the active mode is very effective for underwater use. The mark 2 is built exactly with the same algorithm and combination of optical and electronic.

Tedious Workarounds Comparison

Some of the ergonomics of the RX100 are not the best and seriously deduct from an otherwise excellent experience, the most annoying issues:

Lack of focus lock – no change

For some reason Sony decided to skip on this essential feature, the workaround involves switching to manual focus however it is then possible to accidentally change focus if the front ring is set to control focus. The RX100M2 has the same issue.

Setting Custom White Balance in Video – No change

Setting custom white balance is only possible in the still modes, while in fact if you shoot RAW don’t actually need white balancing. This is the largest non sense of this camera that requires the user to navigate out into Program to ensure white balance is set correctly and you don’t end up with the Custom WB Error message. Though this is annoying is not such a killer as it would initially seem if you take your movies in one of this still modes which is valid for wide angle and ambient light shot. For macro you will need to switch to movie mode aperture priority in AWB. If you keep this discipline this is issue is mitigated. The RX100M2 does not change this and I believe this is due to the fact that the shutter button that is used to set custom white balance is disabled in video.

Lack of 24/25/30 progressive modes at 1080HD – Improvement!

The RX100M2 shoots at 50/60p as well as 25/24p in addition to that you can switch between PAL and NTSC which is great!!!

AVCHD – Improvement!

The RX100M2 has not only the progressive modes at double frame rate but also AVCHD 1.0 compliant format, this means that if you choose the 24M 24/25 p mode you can import with all editing programs without issue. Not only that but if you use the wireless import utility this converts also the AVCHD progressive files in mp4 for you. This is  great improvement

Key Weaknesses comparison

The RX100 had also some key weaknesses let’s see how the mark 2 fares.

Macro Performance – no change 

Exactly the same as its predecessor the RX100M2 has a minimum focus distance of 5cm on land that becomes around 7 in water. Like with the RX100 because of the large capture area you will need diopters for macro shots. On a positive note once you have a close up lens the performance is incredible when coupled with manual focus with peaking.

Stabilizer

Sony has adopted a lens shift approach in this camera instead of the sensor shift of the higher end alpha, maybe due to large size of the sensor compared to the camera body. They have then added some software processing in camera but the results are just average. There are many other cameras that do better than the RX100.

Soft Corners at Wide End – Improvement

The RX100 first generation had soft corners until f/5.6 the situation changes dramatically as we can see in this test card comparison shot. Not sure if there was an issue with the RX100 original sensor but this looks excellent and as sharp as the panasonic LX7 or Canon G15.

Look for yourself!!!

Left RX100M2 Right RX100

No Neutral Density Filter – marginal deterioration

As its predecessor there is no neutral density also on the mark2. A little tip for video is to shoot with filters that take away 1 1/3 f-stop. This is not ideal but helps. There were some speculation that because the minimum ISO in RAW is now 100 instead of 80 sunballs would be more difficult to shoot. 1/3 of an f-stop does not really make any difference I believe this is more a statement so that the RX100 housing that are in stock sell out at full price.

Other features

I have to say that the tilting screen is fantastic to shoot on a tripod on lens. I doubt any housing can accommodate for this but the feature is outstanding

IMG_6772
Tilt screen side view

And this is the rear

RX100M2 tilt screen
RX100M2 tilt screen

Conclusion

So the question is should I buy the RX100M2 or the RX100 maybe grabbing a deal? Recsea has already announced a housing for the mark 2 and Nauticam is working on it. I believe that when it comes to still photography the difference between the two cameras are not substantial as many shots are with strobes I have however noticed a much faster internal flash cycle time. I do not want to be definite but looks like a full dump takes around  seconds to recharge. Also to be considered that in US the price difference is $100 so definitely the Mark2 is the way forward. In UK/Europe the difference on the list price is £150/€180 which is much more.

So I would say if you are planning to use the camera for video go for the RX100M2 the improvements are significant both in terms of video formats but also in terms of sharpness at wide apertures. If your main interest is photography and you live in US go for the mark 2 in Europe instead I would grab a deal on the RX100 when the price of the housing drops.

I am waiting for a test housing from Nauticam as soon as I have it I will post an unboxing video followed by some pool tests.

Underwater Video Tips: Best video settings for Panasonic LX7

I thought of doing a debrief of the settings I use as I see few people that have bought this camera and have few niggles to go through and the obvious learning curve of new equipment so here we go.

Which Video Setting

It is always possible to reduce detail if needed so always shoot in the highest mode AVCHD progressive that in the menu is called PSH this records at 28 Mbps.

Which Mode to Use for Video

The LX7 has a one touch video mode that is accessible in still mode. When you press this button, even if the camera is in Aperture or Shutter priority and even in Manual, the movie clip is recorded in Program mode.

It follows that the mode to use to have full control is the creative video mode accessible through the mode dial.

Standard Setting for Creative Video Mode

I use the Shutter priority setting submenu in this mode. This is because the LX7 does not follow the 180 degrees shutter rule in video program mode.

Set your shutter speed to 1/100 for PAL and 1/125 for NTSC so that your shutter speed is double of the frame rate (1/50 for PAL and 1/60 for NTSC).

Exposure Lock Button

I never use the manual or the aperture priority mode as I find the lens fairly sharp even in macro and very small subjects. When I have changing light I point the camera to the exposure I want and the click Exposure Lock. To disable focus lock you need to go into the menu and set the button to AE lock only.

Exposure Control

I personally find the standard exposure of the LX7 underwater far too bright. So using the exposure compensation dial found by pressing the shutter speed wheel I dial down to -2/3. This is personal sometimes I even go down to -1.

ISO and Max ISO

The LX7 has a very bright lens even at telephoto end and this lens produces also a very sharp image. In the worst case of deep water with low light I found that having an underexposed but cleaner picture at ISO400 is better than letting the camera go all the way to high ISO. So in the menu I set ISO MAX to 400 or in some cases I push this down to 800. I set the ISO to Auto as the camera generally keeps it very low anyway.

Autofocus

I leave autofocus for video mode to on and I ensure that the autofocus is set to single area. Be careful as the default setting is face detection and that does not work well underwater! Multi area and tracking are not available in video mode.

Zoom

In video you can extend the 90mm lens to 180 with the iZoom and to 360mm with digital zoom. I set iZoom to on and Digital zoom to off as I have seen that the iZoom is very useful in macro and the picture quality is not visibly affected.

Metering Mode

I use multi metering for landscapes and centred weighted for close ups and macro.

iDynamic

This is a tricky setting; generally I keep it off or on Low as the standard settings clip the highlights. In doubt turn it off.

Photo Style

This setting controls contrast, sharpness, saturation and noise reduction. I use the standard setting that is a little bit oversaturated. If you do a lot of colour corrections in post processing use the Natural setting. The footage will be less saturated and a bit less sharp with less noise reduction.

White Balance

I use two custom settings WB1 and WB2 one for shooting with ambient light and the other one with lights that I only use in special circumstances.

Stabiliser

I leave this on and it does not affect the field of view.

Zoom Resume

Zoom resume has to be left off as this delays the camera ready to shoot time and ends up with missed opportunities.

Menu Resume

It is useful to leave this on.

Custom Menus

I record all my settings for shooting in ambient light in the C1 mode this has all the settings are describes and recalls the Custom White Balance 1.

I then set another menu C2-1 with auto white balance for shooting with lights and menu C2-2 for shooting with lights and WB2.

This is an example video shot with those settings and no additional lenses this is with video lights and auto white balance little to no correction in post processing.

This other video is with some grading applied and ambient light for most

I hope you found this useful and happy shooting!

Tips for Underwater Video – Tripods and Monopods

First of all I have to thank Mike on Scubaboard to get this in motion the original post is here

When you shoot macro and operate at high magnification even the smallest movement translates into shake, let’s think about it for one moment.

A macro image will have a frame size of 36×24 mm, this means that a move of half centimeter or 1/5 of an inch is equivalent to 20% vertical movement a considerable annoyance. When you shoot a picture this is not an issue because with a very high shutter speed you can freeze motion and there will be no blur like in this image.

Pygmy Seahorse 1.5 cm

Trying to take a video of a moving subject like this proves challenging, and you need to slow down the footage to avoid sea sickness like here

So how do we get outstanding macro footage? We need to be super stable and avoid any type of shake.

One possibility is a tripod. There are various examples of underwater tripods such those made by Ultralight example here

There are several inconveniences using a tripod first is that those are more suited to a camera than a tray that may have the tripod hole off centre, so if you use a tray for your set up and just want to occasionally put it on a tripod this gets complicated.

So that where Mike came into action and contacted ULCS to build a tripod out of a tray those are my results using the following parts:

Camera set up

  • TR-DM tray
  • TR-DUP Extention
  • 2x TR-DH handles
  • 2x 12 segments 12″ locline arms
  • 2x Sola 1200
  • Panasonic LX7 in Nauticam housing

Tripod set up (approx $310)

  • 3x 1420 ball base adapters
  • BA-FBd plate
  • 3x clamps
  • 3x 5″ arm segments

This gives something like this also called Ultimusmacro

UltimusMacro
UltimusMacro

I tried this set up and the key issue is that you are far away from the floor and end up with working distances of around 10-15 cm or 4-6″ those are suited to a +6 diopter but not more and best with camera with at least 105mm zoom.

This is a bit of an issue with my Panasonic LX7 as the max zoom is 90mm equivalent. So I came up with a mini-monopod that has several advantages:

  • Closer to sea floor
  • Less expensive
  • Lighter
  • More flexible

For the mini-monopod all you need is ($150)

  • 3x 1420 ball adapters (two female and one with screw or bolt) – alternatively 3x 3816 2x female and 1x 1420 with bolt if you use AC-AH handles with 3/8 hole
  • BA-FBd plate
  • 1 clamp
  • 1 8″ arm segment

This is the mini in action also called cyclop

Monopod
Monopod

In this configuration I also have a lens holder on the 8″ this gives even more stability
With a mini-monopod you can easily use +10 diopters as you are on the bottom. In my set up I have floats however the 3 1420 ball heads on the bottom are sufficient to have a stable platform that can be pointing down even more raising the arm segment.

In addition to this the monopod can be used to push the camera in remote places or approach critters in crevices or similar

I will be testing both in North Sulawesi starting next week I hope to come back with some great footage

For more pictures of the set up check the Panasonic LX7 link on the top of the page

Grenada Trip First LX7 release

I have just completed the first draft of the clips taken with the LX7 in my trip last week. Links are here:

Youtube may not work in some cases so use vimeo instead

For who wants to know the lens choice for wide angle was as follows

Wet mate: Molinere Sculpture Park, Purple Rain, Veronica L, Shark Reef

Inon UWL-H100: Bianca C (28-40 meters) , Northern Exposures, Southern Comfort, Quarter Wreck, Shake’em (20-32 meters)

You can see in the section of the Veronica L that missing those extra degrees field of view did not allow me to take the full wreck by side even if it was not that big. On couple of reef dives I already had the Inon on the previous wreck dive so I left it you can compare performance of the two lenses in terms of sharpness and flare. Generally I feel the wet mate has less flare and is sharper however it does have an issue of reflections as covered in the previous post.

As always I have used iMovie to edit the AVCHD progressive files that I converted to normal mp4 using the workflow in a previous post. There are no dramatic alterations of colour or exposure and no stabilization has been run in any part of the video (in some parts like the snake eel moving it shows) all was done with custom white balance using the camera functionality, considering how deep were some of the wrecks this is very good I believe.

I would love your comments this was mostly an exploration trip so it is interesting to compare to the RX100 Raja Ampat videos

Underwater Video Tips: Choosing a Close Up Lens for a Compact Camera

There is always a lot of confusion around macro photography and close up lenses. It is useful to set some definitions right before going into selecting the appropriate lens.

In traditional terms a macro photograph is one where the image of the subject on the sensor is the same size of the subject itself. As photography is based on 35mm film this means that a macro photograph is one where the vertical size of the frame measures 24mm. If we look at high-end compact cameras there are very few that are able to capture an area smaller than 35×24 mm, among those the Canon G15 or the Panasonic LX7. Majority of other cameras capture around 60-65mm wide and 40-42mm tall frames usually at the widest end with distances of 1-3 cm from the subject. As compact camera sensors are small strictly speaking there are no compact cameras on the market that can capture an object as small as their sensor.

So as far as we are concerned all that matters is that the height of the frame is same or smaller than 24mm as if we were shooting with a full frame DSLR.

Seems macro but it is not!
Seems macro but it is not! 1:1.2

For an SLR user the choice of a close up lens is quite straightforward as usually there will be a 100mm lens behind a flat port. This lens gives a magnification of 1:1 usually with a closest focus distance of 12” or 30cm. To achieve more with the same lens there is the need of a close up lens that works with a similar principle of a magnifying glass.

A close up lens will have a determined focal length or maximum working distance, beyond which it will not focus. If you hold a close up lens at the focus distance and look inside it you will notice that the object will appear larger as you step back from the lens and smaller as you get closer to it. The camera lens behaves in a similar way. Once you reach the working distance of the close up lens is the zoom that moves the lens forward or back and effectively provides the magnification. The close up lens only shorten the working distance allowing you to get closer.

Close up lens are measured in diopters this is the ratio between 100cm and the lens focal length. So a lens with a focal length of 20cm is a +5 diopter. A 100mm lens at 30cm once placed at 20cm from the object would achieve a 1.5:1 magnification. So with a 100mm lens in a flat port and a +5 diopter we are able to capture images larger than life-size with a DSLR full sensor. A +10 diopter would give a magnification of 2.1:1.

So how much power do we need to shoot macro with a compact camera? Is it the same than with a DSLR? Are there other considerations that apply?

The first issue is that because compact camera have fixed lens there is no way to predict at a given focal length if we will achieve macro or not. A compact camera zoomed to 100mm equivalent is not the same as a full sensor camera with a 100mm lens: in most cases the capture area is much larger. In fact there is no way to know if our lens will or not achieve our objective of taking a macro shot just looking at the camera specs. To make matters more complicated it is not always possible to get too close to our subject, this may be because there is no physical way to get closer or because we do not want to freak out the marine life that we want to capture. In general I like to leave some breathing space to subjects, as a minimum 3 inches or 7.5cm are needed and a bit more. This means that more than a lens with more than 12 power is generally a bit too close to the subject.

So how do we work out what diopters we need for our lens? Unfortunately we will only know after we have actually tested it, this is of course not very good!

Another possible approach is to define what is the working distance that we can realistically sustain with our equipment and the conditions we dive in.

Generally it is always possible to get between 20cm and 10cm and in some cases also under 10cm. This corresponds to 5 – 10 diopters and sometimes more for example 12. Considering that plenty of marine life is actually one inch or larger to capture a frame where the subject is filling it we do not actually need real life-size macro. In practical terms this means that for a compact with zoom of 100mm a lens with 6 diopters is fine with less or more depending on the camera zoom and focus ability. So for general purpose a close up lens between 5 and 7 is perfectly fine, this corresponds to working distances between 14 and 20 cm or a bit less from the back of the close up lens so actually closer from the front of the lens itself. For very small subjects around 1.5 cm like a pygmy seahorse we would be looking at 10 to 12 diopters, more is impossible as we would be crashing into the critter. This means a working distance between 8 and 10 cm or 3 to 4 inches from the front of the lens or 3 to 5 cm or 1 to 2 inches from the close-up lens that would still allow a small space for our lights.

Macro Shot 1:1
Macro Shot 1:1

Will we achieve real life size macro with this? It depends, to give some context my Panasonic LX7 that only has a 90mm zoom will capture a 32mm tall frame with 6 diopters power, strictly speaking this is not macro, and 20mm with two stacked 6 lenses achieving a 1,2:1 super-macro.

Super Macro 1.7:1
Super Macro 1.7:1

There are also other consideration that apply, if all we have is a +10 diopter we need to get very close to our subjects for our lens to start working, in all those situation where we cannot get close we would run into problems. If we look at a videographer with a 10x 400mm zoom camcorder they most likely only need a 2-3 diopter because with the range of zoom available they can comfortably achieve macro staying over a foot away from the subject. So the advice is to always have a 5-6 lens for general work and another 10-12 for smaller subject or if the lenses are stack-able two 5-6 this will cover all possible situations with a camera with a 90-140mm equivalent zoom.

I thought of concluding this blog with some recommendations so those are my recommended close up lenses based on personal use or looking at pictures of others:

  • DSLR: Reefnet Subsee both 5 and 10 with 100mm lens on full frame or 60mm on 1.5x cropped sensor. The new Inon UCL100 is also worth checking but it is more expensive.
  • Compact Camera: Inon UCL165 x2 or Dyron Double Macro lens x2

Note that the Inon UCL165 focal length of 165mm is from the back of the lens so the power is 6.06. Dyron lens are reported as 7 diopters however they are then declared 165mm underwater which is actually 6.06 exactly as the Inon.

Optical quality of both lenses is similar so I guess it depends on price what would be the choice. Inon is available with bayonet mount that maybe a big advantage for some cameras like the Sony RX100.

Whilst the Subsee give the best optical quality they are bulky and not flexible so I would not consider those for a compact rig. Inon and Dyron are lighter and more portable and can be stacked, a single diopter will be in most cases sufficient for good close up work with two required only for the smallest critters. It has also to be considered that at least for stills chromatic aberration can be removed in the editing phase, not so for video, but there generally goes unnoticed unless is really heavy. The Dyron and Inon lenses have the level of quality that the aberration cannot be noticed. This muck diving video has plenty of macro and close up with diopters note that no chromatic aberration is visible, shot with single or double Inon UCL165

There are other brands like FIT or époque but there seems to be quite some confusion as their specs are either air values or magnification that as we appreciate depends on the lens used. From tests I have seen the FIT 16 seems less powerful than an Inon 6 and same of a Subsee 5 and they are expensive so not an option for me.

What other tips are useful for shooting with close up lenses? The first is to make sure to use small apertures to have the maximum depth of field.

Contrary to what many believe the diopter itself does not create an issue of shallow depth of field is the size of the subject and the magnification that create the problem. With diopters most times we are at the maximum possible magnification with a total depth of field of few millimeters, it is important to operate at aperture values for a compact camera of f/8 and if available smaller.

For pictures is it also advised to use very fast shutter speed to avoid motion blur that the shake of the camera could create, usually 1/250 or faster unless using a tripod or a solid base. Video is not usually shot with high shutter speed, if available use double frame rate and shutter of 1/100 or 1/125 depending on the PAL or NTSC video system. This will allow half speed slow motion in editing that could prove useful.

Lights are also very important for close up, for still cameras they allow the camera to focus and for video they are needed to actually take the shot. For still cameras a strobe is essential, as video lights do not perform well at high shutter speed.

A final advice is to use the lowest ISO or gain available to ensure the quality of the picture or footage is the best possible, as we are close and have lights this should not be an issue at all. Most macro stills are shot in manual, for video if a manual mode is not available pumping the lights up results in the camera closing the aperture and reducing the ISO. If manual mode is available it is possible to set shutter, aperture and ISO and then measure the exposure that the light give until a satisfactory value is achieved.

Underwater Video Tips: Panasonic LX7 Settings and Features

My previous testing of underwater video with the Sony RX100 has been quite successful I was initially pretty hard on myself but I would say the performance was as good as it could have been taking into account the conditions

Most of my videos considering the conditions look better than dedicated single chip camcorders on the market and as good as some badly shot 3-chip camcorders

It is worth noting that a decent camera in a good housing like Gates or Light and Motion costs in excess of $3,000 without any lenses or lights, whilst with the same amount of money you can get a complete set up for a high end compact camera with included two sola 1200 and various lenses.

The restrictions of a still camera though still apply at least to the Sony RX100 and those are:

  • No use of zoom at wide angle with wet lenses (problem of set up not specific to RX100)
  • Clumsy operation of functions like white balance
  • having to change wet lenses multiple times in the same dive because close up performance is average

So is there something else out there that at similar or lower price point can get us high quality underwater video?

I believe there is and it is the Panasonic Lumix DMC-LX7, this camera has a bright f/1.4 lens with good sharpness, a 24mm lens and more effective ergonomics than the Sony.

Obviously I am talking about video here as I do believe the RX100 is the camera to beat in terms of compact for still pictures. For video especially at wide angle we are shooting mostly with ambient light and the corner softness of the RX100 does show with wide apertures. So whilst for your photos at close focus wide angle with a strobe the camera does an outstanding job for an HD video at 1080p the image does not look that crisp.

I am glad I got the RX100 as this is going to be the next camera for stills once I abandon the Canon S95.

Ok moving on to the Panasonic LX7 I did a little stress test pointing at the fireplace in low light to see how the two cameras respond, the clips are done 1 minute after the other so have similar ambient light available. It is clear that the LX7 is a winner in virtue of the brighter lens not only that the wider 24mm lens against the 28mm of the Sony shows a clear advantage.

Now what else is good about the LX7 the major feature are definitely the ergonomics, let’s have a look at the rear controls.

Panasonic LX7 rear buttons

The first button of interest is the AF/AEL lock that you can configure to lock focus, exposure or both. Now having this with one touch means that any shot of moving fish in front of the camera or a dive into a cave will resist the camera hunting for focus or trying to change the exposure.

The other button of interest is the WB you can recall and set white balance in any non automatic mode including video, in addition there are two custom settings for white balance and you can alter the tint after setting that is great.

The ISO button is also very useful but mostly for picture and a half press will tell you what combination of aperture, shutter and ISO the camera would shoot at.

This also brings one of the weaknesses of the camera and is the camera’s video Program submode. For some reason this behaves like the still camera program mode so does not take into any account the 180 shutter rule, so be careful and never use the camera in Creative Video mode with the Program submode as results will not be good.

So how should you shoot video with your Panasonic LX7? Simple you should shoot in shutter speed priority or in specific cases in manual.

I think the shutter speed priority is the simplest starting point, so let’ assume you are in the PAL system where video is 25 frames per second you should set shutter priority and speed of 1/50 for wide angle with ISO in Auto. Depending on available light the LX7 will keep the lens at widest aperture and ISO until needed and then start closing the lens, this is fine for us as it is better to have lower noise image than huge depth of field.

If you want to influence depth of field for example in a macro situation when you are zooming in a lot you can take a half press and set the ISO manually until you have the aperture you like. The LX7 sets ISO in 1/3 of f-stop so the fine-tuning possible is incredible.

I would not trust the camera aperture priority mode as the LX7 will quite happily reduce the shutter speed all the way to 1/30 of a second before increasing the ISO and this would give blurred footage.

Shooting macro with the LX7 may require you to operate at double frame rate modes of 50 or 60 fps in that case again in shutter priority mode or manual start with a shutter of 1/100 or 1/125 and pump up your lights until you see the aperture closing. If the image is still soft increase the ISO manually to get where you want to be take into account that this camera has really a lot of corner sharpness so in general it is not needed to get to small aperture as much as it is with other cameras.

So which housing for the LX7? I have done a quick review of the Nauticam in the unboxing video here

This housing is really impressive and makes the camera actually even easier to operate when outside the housing!

Now with all those good things why is the LX7 not as good as the RX100 for still pictures:

  1. Too wide lens: 24mm makes it difficult to get wide angle lenses and impossible to use a fisheye
  2. Resolution is only 10MP in RAW pictures this shows, not in video though
  3. Smaller sensor again the performance at the same ISO is better with the RX100 when you have a strobe

For video some of those drawbacks become actually plus points:

  1. The 24mm lens when coupled with the Nauticam wet mate dome has 84° field of view in water that is good for most situations
  2. Smaller sensor means more depth of field at same aperture

Another factor to consider with regards to the LX7 is the 1cm minimum focus distance, this means that diopters are only needed for super macro very small subjects as the capture area of the camera is incredibly small less than half the RX100.

Other plus points of the LX7

  1. Neutral density filter, -3 f-stops means the camera will not jump to shutter speeds of 1/1000 in bright sunlight but stay at the normal speed with the lens wide open
  2. Stabiliser: the LX7 optical stabiliser is rock solid and gives the same performance of the RX100 active stabiliser without any cropping of reduction of the field of view
  3. A normal Mp4 1080p video mode at 20 Mb/s bitrate that is great for general purpose wide angle

In the next post we will have a look at the Nauticam Wet Mate and the diopter that I have chosen for the LX7

Sony RX100 – Summary of Underwater Video Performance

Few months ago this clip came out

Many people including me got really excited about this camera and had a go at underwater video with it

Now it is time for an end of year review and summary of my experience with the Sony RX100.

Without a doubt the camera is a game changer and there are some feature that are especially suited to underwater video.

Key Strengths

Bright Lens

The RX100 does very well in low light this is a strong selling point for underwater video, even in cloudy days the camera does extremely well

Low Noise

The camera performs very well in video mode up to ISO 800, the level of background noise is really low and the footage clearly benefits from it

Image Quality

The quality of video if we focus on the center, as well at the telephoto end is impressive. Color rendering is very accurate and there is even the option of using Adobe RGB. The dynamic range of the camera is excellent and the image is vibrant.

Video Mode Control

There is full manual control in Video mode and the option for aperture and shutter priority. The program mode does very well. Only an Auto ISO option in manual is missing but this is negligible. Indeed the most interesting mode is aperture priority.

Manual Focus

The peaking function works very well and it is really a strong feature of this camera, it is also very usable underwater

Battery Life

You can easily do 3 dives with the RX100 without having to open the case which is great and actually unusual these days when even a gopro does not last one hour.

Active Steadyshot

I initially slagged the RX100 stabilization system based on performance on land. However at a more in depth analysis it turns out that the RX100 active steadyshot, even if at cost of an image crop is very effective for sudden camera movement and for high magnification macro. The Stabilizer is not as sticky as others so when you eventually vibrate it does not jump. Although the performance for stills is poor to irrelevant and so is the normal mode the active mode is very effective for underwater use.

Tedious Workarounds

Some of the ergonomics of the RX100 are not the best and seriously deduct from an otherwise excellent experience, the most annoying issues:

Lack of focus lock

For some reason Sony decided to skip on this essential feature, the workaround involves switching to manual focus using the function dial however it is then possible to accidentally change focus.

Setting Custom White Balance in Video

Setting custom white balance is only possible in the still modes, while in fact if you shoot RAW don’t actually need white balancing. This is the largest non sense of this camera that requires the user to navigate out into Program to ensure white balance is set correctly and you don’t end up with the Custom WB Error message. Really an awful issue that Sony should try to fix in a firmware update

Lack of 24/25/30 progressive modes at 1080HD

Sony thought that for some reason you either shoot interlaced or you go directly at double frame rate with a 25 or 30 progressive mode only available at reduced bit rate and resolution of 1440×1080 with rectangular pixels. Why did they do that is a total mystery. You are therefore forced to shoot at the highest mode of 1080p50 or 1080p60 that produces large files difficult to digest by many programs. Sony decided to keep a bunch of interlaced modes despite the fact that there are no programs that can edit those without conversion and that CRT Tvs don’t exist since a little while.

AVCHD

Sony embraced AVCHD maybe because their software handles it well but what about the rest of the world? Mp4 is the standard for video clips on the internet and AVCHD adds absolutely no feature to it for simple video recording. Files have to be systematically converted, sometimes with commercial software, to be used with mainstream non linear editors, not only most would not recognize the files at double frame rate.

Key Weaknesses

The RX100 has also some key weaknesses that limit its own performance and can’t be cured by workarounds.

Macro Performance

The camera does an awful job at close range and needs a diopter even to shoot basic macro. To shoot super macro you need +12 diopters and this requires high quality lenses to avoid chromatic aberrations in the image. The focus mechanism with diopter is a bit of a mystery to work out at times. Once you manage to focus the image quality is great. However the need for a +5 diopter as a starter makes this set up expensive and cumbersome to handle in water compared to others.

Stabilizer

Sony has adopted a lens shift approach in this camera instead of the sensor shift of the higher end alpha, maybe due to large size of the sensor compared to the camera body. They have then added some software processing in camera but the results are just average. There are many other cameras that do better than the RX100.

Soft Corners at Wide End

I was going crazy looking at pictures taken with different wet wide-angle lens to check which lens was best, at the end of hours of observation I took some shots on lend at the wide end. The issue is not with the wet lenses is with the camera itself, it has very soft corners until at least f/5.6 and not the sharpest corners anyway afterwards. This cannot be cured and is a key weakness that is not so apparent in stills where you can crop quite a lot 20 megapixels but obvious in video.

No Neutral Density Filter

The RX100 has a bright lens and low noise however in video the ISO starts at 125, in many situation near the surface the camera maxes out at f/11 and then starts increasing shutter speeds to 200 400 800 and so on producing scatty mechanical images. Neutral density filters have been implemented for ages in cheaper camera and take away 2-3 f-stops allowing the camera to operate at wide aperture. For some reason Sony decided not to do anything about this. On land this is an even stronger limitation in bright days.

A final remark that I want to include for all those that use the RX100 for still photography that indeed is the real strength of this camera.

Another key weakness is the strobe recycle time not an issue in video of course but creating several issues of missed shots for photographer

In conclusion the RX100 can produce great footage but has some limitation that need to be taken into account.

If you go muck diving on flat surfaces with a couple of diopters and good video lights it is of course all looking wonderful but the situation changes when you cannot lay down as in my seahorses video

With two Inon UCL165AD stacked it is really hard to get some decent footage and due to the large sensor the depth of field at such level of magnification is pretty much zero.

But the limits show up more in the wide angle where the soft corners come up no matter what you do as very seldom you are able to shoot at f/5.6 or higher at depth below 12 meters or 40 feet

Whoever wants to try the RX100 for video please get in touch if you have more questions and happy 2013!!!

Sony RX100 – Tips for Underwater Video Part 7 – Macro Shots

Just came back from a 11 nights and 10 day diving on a liveaboard in Raja Ampat and I am in the process of putting together the summary videoclip for the trip. To have an idea of the kind of diving in this remote location you can have a look at the superb pictures that my buddy and fiance has taken on Raja Ampat 2012 Flickr Set

I had already gauged that the macro performance of the RX100 is far from outstanding and this trip just confirmed it.

To understand what I am talking about have a look at these two pictures both taken at 5 cm from the front port of the camera using a 3:2 format.

RX100Macro

The first image is shot with the RX100, note the shallow depth of field of the large sensor in P mode.

All looks good however if we take the same shot with a Canon S95 that has a 1/1.7″ sensor we get this result.

S95Macro

To make matters less complicated and don’t get too technical you can measure with a ruler the size of the memory card in the pictures. The S95 presents an image that is 26% longer than the RX100. It is like saying that compared to the RX100 the S95 has a 1.26x magnification.

In video diopters are not very popular because camcorders have small chips around 1/2.5″ and a 10x optical zoom and can focus at very short distance. So usually a no diopter is needed for regular macro work and a 4D is really only for pygmy seahorses.

With our RX100 however we need a 5D just to have a decent macro performance. Actually even a good size nudibranch looks small in the RX100 underwater without any lens. Moreover the RX100 has only a 3.6x zoom so even with a diopter that allows to focus a telephoto at closer distance things don’t really look that big so we are  looking at 5D for basic macro and 9D for super small critters.

The RX100 has a number of housing options with M67 thread as standard, this is the most popular format for diopters and there is ample choice there. If instead we want to use bayonet mounts we are pretty much limited to Inon or Seatool.

As discussed above we are  looking at a starting point of +5 diopter, this cuts immediately lenses like the Inon UCL330 out of the equation, if we look at the most popular and affordable lenses we are left with:

  1. Inon UCL165 6 diopters (1.5x) this lens is stackable
  2. Reefnet subsee 5 diopters (1.25x)
  3. Dyron +7 diopter (1.75x)
  4. FIT achromatic +8 (2x)
  5. Olympus +8 diopter (2x)
  6. Epoque DML-2 8.4 diopters (2.1x)
  7. Reefnet subsee 10 diopters (2.5x)

The first three options are adequate for most of the macro work with the RX100 and get you to fill the screen for almost all subjects except the smallest pygmy seahorses.

As we increase magnification we get the RX100 to a point where is very difficult to produce any decent footage. A 10+ diopter works very well for still pictures where you only have to take a single shot but for 10 seconds of decent footage is close to impossible to achieve focus without a tripod.

Looking at the featured image on this post this is a still picture with two Inon UCL165AD stacked at full telephoto. When I was in Raja Ampat I tried using two UCL165 it was very hard to get anything in focus however the performance is pretty good this is a snapshot taken from my footage.

Pygmy Snapshot

I posted all the pygmy footage on youtube

in this short clip I have a compilation of subjects, if you believed that an hippocampus bargibanti was tiny have a look at hippocampus denise, Pontohi and especially Satomi (1cm) in this clip to have an idea. All in all I am satisfied as I shot 12 minutes of seahorses and could use around 2 that were not too shaky. I do not use software stabilization as I don’t like the warping effect that CMOS sensor camera give so this is all done by hand. I did slow down some of the footage to half speed and this is were the 50 fps of the RX100 come really handy.

Other than Pygmy seahorses that are between 1.5 and 2.5 cm in size there is no need for such high magnification, in fact for the rest of the trip a single UCL165 has been more than adequate.

Looking at cost an Inon UCL165 costs less than a subsee 5  so that is the most cost effective option if you ever think you will need a very high magnification  and you are able to be super steady to avoid shake as it can be stacked with another UCL165 or an UCL330. Specifically having experienced the two UCL165 stacked I think that is probably too hard to handle so a combination UCl165+UCL330 should be the perfect choice for pygmy and similar at 9D alternatively a subsee 10seems the logical super macro choice.

A final tip is camera modes for macro, as discussed in a previous post aperture priority is the way to go and allows you to have enough depth of field so that you have sufficient part of the subject in focus. However this brings also the consideration about lighting. I took some shots in program mode with the RX100 and two Sola 1200, in some situations is quite hard to achieve f/8 or higher numbers with the two lights at the minimum power of 300 lumens with the lowest ISO. It follows that if you operate with a single light you need to have at least 800 lumens and put the light to the max, this may scare skittish critters and prevent you taking the footage you want. A possible solution is a red filter on the light followed by in camera white balance however a single light does produce harsh shadows and this needs to be taken into account.

In conclusion a diopter for macro work with the RX100 is a must so choose one that fits your needs and ensure you have sufficient lighting to support the small aperture required by the camera large sensor.