Tag Archives: wrecks

Using Rectilinear Wide Lenses Underwater

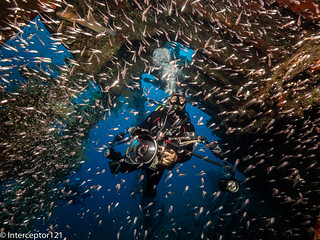
I was checking the technical details of Alex Mustard Underwater Photography Master Class and the majority of wide angle pictures are taken with a fisheye lens. In the section about shooting sharks Alex says that he prefers to shoot sharks with a fisheye otherwise they look ‘skinny’.

If you look online on underwater video forums you frequently see comments on problems with wide angle lenses connected with the use of a rectilinear wide angle lens in a dome.

The two most common complaints are soft corners and distortion.

Soft corners are due to a combination of lens optical issues and dome port optics. In short any lens is to some extent curved and therefore if you shoot a flat surface the image may be sharp in the centre and softer as you move to the corners. Issues with field of curvature are corrected stopping down the lens. The issue with field of curvature happens everywhere not just underwater.

Right now there are four wide angle lens that can be housed for a micro four third camera:

Olympus 9-18mm

This lens has a nice working range that allows to capture 100 degrees diagonal at widest setting and still has a 35mm equivalent at the tele end. This is a pretty little lens at $699 is the most affordable option that can be put in a housing. You will need a wide angle port and the zoom gear. The whole combination for your Nauticam housing comes at $1,399. This lens can also be combined with a glass dome but this will make the whole combination much more expensive and you may want to think about getting a better lens instead.

Olympus 7-14mm

This is an outstanding lens especially on land due to the fast f/2.8 aperture. It is expensive at $1,299.99 and very heavy and bulky. The lens does not fit through the N85 port opening and requires a port adapter this gives the extra benefit of a focus know but with such a wide lens is not really useful due to high depth of field. You will need a 180mm glass dome and the zoom gear for the lens to complete the set up ending at a whopping $3159.99.

Panasonic 7-14mm

I have owned this lens and I have to say that at $799 is the right compromise between wide field of view and price. Furthermore once you get the zoom gear you have the option of a cost effective acrylic dome that will give you a very wide set up for $1589.99. There are reports of poor performance with this lens and it is true that is not as sharp in corners but the results are perfectly acceptable if you stop at f/8 in close shots.

Steering Wheel Truck
Panasonic 7-14mm with acrylic dome 9mm f/8
Exploring the Chrisoula
Panasonic 7-14mm with acrylic dome 7mm f/5

This lens is prone to reflections and flare however once you add the N120 port adapter and the 180mm glass dome this will get you to $2819 at that point you may want to consider the Olympus combination instead.

Panasonic Leica 8-18mm

This is my favourite lens is sharp does not suffer from field of curvature issues and has a very useful zoom range 16-35mm in 35mm equivalent. The zoom gear and the 7″ acrylic dome will take you to 1889.99 that is an excellent price point. The lens is not prone to reflection or flare and as the 7″ dome has the same curvature radius than the 180mm dome it will produce very similar results.

Encircled
Panasonic 8-18mm in 7 acrylic dome f/8
Sunset Neat
Panasonic 8-18mm at 8mm f/10

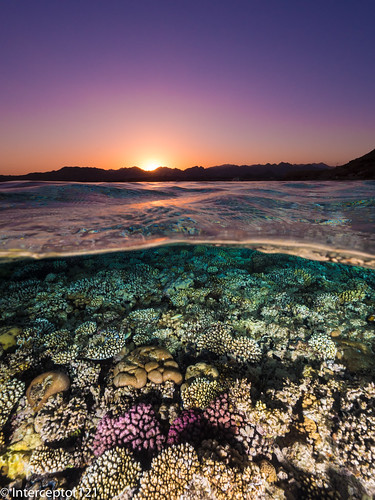
The significant size of the acrylic port and the fact it floats make it ideal for split shots and this is the lens that gives me the best results.

This lens can also take port adapter that allows you to use the 180mm glass dome. This adds up to $2919.99 if you experience bad reflections and shoot frequently in the sun it may be worth it but I have not had any issue so far with this lens probably because of its nano coating.

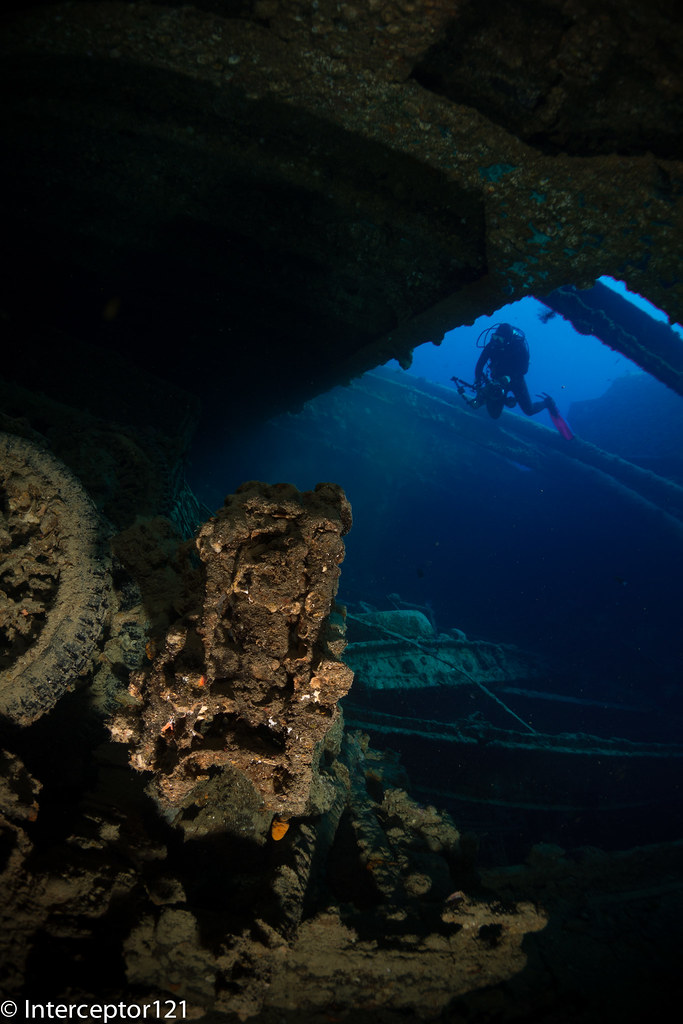
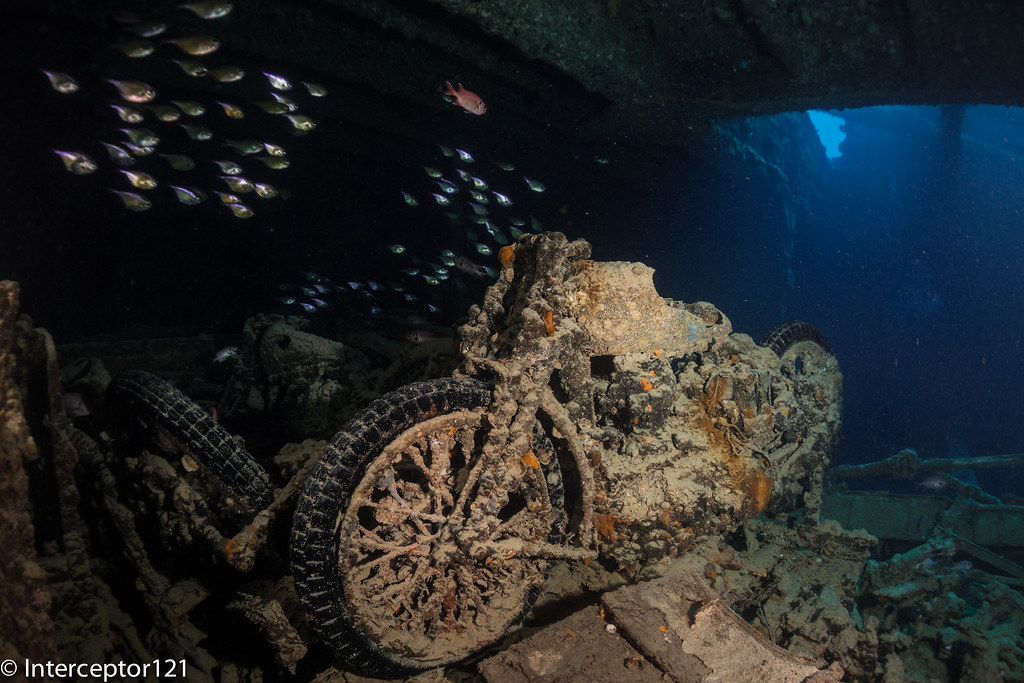
I have found the 7mm focal length too problematic for dome ports and the amount of perspective distortion excessive generally it would be preferred to shoot at 9mm and narrower however this maybe insufficient for wreck interiors if you want a rectilinear look.

Perspective Distortion

One of the regular complaints of video shooters especially in wrecks or caves is that the edges look horrible and distorted and that there is an issue with the corners pulling. This is in fact not an issue but a problem with perspective as you shoot very wide angle. The following test shots will illustrate that the issue happens on land and has nothing to do with dome ports.

Shot at f/2.8 with Panasonic 8-18mm at 8mm shows sharp corners
Image with objects in edges at 8mm

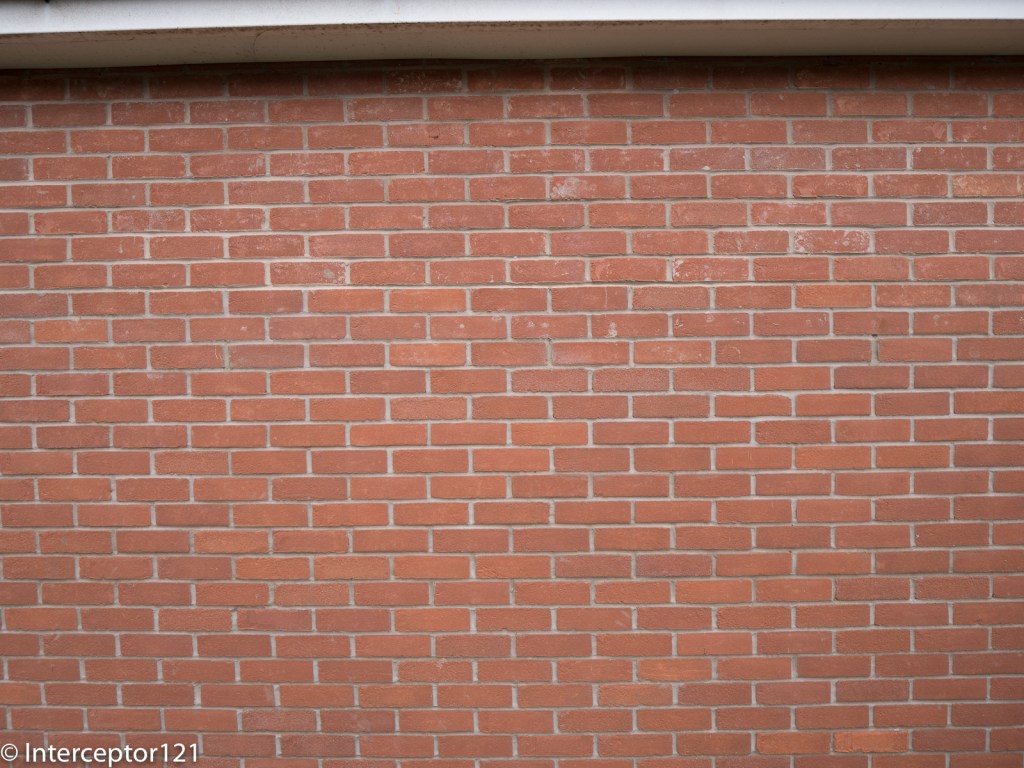
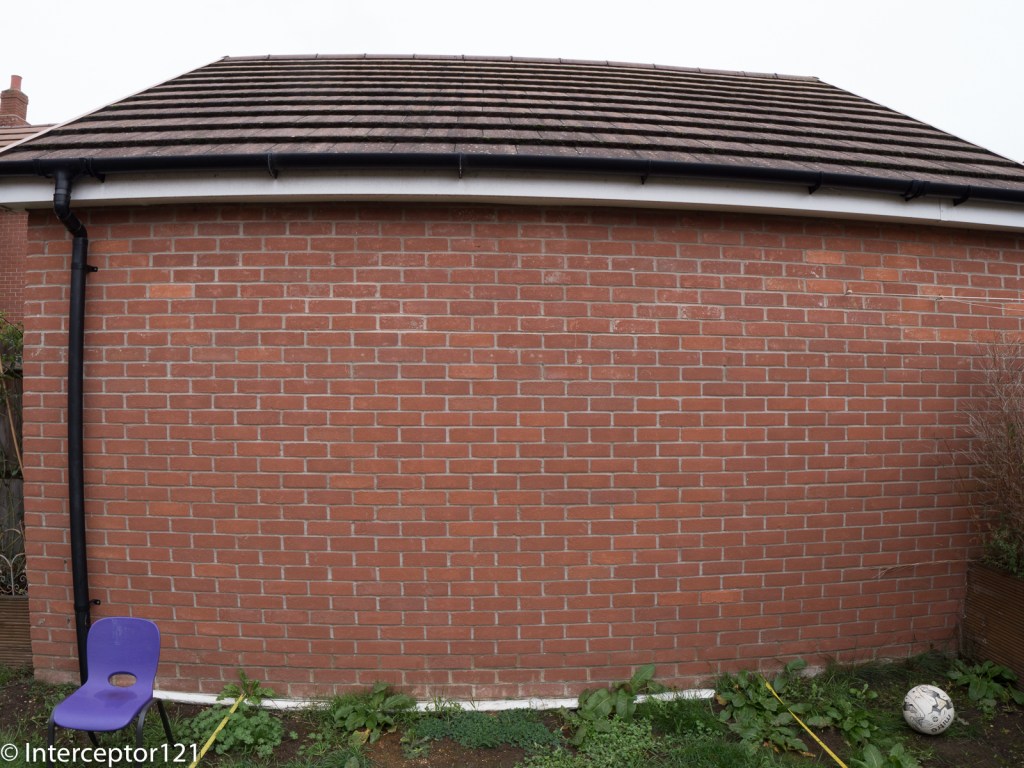
As we can see the football looks like an oval and the chair is pulled. This is due to a perspective issue and is not a lens problem. When you shoot underwater video the objects on the edges of the frame change shape creating this pull effect that most people dislike.

Same scene at 9mm

At 9mm the amount of perspective distortion is reduced and this is the reason why 18mm on 35mm equivalent is one of the favourite focal length for rectilinear video and the maximum angle that should be used in small spaces to avoid the pulling edges.

One of the reason why a lens like the Nauticam WWL-1 is preferred for video is because the corners look sharp but is that really true?

Not really let’s apply some barrel distortion to simulate the WWL-1 to the image that looked badly distorted.

Barrel distortion applied -60 8mm

Now the football looks circular as we have applied -60 barrel distortion, obviously the rest of the image is now bent but this seems not to be of a concern to most people!

Barrel distortion -30 9mm

It needs much less correction to bring the 9mm shot into shape and for sure between the 8mm and 9mm the 9mm is the dimension that produces the most acceptable results.

It has to be said that in video with 16:9 aspect ratio most of the issue will be cropped away at the edges but the distortion in the middle of the frame will remain. For the same reason the 9mm image will appear practically rectilinear with no issues

16:9 crop still showing the edge ‘pulling’ at 8mm

16:9 crop looks straight at 9mm

I hope this post was useful there are four options for micro four thirds shooters to use rectilinear lenses I have settled for the Panasonic 8-18mm as in most cases it is still possible to control the perspective issue, I found this impossible at 7mm.

Bike on Hold 2
Bike in hold 2 on SS Thistlegorm Panasonic 8-18 at 8mm
Bubbling Bike
Shot at 7mm showing the front tyre pulling outside the frame

Obviously if you shoot in the blue this problem will not be visible however rectilinear lenses are popular with wreck shooters and I think this posts gives an idea of the challenges at play.

Finally I would discourage the use of the 7-8mm focal length range for video to those that want to have a rectilinear look.

From this post I started supporting Bluewater Photo in US for my links because it still provides multi brand and choice and because I learnt a lot from Scott Gietler Underwater photography guide back in the days where there was no internet resource to learn from.

Panasonic Lumix G X Vario 14-42mm with Fisheye Converter DMW-GFC1

The Panasonic 8mm Fisheye lens for micro four third is a clear winner for close focus wide angle however the lack of zoom and the really wide 180º cover mean that there are many subjects that will look tiny in the frame.

The next option in terms of width is the Panasonic 7-14mm wide angle lens however this requires a large dome for optimal performance making the set up expensive.

Is there anything else left if you don’t want to buy a wet lens and you already have the Panasonic PZ 14-42 X Lumix G?

Panasonic produces an add on lens DMW-GFC1 that is declared to provide 10.5mm equivalent and reduce minimum focussing distance to 16 cm all specs can be found here.

This add on lens can be used with the 4.33″ dome for the 8mm fisheye and the 30 extension.

I took a few test shots and the results are pretty good.

This first shot is at f/5 and is very sharp in the centre.

Fisheye Converter f/5

Fisheye Converter f/5

Getting a bit closer and stopping at f/8 the results are pretty good for an adapter that is less than £100 on amazon.

Fisheye Converter f/8

Barrel distortion is contained so this combination may be good for wrecks where the fisheye effect is a bit disturbing.

If you have the Lumix G Vario X PZ 14-42mm you may want to invest in this little accessory before getting the much more expensive 8mm fisheye even if the Nauticam 30 extension is required. Later on the extension can be used with the flat port 35 and the Olympus 60mm for super macro and the 4.33″ dome of course with the 8mm.

I think it is amazing how much can be obtained out of this lens if we consider wet diopters, wet wide angle lenses and this adapter before you need to get a second lens.

This lens could also work for video with the Panasonic GH4 at 4K however zoom is not recommended with it.

Red Sea Workshop with Alex Mustard – Part II Thistlegorm and Co

After the first day of fish portraits it was time to go and dive the Thistlegorm, this can be an amazing dive site but also very challenging as the wreck is not sheltered by any reef formation.

We got there early in the morning and attached to the wreck using the classic 3 point method: anchor, line on the bow and line on the stern we were all ready to go.

I have to say Dr Mustard prepared this very well and had a wealth of information on the wreck and the specific features.

The first dive was suggested to be a guide tour of the wreck from the outside with a limited penetration, the second would have been a penetration and the third dive a play with remote strobes (that I did not have).

As I had dived the wreck a number of times I decided to change the order so on dive number one went for a penetration of hold 2 and played a bit with the motorbikes.

There were already some others surrounding the bike as I went down so I played a bit with the divers themselves before being able to get in position.

Wreck Diving
It is amazing how much more interesting is a picture once you have a person in it. Eventually I got hold of the Bike in hold 2 also known as Elle’s bike. I looked around and there were some hatchet fish that I thought would have made the picture more interesting compared to the usual single fish in front of the bike.

Motorbike in Hold 2
I love the reflection on the fish that the strobe produced.

On dive 2 it was time to take some ambient light shots and I was expecting some divers to be around the stern that I could capture. Unfortunately the day boats had gone and the Thistlegorm was pretty empty so dive 2 was a bit of a waste as the boat itself says very little without a diver or a school of fish.

Thistlegorm Stern
Thistlegorm Stern

It could be the size of a RIB but you could not tell from here the massive size of the boat. It is quite dark at the 28 meters I took the picture so there is not a lot of color.

On dive 3 people that had them were playing with remote strobe. I fired a few shots when my cabin mate was placing his strobe, funny enough his remote strobe fired and I blackened him in lightroom so he is actually still there!
Trucks

The remote strobe creates the blue in the truck glass that would not be there otherwise.

Next trip I will take my third Z240 and the gorillapod, I have to get a remote trigger but I think this is relatively straightforward.

The briefing from Dr Mustard included map of all the bikes and trucks and suggestion for shots and strobe positioning really impressive detail there.

After 3 dives on the wreck we moved to Beacon Rock where the Dunraven rests not to dive the wreck but to experiment with dapple light.

This was a very productive dive for me I had some of the best shots in relatively poor conditions.
Dapple

The surface was not flat but this made it even more dramatic as the waves were breaking through.

There were also barracuda and goat fish shoals. The barracuda were not really cooperating so I focused on the goat fish

Special Guest

Goats

Meteor

I also had a 26º snoot this time so I played a bit with an octopus
Waiting in the dark

The good thing about the Inon snoot is that you can remove it and take normal shots with two strobes
This is the same octopus as before just to give you an idea

Side Shot

I was very happy with the performance of my RX100 Mark II one of the only two compact on the trip especially comparing to micro 4:3 that did not really look that much better.

Part 3 will be out soon with the first shots from Ras Mohammed


Red Sea Workshop with Alex Mustard – Part I

So finally the time had come to attend the Nauticam Try out with Alex Mustard.

If you have never done any of those workshops I would definitely recommend you one. It is not just the outstanding tuition but the fact that the boat will go to specific dive sites at specific times to take advantage of conditions and light for photography.

If you are keen to see the pictures this is the link to the set with the 30 images I like the most

Giant Moray

I used the RX100 for stills for the whole trip but then on the last dive I shot this short clip just to give an idea of what it was like. Note that I used the auto magic filter on the lens and by then I had ruined it a bit so the image is softer than it should be and not up to my usual standards, the purpose is to illustrate the diving style not the quality of my set up for video.

The trip started with a preliminary explanation on how things were going to work and after a static first evening on the boat we departed for Abu Nuhas the early morning after. Unfortunately the conditions were really rough so we ended up aborting and after a check dive at alternatives we went to the barge.

The objective was to shoot fish portraits, cardinal fish had eggs in their mouth, at least some of them were carrying them, so you could find yourself your fish and try to take some shots. It was apparent that due to the level of comfort of the fish I could not get close enough with my diopters to take a shot to fill the frame so I needed to crop quite a bit as in this shot.
Eggs

Hopefully the eggs are still visible. Anyway the rest of the gang had for 90% DSLR and were happily shooting portraits with their 100mm macro lens I was struggling getting anything decent so I decided to try something alternative as it was clear that if I was shooting fish mid water I would have been too far away to fill the frame.

This shot from Alex Tattersall gives you an idea of what should have come out with the right level of magnification that I could not achieve.

cardinalwitheggs

In some cases I did find more cooperative fish like those two.
BigEyes

So I put on the snoot and started looking for different things like in this shot taken with the Inon at 20º.
Grey Moray
Those little gray moray are endemic of the red sea and look quite cute. I then found a giant moray and took a series of shots this one being my favorite.
Giant Moray

The Inon snoot is a great piece of kit especially because you can go from 20º to 100º depending on the parts you combine. There are fiber optics snoot on the market that are sensational for macro but do no wide angle, the Inon snoot can do wide angle with 86º 53º 46º coverage and narrower beams of 26º and 20º for smaller things or special effects.

This is a picture of the snoot set that I would recommend to all Inon strobe users.

Wide angle Snoot
Wide angle Snoot

20 degree snoot
20 degree snoot

Inon snoot kit
Inon snoot kit

Obviously I could only capture semi static subjects with the snoot and the issue of fish portraits remains. The RX100 at 100mm equivalent requires 50cm focus distance that becomes 66cm in water. At this distance the capture area is rather large and unsuitable for smaller fish like the cardinals in the example so a solution would be to use an Inon UCL330 diopter to reduce distance to around 25-30 cm and therefore have a 2x magnification but I don’t have this lens anymore so can’t confirm. I will buy it again and do some more tests in a future trip.

I will post part II in the next days with some shots from the Thistlegorm so stay tuned