Tag Archives: ambient light

Sony RX100 White Balance Woes

In one of my first posts on this blog I covered the subject of setting white balance with the Sony RX100.

It may be useful to have a quick recap on the topic:

  • For pictures setting a custom white balance is not useful if you shoot in RAW as the amount of correction in post processing is far superior*
  • For video (that is shot in compressed format) setting the appropriate white balance for your shots is essential

There are exceptions to this rule, some people like to set custom white balance even in RAW when they shoot ambient light pictures. This is because changing the white balance shifts the histogram and therefore if you had taken a shot with an incorrect white balance you may retrieve wrong information from the histogram. Personally I do not do this most of the ambient light shots I judge by eye and not histogram or are silhouettes anyway but may be useful to know.

The other exception is when you shoot a raw video format with bit rates in excess of 100 Mbps, in that case the footage is captured in a bland format lacking any real depth and contrast and things are corrected in post processing. This does not apply to any consumer camera that works in AVCHD or Mp4 with bit rate lower than 50 Mbps in any case.

It follows that setting the appropriate white balance for our videos is something that is important otherwise our clips will look dull, green or have some sort of color cast we do not like.

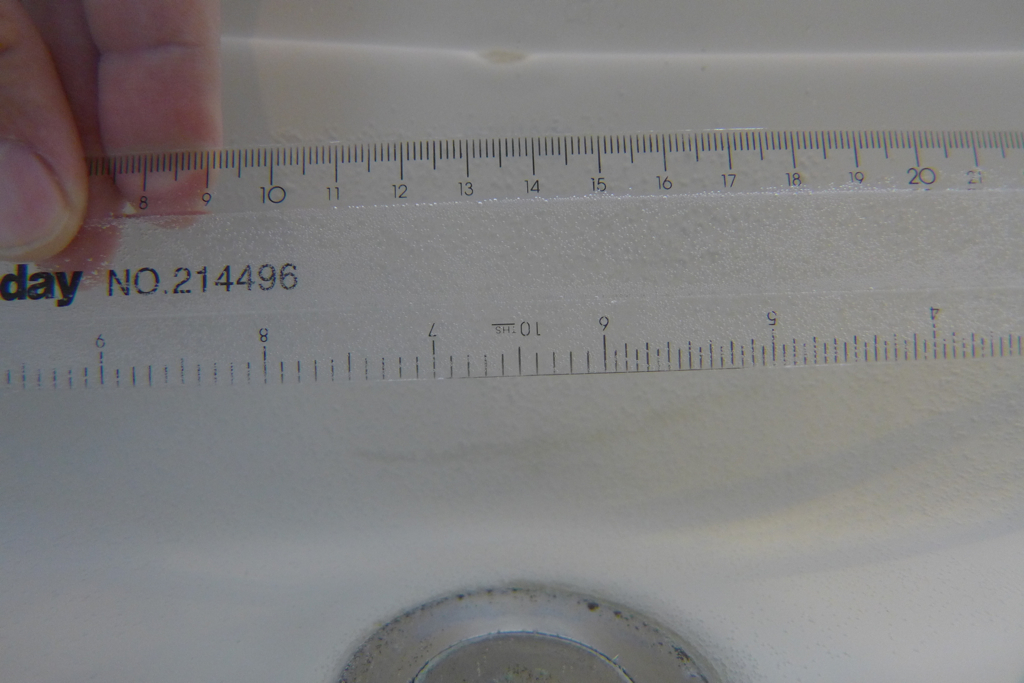
As many of you RX100 I have experience with the infamous Custom White Balance 9900K error. In theory if you set your custom white balance with the camera in P mode over a neutral target this error should only occur if the color temperature is out of range (>9900K) unfortunately this is not the case and you get this error pretty much always with our beloved camera. At the beginning I thought that this was due to my cheap PADI slate, but after various attempts against my hand, sand, buddy’s tank, the sun I have to think there is some genuine issue here.

So I got myself whibal card, that on my test on land performs amazingly well with both the RX100 and the Nikon D7100.

The first thing we can realize is that the auto white balance setting is rather cool in outdoor scenes, whilst it tends to be warmer in indoor scenes with artificial light.

Auto White Balance
Auto White Balance

When you take a custom white balance the colors appear warmer and the bluish cast departs and the yellows come back.

DSC01608

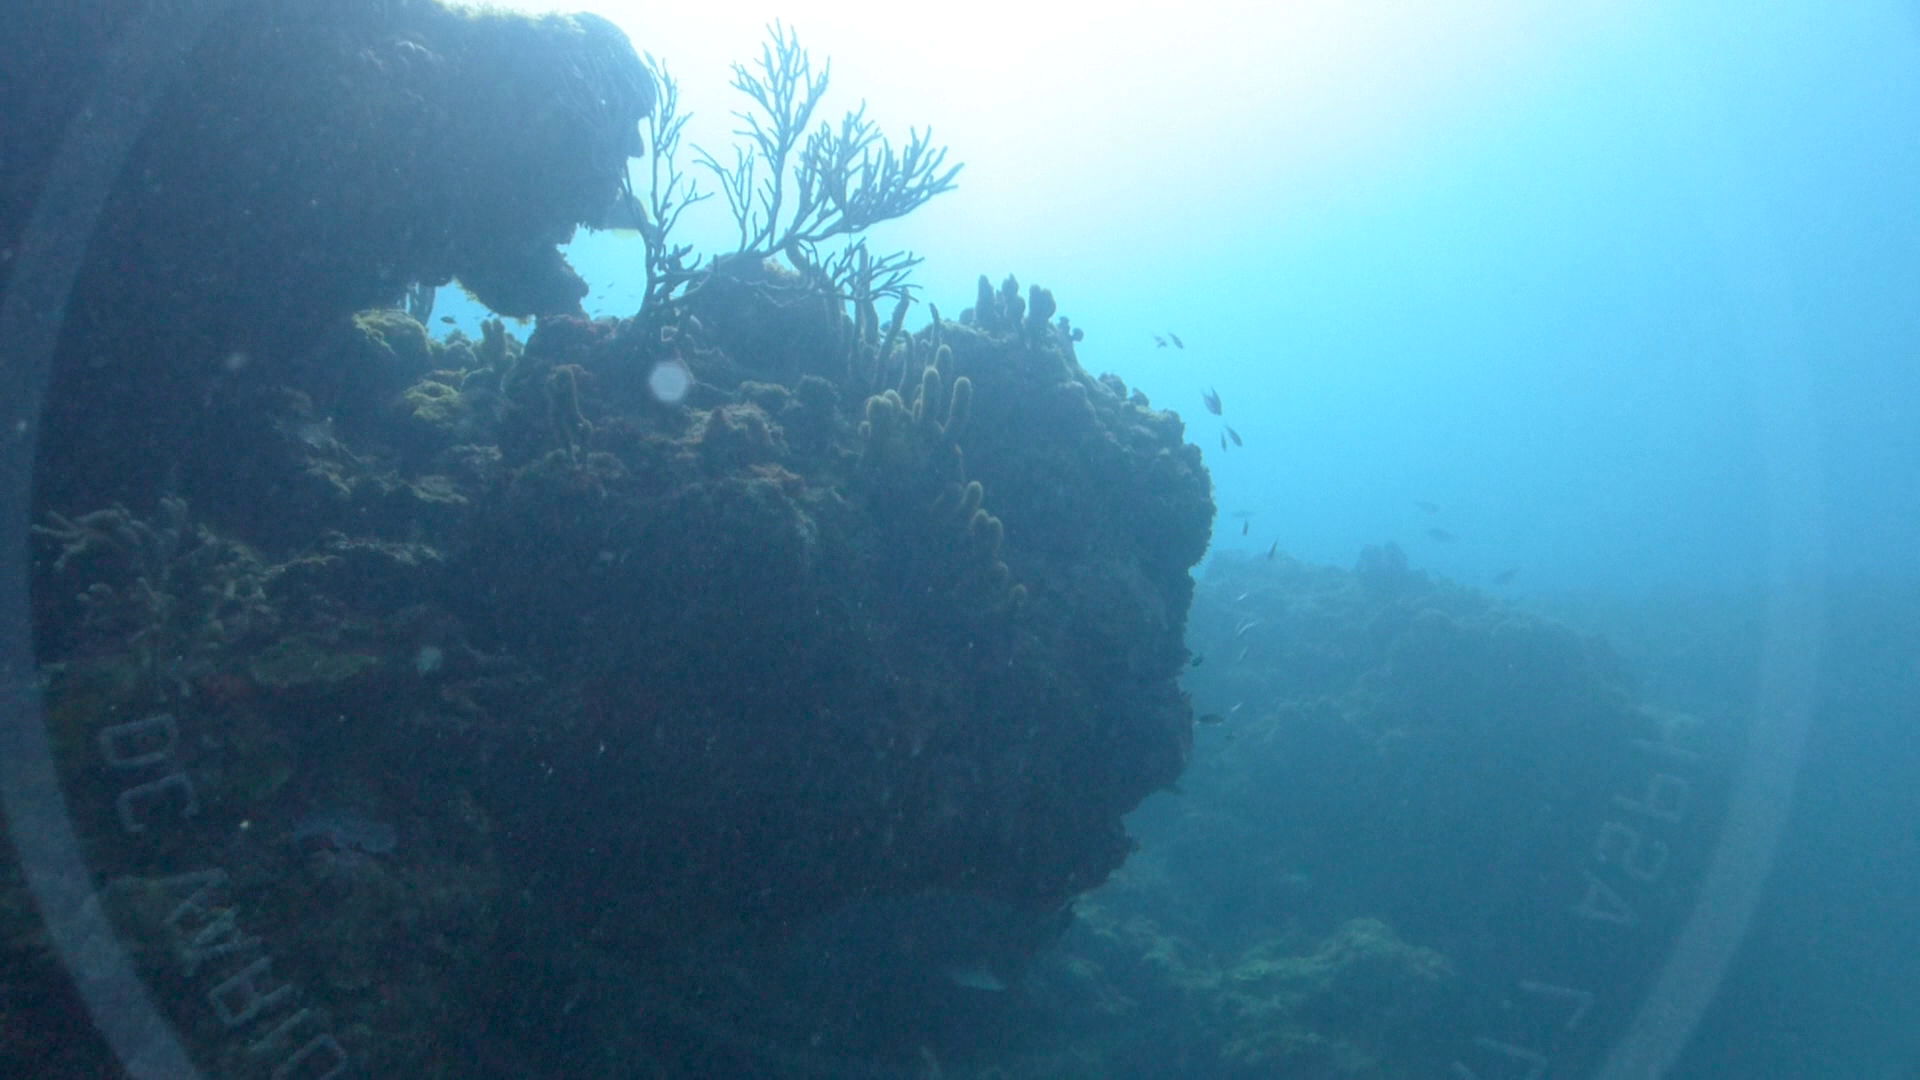
This is particularly bad news if you shoot underwater without a filter and think of using auto white balance as those results will be pretty ugly.

The whibal card has a specific black mark that if illuminated tells you the white balance reading is incorrect because of reflections. I thought this was the key to the 9900 Error, unfortunately I was wrong.

It just fails 100% reliably really painful so I could not get rid of my trusted red filter for the Galapagos trip. I even tried setting the white balance with the filter and it would fail as well.

So I went back to auto white balance and red filter and I am pretty happy with the results, many people have asked me if I have manipulated the footage in post processing as the colors look very deep and some have even said unnatural. Even so shooting at 1/50 means a relatively low ISO and in the specific trip another f/stop of aperture was not really significant but I would have like to have the option of working without the filter, sadly this was not an option.

For what concerns white balance just a few things I want to say:

1. At depth there is no color anyway so what your eye can see it is not what it is, the proof is when you use lights or strobes things look much better than the naked eye. Using your visual as a reference can produce dull results.

2. You have to set an appropriate white balance for your scene, this means removing the cast. If a scene has no cast and the colors look saturated this is not a white balance issue on its own but may due to the camera settings. The RX100II is one of the less saturated camera on the market. The mark I instead is pretty saturated take this into account.

3. Footage that looks dull IS in fact ugly. The fact you set custom white balance with or without a filter does not mean that results is the perfect result, there is no such thing in fact and as colors disappear at depth white balance is not that effective anyway

Nick Hope sometime ago published some interesting tests on wetpixel

http://wetpixel.com/forums/index.php?showtopic=16970&page=8#entry122288

It turns out that there is more than meets the eye.

Just to clarify the only color correction in my Galapagos clip is:

1. In the scene of the dolphins I was pointing the camera upwards and did not have time to take the filter off so ended up with a red cast, I performed a white balance adjustment in iMovie on the opposite value of the tint I was getting until I liked it.

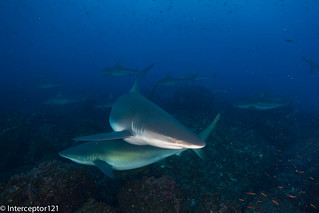
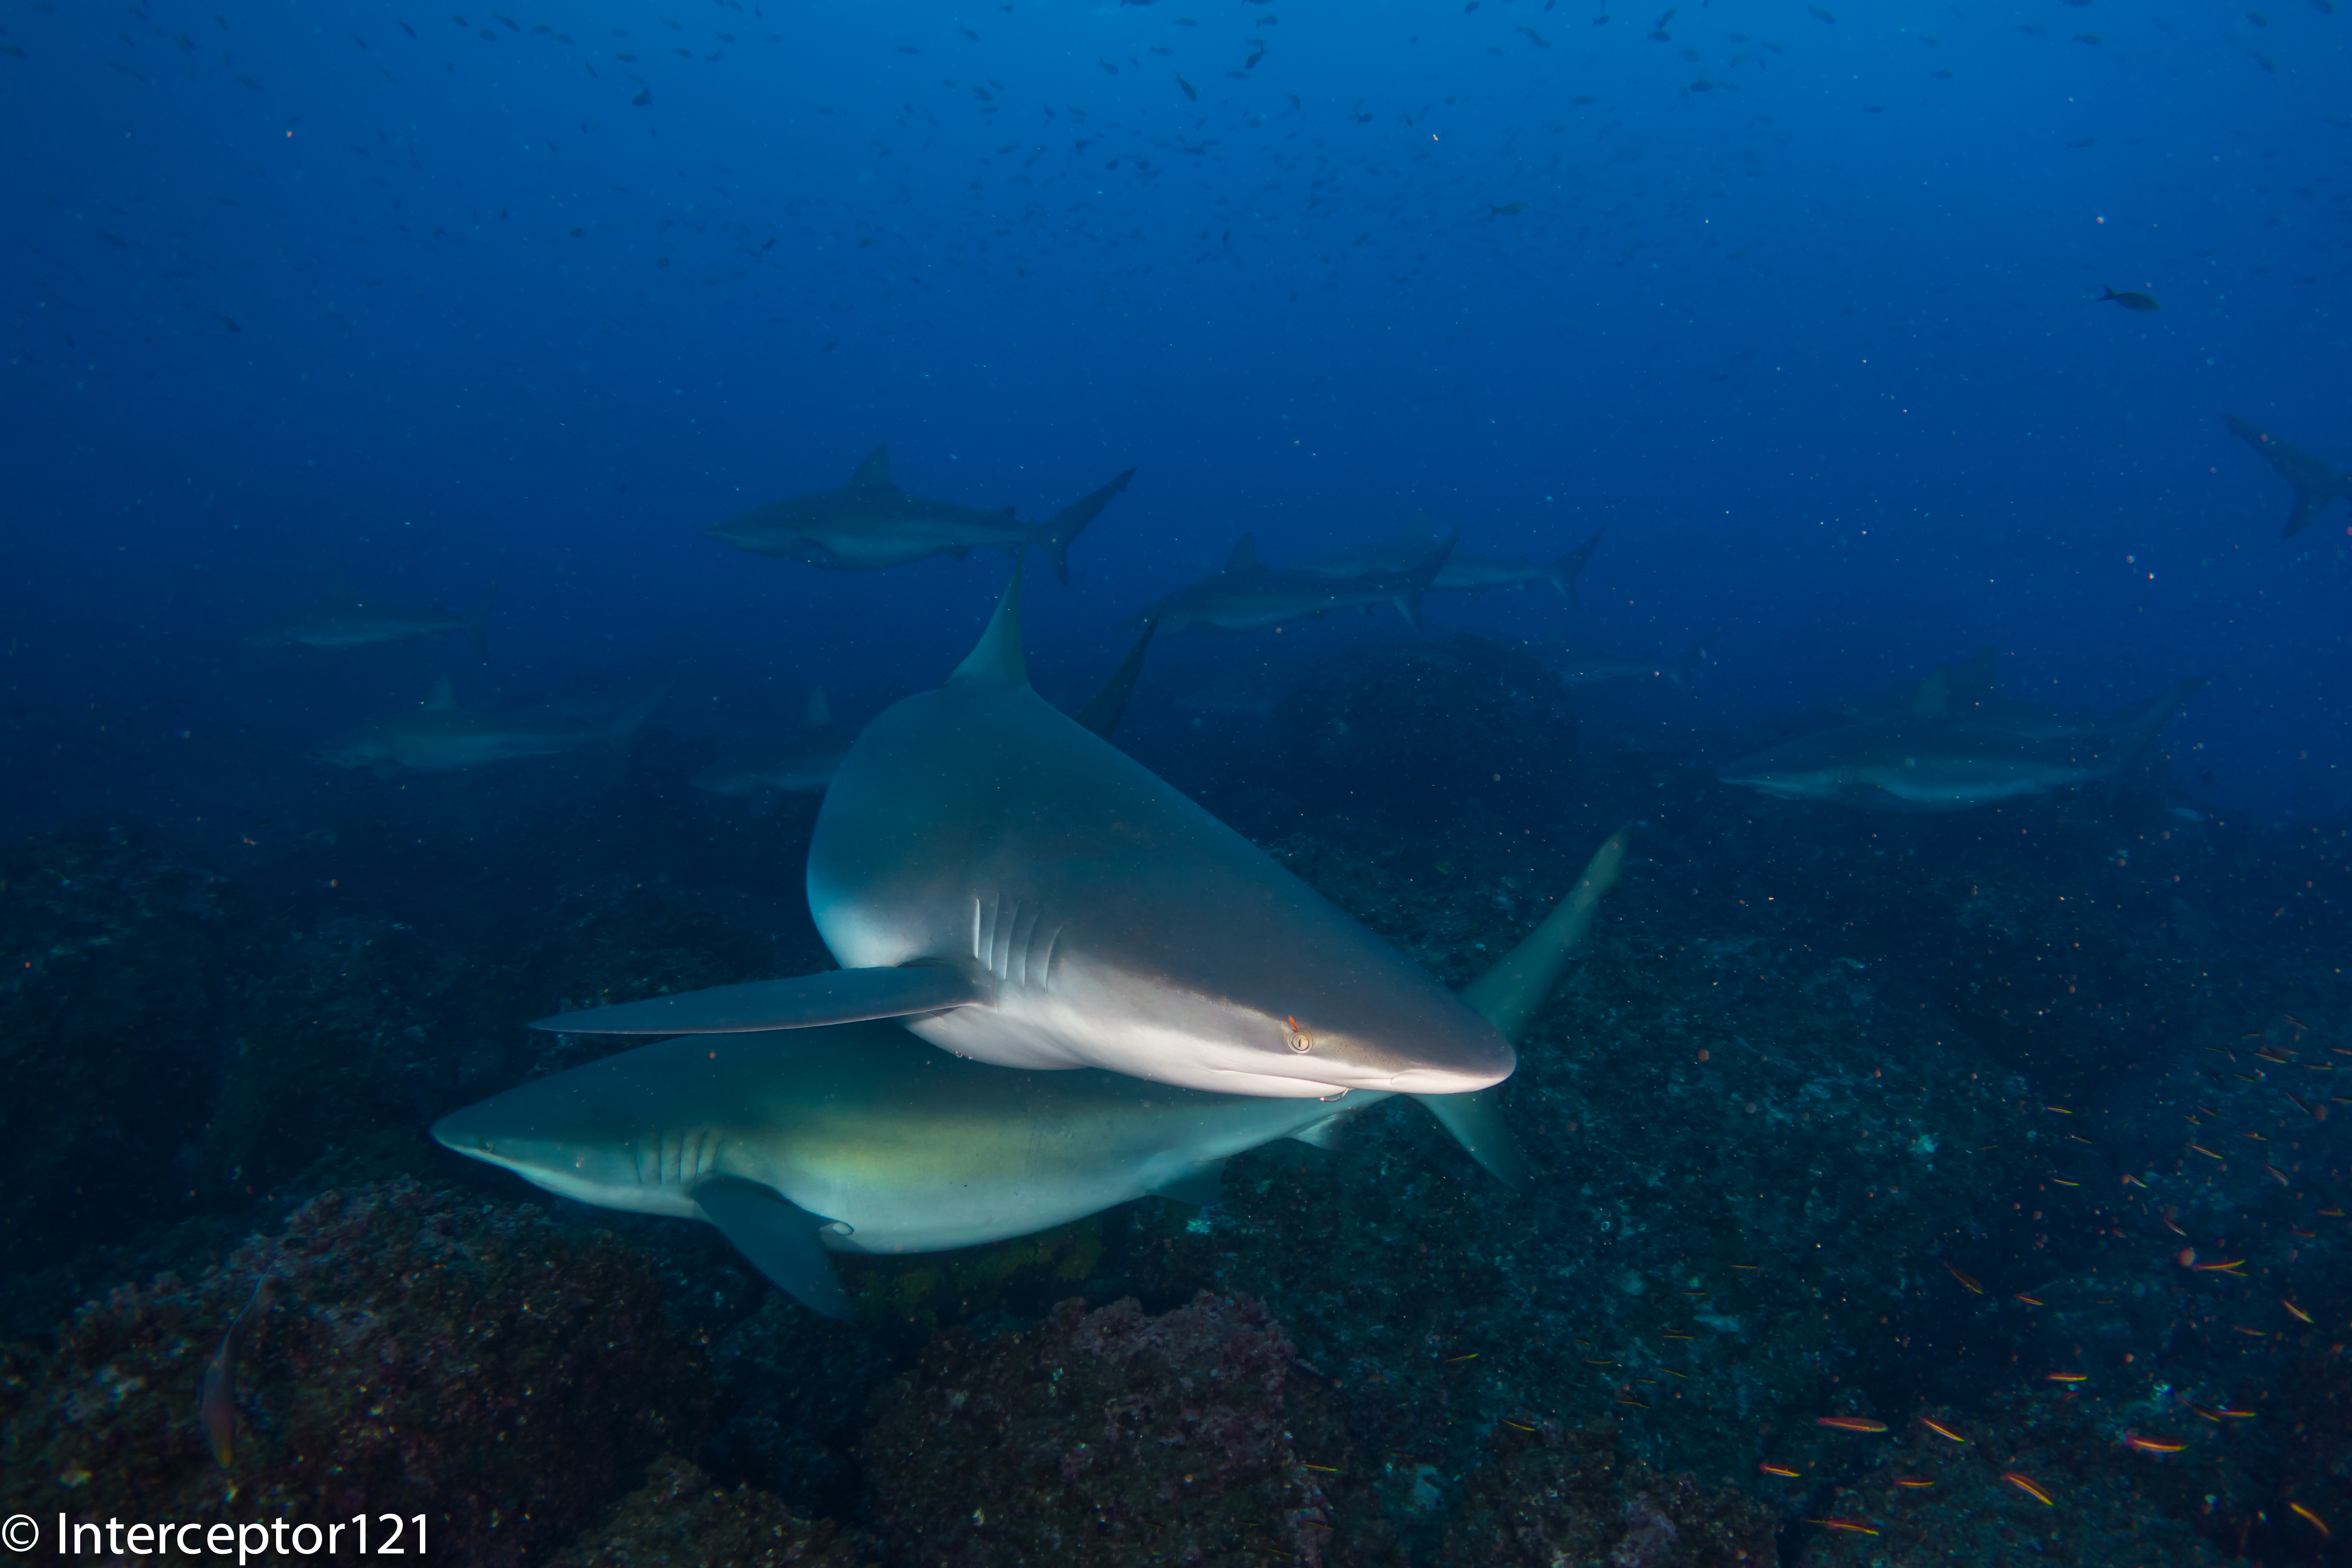
2. In the scene where there is a group of Galapagos sharks and the close up of the eagle ray I have reduced the blue gain as it was over saturated

In all other cases the only changes were increase of contrast or reduction of brightness. When the water was green like at the end in the Punta Vicente Roca scene I did not touch it to make it look artificially blue.

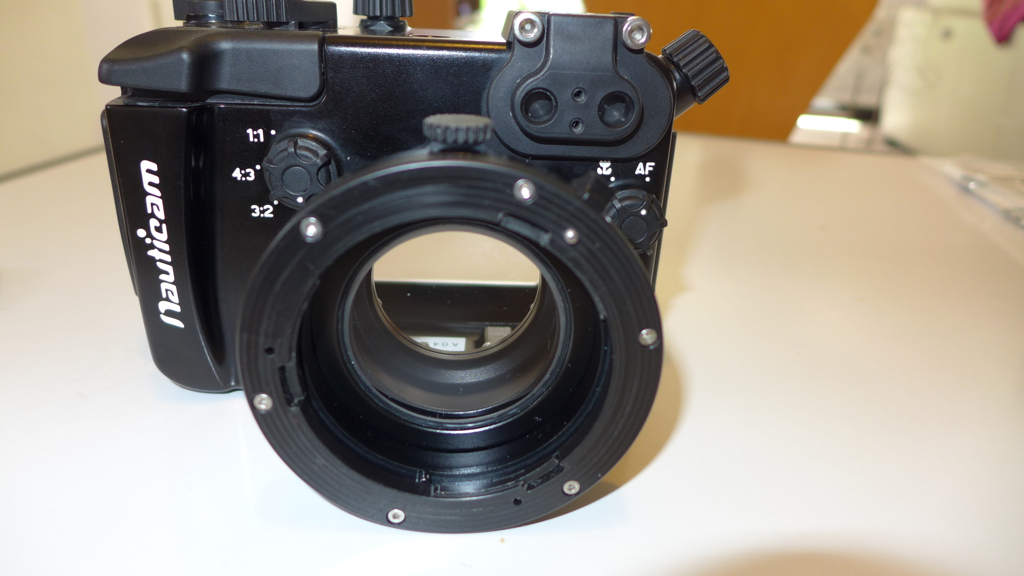
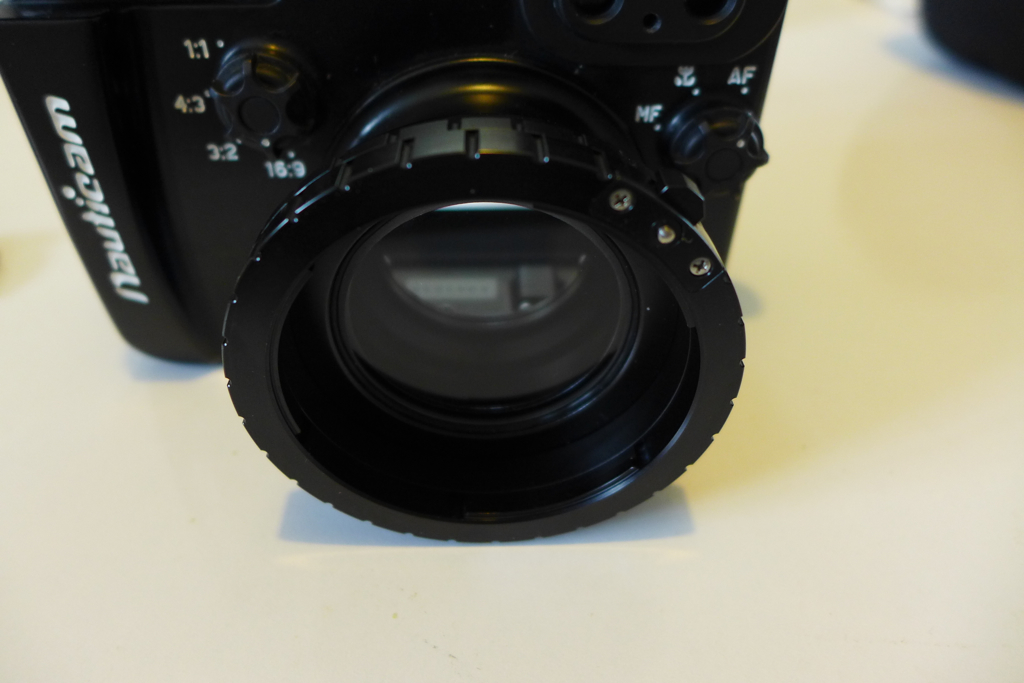
Again for those who ask I use a deeproof push on filter for the Inon UWL-H100 this filter is my preferred for the only reason that is actually the only one available on the market that fits on the lens. Personally I would much prefer a plastic filter like the ikelite/URPRO but this one is glass. It seems to correspond to a deep sunset 2700K with magenta tint of +5 on the RX100 but I have no tools to measure it I can only say it works.

So my recommendation for the RX100 is to get this solution as the Inon lens has the best optical quality and a hood that comes very handy to reduce flare. There are other lenses that fit the RX100 but have no hood. Obviously an not even considering the fisheye style lenses as distortion is ugly and placing a filter under the lens is a very bad idea.

Galapagos: Sony RX100 Mark II Photos

I have mentioned the conditions we found in Galapagos in the previous post so no need to repeat myself.

One of the things I was told before going is that the last dive of the day tends to be pretty dark so not good for video, therefore I used this for photos were I was expecting to use strobes at all times.

I made a mistake as I should have taken the still rig also on the second cousins rock dive anyway I am quite happy on how things turned out considering I did only 4 dives and took 117 photos I am pretty happy I could pick 20 that I consider decent.

The whole set is here

Watching you

The rig I decided to pack at the end had 6+8 inches segment so it looked pretty cumbersome on land.

Photo RIg on Land
Photo RIg on Land

In water the setup looked like a glider with a significant wing span

Photo Rig Underwater

The reason why I took arms so long is that I was expecting sharks to be 4-6 feet away and quite a bit of particles in the water.

I was right. Just have a look at the following two shots, the first taken with a Canon S95 and a single 8″ arm.

Turtle with single strobe 8" arm
Turtle with single strobe 8″ arm

You can see the considerable amount of backscatter despite the 1/1600 shutter speed.

This is another turtle on the same dive

Turtle with twin strobes

This time two strobes on the longer arms are used, even at 1/320 this looks neat. The turtle looks bigger as the lens is not as wide as the previous, shooting distance is the same.

The arms proved to be good for the sharks as expected, I used aperture of f/4 for most shots, ISO 100/200 and shutter 1/60 to 1/125

This is emotionally the best shot

Galapagos Shark Watching me

Later on in the snorkeling trips I took couple of split shots.

Unfortunately the weather was not good and the sky cloudy so I had to play with the graduated filter.

Galapagos Penguin Split Shot

The purist will notice that the water line is not neat, as I am shooting with a wet lens the back of the lens has water as well so to avoid to see that I shoot portrait with the back of the lens in the water, which is a limitation but on a good day will produce interesting shots regardless, also the lens is only 9cm diameter and is flat (Inon UWL-H100)

I took some close ups but even the sea horses were huge so no need for close up lenses.

Giant Pacific Seahorse

Funny enough I took this at f/5.6 1/60 after reading on DXOMark that the RX100 resolution is actually better at f/5.6 than it is at f/11.

The lens is at 35mm equivalent at the shooting distance I used the depth of field is only a couple of cm and as the background is quite plain I did not bother trying a black background that I could possibly not even achieve. This was a TTL shot whilst all the sharks and wide angle were taken with the strobes in manual.

Another great feature on land of the RX100 is the panorama, which I used in Bartolome and other places

Bartolome Panorama
Bartolome Panorama

In general the conditions were very difficult and I am happy with what I could achieve in just 4 dives.

I will be taking the same arms and strobes configuration to the Red Sea in a few weeks but with the Inon UWL-100 with dome. I expect better results as the conditions are usually fabulous in comparison, probably I could do with shorter arms but once in water the set up is not heavy so I will keep it like that


Galapagos: Sony RX100 Mark II Video

The time finally came for our trip to Galapagos and I was ready with a set of think rubber suits to overcome the cold water. I just bought a 5mm Oneill Sector (wonderful suit) a 3mm hooded vest, kevlar gloves and a 5mm 4th Element short john. Well the short john was not used and for most I used just the wetsuit and a set of O’Neill Thermo X unders (very recommended) as El Nino is coming and the water was warmer at 25-27C or 77-80F.

This means lack of schooling hammerhead at shallow depth close to the reef, they were in the blue. We had however our good dose of schooling barracuda, tuna (in the 1000s) and even galapagos sharks

This is the video I produced

If you have problems with playing in your country use vimeo instead

The conditions were difficult with low visibility and in some sites very green water as you can see here

Green waterQuestions will come about what I used etc etc so here is the list

  • Sony RX100II in Nauticam housing
  • FIx adapter for Inon LD mount
  • Inon UWL-H100
  • Deeproof blue water filter
  • Sola video lights 1200 (just few shots of the barracudas and some close ups)
  • Combination of arms and sometimes no arms
  • Ultralight tray TR-DM with extension and handles

The video has been produced with iMovie 9.0.4 no stabilization performed except the scene with the moray eels mating (very mild)

I shot the whole trip in shutter priority 1/50th of a second in the 25 fps 24 Mbps format. After some tests at home I have decided to use this mode as I can’t physically play the 50 fps files the camera produces on any of my devices differently. The 25 fps gives a film look and very smooth footage. This format is only available on the RX100II and not on the original RX100 so the consideration I made at the time for video settings of the RX100 remain valid.

The benefit of 1/50th shutter speed is a full f/stop of light the disbenefit is that at the surface and for backlit shots this is too slow, in those cases I go back to program mode or increase shutter speed to 1/100 or 1/200 or more.

For what concerns the editing I import the raw files in iMovie without using the conversion and then export with x264 using very slow preset and level 4.0 compatibility to use it with my appleTv.

I do minimal color correction in some cases I had to eliminate the red color cast of the filter when shooting upwards, to do that I change the white balance to top yellow until i remove the cast.

In some cases I had to put the green gain to the max for the same problem but in all other cases there is NO color correction in post.

When you work with AVCHD cameras the footage is compressed and the key is to get it right in camera.

As Galapagos conditions were challenging, although less than I expected, I used gloves in some dives to hang on to the barnacles and I also modified the set up to completely eliminate the lights.

I would dive with two 3″ segments and two 6″ Inon Mega float arms when I had the lights on and for other shots in ambient light I would have this set up here that looks odd but it is very effective and almost neutral at only 120 grams in water. The position of the floats means the camera stays upright at all times.

Compact tray for ambient light

I would put a single Sola light on top of the housing not for video purpose but to signal the dive master when I was a bit far in the murky or dark waters. I used this set up on almost all blue water dives (Darwin and Wolf) and the normal set up with lights for the South and West sites with murky or green water.
There will be a separate post on the photos, I did a total of 18 dives with the camera of which 4 where photo and 14 video. You can see an example in the featured image.

I have now ran some statistics on the final clip that I produced

I used a total of 41 video clips:

ISO average was 273 with the following breakdown

  • 2 clips at 160
  • 30 clips at 200
  • 6 clips at 400
  • 3 clips at 800

f/stop average was 3.1 hyperfocal distance on average 1.16 meters. So if I were able to shoot without filter I would have not gained anything in terms of sharpness as most subjects were further away

I would consider the Galapagos and the dive trip I did not the best in terms of brightness and visibility so I would conclude that the RX100II with the Inon UWL-H100 and a red filter is the best set up for wide angle video in terms of performance, ease of use and flexibility.


Barbados: First Sony RX100 Mark II Feature

So after a few months since I got the Nauticam housing I finally had the time to get in the water and try it on.

I was in Barbados for a week and although the diving was not exactly outstanding I did have enough to test the camera behavior.
The link to the videos are here for YouTube at 1080p

or if you prefer Vimeo at 720p

The footage was all taken at 1080p50 the highest mode of the RX100. The RX1oo can work in both PAL and NTSC standard but I chose the PAL mode just to avoid the annoying NTSC message at startup. The clip has been edited with iMovie 9.0.9 and then exported in 1080p25 using Xencoder codec for quicktime in high profile. Youtube then reconverts it to its own specifications, but at least I have the highest possible starting point.

As mentioned the RX100 shoots at shutter speed of 1/100 in 50p mode and this suited me fine in case I wanted to produce a 60p clip for viewing on the computer as currently no online system supports it.

As discussed in the previous post I shot all wide angle in camera Program mode. This allowed me to use the left control wheel button to call the white balance set menu that in video is not available. I set the picture format to 16:9 so that would show similar on the screen. I did notice that when I actually started the movie recording the crop of the active steadyshot kicked in with a reduction of field of view of around 9 degrees or a 1.14 zoom equivalent.

However the active steady shot was well worth it as I have not used any stabilization for any part of this clip and therefore not introduced any extra cropping.

The wide angle shots with the RX100 are an absolute breeze when you use a filter and there is no need for custom white balance until it gets too deep to actually use a filter. I struggled getting decent results with custom white balance, the 9900 K error came pretty much every time except when in shallow water and balancing on sand. Also the results were off with too much magenta tint to the point I had always to correct it.

Ultimately I kept the filter and the camera in Auto White balance and did not bother doing a custom reading at all. The results were excellent.

SS Stavronikita
SS Stavronikita AWB

In deeper water the filter started making the image a bit dark so I took it off and used a temperature setting of 9900K with Magenta and Amber at the maximum.

For close up at distances over 20cm I still shot in program and had good results. When getting super close or macro I used Movie mode in Aperture priority mode with aperture set at f/11. Towards the end of the clip you can see a shot of a small pink frogfish that is done like that. The close up on the eye is shot with two stacked Inon UCL165 the depth of field is really small as you can see but still workable considering I hand held the camera at all time.

Pink Frogfish f/11
Pink Frogfish f/11

When I shot this arrow crab I had left the camera in program mode so it chose an aperture of f/5.6 you can see that whilst the mouth is in focus the arrow is not

Arrow Crab
Arrow Crab f/5.6

Similar situation with the pedersen shrimp where not everything is sharp in focus

Pedersen Shrimp
Pedersen Shrimp f/5.6

Obviously I am being very exigent with my footage and in normal condition this is already good to very good.

So what I liked and what I did not like about the RX100 Mark II:

I liked:

  • The ergonomics and ease of use are outstanding
  • The camera performs incredibly well with a filter in auto white balance
  • The manual focus with peaking works extremely well
  • Dynamic range and colors are outstanding and not just for a compact
  • Image crisp even in the corners at f/1.8 compared to the Mark I this is extremely significant
  • The active stabilizer was great and meant to manipulation in post
  • Battery life is incredible
  • Performance in low light is excellent and better than the Mark I the camera never reached the ISO MAX of 800 I had set hitting a top of 640 at 30 meters
  • Autofocus at wide end in bright conditions is superb

The only think I hated was the custom white balance results an absolute disgrace, to the point that there is no benefit doing it. Not only that the few parts of the clip I had used it and correct it were still a bit off and required correction in post to a small extent.

Also to consider some of the topside capabilities of the RX100 Mark II just to give an idea though this is not exactly the same location have a look as this shot with a Nikon D7100 with sigma 17-70 in comparison with the RX100 Mark II

Nikon D7100 Beach Landscape
RX100 Beach Landscape

There is a difference but considering the size of the RX100 and the fact it fits in a pocket I don’t think there can be that many complains. Obviously once you look at specific lenses for the DSLR things change but in the 28-100mm all purpose range I would say that the gap is not as much as double as the price of the two set ups.

So is the Sony RX100 the best compact underwater video set up? Definitely

Is the Mark II better than the original RX100? Yes and well worth an upgrade for video

How does it compare with the Panasonic LX7? The dynamic range and the colors are superior and produces footage that is simply better and sharper. Where the LX7 excels is at macro in clear waters, this is not because of magnification as the RX100 and LX7 perform exactly the same with diopters, and this is because of the LX7 amazing autofocus. However with a bit of silt or other objects in range there is need to switch to manual focus and there the RX100 is actually superior when using peaking even if the depth of field is actually less, the manual focus on the LX7 with the magnifier is not as good unfortunately.

So my ranking for video is:

1. Sony RX100 Mark II

2. Panasonic LX7

3. Sony RX100

I would also add that for stills the LX7 is even more rewarding at macro range due to the performance of autofocus.

Any questions please drop a comment

Underwater Video Tips: Best video settings for Sony RX100

It is not a mystery that the RX100 is capable of shooting excellent video. In fact in some comparisons with SLRs cameras there is little to no difference in the footage quality. The RX100 has many settings and options so which ones are important for underwater video? I will go and explain those that I find useful.

RX100 Video Behavior

Although the RX100 offers full manual control in video this option is not as useful as it seems. Now that many video editors support AVCHD progressive the 50p or 60p options are the more relevant as the footage can be slowed down to half speed and still offer a standard frame rate (50/60p at half speed is 25/30p).

The RX100 shoots video in program mode with shutter speeds of double the frame rate so 1/100 for PAL and 1/125 for NTSC that is excellent news. The camera will then drop to 1/50 or 1/60 when the max ISO is reached which is still acceptable. In Movie Program mode the camera shoots at the lowest possible ISO for the set shutter speed at the widest required aperture. The RX100 has a minimum ISO in video of 125 and the RX100 has it at 160, which is quite high.

Shooting Wide angle

I shoot all my wide-angle footage with the camera in Program Mode. By that I actually mean Photo Program Mode. Pressing the movie button in P mode results in the same behavior that shooting video in P mode. In order to be able to frame correctly I set the image format to 16:9 also for stills. This is also useful to capture ambient light landscapes. I started shooting in P because this allowed me to white balance quickly however I found out that the custom white balance on the RX100 Mark II is a total disaster and in fact I never use it as it gives weird results. I shoot with a red filter with Auto white balance on until approximately 25/27 meters and then I move to White Balance set to K (colour temperature) 9900K Tint set to M7+Y7. When shooting with lights I also use auto white balance. Generally speaking I only use the movie button and the white balance settings for wide angle.

Deep Wreck in Program Mode

Shooting Macro

When shooting with diopter at tiny subjects focus with the RX100 is a challenge. I set my video mode to Aperture priority with an aperture of f/11 and Auto ISO, the camera will always keep a shutter speed of double the frame rate which is ideal. If you light the subject properly the RX100 will always shoot at the lowest ISO maybe at 200 but not more. I use auto white balance for all my macro. I find it convenient to leave the video mode like this so that I only have P for wide angle and Movie – Aperture priority for video. If you prefer you can set those as memory recall 1 and 2 but I find that not as useful except you don’t need to use the control dial.

Frogfish at f/11
Frogfish at f/11

Settings for the Function Buttons

Many features that can be assigned to the function button are not available in video or not useful. I only have 4 settings in the function wheel:

  1. ISO
  2. Metering Mode – Always on evaluative
  3. DRO – I set it to auto
  4. Focus Mode – in video only constant and manual are available

To be perfectly honest I rarely change any of those except for testing the camera exposure. Even the metering mode can be left to evaluative all the time as when you shoot macro the area is so small and evenly illuminated that I have never had an issue with exposure.

Settings for the Control Wheel

I use the following assignments and I find them very useful:

  • Left: White balance
  • Centre: Manual Focus Toggle
  • Right: Exposure Lock

The bottom arrow is always assigned to exposure compensation and can’t be changed I set it to -0.3 eV all the time.

White Balance

The performance of custom white balance with the RX100 Mark II is shocking worse than the original RX100, 9 out of 10 I get a white balance error and the results are usually off with too much magenta. The only occasions where I do not get an error is in 6 meters or water (20 feet) on a sandy bottom. In other conditions it does not matter if you try with sand, tanks, hand, slates the outcome is shocking. The results can be used changing the tint to an M2 or even zero but generally using a filter and auto is just much easier and better. I assign the K setting to 9900K M7 for shooting at depth, This is painful because it means that unless you have a flat lens like an Epoque or Inon you can basically forget shooting video with the RX100 as the custom white balance is erratic at least.

The Inon UWL-H100 has only one red filter that is compatible and is made by deeproof. I find this filter excellent though I prefer plastic to glass I have to say it works a treat.

Results with White Balance Error 9900
Results with White Balance Error 9900 Note the Magenta tinge
Similar scene with auto white balance and red filter

Focus

The RX100 focus automatically on the center when shooting video and does it very well,. Tracking focus is not as useful and by assigning the center button to manual focus it can be eliminated. When shooting macro it is essential to use peaking. I set it to low with white color. Generally with diopters there is only one focus distance so I move the camera until the peaking shows nice white and then press record trying to be steady. That’s pretty much it.

DRO

I keep the dynamic range optimizer to Auto. This means the ISO is most of the times set automatically to 200 to preserve dynamic range. When the scene is perfectly lit the ISO is chosen to be 160. I don’t see much difference between ISO 160 and 200 but if this bothers you set the DRO to off which means the camera will mostly shoot at ISO 160 in good light conditions.

ISO and Max ISO

I set the ISO Max to 800, having analysed a lot of my footage I have not found one example where the camera shot at ISO800 yet unless I had a filter and was at 30 meters. However I prefer the camera to drop the shutter speed and keep the ISO to 800 instead of going all the way down to 3200.

Zoom

In video the RX100 activates digital zoom even when you set it to off. This deteriorates the image so you need to pay attention that the middle notch corresponding to 3.6x is not exceeded or you will see artifacts in your footage.

Stabilizer

I use active steady shot thought this reduces the field of view as it does help with shake quite a lot with macro footage.

Other Settings to disable

There are a number of settings that are harmful in video either because they use battery or because they are counter productive I disable them all list includes:

  • Smile / Face Detection
  • Picture effects
  • Audio recording ( I do not like bubble sound)
  • Wind Noise Reduction

The following are only relevant for still but I like them off regardless.

  • AF illuminator
  • Red eye reduction
  • MF Assist

Sony RX100M2– First Impressions

I have  been fortunate to receive one of the first RX100M2 that have reached the market so I thought of sharing with you my first impression and what I believe will be the potential for underwater imaging use.

This is the link to the unboxing video of the camera

I posted a summary of the RX100 capabilities for underwater video some time ago on this blog the post is here:

Probably the best thing is to revisit my review and update any significant differences between the RX100 Mark 2 and the original version which is still on the market and will remain at least until the end of 2013.

Key Strengths

Bright Lens –  Not changed

The RX100M2 has exactly the same lens of its predecessor RX100, it is true that when zoomed the minimum aperture drops down to f/4.9 however this is not a concern for underwater imaging as usually long focal lengths are for macro and we are interested in very small aperture to allow for greater depth of field.

Low Noise – Improvement!

In virtue of the new retro illuminated sensor the mark 2 has one full f-stop advantage over the original RX100. This means that ISO800 is a breeze and potentially we could go as low as ISO1600. I would not do that but what it means is a cleaner image at depth in ambient light.

Image Quality – Improvement

Image quality is outstanding and the lack of aggressive contract and sharpness filters in the default settings means more room for correction in post processing.

Video Mode Control – no change

The RX100 had complete control on video mode and the mark 2 maintains the standard. Very important is that the program mode is excellent and keeps the shutter speed at 1/100 or 1/125 when used in active mode which is ideal for 50/60p smooth footage.

Manual Focus – no change

Same as for the RX100

Battery Life – Improvement

According to Sony battery life has improved from an already outstanding CIPA 330 to a declared value of CIPA 350. The new Mark 2 has also an hot shoe so in theory if any manufactures produces a wired TTL enabled housing this means plenty of shooting before changing the battery pack. We suspect though that only ikelite will have this option on the housing.

Active Steadyshot – no change

I initially slagged the RX100 stabilization system based on performance on land. However at a more in depth analysis it turns out that the RX100 active steadyshot, even if at cost of an image crop is very effective for sudden camera movement and for high magnification macro. The Stabilizer is not as sticky as others so when you eventually vibrate it does not jump. Although the performance for stills is poor to irrelevant and so is the normal mode the active mode is very effective for underwater use. The mark 2 is built exactly with the same algorithm and combination of optical and electronic.

Tedious Workarounds Comparison

Some of the ergonomics of the RX100 are not the best and seriously deduct from an otherwise excellent experience, the most annoying issues:

Lack of focus lock – no change

For some reason Sony decided to skip on this essential feature, the workaround involves switching to manual focus however it is then possible to accidentally change focus if the front ring is set to control focus. The RX100M2 has the same issue.

Setting Custom White Balance in Video – No change

Setting custom white balance is only possible in the still modes, while in fact if you shoot RAW don’t actually need white balancing. This is the largest non sense of this camera that requires the user to navigate out into Program to ensure white balance is set correctly and you don’t end up with the Custom WB Error message. Though this is annoying is not such a killer as it would initially seem if you take your movies in one of this still modes which is valid for wide angle and ambient light shot. For macro you will need to switch to movie mode aperture priority in AWB. If you keep this discipline this is issue is mitigated. The RX100M2 does not change this and I believe this is due to the fact that the shutter button that is used to set custom white balance is disabled in video.

Lack of 24/25/30 progressive modes at 1080HD – Improvement!

The RX100M2 shoots at 50/60p as well as 25/24p in addition to that you can switch between PAL and NTSC which is great!!!

AVCHD – Improvement!

The RX100M2 has not only the progressive modes at double frame rate but also AVCHD 1.0 compliant format, this means that if you choose the 24M 24/25 p mode you can import with all editing programs without issue. Not only that but if you use the wireless import utility this converts also the AVCHD progressive files in mp4 for you. This is  great improvement

Key Weaknesses comparison

The RX100 had also some key weaknesses let’s see how the mark 2 fares.

Macro Performance – no change 

Exactly the same as its predecessor the RX100M2 has a minimum focus distance of 5cm on land that becomes around 7 in water. Like with the RX100 because of the large capture area you will need diopters for macro shots. On a positive note once you have a close up lens the performance is incredible when coupled with manual focus with peaking.

Stabilizer

Sony has adopted a lens shift approach in this camera instead of the sensor shift of the higher end alpha, maybe due to large size of the sensor compared to the camera body. They have then added some software processing in camera but the results are just average. There are many other cameras that do better than the RX100.

Soft Corners at Wide End – Improvement

The RX100 first generation had soft corners until f/5.6 the situation changes dramatically as we can see in this test card comparison shot. Not sure if there was an issue with the RX100 original sensor but this looks excellent and as sharp as the panasonic LX7 or Canon G15.

Look for yourself!!!

Left RX100M2 Right RX100

No Neutral Density Filter – marginal deterioration

As its predecessor there is no neutral density also on the mark2. A little tip for video is to shoot with filters that take away 1 1/3 f-stop. This is not ideal but helps. There were some speculation that because the minimum ISO in RAW is now 100 instead of 80 sunballs would be more difficult to shoot. 1/3 of an f-stop does not really make any difference I believe this is more a statement so that the RX100 housing that are in stock sell out at full price.

Other features

I have to say that the tilting screen is fantastic to shoot on a tripod on lens. I doubt any housing can accommodate for this but the feature is outstanding

IMG_6772
Tilt screen side view

And this is the rear

RX100M2 tilt screen
RX100M2 tilt screen

Conclusion

So the question is should I buy the RX100M2 or the RX100 maybe grabbing a deal? Recsea has already announced a housing for the mark 2 and Nauticam is working on it. I believe that when it comes to still photography the difference between the two cameras are not substantial as many shots are with strobes I have however noticed a much faster internal flash cycle time. I do not want to be definite but looks like a full dump takes around  seconds to recharge. Also to be considered that in US the price difference is $100 so definitely the Mark2 is the way forward. In UK/Europe the difference on the list price is £150/€180 which is much more.

So I would say if you are planning to use the camera for video go for the RX100M2 the improvements are significant both in terms of video formats but also in terms of sharpness at wide apertures. If your main interest is photography and you live in US go for the mark 2 in Europe instead I would grab a deal on the RX100 when the price of the housing drops.

I am waiting for a test housing from Nauticam as soon as I have it I will post an unboxing video followed by some pool tests.

Underwater Video Tips: Best video settings for Panasonic LX7

I thought of doing a debrief of the settings I use as I see few people that have bought this camera and have few niggles to go through and the obvious learning curve of new equipment so here we go.

Which Video Setting

It is always possible to reduce detail if needed so always shoot in the highest mode AVCHD progressive that in the menu is called PSH this records at 28 Mbps.

Which Mode to Use for Video

The LX7 has a one touch video mode that is accessible in still mode. When you press this button, even if the camera is in Aperture or Shutter priority and even in Manual, the movie clip is recorded in Program mode.

It follows that the mode to use to have full control is the creative video mode accessible through the mode dial.

Standard Setting for Creative Video Mode

I use the Shutter priority setting submenu in this mode. This is because the LX7 does not follow the 180 degrees shutter rule in video program mode.

Set your shutter speed to 1/100 for PAL and 1/125 for NTSC so that your shutter speed is double of the frame rate (1/50 for PAL and 1/60 for NTSC).

Exposure Lock Button

I never use the manual or the aperture priority mode as I find the lens fairly sharp even in macro and very small subjects. When I have changing light I point the camera to the exposure I want and the click Exposure Lock. To disable focus lock you need to go into the menu and set the button to AE lock only.

Exposure Control

I personally find the standard exposure of the LX7 underwater far too bright. So using the exposure compensation dial found by pressing the shutter speed wheel I dial down to -2/3. This is personal sometimes I even go down to -1.

ISO and Max ISO

The LX7 has a very bright lens even at telephoto end and this lens produces also a very sharp image. In the worst case of deep water with low light I found that having an underexposed but cleaner picture at ISO400 is better than letting the camera go all the way to high ISO. So in the menu I set ISO MAX to 400 or in some cases I push this down to 800. I set the ISO to Auto as the camera generally keeps it very low anyway.

Autofocus

I leave autofocus for video mode to on and I ensure that the autofocus is set to single area. Be careful as the default setting is face detection and that does not work well underwater! Multi area and tracking are not available in video mode.

Zoom

In video you can extend the 90mm lens to 180 with the iZoom and to 360mm with digital zoom. I set iZoom to on and Digital zoom to off as I have seen that the iZoom is very useful in macro and the picture quality is not visibly affected.

Metering Mode

I use multi metering for landscapes and centred weighted for close ups and macro.

iDynamic

This is a tricky setting; generally I keep it off or on Low as the standard settings clip the highlights. In doubt turn it off.

Photo Style

This setting controls contrast, sharpness, saturation and noise reduction. I use the standard setting that is a little bit oversaturated. If you do a lot of colour corrections in post processing use the Natural setting. The footage will be less saturated and a bit less sharp with less noise reduction.

White Balance

I use two custom settings WB1 and WB2 one for shooting with ambient light and the other one with lights that I only use in special circumstances.

Stabiliser

I leave this on and it does not affect the field of view.

Zoom Resume

Zoom resume has to be left off as this delays the camera ready to shoot time and ends up with missed opportunities.

Menu Resume

It is useful to leave this on.

Custom Menus

I record all my settings for shooting in ambient light in the C1 mode this has all the settings are describes and recalls the Custom White Balance 1.

I then set another menu C2-1 with auto white balance for shooting with lights and menu C2-2 for shooting with lights and WB2.

This is an example video shot with those settings and no additional lenses this is with video lights and auto white balance little to no correction in post processing.

This other video is with some grading applied and ambient light for most

I hope you found this useful and happy shooting!

Wide Angle Lenses and Adapters for Panasonic LX7

Who has followed my initial LX7 tests is aware of the few issues I have had at wide angle with the LX7.

One was the reflections back on the lens that I have now hopefully resolved using a black marker and changing the camera from white (and silver lens ring) to black and the other was flare.

Flare is an issue at wide angle even on land. What causes flare? Stray light coming from the sides that washes out the picture and eliminates contrast in the process.

Wide angle lens tend to have an ability to catch stray light from the sides and top and this is the reason why wet wide angle lenses have to be really coated well so that this effect is diminished, however it still can happen.

And it did happen to me with the Inon UWL-H100. The general advice to eliminate or reduce flare is to have a lens hood however lens hoods are generally not an option for wet lenses with an M67 thread mount. The only lens that I know that can position the hood on a screw mount is the fix UWL28M52 or UWL04 most of the other lens do not have a hood and have a circular lens unprotected from stray light. And this usually means at some point you will get flare.

So how do you get around it? In the case of the LX7 is pretty much a forced choice as the Inon UWL-H100 is the only lens that does not vignette at 28mm equivalent focal lenght so the possible solution is to put a hood on the lens.

Inon sells a hood for the UWL-H100 but the hood is attached through 6 allen bolts and its position can’t be fine tuned so to use the hood it is a requirement to change mount from M67 to the LD bayonet. You need also to convert the lens itself into an LD bayonet. If you go to your Inon dealer there is a relatively cheap service part that allows you to convert your M67 lens into a bayonet.

LD Bayonet lens holder

The LD bayonet is the latest incarnation of bayonet mount released by Inon. Whilst the old AD mount relied on a mechanical action to secure the lens, the new LD bayonet is much shallower and relies on a pin lock release to stay in place. There are two adapters on the market that are capable of attaching LD bayonet lenses to an M67 thread, one produced by Nauticam themselves and the other by the Japanese Fisheye Fix.

LD Adapters Boxed
LD Adapters Boxed
Nauticam and Fix LD-M67 adapter

There is a  price difference between the adapters with the Fix being 20% more expensive.

Nauticam LD Adapter
Nauticam LD Adapter

The Nauticam adapter is the largest of the two. It has 6 allen bolts on the front and a thumb screw lock on the back to fix it in position. With LD lenses there is only one position to put the lens hood in the correct place so if for some reason the thread ends in the wrong place with your housing you will need to unscrew the front of the adapter to ensure the release lock is on the upper left of the port this happens the same way on the fix adapter. Make sure the little spring does not jump off in the process…Once the release lock is in the right area the fine tuning of the hood position is done with the thumb screw. A possible weakness is that if your housing port has no room for the thumb screw then this adapter is not good for you.

Whilst the Nauticam is made of plastic and metal the Fix seems to be 100% aluminum, this adapter looks better but does not have a mechanism to fix in place it relies on the strength of the M67 thread, however this locking system is compatible with any 67mm threaded port.

FIX LD Adapter
FIX LD Adapter

The fix allows to perfectly fine tune the hood position and it shows.

Nauticam Hood Alignment

The alignment mechanism of the Nauticam adapter creates an alignment issue with the hood where the lens is few degrees turned clockwise.

With the fix this does not happen.

Fix Hood Position
Fix Hood Position

The hood can be properly aligned. Note that in both cases this does not mean more vignetting as the corners are not covered by the hood.

The other check I do is the position of the back of the lens, if there is a gap between the thread and the back of the lens this can create vignetting so it has to be as close as possible or even protruding as the Inon UWL-H100 mount type 2 does.

Let’s have a look at the back of those two adapters with teh UWL-H100 28LD attached.

Nauticam Rear Lens
Nauticam Rear Lens

The Nauticam thread is somewhat too long so the lens sits slightly more inside the thread line.

With the fix the situation changes sightly.

Fix Rear Lens
Fix Rear Lens

There seems to be little difference we will now check if there is an impact on the possible vignette in water.

Nauticam 28mm
Nauticam 28mm

As we can see there is a little bit of residual vignette on the bottom right corner when the lens is at 28mm equivalent focal length,

This is the same situation with the Fix

Fix 28mm
Fix 28mm

There is still a dark bottom right corner but it is less.

Inserting a 1.25mm spacer between the inner housing and the left side of the camera improves matters, this is because the lens of the LX7 is somewhat misaligned in the Nauticam housing and this corrects it.

Nauticam 28mm Spacer

With the spacer in the housing and the Nauticam adapter there is a tiny little residue of vignette but overall this is ok.

With the fix adapter this is the result.

Fix 28mm Spacer
Fix 28mm Spacer

No dark corners left.

So this is the recap:

  1. You can change the UWL-H100 28M67 into an LD version with a cheap service part
  2. Once the lens has an LD mount it is possible to attach the hood this will reduce flare
  3. Vignetting is slightly increased but can be eliminated with a spacer with the Fix adapter
  4. There is an issue of hood alignment an increased vignetting with the Nauticam LD adapter

A final note: inserting a spacer in the housing is risky, you need to know what you are doing as in theory the chance of flooding could increase so this is not for everyone.

My recommendation to those who want to improve contrast with the UWL-H100 is to convert to LD mount, attach the hood and get a Fisheye Fix LDF-M67 Pro adapter. Changing to bayonet has other advantages making lens swaps in water much faster and easier compared to the thread version especially with a lens as heavy as the UWL-H100.

There are few design issues and manufacturing errors in the Nauticam LD adapter that create issues with the LX7, most likely other cameras that are not so fussy will have no problems but if you have an LX7 avoid the Nauticam adapter entirely until a new production version is defined. I have given Nauticam the feedback and they will probably react.

Grenada Trip First LX7 release

I have just completed the first draft of the clips taken with the LX7 in my trip last week. Links are here:

Youtube may not work in some cases so use vimeo instead

For who wants to know the lens choice for wide angle was as follows

Wet mate: Molinere Sculpture Park, Purple Rain, Veronica L, Shark Reef

Inon UWL-H100: Bianca C (28-40 meters) , Northern Exposures, Southern Comfort, Quarter Wreck, Shake’em (20-32 meters)

You can see in the section of the Veronica L that missing those extra degrees field of view did not allow me to take the full wreck by side even if it was not that big. On couple of reef dives I already had the Inon on the previous wreck dive so I left it you can compare performance of the two lenses in terms of sharpness and flare. Generally I feel the wet mate has less flare and is sharper however it does have an issue of reflections as covered in the previous post.

As always I have used iMovie to edit the AVCHD progressive files that I converted to normal mp4 using the workflow in a previous post. There are no dramatic alterations of colour or exposure and no stabilization has been run in any part of the video (in some parts like the snake eel moving it shows) all was done with custom white balance using the camera functionality, considering how deep were some of the wrecks this is very good I believe.

I would love your comments this was mostly an exploration trip so it is interesting to compare to the RX100 Raja Ampat videos

Panasonic LX7 reference compact for underwater video

So I finally had the opportunity to take the LX7 on a trip after some pool tests.
After my attempts last year with the Sony RX100 I was a bit skeptical that I could actually find something better for video but I think the LX7 beats it.
I put together a sample just to give an idea of equipment used and how it works, please note this is not altered in any way

There is a picture of the rig in this blog on a specific page but let me confirm once again in detail
Panasonic LX7
Nauticam LX7 housing
Ultralight TR-DM tray with extension TR-DUP and two TR-DH handles without ball.
12 segments locline arms on 3/4″ mount base and reducer on the handles
Two sola 1200
Nauticam wet mate
Inon UCL165AD on bespoke M67 adapter
Inon UWL-H100 28M67
Inon M67 double lens holder on custom mount

In a previous post I highlighted that for most the wet mate will be the only lens needed however I had some wreck dives and the 18mm of the Inon wide angle are more appropriate.
I also gave a try to the panasonic intelligent zoom that allows for 2x digital magnification and sharpening that for me works very well and you can see it in the footage. This allows a user with just the wet mate to further zoom without need of a close up lens or a use with a single +6 diopter to achieve super macro.

Pedersen Shrimp with two stacked UCL165AD and intelligent zoom 7.5x The frame height is less than 1cm
Pedersen Shrimp with two stacked UCL165AD and intelligent zoom 7.5x
The frame height is less than 1cm

I found the white balance of the camera excellent on both my hand or sand. I had issues with my padi slate that many times returned a ‘scene too bright’ error. Maybe this is the reason why backscatter failed this camera for video?? Who knows.
You can see that even at 36 meters the colour are as good as they can be.

White Balance on Bianca C 36 meters depth

For macro shots I used the temperature setting at 6500K, I found the white balance tint fine tuning to be excellent to further enhance it.
I shot in shutter priority the whole time with shutter speed of 1/100 or 1/50 depending on conditions and type of shot. The camera autoISO and choice of aperture privilege noise reduction however as the lens of the LX7 is really sharp the relatively wide aperture did not mean soft corners.
I tried the various photo styles and at the end settled for the standard one, I found the natural really to have too little contrast.
I thought of shooting in mp4 for wide and AVCHD progressive for close up but this would have meant two different frame rates to edit, at the end I shot at the highest available setting to avoid confusion.
I had received a new port from nauticam so I had no vignette at 28mm and the full 100 degrees the inon lens can offer.
The ergonomics of the camera that have fixed commands for aperture and shutter proved to be convenient and the built in neutral density filter was very effective at shallow depth or on the surface.
In essence I think that the issues backscatter mention are non existent.
I did have a few problems with the wet lenses though.

Lens Marking reflection on Wet mate dome

The wet mate proved to be a great little tool very sharp and light however none of the sides of the glass have anti reflective coating. In bright scenes or backlit scenes I did not have many issues with flare however I could see the marking on the lens reflected back on the wet mate and in the picture. I suggest putting an inon anti ghost sticker or gaffer tape to hide those shining markers or to colour them with permanent black ink.
Other than this the wet mate performs very well in all reef scenes and close up of critter a few inches big.
The inon diopter did not cause any trouble other than the obvious vignetting until 70mm. One pleasant surprise is the LX7 autofocus. Having struggled with the poor focus of the RX100 at high magnification I was astonished that the LX7 finds focus even with two stacked diopters and keeps it!!! I never had to use manual focus that with the RX100 was the norm at macro range.
I had bought the UCL165 and UCL330 in m67 format but decided to sell them as I will actually switch to bayonet very soon for the wide angle.
The Inon UWL-H100 was probably the most disappointing find of the trip. Image was sharp in normal condition however this lens tends to flare quite a bit and this creates block noise in the water column in video, when I used my hand to shade the lens the flare went away. Inon sells a lens hood for the 28LD version of this lens but not for the M67 as there would be issues to align the hood petals to the frame.

Inon UWL-H100 Flare on top of the frame

Considering that the lens is very heavy in water at 350 grams and that screwing and unscrewing was a concern mid water I have decided to convert the lens into an LD bayonet. Inon sells a replacement service part for the 28LD that can be used to replace the M67 thread of the lens. Other than this part the two lenses M67 and 28LD are identical. I will use a nauticam m67 LD adapter I hope this will not increase the vignette. I will connect my AD mount close up with a AD->LD converter when using the wide angle and then use an AD->M67 converter when I use the wetmate. This saves me buying two different diopters and I can stack the two UCL165AD I already have. They do vignette a lot at medium but who cares when you shoot at full zoom.
I look forward to testing the UWL-H100 with the lens hood I am sure results will be better. On the other hand when the sunlight is behind the shots have incredible sharpness with this lens.
So the LX7 gets 5 stars from my side and I leave you with two recommendations:
1. Apply a form of anti ghost sticker to the LX7 lens
2. If you want to get the Inon UWL-H100 go for the LD mount so that you can put the lens hood on