So finally the time had come to attend the Nauticam Try out with Alex Mustard.
If you have never done any of those workshops I would definitely recommend you one. It is not just the outstanding tuition but the fact that the boat will go to specific dive sites at specific times to take advantage of conditions and light for photography.
If you are keen to see the pictures this is the link to the set with the 30 images I like the most
I used the RX100 for stills for the whole trip but then on the last dive I shot this short clip just to give an idea of what it was like. Note that I used the auto magic filter on the lens and by then I had ruined it a bit so the image is softer than it should be and not up to my usual standards, the purpose is to illustrate the diving style not the quality of my set up for video.
The trip started with a preliminary explanation on how things were going to work and after a static first evening on the boat we departed for Abu Nuhas the early morning after. Unfortunately the conditions were really rough so we ended up aborting and after a check dive at alternatives we went to the barge.
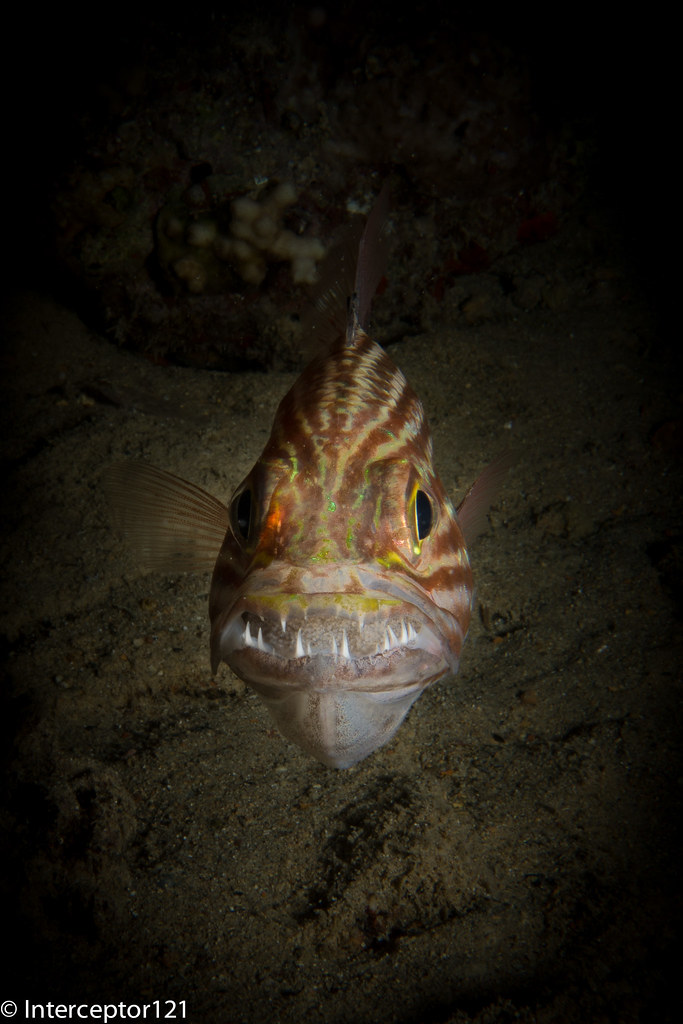
The objective was to shoot fish portraits, cardinal fish had eggs in their mouth, at least some of them were carrying them, so you could find yourself your fish and try to take some shots. It was apparent that due to the level of comfort of the fish I could not get close enough with my diopters to take a shot to fill the frame so I needed to crop quite a bit as in this shot.
Hopefully the eggs are still visible. Anyway the rest of the gang had for 90% DSLR and were happily shooting portraits with their 100mm macro lens I was struggling getting anything decent so I decided to try something alternative as it was clear that if I was shooting fish mid water I would have been too far away to fill the frame.
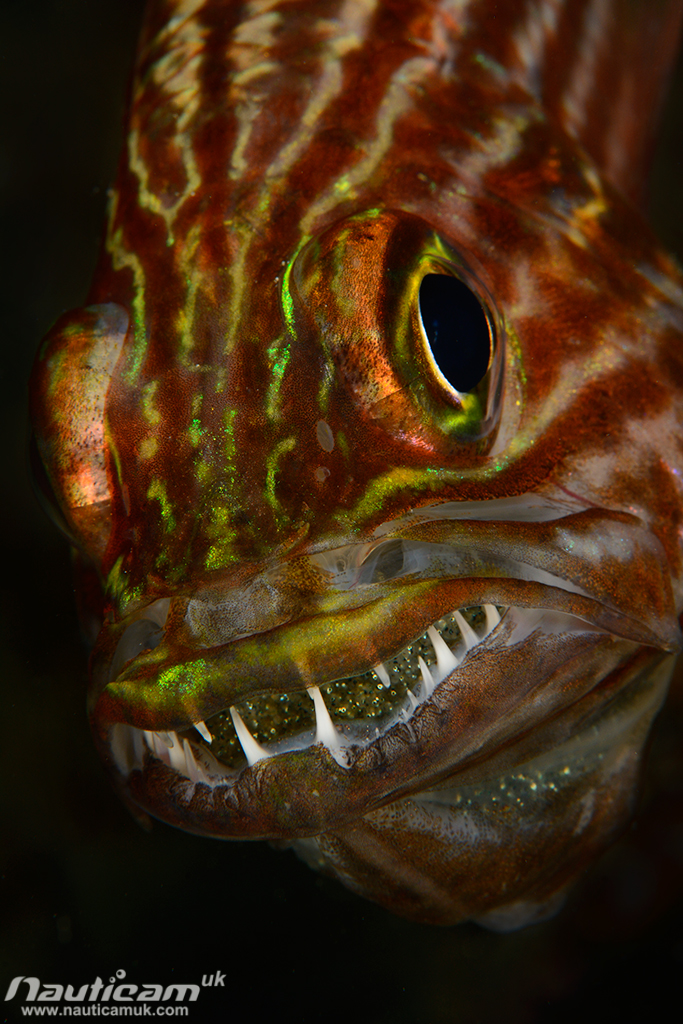
This shot from Alex Tattersall gives you an idea of what should have come out with the right level of magnification that I could not achieve.
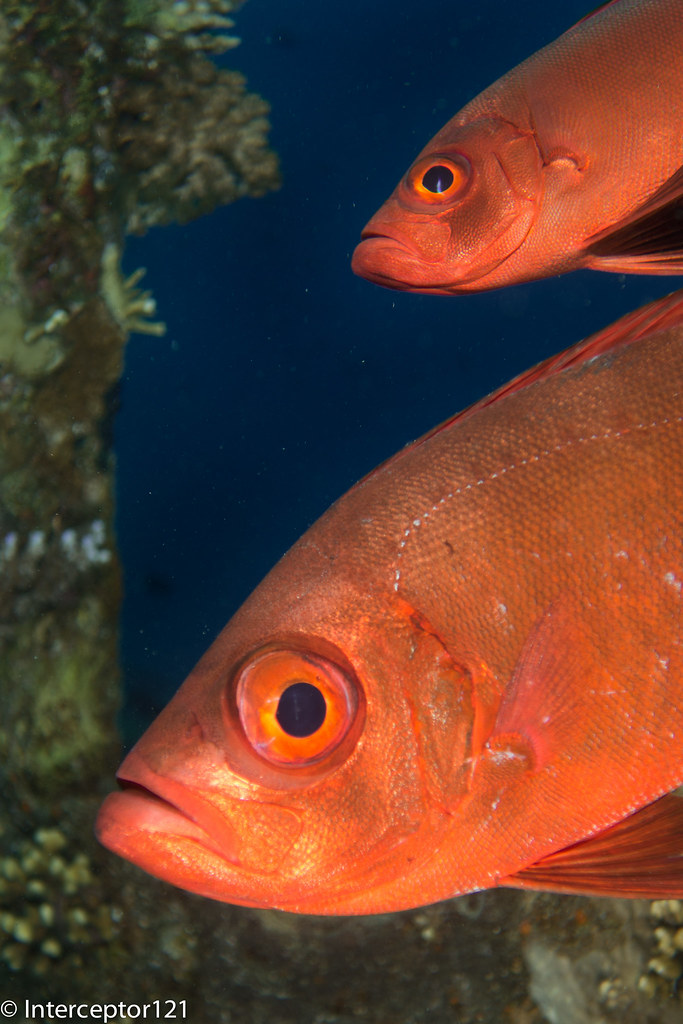
In some cases I did find more cooperative fish like those two.
So I put on the snoot and started looking for different things like in this shot taken with the Inon at 20º.
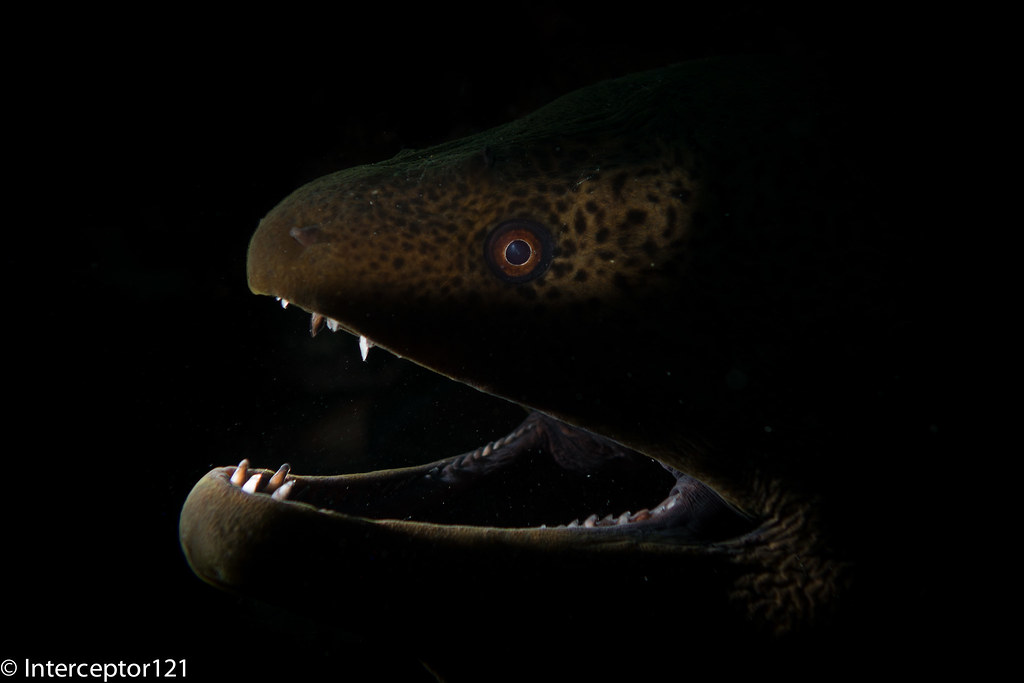
Those little gray moray are endemic of the red sea and look quite cute. I then found a giant moray and took a series of shots this one being my favorite.
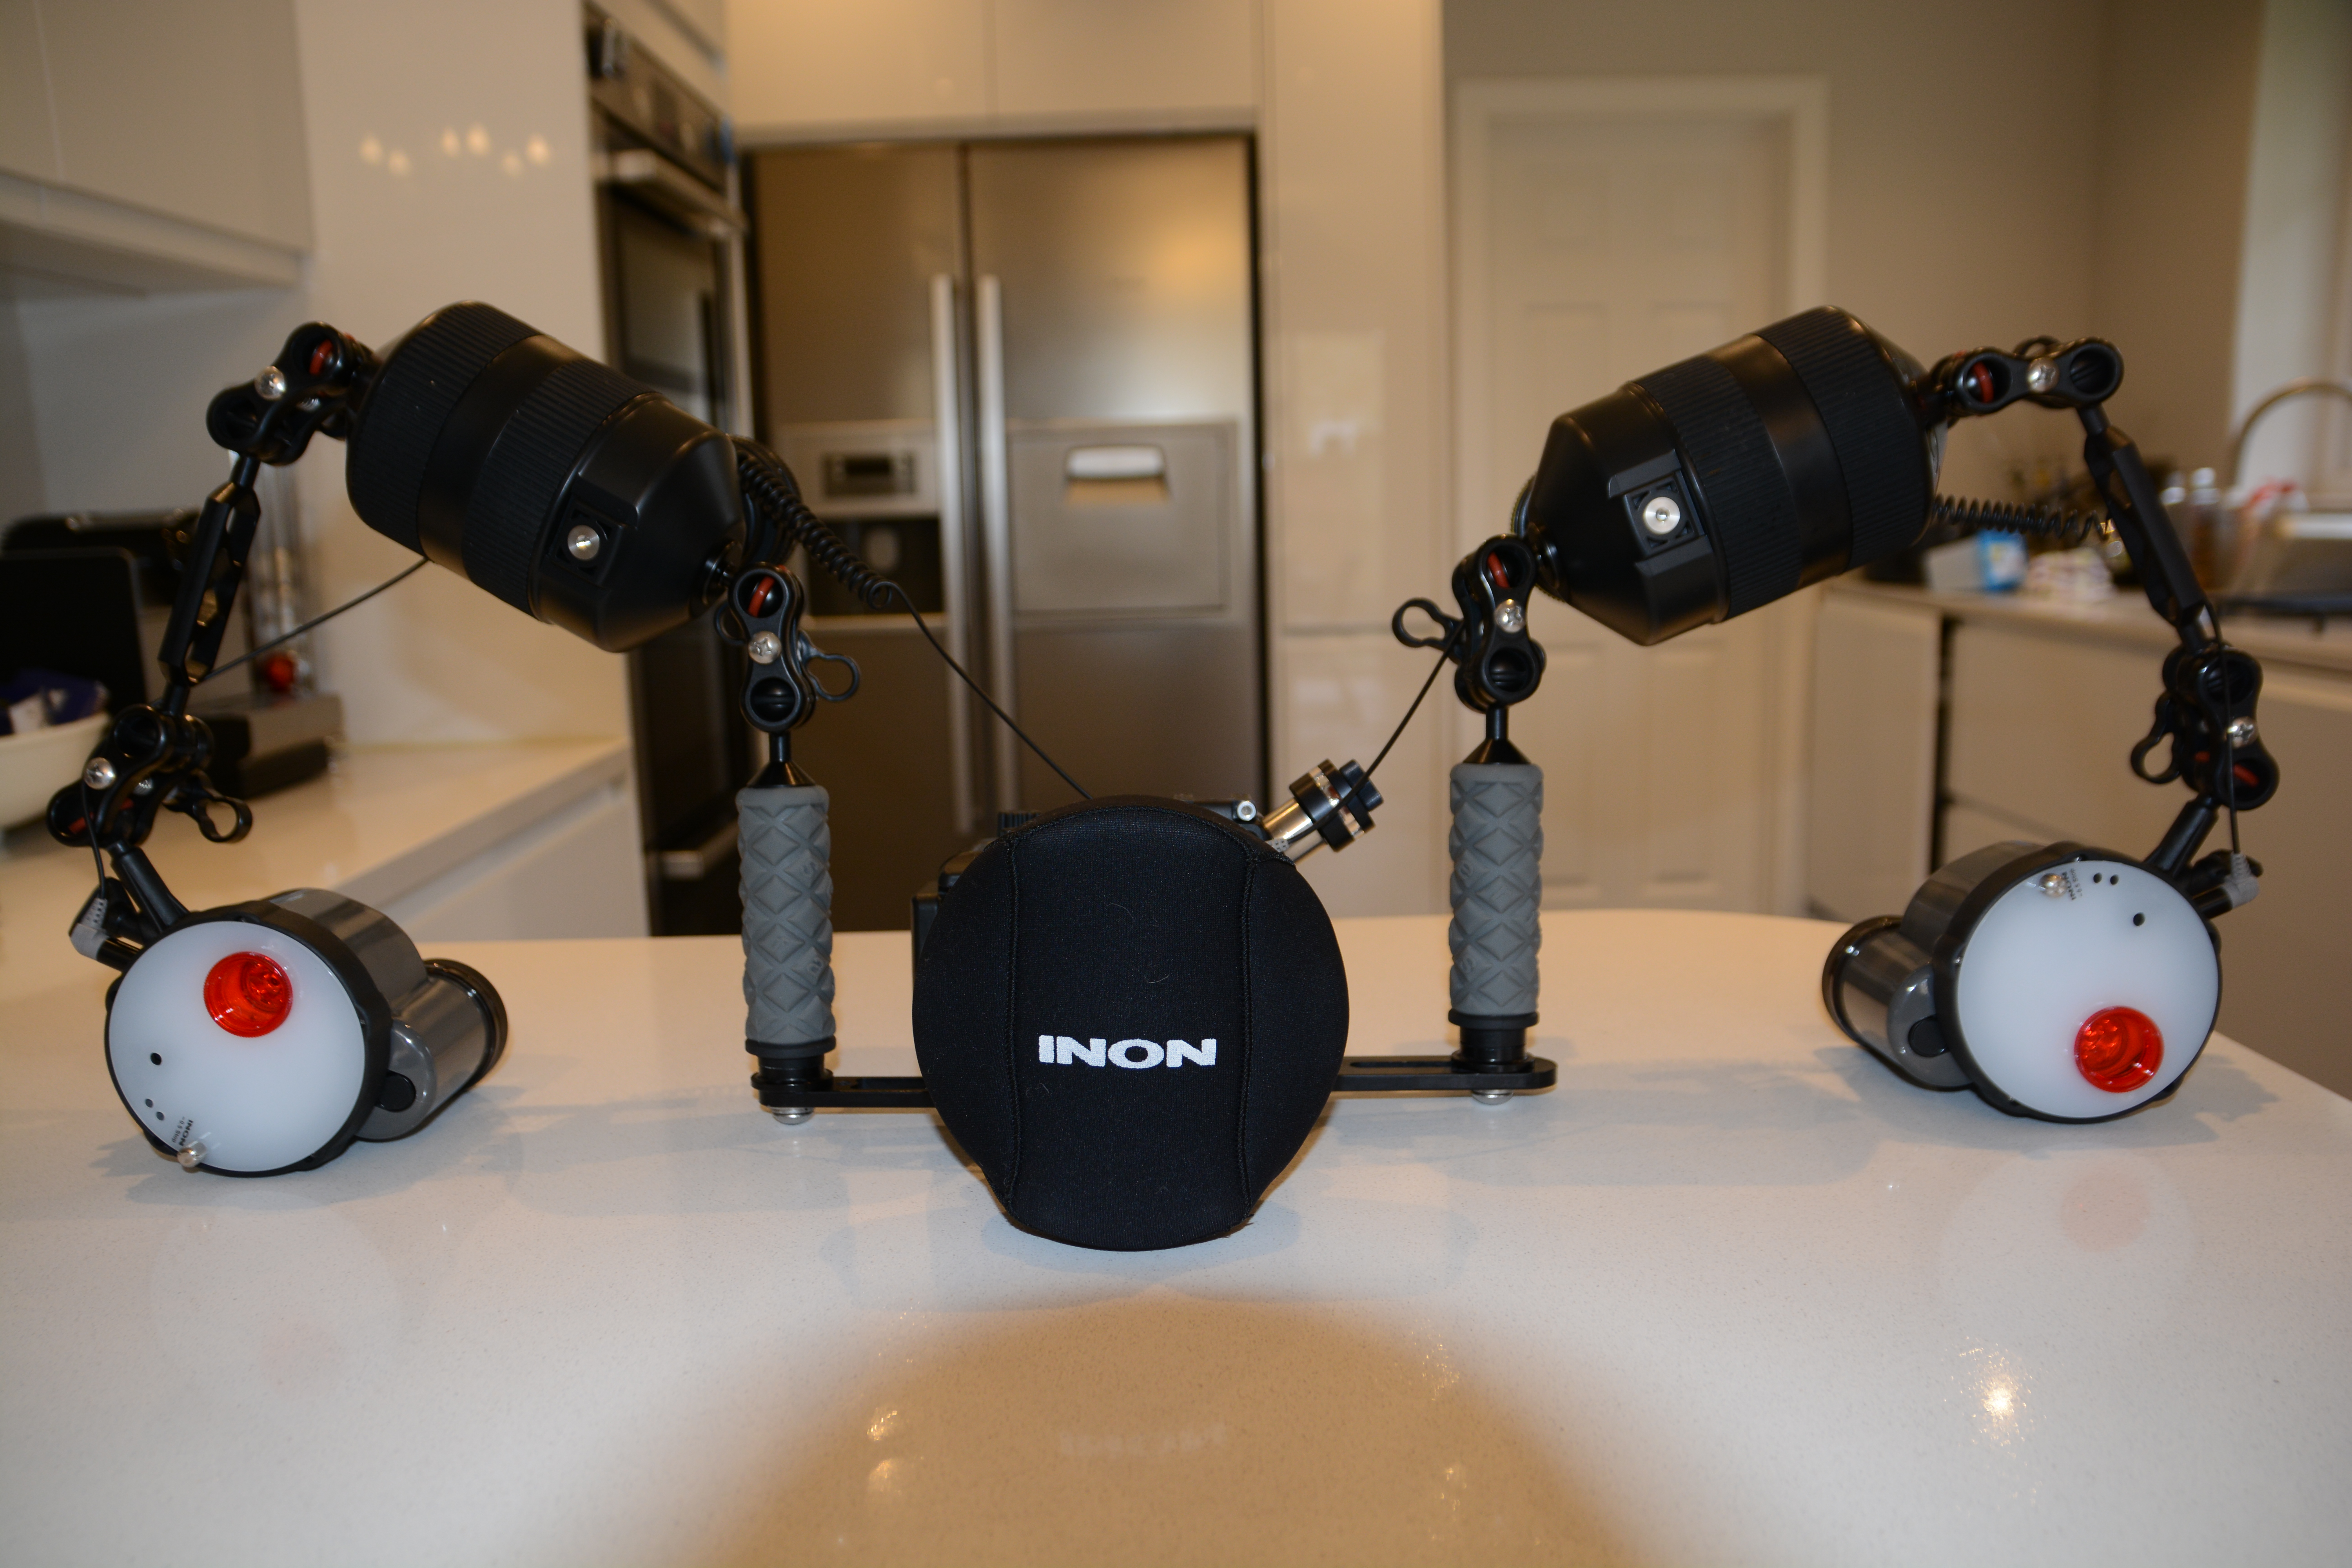
The Inon snoot is a great piece of kit especially because you can go from 20º to 100º depending on the parts you combine. There are fiber optics snoot on the market that are sensational for macro but do no wide angle, the Inon snoot can do wide angle with 86º 53º 46º coverage and narrower beams of 26º and 20º for smaller things or special effects.
This is a picture of the snoot set that I would recommend to all Inon strobe users.
Wide angle Snoot20 degree snootInon snoot kit
Obviously I could only capture semi static subjects with the snoot and the issue of fish portraits remains. The RX100 at 100mm equivalent requires 50cm focus distance that becomes 66cm in water. At this distance the capture area is rather large and unsuitable for smaller fish like the cardinals in the example so a solution would be to use an Inon UCL330 diopter to reduce distance to around 25-30 cm and therefore have a 2x magnification but I don’t have this lens anymore so can’t confirm. I will buy it again and do some more tests in a future trip.
I will post part II in the next days with some shots from the Thistlegorm so stay tuned
I have recently received a number of messages asking me why I am not upgrading to a micro 4:3 set up.
There are several reasons why I am not doing that even if my photo rig is nearly as heavy as a micro 4:3 or even a DSLR and have to do mostly with video not with stills.
I will try and touch on the key points in this post, please remember those are subjective and by no mean a criticism to other people that use 4:3 set up for video.
Note: my perspective is one of a typical non professional user that has limited time to get the best shots. This is not an absolute point of view it is clear that if you are a ‘pro’ and have much more time to spend to get few seconds of footage many considerations do not apply.
Composition
The way I have learned to love underwater video is the composition opportunities that it gives. My main source of inspiration is John Boyle and his book that remains the only valid handbook for what I am concerned even if it is a little old.
One of the classics of underwater video is the sequence: wide-medium-close-super close. On a micro four third in order to have good quality you would choose a macro lens or a wide angle lens, both those choices will prevent a number of shots you either do close and super close or wide and medium and maybe close but not super close.
With a camera with a fixed lens with a range of 28-100mm and wet lenses you can cover the whole spectrum of shots although you may need to swap lenses during the shot the possibility is there.
Optical Quality
Some users try to use one lens to catch all, usually the choice is a Panasonic 14-42mm or an Olympus 12-50mm. However this is not as exciting as it seems in the first place. I have run some comparisons on the optics on DXOMark assuming the 4:3 are on a Panasonic GH3 that really is a mini SLR you can see the results by yourself
Comparison Panasonic 14-42 vs RX100II vs Olympus 12-50
The RX100II gives better quality than both those lenses and especially it does it at f/1.8 versus the f/3.5 of f/4 of the other lenses.
The RX100 does have issues of distortion and chromatic aberration at the edges because of the extensive correction but is overall sharper at wider aperture. This is very important for video that is shot at ambient light.
Wet Lenses
You can add M67 lenses to the Panasonic 14-42 and the 35 macro port (am talking about Nauticam ports here) the results will be worse than the RX100 as the starting point is worst. There is no M67 mount to use the Olympus 12-50mm lens, I will try to see if the flip diopter can do that without vignette but still this gives only 24mm against the 18mm of the RX100 with an Inon wet lens.
Video Quality
The only cameras that are decent are Panasonic as Olympus video is pathetic. However only the GH3/4 have anything better than a compact in terms of recording formats. The new Sony RX100 Mark III with 50 mbps 24/25p seems almost equally interesting.
Stabilisation
Micro 4:3 cameras do not have in camera stabilization in video mode and most of the lenses (the 14-42 is an exception) do not have optical stabilizers to contain costs. It follows that close ups are shaky and even wide angle has jumps.
Conclusion
With all the considerations above it follows the only real set up would be a lens with a stabilizer, the only available that can also shoot close up with a wet lens is the 14-42mm Panasonic. However this lens seems to have worst optical quality than the on-board lens of the RX100II (I have checked some real life shots myself). The only benefit left is the higher bit rate recording format and this is only if you go on a GH3/GH4, with higher recording formats available for the RX100 Mark III and with an announced Panasonic LX8 with potential 4K I personally do not see a reason to jump on the 4:3 wagon for video. I do believe though that if you take mainly stills there is a compelling reason for 4:3 as you can have one camera fitting almost everything and smaller to pack than a DSLR (but not that much and forget about 200-400mm f/2.8 tele lenses).
Snell’s window is a phenomenon by which an underwater viewer sees everything above the surface through a cone of light of width of about 96 degrees [From Martin Edge: Underwater Photography].
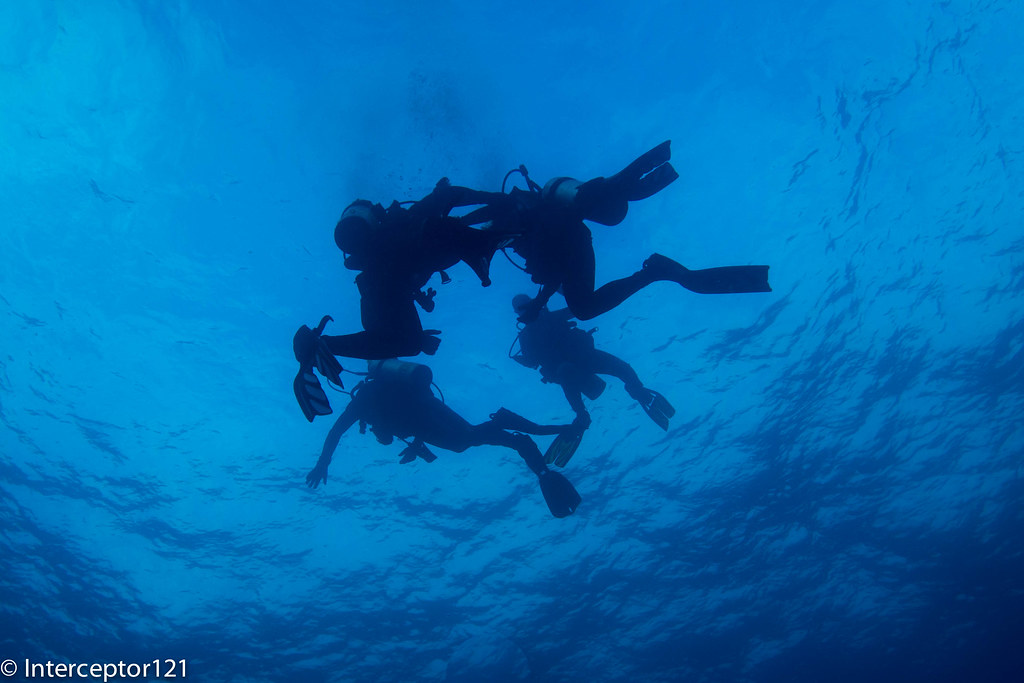
During my last Gapapagos Trip there was a bit of an issue in terms of photography subjects, in essence most of them were fairly big like sharks, turtles, eagle rays and of course divers.
After a while shooting or trying to shoot those uncooperative models I had the idea to try and do different things such as silhouettes and Snell windows. You can also combine both as we did in this case.
So what do you need to shoot image of a Snell window:
1. A lens that is wide enough, you need a bit more than 96º field of view to take the whole window
2. Something interesting on the surface (if you have calm water you can see right through)
3. An interesting subject as silhouette to contrast the clear water if there are waves and you can’t easily see through.
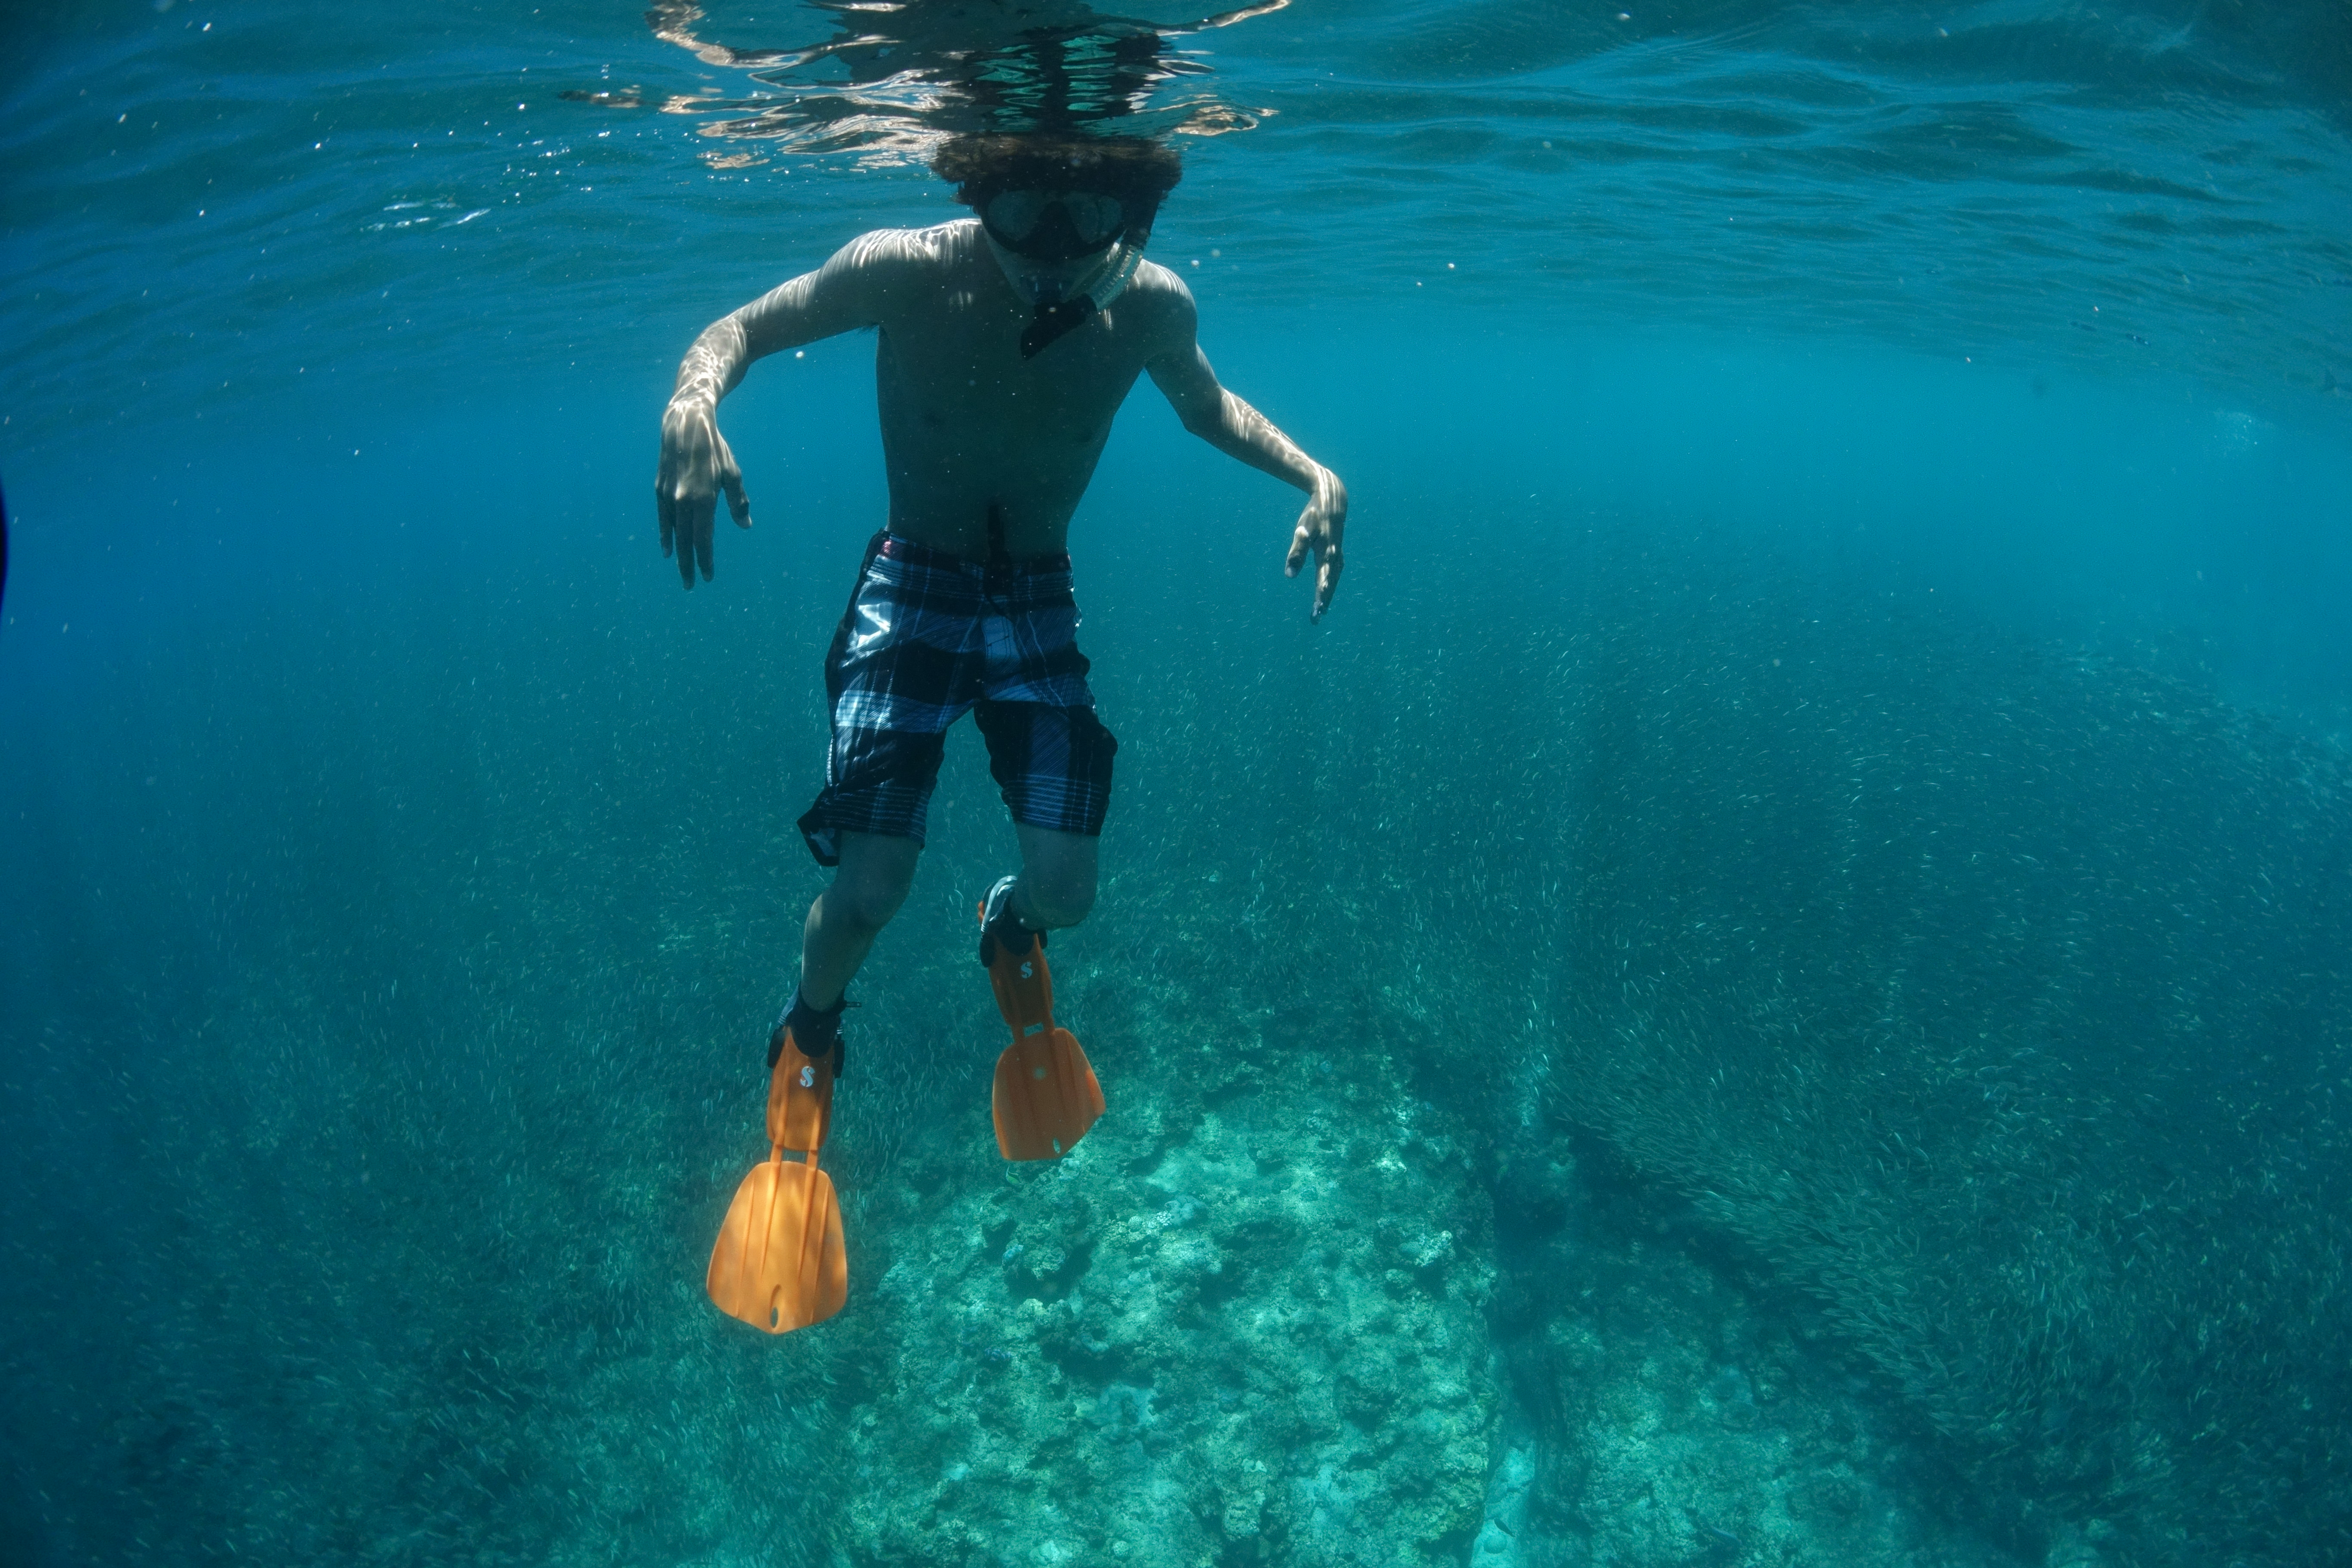
A normal flat wet wide angle lens for our compact camera is not sufficient to capture the snell’s windows as in this example
Divers at Safety Stop – taken with Inon UWL-H100 at wide end
Take into account that even with a fisheye lens on an SLR you can’t capture the Snell’s window on the vertical axis as the field of view will fall short a few degrees.
With a compact camera a semifisheye lens will capture the edges of the window if correctly aimed on the diagonal and horizontal dimensions and will fall short on the vertical.
Snell window divers exiting the water or ascending – UWL-04 semi fisheye lens Canon S95
I am reporting some of the calculated field of view for the most popular lenses at present for compact at 3:2 image format
Wet Lens
Diag FOV
Hor Fov
Ver FOV
Flare/Ghost
UWL-04
151.95
123.22
79.85
Ghost Possible
UWL-100 28AD
149.01
120.97
78.48
No
UWL-28
160.56
129.75
83.81
Both
UWL-H100
157.85
127.71
82.58
No
All those lenses will take a good Snell’s window I have not tried the UWL-28 and I have some concerns this lens may flare as it usually does but I do not know for sure.
Both the Inon lenses produce sharp images with no defect.
In general small sensor cameras like the Canon S series will work fine with the fix/idas lenses and should produce good results also of normal shots through the water.
Using the UWL-04 or UWL-28 with large sensor cameras like the RX100 there could be a sharpness issue a larger apertures so make sure you close that at f/8 or smaller instead of using the shutter speed to balance exposure if you want to go through the water.
Snell’s windows are uncommon with compact camera shooters as they are considered an advanced subject but they can be taken. I will be taking more in a next trip to Egypt I hope for calm surface conditions so I can go through the surface with the shots. Failing that this is very easy to practice in a swimming pool.
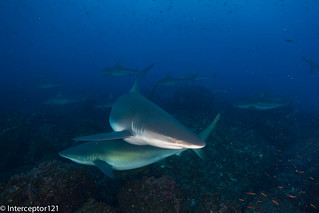
I have mentioned the conditions we found in Galapagos in the previous post so no need to repeat myself.
One of the things I was told before going is that the last dive of the day tends to be pretty dark so not good for video, therefore I used this for photos were I was expecting to use strobes at all times.
I made a mistake as I should have taken the still rig also on the second cousins rock dive anyway I am quite happy on how things turned out considering I did only 4 dives and took 117 photos I am pretty happy I could pick 20 that I consider decent.
The whole set is here
The rig I decided to pack at the end had 6+8 inches segment so it looked pretty cumbersome on land.
Photo RIg on Land
In water the setup looked like a glider with a significant wing span
Photo Rig Underwater
The reason why I took arms so long is that I was expecting sharks to be 4-6 feet away and quite a bit of particles in the water.
I was right. Just have a look at the following two shots, the first taken with a Canon S95 and a single 8″ arm.
Turtle with single strobe 8″ arm
You can see the considerable amount of backscatter despite the 1/1600 shutter speed.
This is another turtle on the same dive
Turtle with twin strobes
This time two strobes on the longer arms are used, even at 1/320 this looks neat. The turtle looks bigger as the lens is not as wide as the previous, shooting distance is the same.
The arms proved to be good for the sharks as expected, I used aperture of f/4 for most shots, ISO 100/200 and shutter 1/60 to 1/125
This is emotionally the best shot
Galapagos Shark Watching me
Later on in the snorkeling trips I took couple of split shots.
Unfortunately the weather was not good and the sky cloudy so I had to play with the graduated filter.
Galapagos Penguin Split Shot
The purist will notice that the water line is not neat, as I am shooting with a wet lens the back of the lens has water as well so to avoid to see that I shoot portrait with the back of the lens in the water, which is a limitation but on a good day will produce interesting shots regardless, also the lens is only 9cm diameter and is flat (Inon UWL-H100)
I took some close ups but even the sea horses were huge so no need for close up lenses.
Giant Pacific Seahorse
Funny enough I took this at f/5.6 1/60 after reading on DXOMark that the RX100 resolution is actually better at f/5.6 than it is at f/11.
The lens is at 35mm equivalent at the shooting distance I used the depth of field is only a couple of cm and as the background is quite plain I did not bother trying a black background that I could possibly not even achieve. This was a TTL shot whilst all the sharks and wide angle were taken with the strobes in manual.
Another great feature on land of the RX100 is the panorama, which I used in Bartolome and other places
Bartolome Panorama
In general the conditions were very difficult and I am happy with what I could achieve in just 4 dives.
I will be taking the same arms and strobes configuration to the Red Sea in a few weeks but with the Inon UWL-100 with dome. I expect better results as the conditions are usually fabulous in comparison, probably I could do with shorter arms but once in water the set up is not heavy so I will keep it like that
During the London Dive Show I attended a talk from Martin where he covered a number of shooting situations and how to deal with them in terms of composition and settings.
There was a promotion for a two for one tuition day with him that my buddy was keen to take so few months later we made our way to Dorset for a day of underwater photography with Martin.
This will be my first day of shooting with the RX100 Mark II albeit in a pool with my new arms and lenses so I was looking forward to it.
We arrived in Poole the night before and got ready for an 8.30 start with Martin.
We started off with a review of some basic exposure concepts and then looked at competition winning pictures and trying to identify what makes a wow picture. It was extremely useful!
Afterwards we went through our trips pictures so he could see what needed improving. Then look at what was needed for the next trip.
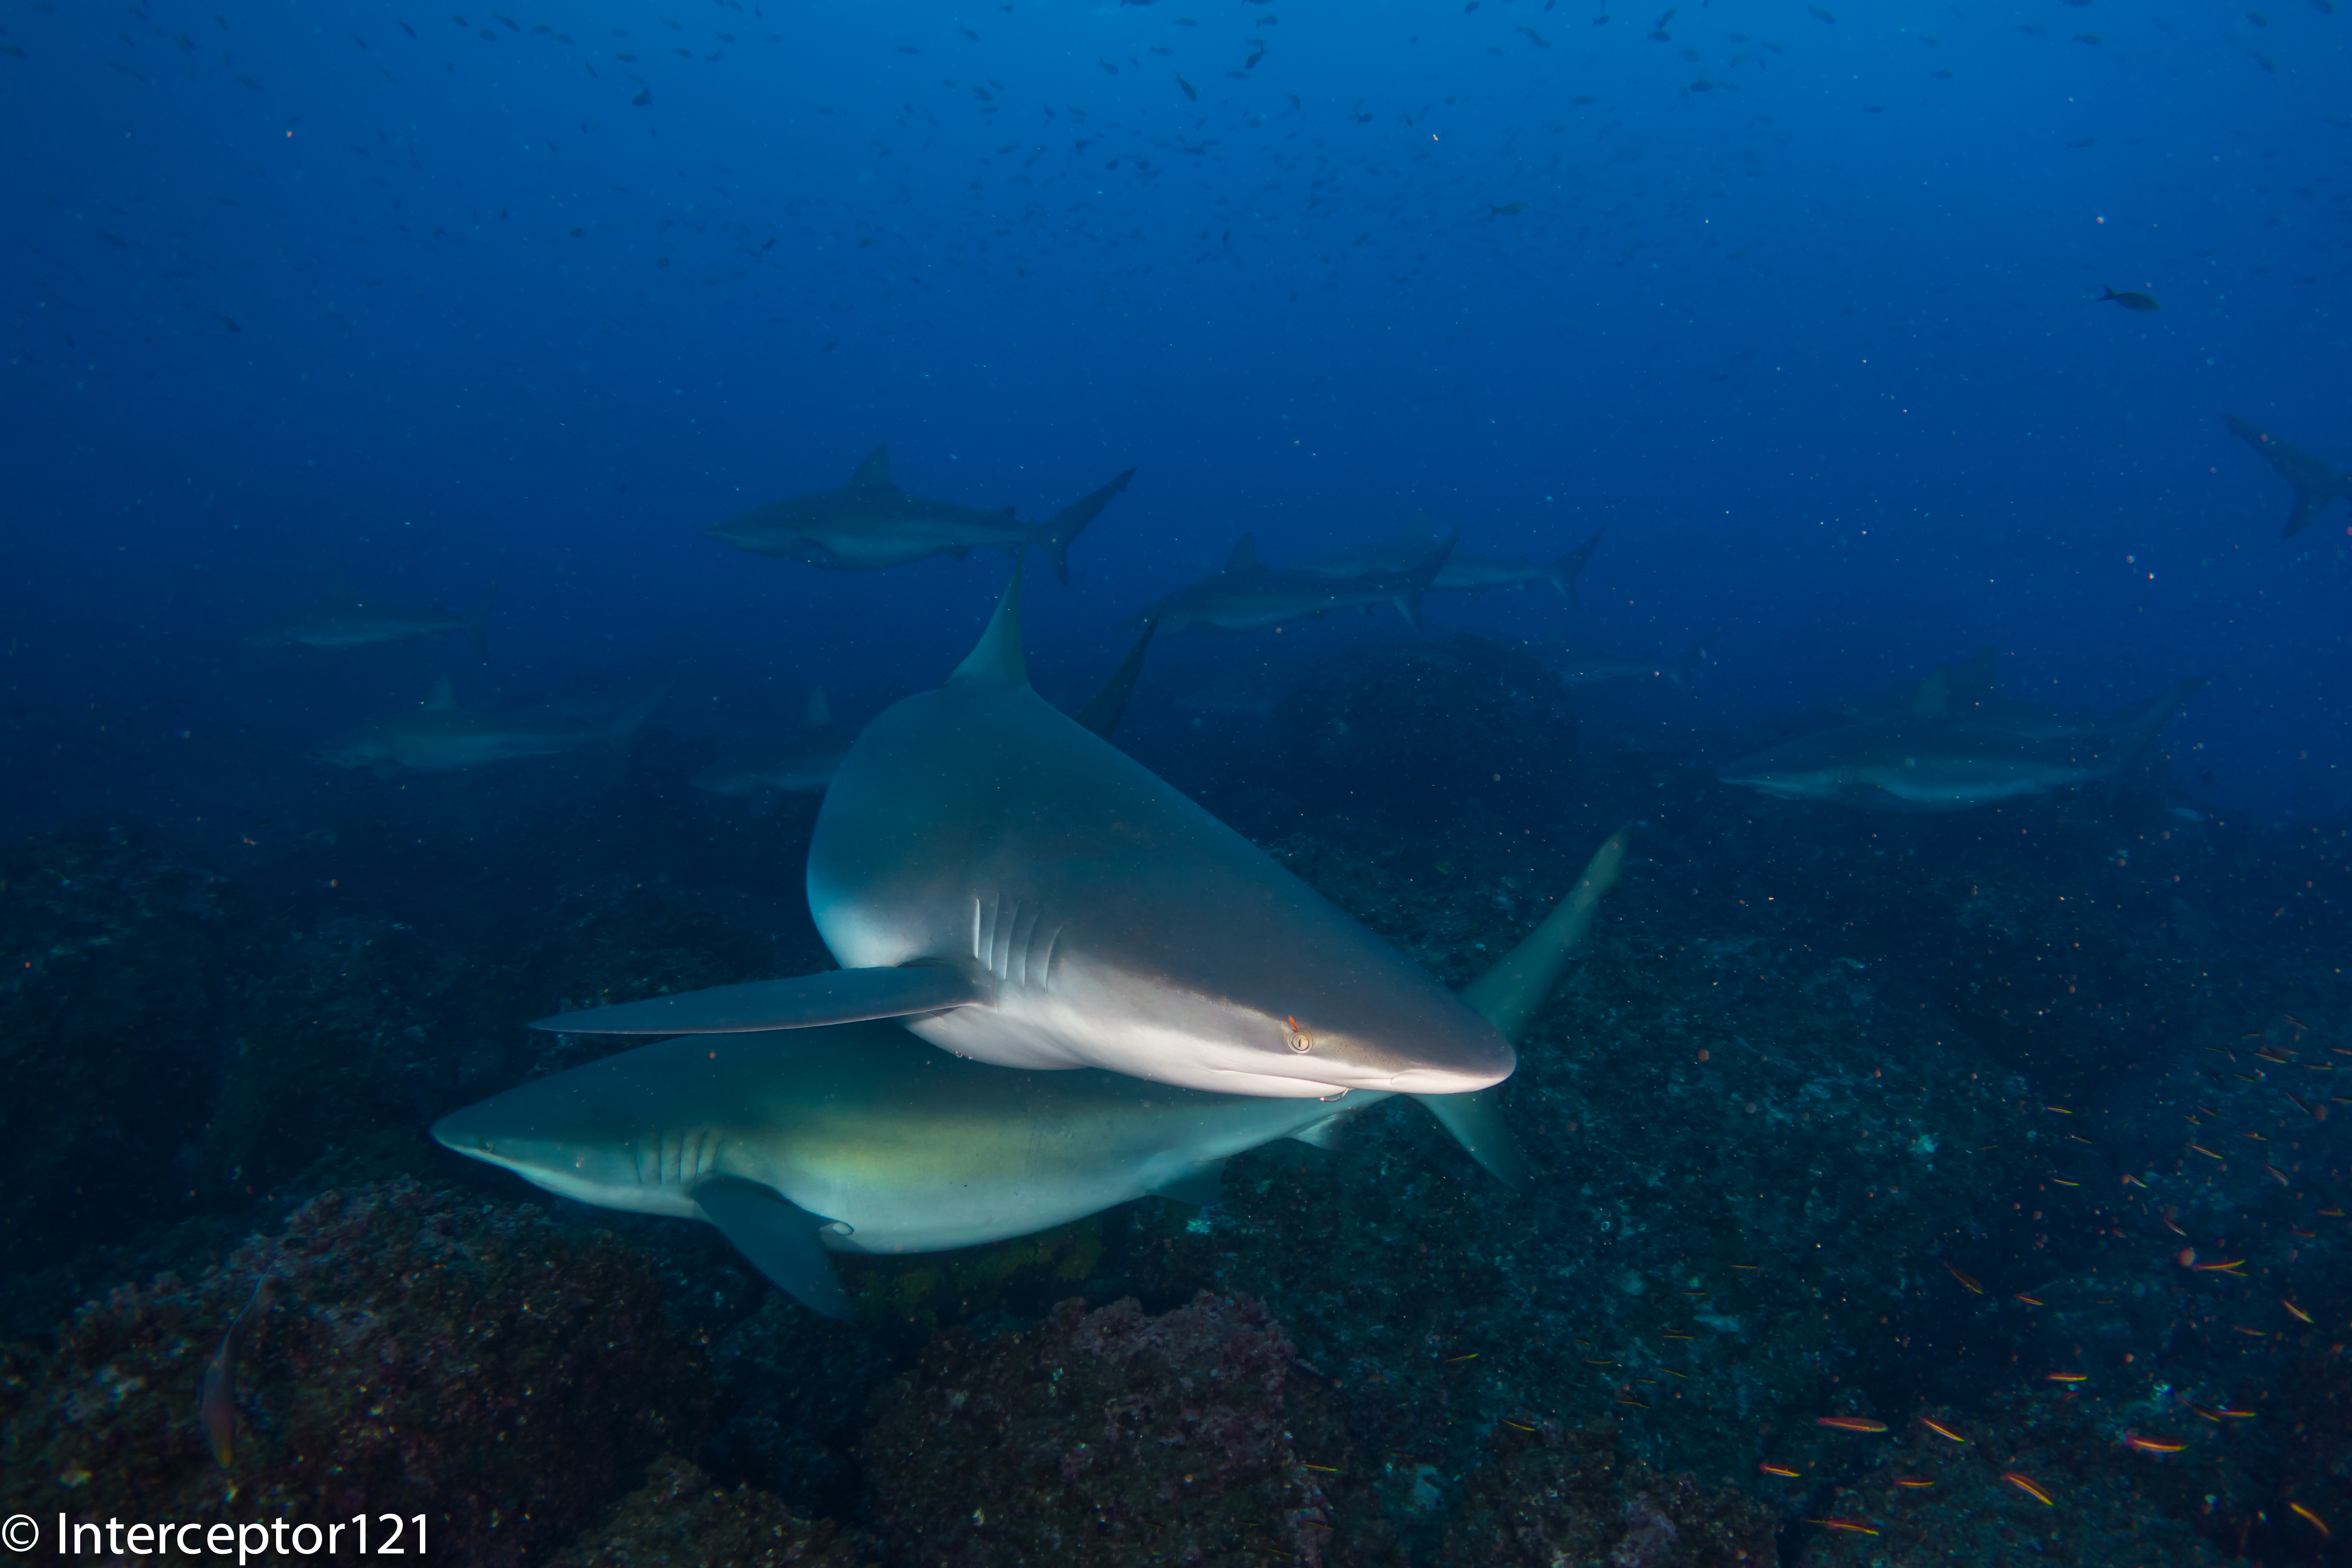
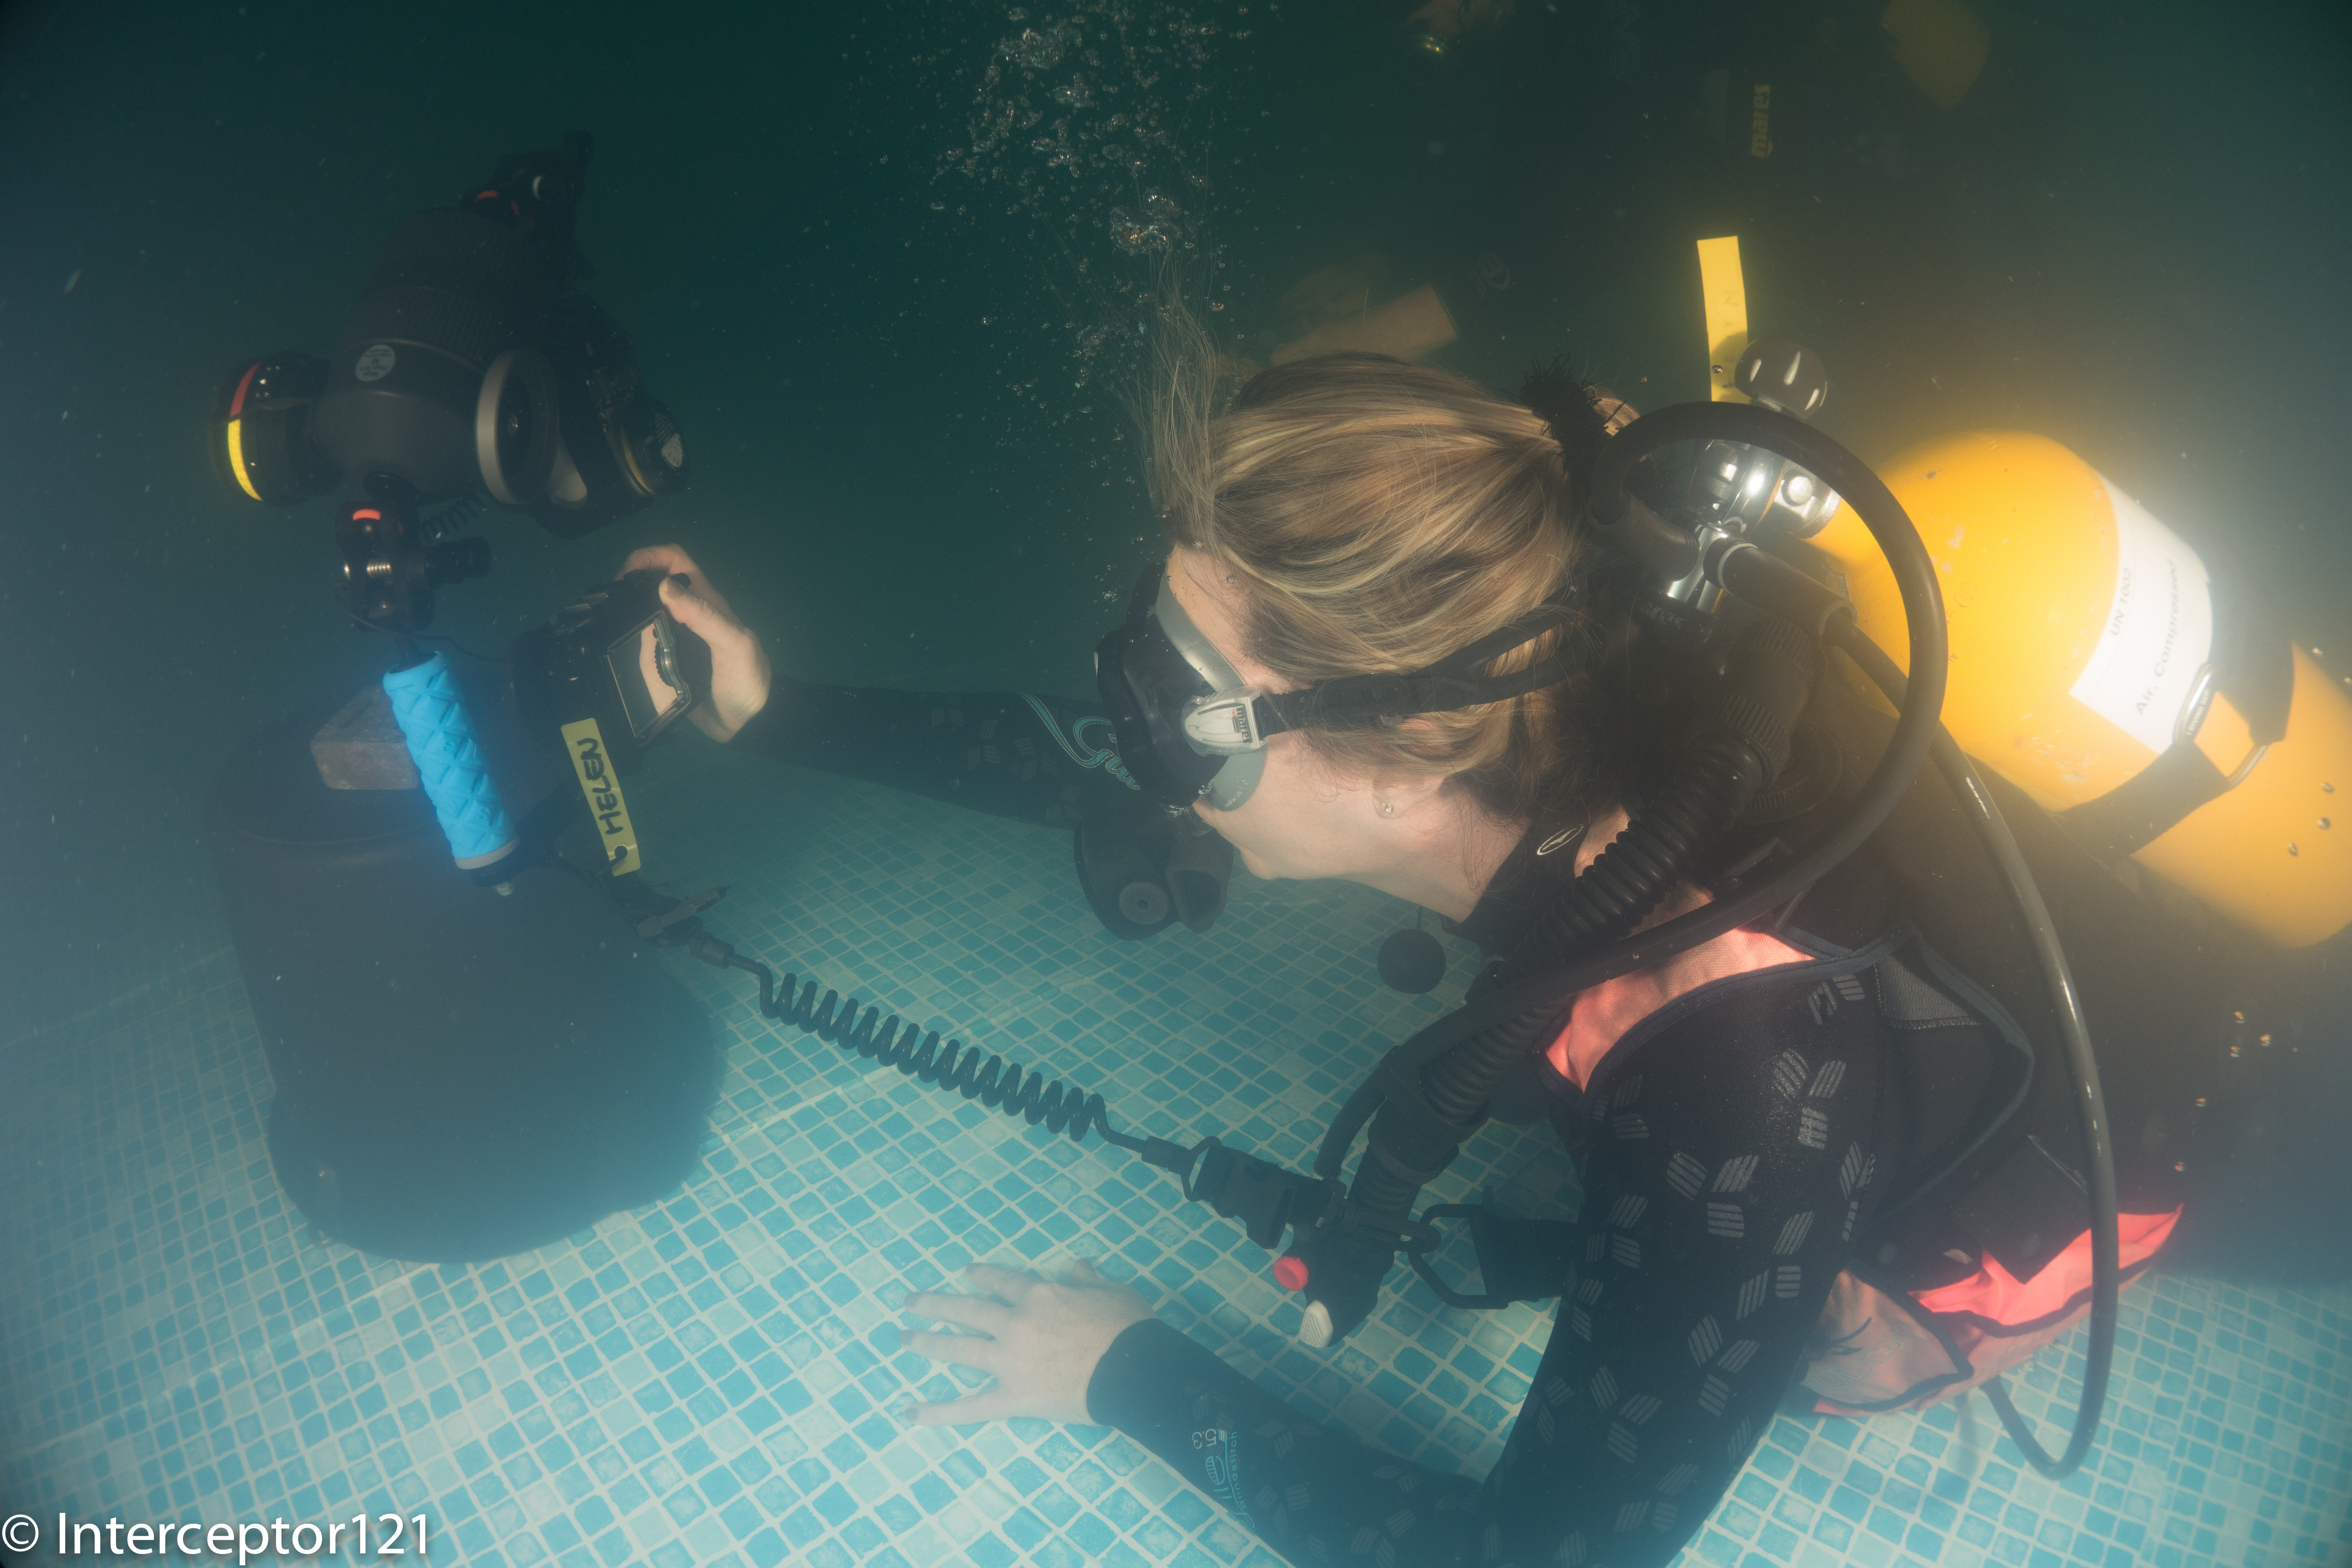
With that in mind we set up to jump in the pool to take some pictures the objective was to improve my buddy close ups and portraits as apparently her wide angle is as good as it gets with the Canon S95 used see featured image on this post.
Pool conditions were low visibility and plenty of suspended particles as the pool is used for kids swimming lessons let me give you an idea!
Pool Conditions
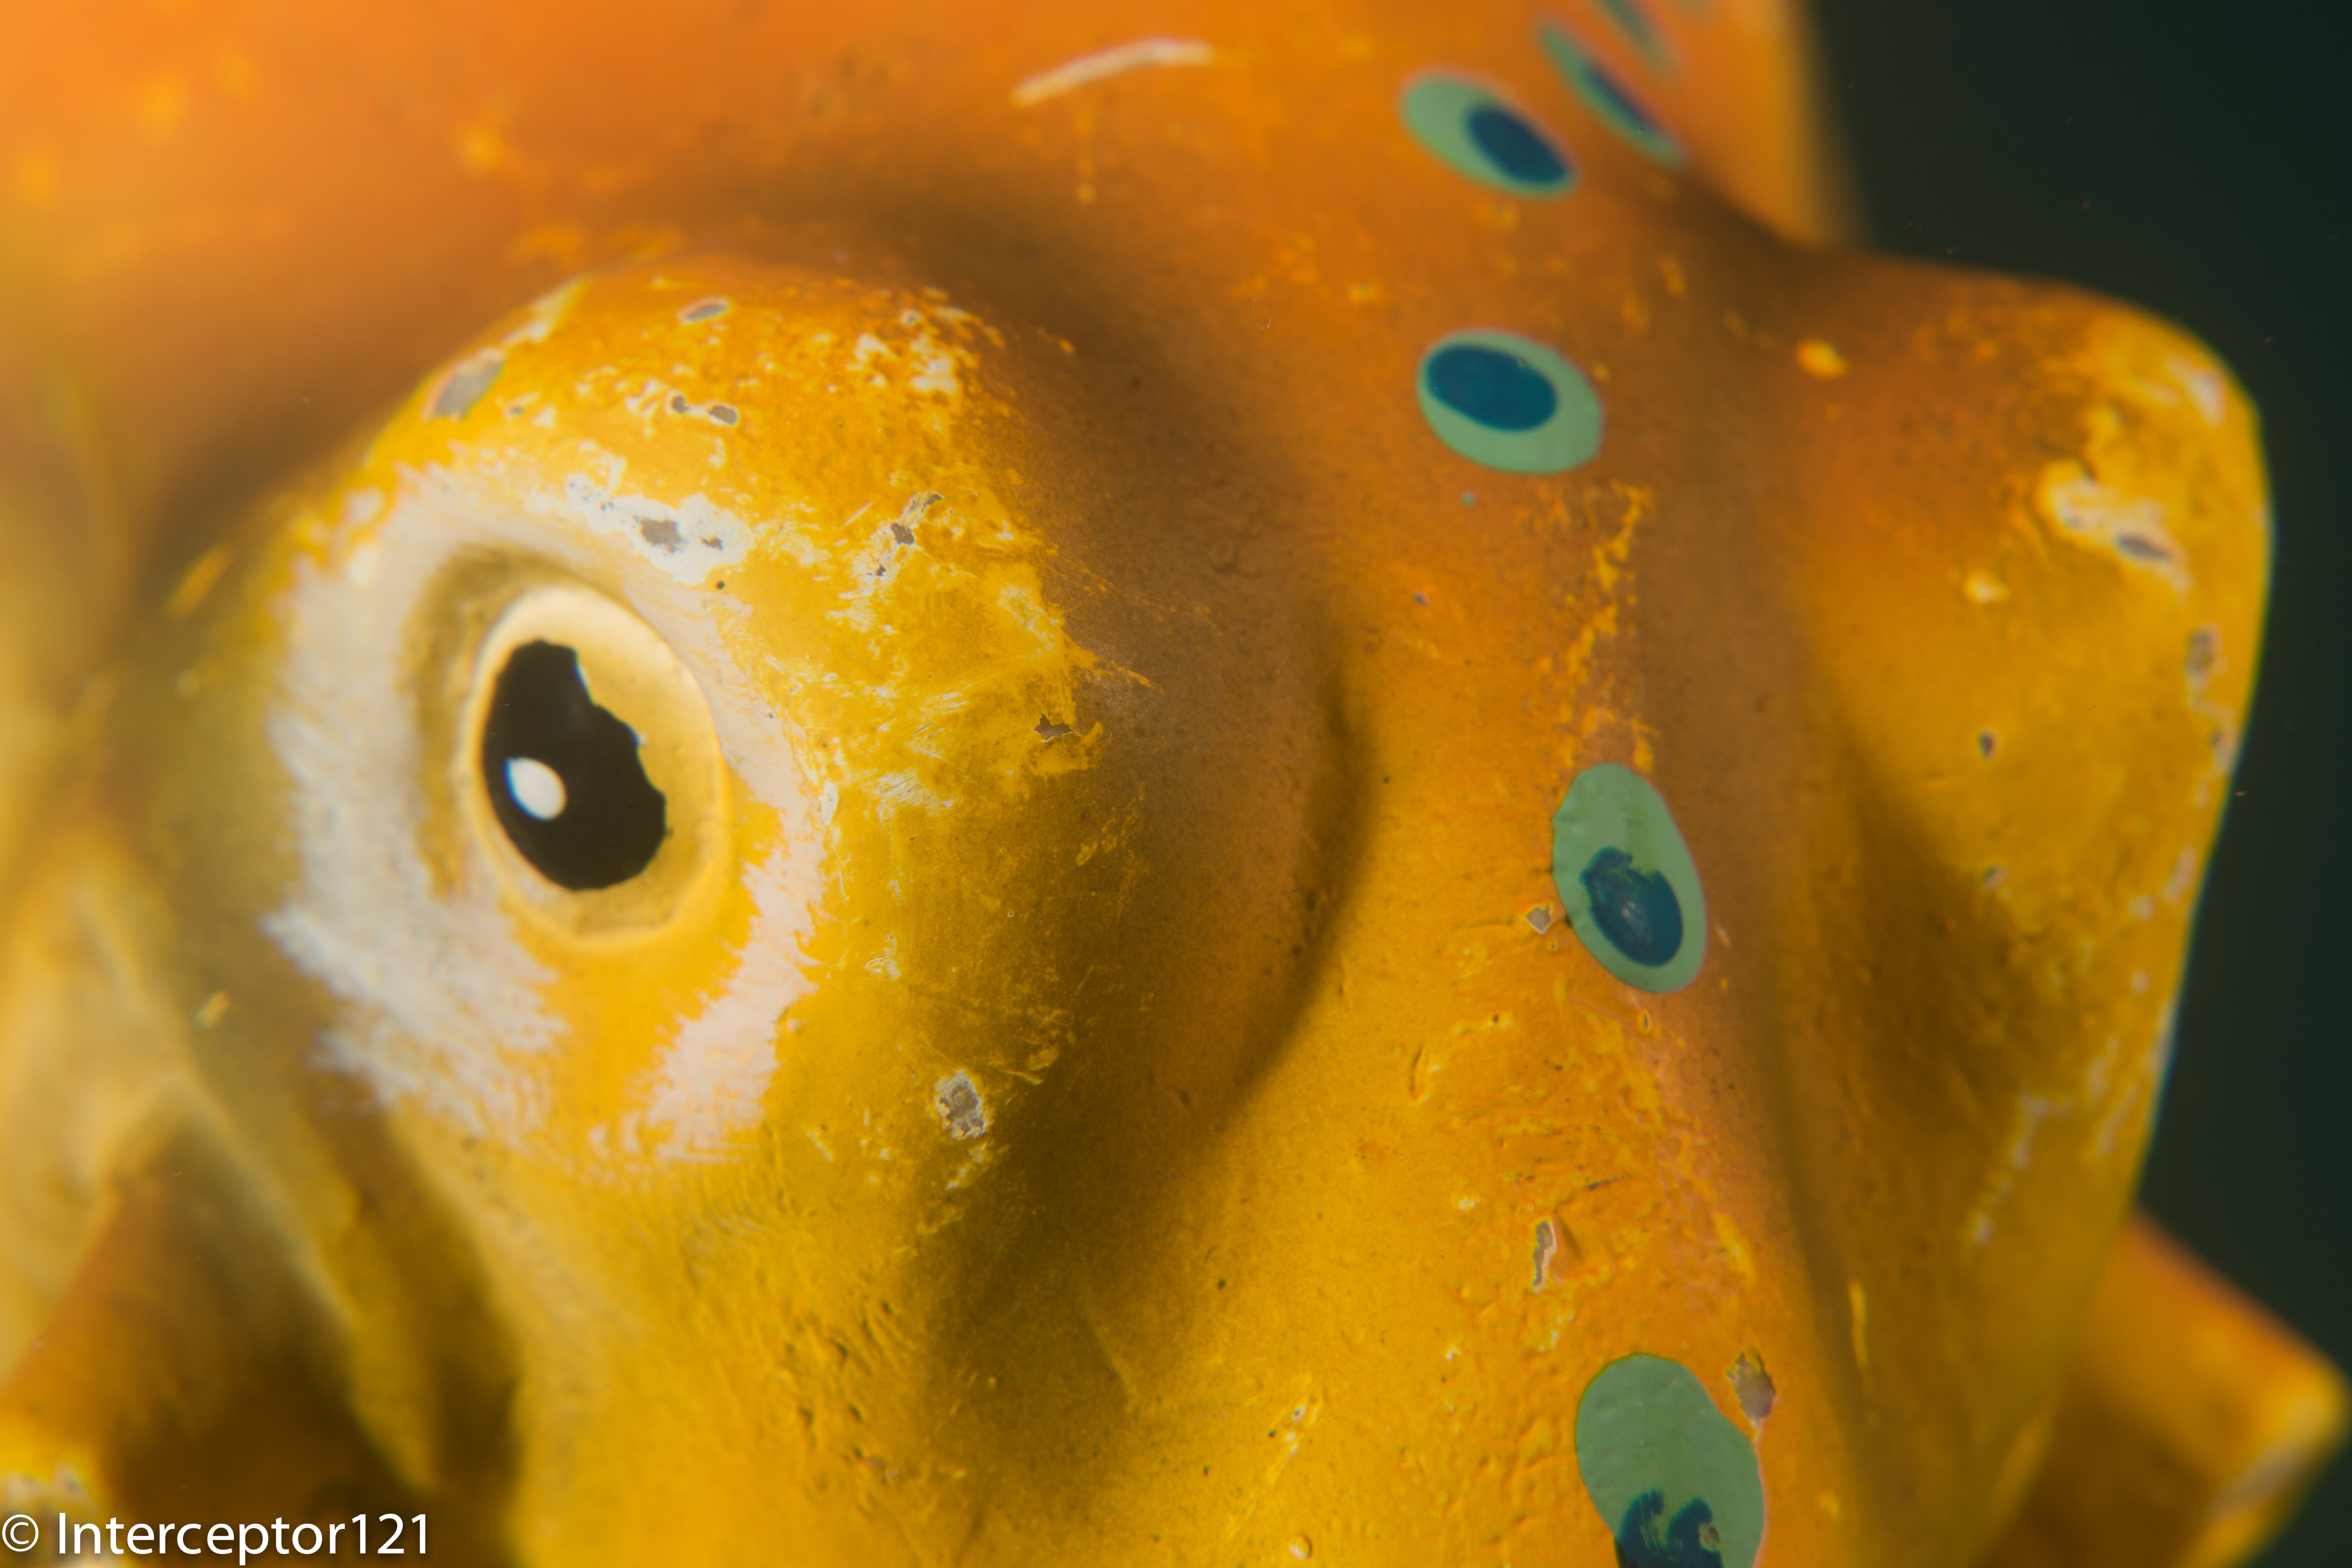
The first task was to shoot a frog with a view of eliminating shadows in its mouth. Start with one strobe and finish off with two.
Frog at 28mm
The frog with the bare port gives you an idea of the size and the complexity of the task with one strobe. There are shadows in his mouth.
Frog at 50mm
I then shot a portrait at 50mm, the reason why you see shadows more on the left is because I set the strobe at different powers.
Frog single diopter
The magnification of the RX100 is little so I went on with a first Inon UCL-165 and full zoom at 100mm equivalent. Note that everything is pretty much sharp at f/11.
Frog Double Diopter
With two Inon UCL-165 focusing on the mouth will result in this and the eyes being in focus and the rest blurred because of lack of depth of field.
Octopus fisheye
I then moved to an Octopus rich of textures. I took the first shot with my Inon UWL-100 28AD with dome.
Octopus at 28mm
The same octo at 28mm fills the frame much more of course.
Octopus at 50mm
The Octopus at 50mm looks even better. I have topped up the lighting on this one.
Octopus single diopter
I then took this guy with a single UCL-165 note the depth of field insufficient to keep the back of the head in focus, results though are exceptional.
Octopus double diopter
With two close up lenses we go back to the depth of field problem even at f/11.
I thought I had at that point nailed all focus and strobe issues, especially considering I shot with single auto focus, I did not bother using manual focus at all with exception of some double diopter shots.
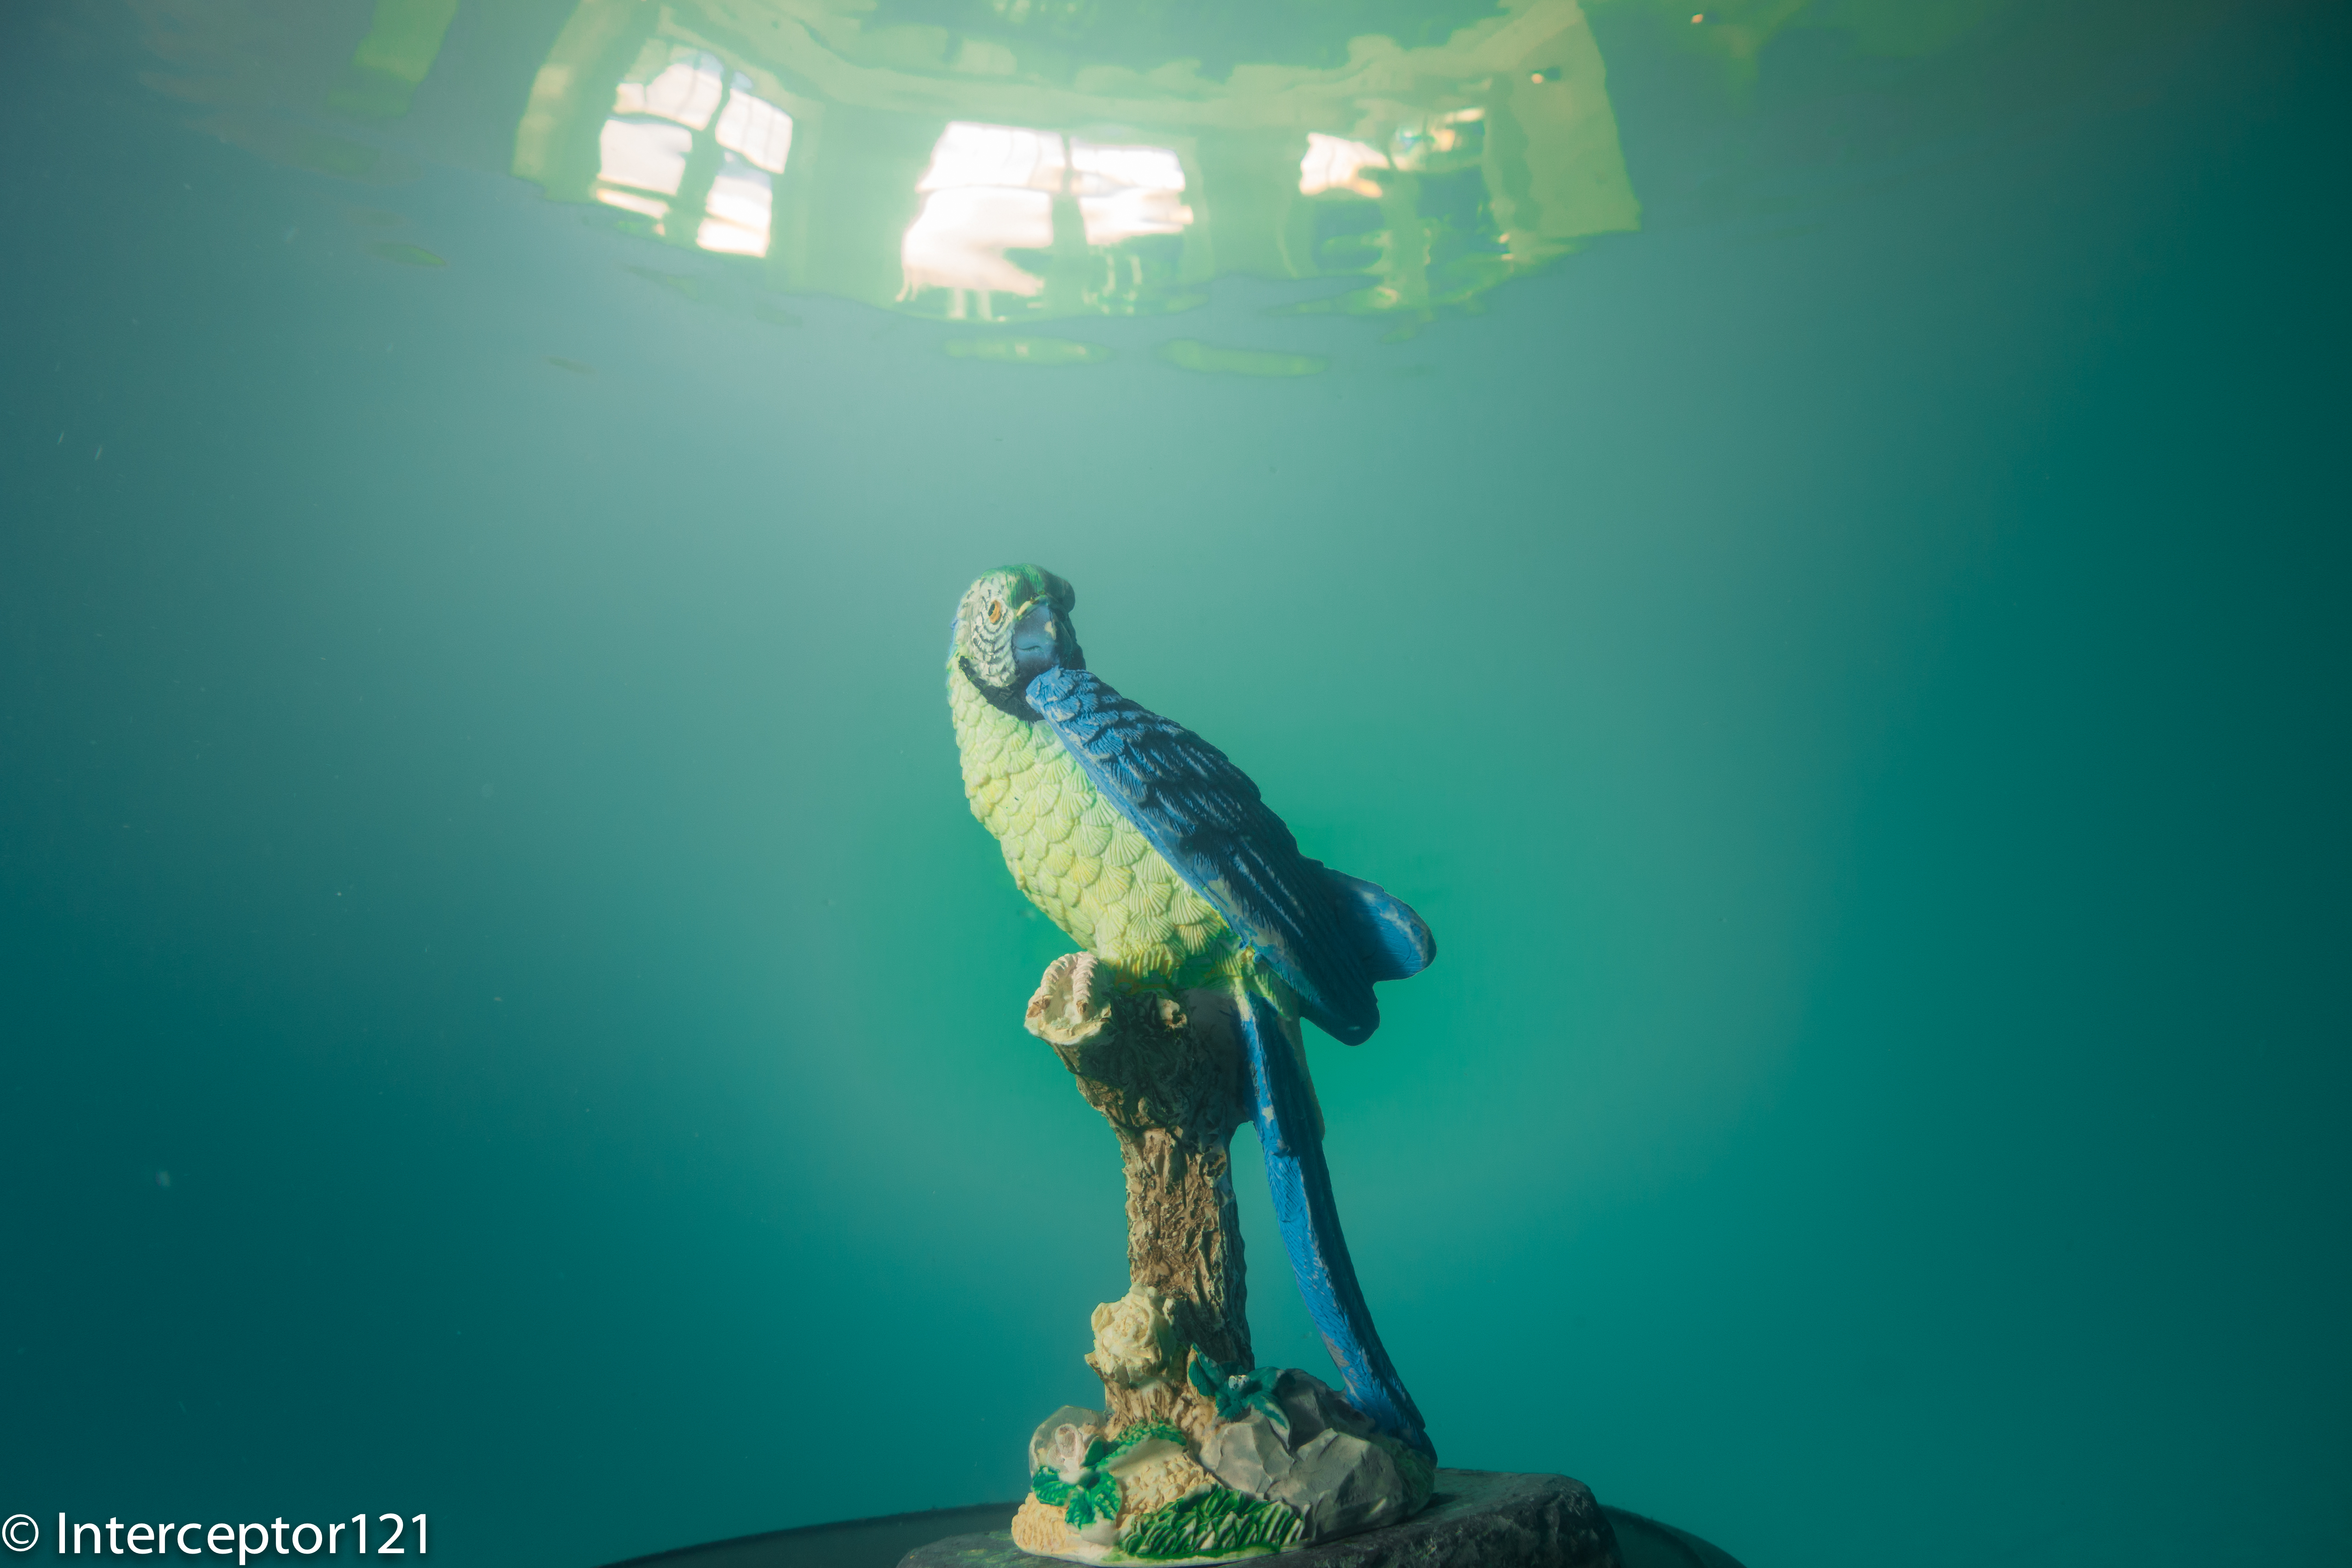
I then tried a few surface reflections with the fisheye this being the best.
Falcon Fisheye
You can see the outside of the pool and the windows on the top.
Family Fisheye
Afterwards made my own composition of statues for a fisheye shot that I think came out very well. The Z240 performed extremely well in both TTL and external auto as well as manual.
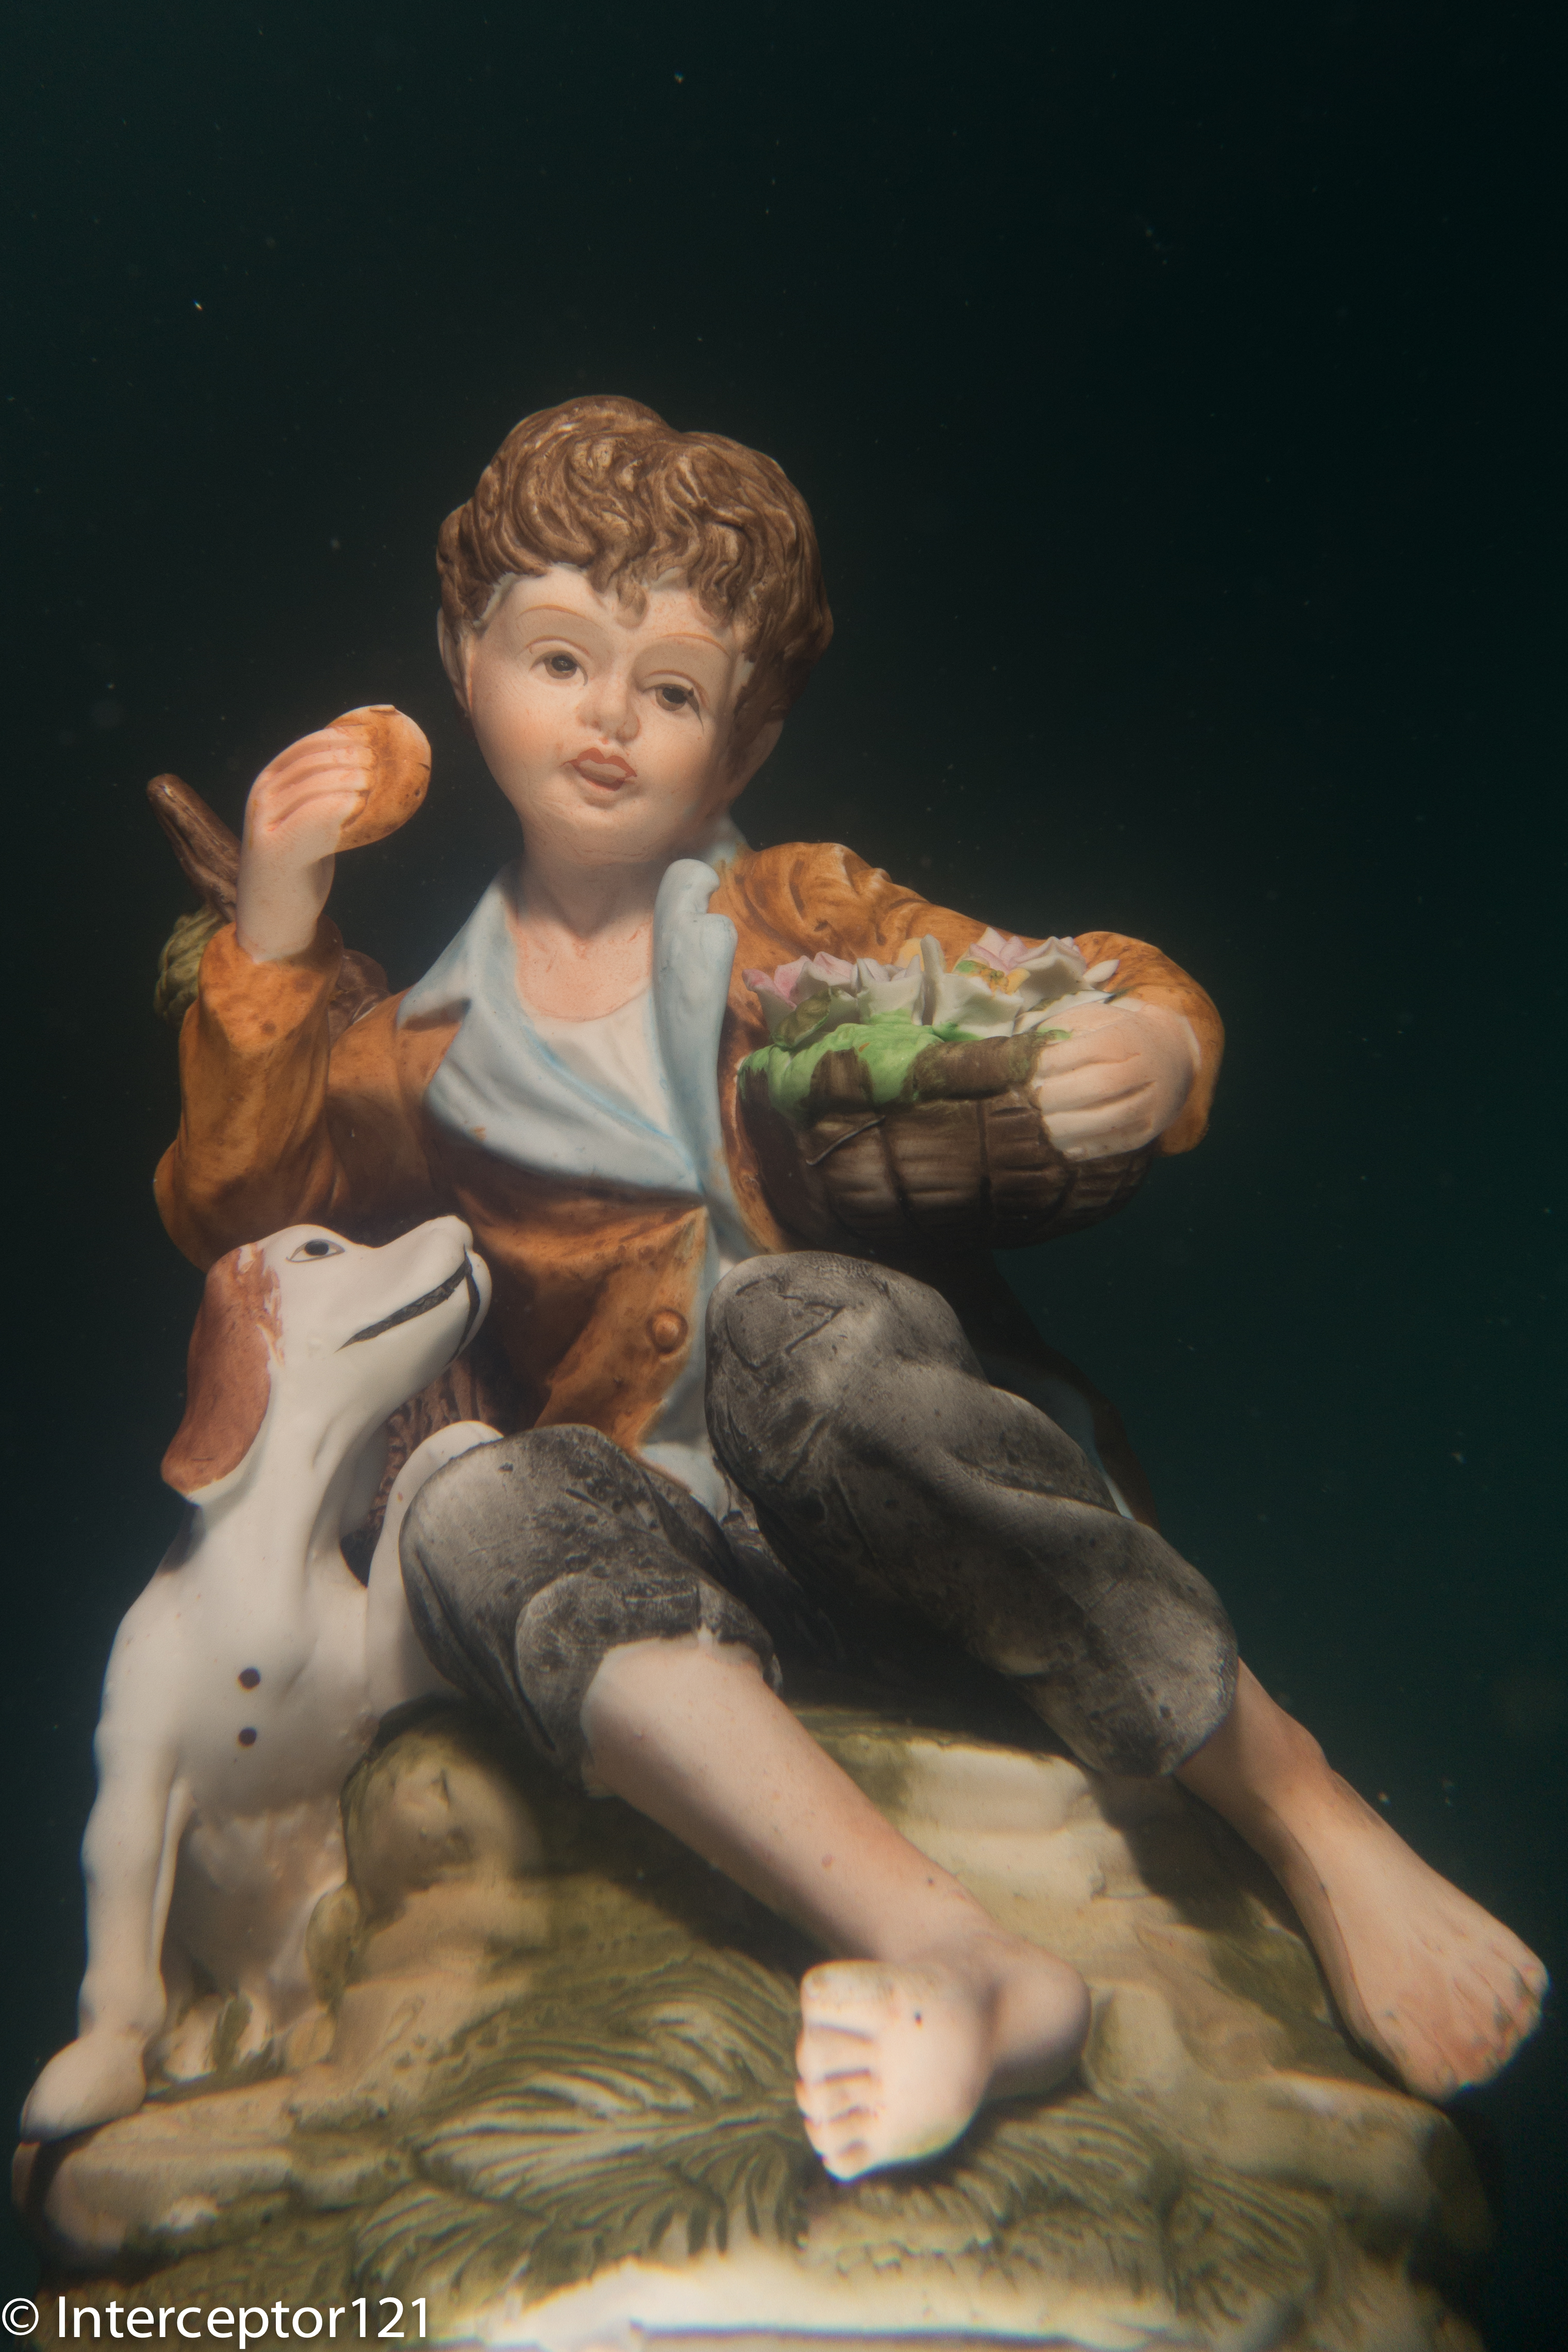
Child with dog
Martin asked me to have a go at the child with the dog as it is extremely difficult to lit up properly.
I went for an alternative strobe placement with light from the bottom as if it was in a gallery. He was impressed with the results.
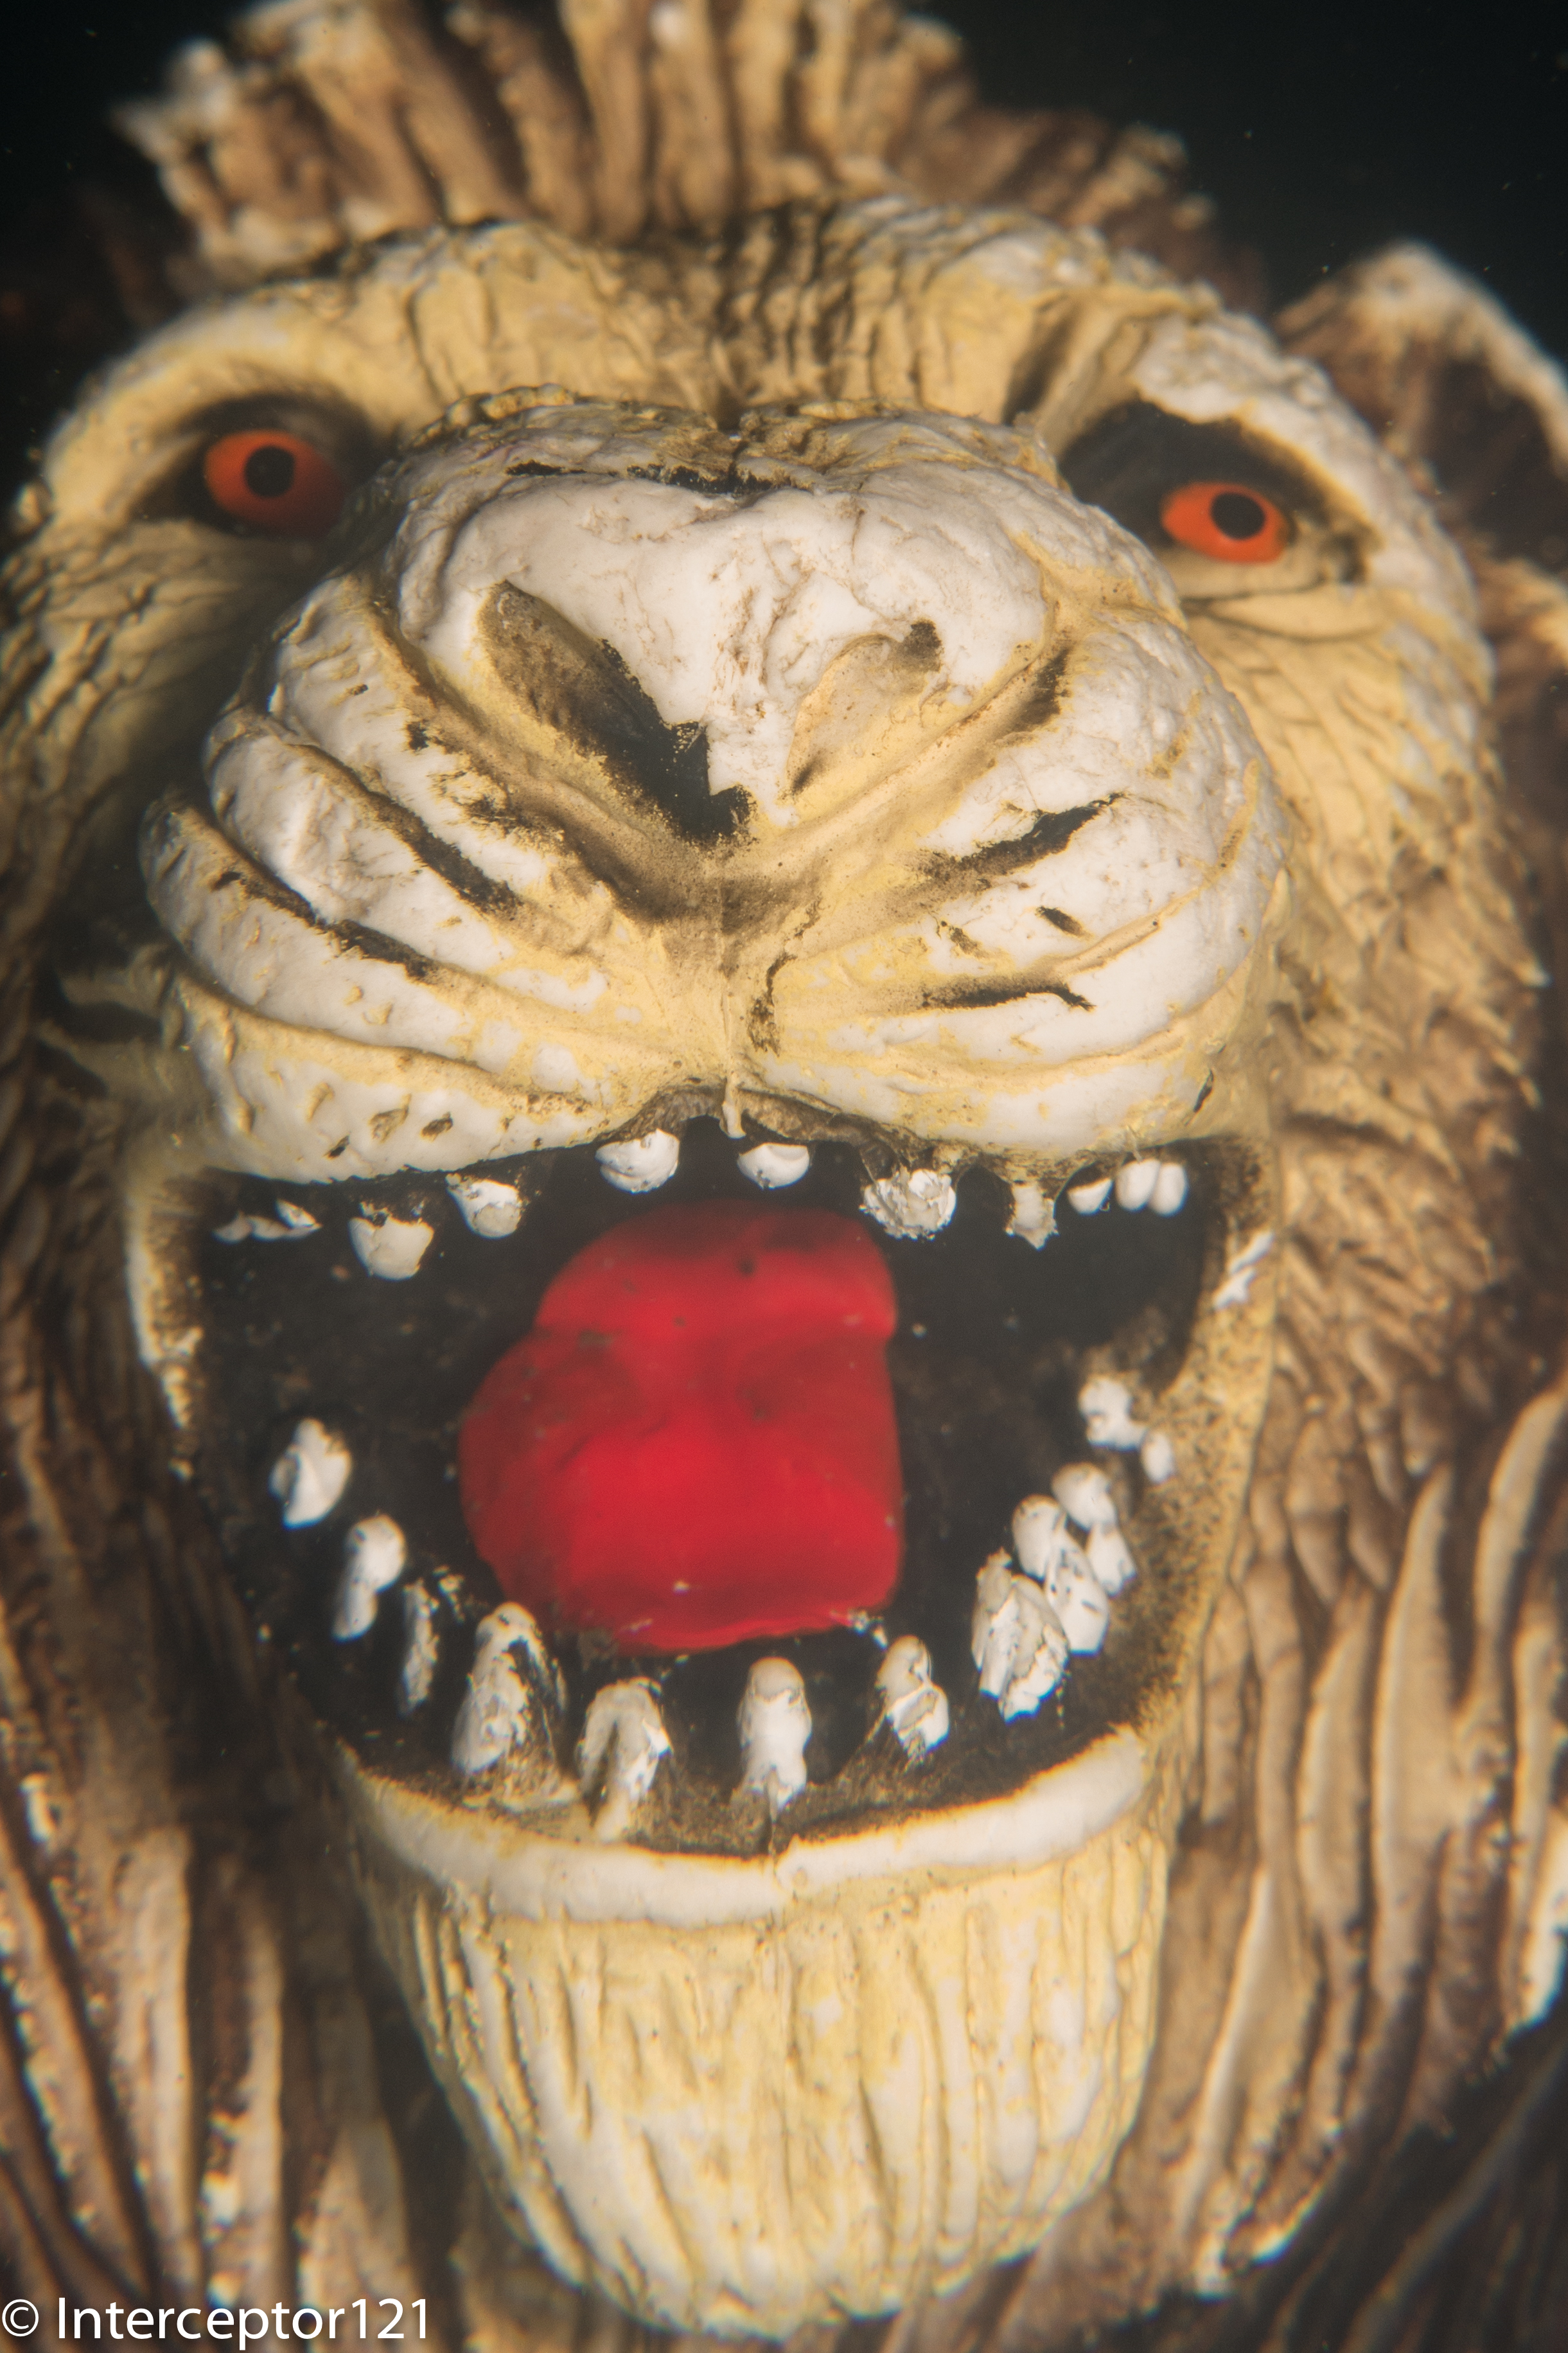
Lion Mouth Single Diopter
To finish off my last task was the tongue and eyes of a lion that I shot with a single UCL-165.
Overall a great day and I definitely recommend you the tuition day with Martin. He is a great person and extremely good at teaching I can see the benefits my buddy had right away.
Lessons learned on the RX100
There were a few things that I learned about my RX100 still rig mode that I want to share with you.
The autofocus is incredible. I even used this for macro. If the camera does not focus is because you don’t have enough depth of field and that is it.
Best macro performance is with a single diopter and also had a benefit of an increased working distance, this means the shots will need cropping for extremely small critters
Two diopters resulted in near bokeh with less than 1mm in focus and difficult to autofocus (though the LCD is great and I could see if things were in focus or not I think this is personal and I would recommend DMF to others)
Performance at wide angle with the UWL-100 28AD with dome is stellar
Inon float arms (I used two 6″ segments) were perfect with lens holders on it.
Inon Z240 twin set with one in TTL and the second in external auto delivered creative lighting without headaches, remember to buy the AUTO diffuser that does not come with the strobe
Strobes in manual allowed for even more creativity and the level of precision compared to sea and sea was staggering
Despite pool conditions the RX100 focused well in low light and much better than the Canon S95 that was returning focus error on the same exposures. I will not bother having a focus light with this camera and only have a single sola on night dives
That’s all for now any question just drop a comment
As you add up lenses and accessories to your underwater photography or compact video rig you start experiencing an increase in weight first on land and afterwards in water.
My current rig for photography weights in excess of 5 Kg (11 lbs) and in water this is very near to 2 Kg (4.4 lbs). The housing and the hardware are usually the main culprit but even strobes or lights can easily add weight. As you add more and more components the weight of your rig ramps up.
I use locline arms for video and this greatly helps reducing weight both in and outside water. My compact video rig is around 500 grams or 1.1 lbs in water but also very lights outside water. The Sola lights really help with their incredibly compact size. The heaviest items are the tray and handle and the lenses.
Sony RX100 Mark II Underwater Video Rig
For my video rigs I use STIX jumbo floats on the tray and on the locline segments. Each one of those floats gives around 160 grams 5.6 Oz lift in water.
Stix floats are available as large and jumbo format more information directly on the 4th generation designs web site here
For stills I use aluminum arms as I find them more precise but also need longer arms and be able to sustain a heavier weight for a strobe outside water. Strobes frequently weight over half a kg with batteries, this is too much for a 1/2″ locline arm and stiffer 3/4″ segments are required. I don’t particularly like the 3/4″ segments and I prefer ball and clamp solutions. 3/4″ segment can hold easily a strobe but can’t be really too long.
This is my basic still set up I had for the Panasonic LX7
LX7 Photo Rig Front
Even in this case I tried to use as many floats as possible to keep it light around the usual half Kg 1.1 lbs underwater weight.
For my RX100 I have two strobes and arms with 8″ and 5″ long segments.
The 5.5 Kg rig in hand
As you can read this is 5.5 Kg on land and even with 6 Jumbo stix floats the underwater weight is over 680 grams or 1.5 lbs this for me is a bit too much to carry around so I started looking into alternative solutions.
Left Inon Mega M – Center ULCS 8″ with 3 Jumbo Floats – Right ULCS 5″ with 2 Large Floats
The ultralight buoyancy arms provide too little lift in my opinion to be worth using so I looked at float arms in carbon or plastic material as an alternative. I came across Inon and Nauticam products and so I ran some comparison based on some metrics I have defined myself.
Update 16 March I also include Stix float arms now.
Those are:
Buoyancy per $: how much lift do you get per $ spent
Buoyancy per mm: how much lift do you get per mm effective length*
Buoyancy per gram: how much lift do you get in relation to the on land weight of the arm
*effective length is measured from the center of the arm balls
I refer to US $ prices just for convenience the same would apply even more in UK/Euro terms so here are some results
Standard Float Arms
You would use standard float arms if you have an acrylic dome on an SLR or mirror-less or a plastic housing that gives considerable lift as those solution give limited lift in water ranging from 75 to 333 grams.
Arm Type
Buoyancy
Cost Total
Weight
Depth Rating
ULCS S + 2 Stix L
154
$57.50
101
40m/130ft
Stix 6″ L
142
$43.00
101
40m/130ft
Inon S
75
$75.95
142
70m/230ft
ULCS M + 3 Stix L
237
$66.75
146
40m/130ft
Stix 9″ L
260
$48.00
146
40m/130ft
Nauticam M
240
$80.00
200
100m/330ft
Inon M
135
$89.95
181
70m/230ft
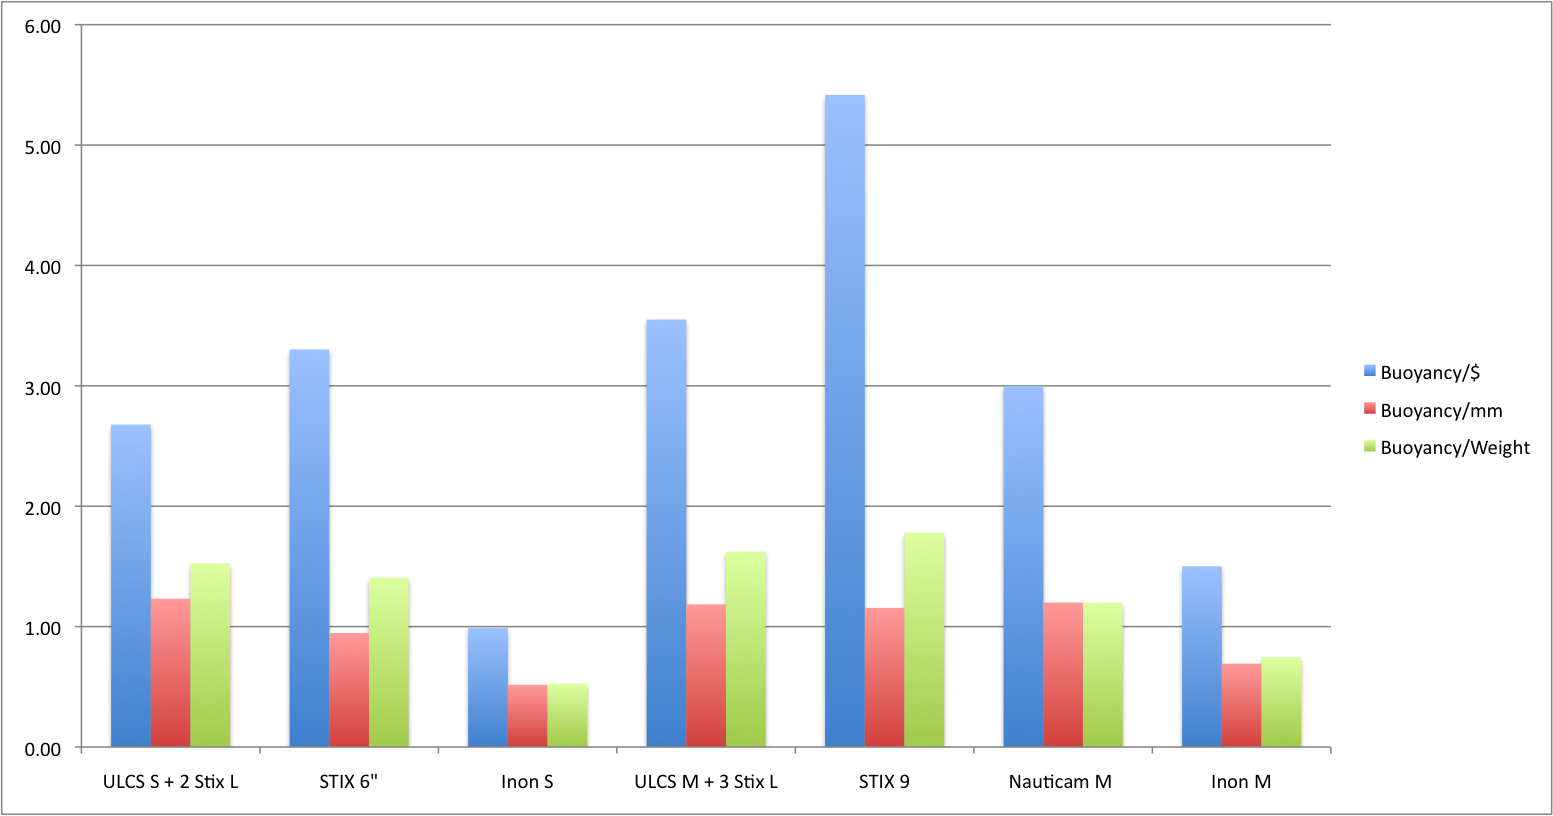
I have compared an ULCS 5″ and 8″ segment with Nauticam 60 mm diameter and Inon arms of the same diameter 52 mm or 2″. Those are the results. Update the new graph also includes Stix arms made of aluminum with plastic balls and their own floats.
Standard Float Arms Key figures
In this category you can see that a STIX arm with large floats beats a carbon or plastic float arms on all metrics in fact on the shorter segment nauticam does not even produce a float arm solution.
An ULCS 5″ segment with 2 large floats give a lift of 154 grams or 5.4 Oz and an 8″ segment a good 237 grams or 8.5 Oz, Stix arms offer 142 and 260 grams respectively in the 6″ and 9″ lengths.
This solution gives more lift in water and is lighter on land I see no benefits investing in a float arm in this range of buoyancy and for this reason I have not even considered ULCS buoyancy arms. A pack of large stix floats costs $25 for 4 units of 99 grams or 3.5 Oz lift each and those can be moved on your arm segments making it a very flexible option.
Mega Floats
I define as mega floats anything that offers at least 2 grams lift for each mm effective length. I put the Stix arms in this category even if they fall short in this metric as they are comparable and cost effective.
Each one of those solutions will provide in excess of 274 grams or 9 Oz lift in water. In this category we have the ULCS arms with Stix jumbo floats as the most agile solution at 2.5″ or 63.5 mm diameter, this has the benefit of not requiring extra long clamps to fold two segments with floats fully. Nauticam and Inon both have segments with 90 mm and 97 mm diameter. Inon segments have an extra benefit compared to Nauticam for compact camera users using wet lenses as they can support up to 2 single lens holder for each segment as in the picture earlier in this post. Stix arms made of plastic are the cheapest in this category though can’t offer the same amount of buoyancy of carbon or ABS arms.
Arm Type
Buoyancy
Cost Total
Weight
Depth Rating
ULCS S + STIX J
274
$62.50
122
40m/130ft
STIX 6″
284
$43.00
122
40m/130ft
Inon S Mega
390
$82.95
219
70m/230ft
Nauticam S Mega
375
$90.00
240
100m/330ft
Inon M Mega
650
$93.95
295
70m/230ft
ULCS M + STIX J
416
$74.25
175
40m/130ft
STIX 9″
425
$51.00
178
40m/130ft
Nauticam M Mega
655
$120.00
275
100m/330ft
Those are the results:
Mega Float Arms Key Figures
Stix float arms score higher on a Buoyancy/$ metric and also lead the way in terms of buoyancy/weight ratio however the amount of lift offered is limited and this solution does score low on the buoyancy/mm metric. Especially in the medium segment around 8/9 inches you can see that there is not much difference on a buoyancy/$ between a 9″ stix arm and an Inon M mega.
You do get a problem with this big arms if you want to fold the segments on themselves. Currently ULCS provides the AC-CSB clamp for 2″ arm segments but even with that you can’t fold two mega arms.
Inon Mega + ULCS Large
Here a few example of the issue I mentioned a mega arm with a 5″ segment with float reaches maybe 30º and without the float around 20º
Mega float + 5″ segment
Ultimately I do not think is a big issue as you can use the strobe adapter segment and still achieve all possible positions for your light anyway if you are concerned do get a couple of the longer clamps.
This is my rig with the float arms it does look neat compared to the version with STIX floats
Sony RX100 Mark II rig with Inon Mega float arms
Conclusion
Unless you have a plastic housing or a housing nearly neutral in water floats or float arms at 2″ diameter are not really effective, produce limited lift and are not a really cost effective way to add buoyancy to your rig. 2″ floats can be used to trim your rig in case larger floats are too buoyancy but are not a primary way to achieve the purpose. For example if I wanted to make my rig neutral I could add 2 large Stix floats on each arm.
Stix floats offer a lot of flexibility as you can take them off arm segments and put them elsewhere in a flexible way. Stix floats are also an option just within recreational limits 40m/130ft past this depth the floats loose buoyancy and eventually crush. Stix do offer custom materials float that resist greater depths on request.
Mega arms are a bit clumsy but do provide the lift needed and are cost effective even if a bit heavy on land. My preference if you use wet lenses is for the Inon arms, those are the most cost effective and provide the most lift and can also support lens holders. Inon arms are rated for 70 m/230 ft if you go deeper you need the Nauticam arms that ca go down to 100 m/330 ft. So for technical photographer float arms are really the only way forward in terms of off the shelf solutions. Obviously you can get bespoke solution using submarine grade divinycell but that is beyond the expertise and reach of a normal user.
How much lift do you need?
To calculate the buoyancy of your rig you can use manufacturers data sheets (Inon is brilliant, ULCS does provide some weights, housing manufacturers usually don’t). Failing that you can calculate this item by item using a graduated measuring container or last resort put your whole rig in water and use a luggage scale.
Caution
I balance my rig to have it neutral WITHOUT wet lenses this is for safety reasons. If you use a heavy wide angle wet lens and your rig is overall neutral the moment you take the lens off the port your rig will start to go up. Likewise if you had to loose your lens your rig would float and could escape to the surface. If you want to balance the overall rig you need to find a solution to balance the lenses themselves otherwise severe risks of runaway ascent chasing the rig could incur
Following the failed test on the Nauticam Electrical Sync Cord bulkhead I was out in the market to check what else could be done with the M16 port on the RX100 Mark II housing.
I bumped into the leak sentinel while at the London Dive Show. As you may know Nauticam provides now a vacuum system with temperature compensation on all new micro 4:3 and DSLR housings. Also older models can be retrofitted but not the RX100 because essentially the moisture sensor is much simpler.
So if the Nauticam housing has already a moisture sensor why bother adding a vacuum test. The advantages are numerous:
A moisture sensor still requires the housing to be put into water to be tested
A moisture sensor starts beeping when water has already made its way into the housing, if you are in a situation where you have a mandatory safety stop or a deco stop you don’t want really to have the additional stress of a camera flood.
With a leak sensor you can check the integrity of the housing before the dive and without putting it in water
You can rapidly change battery and the likes and not worry if you have compromised the seal of your housing
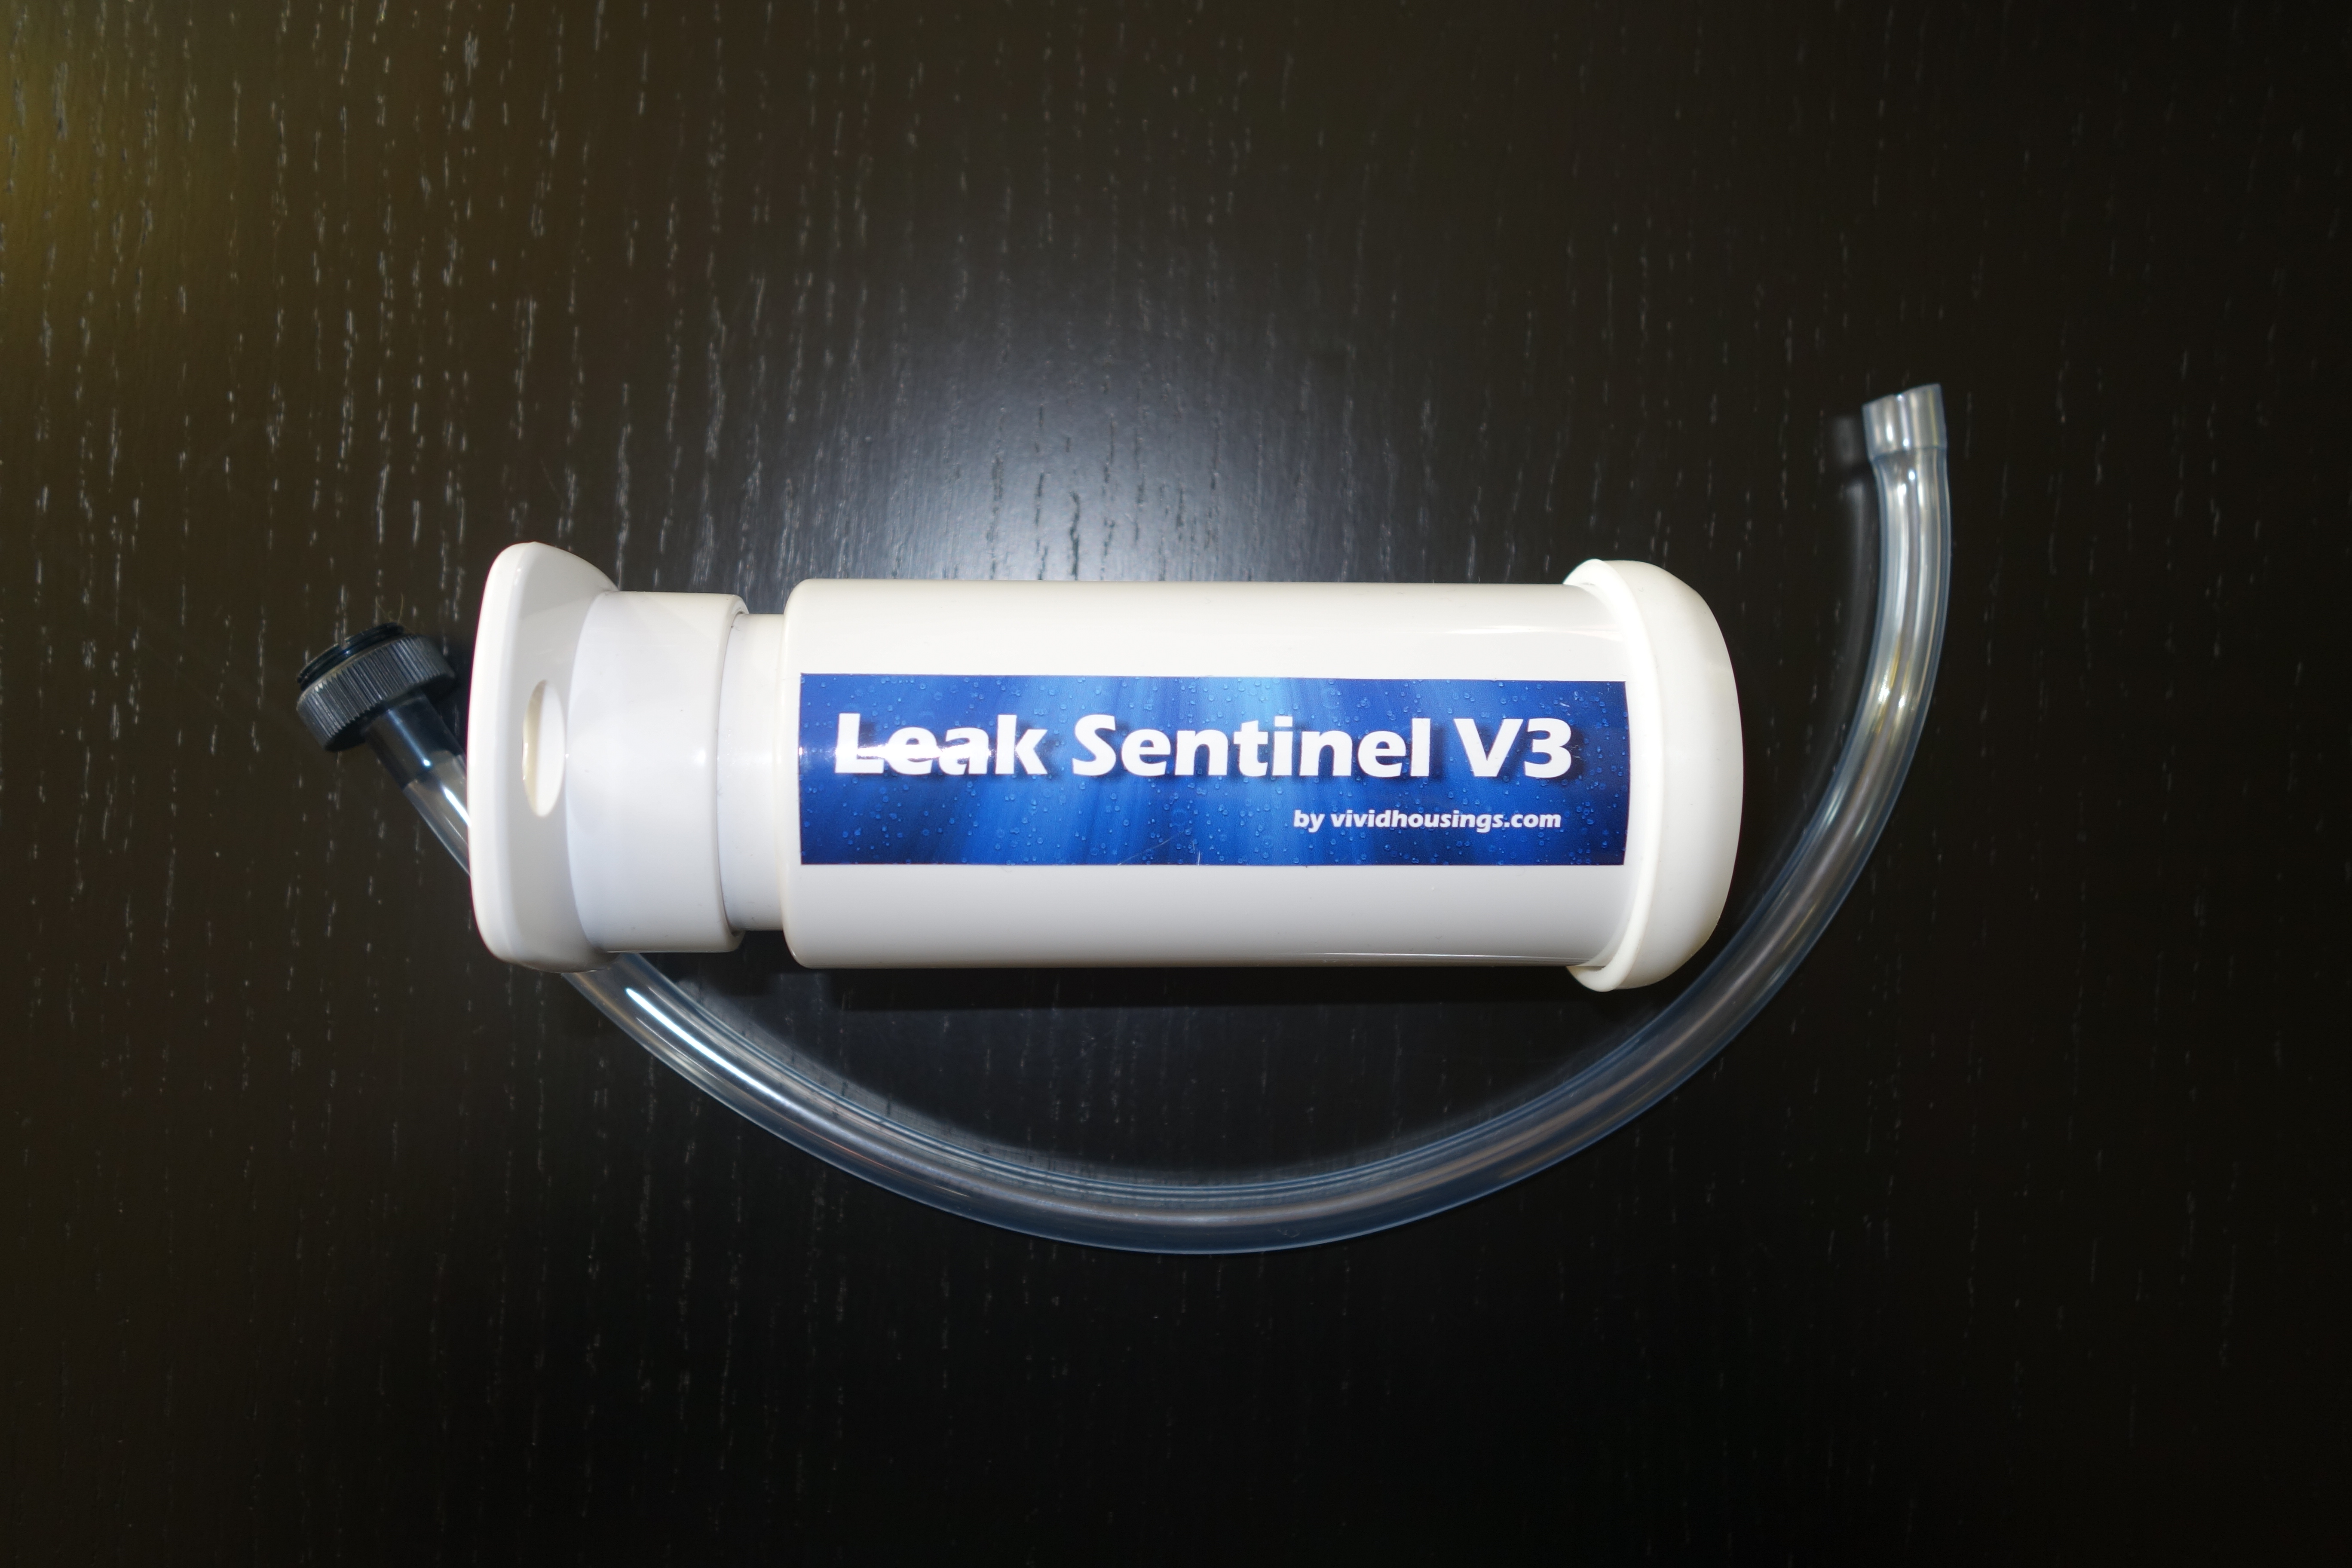
With all of this in mind I went off and contacted Vivid housings
After an email exchange about the design of the product I was convinced that it was worth getting it so I ordered one and after just 3 days it turned up in my post directly from Slovenia.
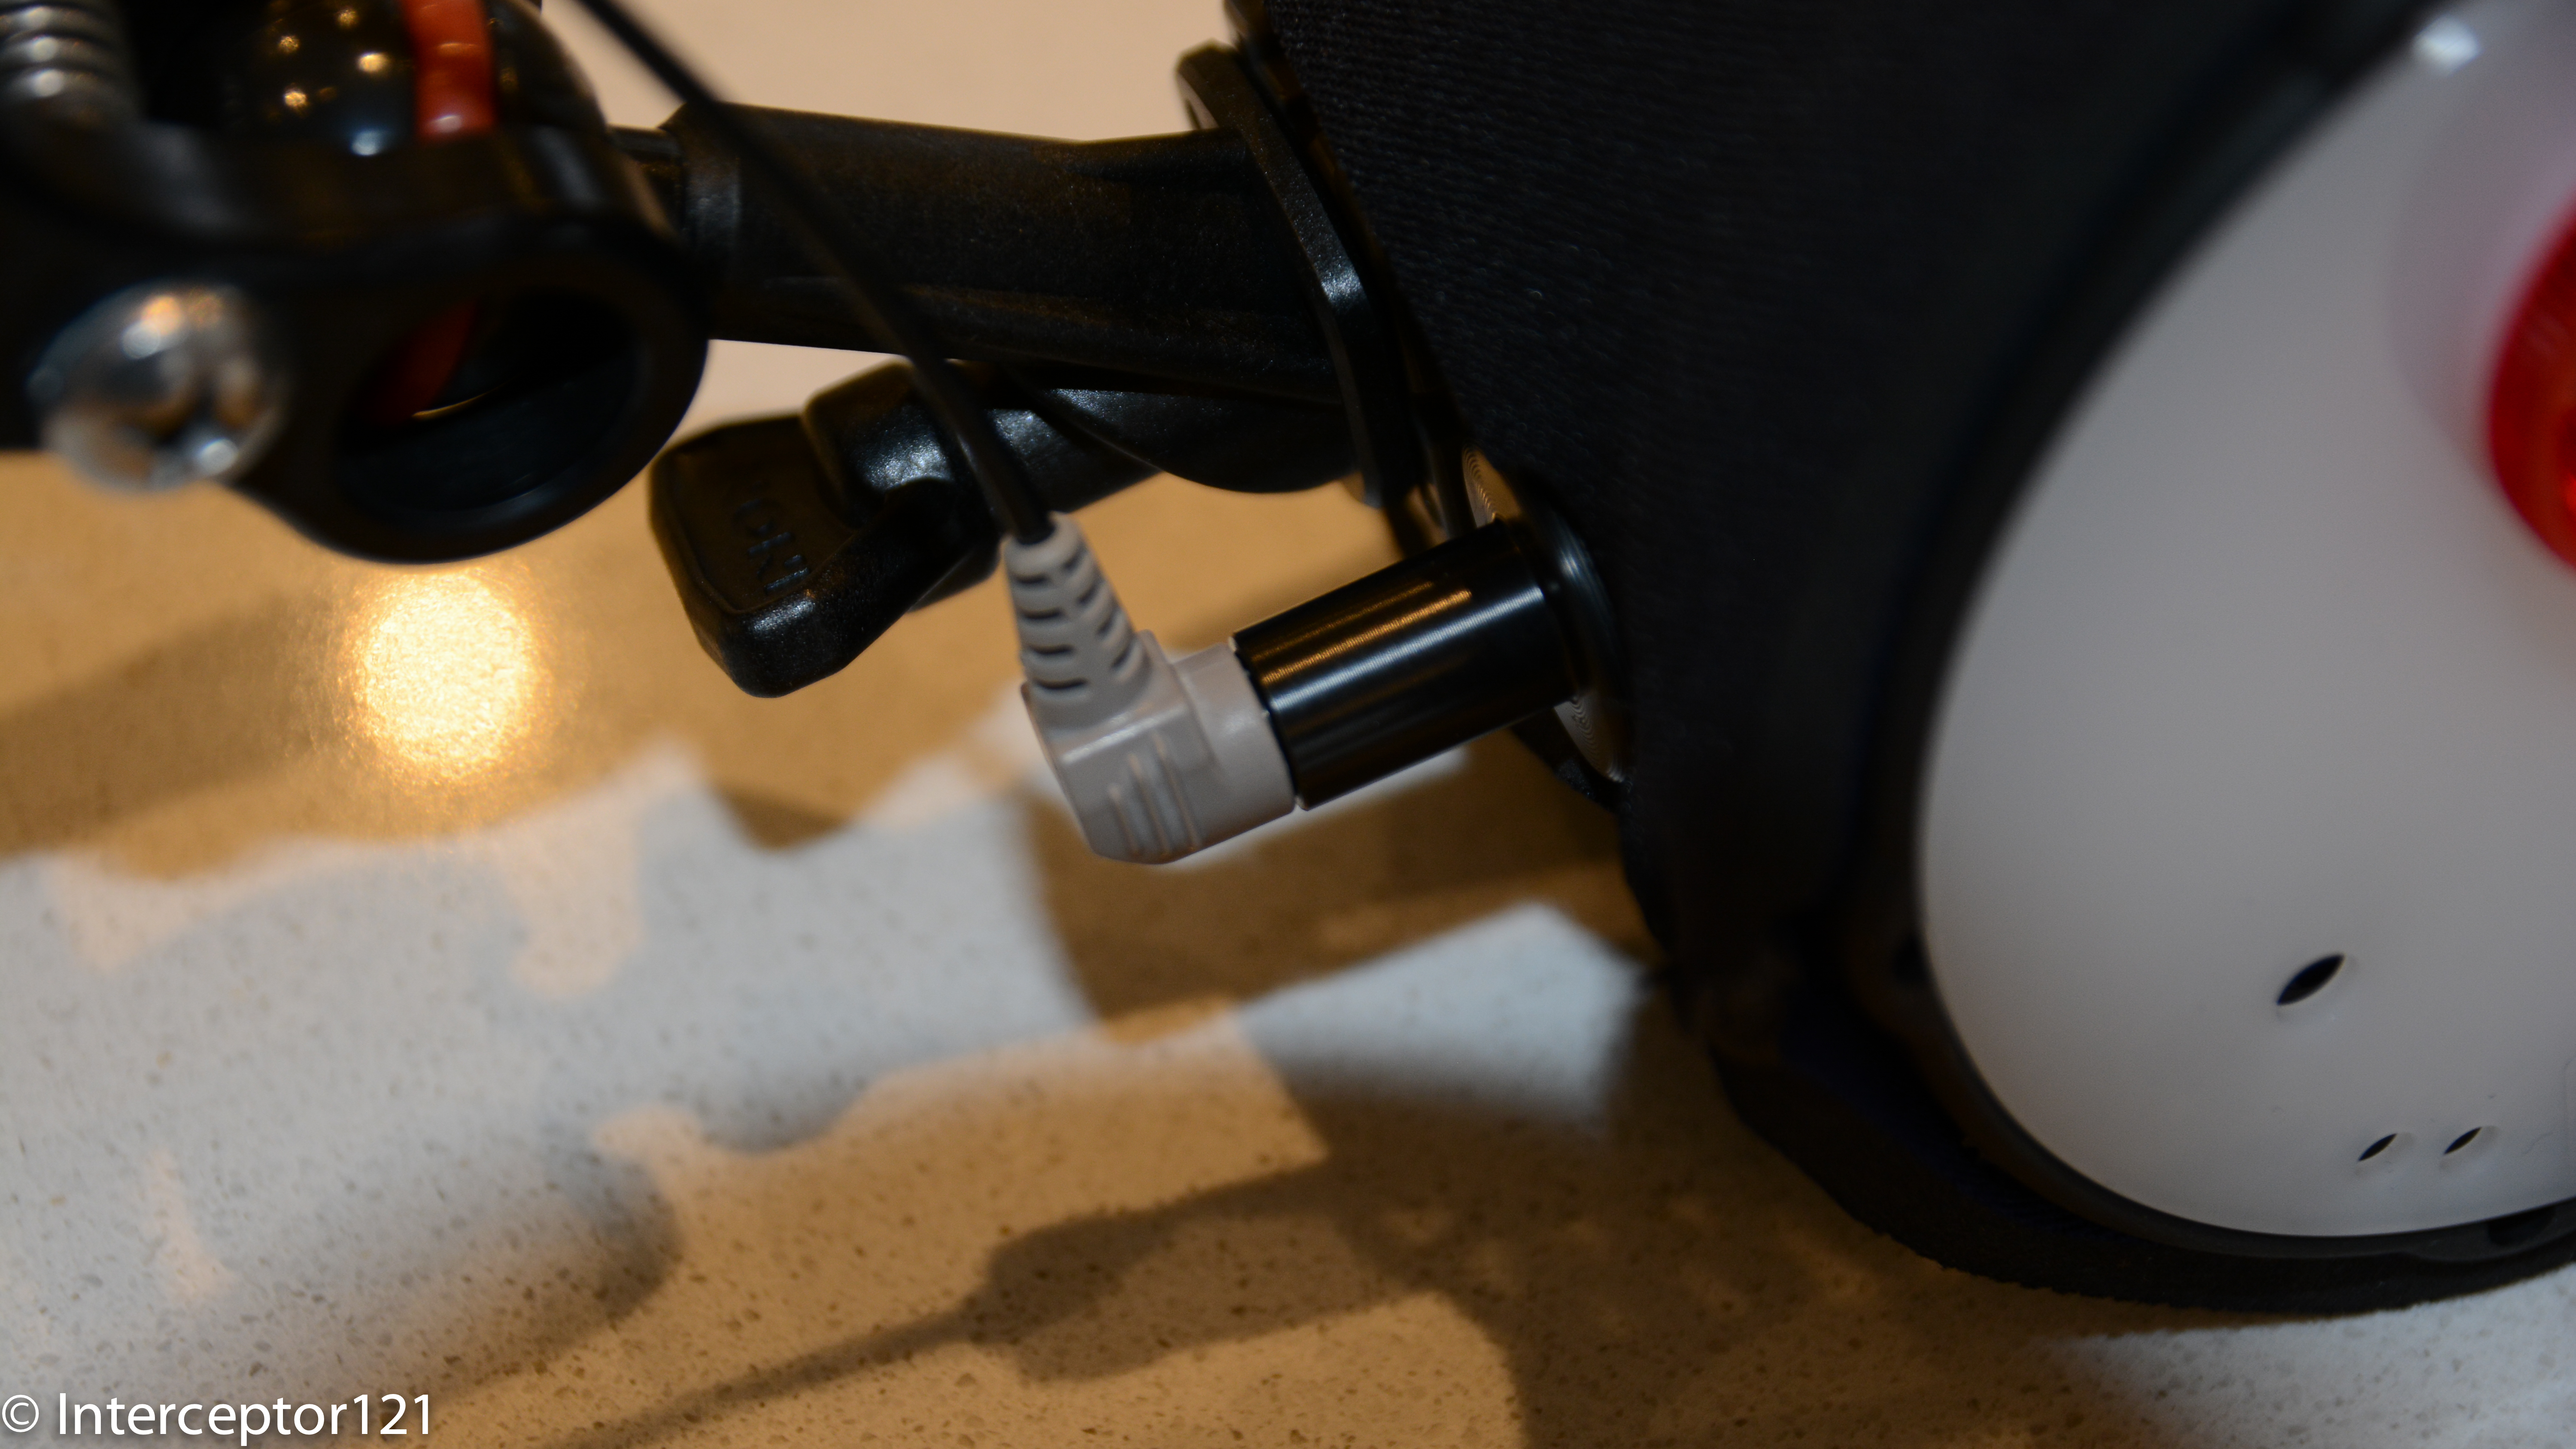
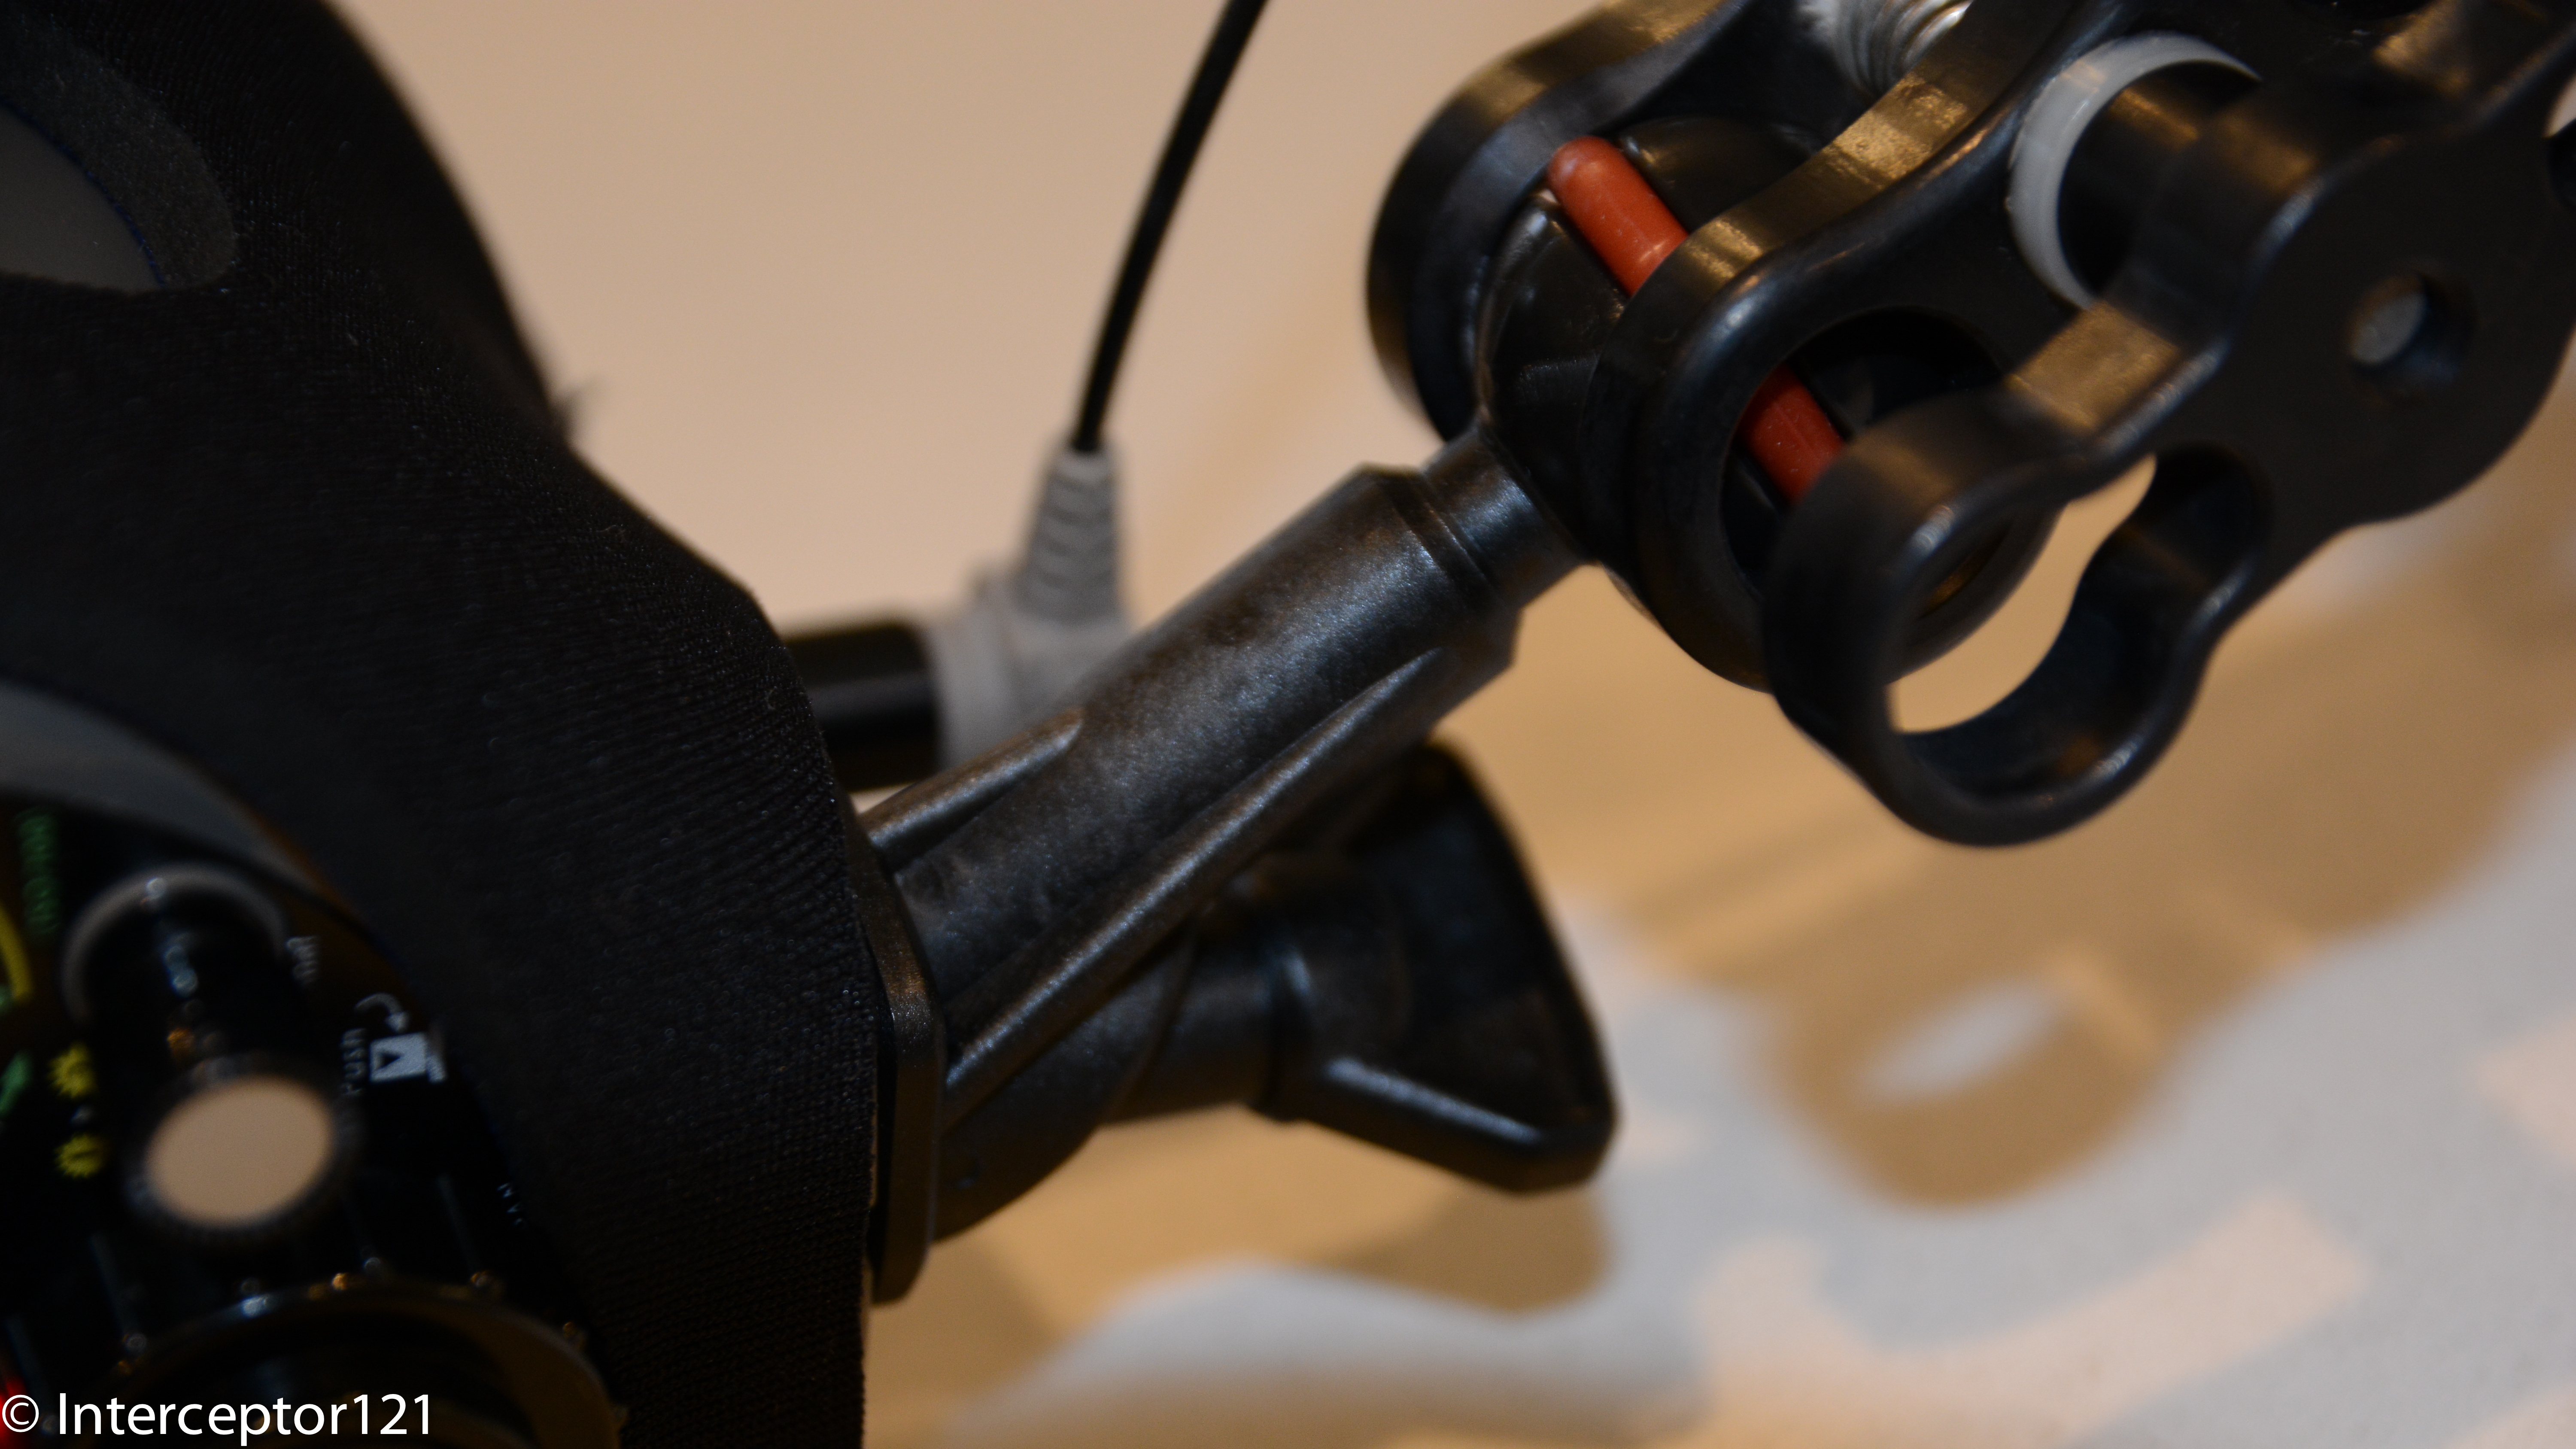
The system comes with an M16 adapter to screw on the housing bulkhead. The best way to remove the cap on the Mark II housing is using a CR2032 battery like the one of the moisture sensor.
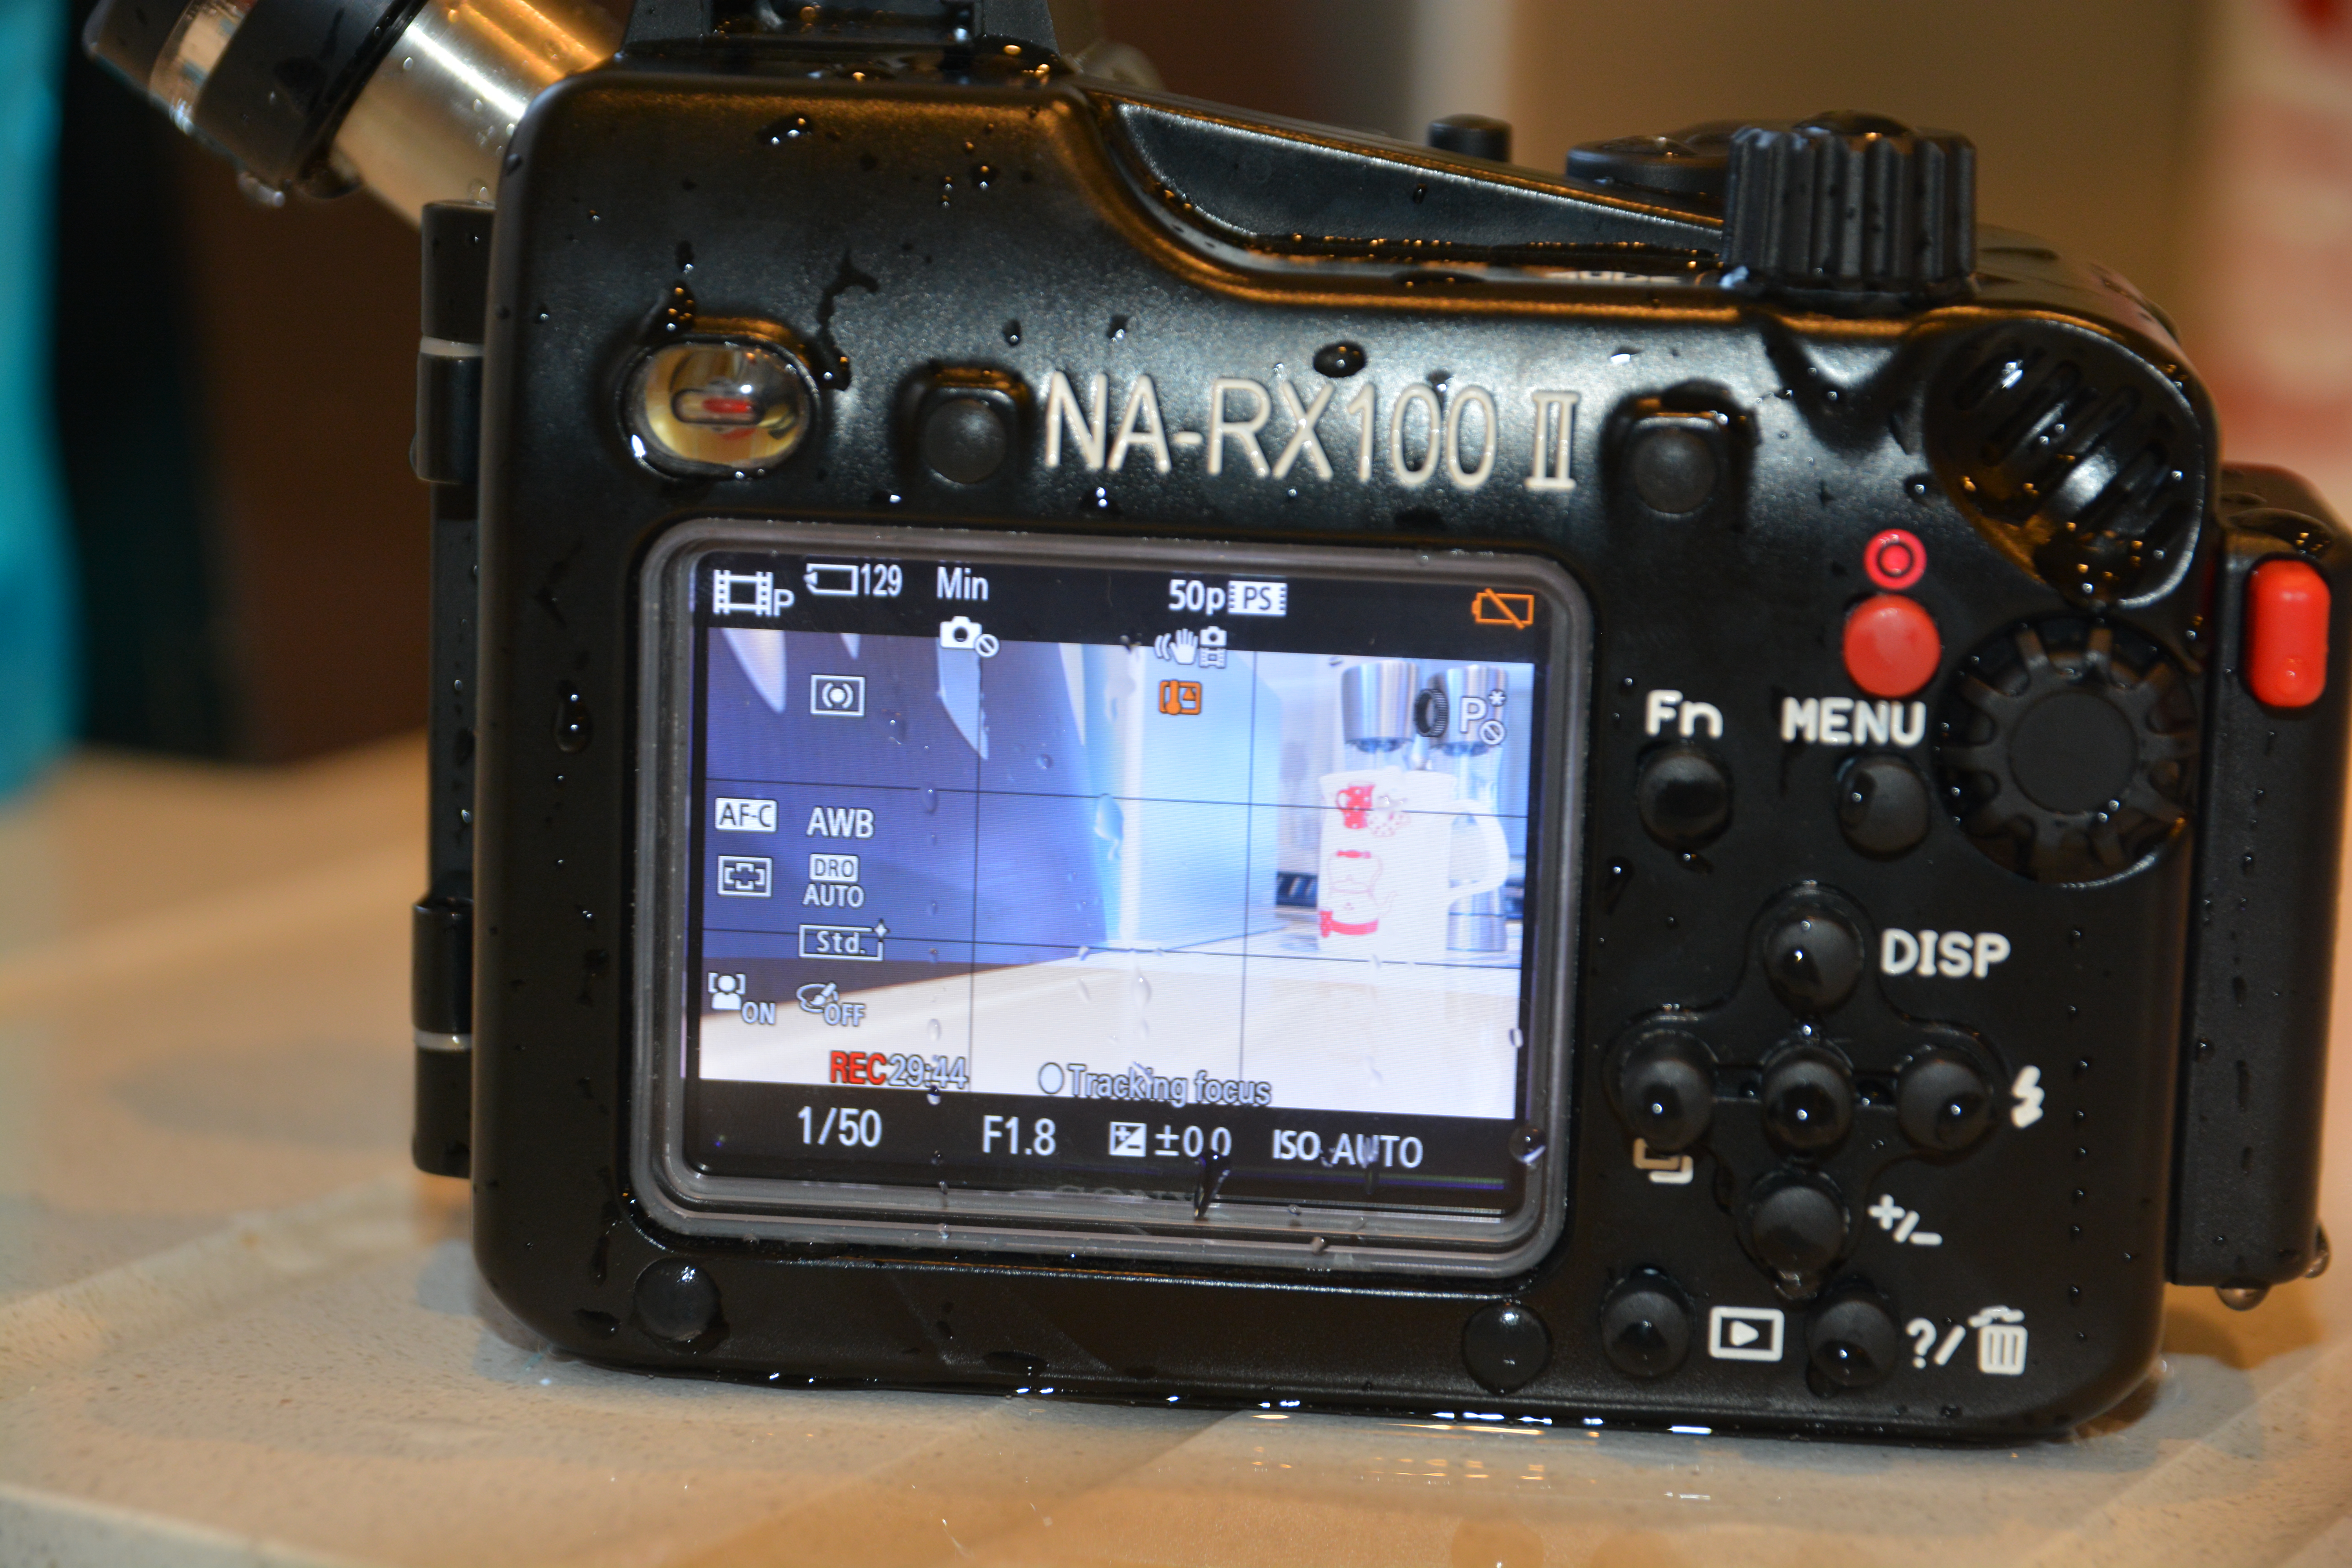
I set up the system on the housing as in the featured image and started my preparation. It takes 3 pump strokes to get a green light and the instructions say to add between half and a full stroke to make sure it is not on the edge. I had 4 full strokes.
I prepared the housing and camera in a room at 21C and waited 20 minutes before putting it in water at 15C.
I then put the camera in video recording mode for one hour, the Rx100 has a limit at 30′ so I had to record two files. After one hour the system was still showing a green light I took it out of the water and follow the depressurization procedure and extracted the camera. Measuring the temperature inside the battery compartment the sensor indicated 28C.
Now this made me think to the fact that this solution, although equipped with a temperature sensor, does not actually manage temperature compensation. If you know anything about physics you know that the following is true for an gas also known as Gay Lussac law
the pressure of a gas of fixed mass and fixed volume is directly proportional to the gas’s absolute temperature
As our housing is rigid and not compressible this means that the ratio between temperature and pressure is constant.
This also means that if the temperature increases because the camera warms up with use the vacuum will drop (pressure increases), this could create a false positive.
I therefore performed the following steps
I immersed in water at 32C and started shooting a video clip.
After around 50 minutes the led started to alternate red and green. The camera has the temperature warning indicating a possible temperature close to 40 degrees
I kept the camera in water pretty sure there was no leak and then at 60 minutes took it out of the water
After few minutes outside water in a room at 21C the light went back to green
The camera temperature in the battery compartment was 36C
Water Temperature MeasureTemperature warning
The ambient pressure was 1016 mpa so I estimate I created around 750mpa inside the housing with 4 full strokes, however as the camera sustained an increase of 19 degrees from 21 to 40 the pressure sustained an increase of 6.5% bringing it in the warning area of the leak sentinel and generated a false positive.
Now there are a few considerations to be done:
1. If you shoot pictures even firing the flash is unlikely to get the camera as hot as when you shoot video
2. The water in the dive will seldom be 30C anyway
3. It is preferable to prepare the camera in a temperature as close as possible to the diving temperature and in the driest environment available
4. It is possible to estimate the amount of vacuum each pump strokes gives and compensate for the temperature changes
The worst possible scenario is a video camera housing prepared in an air conditioned environment this is the only scenario where temperature compensation is useful.
Generally the suggestion of the user manual to give one or half pump strokes should be changed. Say that I have a large housing and it takes 10 strokes to create the vacuum, I would suggest another 3 strokes is diving in warm water otherwise the possibility of false positives is increased.
Vacuum Pump
For what concerns the RX100 and only for very warm water shooting a lot of video there is a theoretical possibility that the camera overheats, and if the housing had been assembled in a much colder room, this gives a false positive.
To minimize this possibility prepare your housing at the normal ambient temperature of your dive site is generally the best practice for tropical diving. I also do not recommend practices like preparing your housing in a cold air conditioned cabin, some people think they avoid condensation not thinking that a 20+ degrees thermal shock does do any good to the camera.
Ultimately at €200 including worldwide shipping I can definitely recommend the leak sentinel to all RX100 users. Considering the cost of your investment even at the price of the RX100 Mark II of $750/£649/€699 this is a good tool and more than anything give you the extra reassurance of having a watertight housing, and also helps you in all your situations where you have a battery change or you have to open the housing before the end of your day.
Recently I have started building my RX100 Mark II photo rig and as part of this I had to choose a wet fisheye lens.
For video I do not like the barrel distortion of a fisheye lens, and on top of that you can’t attach a push on filter to a dome so for me those are two big no when it comes to the RX100 and its white balance error woes.
For still instead I shoot only RAW never white balance in the water and a fisheye lens is required so that I can have human size strobe arms when shooting close focus wide angle at distances between 0 and 16”.
I will focus my discussion on the Nauticam housing starting off with a 67mm thread and go from there.
Currently there are 3 options on the market for the RX100 and come from 3 difference manufacturers. I will go through each one briefly and then we will look more in detail at the two I consider best.
The first lens is the FIX UWL-28M52R, this lens is the smallest of all and was originally design to nicely complement the form factor of a Canon S100 in a fix housing, hence the 52mm thread. The lens has a magnification factor of 0.41x and a diameter of 126mm including the hood, the lens is actually much smaller at around 90mm.
Fix has introduced this lens in 2011 as a replacement of the previous UWL-04 model for two reasons, the first is to have a smaller lens as the UWL-04 was a too big in comparison of the housing, second probably cost though this was never declared. However other people tests and plenty of in water images show that this lens is actually worse than its predecessor. It is also smaller making split over-under shots more difficult.
When Fix withdraw the UWL-04 the manufacturer of the lens continued the production and finally put it back on the market under the i-divesite brand. This lens is the same as the Fix except the label.
Both lenses the old and new fix are pretty much a copy of the old Inon UFL-165, both made of 4 glass elements and an acrylic dome with hard anti scratch coating.
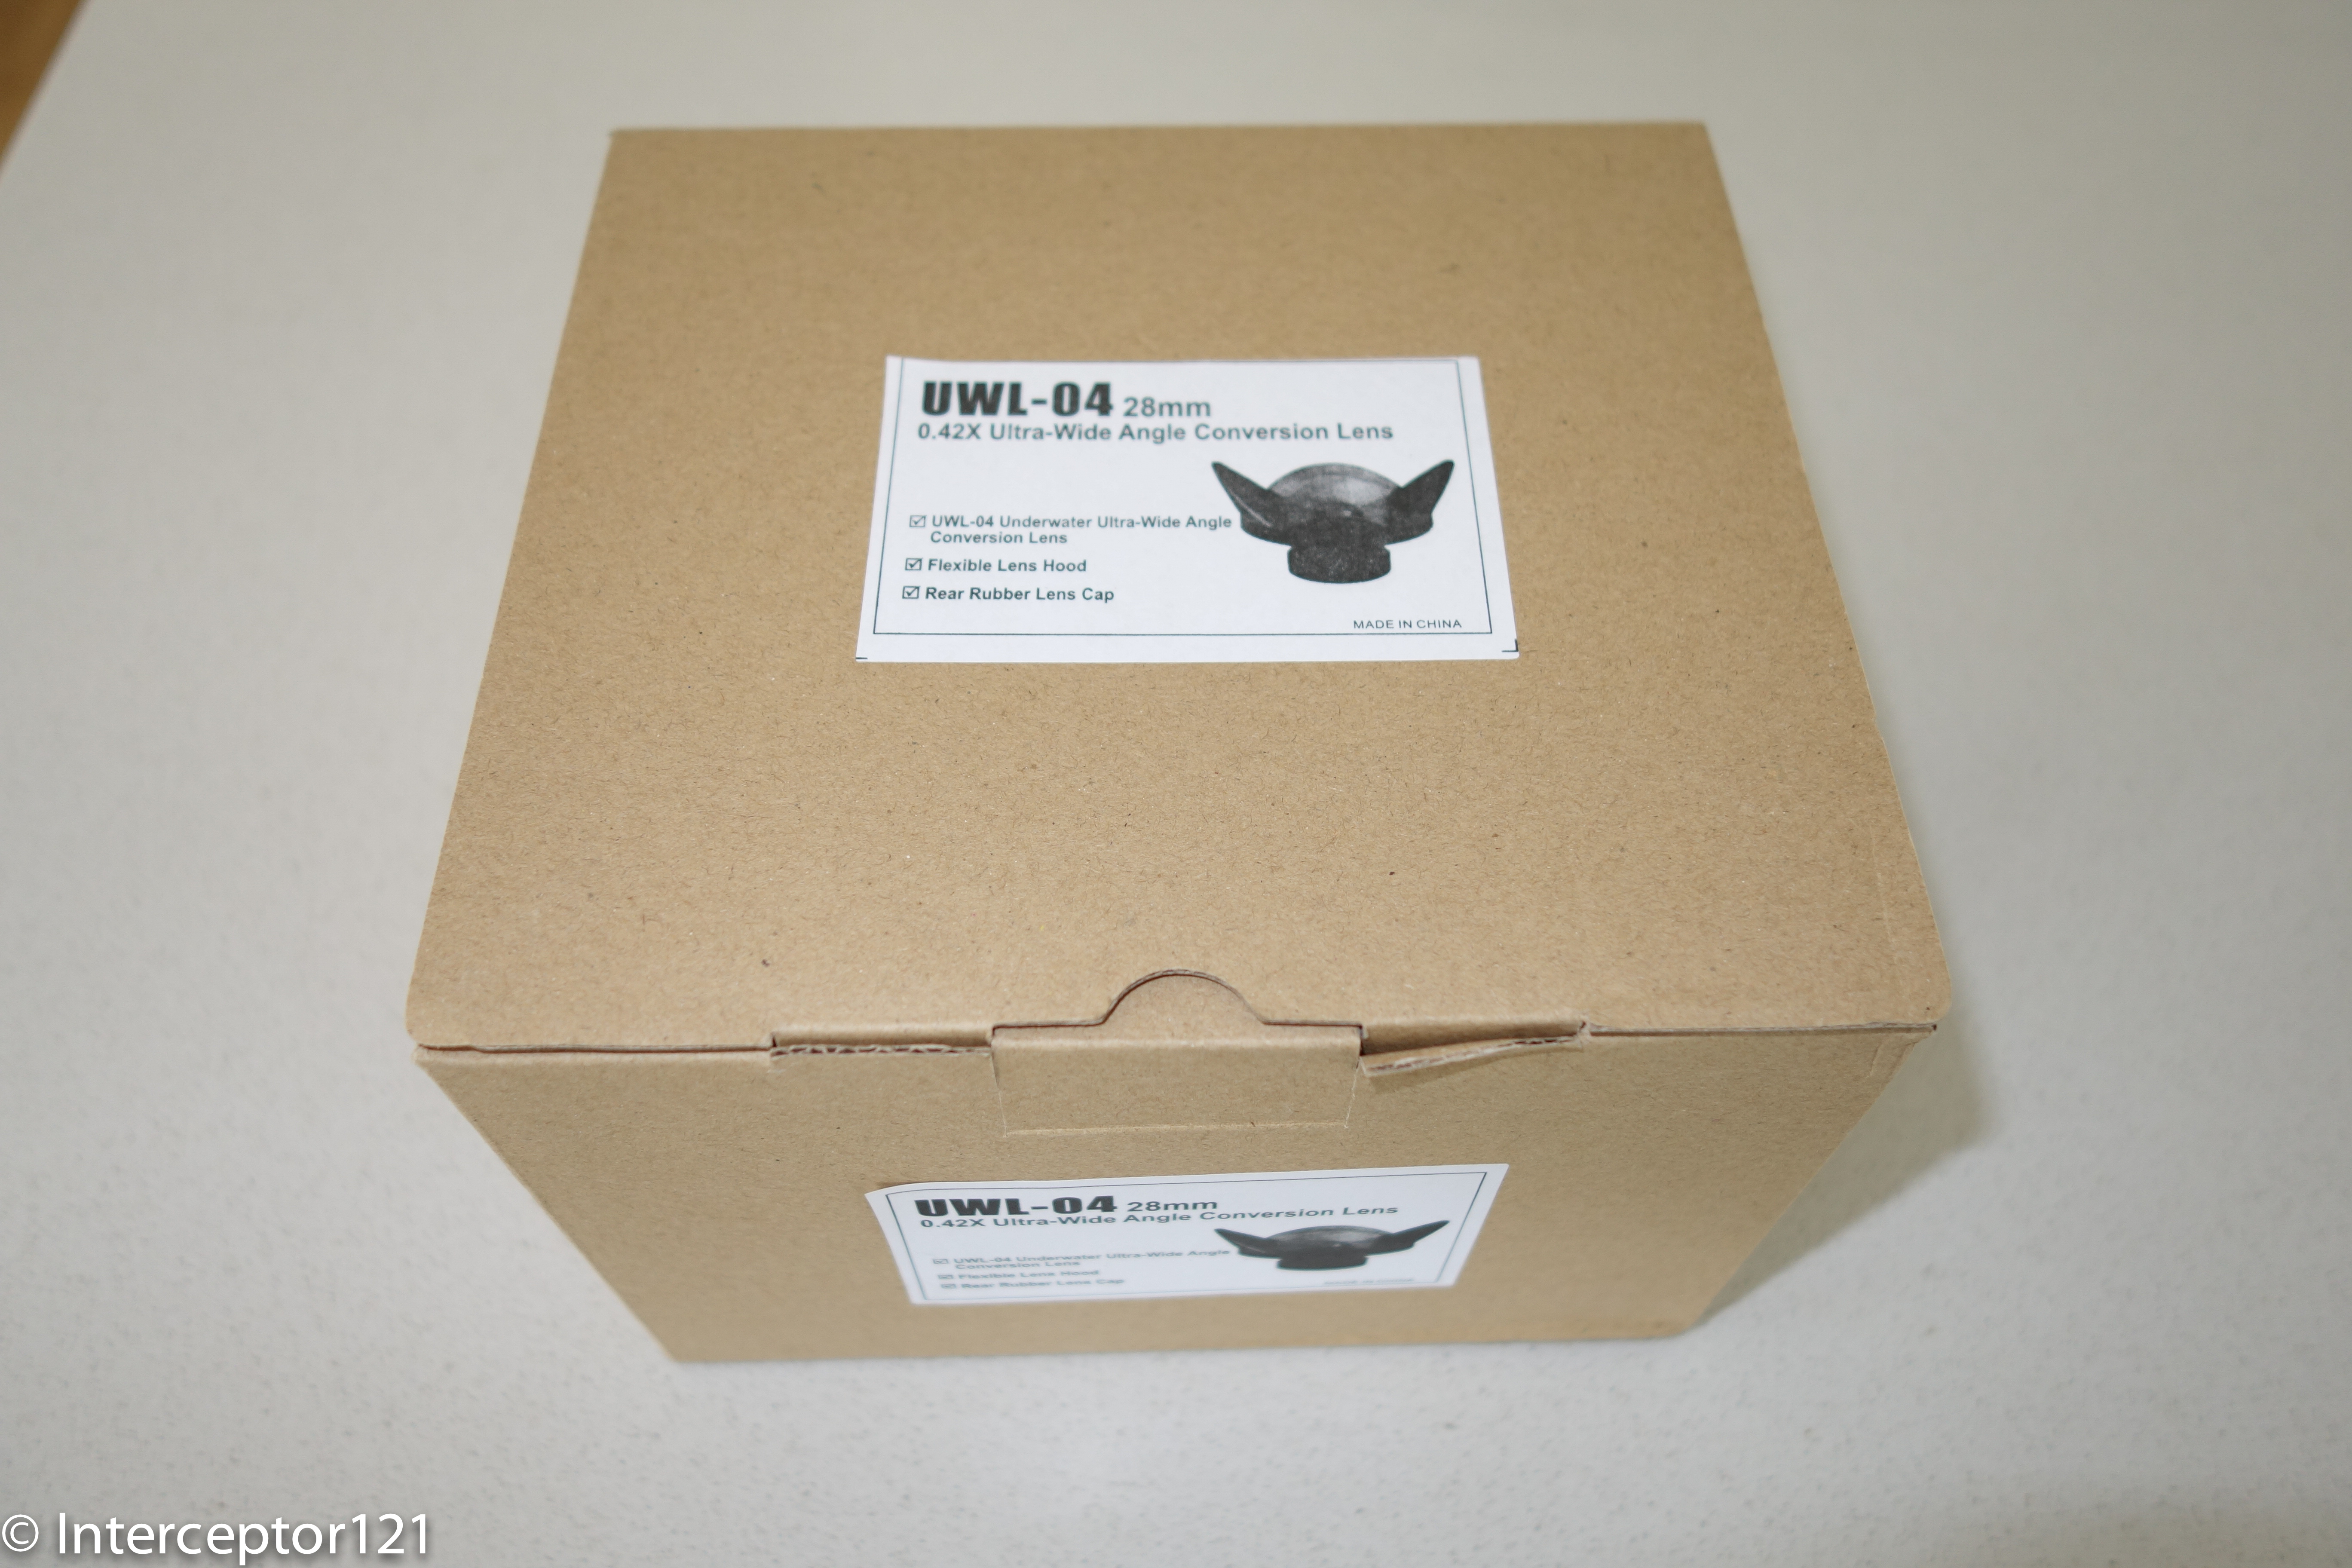
Here is a set of shots for the UWL-04 and the various parts in the box.
UWL-04 BoxUWL-04 package contentsUWL-04 Hood CoverUWL-04 with ringUWL-04 back lens
The last lens on the market is the Inon UWL-H100 with dome. This lens is available with an M67 mount and with an LD bayonet mount. Due to the size and weight of those lenses in water (100 to 500 grams weight and diameter between 125 and 152 mm) a bayonet mount is my preferred choice.
The Inon lens is actually made entirely of glass, the dome is the biggest at 115mm for the lens with an overall diameter of 132mm. This lens is the more suitable to split over under shot and promises a better contrast and less flare than the other lenses with plastic domes. Inon had some concerns about plastic domes and flare following the performance issue of their UFL165 so went for 100% glass for all next generation lenses.
Vignetting with RX100
In certain conditions all those lenses actually have some vignette in water. Despite what you read on shop websites if you look at real pictures there is a bit of that.
The Fix and Idas lenses have an issue with the lateral hood, the shots look clear of vignette on land but in water the magnification of the hood petals makes them show in the picture, we are talking a minimum crop required around 1% and usually on one side. The Inon UWL-H100 has a different issue and it gives in specific situations a tiny bit of vignette in the corners, around 2% of the image needs to be cropped. Both lenses will not vignette when image stabilization is deactivated, the image stabilizer tends to aggravate the issue so if you are obsessed switch it off and try to be steady shooting at speeds of 1/125th of a second or faster. For example on the amount of vignette see the following
UWL-04 note the vignette upper left centerUWL-28M52R again vignette on the left upper sideUWL-H100 vignette in left corners
I would like to thank Alex Tattersall, Tamas Plotek and Troy Williams for those in water pictures.
Inon UWL-100 28AD
Inon has another lens that is suitable for the RX100 and is the UWL-100 28AD a lens originally introduced in 2005. This lens has a smaller rear element than the UWL-H100 and it is not suited to many cameras with a very large lens aperture. The RX100 however works fine with this lens and contrary to the newer UWL-H100 this lens does not vignette in water or on land. The reason is that the de-magnification of this lens is less than the newer lens 0.63x vs 0.6x. This is the lens I have chosen for my RX100 Mark II and I will compare it here with the UWL-04 I have recently bought for my Canon S95. There are no substantial differences between the UWL-100 28AD and the UWL-H100 in terms of optical quality.
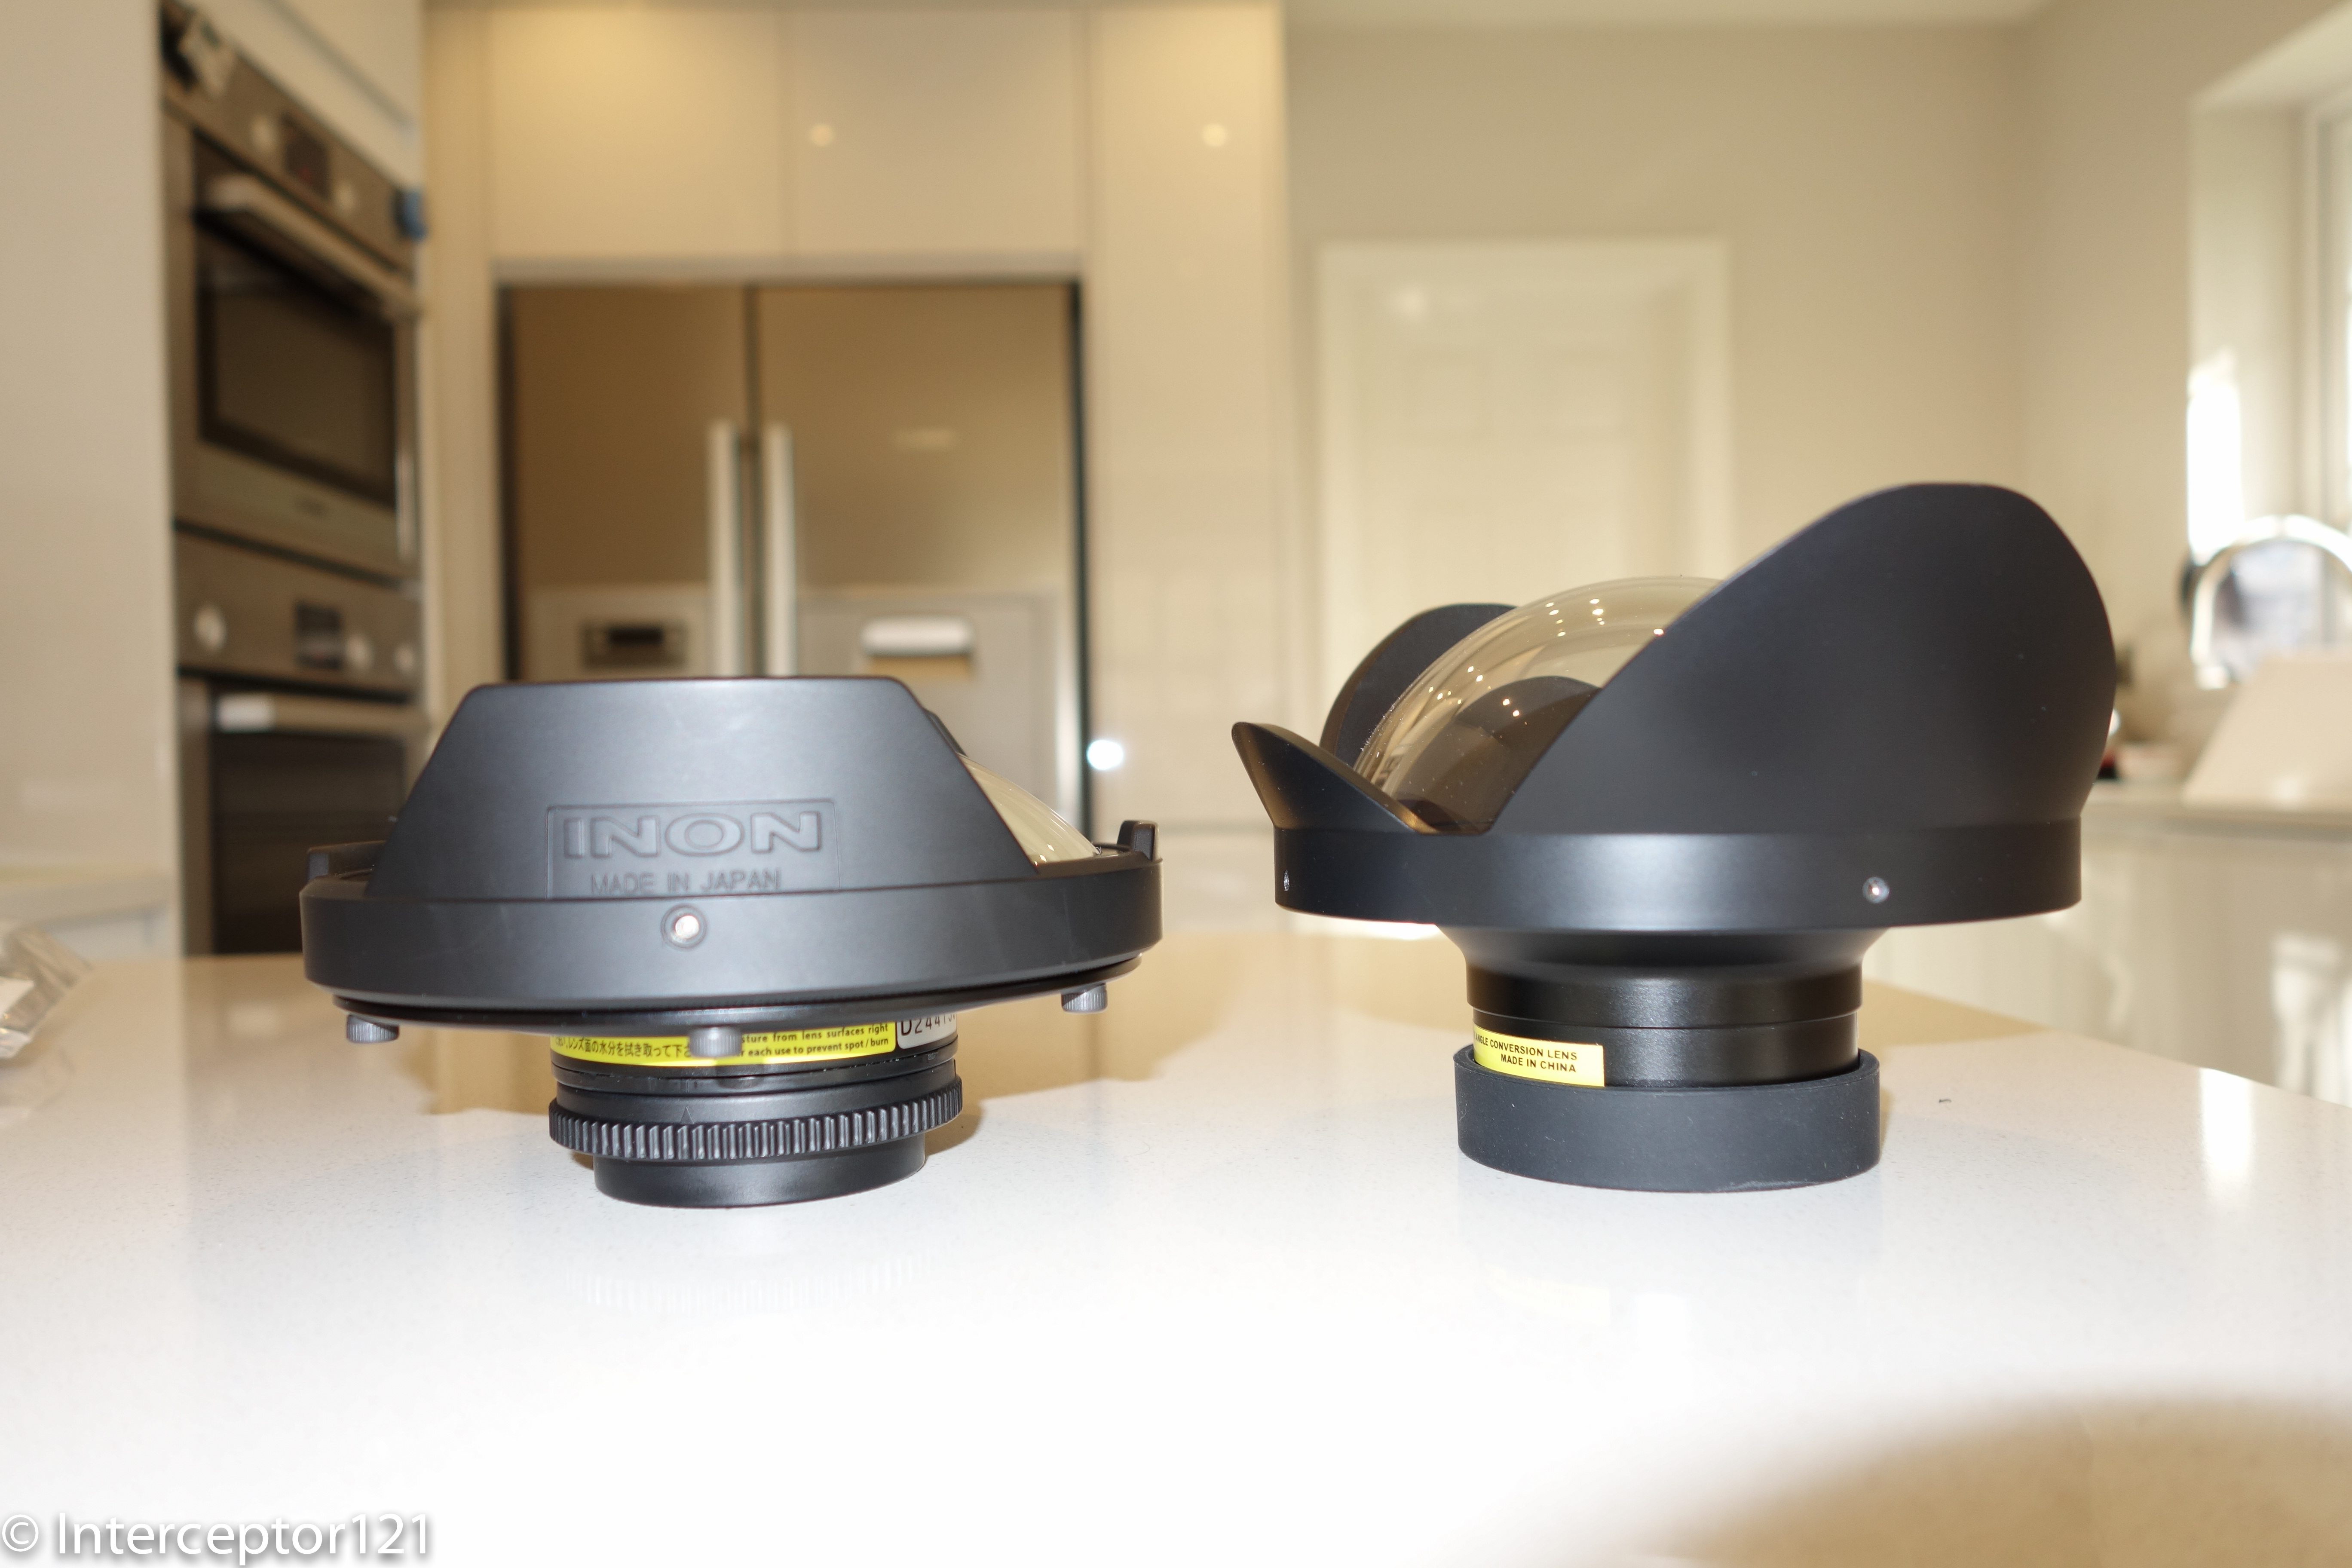
Here are few pictures to compare the lenses, take into account that whilst the weight on land is comparable, once in water the Inon lens is heavier at 400 grams versus 160 of the UWL-04.
UWL-04 UWL-100UWL-04 UWL-100 profile
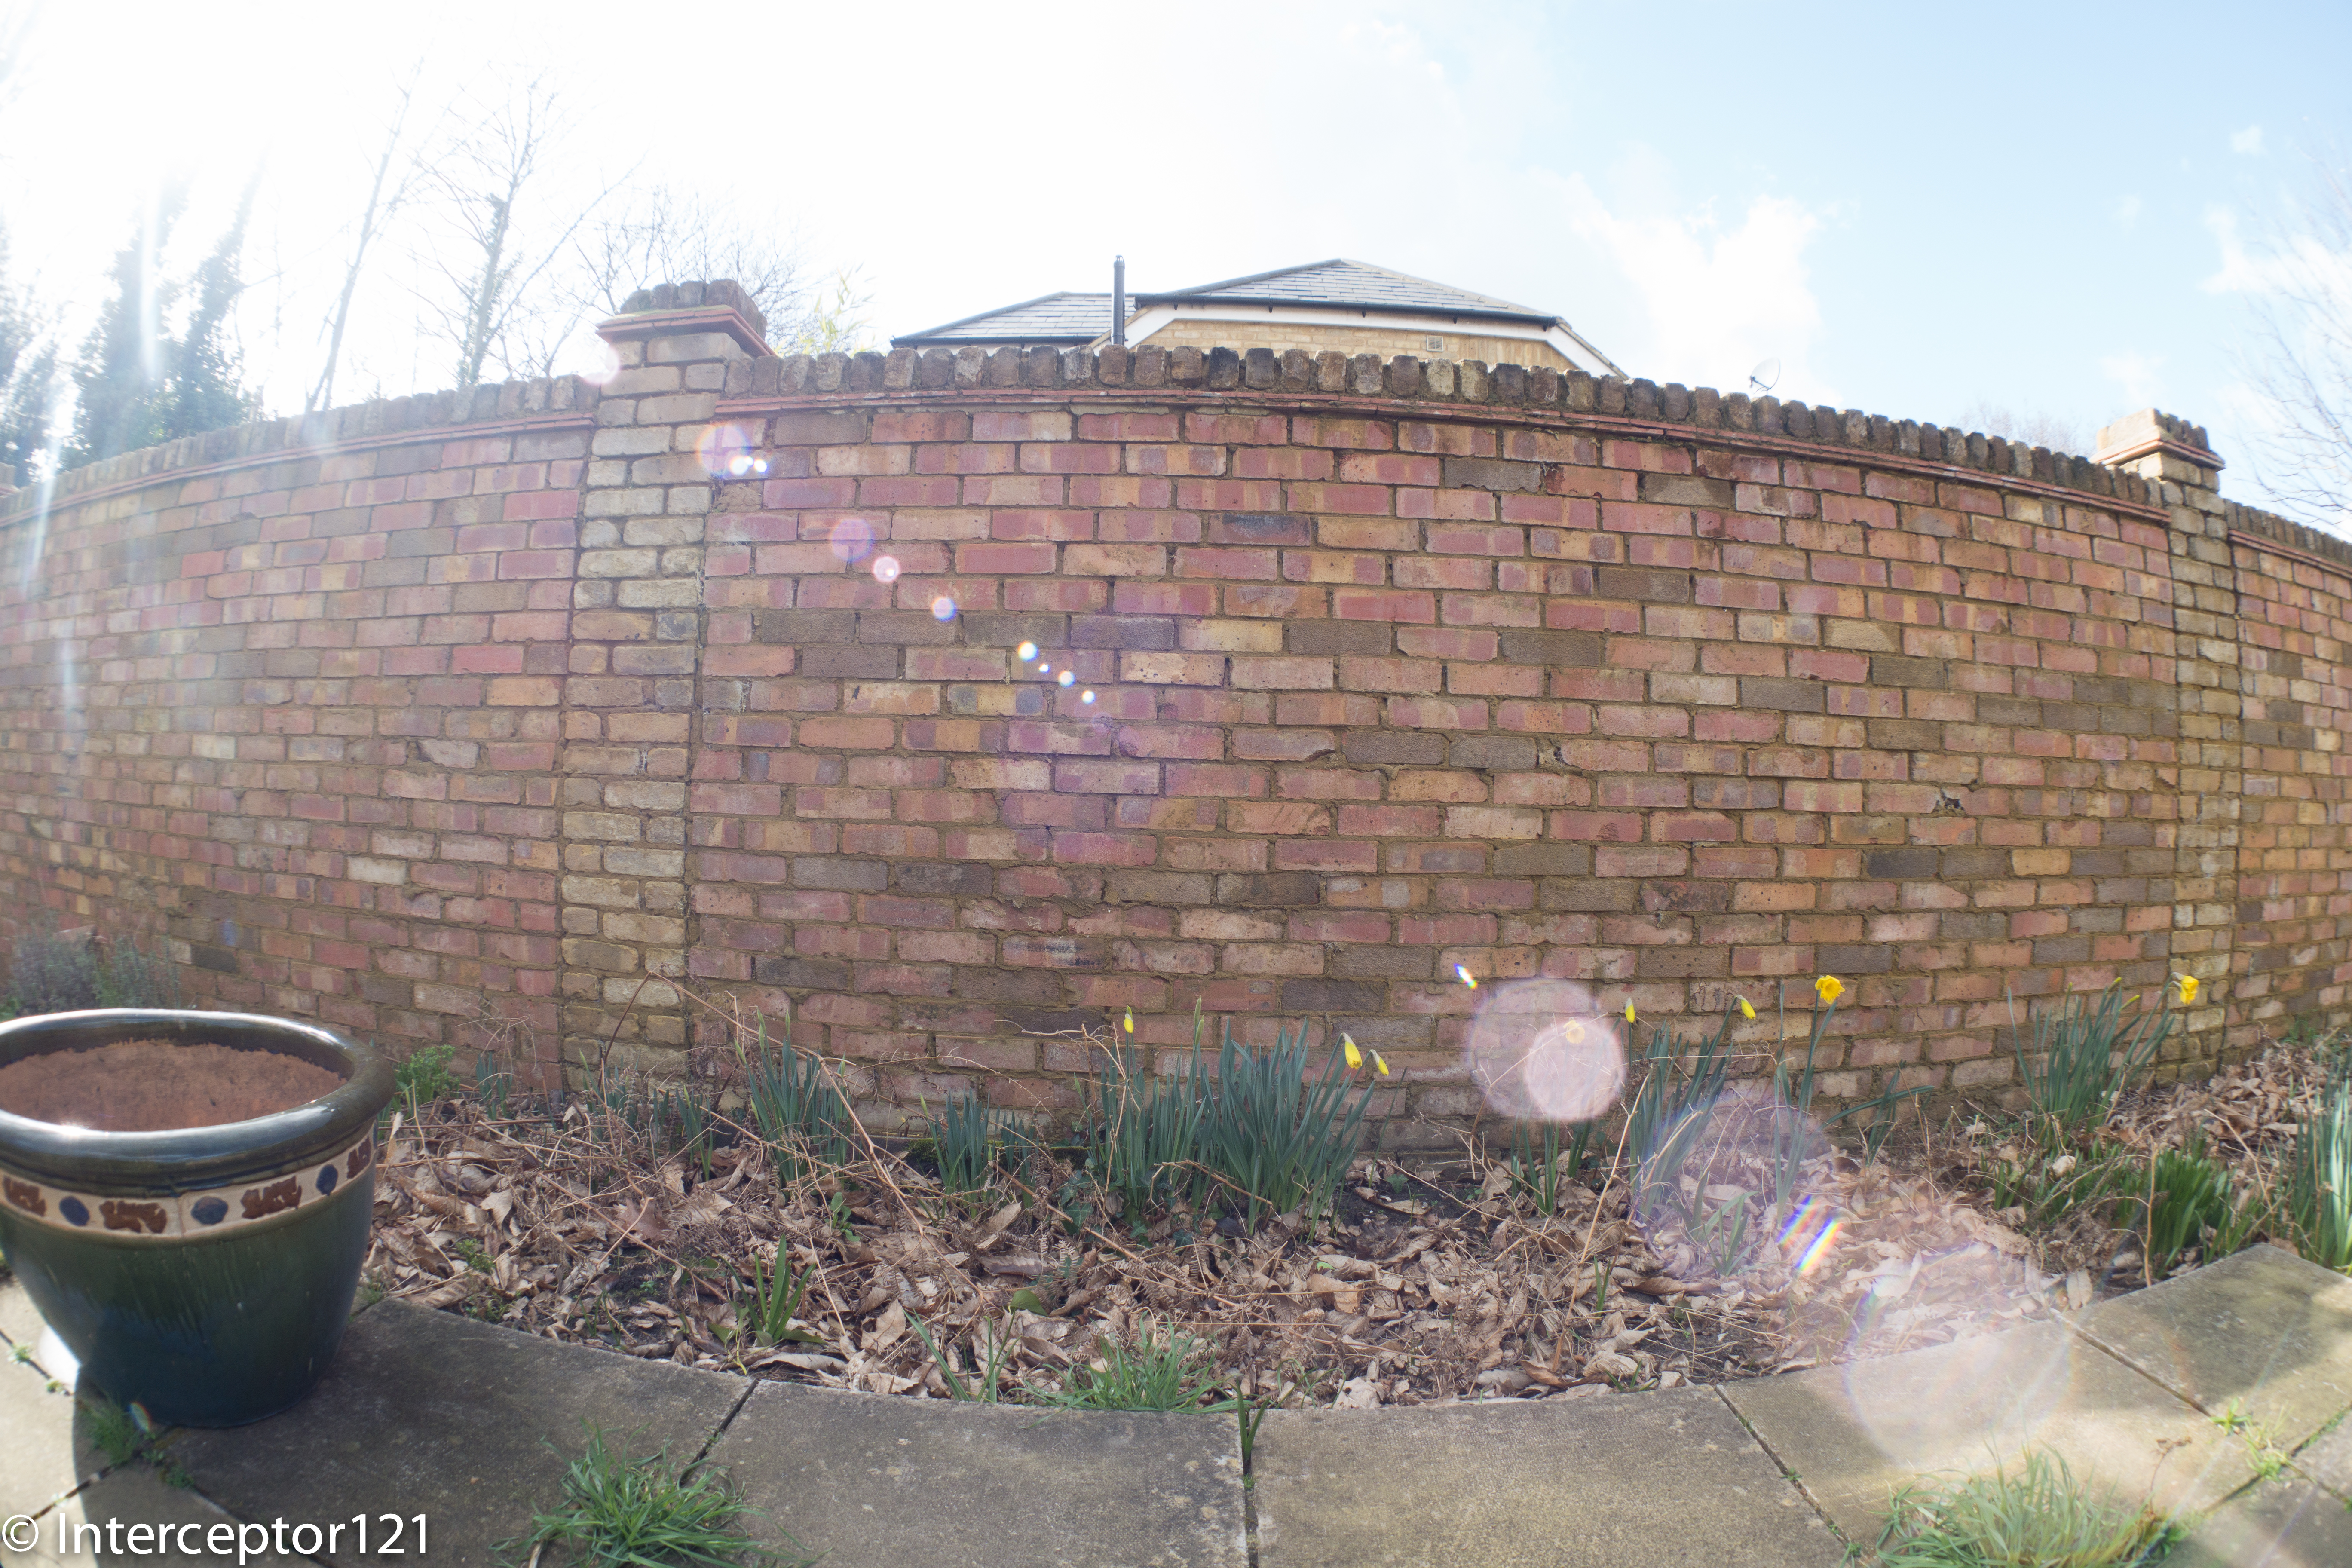
Image Quality
There is no need to take the lenses in water to compare image quality generally things get worse in water not better so it is sufficient to take a shot on land and see how that goes to have a relative comparison between two lenses. In this example the cameras are on a table exactly in the same position when the shots are taken and use the same settings of ISO, aperture and shutter speed.
The first impression is that the UWL-04 is a tad wider but more rectilinear, the Inon lens has definitely more barrel distortion and is more a fisheye than the UWL-04 is. Looking at mid upper frame you can see that at diagonal level the UWL-100 28AD is actually wider than the UWL-04 that remains wider horizontally. This means looking at the specs can be misleading and results depend on the camera lens combination.
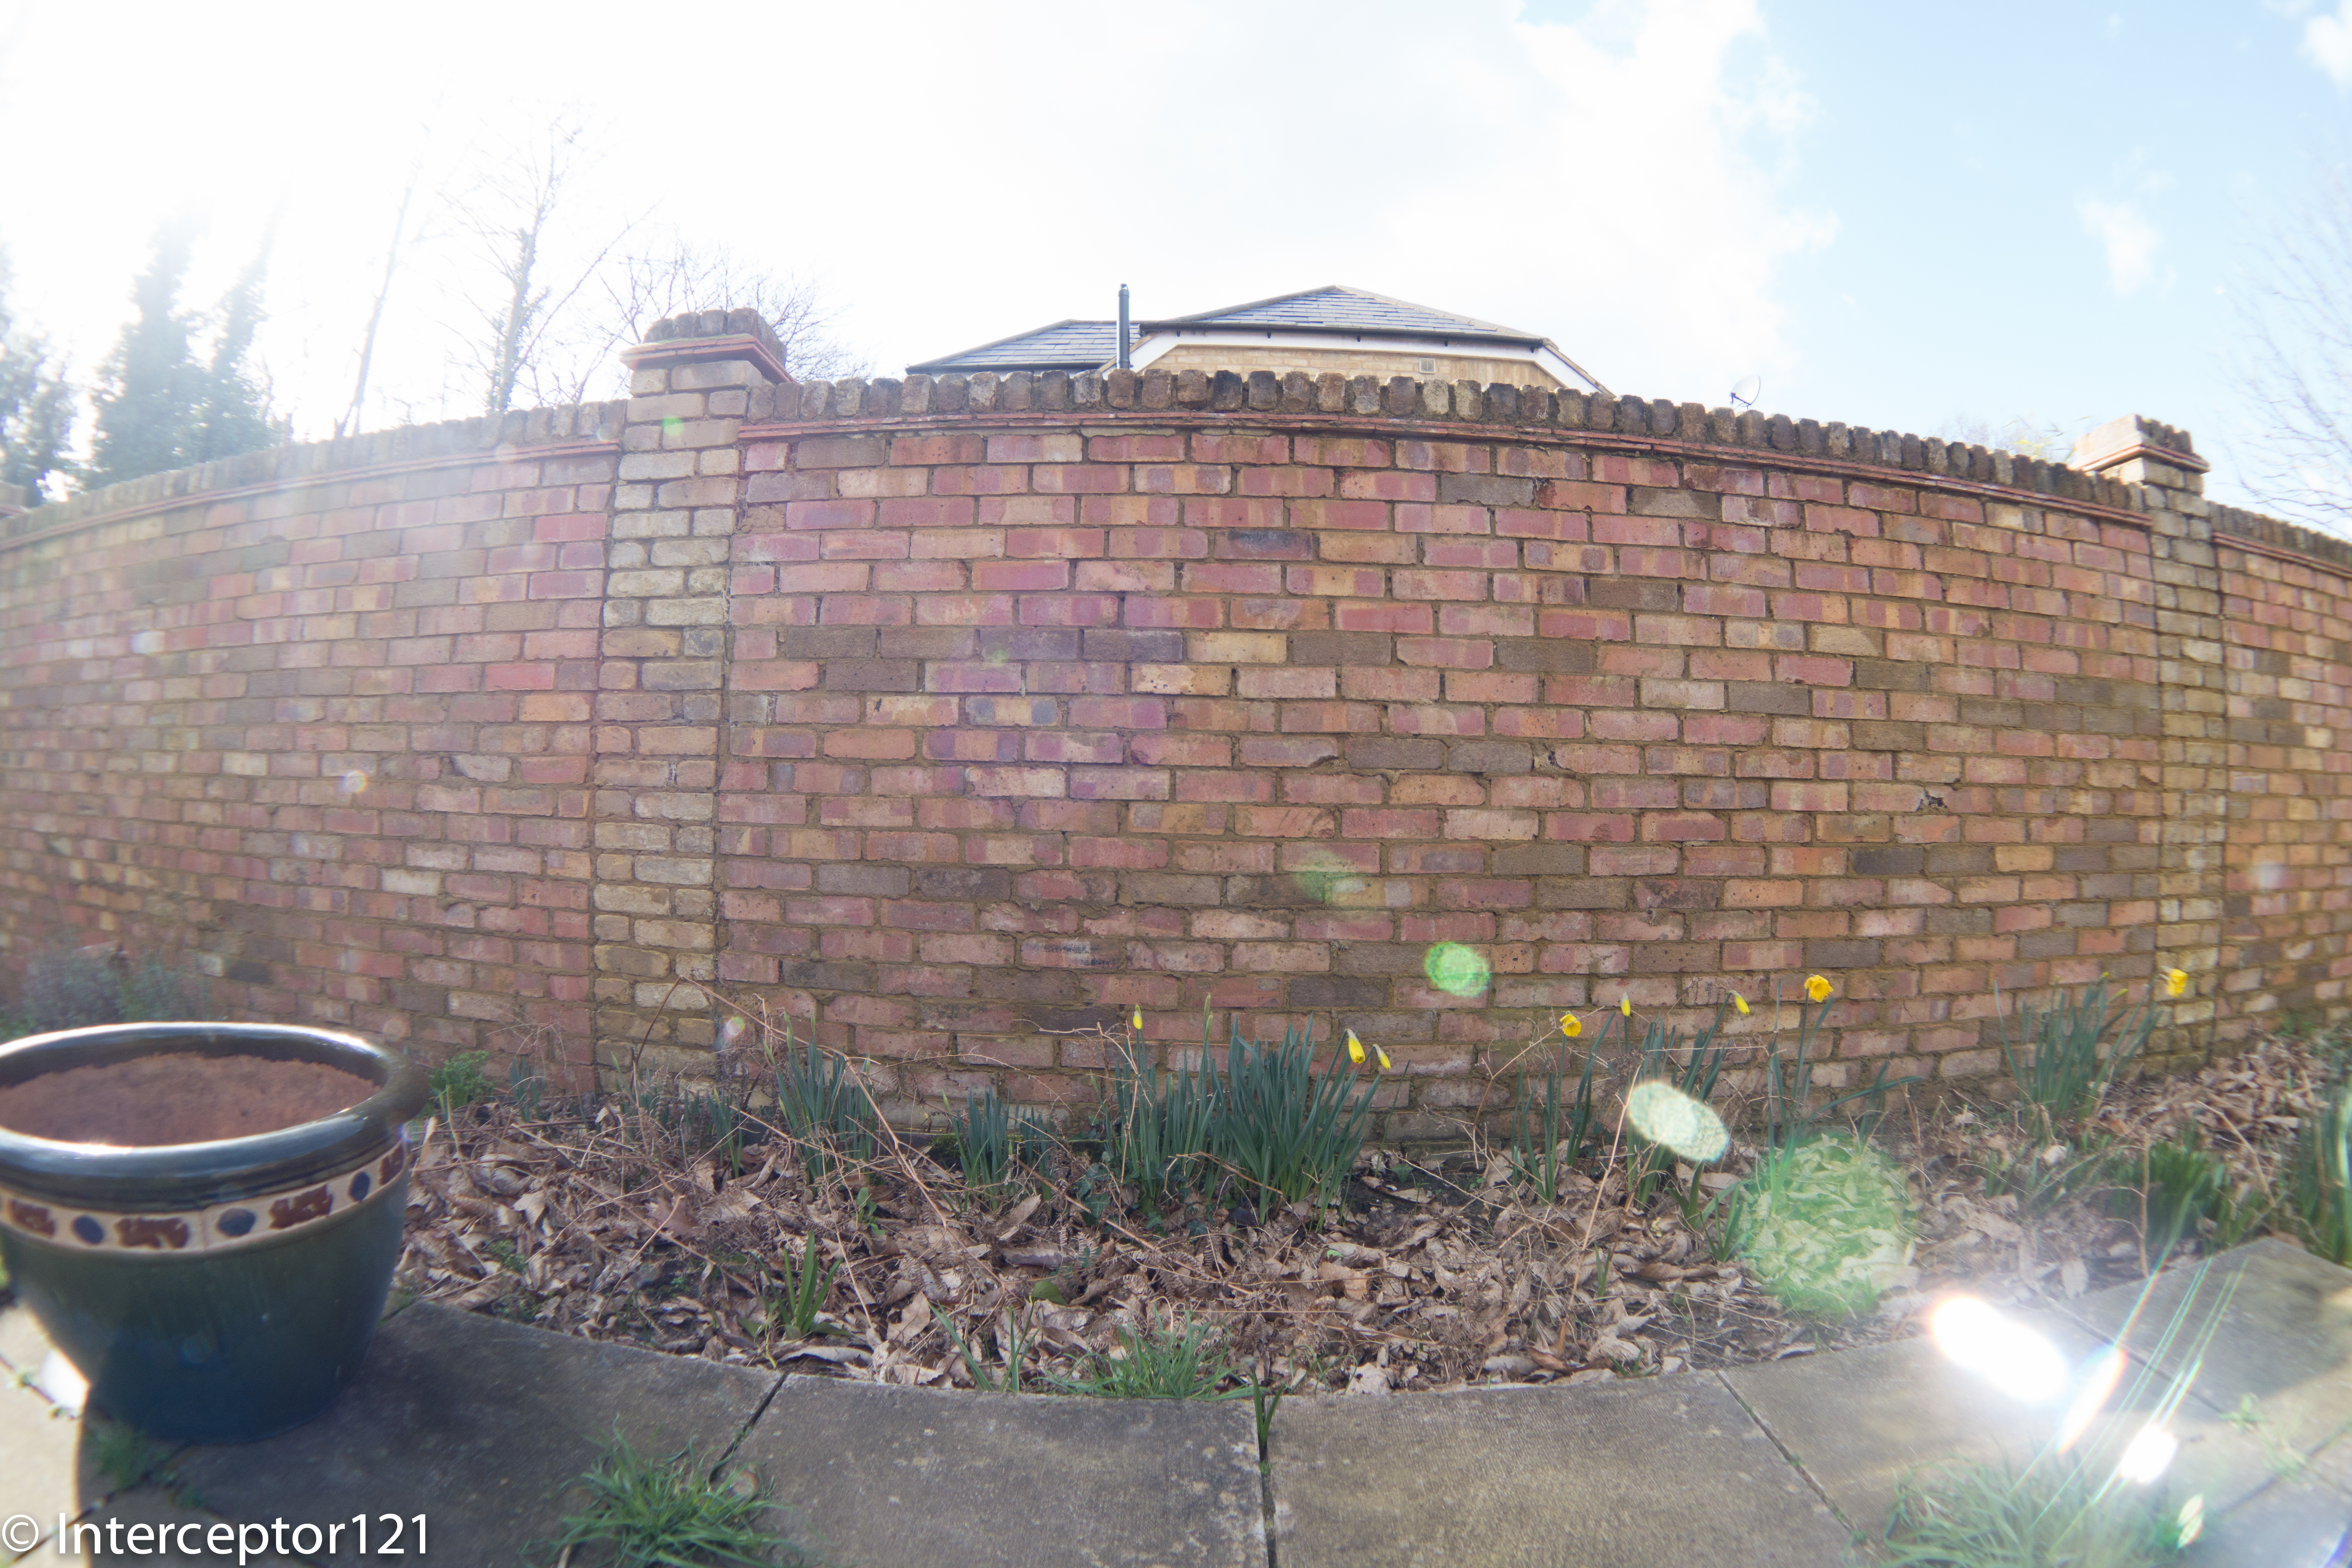
So how do these lenses compare when it comes to corner sharpness and flare?
This is a shot with the UWL-100 in very harsh conditions with sun-rays hitting the lens directly on the dome, you can clearly see the ghosting that comes from it.
UWL-100 Sunlight
This is the same shot in the same place taken with the UWL-04 you immediate notice that the ghosting has a green color. This is most likely due to lack of anti-reflection coating inside the dome and to the color of the inner lens mount.
UWL-04 Sunlight
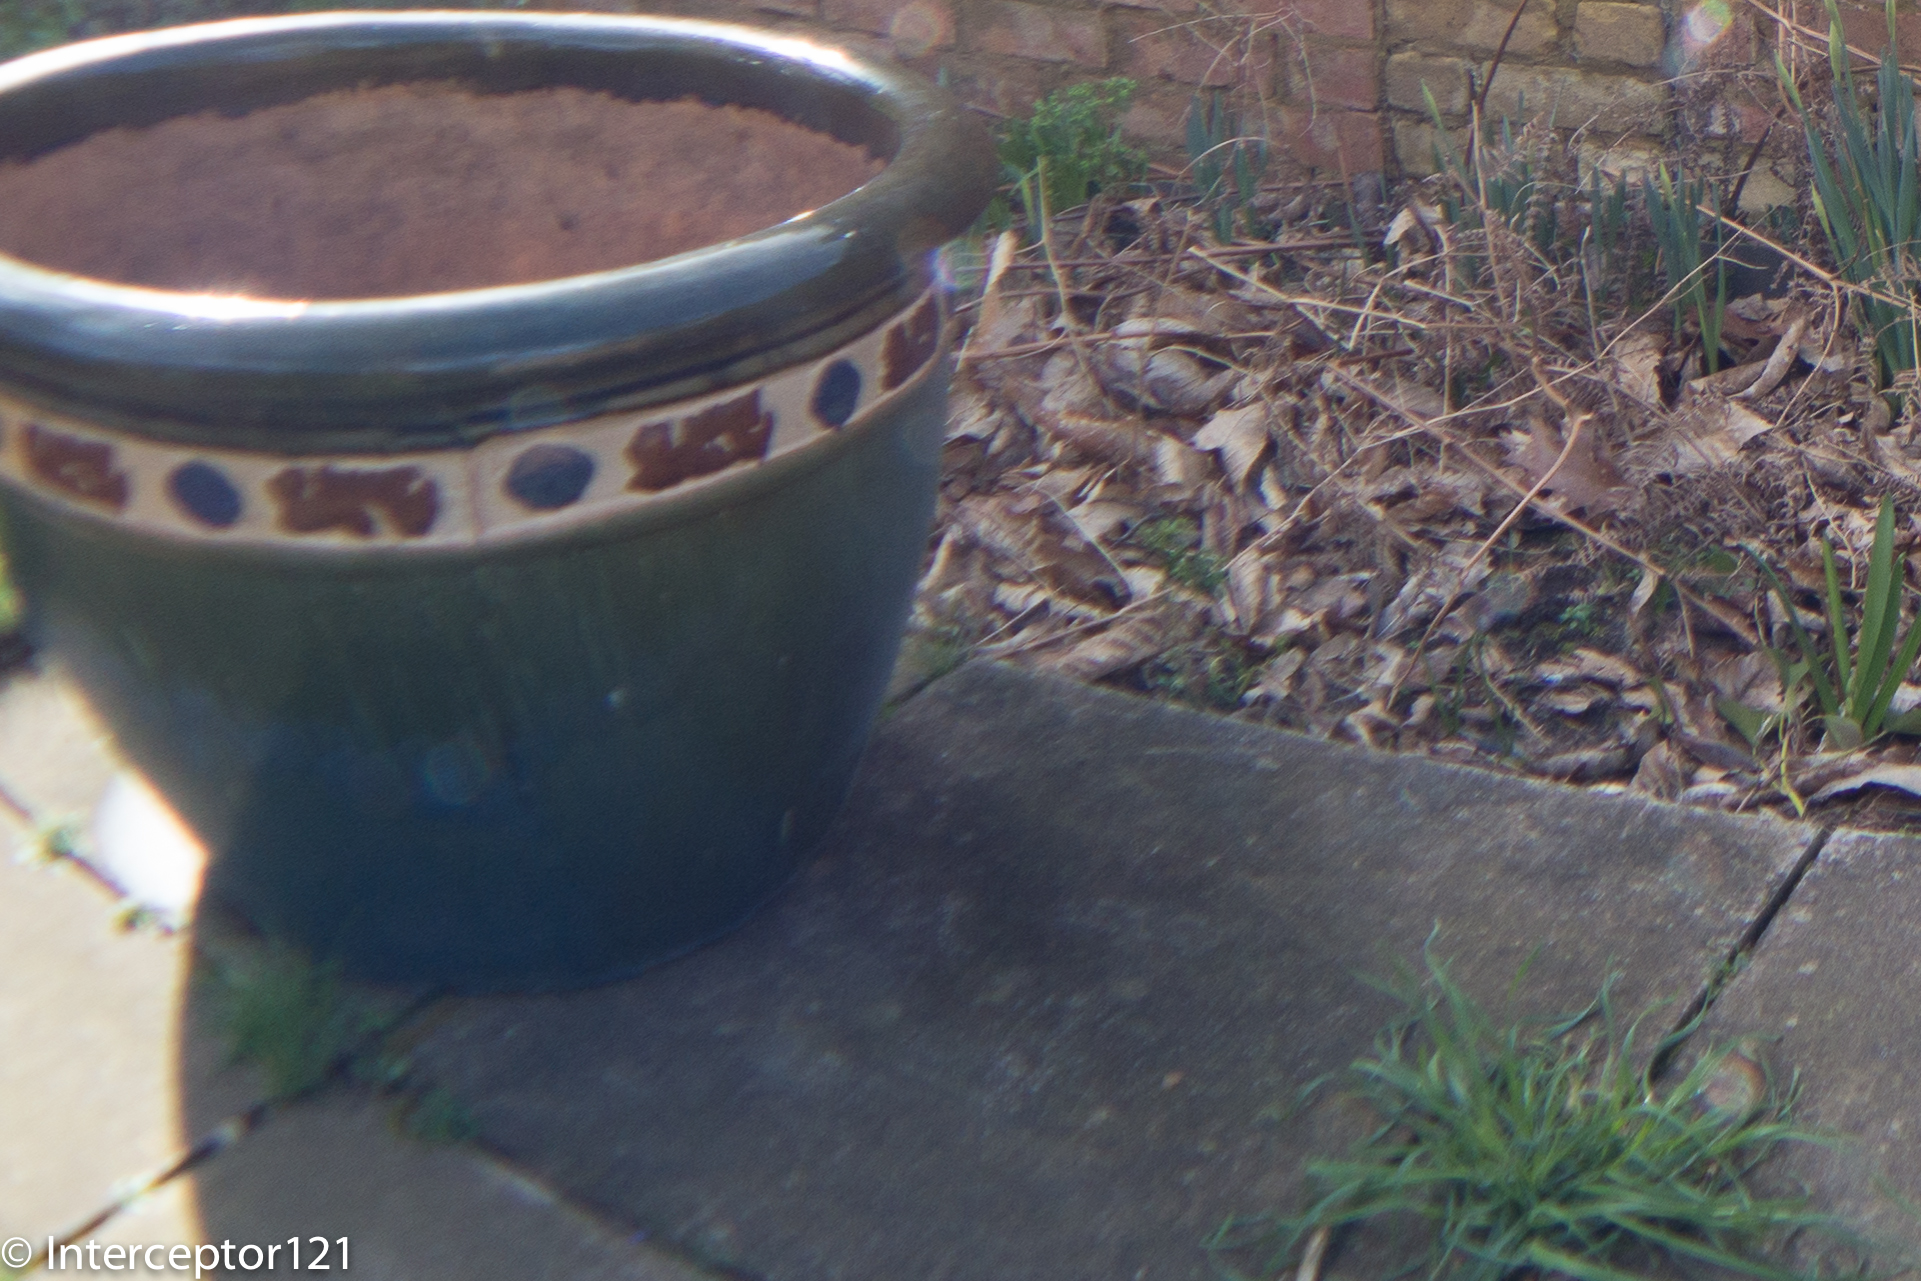
Looking at the image the picture taken with the Inon has a clearer ghosting but then is sharp in the rest of the image, the UWL-04 image has flare around it with comparable less contrast as we move from the center to the corners.
The other two images are a crop in the corner, you can see that despite the high level of distortion you can still distinguish some detail of the small grass bush in the Inon image, the UWL-04 instead is softer and the bush is basically a uniform green shape with no detail at all.
UWL-100 CropUWL-04 Crop
Update 28 Feb I have taken some shots with the UWL-H100 and the UFL165AD here are the overviews
Inon UWl-H100
The UWL-H100 is actually wider than the UWL-04 with the Sony RX100 despite the advertised 144.5 degrees versus 165 of the UWL-04. Has the same level of detail of the UWL-100 28AD
Inon UFL-165 AD
The UFL165AD flare issue is obvious in this shot both lower corners are compromised, this confirms why the UWL-04 is the best option for the Canon S series in terms of flare or vignette.
Looking at the UWL-H100 crop you can see the vignette more apparent in the upper corner and the image sharpness, it is possible that with an M67 mount there is no vignette with a Nauticam housing in most conditions, with LD mount you need to turn image stabiliser off or crop. Considering this is the widest lens it is not a big issue. Once cropped the UWL-H100 gives still the widest field of view but someone maybe be annoyed by this. Zooming in results in the same field of view of the UWL-10- 28AD
Ergonomics
The Inon lens presents the benefit of a bayonet mount, although the lens is heavy it can be removed in water quite easily, the UWL-04 has some issues whereby the adapter ring would unscrew instead of the lens, this can be avoided fixing the adapter on the lens but then there is no lens cap that would fit the larger M67 screw in the box so you need to buy one yourself, generally the size of the petals make this lens impossible to handle in water and is more like diving with a dome port. It has to be noted though that you can zoom through with both lenses so still continue and take portrait shots and close ups. Obviously for real close or macro you do need to take the lens off which with the UWL-04 you can basically forget.
Cost
The UWL-04 costs $460 in US as shown here with dome cover and step down ring, and £362 in UK. The Inon UWL-100 28AD with dome costs $907.80 including an M67-ADF adapter in US and £775 in UK. All in all the Inon is around near to double the price of the UWL-04. The UWL-H100 is even more expensive at $970 for the M67 version and $942 for the LD bayonet, you then need to add $160 for an adapter for a total of $1,102 that is a lot of money another reason for the 28AD version.
Conclusion
The Inon is the best lens for the RX100 and there is no doubt, however it costs more than double the UWL-04 not everybody will be able to afford it. The UWL-04 is a somewhat basic lens that lacks sophistication and is essentially not removable in water but comes at a great price. In terms of field of view the lenses are very similar with the Inon lenses having more fisheye distortion and a wider diagonal field of view. The UWL-04 is more rectilinear and as consequence has less field of view diagonally. Only one lens has zero vignette at the wide end and this is the UWL-100 28AD with dome.
In Water Shots
I don’t have shots in water yet pending my next trip but two galleries that give an idea are here:
The second shooter has got rid of the UWL-04 to buy an Inon as not happy with corner sharpness!
My perspective is if I look at the pictures I can barely tell the difference however looking close the Inon lens is sharper at one f/stop less, the UWL-04 requires stopping at f/8 or smaller, you can happily shoot f/5.6 with the Inon which means you need less light and less strobe power.
So the time has come to talk about photography more in depth. I have actually given up stills in favor of video since a few years as I find video gets me closer to behaviors than stills do, I guess am just not patient enough to capture behaviors on still as that involves waiting!
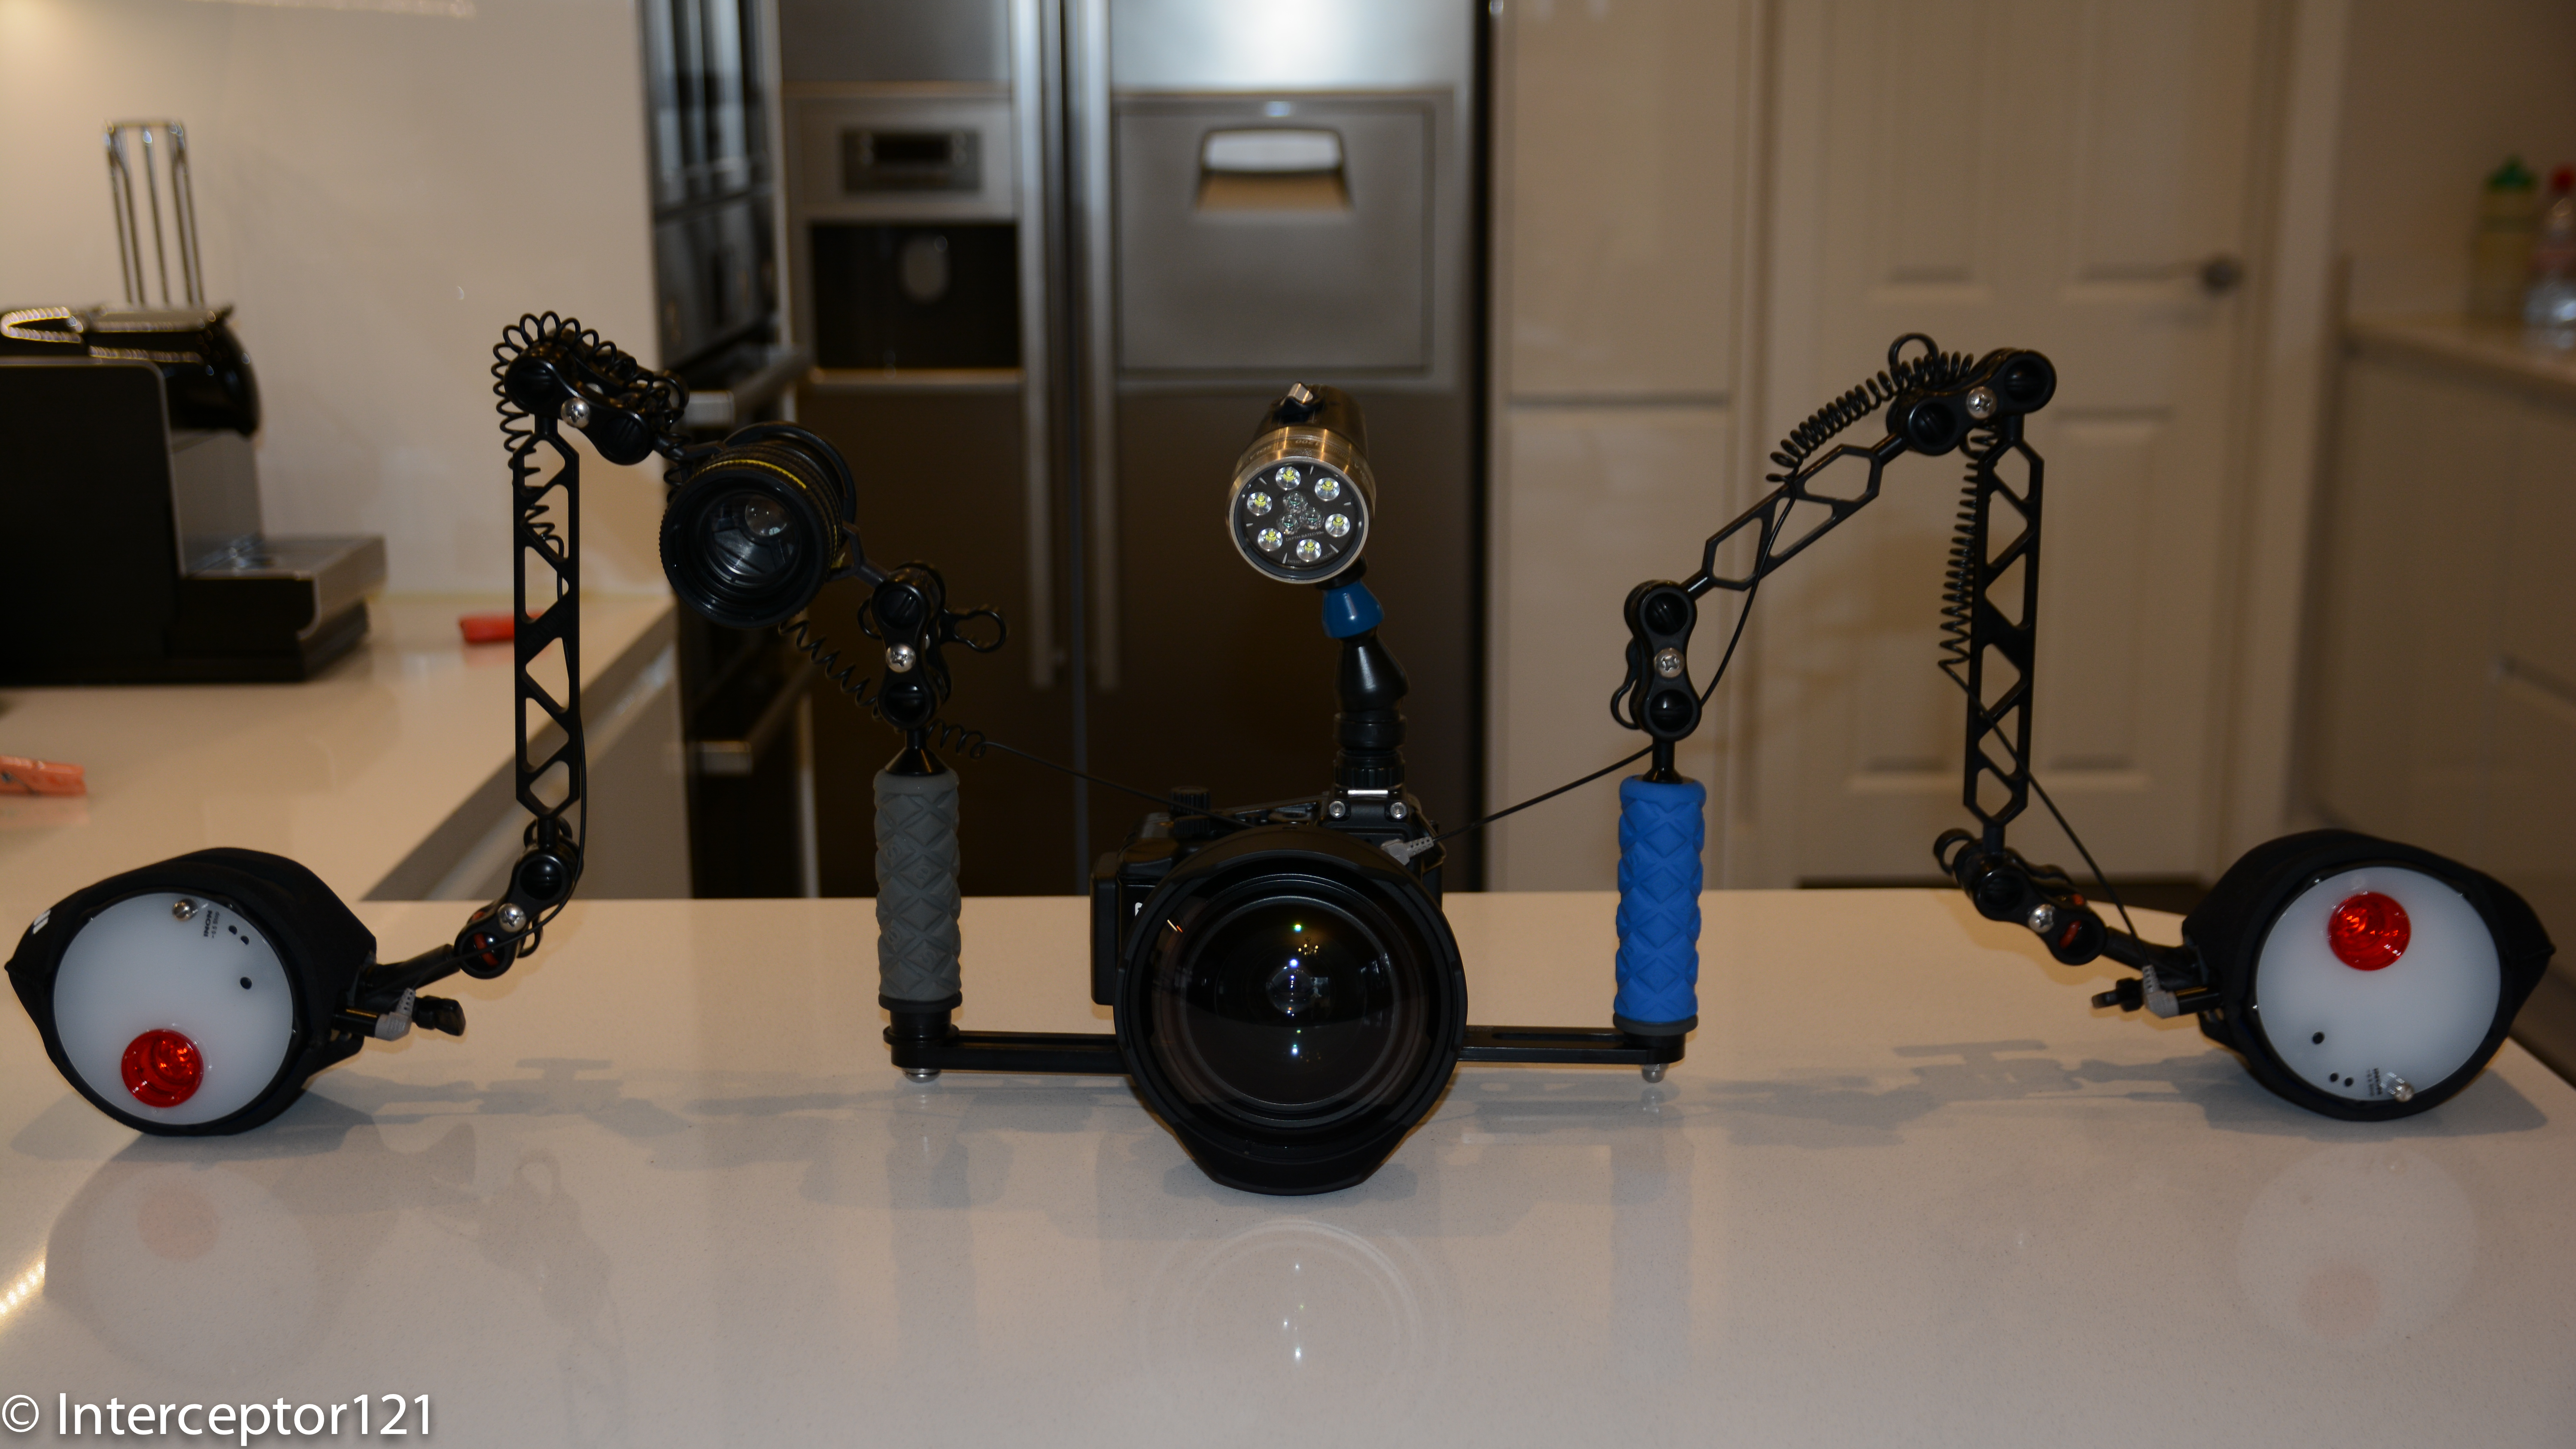
Anyway this is the rig as it is today without the floats.
Sony RX100 Mark II Still Rig as of 2014 January 20th
The RX100 is a demanding compact for the very same reason why it is the best compact the huge sensor it sports. If you come from shooting a canon or panasonic or even Olympus on a 1/1.7″ sensor you find the RX100 to be very unforgiving. In essence you can’t really just point and shoot you need to put some more thinking into your shots.
The rig that I have put together for stills has the same meticulous attention to detail than my video rig has, you would say OCD probably but here it is.
So let’s start with the housing, Nauticam just makes the best most ergonomic housing for the RX100 period. There is nothing you can think of improving about this housing. Even if the bulkhead connector is useless you can actually put a vacuum valve on it to put it to full use.
Nauticam do offer an M67 thread native on all their compact housings but I find this tedious to say the least. The beauty of a compact is that you can shoot wide and macro on the same dive, the M67 thread in essence negates this as it makes virtually impossible to change lenses on a dive. This is the reason why I went for the Inon 28AD mount for my rig using an inexpensive 10 bar adapter priced at $20 or £15.
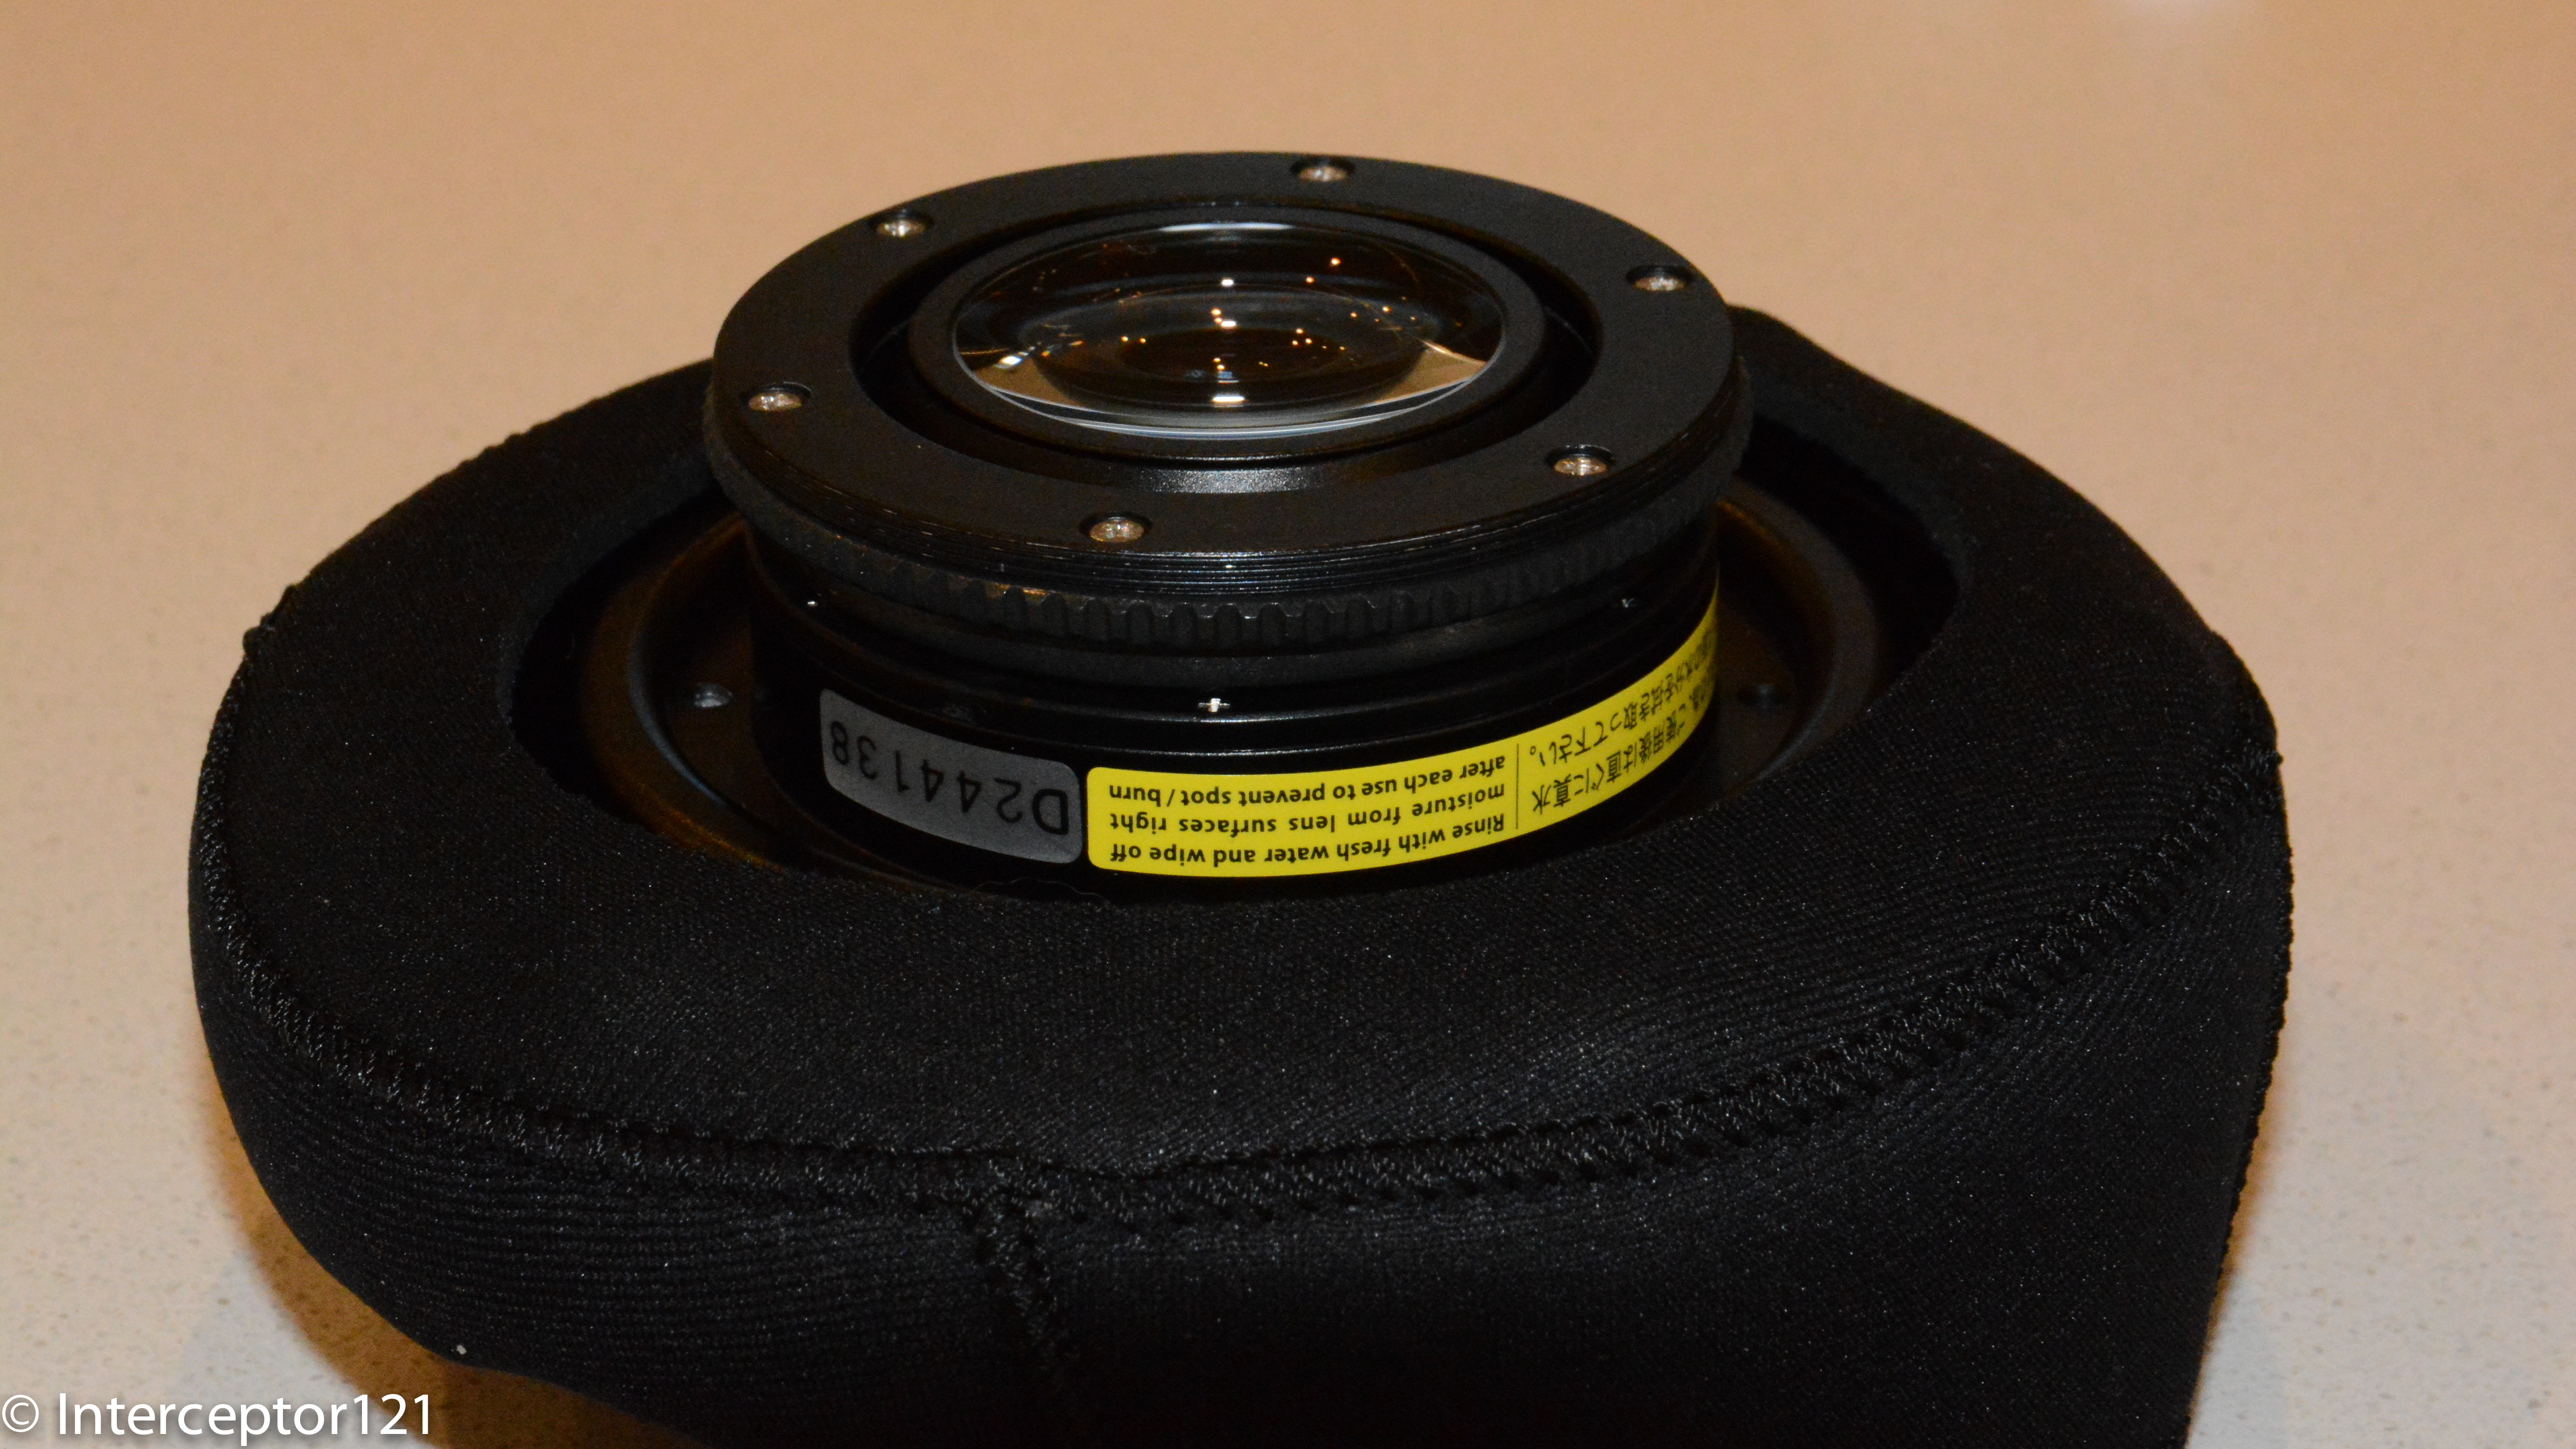
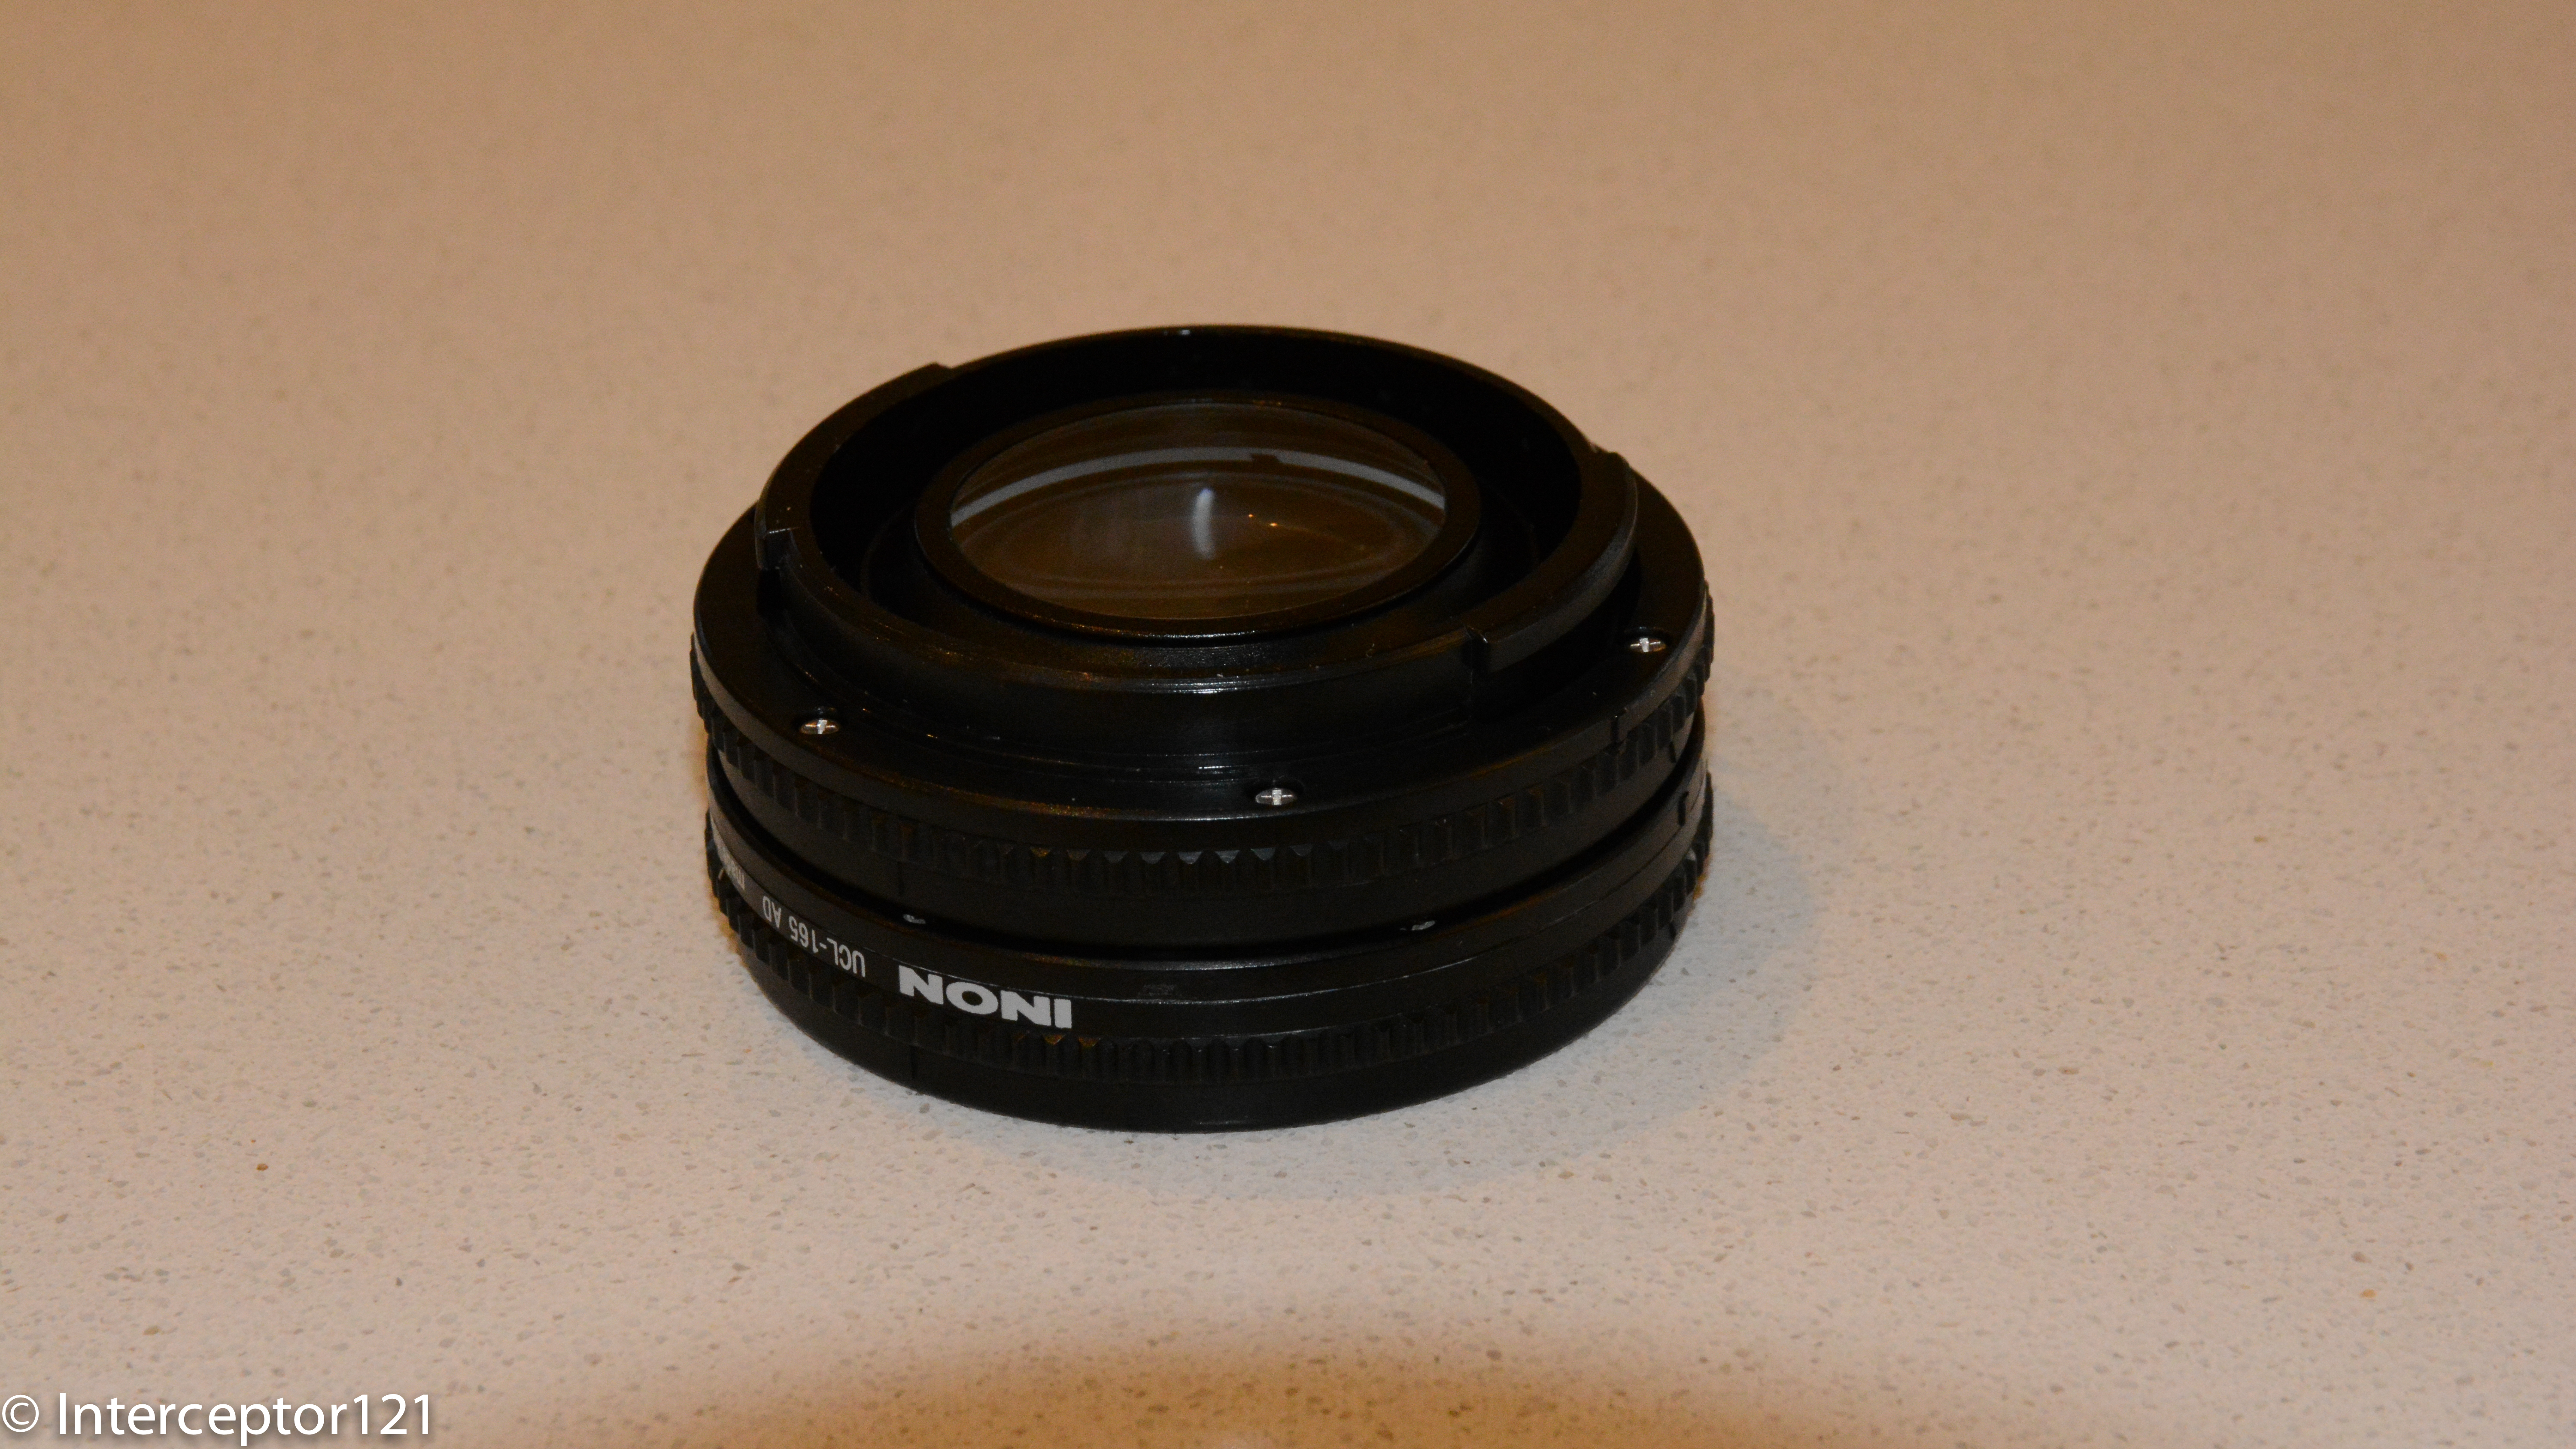
M67-ADF adapter with Inon UWL-100 attached
Once you connect the Inon UWL-100 28AD the lens is very close to the housing to the point of nearly touching the port. This means you get no vignette with this lens with the added dome, and actually a larger field of view in water than you get with the UWL-H100. Why is that? The UWL-100 28AD has less magnification so it does not vignette even on land, once you add the dome you get almost the same field of view in water around 150º. The lens is just a tad lighter than the UWL-H100 with an in water weight of 400 grams.
The choice of the 28AD mount means you can only use the UCL-165AD close up lenses, that if attached would crash into the glass, you need therefore a 28AD->AD adapter from Inon.
28AD to AD adapter with UCL-165AD attached
You do get vignette until 50mm however this is not an issue as you shoot those lenses at the tele-end.
This is the whole lens set with the two adapters.
Two UCL-165AD, UWL-100 28AD with dome, 28AD->ADF adapter, M67-28ADF adapter
As discussed in other posts the two stacked diopters give you super macro, they are also light with 35 grams each in water. The small amount of fringing they give can be eliminated in lightroom with a single click.
Inon UCL-165AD x2 with Inon 28AD to AD adapter
The wide angle lens sports a 115mm optical glass dome with inner anti-reflection coating. If you are into observing fine detail you will notice that the dome is not actually a full semicircle but flatter, if you add the special coating this means no flare and increased contrast. If you wonder why shots taken with Inon dome lenses are sharper is because only 1% of the incoming light is reflected, against 3% of an acrylic dome, the glass dome due to the coating don’t flare, plastic ones do as simple as that.
Inon UWL-100 28AD with Dome
Now let’s move on to the strobes a twin Inon Z240 set. I have been a sea and sea user for years until I managed to damage my YS-01 and got no assistance at all from S&S since then I decided to go elsewhere.
What I love about the Z240 is the variety of controls to manage shadows, the sharp aiming light with a red filter good for the most skittish critters. Contrary to what many people think I aim directly at the subject in macro as the distance is short and backscatter is not an issue so no point aiming the strobes away for me.
FIT Sea and Sea adapter for Inon Strobes
I happened to have a pair of Sea and Sea optical L cable that served me well and had no will to change, FIT produces this cost effective adapter that goes on your Z240 and makes it compatible, I just love it.
Inon Z MV Strobe adapter
I believe Inon Z MV strobe head adapter has no equal in ergonomics but for some reason a part that is $20 in Japan sells at over $40 in US and £30 in UK so is not that popular. My second choice would be the Nauticam strobe adapter that has got the small feet needed to correctly lock on the strobe head.
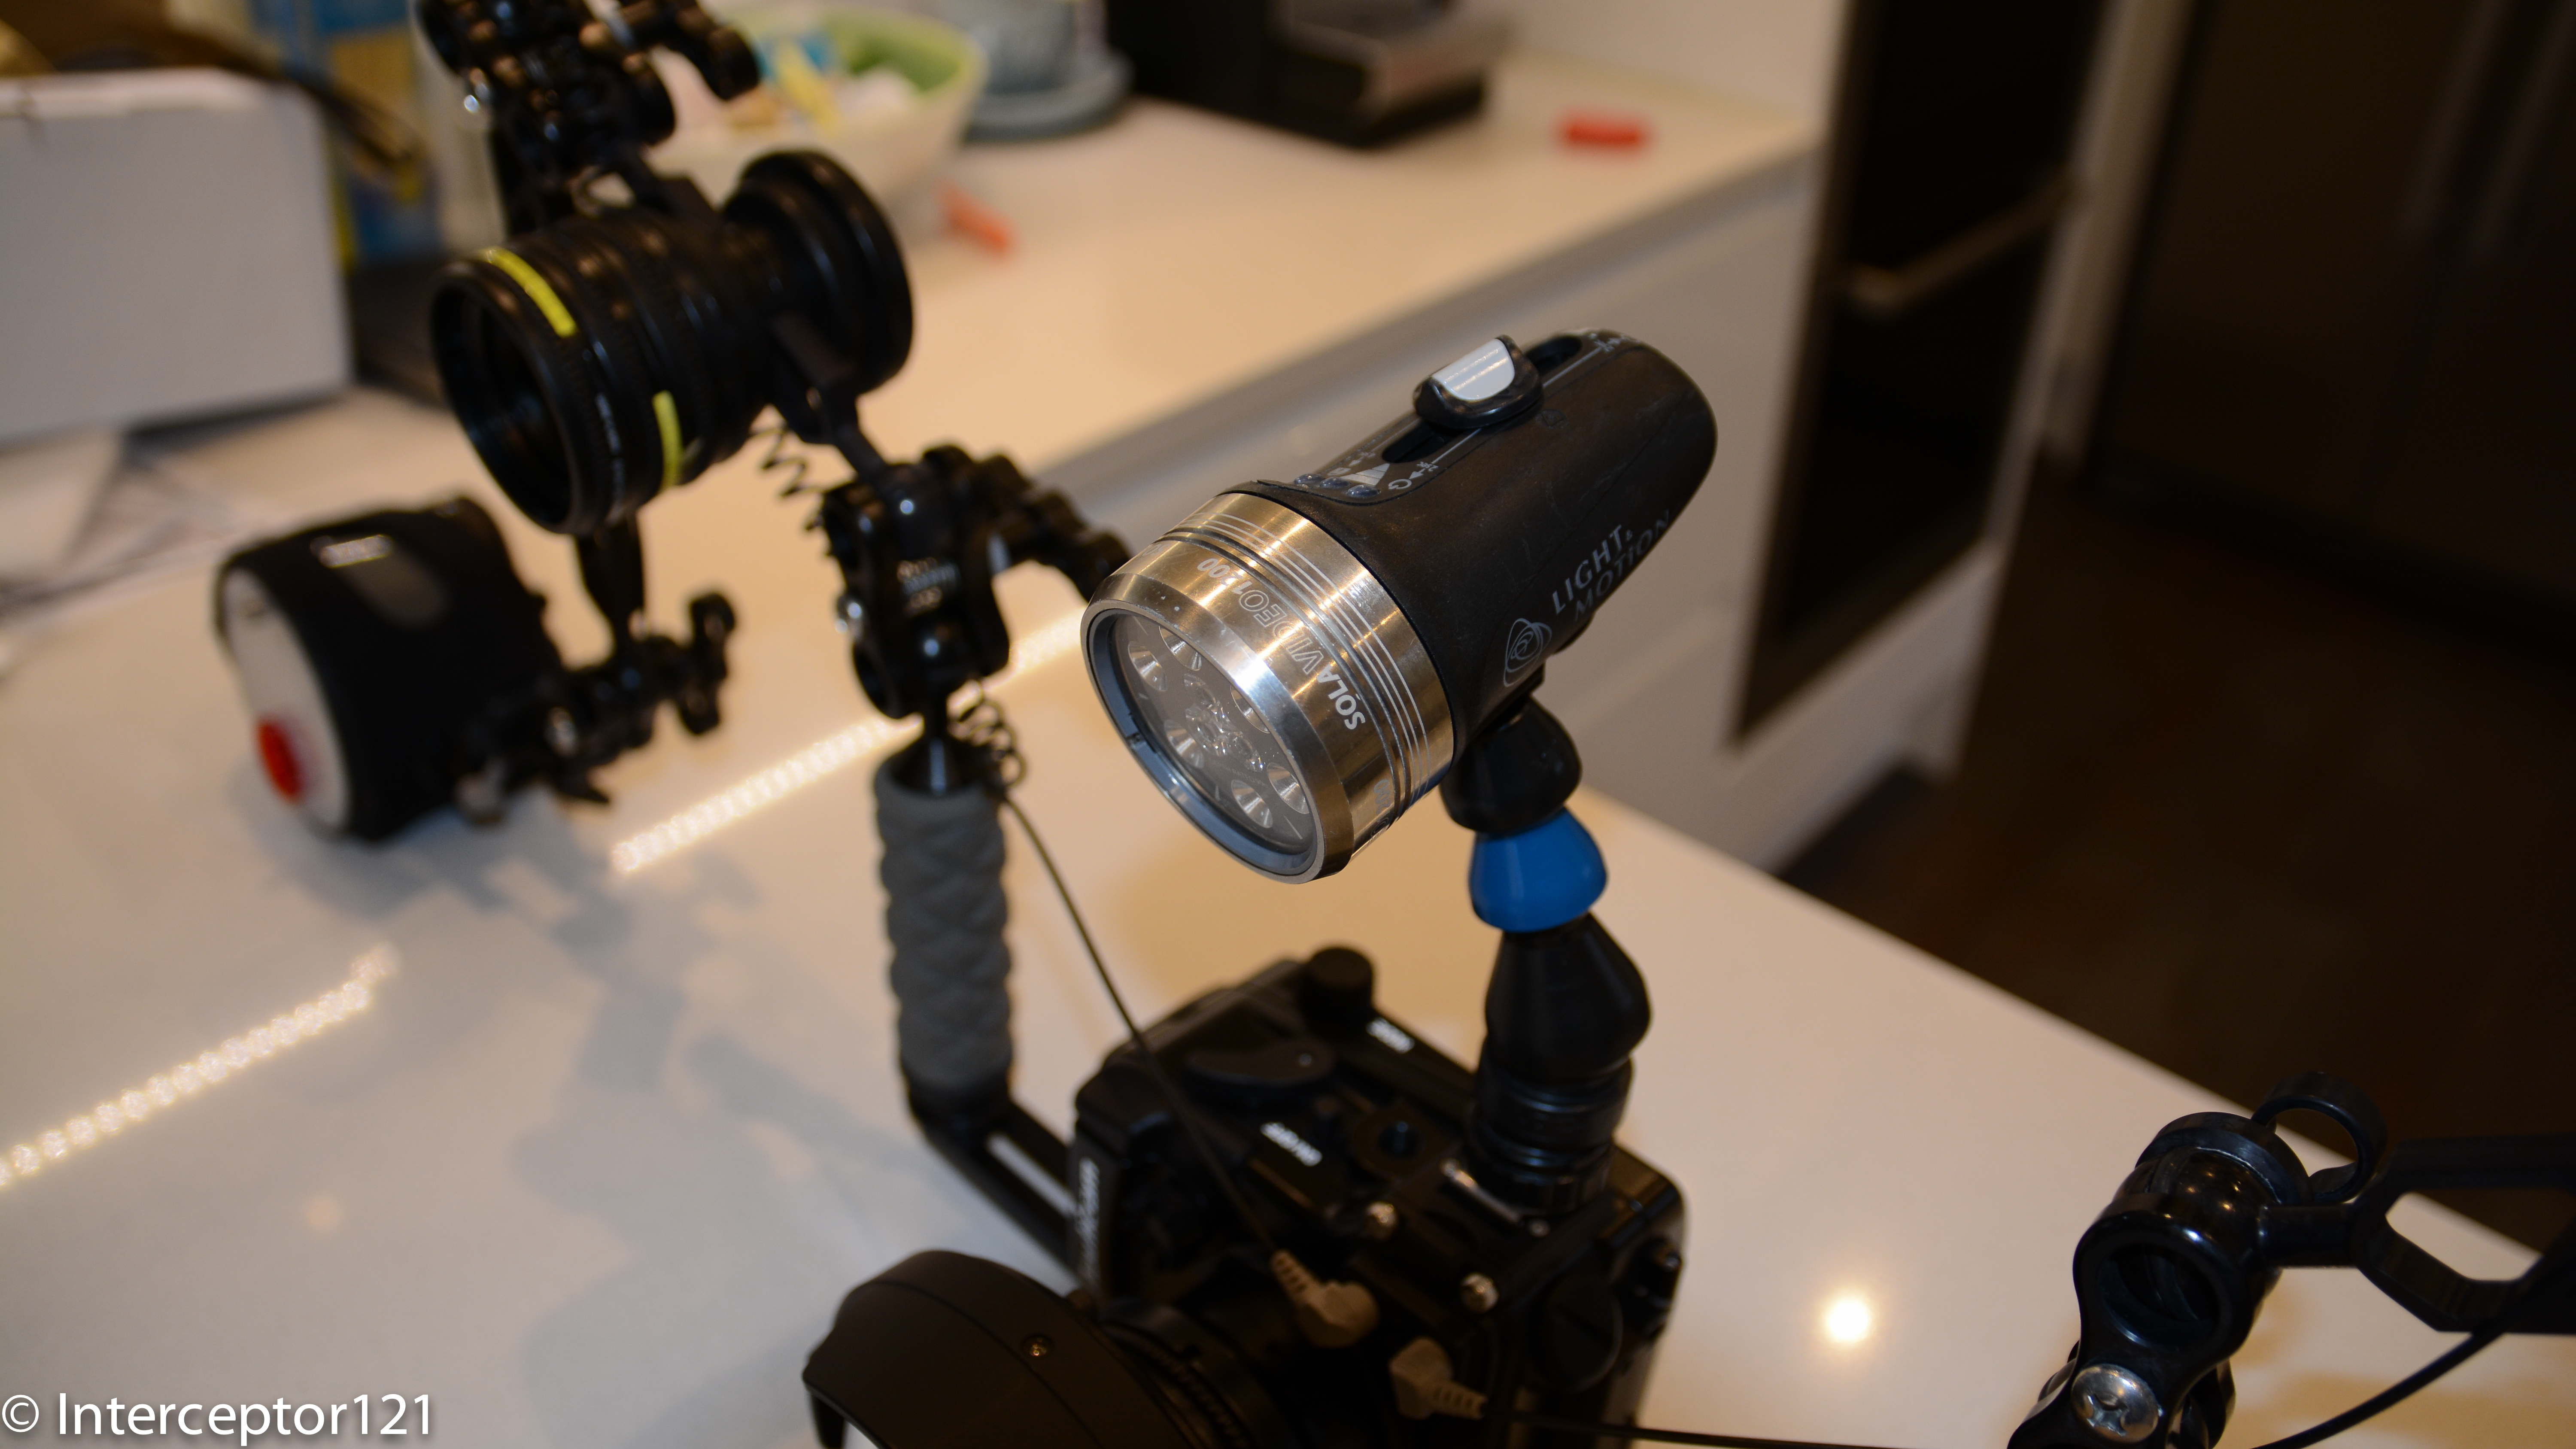
Sola 1200 on Loc line mount
With the Z240 doing wonders as aiming light there is no real room for a focus light however I have a set of Sola Video 1200 and what I like is that you can use them as dive light. I have connected them with a locline cold shoe, this will soon change to a ball mount, as the cold shoe is on the left side. Probably I will get a Sola Dive 800 so I can leave my two trays set for video and stills on the boat.
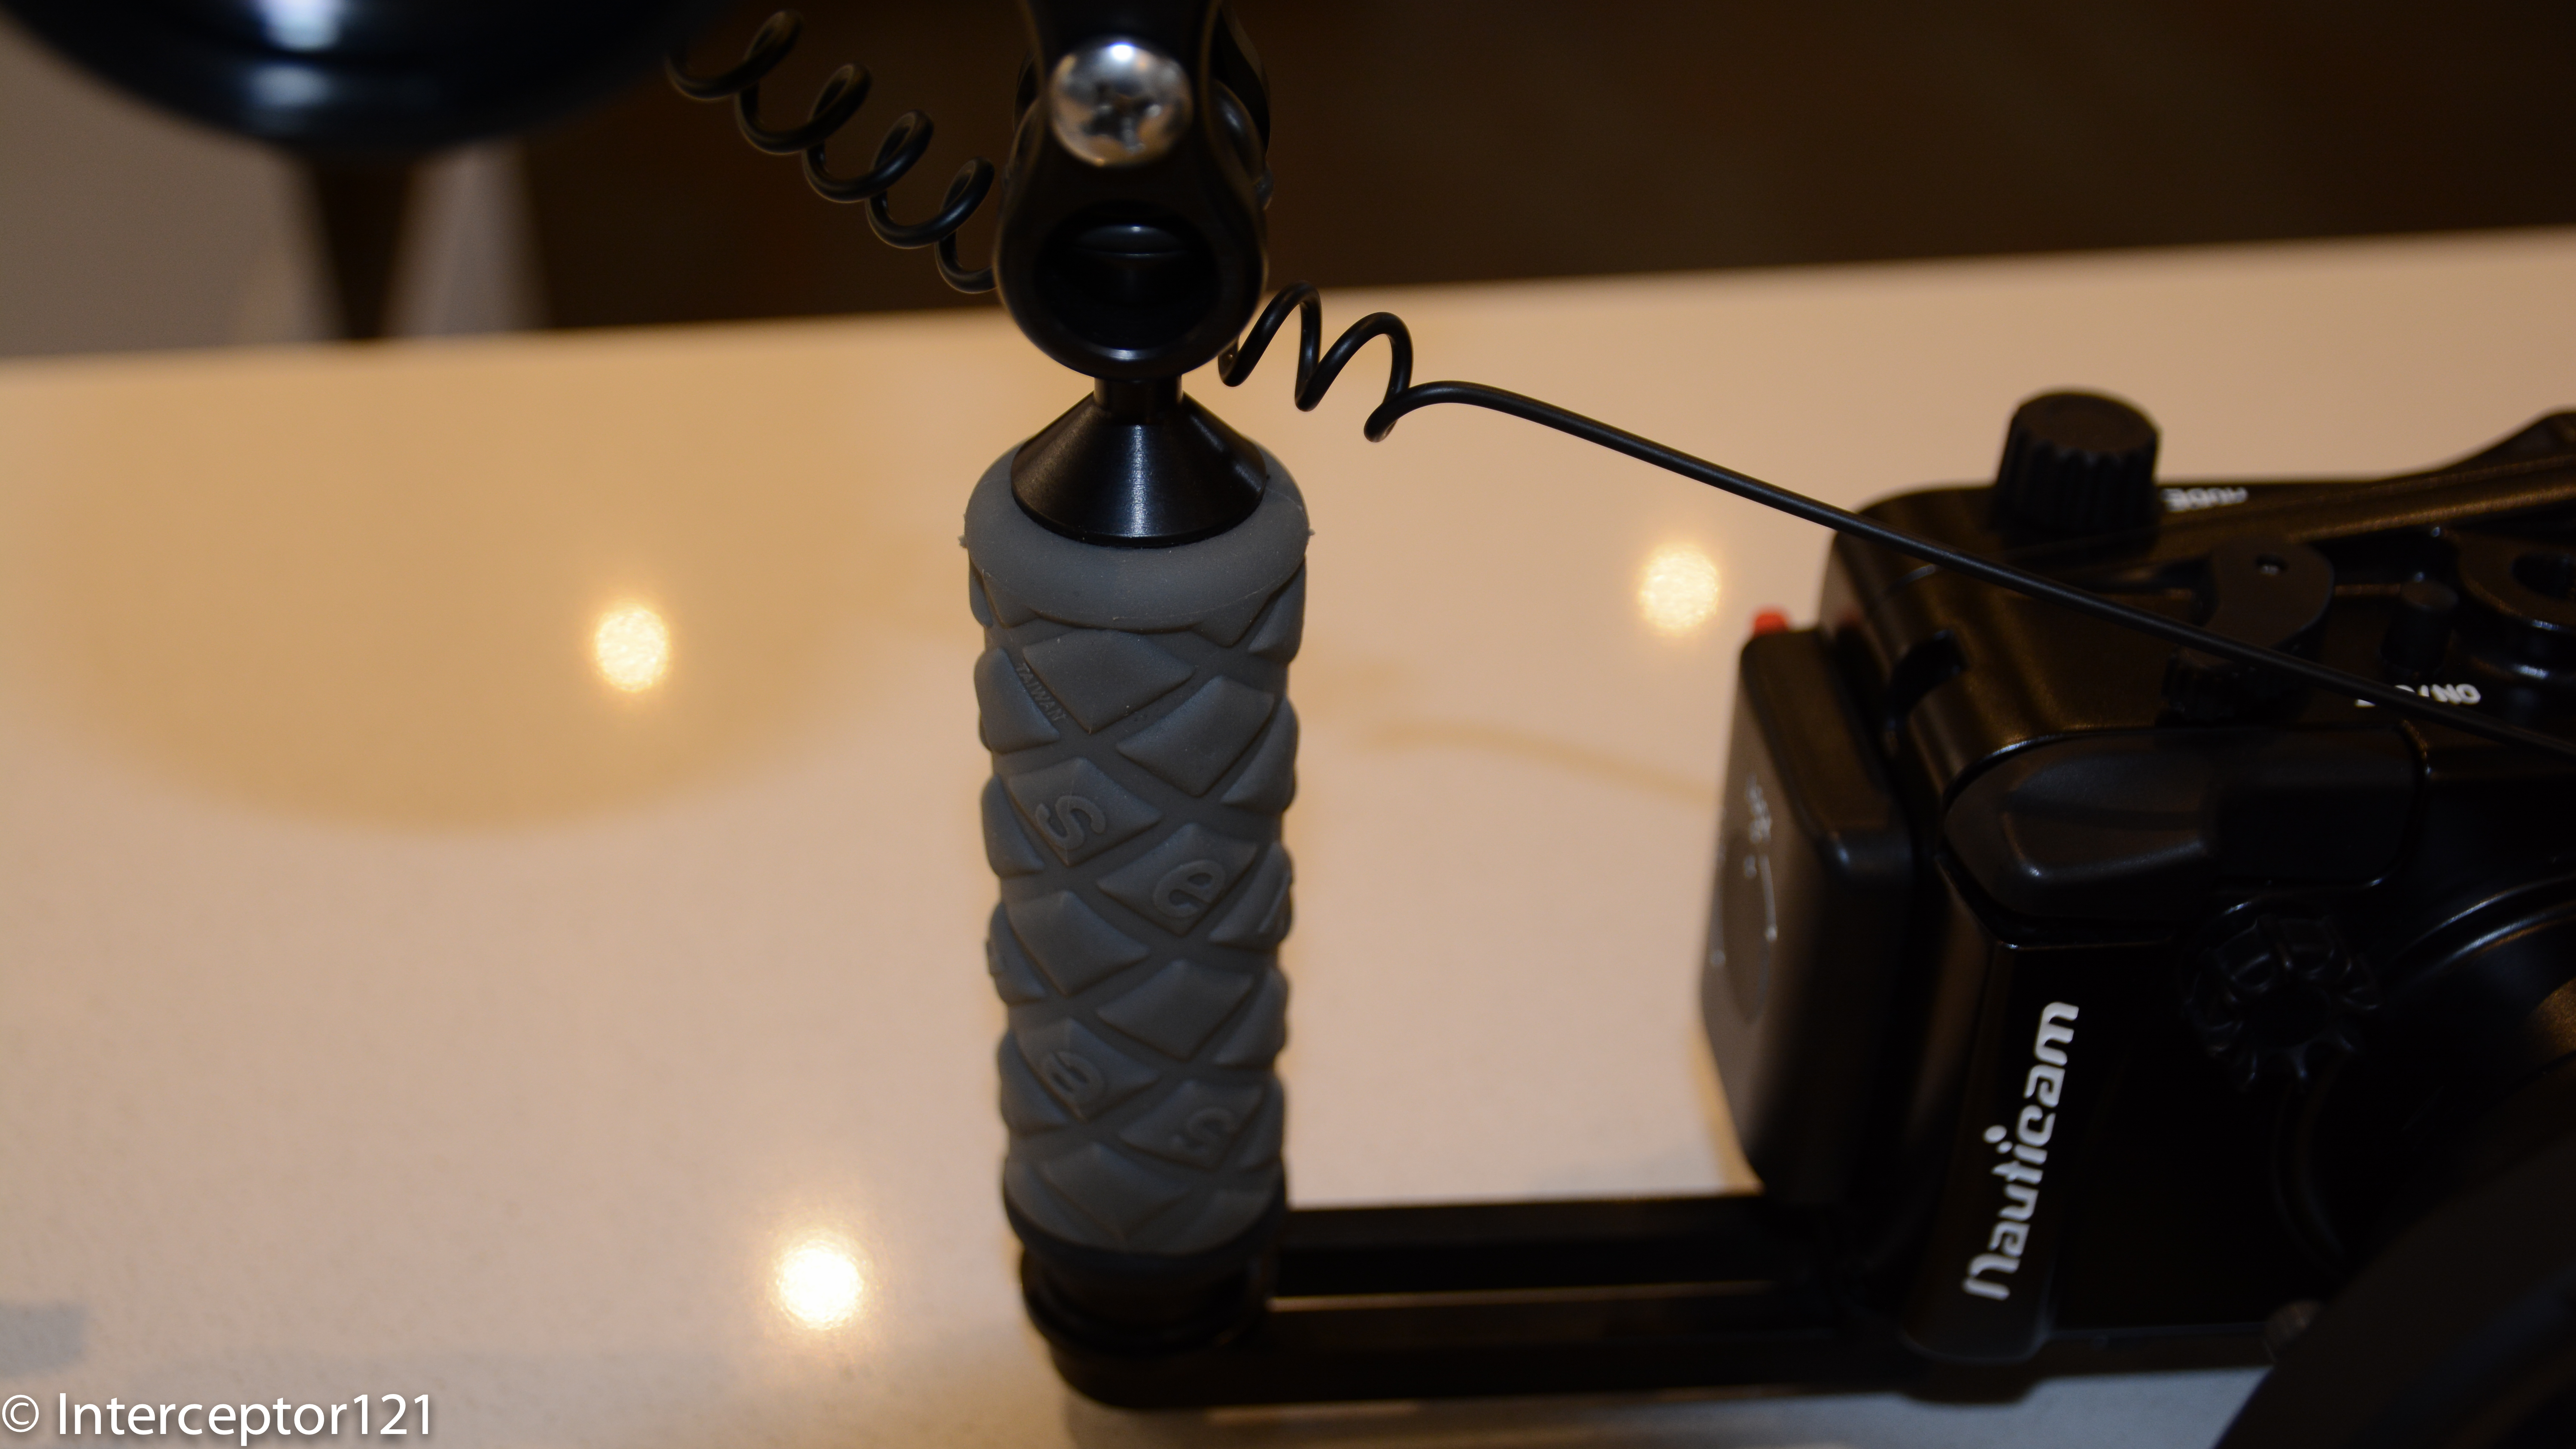
Left Handle Ultralight TR-DHB
Looking at the tray I use ultralight, it simple and sturdy and allows me to center the port in the middle of the tray.
The most attentive will see that the two handles have different colors.
Right Handle Ultralight AC-H
Why is that? Firstly I want to place the handles at maximum distance, second by placing two different handle I can ensure the ball is at the same height, this would not be true if I was using the same handle on both sides. I use a TR-DM with a TR-DUPL long extension to make the tray 30cm or 12″.
Sony RX100 Mark II Still Rig as of 2014 January 20th
So this is what it looks like, there will be floats on it, I estimate I need 8 floats to make the rig neutral with the lenses off. I am planning to place 3 on each 8″ arm segment and two on the tray however I might change this to 2 on each arm and a bespoke float on the tray bottom. I will run some test to see what works best.
So that’s all folks surely there will be questions and I look forward to answer them.
Just want to remind you that if you are in the market for a compact still or video rig I provide a personal shopper service for £30 or $45 that provides an end to end service on your budget where all you have to do is to call the shop to pay. Of course we would discuss any observations about the set up before this gets finalized, but am sure better to spend a little amount instead of making expensive mistakes!
UPDATE 9 June 2014 I have made some more changes to the rig the current version (never say final) is here
In this post I will investigate for your enjoyment the bulkhead connector available for the Sony RX100 Mark II and will see why this is unfortunately an accessory that is not worth buying. There are other ways to put the M16 port to use for example with a leak detection system but if were thinking of firing strobes using electrical sync cords then think again.
I was today at the London International Dive Show where I met Dr Alex Tattersall of Nauticam UK that also introduced me to Catherine Lai, daughter of Edward CEO and founder of Nauticam and herself operations director.
I felt a bit sorry when I had to explain why the bulkhead was not a workable solution and if you have a look at the youtube video you will understand why, this has been shot by my fiance’ on an iPhone so apologies for the portrait format and occasional shake.
Right so if you didn’t manage to hear the audio or understand the subtitles here is the plain text explanation.
The bulkhead has a single X pin that connects to the center of the RX100 multi-shoe, now this is the same interface that is on the newer Nex and on the A7. The Sony multi-shoe has a complex 21 pin interface that used with compatible accessories can trigger an external TTL flash.
In order for an external device to be recognized the interface of the connector need to connect to the 21 pin slot not just to the center. Nauticam bulkhead adapter is not so complex and only connect only on the center pin.
So the result is that the external connection is not recognized and if you leave the flash set to fill flash, as you would do with an optical connection, the internal RX100 flash pops out and fires away negating the benefit of the electrical connection.
So in order to make it work you need to set the internal flash to OFF. As the pin on the multi-shoe is always live this works perfectly so when you press the shutter the nikonos interface triggers the external strobe which is what should happen.
The little but significant inconvenient is that if you set the flash to off the LCD goes pretty much black as the RX100 has live view on the LCD and only lights up when you half press the shutter. This means is practically impossible to compose any shot unless you have a really bright focus light or there is sufficient ambient light. In any case for a close focus wide angle shot that you will take with this camera with apertures between f/8 and f/11 the screen will look pitch black as in the video even if you set the LCD to sunny weather.
Whilst the A7 and Nex have an option to disable live view in the LCD, the RX100 does not have such option so you are pretty much done and this accessory is not worth buying as it also introduces an additional point of failure for the housing and one for each strobe.
So the supposed big advantage of the Mark II goes out of the window, time to despair? Not at all!!!
I had the impression that the internal flash was recycling much faster than the original RX100, well I have done some tests and I can confirm what imaging-resource has measured: the flash recycling time at full power goes from 7.2 sec of the RX100 down to 4.4 seconds of the Mark II.
Now this is significant because after your shot you need anyway 2 seconds to recharge the strobes and look at the image preview after the shot and probably another 2 seconds to recompose the shot, at that time the RX100 Mark II will be ready to shoot again at full power.
The improved CIPA rating of the Mark II also means well in excess of 200 shots at full flash before having to change the battery so there is no big deal that the electrical option is not workable, get yourself a twin set of Inon Z240 (my current favourite) or Sea and Sea YS-D1 and you will have no issues compared to any other compact as the RX100 Mark II has the highest CIPA rating of all compacts on the market that are good underwater.
In fact the most significant improvement of the RX100 Mark II in addition to the better performance in low light is certainly the strobe recycle time, from 7.2 to 4.4 is nearly a 40% improvement and the Mark II is faster to recycle than a Canon S120 although not as fast as the G15 or as fast as the Panasonic LX7 or Olympus XZ2. However we are talking about 1.2 seconds difference I doubt that is such a big deal
Clearly the RX100 Mark II is the best compact camera for both still and videos and I look forward to shooting more stills with it.