The Panasonic 8mm Fisheye lens for micro four third is a clear winner for close focus wide angle however the lack of zoom and the really wide 180º cover mean that there are many subjects that will look tiny in the frame.
The next option in terms of width is the Panasonic 7-14mm wide angle lens however this requires a large dome for optimal performance making the set up expensive.
Is there anything else left if you don’t want to buy a wet lens and you already have the Panasonic PZ 14-42 X Lumix G?
Panasonic produces an add on lens DMW-GFC1 that is declared to provide 10.5mm equivalent and reduce minimum focussing distance to 16 cm all specs can be found here.
This add on lens can be used with the 4.33″ dome for the 8mm fisheye and the 30 extension.
I took a few test shots and the results are pretty good.
This first shot is at f/5 and is very sharp in the centre.
Fisheye Converter f/5
Getting a bit closer and stopping at f/8 the results are pretty good for an adapter that is less than £100 on amazon.
Fisheye Converter f/8
Barrel distortion is contained so this combination may be good for wrecks where the fisheye effect is a bit disturbing.
If you have the Lumix G Vario X PZ 14-42mm you may want to invest in this little accessory before getting the much more expensive 8mm fisheye even if the Nauticam 30 extension is required. Later on the extension can be used with the flat port 35 and the Olympus 60mm for super macro and the 4.33″ dome of course with the 8mm.
I think it is amazing how much can be obtained out of this lens if we consider wet diopters, wet wide angle lenses and this adapter before you need to get a second lens.
This lens could also work for video with the Panasonic GH4 at 4K however zoom is not recommended with it.
With the arrival of the new Nauticam N50 port system for advanced compacts I believe we say goodbye to using a large sensor compact underwater.
We already saw some signs when Sony released the RX100 Mark III with a 24-70mm equivalent lens, this effectively killed any use of the camera for macro. The new Panasonic LX100 has a similar problem with a 24-75mm lens but on top it has the new N50 port system in the nauticam housing or a severely limited functionality in the Ikelite version. It is obvious that the Panasonic LX100 will have similar sever limitations for macro but also with only 10 Megapixels really not be a strong competitor.
The last kid on the block is the Canon G7X, this camera looks very similar to the Sony RX100 Mark II and has a 24-100 zoom range that on land is very useful with an aperture of f/2.8 at tele end that is really interesting for land use. However this camera in the Nauticam version has the same port system N50.
So why has Nauticam introduced this? Both the Canon G7X and the Panasonic LX100 have fairly long lenses in terms of physical size and the zoom mechanism is such that the lens is retracted at wide end. This means that there is quite a gap between the lens and the port and wet lenses in those conditions have issues of both corner softness and chromatic aberrations. So Nauticam has introduced a short port with zoom blocked so that wet lenses can be used.
Effectively this is like diving with a fixed 18mm lens on your camera behind a dome with no zoom capability, taking the wet lens off results in horrible pincushion distortion so not really appealing.
Pincushion Distortion at 24mm with flat port
The dome port does not allow the use of the full zoom at least without a diopter, so this is of limited use too for video.
Cost wise the new housing with the port system are around $1,200 in the US with additional $350 for the dome and $180 for the flat wide port. We are approaching the low end of Micro 4/3 Nauticam housing prices and are more expensive than Olympus OEM options but without the same flexibility and quality in terms of lenses.
It is clear that the Sony RX100 Mark I and II will remain one of a kind and this is the reason why they remain popular few years after launch.
It is official now the prices of the NA-LX100 are confirmed
in US $1,200 for the housing with flat port, $180 for the wide short port and $350 for the 3.5″ acrylic dome.
In UK £920 for the housing and flat port, £150 for the wide short port and most likely £290 for the dome.
Which means we can now update the GH4 comparisons for 4K
Super Wide
Panasonic LX100 $899 NA-LX100 $1,200 with Short Port $180 and Wet lens Inon UWL-H100 $522
Panasonic GH4 with 7-14mm and 6″ dome $2750 housing and port only plus camera and lens $2,399
The max field of view of the two options is almost the same however you can’t zoom the LX100 due to the zoom lock on the housing.
LX100 $2,801
GH4 $5,149
Price Difference $2,348
Mid range
Panasonic LX100 $899 housing $1,200 3.5″ dome circa $350
Panasonic GH4 with 12-35mm and 6″ dome $2750 housing and port Camera and Lens $2,399
The LX100 is wider in 4K at 26-81mm vs 28-81mm of the GH4
LX100 $2,449
GH4 $5,149
Price Difference $2,700
Close Up
Panasonic LX100 with NA-LX100 rectangular port $2,099
Panasonic GH4 with 14-42 and 35 macro port $1,815 housing and port $2,680
The GH4 will have more magnification due to the longer focal length with the same diopter.
LX100 $2,099
GH4 $4,495
Price Difference $2,396
The gap is still significant even with the price increase ranging between $2348 and $2700.
I still have some concerns on the 3.5″ acrylic dome for the LX100 as I am not sure about focus distance. If this port works with the full zoom it is definitely the most appealing for video but we will need to check this out.
On Christmas day Nauticam has released the NA-LX100 housing for the Panasonic DMC-LX100. It is priced at ¥168,000 which is 50,000 more expensive than the last NA-RX100 III.
If this translates correctly in $ and UK prices it means $1,399 plus tax or £895 including VAT for UK.
Here is the original link in Japanese on the fisheye homepage
NA-LX100 with flat rectangular portNA-LX100 Rear View
Prices for the short port for wet lenses and the dome port have not yet been announced but we know that the dome can use the camera at full zoom and that the short port. The US price of the flip diopter for the rectangular port is known and is $220.
Which means we can now update the GH4 comparisons for 4K
Super Wide
Panasonic LX100 $899 NA-LX100 with Short Port and Wet lens $2,000 circa
Panasonic GH4 with 7-14mm and 6″ dome $2750 housing and port only plus camera and lens $2,399
The max field of view of the two options is almost the same however you can’t zoom the LX100 due to the zoom lock on the housing.
LX100 $2,899
GH4 $5,149
Price Difference $2,250
Mid range
Panasonic LX100 $899 with 3.5″ dome circa $1,699
Panasonic GH4 with 12-35mm and 6″ dome $2750 housing and port Camera and Lens $2,399
The LX100 is wider in 4K at 26-81mm vs 28-81mm of the GH4
LX100 $2,599
GH4 $5,149
Price Difference $2,550
Close Up
Panasonic LX100 with NA-LX100 rectangular port $2,299
Panasonic GH4 with 14-42 and 35 macro port $1,815 housing and port $2,680
The GH4 will have more magnification due to the longer focal length with the same diopter.
LX100 $2,299
GH4 $4,495
Price Difference $2,195
The gap is still significant even with the price increase ranging between $2200 and $2500.
There is still an option to use the GH4 with wet lenses although this has only been tried with diopters to date it is technically possible to use a wet wide angle lens.
This week I have been in contact with Nauticam that have given me some final details with regards to the NA-LX100 housing that will be released in the next weeks and is already available for pre-order in Hong Kong.
The housing is confirmed to have a changeable port system the default is the rectangular flat port as in the image below.
When shooting 4K the Panasonic LX100 focal length is 26-81mm which means that in water the default port will give a range of 35-108mm due to water magnification. This is however negated by the increased working distance so don’t get too excited about macro.
Panasonic LX100 Flat Port
There will be a flip diopter for the rectangular port as a separate accessory. Due to the limited zoom of the LX100 a strong diopter with power of at least +10 in water is required for macro.
The other option displayed was a mini dome port.
Nauticam LX100 Mini Dome Port
Nauticam has confirmed that this dome is 3.5″ wide and unfortunately there is no provision currently for a flip diopter for this port.
The 3.5″ acrylic port is probably the most versatile option for the Panasonic LX100 and I am a bit puzzled of why the flat port is offered as a default. The mini dome seems perfect for all round reef use when there are no really small critters and medium size fish.
Nauticam has also a super wide option that utilizes a short port with a 67mm thread. This takes the Inon UWL-H100 from what we have heard and also a new lens Nauticam has designed.
The zoom will be locked so the lens will stay at 24mm limitedto circa 50mm which means with the wet lens this is a 16-32mm wide lens in water, I am not sure however that zoom in will be a possibility with the Inon lens but will be possible with the Nauticam lens as far as I understand.
Nauticam LX100 Wide wet lens
So what is the strategy for Nauticam and this housing?
It is quite clear for me that the Panasonic LX100 has the same 4K capabilities of the GH4 the same IPB codec and processor. It falls short of cinema options but costs half of the GH4 body.
So for your perusal those are the equivalent options
Super Wide
Panasonic LX100 $899 NA-LX100 with Short Port and Wet lens $1,700 circa
Panasonic GH4 with 7-14mm and 6″ dome $2750 housing and port only plus camera and lens $2,399
The max field of view of the two options is almost the same however you can’t zoom the LX100 due to the zoom lock on the housing.
LX100 $2,599
GH4 $5,149
Price Difference $2,550
Mid range
Panasonic LX100 $899 with 3.5″ dome circa $1,300
Panasonic GH4 with 12-35mm and 6″ dome $2750 housing and port Camera and Lens $2,399
The LX100 is wider in 4K at 26-81mm vs 28-81mm of the GH4
LX100 $2,200
GH4 $5,149
Price Difference $2,950
Close Up
Panasonic LX100 with rectangular port $2,000
Panasonic GH4 with 14-42 and 35 macro port $1,815 housing and port $2,540
The GH4 will have more magnification due to the longer focal length with the same diopter.
LX100 $2,000
GH4 $4,355
Price Difference $2,355
So the performance may be better but the price difference is very high.
The total cost of the Panasonic GH4 plus lenses housing and port is around $6,640 but the LX100 stops at a much more modest $2,400 without the wet wide angle lens. This still does not include flip diopters adapters and lens worth another $800+ but gives an idea that the total will be around $3,200 for the whole set.
You can get a complete 4K underwater video rig around $4,500-4,700 including tray, video lights and all the rest which few years ago would have been unthinkable.
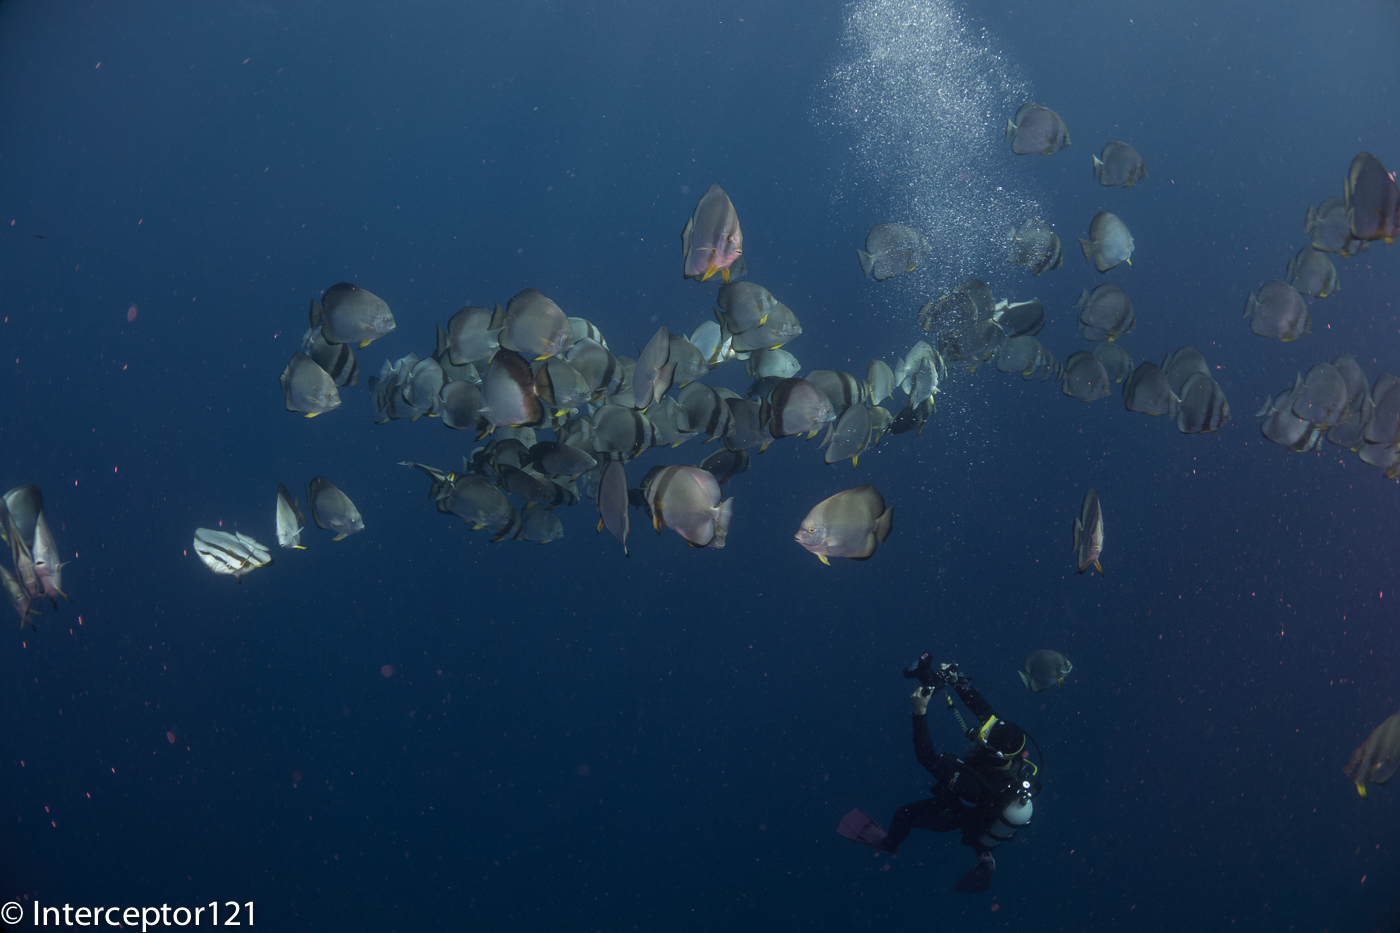
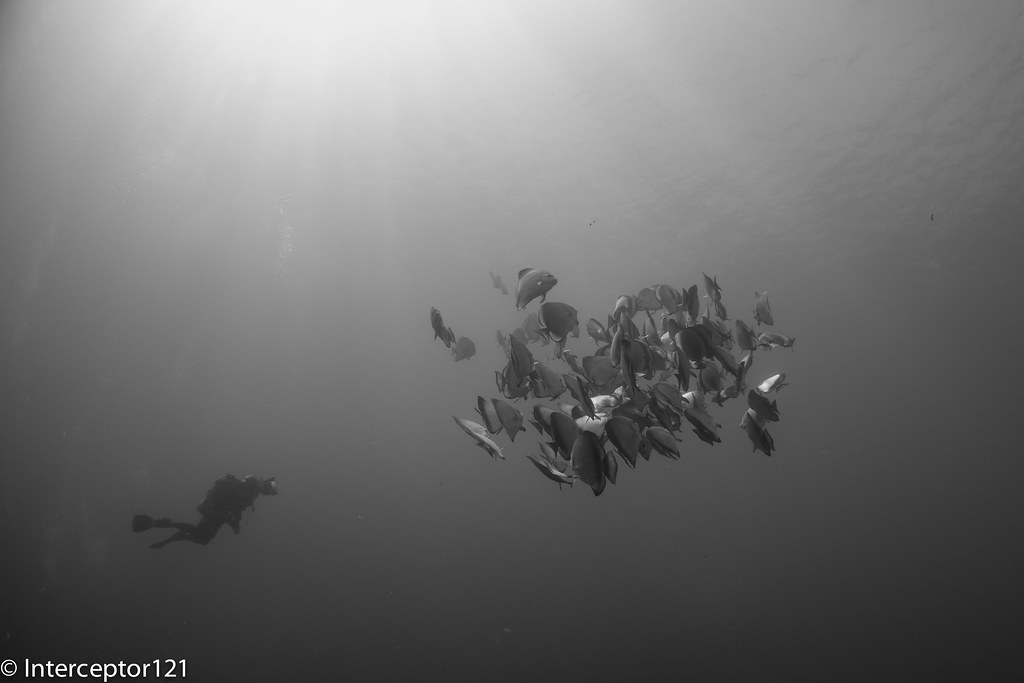
On Friday we were up for our last 3 dives at Shark Reef the current had not changed but this time I decided to give more a go to the schooling fish after setting up all the backgrounds I wanted.
As you can see from the image on the title we had more of the usual divers chasing fish but this did not deter me this time as I developed a specific technique to do the dive that I used fully on the last two photo dives.
So after a bit of experimental shots like this one
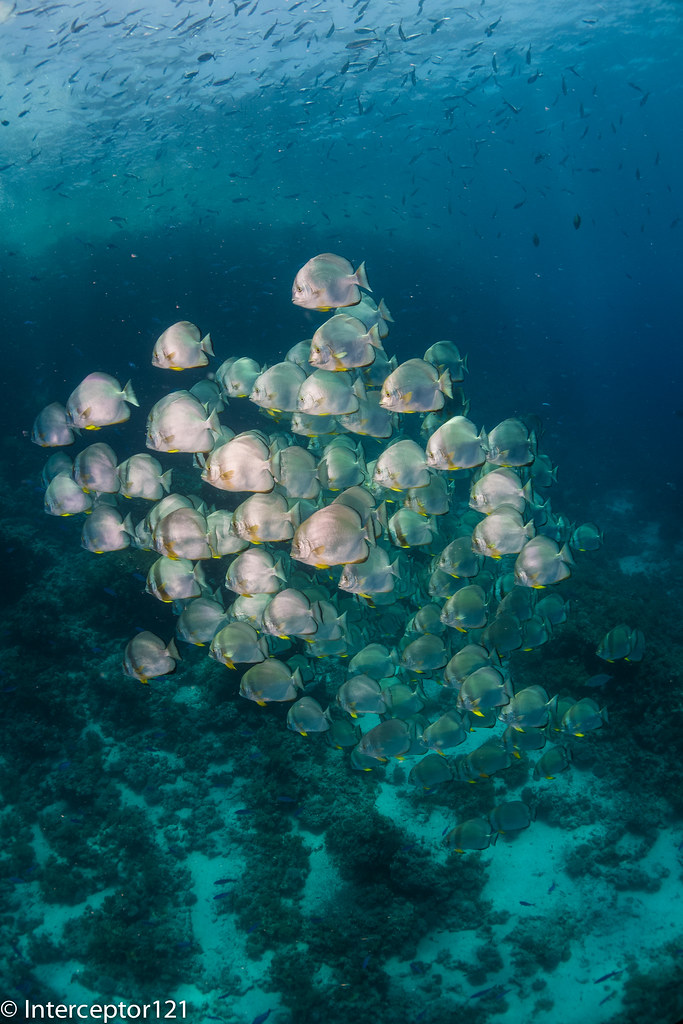
Batfish school from Top
It was time to give it a proper go. To be honest is not that I like batfish that much and probably this is one fish that you can shoot in RAW in ambient light however if you do that you need to sacrifice quite a few ISO stops. With strobes the issue is to get the school in a formation that allows you to do a good job with lighting. This is my best shot for the session.
What I like about this shot is the light on the fish or most of it where you can see yellow fins but also the background and a hint of surface.
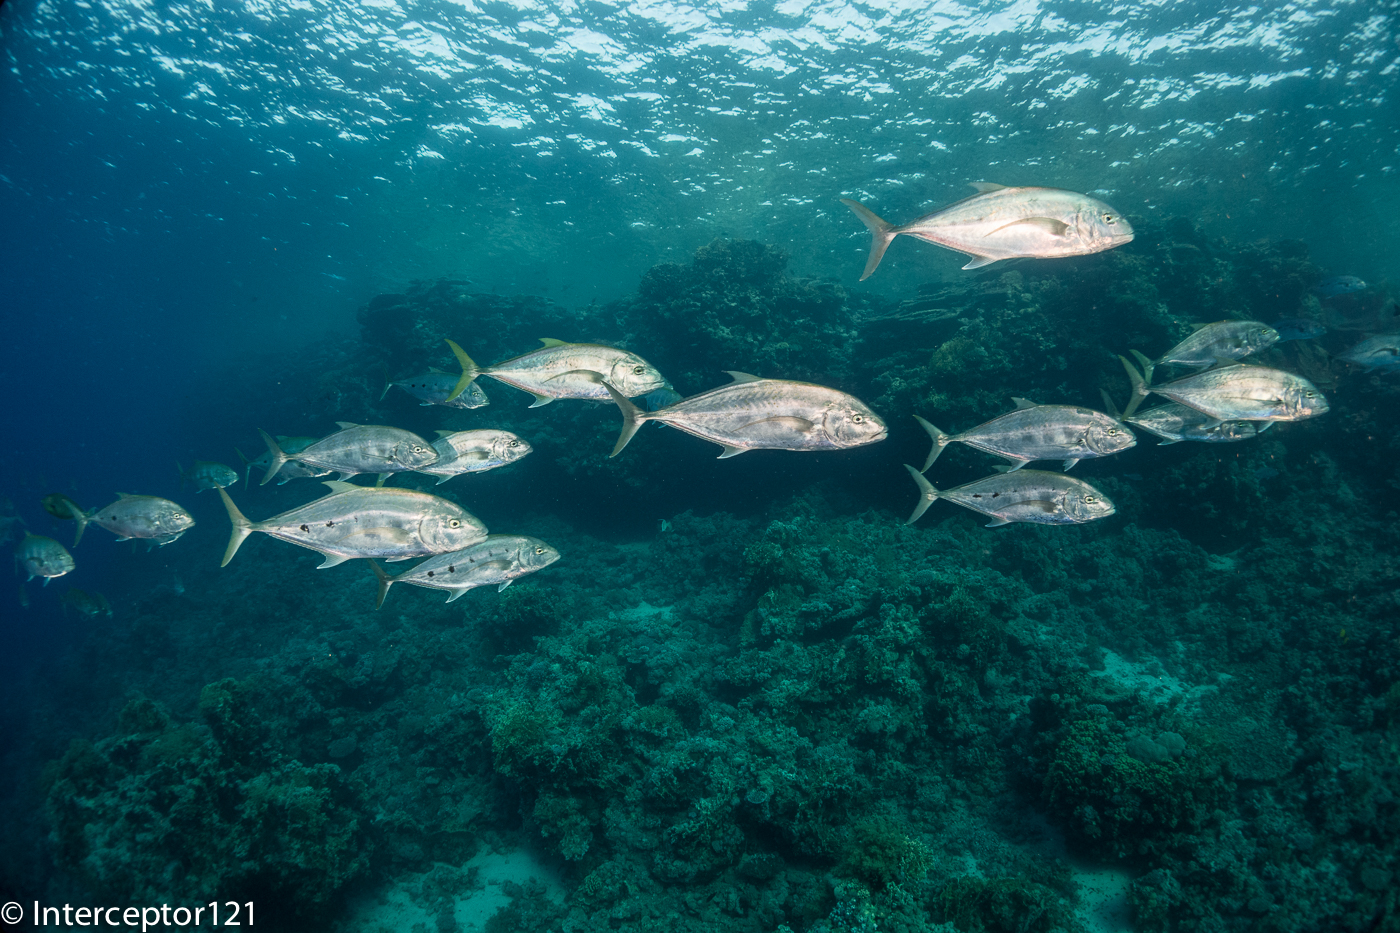
Other fish that featured on the day were jacks but catching a school of those running past is quite hard unless the school is really big and they circle you.
Jacks Schooling
In those type of formation you have all sort of issues with hightlights form the strobes in fact I was shooting 1/4 of power.
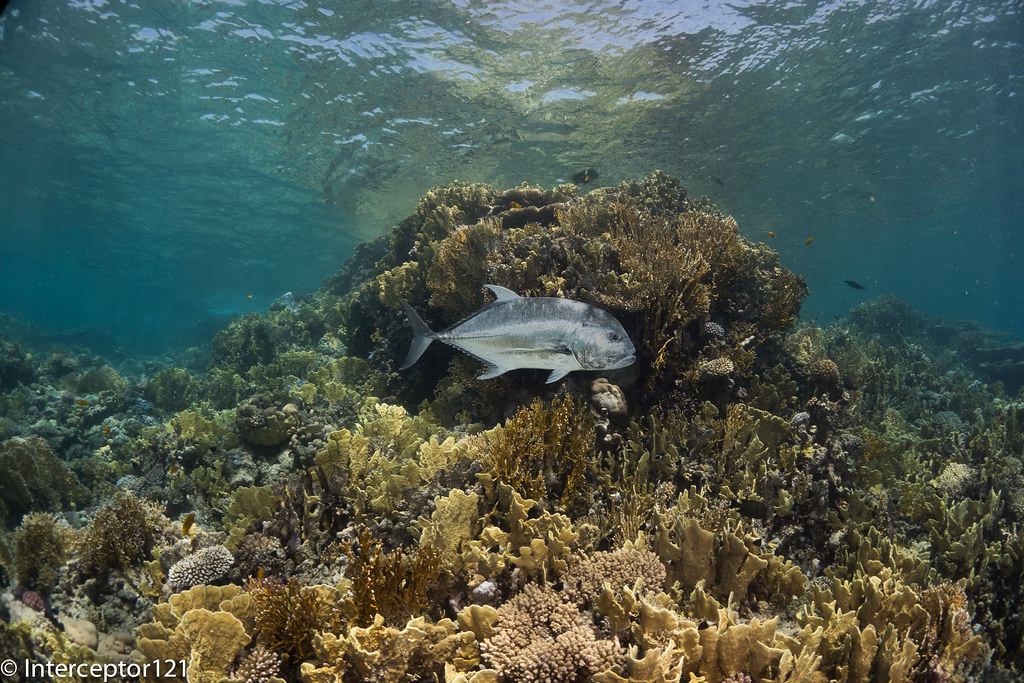
Giant trevallies made a more interesting single fish shot like this one.
Contrary to what you may think this is a shot with strobes otherwise you would not see the texture of the fish as you see it. Maybe a busy background but good technical exercise.
I also attempted a few anthias shots just to try a well tested technique to get them buzzing out the reef
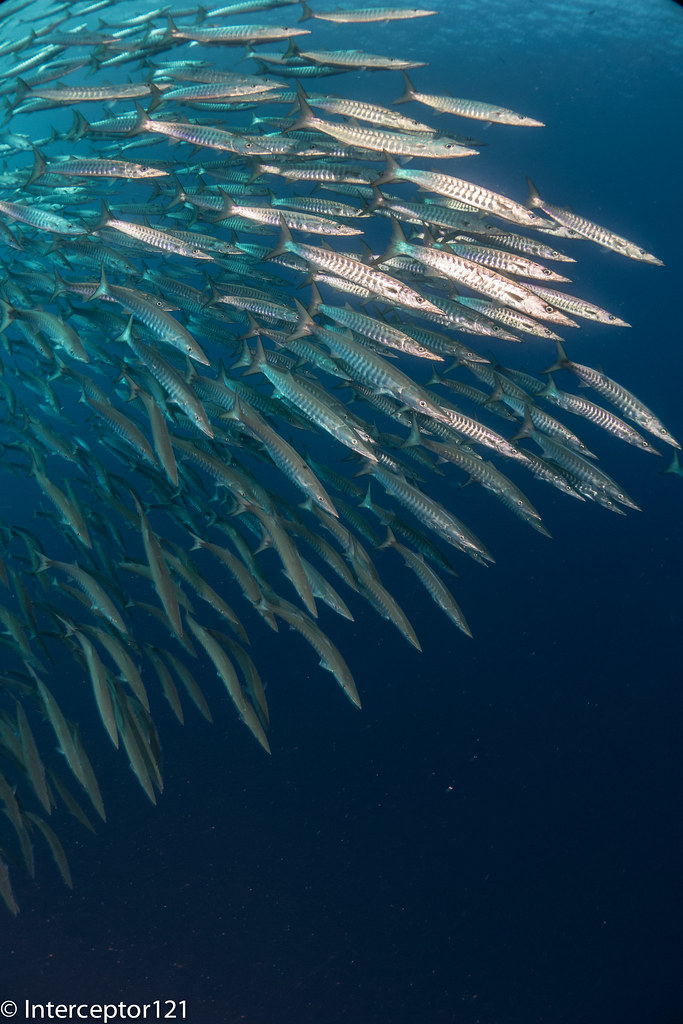
In the middle of the dives while I was waiting the barracuda school came out to play. Barracudas are quite tough as they require strobes to lit properly and I find the multitude of black and white shots that you see a bit boring as the fish texture is what makes the shot.
You have several challenges with the formation, if the school is big is difficult to take it all unless you are on the bottom or on the top. In the first case you need to control bubbles in the second you shoot the bottom so better be neat.
Anyway with a bit of patience I got the shot that I wanted
It is impossible to illuminate properly all of them but this shot has got the right geometry and I think is quite pleasant.
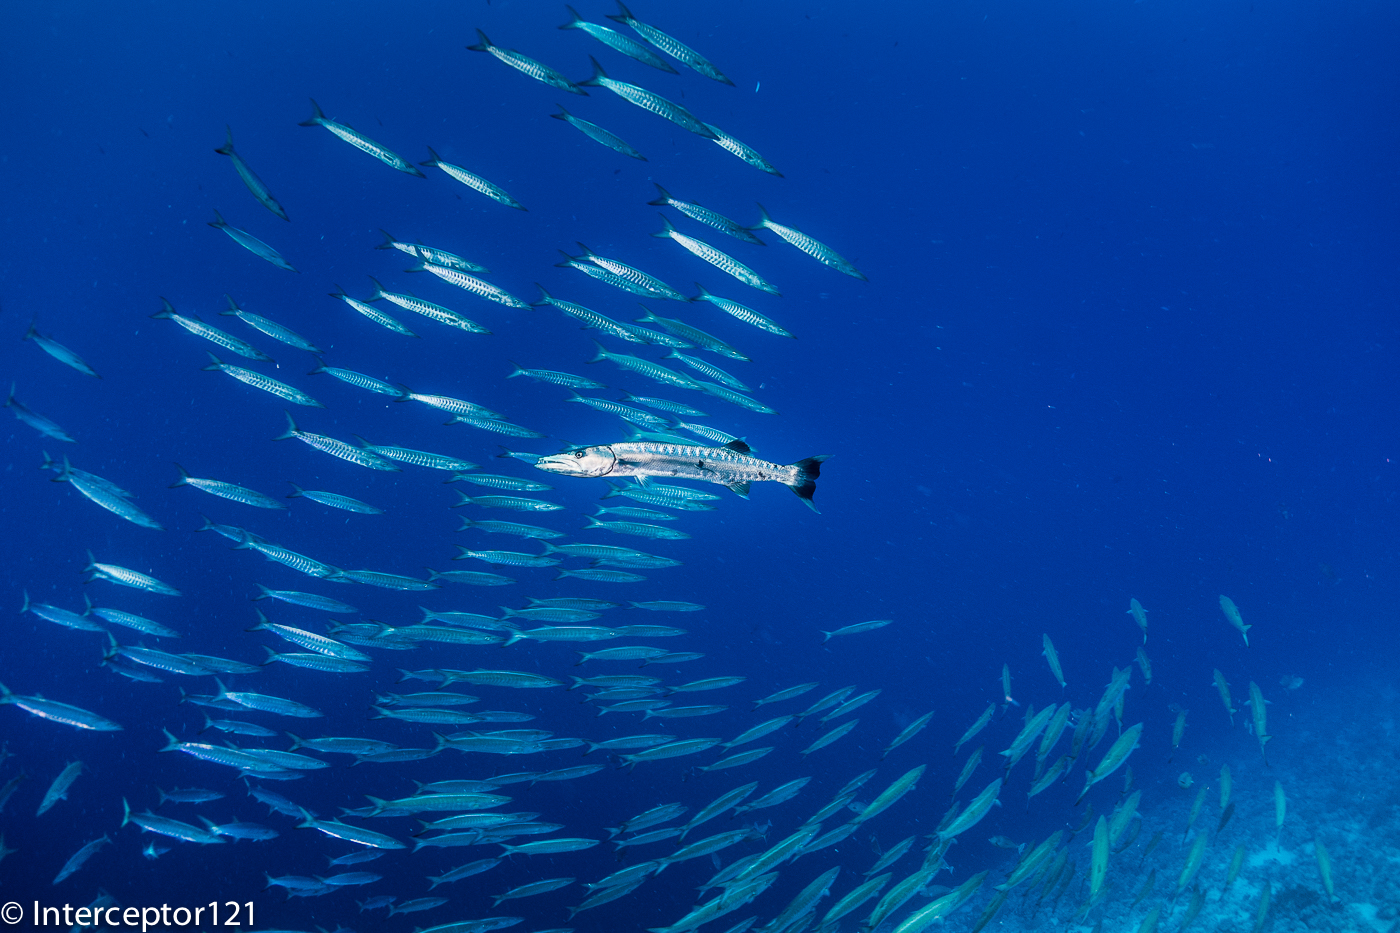
On the second dive I was lucky to spend some time with a Giant Barracuda that was literally commanding the school at sight, very rewarding from a diving point of view I got so excited that I kept shooting with a relatively slow shutter speed however the fish that is lit by the strobe is well crisp.
Giant Barracuda issuing orders
This shot is much deeper than the previous so the blue is colder but still makes for an interesting shot.
On dive 3 I decided to do a bit of video although I had not taken my favorite lens so I had to apply a filter directly on the camera lens. Moreover I had forgot the setting Toy effect on from some other experiment and whilst this is off in RAW it came back in video so the result is a soft warmer image…yuk still was fun to put it together so here it goes
It was time to rinse the gear (if you could call that hosing it quickly on the dive platform) and get ready to leave the day after. On the last day we were asked to put together a selection of our best 10 pictures and were give a video with some gopro footage taken by the ops manager plus our slideshow. Considering the time it was spent to do it the result is excellent.I hope this has given you an idea of the workshop that I definitely recommend, on the next post I will write my personal lessons learned from such experience.
After the first 3 days of workshop we got into the core of it and Alex talked about schooling fish and how to take shots.
We had 4-5 varieties to choose from:
Batfish
Surgeonfish
Barracuda
Jacks
Snappers
Detailed information was given in terms of how to best approach the fish depending on their behavior and also about the etiquette in terms of letting other people best positioned taking their shot first.
The surgeon fish are not that photogenic and actually quite messy I tried to take some shots when the current was pumping and they were all aligned close to the bottom at Yolanda however to me this is not that exciting as a shot. Other people got better results but I frankly was not that bothered about Surgeons. Probably as the fish is pretty dark and does not reflect the strobe much. The featured image close to the title shows what I mean.
During this trip the current was not going north to south as usual but there was near to no current at shark reef and current going outward at yolanda corner. This means the snappers that usually sit at the edge of shark reef were not out to play.
We were left with barracuda, batfish and jacks to choose from. On day 4 I only see few giant trevally but not many schooling jacks so had to focus on barracuda and batfish.
Unfortunately the barracuda were far from the reef and a bit too deep and did not really want to entertain chasing them so I tried with the batfish. Obviously there were not only us but also other boats so it was a bit of a competition for fish.
Encirclement
Also you always managed to get someone in the frame or bubbles
Shooting Batfish Below
So I focused on trying to get the best backgrounds for the pictures to come like in this case.
Also had some fun taking images of the others and the batfish one or two came out pretty good.
Creative angles
It is quite hard to have the discipline to respect rules when you are with other 18 photographer on the boat so the competitions had to be expected and I was not that bothered.
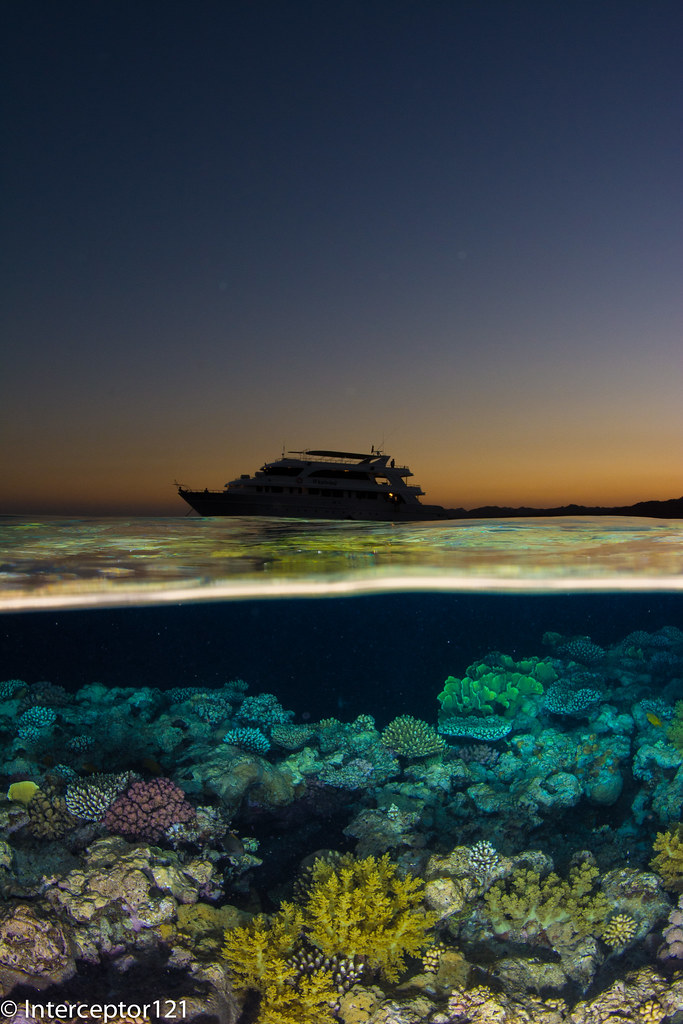
In the evening we headed back to Ras Katy and I borrowed a Nikon D7100 from Nauticam UK. I asked to have a 9″ dome for the split shot and jumped in the water with the idea of just doing that.
This is my best shot
Personally I do not like split shots where the surface line is very distorted to avoid that you need to make sure your lens is near to rectilinear and it is better to shoot portrait as there is little distortion on that axis. What I wanted to capture in this shot is layers, the reef, water under and over, the boat and sunset colors.
I think it came out pretty good but it is painful to take 100 shots just to get one right and I wish I had some fish in the frame but never mind is good enough like this. The water was not really flat so that was an additional challenge as you can see the wave breaks on the lens creating a little thicker line but overall a good shot.
Who has followed my initial LX7 tests is aware of the few issues I have had at wide angle with the LX7.
One was the reflections back on the lens that I have now hopefully resolved using a black marker and changing the camera from white (and silver lens ring) to black and the other was flare.
Flare is an issue at wide angle even on land. What causes flare? Stray light coming from the sides that washes out the picture and eliminates contrast in the process.
Wide angle lens tend to have an ability to catch stray light from the sides and top and this is the reason why wet wide angle lenses have to be really coated well so that this effect is diminished, however it still can happen.
And it did happen to me with the Inon UWL-H100. The general advice to eliminate or reduce flare is to have a lens hood however lens hoods are generally not an option for wet lenses with an M67 thread mount. The only lens that I know that can position the hood on a screw mount is the fix UWL28M52 or UWL04 most of the other lens do not have a hood and have a circular lens unprotected from stray light. And this usually means at some point you will get flare.
So how do you get around it? In the case of the LX7 is pretty much a forced choice as the Inon UWL-H100 is the only lens that does not vignette at 28mm equivalent focal lenght so the possible solution is to put a hood on the lens.
Inon sells a hood for the UWL-H100 but the hood is attached through 6 allen bolts and its position can’t be fine tuned so to use the hood it is a requirement to change mount from M67 to the LD bayonet. You need also to convert the lens itself into an LD bayonet. If you go to your Inon dealer there is a relatively cheap service part that allows you to convert your M67 lens into a bayonet.
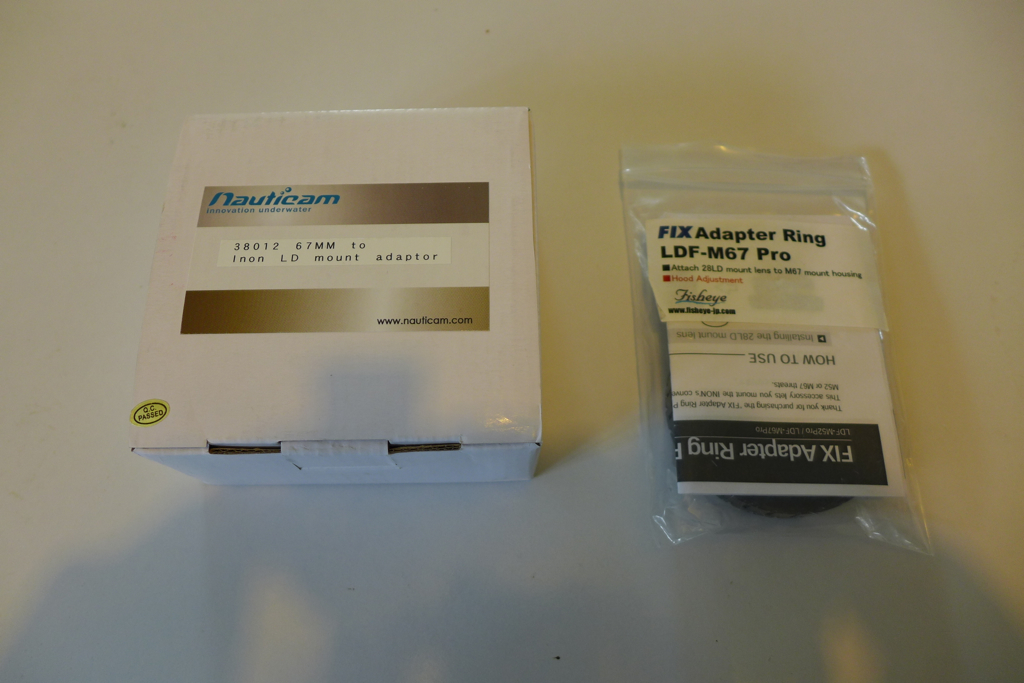
LD Bayonet lens holder
The LD bayonet is the latest incarnation of bayonet mount released by Inon. Whilst the old AD mount relied on a mechanical action to secure the lens, the new LD bayonet is much shallower and relies on a pin lock release to stay in place. There are two adapters on the market that are capable of attaching LD bayonet lenses to an M67 thread, one produced by Nauticam themselves and the other by the Japanese Fisheye Fix.
LD Adapters BoxedNauticam and Fix LD-M67 adapter
There is a price difference between the adapters with the Fix being 20% more expensive.
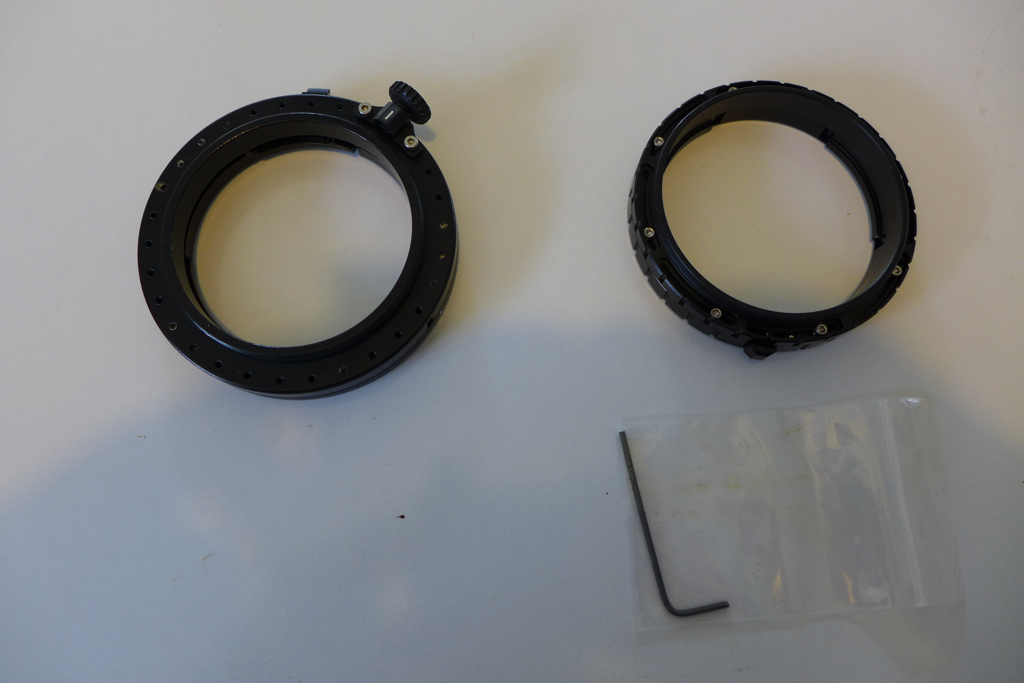
Nauticam LD Adapter
The Nauticam adapter is the largest of the two. It has 6 allen bolts on the front and a thumb screw lock on the back to fix it in position. With LD lenses there is only one position to put the lens hood in the correct place so if for some reason the thread ends in the wrong place with your housing you will need to unscrew the front of the adapter to ensure the release lock is on the upper left of the port this happens the same way on the fix adapter. Make sure the little spring does not jump off in the process…Once the release lock is in the right area the fine tuning of the hood position is done with the thumb screw. A possible weakness is that if your housing port has no room for the thumb screw then this adapter is not good for you.
Whilst the Nauticam is made of plastic and metal the Fix seems to be 100% aluminum, this adapter looks better but does not have a mechanism to fix in place it relies on the strength of the M67 thread, however this locking system is compatible with any 67mm threaded port.
FIX LD Adapter
The fix allows to perfectly fine tune the hood position and it shows.
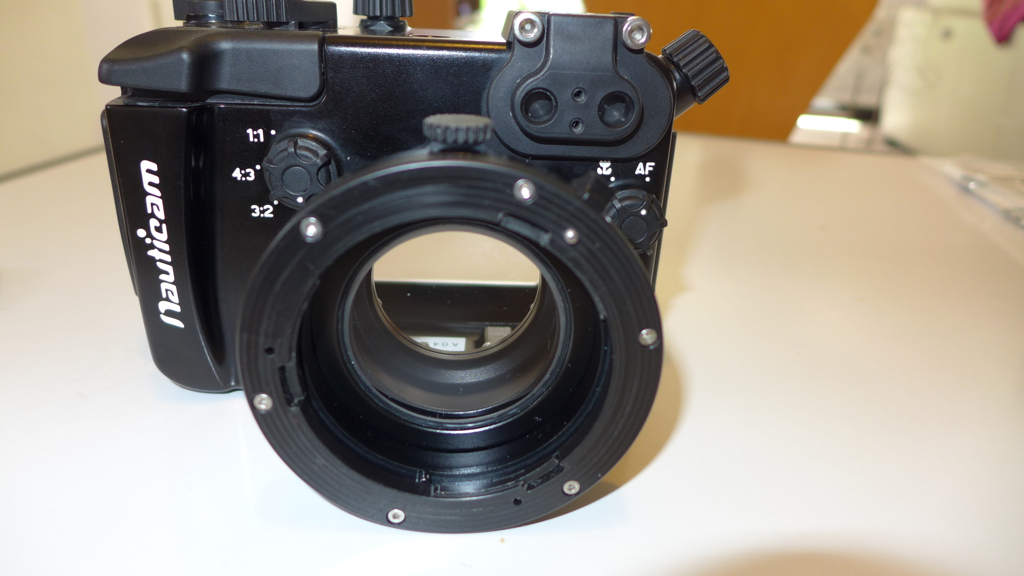
Nauticam Hood Alignment
The alignment mechanism of the Nauticam adapter creates an alignment issue with the hood where the lens is few degrees turned clockwise.
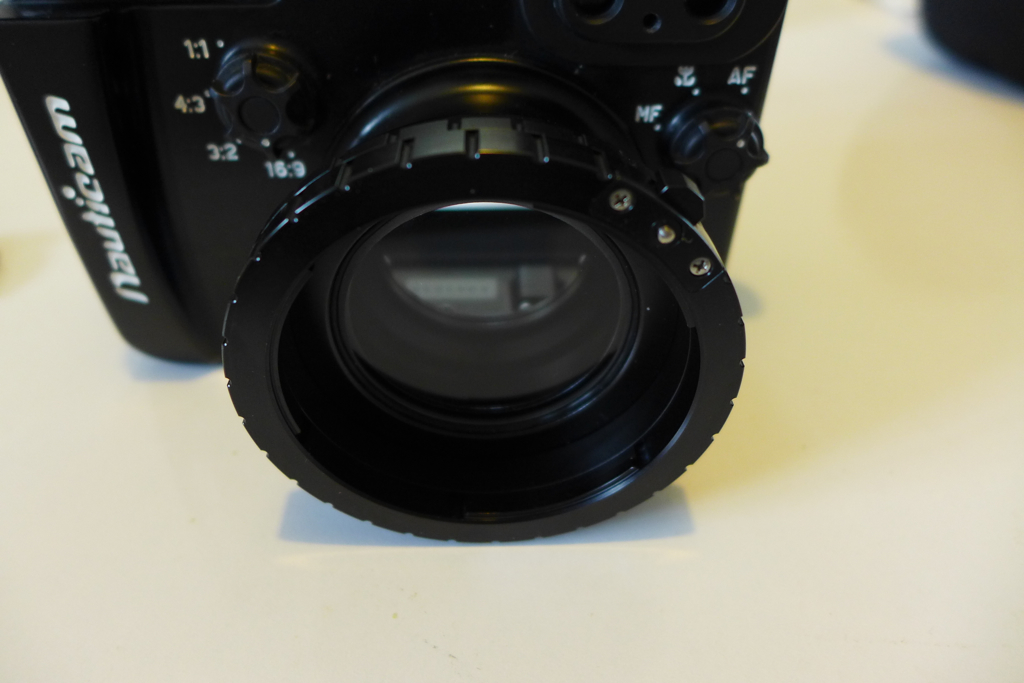
With the fix this does not happen.
Fix Hood Position
The hood can be properly aligned. Note that in both cases this does not mean more vignetting as the corners are not covered by the hood.
The other check I do is the position of the back of the lens, if there is a gap between the thread and the back of the lens this can create vignetting so it has to be as close as possible or even protruding as the Inon UWL-H100 mount type 2 does.
Let’s have a look at the back of those two adapters with teh UWL-H100 28LD attached.
Nauticam Rear Lens
The Nauticam thread is somewhat too long so the lens sits slightly more inside the thread line.
With the fix the situation changes sightly.
Fix Rear Lens
There seems to be little difference we will now check if there is an impact on the possible vignette in water.
Nauticam 28mm
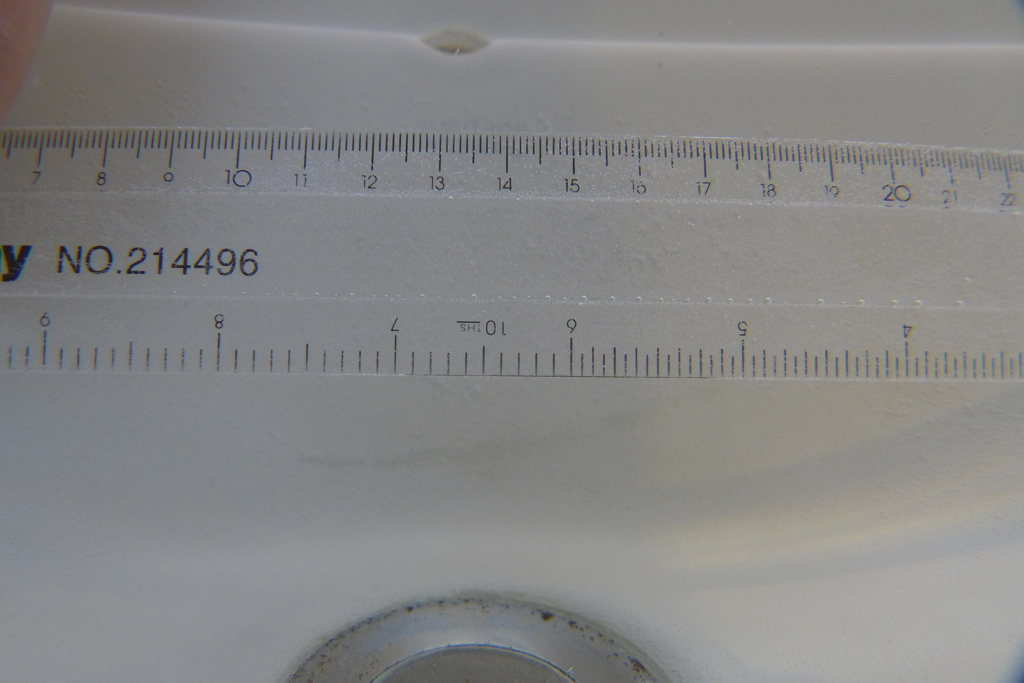
As we can see there is a little bit of residual vignette on the bottom right corner when the lens is at 28mm equivalent focal length,
This is the same situation with the Fix
Fix 28mm
There is still a dark bottom right corner but it is less.
Inserting a 1.25mm spacer between the inner housing and the left side of the camera improves matters, this is because the lens of the LX7 is somewhat misaligned in the Nauticam housing and this corrects it.
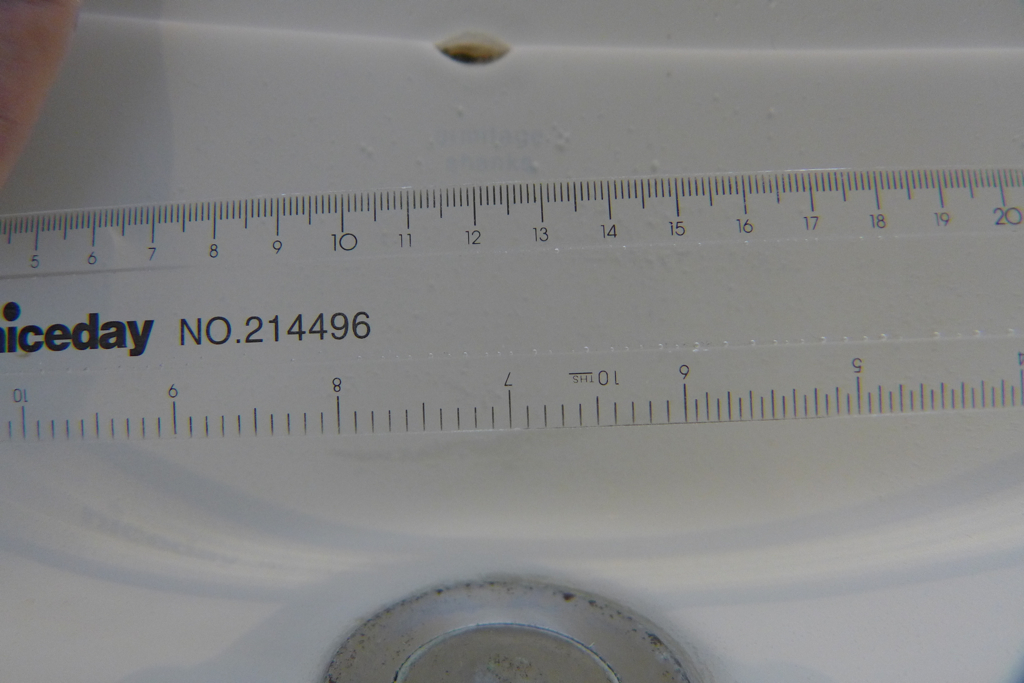
Nauticam 28mm Spacer
With the spacer in the housing and the Nauticam adapter there is a tiny little residue of vignette but overall this is ok.
With the fix adapter this is the result.
Fix 28mm Spacer
No dark corners left.
So this is the recap:
You can change the UWL-H100 28M67 into an LD version with a cheap service part
Once the lens has an LD mount it is possible to attach the hood this will reduce flare
Vignetting is slightly increased but can be eliminated with a spacer with the Fix adapter
There is an issue of hood alignment an increased vignetting with the Nauticam LD adapter
A final note: inserting a spacer in the housing is risky, you need to know what you are doing as in theory the chance of flooding could increase so this is not for everyone.
My recommendation to those who want to improve contrast with the UWL-H100 is to convert to LD mount, attach the hood and get a Fisheye Fix LDF-M67 Pro adapter. Changing to bayonet has other advantages making lens swaps in water much faster and easier compared to the thread version especially with a lens as heavy as the UWL-H100.
There are few design issues and manufacturing errors in the Nauticam LD adapter that create issues with the LX7, most likely other cameras that are not so fussy will have no problems but if you have an LX7 avoid the Nauticam adapter entirely until a new production version is defined. I have given Nauticam the feedback and they will probably react.
So I finally had the opportunity to take the LX7 on a trip after some pool tests.
After my attempts last year with the Sony RX100 I was a bit skeptical that I could actually find something better for video but I think the LX7 beats it.
I put together a sample just to give an idea of equipment used and how it works, please note this is not altered in any way http://vimeo.com/62838598
There is a picture of the rig in this blog on a specific page but let me confirm once again in detail
Panasonic LX7
Nauticam LX7 housing
Ultralight TR-DM tray with extension TR-DUP and two TR-DH handles without ball.
12 segments locline arms on 3/4″ mount base and reducer on the handles
Two sola 1200
Nauticam wet mate
Inon UCL165AD on bespoke M67 adapter
Inon UWL-H100 28M67
Inon M67 double lens holder on custom mount
In a previous post I highlighted that for most the wet mate will be the only lens needed however I had some wreck dives and the 18mm of the Inon wide angle are more appropriate.
I also gave a try to the panasonic intelligent zoom that allows for 2x digital magnification and sharpening that for me works very well and you can see it in the footage. This allows a user with just the wet mate to further zoom without need of a close up lens or a use with a single +6 diopter to achieve super macro.
Pedersen Shrimp with two stacked UCL165AD and intelligent zoom 7.5x The frame height is less than 1cm
I found the white balance of the camera excellent on both my hand or sand. I had issues with my padi slate that many times returned a ‘scene too bright’ error. Maybe this is the reason why backscatter failed this camera for video?? Who knows.
You can see that even at 36 meters the colour are as good as they can be.
White Balance on Bianca C 36 meters depth
For macro shots I used the temperature setting at 6500K, I found the white balance tint fine tuning to be excellent to further enhance it.
I shot in shutter priority the whole time with shutter speed of 1/100 or 1/50 depending on conditions and type of shot. The camera autoISO and choice of aperture privilege noise reduction however as the lens of the LX7 is really sharp the relatively wide aperture did not mean soft corners.
I tried the various photo styles and at the end settled for the standard one, I found the natural really to have too little contrast.
I thought of shooting in mp4 for wide and AVCHD progressive for close up but this would have meant two different frame rates to edit, at the end I shot at the highest available setting to avoid confusion.
I had received a new port from nauticam so I had no vignette at 28mm and the full 100 degrees the inon lens can offer.
The ergonomics of the camera that have fixed commands for aperture and shutter proved to be convenient and the built in neutral density filter was very effective at shallow depth or on the surface.
In essence I think that the issues backscatter mention are non existent.
I did have a few problems with the wet lenses though.
Lens Marking reflection on Wet mate dome
The wet mate proved to be a great little tool very sharp and light however none of the sides of the glass have anti reflective coating. In bright scenes or backlit scenes I did not have many issues with flare however I could see the marking on the lens reflected back on the wet mate and in the picture. I suggest putting an inon anti ghost sticker or gaffer tape to hide those shining markers or to colour them with permanent black ink.
Other than this the wet mate performs very well in all reef scenes and close up of critter a few inches big.
The inon diopter did not cause any trouble other than the obvious vignetting until 70mm. One pleasant surprise is the LX7 autofocus. Having struggled with the poor focus of the RX100 at high magnification I was astonished that the LX7 finds focus even with two stacked diopters and keeps it!!! I never had to use manual focus that with the RX100 was the norm at macro range.
I had bought the UCL165 and UCL330 in m67 format but decided to sell them as I will actually switch to bayonet very soon for the wide angle.
The Inon UWL-H100 was probably the most disappointing find of the trip. Image was sharp in normal condition however this lens tends to flare quite a bit and this creates block noise in the water column in video, when I used my hand to shade the lens the flare went away. Inon sells a lens hood for the 28LD version of this lens but not for the M67 as there would be issues to align the hood petals to the frame.
Inon UWL-H100 Flare on top of the frame
Considering that the lens is very heavy in water at 350 grams and that screwing and unscrewing was a concern mid water I have decided to convert the lens into an LD bayonet. Inon sells a replacement service part for the 28LD that can be used to replace the M67 thread of the lens. Other than this part the two lenses M67 and 28LD are identical. I will use a nauticam m67 LD adapter I hope this will not increase the vignette. I will connect my AD mount close up with a AD->LD converter when using the wide angle and then use an AD->M67 converter when I use the wetmate. This saves me buying two different diopters and I can stack the two UCL165AD I already have. They do vignette a lot at medium but who cares when you shoot at full zoom.
I look forward to testing the UWL-H100 with the lens hood I am sure results will be better. On the other hand when the sunlight is behind the shots have incredible sharpness with this lens.
So the LX7 gets 5 stars from my side and I leave you with two recommendations:
1. Apply a form of anti ghost sticker to the LX7 lens
2. If you want to get the Inon UWL-H100 go for the LD mount so that you can put the lens hood on
When compact cameras were designed for 35mm it was quite common to shoot just with a camera and strobe; this allowed the average user to take decent close up pictures as long as the camera was capable of focusing within a couple of inches from the subject.
Years later manufacturers started introducing wider lenses first came 28mm equivalent and most recently 24mm, these cameras give an increased field of view on land of 75 and 84 degrees diagonal.
So why is it a bad idea to shoot just with the bare camera and no add-on lenses?
Two key reasons:
Once in water the 84 degrees diagonal of a 24mm equivalent camera reduce to 54 or less because of the water medium
At focal lengths shorter than 35mm pincushion distortion becomes stronger to the point the pictures are awful.
Pincushion Distortion at 24mm with flat port
So if you plan to use your wider compact camera underwater without lenses make sure you zoom to 35mm to avoid distortion.
This is the same picture at 35mm note how the image is now rectilinear.
Flat Port 35mm
At 35mm we are back were we were in the mid 2000 and all we can do is close-ups so there is no advantage having a wider lens for underwater use with a compact.
Another common misconception is that a compact camera takes great macro just with the internal flash. Firstly a macro picture has a 24mm height of the capture area, nearly no compacts on the market are capable of this: the Panasonic LX7 and the Canon G15 within the current range are the exceptions. However at 1cm distance the internal flash is completely obscured by the lens, which means there really is no macro without a strobe and a close up lens: all you can shoot are close-ups.
Flat Port Close Up
This explains the need for wet lenses in water, wide-angle lenses to increase the field of view and allow us to get closer and take advantage of artificial lighting, close up lenses that also allow us to get closer using the full zoom of the camera and shoot at increased magnification without being on top of our subject.
The needs of photography and video differ as lighting tools differ, photos require strobe to freeze motion, video instead uses fixed lights. Photos are also taken at much wider angle than videos and fisheye effect is accepted, an effect that in video is generally not welcome.
With this in mind what are the wet lens options for the Panasonic LX7?
It depends of course on the planned usage of the camera.
Underwater Photographers
The LX7 has extremely good close up capabilities out of the box, however the capture area is around 12×8 cm that is not exactly small. If we want our nudibranch of shrimp to fill more of the frame we need a close up lens.
From my tests the Inon UCL165 brings around 2.5x magnification with the LX7.
Inon UCL165
I have tried stacking two UCL165 but the amount of chromatic aberration is too much for my liking, I found that 9 diopters is the max before fringing becomes a real problem and I do not recommend stacking two of those lenses or two equivalent Dyron diopters. I think the most flexible set up is a UCL165 and UCL330, this covers all possible working distances. I do not have a UCL330 yet so I can confirm but I have taken shots with a very similar lens (Olympus PTMC-01) and the results are excellent with a capture area of 48×32 mm that is very close to real macro. The zoom of the LX7 is the real limit here as it maxes out at 90mm versus the 120 of a Canon S110 or 140 of the Canon G15.
For close focus and ambient light wide-angle the bad news is that there is no fisheye lens that works well with the LX7 this is due to the extremely large lens.
I have tested the Inon UWL-H100 and I had to wait for a new port to be delivered from Nauticam as their original one was too long and had vignetting even at 28mm. This lens yields more than 100 degrees diagonal and is my preferred choice for the LX7 for stills. There is however a good amount of blue and yellow fringing if I really have to be picky so the extended field of view comes at some price.
UWL-H100 28mm
I use Inon lenses however a possible candidate is the Epoque DCL30, this lens is reported to work with 28mm equivalent cameras however the rear lens is smaller than the Inon so I believe this needs confirmation. There is a $70 difference in US and £70 here in UK between the two lenses and considering that a dome will not worth I encourage testing this lens as the results may be acceptable. I think bluewater photo markets this lens in US under their own brand.
Underwater Videographer
If you plan to use the LX7 for video the situation is different, as the camera close up performance is extremely good and usually macro video is very hard. Most time we shoot with ambient light and if visibility is acceptable getting that close is not so important considering the LX7 ability to manipulate white balance.
The first suggestion is to get a Nauticam Wet Mate, this is a sealed air dome that gives us back the air field of view and works extremely well without any chromatic aberration and extremely sharp corners. This lens keeps the image rectilinear that is also a good thing for video.
LX7 with Nauticam Wet-Mate (do not compare with the Inon Picture this is taken from further away)
For majority of reef dives the wet mate is all is needed as this also allows the full use of the zoom without soft corners that occur if you zoom into a wet wide-angle lens. This lens is the most versatile for general video use and costs $250, great value from Nauticam.
There are however specific situations where the wet mate is not sufficient, as before close up performance with the bare port is good but not great for smaller critter, so a close up lens would be the next addition, again an Inon UCL165 or a Dyron Double Diopter would work just fine and have the same power.
When shooting at closer distance with lights, or when there is large fish or wrecks a wet lens is important as the 84 degrees diagonal of the LX7 are actually only 76 horizontal. Again the Inon UWL-H100 is my choice but would check again for the Epoque DCL-30. One characteristic of the LX7 that is interesting is that the diagonal field of view of the camera remains constant when picture format changes, this means the horizontal field of view is larger at 16:9 movie mode than it is at 3:2 for pictures.
Field of view with the LX7
Those are the maximum angles of coverage horizontal of the LX7 as I measured them at 3:2:
Bare Port 24mm: 50°
Wet mate 24mm: 71.5°
Inon UWL-H100: 88°
At 16:9 there is a wider field of view of:
Bare Port 24mm: 54°
Wet mate 24mm: 76.2°
Inon UWL-H100: 93°
In general terms with the wet mate we can cover 1.56x the horizontal field of view of the flat port and with the wide-angle 2.1x.
The wide-angle offers an additional 35% over the wet mate don’t be mislead by the apparent small difference between 84° and 100° as those are diagonal measures not horizontal and those few degrees more count.
At 1 meter distance the maximum subject size with the wet mate in movie mode is 1.56 meters and with the wide-angle this becomes 2.1, that confirms that the wet-mate is good for general use and the wide-angle is only required for close scenes of larger fish or wrecks.
Those are the three lenses I have used for those tests. A final consideration is about the lens mount. I will use the LX7 for video so my choice has been a 67mm mount, because this is the only format that the wet-mate offers.
If I was using the LX7 only for pictures I would prefer the flexibility of the Inon LD mount even if this costs a bit more as it makes it so much easier to swap lenses in water when you have a bayonet mount.