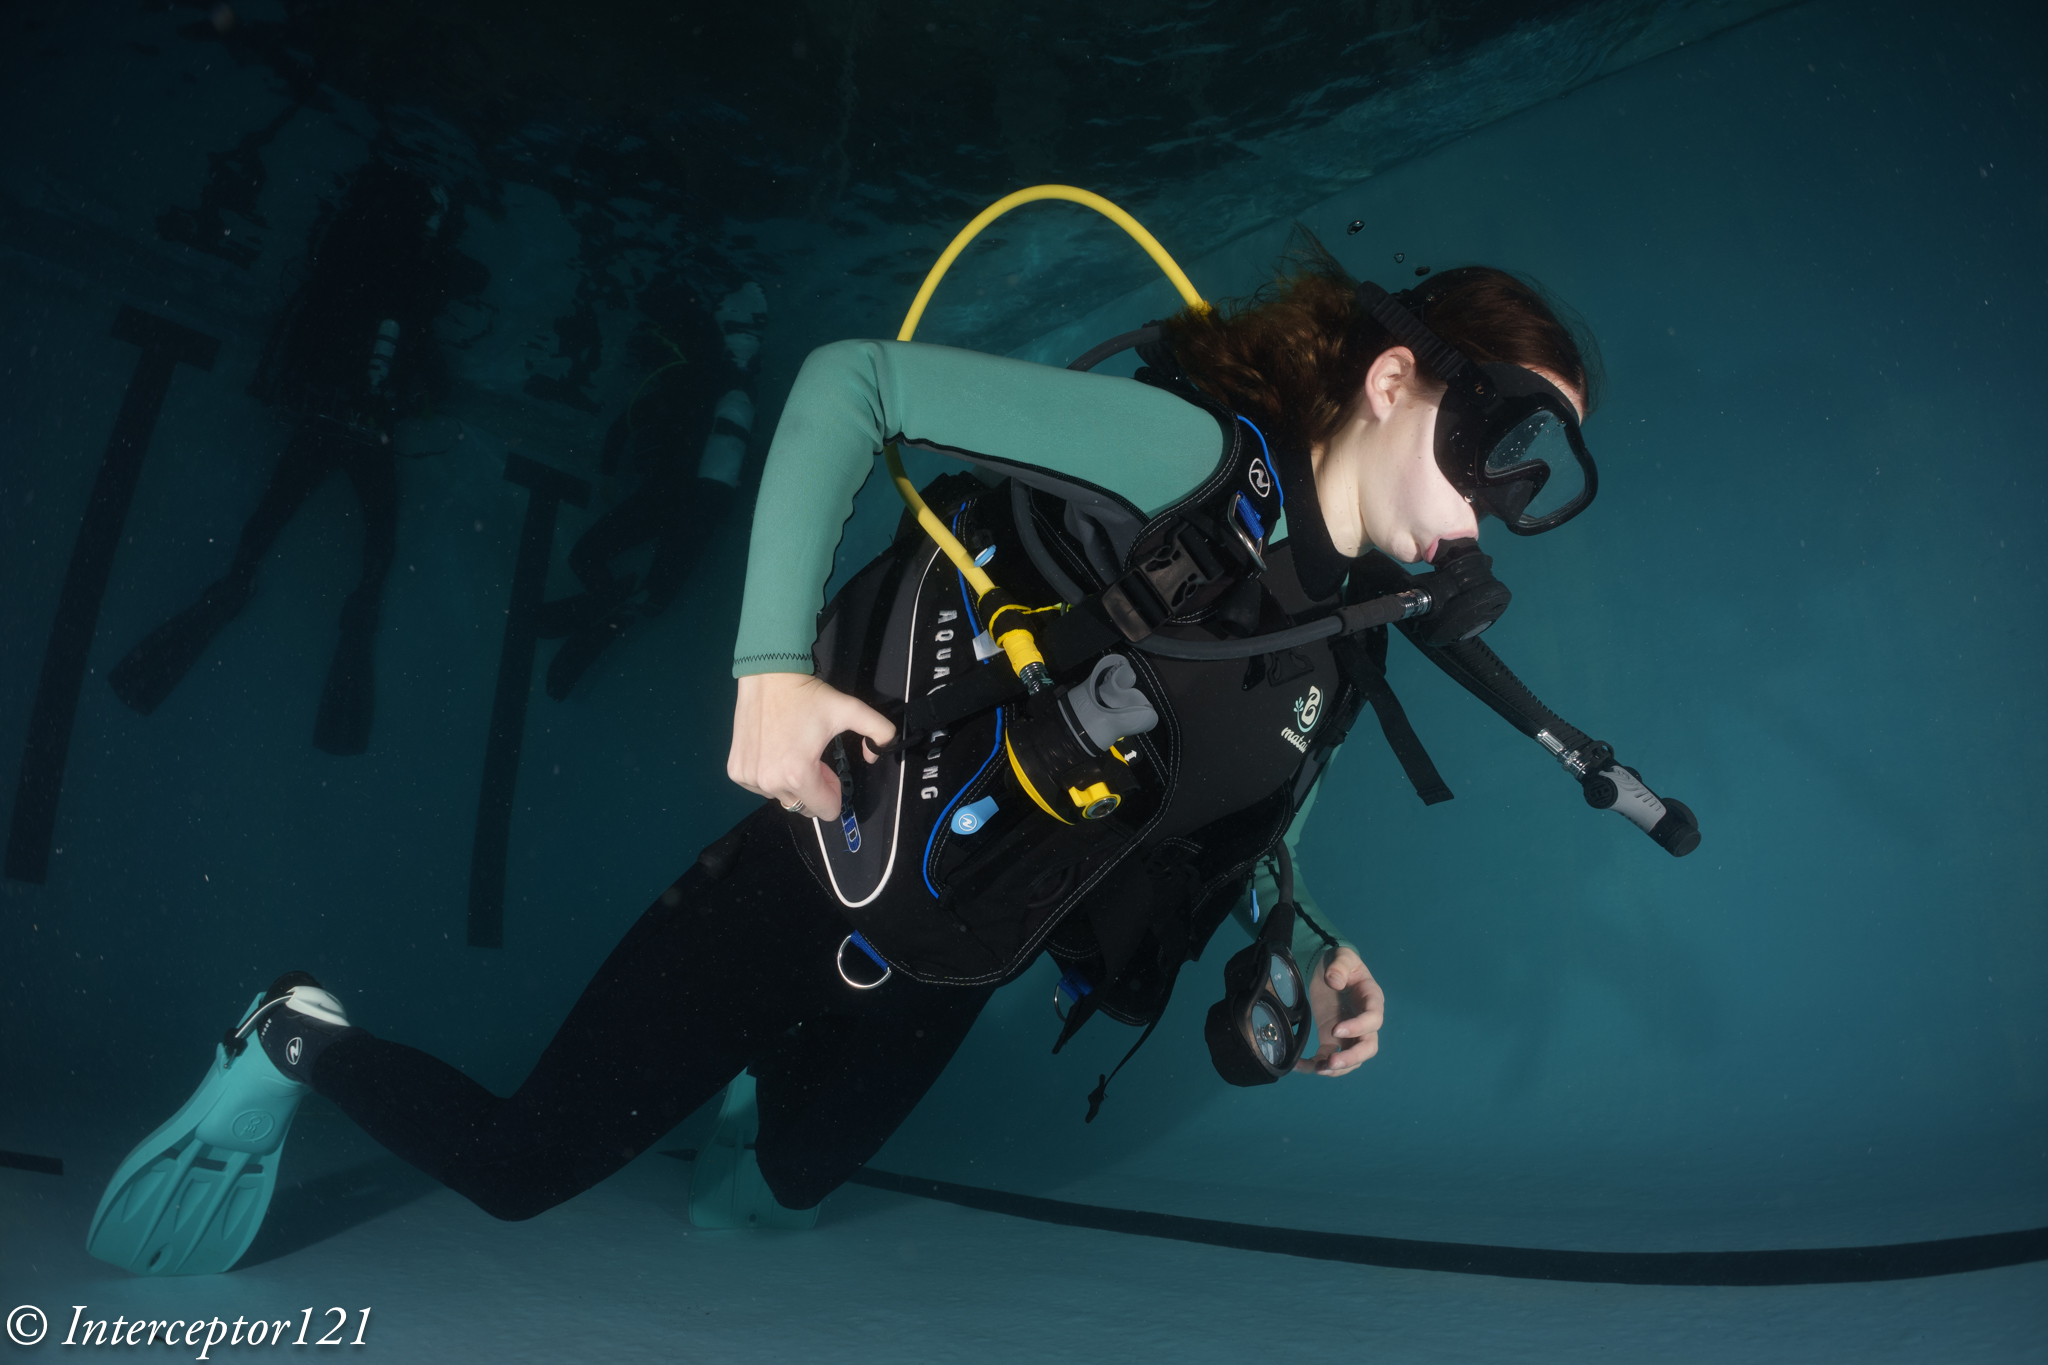
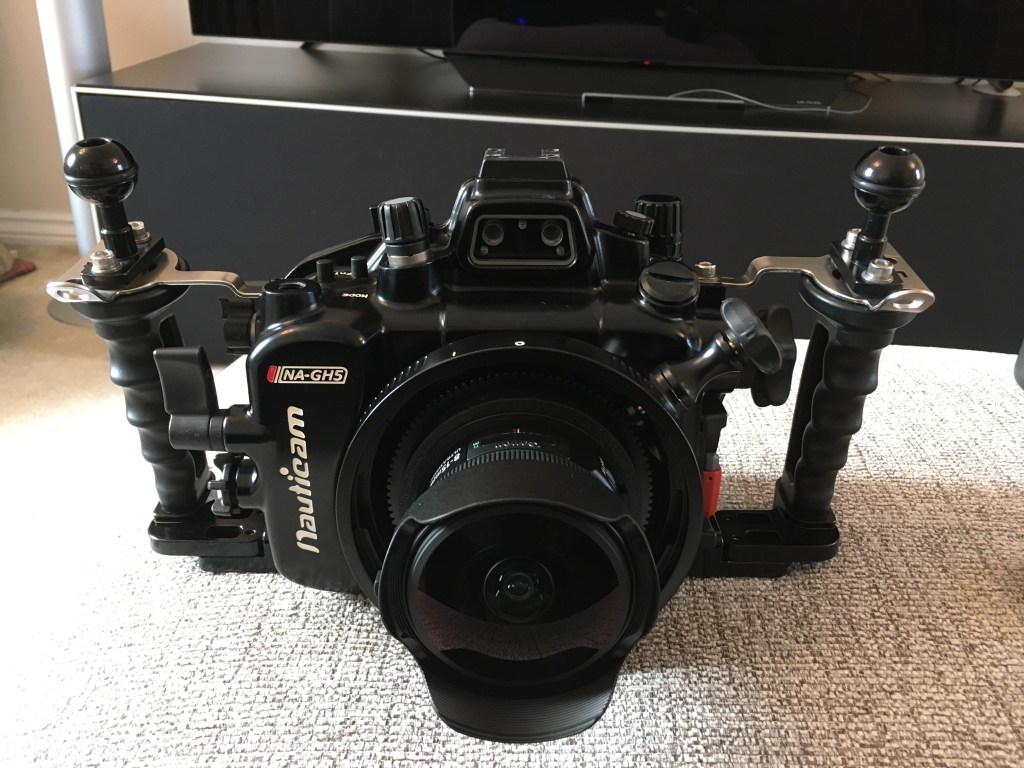
Following from a previous article about not increasing bulk I have considered a few options for the Canon 8-15mm fisheye.
The 8-15mm is not a small lens and due to the different flange distance between Canon EF mount for DSLR (44mm) and Sony E-Mount (18mm) we have a chunky 35.5mm N100 to N120 adapter port that makes the whole set up not that compact.
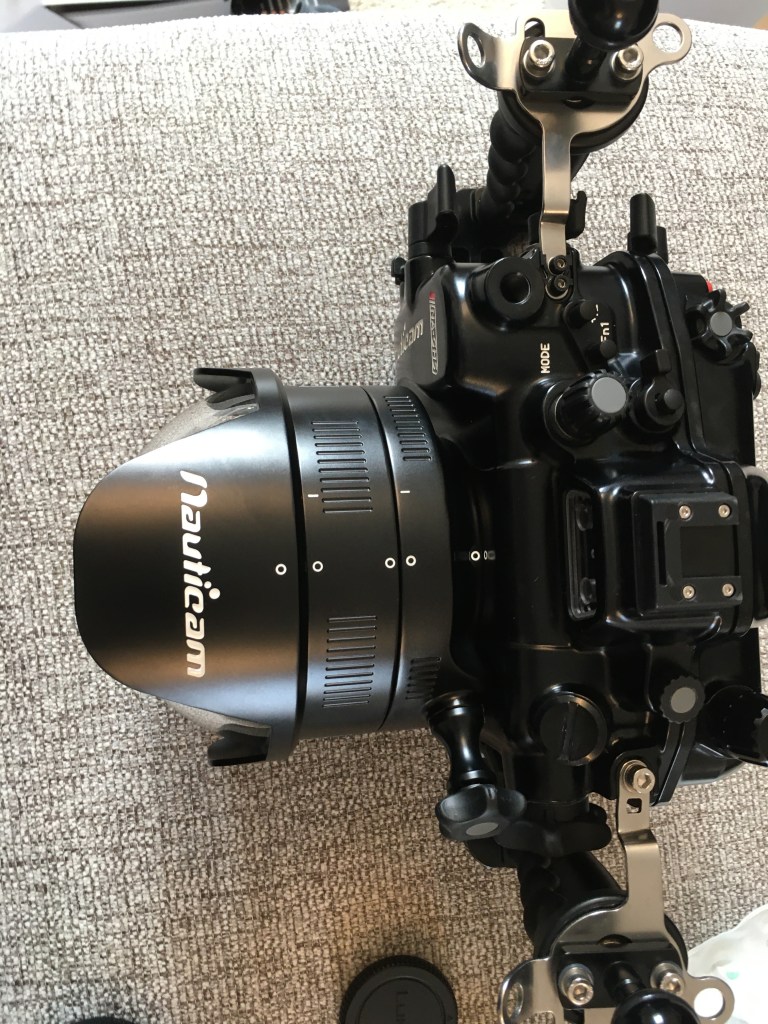
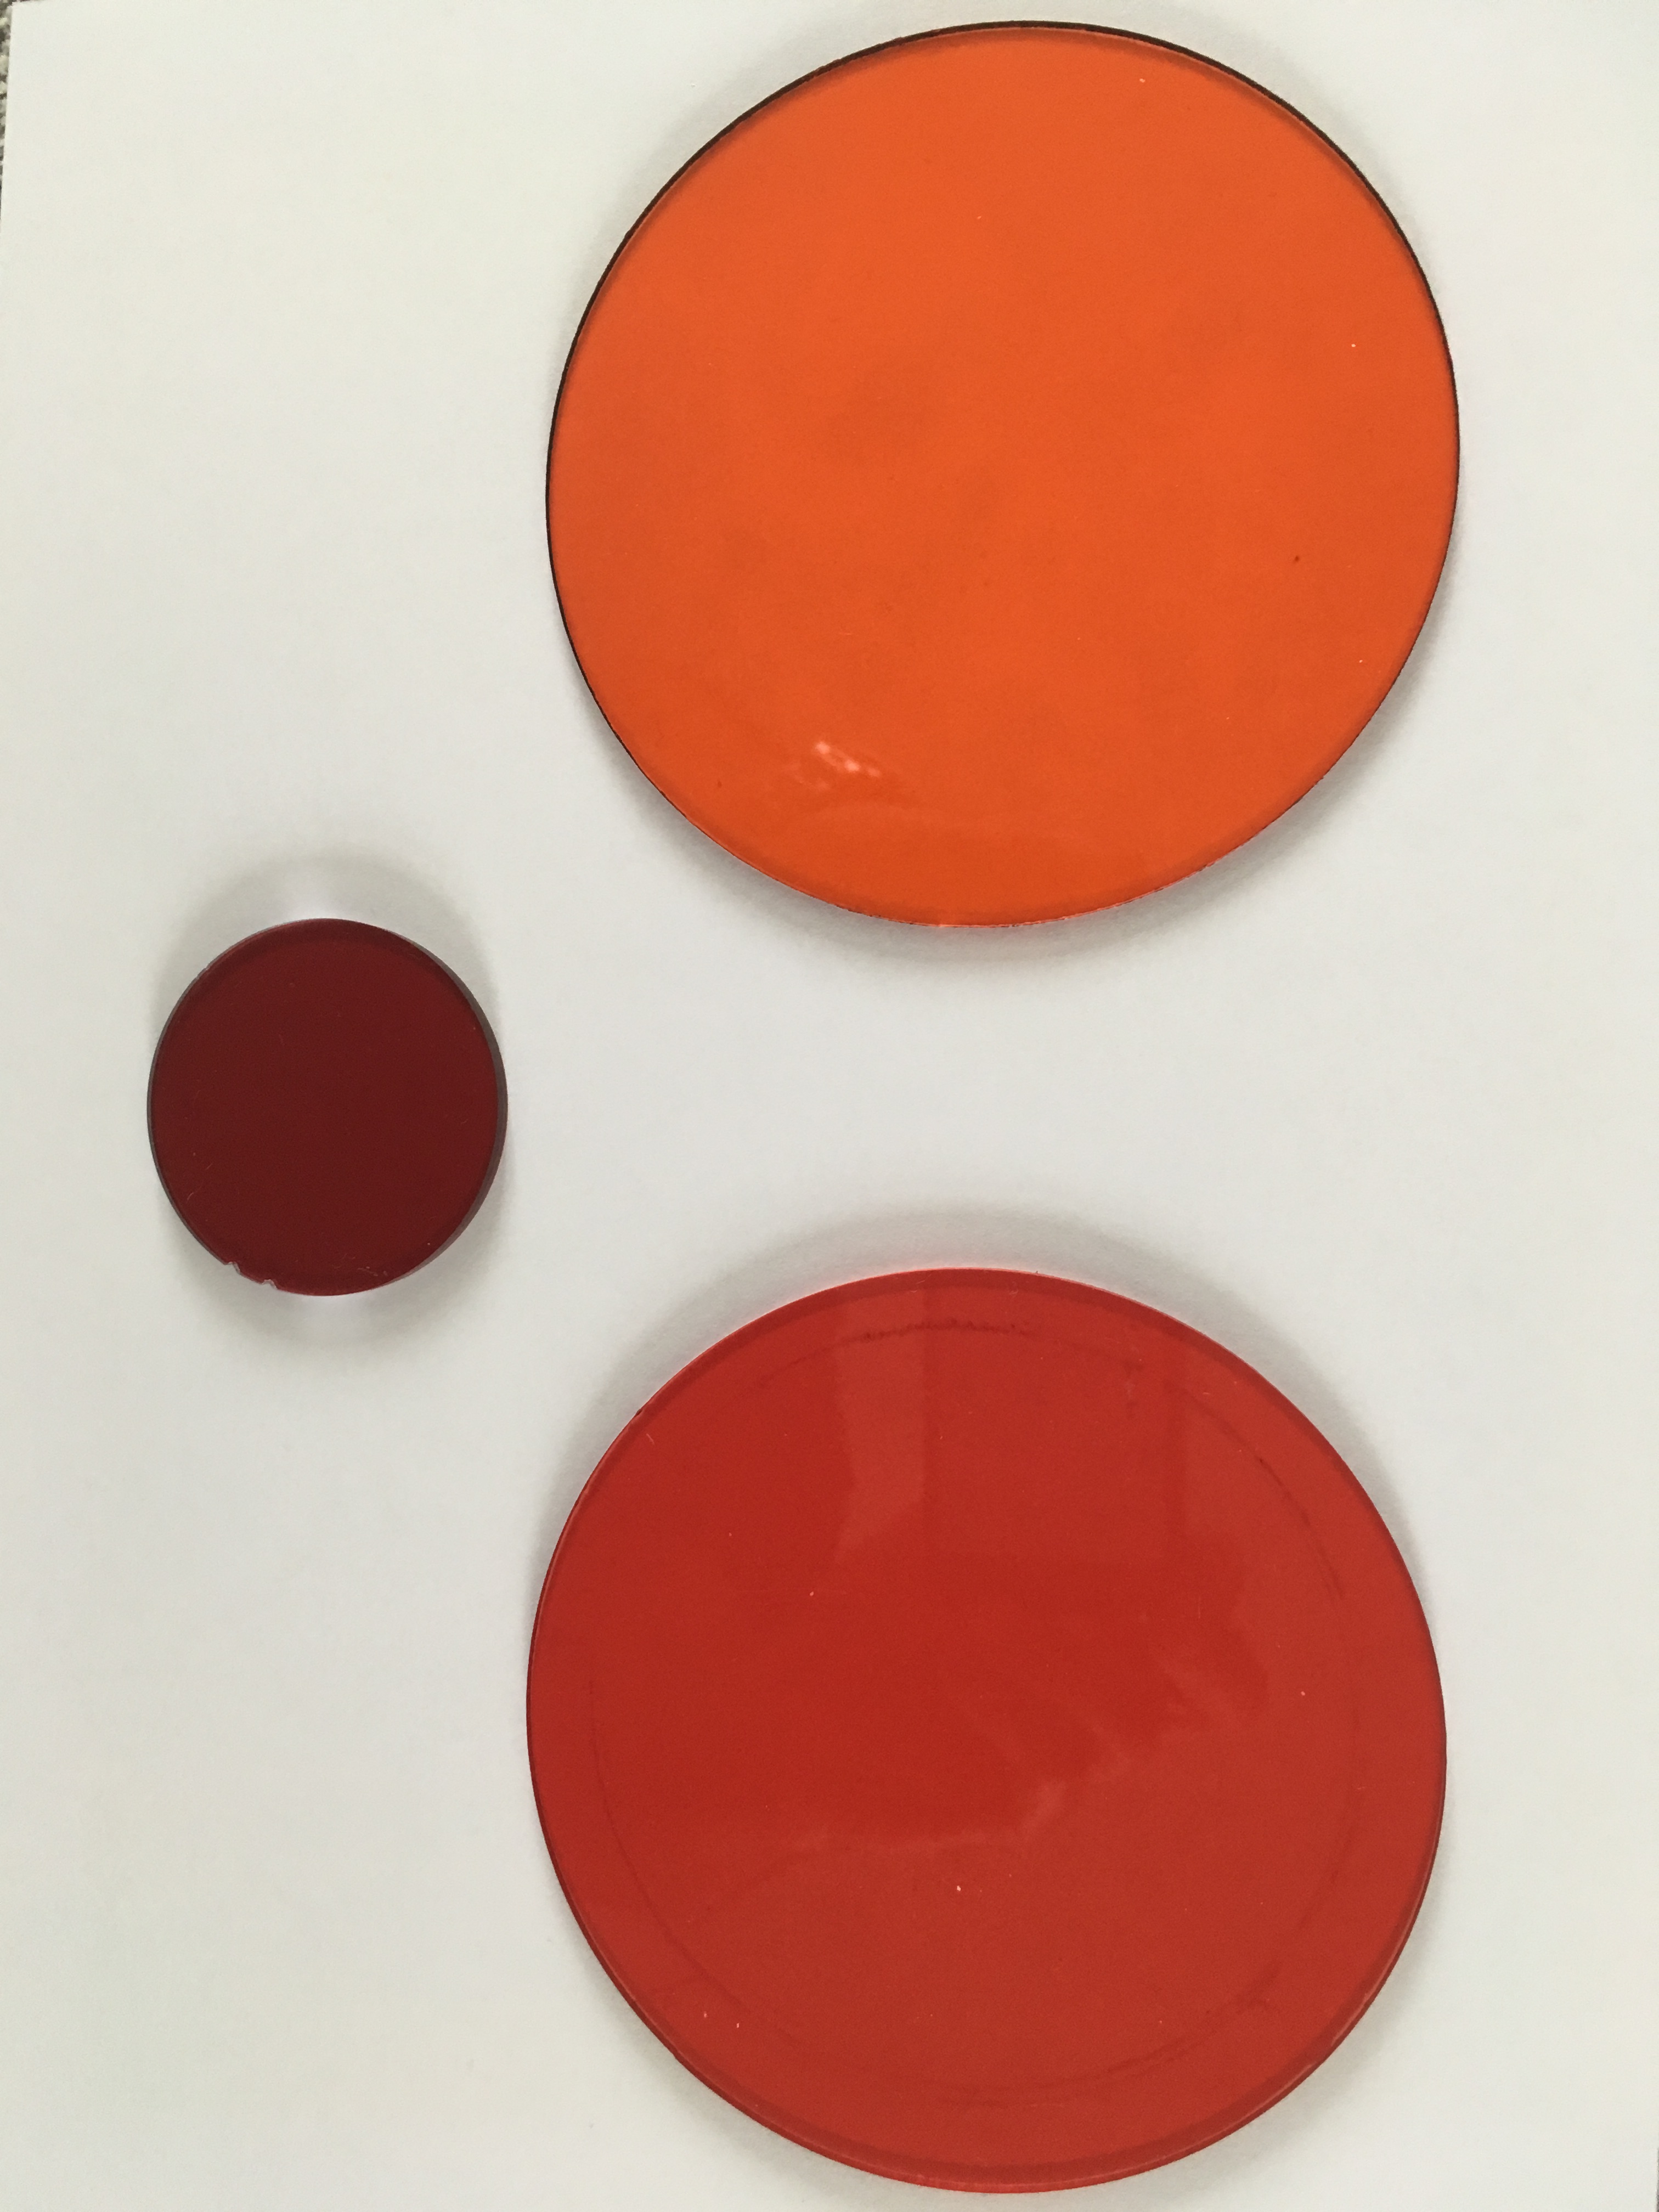
Dome Options 140mm vs 4.33″
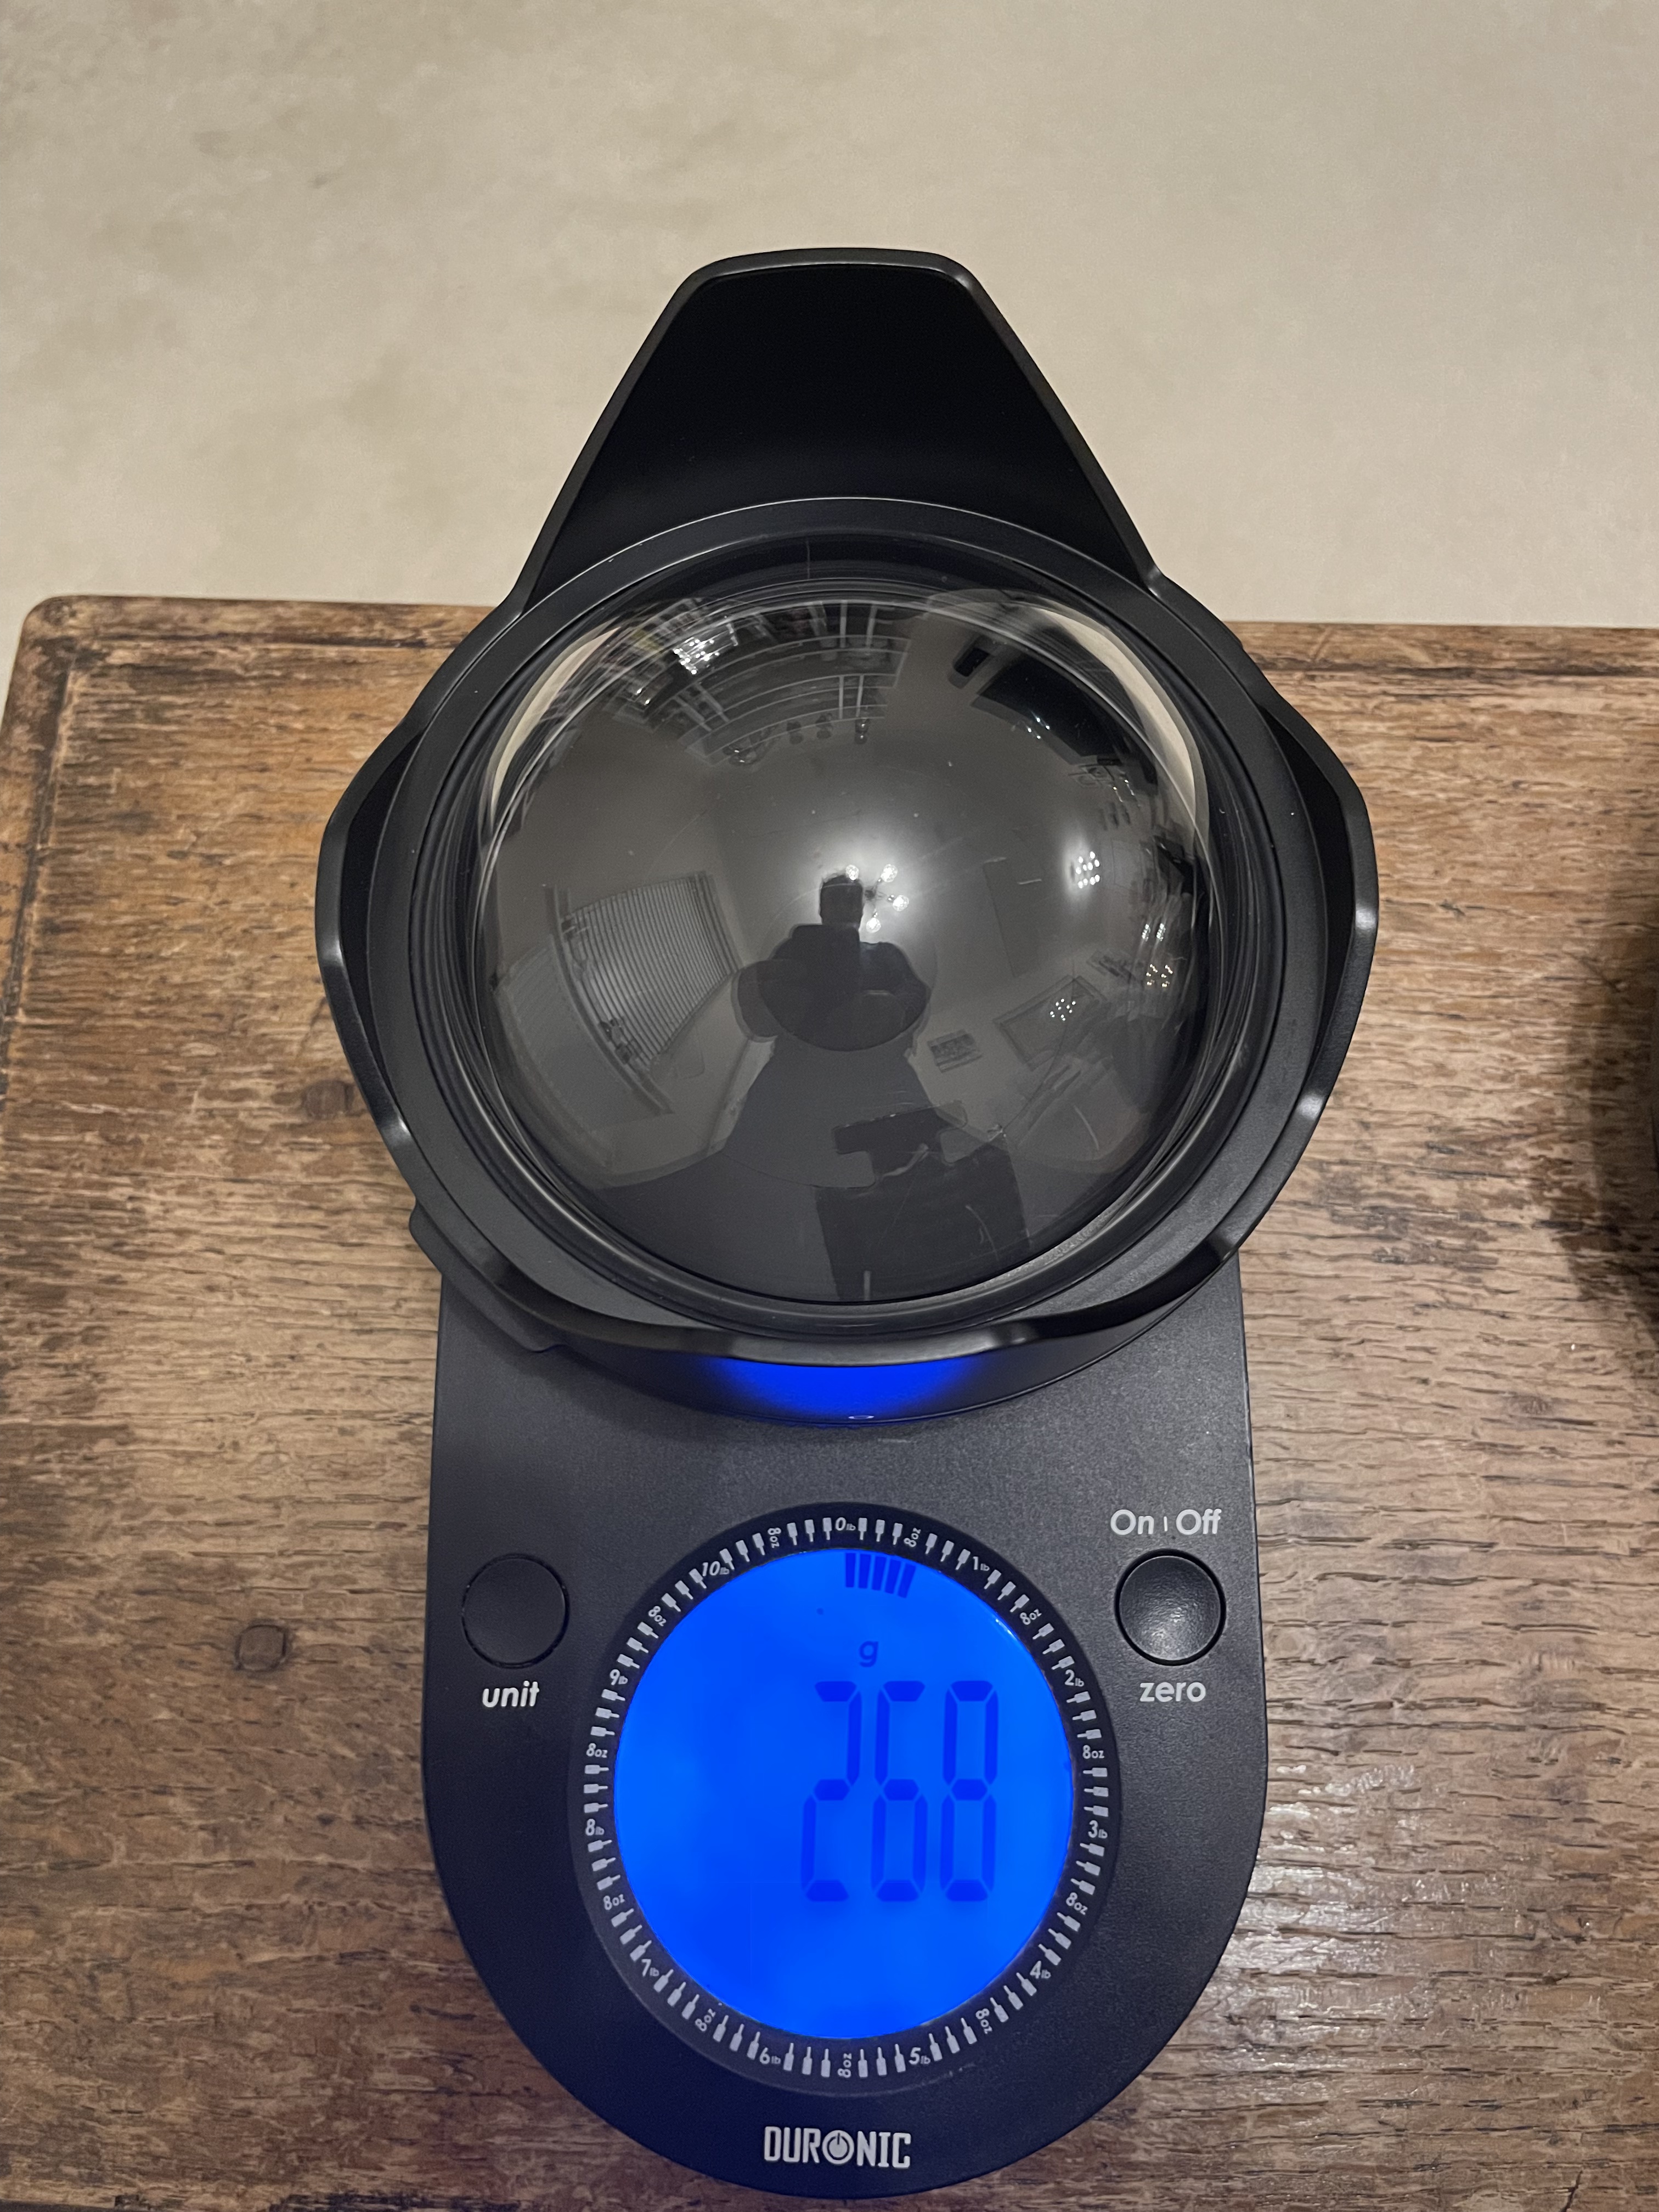
The Nauticam port chart recommends the 140mm glass fisheye dome for the 8.15mm, this port is 69mm radius and is made with anti reflective optical glass and weights 630 grams.
140mm Glass Dome on Scale
There is another dome from Nauticam the 4.33″ acrylic but this does not feature on the port chart for the Canon 8-15mm.
I did some calculations and this dome should require the same extension so I ordered one conscious that this would be lighter but not necessarily increase the underwater lift due to a reduced volume.
4.33″ dome weight
Although there is a difference of 362 grams the smaller volume will result in less buoyancy 348g lift vs 688g lift for the 140mm so overall the additional buoyancy is only 22 grams.
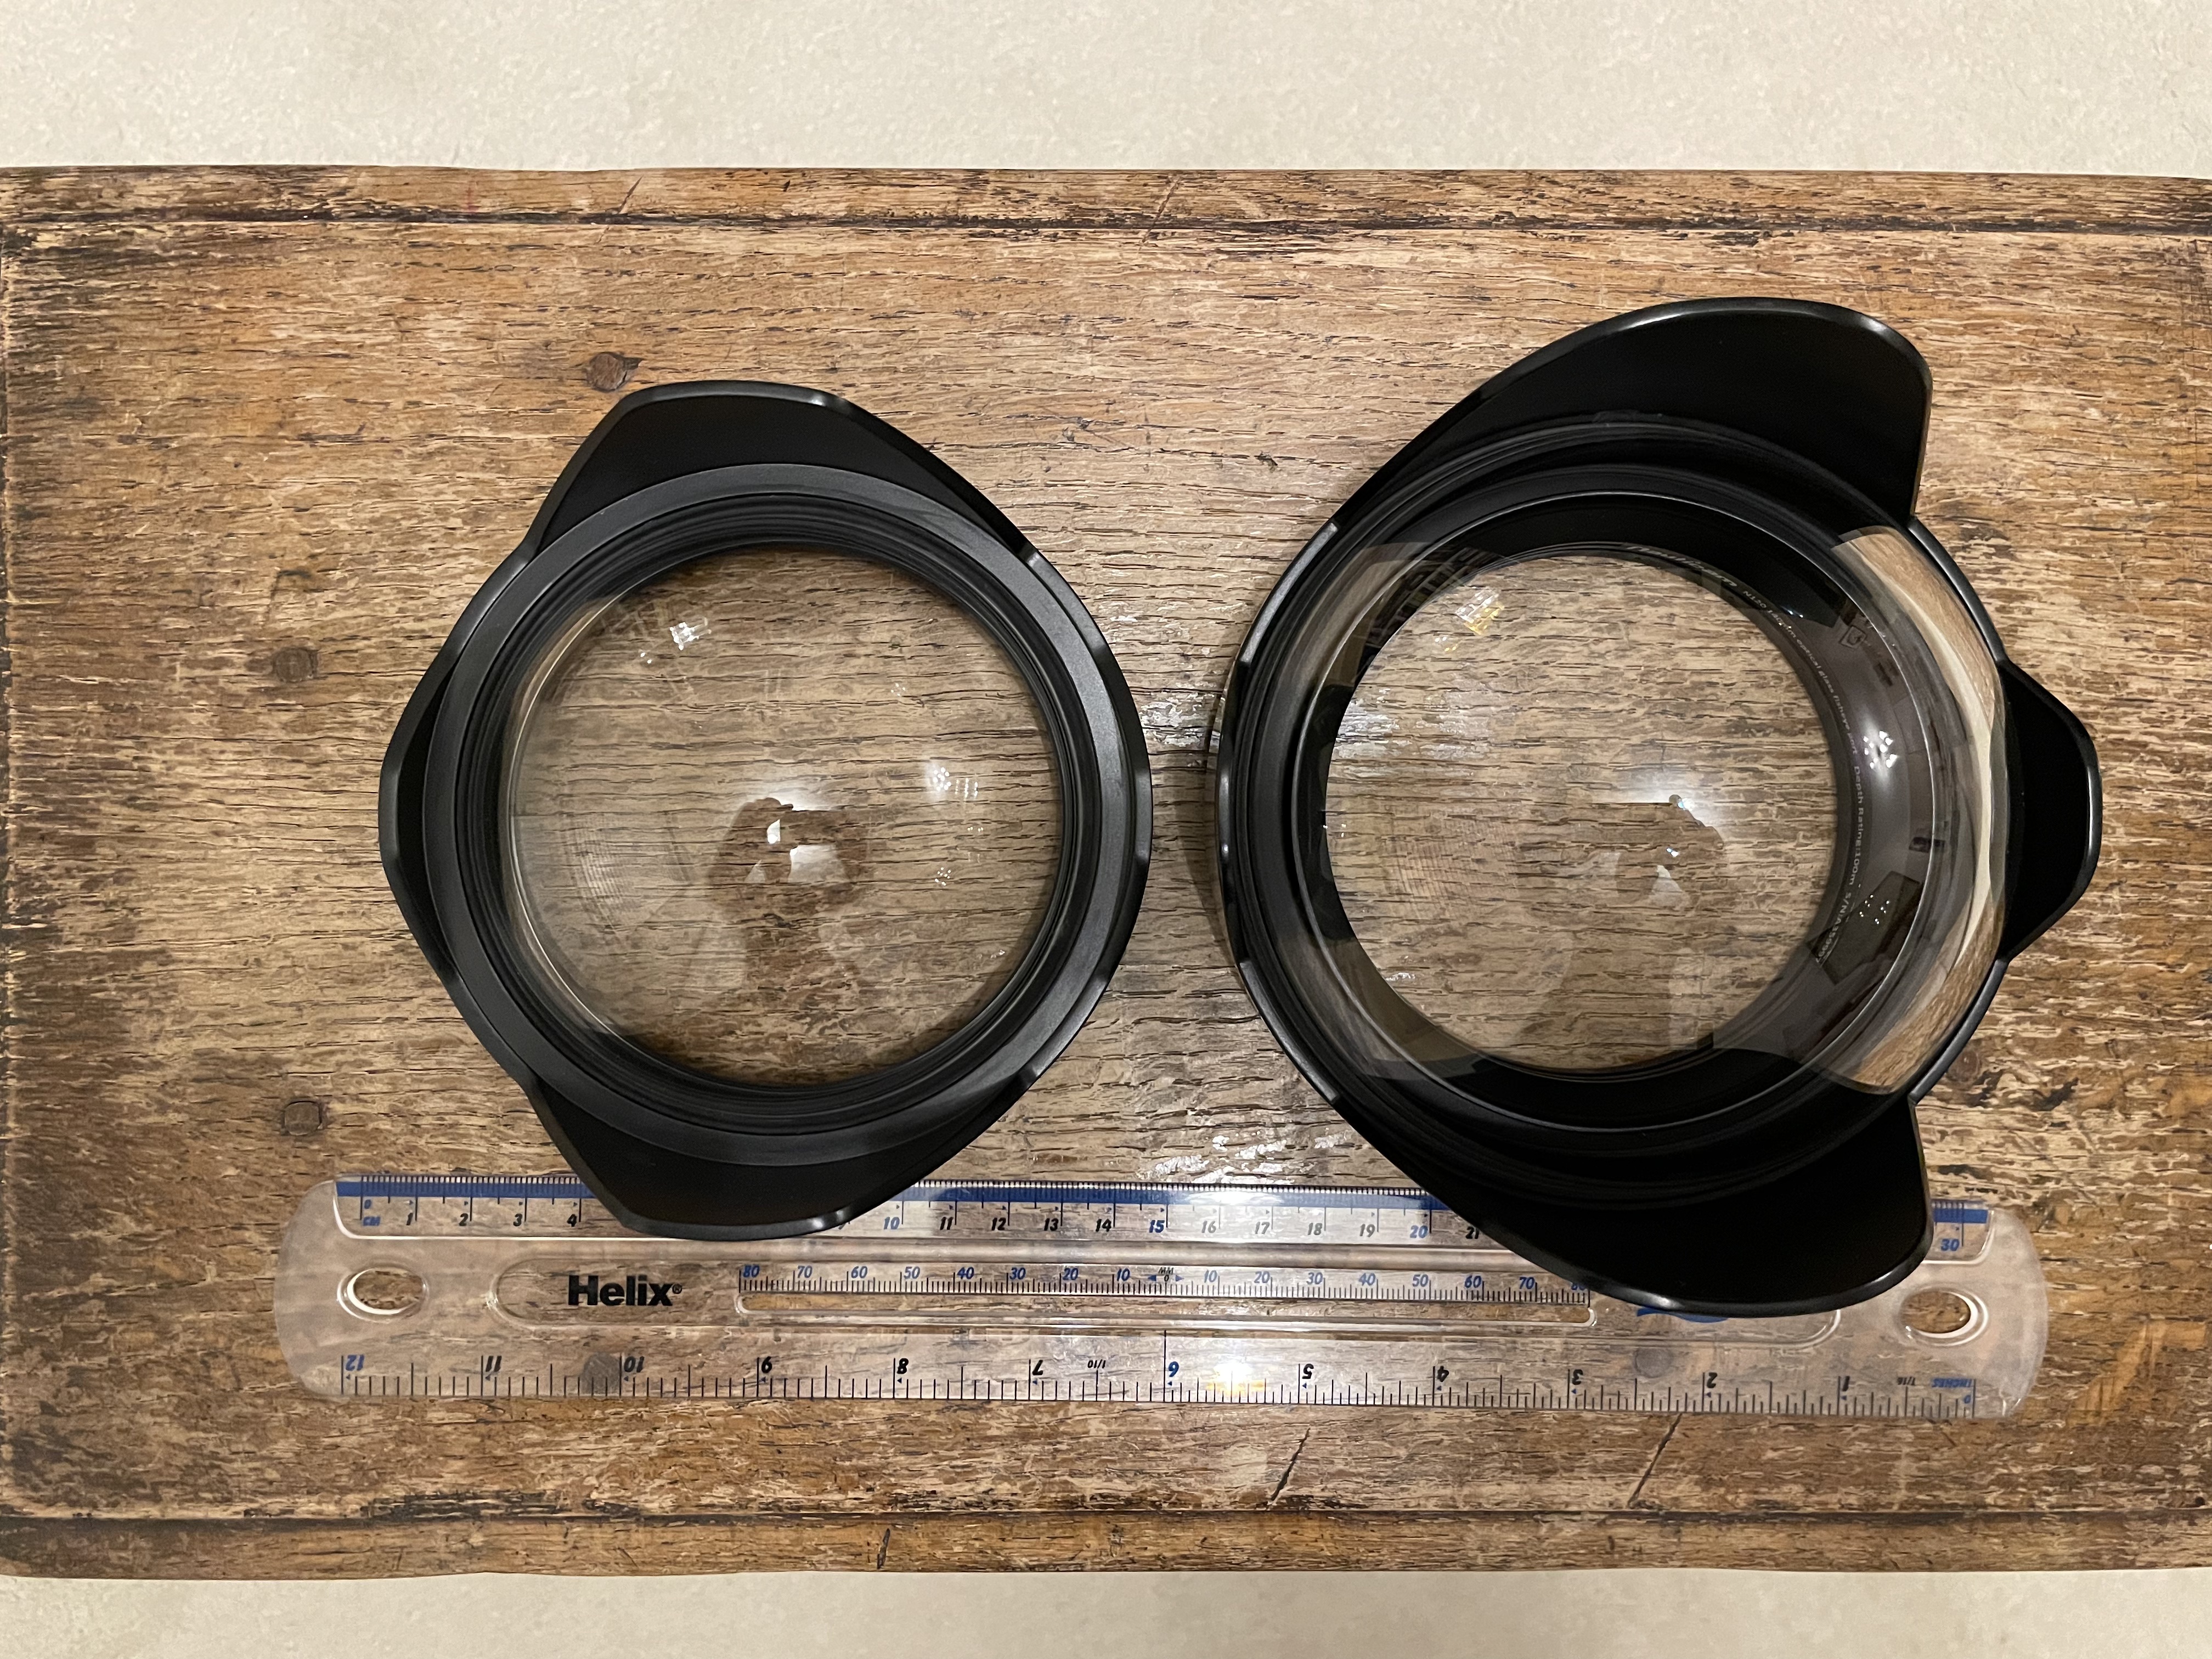
4.33″ vs 140mm
The primary benefit of this smaller dome is that it gets you closer this in turn means that things will look bigger and as consequence depth of field will drop. Depth of field depends on magnification and as you will get closer it will drop compared to other domes. So larger domes have more depth of field not because they are larger when you are at close range but simply because your camera focal plane is standing further back.
To give an idea this is a little miniature shot with the 140mm dome with the target touching the glass port.
140mm dome close up
This is the same target with the 4.33″ dome.
4.33 dome
Side by side shows the difference in magnification.
Left 4.33″ dome right 140mm dome
If we look at the same detail we can see that the 140mm dome image detail is less blurred.
4’33 dome vs 140mm dome
We are on land here there is no water involved and the 140mm image is sharper at the edge simply because it is smaller.
As depth of field must be compared at equal magnification we can also bust another myth of larger domes vs smaller domes there is no increased depth of field you are just standing further back if you compared the front of the port instead of the focal plane.
Building the Rig
The extension required is still 30mm as for the 140mm dome,
Acrylic dome profile
The overall size of this dome means it is flush with the extension ring.
Port details the lens hood must be removed
This is the overall rig with the amount of flotation in this image it is around 600 grams negative in fresh water.
4.33 rig
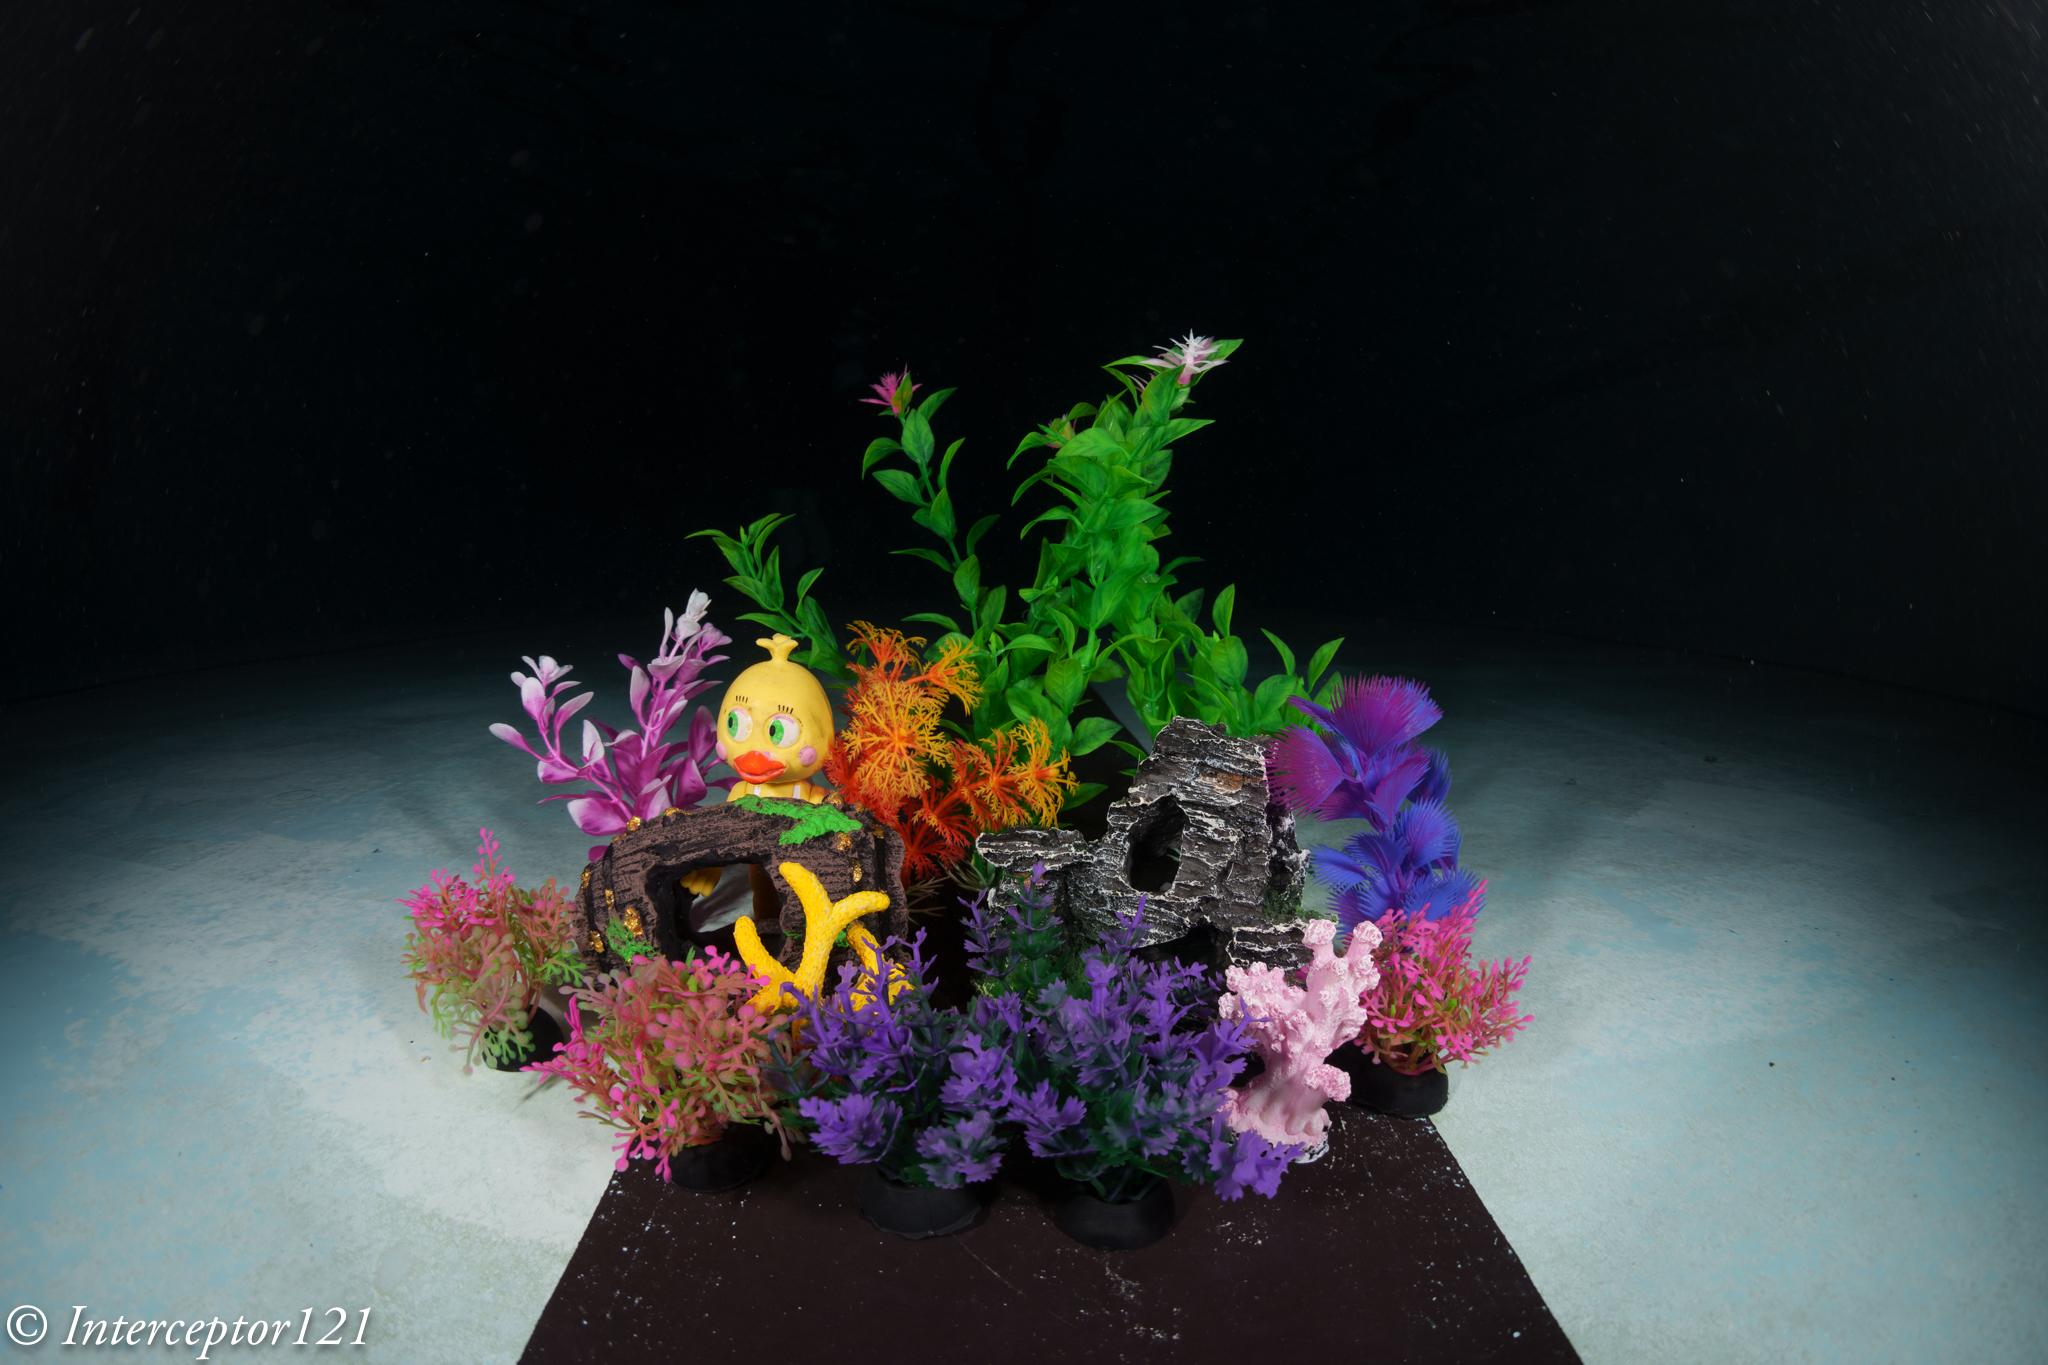
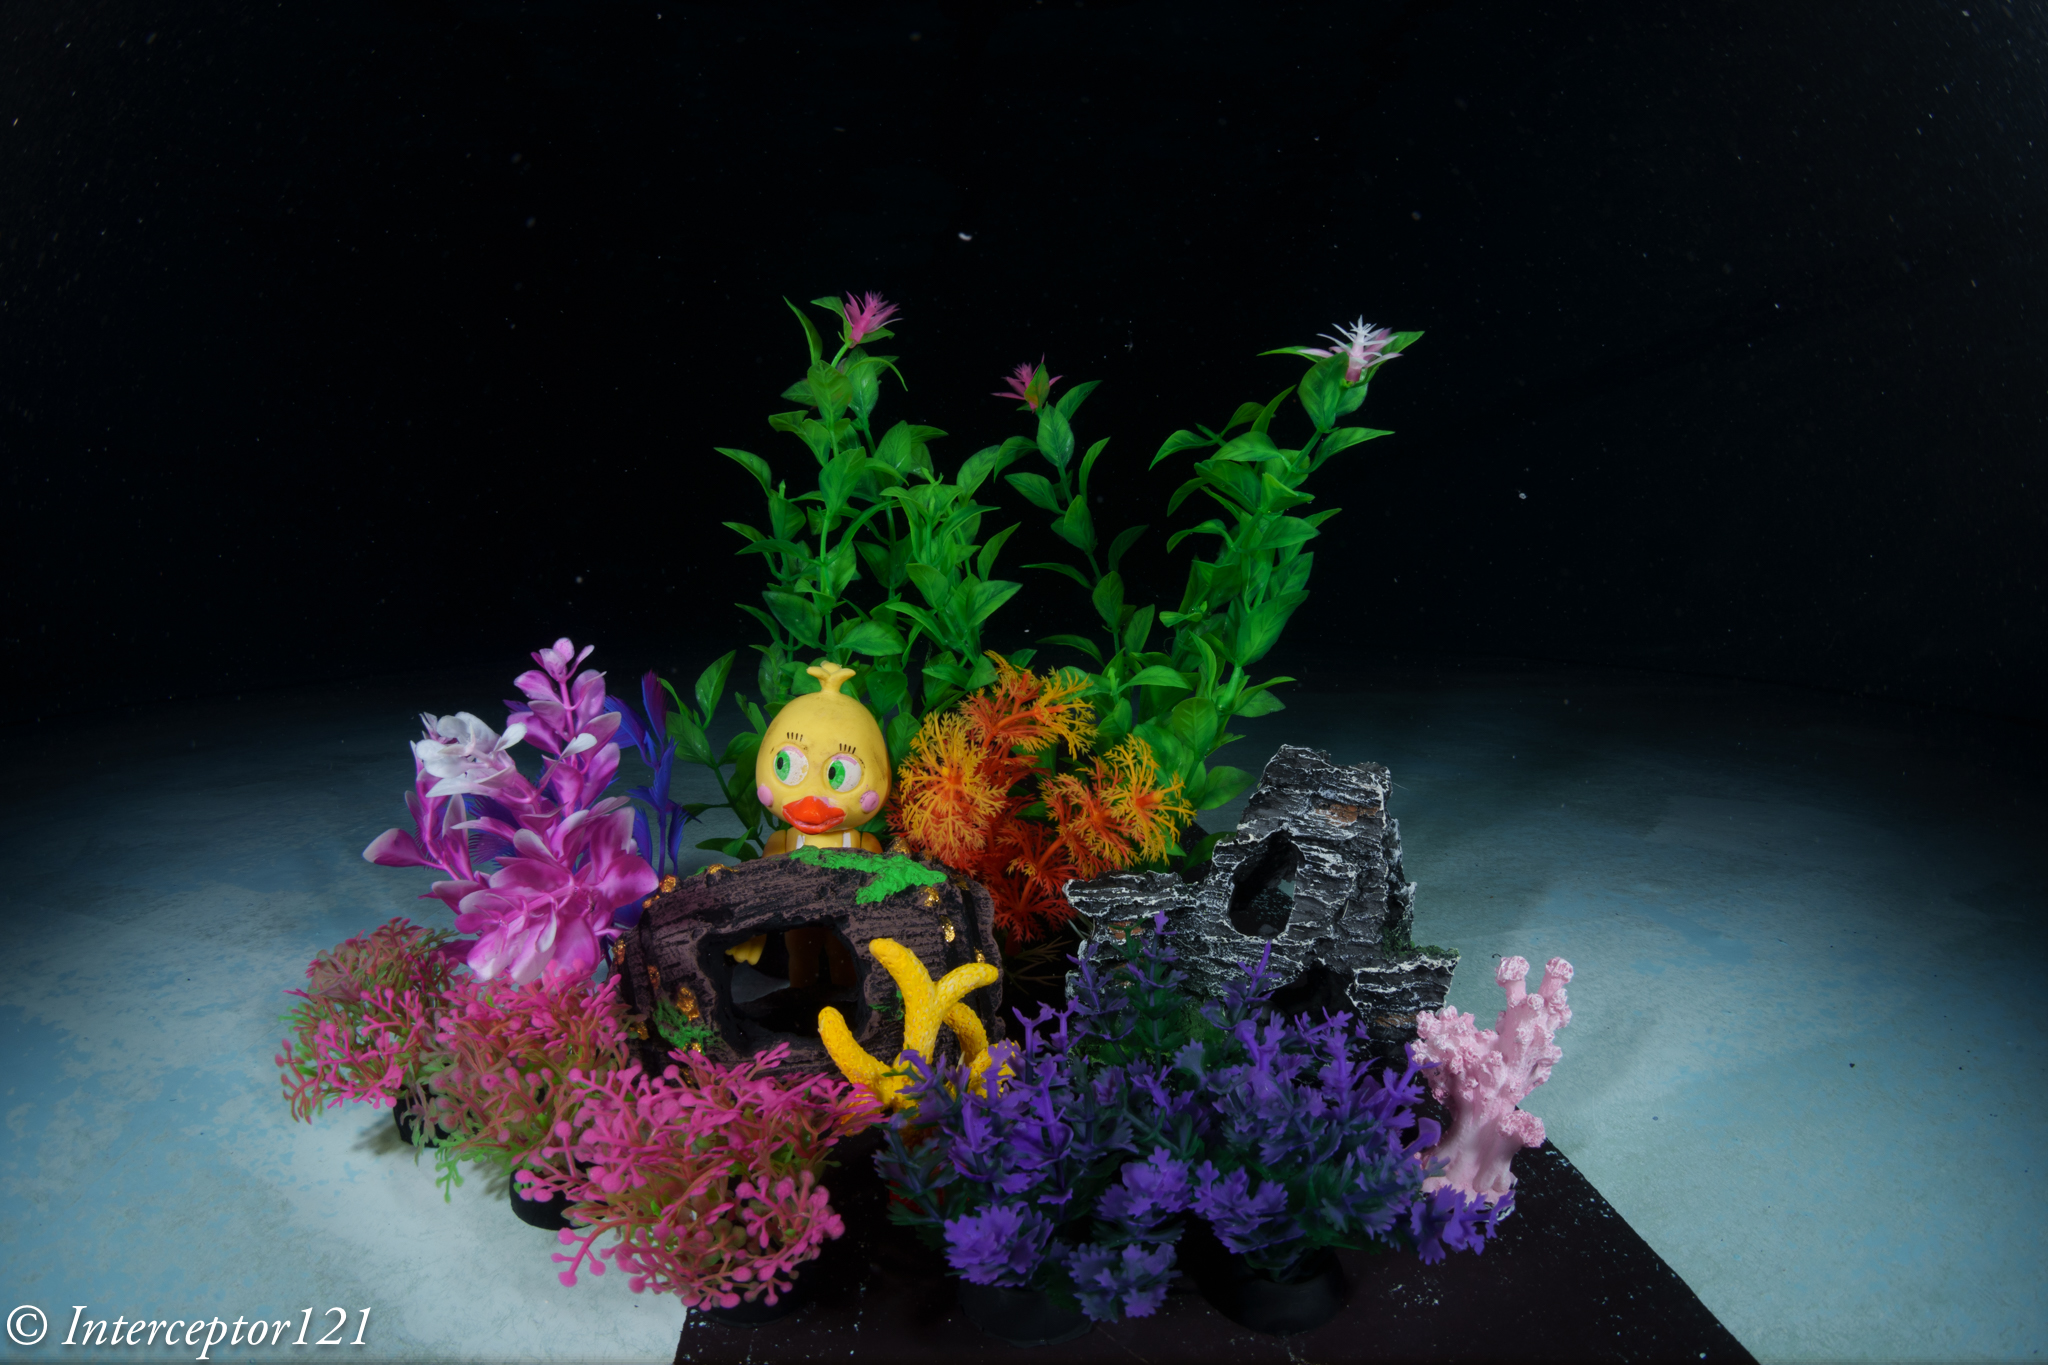
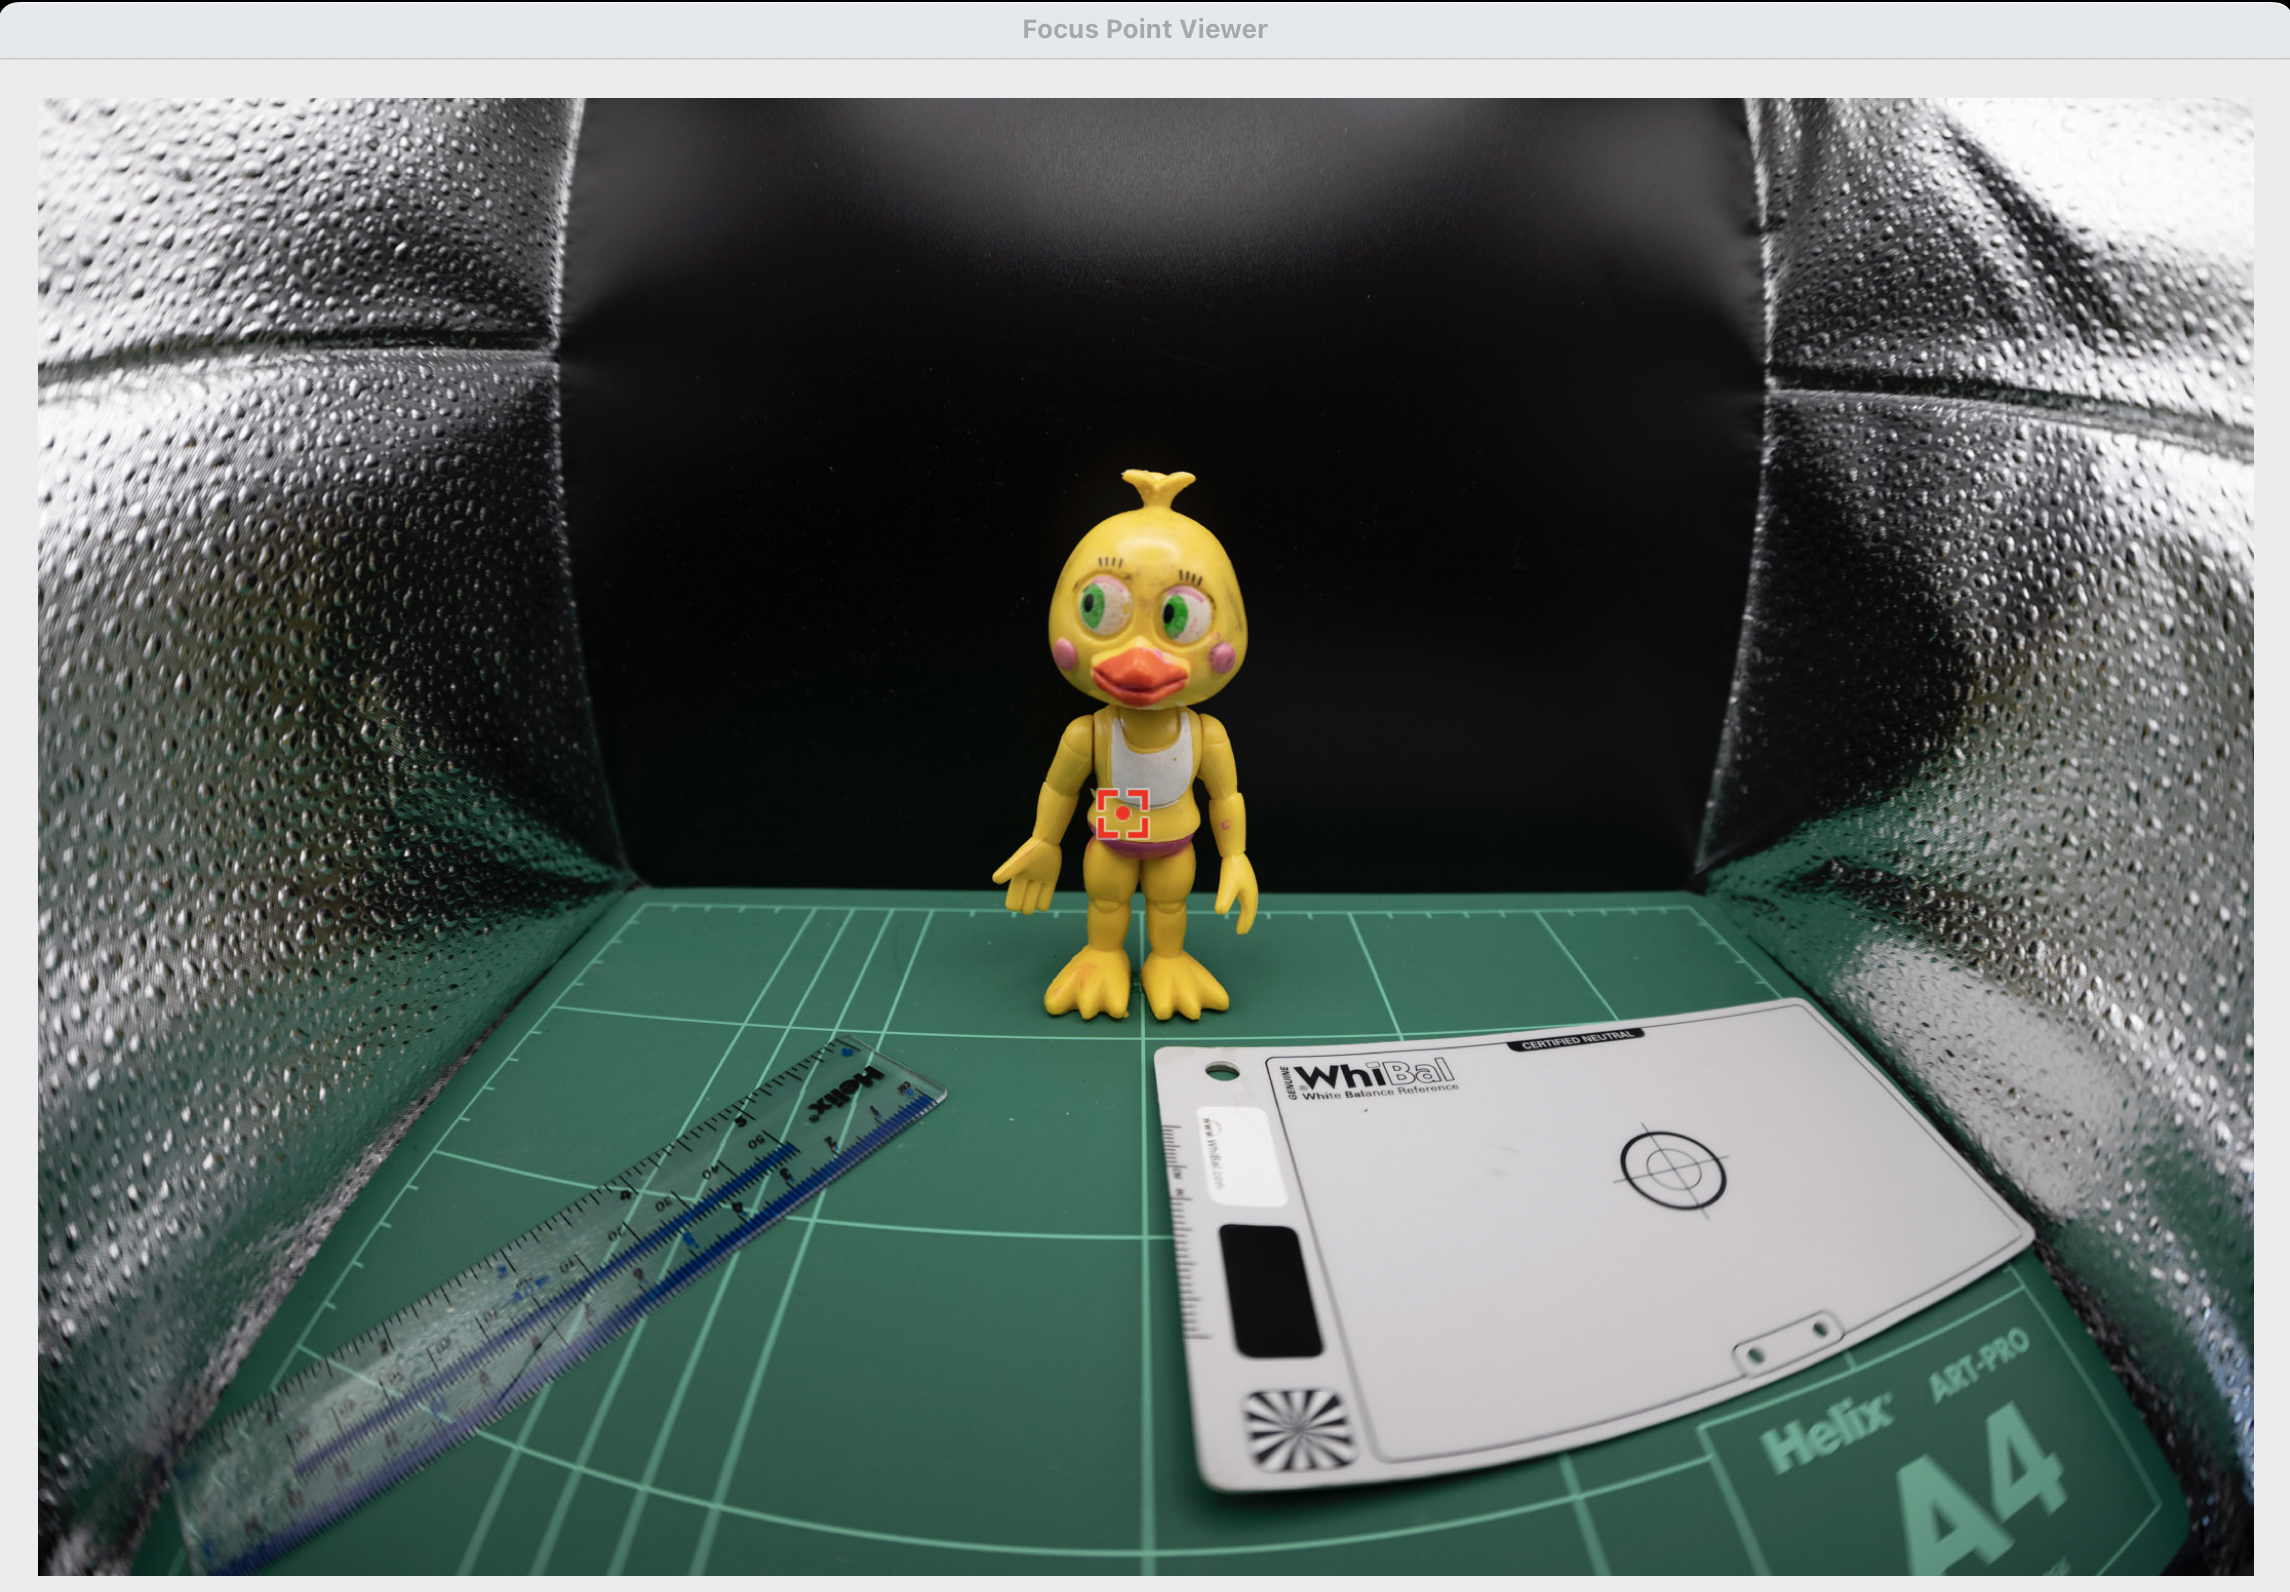
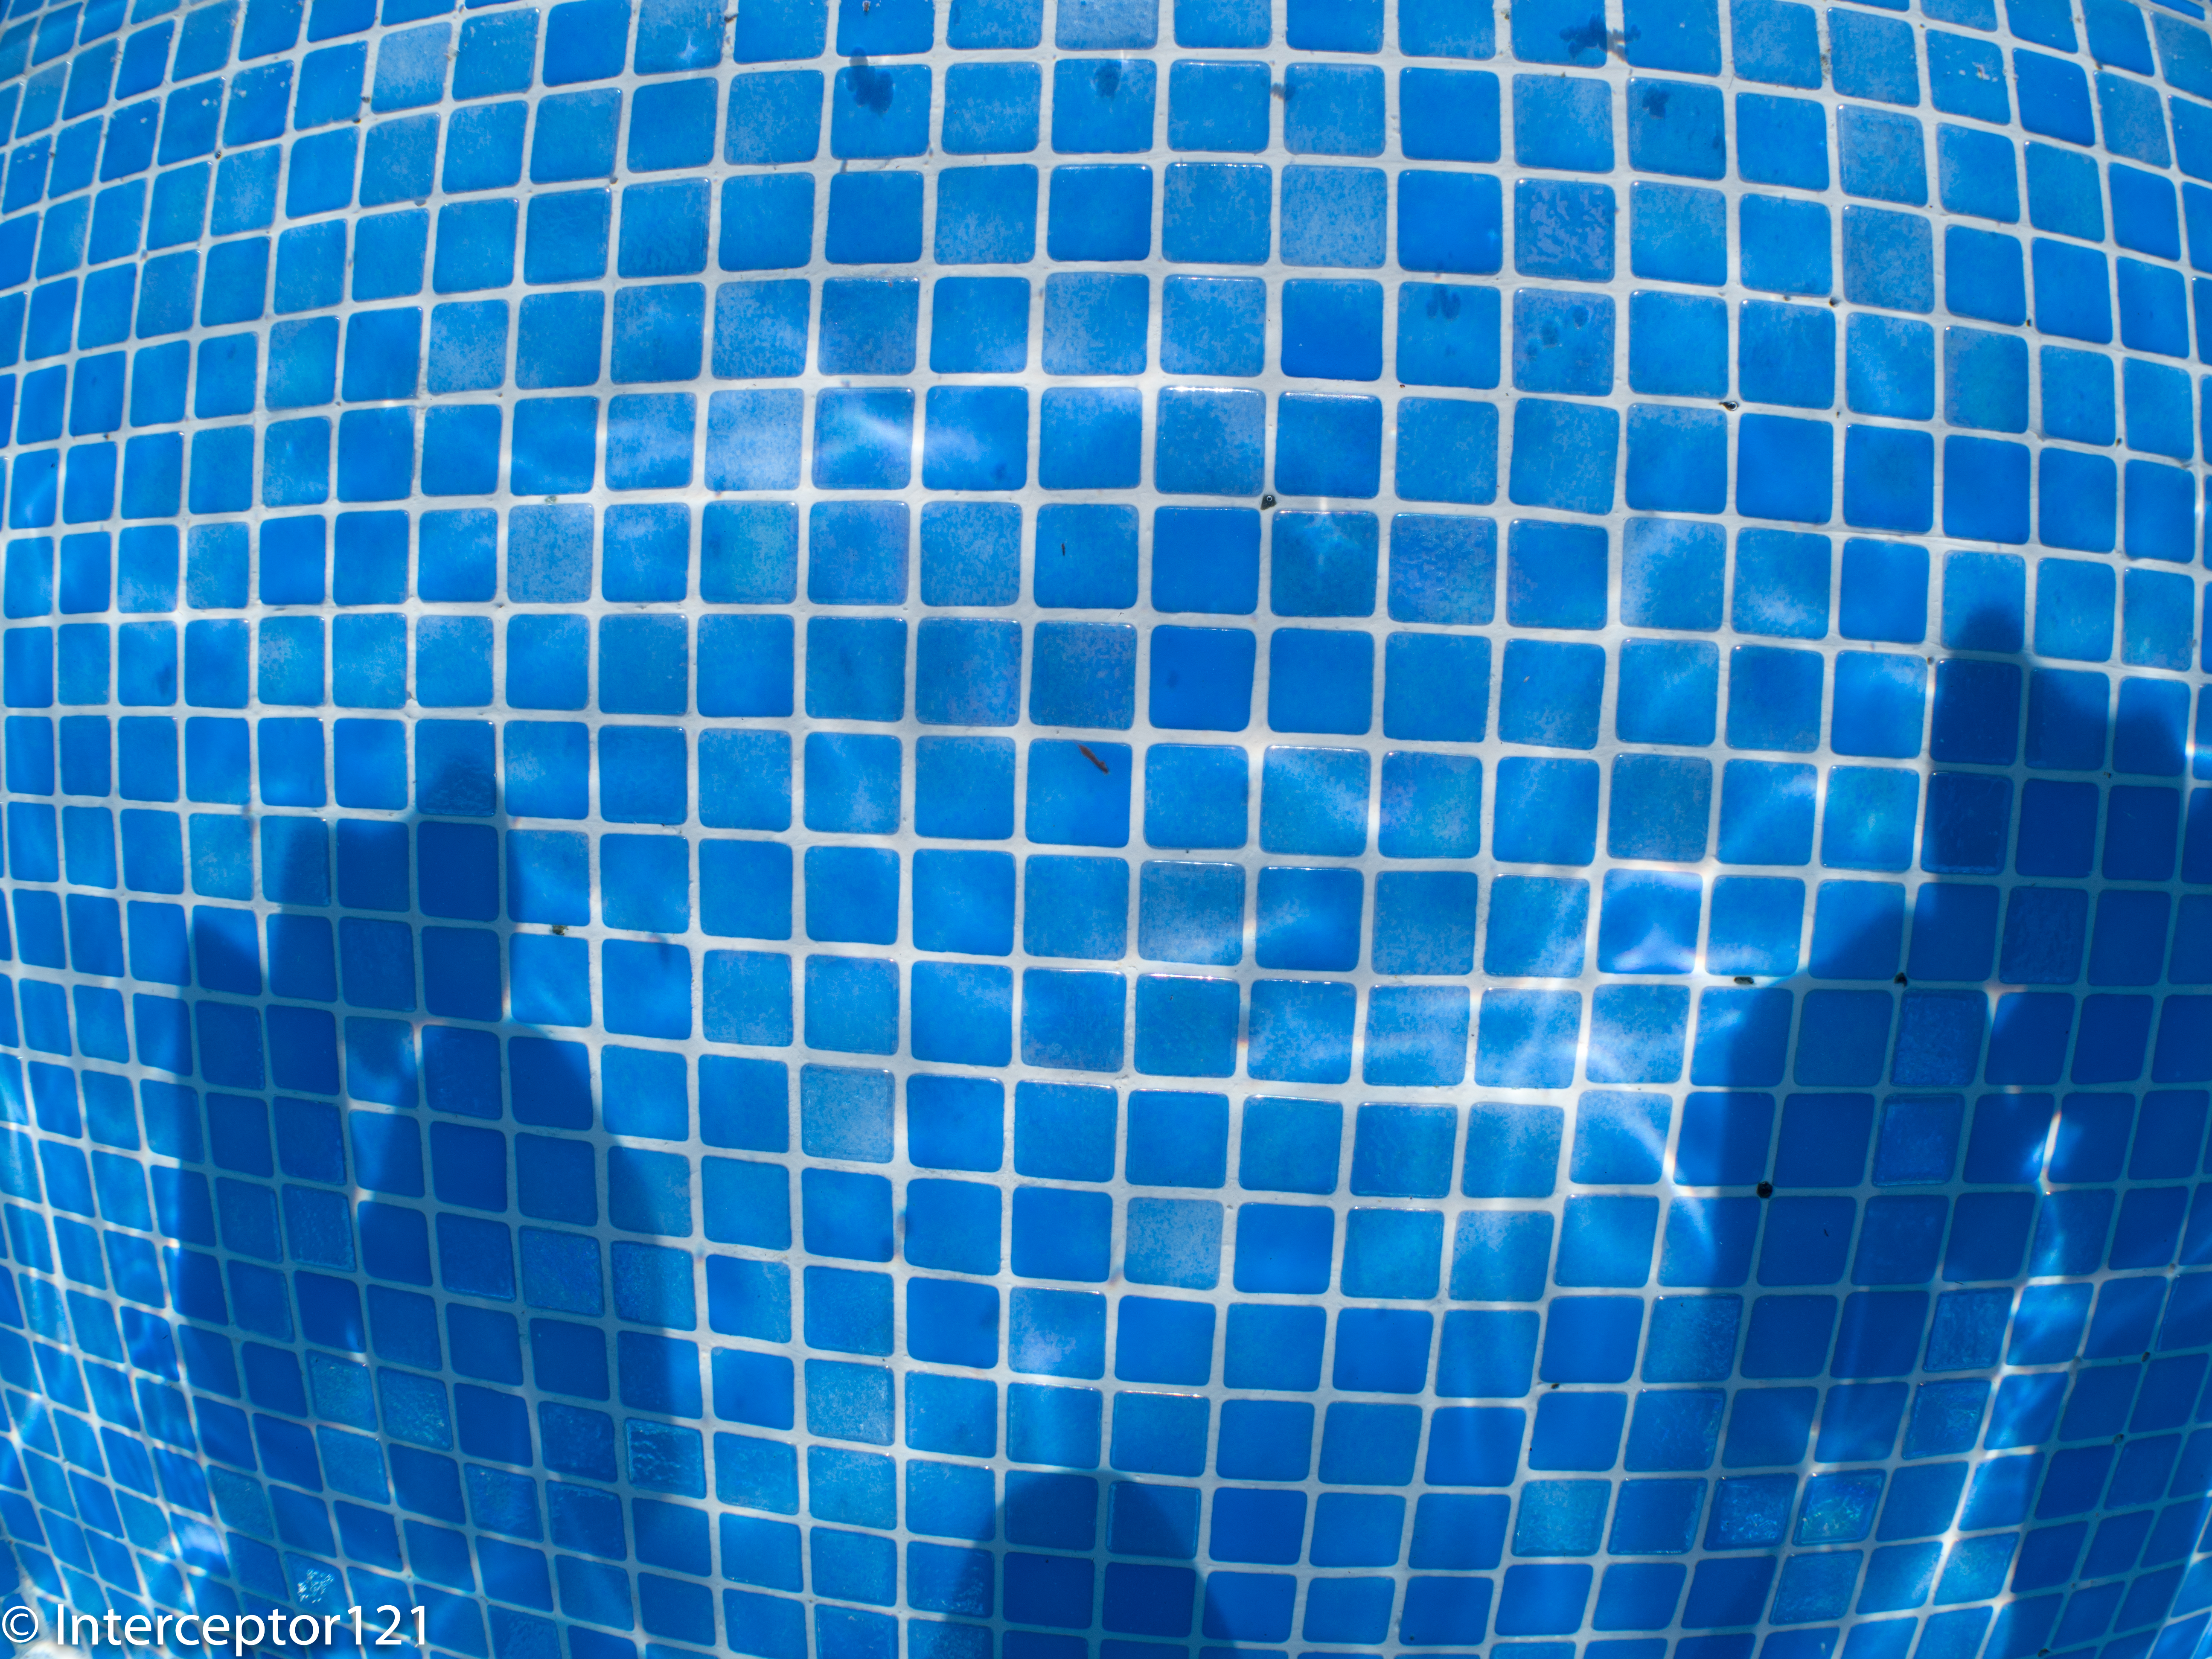
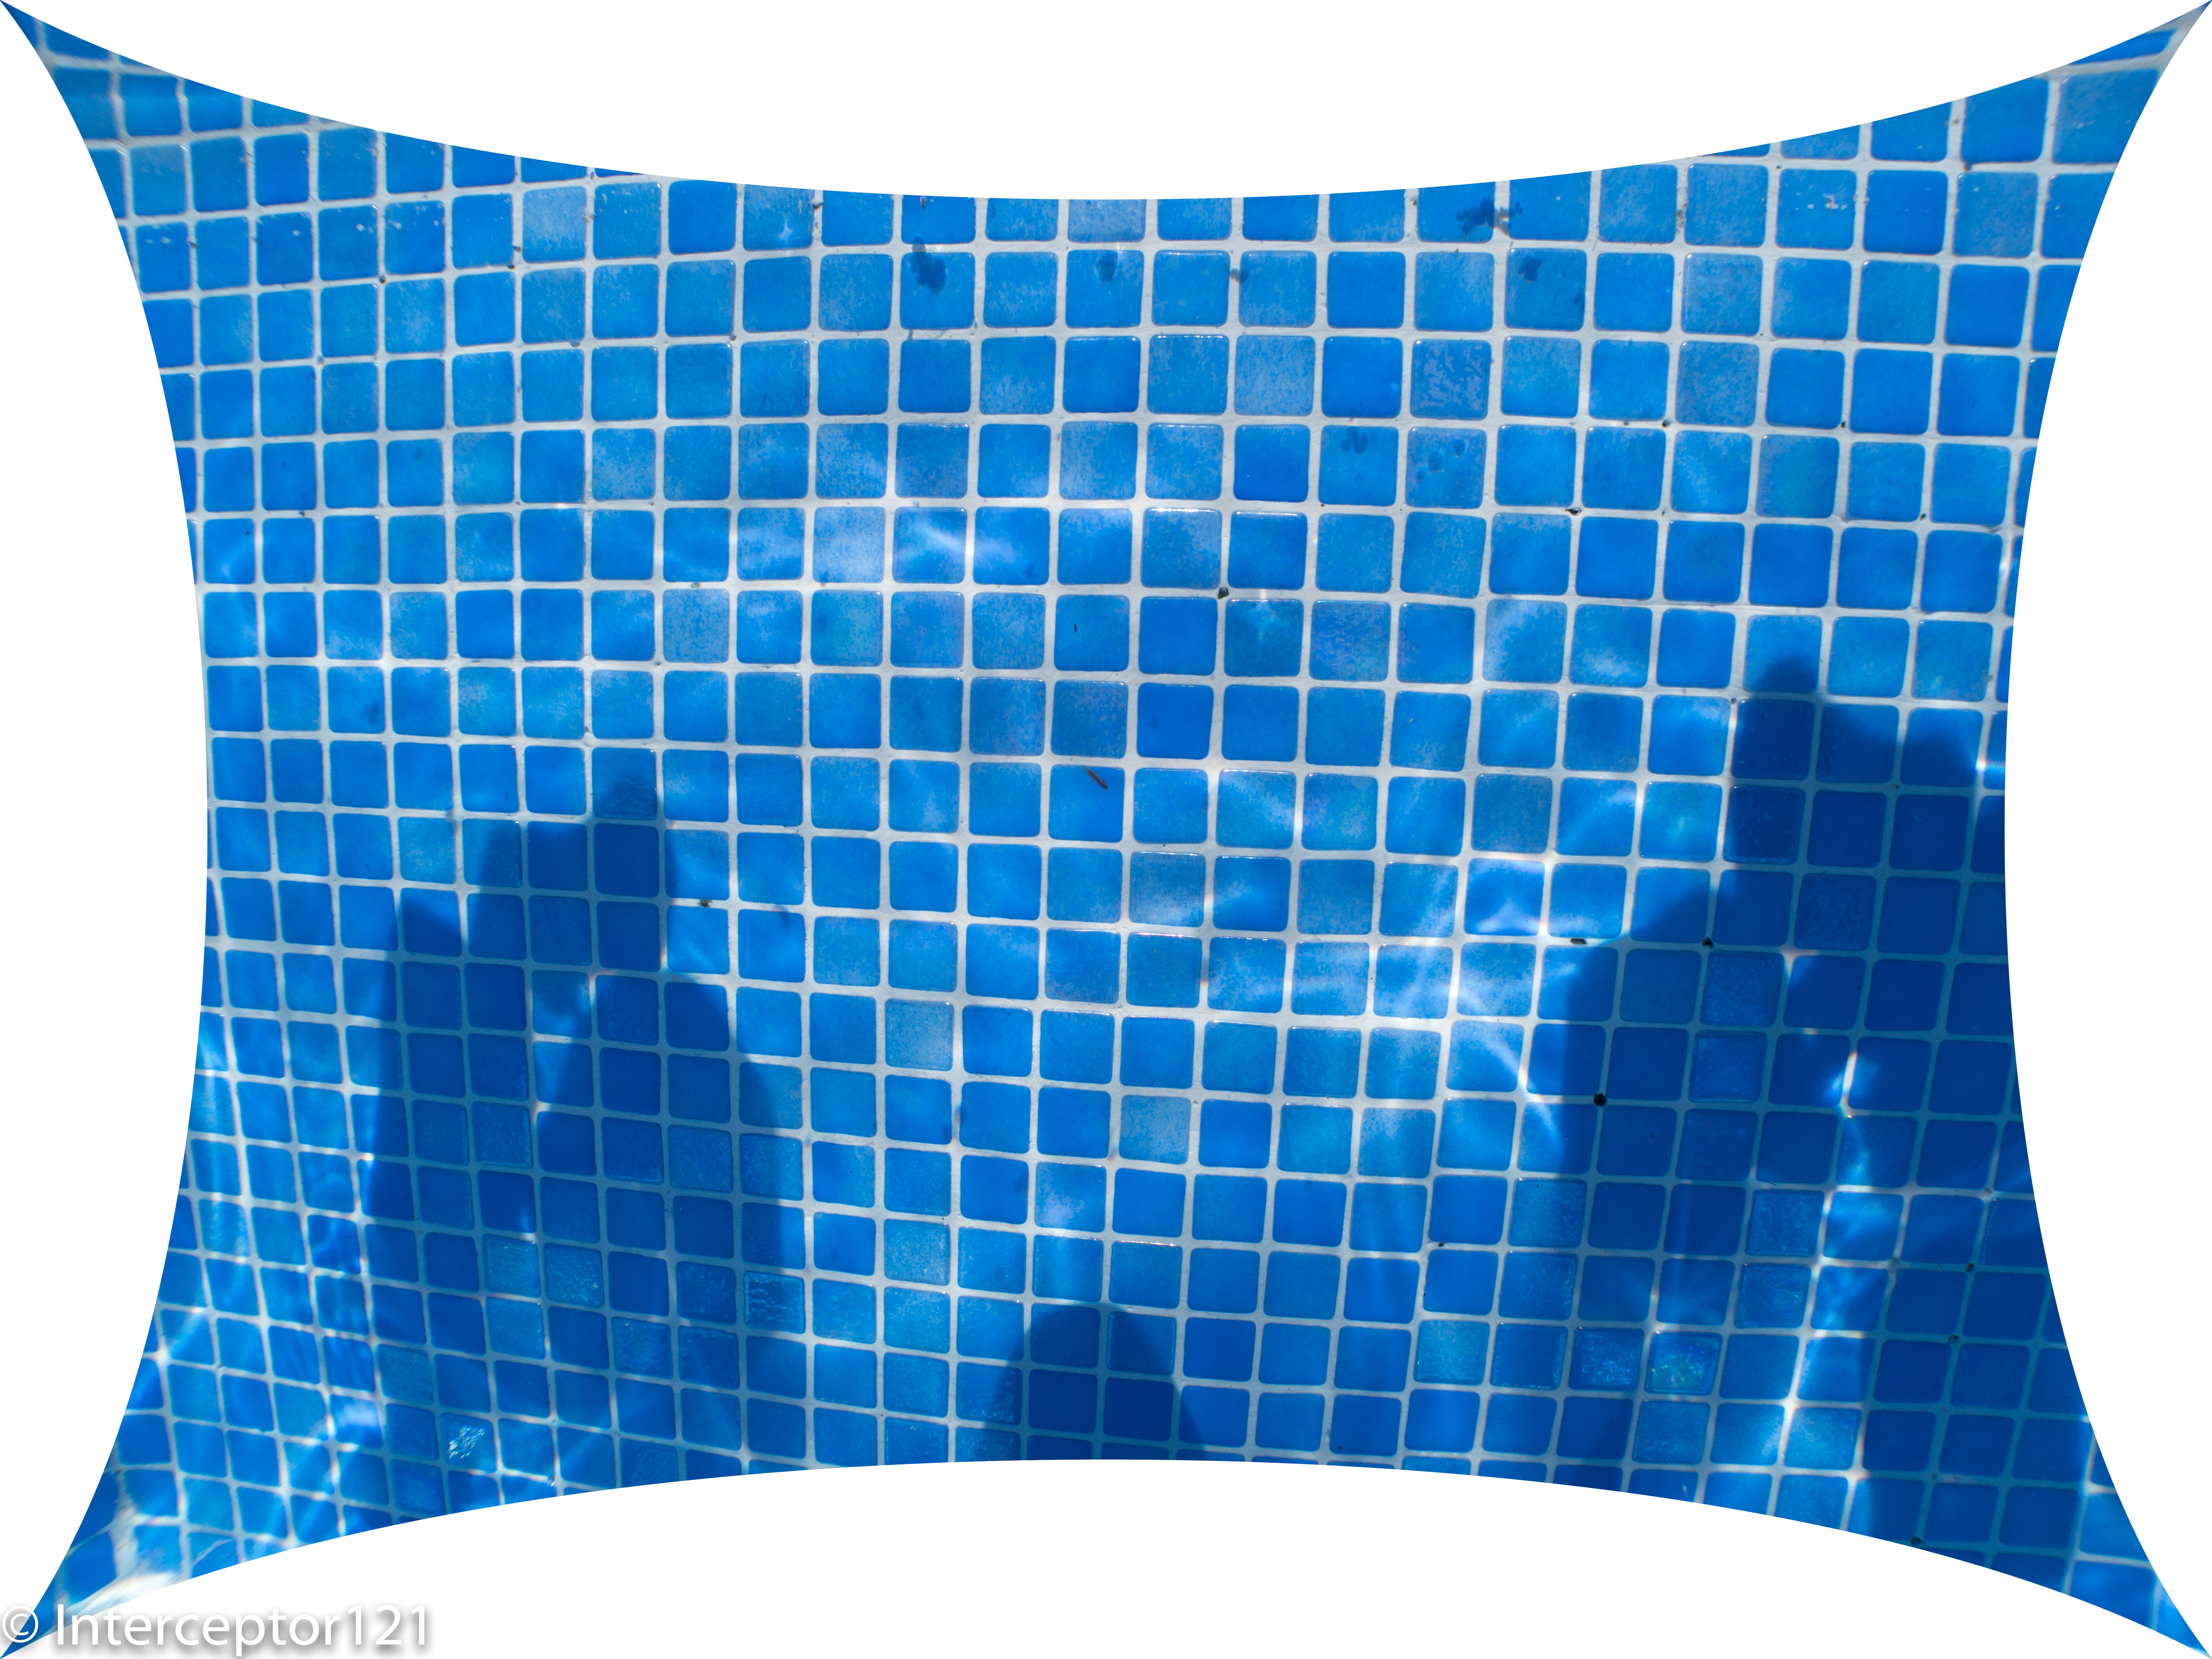
Now that we know what to expect is time to get in the pool and take some shots. I got some miniature aquarium fixtures to simulate a close focus wide angle situation.
Pool Session
Once in water I set up my artificial reef and got shooting.
I was at the point of touching the props so I had to stand back a little. As expected the issue is depth of field.
Shots at f/11
For starter we try to get as close as possible and focus in line with the chick.
Fisheye f/11 Focus on back
Due to the extreme magnification the front details are quite soft. So from here I start moving backwards a little.
Still focussed on the chick the sharpness improves due to reduced magnification this is a simulation of a larger dome.
Fisheye f/11 Focus on chick
There still is severe blurring of the front detail at f/11. However due to the increased depth of field that the dome brings behind the focus point the rest looks pretty good.
Focussing on the middle of the frame at f/11 results in blurry details for the features in the front of the frame but much less blurry than before and the chick is still relatively sharp.
fisheye f/11 Focus on edge front
Focussing on the pink reef detail results in a better overall result in a counterintuitive way.
Shots at f/16
Stopping down the lens results in increased depth of field so more of the image is in focus however the overall sharpness drops. This is a good place to be if you don’t want to be too sophisticated with the choice of focus point and you are close.
You can get closer but the front detail is still a bit soft but acceptable.
Fisheye f/16 Focus on back
If you move your focus point a bit further in front the situation improves.
fisheye f/16 Focus on middle
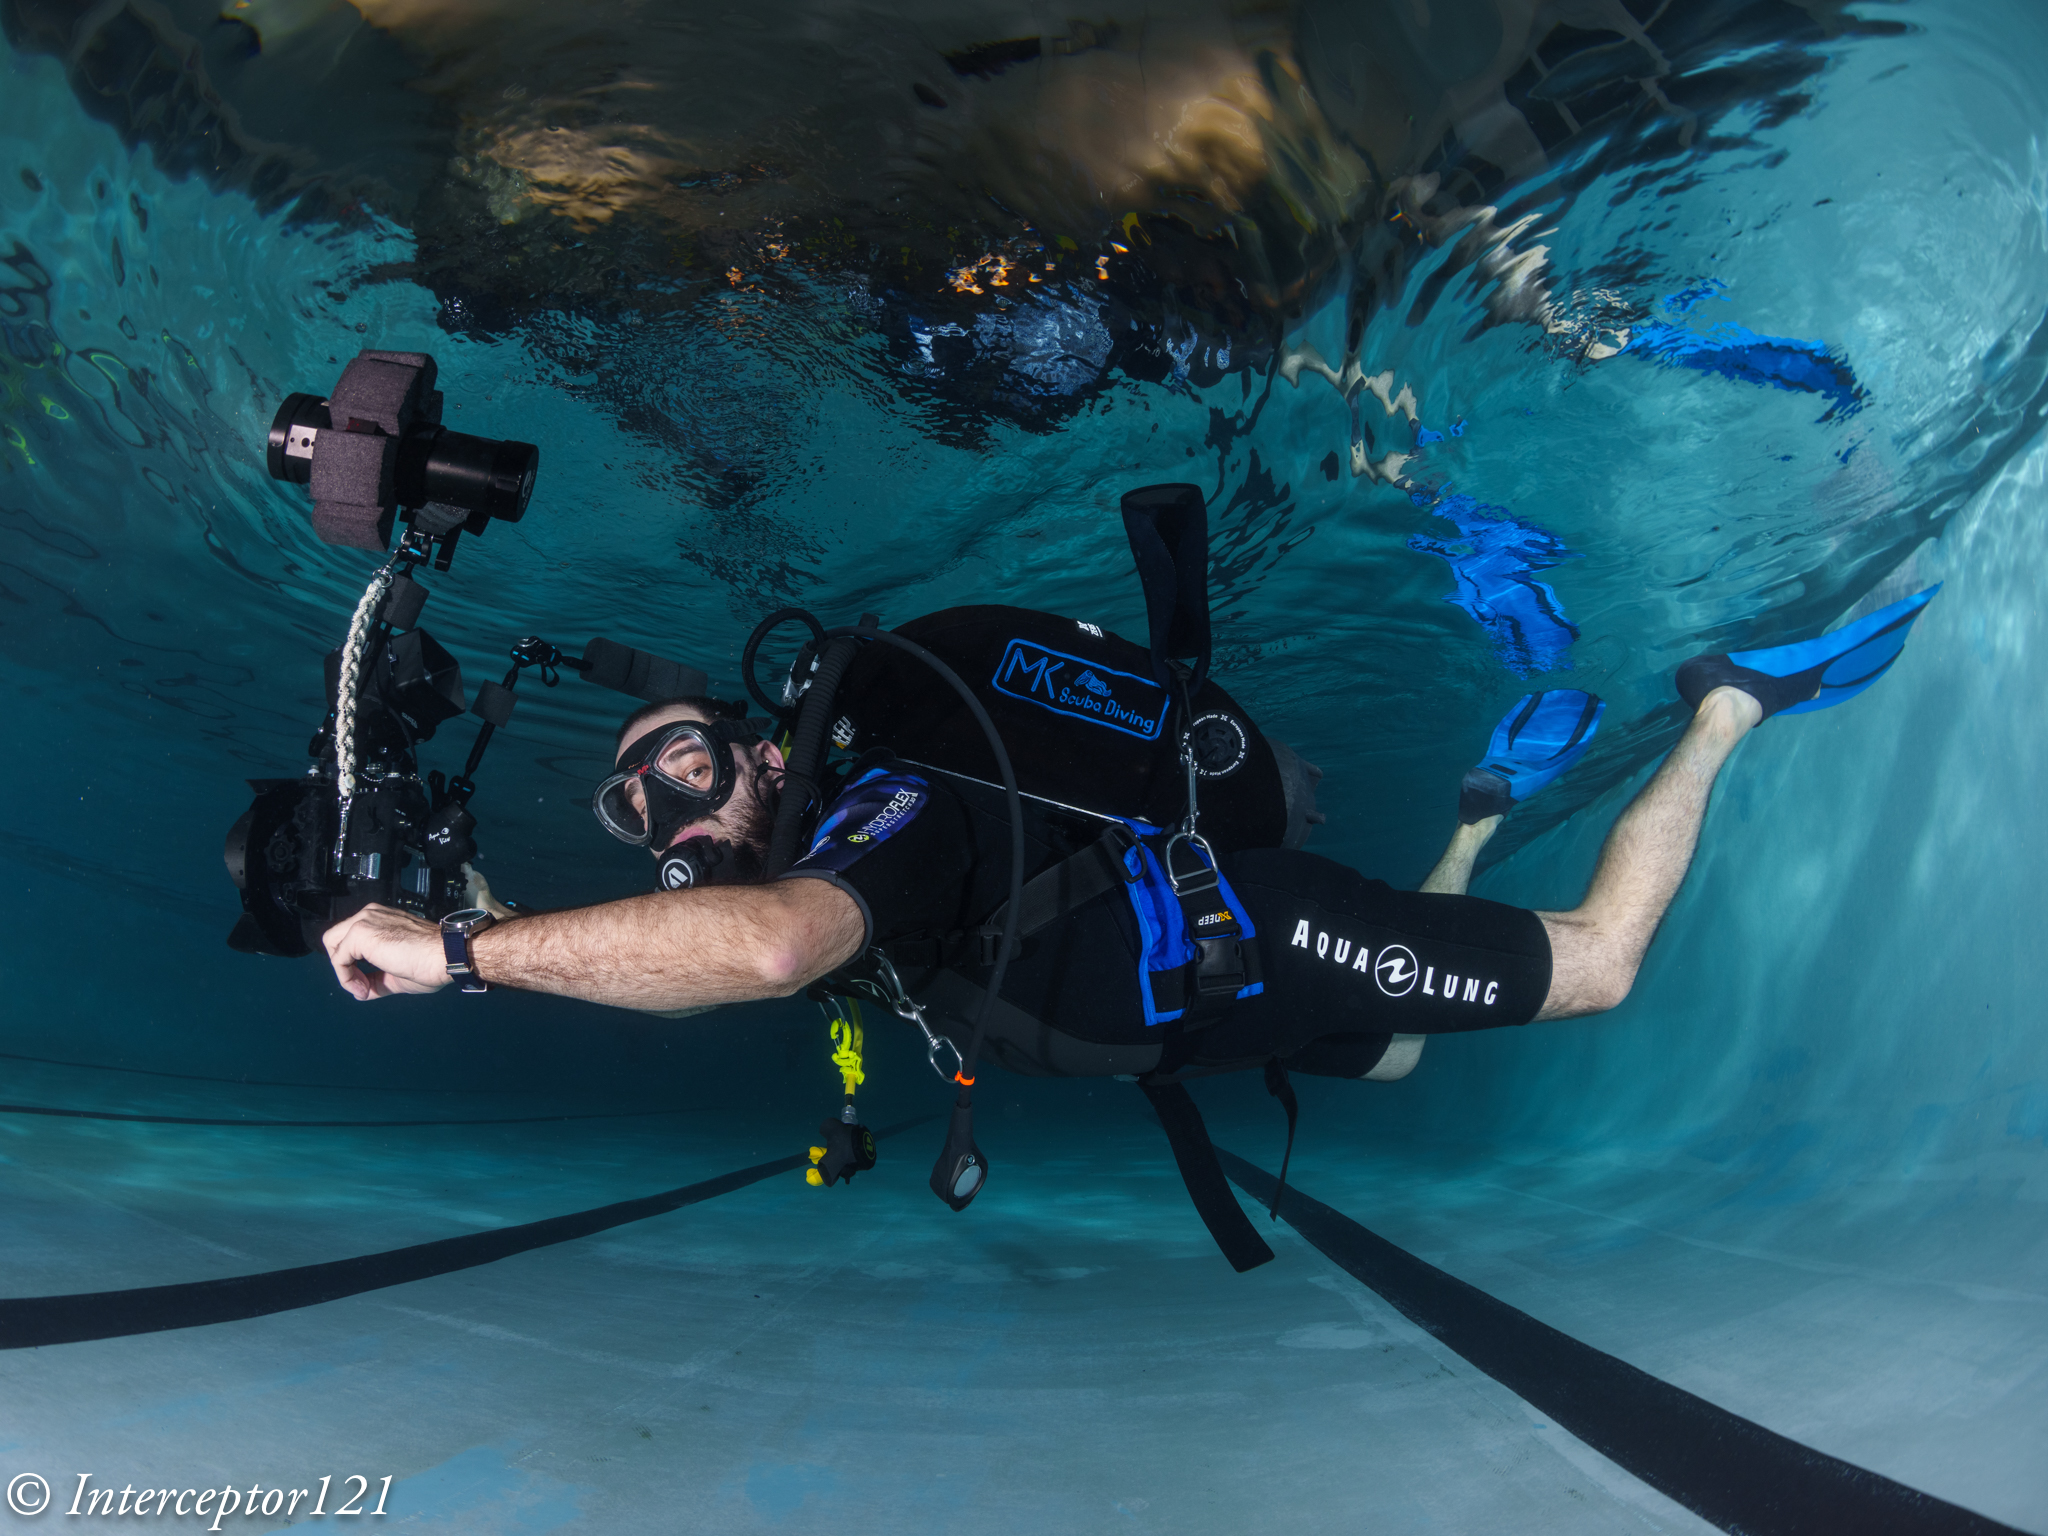
At this point I decided to get into the picture with a white balance slate.
Fisheye f/16 Focus on back diver
Although the front is quite blurry due to the extreme close range the result is acceptable for the non pixel peeper.
Shots at f/22
We are here hitting diffraction limit and the image looses sharpness but we are after depth of field so be it.
fisheye f/22 Focus on duck
Now the depth of field is there although the detail in the centre is less sharp.
fisheye f/22 Focus on middle
Moving the focus point makes the image a bit better.
Time to insert the diver in the frame.
Fisheye f/22 Focus on back diver
Overall ok not amazing consider the dome is on the parts.
Conclusion
The small acrylic dome does quite well at close range, the limitations come from the depth of field and not from the water and the dome increases the depth of field behind the focus point. This is something that you can use to your advantage if you remember when you are in open water.
For shots that are further away you can shoot at f/11 and get excellent IQ there is no need to stop down further to improve the edges. Consider however that f/8 may be just too wide on full frame and introduce additional aberrations regardless of depth of field.
VideoDiver at f/11
Some numbers:
Nauticam 140mm Glass dome: £911
Nauticam 4.33″ Acrylic dome: £550
Price difference £361 or 40% however bear in mind that the primary benefit of the glass dome is to resist reflections and ghosting due to the coating and the fact you can keep the 8-15mm hood on.
When shooting ultra-wide angle, you benefit from a large depth of field
You can get very close to large subjects, maximizing color and sharpness
They perform well behind dome ports with good corner sharpness, and they don’t need a diopter
You usually need at least 2 strobes with good angle of coverage to properly light the entire area.
Some of the above statements are correct in absolute, some are correct but not specific to fisheye lenses and some are just incorrect.
Fisheye lenses usually focus very close -> true for the most recent fisheye lenses, not true for some older models
They are small and light -> Not true. Canon 8-15mm and Nikon 8/15mm are fairly chunky lenses with lots of glass
When shooting ultra-wide angle, you benefit from a large depth of field -> not a property of the fisheye lens but of the focal lens. In fact due to the extreme field of view Fisheye lenses have issues of depth of field.
This is a tea towel shot with a rectilinear lens. Note how sharp the target is at f/5.6
Rectilinear f/5.6
This is the same target at the same distance with the Canon 8-15mm at f/5.6 note how the edges are blurry and the blur starts very near centre.
fisheye f/5.6
You need to stop down the lens to f/16 to start getting coverage for the edges.
fisheye f/16
You can get very close to large subjects, maximizing color and sharpness -> This is a consequence of close working distance and wide field of view however sharpness is another story
As we have seen before fisheye shots at close distance are generally not that sharp especially at the edges.
They perform well behind dome ports with good corner sharpness, and they don’t need a diopterThis happens to be true in practice and it is a major benefit for the underwater shooter
We will dive in detail in this topic.
You usually need at least 2 strobes with good angle of coverage to properly light the entire area.Fisheye lenses cover an aspect ratio wider than the format aspect ratio and result in limited vertical angle of coverage. Fisheye lenses are ideal for two strobes except the very far edges.
A barrel gives an idea of the fisheye lens distortion
Let’s ignore the edges and assume we are a one meter.
Horizontal field of view 2*tan(71)=5.8 meters
Vertical field of view 2*tan(45.5)=2.03
Aspect Ratio = 2.85:1
The issue with fisheye lenses is that the frame is really very wide much wider than it is tall. This means some of the edges on the horizontal axis will be normally dark unless you are very very close.
Fisheye lenses and Dome Ports
A dome is simply a lens with a single element that has the property to retain the air field of view of a lens.
A dome is a lens with a lot of field of curvature simply because it is bent.
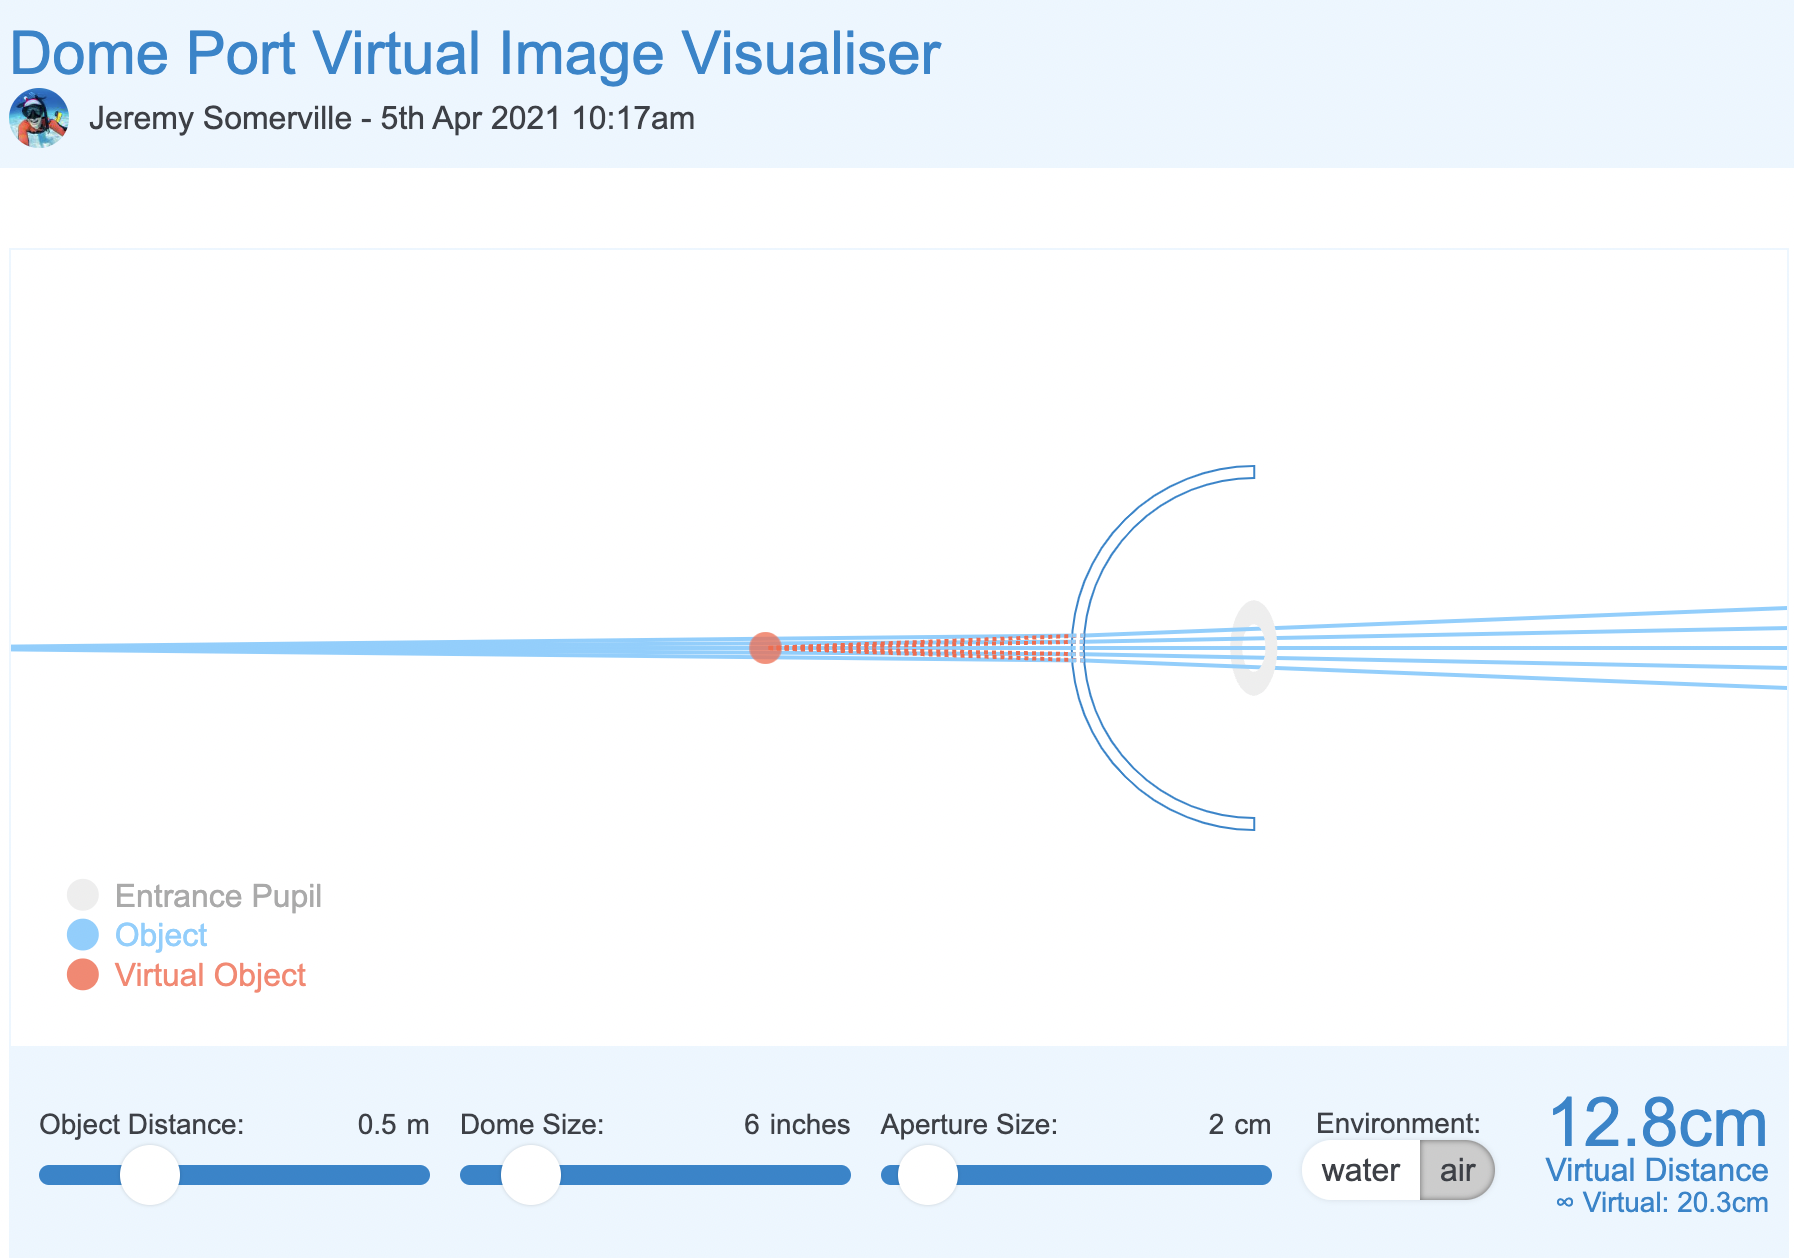
Using the dome port visualiser we can see that the effect of a dome is to bring the image closer to where it really is.
The net effect of a dome port is to increase the depth of field as infinity focus is reached much sooner.
A dome port has several side effects the main ones are:
Spherical aberration
Field of curvature
A fisheye lens works opposite to a dome. The centre of the frame is closer to the lens the edges are further away.
Domes, field of curvature and Fisheye lenses
In order to understant how the barrel distortion works in combination with a dome port and a fisheye lens we can build a small simulation in a light box where the edges of the frame are closer than a flat target.
Target in a lightbox focussed head on
We can see that despite the edges are quite blurry this image is actually better than our flat target.
f/11 centre
At f/11 the image is not perfect but we can see that most details off centre are not looking bad at all.
f/11 edgef/11 detail crop
it is definitely blurry but not as bad as the tea towel as if the way the element are laid out improves the image in the corners.
And this is exactly the point: the items as laid out emulating the curvature of a dome improve the fisheye lens performance.
By f/16 the image is almost all sharp.
f/16 centref/16 edgeF/16 Centre 100%
One trick is not to focus in the back of the frame but find a middle point this means we can find additional depth of field in front of the target.
Focus mid way
Let’s see how this goes. at f/11 we already get some better results.
f/11 off centref/11 edge off centre
f/11 off centre crop
At f/16 we get some additional improvement but is not as major as the original f/16
f/16 off centre
Looking at the other areas there are some minor improvements but generally less as we close down the aperture.
f/16 off centref/16 off centre 100% crop detail
In conclusion the layout of the image elements helps the fisheye lens to achieve better image quality this can be futher improve focussing off centre however closing down the aperture results in the best results regardless.
In short we can improve an image at f/11 by shooting off centre in a strategic point to improve depth of field but ultimately aperture plays a bigger role in improving performance of the fisheye lens.
A similar reasoning can be applied to dome size vs closing down the aperture.
We can plot a scenario in the dome simulator tool.
In the starting example our aperture is 4cm to similate our 15mm lens at f/4.
6″ dome f/4 simulator
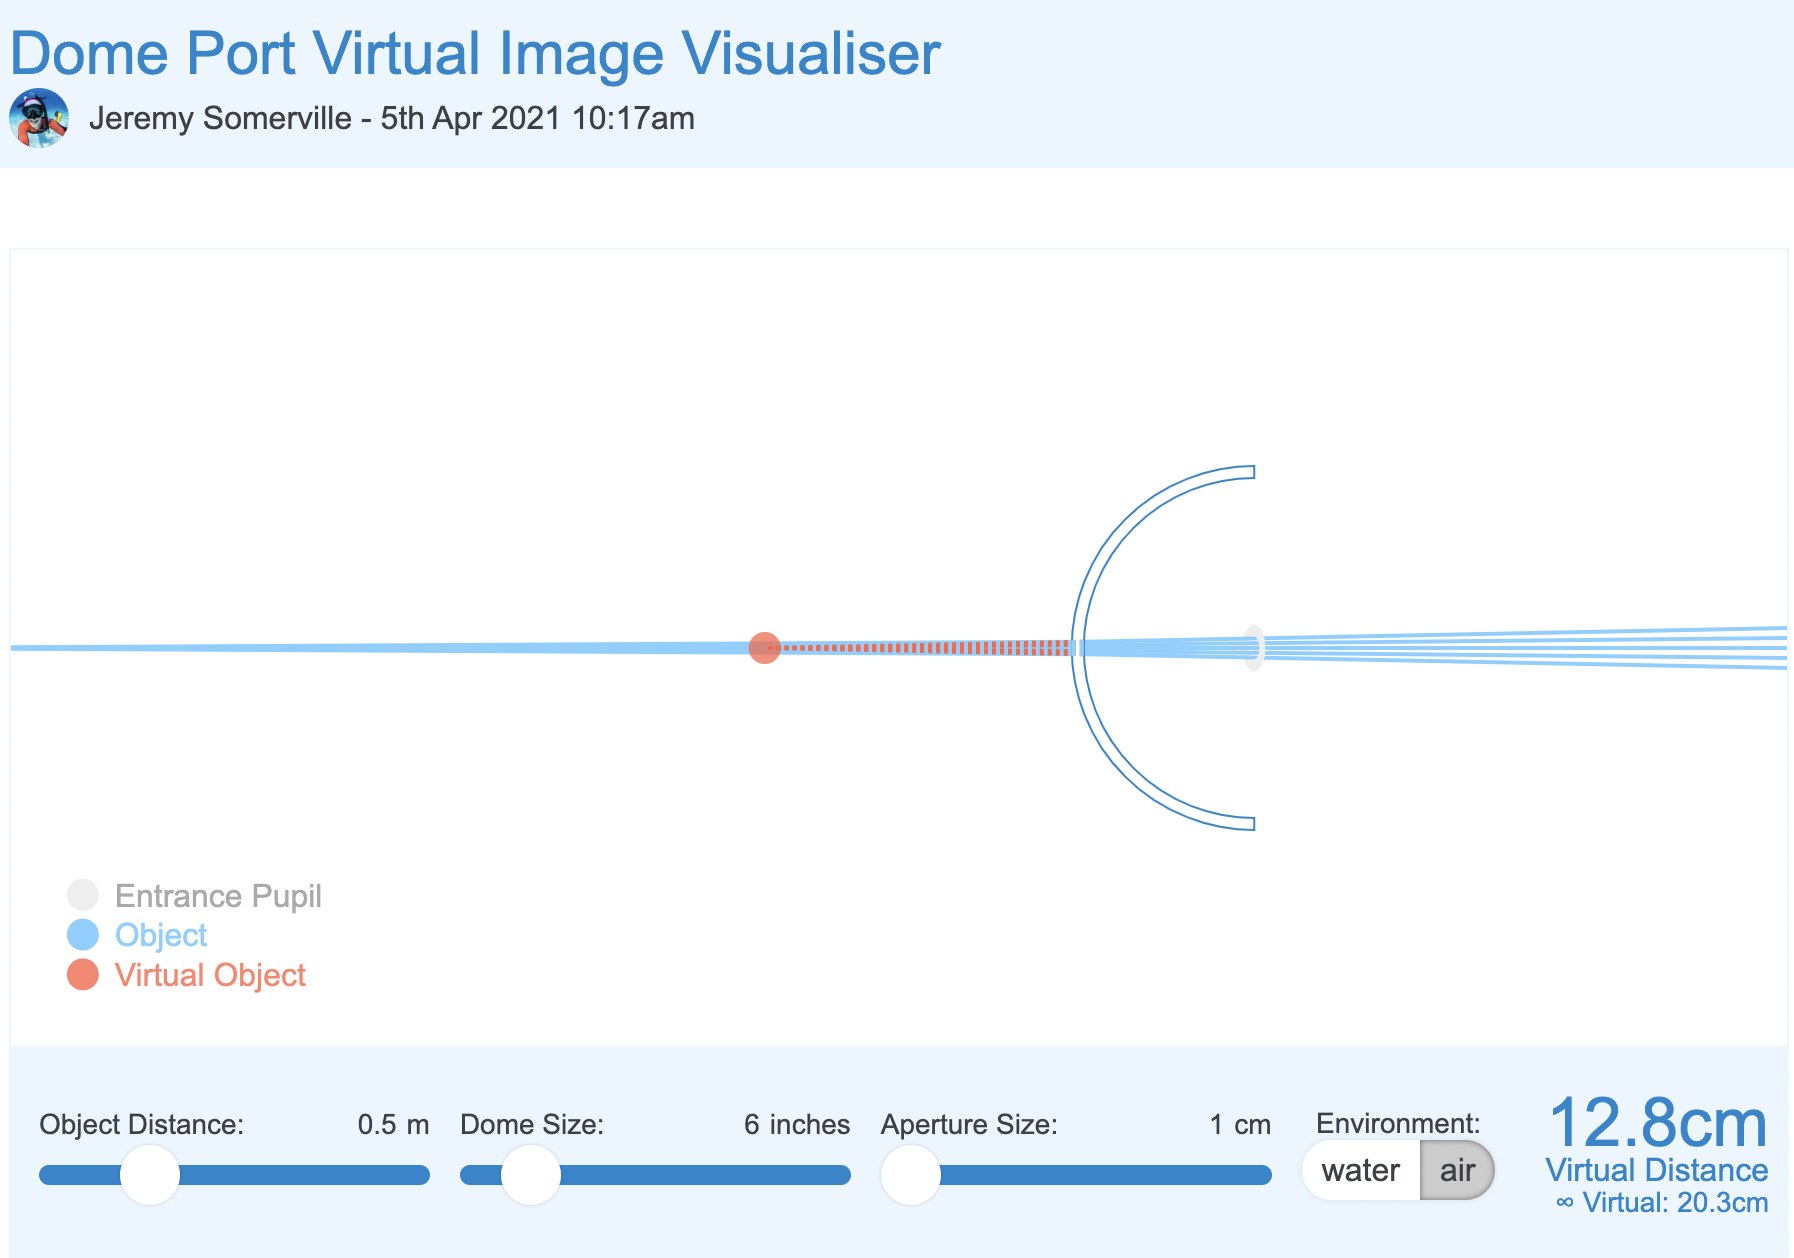
We now reduce the aperture to 2cm which is more or less f/8
6″ dome f/8 simulation
And finally to 1cm which is more of less f/14. In reality this is mm not cm but should make you understand that aperture matters more than anything else.
6″ dome f/14 smulation
What we can see is that by reducing the aperture the light rays passing through the dome converge and this means stray light is reduced and as consequence spherical aberrations are decreased.
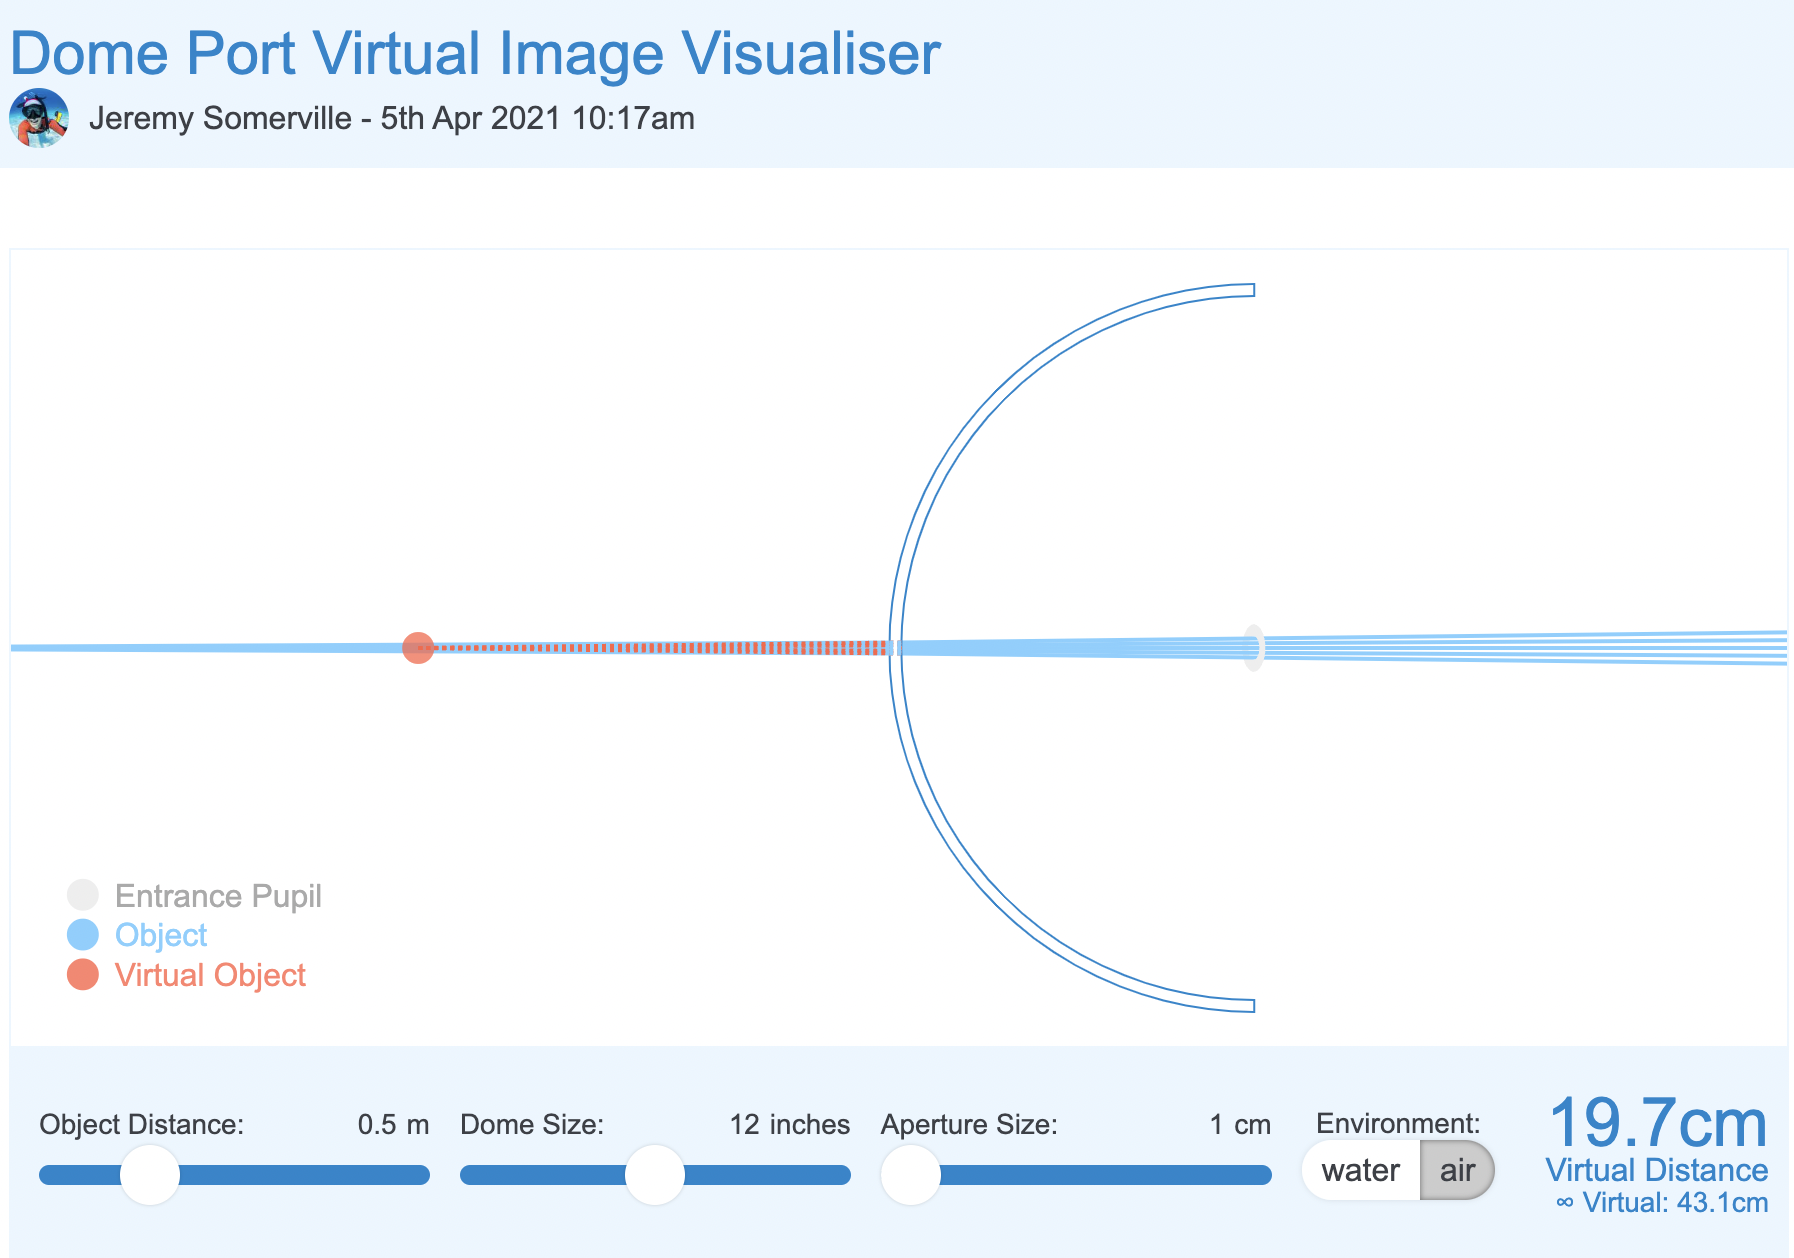
Let’s now introduce dome size which is the equivalent of depth of field in the mix in our light box shooting off centre.
12″ dome f/8 simulation
We can see that with a double size dome the converging effect on the light rays is not as significant as the aperture is already small, but nonetheless is present. This is consistent with our f/11 off centre use case.
Finally at aperture completely closed.
12″ dome f/14 simulation
Although virtual distance has increased significantly the effect of the large dome on the stray rays is not significant here aperture rules.
What does all of the above mean?
I realise this was a bit geeky.
To summarise a dome has two issues one is spherical aberration for the very shape of the dome. This is mostly cured by closing down the aperture. Dome size has limited effect here unless you shoot wide open and with apertures from f/14 we can see that large dome vs small dome does not really matter.
However when it comes to field of curvature large dome helps the situation but because fisheye lens have barrel distortion and this has a counter effect to dome shape curvature therefore dome size matters much less to a fisheye lens than it would to a rectilinear lens.
Some additional insight in this post. And the summary finding here.
The takeaway message is this: stopping down the aperture improves field curvature and astigmatism somewhat, improves coma a lot, and improves spherical aberration most of all. The sum total of these effects changes our ‘area of best focus’, which is what we photographers really mean when we say ‘field curvature’.
We could paraphrase this by saying:
A dome port increases depth of field and a fisheye lens, due to barrel distortion, benefits from a dome port. Optical aberrations introduced by the dome are mostly addressed by stopping down the aperture. The size of the dome port does not matter too much when using a fisheye lens and the benefit on aberrations of a much larger size dome is likely to be minimal when we look at that simulator. Focussing appropriately mitigates residual issues of field of curvature of the dome for the fisheye lens.
Underwater proof of concept
I took my Sony A1 with a Canon 8-15mm first and then with a WWL-1 that behaves very much like a fisheye lens.
Let’s have a look at some images shot with Nauticam 140mm dome.
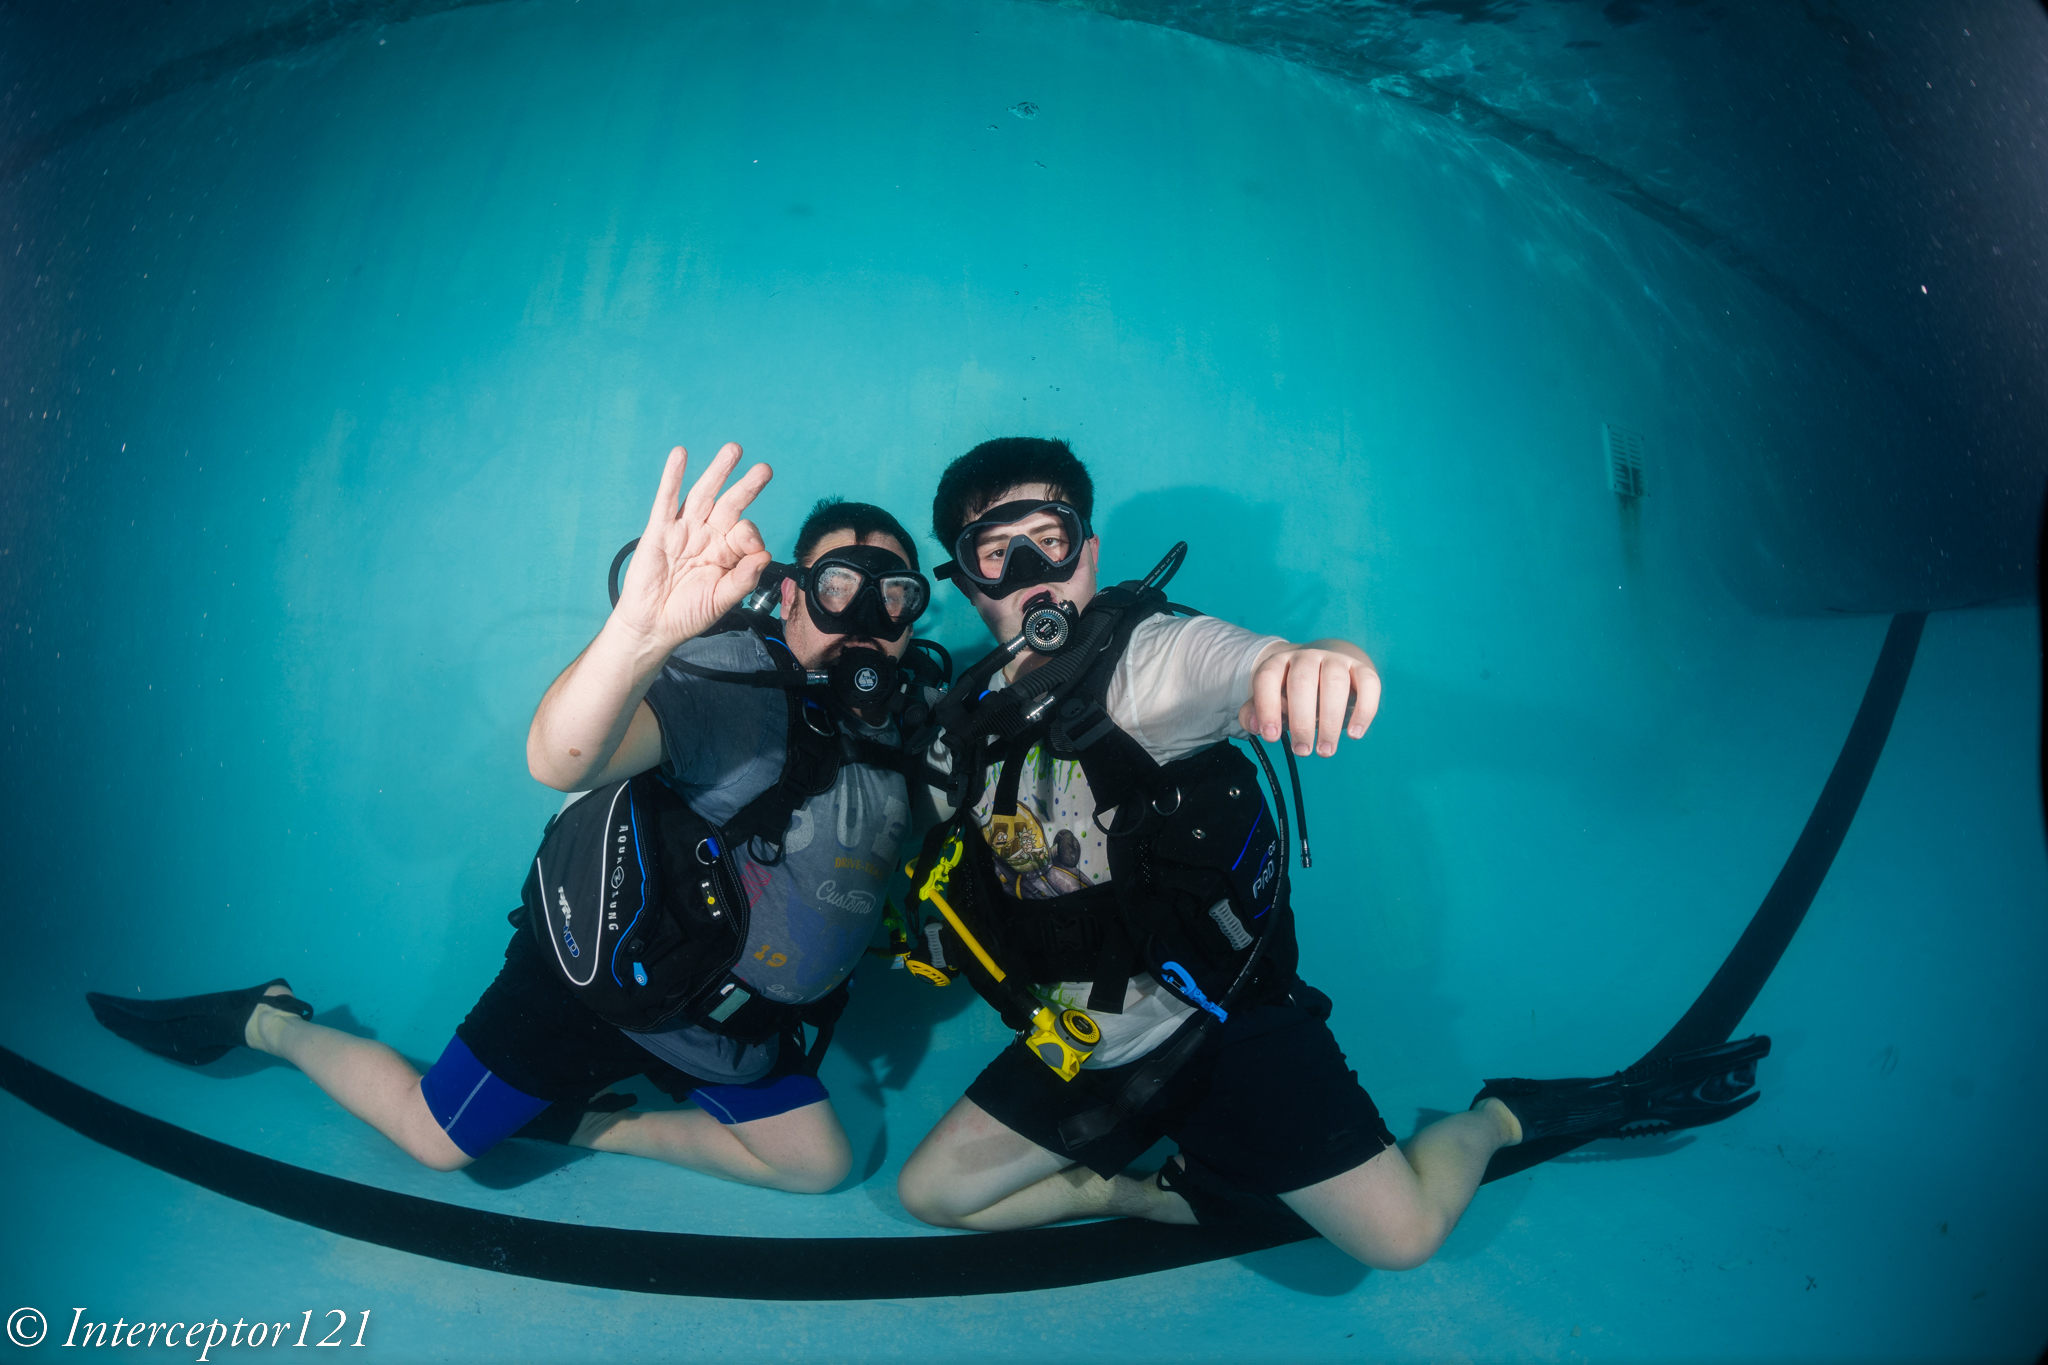
The two buddies at f/8
The image above sees two buddies in the frame almost flat with their fins going back in the frame however the result is much better than the lightbox example as result of distance and dome port increasing field of view and adding curvature to bring the fins in.
This however does not resolve all issues if you focus near like in this example focussed on the eye of the croc
Focus on the eye at f/8
Here the eye is close resulting in the tail being blurred this is an effect of close distance and lack of depth of field despite the dome.
More interesting the nose is even more blurred as the dome brings that even close and blurs away due to field of curvature as the focus point is behind.
In this other example instead of focussing on the eye the focus goes mid frame so the fins are still in decent shape even if deep in the frame at f/8.
Focus midway
In order to prove the concept even more I took some props underwater.
First let’s have a look a shot at f/8 with the WWL-1.
Close up at f/8
As we can see the image is not too bad even in the close area but it is definitely better at f/11
Close up at f/11
What happens if we position the target off centre?
Contrary to our topside example the situation does not improve by focussing on the edge to further prove the issue here is NOT depth of field.
Focus off centre f/8
Here a detail crop the image is still fuzzy despite then focus is right on the spot. Depth of field is not the issue.
Edge focus at f/8
And finally we close down the aperture to f/11.
Edge at f/11
Crop at 100%
Edge at f/11
So here we can see that the underwater interface provides already for the depth of field but moving the focus at the edges does not have such a good effect.
Why? Because this is likely to do with aberrations of the lens itself as shown in my previous post on the Sony 28-60mm.
The combined 28mm with WWL-1 at f/8 means 20/8-2.5 mm aperture when stopped down to f/11 this becomes small enough to cure aberrations (less than 1cm with reduced field of view is sufficient).
For the same reason ASPC and MFT will be able to shoot at wider aperture not because of depth of field but due to smaller lens aperture.
15mm fisheye at f/14 –> 1.07mm physical aperture
8mm MFT fisheye at f/8 –> 1mm physical aperture
Again it is not the depth of field but the aperture size to cure most aberrations.
Conclusion
All Nauticam port chart recommend the 140mm dome and not larger domes. This is aligned with the theory behind this post that dome size ultimately matters but not as much as stopping down the lens and that fisheye are naturally helped by dome port geometry.
This conclusion also extends to water contact optics which are composed by a fisheye like demagnifier and an integrated dome port.
As long as the rear element of the lens is big enough the increased size of the lens does not result in proportional improvement of performance.
To support the empirical evidence of this article you can read this review of the 140mm dome by Alex Mustard.
By coincidence Alex recommends shooting at f/14 or f/16 which means a physical aperture of 1mm which cures all sorts of aberrations.
Considering that the benefit of a much larger dome may be as small as 1/2 to 2/3 aperture stops you may consider going the opposite way and get a very small dome which will result in additional spherical aberration and will need to be stopped down more when shooting very close.
If you use the Nauticam system there are only two ports that are a full emisphere and therefore able to contain a fisheye lens field of view:
140mm optical glass fisheye port
4.33″ acrylic dome port
I happen to own both those ports and in a future article will compare and contrast the two. I will also revisit the topic of dome ports and rectilinear lenses which is obviously different from fisheye lenses.
Nauticam makes some really interesting adapters and ports for Sony cameras, one of them allows you to use vintage Nikkor lenses on full frame mirrorless cameras.
I decided to source the UW15 as I am planning to use it for video after seeing the results on the movie Avatar.
The challenge of the Nikkor lenses is that they are entirely manual with aperture and focus knobs. This is generally not an issue for videography which is my intended use but I wanted to check how does this lens work for photography as many people still rave about it.
Lenses compatible with the adapter are UW 15, UW 20 and UW 85 full manual. Later autofocus lenses are not supported.
The Rig
My rig is a classic derivation from wide angle with 8″ and 12″ arm segments and my trusty (!) Sea and Sea YS-D2.
Nikkor 15mm rig
The Nikkor weights around 600 grams and gives almost zero lift so this rig was over 300 grams negative in fresh water.
Before using it you need to assemble the lens on the adapter.
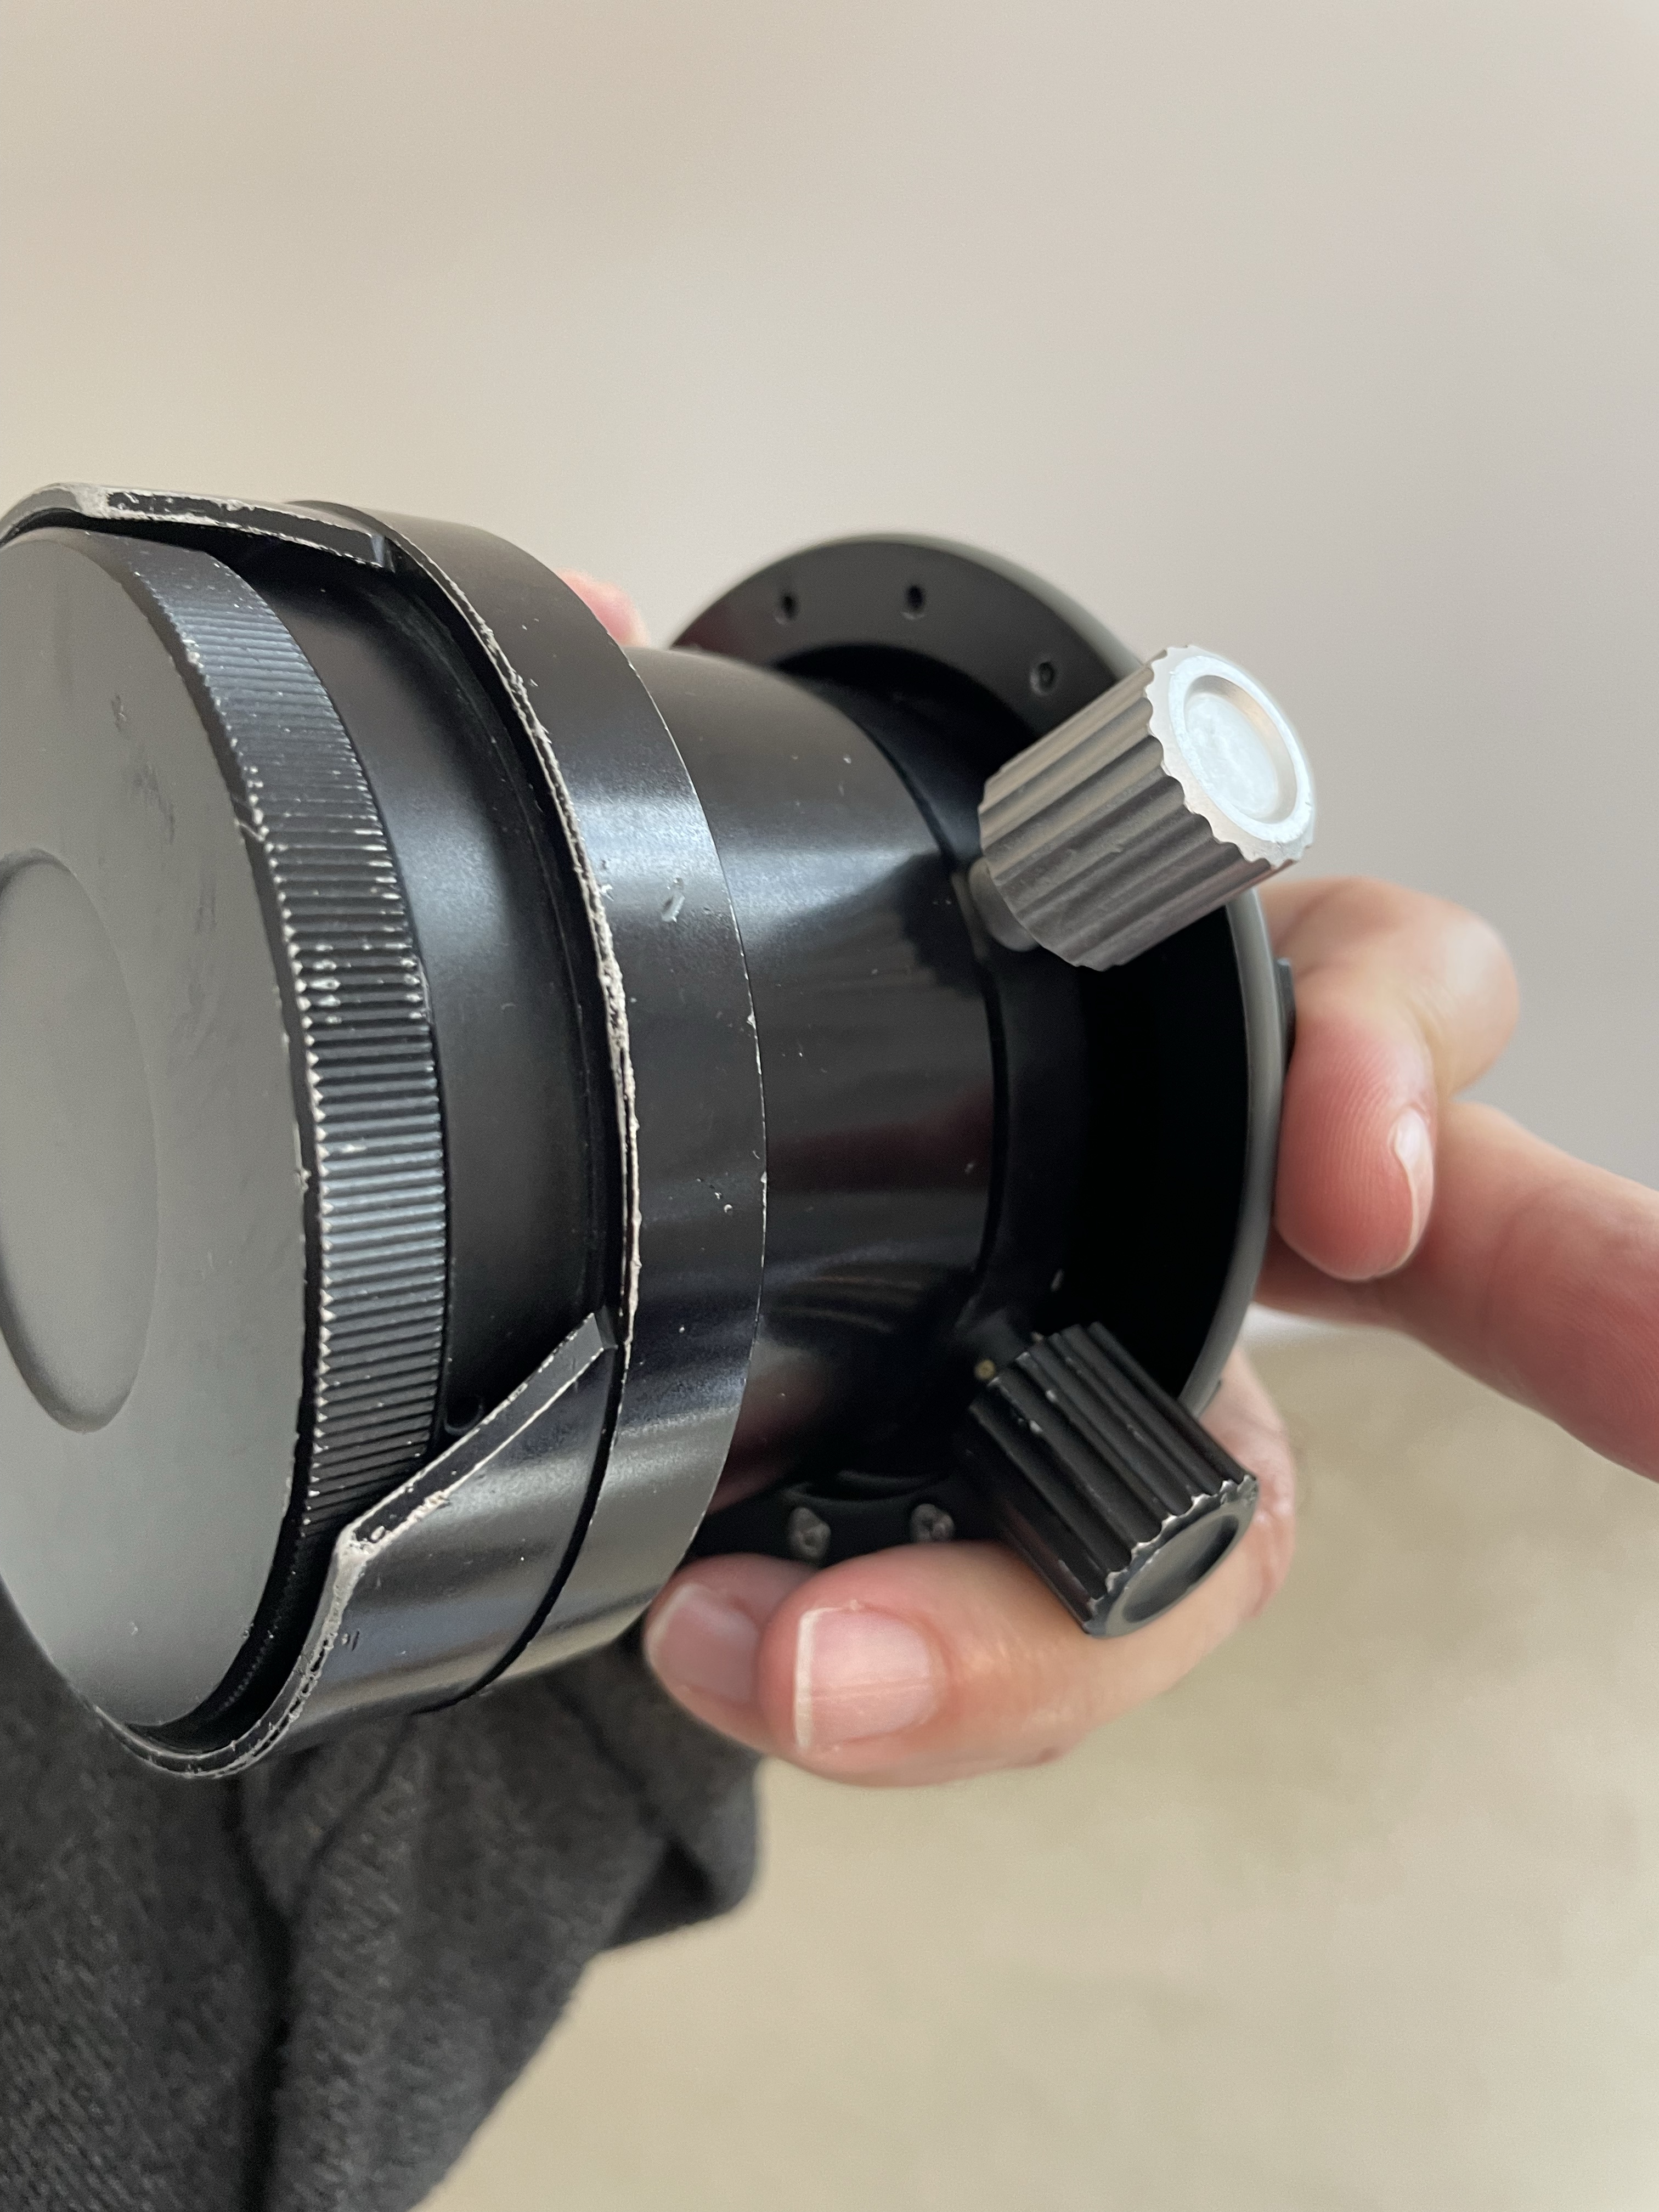
Nauticam Nikonos Adapter
You have two parts that can be removed to allow the lens to mount depending on your preference. I set the lens with the display upright so I could try and see it while shooting.
Nauticam Nikkor adapter top side
The controls are located on the left side side and bottom which is where I normally have my levers.
Nauticam Nikkor adapter controls
On the right you will see the display scales.
Nikkor UW15 Aperture and Focus Display
I have to say I was a bit nervous setting this on my A1 considering that this is a lens that is 25 years old at least but the vacuum test was fine so ready to go to the pool with the friends at Rec2Tec Bletchley.
The UW 15 Construction
The Nikkor lenses were generally rectilinear. The 15mm has a field of view equivalent to 20mm so only 94 degrees on the diagonal.
The approach was to correct the water distortion until such point when the image becomes rectilinear and eliminate other aberrations.
I have to say that the amount of chromatic aberrations is practically non existant.
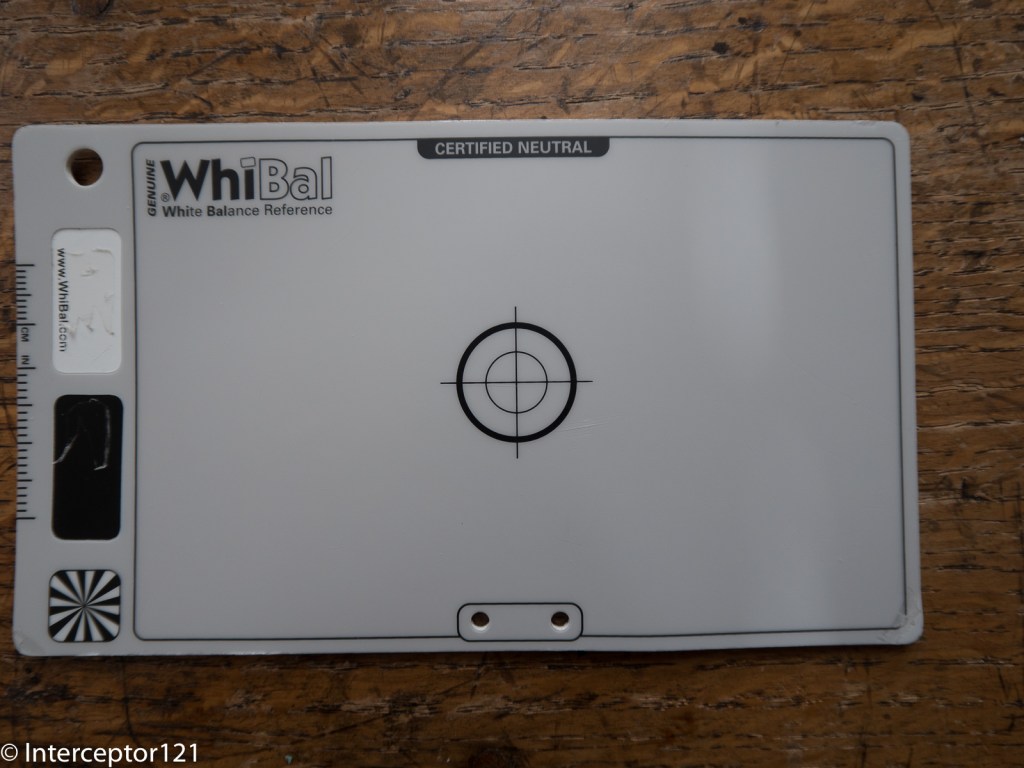
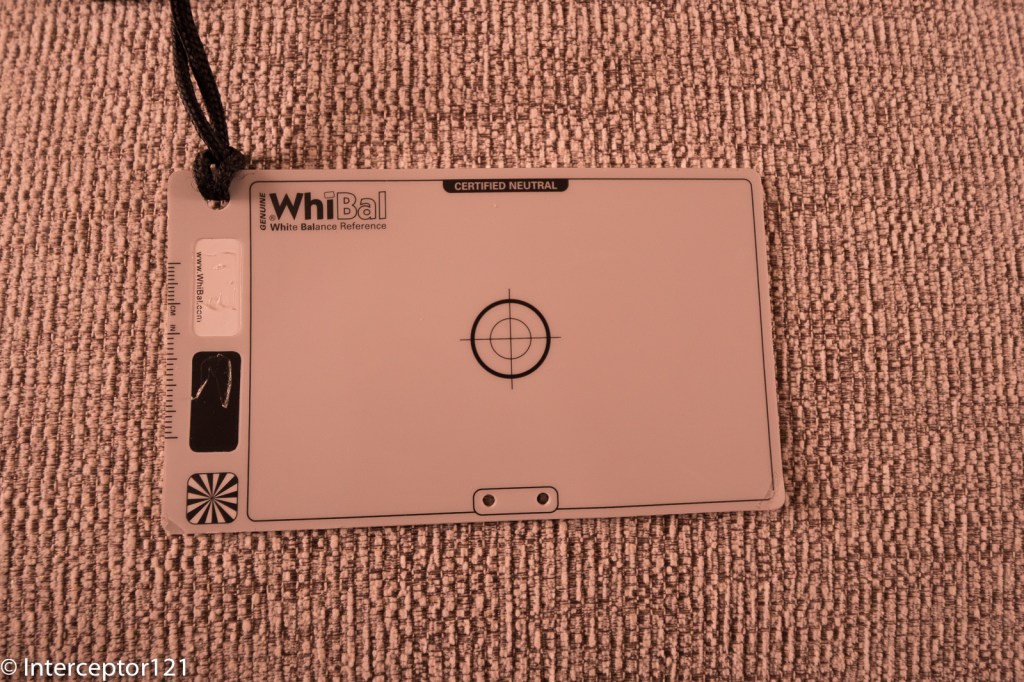
White balance slate
Rectilinear lenses have gone out of fashion since dome ports with fisheye distortion being the preferred look for wide angle in modern underwater photography. For video though straight lines have a value.
Pool Session
Using this lens on the Sony A1 proved challenging for photography. Nailing the focus using peaking did not feel particularly precise.
Not so sharp focus
Some shots may have been sharp enough on film resolution but with the 50 megapixels of the A1 even the slightest misfocus shows.
Is it in focus?
My productivity was quite low at the beginning as I was trying to get a hand of the lens.
The lens itself is by all means extremely sharp even for my camera.
Grid
I worked out that I could not do what I normally do which is to frame first and focus after as by the time I had nailed the focus things would have moved so I decided to set the focus and move forward or back until I thought I had my target in focus.
The situation started to improve.
DSD student with Instructor David Allen
I felt I had worked out how to use the lens so started looking for some subjects. During those sessions you see all sort of stuff as people practice their skills.
Riding
Considerations on the controls
I believe that the average underwater photographer shooting digital will find it very hard to use this lens and will end up shooting at f/8 or smaller apertures so that focussing becomes easier. The lens is especially challenging as it is not particularly wide so you do need strobe power.
DSD Student
I found really hard the lack of display of aperture and focus position. The lens is designed for much smaller Nikonos housing, with my A1 housing being more bulky you need to actually turn and look at the lens to check your settings so many times I did not have the right aperture of focus and it all was pretty laborious. In a video situation for wide angle this lens will work just fine with set and forget at 4K but to nail focus on a high megapixel camera is a hard task.
When you do get the focus though the image is outstanding.
Just married
I tried a selfie to check the focus scale and it worked well.
Selfie
Consider that the most shots were at f/5.6 or f/8.
Dave
As you have no exif data it is impossible to remember what you shot unless you write it down on a slate.
Is it worth it?
The answer depends on your use case and if you already had the lens.
The following use cases fit the Nikkor UW 15 pretty well:
Videos of sharks or pelagic that do not come too close where ambient light is low
Photos at mid range with fairly static scenes where you want straight lines for example fashion models
The lens is definitely not easy to use for dynamic shots, situations where you need to get very close (as it does not focus very close) and where you need to continuosly adjust focus.
In terms of costs in GBP you are looking at:
£474 Nauticam Nikonos Adapter 37202
£300-500 Second hand Nikkor UW15
Obviously if you already have the lens and you are in one of the above use cases I would recommend you get an adapter and give it a go perhaps looking on the second hand market.
If instead you do not have the lens I would say not to bother unless money is no object, you are in the two use cases above and you have sufficent dexterity to control this lens.
Undewater photography has moved forward a great deal thanks to autofocus and although the Nikkor UW 15 is really sharp getting critical focus right is not easy. When it comes to video where you do not normally use autofocus for wide angle this lens is really interesting.
You can shoot at f/5.6 even f/4 subjects in the distance in ambient light with extremely clear and sharp detail at a fraction of the cost of other water contact optics. If you do not own any of the WACP or WWL I would say the UW 15 deserves some considerations but only if your command of depth of field and focus is very good otherwise it is better to pass.
It was time again to visit Gianluigi and all friends at Punta Campanella Diving in Massa Lubrense.
As I had already been in Egypt on a liveaboard I only did 4 dives:
Banco di Santa croce
Vervece
Punta Campanella
Mitigliano steps
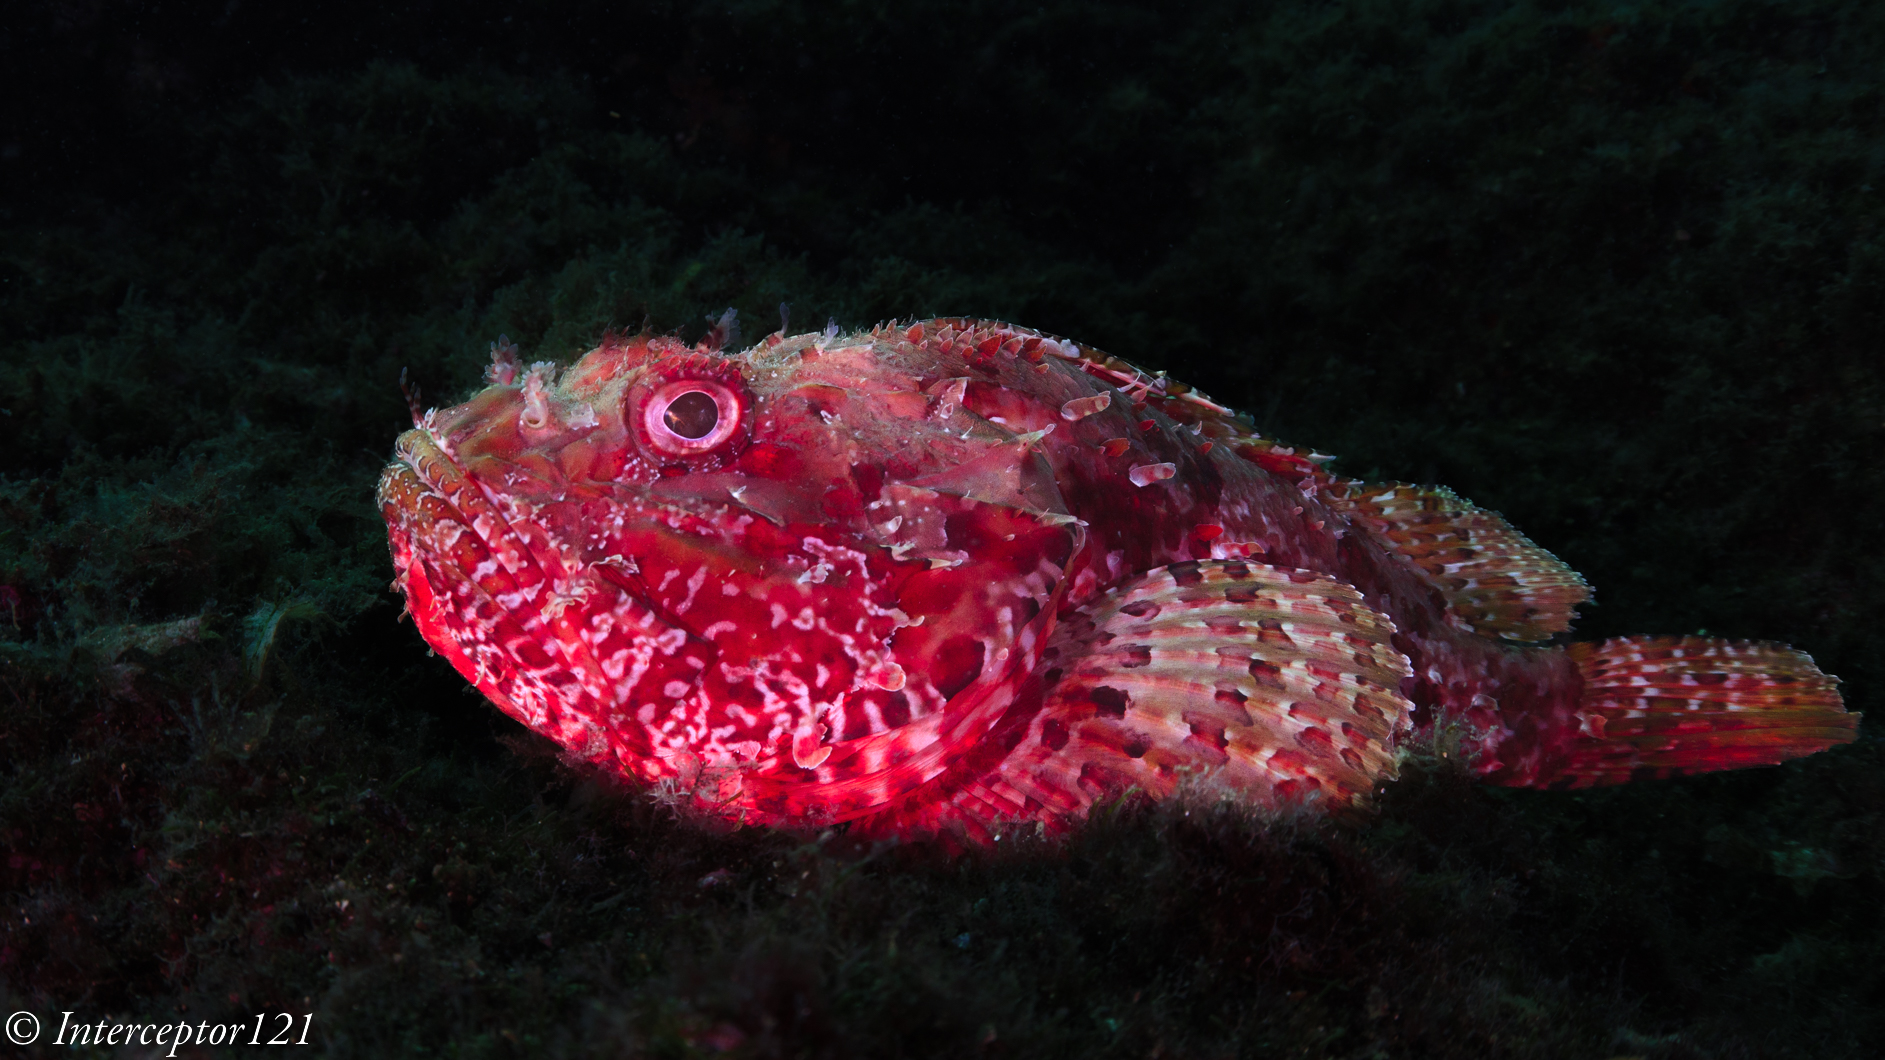
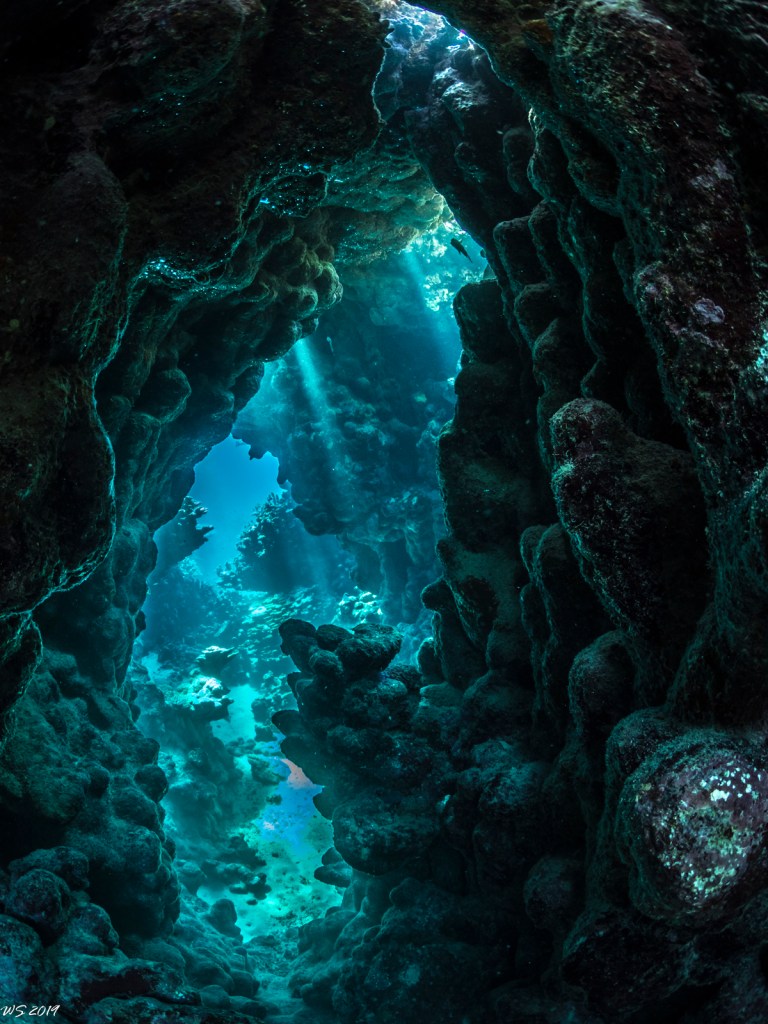
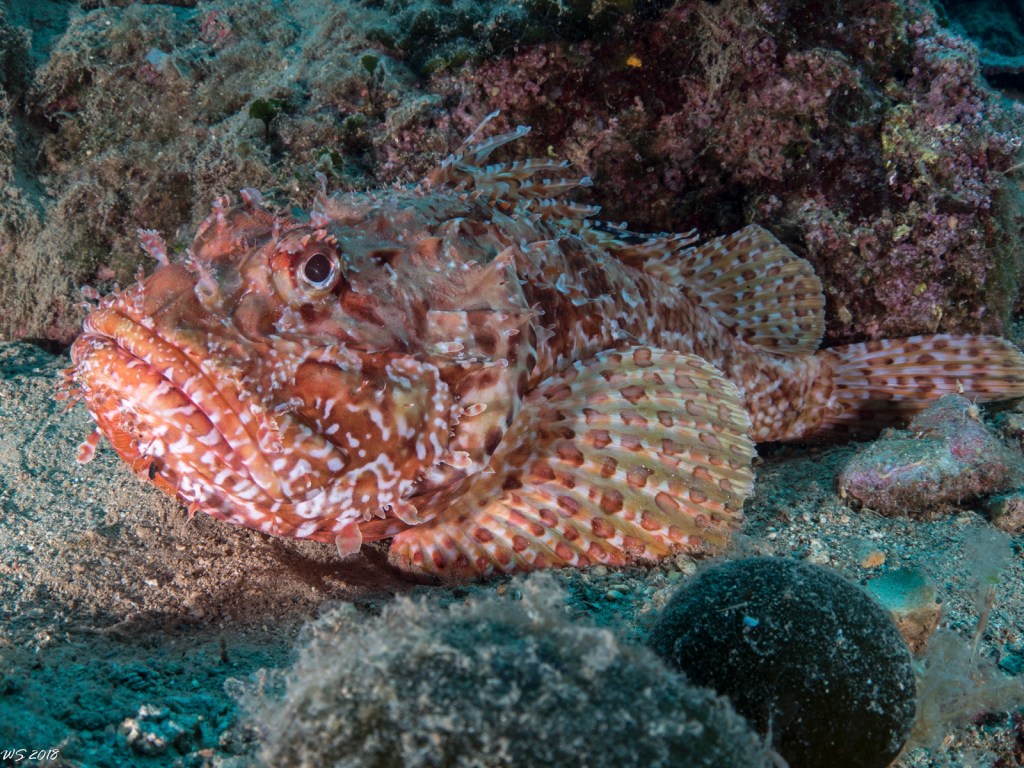
The banco visibility was poor also at depth however I still managed to get a few interesting shots with inward lighting.
ProfileInward Rockfish
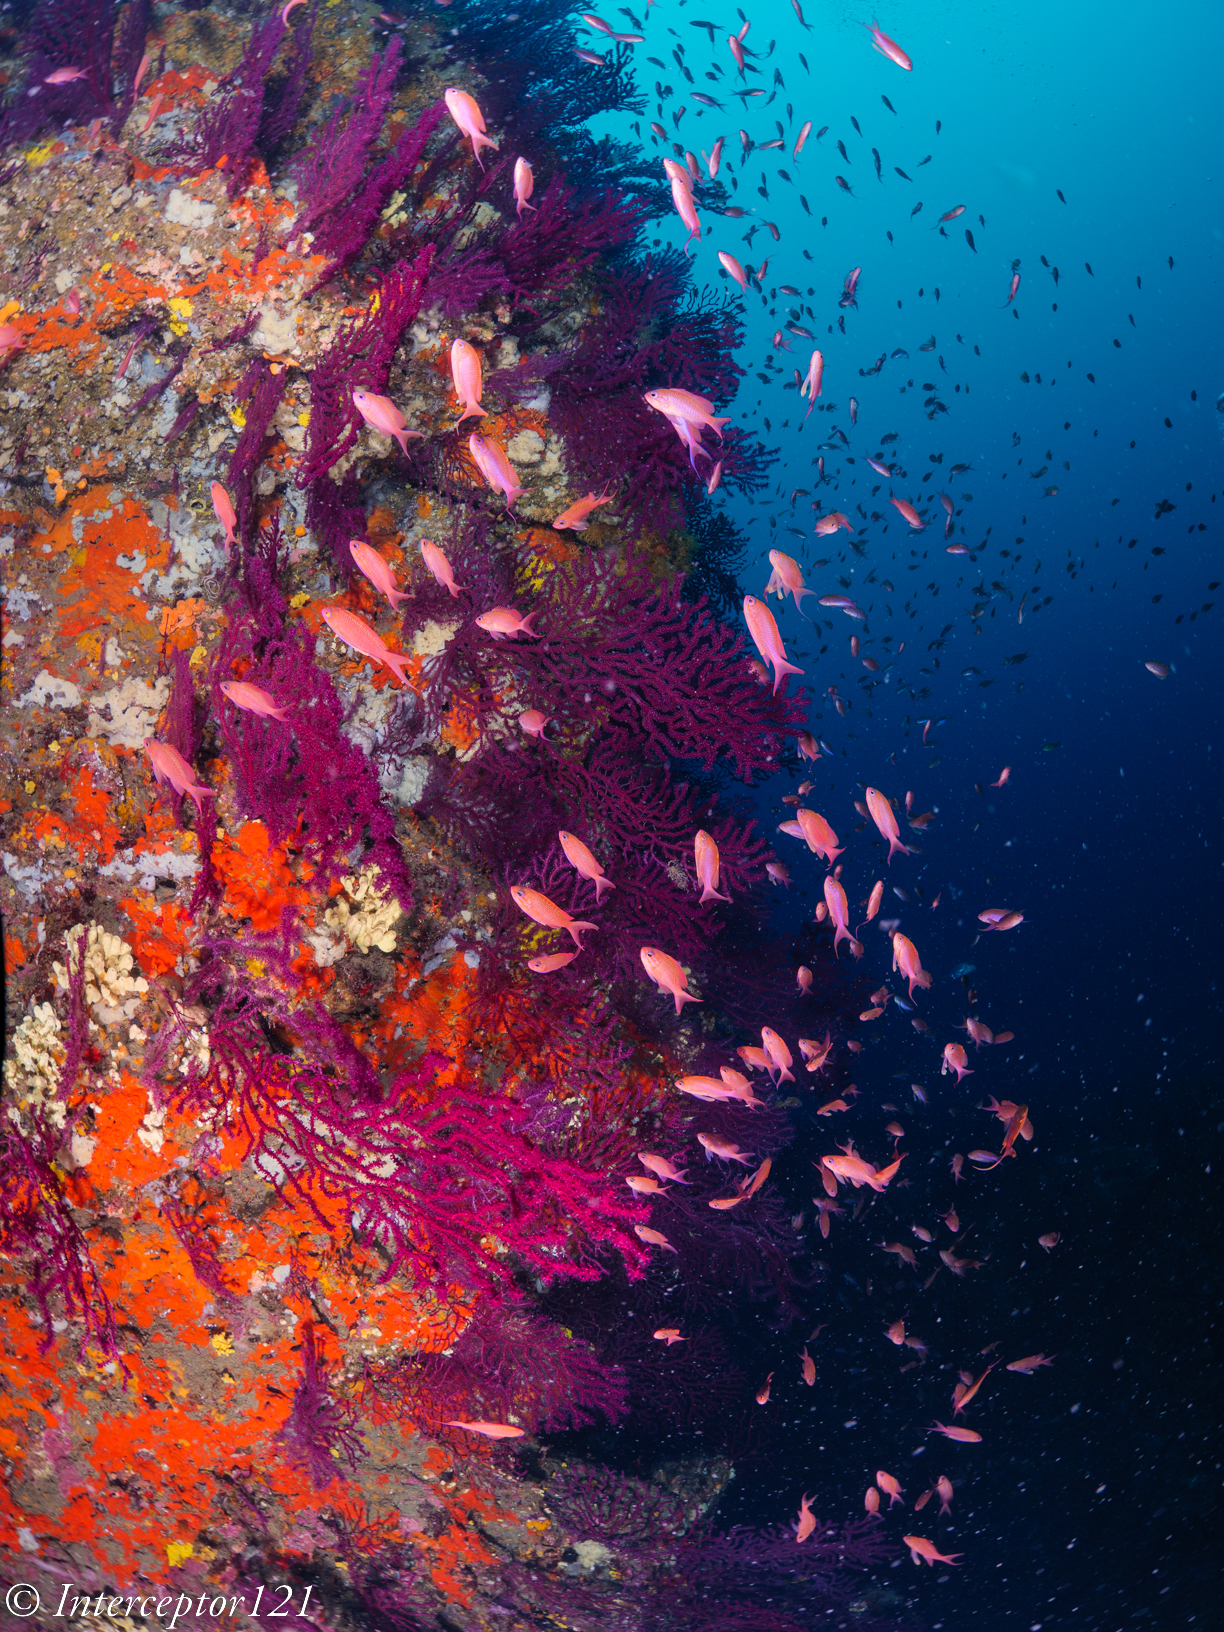
Groupers were very shy but the anthias were performing
Deep BommieWall
Consider that the anthias images are between 30 and 40 meters. I went there as I wanted the red gorgonian coral in the shots
The Vervece instead was a wonderful dive however the barracuda love to hang exactly on the thermocline resulting in hazy images
Thermocline
I could manage a good shot were you can see the surface staying right on the thermocline.
Vervece doppio senso
The second day had one of my favourite spots Punta Campanella conditions again difficult with limited visibility but plenty of options for interesting shots.
Eyes
In addition to the cardinal fish in the cracks there was an interesting hermit crab that started legging it when I set the strobes for inward lighting.
Hermit on a run
At the surface I manage a few decent shots of jellyfish
Stinger
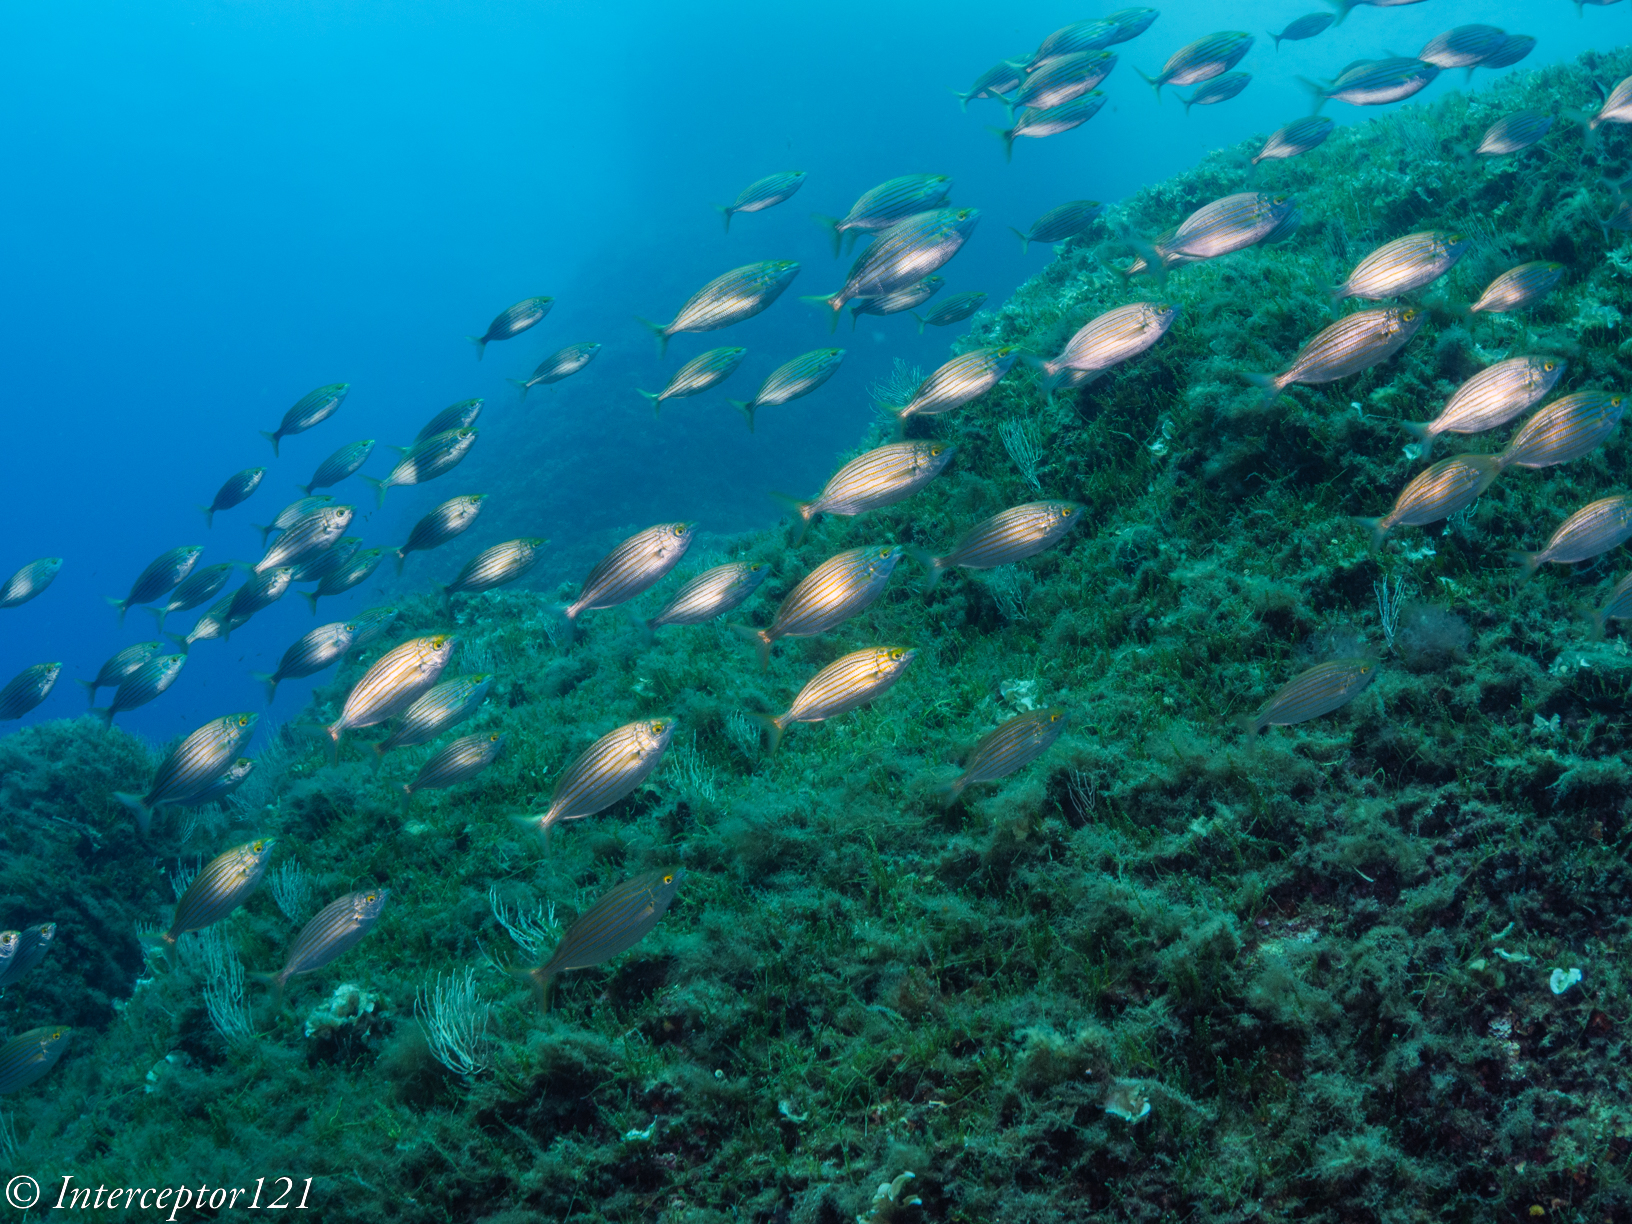
I would have liked to go on the Isca caves however the divers were not experienced so we went to the steps of Mitigliano which is a great close up wide angle dive.
Gorgonia
Corals are not too deep and there is a good variety of fish on top the cardinals in the cracks
DamselSalp UphillMullets
The visibility was a bit better but the light was decent so I took a variety of shots of salp, mullets and damselfish
That’s all for Italy for 2022. I feel I need more dives to get the best but am quite happy considering the limited number I could do.
For sure shooting wide angle here is a challenge but I think the shots worked out ok
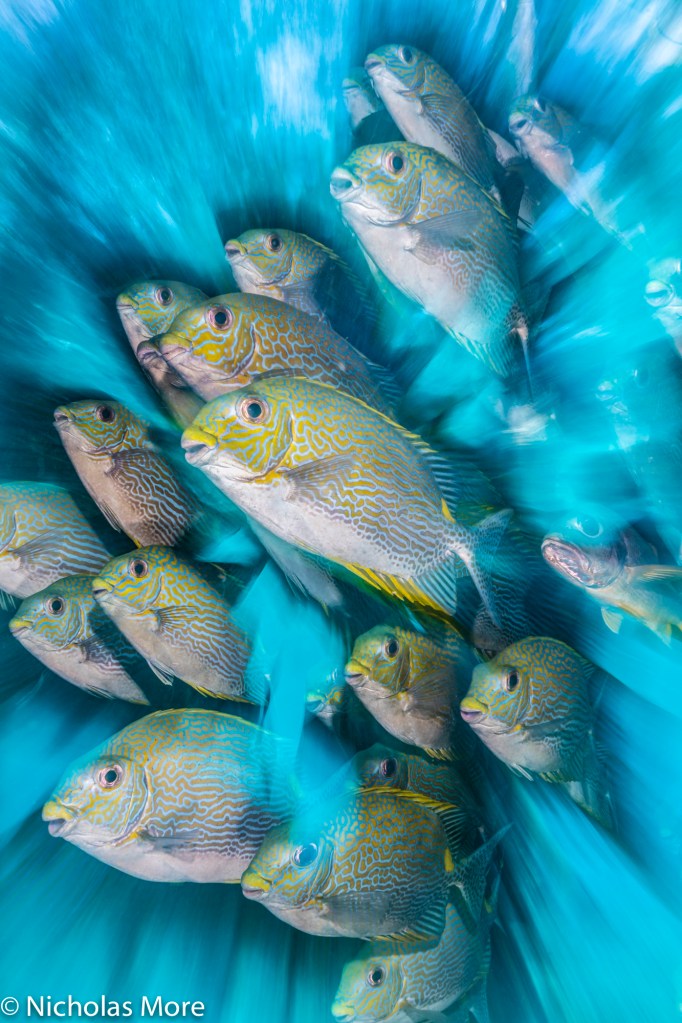
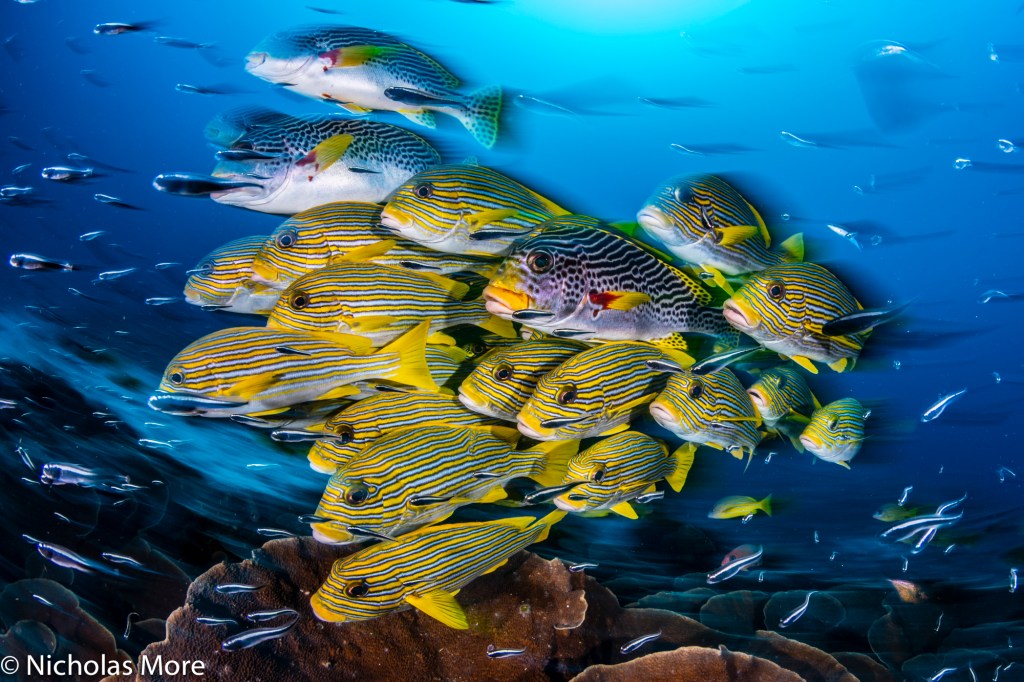
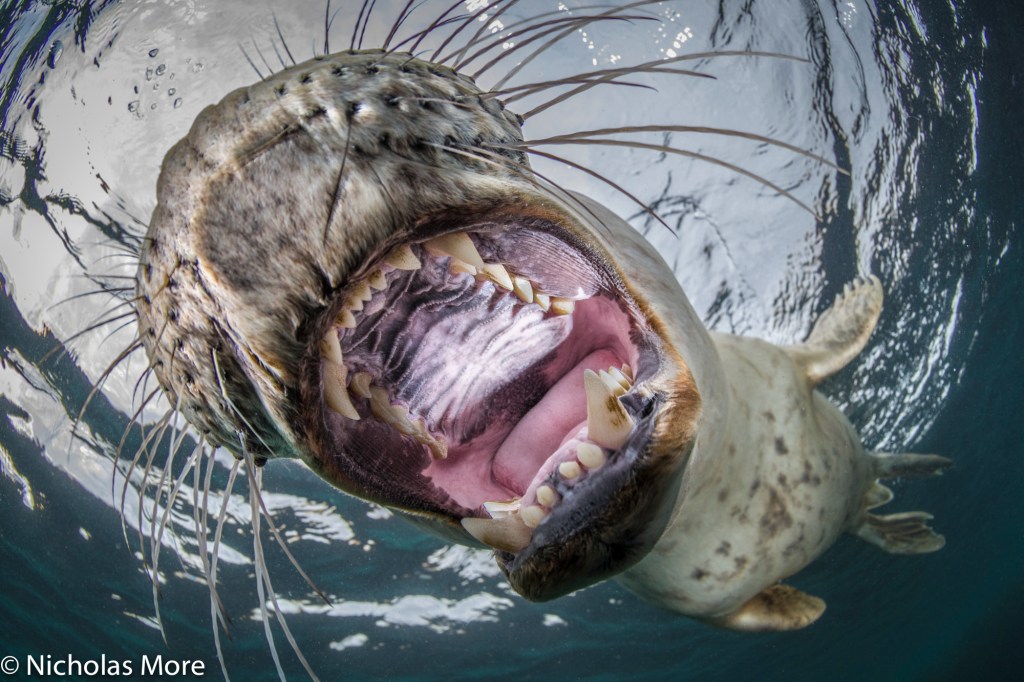
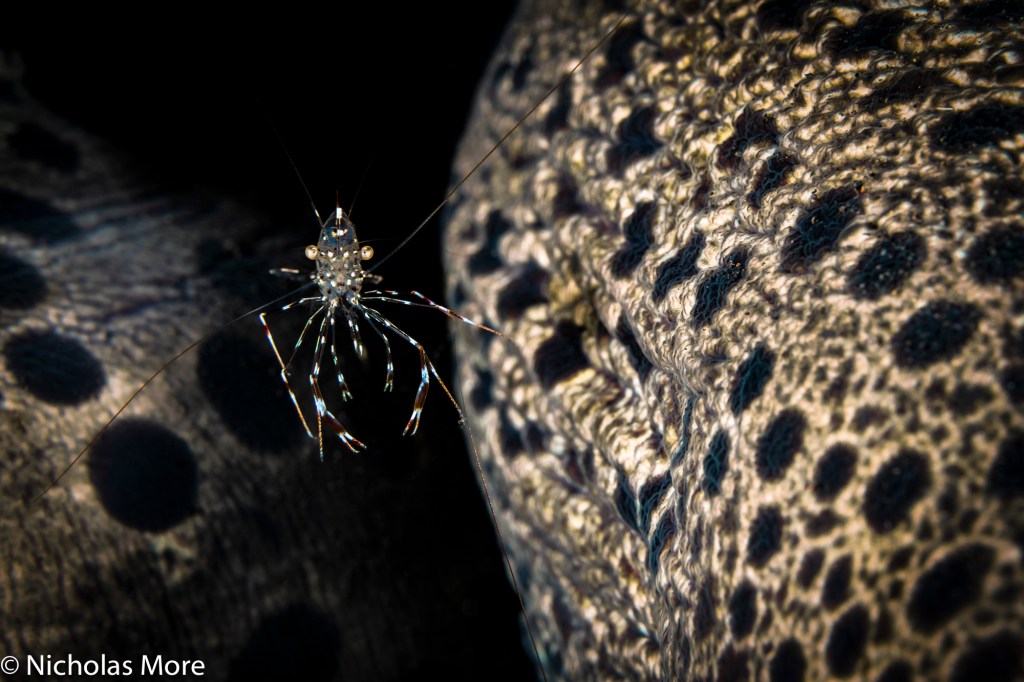
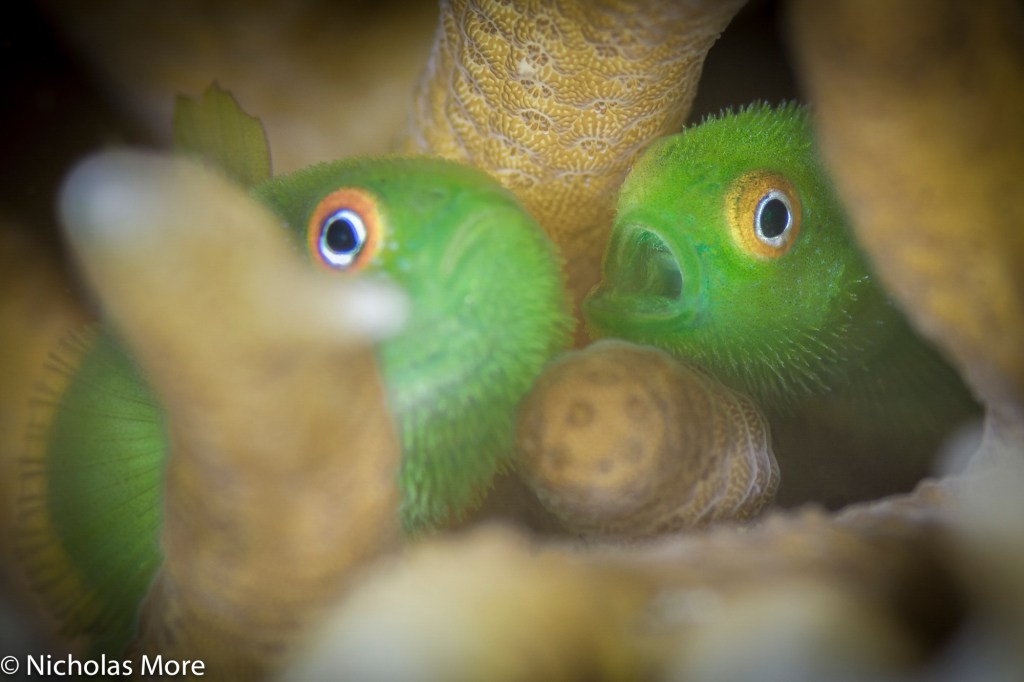
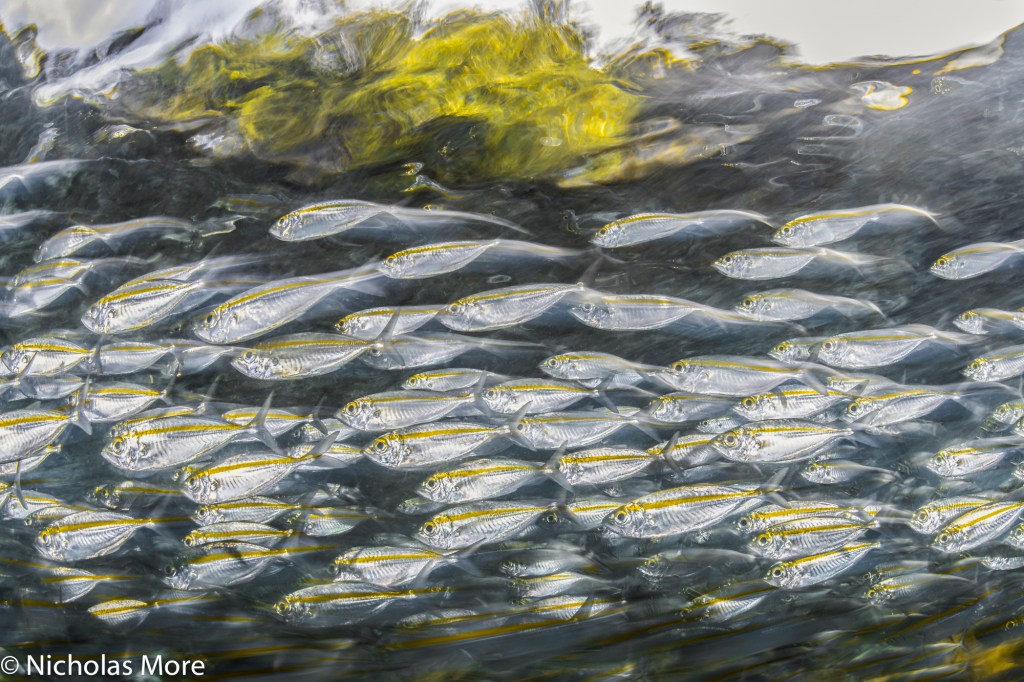
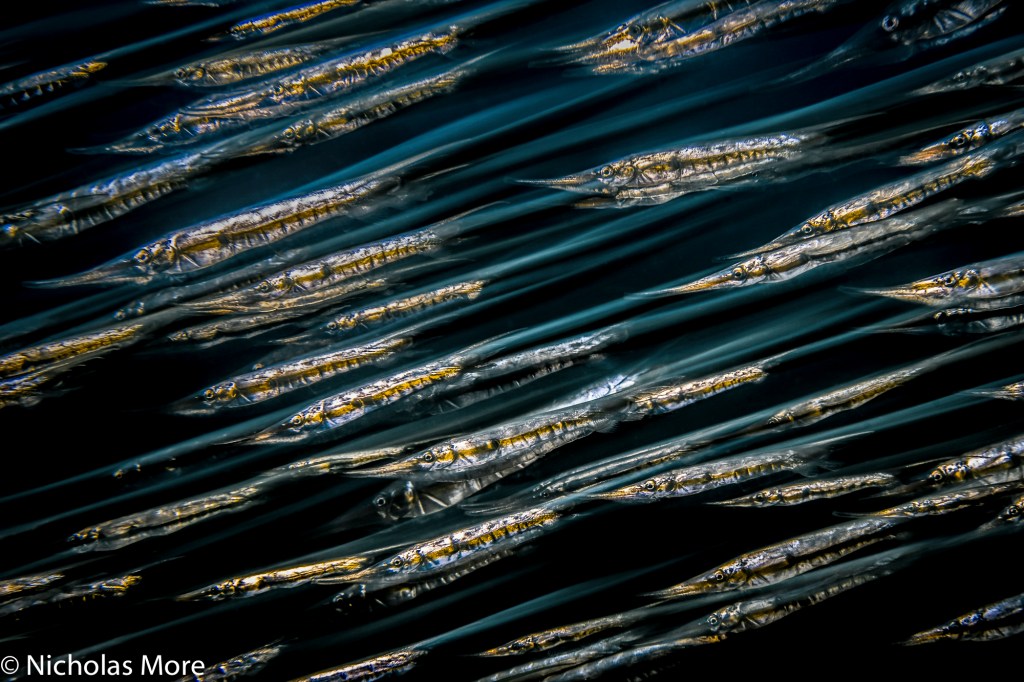
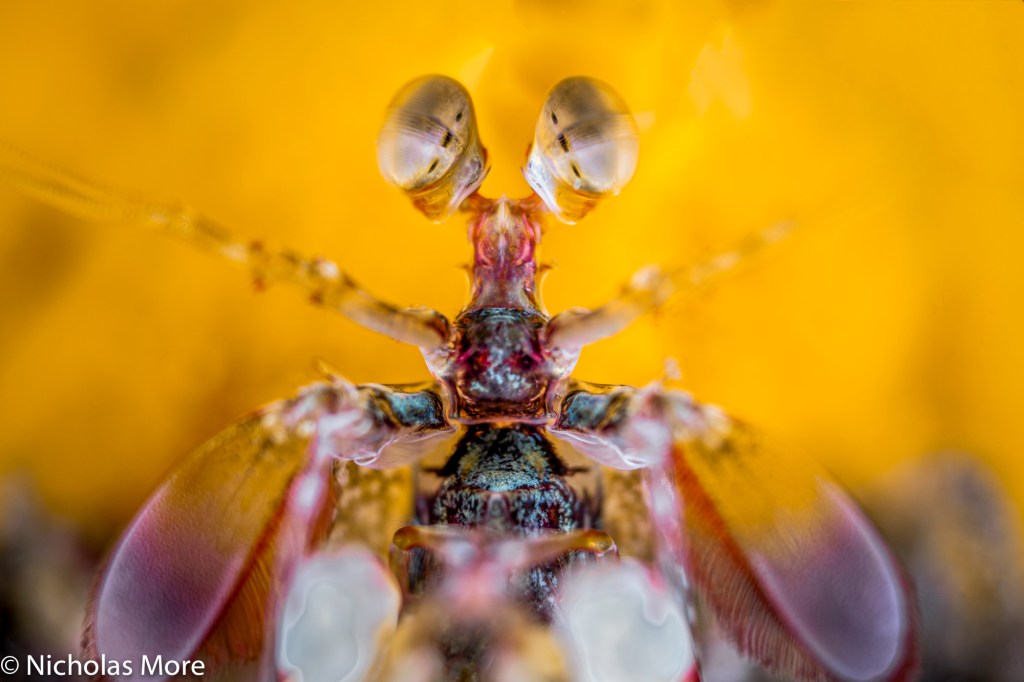
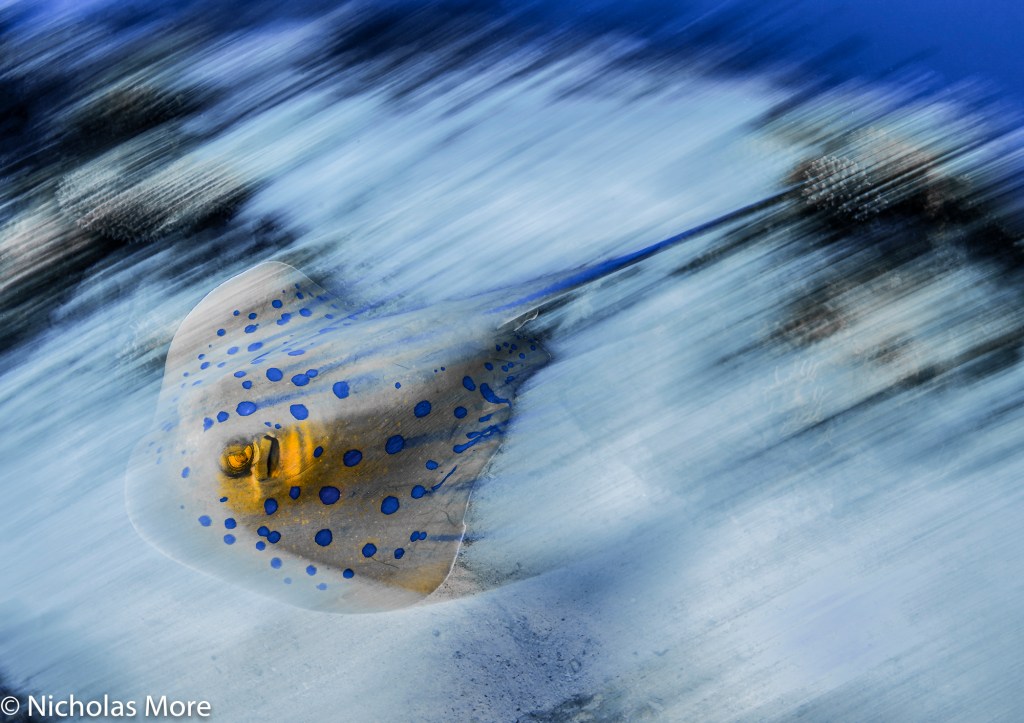
I have met Nick in 2015 and I was immediately impressed by his techniques and shots and we have been on a couple of trips together were I have been able to see the dedication he puts in getting the right image. Nick has the mindset required to take stunning images without a doubt.
So I am very pleased to share this post with you. Nick has also provided me with a set of pictures that I will host here. To stay up to date with his shots follow him on Instagram
If you want technical details on how to take motion blur shots the best path is to get a copy of the 2020 edition of Martin Edge‘s book The Underwater Photographer: a classic in the library of each underwater shooter.
Underwater photographer 2020 Edition
Chapter 9 of the 2020 edition is dedicated to Motion Blur and is authored by Nicholas More in person so you get the low down required by the photographer who has made this style his trademark.
Who is Nicholas (Nick) More?
Nick and his trusted D500 during a workshop with Dr Alex Mustard – use permitted
Dr Nicholas More is a Dental Surgeon from Exmouth, Devon, UK and is married to Rachel and father to their son, Ben. He has been diving since his teenage years and is now a PADI Dive Master, with well over 2000 dives. Nick combined this with photography in 2012.
Key Achievements
Nick is a multi-award winning Underwater Photographer and the current British Underwater Photographer of the Year. His other notable achievements include numerous commendations in the British Wildlife Photography Awards (BWPA) and the Underwater Photographer of the Year (UPY), back-back wins in the BSoUP Print competition and a Silver medal in the Our World Underwater Photo competition.
Underwater Photographer of the Year:
British Underwater Photographer of the Year – 2020.
Highly Commended UPY – Wide Angle – 2020.
Commended UPY – Portraits – 2020.
Highly Commended UPY – Black & White – 2019.
Highly Commended UPY – British Wide Angle – 2019.
Commended UPY – Portraits – 2019
Runner Up: British Wide Angle UPY – 2018.
Highly Commended UPY – Portraits – 2018
The shot that awarded Nick the British UPY 2020 and Highly Commended UPY – Wide Angle – 2020
Wide angle Ocean art 2019 WinnerOcean Art 2019 Reefscape runner up
British Wildlife Photography Awards:
2 x Highly Commended BWPA – 2019.
Grey Seal Halichoerus grypus
Our World Underwater.
Silver medal, Macro Unrestricted – 2017.
Lembeh / Gulen Shootout:
Grand Prize Winner – 2018
Think Pink Photo Contest:
Winner – 2017.
BSoUP / Diver Print Competition:
BSoUP:
Grand Prize Winner – 2016 / 2017.
Judges Vote:
Highly commended – 2014 / 2015 / 2017 / 2019.
Public Vote:
Overseas Winner – 2013.
Advanced Overseas Runner-Up – 2014 / 2016.
Advanced British & Irish Runner-Up – 2016 / 2017.
Questions and Answers
When did you start underwater photography and why?
I have been diving since the 1990s. I started UW photography in 2012 as digital compact cameras became common place. I caught the bug very quickly and never looked back.
How much diving experience did you have when you started?
LOTS! I had approx. 1500 dives when i started UW photography. Im a PADI DM.
Were you a land photographer before starting?
NO! The only land photography I do is with an iPhone. I did go on safari in 2018 to Botswana, I borrowed a telephoto lens and got some pretty nice shots of the wildlife. The only subject I shoot on land is my son, Ben!
What was your first underwater camera and housing?
My 1st UW camera system was a Canon S95 in Canon polycarbonate housing. No strobes, just 1 touch custom WB, i did have an Inon Wide Angle wet lens that made a big difference.
Nick first camera was a Canon S95 in a classic polycarbonate housing
I then moved to micro 4/3rds with an Olympus OM-D before moving to a Nikon7100/7200.
What is your current camera rig and why did you choose it?
I shoot with a Nikon D500 in a Nauticam housing. I use Inon Z240 & Z330 strobes depending whether I’m shooting Wide or Macro. It has been very successful for me & I know the housing like the back of my hand.
The Nikon D500 is a popular choice among underwater photographer and is the camera Nick shoots in a Nauticam housing
The D500 has super fast AF and great IQ. Im considering full frame but I wouldn’t trade my D500 rig. It would be used alongside.
What is your favourite discipline (wide angle, macro, portraits, blackwater, etc)?
I enjoy shooting Wide angle & macro. My preference is shooting animal portraits big & small. I like to shoot using motion blur.
Im not a fan of wrecks or divers in my shots. Im more interested in the animals.
What has been to date your best trip from a photography viewpoint?
Raja Ampat without doubt. My last trip has produced numerous competition winners including some i can’t talk about yet! Raja has it all. The biodiversity is off the scale.
striated frogfish or hairy frogfish Antennarius striatus Retra LSD Snoot
How many trips have you done in the last 3 years and where?
Ive had around 10 trips in the past 3 years. Trips include Lembeh / Raja Ampat & Bali. The Egyptian Red Sea and the Bahamas & Cuba for sharks and other big animals. I decide on which trips I go on depending on location, subjects and I have a preference for attending workshops with Alex Mustard & Wetpixel.
Has there been a defining moment where you think your photography improved significantly?
Most definitely. Paul Duxfield taught me the basics and encouraged experimentation. Alex Mustard and his workshop participants then inspired me to improve….quickly. Im competitive my nature so challenged myself to be the best I can be. I won the overseas category of the Diver / BSoUP Print Competition in 2013 at my 1st attempt. This meant I had to enter advanced / pro categories from then on – I had to improve! Long way to go…..
What is your personal favourite shot among all you have taken?
My favourite shot, is a unique image of a porcelain crab, backlit through its host anemone. It was awarded Highly Commended in the Black & White category in UPY 2019. Its difficult to be original in UW photography and I feel this image is, as its not been done before or since!
Nick personal favourite is the unique shot of a porcelain crab Highly Commended UPY – Black & White – 2019.Periclimenes colemani Snooted Colemans Shrimp Portrait Retra LSD SnootMotion blur also works with schooling fishFast moving Stingray of the Red Sea
Looking at Nauticam port chart the only option for a fisheye zoom is to combine the Panasonic PZ 14-42 with a fisheye add on lens. This is a solution that is not that popular due to low optical quality.
So micro four thirds users have been left with a prime fisheye lens from Panasonic or Olympus…until now!
Looking at Nauticam port chart we can see that there is an option to use the Speedbooster Metabones adapter and with this you convert your MFT camera to a 1.42x crop allowing you to use Canon EF-M lenses for cropped sensor including the Tokina 10-17mm fisheye. This is certainly an option and can be combined with a Kenko 1.4x teleconverter giving you a range of 14.2 to 33.8 mm in full frame equivalent or 7.1 to 16.9 mm in MFT terms fisheye zoom of which the usable range is 8 -16.9 mm after removing vignetting.
A further issue is that the Speedbooster gives you another stop of light limiting the aperture to f/16 while this is generally a bonus for land shooting in low light underwater we want to use all apertures all the way to f/22 for sunbursts even if this means diffraction problems.
This lens on full frame can be used for a circular and diagonal fisheye but Wolfgang has devised a method to use it as an 8-15mm fisheye zoom on MFT.
Part list – missing the zoom gear
What you need are the following:
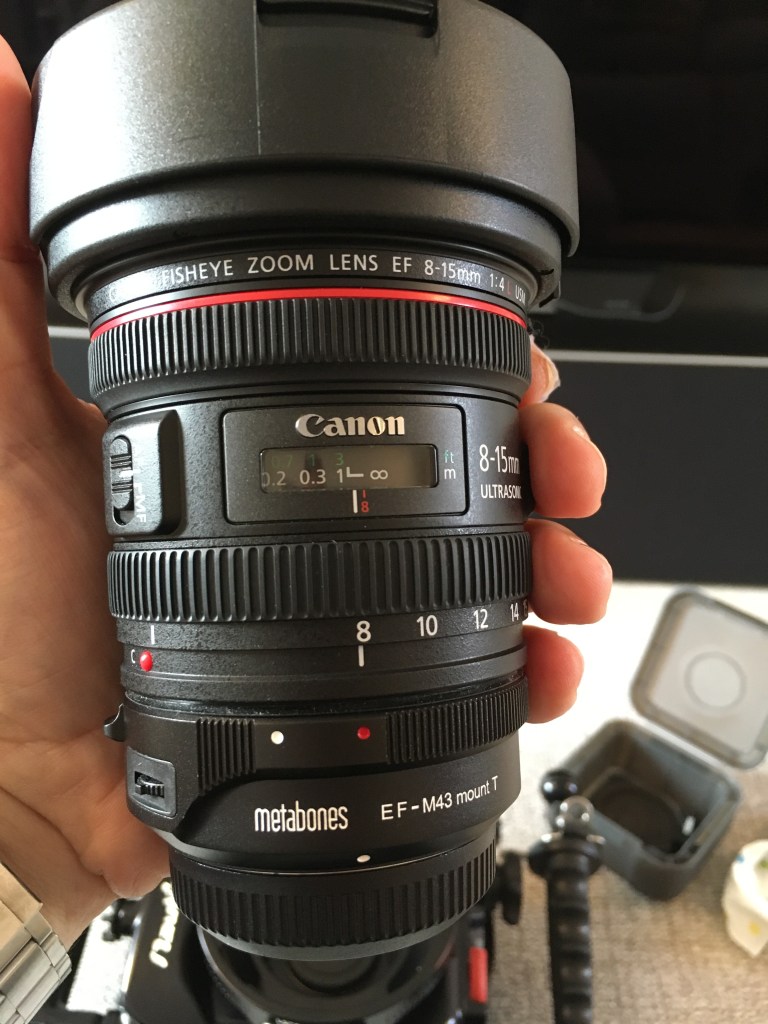
Canon EF 8-15mm f/4L fisheye USM
Metabones Smart Adapter MB_EF_m43_BT2 or Viltrox EF-M1 Adapter
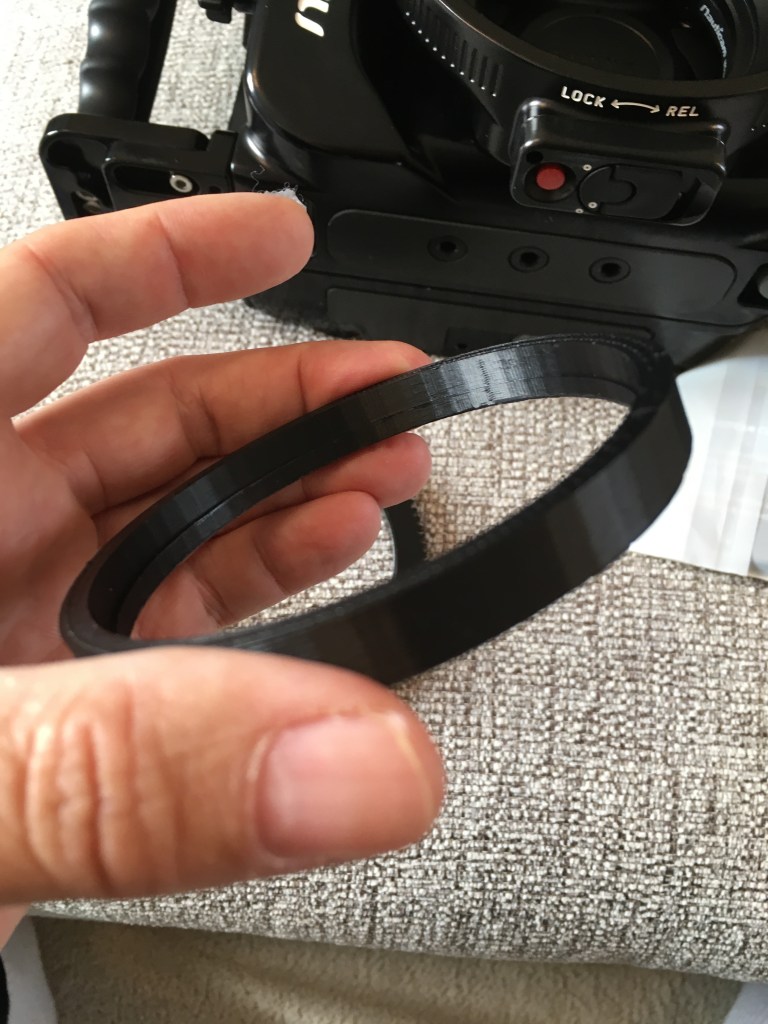
A 3D printed gear extension ring
Nauticam C-815Z zoom gear
Nauticam 36064 N85 to N120 34.7mm port adapter with knob
Nauticam 21135 35mm extension ring with lock
Nauticam 18810 N120 140mm optical glass fisheye port
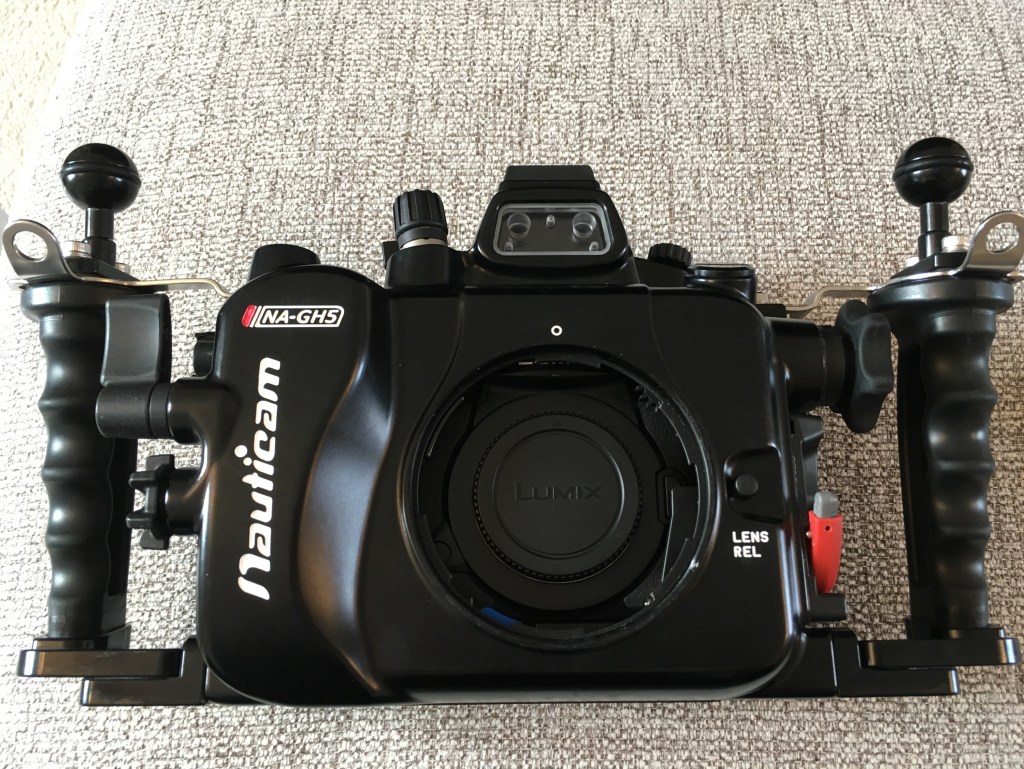
The assembly is quite complicated as the lens won’t fit through the N85 port. It starts with inserting the camera with no lens in the housing.
GH5 body only assemblyCamera in housing without port
The next step is to fit the port adapter
Attach N85 N120 Metabones adapter
Then we need to prepare the lens with the smart adapter once removed the tripod mount part.
Canon 8-15 on Metabones Smart Adapter IV
As the port is designed for the speed booster the lens will be few mm off therefore the gear will not grip. Wolfgang has devised a simple adapter to make it work.
gear extension ringZoom gear on lens
This shifts the gear backwards allowing to grip on the knob.
Looking at nauticam port chart an extension ring of 30mm is recommended for the speedbooster and now we have extra 5mm in length Wolfgang uses a 35mm extension. however looking at the lens entrance pupil I have concluded that 30mm will be actually better positioned. Nauticam have confirmed there won’t be performance differences. You need to secure the ring on the dome before final assembly.
Fisheye dome and extensionFull assembly top viewSide front view
The rig looks bigger than the 4.33 dome but the size of the GH5 housing is quite proportionate. It will look bigger on a traditional small size non clam style housing.
The disassembly will be made again in 3 steps.
Disassembly
I am not particularly interested in the 1.4x teleconverter version consider that once zoomed in to 15mm the lens is horizontally narrower than a 12mm native lens so there is no requirement for the teleconverter at all.
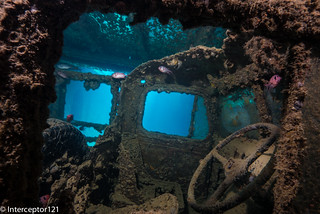
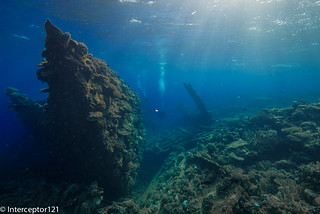
This table gives you an idea of the working range compared to a rectilinear lens along the horizontal axis as diagonal is not a fair comparison. The lens is very effective at 8-10mm where any rectilinear would do bad then overlaps with an 8-18mm lens. The choice of lens would be dictated by the need to have or not straight lines. The range from 13mm is particularly useful for sharks and fish that do not come that close.
Focal length
Horizontal
Vertical
Diagonal
Horizontal Linear Eq
Width
Height
Diagonal
8
130.9
95.9
170.2
17.3
13
21.64
9
114.9
84.7
147.8
10
102.5
75.9
131.0
6.9
11
92.6
68.7
117.8
8.3
12
84.5
62.9
107.2
9.5
13
77.7
57.9
98.4
10.8
14
72.0
53.7
90.9
11.9
15
67.0
50.1
84.6
13.0
Wolfgang has provided me with some shots that illustrate how versatile is this set up.
8mm end surface shotCaves 8mm15mm end close upDolphins at 15mmDiver close up at 8mmSnell windows 8mmRobust ghost pipefish @15mm
As you can see you can even shoot a robust ghost pipefish!
The contrast of the glass dome is great and the optical quality is excellent. On my GH5 body there is uncorrected chromatic aberration that you can remove in one click. Furthermore lens profiles are available to de-fish images and make them rectilinear should you want to do so.
I would like to thank Wolfgang for being available for questions for providing the 3D print and the images that are featured here on this post.
If you can’t print 3D and need an adapter ring I can sell you one for £7 plus shipping contact me for arrangements.
Note: it is possible to use a Metabones Speed Booster Ultra in combination with a Tokina 10-17mm zoom fisheye and a smaller 4.33″ acrylic dome.
UK Cost of the canon option: £3,076
Uk Cost of the Tokina option: £2,111
However if you add the glass dome back
UK Cost of Tokina with glass dome: £2,615
The gap is £461 and if you go for a Vitrox adapter (would not recommend for the speedbooster) the difference on a comparable basis is £176 which for me does not make sense as the Canon optics are far superior.
So I would say either Tokina in acrylic for the cost conscious or Canon in glass for those looking for the ultimate optical quality.
I was checking the technical details of Alex Mustard Underwater Photography Master Class and the majority of wide angle pictures are taken with a fisheye lens. In the section about shooting sharks Alex says that he prefers to shoot sharks with a fisheye otherwise they look ‘skinny’.
If you look online on underwater video forums you frequently see comments on problems with wide angle lenses connected with the use of a rectilinear wide angle lens in a dome.
The two most common complaints are soft corners and distortion.
Soft corners are due to a combination of lens optical issues and dome port optics. In short any lens is to some extent curved and therefore if you shoot a flat surface the image may be sharp in the centre and softer as you move to the corners. Issues with field of curvature are corrected stopping down the lens. The issue with field of curvature happens everywhere not just underwater.
Right now there are four wide angle lens that can be housed for a micro four third camera:
This lens has a nice working range that allows to capture 100 degrees diagonal at widest setting and still has a 35mm equivalent at the tele end. This is a pretty little lens at $699 is the most affordable option that can be put in a housing. You will need a wide angle port and the zoom gear. The whole combination for your Nauticam housing comes at $1,399. This lens can also be combined with a glass dome but this will make the whole combination much more expensive and you may want to think about getting a better lens instead.
This is an outstanding lens especially on land due to the fast f/2.8 aperture. It is expensive at $1,299.99 and very heavy and bulky. The lens does not fit through the N85 port opening and requires a port adapter this gives the extra benefit of a focus know but with such a wide lens is not really useful due to high depth of field. You will need a 180mm glass dome and the zoom gear for the lens to complete the set up ending at a whopping $3159.99.
I have owned this lens and I have to say that at $799 is the right compromise between wide field of view and price. Furthermore once you get the zoom gear you have the option of a cost effective acrylic dome that will give you a very wide set up for $1589.99. There are reports of poor performance with this lens and it is true that is not as sharp in corners but the results are perfectly acceptable if you stop at f/8 in close shots.
Panasonic 7-14mm with acrylic dome 9mm f/8
Panasonic 7-14mm with acrylic dome 7mm f/5
This lens is prone to reflections and flare however once you add the N120 port adapter and the 180mm glass dome this will get you to $2819 at that point you may want to consider the Olympus combination instead.
This is my favourite lens is sharp does not suffer from field of curvature issues and has a very useful zoom range 16-35mm in 35mm equivalent. The zoom gear and the 7″ acrylic dome will take you to 1889.99 that is an excellent price point. The lens is not prone to reflection or flare and as the 7″ dome has the same curvature radius than the 180mm dome it will produce very similar results.
Panasonic 8-18mm in 7 acrylic dome f/8
Panasonic 8-18mm at 8mm f/10
The significant size of the acrylic port and the fact it floats make it ideal for split shots and this is the lens that gives me the best results.
This lens can also take port adapter that allows you to use the 180mm glass dome. This adds up to $2919.99 if you experience bad reflections and shoot frequently in the sun it may be worth it but I have not had any issue so far with this lens probably because of its nano coating.
I have found the 7mm focal length too problematic for dome ports and the amount of perspective distortion excessive generally it would be preferred to shoot at 9mm and narrower however this maybe insufficient for wreck interiors if you want a rectilinear look.
Perspective Distortion
One of the regular complaints of video shooters especially in wrecks or caves is that the edges look horrible and distorted and that there is an issue with the corners pulling. This is in fact not an issue but a problem with perspective as you shoot very wide angle. The following test shots will illustrate that the issue happens on land and has nothing to do with dome ports.
Shot at f/2.8 with Panasonic 8-18mm at 8mm shows sharp corners Image with objects in edges at 8mm
As we can see the football looks like an oval and the chair is pulled. This is due to a perspective issue and is not a lens problem. When you shoot underwater video the objects on the edges of the frame change shape creating this pull effect that most people dislike.
Same scene at 9mm
At 9mm the amount of perspective distortion is reduced and this is the reason why 18mm on 35mm equivalent is one of the favourite focal length for rectilinear video and the maximum angle that should be used in small spaces to avoid the pulling edges.
One of the reason why a lens like the Nauticam WWL-1 is preferred for video is because the corners look sharp but is that really true?
Not really let’s apply some barrel distortion to simulate the WWL-1 to the image that looked badly distorted.
Barrel distortion applied -60 8mm
Now the football looks circular as we have applied -60 barrel distortion, obviously the rest of the image is now bent but this seems not to be of a concern to most people!
Barrel distortion -30 9mm
It needs much less correction to bring the 9mm shot into shape and for sure between the 8mm and 9mm the 9mm is the dimension that produces the most acceptable results.
It has to be said that in video with 16:9 aspect ratio most of the issue will be cropped away at the edges but the distortion in the middle of the frame will remain. For the same reason the 9mm image will appear practically rectilinear with no issues
16:9 crop still showing the edge ‘pulling’ at 8mm
16:9 crop looks straight at 9mm
I hope this post was useful there are four options for micro four thirds shooters to use rectilinear lenses I have settled for the Panasonic 8-18mm as in most cases it is still possible to control the perspective issue, I found this impossible at 7mm.
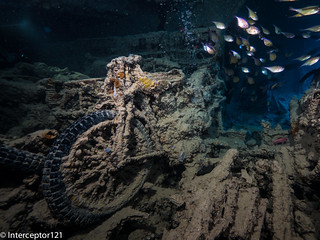
Bike in hold 2 on SS Thistlegorm Panasonic 8-18 at 8mm
Shot at 7mm showing the front tyre pulling outside the frame
Obviously if you shoot in the blue this problem will not be visible however rectilinear lenses are popular with wreck shooters and I think this posts gives an idea of the challenges at play.
Finally I would discourage the use of the 7-8mm focal length range for video to those that want to have a rectilinear look.
From this post I started supporting Bluewater Photo in US for my links because it still provides multi brand and choice and because I learnt a lot from Scott Gietler Underwater photography guide back in the days where there was no internet resource to learn from.
When people think about creating lighting technique for underwater photography a few things come to mind and usually it is about tools. Snoots for example have become very popular and help the underwater photographer to increase separation of the subject from the background. I have seen some people jumping in the water with a black slate to create an artificial black background, clearly is much easier to do that for macro as everything is at end and typically the subjects are not fast moving or the diver is not fast moving.
Then of course there is strobe positioning, classic, inward, crossed, rabbit ears, backlighting etcetera here goes a long list of options.
At the end however some pictures just seem to “pop” more than others, and this usually has to do with the colours and the contrast and with the blue.
It is not a coincidence that the term Mustard Blue is what has made some shots from Alex Mustard re-known and if you read his underwater photography masterclass there is a whole section ‘The sea is blue’ where Dr. Mustard goes on about the importance of exposure and background blue.
His suggestions are to:
Dial in an underexposure (for the water) around -2/3 to -1 1/3 Ev
Using warm strobes
It is worth stressing out that the primary reason why the camera gets fooled by the conditions underwater is because colours gets absorbed and blue lights gets scattered instead creating that milky glare at times when the water has lots of suspended particles.
If shoot an auto mode with exposure compensation at zero your pictures will for most part come out washed out and lacking contrast underwater and this is one the primary reasons photographer like Dr Mustard do not follow the expose to the right rules.
Underexposure for the water is obtained by keeping the aperture and ISO constant as they are aligned to the strobes and changing the shutter speed accordingly. Obviously if you are shooting video your shutter speed is most likely fixed so you need to find alternative ways to get your blue as you want it but generally you would still underexpose probably not as much.
With regards to warm strobes this is a fairly subtle point linked to the camera auto white balance mechanism.
Most flash strobes have colour temperatures between 5500 and 6500 K and therefore are not at all particularly warm.
Inon Z240 Standard and Warm diffuser
Inon has developed warming diffusers for their Z240 range and I believe also for the most recent Z330 range. They are available in 4600K and 4900K temperature. I definitely recommend the 4600K version over the 4900K as it has a stronger effect.
So how does a warm strobe work in order to get a richer blue?
Table of light sources – Olympus education
When we shoot with strobes the camera is set to auto white balance, and will average for most the subject we hit with our strobes to calculate the average colour temperature and tint.
The camera auto white balance operates between 2500K and 7500K typically so a warm strobe is likely to set the colour to 4600K instead of the typical 5500K the ‘extra’ 900K do not really do anything to the subject that will anyway we white balance but give an extra kick to the blue background. Underwater colour temperature is usually higher than 9000K and easily reaches 14000K (purple tone in the water) at depth. So the warm strobes are particularly effective in shallower and clearer water as they push the blue to a darker tint like in this example taken around 12 meters.
f/8 1/125 ISO 125
You can see how deep is the blue other example taken on the Barge at less than 10 meters.
Portrait in deep blue…
So what happens if you don’t have a warm strobe or if there aren’t warm diffusers for the strobe you have, or maybe you don’t want to spend the money for them?
Amazon comes to the rescue
If your strobe is around 5250 with diffusers (like Sea and Sea YS-D2 or Inon S2000/Z240/D200) get a 1/8 CTO
Be careful not to exceed with this technique or subject will turn too warm.
An alternative and perhaps counterintuitive approach is to use cooling filters.
In this case the strobe light will become colder to emulate the water colour and the camera will need to be set to custom white balance.
In almost all cameras except Olympus that reach 14000K colour temperatures are limited to 10000K however they can be further enhanced to reach 11000K if you have an adjustment panel like the Panasonic or Sony cameras. Pushing the adjustment to the A gives extra 1K. This technique with a bare lens has however a limitation as when the custom white balance caps the colours go completely off.
In order to see what can the colour temperature setting do we can compare a normal grey card shot with one where the colour temp is 11000K and magenta is pushed to the max.
Grey card bare lens Maxed out Custom White balance on Panasonic GH5
In order to cool down the strobes you need a cyan filter, the custom white balance can correct up to 2 stops Cyan but no more. You can trim a sheet of Rosco 4360 to fit into your diffuser as below. This takes around 1 stop Ev off the strobe.
Sea and Sea diffuser with a Cyan 60 gel
It important to stress that the predominant colour in blue and blue water is cyan not blue and this is what gives the washed out scattering. We want to keep the deep blues and get rid of light blue and green which ultimately is cyan the colour of water.
So the strobe will emulate the water and the camera custom white balance will set the colour restoring what was lost and giving us a full correct spectrum. This however only works until the water colour temperature gets to 11000K and this is not as deep as you may think it could be a low as 9-10 meters. A cyan 60 filter is approximately 9500K. You can see the colour in the image below.
Cyan 2 Stop results in Colour Temperature around 9500K
In this technique the strobe is not used to give colour but to eliminate shadows the custom white balance is going to give a deep colour that penetrates the whole frame so any subject in the distance will be colourful as well.
The benefit of this technique is that you may use wider apertures and even slower shutter speeds like in this 1/60 example here.
batfish formation 1/60 f/5.6 ISO 200
You can clearly see the orange colours of the anthias far behind in the frame.
The ultimate stretch of this technique is to combine a filter like the magic filter this can be used with both a Cyan 2 stops and also a Cyan 3 stops in deeper water. This technique is taxing on exposure as your strobes are half power and your exposure has 1 2/3 stops less however this is easily recovered as you tend to shoot at slower shutter speeds of 1/30 to 1/60 instead of 1/125 to 1/200 because the filter will give you the deeper blues.
Magic filters on WB slate
The magic filter adds around 3000K to you camera custom white balance ability reaching the 14000K where the water starts turning purple blue. To that regards due to the amount of red I do not recommend going to deep with the magic and keep it to a max of 13 meters as recommended on their website.
The magic filter is almost a perfect match for the Cyan 60 filter if you overlap them over the lens you get almost a neutral grey card the temperature is only 150K off while the tint is around 5 notches toward green in Lightroom.
Magic Filter + Cyan 60 results in almost neutral grey card
This cave shot I believe gives an idea and is taken with filter on lens and strobes.
Magic filter plus Cyan 60
I have also tried the magic filter with Cyan 90 however there are some side effect to consider. Firstly you get Cyan cast on the image at shallower depths. Second the magic filter has a tendency to turn purple below a certain depth so I recommend to use the magic with the Cyan 60 as you are certain that the foreground subject and the strobe filter will give you a neutral colour. If you are in deeper water and the temperature is above 10000K this will only result in a deeper blue and a warmer light on the subject that once RAW corrected will look just fine.
Conclusion
In this post I have tried to give you some tips on how to use gels to give deeper blue or richer colours to your wide angle. I would recommend to start with warming diffusers and then move to cyan filters and finally to magic filter and cyan filter in combination.
A final word for video shooters. I am not aware of any add on warming diffusers for video lights and generally I have not seen LED warmer than 5000K therefore unless you shoot at 60p 1/125 it will be very hard to get deep blue at shallow depths without a lens filter.
There is no doubt that the Panasonic GH5 is a very capable camera and in given conditions the video performance you can get is truly impressive.
Broadly speaking a video clip needs to be:
Sharp
Colorful
Contrasty
Clean
Those 4 characteristics are tightly related to:
Resolution
Color depth
Dynamic range
Low Noise
Resolution
Today everyone shoots 4K and after all resolution is well supported by almost any camera, broadly is unaffected by other factors and unless the noise is really high sharpness of your frame is not going to be a real issue shooting at 4K.
Color depth
In normal conditions and not underwater a camera can resolve many colors. However underwater due to the diffraction of light and selective absorption of colours the starting point is very different from land. So generally is not the camera that cannot resolve the colors but the colors that are missing to start with. This post will focus specifically on this aspect. The Panasonic GH5 can resolve 23.8 bits in RAW and therefore technically has less than 8 bits color depth – do not confuse this with the 8 or 10 bit recording setting.
Dynamic Range
Underwater scenes tend to have limited dynamic range, with the exception of sunbursts or shooting against the light this is going to be an issue only in specific circumstances of very bright scenes with shadows. In all scenes taken with video lights dynamic range is not an issue at all. The GH5 has 13 stops of dynamic range but rarely this is an important consideration.
Noise
Noise is an important consideration as when the noise goes up the camera looses the other characteristics, color, dynamic range and resolution will be affected when the camera is outside the sweet spot. Broadly speaking the Panasonic GH5 does not do well once you pass the ISO 1600 setting and I tend to cap the ISO in video at 800 in most cases.
Diving Conditions
To understand how those variables play we can see how the same set up reacts very differently in scene where there is less light and therefore the camera uses high ISO like this one.
The same camera with exactly the same equipment in brighter water produces this
So the reason for the above is that with less light there are less colours and the clip looks what it is really.
OK moving on to the main subject of this post how do I get the colors right? It is a combination of techniques and the trick is to use the right one in the right conditions.
Generally every site has specific conditions that change depending on weather, time of the day, visibility and other factors. So in broad terms a site will have more or less light and therefore more or less colours. It is therefore impossible to categorically define what to do at a given depth but is more about typical values. With this in mind we have typically 3 scenarios:
Ambient light shots
Artificial light shots
Balanced light shots
Close up Shots
In general close up shots especially of small subject fall within the scenario 2 for which a video light with high color rendering is important as this will define the colours you see. With a lot of power it is possible to extend artificial lighting to larger subjects but eventually you run out of power due to distance or size of the subject.
Wide angle shots and seascapes
True wide angle shots are generally ambient light shots which also means when it gets too dark the colors will be missing and it will look blue not matter the equipment.
In order to make the most of ambient light shots for wide angle it is essential to balance the colours in water even when you use a RAW format on a still image because RAW files are not as RAW as you think and are actually compressed.
Custom White Balance
Using Custom White balance with a grey card it is possible to obtain decent results until the camera hits the maximum color temperature in the case of the Panasonic GH5 this is 9900K. Depending on conditions you may get to 10-12 meters and this still works, in darker water this stops working much sooner.
Chrisoula K Ambient Light 5 meters
Color Filters
Color filters push the limit of custom white balance further down. Some add more or less 4 meters others up to 6-8 meters at the expense of an overall loss of light. Filters are useful when there is a lot of light because also help to keep the Panasonic Gh5 in the best aperture range (not smaller than f/11)
Filter in action at 10 meters
Right now there are predominantly 3 filters on the market:
UR PRO
Magic filter
Keldan Spectrum
All those filters will improve the performance and color rendering of your footage, under the conditions that the loss of light is not pushing the camera above reasonable ISO values.
In terms of depth range the magic filter and the Keldan Spectrum -2 version can be pushed to 15 meters depth on a bright day in clear water. The URPRO is capable of getting a few meters more down to around 17-18 meters although it does generate an orange cast (as there is no red left) it is still workable.
Filter
Light Loss
Typical Max Depth
Magic Filter
1 2/3 Ev
15 meters
Keldan Spectrum -2
2 stop (WWL)
15 meters
URPRO
1 2/3 Ev
18 meters
This image gives an idea of the 3 filters as you can see they are very different one from the other.
Keldan top URPRO bottom Magic filter
Balanced Wide Angle Shots
This is an entirely new technique that has started with the Keldan Ambient light filters. I wrote a whole piece on wetpixel
The principle is to use custom white balance with or without filter to obtain color rendering and then put filters on the video light so that the color of the light emulates the ambient light and therefore it only gives texture not color.
Keldan has developed a whole range of filters for various situation that match their light and therefore are not applicable to any other light.
As I do not own a set of Keldan I have done some tests and found that a gel of Cyan filter 2 or 3 stops makes my divepro G18+ practically ambient light in the conditions I dive into.
Filter
Cyan Strength
Magic Filter
2 stops
Keldan Spectrum
2 stops
URPRO
3 stops
The above value are based on my experience use at your own risk especially with different lights.
Square Cyan 2 stops Round Cyan 3 stops
To give an idea I overlapped the filter to my iPhone lens
This is the shot without any filters
Original ShotURPRO and Cyan 3 stops (darker)Magic filter and cyan 2 stops accurateKeldan and cyan 2 stops accurate
This example shows that the two filters cancel themselves the result is almost daylight with no cast which means in water if you use a video light or a strobe you will not see a red or orange spots on the image.
For those taking pictures the same combination remains true with Inon Z240 and Sea and Sea YS-D2
Example picture here
My own filter and Cyan 3 stop note that the light is coming from the other side
One thing to take into account is that you need to find a way to hold the gel on the video light or the strobes. The flat surface strobe diffusers make this process easy, finding something you can use with your video lights is not easy and also the gels may melt after continuous use.
Artificial lights
It comes a point and a depth where filters stop working, this could be as shallow as 8 meters in green water. As the scene is dark using lights is what is required. There is nothing specific about this technique except making sure you don’t get burned highlights or backscatter. As it happens in photography using long arms (maybe not as long as for stills) is key to get good lighting on your subject.
My Camera Settings
I use CineLike D with saturation, sharpness and noise reduction to -5. I shoot at 24/25p AVCI 400 mbps and follow the 180 rules, it is entirely possible to shoot at 1/100 if you like more crisp look.
Clearly there are people out there that do not like filters and think white balance is best etc but I think a good read on magic filters explains it all.
It has been almost 4 years since my first review of the Nauticam WWL-1 wet wide angle lens and a few accessories later this lens is definitely my all time favourite for underwater video with my GH5.
I do not want to repeat myself and beat to death the topic of sharpness in corners I would rather recap on the other benefits of this lens that really make it unique for underwater video. Obviously this lens is very valid also for still images because of the ability to zoom through but this is not the focus of this post.
So let’s have a look at the three killer features of this lens that make it really special
Field of view
The WWL-1 once combined with the Panasonic 14-42mm MKII (the best lens to combine with the WWL-1 in my view) offers a field of view of 130 degrees diagonal. But what does that really mean?
First the WWL-1 does not compare with a rectilinear lens in fact it is almost a fisheye lens as we can see from those shots of a pool wall.
WWL-1 at 14mm wide end
The barrel distortion is evident correcting the image in lightroom gives an idea although not 100% correct of what is the real field of view of the lens.
WWl-1 at 14mm with distortion correction at 100
What is interesting to see is that the WWL-1 like a fisheye lens offers a much wider diagonal field of view than on the other dimensions.
I have compared the WWL-1 with other rectilinear lenses and with the 8mm fisheye.
Horizontal
25
50
100
200
FOV
Linear Ratio to FE
7-14mm@7
62
124
248
496
102
57%
8-18mm@8
54
108
216
432
94
50%
12-60mm@12
36
72
144
288
72
33%
WWL-1
61
122
244
488
102
56%
Fisheye 8mm
109
218
436
872
130
100%
Vertical
25
50
100
200
FOV
7-14mm@7
46
92
184
368
86
84%
8-18mm@8
41
82
164
328
78
75%
12-60mm@12
27
54
108
216
57
49%
WWL-1
39
78
156
312
75
71%
Fisheye 8mm
55
110
220
440
96
100%
Diagonal
25
50
100
200
FOV
7-14mm@7
77
154
308
616
114
13%
8-18mm@8
68
136
272
544
107
12%
12-60mm@12
45
90
180
360
84
8%
WWL-1
107
214
428
856
130
18%
Fisheye 8mm
583
1166
2332
4664
170
100%
The table I have prepared uses the equisolid equation for a fisheye lens to map the WWL-1 I have verified the values and I can confirm the WWL-1 is somehow equivalent to 10.06mm fisheye lens.
There are two things that are worth noting, the first is that on the horizontal and vertical axis the WWL-1 is not wider than the Panasonic 7-14mm at 7mm. The other consideration is that with the WWL-1 the 4:3 format frame starts to become a classic 3:2 as the ration width/height is 1.56.
When we work in video at 16:9 we crop out most of the diagonal part leaving the rest of the field of view intact this means that in video mode the lens is much more rectilinear and the barrel distortion more contained.
14mm WWL-1 cropped at 16:9
If we look at a frame at 25mm we can see that at 4:3 the level of distortion is reduced but still present.
WWL-1@25mm
.The corrected frame shows the residual distortion.
WWL-1@25mm correctedWWL-1@25mm 16:9 crop
The level of residual distortion in video mode is pretty negligible at 25mm. At 35mm even in 4:3 mode the WWL-1 is practically straight.
The benefit of the distortion of the WWL-1 is such that if you are shooting large sharks for example the barrel distortion makes those sharks look large in the centre of the frame and when they go out of the frame you don’t have the pull effect of a classic rectilinear lens behind a dome. At the same time if you need to shoot some divers or lines that are straight you can zoom in and still cover a pretty wide field of view.
Stabilization
The other benefit of the WWL-1 is that allows you to use lenses that are stabilised, today any lens at the 7-8mm range on micro four third has no stabilisation which means you need to use the in body stabiliser if available with your camera. For the GH5 this means that choosing a lens like the 14-42 MkII gives you access to Dual IS combining body and lens stabiliser and IS lock that really is useful when finning around. I just want to make sure that I am clear I am talking of this lens
The Panasonic 14-42PZ power zoom is NOT compatible with dual IS so if you use this lens you either have in body or lens stabiliser not both. Obviously if you have a camera without stabilisation like the GH5s or the BMPCC 4K all of this is less relevant but still you can have some stabilisation instead of nothing.
I have not shot a comparative Dual IS vs Lens IS vs nothing in the pool but I am planning to do that soon. I can only say once you have dual IS with IS lock you don’t want to go back.
Personally I think that any dive down to 18 meters in tropical or subtropical water will benefit from a filter but I also believe that conditions may change and in some cases you want to take the filter off. Now most of the rectilinear lenses for the GH5 do not even take a filter but also consider that once you fit one in dome port you are stuck with it for the dive. With the WWL-1 and the Keldan filter if you feel there is too little light and you want to get rid of the filter you can.